


Results 61 to 80 of 121
-
10-09-2012 #61
 Registered User
- Join Date
- Jul 2011
- Location
- South Dakota
- Posts
- 118

Progress has been a bit slow lately... "life" has gotten in the way. My wife has had some medical issues that needed to be priority #1, and a host of other things have popped up. When you build these cars by yourself, one MAJOR issues is that when you are not working on the car... NOBODY is working on the car.

Anyway, I have been working on completing the mini-tubbing on the car. I did a few modifications to build more strength into the rear of the car (since this is an issue with convertibles.) I will show more on this soon.
But I did get one of my major pieces recently... Thanks to Roger and the guys over at Speedtech I am the proud owner of one of their Torque Arm systems w/ complete 9" rear-end! The quality and craftsmanship of their components is amazing... only thing better is their customer service!
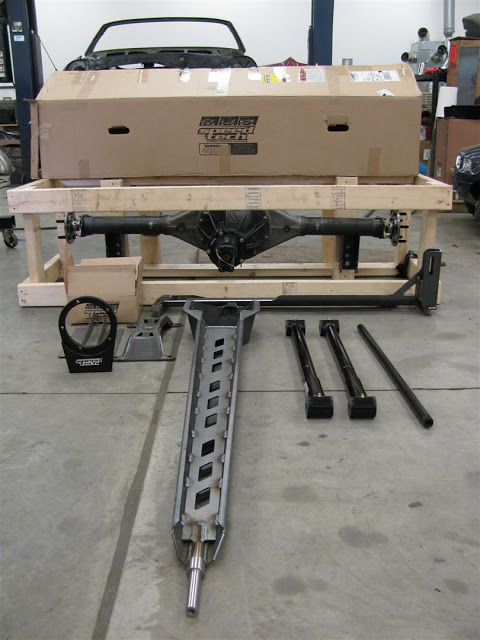 67 Firebird Convertible
Jarrod
My Build Thread:
https://www.pro-touring.com/showthre...rd-Convertible)
-
05-13-2013 #62
Registered User
- Join Date
- Jul 2011
- Location
- South Dakota
- Posts
- 118
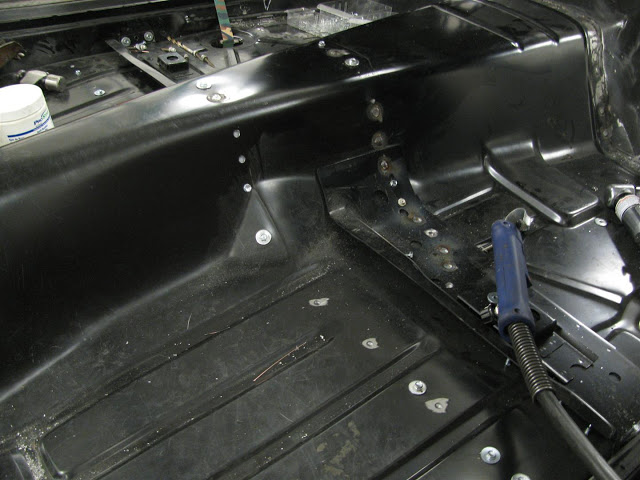
So on to the convertible floor braces... these were a bit of a PITA! the initial fitment showed that I would be using LOTS of screws to suck them up and get them to contour to the floor.
I used a Trans-Jack to hold the main brace into place so I could mark it off and drill out the holes so I could weld from inside the car. When plug welding, I like to weld to the THICK metal of the floor brace, rather then to the thin metal of the floor.
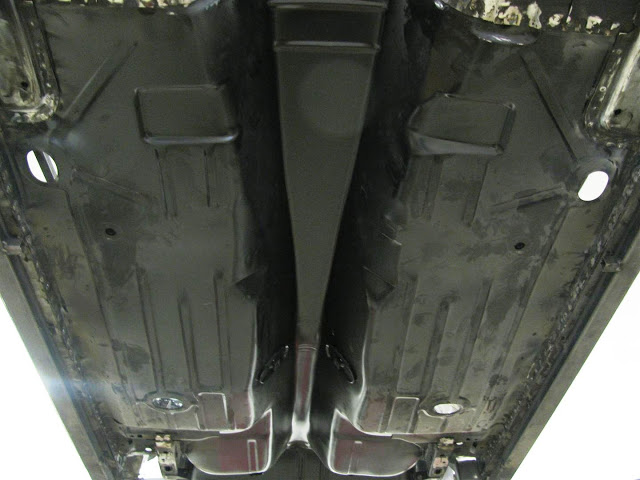
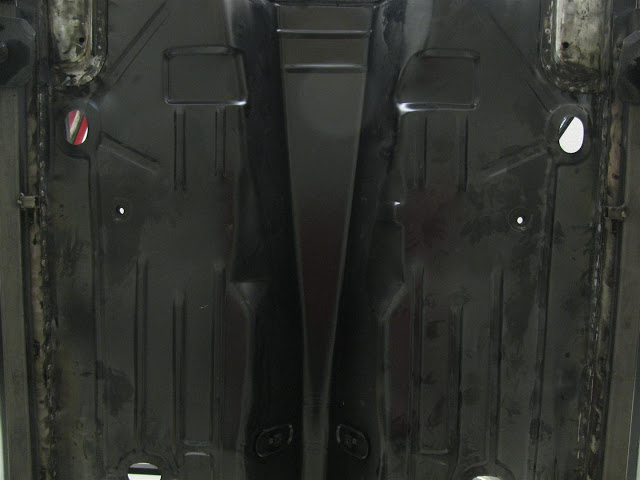
Epoxy primed the inside of the braces...
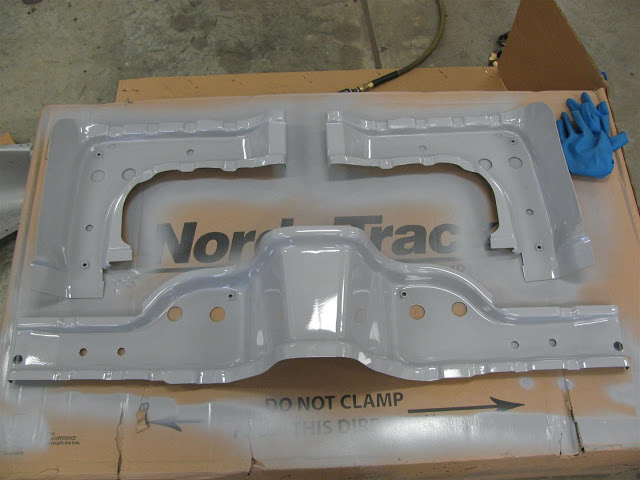
Using the Trans-Jack to hold brace in place to mark floor...
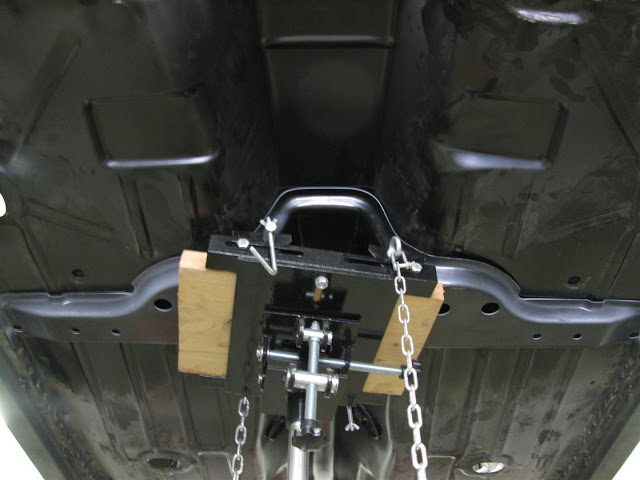
Used screws to SUCK the brace up to contour the floor... it actually turned out to look JUST like the original that I still had in the shop for reference.
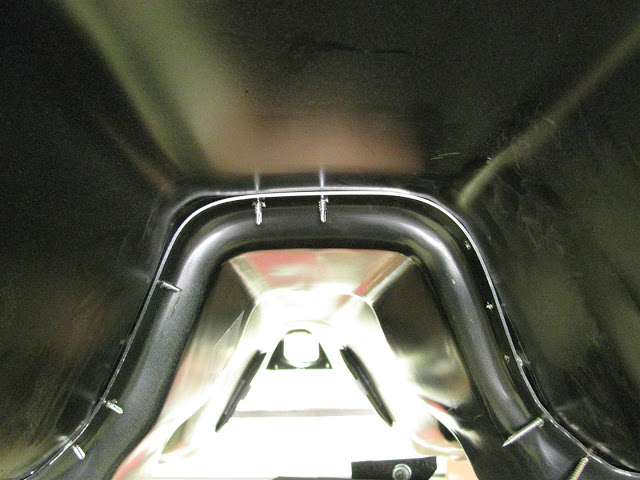
Used the original floor to take some measurements... but also used some measurements off of the front firewall to make sure braces were squared up with the car.
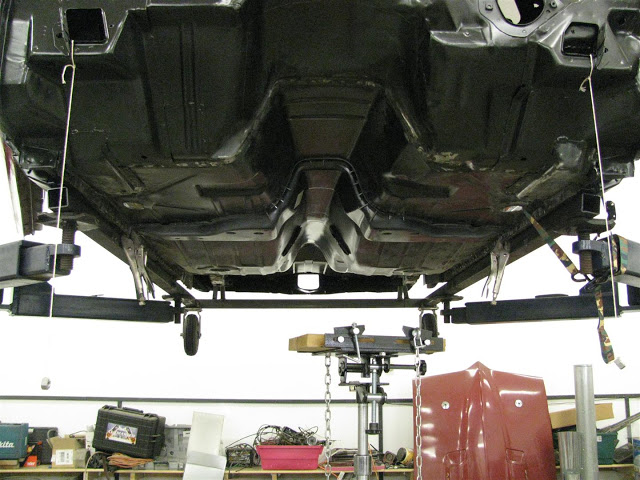
Here you can see all the screws holding the floor in place... it has some welds already done.
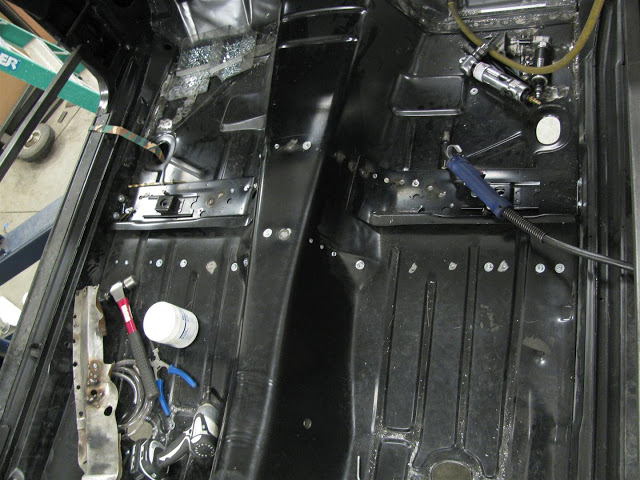
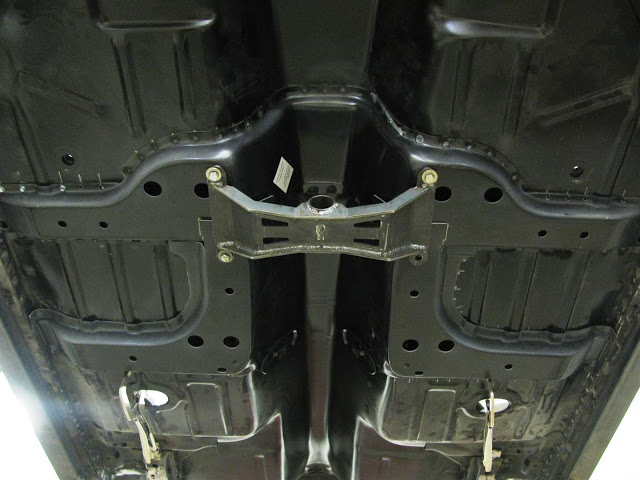
NOTE: make sure you use either the original cross brace or whatever brace you will be using to make sure it will bolt up BEFORE you weld in the left/right rear brace. Here I am using Speedtech's Torque Arm brace to make sure everything is OK before I mark off the location for the left/right rear braces.
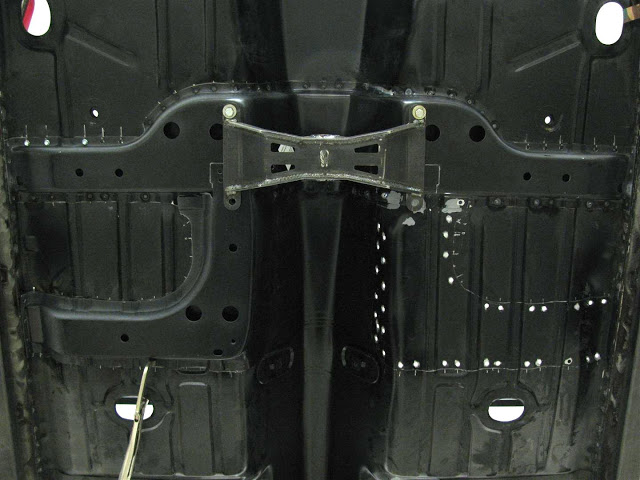
Marked off for the left brace... drilled holes to plug weld from the top.
 67 Firebird Convertible
Jarrod
My Build Thread:
https://www.pro-touring.com/showthre...rd-Convertible)
05-13-2013 #63
Registered User
- Join Date
- Jul 2011
- Location
- South Dakota
- Posts
- 118
Not a fan of having to weld upside down... but was very pleased how my welds turned out where the left/right braces meet up with the main brace. I used LOTS of HEAT!
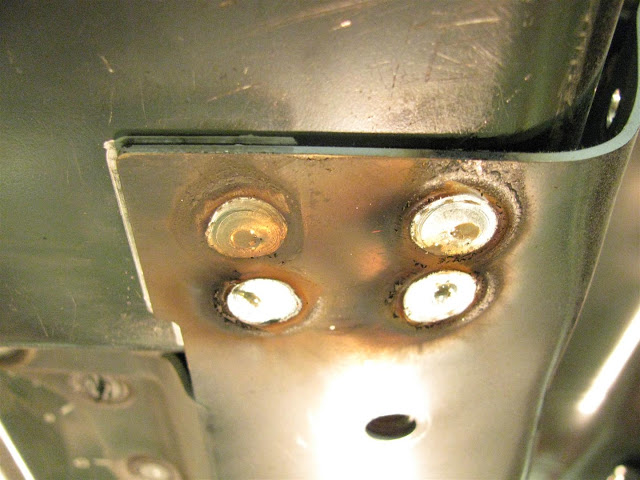
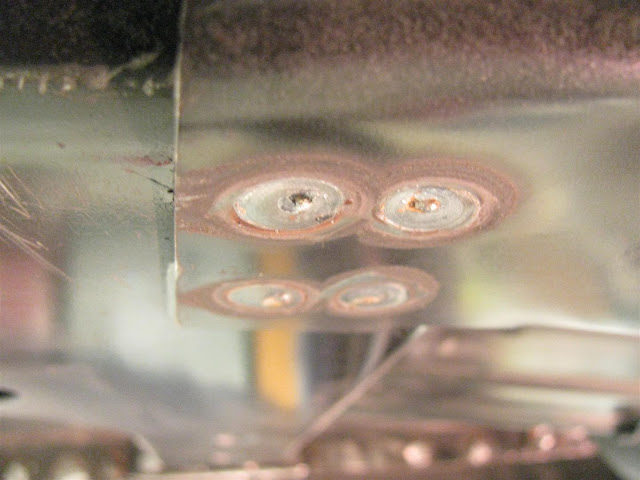
All finished... I will clean up the welds when I go over the entire floor before I epoxy coat it then truck bed line it.
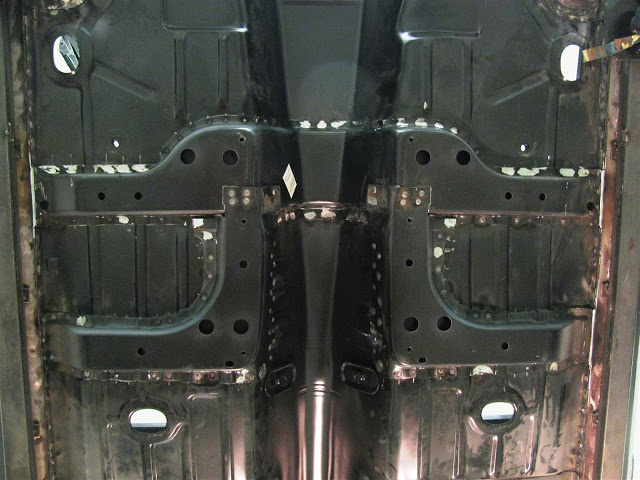
It was quite amazing to see how much strength these braces put into the floor. (You could really tell when you would stand inside the car... there was NO give anymore.) I can not believe some of the photos out there where people leave these off during a restoration... they are a MAJOR structural piece for the convertibles.67 Firebird Convertible
Jarrod
My Build Thread:
https://www.pro-touring.com/showthre...rd-Convertible)
05-13-2013 #64 Registered User
- Join Date
- Apr 2004
- Location
- Cedar Rapids, IA
- Posts
- 999
subscribing.
Nice job! Another bird will live to see another day.Some times I'm fast sometimes I'm half-fast
05-13-2013 #65 Pro-Touring Veteran
- Join Date
- Jul 2006
- Location
- Merritt Island,FL
- Posts
- 1,182
Project is looking great !
Check out my web site.
http://screaminperformance.net
05-14-2013 #66
Registered User
- Join Date
- Jul 2011
- Location
- South Dakota
- Posts
- 118
Thank you! I also want to thank you guys for the AWESOME website, and pictures you guys post. I have looked at them for visual reference and ideas MANY TIMES! AWESOME WORK! Originally Posted by 67speedfreak
 67 Firebird Convertible
Jarrod
My Build Thread:
https://www.pro-touring.com/showthre...rd-Convertible)
05-14-2013 #67
Registered User
- Join Date
- Jul 2011
- Location
- South Dakota
- Posts
- 118
Next up... Mini-tubs.
I know they say it usually takes about 40-50 hours to mini-tub a Camaro/Firebird... honestly, I probably have closer to 100 due to wanting to build in more strength into this area.
ISSUE: Convertibles put MUCH more stress into this area than coupes do. This is due to lack of having a roof, the convertibles use the rear seat brace to compensate (plus thicker rockers and extra bracing.) On the sides of the rear seat brace (where it attaches to the inner wheelhouse) there is actually a few layers of steel used here to build up the strength so as to reduce body flex.
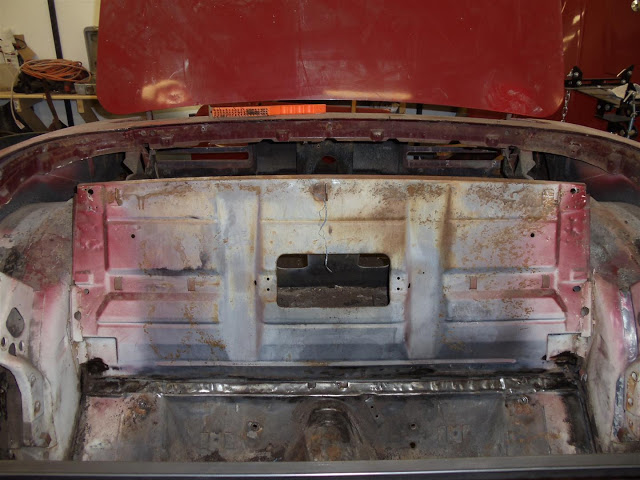
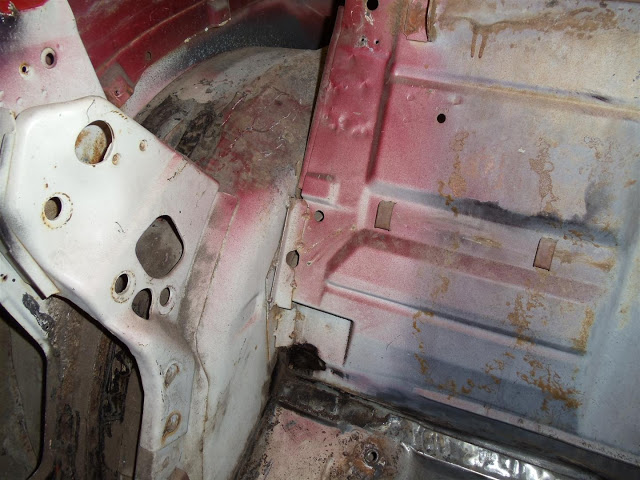
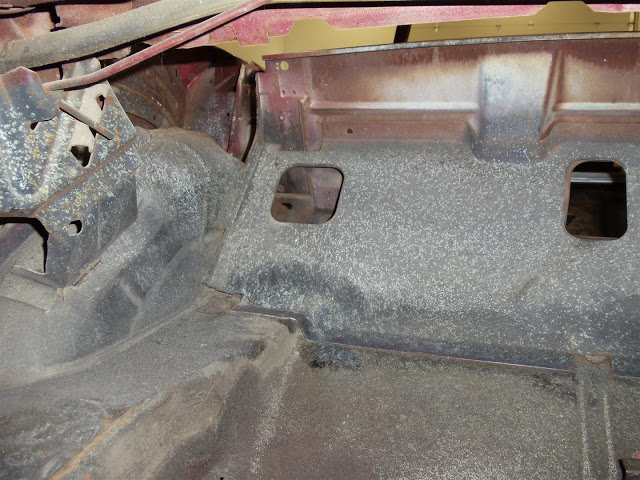
Being that I will be running a WAY larger set of rear tires, cutting the frame down for the mini-tubs and adding MUCH more horsepower than the car had originally, I wanted to OVERBUILD this area to compensate. I know some people put in roll cages to handle some of the body flex, but I am building this with my family in mind, and didn't want to deal with the cage being in the way of using the rear seat. So my plan is to BEEF UP this area.
Stay tuned for the PLAN.
67 Firebird Convertible
Jarrod
My Build Thread:
https://www.pro-touring.com/showthre...rd-Convertible)
05-14-2013 #68
Registered User
- Join Date
- Jul 2011
- Location
- South Dakota
- Posts
- 118
Here is where I am starting...
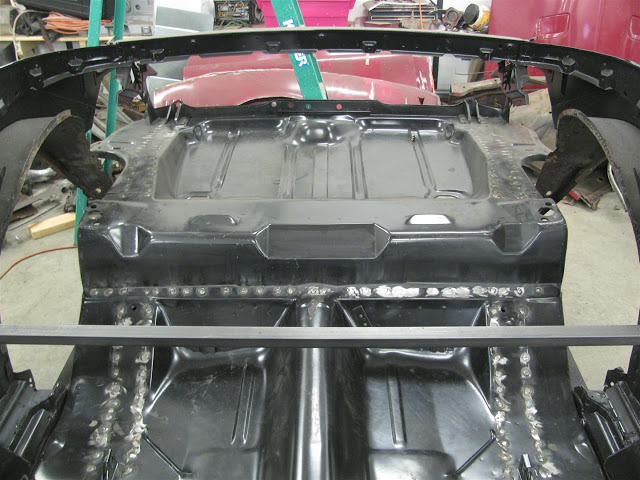
I didn't take as great of pictures on the passenger side (where I started)... so you will see more when I show the drivers side installation.
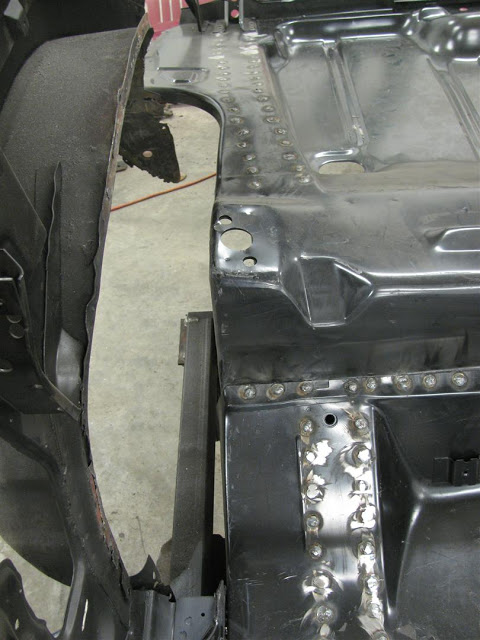
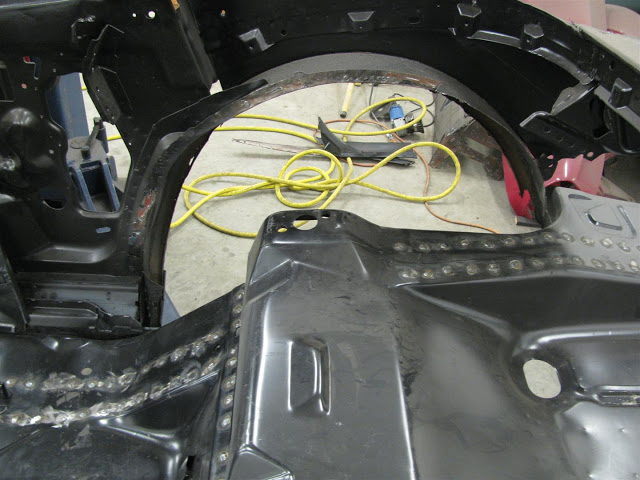
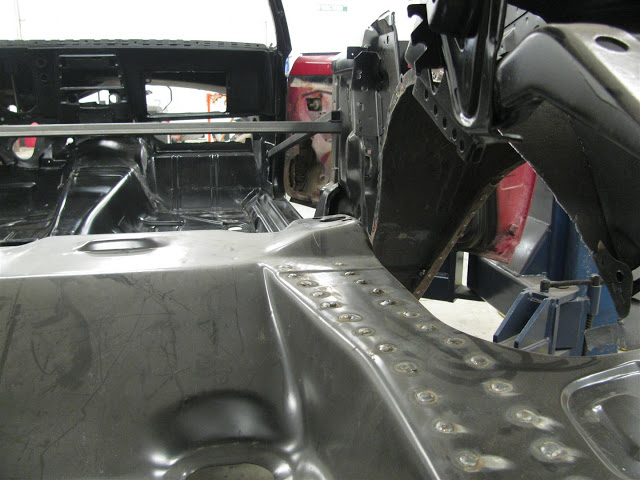
Will be installing the DSE (Detroit Speed and Engineering) min-tubs...
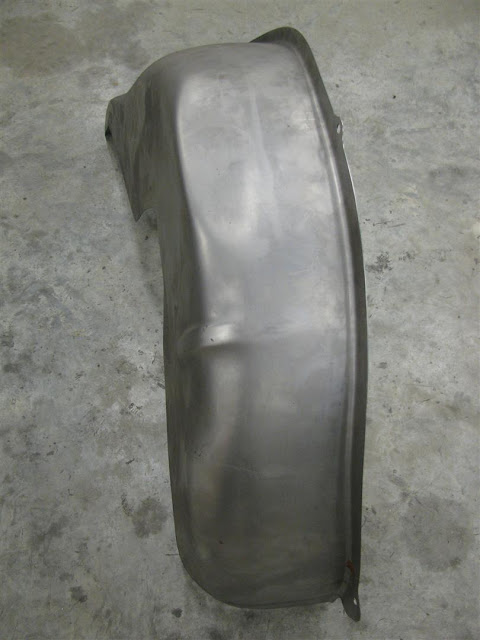 67 Firebird Convertible
Jarrod
My Build Thread:
https://www.pro-touring.com/showthre...rd-Convertible)
05-14-2013 #69
Registered User
- Join Date
- Jul 2011
- Location
- South Dakota
- Posts
- 118
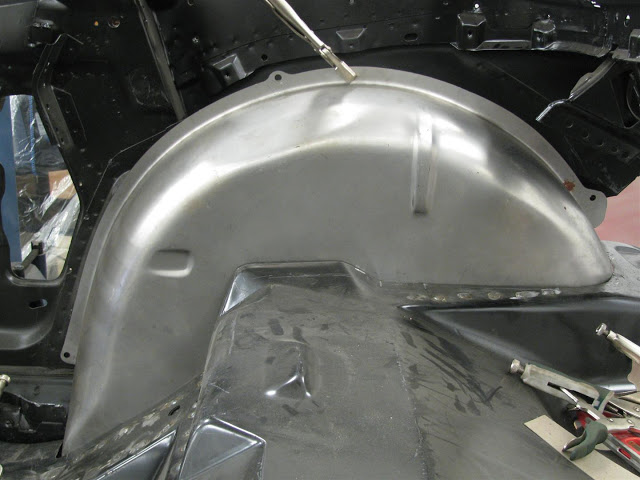
I will go over the process better on the passenger side (due to better pictures). But you can see here where I marked my cut line about 2.75" inside of where the inner wheelhouse would be mounted
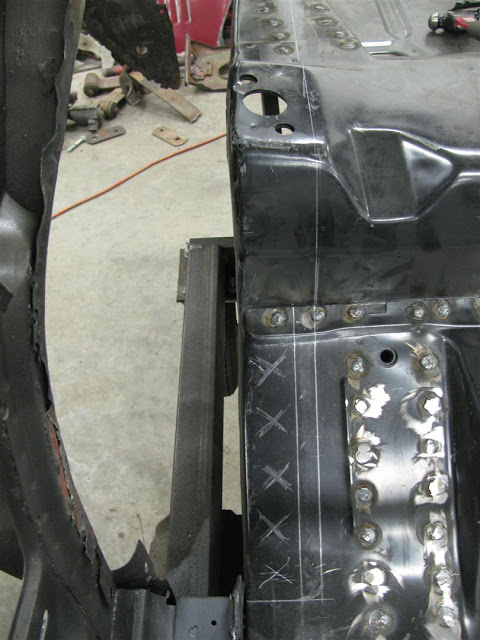
Then with the help of a cutoff wheel / Plasma / and sawzall I removed the necessary metal. (This was the first cut... there is MUCH more trimming and cleaning up done before the tub goes in.)
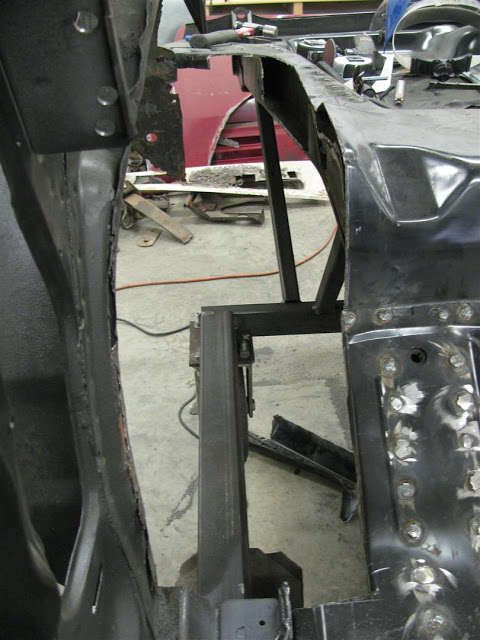
Here is the passenger side tub being trial fit into it's location.
 67 Firebird Convertible
Jarrod
My Build Thread:
https://www.pro-touring.com/showthre...rd-Convertible)
05-14-2013 #70
Registered User
- Join Date
- Jul 2011
- Location
- South Dakota
- Posts
- 118
OK my plan for "Beefing Up" my mini-tub install.

Like I said before, (on the convertibles) GM addressed the loss of rigidity that the roof gives the coupes in a few different ways. One of the major ways it did this was to build in more support between the wheelhouses with a much larger and more structural brace between them (the rear seat brace.)
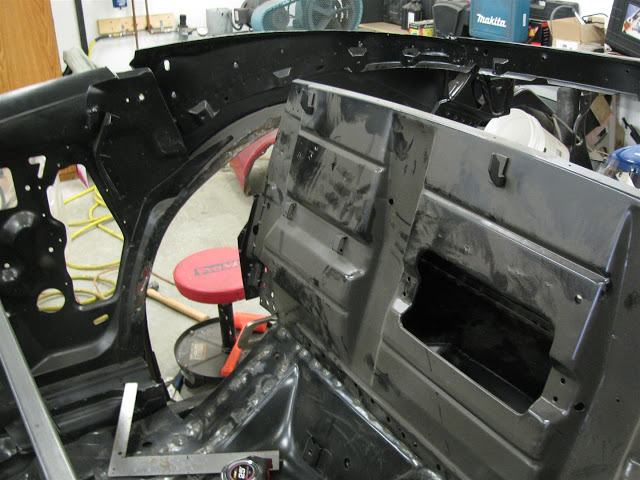
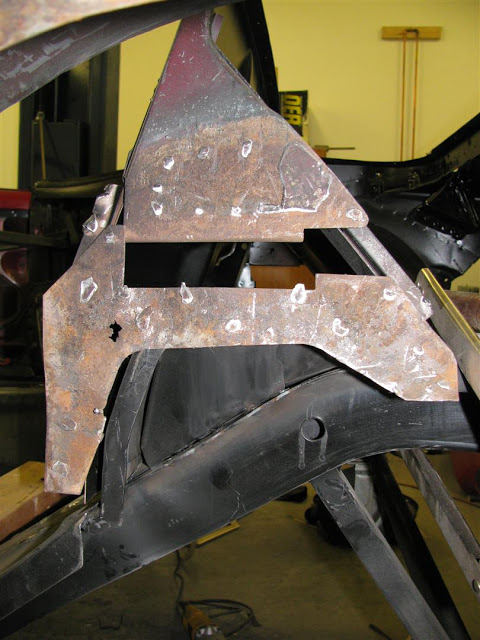
Here you can see where they used some 20 gauge sheet metal to mount the seat brace to the wheelhouses. (NOTE: this brace is not clamped tight up against the front of the floor... so it is sitting almost an inch forward and low.)
 67 Firebird Convertible
Jarrod
My Build Thread:
https://www.pro-touring.com/showthre...rd-Convertible)
05-14-2013 #71
Registered User
- Join Date
- Jul 2011
- Location
- South Dakota
- Posts
- 118
I wanted to use this idea, but make it MUCH stronger... so I started by making a template of GM's design...
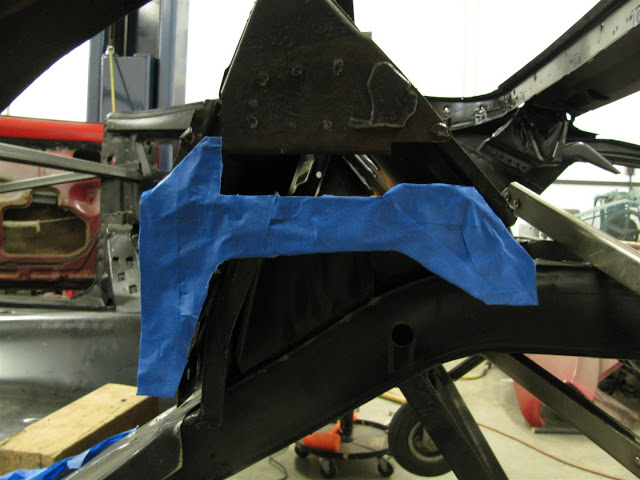
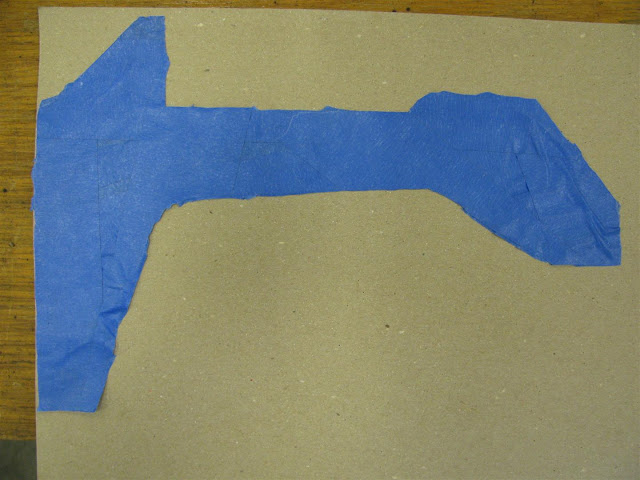
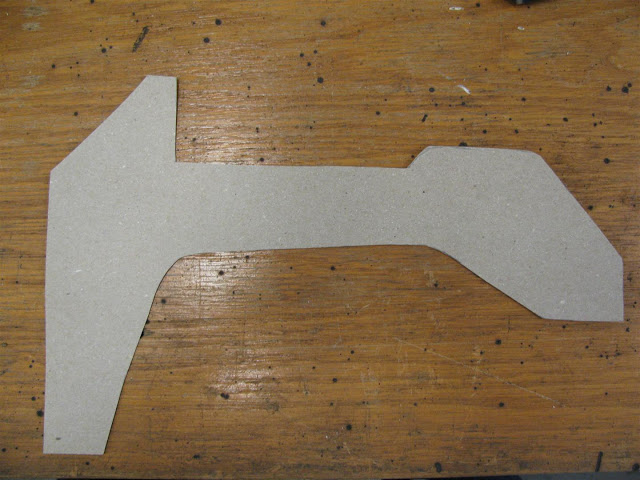
Here it is taped into location on the passenger side.
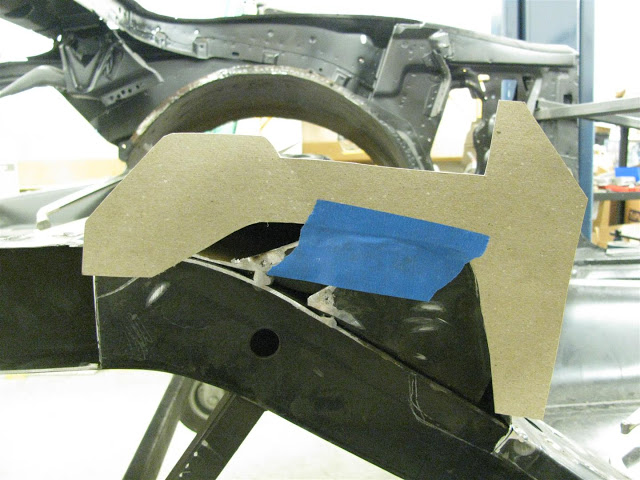
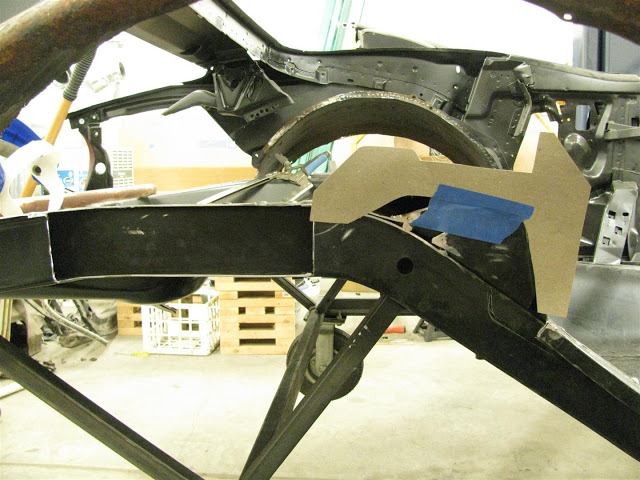
Here you can see how the rear seat brace gets tied inbetween the wheelhouse and trunk floor.
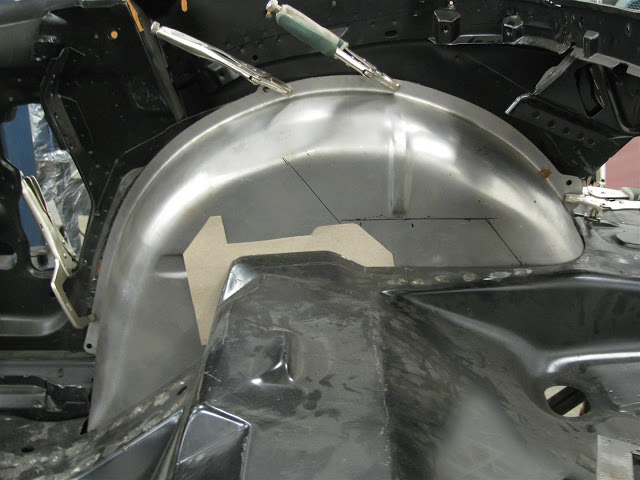 67 Firebird Convertible
Jarrod
My Build Thread:
https://www.pro-touring.com/showthre...rd-Convertible)
05-14-2013 #72
Registered User
- Join Date
- Jul 2011
- Location
- South Dakota
- Posts
- 118
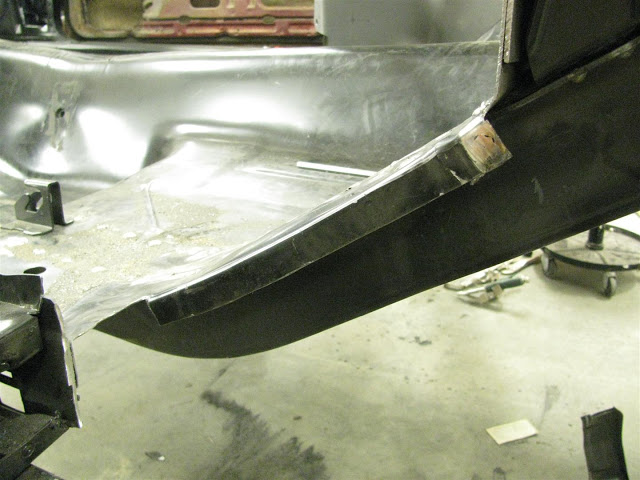
To make room for the larger tubs, you must cut into the frame rails. To compensate for the loss of strength, DSE suggests that a person welds 1/8" steel plate back into the missing portion of the frame rail. For this is MUCH thicker metal than what GM actually used on the frame rails themselves.
Here you can see the missing portion of the frame rail.
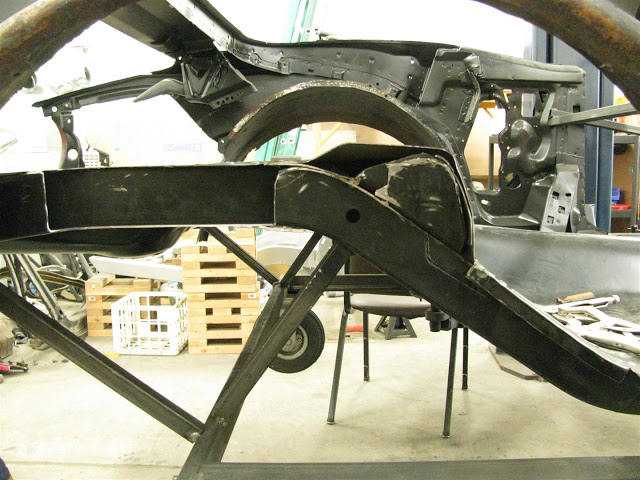
My plan was to add to DSE's plan and also incorporate GM's design... but BEEF UP both! 67 Firebird Convertible
Jarrod
My Build Thread:
https://www.pro-touring.com/showthre...rd-Convertible)
05-14-2013 #73
Registered User
- Join Date
- Jul 2011
- Location
- South Dakota
- Posts
- 118
So rather than just close up the frame and patch shut the missing portions in the trunk floor, I would build a plate that would do both. PLUS I would incorporate GM's brace... but not out of 20 gauge sheet metal.
MY PLAN:
If welding the frame back shut with 1/8" steel plate builds strength back into the frame... making this plate twice as high and running it all the way to the front of the trunk would add MUCH more strength into the car.
Here the plan... the transparent red area is where I will be welding in a 1/8" steel plate to not only build back up the missing portion of the frame rail, but also add in a MUCH larger area for the inner wheelhouse to make it's connection to the frame and rear seat brace.
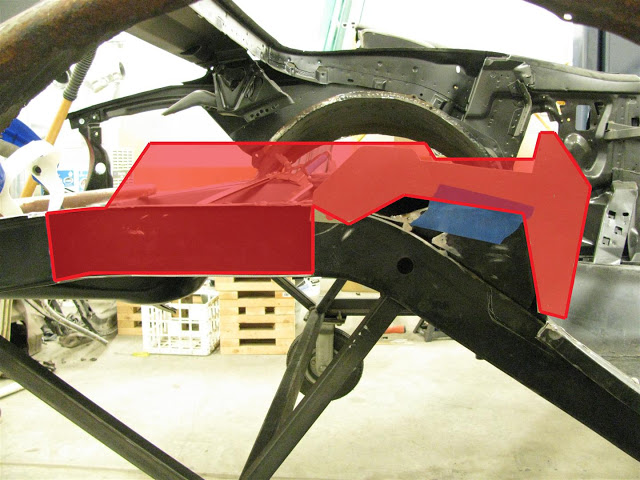
Here you can see how much more of the wheelhouse I will be making contact with and basically doubling the height of the frame rail in this section.
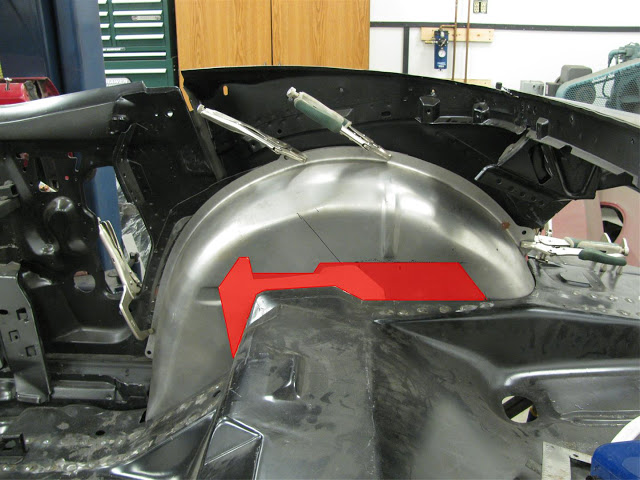 67 Firebird Convertible
Jarrod
My Build Thread:
https://www.pro-touring.com/showthre...rd-Convertible)
05-14-2013 #74
Registered User
- Join Date
- Jul 2011
- Location
- South Dakota
- Posts
- 118
Out comes the cardboard! (had a hard time finding good cardboard to use... ended up using some old signs we took down at work)
It was ALOT of trial fitting to get the template just right....
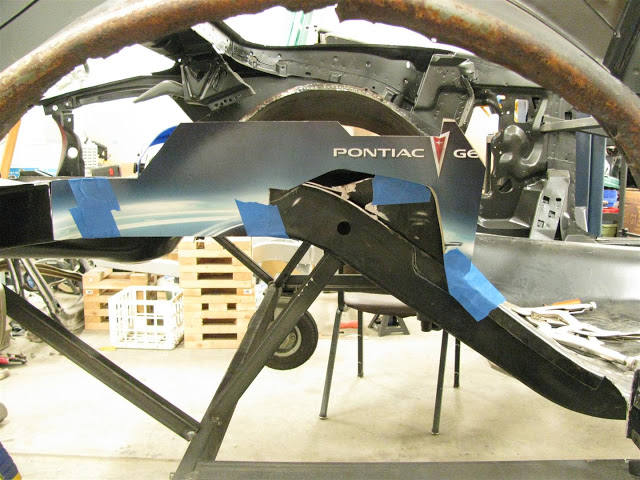
Here you can see how it will take the place of the GM template I used from the rear seat brace.
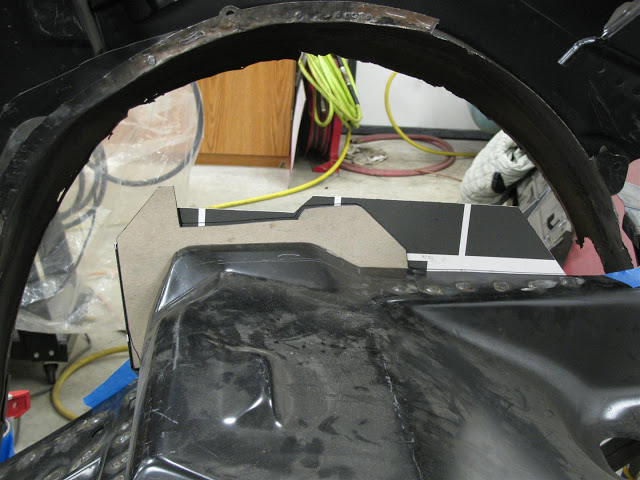
Test fit the inner wheelhouse to see how it will work...
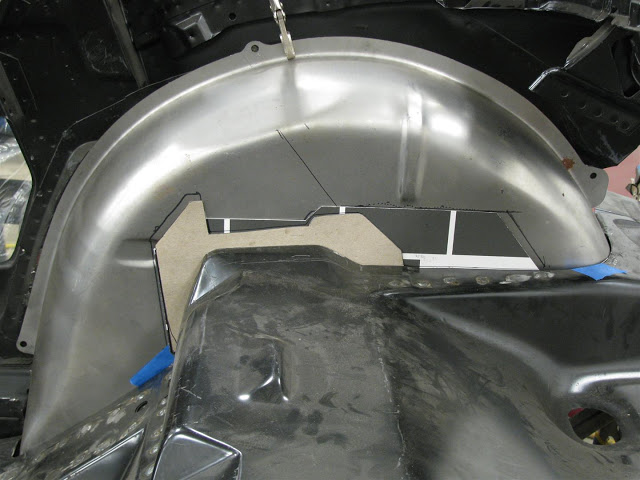 67 Firebird Convertible
Jarrod
My Build Thread:
https://www.pro-touring.com/showthre...rd-Convertible)
05-14-2013 #75
Registered User
- Join Date
- Jul 2011
- Location
- South Dakota
- Posts
- 118
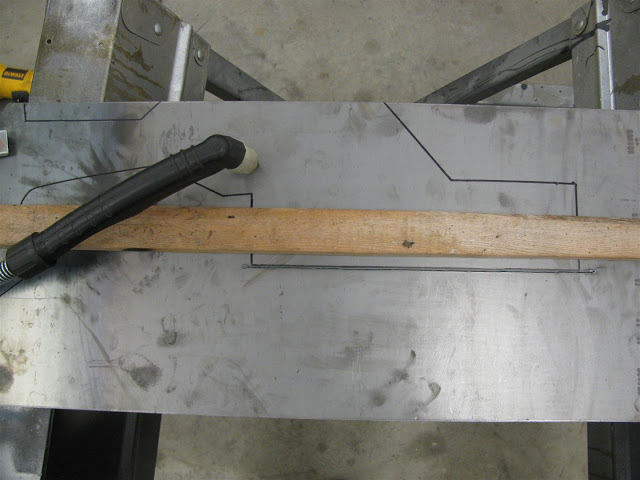
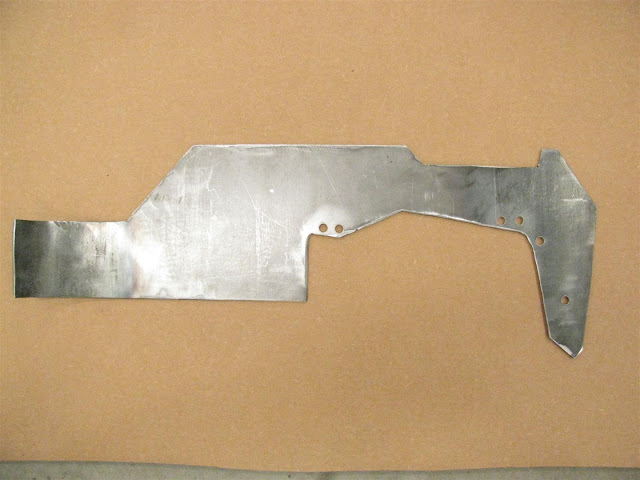
Transfer the template to 1/8th inch steel plate.
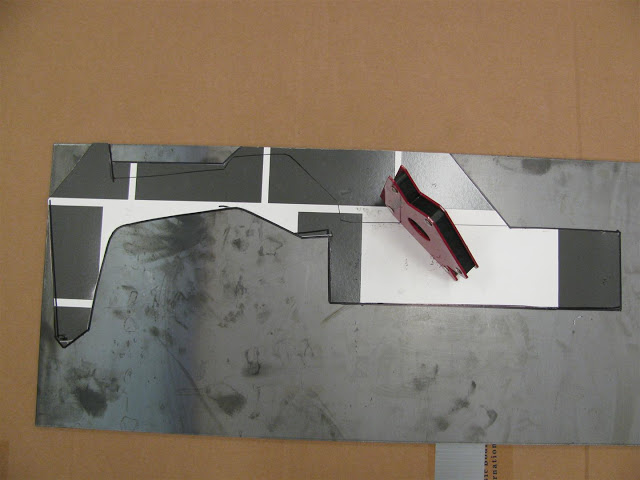
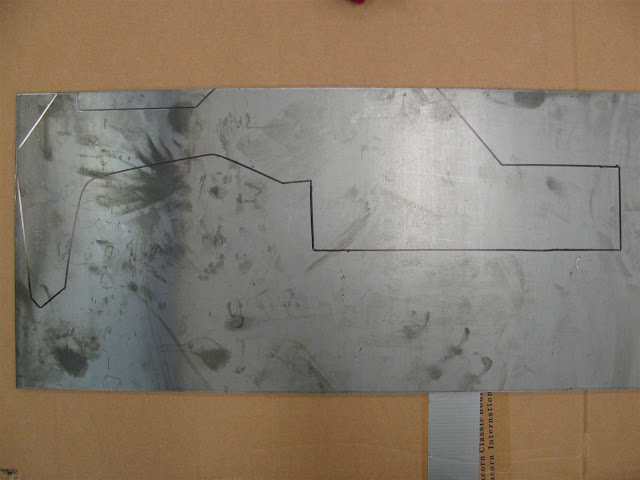
I have a attachment for my plasma that is suppose to make it easy to cut straight lines... but I found using a piece of wood as a "fence" worked GREAT!
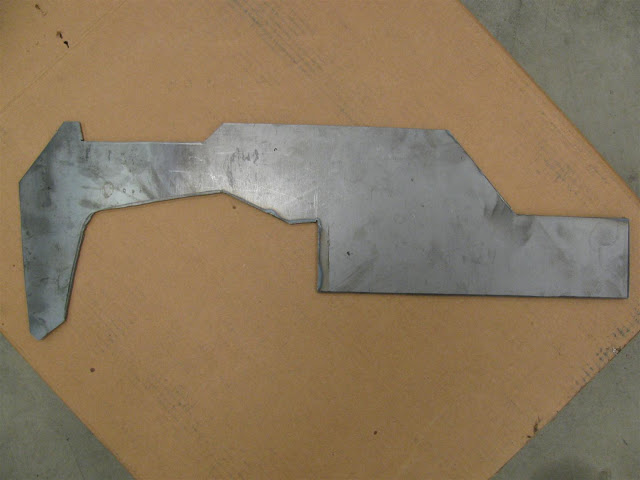
Here it is after using a MAP torch and heating the end to create the curve... I also drilled in a few areas so as to be able to plug weld it to the structure underneath.
 67 Firebird Convertible
Jarrod
My Build Thread:
https://www.pro-touring.com/showthre...rd-Convertible)
05-14-2013 #76
Registered User
- Join Date
- Jul 2011
- Location
- South Dakota
- Posts
- 118
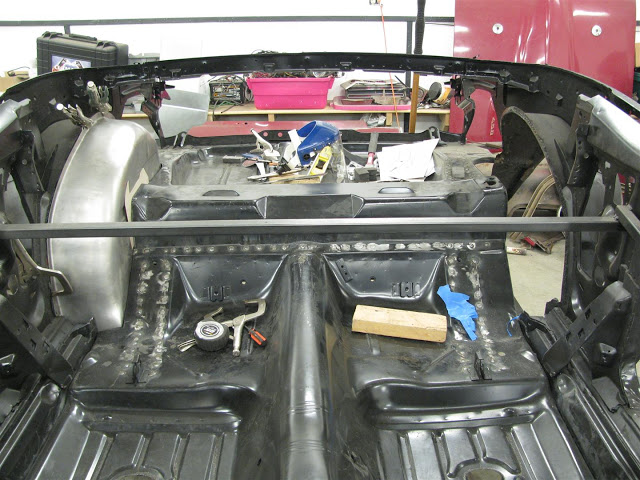
Here you can see how much further in the mini-tubs are compared to the "stock" side.
 67 Firebird Convertible
Jarrod
My Build Thread:
https://www.pro-touring.com/showthre...rd-Convertible)
05-14-2013 #77
Registered User
- Join Date
- Jul 2011
- Location
- South Dakota
- Posts
- 118
On to the drivers side...
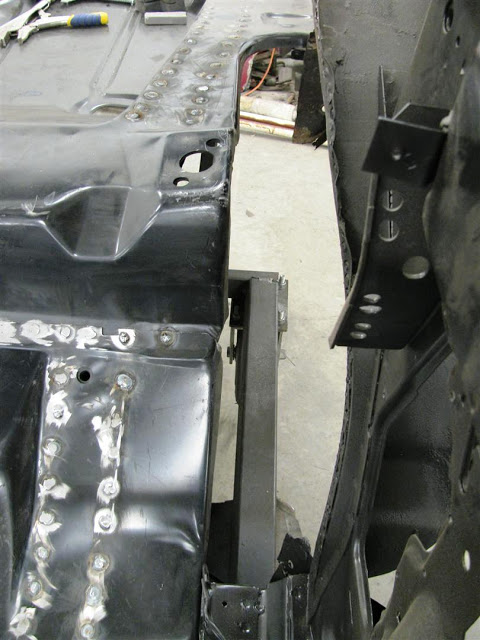
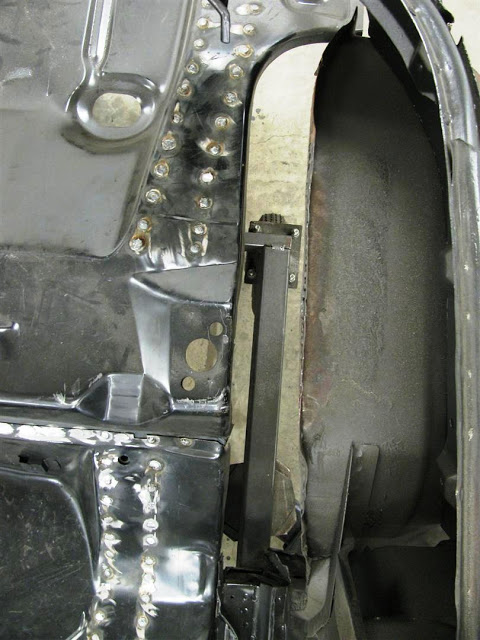
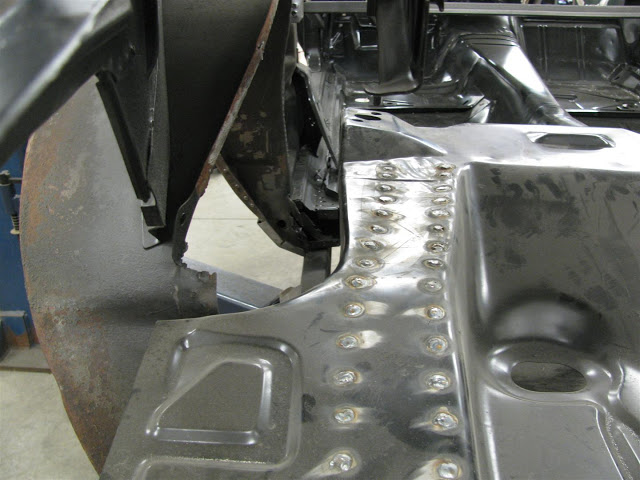
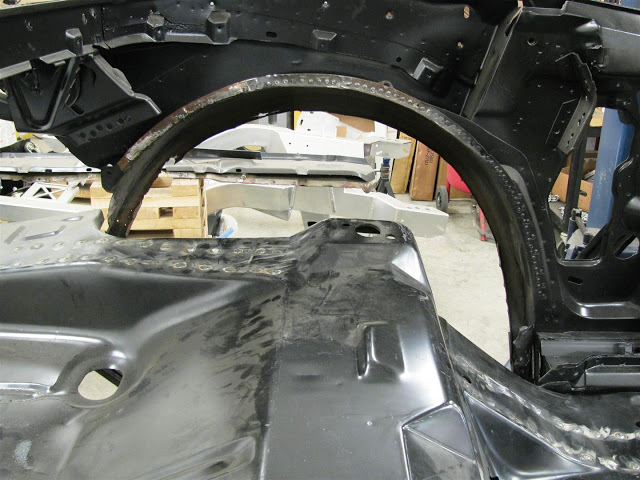
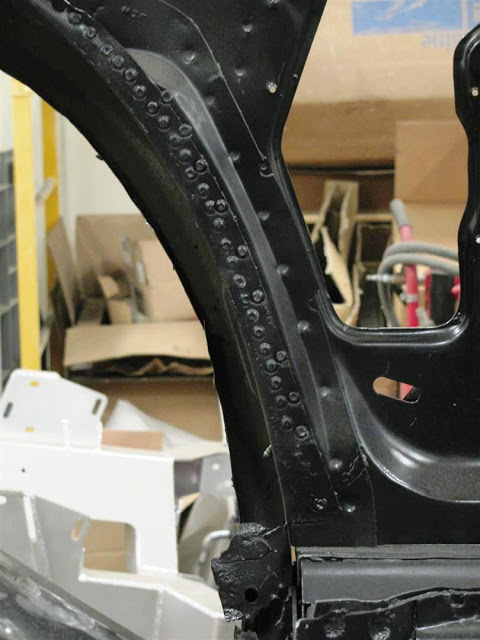
Did you see all the spot weld GM used where the inner and outer wheelhouses meet each other. I was original going to try and keep the outer wheelhouse. but after seeing the rough shape they were in and the HELL it was to separate the two... I decided to put new ones in their place. So I drilled all these for NOTHING!
 67 Firebird Convertible
Jarrod
My Build Thread:
https://www.pro-touring.com/showthre...rd-Convertible)
05-14-2013 #78
Registered User
- Join Date
- Jul 2011
- Location
- South Dakota
- Posts
- 118
Marked off...
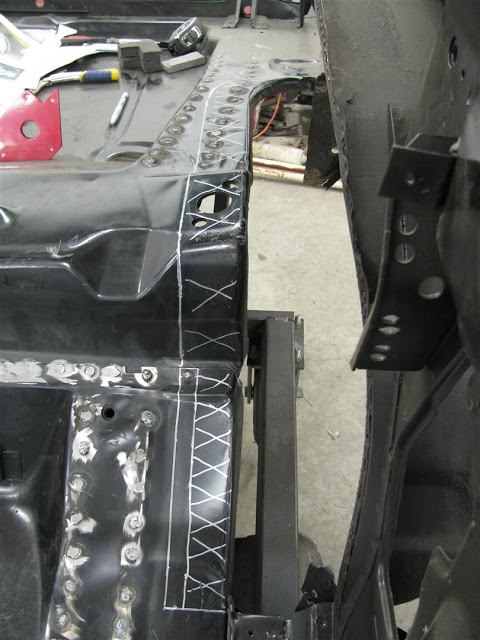
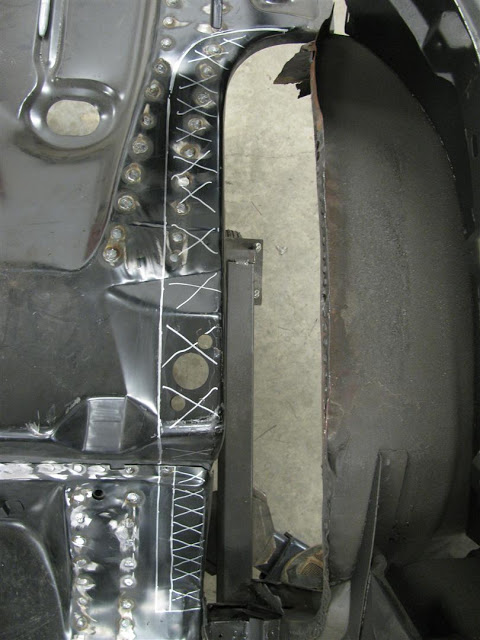
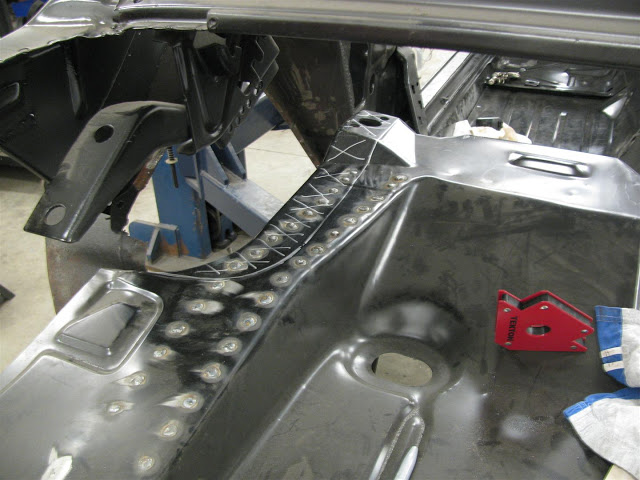
For Me... one of the tricky parts was making sure this rear curvature was correct to follow the tub. They tell you to come in 2.75" and mark for the cut... but DO NOT do that all the way around.. for the wheelhouse isn't 2.75" larger all the way around... so take your time making sure the curve is as close as you can make it to match the tub.
 67 Firebird Convertible
Jarrod
My Build Thread:
https://www.pro-touring.com/showthre...rd-Convertible)
05-14-2013 #79
Registered User
- Join Date
- Jul 2011
- Location
- South Dakota
- Posts
- 118
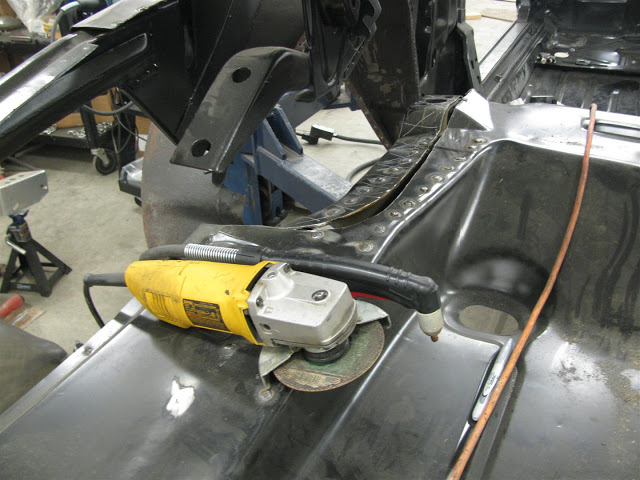
Tools I used for the job... (I also used a sawzall)
Side Note: I really didn't use the Plasma that much... it is hard to cut through multiple layers effectively with a Plasma torch... Plus doing it VERY straight. I did use it to make quick rough cuts in some areas... then cleaned it up with a grinder.
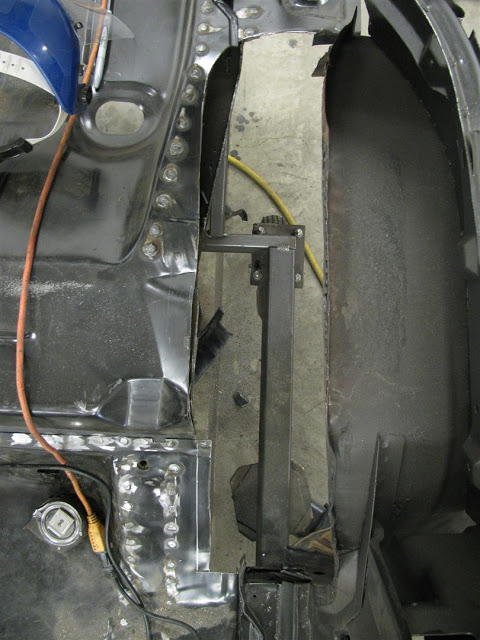
Here is the first "rough cut"... you can see the bottom of the rail is still there.
 67 Firebird Convertible
Jarrod
My Build Thread:
https://www.pro-touring.com/showthre...rd-Convertible)
05-14-2013 #80
Registered User
- Join Date
- Jul 2011
- Location
- South Dakota
- Posts
- 118
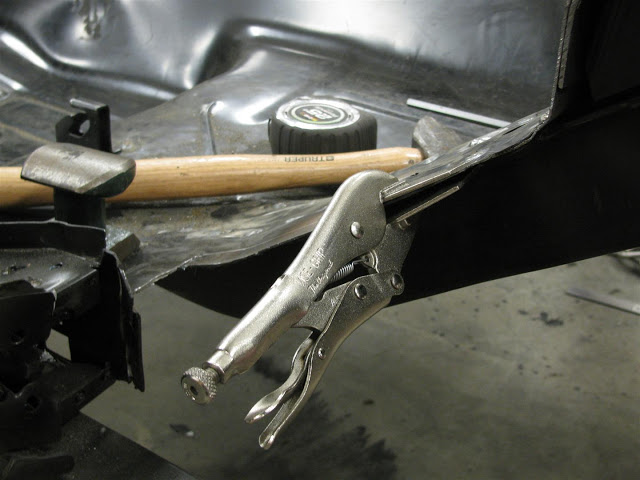
That little flange in the front of the opening is left in order to form a lip to make contact with the wheelhouse.
Just clamp onto it and bend it down into place.
 67 Firebird Convertible
Jarrod
My Build Thread:
https://www.pro-touring.com/showthre...rd-Convertible)
Tags for this Thread

 Reply With Quote




