


Results 1 to 20 of 48
-
09-13-2010 #1

 Full Blown G-Machiner
- Join Date
- Sep 2005
- Location
- East, Tennessee
- Posts
- 574

Complete G-Body DSE suspension upgrade
I would like to start this off with a little information on what we’re doing to our GNS Test Car and our goals then move into the build process with some install pictures. Our goal with this car is to frequent Autocross & Road courses while keeping a Track Ready Street Friendly handling car whether it be on the street, at the drag strip or on a closed course. Our motto here is "Function is Everything"!
We chose Detroit Speed & Engineering’s full G-Body suspension package as the suspension for our GNS Test car. We will be at DSE Tomorrow documenting and doing the install. One thing about DSE, They are pounding their cars every weekend, customers are pounding their cars every weekend, and most of the time a DSE equipped car is winning (Frank Serifine) and that alone made it an easy choice for us.
We will start off with some basic measurements to give us a base to start with.
Here are a few basic numbers on our GNS test car:
Wheel base: 2746mm - 108.1in
Track: Front: 1486mm - 58.5in / Rear: 1466mm - 57.7in
Length: 5095mm - 200.6in
Width: 1819mm - 71.6in
Height: 1387mm - 54.6in
Drag Coefficient: 0.410 (Tested by GM)
Current Tire / Wheel sizes: Wheel make- CCW / 3-Piece
FRONT WHEEL: 18" X 9.5" - 4.75 Back Spacing
REAR WHEEL: 18" X 10.0" - 4.75 Back Spacing
FRONT TIRE: 255-35/18
REAR TIRE: 285-40/18
NOTE: No rubbing issues at all with stock suspension!! Went to Hotchkis lowering springs in the rear only and it dropped it perfectly 1". Got minor rubbing so I rolled the lips with the moldings.
A lot more info on wheels & fitment here:18" CCW Wheels on Scot W's car..
Stock ride height from floor to wheel well lip w/CCW wheels:
FRONT: 25.5"
REAR: 27.75"
REAR ride height After installing the Hotchkis lowering springs = 26.75"
4-Corner Scaling: Done on (8/30/10)
Next we SCALED the car on all 4 corners to give us a weight on all 4 corners before installing the DSE suspension. After the installation we will re-scale the car to see how much weight was shaved and where.
When trying to even up cross weight you want to get as close to 50% as possible.
Here is what we had in the car had at Scaling..
* Full tank of gas just topped off!
* Nothing left inside the cars counsel /glove box, no floor mats.
* Nothing in the trunk.
* Tires at recommended pressure.
First we started with leveling the scales on the surface to make sure they were level before we started. This was done using a 6ft level across the scales, and then we jacked the car up in the center and lowered it onto the scales front & rear. With the whole car resting on all four individual scales we took measurements.
FRONT "CAR ONLY" :
* Left = 997 lbs
............................Total front "car only" = 1,953 lbs
* Right= 956 lbs
REAR "CAR ONLY"
* Left = 695 lbs
............................ Total Rear "car only" = 1,436 lbs
* Right = 741 lbs
Completed Percentages & Formula:
Front Bias: 1953 / 3389 = .57627 = 57.6%
Rear Bias: 1436 / 3389 = .42372 = 42.4%
The left front and right rear are heavier than they should be. The left side usually is heavier than the right, - "without driver". Next time we scale the car we will disconnect one end link on the front and rear anti roll bars when scaling, then connect them on the scales and shim them so they don't jack weight from one corner to the other. Doing this removes any unwanted bind the sway bars could be causing. Raising a spring perch on the LF corner will increase weight on the LF and RR corners.
Our left and right side weights add up to almost even, so by adjusting the heavy corners we should be able to balance them pretty close without driver.
Next post will be install pictures and more measurements.
SW.
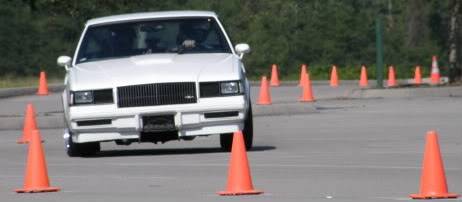
Picture below is how the car sits now... Stay Tuned! More to Come!!!
 1986 Buick T-Type
RideTech, DSE, BAER Brakes, Forgeline Wheels, LED lighting, More!
* Get your Top of the line GPS Theft recovery devices Here!
www.GNSperformance.com
-
09-13-2010 #2
 Registered User
- Join Date
- Aug 2004
- Location
- Rustburg, Virginia
- Posts
- 3,436
Nice looking car...stance looks good as is... the new performance add-ons should enhance your driving experience. Even if you don't lose alot of weight the car should work better...so that would be a plus that may or maynot show up on the scales.
1970 RS/SS350 139K on the clock:
89 TPI motor w/ 1pc rear seal coupled to a Viper T56 via Mcleod's modular bellhousing w/ hydraulic T/O bearing from the Viper, 12 bolt rear w/ 3.73 gearing, SC&C upper control arms, factory lowers with Delalums, C5 brakes at all four corners, Front Wheels 17x8's with Sumi 255/40/17 and Rear Wheels 17x9's with Sumi 275/40/17.
Brief description of the work done so far can be found here: http://www.nastyz28.com/forum/showthread.php?t=112454
-
09-13-2010 #3
Full Blown G-Machiner
- Join Date
- Sep 2005
- Location
- East, Tennessee
- Posts
- 574
Thanks John! Both DSE and I want to keep my ride height the same if all possible. I figured I might shed some weight on the front A arms by getting rid of those heavy/bulky stock ones. There is no doubt it will be a much better and enjoyable ride and there won't be a worry when heading onto a closed course to thrash on it!! Originally Posted by John Wright


Were just trying to cover all bases by measuring and weighing everything before/after each step for future reference.
Scot W.1986 Buick T-Type
RideTech, DSE, BAER Brakes, Forgeline Wheels, LED lighting, More!
* Get your Top of the line GPS Theft recovery devices Here!
www.GNSperformance.com
09-13-2010 #4
Registered User
- Join Date
- Aug 2004
- Location
- Rustburg, Virginia
- Posts
- 3,436
Just didn't want you to expect huge weight reductions(it may or may not lose weight in large amounts)....like I said the fact that the suspension will work better/smoother will enhance the whole package. Simply freeing up the pivot points and bushings help both the ride and suspension aspects....and hopefully the car can shed a few pounds along the "weigh"....
 1970 RS/SS350 139K on the clock:
89 TPI motor w/ 1pc rear seal coupled to a Viper T56 via Mcleod's modular bellhousing w/ hydraulic T/O bearing from the Viper, 12 bolt rear w/ 3.73 gearing, SC&C upper control arms, factory lowers with Delalums, C5 brakes at all four corners, Front Wheels 17x8's with Sumi 255/40/17 and Rear Wheels 17x9's with Sumi 275/40/17.
Brief description of the work done so far can be found here: http://www.nastyz28.com/forum/showthread.php?t=112454
09-13-2010 #5
Registered User
- Join Date
- May 2009
- Posts
- 99
So this is the drag coefficient for this car? (Not just a run of the mill Regal). Originally Posted by xxxturbo6
What aero mods have been done?
09-13-2010 #6
Full Blown G-Machiner
- Join Date
- Sep 2005
- Location
- East, Tennessee
- Posts
- 574
No this is for a regular regal and was tested by GM originaly. I just posted it seeing as there wasn't much info out there on drag coefficient on these cars. Originally Posted by nullshine
No aero mods done, still all stock..
Scot W.1986 Buick T-Type
RideTech, DSE, BAER Brakes, Forgeline Wheels, LED lighting, More!
* Get your Top of the line GPS Theft recovery devices Here!
www.GNSperformance.com
09-13-2010 #7
Registered User
- Join Date
- May 2009
- Posts
- 99
OIC, where did you get the coefficient of drag figures?
I'm not challenging its validity, just wondering if you have some kind of a list/chart/database or something that you'd like to share?
I've been looking for this kind of information for a while now, but can't seem to find much on G-bodies (as you said, there isn't much aero info around on these cars). Or even if you have figures for anything else (GM or otherwise), it would be awesome, just for curiosity.
Wicked car btw, and I love the "Function is Everything" motto!
09-14-2010 #8 Registered User
- Join Date
- Mar 2009
- Location
- overseas
- Posts
- 3,434
looks great!!!
Kevin S. (overseas in Germany)
1963 Chevrolet Impala 2d ht Coupe
www.CruznArt.com
CRUZN - Automotive Artworks
09-14-2010 #9
Registered User
- Join Date
- Aug 2004
- Location
- Rustburg, Virginia
- Posts
- 3,436
can't wait to see the after pics...the car is in good hands over there.
1970 RS/SS350 139K on the clock:
89 TPI motor w/ 1pc rear seal coupled to a Viper T56 via Mcleod's modular bellhousing w/ hydraulic T/O bearing from the Viper, 12 bolt rear w/ 3.73 gearing, SC&C upper control arms, factory lowers with Delalums, C5 brakes at all four corners, Front Wheels 17x8's with Sumi 255/40/17 and Rear Wheels 17x9's with Sumi 275/40/17.
Brief description of the work done so far can be found here: http://www.nastyz28.com/forum/showthread.php?t=112454
09-15-2010 #10
Registered User
- Join Date
- Oct 2004
- Location
- St Louis, MO
- Posts
- 373
Awesome. This is going to be great info. I love the car, almost makes me wish I went the Regal route instead of the Malibu build.
09-15-2010 #11 Registered User
- Join Date
- Sep 2007
- Location
- Thehoodstock,GA
- Posts
- 793
Glad you chose that car........looks great!
MarkK
09-15-2010 #12
Full Blown G-Machiner
- Join Date
- Sep 2005
- Location
- East, Tennessee
- Posts
- 574
It is 12:30 am here and I just walked in the door from DSE in Mooresville,NC. What a facility that is! We had to push Dale Earnhardt Jr's 1967 Camaro off the lift to make room for our TR Regal!!!
 I missed Kyle Bush by one day picking up his camaro....bummer. That would have been nice to see his too and meet him.
I can't even begin to say how nice everyone is at DSE, Kyle Tucker (owner) Made me feel right at home, He then changed clothes and jumped right in with his employee's and got filty tearing my car apart!! With everyone there being so nice, it was a bummer to leave... That place is "Top Notch" and the craftsmanship and fabrication those guys do just blows me away, These guys know what there doing!!
The complete DSE suspension is now on the car and "WOW" what a Big difference!!! It's Crazy!!
The following parts were installed:
FRONT:
* DSE Upper & Lower tubular A-arms w/Delrin bushings
* DSE Hollow Tubular sway bar
* DSE Front frame braces
* DSE 2" Drop Springs
* DSE Shocks
REAR:
* DSE Upper & Lower Adjustable control arms
* DSE Rear 1 1/8" Chassis mounted Tubular Sway Bar
* DSE 2" Drop Springs
* DSE Shocks
* DSE Drive shaft loop
Tomorrow we will be thrashing on the GNS car to get it ready for the start of Fridays RTTH event but as soon as I get an chance to go through the 200+ pic's I took and the (2) 90min videos I took I will post them here with a small detailed write up with measurements, Alignment info, Ride height info ETC...
We were ALL very supprised on how easy these parts went on the first G-Body Turbo Regal.. They literally just fell into place without hassle! I was amazing to even see the front springs go in so easy with a floor jack!! It's on video!
Okay, it's time to crash..Thanks for looking, Stay tuned for the interesting stuff!
Scot W.1986 Buick T-Type
RideTech, DSE, BAER Brakes, Forgeline Wheels, LED lighting, More!
* Get your Top of the line GPS Theft recovery devices Here!
www.GNSperformance.com
09-16-2010 #13
Registered User
- Join Date
- Mar 2006
- Location
- Lafayette
- Posts
- 296
cant wait to see how all this works...
Scott
Built LTX, TKO600, 12Bolt
09-16-2010 #14
Full Blown G-Machiner
- Join Date
- Sep 2005
- Location
- East, Tennessee
- Posts
- 574
Okay, I have some time so I thought I would post up some pic's from my trip to DSE.
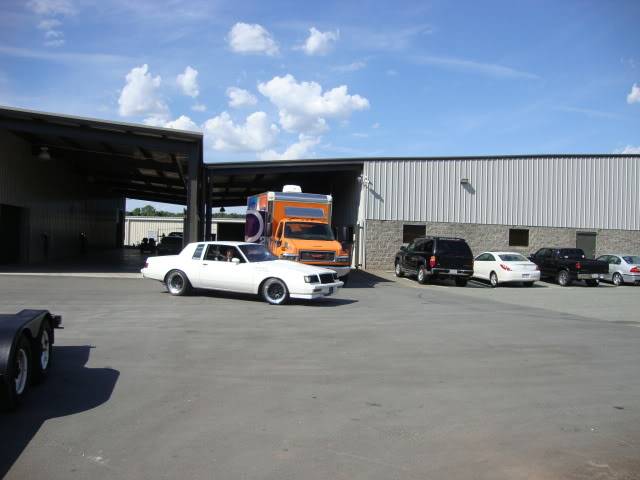
DSE Facility..
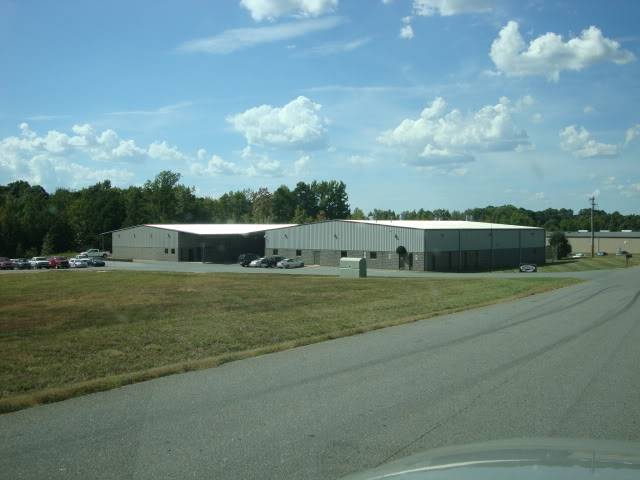
Kyle (owner) & Ryan (Engineer of the G-Body products) taking it for a spin on the proving ground course Before the install.
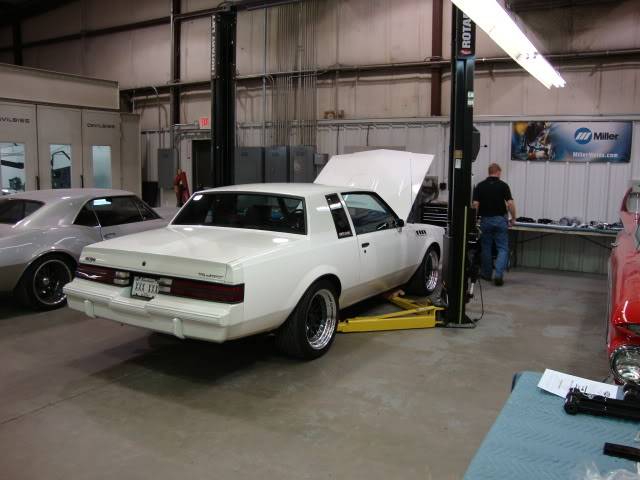
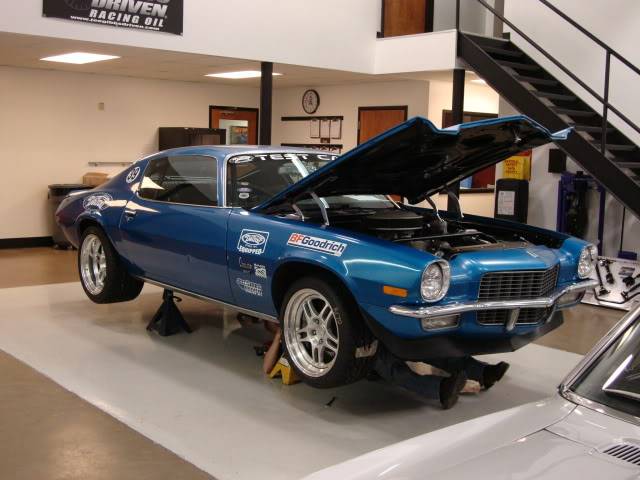
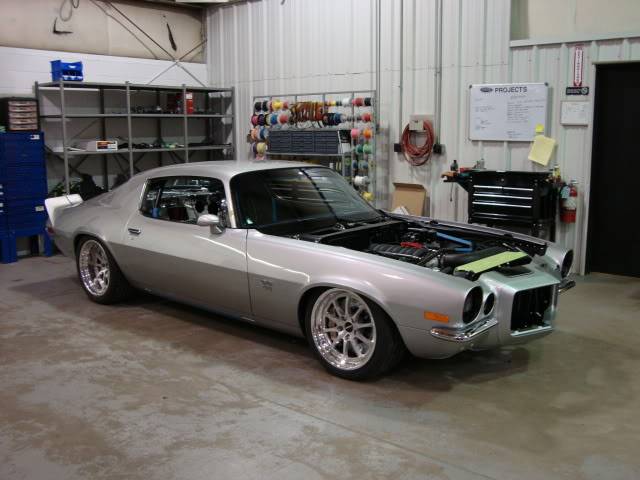
The car in the shop.....That's Dale Earnhardt Jr's Camaro beside it to the left..
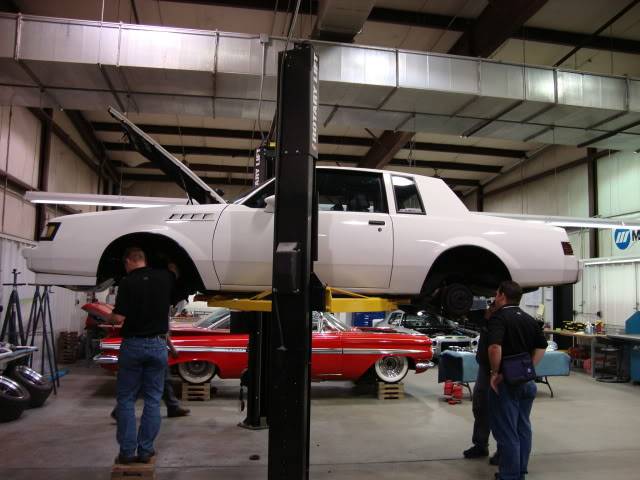
The DSE staff doing some evaluating/documenting before the tear down..
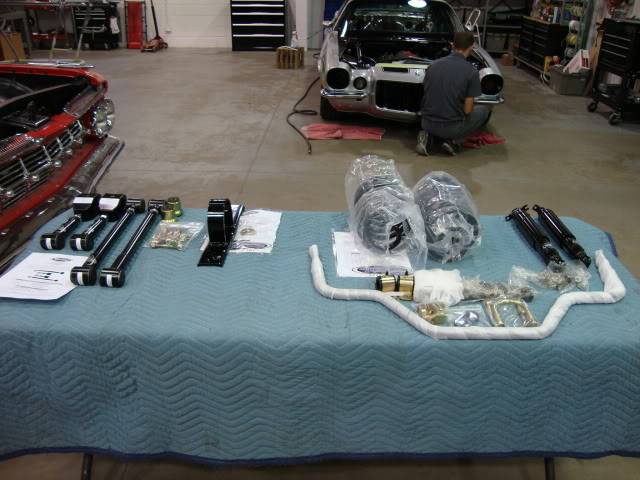
A look at the Front parts ready to install..
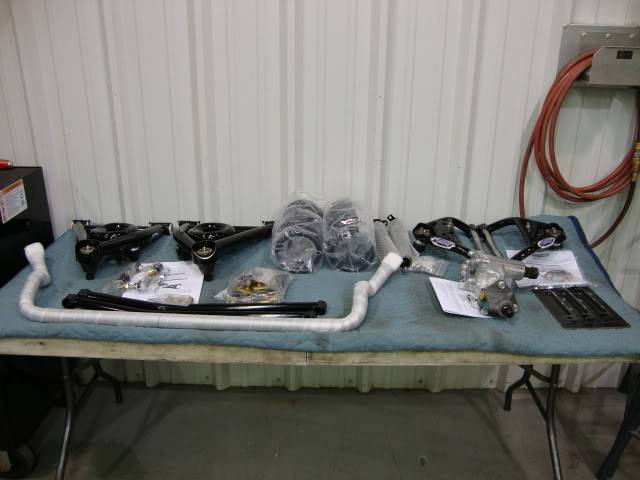
A look at the Rear parts ready to be installed..
Kyle Tuckers 1970 Camaro..
Customers Car being built... My dream car!
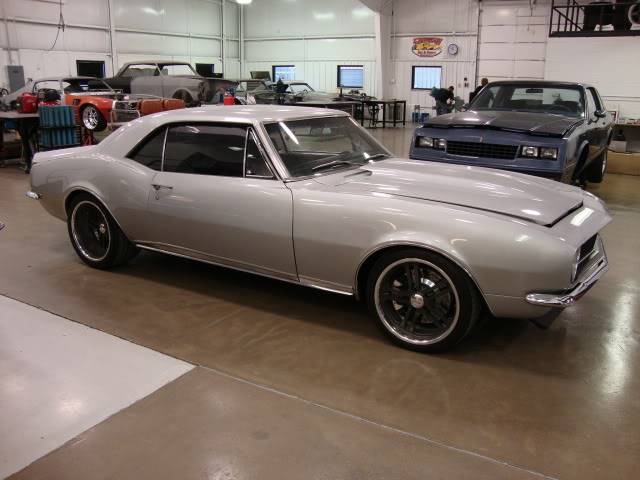
Dale Earnhardt Jr's 1967 Camaro..
Next, Give me a couple days to arrange the whole process into steps. I will also provide some good info to go along with each step that was made. A Bunch of stuff was measured/compared against the old & new products before installed. I will be adding every bit of info that was collected and the end results of the car now at the very end of this install.
Scot W.1986 Buick T-Type
RideTech, DSE, BAER Brakes, Forgeline Wheels, LED lighting, More!
* Get your Top of the line GPS Theft recovery devices Here!
www.GNSperformance.com
09-17-2010 #15
Registered User
- Join Date
- Aug 2004
- Location
- Rustburg, Virginia
- Posts
- 3,436
Hurry back with all of the intricate details....
 1970 RS/SS350 139K on the clock:
89 TPI motor w/ 1pc rear seal coupled to a Viper T56 via Mcleod's modular bellhousing w/ hydraulic T/O bearing from the Viper, 12 bolt rear w/ 3.73 gearing, SC&C upper control arms, factory lowers with Delalums, C5 brakes at all four corners, Front Wheels 17x8's with Sumi 255/40/17 and Rear Wheels 17x9's with Sumi 275/40/17.
Brief description of the work done so far can be found here: http://www.nastyz28.com/forum/showthread.php?t=112454
09-20-2010 #16
Full Blown G-Machiner
- Join Date
- Sep 2005
- Location
- East, Tennessee
- Posts
- 574
Update
Okay guy's, The RTTH event is over and now I had time to put together some more pic's and info on the DSE build.
I guess I will start off with the front install. Overall all of these parts practically fell into place! None of it was a hassle to install nor did any of these parts give us a fit while installing. Everything has been Pre-measured to "Stock Specs" before they even go out the door so the fit is perfect.
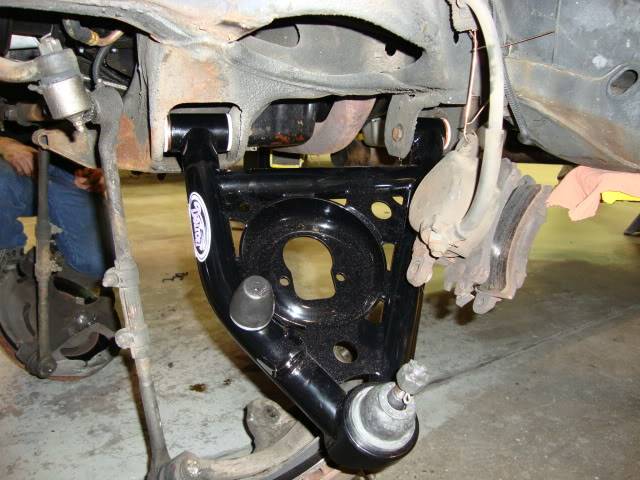
Front Lower A-Arm installed
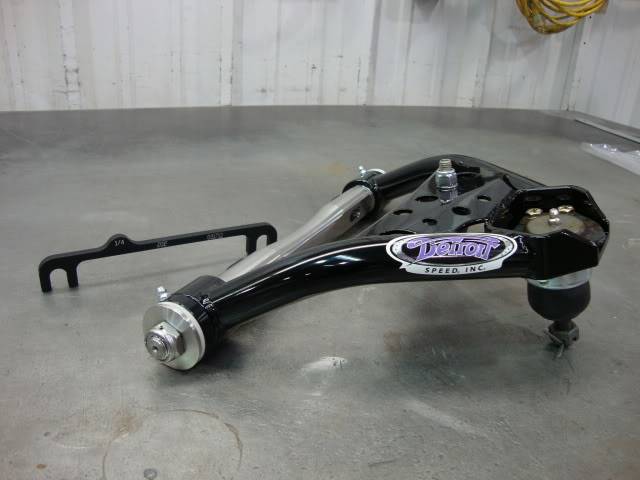
Front Upper A-Arm & 1/4" Camber shim prior to install. The 1/4" shim from the DSE "Track Shim Kit" is used as a baseline for allignment.
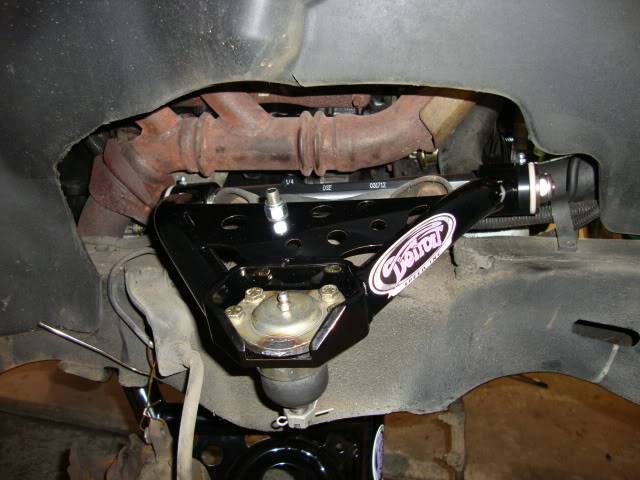
Front Upper A-Arm installed showing the shim installed as well..
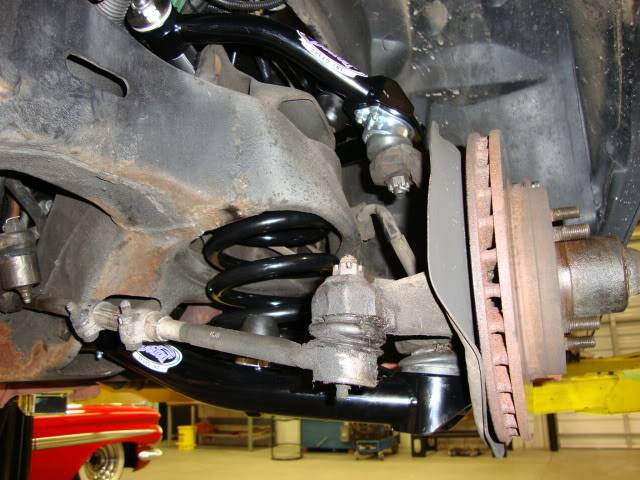
Here are the A-Arms installed and completed..
Here we will install the front DSE sway bar.
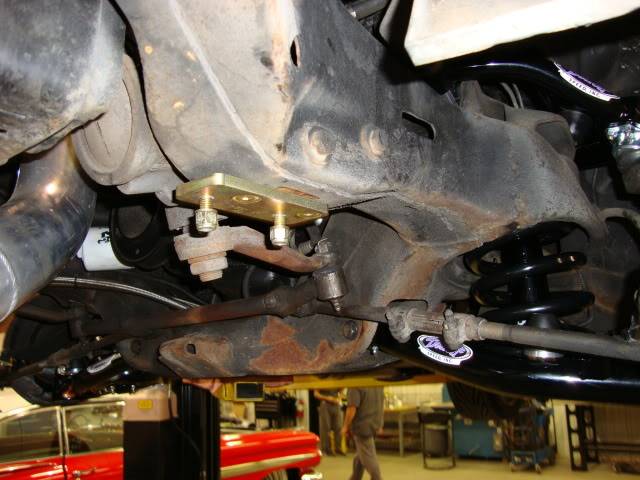
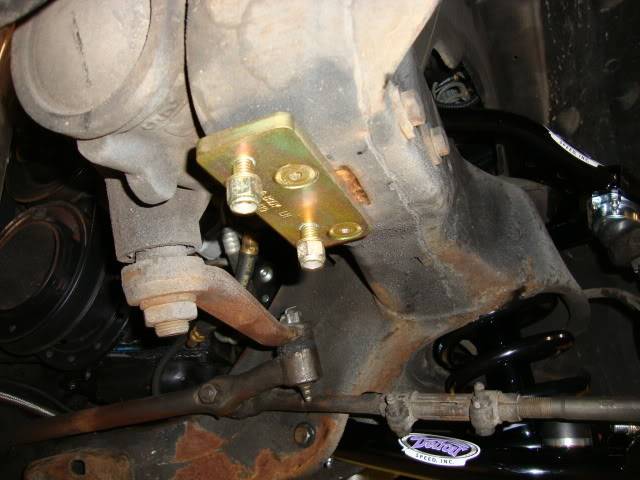
In these pictures you see the DSE relocation bracket for the sway bar. This bracket is there to move the bar forward a bit from the stock location. (Not to worry it actually has MORE clrearance now over the stock one!) Must be due to the design of the DSE sway bar it's self.
Here is a few pictures of the DSE patented sway bar "Swivel Links"tm installed. These were designed to elliminate "Bind" and allow for the front sway bar to articulate better with the front suspension to keep all 4 tires planted to the ground. In these pictures you can also see the shocks installed.
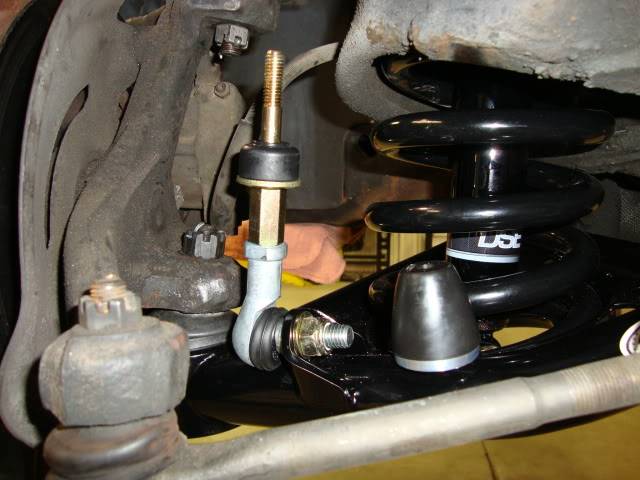
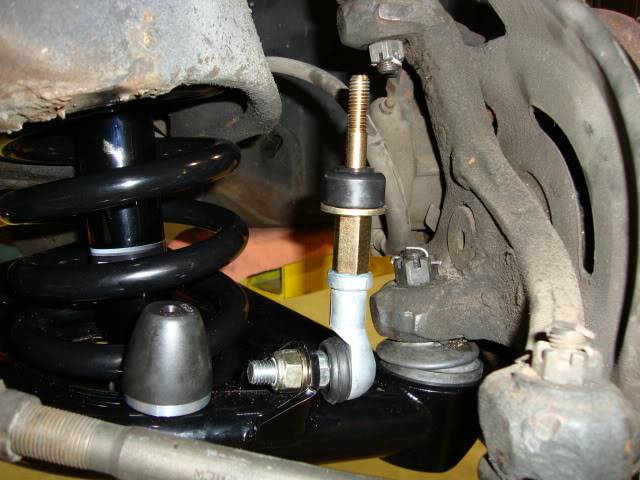
Here is the Sway bar mounted..
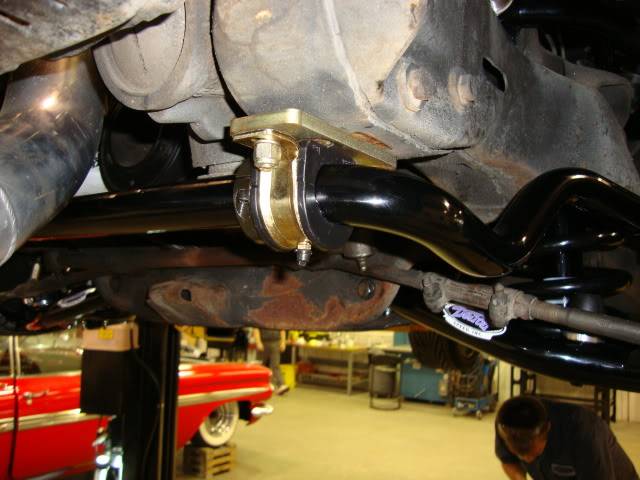
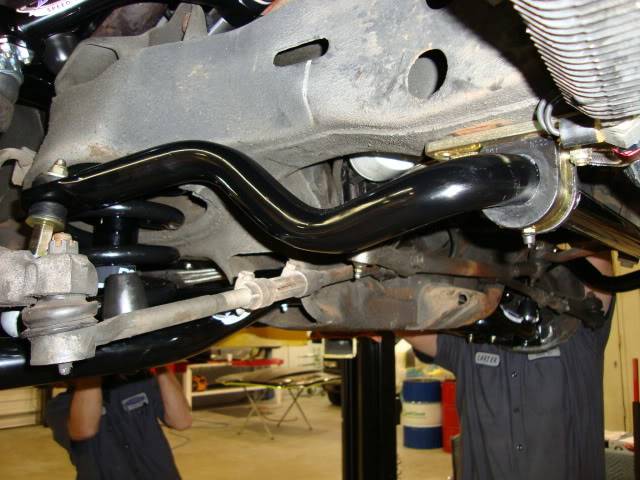 1986 Buick T-Type
RideTech, DSE, BAER Brakes, Forgeline Wheels, LED lighting, More!
* Get your Top of the line GPS Theft recovery devices Here!
www.GNSperformance.com
09-20-2010 #17
Full Blown G-Machiner
- Join Date
- Sep 2005
- Location
- East, Tennessee
- Posts
- 574
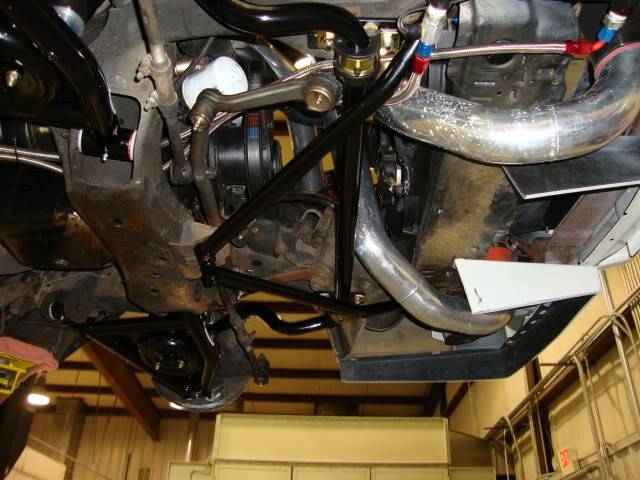
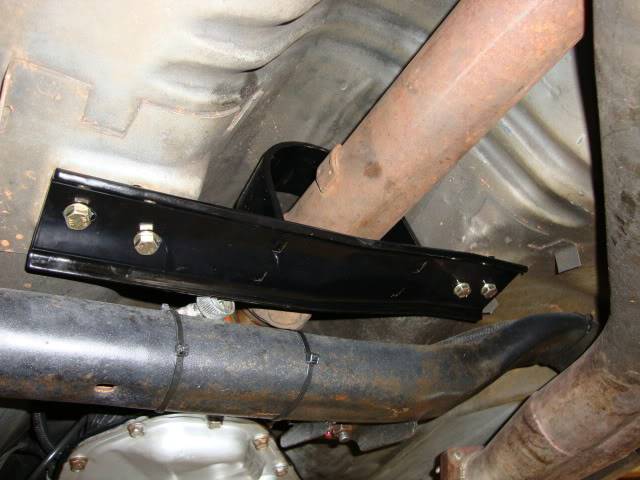
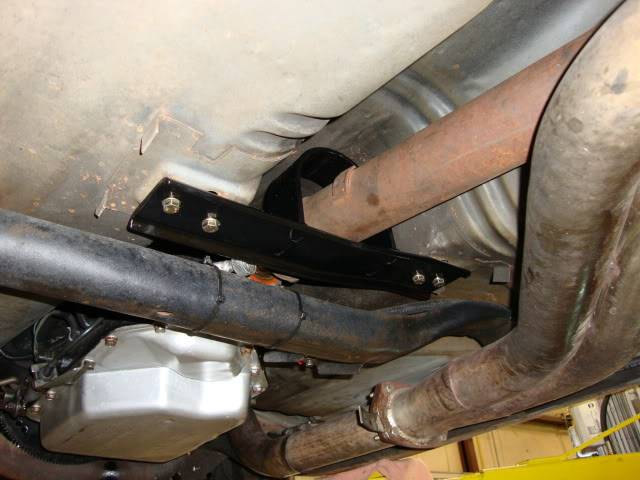
DSE Front Frame Braces/ Drive shaft Loop
Here is a few pictures of the DSE front Frame Braces installed. There is still Plenty of room for front mount I/C pipes!
Note: These come with the purchase of the front sway bar!
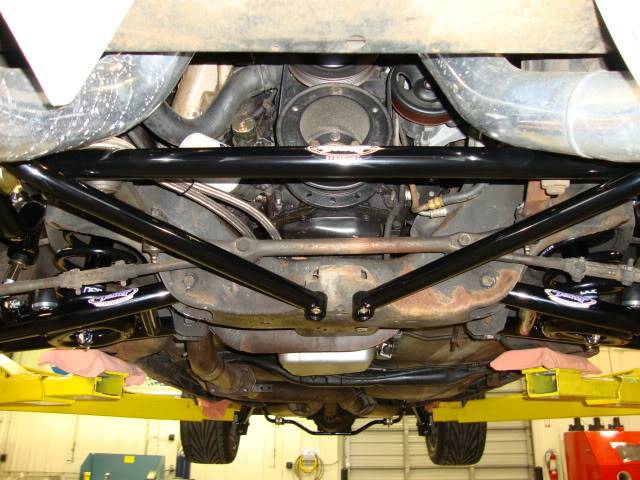

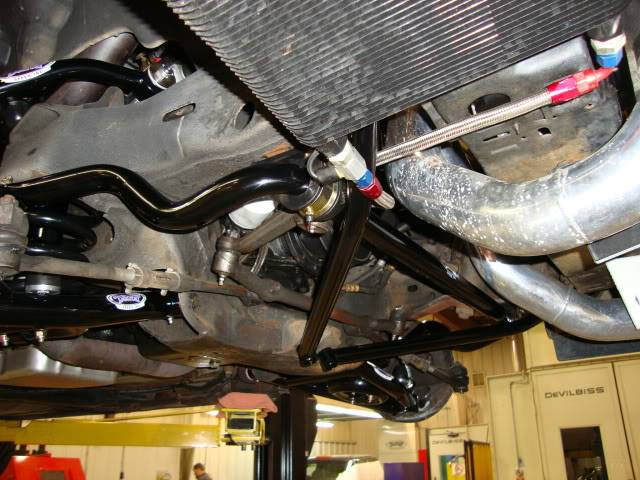
The DSE "Drive Shaft Loop" installed..
 1986 Buick T-Type
RideTech, DSE, BAER Brakes, Forgeline Wheels, LED lighting, More!
* Get your Top of the line GPS Theft recovery devices Here!
www.GNSperformance.com
09-20-2010 #18
Full Blown G-Machiner
- Join Date
- Sep 2005
- Location
- East, Tennessee
- Posts
- 574
Front Spring Height Measurements
Here I did a few measurements with the Front old springs compared to the new DSE springs.
Here are the results:
"Stock 24 yr old spring Height" = 14-1/8" Tall
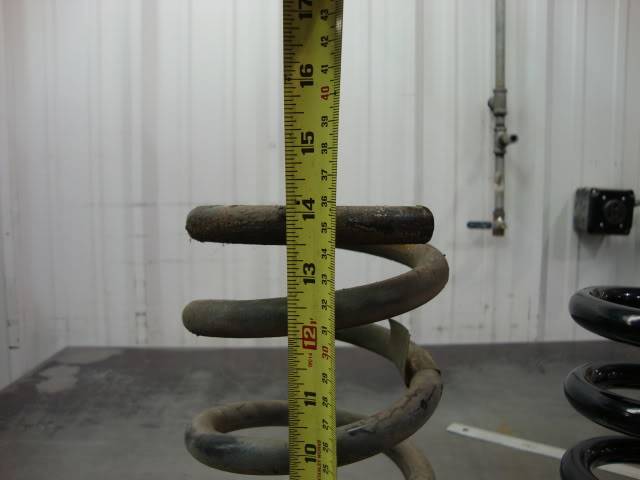
DSE Front 2" drop spring Height = 12-1/16" Tall
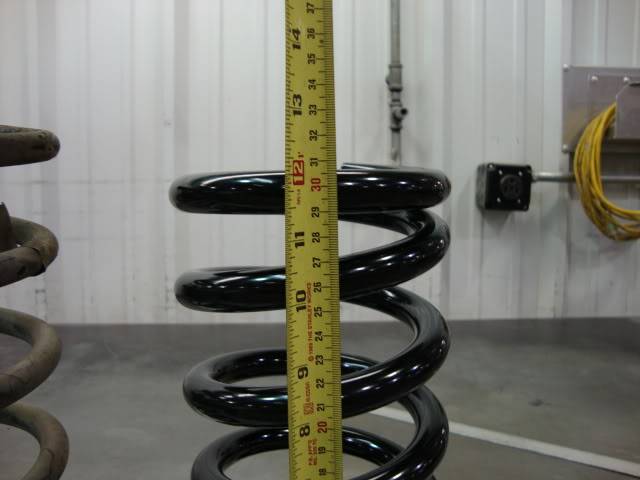
NOTE: Although the DSE springs are considerably lower prior to going in the car. The ride height only dropped 7/8" inch!
OLD "Front" Ride Height = 25.5" (measuring from ground to fender lip).
New DSE "Front" Ride Height = 24 5/8" (Measuring from the exact same place as we did for the Old ride height)..
SW.1986 Buick T-Type
RideTech, DSE, BAER Brakes, Forgeline Wheels, LED lighting, More!
* Get your Top of the line GPS Theft recovery devices Here!
www.GNSperformance.com
09-20-2010 #19
Full Blown G-Machiner
- Join Date
- Sep 2005
- Location
- East, Tennessee
- Posts
- 574
Rear DSE suspension install
Okay here we will touch on the REAR portion of the DSE suspension install.
First I would like to touch base on the info gathered on the REAR springs of the old set up and the new DSE set up. On our old set up we used the Hotchkis 1" drop springs in the car.
Hotchkis 1" drop spring Height = 13.25" Tall
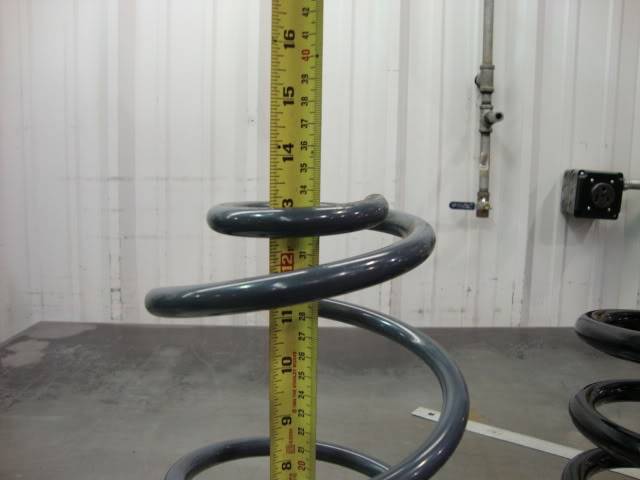
DSE Rear 2" drop spring height = 12.25" Tall
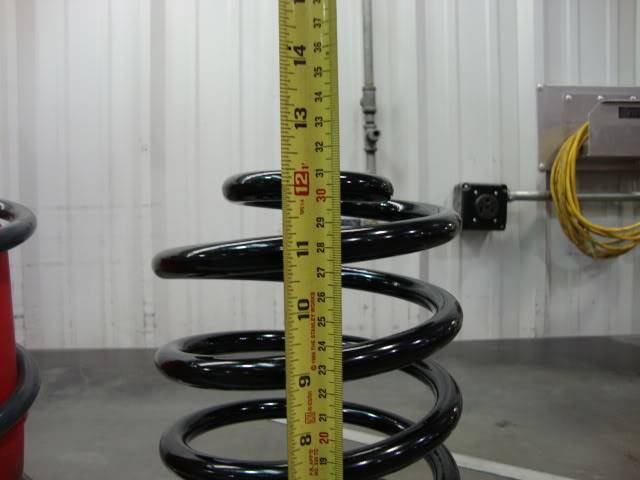
Rear Ride height comparisons:
"Old" Rear ride height = 26.75" (with Hotchkis 1" drop springs)
New DSE Rear ride height = 26-1/8" ( measured after the drive around) and in the same spot as measured before.
Now we will move onto the Rear suspension install.
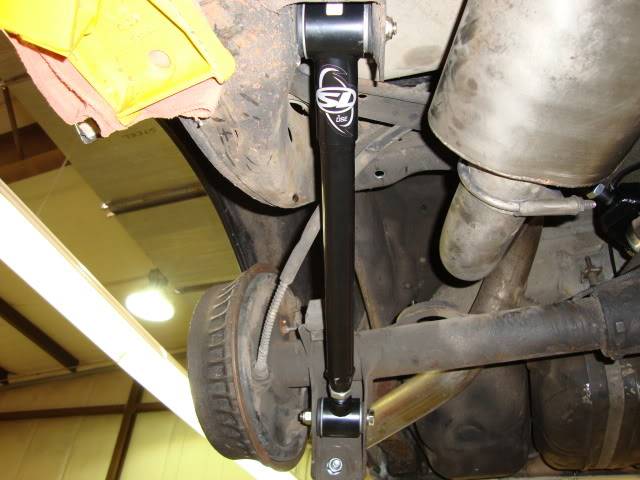
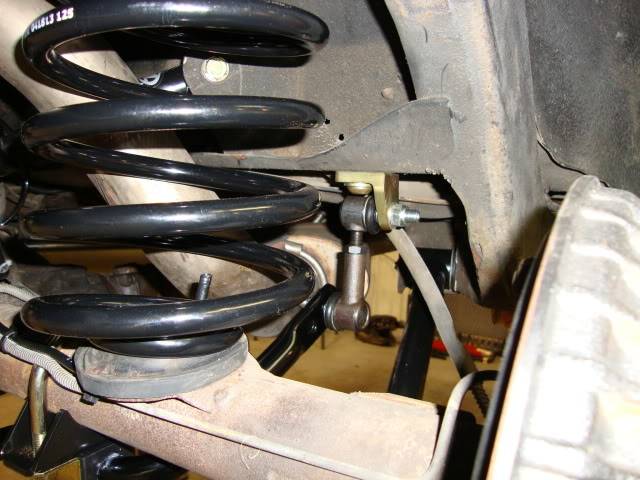
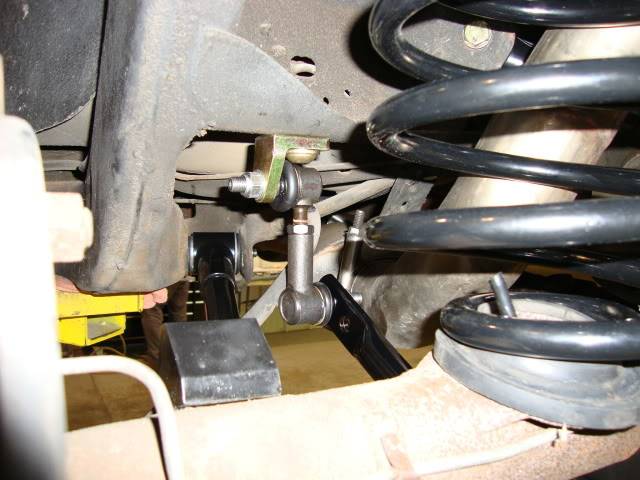
Here is a picture of an Adjustable Rear Lower control arm installed and an Adjustable Upper control arm installed. These DSE rear control arms are exceptionally different over the rest of them out there today and the reason for that is DSE's patented "Swivel Link" tm System. These control arms actually swivel on one end allowing your 4-link rear end to articulate fully and keep all 4 tires planted on the ground. This was a speacial interest to me when I seen the demostration done on my own car. Once the whole rear suspension was complete one of the guys took his hands and placed them on one of the rear brake drums and moved the whole axle Up & Down with ease, Then he had me do it and look at the swivel links to see them move. AMAZING.. and Not one bit of bind at all!!! DSE told me that when people box-in the stock lowers that it actually takes "Flex" away that was actually designed to be there in order for this 4-link suspension to work. It worked out fine in a drag application but not when you want to keep all tires planted to the ground.
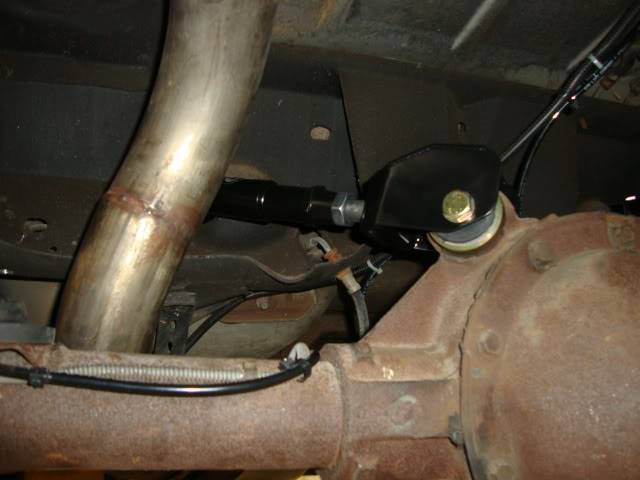
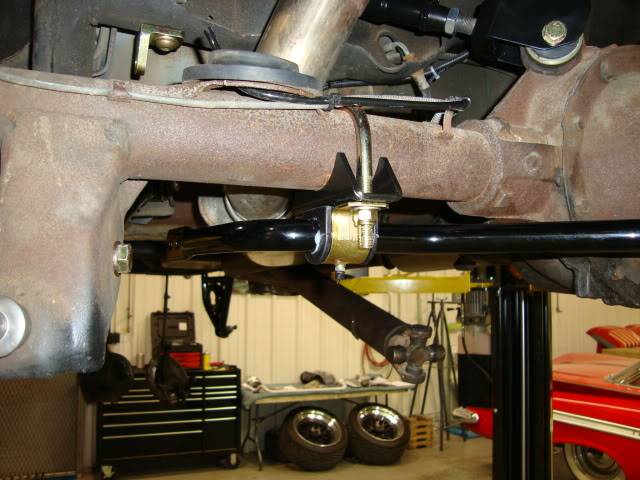
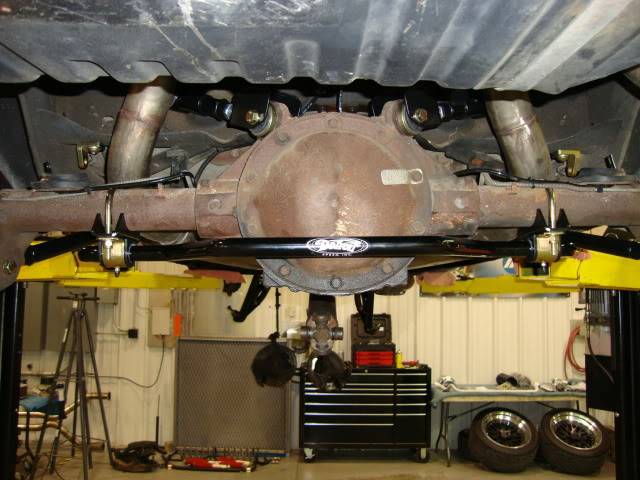
DSE Rear sway bar install pictures:
Here is a picture showing the "One" hole needed to be drilled to mount the bracket for the rear sway bar end links.
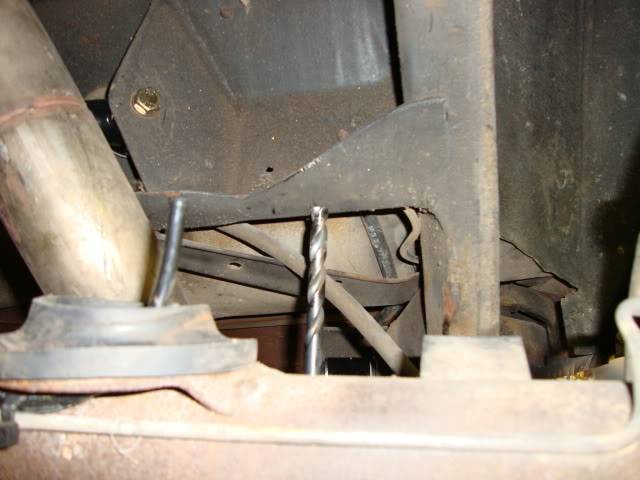
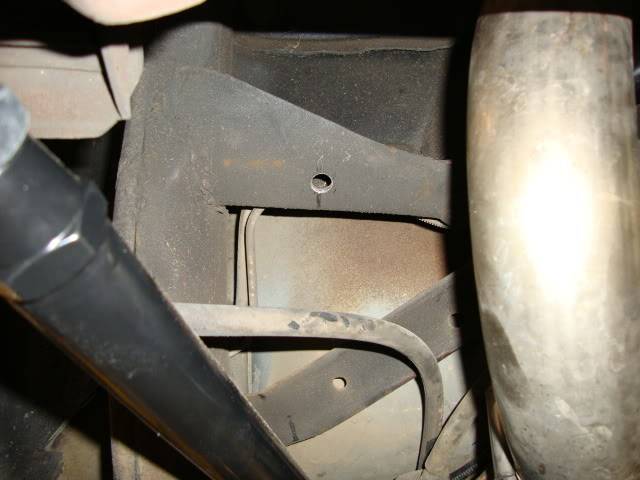
Here is the end link bracket installed.
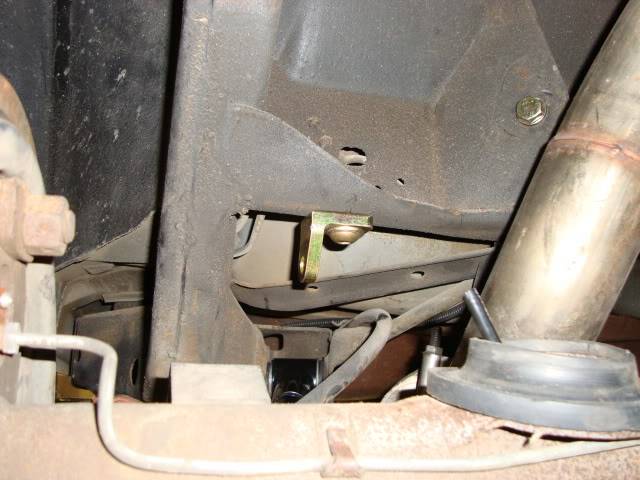
This picture shows the rear sway bar axle mount bracket installed..
Here is a picture of the rear sway bar end links that also incorportate the pattented "Swivel Link"tm System. These end links are "Beefy" to say the least and they elliminate Bind!
 1986 Buick T-Type
RideTech, DSE, BAER Brakes, Forgeline Wheels, LED lighting, More!
* Get your Top of the line GPS Theft recovery devices Here!
www.GNSperformance.com
09-20-2010 #20
Full Blown G-Machiner
- Join Date
- Sep 2005
- Location
- East, Tennessee
- Posts
- 574
Here is a picture showing the adjustability holes in the sway bar it's self! These holes are for moving the end link forward or backwards to change the ride of the car. Front is more for street and the rear is for a more aggressive ride.
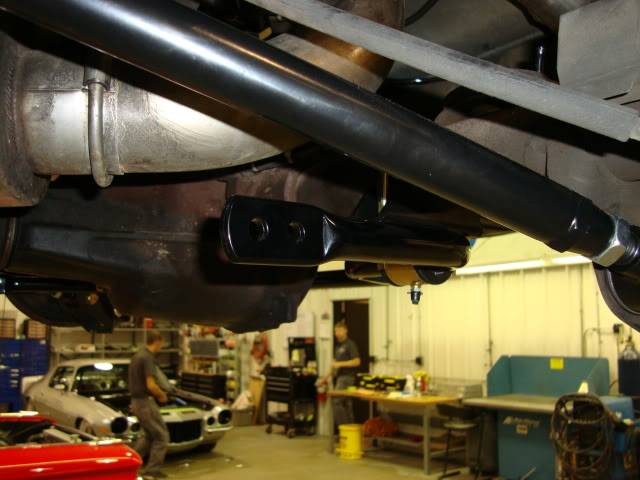
Here is the bar completed/installed..
 1986 Buick T-Type
RideTech, DSE, BAER Brakes, Forgeline Wheels, LED lighting, More!
* Get your Top of the line GPS Theft recovery devices Here!
www.GNSperformance.com

 Reply With Quote



