


Results 21 to 40 of 49
Thread: Crazy idea....
-
08-27-2010 #21

 Registered User
- Join Date
- Aug 2010
- Location
- Florida
- Posts
- 29
Tim, Originally Posted by GRNOVA

I too was into r/c.... Monokote is a plastic... not sure that it would work, due to chemicals in the fiberglass resin. I think that stuff wouldn't hold up with the resin setting up right on top of it. Thanks for the idea.
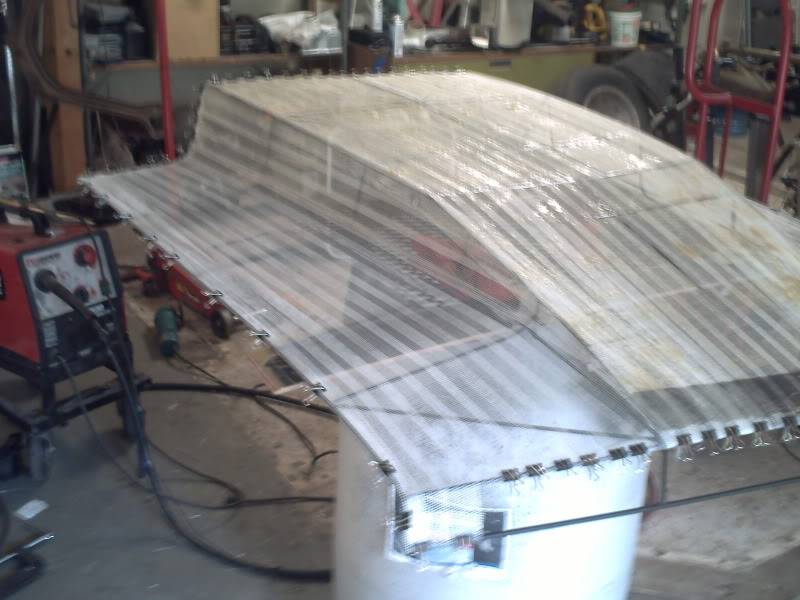
I did, however, find something that may work. I rifled through the garage and ran across some fiberglass drywall seam tape. It has a sticky backing and seems to hang on to the framework really well. I'll lay some resin down on it to make it more permanent.70 Maverick: 302 w/ TL 4 spd. 9" rear 3.91:1 gears on a mini spool. 4 wheel disk brakes, cage, fuel cell, and more to come!! next up.... suspension!
-
08-28-2010 #22
 Registered User
- Join Date
- Aug 2007
- Location
- Roanoke (FortWorth) Texas
- Posts
- 786
Here is the hood I msg'd you about.
http://www.feathercarbon.com/cf_part...k/maverick.htmChrisTotal Cost Involved - Ridetech - Fatman - Total Control Products - Gateway Performance - MaverickMan Carbon
-
08-29-2010 #23
Registered User
- Join Date
- Aug 2010
- Location
- Florida
- Posts
- 29
Did a little side work, and got the glass for free! So far I have $25 in the hood, got to do a little rethink on some of the contours, but its nearly finished. more pics soon.
70 Maverick: 302 w/ TL 4 spd. 9" rear 3.91:1 gears on a mini spool. 4 wheel disk brakes, cage, fuel cell, and more to come!! next up.... suspension!
-
08-29-2010 #24
Registered User
- Join Date
- Oct 2007
- Location
- McHenry, Il.
- Posts
- 116

Nice! We can't wait to see how it works. Get it done for under a hundred.
Vinyl tape could be used instead of the paper tape. I reinforced the air bag cover on my car with 2 inch wide black tape to hold the pieces together then glassed over it. Held up well and the tape did not melt from the resin.
-
08-29-2010 #25
 Registered User
- Join Date
- Jul 2003
- Location
- Anaheim Hills, CA
- Posts
- 11,967
I work with Derrek (MavericMan) if you need a discount. Originally Posted by falcon65
However, I'm very curious how this hood will come out.. pretty damn creative!"A ship in port is safe, but that's not what ships are built for."
1968 Track Rat Camaro:
https://www.youtube.com/watch?v=SGHJ5c1yLIo&t=2s
1971 Chevelle Wagon with a few mods:
https://www.youtube.com/watch?v=WBVPR3sRgyU
-
08-29-2010 #26
Registered User
- Join Date
- Aug 2010
- Location
- Florida
- Posts
- 29
Let Derrek know where I'm at with this, see if he can give me some pointers. This is the first time doing this on this scale.
-Mike70 Maverick: 302 w/ TL 4 spd. 9" rear 3.91:1 gears on a mini spool. 4 wheel disk brakes, cage, fuel cell, and more to come!! next up.... suspension!
-
08-29-2010 #27
Registered User
- Join Date
- Nov 2008
- Location
- Lake Oswego, OR
- Posts
- 612
Would HyperFiber work in this application?
http://www.percyshp.com/store/fiberg...tes/cat_5.htmlLee
1966 Cutlass
The difference between truth & fiction: fiction has to make sense.
Build Thread:
https://www.pro-touring.com/forum/sh...ad.php?t=64470
-
08-29-2010 #28
 Registered User
- Join Date
- Mar 2010
- Location
- San Gabriel Valley CA
- Posts
- 148
HyperFiber might work, but it would price this thing through the roof. I was interested in HyperFiber until I saw the price.
Mike Lara
-
08-29-2010 #29
Registered User
- Join Date
- Nov 2008
- Location
- Lake Oswego, OR
- Posts
- 612
I wonder if HyperFiber would be willing to sponsor a build like this to show off the possible uses for their product? Originally Posted by fbody_mike
Lee
1966 Cutlass
The difference between truth & fiction: fiction has to make sense.
Build Thread:
https://www.pro-touring.com/forum/sh...ad.php?t=64470
08-29-2010 #30
Registered User
- Join Date
- Jul 2009
- Location
- Wartrace, Tn.
- Posts
- 116
Not sure how far into this you are, but there are some structural foams you can use to fill in and glass over that might make your life much easier in the long run.
The problem I see is that if you can manage to keep the wetted out glass pulled tight over the metal structure (which in my glass experience is a big if), you are going to end up with a cured part that is segmented to match the structure. In other words, it won't loft from front to back smoothly, but be sort of like a bridge that was cast in pieces . . . da thump, da thump. Lots of body work to get the finish you will want.
If you use the foam that won't melt from resin, you can carve it to the shape you want over (inside actually) the metal frame to get exactly what you really want, glass over it, dig out the foam from the back, and finish as necessary. You will still have body work, but much less. You can carve a pretty good surface with a surform tool.
I cannot remember the name of the foam, but I will dig through my notes and see if I still have it. I have used it in the past. If memory serves, the one that works is blue. You can buy it in sheets about 6" thick, and glue together to get dimensions you need.
You could also shrink wrap it (call a marina that does winter wrapping) but I am not sure if that will melt from resin. I suspect it would. If not that would be quick, easy and cheap. It could be shrink wrapped in a matter of minutes. But you would still be back to the same issue of the wrap giving you tight straight lines from one rib to the next, and not lofting smoothly.
08-30-2010 #31
Registered User
- Join Date
- Aug 2010
- Location
- Florida
- Posts
- 29
So far, I've got $25 in this hood. I got the glass already to lay. I was even considering tinfoil to help support the glass as I lay it. I have also been considering laying the glass in sections rather than all at once. I like the idea of foam, but I'm not sure of cost. It would be a good support for the glass to keep it smooth. I may make a mold when I'm done to pop out more and try to sell them. Still considering that. Originally Posted by Boatmark
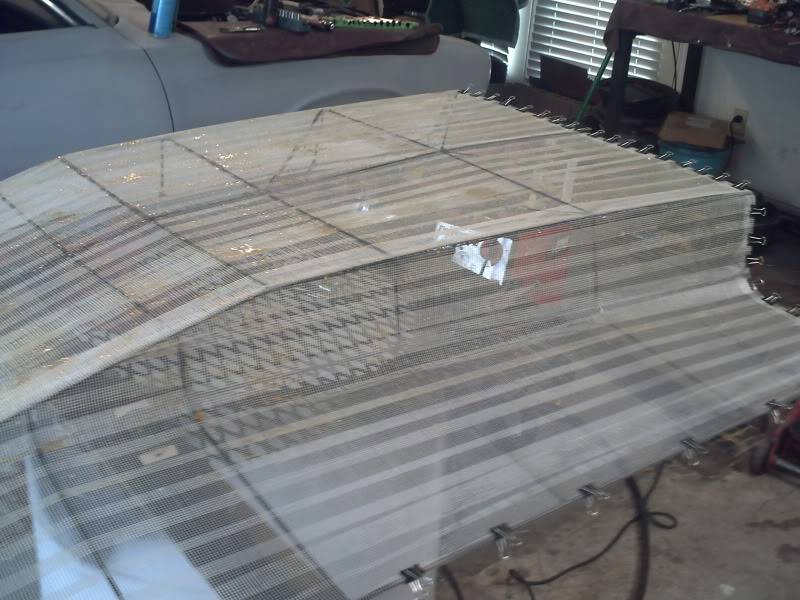
What about using fiberglass screen material? Like window screen. I have a ton of that s**t! Set it up with resin to stiffen it and then lay the 'glass right on top.... hmmm. Have to think on that one.
Thanks for all the input guys... you're giving me alot of ideas!70 Maverick: 302 w/ TL 4 spd. 9" rear 3.91:1 gears on a mini spool. 4 wheel disk brakes, cage, fuel cell, and more to come!! next up.... suspension!
08-30-2010 #32
Registered User
- Join Date
- Jul 2009
- Location
- Wartrace, Tn.
- Posts
- 116
I have been thinking this farther through. I just went back and looked at the hood frame again, and I think there is a cheap solution.
Looking at the hood, it looks like it is all angles, with little to no hard bends. Buy a couple of sheets of cheap white formica. The really cheap no texture shiney stuff. Imagine you are skinning the hood in steel, and cut and fit the mica to the structure. Use something like hot glue to keep it in place.
Next, wax the S**t out of the mica. If you have a fiberglass supply house around get a can of mold release wax, but if not, any high silicone/carnuba car wax will work.
Leave a little area around any seams un-waxed. Take a couple of blocks of modeling clay. (that stuff kids use), roll little lengths of it and press it into the seams. Dig some things that fit the various radiuses you want out of your toolbox and tool the clay into smooth seams.
Glass over it, and presto!, a hood. Once it is fully cured, peel the mica and clay off and bodywork it as needed for a good finish.
If it were me, I would lay it up thicker, glass some pvc stiffeners to the top, and use it as a quickie mold to make your hood, and a few more. The time it takes to make it a female mold, will still be less than it takes to finish the hood make as a male part. And you can make more hoods.
I think this will give you the consistant lofting to match the fenders with little hassle and much less mess. In the custom yacht building world you would be amazed how many beautiful finished parts came from quickie mica and clay molds.
Hope this helps.
08-30-2010 #33
Registered User
- Join Date
- Aug 2010
- Location
- Florida
- Posts
- 29
That sounds fantastic! I'll hit up Lowes tomorrow and see what they have. Oddly enough, I have some modeling clay laying around from a past experiment. I have 2 sheets of fiberglass to make this hood. I hope its enough to make it relatively sturdy under the conditions I will put it through. I have some more rod that I could use to stiffen the hood postmortem. Thanks again! Originally Posted by Boatmark
70 Maverick: 302 w/ TL 4 spd. 9" rear 3.91:1 gears on a mini spool. 4 wheel disk brakes, cage, fuel cell, and more to come!! next up.... suspension!
08-30-2010 #34
Registered User
- Join Date
- Jul 2009
- Location
- Wartrace, Tn.
- Posts
- 116
Been thinking again. Better just do your hood, if you turn this into a mold then it brings up mold release issues and products that are a little tougher to deal with if you haven't been there before. Make the mica deal and do one. Depending on the condition of the bottom side of that metal frame, I would try to flip it and mica the bottom. Much easier if the "finished" side is up.
As for layers etc. its really hard to comment w/o seeing what you have. Keep in mind you are going to need to put edges on it to make it stiffer, so allow for that around the perimeter. Allow for a hood gap, and a vertical edge thickness.
Short version of glass 101 - there are two materials, mat (the hairy stuff) and roving (looks like woven cloth). Best result is alternating layers of both. Better yet, pre-made knitted materials that already combine them, but you are not likely to see that without going to a pro glass shop. Play with it, experiment, and you should be fine. Cut strips about 4-6 inches wide and reinforce each of the transitions like the scoop. To make it easier to bodywork, I would do that on the bottom after you pull it off the mica. Depending of course on which side you decide to work from.
Big thing to remember if you have not spent much time with glass is that resin has no strenth. people tend to want to add too much resin and get brittle parts.
Each layer should be wet, resist the tendency to keep adding resin. Wet it out, but not dripping. Fiberglass strands are just that, a microscopic form of synthetic glass. Resin surrounds the strand, but does not saturate it. You are essentially locking each strand in place to form a solid. This is an over simplification, but you get the point. Once the left over resin dries in the cup, take it out and smack it on the workbench, it will crack into pieces without the glass.
You could glass in some stiffeners underneath, or glass tab the steel frame into it I guess. Judge that based on how the part comes out.
I will state for the record that there are ways to do this with a higher level of craftsmanship, and with labor savings, but this works for down and dirty. Just substituting grunt labor, itching, and some cursing, in place of money. I can relate to that.
09-09-2010 #35
Registered User
- Join Date
- Jul 2009
- Location
- Wartrace, Tn.
- Posts
- 116
So what ever happened with this . . . . . .
09-09-2010 #36
Registered User
- Join Date
- Jan 2010
- Location
- Elk River, MN
- Posts
- 676
Stretch and hogring some fabric onto the frame and let it be, then do a retro military look with the rest of the build. Might be goofy but you never know...
-mattMatt Peterson 84 Monte Carlo - Sold :( | 99 Corvette Racecar | 2001 Z06 Daily Driver
https://www.pro-touring.com/showthre...ng-Bertha-Back
http://ls1tech.com/forums/conversions-hybrids/1499192-84-monte-5-3-build.html
https://www.pro-touring.com/threads/...rvette-Racecar
09-21-2010 #37
Registered User
- Join Date
- Aug 2010
- Location
- Florida
- Posts
- 29
**update**
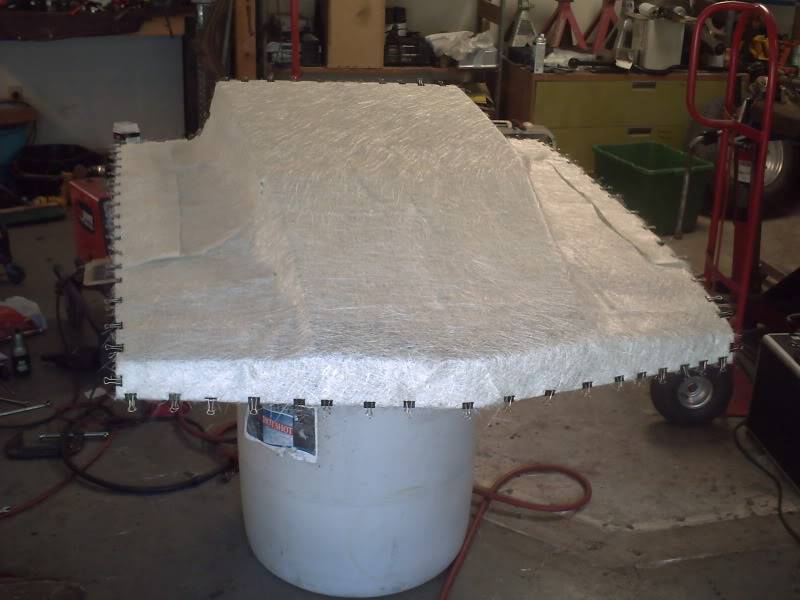
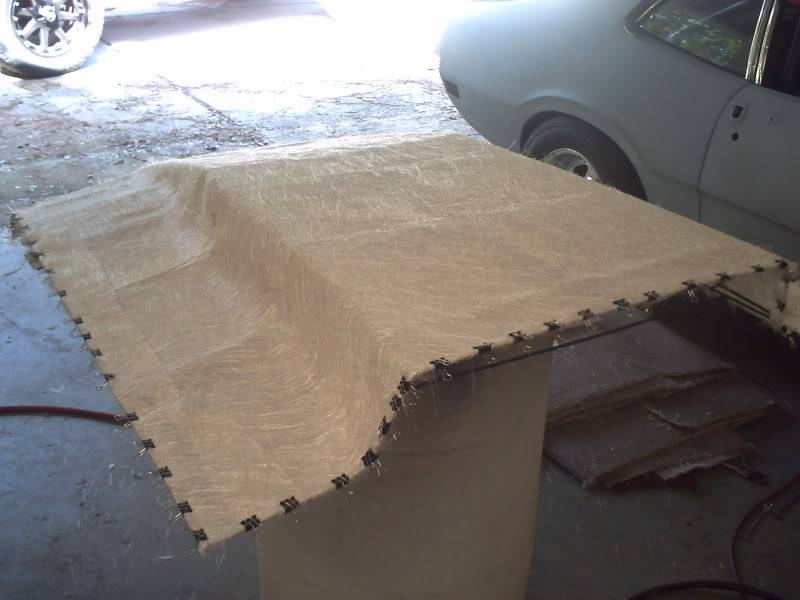
Tried to lay fiberglass in a variety of methods. Cannot get the material to lay flat
 .... So, I am going to buy a hood. I have to bite the bullet in order to have the car "legal" by the Turkey Rod Run and possibly the Daytona Dream cruise. I know I am far from finished, but it would be nice to enjoy it a little until I get the cash together to finish it. To me, its kinda the point of building a car in the first place. I'll post some pics of the disaster tonight. Thanks again for all the helpful input. I need to start a build thread when I get all my pics together. For those who want to know, I will be going with the feathercarbon.com hood that GrabberGT posted up about earlier in this thread. I talked to a couple of buddies that drag race their Mavericks, and they both use the feathercarbon hood.
-MikeLast edited by sharpe351; 09-21-2010 at 07:33 AM. Reason: additional information.
70 Maverick: 302 w/ TL 4 spd. 9" rear 3.91:1 gears on a mini spool. 4 wheel disk brakes, cage, fuel cell, and more to come!! next up.... suspension!
09-21-2010 #38
Registered User
- Join Date
- Mar 2010
- Location
- Richmond, CA
- Posts
- 108
well post the pics we all want to see.
83 Cutlass 96 LT1, 52mm TB, Electric WP,TH350, Hotchkis sways front/rear poly bushings 8.5 10 bolt 3.73's posi, boxed adjust rear arms, dual cat-back exhaust 2.5" x-pipe 40series
http://www.cardomain.com/ride/2540200
09-22-2010 #39
Registered User
- Join Date
- Aug 2010
- Location
- Florida
- Posts
- 29
here ya go. this is initial layout. I was too pissed to take pics before removing all the messed up 'glass.
 70 Maverick: 302 w/ TL 4 spd. 9" rear 3.91:1 gears on a mini spool. 4 wheel disk brakes, cage, fuel cell, and more to come!! next up.... suspension!
09-22-2010 #40 Registered User
- Join Date
- Apr 2009
- Location
- san diego
- Posts
- 5,101
looks good! what went wrong. You can always sand fiberglass to get it perfect!
My build thread: https://www.pro-touring.com/showthre...ing&highlight=
The mustang build thread: https://www.pro-touring.com/showthre...el)&highlight=

 Reply With Quote