Results 121 to 140 of 169
-
03-07-2015 #121

 Registered User
- Join Date
- Jan 2008
- Location
- Houston, TX
- Posts
- 193

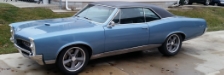
Lookin sharp. Its nice to see some different ideas on a basic design.
Asa Walker
Houston, TX
-
03-07-2015 #122
 Registered User
- Join Date
- Feb 2005
- Location
- Waterloo, Ia
- Posts
- 1,408
Nice work!
-Nick
-1967 GTO I drive and race
-Build threads:
-http://forums.maxperformanceinc.com/forums/showthread.php?t=615847&page=23
-https://www.pro-touring.com/showthre...project-thread
-
03-13-2015 #123
 Registered User
- Join Date
- Nov 2008
- Location
- st. paul mn.
- Posts
- 438
Thanks for the interest and the compliment. hoping to learn new things everyday! Originally Posted by acegto

Thanks for the compliment i am just learning as I go hoping to build something outstanding on a budget so with any luck this works! Originally Posted by Nicks67GTO
Follow Us on Facebook!
http://www.Facebook.com/ErodzCustoms
Visit Our Website!
http://www.ErodzCustoms.com
Follow our Crazy Shop Mod's!
http://www.garagejournal.com/forum/s...ad.php?t=48204
-
03-13-2015 #124
Registered User
- Join Date
- Nov 2008
- Location
- st. paul mn.
- Posts
- 438
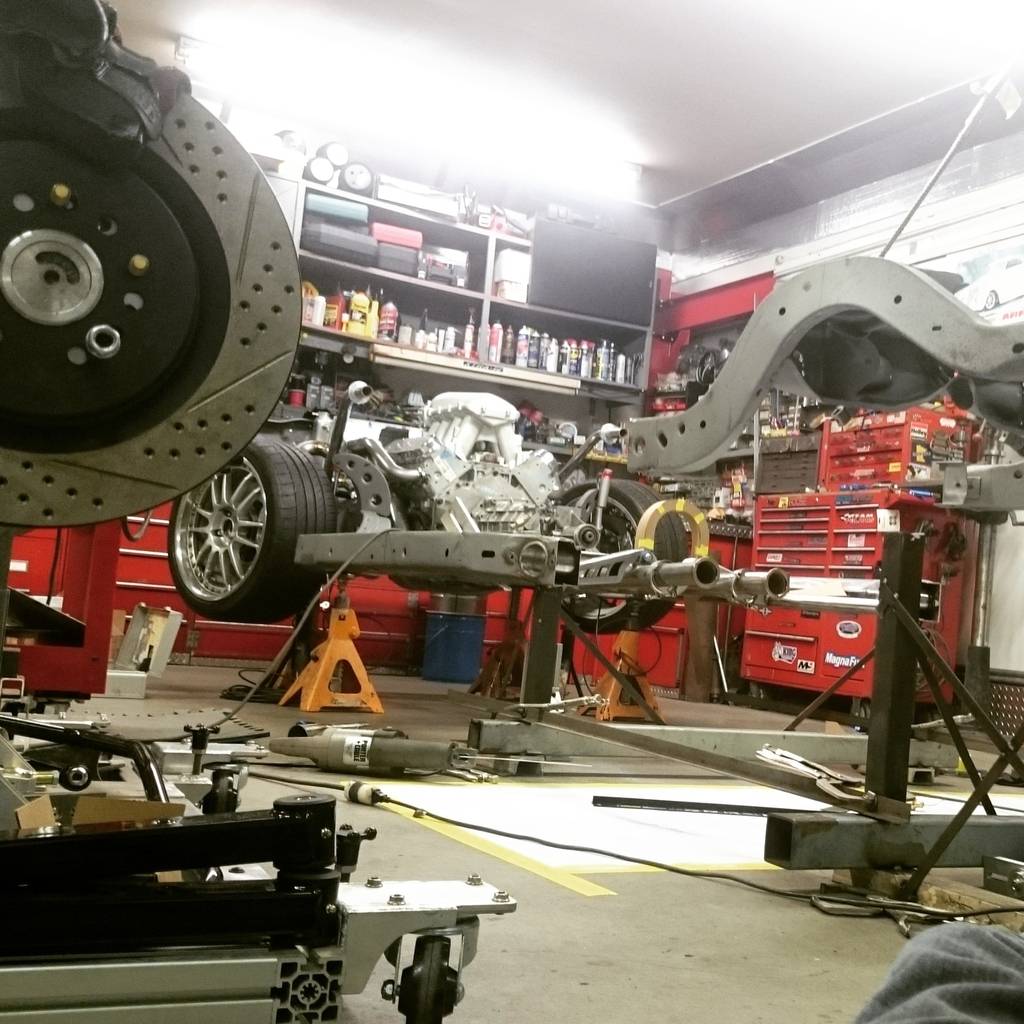
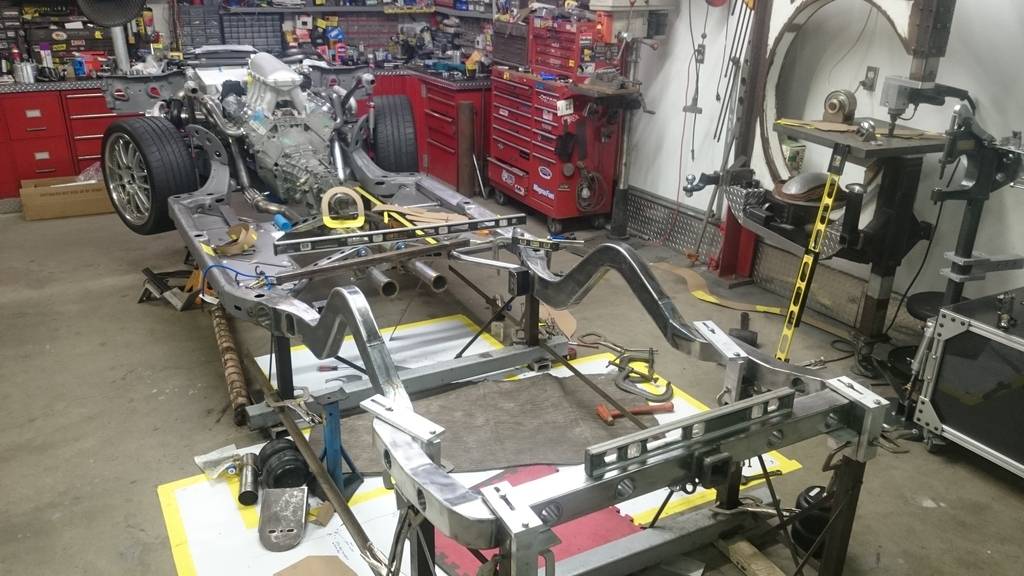
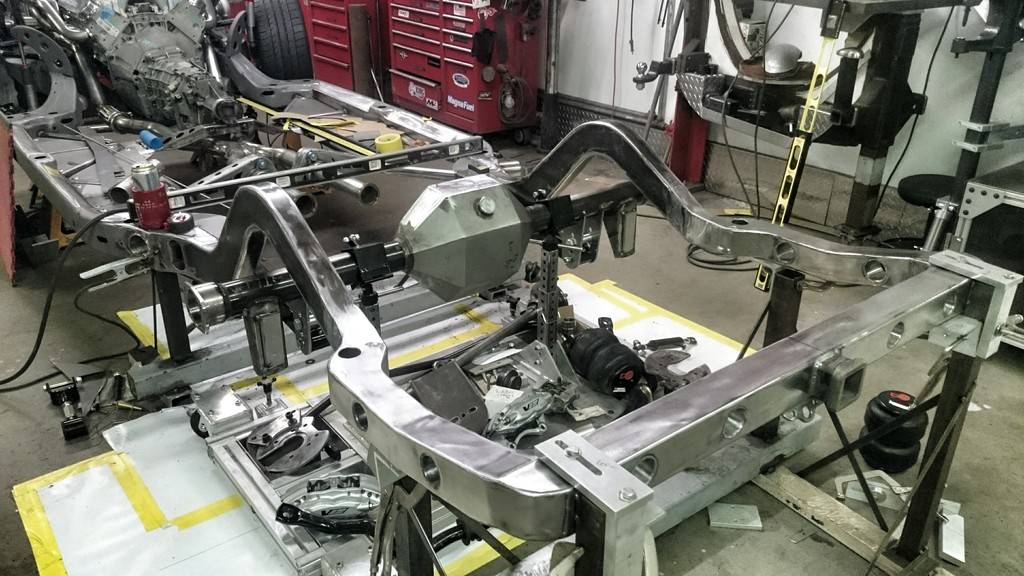
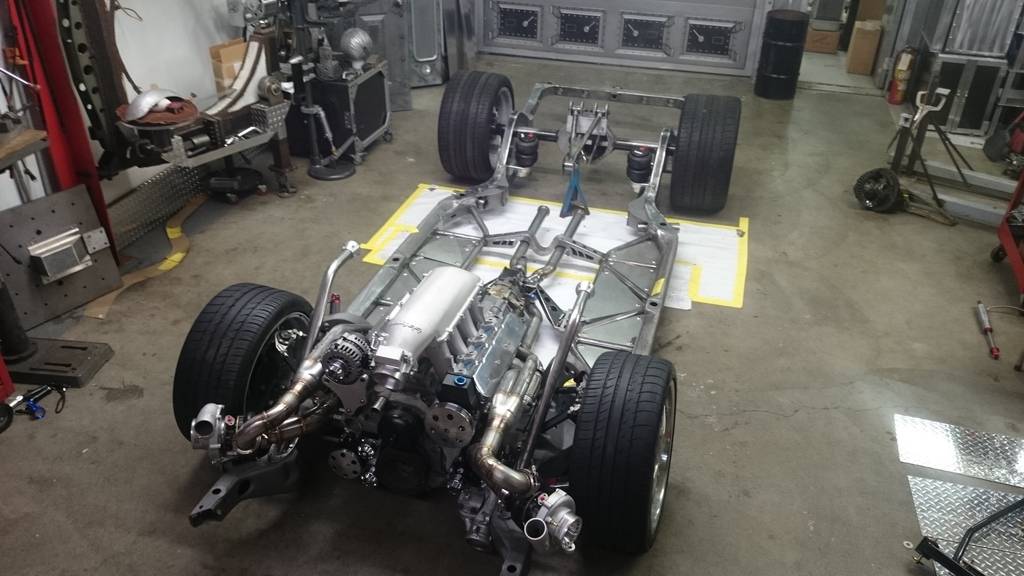
well looks like things are going just as planned! ah well NOT! i just wanted a nice clean frame with a nice working suspension system. and the ideas after reading Ron Suttons advice looks like I will be attempting to make a adjustable 3 link for this along with the narrowed frame section with trailer hitch. so i agreed with the voices in my head and decided to take on this massive project on my own while attempting to lear 3 d cad. at the same time.
 apparently i am into self torture!
 Follow Us on Facebook!
http://www.Facebook.com/ErodzCustoms
Visit Our Website!
http://www.ErodzCustoms.com
Follow our Crazy Shop Mod's!
http://www.garagejournal.com/forum/s...ad.php?t=48204
-
03-21-2015 #125
Registered User
- Join Date
- Nov 2008
- Location
- st. paul mn.
- Posts
- 438
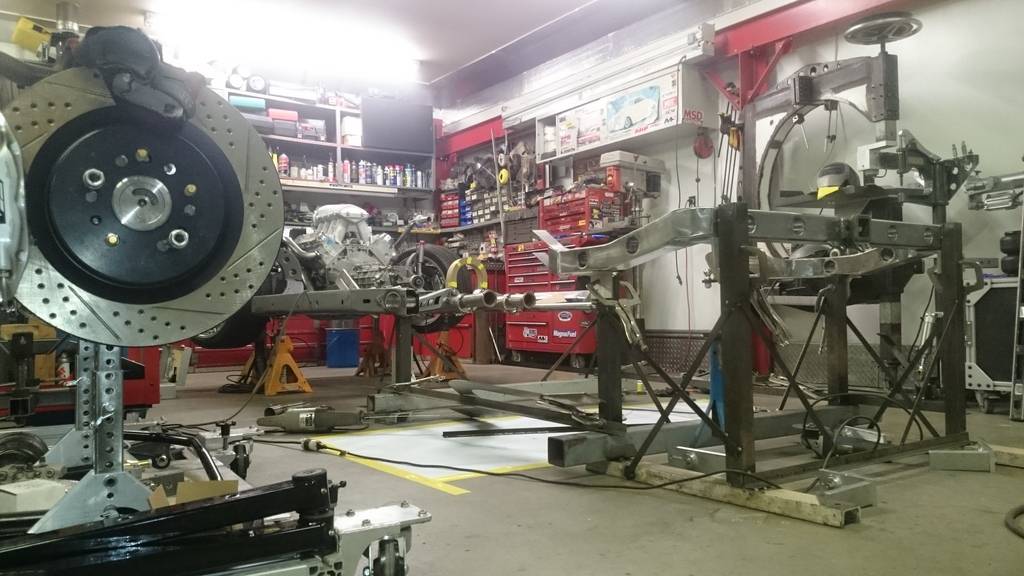
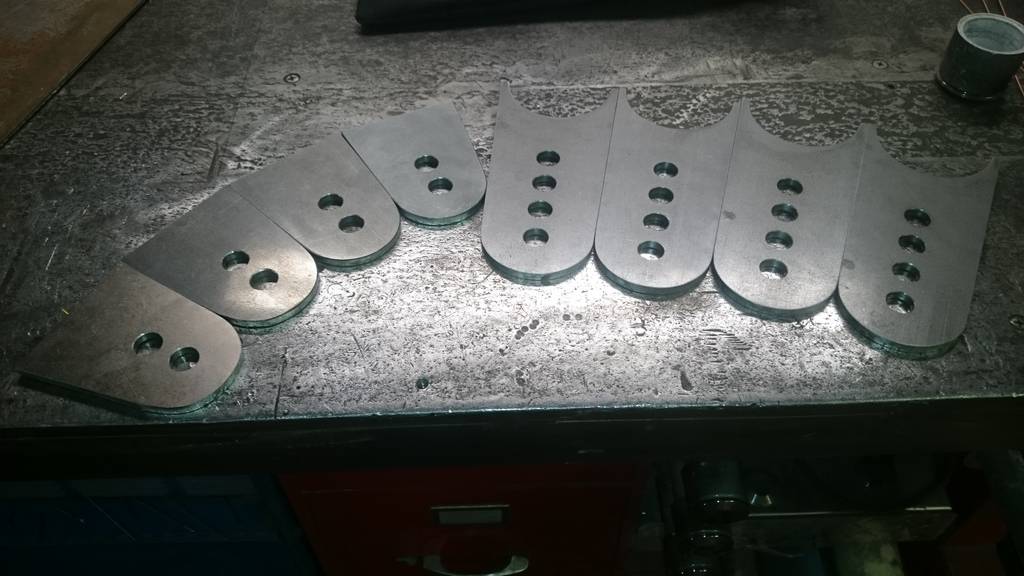
making some progress one piece of steel at a time someday i will have a full frame building table but for now it is time to make due with what you have. so I am going to do this in sections to make it easier to work with it on the bench. hope this works.
 Follow Us on Facebook!
http://www.Facebook.com/ErodzCustoms
Visit Our Website!
http://www.ErodzCustoms.com
Follow our Crazy Shop Mod's!
http://www.garagejournal.com/forum/s...ad.php?t=48204
-
04-05-2015 #126
Registered User
- Join Date
- Nov 2008
- Location
- st. paul mn.
- Posts
- 438
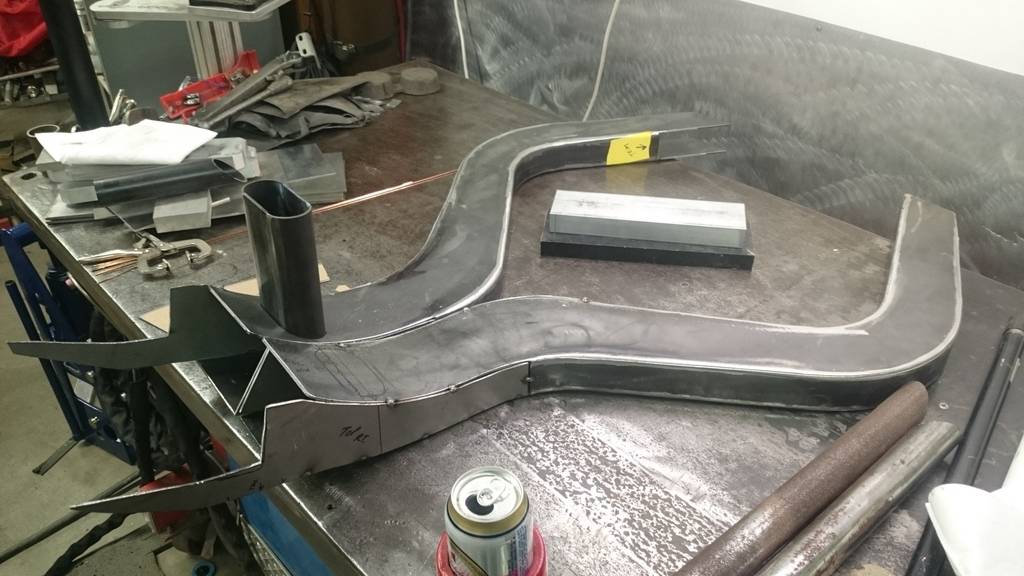
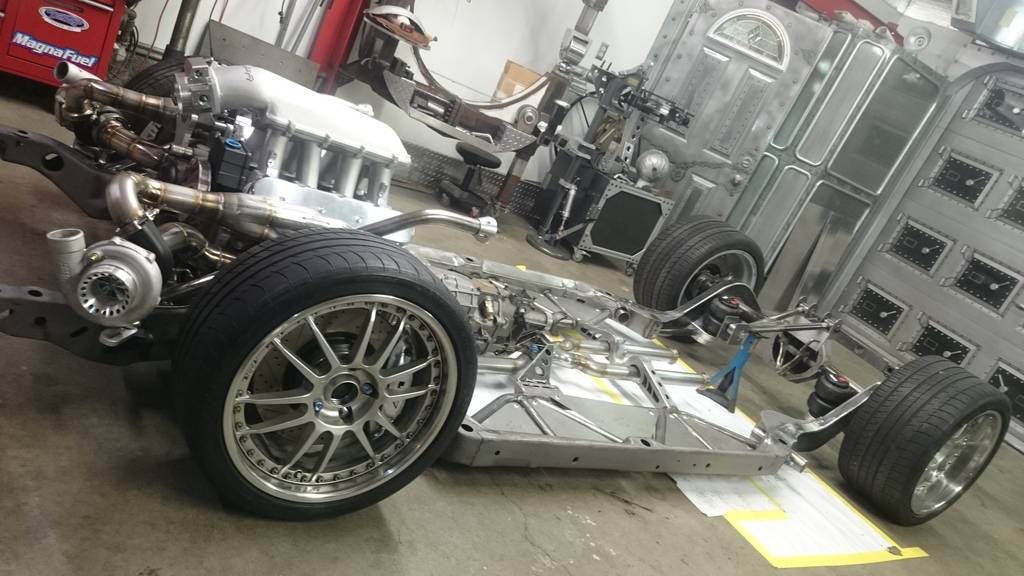
making baby steps in progress. but still progress non the less! frame section fitting,grinding,redesign and welding.

 Follow Us on Facebook!
http://www.Facebook.com/ErodzCustoms
Visit Our Website!
http://www.ErodzCustoms.com
Follow our Crazy Shop Mod's!
http://www.garagejournal.com/forum/s...ad.php?t=48204
-
04-15-2015 #127
Registered User
- Join Date
- Nov 2008
- Location
- st. paul mn.
- Posts
- 438
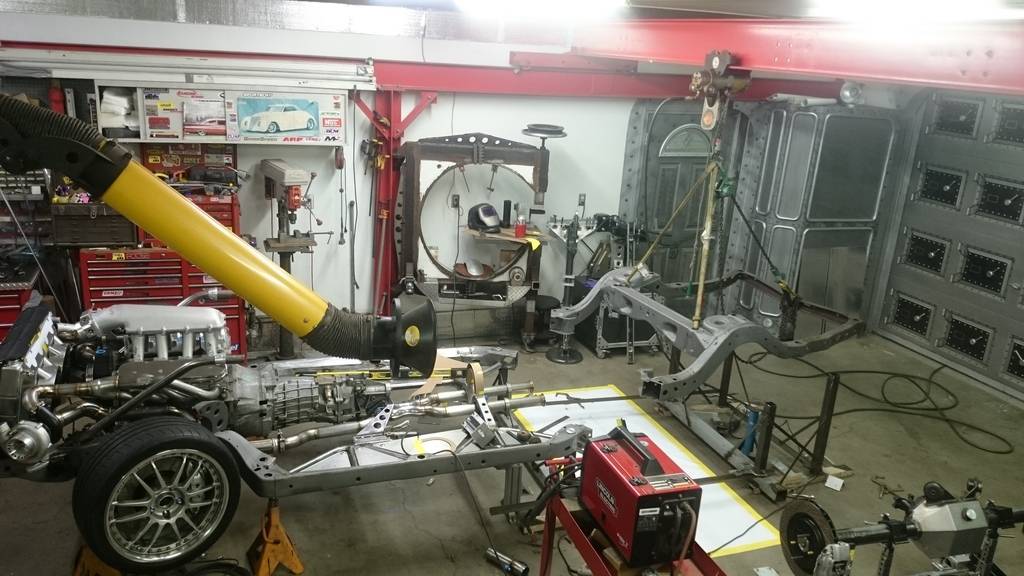
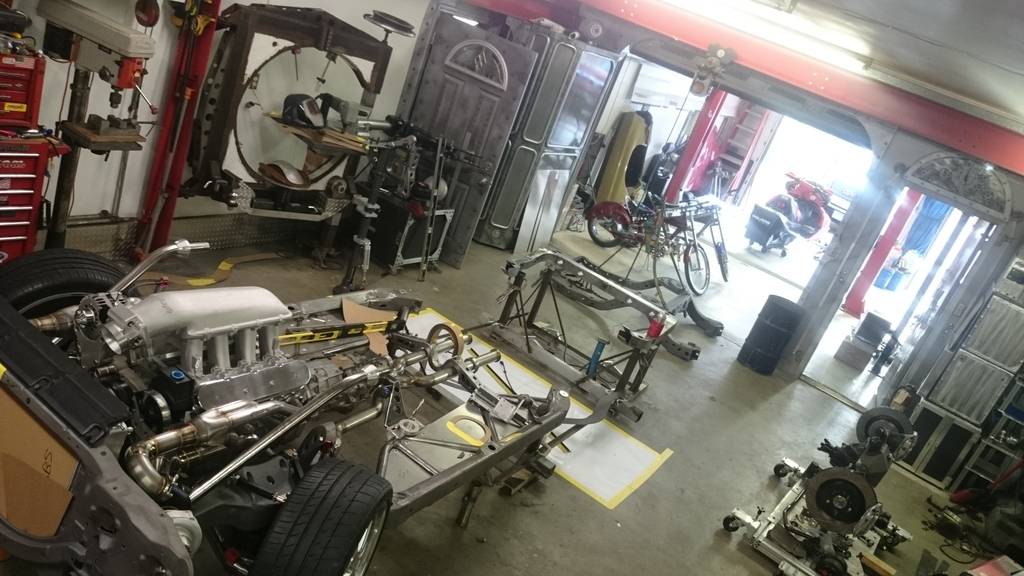
making progress one weld at a time! sometimes forward progress sometimes backwards!
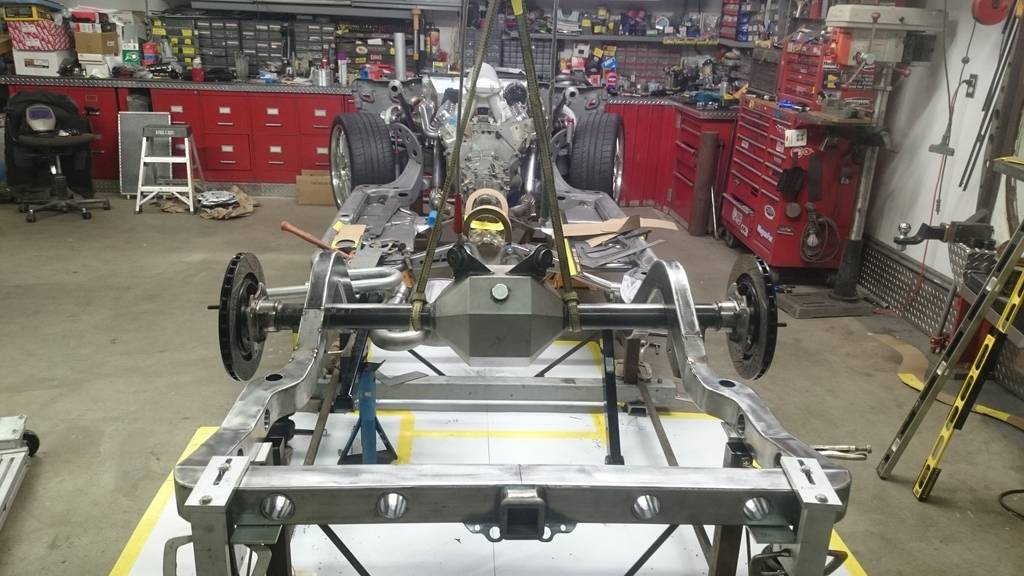
this is were the backwards progress comes in! crap more rework!
 Follow Us on Facebook!
http://www.Facebook.com/ErodzCustoms
Visit Our Website!
http://www.ErodzCustoms.com
Follow our Crazy Shop Mod's!
http://www.garagejournal.com/forum/s...ad.php?t=48204
-
04-24-2015 #128
Registered User
- Join Date
- Nov 2008
- Location
- st. paul mn.
- Posts
- 438
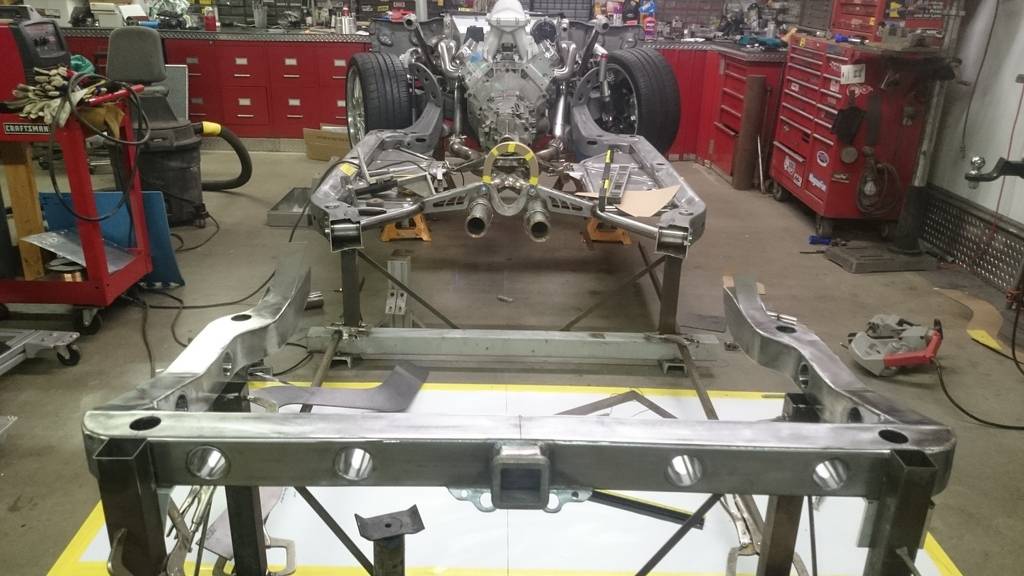
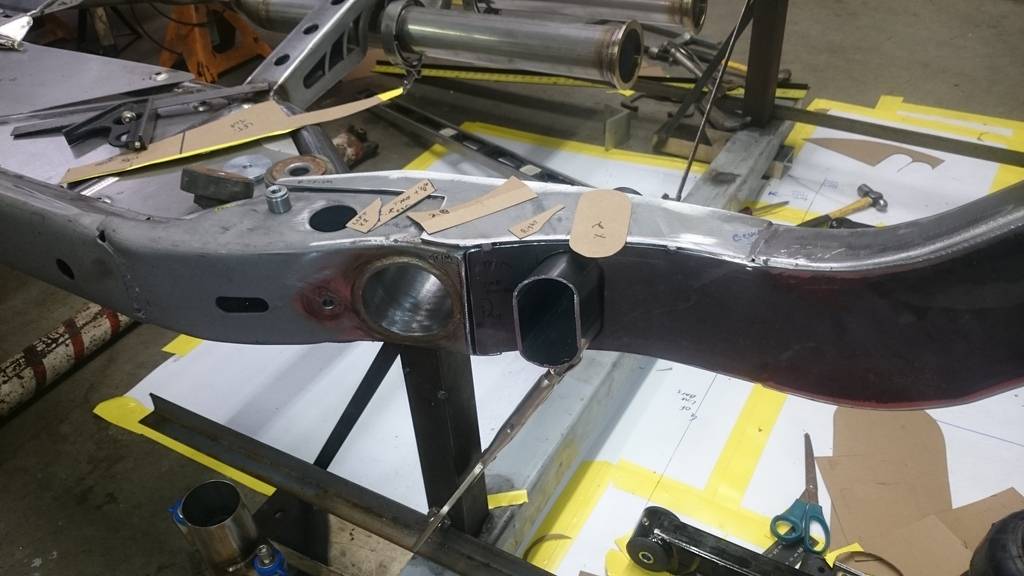
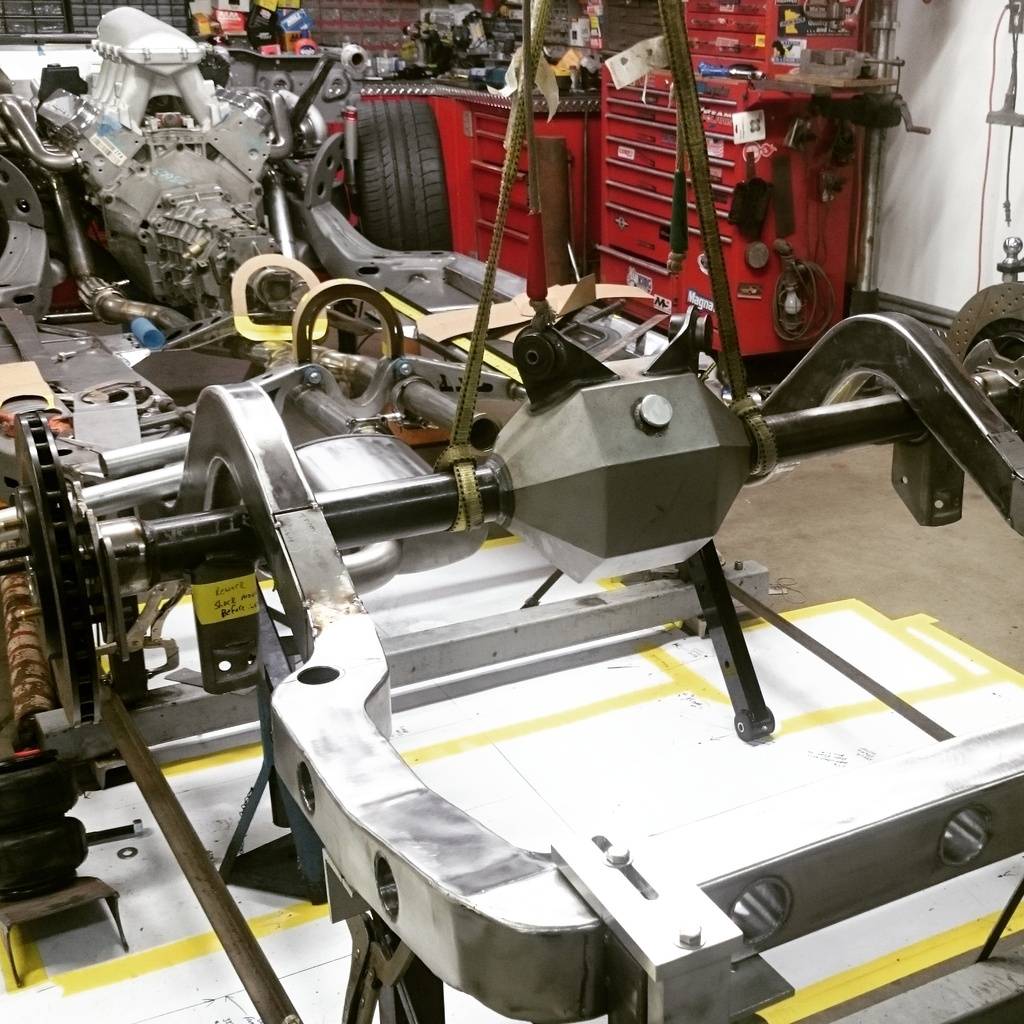
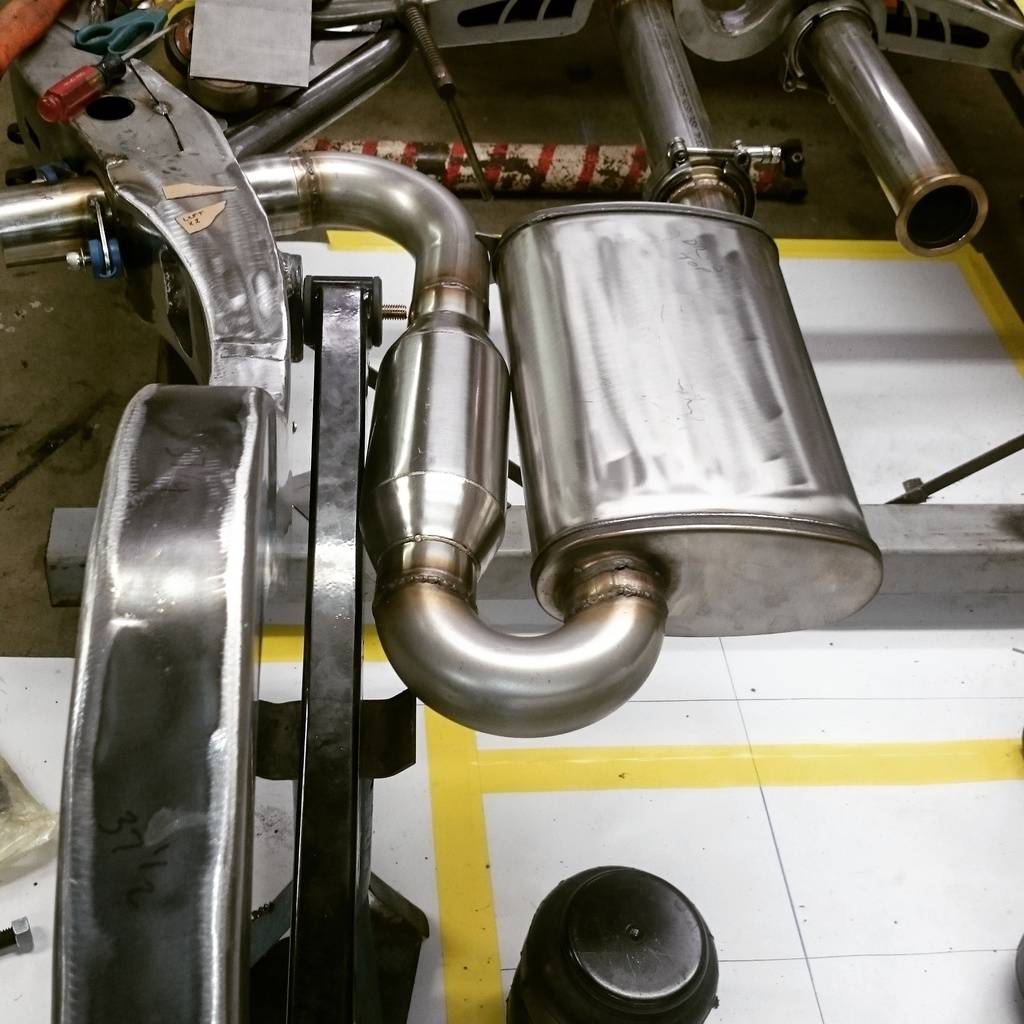
small steps toward getting the chassis back together again.a friend of mine owns a shop called Crazy talk customs is making some link bars for me while we fabricate the new link bar tabs, have some new mufflers coming so I can rework the exhaust again.
 Follow Us on Facebook!
http://www.Facebook.com/ErodzCustoms
Visit Our Website!
http://www.ErodzCustoms.com
Follow our Crazy Shop Mod's!
http://www.garagejournal.com/forum/s...ad.php?t=48204
-
04-24-2015 #129
Registered User
- Join Date
- Nov 2012
- Posts
- 346
What's do you have planned for the muffler rework?
_______________
1969 Camaro
1966 Skylark
1964 Lemans
1960 Biscayne
Steve
-
04-25-2015 #130
 Registered User
- Join Date
- Sep 2011
- Location
- So Cal
- Posts
- 254
Dude, such an amazing build!!!! Great work..
-
04-30-2015 #131
Registered User
- Join Date
- Nov 2008
- Location
- st. paul mn.
- Posts
- 438
ended up ordering a pair of magnaflow mufflers with the in and out on the same side this is coming up soon so picts coming shortly. Originally Posted by Zoomin
Thanks. just learning as I go and hoping the extra effort will be worth it in the end. Originally Posted by Sean Cooke
Follow Us on Facebook!
http://www.Facebook.com/ErodzCustoms
Visit Our Website!
http://www.ErodzCustoms.com
Follow our Crazy Shop Mod's!
http://www.garagejournal.com/forum/s...ad.php?t=48204
-
05-14-2015 #132
Registered User
- Join Date
- Nov 2008
- Location
- st. paul mn.
- Posts
- 438
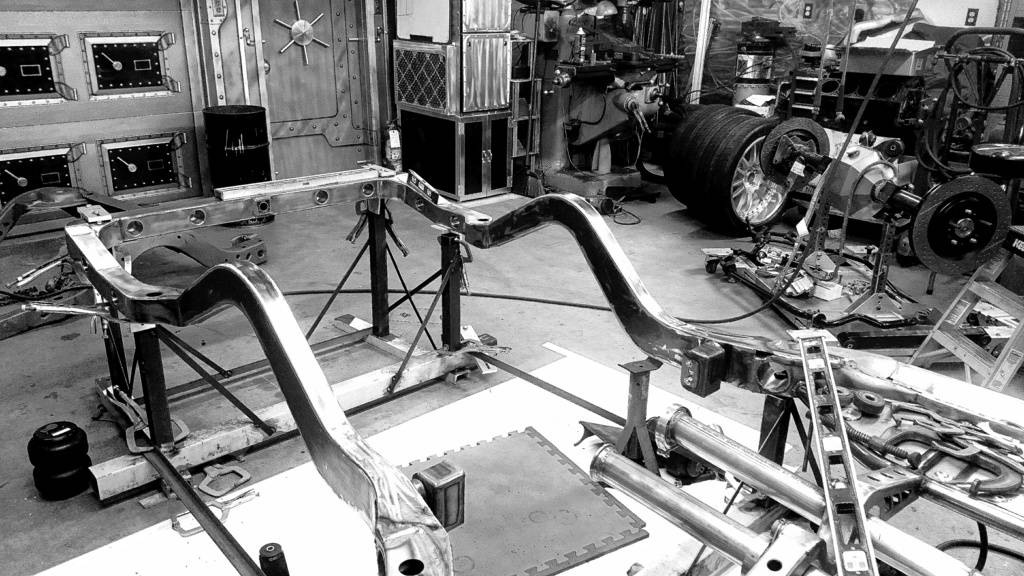
slow progress but still progress non the less.
 Follow Us on Facebook!
http://www.Facebook.com/ErodzCustoms
Visit Our Website!
http://www.ErodzCustoms.com
Follow our Crazy Shop Mod's!
http://www.garagejournal.com/forum/s...ad.php?t=48204
-
05-14-2015 #133
Registered User
- Join Date
- Jul 2011
- Posts
- 134
Looks great Eric. Really cool.
-
05-14-2015 #134
Registered User
- Join Date
- Oct 2014
- Location
- Centra QLD Down under
- Posts
- 16

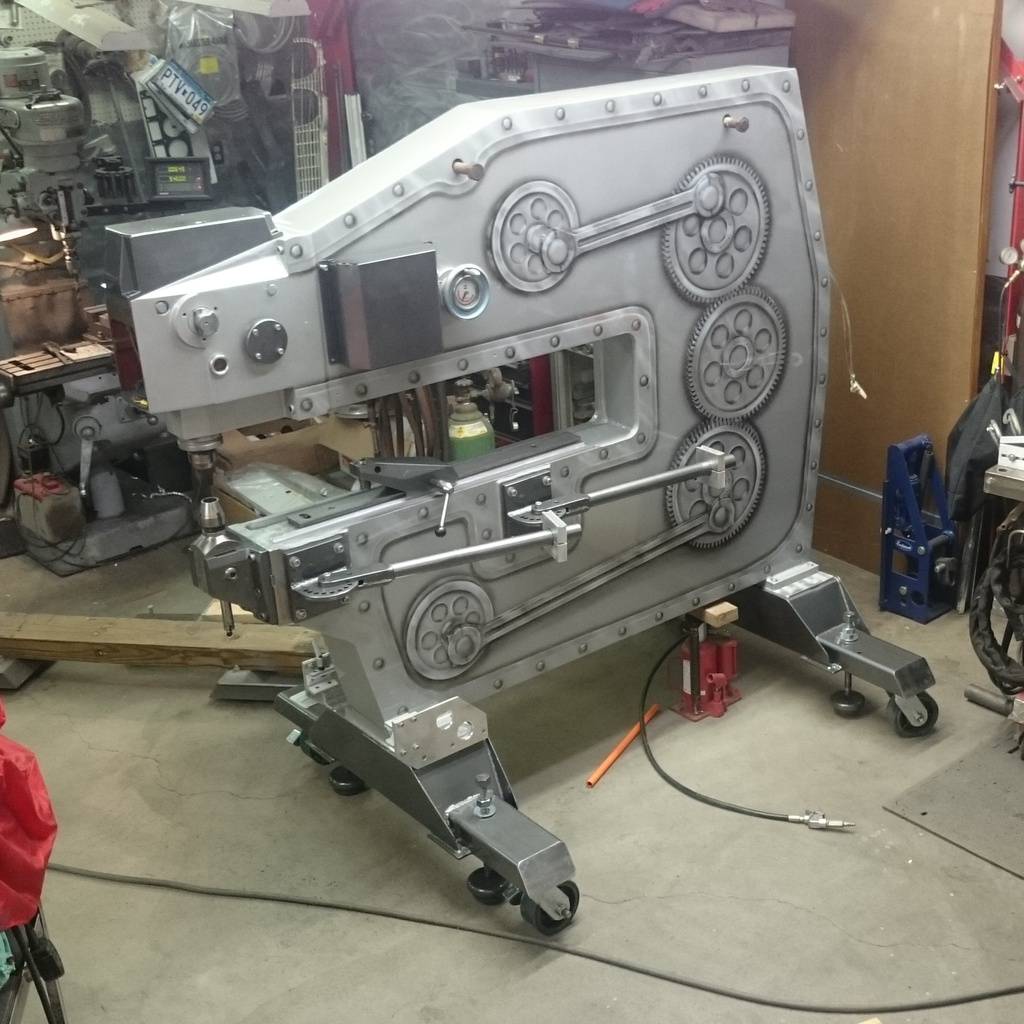
Just want to say I love your work! And when I grow up I want to have a workshop like yours, love it. Awesome set up, my shed is just a shed, utilitarian to say the least. Just looking at yours makes me want to build cool stuff. I might have to live vicariously through pictures on here till I get my S@#t together! Can you tell me what the adaptor is for on the English wheel? post 128. Planishing hammer or some sort of saw/punch? I want to build one one day and any sort of versatility that can be built in is a bonus. Do you have some sort of cnc cutter or do you cut all your stuff out by hand?
Ben
-
05-24-2015 #135
Registered User
- Join Date
- Nov 2008
- Location
- st. paul mn.
- Posts
- 438
Thanks for the kind words. have a lot more to come so stay tuned in for more! Originally Posted by LS7 Z/28
Thanks for the interest in my projects . just remember NOTHING comes for free everything takes time and effort and I have been at it for over 20 years to get it to the point it is today.the English wheel has a nibbler that will work on 10 gauge steel it just unbolts to convert over to a english wheel.I plan on making more attachments for it as the need comes along. all stuff that i have made has been done old school with a bad saw and had grinder currently working on 3 d cad so this will become easier in the future! Originally Posted by BenE64
Follow Us on Facebook!
http://www.Facebook.com/ErodzCustoms
Visit Our Website!
http://www.ErodzCustoms.com
Follow our Crazy Shop Mod's!
http://www.garagejournal.com/forum/s...ad.php?t=48204
-
05-24-2015 #136
 Registered User
- Join Date
- Dec 2010
- Location
- Fredericksburg, VA.
- Posts
- 3,163
Eric,
I have to say the first time I read about your plans to build 10 custom cars I thought Yea right. Now I'm thinking why stop at 10? GREAT WORK!!
-
05-24-2015 #137
 Registered User
- Join Date
- Feb 2011
- Posts
- 284
If you calculate the area of the two circular fans I think you'll find Andrew is correct, you will have insufficient cooling at speed because the air will stack up in front of the rad. You've effectively turned the factory 500+ sq inch rad into about half of that. Originally Posted by E.rodz
Credit where credit is due however, excellent workmanship on everything in sight.70 GTO - Alum 5.3/4L80e, 7875
17 GT350
-
06-11-2015 #138
Registered User
- Join Date
- Nov 2008
- Location
- st. paul mn.
- Posts
- 438
lol. it has only taking me 20 years to get the shop where i can work it and if i can get back on track ten will take me till i am 110 so looks like it is time to pick up the pace! Originally Posted by TheJDMan
thanks for the insight I was not disagreeing with andrew on that one just did not want to reveal what is next but that will be addressed the close to the radiator with the fans is what i do not agree with.however i am always open to opinions and anything I can learn from other people. Originally Posted by Interceptor5588
Follow Us on Facebook!
http://www.Facebook.com/ErodzCustoms
Visit Our Website!
http://www.ErodzCustoms.com
Follow our Crazy Shop Mod's!
http://www.garagejournal.com/forum/s...ad.php?t=48204
-
01-21-2016 #139
Registered User
- Join Date
- Nov 2008
- Location
- st. paul mn.
- Posts
- 438
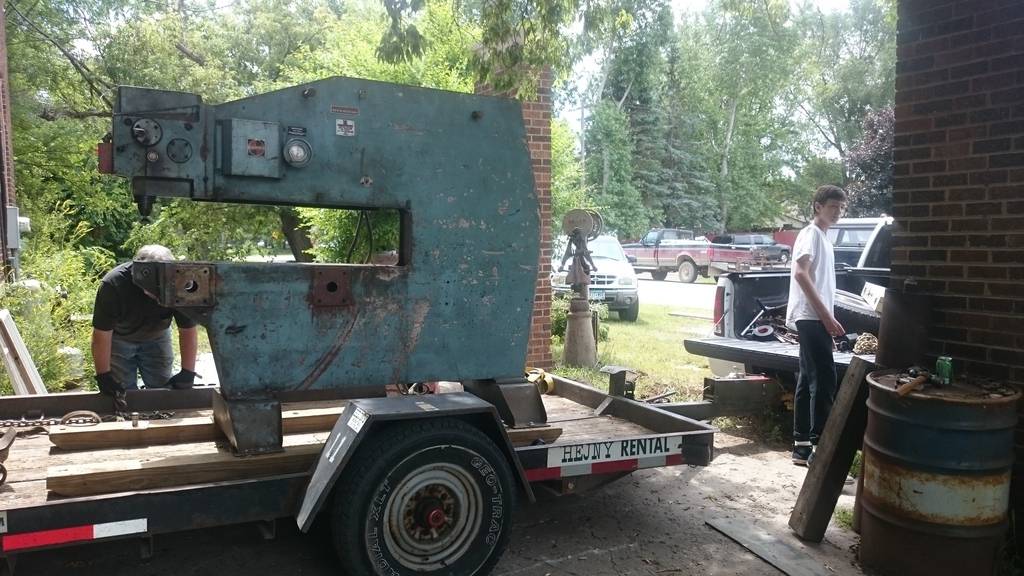
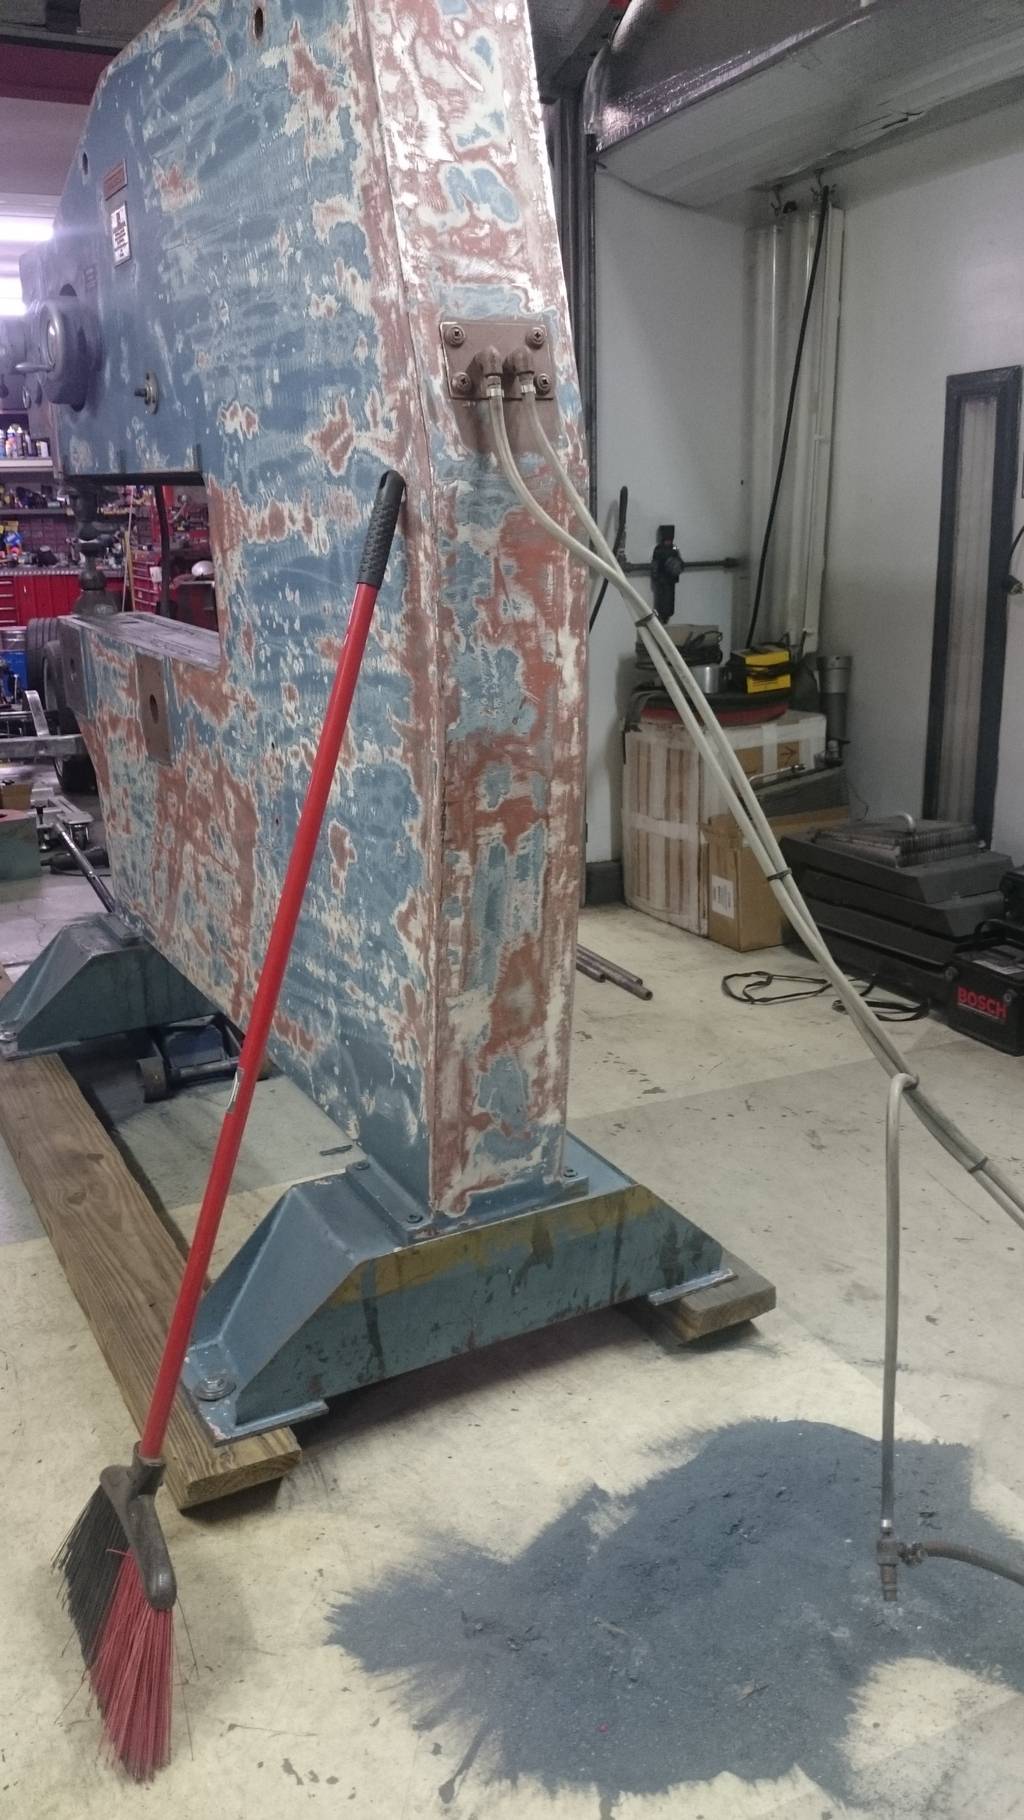
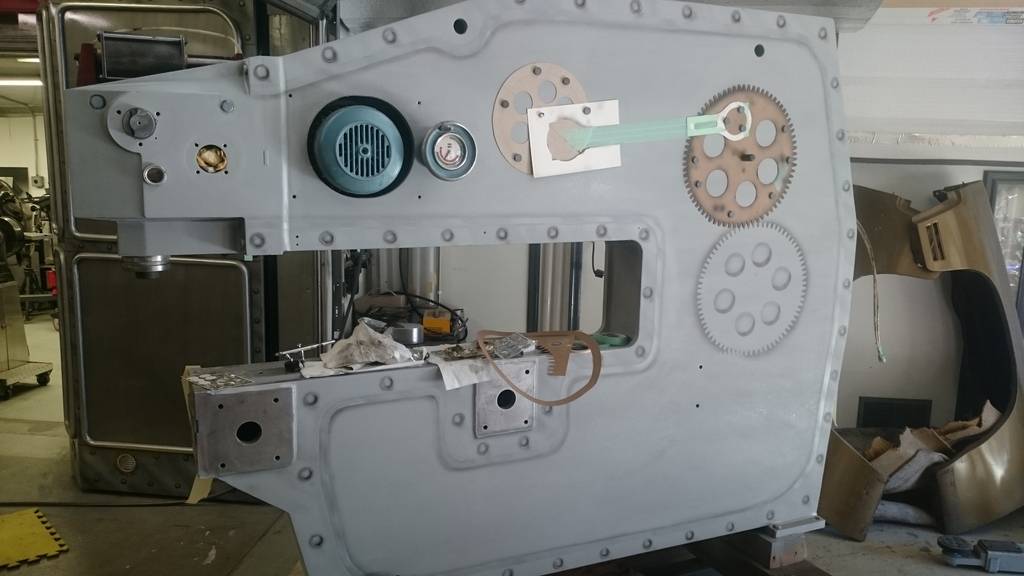
just wanted to get this back up to date. this whole summer i spent on driving the hell out of the belair racking on over 5,000 miles just having a ball. scored a dream tool which i never in a million years would have guessed i could ever own one. looks like i was in the right place at the right time for once, but it ended up getting alot more involved than i ever expected cleaning the shop moving everything 10 times to make a home for the beast and getting it wired up was no treat either. i figured it was just to big and plane looking so it need a paint job and airbrush treatment as well. this thing is going to help me build tons of parts for the Chevelle so why not?
 Follow Us on Facebook!
http://www.Facebook.com/ErodzCustoms
Visit Our Website!
http://www.ErodzCustoms.com
Follow our Crazy Shop Mod's!
http://www.garagejournal.com/forum/s...ad.php?t=48204
-
01-21-2016 #140
Registered User
- Join Date
- Nov 2012
- Posts
- 346
That's very cool!
_______________
1969 Camaro
1966 Skylark
1964 Lemans
1960 Biscayne
Steve
-

 Reply With Quote