Results 21 to 40 of 44
Thread: First Build: '71 Nova
-
10-22-2013 #21
 Registered User
- Join Date
- Jul 2013
- Posts
- 23

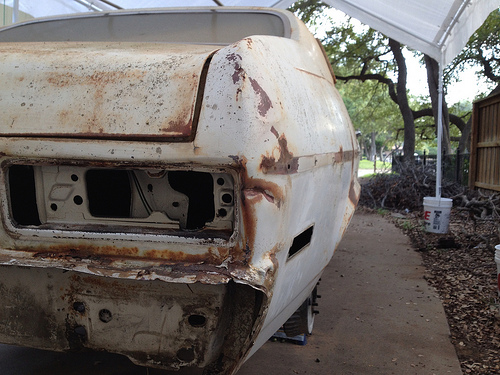
Update: Removed the jacked up rear bumper bracket. When my room mate woke up, just for kicks, grabbed a small cedar block and started tapping on the rear corner dent to see what was what (with the existing damage and the previous "repairs") turns out there is a lot of bondo in there for no real reason other than lazy slab n shoot body work. The rear panel will have to be replaced (because of rust/pitting), but with a little pin puller work, the quarters will be savable.
before/after

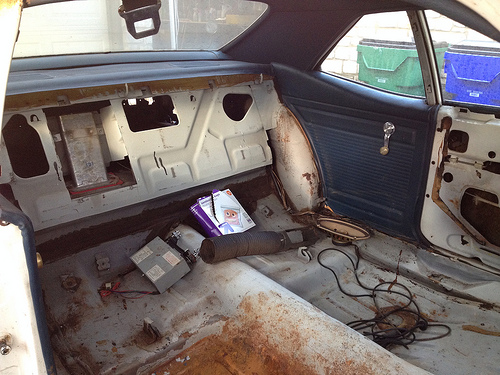
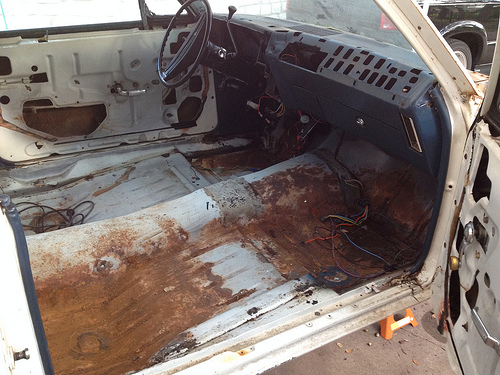
Then we cleared out the remaining interior and bulkhead bits. The interior is all in pretty good shape, but some parts don't fit my plan, so they'll be in the classified thread when I have replacements.
This is where the fun begins: time to order sheet metal!
Plus, I got the tires mounted + balanced, and borrowed an s10->c5 spacer kit from a buddy to ballpark wheel fitment.

-
10-23-2013 #22
Registered User
- Join Date
- Jul 2013
- Posts
- 23
Update: I ordered some sheet metal! Kick panel supports, upper dash and right side floor pan are on the way.
-
10-24-2013 #23
New to Pro-Touring
- Join Date
- Oct 2013
- Posts
- 7
Love to see the Nova's! What's the back space on those wheels? Any tire clearance issues?
-
10-25-2013 #24
Registered User
- Join Date
- Jul 2013
- Posts
- 23
The wheels are c5 front spec 18x9.5 7.02" back space/45mm offset. I have a set of spacers designed to run c5 spec on an s10 which I think are 45 and 55mm. I mounted a wheel in the rear with the 45mm spacer and that's a bit too thick. There is plenty of clearance on the inside (wheel well/shock) to fit my 275/40 tires with probably a 30mm spacer. It's nice to have something available for mock-up. I won't really get an idea for front clearance till I get the suspension and fenders mounted. In the meantime, I just put the wheels on my s10. Ideally, I'd like to run a set of wheels with little to no spacers, but availability of a wheel that's not run of the mill is slim till you get into custom forging.
The corvettes use staggered wheel sizes in both diameter and width, but I want to keep all the wheels the same for the sake of rotation and general practicality...and possibly carry a full size spare for road trips.
-
11-19-2013 #25
Registered User
- Join Date
- Jul 2013
- Posts
- 23
Hey all,
Time for an update! I picked up a welder (miller211), removed the dash wiring harness, door panels, shoulder belts, package tray, windlace, visors and mirror. I bought a low (4)cfm RO sander a while back and finally got to test it out. It works pretty well but my little compressor will be running constantly during use. The running twin piston motor equalizes input/output psi at around 55. In the mean time, here's a partially refined wish list of interior items. Pics when I get some actual work done. I have The right side floor pan, dash top panel and kick panel supports that will go in shortly.
Sparco r505 seats (black w/grey stitching) with sliding tracks
3 point retractable belts (black)
Lokar Handbrake (black)
Custom reupholstered rear bench (w/bucket style bolstering)
Momo Gotham steering wheel and shift knob (black leather w/ black chrome trim)
Flaming River tilt steering column (black)
Clayton Machine Works pedal assembly
American Autowire Classic Update full car wiring harness
Dakota Digital VHX instrument panel (carbon w/ red numbers)
Black carpet, door panels, package tray, and dash pad
Buckskin (light tan) Headliner, a/b pillars
New OE style window cranks w/ black knobs
Full Dynamat roof and floor
-
12-29-2013 #26
Registered User
- Join Date
- Jul 2013
- Posts
- 23
Okay, finally got back in the garage. First, moved the car in to the garage (this is when Texas winter starts getting nasty) Cut out the crusty part of the left kick panel support and replaced it. The patch was (as expected) a little different than original, so some modifications were necessary. Cold galvanizer (weld-through), plug welds. Smoothed out the welds pretty nice, but I'll get a shot after its all smoothed out.
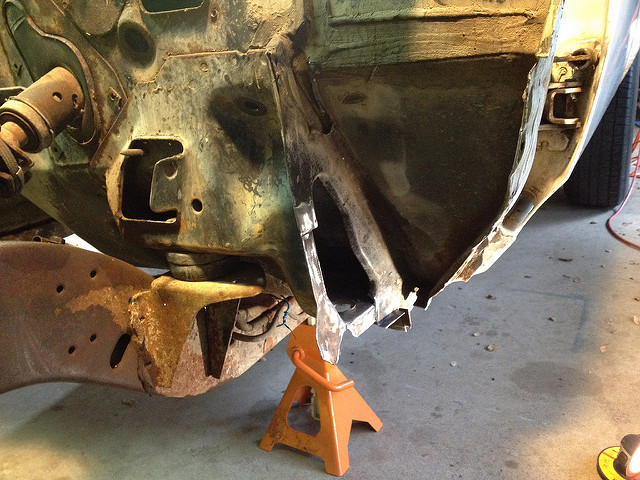
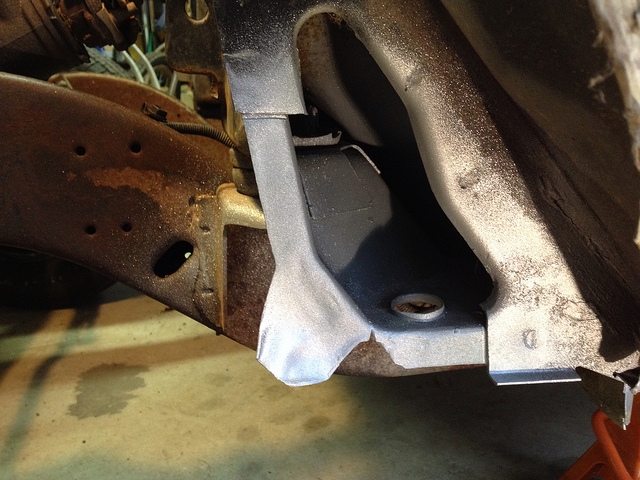
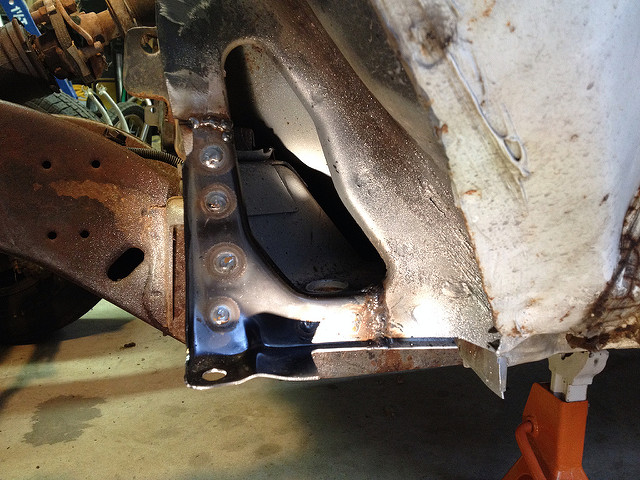
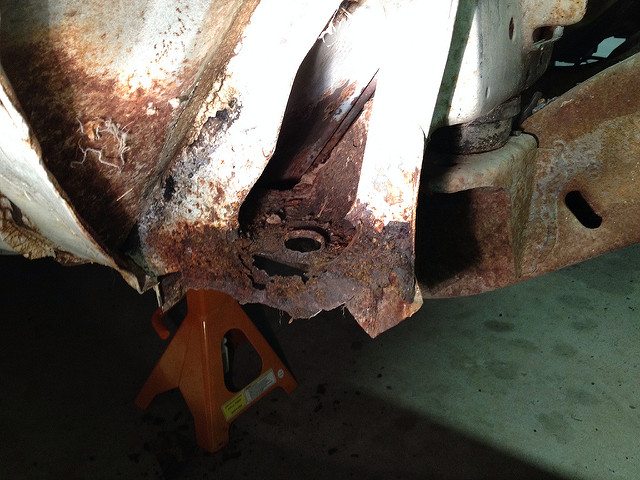
Here's the prime time drama cliffhanger for the next entry (cue the urgent violins)
-
12-29-2013 #27
 Registered User
- Join Date
- Jan 2011
- Location
- CENTEX
- Posts
- 67
Very cool!! I love 68-72 Novas!! Keep up the good work!!
J. Will.
70 Chevelle Malibu, 69 Cutlass S convertible, 71 Monte Carlo, 16 Chevy SS (yes, that one)
-
12-31-2013 #28
 Registered User
- Join Date
- Dec 2012
- Location
- northern illinois
- Posts
- 5
First Build: '71 Nova
Nice to see it's being repaired properly and not thrown together, keep up the good work!
Glad to see another 3rd gen
-
12-31-2013 #29
Registered User
- Join Date
- Feb 2012
- Location
- SW, Michigan
- Posts
- 875
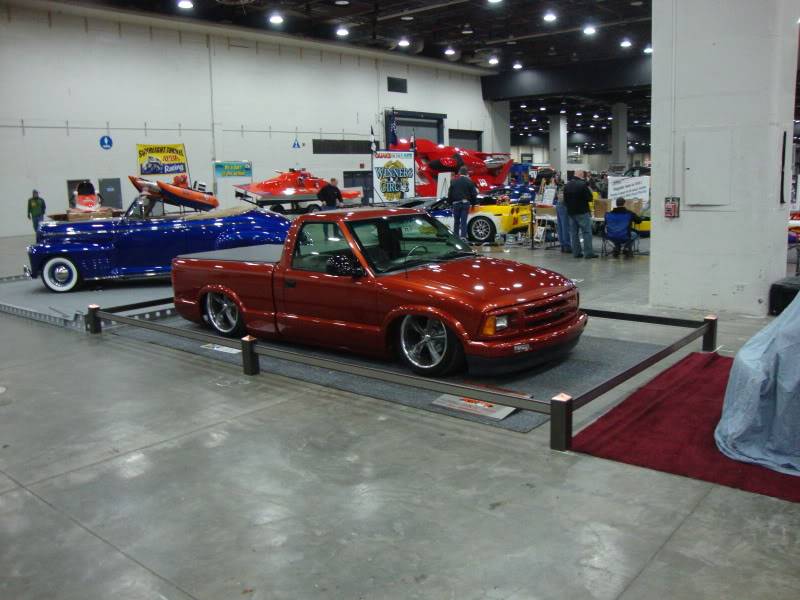
I have those tires on my truck, actually I am pretty happy with them.
-
12-31-2013 #30
Registered User
- Join Date
- Jul 2013
- Posts
- 23
ha! me too. I put them on the s10 to get some use out of them until the Nova's ready to roll around Originally Posted by Auto Rod Technologies


-
12-31-2013 #31
Registered User
- Join Date
- Feb 2012
- Location
- SW, Michigan
- Posts
- 875
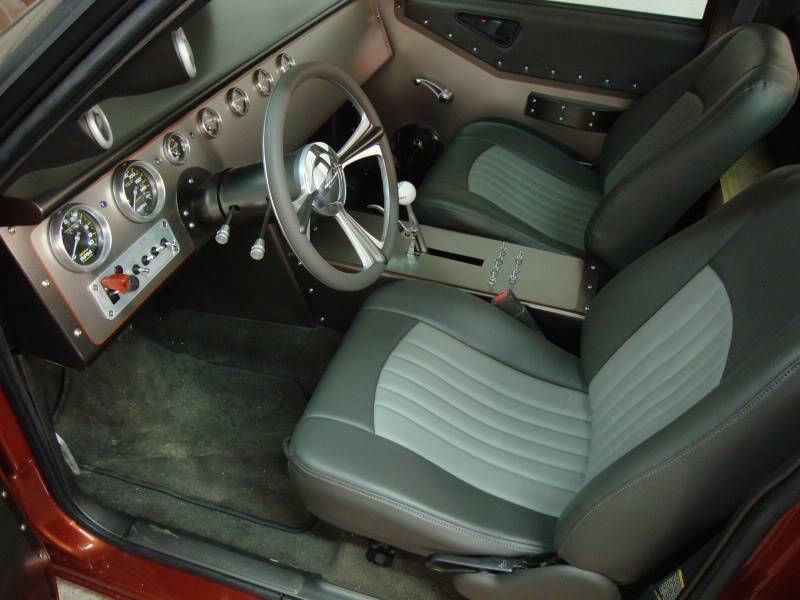
lol.. here's mine
-
01-02-2014 #32
Registered User
- Join Date
- Jul 2013
- Posts
- 23
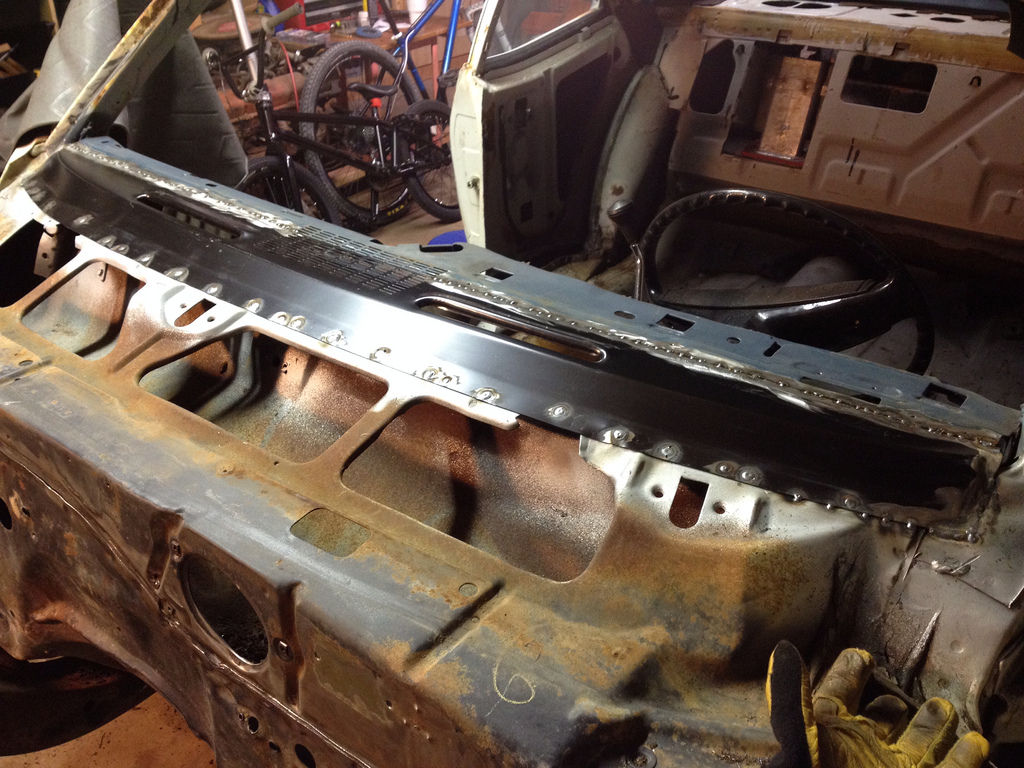
Ok back in the garage. Decided to skip the passenger kick panel support for now (the pocket bottom inside the KPS is pretty crusty and will have to be rebuilt. Plans are to use what I need from the other patch panels and utilize the scraps with optimum shapes) So on to the dash panel.
I popped the WS reveal moldings off the front and rear glass to find some more holes :l The windshield came out in one piece, luckily, as it has a top to bottom crack on either side. I feel like this spot can be replaced fairly easily with sheet metal. I've also decided on flush mounting the new windshield.
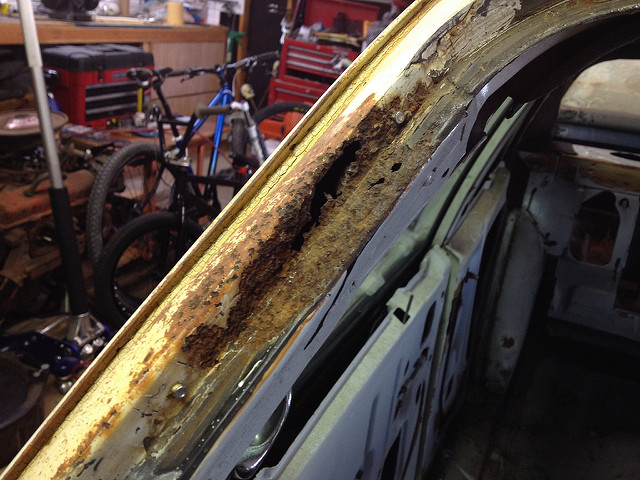
After the dash panel spot welds were ground out, I found that the upper cowl panel was still in good shape.
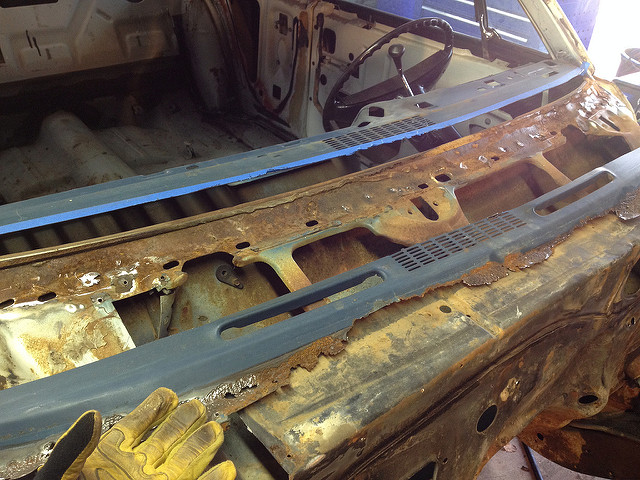
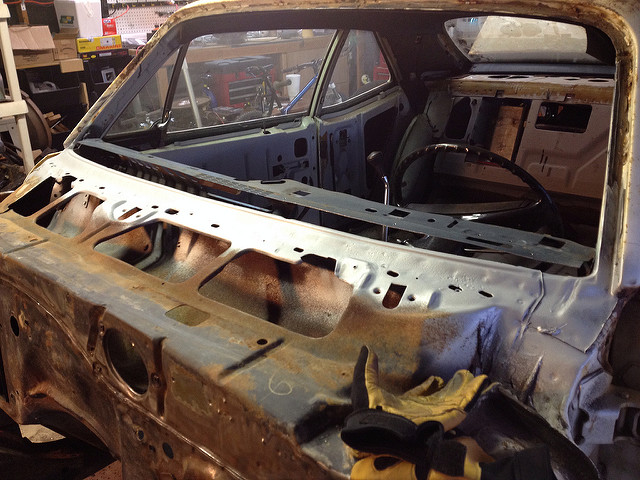
Here's the panel all tacked in. I'm gonna cut the speaker grille out and put a solid patch in there. Also, the passenger side of the dash was broke loose (spot weld) at the a-pillar, so I gotta sew that up when It's time to finish welding the patch.
-
01-07-2014 #33
Registered User
- Join Date
- Jul 2013
- Posts
- 23
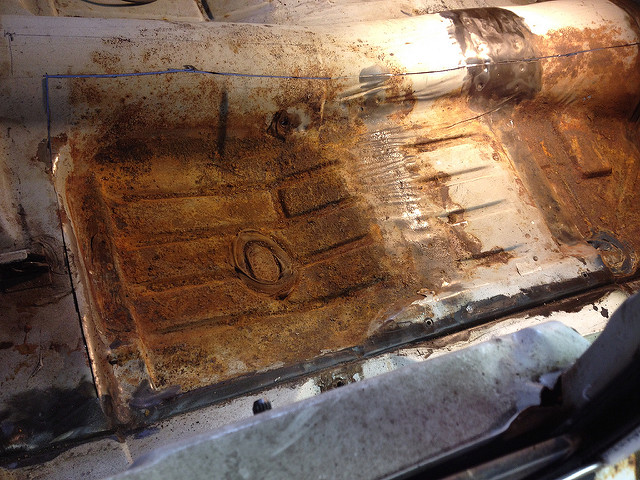
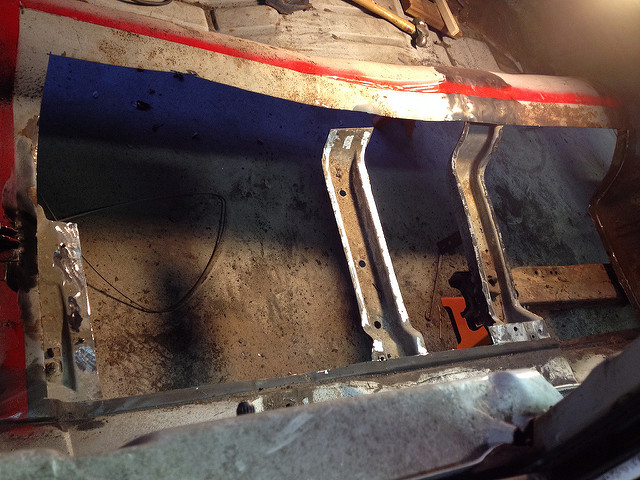
Tackled as much of the floor pan as possible before it got too cold. Looks like a soda was spilled on this side of the car. I know modern sodas will eat through egg shells, plus the window crank knobs are all sticky. So if you spill a soda in your car, pull the carpet up and clean it out real good or you'll be lookin like Fred Flintstone #protip
After the second picture, I laid a tape line and cut the flange back to about 1.25", lapped the panel in, and fixed it down with sheet metal screws to keep it square for welding. I guess I could have cut it flush and butt welded it, or even pulled the entire floor side out, but I felt like separating the floor from the rocker etc would be a mess and I didn't want to risk tweaking the cab. I also didn't want to pull the old floor out and find that the new panel doesn't fit right. I think this will be a nice solid repair. I'll go in with a body hammer and knock the panel down flush to the braces and tunnel before I get to spot welding.

01-09-2014 #34
Registered User
- Join Date
- Feb 2011
- Location
- Chico, CA
- Posts
- 203
Very cool build! Nice work!
The #protip made me actually LOL.Jeff
01-09-2014 #35
Registered User
- Join Date
- Nov 2012
- Posts
- 346
Lol! Another thumbs up for Sumitomo. Best cheap tire out there, IMO.
And I'm a big fan of Novas too. I'm in for the long haul._______________
1969 Camaro
1966 Skylark
1964 Lemans
1960 Biscayne
Steve
01-12-2014 #36
Registered User
- Join Date
- Jul 2013
- Posts
- 23
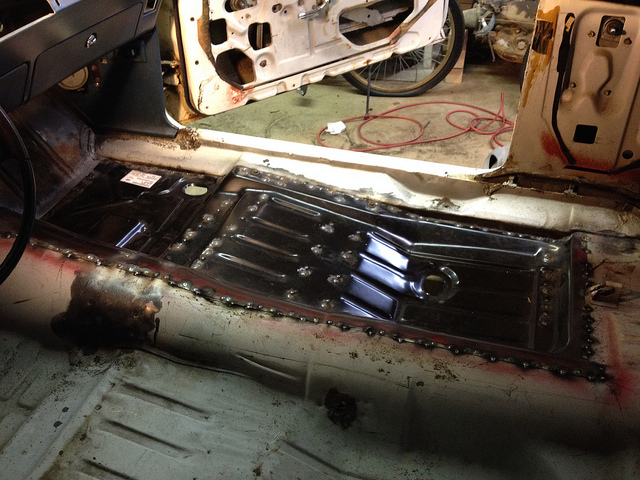
Mini tubs and quadra-link have been added to the list. Now that I finished up my floor pan, I gotta cut it all up again, but I can admire it for a while as I replenish my FUNds.
Tail Panel, Trunk Floor, Rear Windshield to Deck Lid Panel and Radiator Support have been ordered.
So this is what I did tonight after the third quarter of the Denver/SD game. Plug welds plus some stitch welds for good measure. (also filled in the holes from the clecos(HA-COUGHsheetmetalscrews)
Goodnight everybody. Thanks for the support!
01-20-2014 #37
Registered User
- Join Date
- Jul 2013
- Posts
- 23
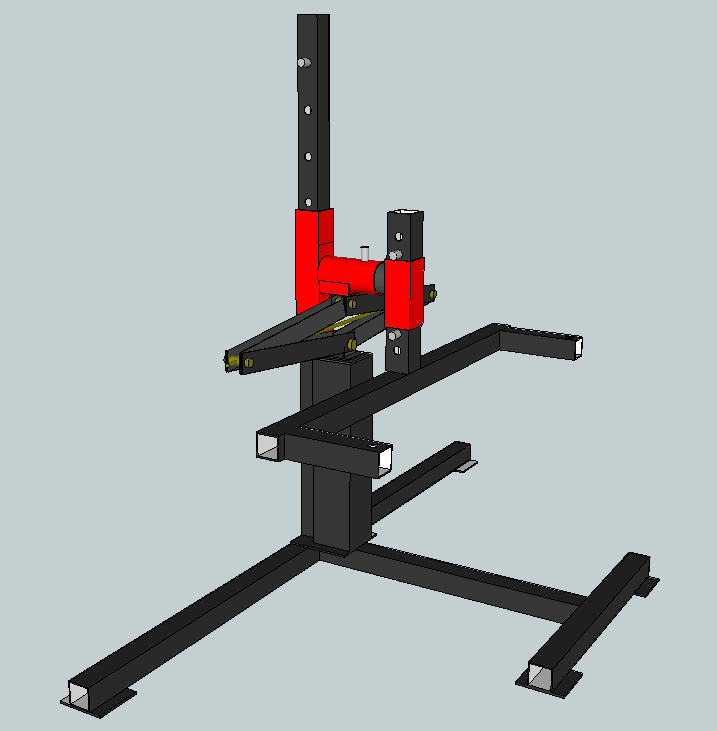
Wheel tubs came in...still waiting on all the other sheet metal. In the meantime, I'm designing a rotisserie, I should be able to build one under $300. I'll post some of that stuff when I get building. A new idea in the mill is shortening the bumpers and brackets. I want to tuck them in as tight to the body as possible and get the backward slant lines a little more pronounced. I have the rusty old bumpers / brackets to test on before modifying new straight ones. the bumpers will be black or body color, so all the chrome will come off regardless. The final look will maintain the basic shape of the OE bumpers, and you'd (hopefully) only notice the difference if you were familiar with the car or it was parked right next to another nova.
01-20-2014 #38
Registered User
- Join Date
- Jul 2013
- Posts
- 23
here's a close-to-scale model of my rotisserie design using a scissor jack (30" rise 5,000lb). I'll add casters, just didn't feel like drawing them here. Specs are subject(definitely) to change. The jacks I ordered are for leveling RVs, so that should be plenty to lift a 800-1000lb car cab. I won't have to worry about rams failing if it sits in the garage for a few years afterward, plus I can screw the jacks with a couple of electric drills. yee haw.
01-21-2014 #39 Rat Pack Member

- Join Date
- Nov 2004
- Location
- LYNCHBURG,OHIO
- Posts
- 512
Nice build!
Greg Tholen
GT Motorsports
Dealer for Wilwood,Baer,Viking,Moser,BMR,Earl's
(937)763-7272


01-21-2014 #40 Registered User
- Join Date
- Nov 2006
- Location
- Hildebran, NC
- Posts
- 998
Nice Work!!!
I am really interested in seeing this done to a Nova. Originally Posted by RayTx
Nice work on the rotisserie as well.
The 30 inch lift would let you pick the car right up off the body, and give plenty of room to get the chassis out from under the body.
Mcmaster carr has 3d drawings of casters if you need them.

 Reply With Quote