

Results 61 to 80 of 299
Thread: 1970 Firebird Twin Turbo Build
-
08-06-2010 #61

 Registered User
- Join Date
- Oct 2009
- Location
- Palm Beach County
- Posts
- 194

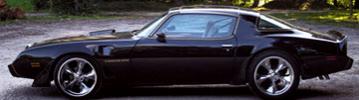
Are you planning on plowing snow with that Bird? The lowered visual effect makes that Pontiac look freaken wicked. I love it!!! Now, go get some air bags so the city doesn't try to sub you out at winter time.
Corlas
68 Firebird https://www.pro-touring.com/threads/...chine-GO-GO-GO
-
08-06-2010 #62
Registered User
- Join Date
- Sep 2004
- Location
- Fresno, Ca
- Posts
- 379
I agree. I love the visual impact the lowered stance makes, but there's no way you could actually drive a car on the street with that stance. Are airbags in the plans?
I also like the rear view w/ the wider stance/tires, air diffuser, and exhaust tips.
08-07-2010 #63 Registered User
- Join Date
- Jan 2009
- Posts
- 110
Thanks for the comments. The steering will not be inhibited as we will be able to adjust the ride height through the coil-overs and are providing additional clearance through the close-out panels we are fabricating. I should have updated renderings in a few days that show the actual wheels we are using and the additional body mods we made since the initial rendering was made. I received a sneak peak and they are amazing.
08-07-2010 #64
Registered User
- Join Date
- May 2010
- Posts
- 11
I usually just cruise, but those renderings made me say "DAAYYYYYYMMMMM!!!!!!"
08-07-2010 #65
Registered User
- Join Date
- Apr 2010
- Posts
- 363
that rendering is flipping amazing. props to them and the car.
08-08-2010 #66 Registered User
- Join Date
- Aug 2008
- Location
- Charleston, SC
- Posts
- 354
 Originally Posted by aronhk_md

I pointed that out in my earlier post. I ran into the same issues on my 2nd gen wheel wells. Luckily, Ben and I addressed the problem early on. I'm look forward to the updated renderings on this car. I realize it is a PIA to get something that looks good but is also functional but I also want my rendering to look very close to the car being built. That is harder than one would think...
Take the nose on this car.. The rendering shows a much smaller snout and a more sleek modering look to it compared to the actual Pontiac nose on the car. The builder is doing a good job of making the build as close as possible but keeping it functional. To get the nose to look like the one in the rendering, he'd have to completely fabricate a new nose which would take more time that he already has in the whole car. It would probably require sculpting in clay first and then have that to work from for fabrication. Tons of work there!
Those are the types of things that drive me nuts when I am personally invloved. So after driving Ben crazy with changes, I picked the latest one with the major mods I knew I wanted and figure we will rerender if we have to make any signficant changes. Pretty much as you are doing. Thanks for all the pics. It really shows how this process works better than most threads I have seen.
08-08-2010 #67
Registered User
- Join Date
- Jan 2009
- Posts
- 110
Glad you solved the front wheel clearance issue early on. As everyone would agree, the minute you think you've got it figured out, you need to step back and try to find what you've missed. It seems every decision as a ripple effect into several other (often unexpected) areas.
You are very keen to pick up on the front nose and how it looks. Here's the trick, by extending and enlarging the hood scoops (which actually extend over the front nose by 2") and creating a larger lower valance with extending chin spoiler it creates a visual effect of pushing the nose back. My nose is an aftermarket fiberglass, but it is the same size and dimensions of a stock nose. This was one of the issues with the second gen Firebirds (and similar GTO's) - you either loved the nose or hated it. I always like it, but we decided to mute its prominence by making these modifications. Also, by adding the wheel well and side skirting, one's eye will immediately travel around the car rather than being stuck on the nose and ridiculously small hood scoops that were stock.
Glad to see you are finding value in these posts. Stay tuned, we will be providing a ton of content the next two months as this build is completed.
08-09-2010 #68 Registered User
- Join Date
- Aug 2007
- Location
- Paris France
- Posts
- 88
I'm in love! Originally Posted by tcronkright

PS: I see negative camber, is IRS planned? (vette?)http://www.youtube.com/watch?v=crfnkxyIv_o
-79 Trans Am Special Edition with a 7.2 engine and 20" Boyd Smoothie II
-64 Hi-tech Squareback
Location: France
08-09-2010 #69
Registered User
- Join Date
- Aug 2008
- Location
- Charleston, SC
- Posts
- 354
You are doing a great job! I am definitely learning some good stuff here. My car is getting done by Chad but I plan on "helping". Now I just have to make sure Chad doesn't charge too much extra for that. LOL Here is my build if you get a chance to look at it. Originally Posted by tcronkright
https://www.pro-touring.com/forum/sh...ad.php?t=70526
08-09-2010 #70 Registered User
- Join Date
- Sep 2009
- Location
- Hopkinsville KY
- Posts
- 17
Total Badass build!!! Rockin Pontiac Power!!!!!
Brian Embry
LIVE FREE, LIVE HARD, DRIVE FAST!!!!
08-10-2010 #71
Registered User
- Join Date
- Jan 2009
- Posts
- 110
We are not running an independent rear suspension, we installed DSE's quadralink suspension in the rear. The rendering shows a negative camber but the wheels will sit level against the road.
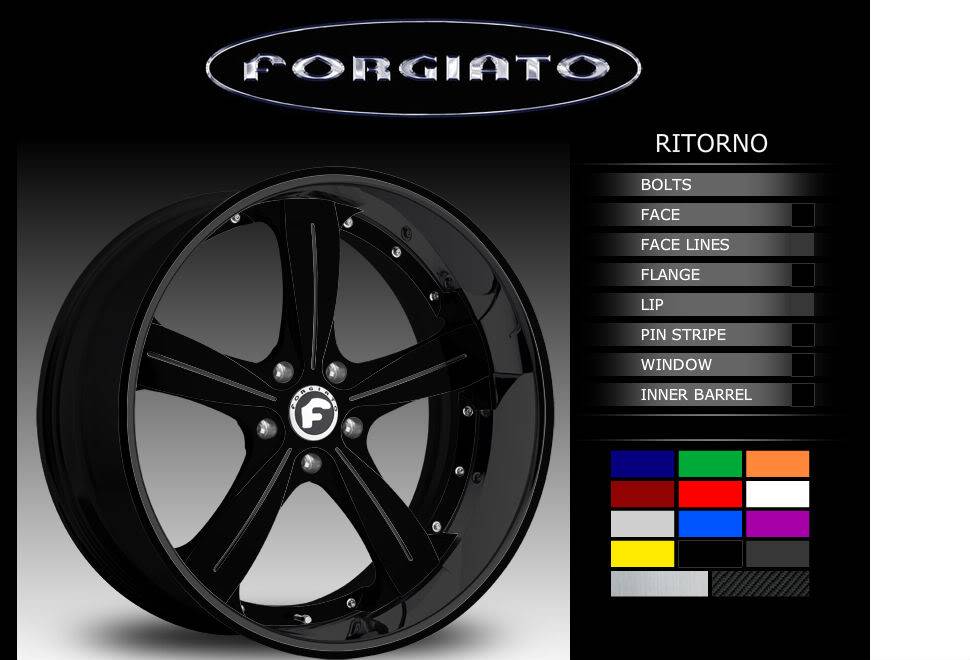
Horton just updated the renderings to show the front running lights, rear tucked bumper and Forgiato wheels that will be painted black and trimmed in a metallic gun metal gray to match the striping on the car. We are running 19" x 10" front wheels and 20" x 12.5" wheels. Not sure if we are running gloss, satin or matte finish. We are leaning towards gloss for the black and either satin or matte for the gray. Thoughts?
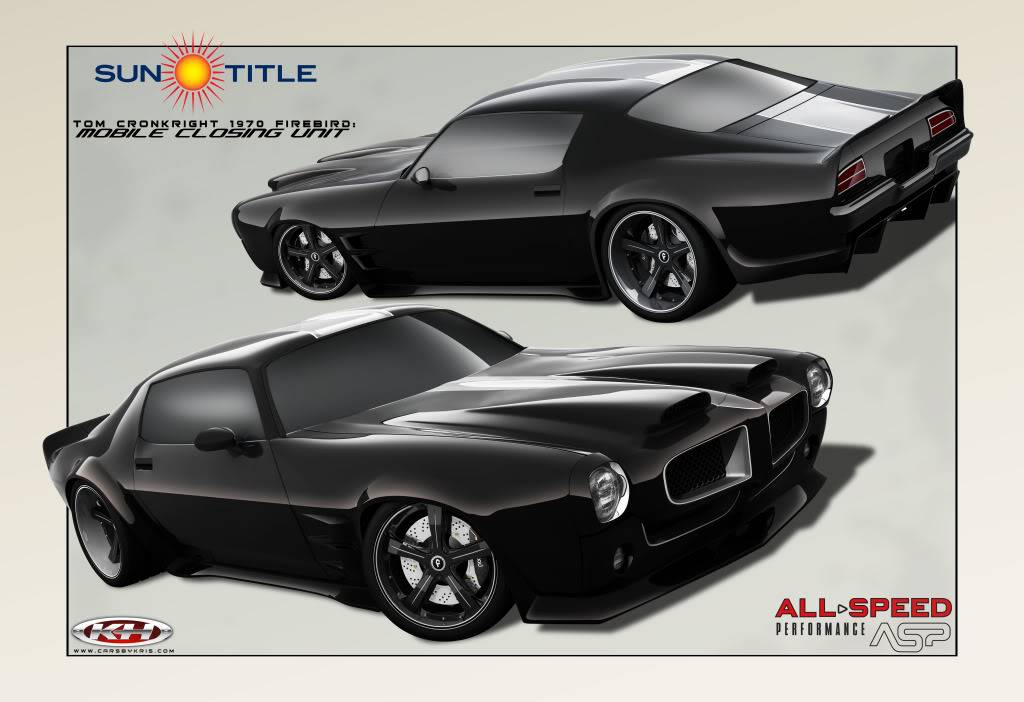
This is a new style of wheel developed by Forgiato this year.
08-10-2010 #72
Registered User
- Join Date
- Aug 2008
- Location
- Charleston, SC
- Posts
- 354
Very nice!!! I like the satin look but the gloss is very good looking as well. I am not sure how gloss would hold up with much road time but it does look killer.
I like that front end as much or more than the one I am doing. There have been several of the early series done recently, though not to this level so I decided I'd back up and use the newer nose with the double chin removed to have somethng a little different. Both would look bitchin sitting side by side I bet!
08-17-2010 #73 Registered User
- Join Date
- Feb 2005
- Location
- Sydney, Australia
- Posts
- 1,798

I do love those big Formula scoops....awesome!
Regards,
Leigh
Sydney, Australia
1971 Firebird 455
https://www.pro-touring.com/showthre...Project/page27
08-17-2010 #74
Registered User
- Join Date
- Jul 2010
- Location
- Chicago
- Posts
- 8
one word, wow!
08-20-2010 #75
Registered User
- Join Date
- Mar 2008
- Location
- Wichita, KS
- Posts
- 375
just my thought here. But those wheels are hideous compared to the insanely sexy ones in the previous rendering.
but besides that, this is the coolest pontiac build i have ever seen. hands down67 GTO, LS2, T56
WILWOOD, FORGELINE, RIDETECH
08-21-2010 #76
Registered User
- Join Date
- Jan 2009
- Posts
- 110
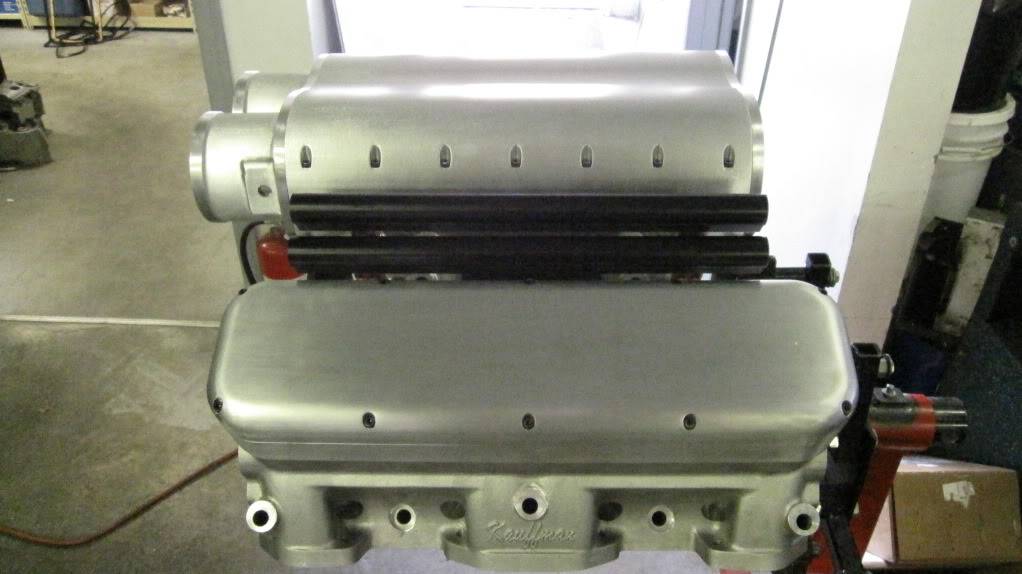
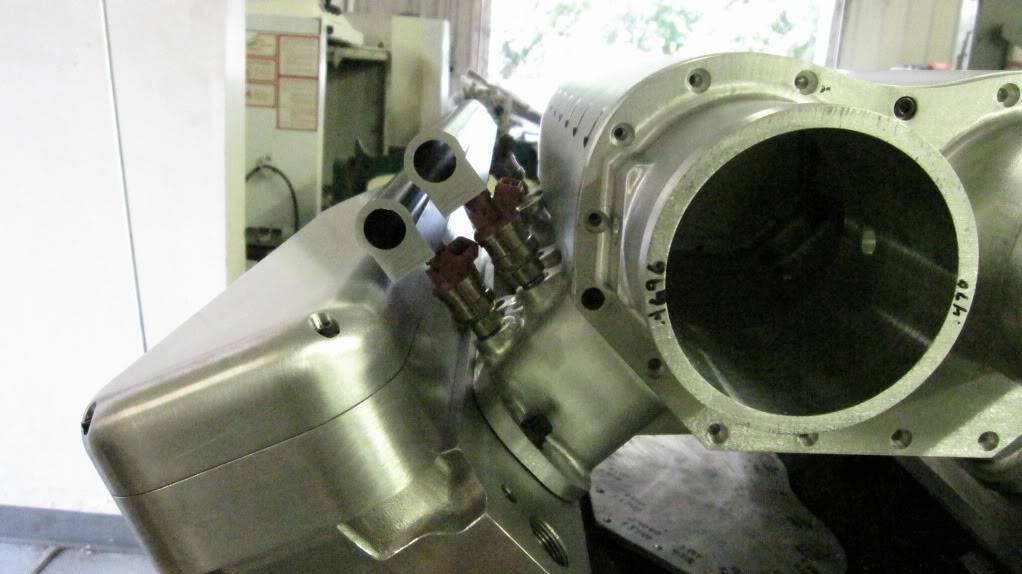
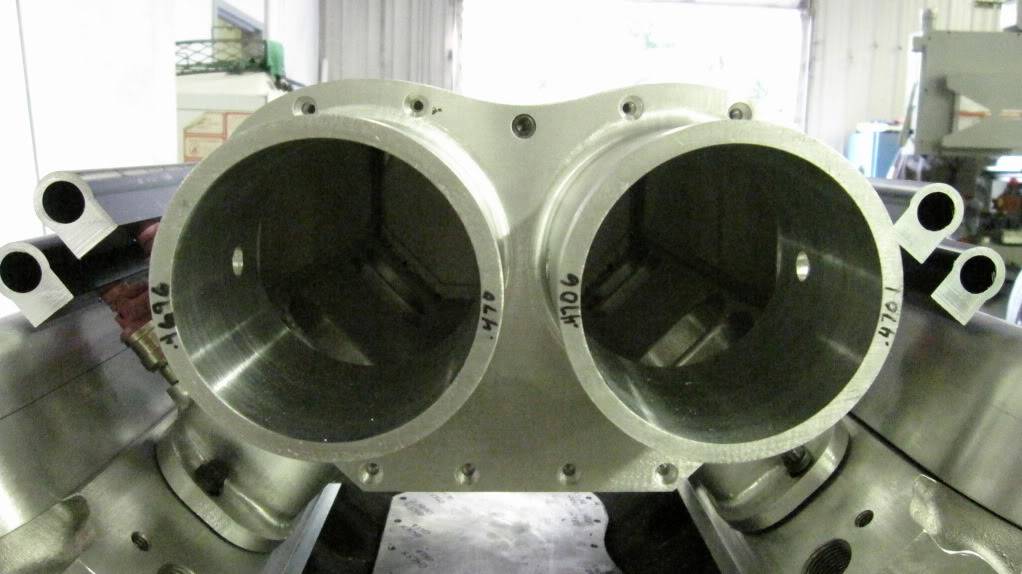
Dave Visner called me over yesterday to go over the final touches on the intake, throttle bodies and valve covers. The throttle body openings are 4" each to match the 4" plumbing for the turbos. He has designed the linkage to run under the intake just above the valley pan so everything is concealed. He is also creating a billet water cross over and thermostat housing. The heads have a dual cooling chambers - front and back. We will tie the two cooling systems together under the intake.
In order to keep the look and milling consistent, Visner made custom risers and valve covers out of a single piece of billet.
We decided on dual fuel rails with two separate stages of injectors to support both a smooth idle and higher fuel demands once we apply boost.
We will powder coat or anodize the intake, throttle bodies and valve covers. The plumbing will be powder coated black as well. The heads will stay aluminum and the block and oil pan will be black. We are making a 9" x 3" raised letter plate that will be inlayed into the center of the valve covers. The letters will be brushed aluminum with a black background.
Any suggestions on what we should put on the name plate?
Dave, heres to you man Bad A$$!


08-21-2010 #77 Registered User
- Join Date
- Mar 2007
- Location
- Florida
- Posts
- 2,391
This build is just amazing! Can't wait to see it completed!
08-21-2010 #78 Starting The Transformation
- Join Date
- May 2005
- Location
- Warminster, PA
- Posts
- 170
I havnt been on this site in about 2 years, and this is the first thread i come back to see... I just messed my pants. I think you should have the valve covers say EVIL.
1979 Trans Am - In the big junkyard in the sky
1980 Turbo Trans Am - In the big junkyard in the sky
A journey of a thousand miles begins with a single BURNOUT!
08-21-2010 #79 New to Pro-Touring
- Join Date
- Mar 2010
- Posts
- 26
i think the raw finish looks the best, really cool project and great one off work.
as for the name on the valve cover i do not have a suggestion but i would say whatever it is you should do it in the TA style font.
08-21-2010 #80 Registered User
- Join Date
- Jan 2010
- Location
- Delaware
- Posts
- 689
The plate should say, "Sorry, I'm full. Just ate a Chevy for lunch, and had Mopars and Fords for dinner last night. Anyone have a toothpick?"
1973 Trans Am 455 SR block, ported 6x-8 heads, solid cam, Victor intake, 830 CSU carb, aluminum rods, 77mm Garrett turbo and methanol injection. 1064hp at the flywheel@5500 rpm

 Reply With Quote


