Hi Joey. I am working on the same setup for my Nova, but using 600# springs. The adjusters need a helix cut into them to sit properly in the spring pocket and I highly advise welding a stud (all thread) to hold them up to the sub frame while you assemble the springs. You can use the existing inspection hole or drill a new hole somewhere more convenient for that stud to go through. The stud isn't a requirement but it will make it much easier to get everything clocked and positioned if you intend to assemble the springs into the frame by yourself.
Here is some info from my build. Since then I have added studs and installed them into the upper pocket.
Originally Posted by TheBandit
Next I decided to start prepping parts for getting the car back on all four eventually. I think I mentioned a long while back in this thread that I plan to use AFCO adjustable spring spacers and springs on the front of my car.
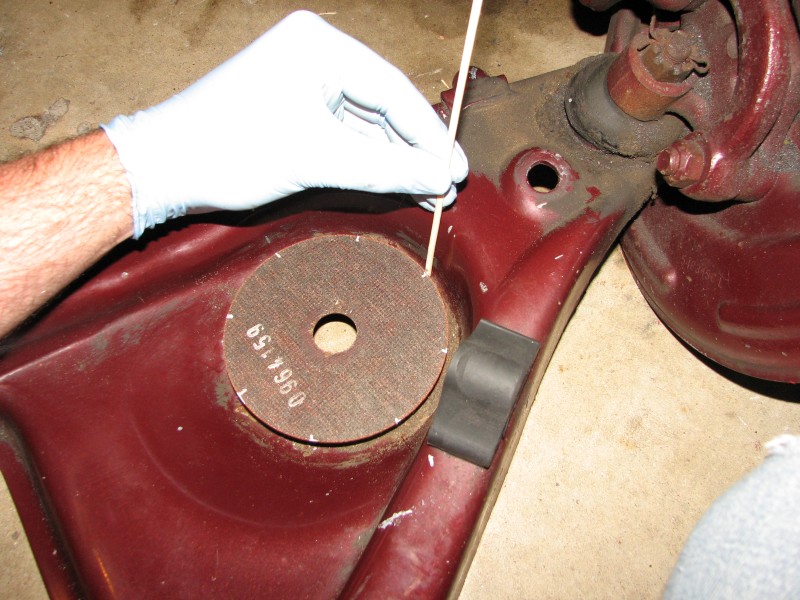
The AFCO spacers are flat ended, but both the control arm and subframe have tapered spring pockets to accept the pigtailed coil springs. To determine the taper, I took a 4-1/2" cuttoff wheel, which happens to be the same diameter as the AFCO spacers, marked it every 45 degrees, and measured the depth of the taper using some wood skewers. I found the taper to be approximately linear, going from 0 to 1/2" depth around the 360 degrees. You can see here I measured from the lower control arm; the subframe pocket appears to be the same and should be based on the symmetry of the spring.
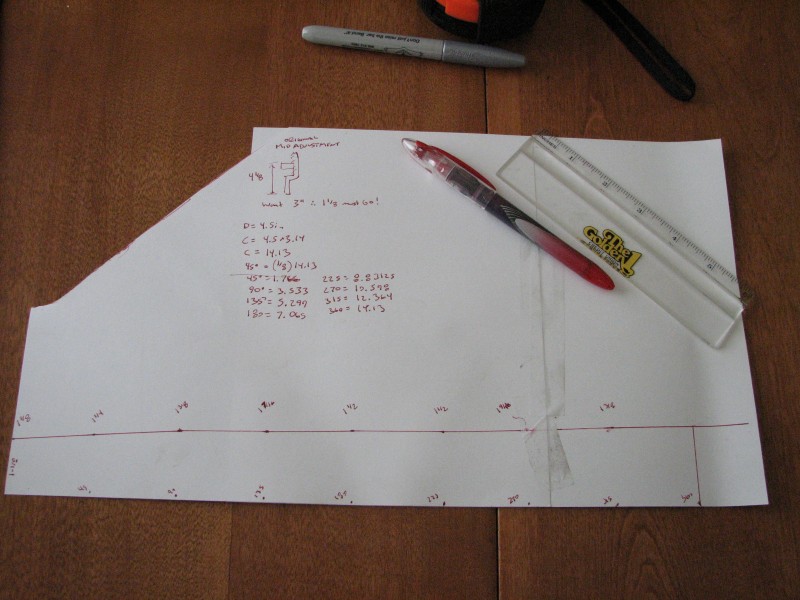
Next I laid out a template on a piece of paper. The circumference of a 4.5" circle is about 14-1/8", so I had to tape two pieces of paper together to get enough length.
I cut my template out, wrapped it around the spacer, and marked it as shown below. If you do this be very careful to verify the taper goes in the right direction.
I decided to lay this out so that when the adjuster was mid travel, I would have a 2" lowered height, trying to replicate Hotchkiss 2" drop height coil springs. The Hotchkiss springs are the same rate (600lb/in) and have a 12.5" free length. To get this, my taper removes from 1-1/8" to 1-5/8" from the AFCO spacers. I can adjust these a full inch in either direction, which translates to about 1-3/4 inches of ride height in either direction (lower control arm ratio of 9/16). So I should theoretically have any where from 1/4" drop to 3-3/4" drop depending on where I adjust them.
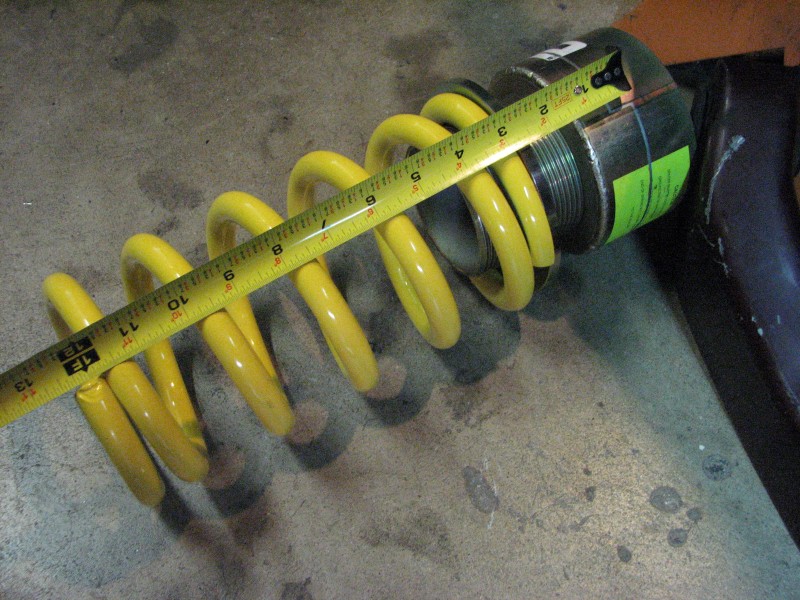
Before cutting, I verified the total free length of 12.5" with the adjusters mid-travel
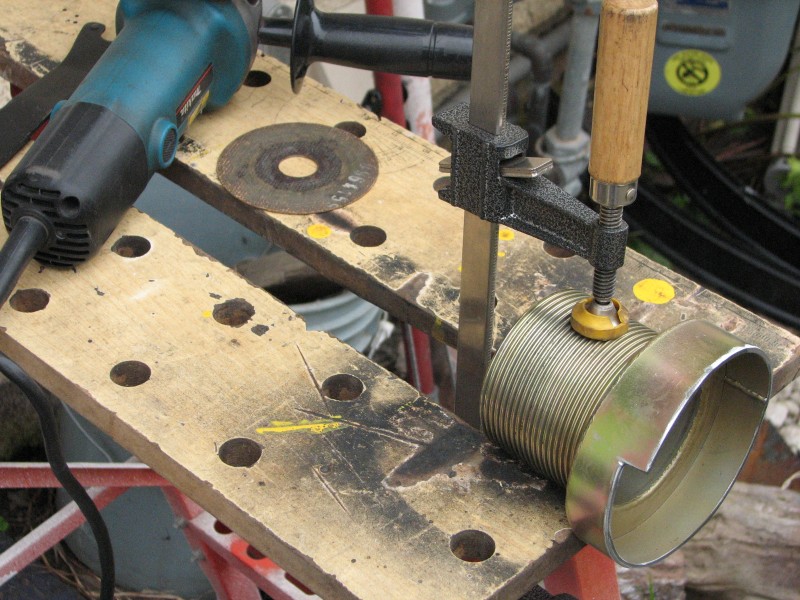
Then I clamped the spacer onto a folding workbench and made the cut with a cutoff wheel.
Wala! It fits the pocket with even contact all the way around:
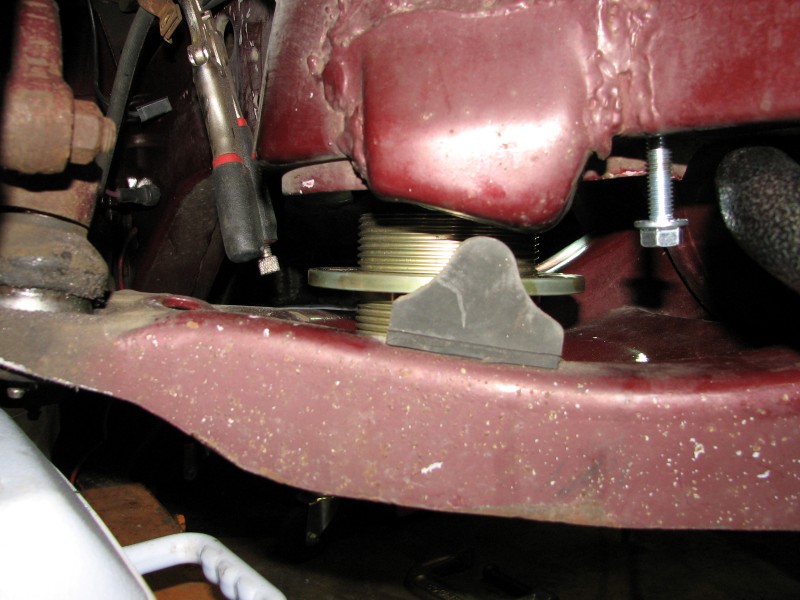
From what I've seen, people usually put these into the upper spring pocket, citing interference when placed on the lower control arm. I decided to try mocking it up in the LCA and it appears it would clear just fine in either position.
That's all for now. Next step - get the engine to a machine shop and paint the exposed sections of the frame.
Clint - '70 Nova "restomod" cruiser & autocross family car





 Registered User

 Originally Posted by TheBandit
 Clint - '70 Nova "restomod" cruiser & autocross family car






 Reply With Quote




