


Results 481 to 500 of 902
Hybrid View


-
04-04-2018 #1

 -Moderator/Sponsor-
- Join Date
- Jun 2001
- Location
- Newbury Park, CA
- Posts
- 5,838

Very cool project. The boss at my first job had one, let it sit, and wanted to give it to me. Unfortunately I had to decline :-(
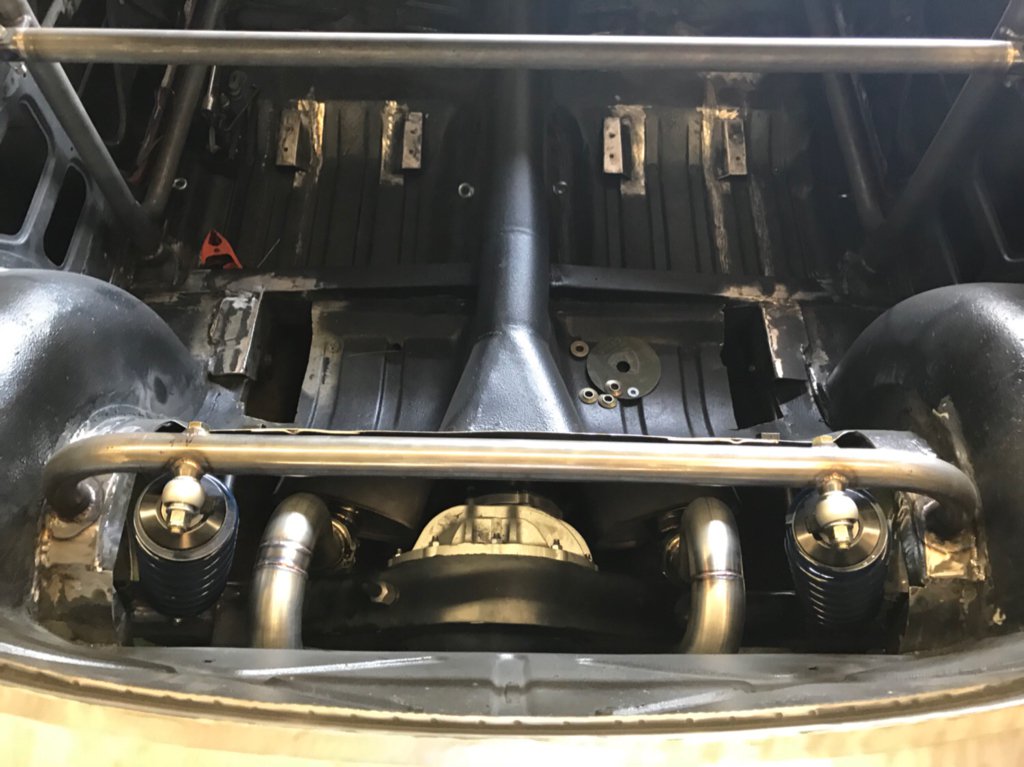
For the coilover shock, both ends are single shear. Have you considered a double shear joint on both ends?VaporWorx. We Give You Gas http://www.vaporworx.com
-
04-04-2018 #2
Registered User
- Join Date
- Oct 2007
- Location
- Camas, WA
- Posts
- 640
Turned down a free car! Sounds like you saved a lot of money in the long run.😂 Originally Posted by CarlC

I believe the lower shock mount is a double shear. That is if I understand what that means. The shock mount has a plate on both sides.
-
04-04-2018 #3
-Moderator/Sponsor-
- Join Date
- Jun 2001
- Location
- Newbury Park, CA
- Posts
- 5,838
I've had the same fun car for 36 years. Ignorance is bliss when it comes to car expenses.
Thanks for the photo. It was hard to see in your latest photos. Yes, double shear so that the fastener is in shear in two places (like the lower mount) and reduces the bending moment/twisting created (like the upper mount.)
The moment load from the upper shock mount gets transferred to the top of the arch, so that connection has to support both the vertical loading and bending moment from the coilover. Depending on tube thickness, arch thickness, weld size + quality, etc. a brace to support from the arch to the tube may be a good structural addition. In addition, a "|_|" type bracket around the top of the shock to put the bolt in double shear and eliminate the fastener bending moment will significantly strengthen the connection and reduce the chances of bending the bolt.
Kinda like the first photo http://www.fourwheeler.com/how-to/07.../photo-11.htmlLast edited by CarlC; 04-04-2018 at 11:12 PM.
VaporWorx. We Give You Gas http://www.vaporworx.com
-
04-05-2018 #4
Registered User
- Join Date
- Oct 2007
- Location
- Camas, WA
- Posts
- 640
Thanks for the detailed explanation and suggestion on boxing the upper mount.
-
04-06-2018 #5
Registered User
- Join Date
- Oct 2007
- Location
- Camas, WA
- Posts
- 640
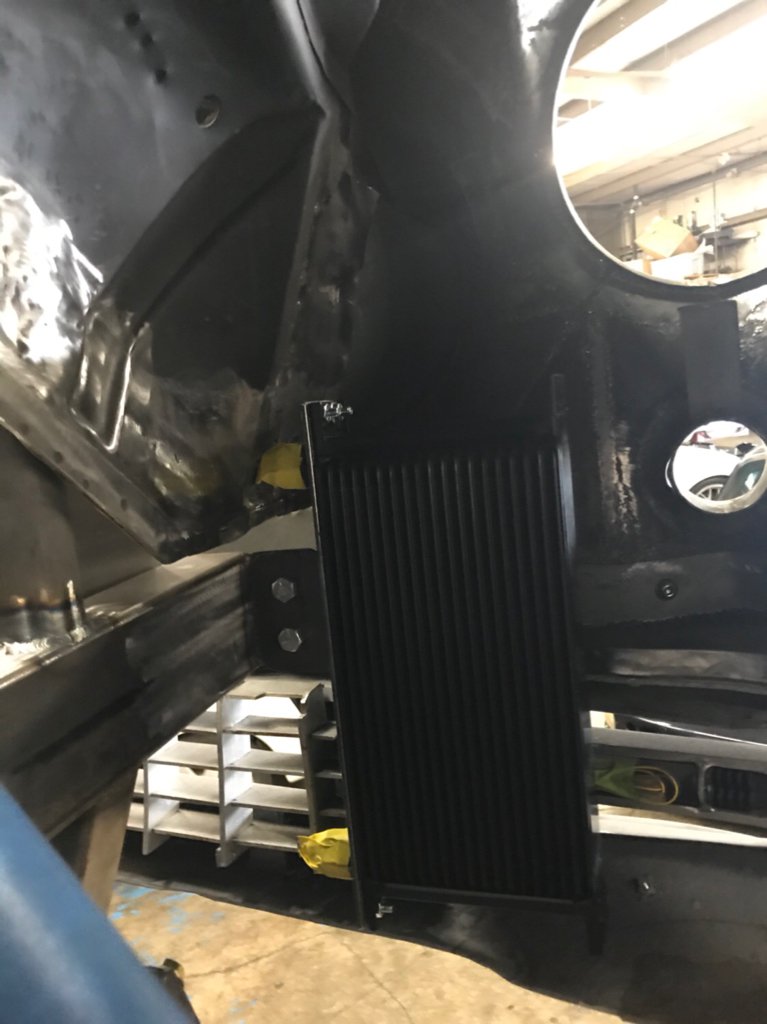
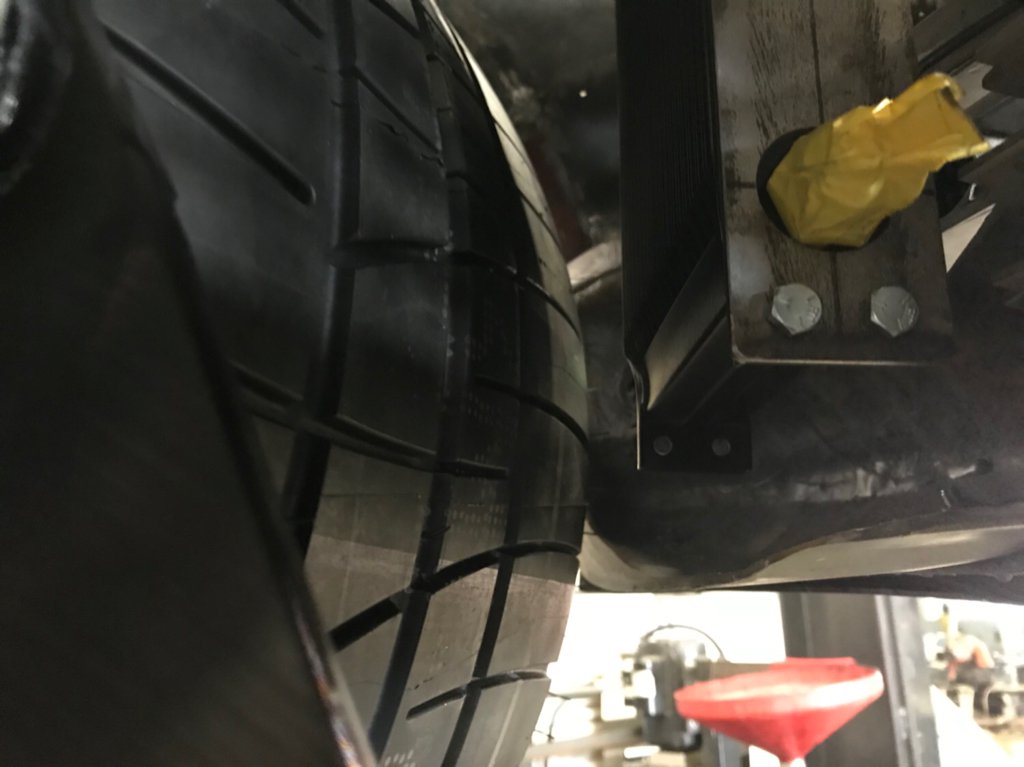
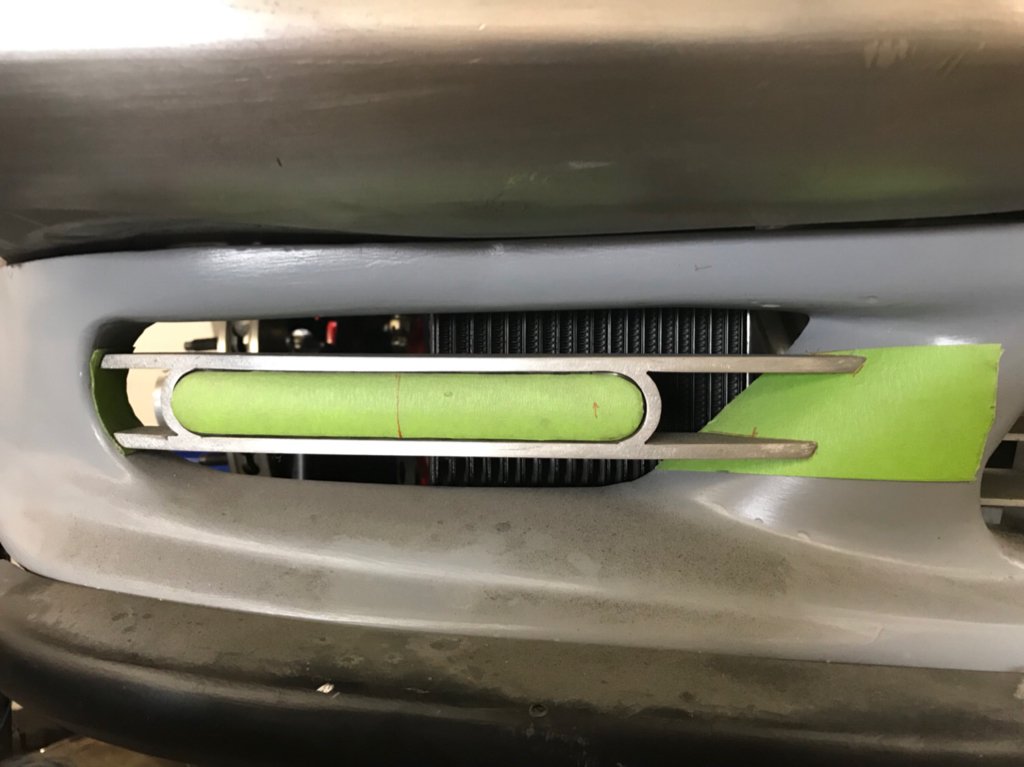
We have the oil and transmission coolers mounted. I will have to put some sort of protective screen on it still but is should work well.
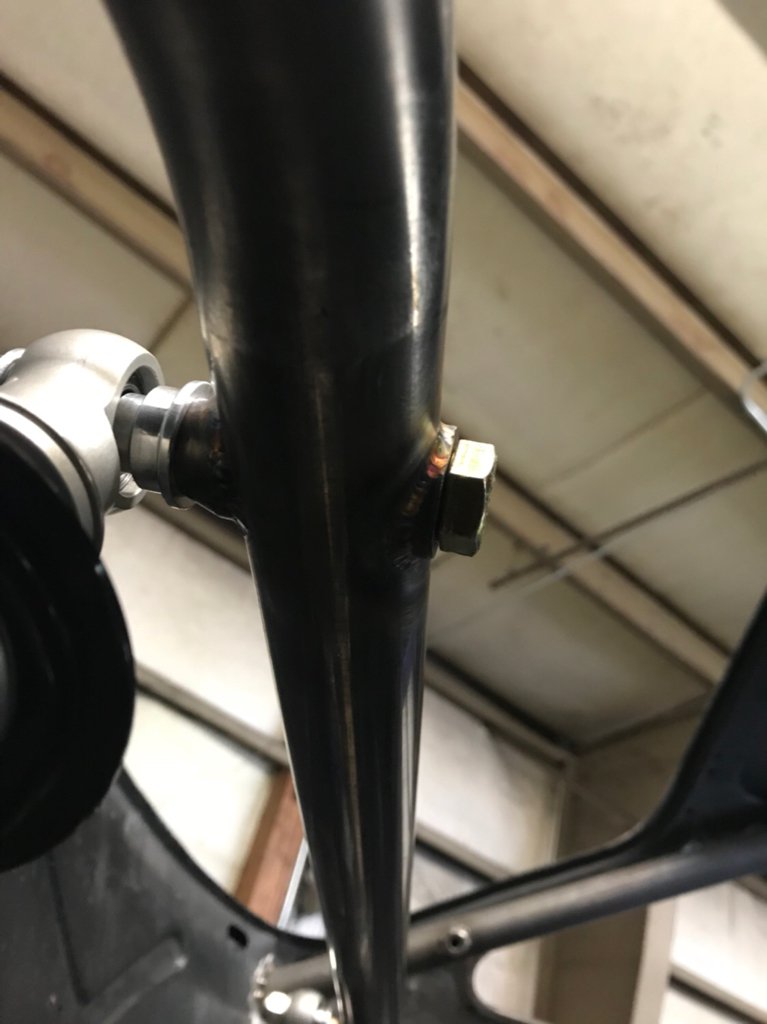
Here is a close up picture of the upper shock mount. It has a pretty heavy duty sleeve in it for strength.
Ron Sutton brought up a concern today. He questioned the long-term durability of the aluminum lower link bars and panhard bar. Some new bars are now in the way with the help of Dave over at Ron Sutton Race Technologies. Those guys, along with the fellas at Rhom Innovations have been fantastic to work with.
-
07-20-2018 #6
Registered User
- Join Date
- Oct 2007
- Location
- Camas, WA
- Posts
- 640
Not much progress on the car over the past 3 months. The chassis guys have been very busy with race season and Mom car went on the back burner.
This week was pretty productive though. The rear sway bar is mounted. It is mounted in the same spot I originally placed it because a better spot could not be found. Since we moved to a smaller diameter bar we also used a smaller diameter mounting bar. This allowed up to tuck the bar in closer to the fuel tank.
It has 3 mounting holes that correspond with the holes on the bar. The should allow for some tuning as needed.
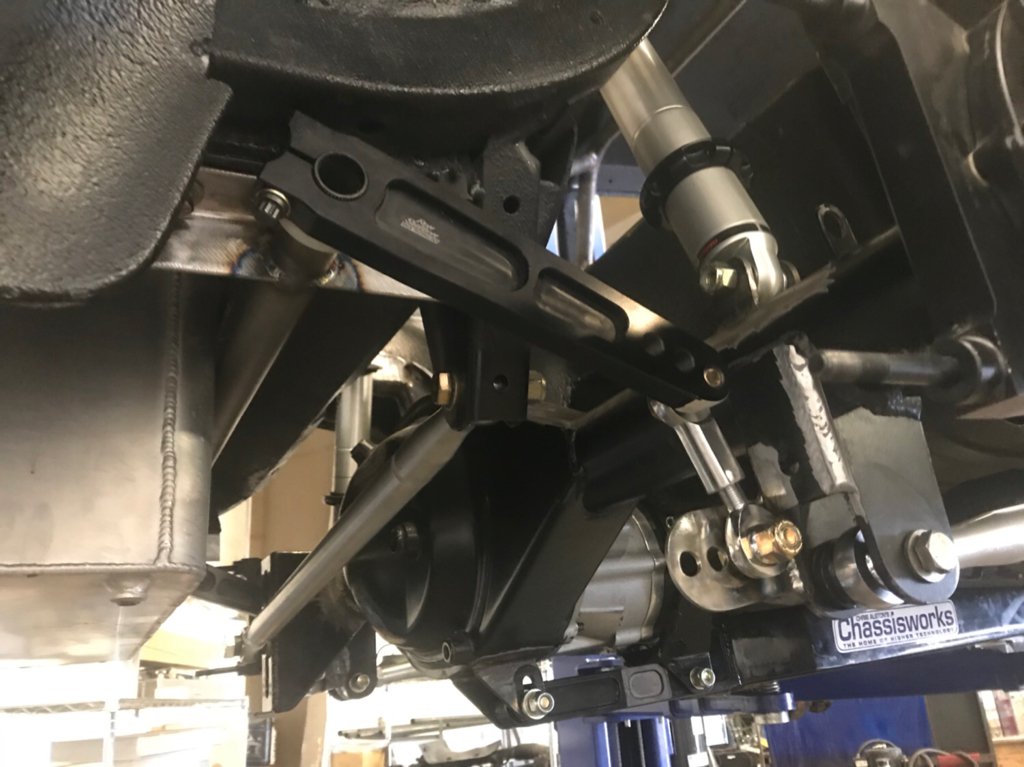
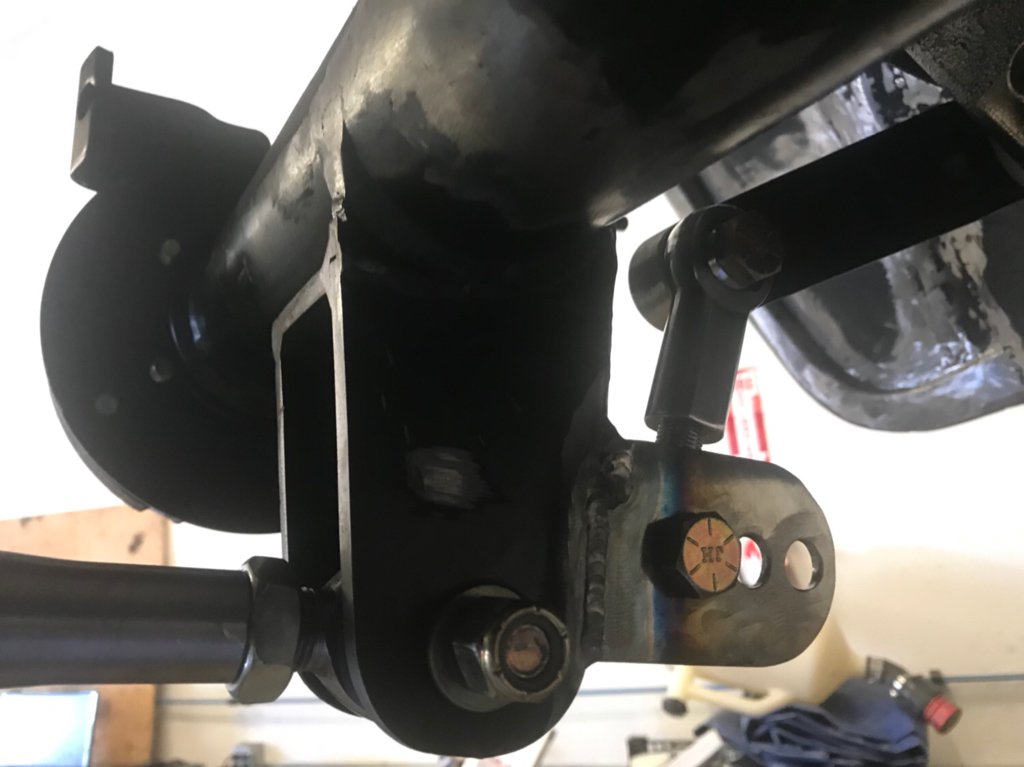
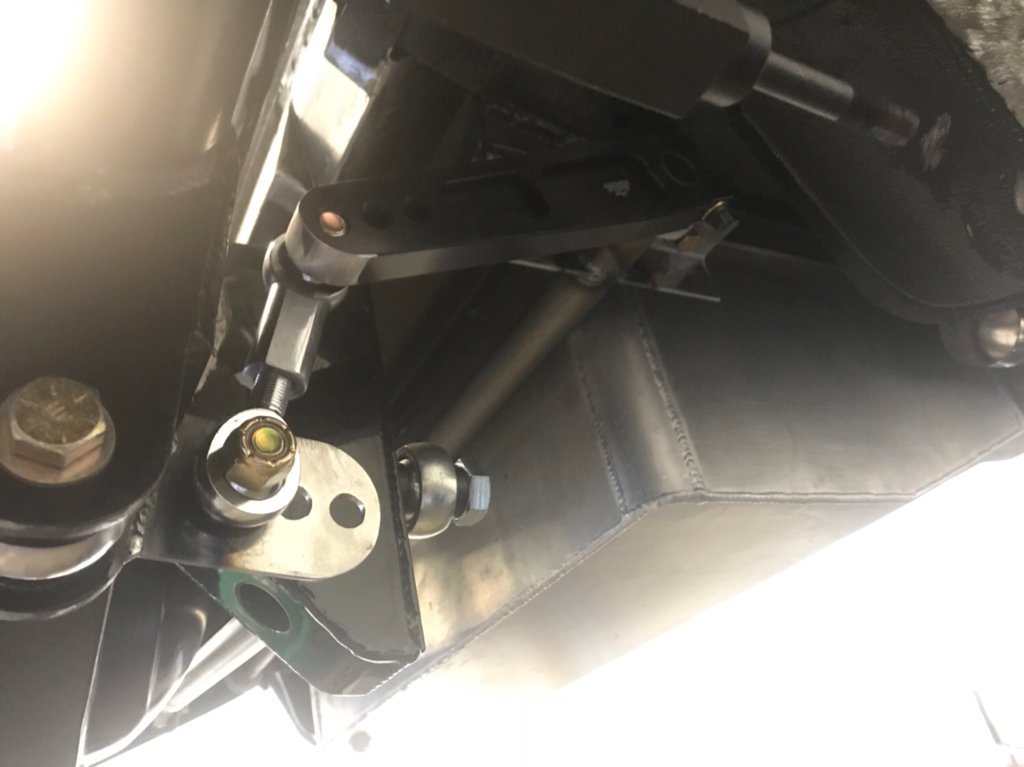
Nice progress was made on the headers. This was a real PITA due to space. Glad I wasn’t doing it! Jon over at Rhom Innovations has done a great job. There is hardly any clearance . We are now waiting on a couple tight bends and then it can come out for final welding.
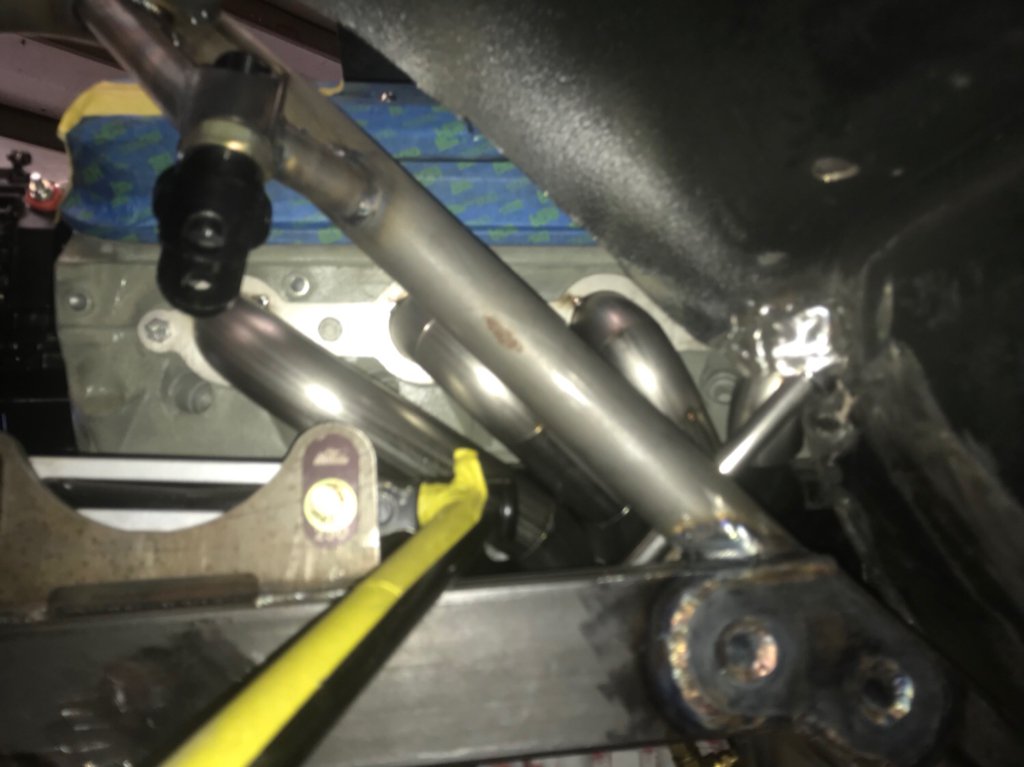
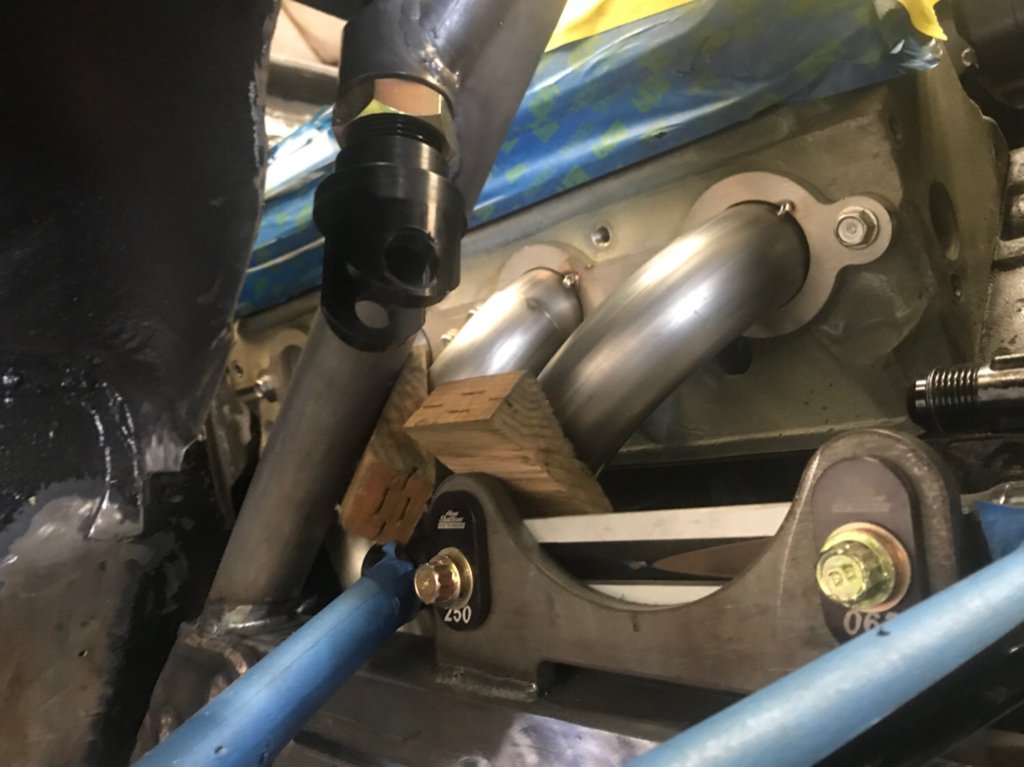
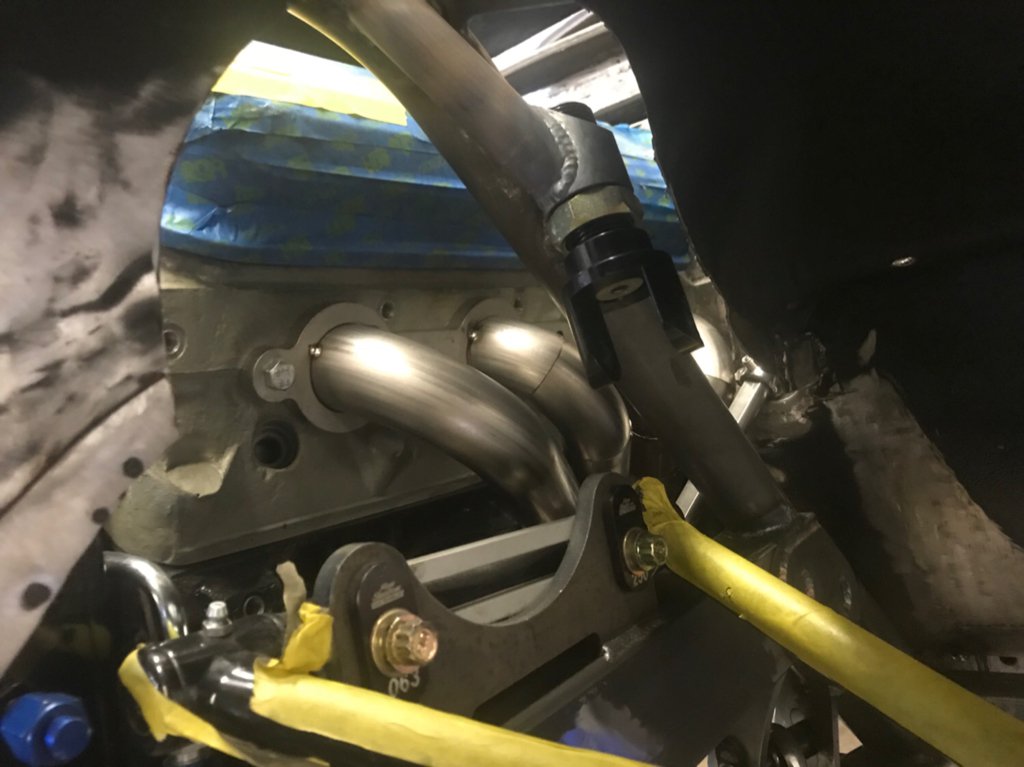
Jon also made an X pipe that will mount right under the transmission mount and in front of the torque arm mount. We weren’t sure a X pipe would work but it did.
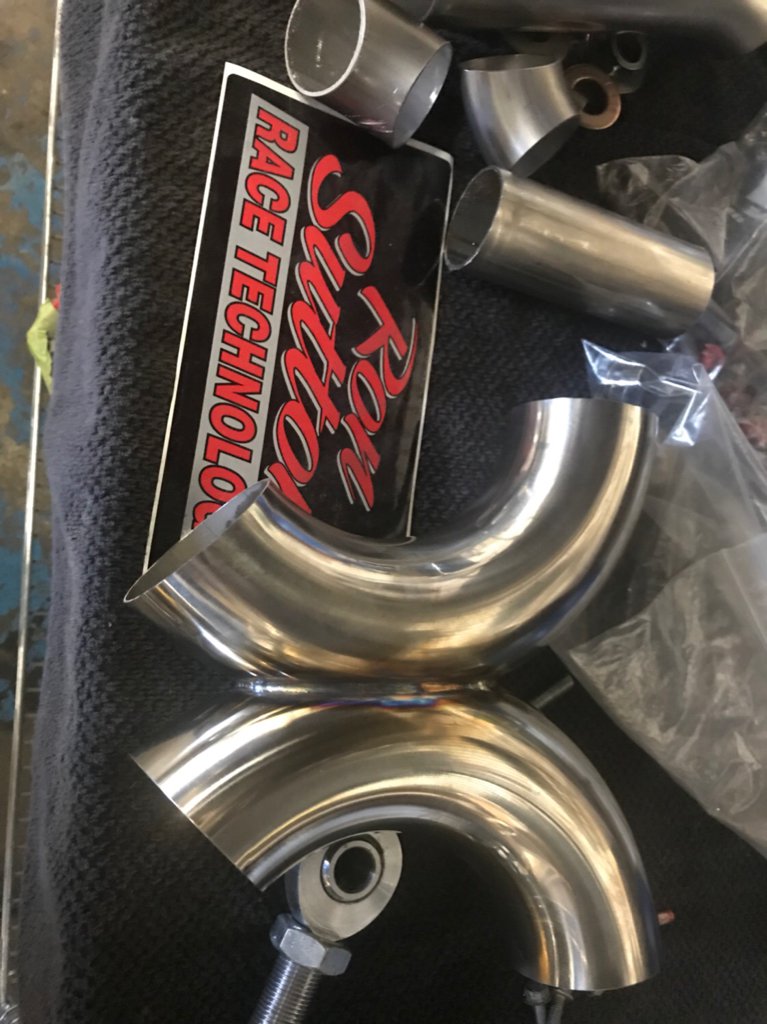
We hope to finish up the headers next week as well as the exhaust. The final bits to fabricate will be the radiator and a cold air intake. The cold air intake will pull air from the hood scoop.
-
07-26-2018 #7
Registered User
- Join Date
- Oct 2007
- Location
- Camas, WA
- Posts
- 640
Super tight fit for the headers. No wonder I couldn’t find a set of off the shelf headers that would work.
https://youtu.be/o4Ithh5d5iE
-
07-26-2018 #8
Registered User
- Join Date
- May 2013
- Location
- Colton Ca.
- Posts
- 623
This car is so bad a$!. You going to Ron's workshop this year in Vegas Darreld?
AhmadAhmad B.
-
07-26-2018 #9
Registered User
- Join Date
- Oct 2007
- Location
- Camas, WA
- Posts
- 640
Thanks Ahmad. Not this year. I am going to SEMA with 4 buddies and I am the only 1 who knows all of them. I am kinda bummed to not go to Ron’s workshop. I always learn so much. Are you going?
-
07-26-2018 #10
Registered User
- Join Date
- May 2013
- Location
- Colton Ca.
- Posts
- 623
I'm going to try but I literally started a new high school teaching job this week and the school year falls within the worshop week. I'm going to try to arrange for a substitute tho.
Your car is coming along amazing tho. You should try and get your car into Sema thru Ron when completed maybe? It looks more then worthy.Ahmad B.
-
07-31-2018 #11
Registered User
- Join Date
- Oct 2007
- Location
- Camas, WA
- Posts
- 640
Congrats on the new job. Good luck with getting the substitute.
More progress on the exhaust. We are waiting on a couple more bends to finish the tailpipes. Will be working on the connecting the steering shaft this afternoon.
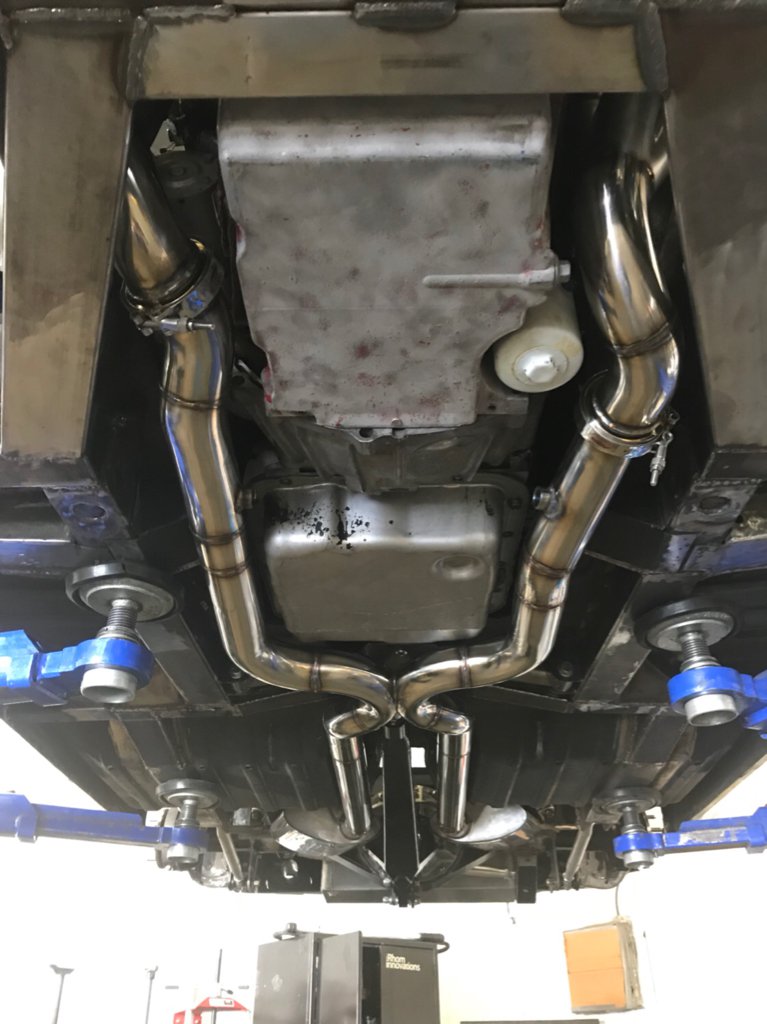
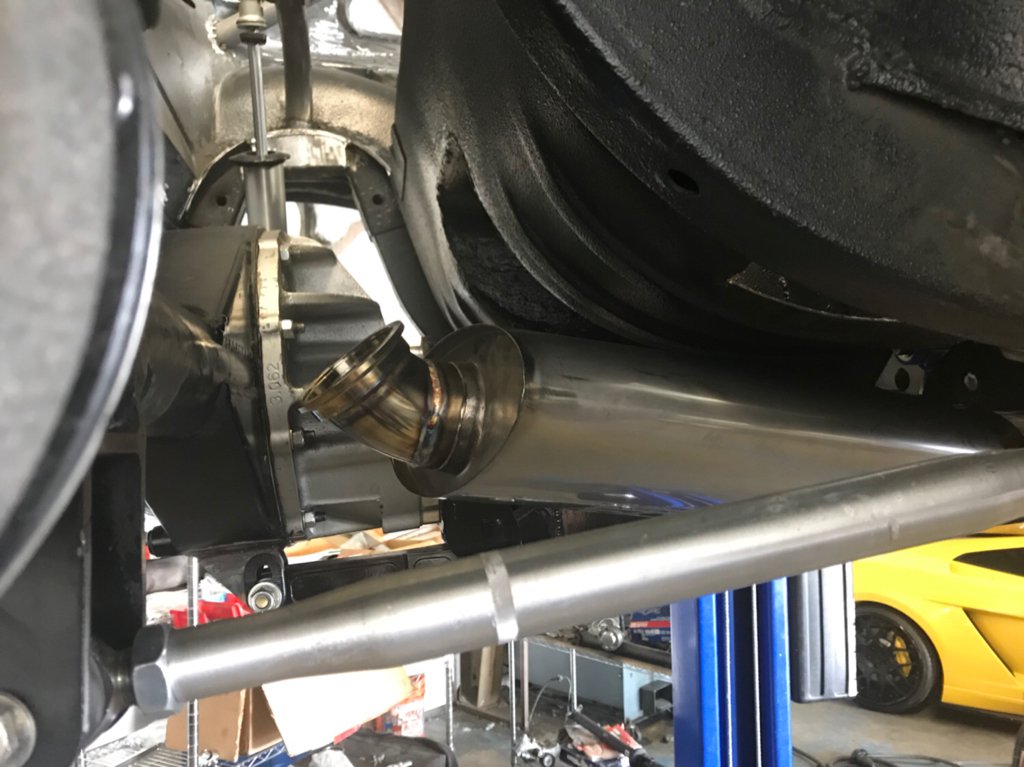
Now I have to decide on the placement of the exhaust tips.
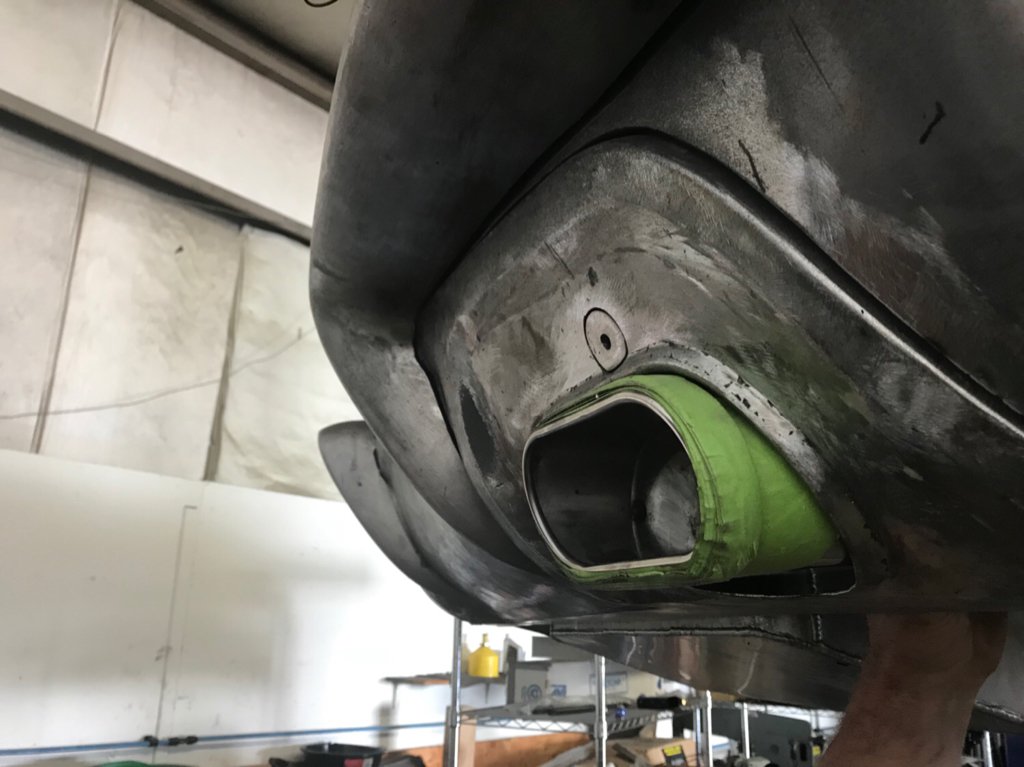
Recessed, flush or lips showing. What do you think? I am thinking lips showing.
Recessed
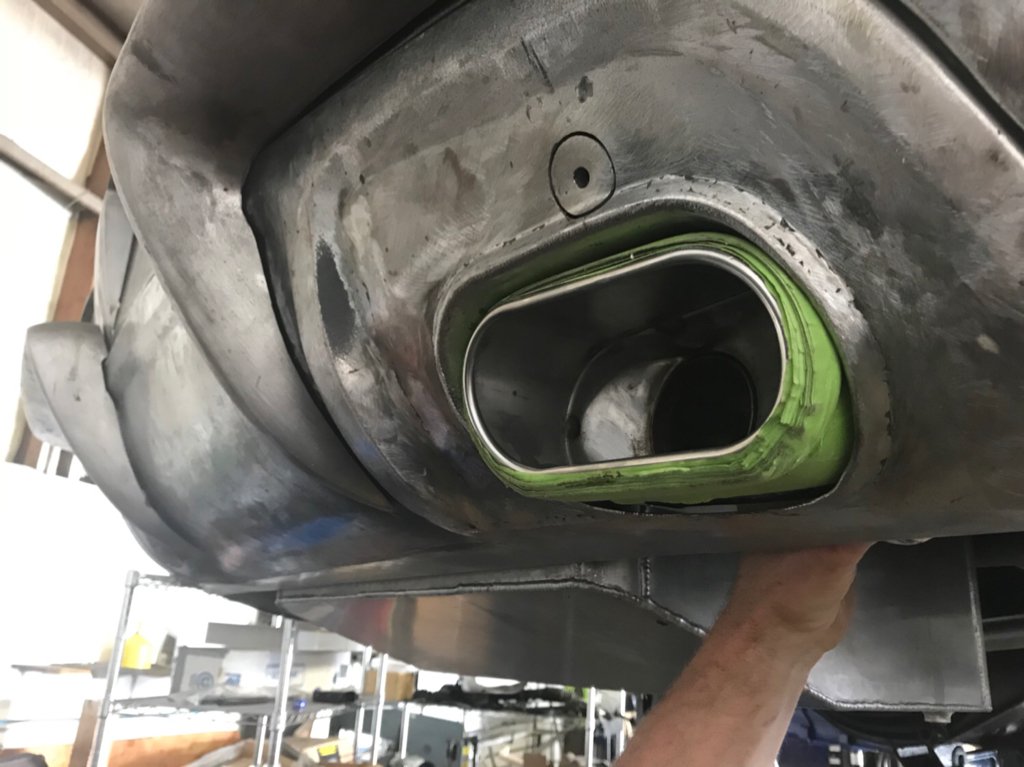
Flush
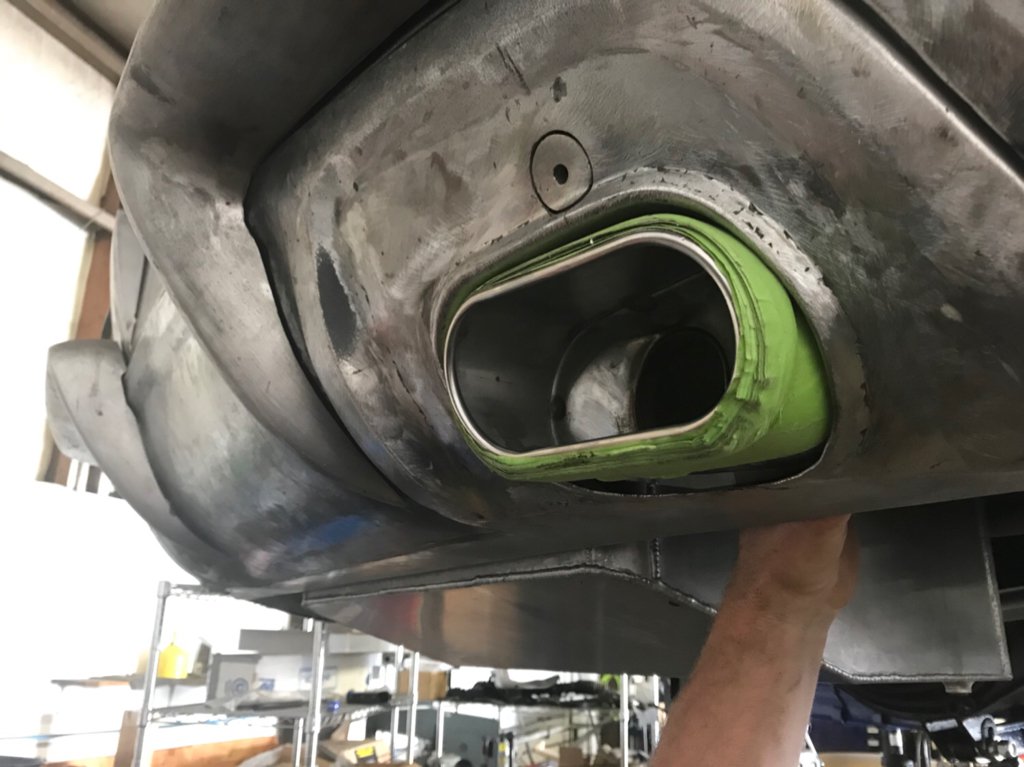
Tips showing
-
07-31-2018 #12
Registered User
- Join Date
- Feb 2014
- Posts
- 779
Either flush, or out. Otherwise you might be getting soot on the paint.
I'd go with flush. My reasoning, is that what the new cars (Volvo specifically) have, which tells me a focus group somewhere said that's more visually appealing that sucked in, or sticking out.
Just my 0.02
-
07-31-2018 #13
Registered User
- Join Date
- Mar 2009
- Location
- Houston, TX
- Posts
- 1,197
I'd go with flush. Out looks out of place with the curve of the valance.
Tu Ho
Firebird V2-LS swap
-
08-01-2018 #14
Registered User
- Join Date
- Oct 2007
- Location
- Camas, WA
- Posts
- 640
Thanks for the feedback. I will be going with flush. It will provide about the same look as the chrome trim around the tail lights.
-
08-06-2018 #15
Registered User
- Join Date
- Oct 2007
- Location
- Camas, WA
- Posts
- 640
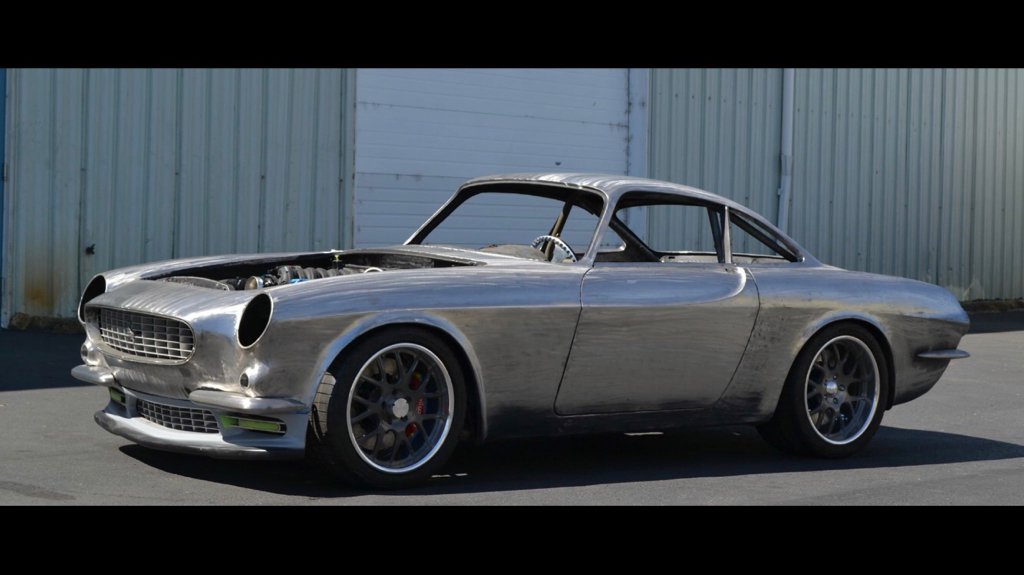
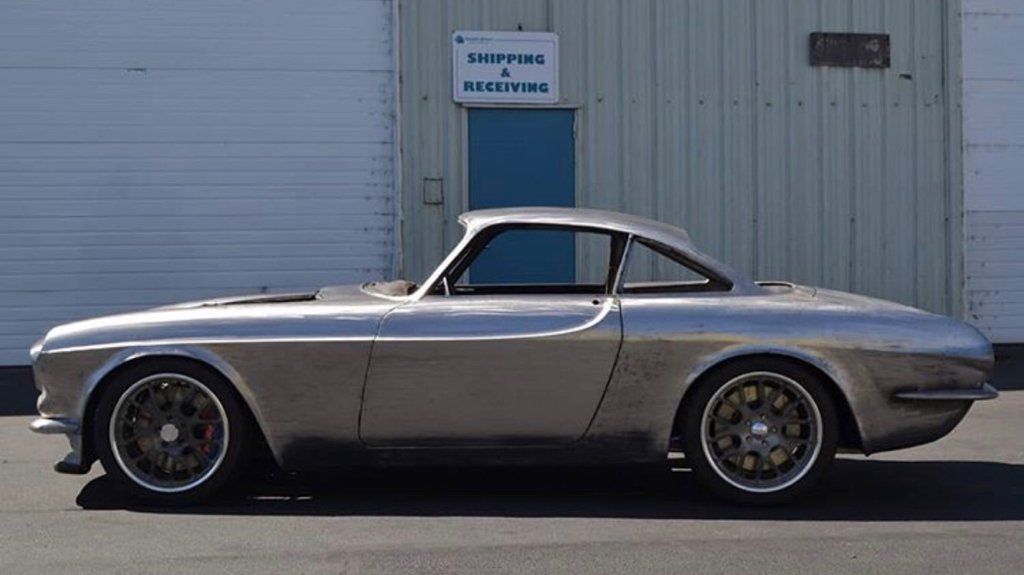
The car sees the sun for the first time in a little over a year.

-
08-06-2018 #16
 -Moderator/Sponsor-
- Join Date
- Apr 2001
- Location
- The City of Fountains
- Posts
- 16,126
Looks amazing!
1970 GTO Version 3.0
1967 Cougar build
GM High-Tech Performance feature
My YouTube Channel Please Subscribe!
Instagram @dr__efi
I deliver what EFI promises.
Remote Holley EFI tuning.
Please get in touch if I can be of service.
"You were the gun, your voice was the trigger, your bravery was the barrel, your eyes were the bullets." ~ Her
-
08-06-2018 #17
Registered User
- Join Date
- Dec 2012
- Posts
- 456

Simply gorgeous car ....
SteveBuild it right ... 'The 2nd Time !!'
69' SS/RS X11 PRO-TOURING E-Force LS7 - SOLD
2 Custom FJ40's -SOLD
77' 911 Hotrod - SOLD
'Killer Piggy' 73 FJ55
67 Camaro - TBD
-
08-06-2018 #18
Registered User
- Join Date
- Oct 2012
- Posts
- 118
Great looking car!
Eddie
-
08-06-2018 #19
Registered User
- Join Date
- Oct 2014
- Posts
- 266
This such an epic build. Car looks fantastic.
1988 Mazda RX7 - Forged LS/T56, 76mm turbo, ProEFI, Ford 8.8 - Sold
1965 Mustang Coupe - TT Coyote, TR6060, Haltech, big brakes, updated suspension.
2007 Aston Martin V8 Vantage - Full bolt-ons
2016 BMW 428iX GranSport - Stock...ish.
-
08-06-2018 #20
Registered User
- Join Date
- Oct 2007
- Location
- Camas, WA
- Posts
- 640
Thanks guys. I think the original car had great lines to start with. I hope the changes we have made enhanced the original car. So far the response has been pretty positive.
The car has way more ground clearance than I thought it would. The lowest point is the front valance. I will have to be careful with it. It is about 4” above ground. I was a little concerned about the x pipe but it looks great. The car should be about 1/4” lower than it is now.
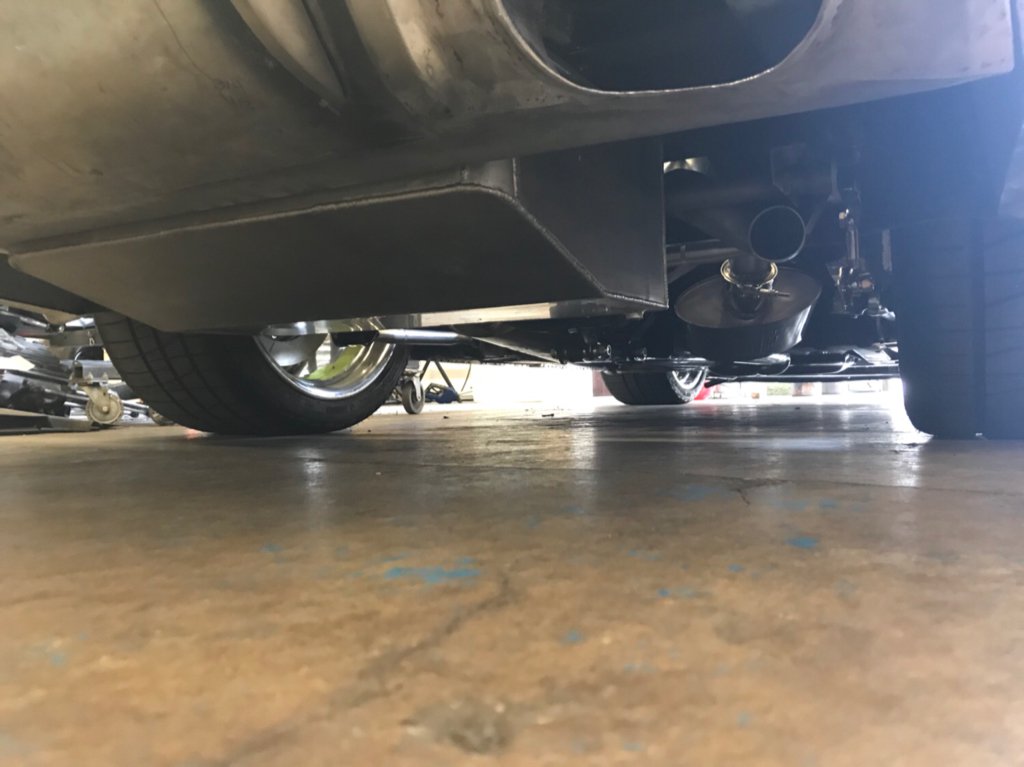
Exhaust over the axle is done. Just need to install the resonators and tips. The guys at Rhom Innovations are a little concerned about expansion of the stainless exhaust, particularly with the V band clamps. Since I have 3 sets of them they feel that the stainless can expand about 10% when under heat. We plan on bolting the tip to the can and allowing the tailpipes to expand in a slip joint at the tip. I appreciate this level of detail.
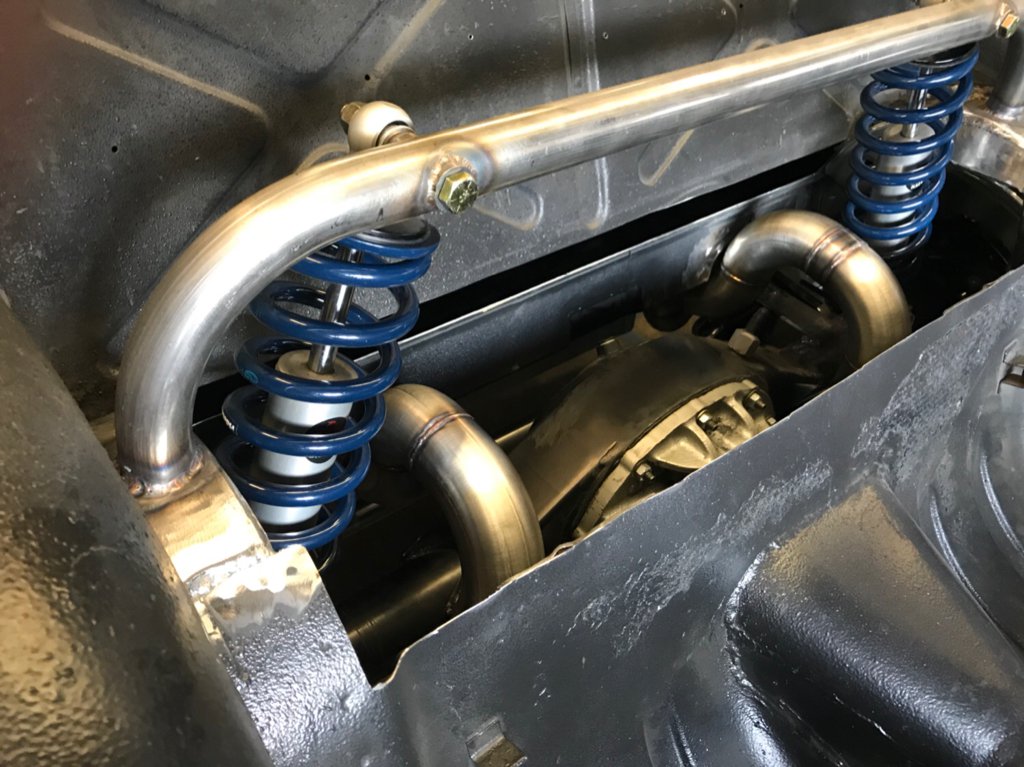
Getting pretty close to coming home. I need to make a couple adjustments to the firewall. I need to rehang the heater box, ECO and tranny controller before it goes back to the body shop.

 Reply With Quote


