


Results 41 to 59 of 59
Thread: Busted and I gotta fix it
-
07-14-2011 #41

 Registered User
- Join Date
- Nov 2005
- Location
- Little Rock, Arkansas
- Posts
- 945
Life is getting busy again but I did manage time to work on mounting the Canton pickup to the Butler Pro-Series oil pump I bought. No big deal here. I did countersink the tab on the pickup with a 1/2 inch bit to make the base plate screw fit flush. Other than that it fit as advertised.
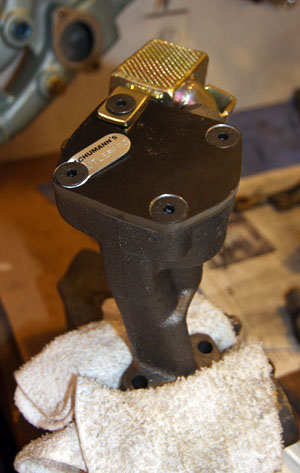
With luck I'll be washing the block this weekend and can start putting it together.
Ty, the block I picked up had already been machined for a stock 400 rebuild. Whomever did the machine work knew Pontiac blocks. They had already de-burred the lifter valley. On my last block I polished the walls to speed oil drain back. I decided not to do that this time. I don't think it makes that big a difference. I also elected to not go with street fill of hard block. I did that on my old block and it worked but the oil temps always ran high. Since this is not a race motor (most days) and more of a street cruiser and occasional weekend warrior I'm going to try running without it. I may regret it later but this is how we learn.
I did spend time last night inspecting every oil passage that can be visually confirmed. All of that looked good. Some have complained about the feed hole from the pump having flash blocking it but this one was very clean and as cast. Both galley looked true and clean but a good washing will get the previous build's assembly lube out of there for me to confirm it. I also did a visual inspect on every hole and checked the threads. It looks like the previous shop had chased them all because I didn't find a one that I couldn't screw the hardware into as needed. I'll be using studs for the mains and heads so that is important. We want our torque values to be spot on.
I did not have the block decked because I need to mock it up first and see how far in the hole we have the pistons. To do that I had to have it honed out to fit the pistons. That's next on the list as far as the block is concerned.
-
07-14-2011 #42 Registered User
- Join Date
- Feb 2005
- Location
- Sydney, Australia
- Posts
- 1,797

Chris,
I understand the stud bottom end...went that way with mine as well...but the studs on the top end - is that more because of your plans for the alloy heads later?Regards,
Leigh
Sydney, Australia
1971 Firebird 455
https://www.pro-touring.com/showthre...Project/page27
07-14-2011 #43
Registered User
- Join Date
- Nov 2005
- Location
- Little Rock, Arkansas
- Posts
- 945
No, more about the fact that my factory head bolts have been torqued so many times I don't trust them and I had a set of head studs setting around so I figured "why not?". I am on a budget so I'll use these studs that I took in on a trade. I suspect these studs won't work with the aluminum heads anyway.
07-16-2011 #44
Registered User
- Join Date
- Nov 2005
- Location
- Little Rock, Arkansas
- Posts
- 945
I managed to get the block to the point of washing it this past week. So this morning it was time to get doing the hard part, cleaning this hunk of iron.
First I had to gather all my supplies. I use a stiff bristle brush, Dawn dishwashing liquid, rifle brushes and swabs along with my pressure washer. I always spray it down with WD40 after I'm done and then start in on the blowing it off with compressed air and do a final wipe down with clean rags. Here's how we started out today:
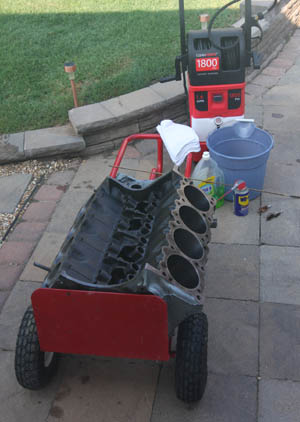
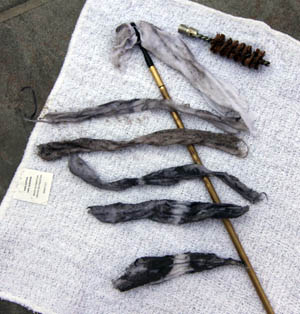
And if anyone ever says why do you need to clean the oil galley with a rifle brush and swabs, well, show them this. The cleanings progress from bottom to top. The block looked clean on the outside so don't judge a book by its cover:
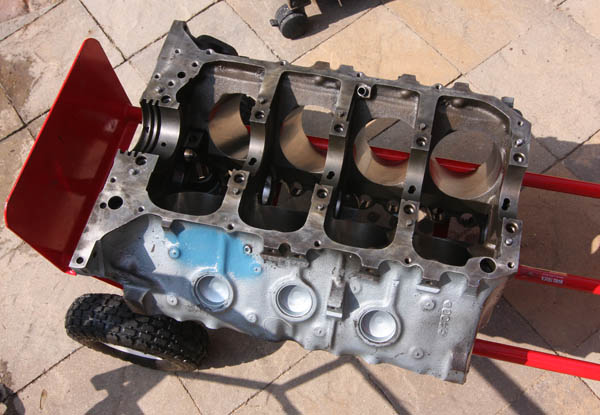
And when it was all done it looked like a shiny new penny:
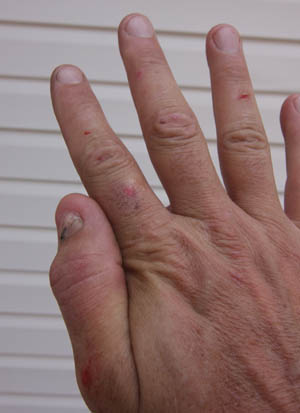
I always know when I've done it correctly. At least one of my hands looks like I've been in a fight with a bobcat:
07-16-2011 #45 Registered User
- Join Date
- Mar 2007
- Location
- Florida
- Posts
- 2,391

Looks great!
07-17-2011 #46
Registered User
- Join Date
- Feb 2005
- Location
- Sydney, Australia
- Posts
- 1,797
lol...thats my plan, too....I ended up going studs on the bottom end because I picked up 4 bolt stud kit cheap off Ebay brand new.....you have to stick with the bargains where you can, so you can afford teh good stuff when you need to. Originally Posted by critter
 Regards,
Leigh
Sydney, Australia
1971 Firebird 455
https://www.pro-touring.com/showthre...Project/page27
07-17-2011 #47
Registered User
- Join Date
- Nov 2005
- Location
- Little Rock, Arkansas
- Posts
- 945
Good progress today. I started off by measuring all the main bearing clearances. They were very consistent with most being in the .0010-.0015 range. According to the factory service manual that's right in the middle of what's considered acceptable so I give point to the quality of the Tomahawk cast crank.
Once I had that I started looking at the Best Gasket rope seal for the rear main. I had installed rope seals before when we could still buy them with asbestos in them but the last couple I've done have been the viton variety. Everyone reports excellent results with this seal so I opened the package. Here's what comes with it:
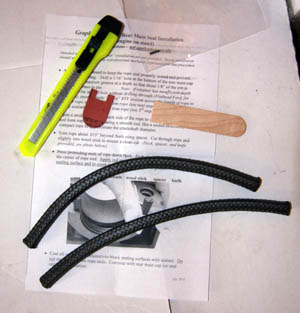
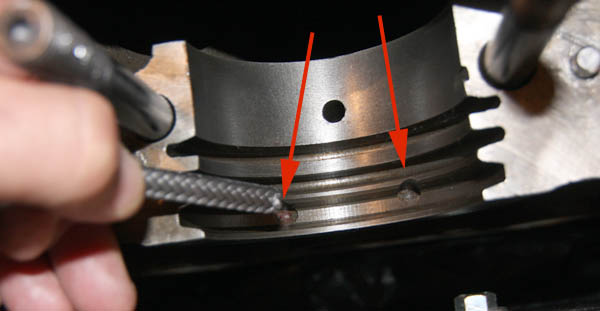
The first thing I noticed was that the instructions were not engine specific and that it included a tiny little roll pin. The generic instructions state that you drill a hole in the block seal area and put that pin in to keep the seal from rotating. That sent me to the internet. Sure enough, that was designed to be used with blocks that might not have the factory anti-rotation holes like we have in our Pontiac blocks and cap:
So on to what I remember. That is the art/science of jamming the material into the groove and rolling it in. I have an old Craftsman 1/2 inch extension that I inherited from my dad that works wonders for this application:
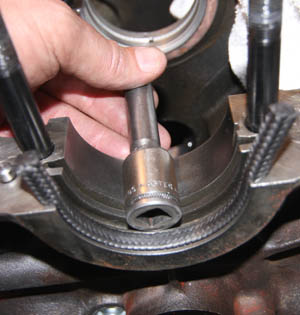
The cool thing about their kit is that they supply a spacer, backing board so you don't cut your finger and the razor knife to make a clean cut. Talk about idiot proof. Heck, even I can get this right! (I'll probably find out I did it wrong for saying that):
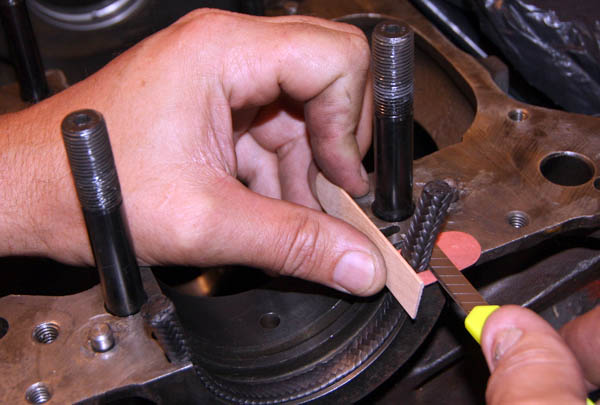
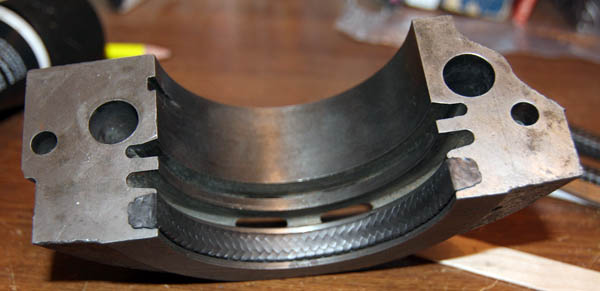
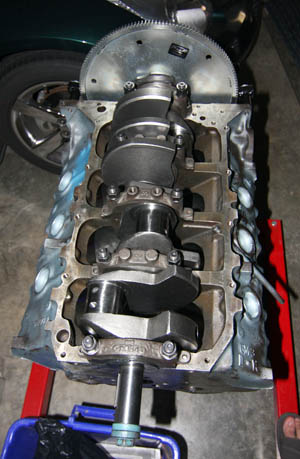
So the seal went in like a dream, I lubed the bearings with assembly lube and started torquing things down, rotating the crank as I went. Initially it seemed a little tight but as the rear main seal settled it things smoothed out. I asked Tammy to deliver a second opinion. She came out and did one full rotation for me and proclaimed it "smooth" so I'm going to say it. The crank is in:
07-18-2011 #48 Registered User
- Join Date
- Aug 2004
- Location
- Rustburg, Virginia
- Posts
- 3,436
Now go get those 8 holes filled!...LOL...looks good.
1970 RS/SS350 139K on the clock:
89 TPI motor w/ 1pc rear seal coupled to a Viper T56 via Mcleod's modular bellhousing w/ hydraulic T/O bearing from the Viper, 12 bolt rear w/ 3.73 gearing, SC&C upper control arms, factory lowers with Delalums, C5 brakes at all four corners, Front Wheels 17x8's with Sumi 255/40/17 and Rear Wheels 17x9's with Sumi 275/40/17.
Brief description of the work done so far can be found here: http://www.nastyz28.com/forum/showthread.php?t=112454

07-18-2011 #49
Registered User
- Join Date
- Nov 2005
- Location
- Little Rock, Arkansas
- Posts
- 945
Working on it but the grandkids are coming to town so progress may slow for a bit.
07-18-2011 #50
Registered User
- Join Date
- Dec 2008
- Location
- Lehigh Valley Pa
- Posts
- 1,269
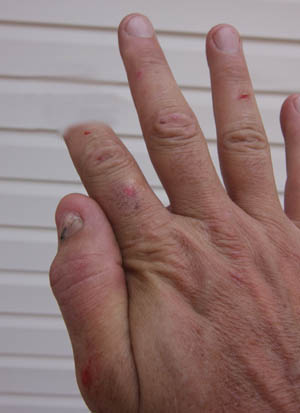
Good work. I would have hacked a finger off doing that seal.
1996 Federal Cadillac hearse
1988 Eureka Chevy hearse
07-18-2011 #51
Registered User
- Join Date
- Nov 2005
- Location
- Little Rock, Arkansas
- Posts
- 945
Uh, well...
07-19-2011 #52
Registered User
- Join Date
- Nov 2005
- Location
- Little Rock, Arkansas
- Posts
- 945
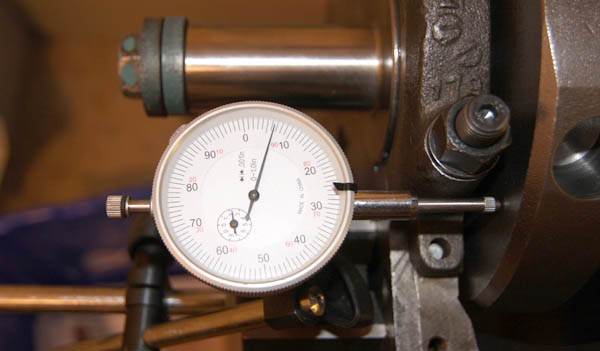
Crankshaft end play looks good:
07-29-2011 #53
Registered User
- Join Date
- Nov 2005
- Location
- Little Rock, Arkansas
- Posts
- 945
Vacation is over. I had a great time visiting with my son and his family. Spoiling grandchildren is great fun!
Tonight I finished measuring rod journals. I had one, #5, that was a little tight at .0017 but some work with the green scotch-brite took care of that.
I moved on to rings after that. I couldn't get a good photo but the top ring gap showed .012 and the bottom compression ring showed .024. WTH? Since I bought these parts from a guy who had a shop assemble the bottom end and everything to this point has checked out well I was surprised. My standard has always been .004 X the bore size for final ring gap. So, .004 X 4.155 = .01662 so I round up and I get .017. That is very close to the .018 I've used in the past on the 455 engine's I've built.
I don't know who's rings these are so I'm going to contact the guy I bought them from and get a brand. Maybe I'm missing something.
Since that had by stopped for the moment I moved on to some detail work. I like to take 1000 grit sandpaper and wet sand the edges on the top of the pistons:
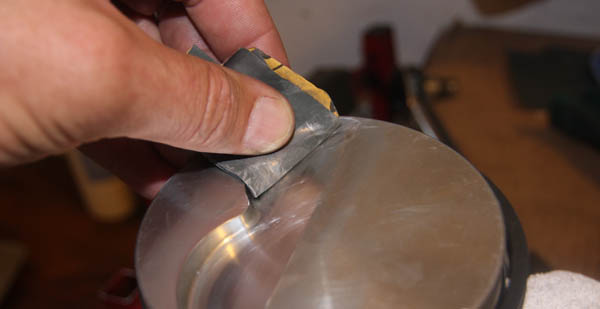
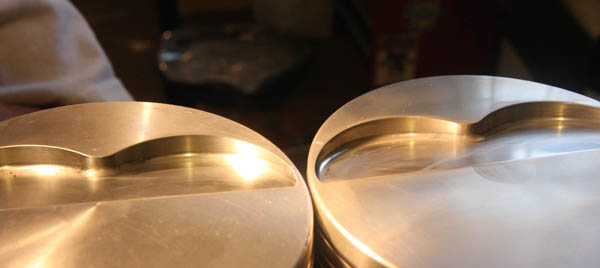
I don't know if you can see it here but look closely at the sharp edges of the valve reliefs. The idea is smooth them and avoid detonation. Since I'm running a very solid 9.5:1 compression ratio on this build I wanted to be sure I'm cool with this kind of stuff. The one on the left is not sanded. Hope you can see it:
More when I find out about the rings.
07-29-2011 #54
Registered User
- Join Date
- May 2011
- Location
- OKC
- Posts
- 124
Just read this whole thread again, looks like your not real far from having it together!

07-30-2011 #55
Registered User
- Join Date
- Nov 2005
- Location
- Little Rock, Arkansas
- Posts
- 945
It appears a new set of rings are in my future. Four of the sets were usable but another 4 had bottom ring gaps larger than my largest .035 feeler gauge. Two of those 4 had top ring gaps over .024. Way too loose! I don't know if they had ring filing class that day at the previous machine shop. One side, the odd cylinder side, was consistent at .012 top gap and .024 bottom. The even side looked like a cross eyed amputee had filed them with his file in his teeth. They were filed at an angle and all over the place on the gaps.
Sigh.
07-30-2011 #56
Registered User
- Join Date
- Mar 2005
- Location
- Texas
- Posts
- 90
I was going to mention something about lubricating the cam gear. I know you are dealing with a Pontiac block but chevy small blocks have a good fix also. The chevy distributor has this channel that fits the oil feed to supply oil forward in front of the distributor. The recomended fix is machine a small groove that will spray oil right on the cam and distributor gear where they mesh. I had changed to a stock type hydraulic roller cam and used a stock type distributor gear. I have excellent oil pressure but I inspected the oil pump prior to use. I also did tack weld the pickup on the pump cause I know the worst can happen. This engine is in my 1992 chevy truck daily driver. So far so good. The 1990 IROC heads and stock shortblock with new rings and bearings and the Vortec roller cam made a good combination. The V6 is gone and the 350 is a one piece rear seal block with low miles and standard bore. I did mill the heads just to clean them up and my compression comes in a 9.3:1. Its the little things that makes it all work. Originally Posted by critter
I did clean the block really well like you did. If you have access to the hot water heater in the house you can do the final rinse with the drain on the hot water heater. Use a really good hose and gloves the water is really really hot, but it cleans and the hot water evaporates fast and prevents flash rust. It also cleans every last bit of oil off the block. I did blow air through all the passages to make sure i did not miss anything. After the block was clean and dry I went right to assembly.
Glad to see your build is going well. As soon as I get a few more miles on the engine I am going to Amsoil synthetic and thier filter. I currently use nothing but Wix filters.
My best friend had a 1972 Firebird Back in the late 80's. Here is how old the setup was. The engine was an RHS Pontiac 400 short block and he installed Ram Air heads that he ported and a 280 Comp cam hydraulic cam. That car was really fast and good combination. It had the entire Rancho suspension and sway bars. It was his daily driver for a long time. It was such a well put together ride. It was so streetable and so much fun to drive. I guess we were before our time with that car, fun, fast and steetable who would have thought you could have it all in one car. And now we have pro touring. Isn't it great.
Keep us posted on how the build turns out, look forward to hearing how much you like the new combination.There were 13,802 1974 Z28's made.
I got two of them!
1974 Camaro coupe, 1974 Z28 restoration project,1974 Z28 shell (they are more of a project)
1992 Chevy Silverado (black with red interior V6 5speed) 454SS wannabe. Now a 350 w/5speed, Finally!!
Will be a 454 with a 6 speed one day.
07-31-2011 #57
Registered User
- Join Date
- Nov 2005
- Location
- Little Rock, Arkansas
- Posts
- 945
F-body, one day at a time brother. You can finish it. Just dedicate yourself to doing at least one thing a day, no matter how small.
It's been a frustrating weekend. I managed to find a Federal Mogul part number for the ring set I needed. I called a couple of local parts stores. One told me that I needed to go to a machine shop. The second said they would have to call their home office to cross reference the number and they'd get back to me on Monday.
And they wonder why I spend my money with Summit and Jegs? If they can't reference a make, model and year in that damned computer they just can't get it done anymore.
07-31-2011 #58
Registered User
- Join Date
- May 2011
- Location
- OKC
- Posts
- 124
I know how you feel there. I can go to a local store KNOWING what I need to buy, tell them, and they're like "Okay, what kind of car is it?" I reply a 1978 Trans Am, but thats not what the part I need is for... "oh..we don't have what you need." Originally Posted by critter
Off to the internet, its rediculous! They even did that when I wanted a transmission cooler...really? They're all the same just different sizes!! So frustrating.
08-05-2011 #59
Registered User
- Join Date
- Nov 2005
- Location
- Little Rock, Arkansas
- Posts
- 945
I know you all think I probably abandoned this build but I haven't. I was busy with a visit from my son and grandchildren plus being delayed waiting on a new ring pack to arrive. So back to business.
Gapping file fit rings is not the voodoo science that some might think. The ring manufacturer will usually include instructions with the ring pack regarding the end gaps and orientation of the rings. Just remember, loose is good and tight is bad. Loose means you might lose a little bit of cylinder sealing ability but tight means the end gaps might jam and break a ring land on a piston or worse.
The first step is to wash the ring packs down with some brake cleaner. If there's one rule on engine building it's to keep the crap out of the motor. Once that's done check the oil rings to be sure they're OK. Most pistons use an upper, scraper and lower ring in the oil rail. Some use a support ring that's supplied with the piston like the ones I'm using. The support ring has a bump or tab that fits the slot in the piston oil scraper ring just above the wrist pin. If those all check out, once you have them mounted you have a valuable tool. The rings that are critical are the upper and lower compression rings. Those are the "file fit" rings. But to get the gap properly set on those you need to be sure the ring is square in the bore. So the old hot rodders would push the oil rings around to get them protruding equally on all sides. Then you can insert the compression ring in the top of the bore and use the piston to push the ring down until the oil rails work as a stop. Viola! now your ring is square in the bore so you can measure the gap.
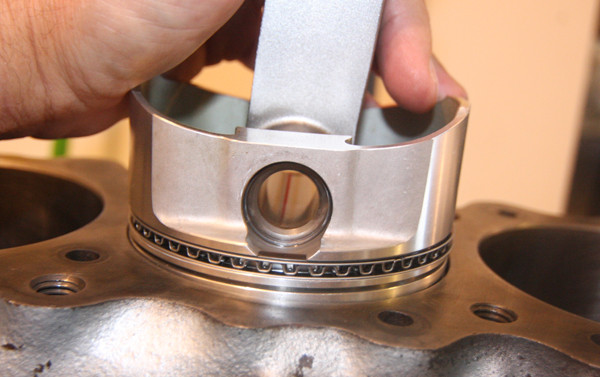
We will be using a feeler gauge to measure the gap. I try to size stuff so that when I slide the feeler gauge through that gap it has a slight drag.
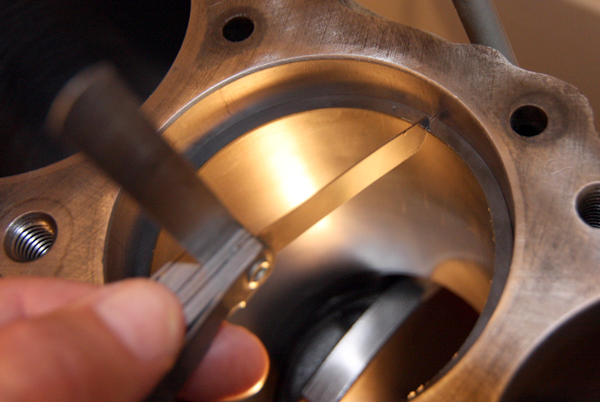
Now that the initial measurement is done the initial filing of the ring is done. There's one rule. You can take it off but you can't put it back. Go slow. Take of a little material and then put the ring back in the bore to measure. After a few you'll get the feel for it. So how do you file a ring? The best way is with a tool especially designed for this. But how do you do it if you're a guy in a garage doing a home build?
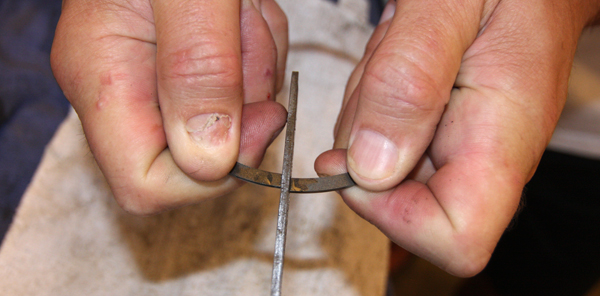
Get yourself a Mill file. This will have teeth that only cut in one direction. Do NOT use a diamond tooth file. We want all cuts to be made from the outside of the ring to the inside. This gives us the cleanest edge to the outside of the ring and the piston wall. The finer the teeth on the file, the better. Mount it in a vice, oil the file and then proceed to clamp the ring on both sides and file away. The edges will stay parallel and square!
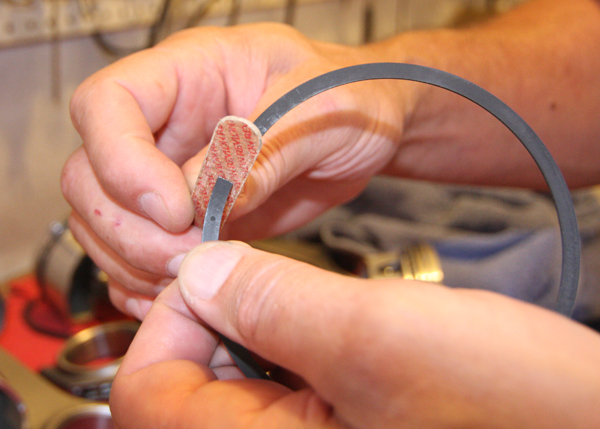
Don't think you're done when you get those ring gaps just where you want them. You need to dress those sharp file cuts some way. It can be done with emory cloth, some 400 grit sandpaper or my personal favorite, an emory board from the wife's manicure set.
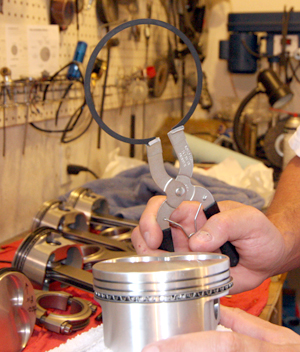
Before you install those rings be sure the ring grooves are clean as a whistle. There are a couple of ways to get rings on a piston. I usually walk them on but I see where the ring manufacturers are not recommending that these days so I thought I'd show the acceptable way to do it. Use a ring expander tool like this to spread them and drop them in the ring grooves.
More to come.

 Reply With Quote



