

Results 1 to 20 of 25
-
03-11-2011 #1
 Registered User
- Join Date
- Aug 2004
- Location
- Spring, TX
- Posts
- 222
1969 Camaro Restomod Project Thread
Finally getting around to putting a thread up on here. Been keeping it on a few other sites. It's just another 69 camaro so nothing to exciting or "innovating" for most out there. However, it is my first car and I'm building it the way I always wanted to. End goal is to have a fun car that I can drive anywhere, take on Power Tour and see some track time (both straight and turns).
9-8-2010:
Well finally got the urge to start working on the 69 again. Putting off any more work on the 2010 to start funneling cash towards my first car. I'm really excited about working on the car. I've picked up a few parts for it already (nothing too major).
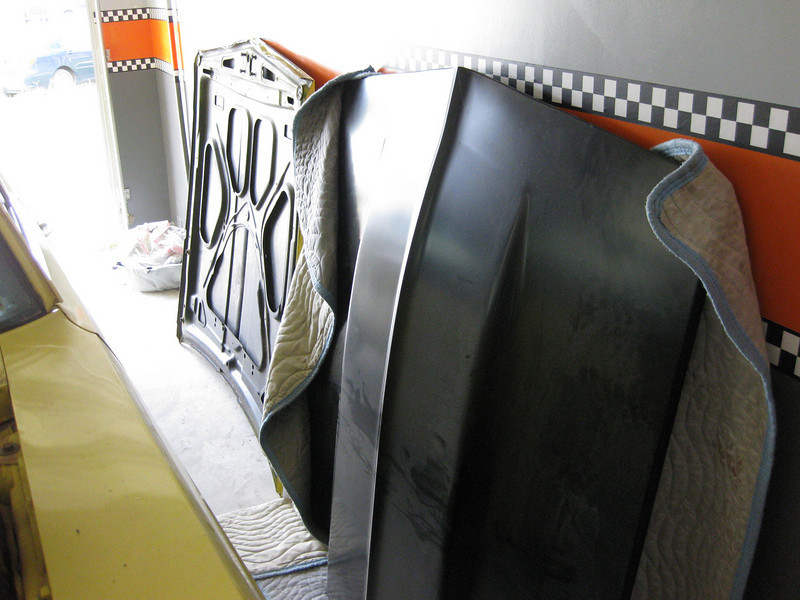
Started today by putting the car on jack stands and taking off the stock hood. Stock hood will be replaced with a new steel cowl hood.
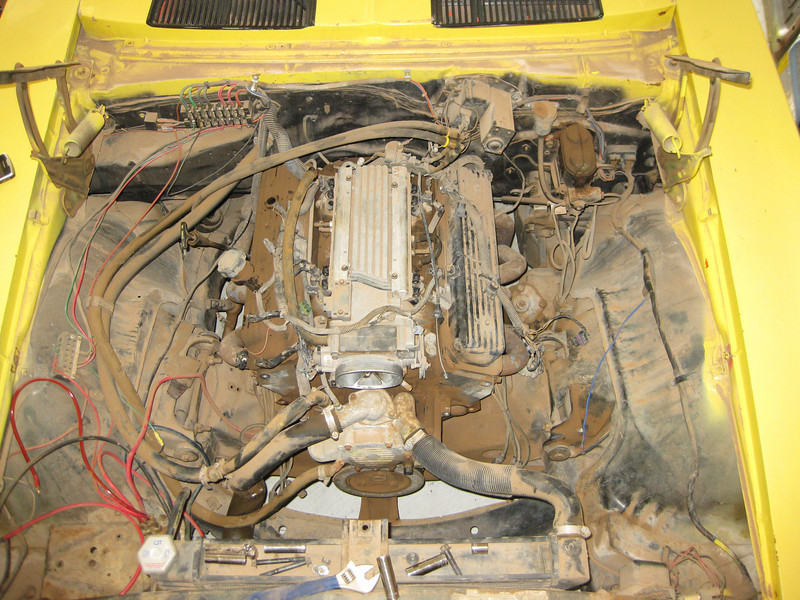
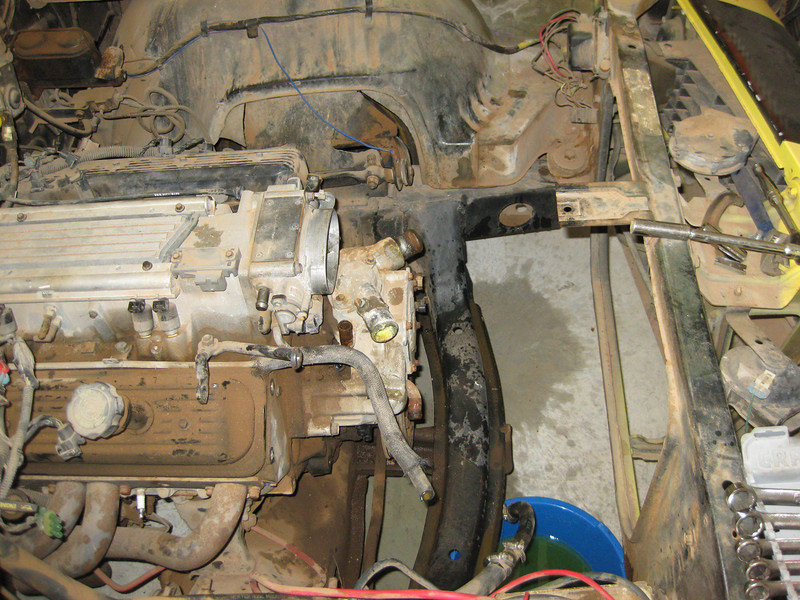
Started prepping to remove the 94 Z28 LT1/T56 setup. Motor has a new owner waiting for it, and the transmission is being sold to a co-working for swap into his 70 Chevelle SS.
Coming soon, I'll be removing the 10 year old MAACO paint job for something a little nicer. Car will be returned to Hugger Orange and plan to have the body completely refinished and all rust removed.
Also soon to come, picking up a 6.0L iron block later this week for a 408 build w/ L92 heads. Will be setting it up to be decent NA motor but plans to add boost in the future. Also may pick up a 12 bolt factory 69 rearend to build for this car to replace the 8.2" 10 bolt factory limited slip rearend. Already picked up a LS type T56 that has been rebuilt and comes with a Spec clutch (may/may not use, undecided).
Ultimately I would like this car to have full aftermarket suspension (ie front clip, 4 link, etc). For now I'm going to focus on getting the body work done, maybe get it mini-tubbed in the process, and get it running. I'll do suspension after it's running/driving. Easy enough to do and will let me enjoy the car about a year sooner for a while as I save up for the suspension.
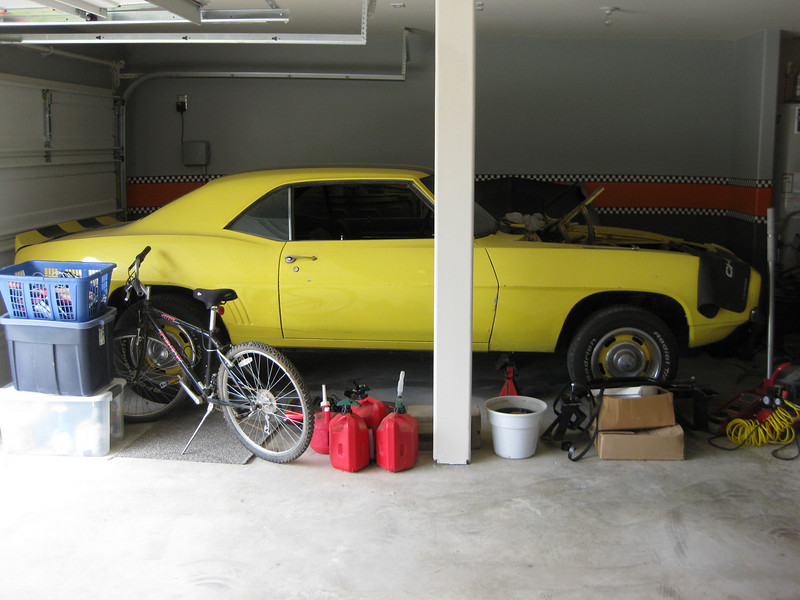
Now on to the pics! Not much done today but car is still kinda cramped in the garage (working on making more room to work as well!)
In the garage with the 2010 SS:
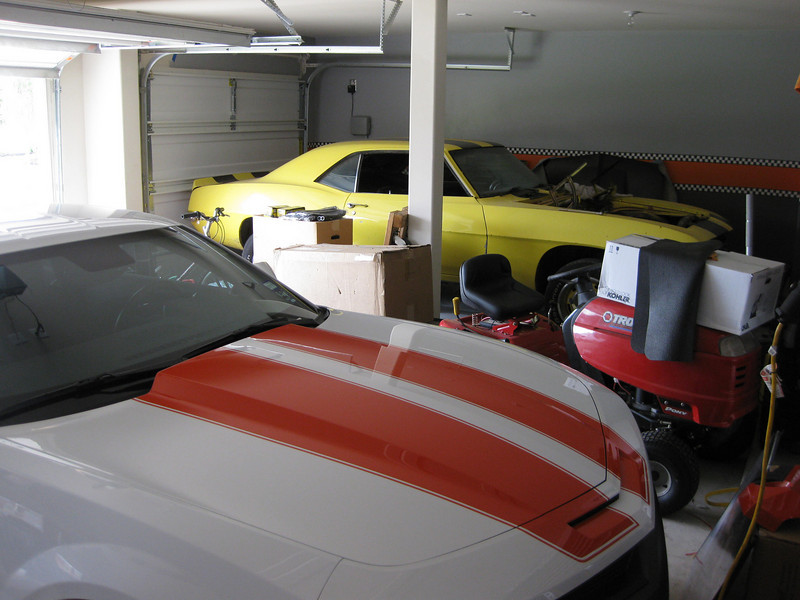
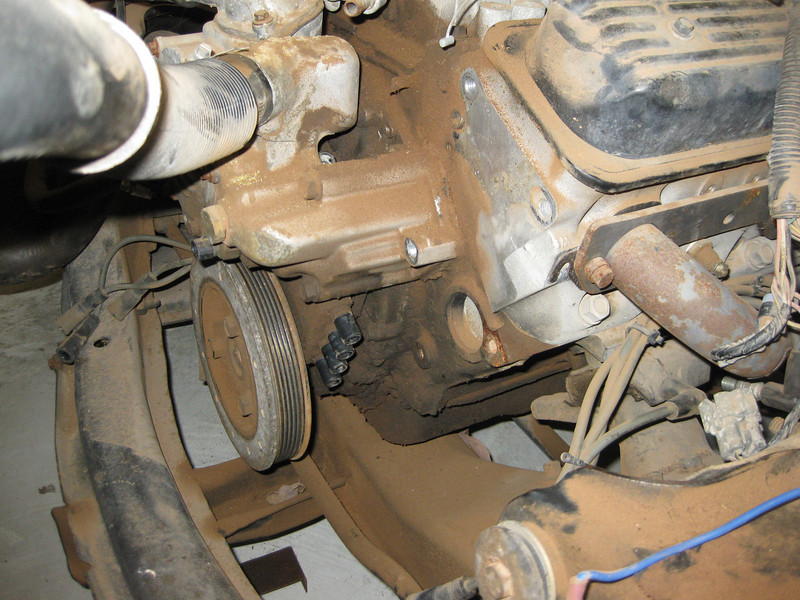
Filthy LT1 setup (car has been parked for 5-6 years, most of which outside in west Texas):
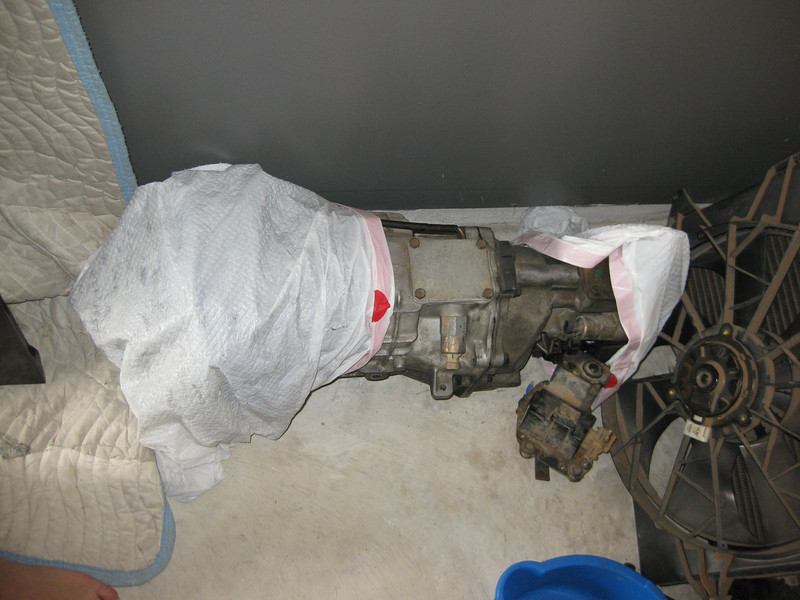
Few pics of the new parts I have for the car (T56, clutch, hood)

-
03-11-2011 #2
Registered User
- Join Date
- Aug 2004
- Location
- Spring, TX
- Posts
- 222
9-8-2010:
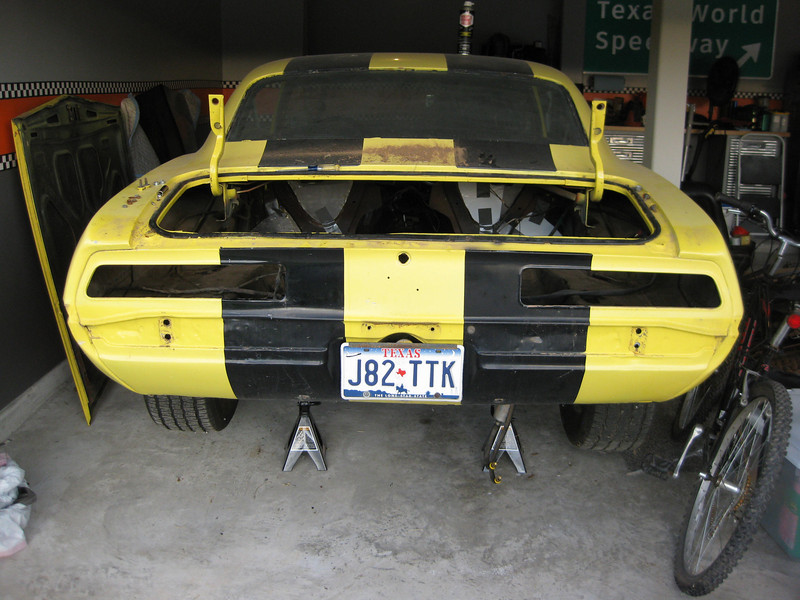
Here are some misc pictures of the car showing the body damage and rust I'll be contesting!
Passenger Rear quarter panel:
Driver Rear quarter panel:
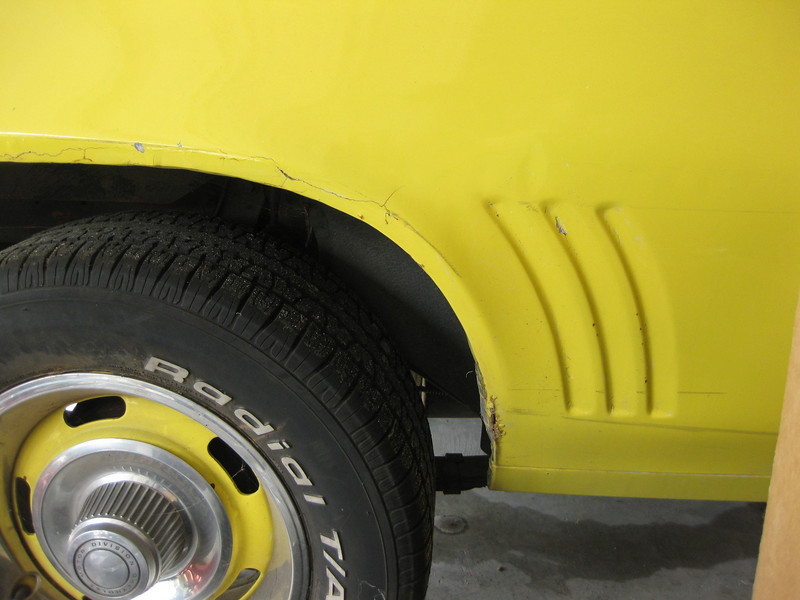
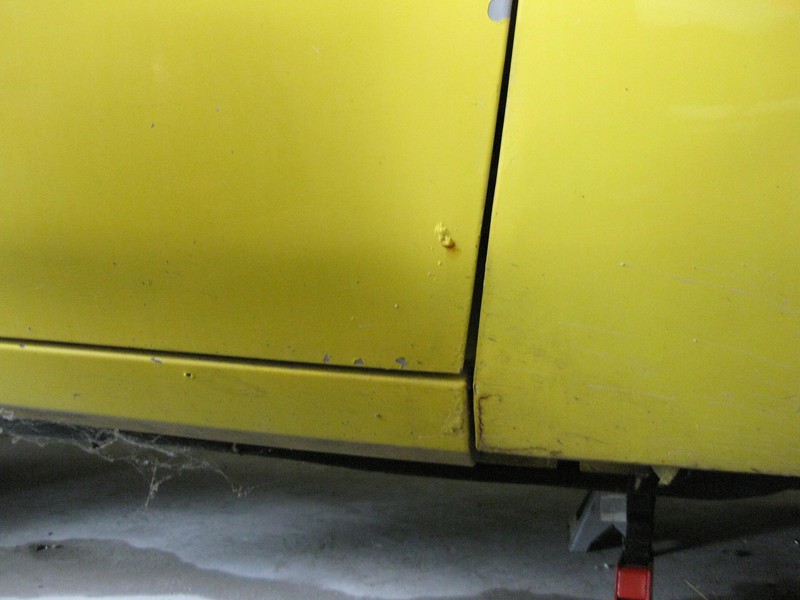
Driver front fender/door:
Passenger front fender/door:
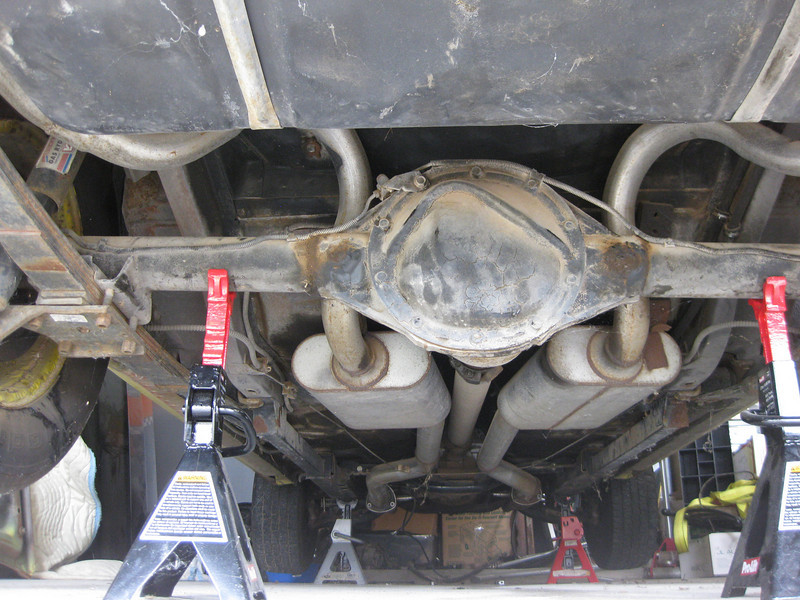
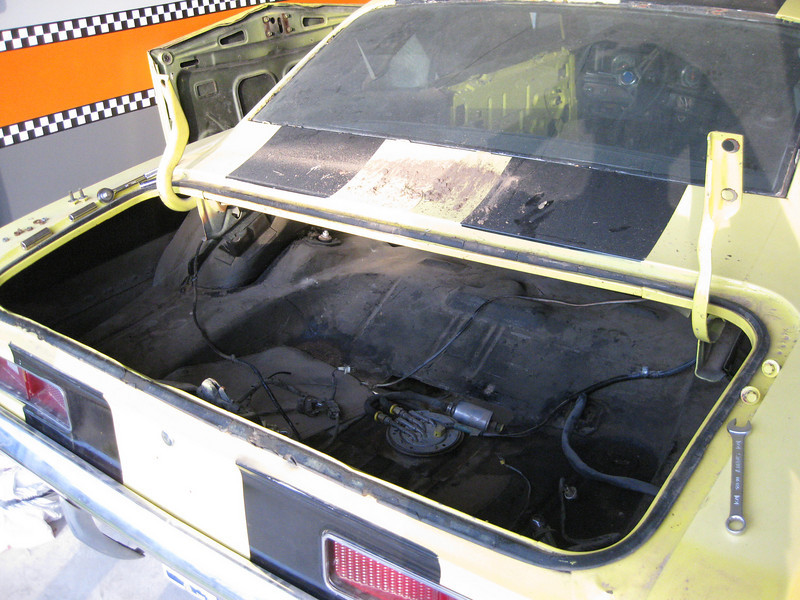
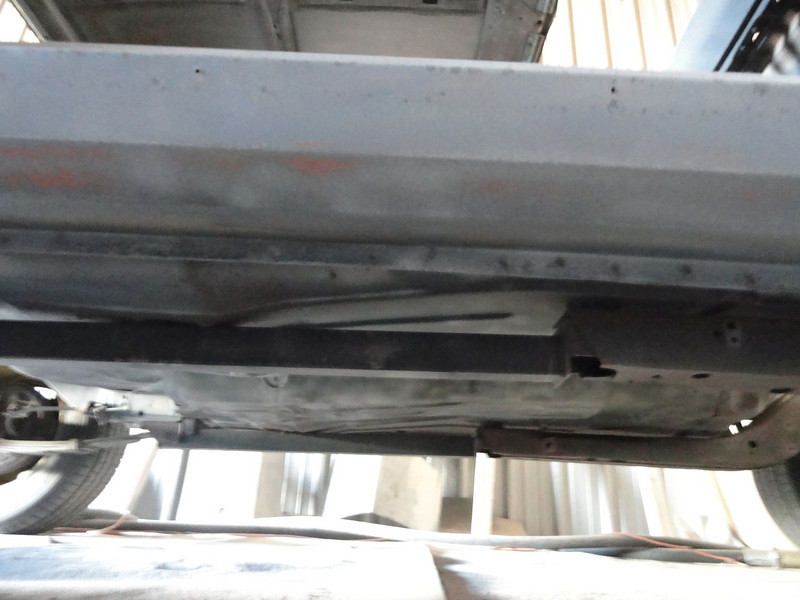
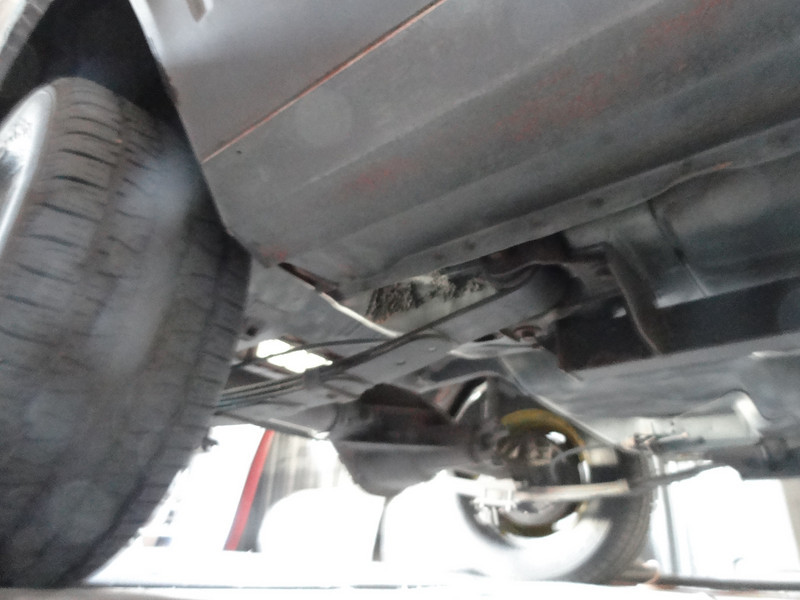
Rearend/Exhaust:
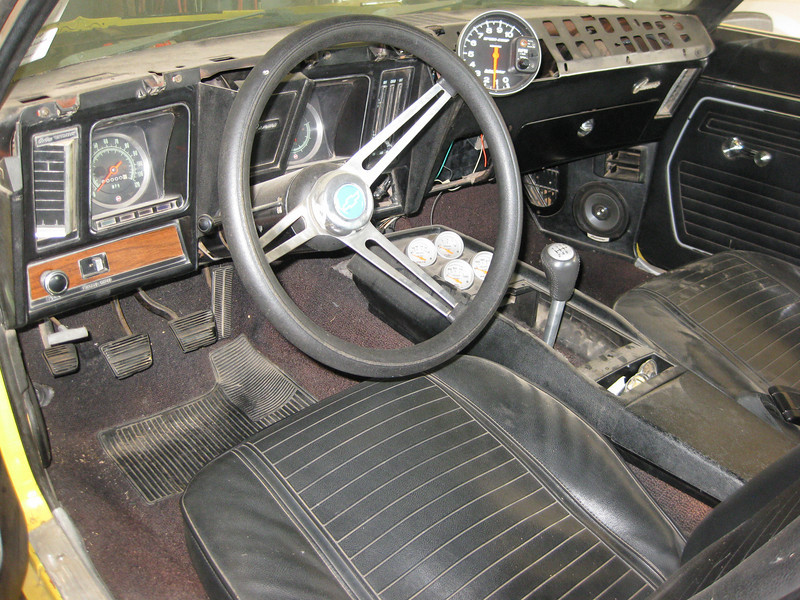
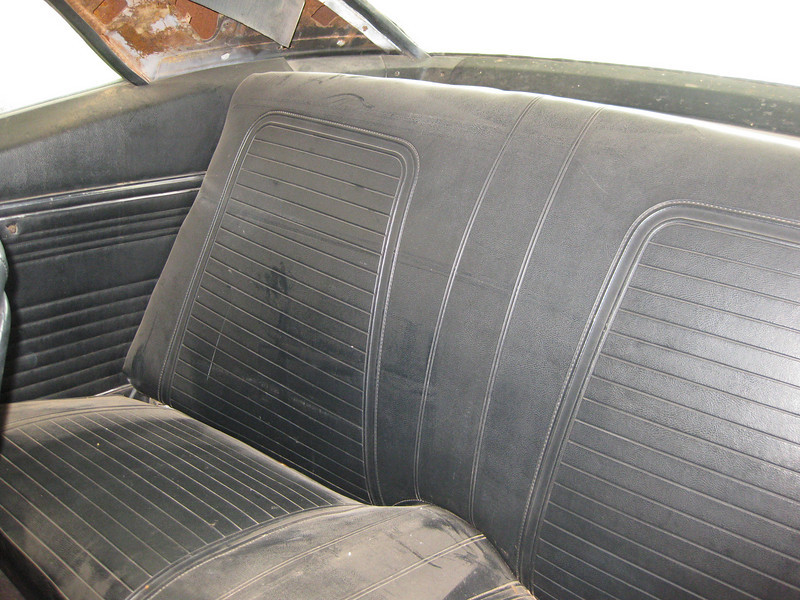
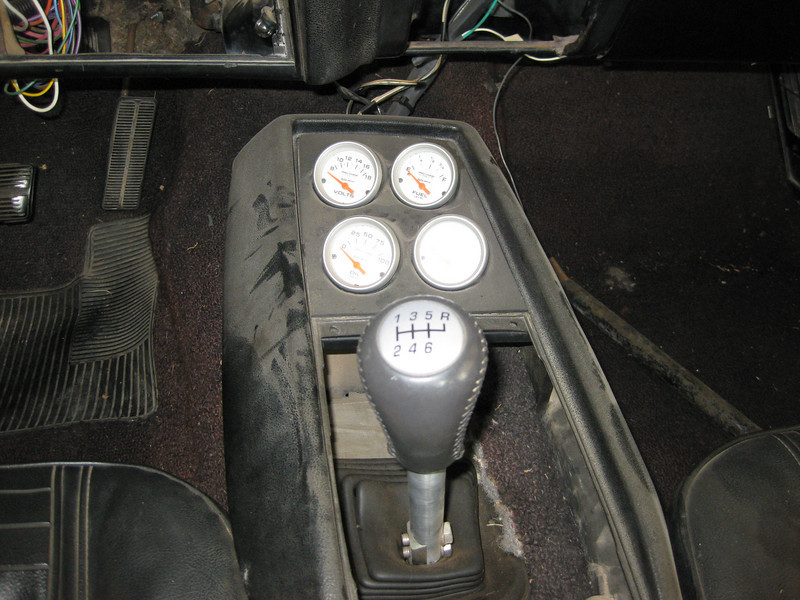
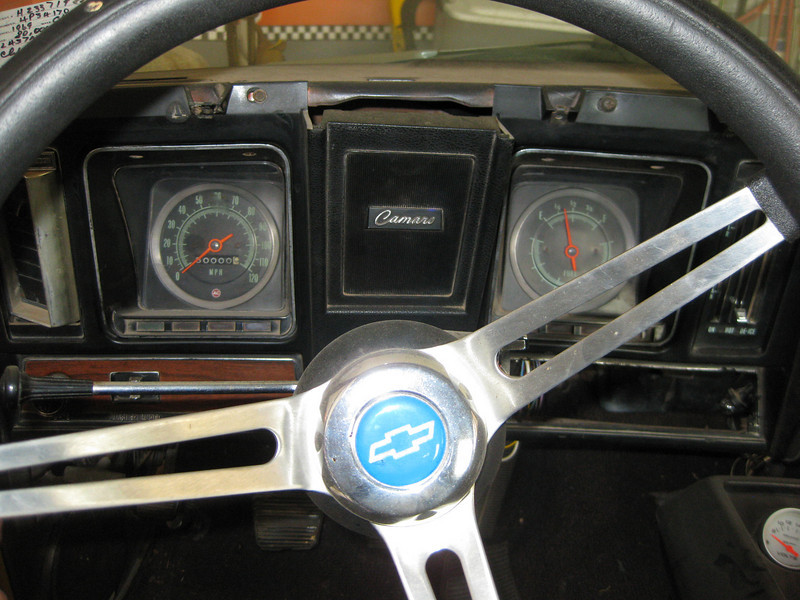
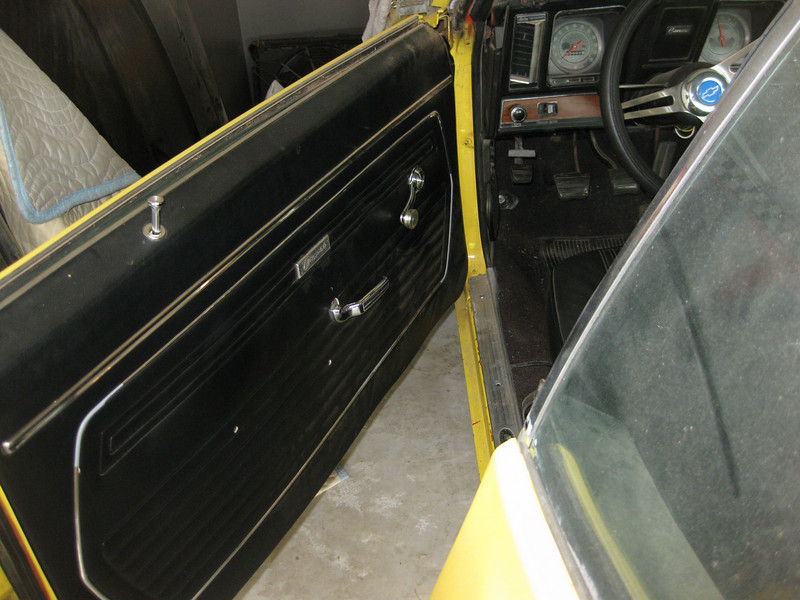
Interior:
I will be updating this. Don't expect final results for quite some time but hope to use this thread for motivation/incentive to put the work in. Hoping to have the engine/trans out by the weekend and then I'll see if I'm going to strip it in the garage or have it media blasted/stripped by a shop.
William
03-11-2011 #3
Registered User
- Join Date
- Aug 2004
- Location
- Spring, TX
- Posts
- 222
9-9-2010:
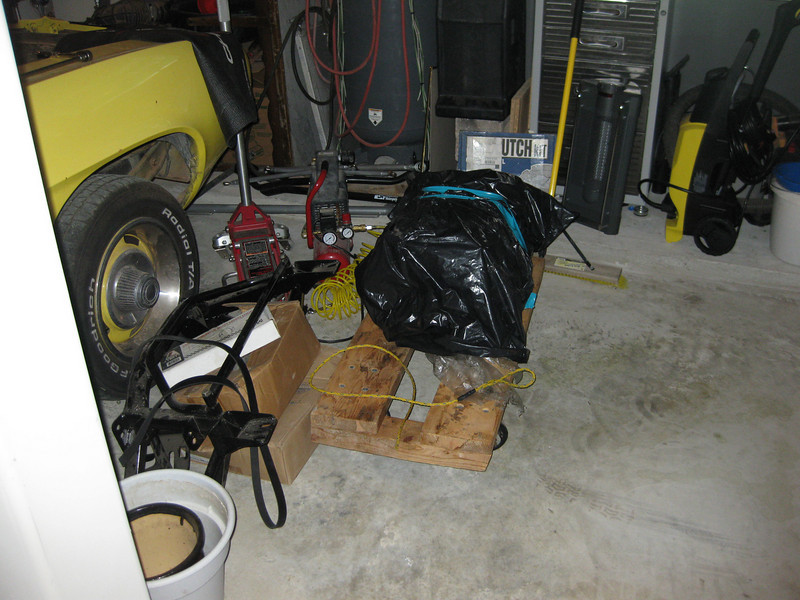
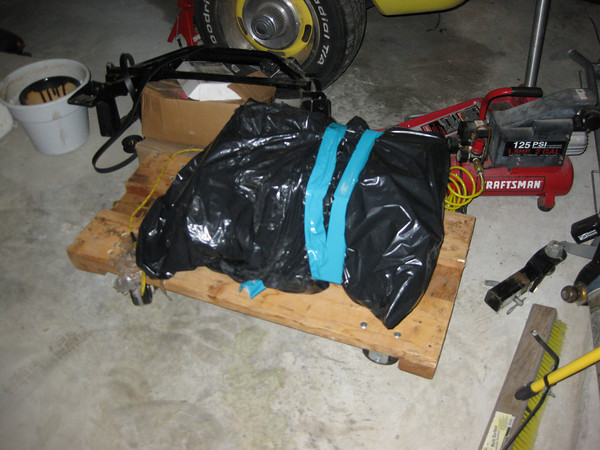
Mainly all I did today since engine/trans is about ready to be pulled is I reorganized the garage to make more room. Still have a few things to move around but there is plenty of space now compared to what there was.

Sorry it's still in the bag, I'll pull it out tomorrow for better pics. Picked up the 6.0L iron block machined to be a 408. Took a set of calipers with me and all appears to be good. I'll naturally have it checked out by a machinist to ensure all is ok. HKE did the work so I'll probably take it back there.
03-11-2011 #4
Registered User
- Join Date
- Aug 2004
- Location
- Spring, TX
- Posts
- 222
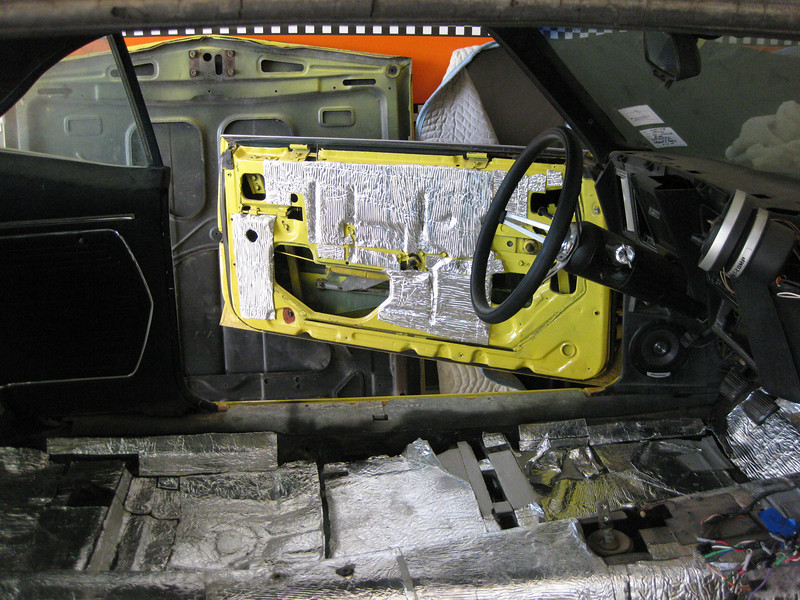
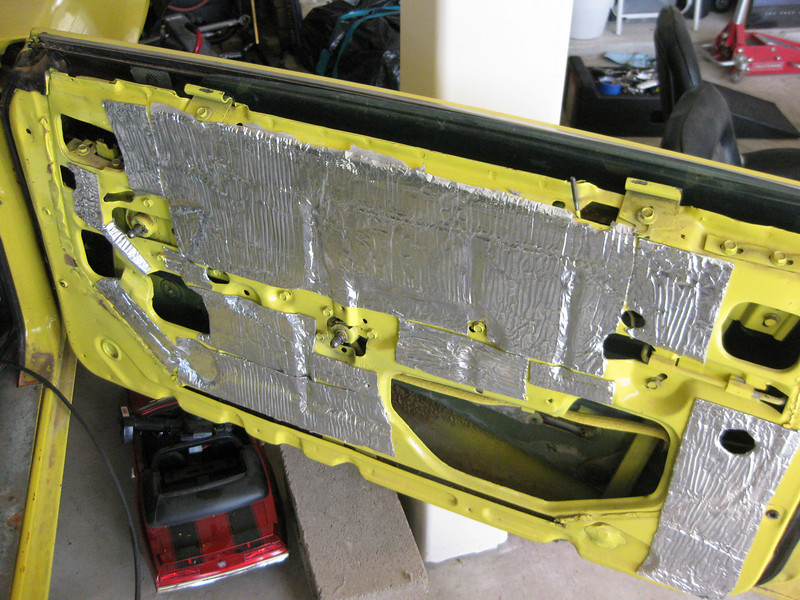
9-10-2010:
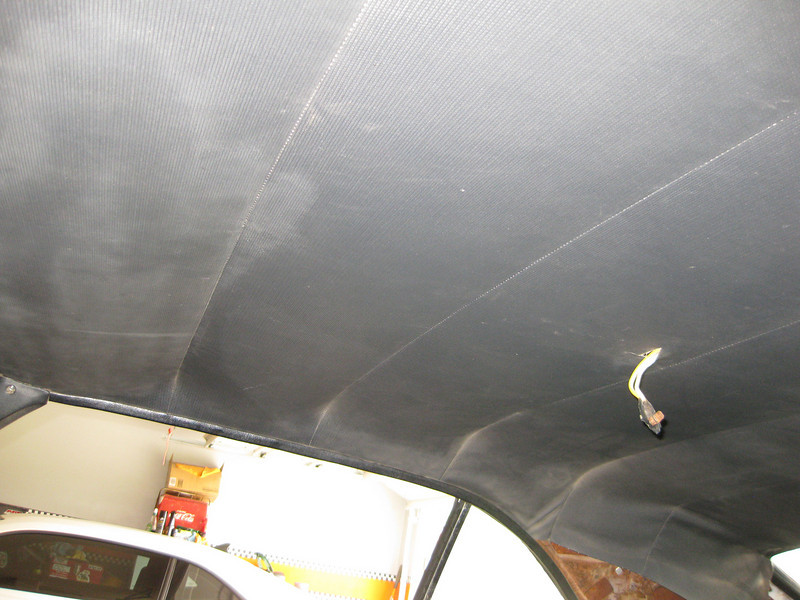
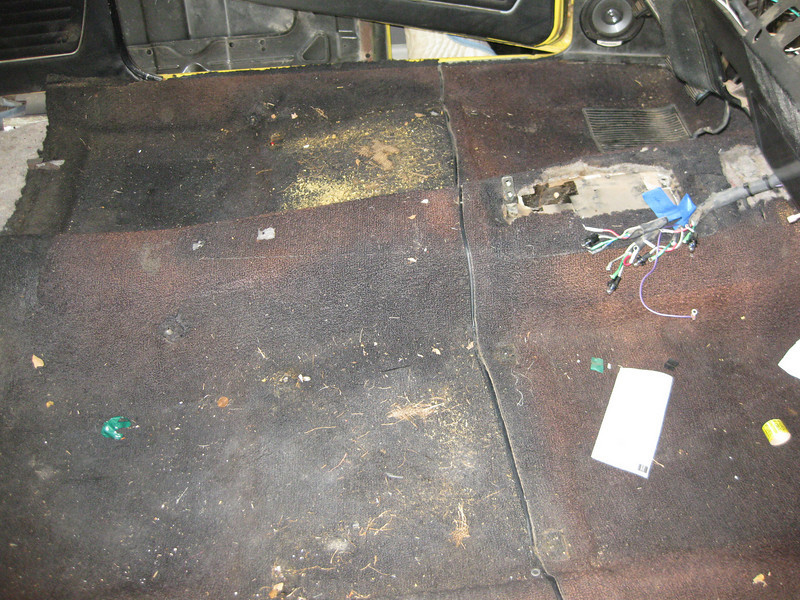
Interior has been stripped and I started removing the guages before I started running out of light and time before dinner. I forgot the extent I went to when I did it the first time to make it quiet inside.
Pics:
Interior as was when I started
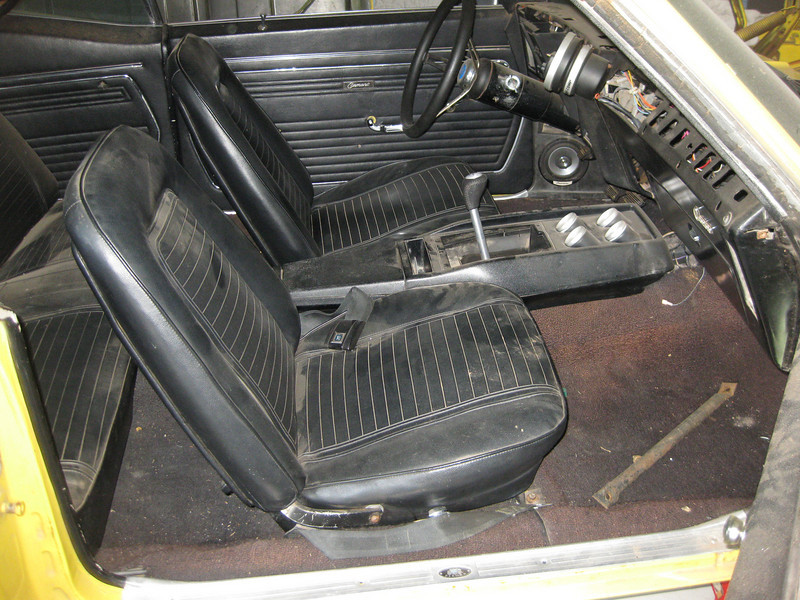
Seats pulled up. Carpet sunfaded red. Threw it away for new stuff.
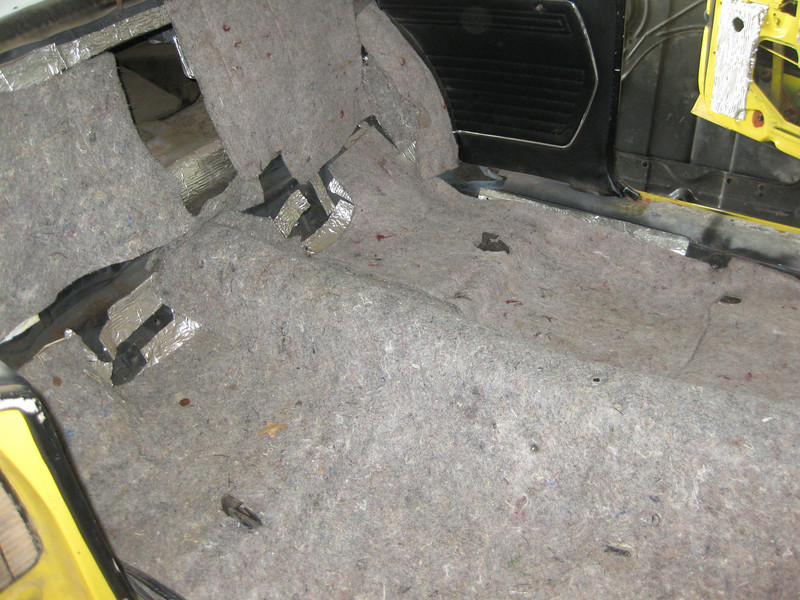
Forgot I put down a 3/4" layer of "jute" under the carpet to sound deadening. I didn't remember doing this until I saw it LOL

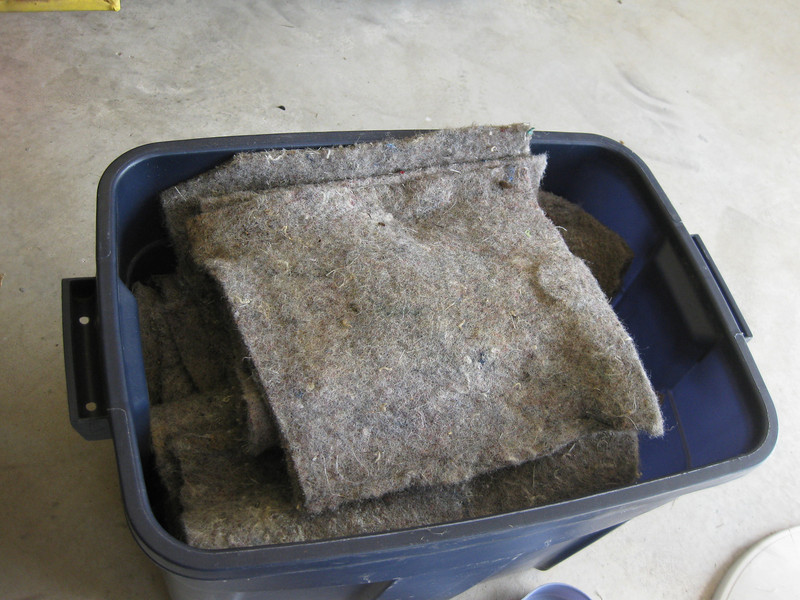
This is how much of that stuff there was...Probably about 15-20lbs worth, maybe more but I dont have a scale.
Under that there was a thin layer of thermal insulation (water heater stuff). Not the best but on a college kid buget it wasn't bad. I had this stuff EVERYWHERE!
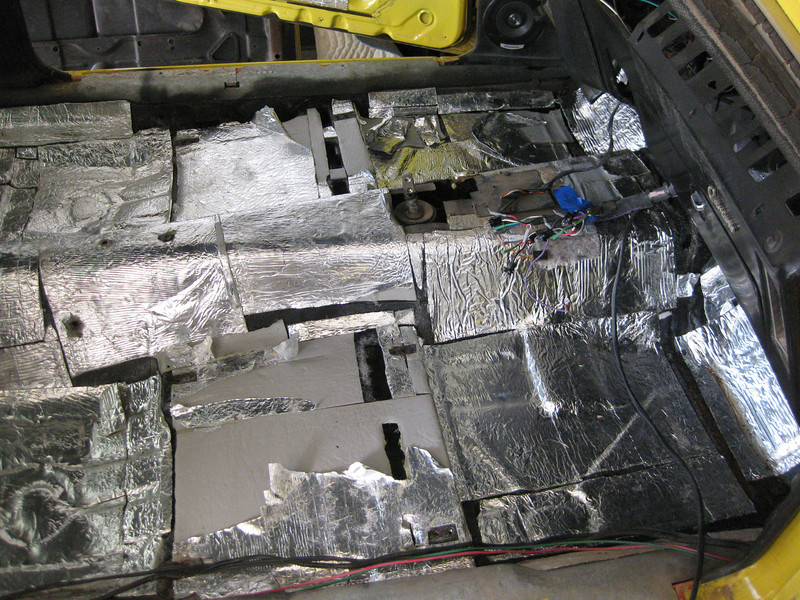
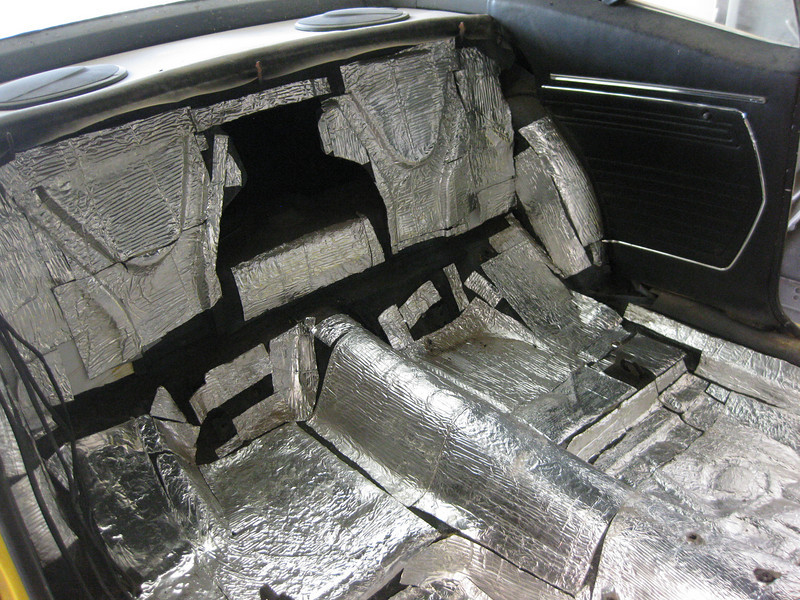
All of that was removed as well. There is residue left but it's not too bad.
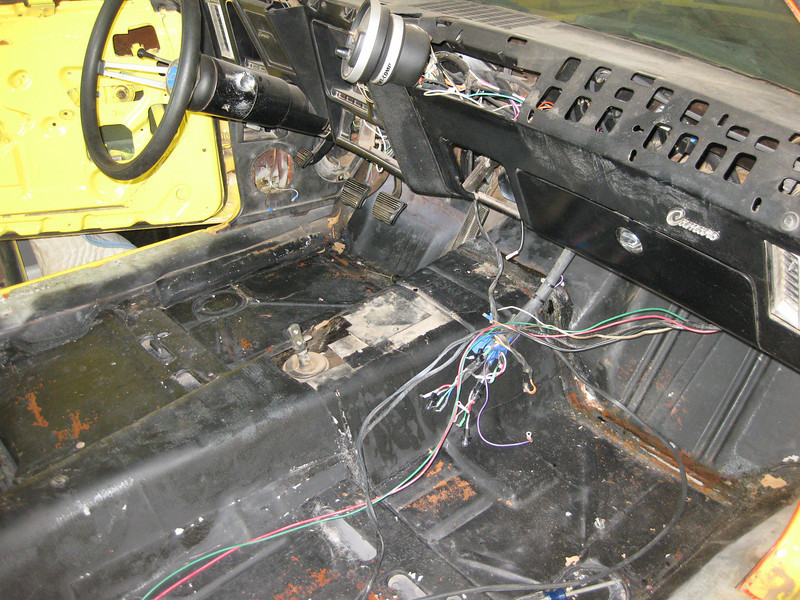
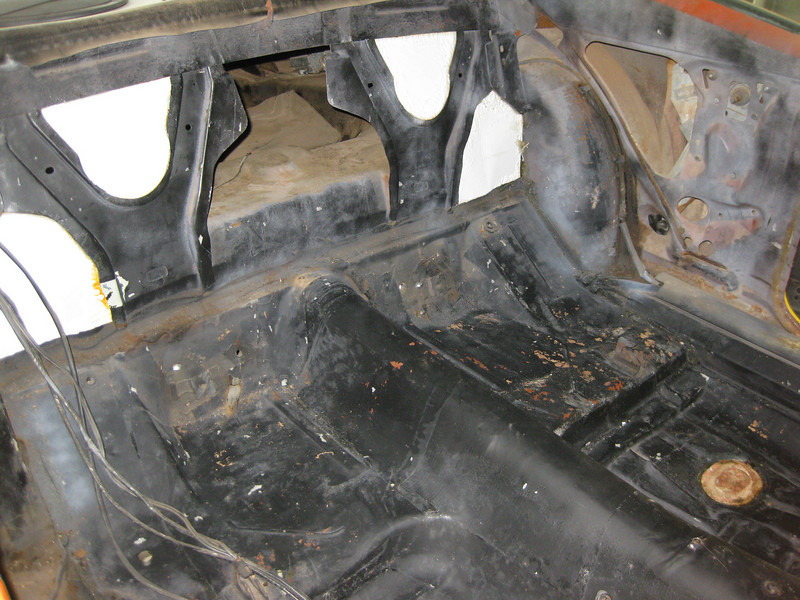
Quick pic of how I left it today.

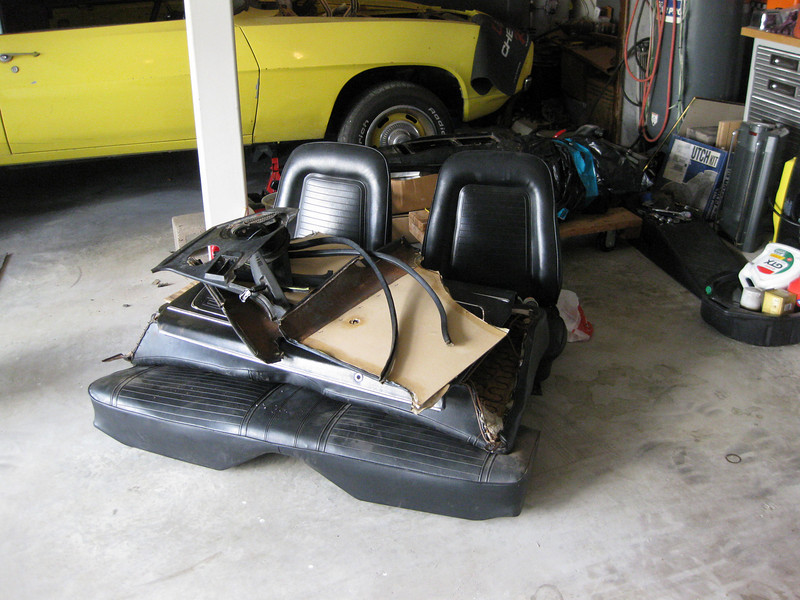
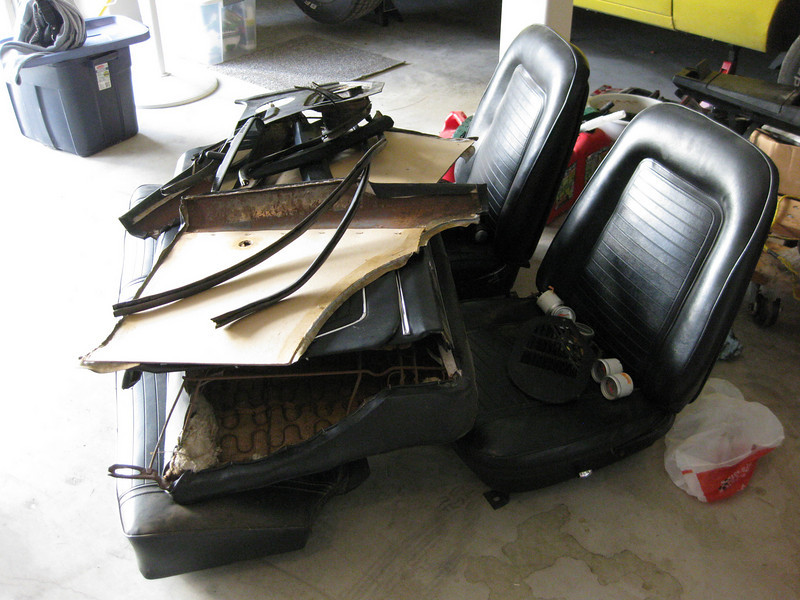
Here is the pile of parts that were removed. Carpet not shown as it was in the trash with the insulation.
I'll have more pics tomorrow when the engine gets pulled.
William
03-11-2011 #5
Registered User
- Join Date
- Aug 2004
- Location
- Spring, TX
- Posts
- 222
9-11-2010:
Went to Super Chevy at HRP and walked around/checked out the nice cars in the area. Swap meet brought me to the Camaro Country guys. Talked to them a bit and I think I'm going to take the car down there to get blasted. Also may have them do the quarters on the car. I'll check out their place when they blast it and maybe ask for some references to discuss with customers.
We got back from Super Chevy and decided to tear into the 69 even further. Burgers and beer later we got a good bit accomplished!
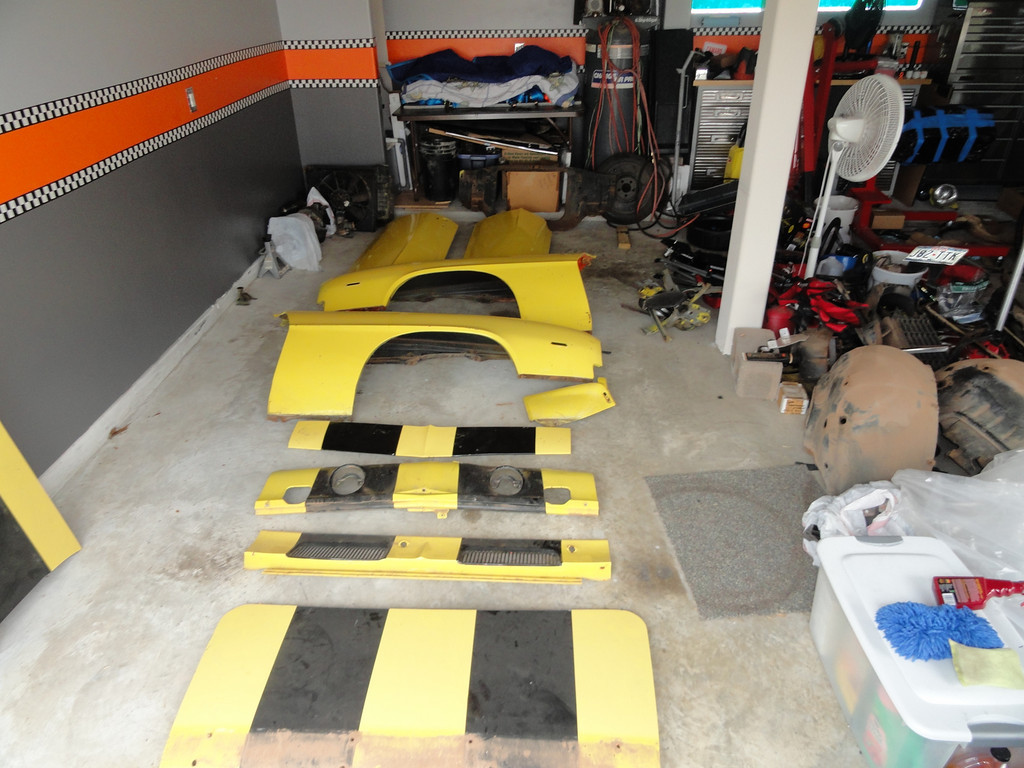
Front end coming apart. Grille removed, bumper removed and lower valence coming off.
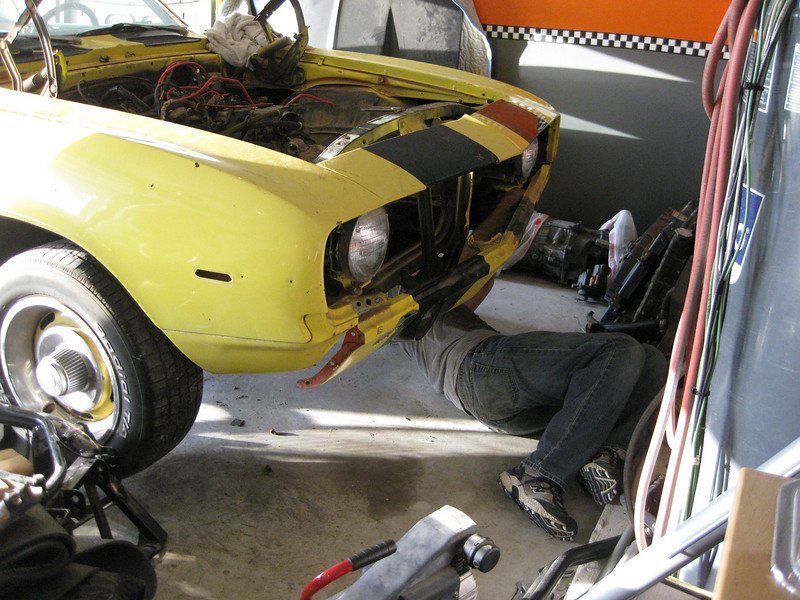
Trunk and spoiler removed.
Bumper/lights removed.
Engine is coming out!
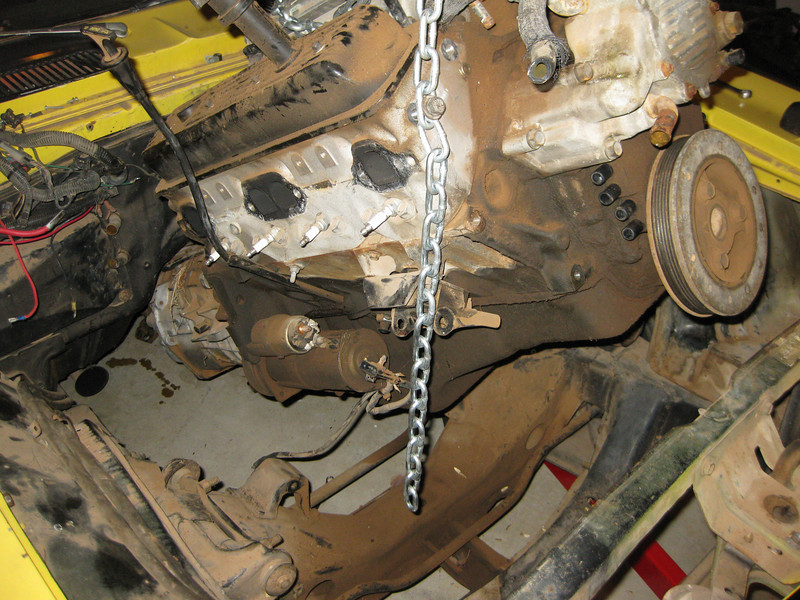
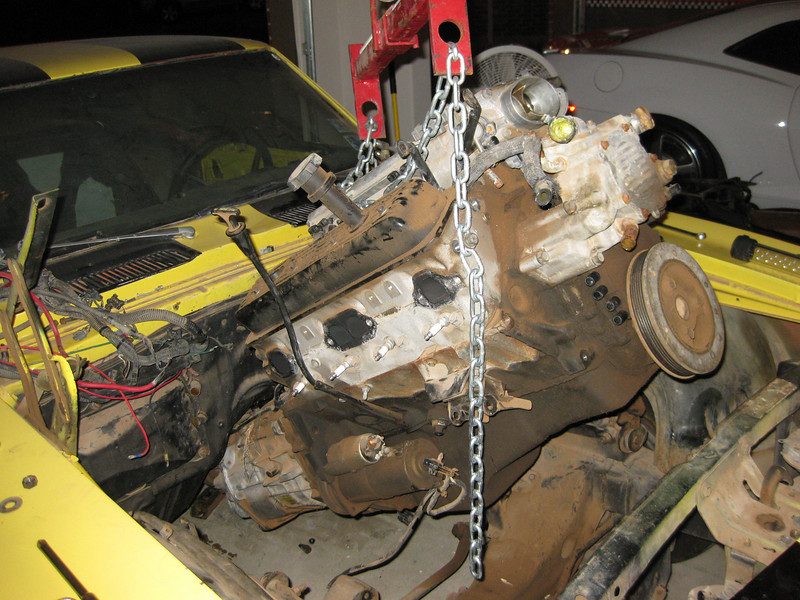
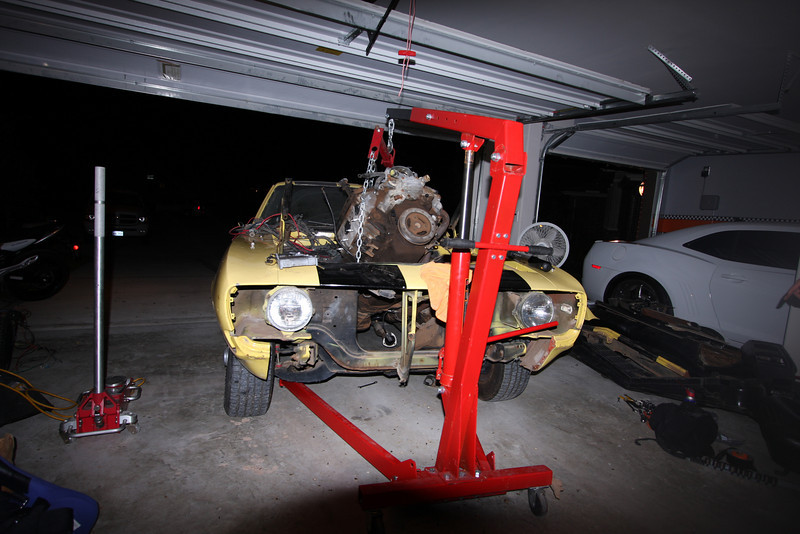
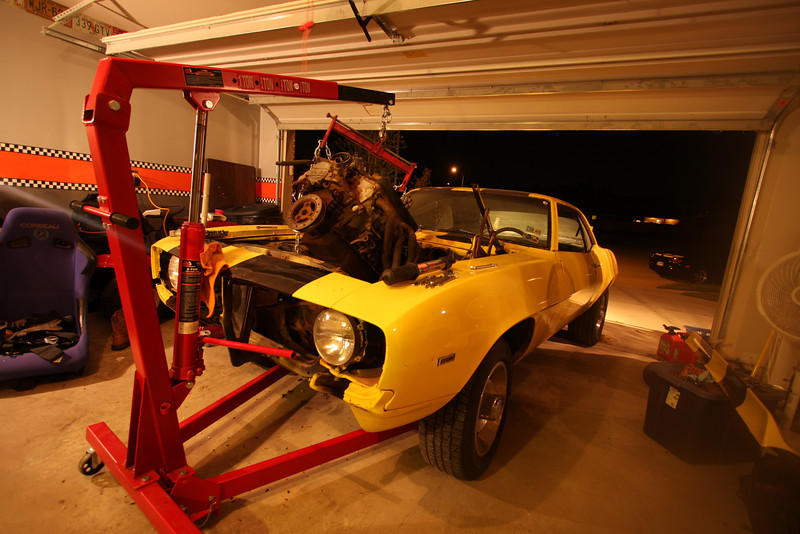
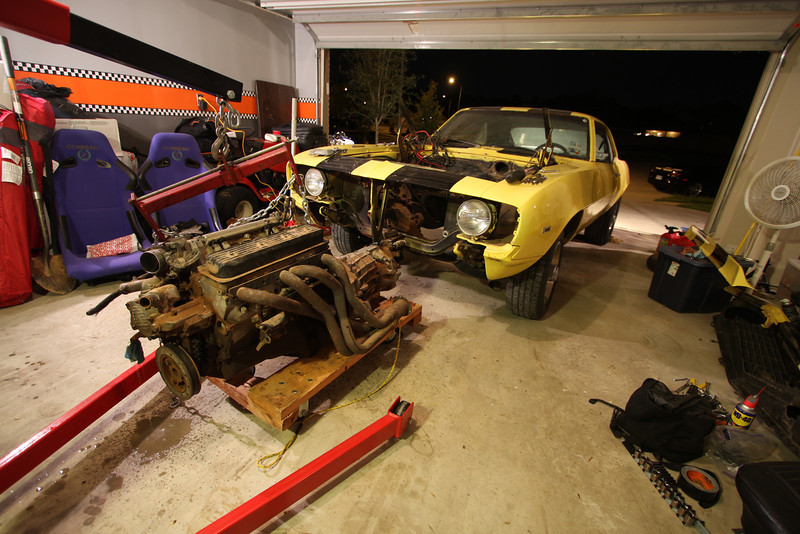
That's all we got done today. Was a FULL day. Tomorrow I got chores/etc to do, will try to clean up the garage and put the tools up that we used. Trans will get pulled off as it's sold, engine will get loaded up as it's sold as well. Going to keep taking panels off and then throw it all on a trailer/bed of the truck and take it to get it blasted.
William
03-11-2011 #6
Registered User
- Join Date
- Aug 2004
- Location
- Spring, TX
- Posts
- 222
At this point I hit a stopping point. Work picked up and occupied all my time as it tends to do. Had to take a break from the car and focus on life for a bit. Ended up leaving my current employer and waiting to start with my new. That means I had about 3 weeks vacation!!! So on to more updates!
2-21-2011:
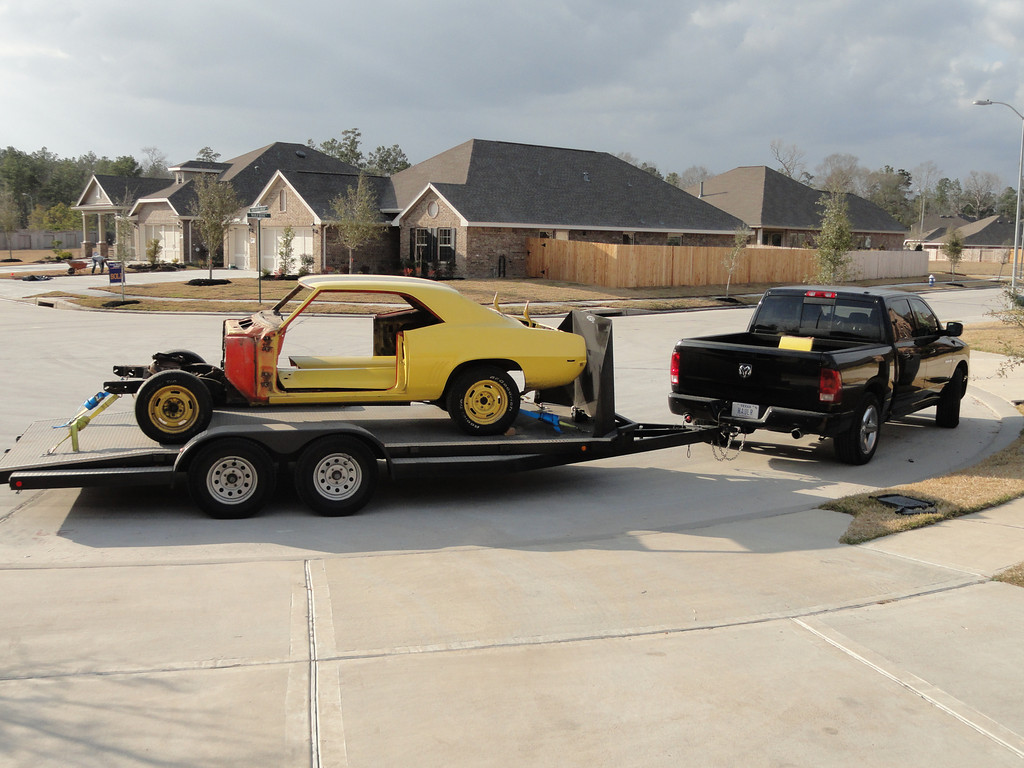
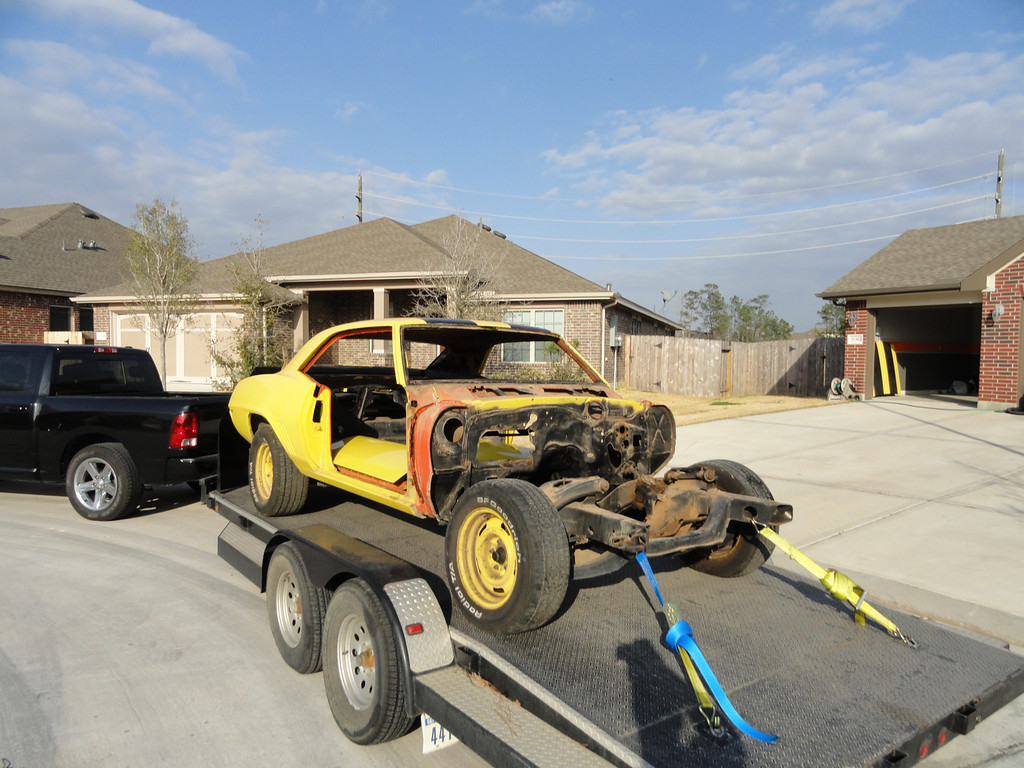
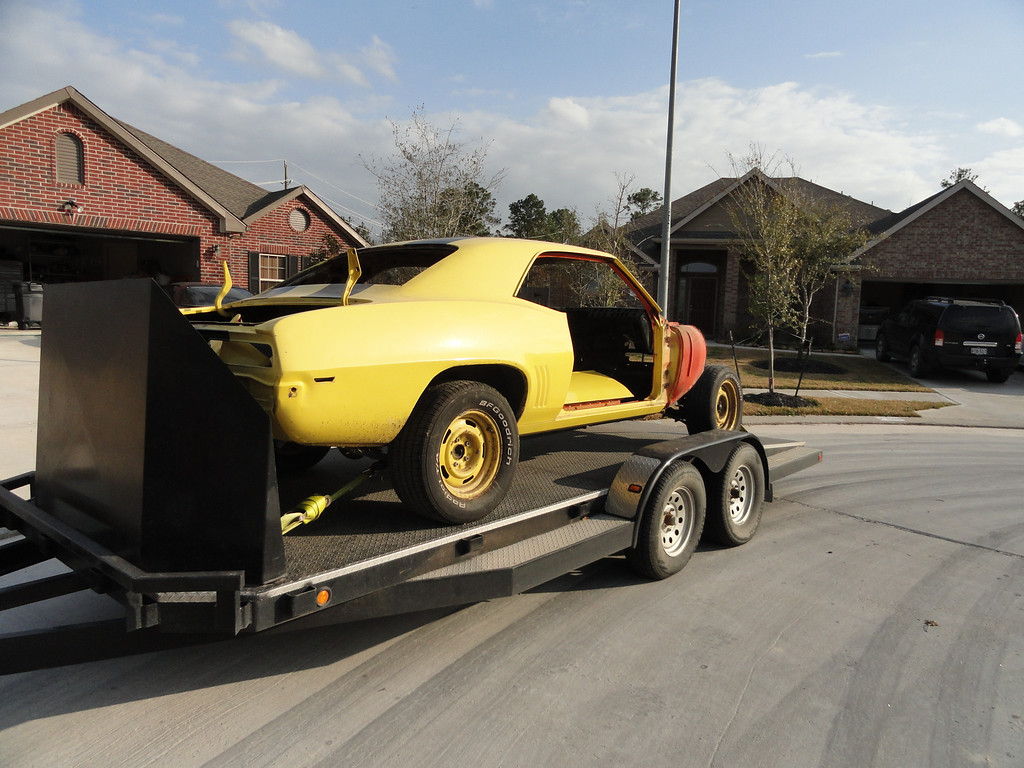
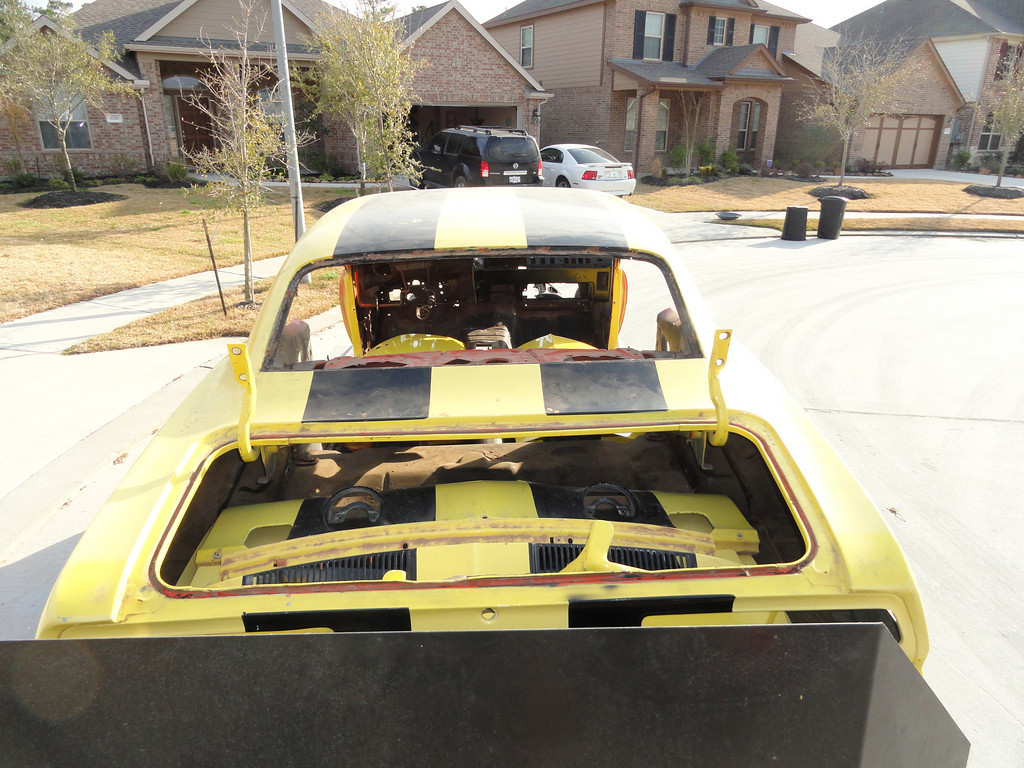
Didn't get the car to the blasting place today. Had to remove the exhaust, doors and get it on the trailer still. Got that all finished up today so it'll be dropped off first thing in the morning.
Friend of mine that has built a few of these already said it looks like a pretty solid car to start with. Quarter panels we know need work but pillars/pans/rockers/cowl, all look good. Rear window channel has a little damage but all will be replaced with the new quarter panel. We'll see if we still feel the same after the blast work.
Pics:
More pics to come when the paint/bondo is off the car!
William
03-11-2011 #7
Registered User
- Join Date
- Aug 2004
- Location
- Spring, TX
- Posts
- 222
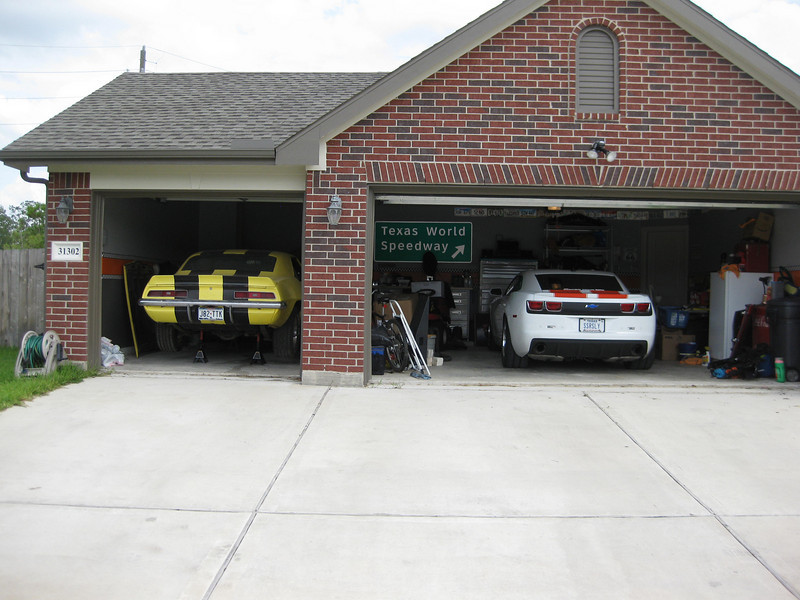
So the camaro was gone, and I was bored...What to do...UPDATE THE GARAGE!!!
2-28-2011:
Sorry for the messy pics and plan to get better pics. Started to clean up camaro stuff and it got dark and it hit me...Garage needs more light!!!
Before:
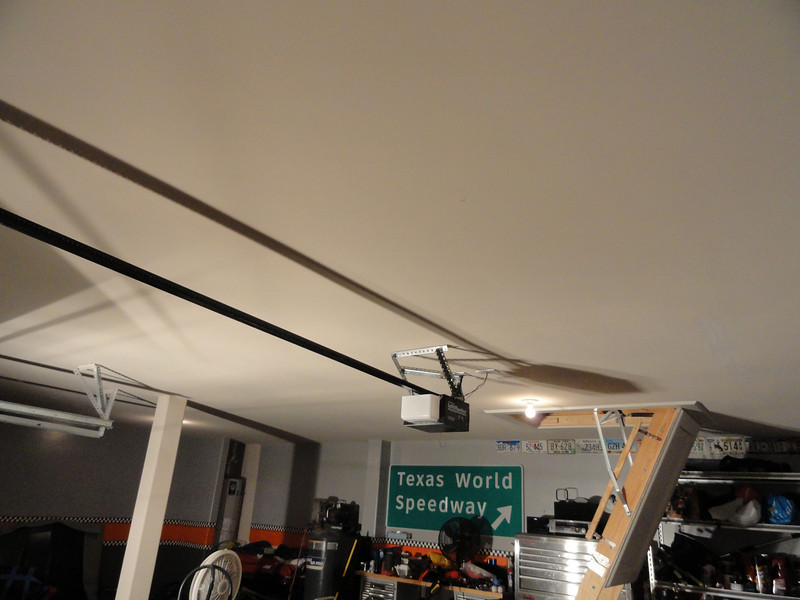

As you can see it was dark at best with the 2 incandescent bulbs. I have 2 drop lights and some halogens on a stand (cheapies from Northern Tool). Not NEARLY enough light for a working space for the car hobby!
The lights to be installed:
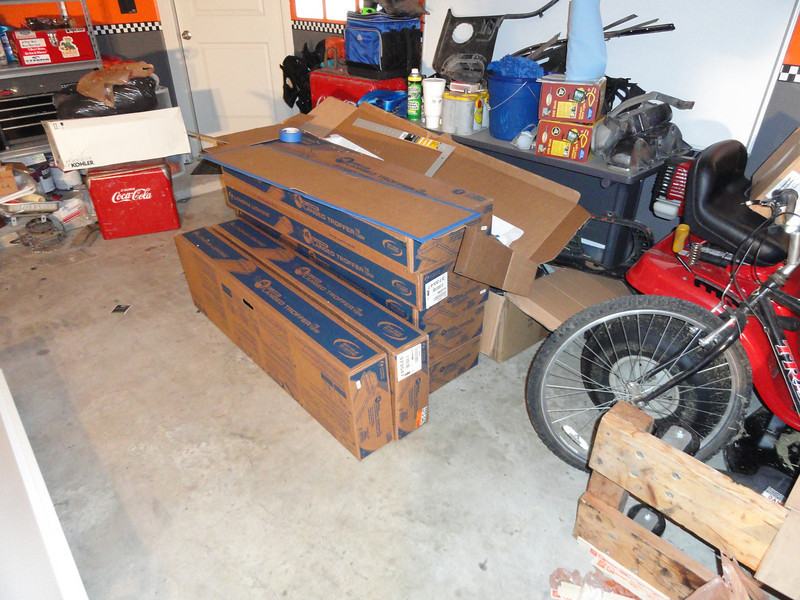
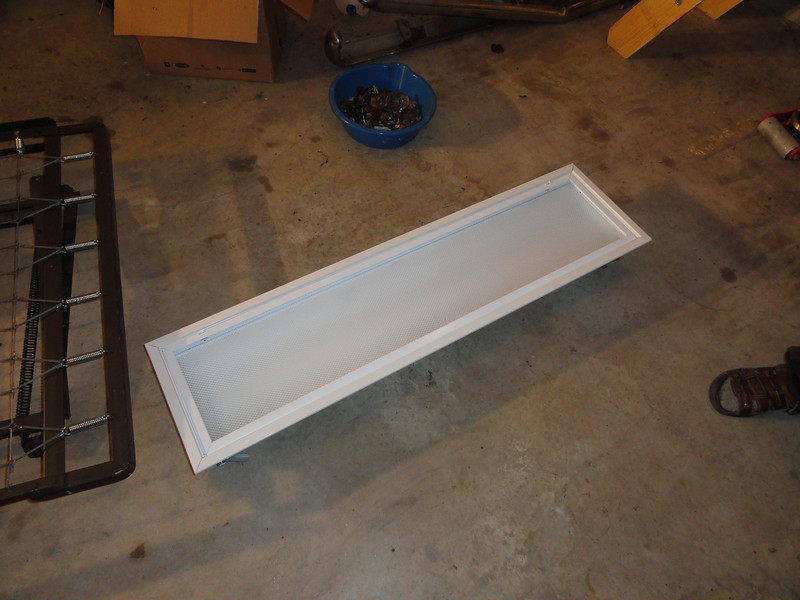
Lights are 1ft x 4ft fluorescent recessed fixtures each with 2 - T8 6500k bulbs. I picked up 9 of these lights, 3 for each car bay! Ended up spending quite a bit of cash on lighting and got to learn a lot about working with sheetrock and mounting for these guys. I think the results however are well worth the hassle (2 solid days in the garage hanging lights).
After:


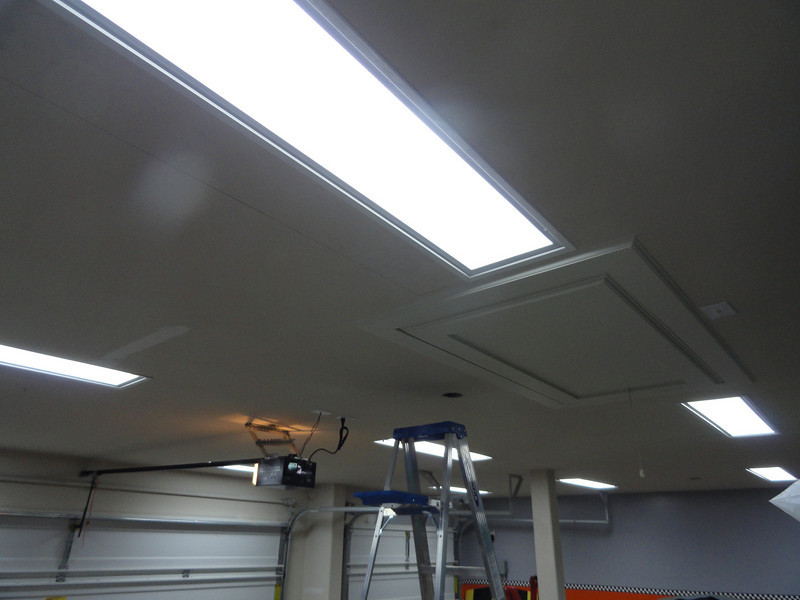
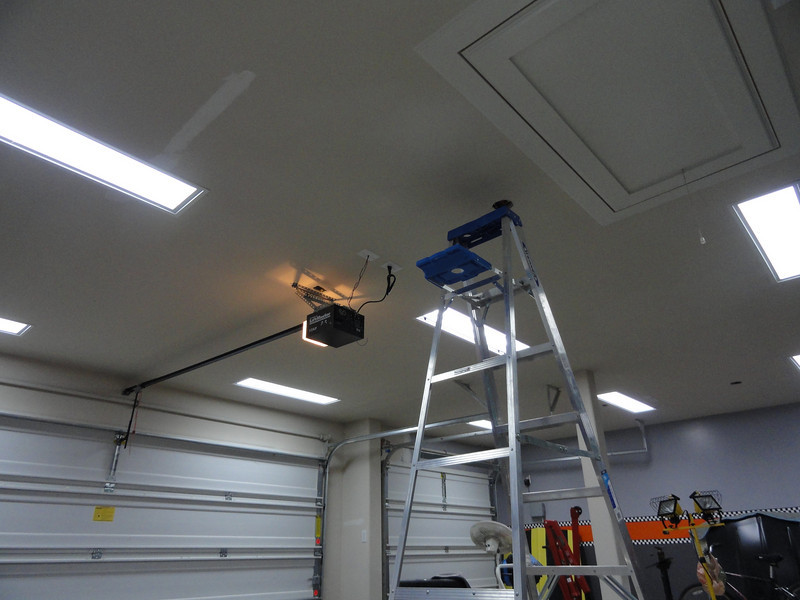
More pics to come when the garage is cleaned up a little more. It's VERY bright inside the garage. Back row of lights are on a separate switch so when it's daytime and the garage is open and the lights are blocked, they can be turned off. Front lights are far enough forward to light up the work bench and under the hood of the cars. Roof will be painted eventually, just not high on the priority.
William
03-11-2011 #8
Registered User
- Join Date
- Aug 2004
- Location
- Spring, TX
- Posts
- 222
3-1-2011:
Went to see the car at Enviro Cleaning today all blasted inside and out.
I'll put up some teasers before getting into any details.
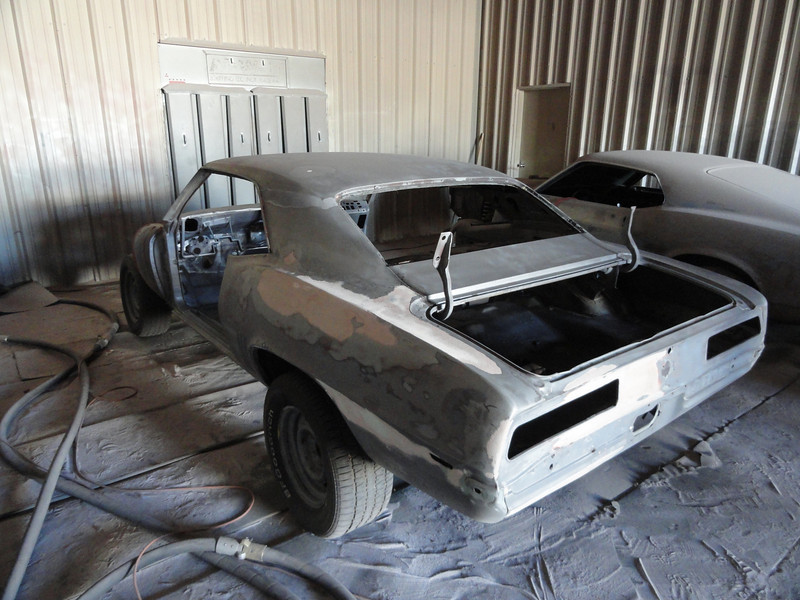
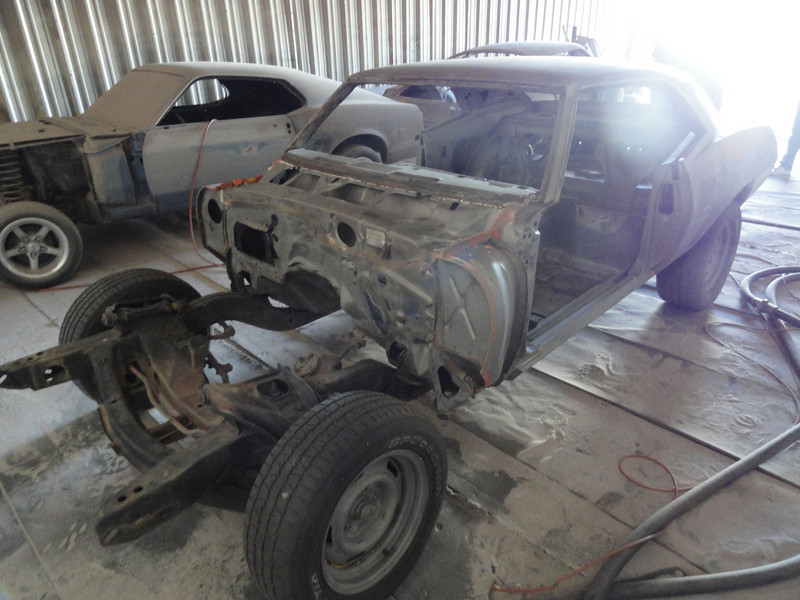
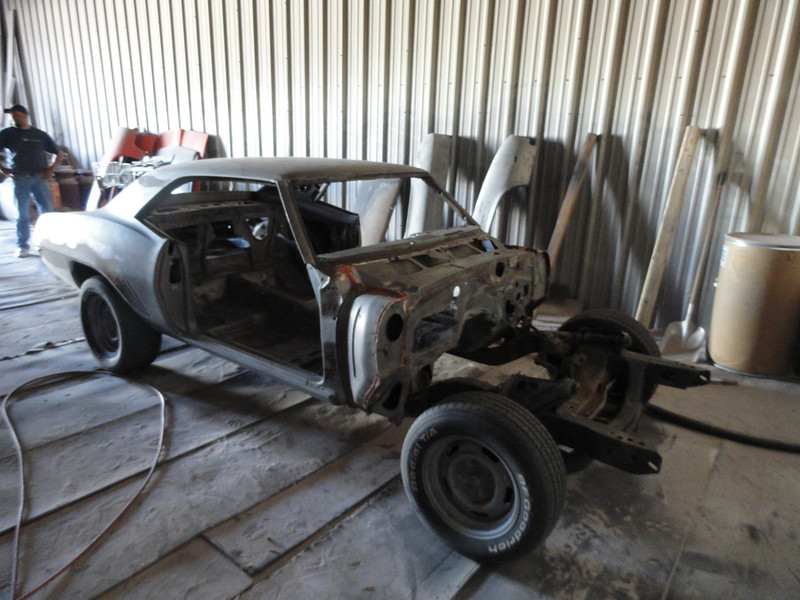
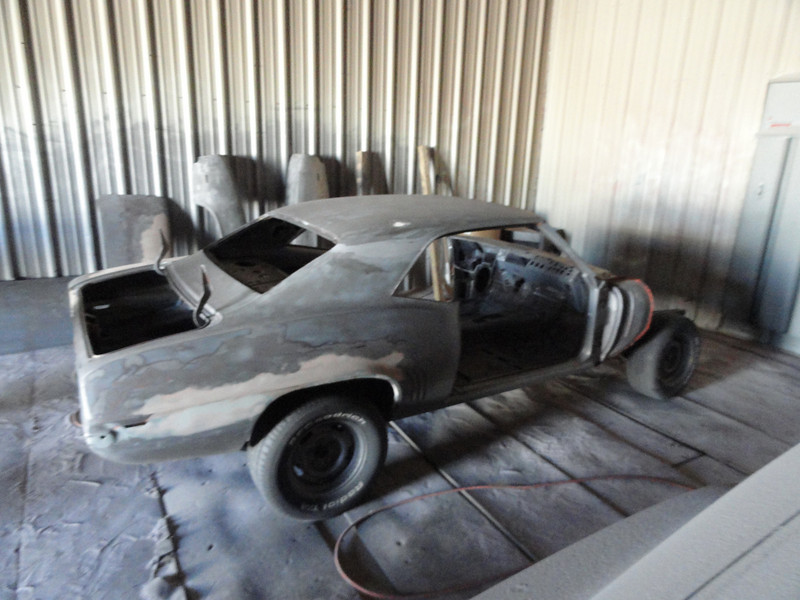
That's all for now. I can get into specifics later on areas of concern. Obviously you can tell (and as I suspected) quarter panels are "rough." Few surprises like small rust bubbles (common areas just didn't see it) in the roof cap on windshield channel, and down by the vin on the sealing surface of the front window. Both areas are very small but still should be address and patched at the very least. Bottoms of the front fenders need some patch work and the doors need some patch work. Trunk lid will need to be replaced.
William
03-11-2011 #9
Registered User
- Join Date
- Aug 2004
- Location
- Spring, TX
- Posts
- 222
3-4-2011:
Got a call around 10am saying the body of the car has been primed. They were working on fenders and small pieces. No call to pick it up yet so I'll plan on picking it up Monday. That's ok as I have some more work to do in the garage getting it ready for the car/project.
Here are a few detailed shots to hold you guys over until I get the primed pictures.
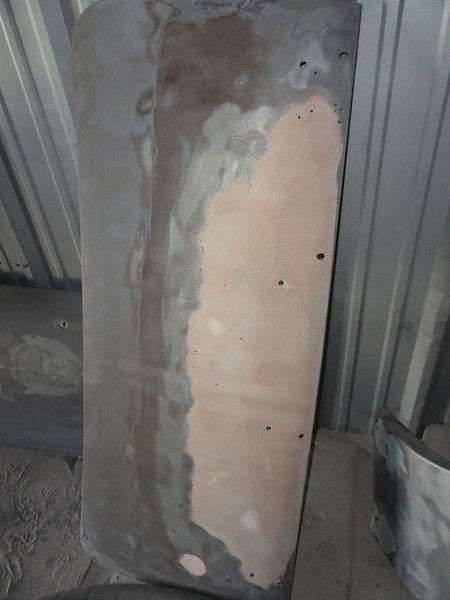
Tail Panel:
Showing most the bondo on panel.
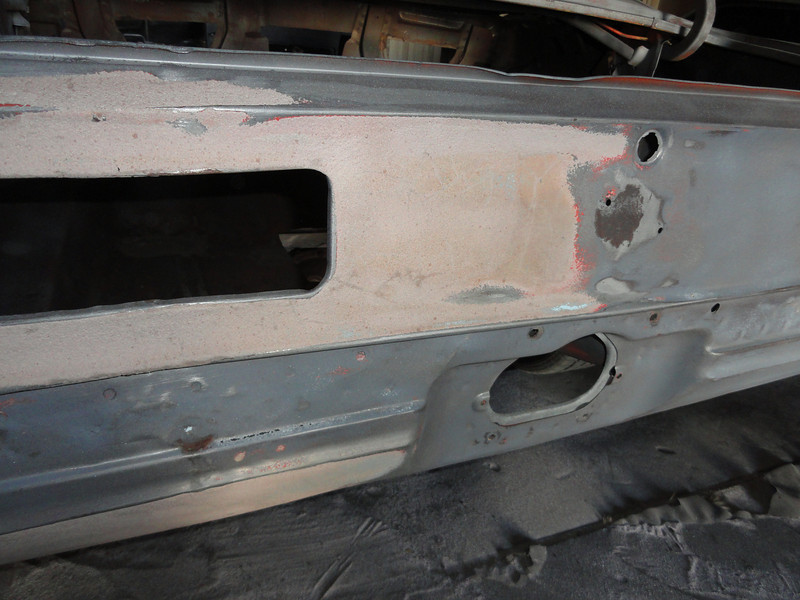
Small tear behind bumper and line of rust.
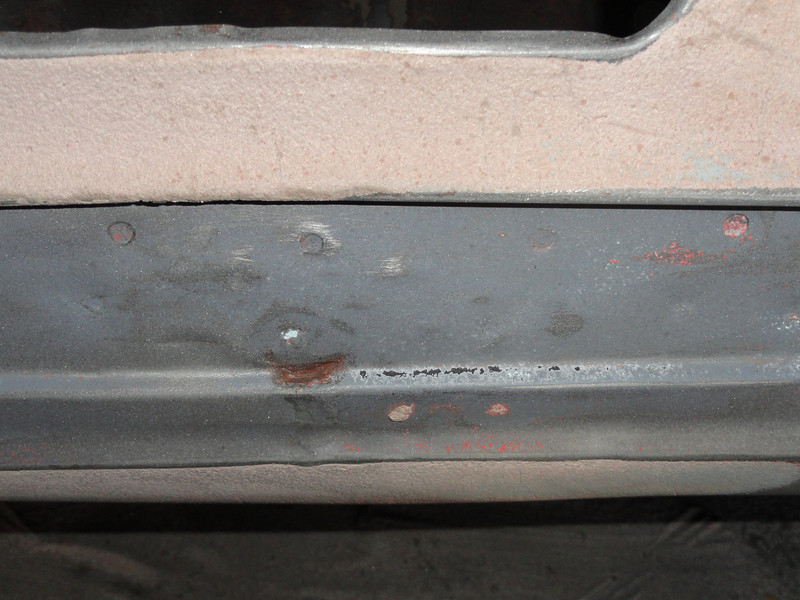
Showing the bondo on the lower valence.

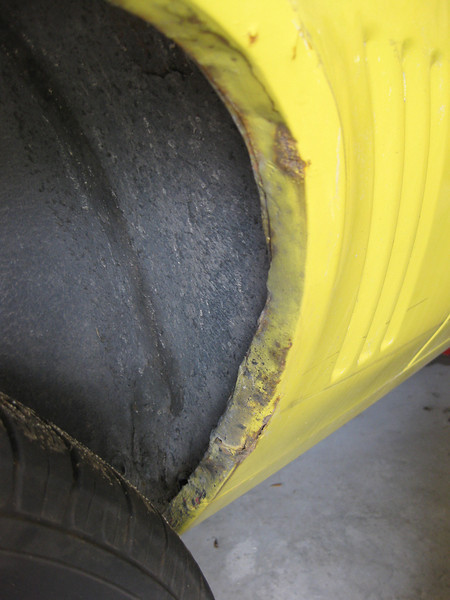
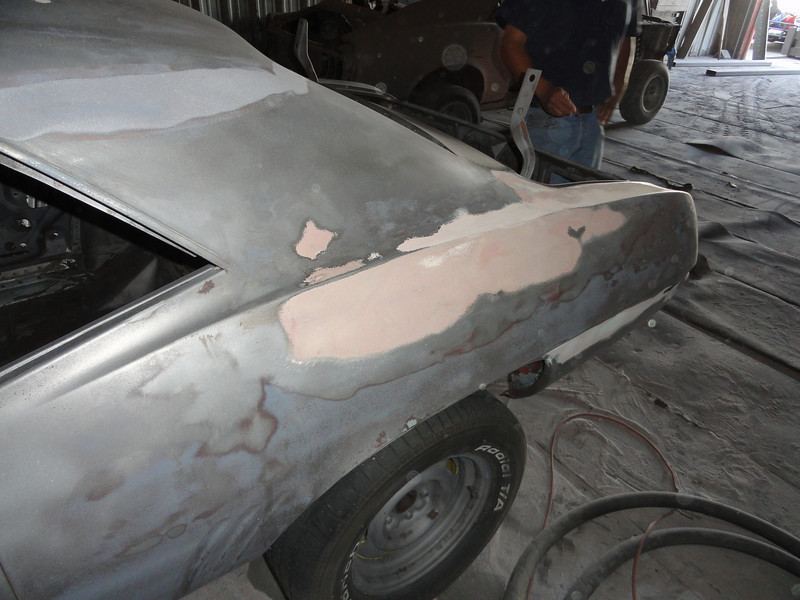
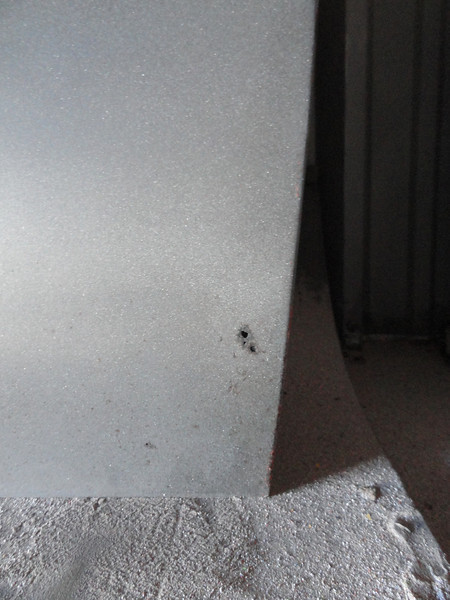
Passenger Quarter Panel:
Worst panel on the car.
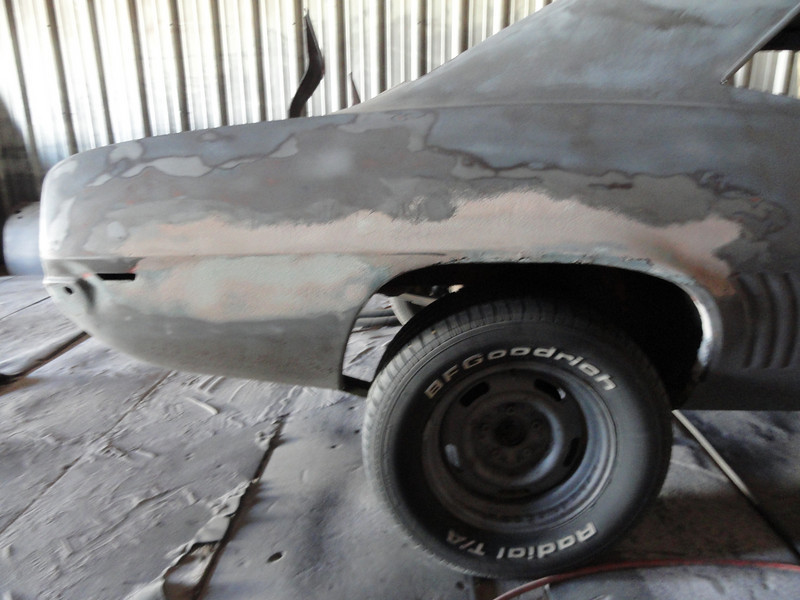
Top of the wheel well rust (could see this through paint).
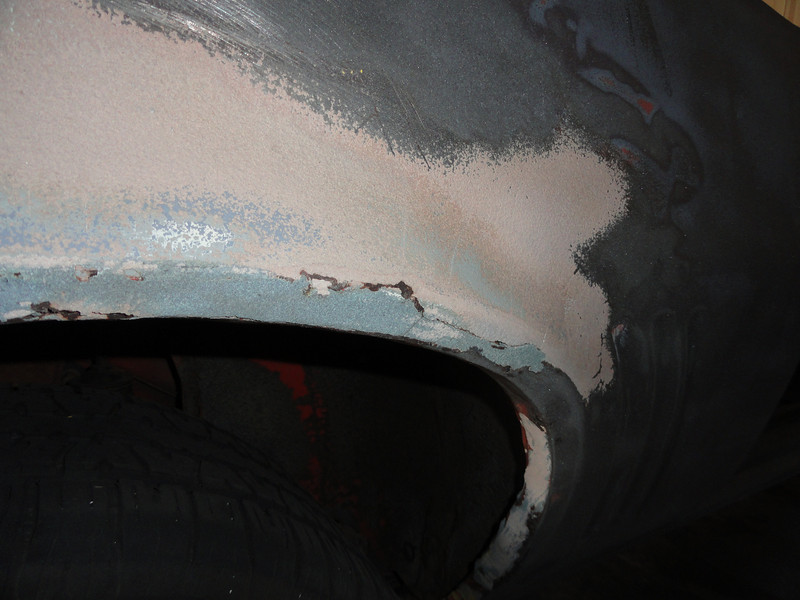
Split quarter just in front of the rear wheel.
Window channel on passenger quarter.

Rust in the trunk area on passenger side.
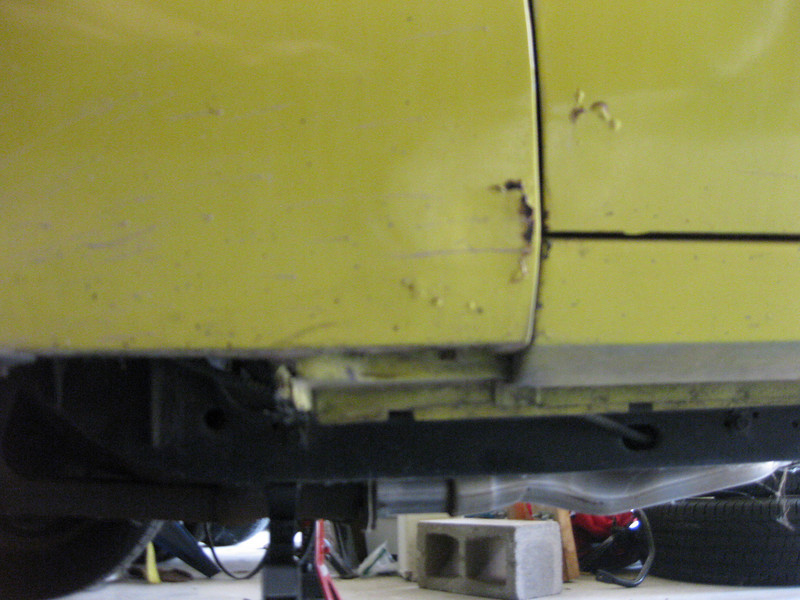
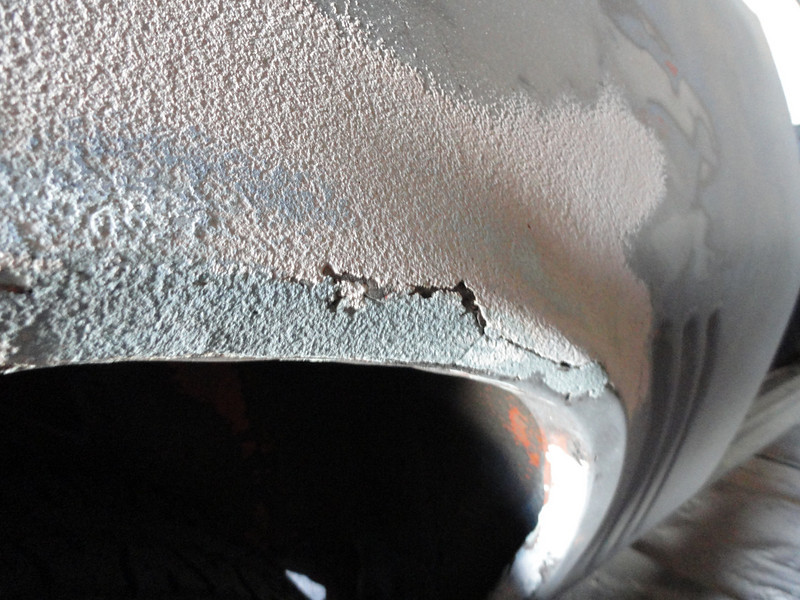
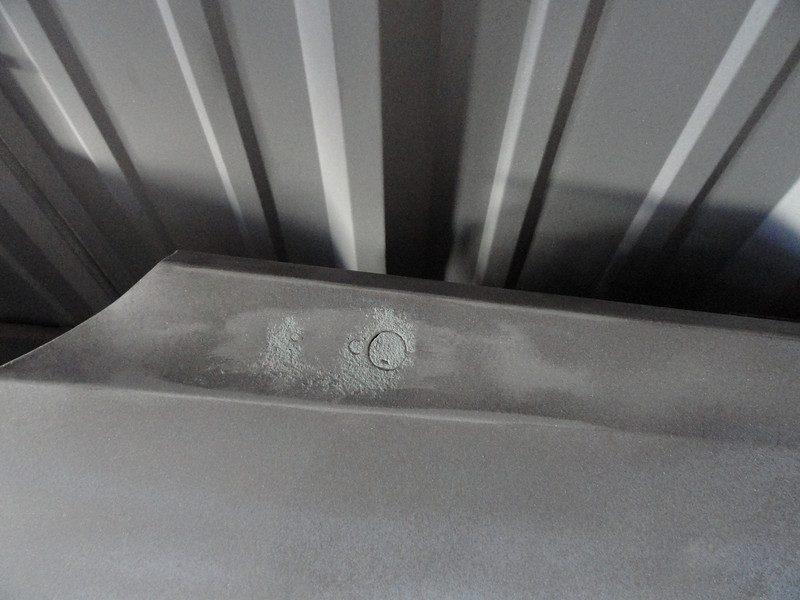
Driver Quarter Panel:
Bondo in weird places.
Small amount of rust above the wheel well. Not as bad as the other side.
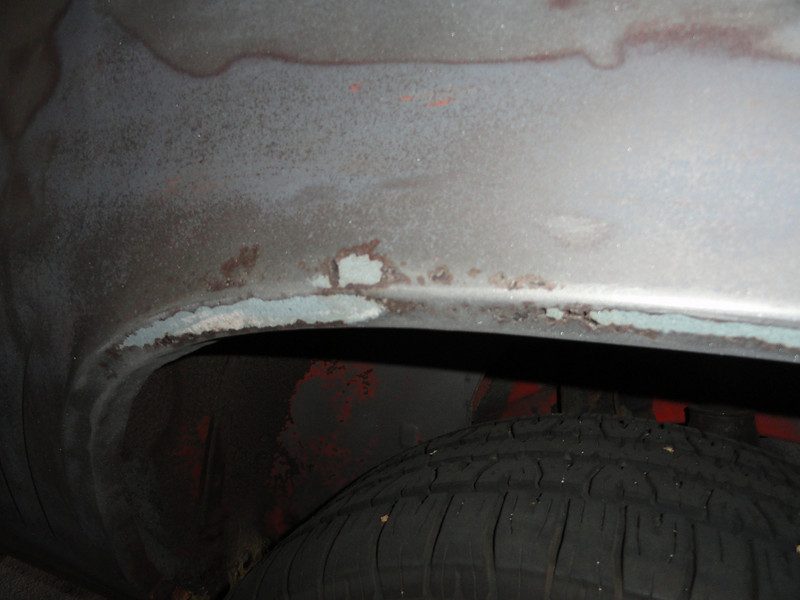
Small amount of rust in front of rear wheel.
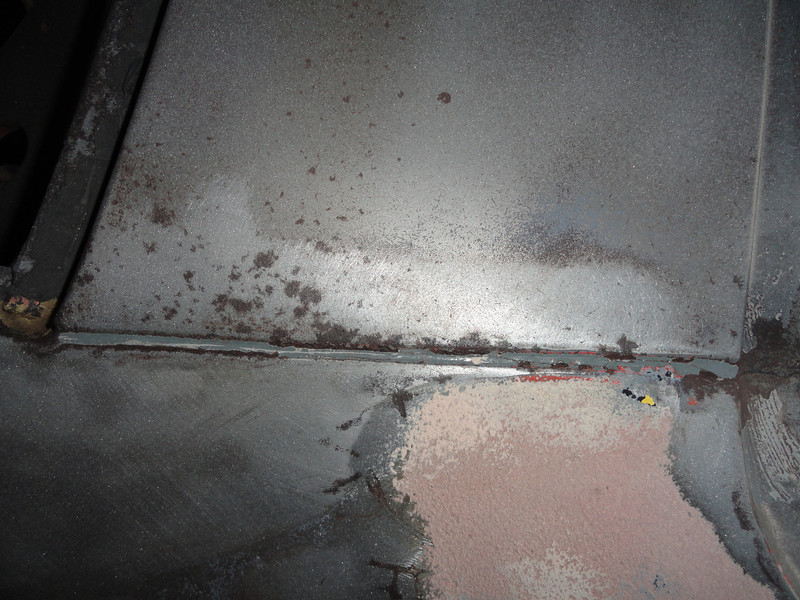
Rust in the seam between the quarter panel and the panel above the trunk below the rear windshield.
03-11-2011 #10
Registered User
- Join Date
- Aug 2004
- Location
- Spring, TX
- Posts
- 222
3-4-2011:
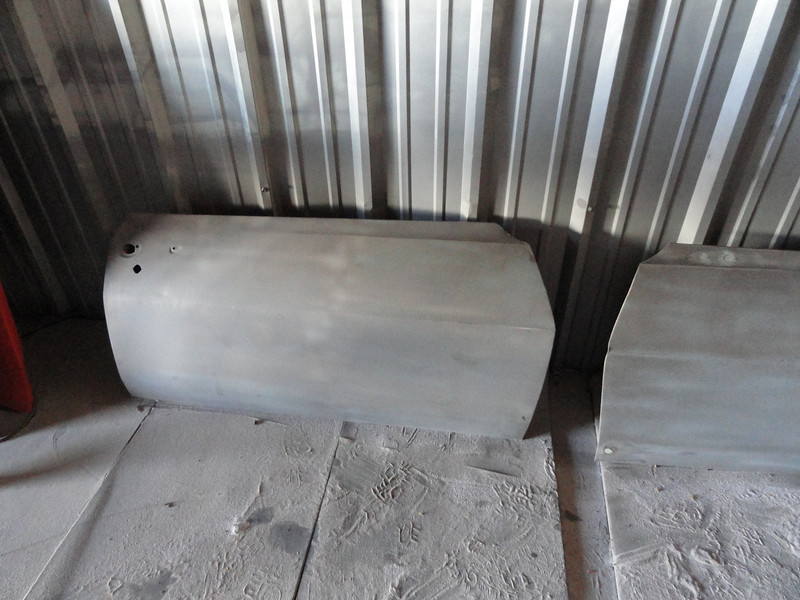
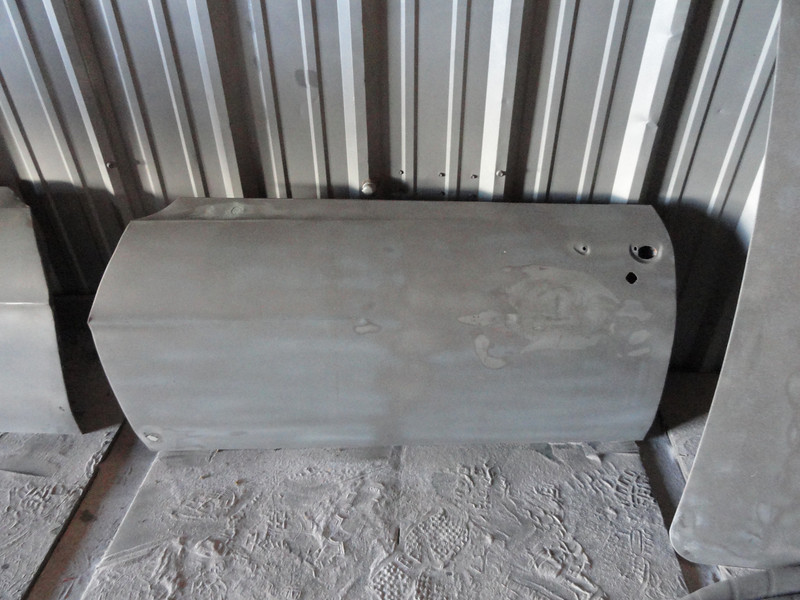
Passenger Side Door:
Very little rust in this panel.
Looking at the bottom right of the panel above, you can see this small spot of rust.
Driver Side Door:
Little more rust but not terrible. Will be patched.
Previously filled side mirror hole. Will be punched out and mirror installed.
Rust in bottom front corner (similar place as other side).
Leading edge of the door hit the fender (misaligned). Will be fixed.
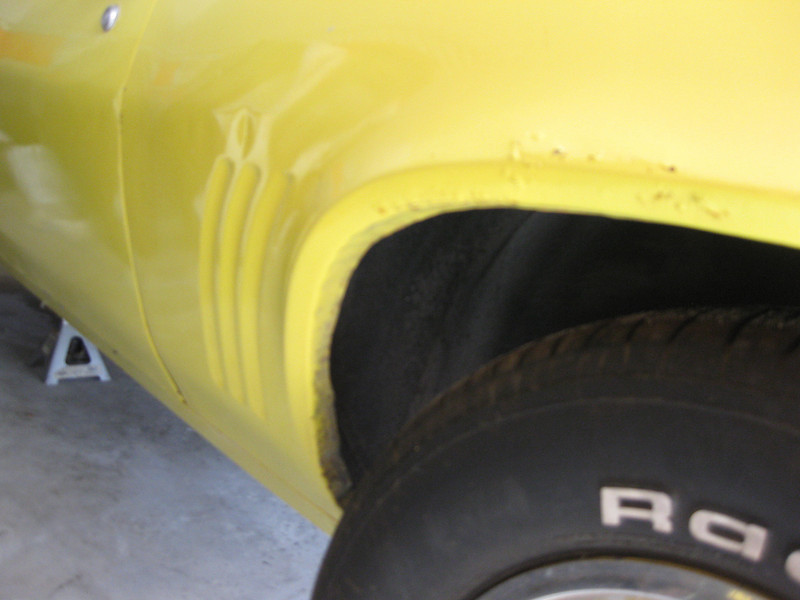
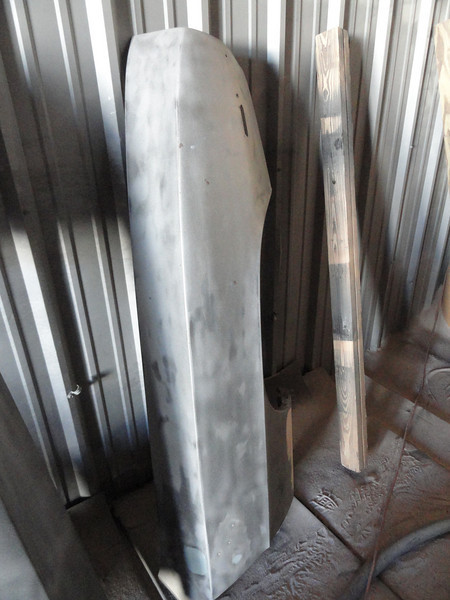
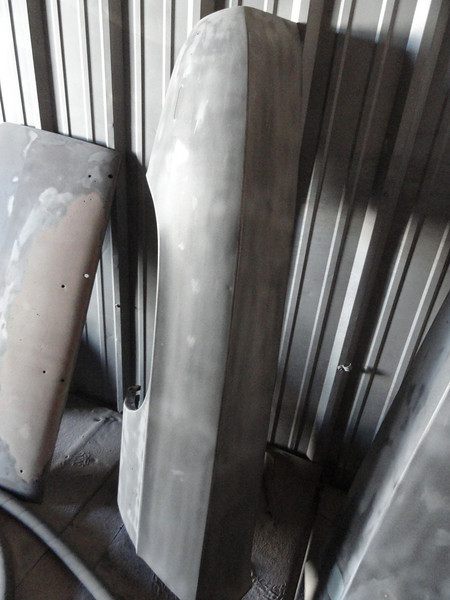
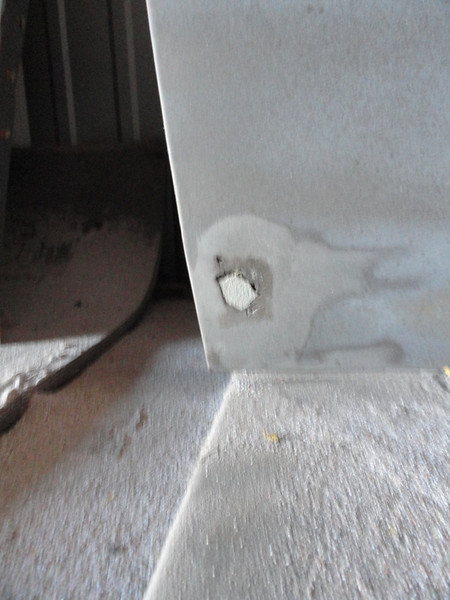
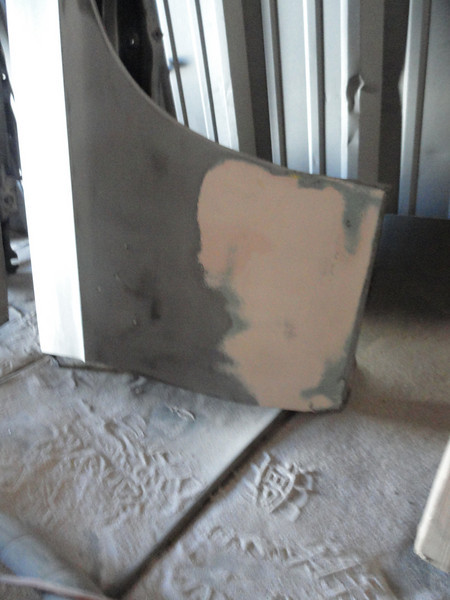
Passenger Front Fender:
Looks pretty good, had a dent pulled out in the past, will be patched.
Closeup of the bondo repair work on lower side behind wheel.
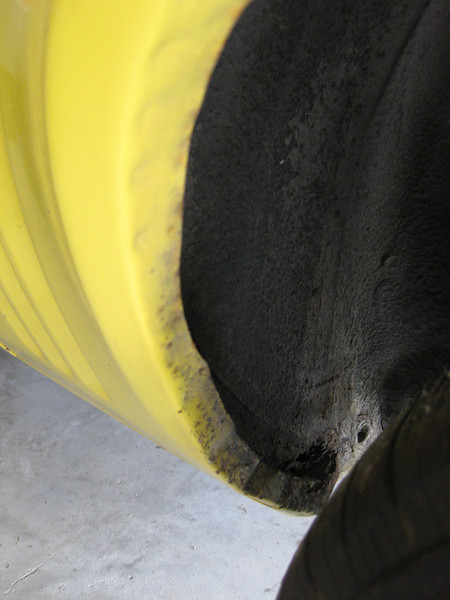
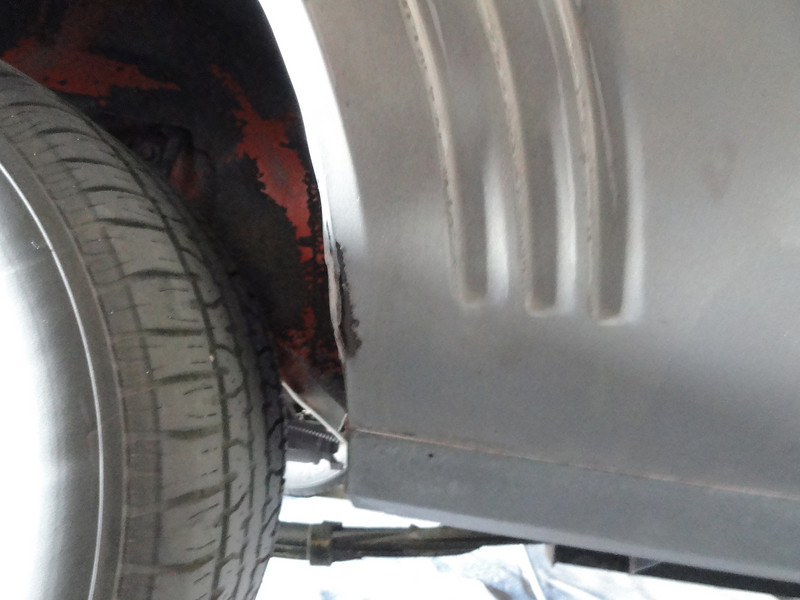
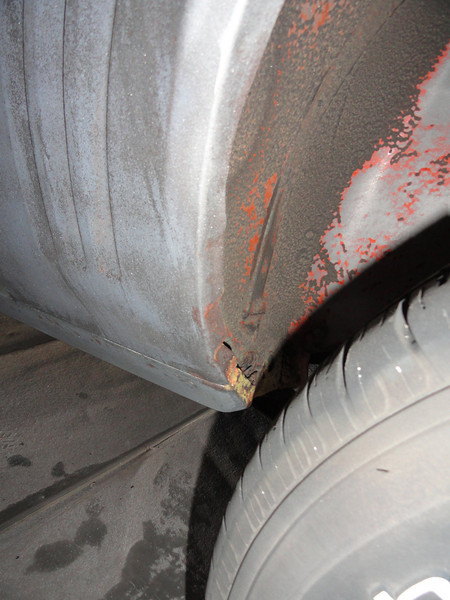
Driver Front Fender:
Little rust but again it will be patched.
Closeup of the rust on the lower section behind the wheel.

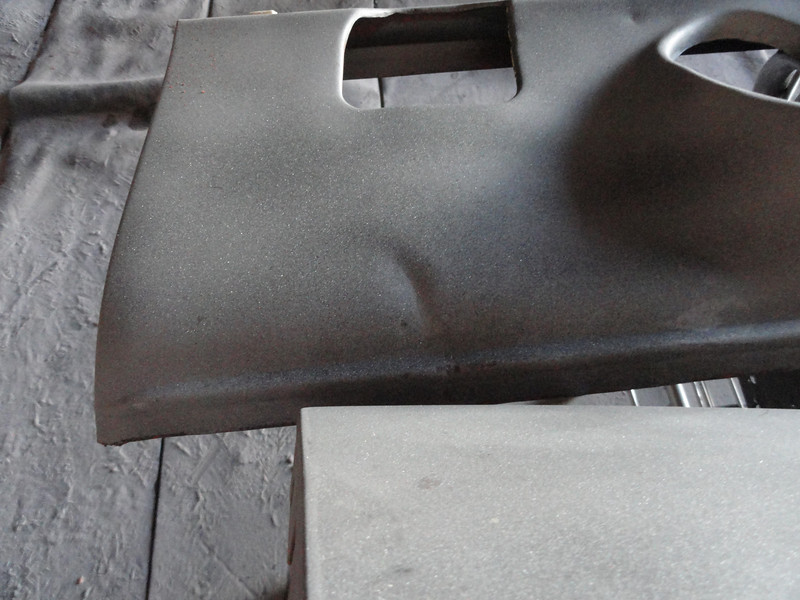
Dash:
Cant find the pic but it has a nickel size rust spot on the dash sealing area for the front windshield below the vin. It will get patched.
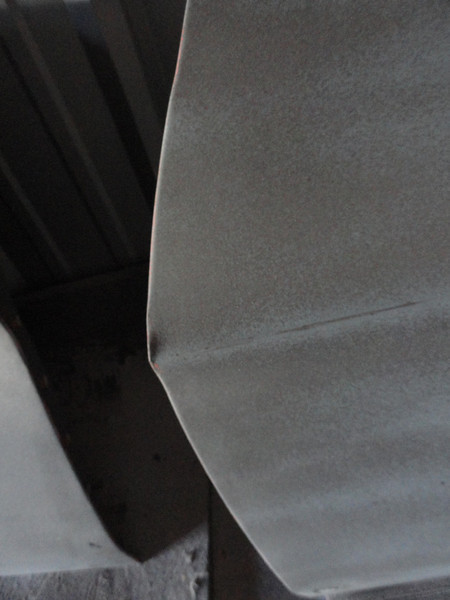
Roof:
Pretty good shape, little rust in the window channel and some surface rust/dents. Will be patched where necessary.
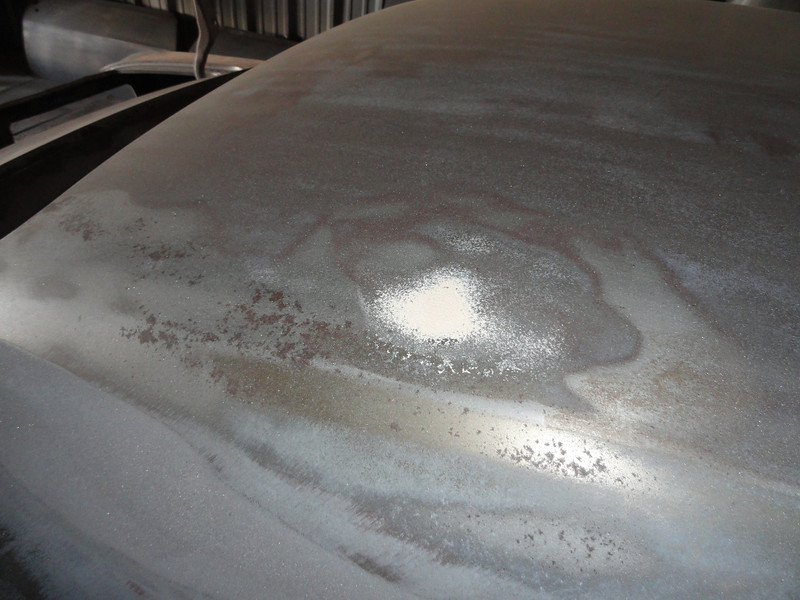
Front window channel (approx 1ft from passenger a-pillar).

Closeup of the same spot showing a small spot of rust.
03-11-2011 #11
Registered User
- Join Date
- Aug 2004
- Location
- Spring, TX
- Posts
- 222
3-4-2011:
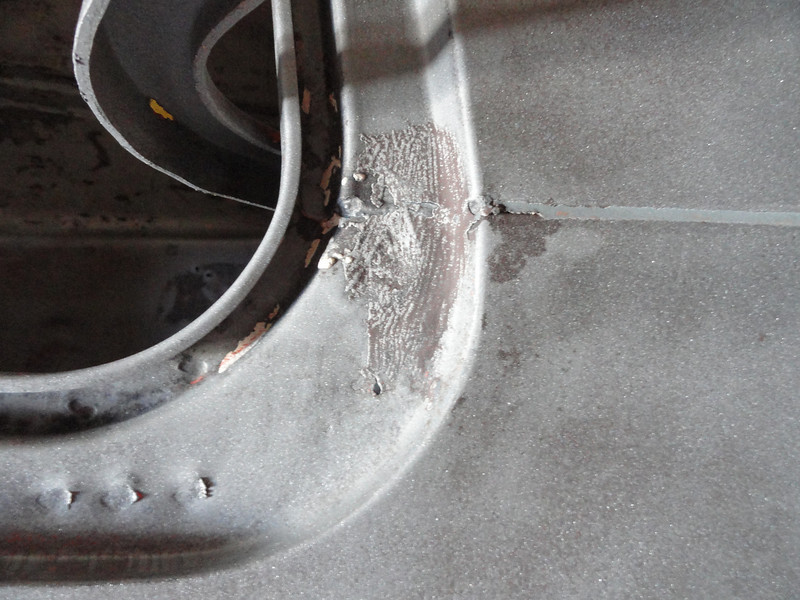
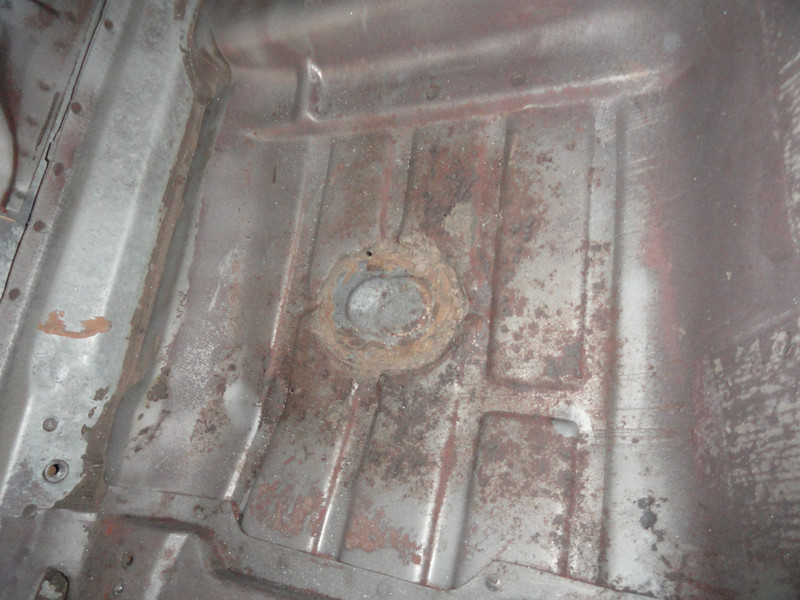
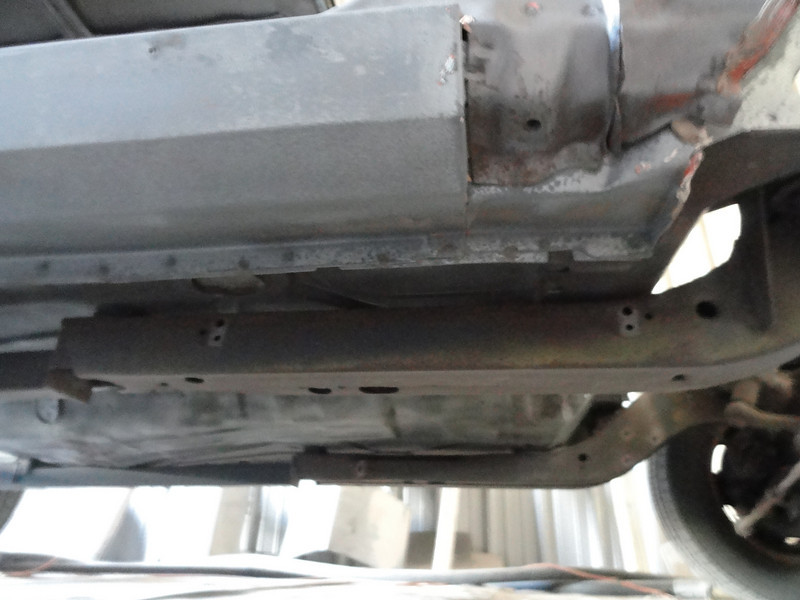
Floors and rocker panels:
Overall very good shape. Small patches in rear floor near the drains to fix pin hole rust (not bad)
Passenger side rear floor drain.
Driver side rear floor drain.
Driver side rocker panel. SOLID.
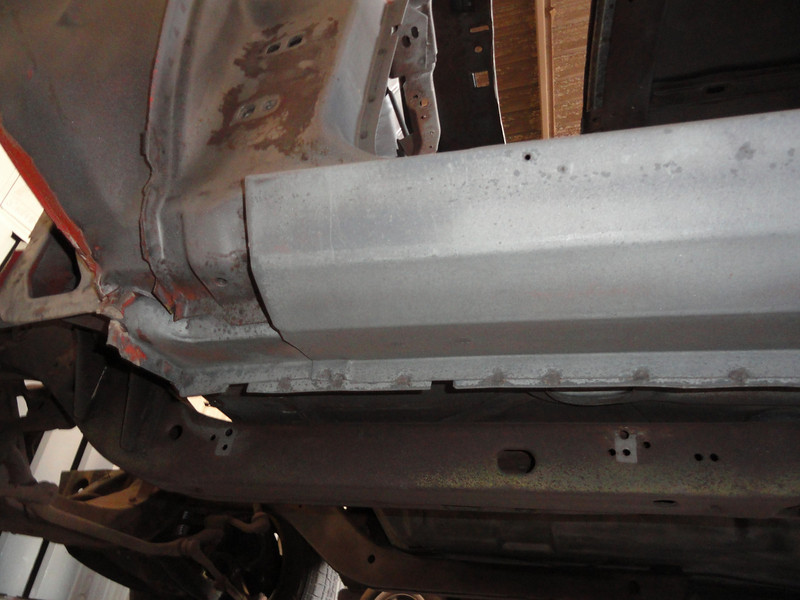
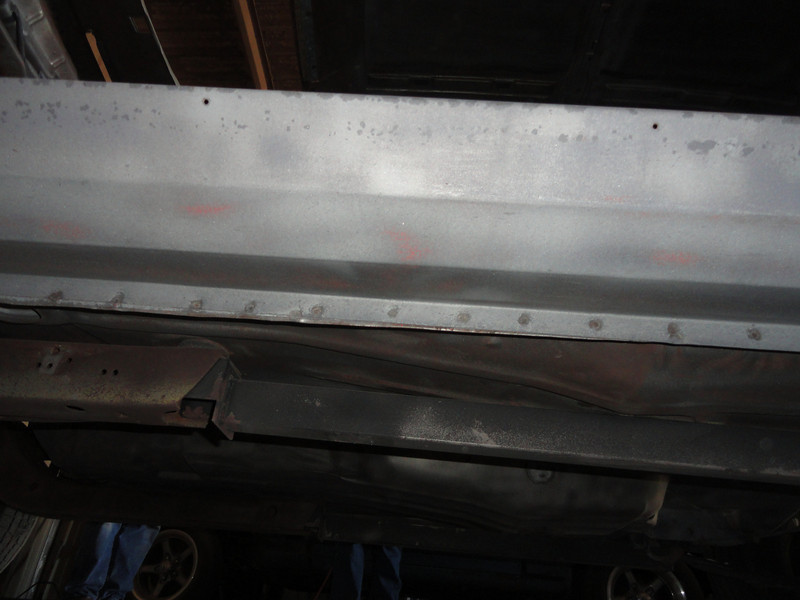
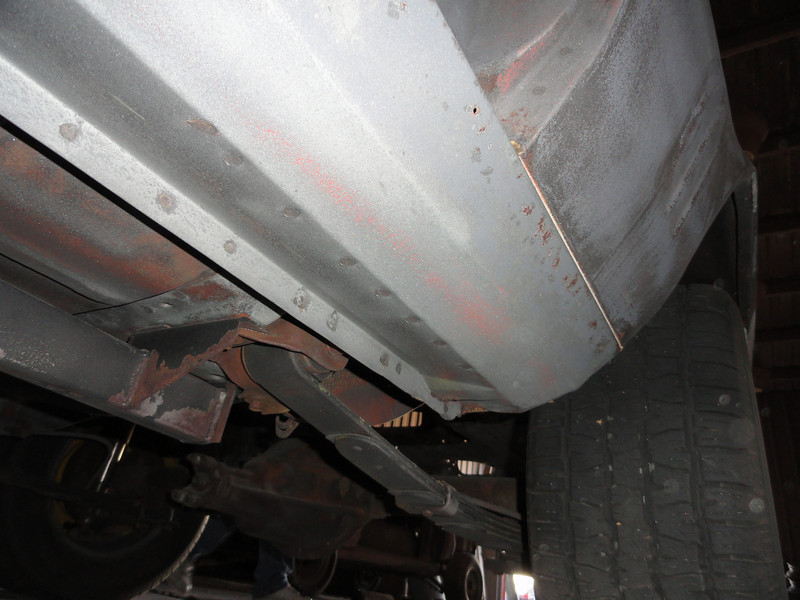
Passenger side rocker panel. SOLID.
Hole in trunk pan for previously modified tank (patching and going different route).
No pics after blasting but shifter hole(s) will be patched with an auto tunnel panel and will cut a single hole for T56.
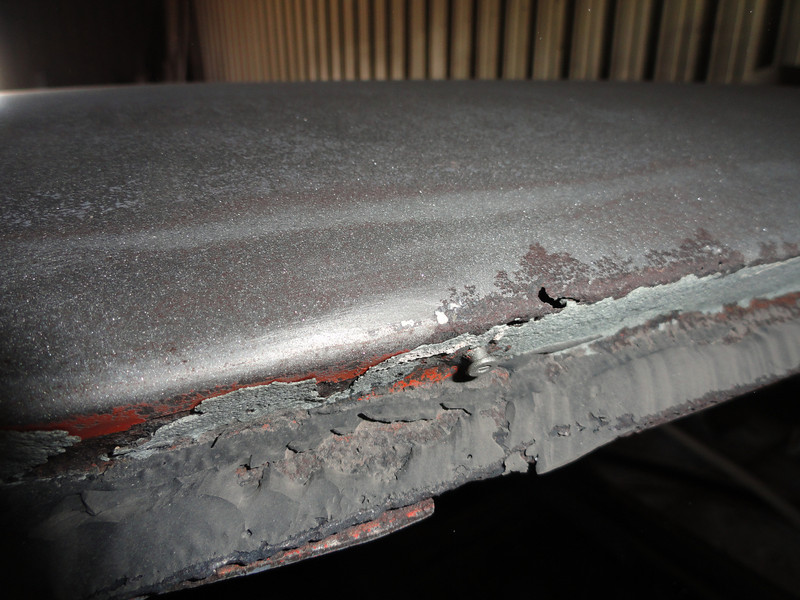
Trunk lid:
This will be replaced. LOTS of bondo on it.
Header panel:
Looks good, no dents, rust, etc.
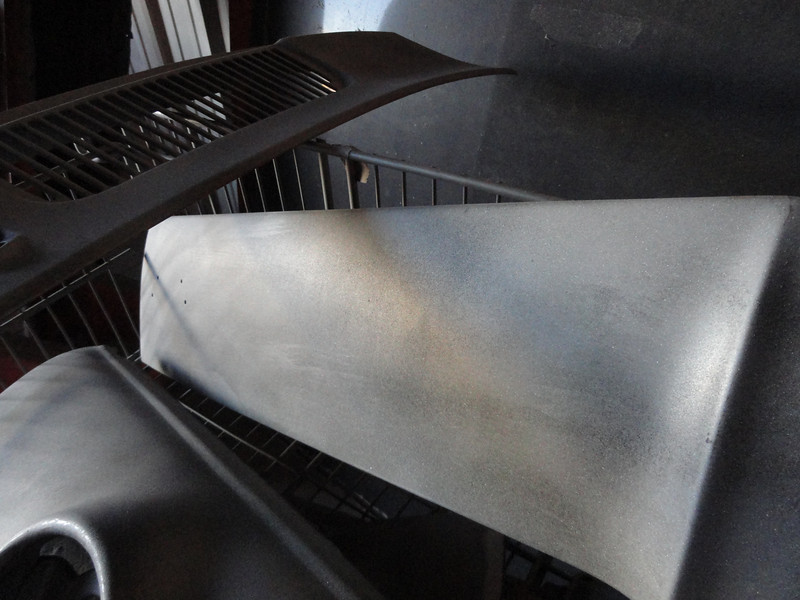
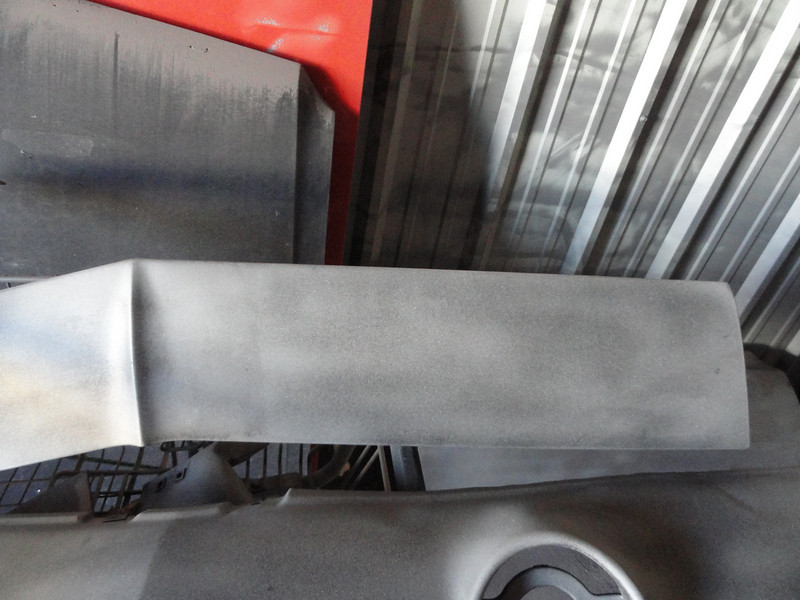
Front Valence:
No rust, but a few small dents that will need to be fixed.
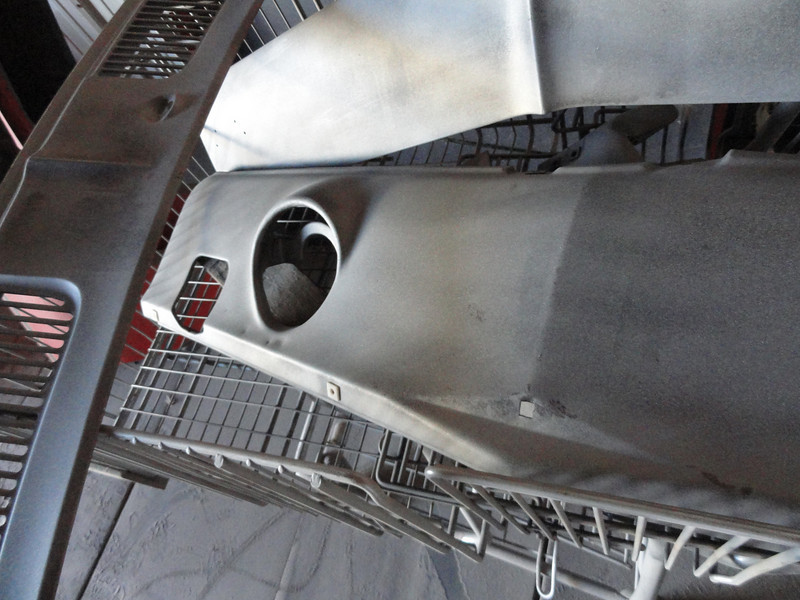
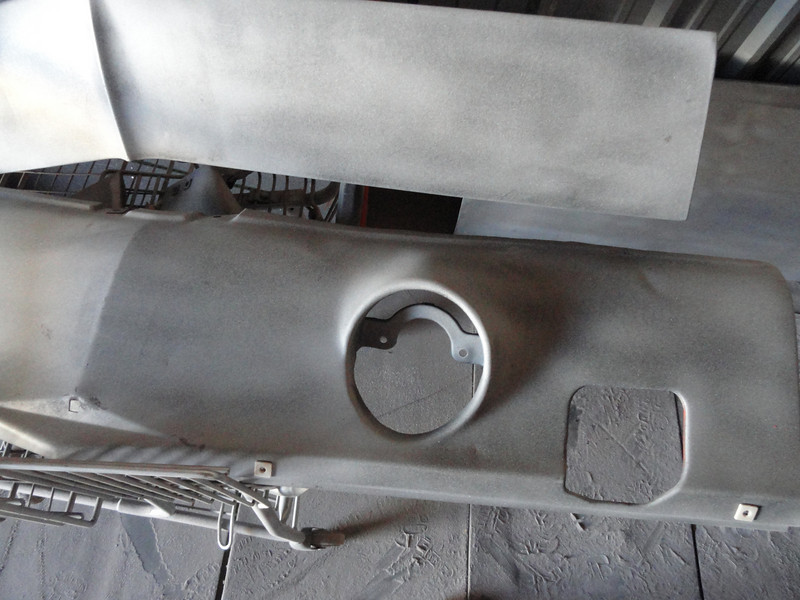
Vent panel:
No pics (can be seen in some of the above), but all is good. No real rust or dents.
That's all the detailed updates I can give for now.
William
03-11-2011 #12
Registered User
- Join Date
- Aug 2004
- Location
- Spring, TX
- Posts
- 222
That brings us up to date on the project.
Putting in an order today for all the sheet metal I will be needing on the project. Trying to split up the orders into specific groups/sections to track costs on the project and keep the flow of the project going. Right now goal is the body work. Probably going to make a gantt chart for the project is MS project to try and track milestones and expected dates. Part of being in project management in my working life I guess.
Ultimate goal for right now is to have the body work completed by end of summer. While the car is at the body shop I will build the 408 and have it prepped for the cars return. After body work I'll begin the interior renovations. After that will be suspension, wheels, tires, brakes. HOPING to have the car done by Power Tour 2012. Time will tell!!!
William
03-11-2011 #13 New to Pro-Touring
- Join Date
- Jul 2007
- Location
- Biloxi, Mississippi
- Posts
- 66
Wow, that's a lot of change for one page!!! Love the updates to the garage, btw. I keep building my dream garage in my mind, and now I've added recessed lights!!!
2011 Mustang GT 5.0 6-speed, 3.55 rear, and Brembo package
03-12-2011 #14 Registered User
- Join Date
- Jan 2008
- Location
- Charlotte
- Posts
- 1,295
I see your now here and Lat-G... nice!
2005 LeMans Blue Corvette w/ T56 & Z51 & C6Z06 Brakes, Build Thread: https://www.pro-touring.com/showthread.php?64496
2005 GMC Sierra 2500HD LLY / Allison
2014 Chevy SS LS3 / 4 Door
03-12-2011 #15 Registered User
- Join Date
- Jul 2006
- Location
- Lake Tillery NC
- Posts
- 841

Cool Project! Keep us updated.
Michael Tucker
Project "Trouble" 1969 Camaro DSE subframe, quadrilink, 13" wilwood brakes, Rated X Rushforths, LS2/T56
1968 Camaro
04-01-2011 #16
Registered User
- Join Date
- Aug 2004
- Location
- Spring, TX
- Posts
- 222
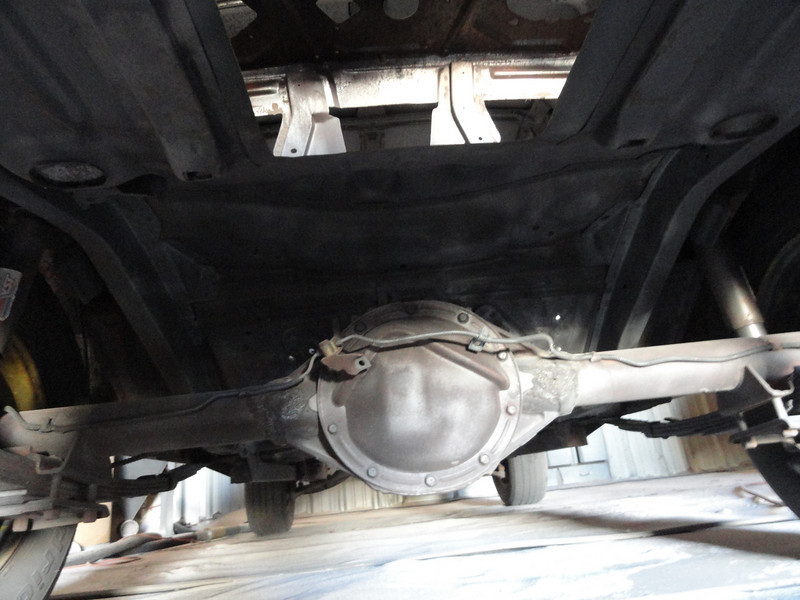
Update for pics. Picked up the rearend today. Couldn't wait until tomorrow. Guy was thinking about keeping it but lots of folding green changed his mind

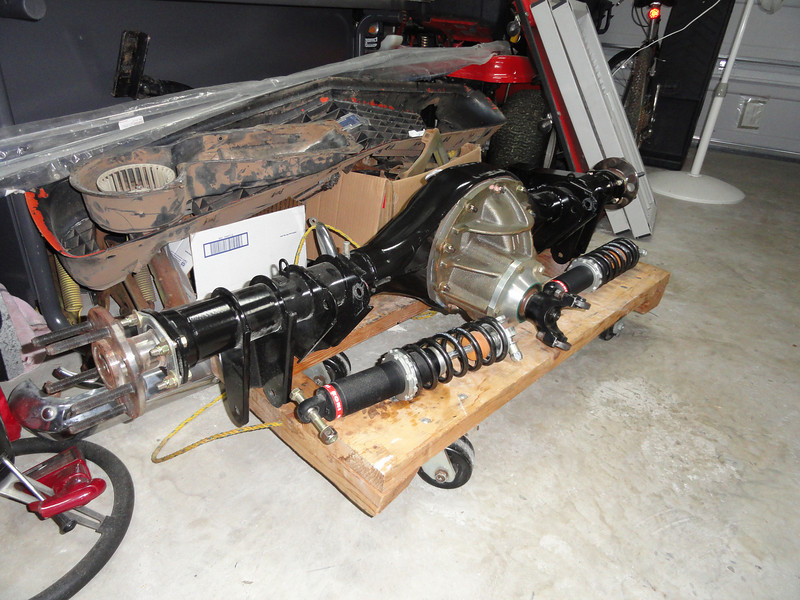
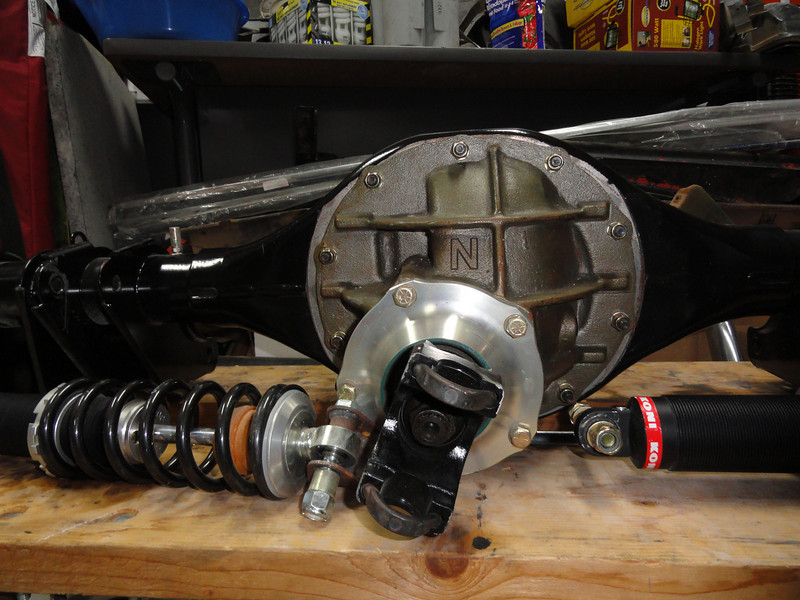

Quadralink (4 link) brackets already welded on already.

Interesting question however. Guy gave me the coilovers with the rearend. They have a DSE part number on the spring. However in my research I see that DSE offers a revalved QA1 as the shock choice. Also upon further observation, I see that the shocks appear to be front shocks that DSE used to sell.
Anyone have an insight on this? I'm ok with it as I got a good enough deal on it all to justify buying new coilovers if I need to, just interesting that it has what appears to be front shocks that came with it. I got it from a guy who bought it from the original purchaser. A twice hand me down 9" that has never been run...
Details are 54.75" width, 31 spline axles, ford tru-trac diff and 4.10 gears. Is powder coated gloss black and has the moser "N" spec center section.
William
12-23-2014 #17
Registered User
- Join Date
- Aug 2004
- Location
- Spring, TX
- Posts
- 222

Thread gravedigger.
03-21-2016 #18
Registered User
- Join Date
- Aug 2004
- Location
- Spring, TX
- Posts
- 222
TTT
03-21-2016 #19 Registered User
- Join Date
- Mar 2015
- Location
- Baton Rouge, LA
- Posts
- 106
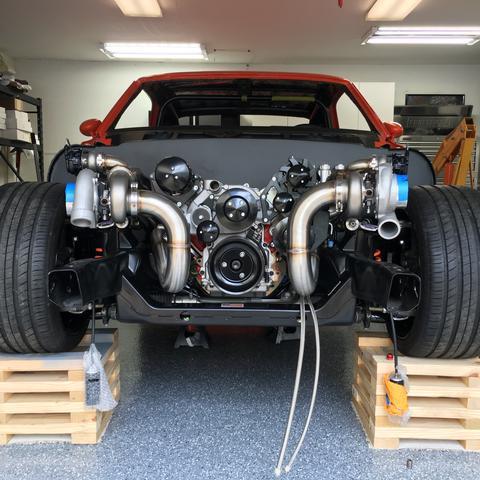
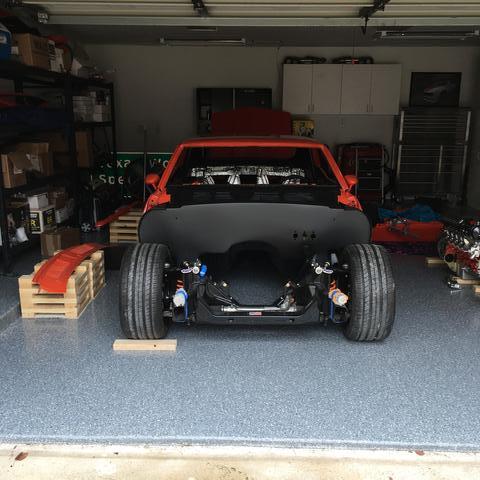
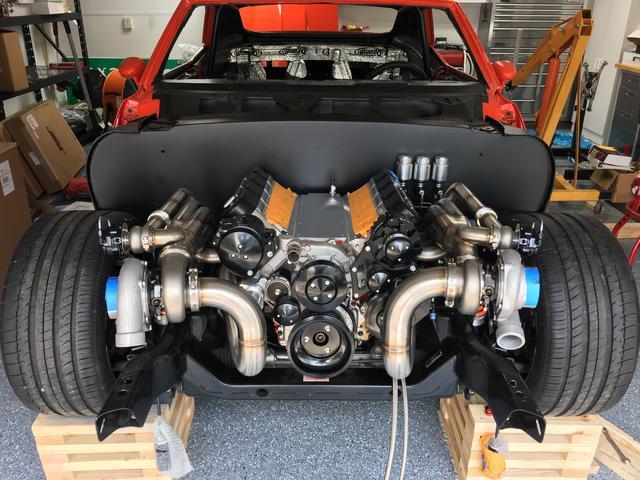
Wow! That looks fantastic, I really like completely smooth firewall and of course those twin turbos ahah.
03-21-2016 #20
Registered User
- Join Date
- Aug 2004
- Location
- Spring, TX
- Posts
- 222
Yea firewall came out very nice. Happy I went this route with the clutch/brake pedal assembly. Really compliments the engine I think.
It will fill up some once i start putting in the PCV/Breather tank/etc but should still be pretty "clean."


 Reply With Quote


