


Results 41 to 60 of 68
Thread: Introducing Project THANKS MOM!
-
04-18-2011 #41

 Sponsor / Rat Pack Member

- Join Date
- Aug 2006
- Location
- Nashville TN
- Posts
- 771
Nice Camera work Jeff, those pictures look really nice.
It was a real pleasure working with Jeff on this car. It was nice to start with something that did not require a complete new skin before you ever got started on the body work.
Here is a few more from when I loaded it up to deliver it back to Jeff.
Brian Finch
Pro-touring Hero
The Proof is on the Pavement
Sponsored by Baer Brakes, JRI Shocks, Pennzoil, Tremec, Magnaflow, Centerforce, AFCO Racing, Kurt Urban Performance, Amercian Powertrain, Forgeline, Holley, and of course BFG.
For the best engine money can buy please visit http://www.kurturbanperformance.com/
Authorized dealer for Baer, Ridetech, Detroit Speed, Vintage Air, Motorstate Distributing, Wilwood Engineering, American Autowire, Forgeline, Holley, Afco,
Contact brian@finchperformance for special Pro-Touring.com member pricing
www.hotrodtransformations.com
-
05-17-2011 #42
 Registered User
- Join Date
- Aug 2006
- Posts
- 82

Project THANKS MOM! - Some exterior updates
Well it has been quite a month in between my last post. Where I live and where I work we have all had to dodge tornadoes and work layoffs. And actually both of them happened on the same day. Fortunately I made it through both but I have friends who have lost their home and I have a longtime friend who just lost his job. I just have to count my blessings and move on.
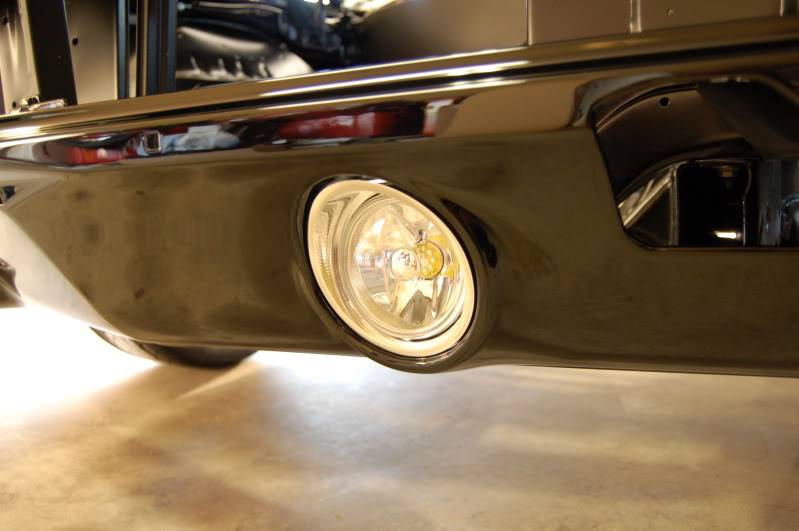
So back to the good stuff. The stuff like a bad day in the garage is better than a day at work. I have been slowly moving forward with the exterior items on my car. I had Marquez Design turn signals and DSE headlights to install. I know you guys have seen this stuff before but I am here to add that they are both great items and really update the look on the front. In case you have thought about getting these turn signals you might want to know that you have to drill new holes and cut out part of the front valence in order for them to fit. And I probably would recommend cutting this out before the fresh paint job.
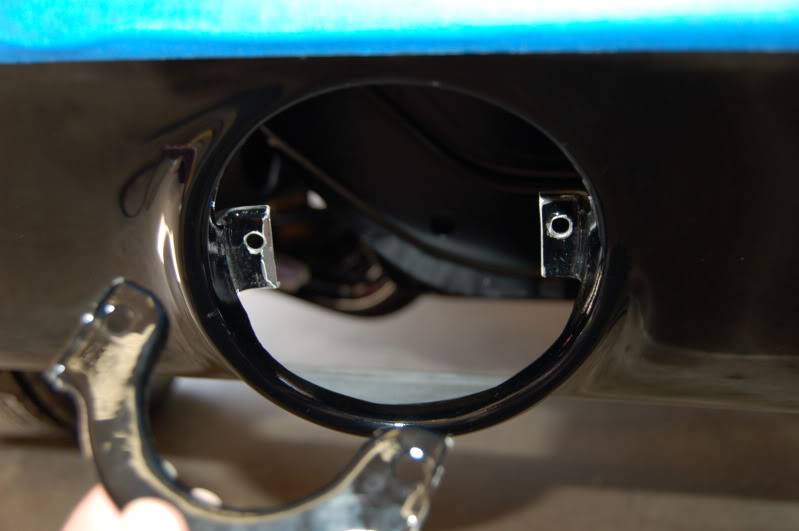
Here it is installed. These are really nice machined pieces that offer a close fit to the bodywork.
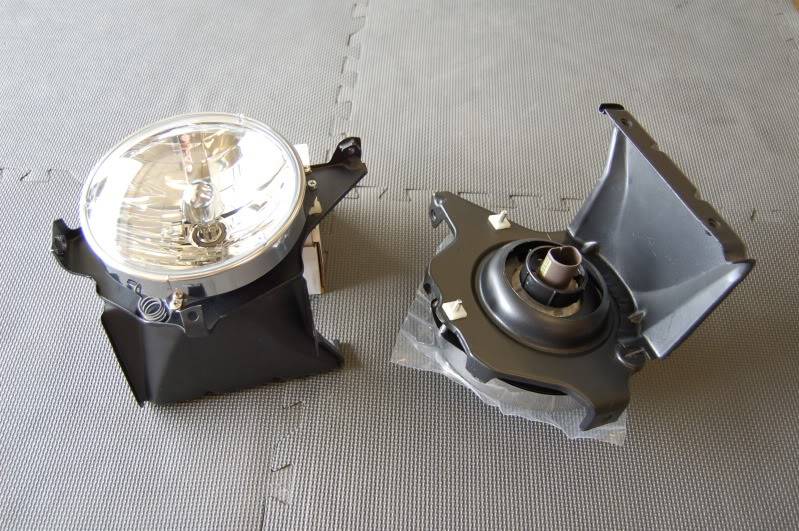
Then I moved on to the Detroit Speed headlights. I had originally told Brian I would probably get new headlight brackets. He ended up blasting and powder coating them and they turned out great. Hey, something else we actually got to save from the original car.
One thing to note about installing these is that you have to cut out a 2.75" hole in the back bracket in order for them to fit. Again, something probably better done before the paint or powder coat. I used a hydraulic punch and that worked out great.
After a bunch of tweaking they are all mounted up and then the rest of the front could be assembled.
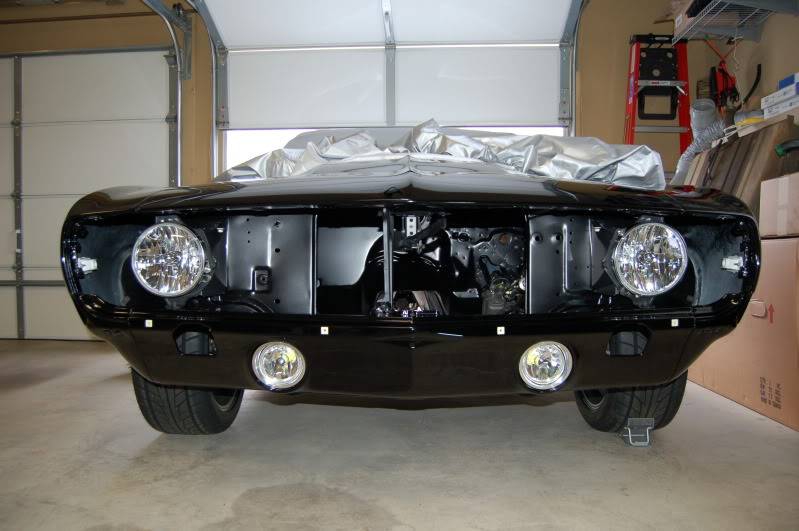
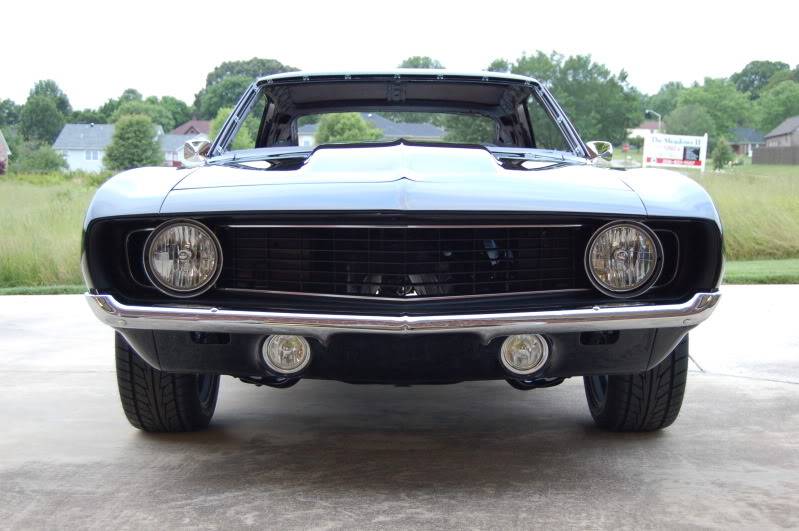
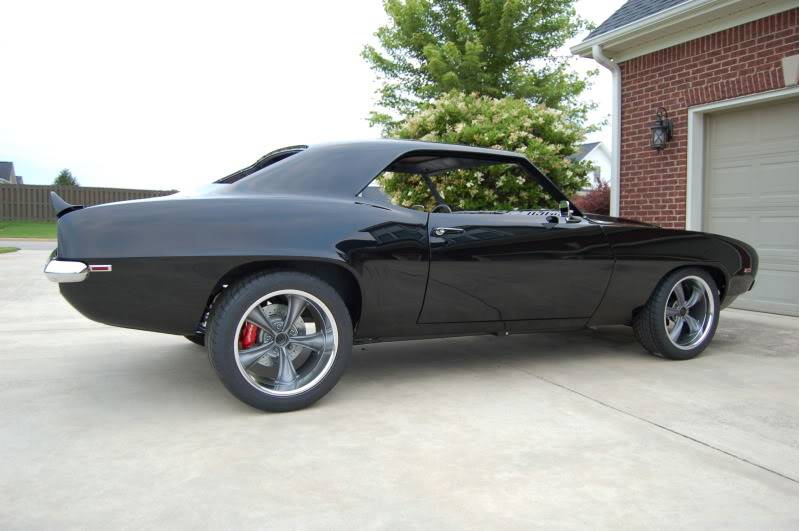
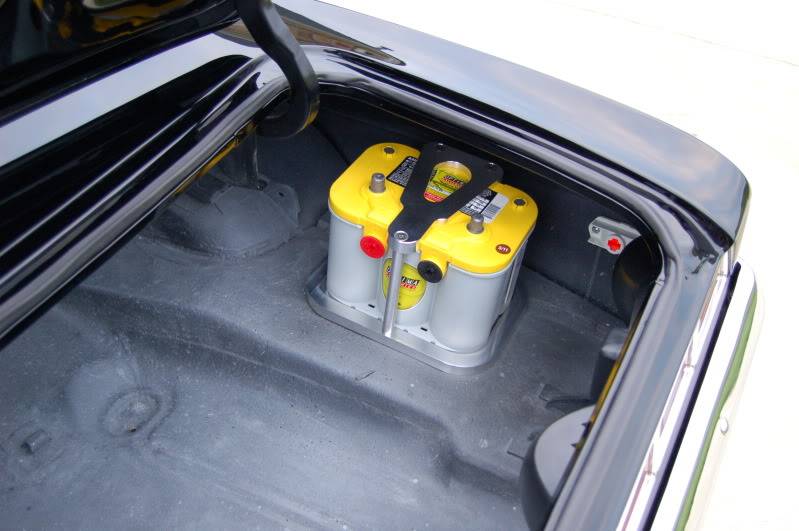
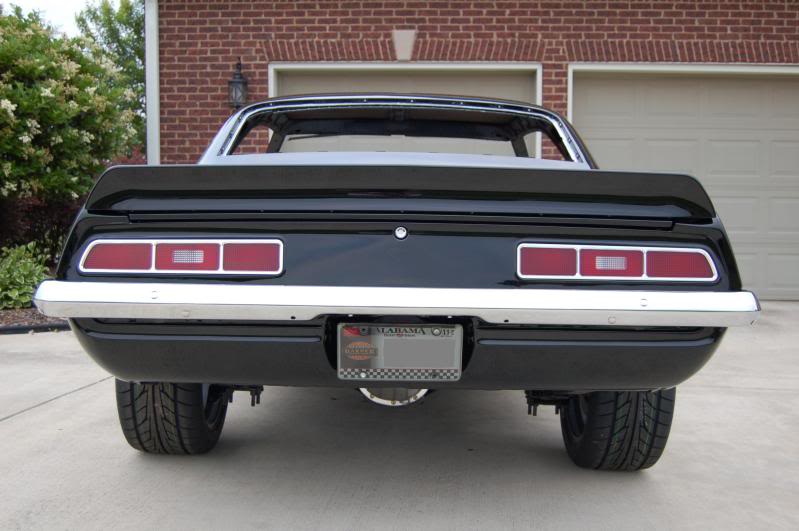
Then onto mirrors, door handles, weatherstripping, side markers, battery relocate, rear bumper, etc.
Finally, tonight I did a test fit of front spoiler.
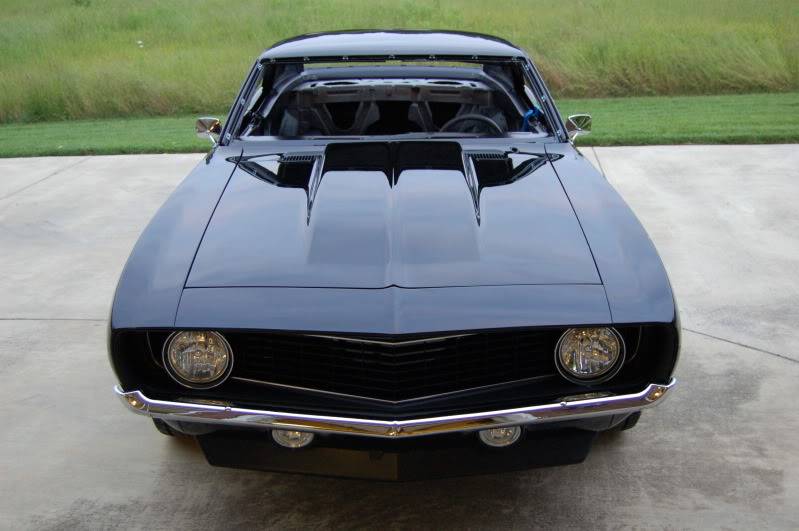
That will do it for now. Up next will probably be Dynamat, headliner, and then working on glass installation. Thanks again for the positive comments guys. And Wayne I will try to ask Brian again what paint mixture he used on the dash. I know he had told me before but it has been a while.
I will be up at the Nashville Good Guys event this Saturday and the RTMC event the following weekend. Hope to see a bunch of you guys there.
KUSI
-
05-17-2011 #43
 Registered User
- Join Date
- Jul 2008
- Location
- ohio
- Posts
- 1,135
car looks great kusi!! are you planning on lowering the car? the paint looks deep glad to hear you avoided both the storms and layoffs! just got to move on!!
keep the wheels a spinning and the Beavers a grinning (burt reynolds-smokey and the bandit)
-
05-17-2011 #44
 Registered User
- Join Date
- Dec 2005
- Location
- Birmingham, AL
- Posts
- 3,355
Great progress. Where in Alabama do you live? I am in Birmingham.
Stephen
-
05-17-2011 #45
 Full Blown G-Machiner
- Join Date
- Sep 2010
- Location
- alpine ca
- Posts
- 657
Kusi god bless you and your family i hope you stay working and your bride is doing well love your car its coming along awesome
john1972 NOVA SPEED TECH TORQUE ARM AND FRONT ARMS , RUSHFORTH NIGHT TRAINS, DRIVERZ INC
BUILD LINK
https://www.pro-touring.com/showthre...t-(GREY-MATTER)
-
05-18-2011 #46
 Registered User
- Join Date
- Mar 2009
- Location
- overseas
- Posts
- 3,434
very nice man!!!
Kevin S. (overseas in Germany)
1963 Chevrolet Impala 2d ht Coupe
www.CruznArt.com
CRUZN - Automotive Artworks
-
05-18-2011 #47
 Registered User
- Join Date
- Nov 2004
- Location
- KC, MO
- Posts
- 298
What size are those wheels and tires? They are exactly what I want on my 68!
-
05-18-2011 #48
Registered User
- Join Date
- Aug 2006
- Posts
- 82
Craigs73,
Thanks. Do I plan on lowering the car? Absolutely! I thought those pictures would bring that question up. It is just that high right now with the engine, interior, and gas tank being out. The car is set up for lowering with the front coil springs and rear leaf springs but I am sure I will still have to add lowering blocks in the back to get it just right. And that deep black is all Brian Finch's handy work.
srh3trinity,
Thanks. I live just north of you in Huntsville. Not enough miles away from Tornado Alley for my liking though.
johnny68,
I appreciate the well wishes. Same to you and your family.
CruizinKev,
Thanks.
Jarcaines,
Those wheels are the heavily debated Boss 338s. Not that they don't look nice but usually the issue of do they fit the Camaros. I was and still am torn between too many nice $$$ wheels and couldn't make up my mind. I needed something now and I ended up liking these especially for the price.
Front: 18x8 with 4.5 BS, Nitto NT555 245/40R18
Rear: 18x9.5 with 5.0 BS, Nitto NT555 275/40R18
In my opinion, this company chose the wrong backspacing when they made these wheels. If they would have setup for more backspacing I think they would sell even more of them. The front is okay at 4.5 BS but the back at 5.0 BS is really pushing it. So much so that many places will not recommend this size on a first gen Camaro. I was able to test fit these wheels before I bought them because a friend had just bought them. After putting them on over the new brakes they are VERY close. The only thing I have in my favor is the fact that Brian did a clean job of cutting back the fender edges inside the wheel tub. These wheels really need at least 5.5 BS and then there wouldn't be an issue. However, as you already know your 68 will have a more rounded wheel opening and you might be able to fit them without an issue. Here is a link to the same set of wheels on a 68. I think you will like the look.
http://www.camaros.net/forums/showpo...&postcount=518
-
05-18-2011 #49
Registered User
- Join Date
- Nov 2004
- Location
- KC, MO
- Posts
- 298
Awesome, thanks for the info. I have looked at the 338's but I had the same concerns you are mentioning here, thats a good point about the 68 arches vs. the 69 though. Thanks for the link, both your car and the 68 look great in those shoes!
-
04-03-2012 #50
 Registered User
- Join Date
- Jul 2011
- Location
- NC
- Posts
- 461
Kusi,
Great looking car man! I was really torn on my build to go with black or not...it was keeping me up at nite for weeks prior to paint! lol... Yours turned out very mean looking! Keep up the great work! Are you running a VA Gen iv ac system? I haven't drilled my holes out yet in the firewall is why I ask...
Josh
"Schism"
-
04-03-2012 #51
Registered User
- Join Date
- Aug 2006
- Posts
- 82
Thanks Josh.
Making a paint color choice kept you up for weeks...is that all? How about years! I went through thoughts of different dark grey/silver tone colors for a while too but I always ended up coming back to black. It is the one color that I knew would never go out of style. And yes I am running the Vintage Air Gen IV system along with their black anodized bulkhead. Brian cut and installed that piece after he was finishing painting the firewall. The spot I have mine seems to be a pretty common spot. You might like to have it tucked more into the fender opening but the location is really driven by the inside sheetmetal. As far as mounting the Gen IV system I ended up using the DSE bracket because my firewall work was already complete and welding anything new to it wouldn't turn out pretty. You might be in that same boat since I remember your firewall work was done too. Here are a few photos to show the location.
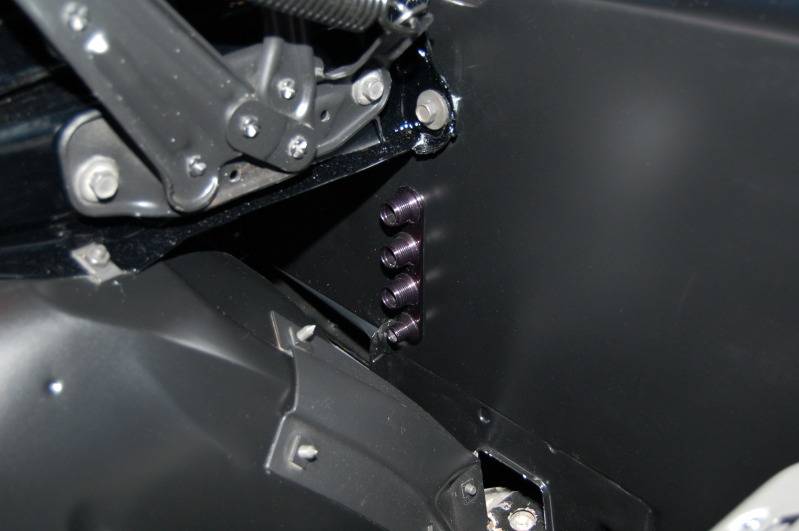
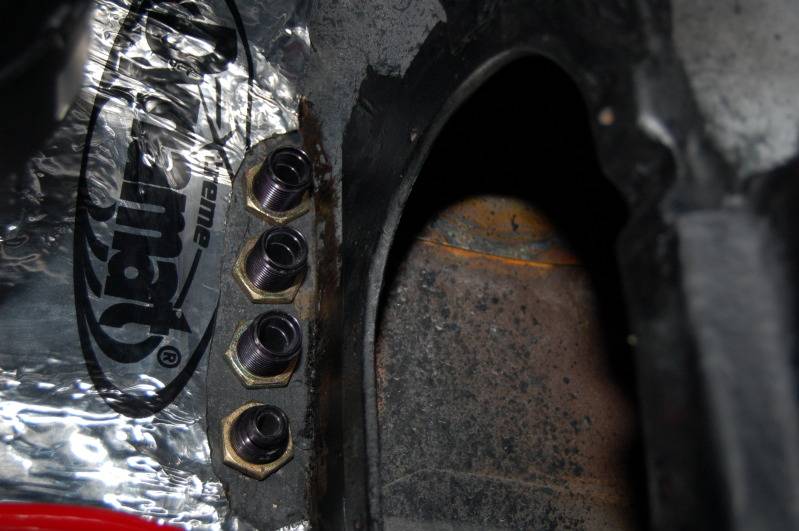
-
04-03-2012 #52
Registered User
- Join Date
- Jul 2011
- Location
- NC
- Posts
- 461
Thanks kusi,
Great pics- will help me out alot! I was thinking of moving the lines in further but then I have to deal with coming thru that hole in pic 2... Is there a reason why you didn't go in further or is that just where Brian put it? lines to short? That bulkhead is from VA? Yes, I believe I will have to get the DSE bracket bc my firewall is pretty much done....
Thanks again
-
04-03-2012 #53
Registered User
- Join Date
- Aug 2006
- Posts
- 82
Yes, that is a Vintage Air bulkhead. And I wouldn't want to mount it any further in and then have to deal with the hoses coming out of the fresh air opening. I plan on putting the stock kick panel back on there and I also want to keep my fresh air vent for now. Eventually I might close it off all together and place a speaker in there like some others have done. The VA system is great but keep in mind that you no longer will be pulling in fresh air from the outside like you can on any new car A/C system.
-
04-04-2012 #54
 Pro-Touring Veteran
- Join Date
- Jul 2006
- Location
- Merritt Island,FL
- Posts
- 1,182
Very nice looking car !
Check out my web site.
http://screaminperformance.net
-
04-13-2012 #55
Registered User
- Join Date
- Aug 2006
- Posts
- 82
Project Thanks Mom! - Updates from this past year.
It is hard to believe a year has passed already on this project but life happens. For the most part the delay came from my wish list change to an LS3 engine versus rebuilding the 350 again or going with a 383 stroker. I have been to too many of the Pro-Touring events and had the privilege of riding along in many of the forum members cars equipped with these fuel injected powerplants. I knew I would regret not going the LS route and I definitely did not want to do the engine purchase twice. So I started the project of money saving again and then by last December I found a decent deal on a new LS3. In between this I had stock piled and test fit quite a few different parts all over the car. Radiator, fender braces, battery tray, vintage air, seats/brackets, dash, brakes, etc. Everything I have worked on pretty much required some modification, rework, or another part all together. It can be frustrating but for the most part it is still fun and I know it will all work out in the end. Through trial and error and a bunch of research/help from this forum I have learned a bunch along the way. Here are a few photos for now.
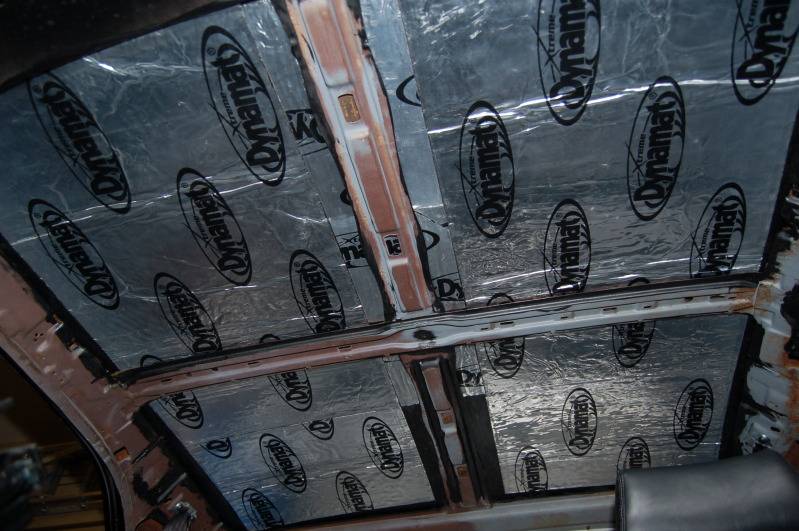
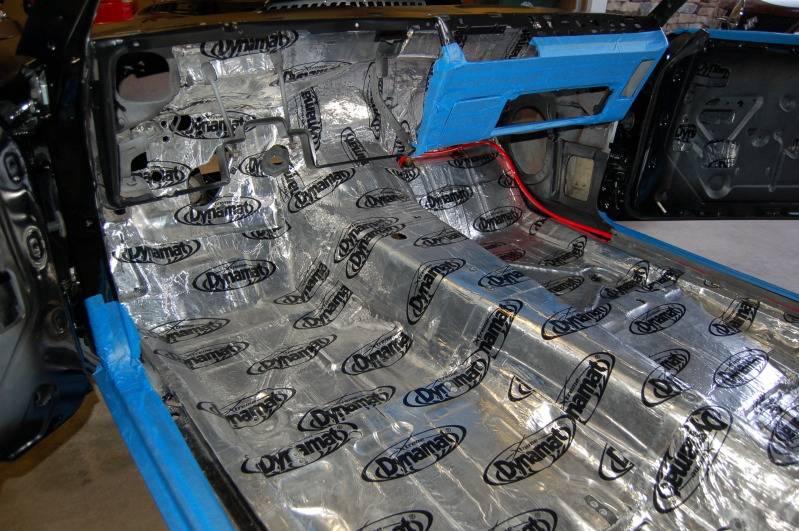
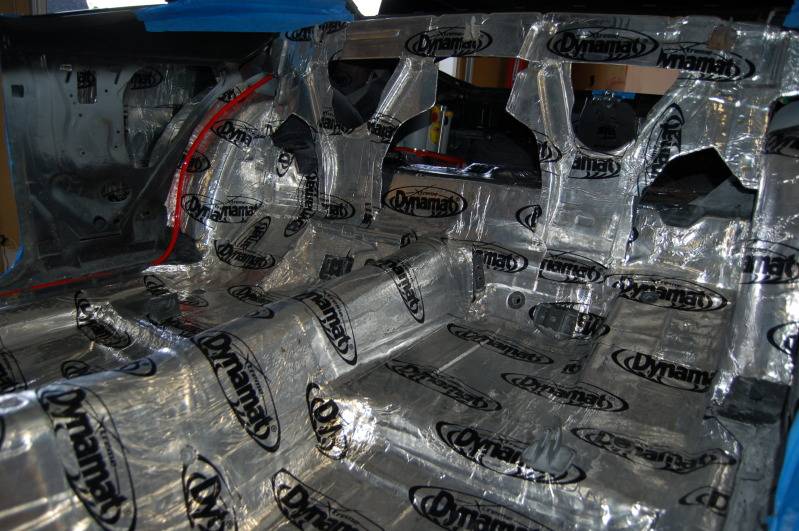
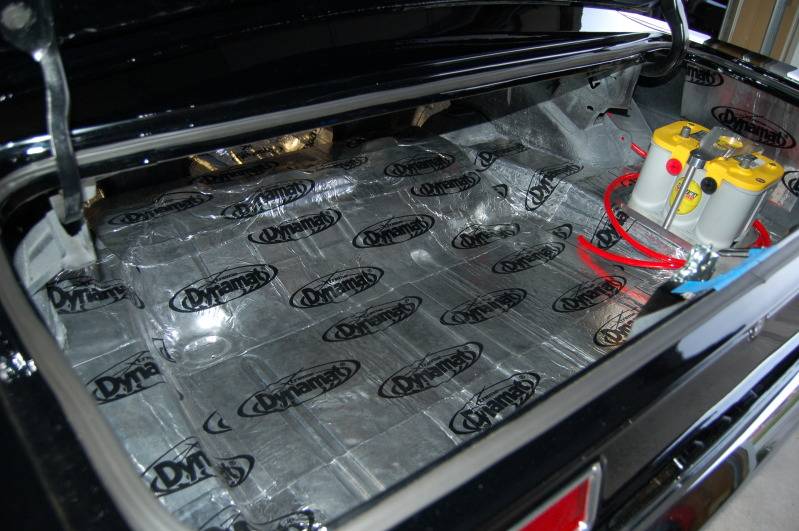
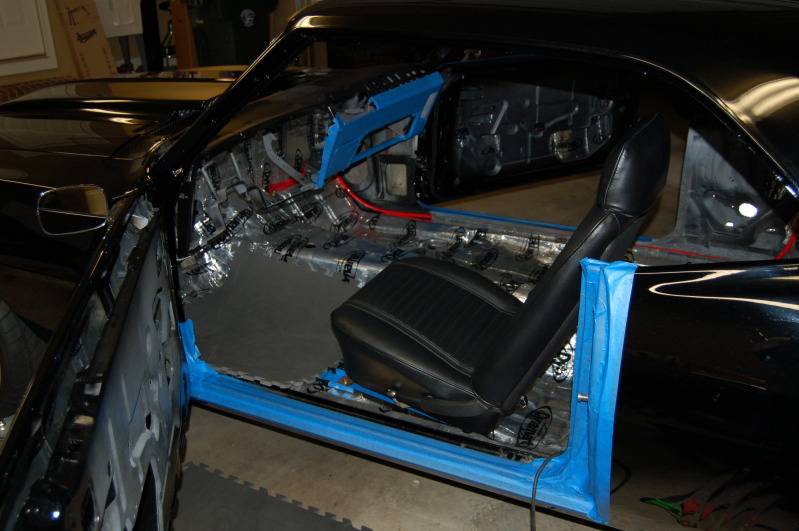
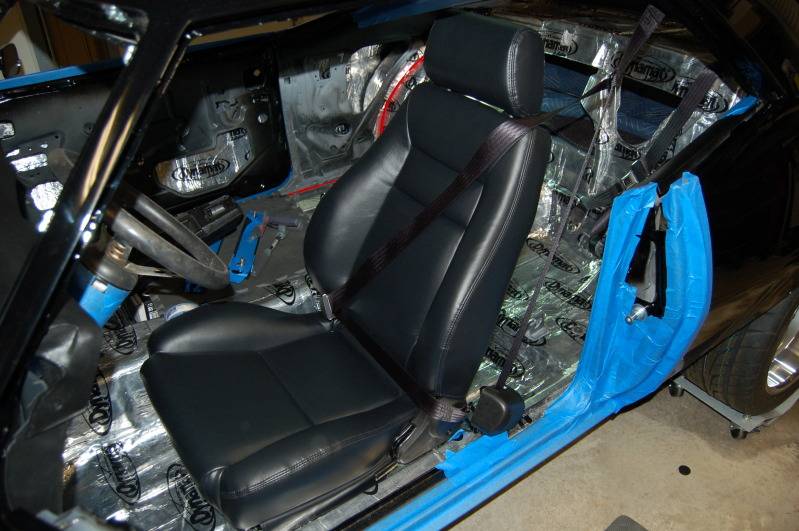
I hit the roof panel with Eastwood convertor first. Then started soundproofing/heat shielding with Dynamat. A LOT of it. I ended up liking how well it worked and pretty much did the whole car. If anybody wants to know it takes about 4 bulk packs. Shutting the doors or just the solid feeling of the whole car now is a night and day difference.
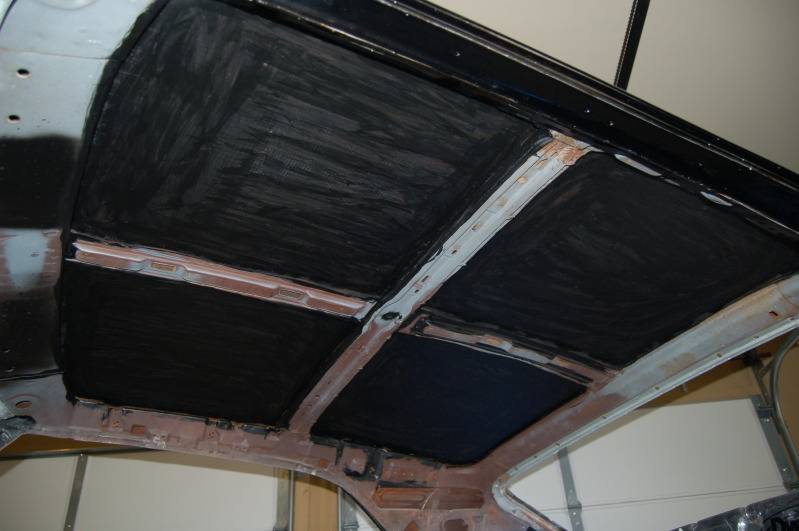
I have had the interior restored for a few years so I went ahead and installed the front seats. The funny thing is I had always driven this car with a seat that was shot. I basically sat on towels over the springs and that must have sunk me pretty far down in the seat. Because when I sat in the seat this go around I was up into the roof. NOT GOOD! So I ordered the 2" seat setback brackets thinking those might work. These actually were a well built piece and fit right to the floor boards with no mods. However, at 6'2" I was still not able to get comfortable and I knew I needed seats that recline. Ended up going with some Scat ProCar Elite seats after originally thinking about the better matching Rallys. To me the elites will fit a taller person much better because of the extra seat back height. I will also end up modifying the Procar seat brackets to get another inch of head height clearance. To go along with the new seats I added the Morris Classic Concepts seat belt sets for the front and rear. Yet another quality built product that I have been very pleased with. They are comfortable and the new GM logo that matches the original belts is a nice touch.
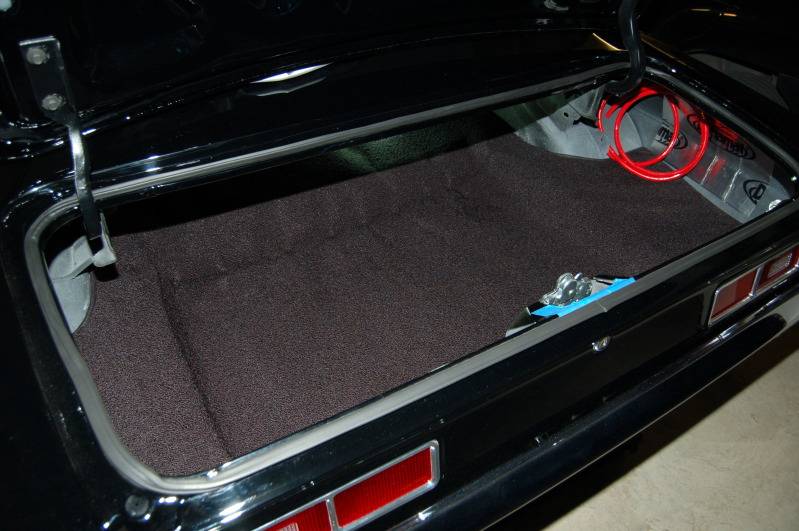
Molded trunk carpet. This was a new product that had just showed up at Classic Industries. Ordered it, got it, unboxed it, unfolded it, it fit, BAM, done!
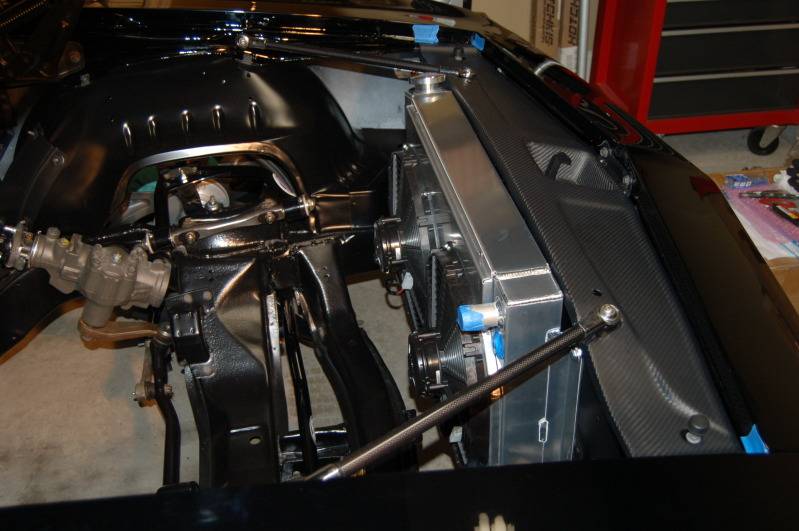
Test fit of the PRC LS radiator and some Anvil Auto goodies.
-
04-13-2012 #56
Registered User
- Join Date
- Aug 2006
- Posts
- 82
Project Thanks Mom! - Updates from this past year.
Sometimes good things come in big packages. It even had that new engine smell. Good stuff!
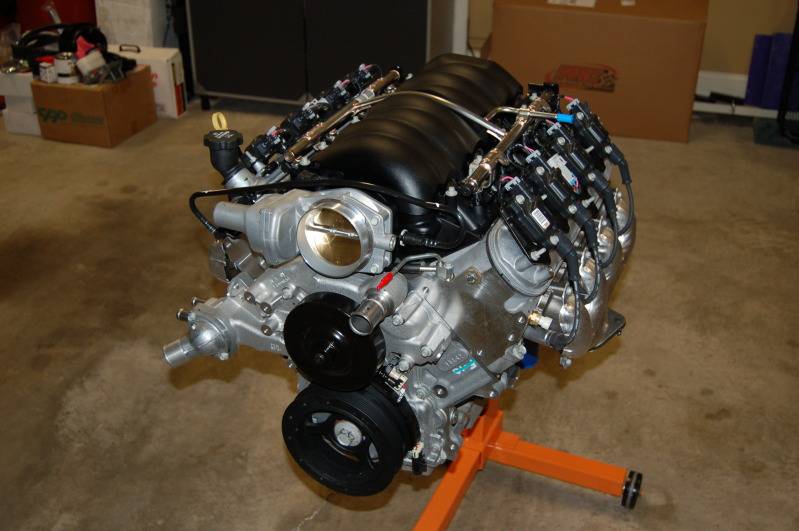
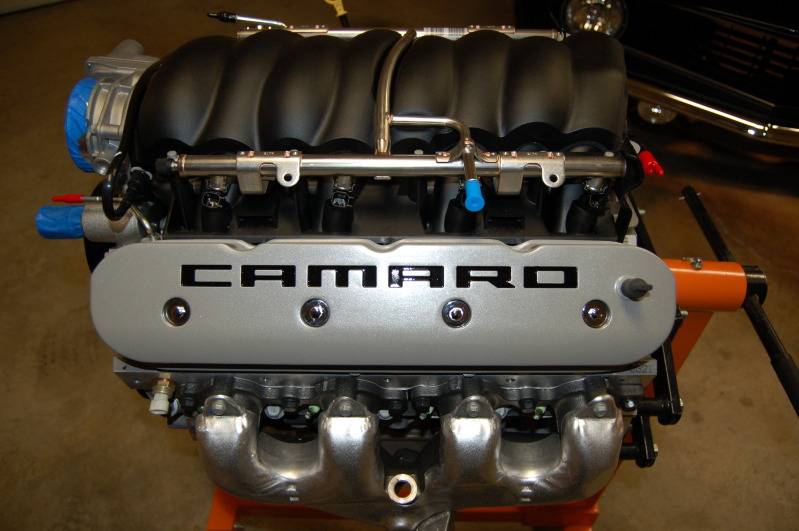
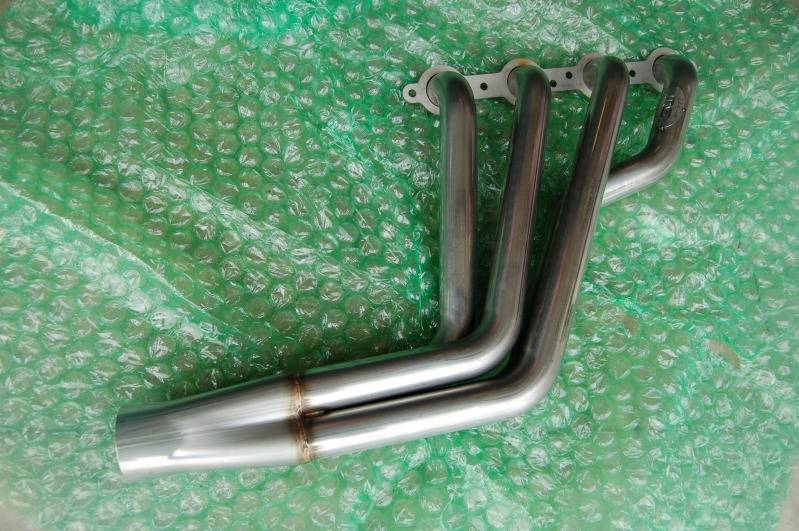
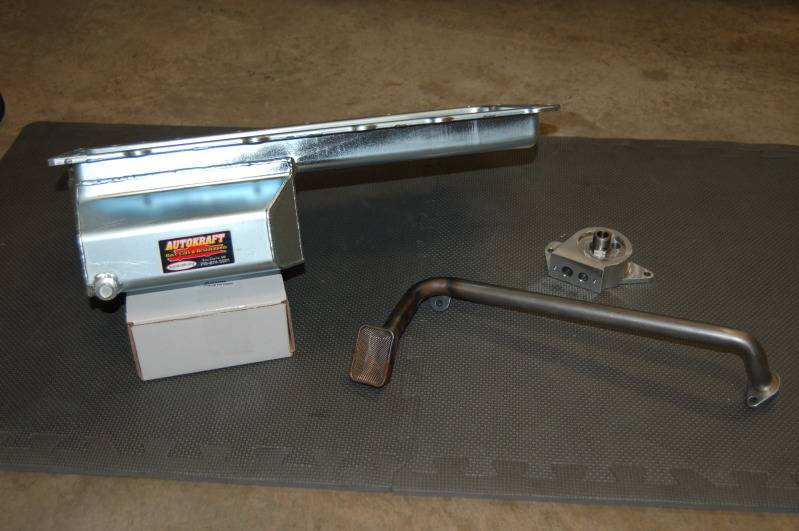
Aftermarket goodies I added to help dress up the engine, improve flow, and prevent any oil starvation.
I have gone through a couple of different LS conversion engine plates to make my drivetrain combo and trans crossmember work. I realize now that the half height body mounts and a large engine setback might have been easier with some trans tunnel modifications. Since the first attempt I have used some tools of persuasion on the tunnel. I am still tweaking on getting this setback the way I like it but I am pretty close now. Here it is sitting in for the second time.
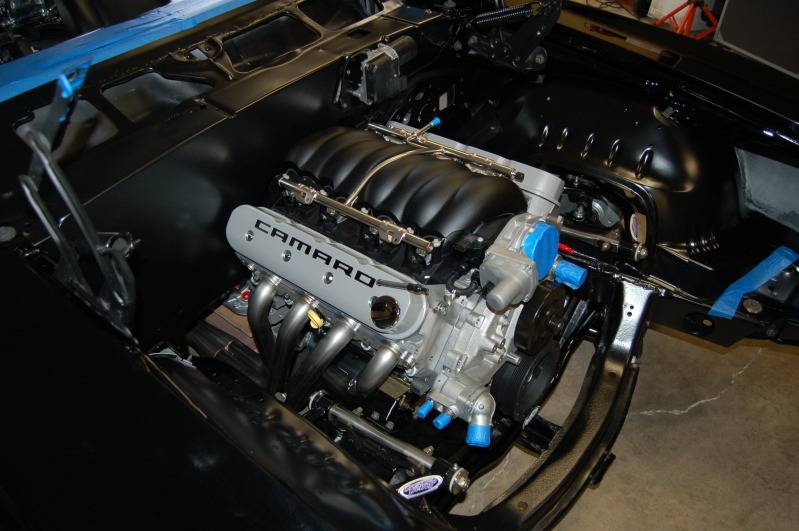
Here is a shot of the Stainless Works headers installed. I know a bunch of guys like to see if headers hang down below the frame rails. I think the SW headers tuck up slightly higher than the other brands I had looked at. One more inch up and they would probably be perfect. But for a non custom header I thought they have fit just as described and had good clearances all around. Some spots around the power steering are close but that is always the case for this car.
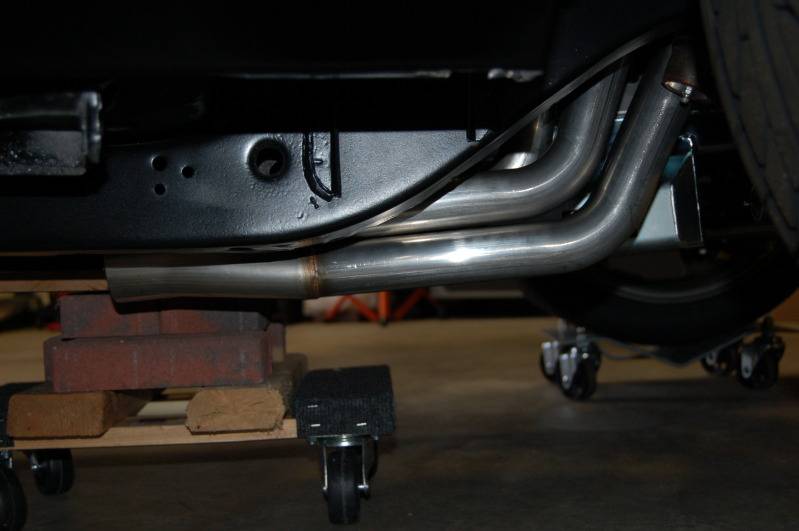
Here is a shot where I was trying an extreme engine setback. It fits as far as securing the engine but the trans was jammed in the tunnel and the trans mounting point also went past the crossmember mounting holes. Still I thought it looked cool. Fuel lines, wiring harness, or anything else for that matter would be a tight squeeze. The distance from the firewall to the passenger side head/valve cover was one hand width...ask me how I know.
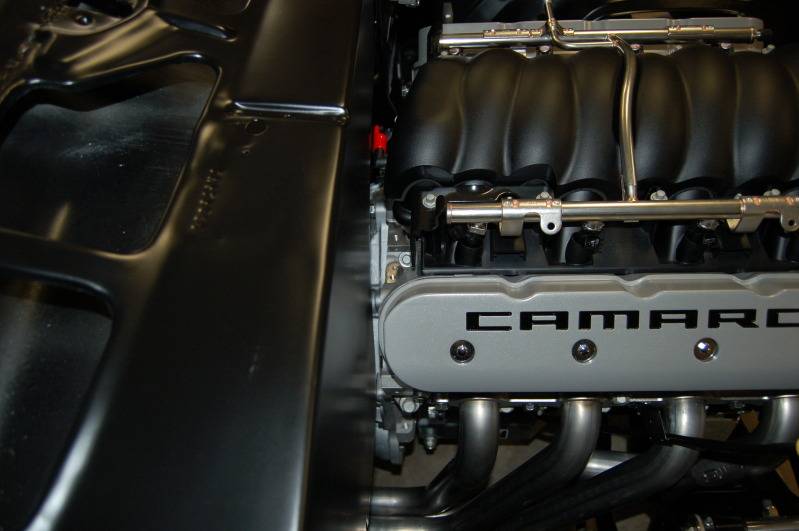
-
04-15-2012 #57
 Registered User
- Join Date
- Dec 2009
- Posts
- 1,607
Kusi! Car looks great. You got your motor farther bck than I did...:D
Ron in SoCal
69 Camaro in progress
http://www.lateral-g.net/forums/showthread.php4?t=31246
Used to be known as flash911
-
05-29-2012 #58
Registered User
- Join Date
- Jul 2011
- Location
- NC
- Posts
- 461
Introducing Project THANKS MOM!
Kusi,
Any updates? Do those valve covers go over the coil packs or have you not put them back on yet?
05-29-2012 #59
Registered User
- Join Date
- Aug 2006
- Posts
- 82
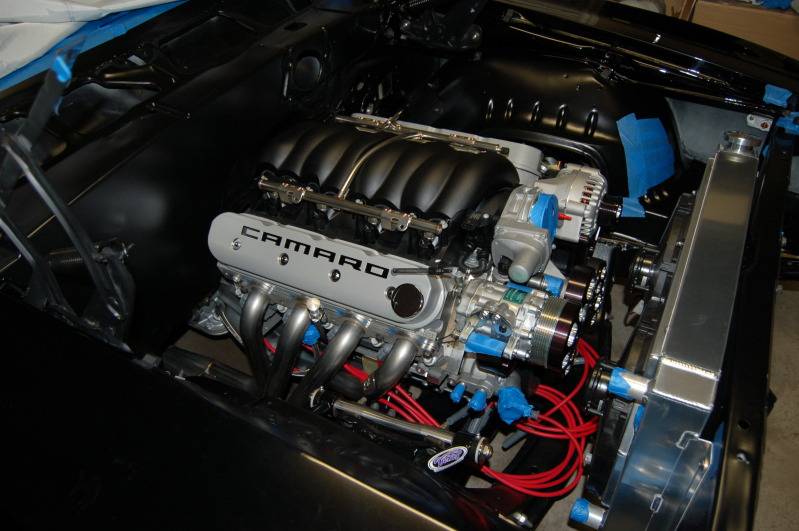
Hey diesel. I was just looking at your thread a minute ago. That setup turned out nice on your engine. It looks like we worked on similar items this past weekend. I had out all my Vintage Air stuff trying to figure out where to run all the lines. I also got out the AAW kit and started going through all the wiring. Oh boy, that one will take me a while. I am still working on getting an LS3 engine harness to work in conjunction with it too. As far as the valve covers they are from GM but taller versions of the stock covers. They are a clean well built piece but I do have to relocate my coil packs. I was working on that layout this weekend too. There are a few options out there for mounting them behind the heads but it is very tight so I am thinking about packing them together and placing them down low on the front of the block. I just got the MSD universal wire kit and I will cut them all to length.
05-31-2012 #60
Registered User
- Join Date
- Jul 2011
- Location
- NC
- Posts
- 461
Introducing Project THANKS MOM!
Kusi- did you get the extended hose kit from VA? If you are planning on tucking/hiding in fender you will need longer lines! It didn't come with all the correct fittings i need to do it the way i am so i had to order a few more...
I also pulled out my engine harness/cpu & AAW kit! The engine harness is very easy- all plug & play- just have to mount the cpu somewhere & after lookin at tucks this wknd up under the dash on pass side looks best. I will drill a 2" hole low behind motor just above trans tunnel to fit the cpu plugs thru & then grommet it.
The aaw kit is almost all done too- i was really dreading it but it doesn't look to bad at all! Most of it is done!
I love those new valve covers! Im gonna prob go the cheaper route & make a coil cover panel with some CNC & put some custom writing in it or something? Not sure yet...

 Reply With Quote



