


Results 1 to 20 of 21
Thread: First-Timer 68 LS-1 Camaro
-
01-02-2010 #1
 Registered User
- Join Date
- Jul 2009
- Location
- Graham NC
- Posts
- 34

First-Timer 68 LS-1 Camaro
Well here we go. This is an awesome site but it ends up costing me more money everytime I get on here
 . This place gives me idea after idea. This is my first full restoration-modification of this kind. I've done alot of bolt on type stuff to boats, cars, and bikes but never anything to this extent. We'll see how it goes.
The plan is to take this plain jane 68 Camaro and turn into the best driver tuff quality car that I can. I bought a 2002 Z28 with a LS1, 4l60e in it with only 33000 miles on it and going to combine the 2 cars together and see what comes out. Planing on doing everything myself ( including paint ). I bought the car a few months ago. I thought it was in good enough shape to just throw some paint on and go riding. Well that aint how I roll. After a visit to Prodigy down in Florida while we was there on vacation ( by the way if you ever get a chance to tour the shop with Frank, do it. He is a awesome guy and his work is unreal ) it was on after that.
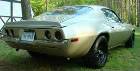
The 68 was in decent shape when I got it. New quarters, fenders, SS hood, trunk lid, bumpers, and RS package. Interior in good shape. Just needed finishing up. Had a 468 and 350 turbo in it. Here is the starting pics like I bought it home.
More to come,
Dion


-
01-02-2010 #2 Registered User
- Join Date
- Jul 2003
- Location
- Anaheim Hills, CA
- Posts
- 11,967
That looks like a pretty clean starting point. Can't wait to see it take shape.
"A ship in port is safe, but that's not what ships are built for."
1968 Track Rat Camaro:
https://www.youtube.com/watch?v=SGHJ5c1yLIo&t=2s
1971 Chevelle Wagon with a few mods:
https://www.youtube.com/watch?v=WBVPR3sRgyU
01-02-2010 #3
Registered User
- Join Date
- Jul 2009
- Location
- Graham NC
- Posts
- 34
After digging into the car I would find 1 thing after another to fix. When I started to replace the subframe bushings and found some rust in the frame around the bushing holes I new that I had to go deeper than I was planning. It's not in my blood to cover something up. I was always taught to fix it right the first time. I learned how to weld ( kind of ) a long time ago so my first money spent on the project was buying a welder. I knew it would come in handy. I went ahead and pulled the subframe out, tore it down, sandblasted it and welded up the bushing mounts with a repair kit. That was easy. Went ahead and did the guldstrand mod while I had it down. Repainted with 2 part epoxy and a semi gloss paint with my new Startingline paint gun set. Sure does shoot sweet. A buddy of mine just finished his 67 Camaro and had his rotissorie just sitting there. He talked me into putting my shel on it to make it easier on me. Well I belive that the decision to do that was a good 1 but it will probably add several weeks to the project. It's amazing what all is hiding under that 42 year old undercoating.
More to come,
Dion


01-02-2010 #4 Registered User
- Join Date
- Apr 2007
- Location
- Utah
- Posts
- 533
Nice looking car. Great job. I love the stance.
Sam
Northern UT.
'68 Camaro "Bodacious"
'56 210 2dr "Buckshot"
01-02-2010 #5
Registered User
- Join Date
- Jul 2009
- Location
- Graham NC
- Posts
- 34
Got a good deal on a set of Rushforth Fuel wheels. 18x10 5.675bs ( told you the welder would come in handy ) and 18x8 4.75bs. Bought some 285-40-18 Nittos for the rear. Started mocking them up and it's going to be real close to working. I know that I could just jack the rear up and they would fit but this car will be driven with passengers. Not wanting to do a full mini tub because it's a snowball thing. You do the mini tubs, then the springs and gas tank follow. I am working on moving the inside tub in 1" and rolling the quarter lip up while leaving enough of a flat area to mount a set of modified chrome wheel well moldings to. The 285's are'nt really that big but I don't want to have any issues at all with tire rubs while the car is sitting low. I will be using the LS1 disk brake system so thats going to push my rear wheels out a touch more per side also. If I have problems with to much offset then later in the build I'll just go to the Ford 9" I have sitting in the corner but not untill I just can't get the 10 bolt to work.
More to come,
Dion


01-02-2010 #6 Registered User
- Join Date
- Nov 2006
- Location
- Ma.
- Posts
- 5,560
The car looks great, nice work. Nice job on the sub frame.
Wayne
Car FINALLY home !!!!!! lol
Project FNQUIK https://www.pro-touring.com/showthre...ghlight=FNQUIK
01-03-2010 #7 Registered User
- Join Date
- Mar 2009
- Location
- overseas
- Posts
- 3,434
looks nice!
 Kevin S. (overseas in Germany)
1963 Chevrolet Impala 2d ht Coupe
www.CruznArt.com
CRUZN - Automotive Artworks
01-03-2010 #8 Registered User
- Join Date
- Dec 2006
- Location
- summerville,sc
- Posts
- 160
looks good so far.

01-03-2010 #9 Registered User
- Join Date
- Aug 2004
- Location
- Burnaby, BC, Canada
- Posts
- 1,388
Nice work, keep us posted
1969 CAMARO RS

2002 LS1-T56 Dyno results: 452 rwhp, 425 rwtq
Project pics of my '69
Lateral-G Feature Page
Camaro Performers Magazine Feature
01-03-2010 #10
Banned
- Join Date
- Aug 2003
- Location
- Orlando, FL
- Posts
- 8,745
Looks great Dion. I bet you have a 1/2" more on the inside to move those wheels in. A 6" BS would have been closer, but like you said, you got a deal and have a welder.
You already know, but if you need me, call or write.
01-04-2010 #11
Registered User
- Join Date
- Jul 2009
- Location
- Graham NC
- Posts
- 34
Thanks for the compliments guys. Frank, you are real close on that 1/2". The best I can do at air measuring
it looks like I'm going to be between a 1/4 and 1/2 to far out per side. I got the outer lip rolled really nice but left enough to be able to bolt the modified wheel well molding to. I also split the inner wheel well and added a 1" to it ( not the easiest thing I've ever done, they are just tacked together now with alot more welding and grinding to go ) The final measurement is 13 1/2"s clearence at the top. Before I started it was only about 11 1/2"s. I'm going to get all the clearence I can while it's on the rotissorie then if I have a problem later on when I get it rolling I'll cut the rear and make it right.
Cya, Dion
03-10-2010 #12
Registered User
- Join Date
- Jul 2009
- Location
- Graham NC
- Posts
- 34
Well after countless hours ( I'm slow ) of getting all the rust out of the floors, widening the wheel tubs, and installing a DSE shock crossmember, I finally sealed off the floor today. I started with a 2 part Epoxy and finished up with Upol Raptor bedliner. I had mixed feelings about using the bedliner but I'm planning on really driving this car and figured it would hold up to some abuse. I am pleased with the results. Should be able to withstand alot of beating. Next is going to be getting it off the rotissorie so I can fix the inner cowl and dash. I aint leaving no rust behind.
Cya, Dion


03-10-2010 #13
Registered User
- Join Date
- Nov 2006
- Location
- Ma.
- Posts
- 5,560
Its looking really good. Nice work under there, it should hold up well.
Wayne
Car FINALLY home !!!!!! lol
Project FNQUIK https://www.pro-touring.com/showthre...ghlight=FNQUIK
03-10-2010 #14
Registered User
- Join Date
- Mar 2009
- Location
- overseas
- Posts
- 3,434
nice! good job
Kevin S. (overseas in Germany)
1963 Chevrolet Impala 2d ht Coupe
www.CruznArt.com
CRUZN - Automotive Artworks
03-11-2010 #15
Registered User
- Join Date
- Apr 2005
- Posts
- 413

Lookin' good. Don't forget the DSE upper shock mounts need to be welded in. This will cause you a little rework with the bedliner on the bottom. Just make you weld them in before you spray the trunk. The welding will burn the top side coating as well.
03-11-2010 #16 Registered User
- Join Date
- Mar 2010
- Location
- Rochester NY
- Posts
- 403
looking good -- keep up the good work
Don
Grace - 67 Camaro daily driver with upgrades along the way.
https://www.pro-touring.com/showthre...-Camaro-Driver
03-11-2010 #17 Registered User
- Join Date
- Aug 2004
- Location
- Rustburg, Virginia
- Posts
- 3,436
I don't know how I missed this thread....car is really taking shape...good work Dion.
1970 RS/SS350 139K on the clock:
89 TPI motor w/ 1pc rear seal coupled to a Viper T56 via Mcleod's modular bellhousing w/ hydraulic T/O bearing from the Viper, 12 bolt rear w/ 3.73 gearing, SC&C upper control arms, factory lowers with Delalums, C5 brakes at all four corners, Front Wheels 17x8's with Sumi 255/40/17 and Rear Wheels 17x9's with Sumi 275/40/17.
Brief description of the work done so far can be found here: http://www.nastyz28.com/forum/showthread.php?t=112454
03-11-2010 #18 Registered User
- Join Date
- Nov 2008
- Location
- iceland
- Posts
- 1,859

Nice looking car
Bjarni B
My Chevelle project The Awakening
http://www.1971chevelle.net/

http://www.kvartmila.is/smf/index.php?topic=27028.0
CHEVY POWER RULES!
03-11-2010 #19 Registered User
- Join Date
- Nov 2003
- Location
- michigan
- Posts
- 1,232
looks like a nice project.. keep those updates coming!
colt zantop
1968 camaro LS1.......aka......."NJECTED"
03-11-2010 #20
Registered User
- Join Date
- Aug 2004
- Location
- St. Louis
- Posts
- 191
Looks great.
Amazing how well that stuff works and looks as an under armour. Good choice and nice progress.

 Reply With Quote



