


Results 1 to 6 of 6
Thread: Project Black Diamond Dec-April
-
05-13-2008 #1

 Registered User
- Join Date
- Jul 2007
- Location
- Wake Forest North Carolina
- Posts
- 66
Project Black Diamond Dec-April
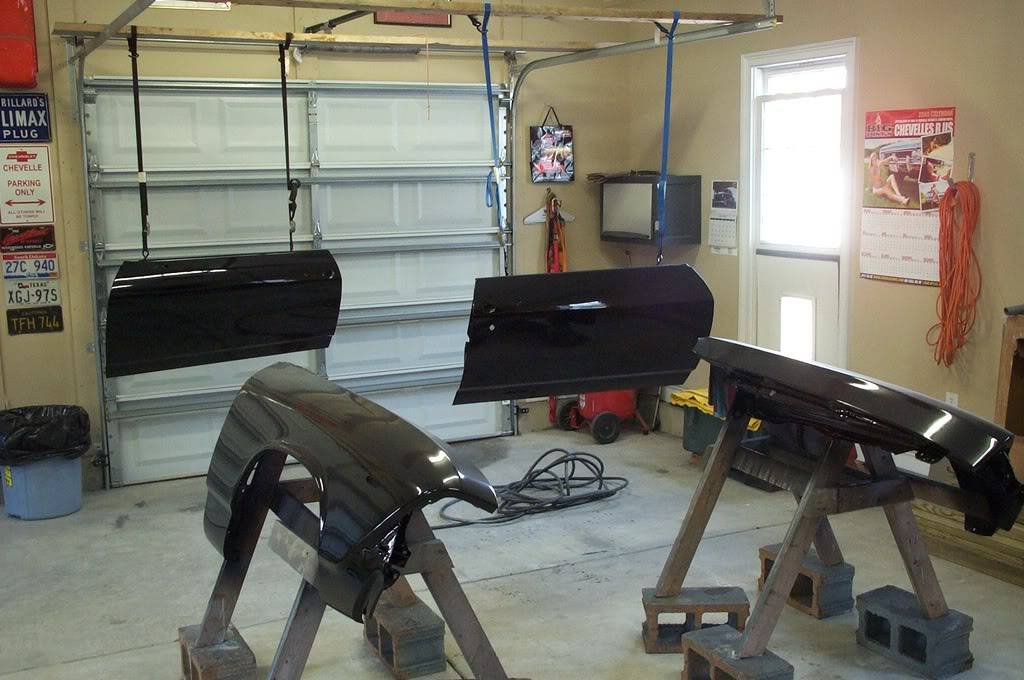
I think I left of with paint pictures of the overall body, the frame was basically a rolling/complete chassis, I still had the doors, fenders, trunk, hood and front header to paint. Historic thread in new members : https://www.pro-touring.com/forum/showthread.php?t=32577&highlight=dharrod.
The body and chassis have now been brought together.
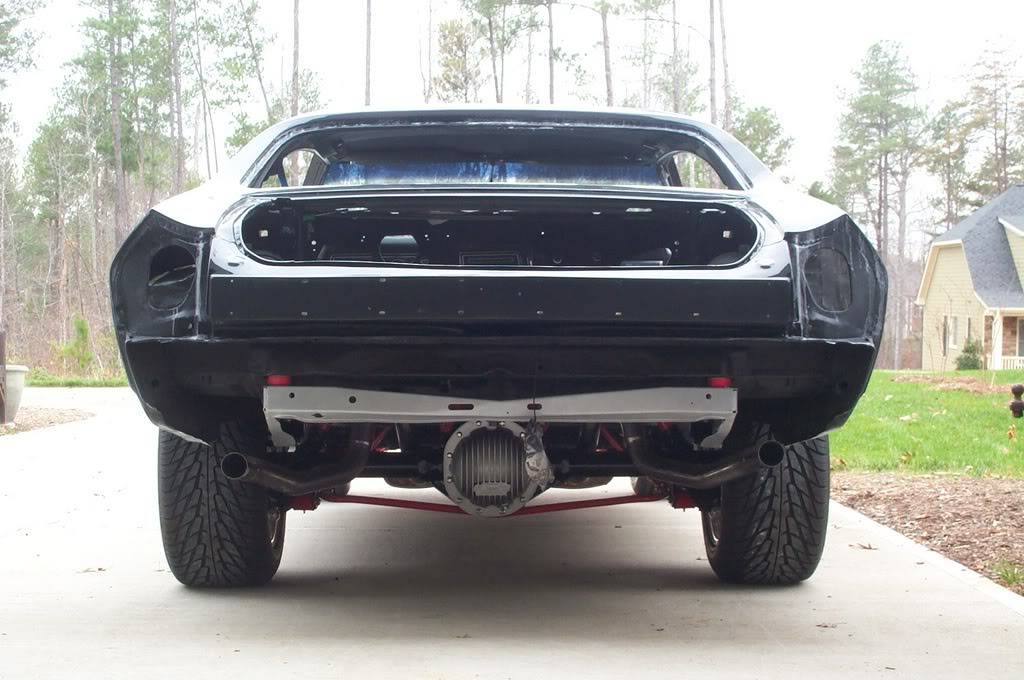
After getting the car back on frame I spent some time on the interior getting some initial wiring done and laying the sound proofing. The shot right below is simple sound proofing that almost everyone is doing. I ran it all the way up the front pannel as I had already removed the factory sound proofing to put in inner brackets for the heating unit and ignition box.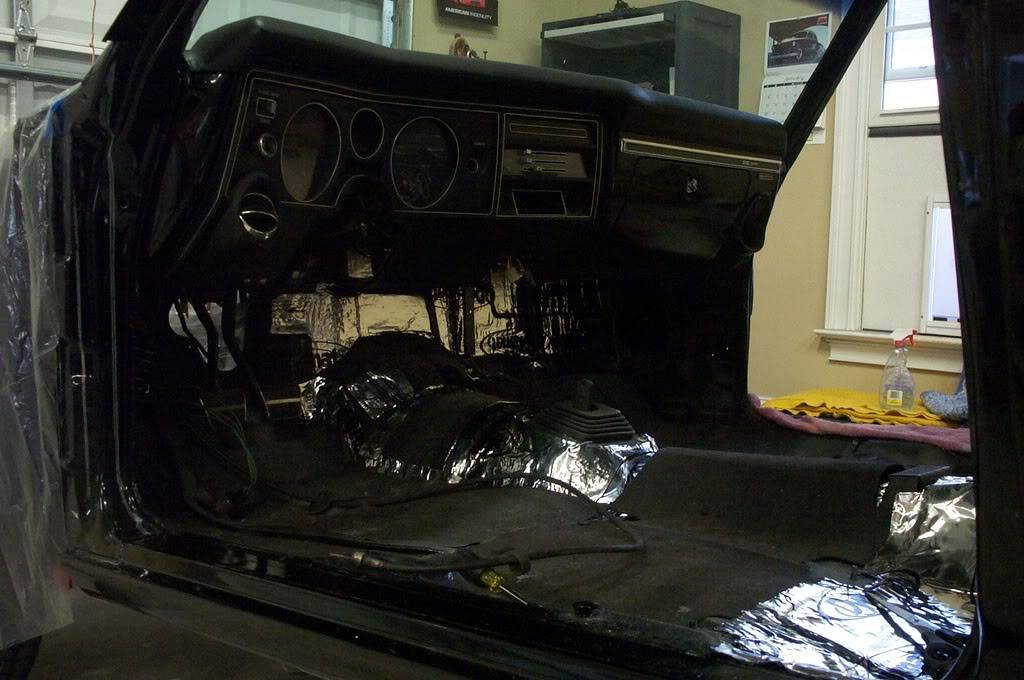
The wiring was a learning experience. Trying to keep wires hidden and removing the old remote sensing/regulator and moving the battery soleniod to the trunk made things fun. Add in the ignition box, electric fan, new headlights, wiper motor and new heating unit I had several electrical gremlins to work out. I was able to get it to fire after a couple of goofy mistakes on my part. You'll see the stainless steel headers turned a golden brown; I plan to remov the headers and have them ceramic coated along with part of the exhaust
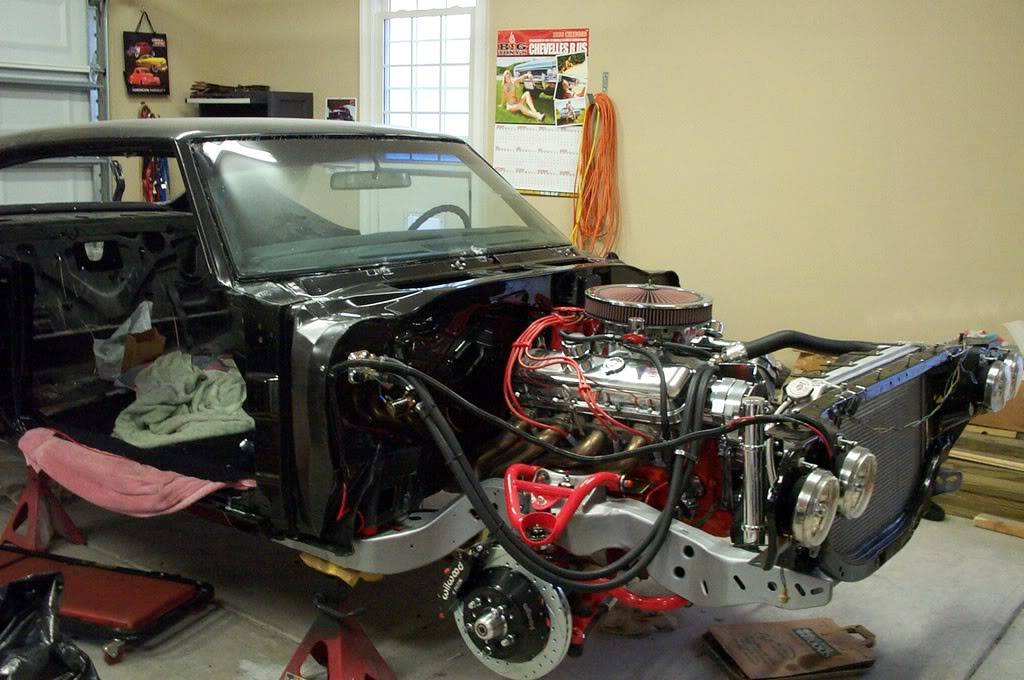
Another step prior to the fenders was to get the brake system working. I decided to go with manual brakes to get as clean of an engine bay as I could. My wife and I pumped for ever to bench bleed it and I used all of my husband points as my wife was the pedal pumper overall. As a side note the paint appeared to turn out fine and had a good shine after the first round of buffing (my second paint job overall) .
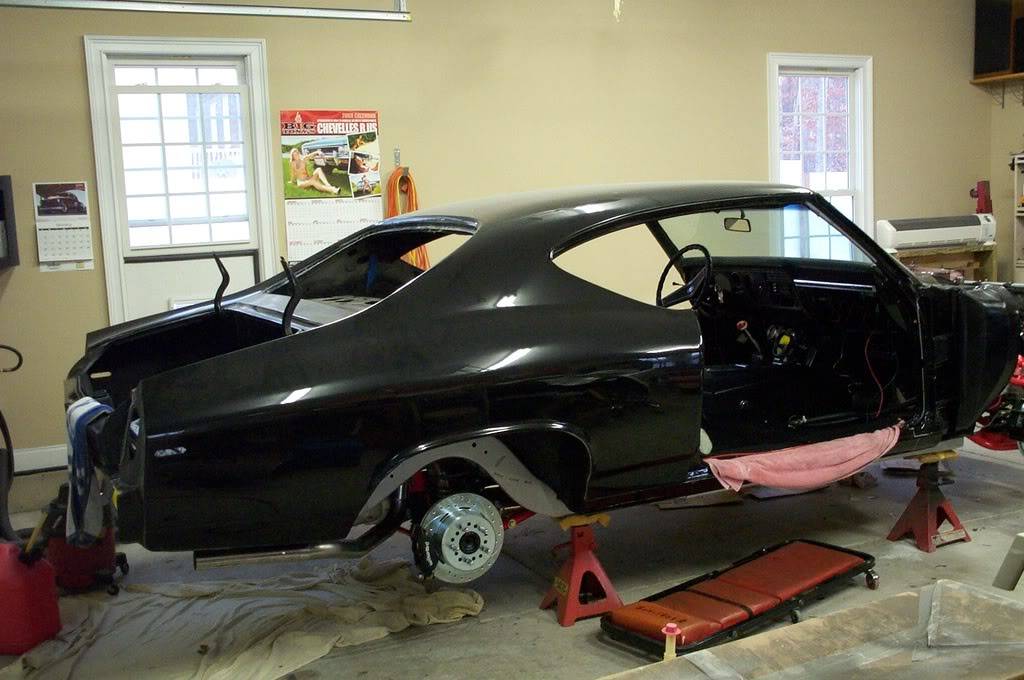
I then moved the main car two the detached garage to have more of a 'clean' room (I took the wife's bay/spot) after a little begging. This allowed me to get the fenders and doors painted.
-
05-13-2008 #2 Registered User
- Join Date
- Oct 2004
- Location
- St.Anne Il
- Posts
- 3,924

wow that is looking good !!!!!!! ... and make sure you keep thanking the Wife for that spot in case another project comes along..
Darrin Stalnecker
1969 Camaro Convert full pt pr
2007 Corvette Supercharged
1968 Camaro LS1 T56
http://www.fquick.com/dropit69
05-13-2008 #3 Pro-Touring Veteran
- Join Date
- Jun 2007
- Location
- Fort Myers, FL
- Posts
- 1,003
Thats awesome looks like everything is starting to come together. Its going to look awesome when it is assembled.
Chris Smock aka Blazed67
1967 Firebird Convertible- Tough Luck- never ending
2003 VW Jetta Wagon 1.8T- the new DD
2006 Suzuki SV1000R- greatly missed
05-13-2008 #4 Registered User
- Join Date
- Nov 2006
- Location
- Ma.
- Posts
- 5,560
Looking good keep the updates comming
WayneWayne
Car FINALLY home !!!!!! lol
Project FNQUIK https://www.pro-touring.com/showthre...ghlight=FNQUIK
05-13-2008 #5 Registered User
- Join Date
- Feb 2006
- Location
- Somewhere in the Pacific Ocean
- Posts
- 161
Looks sweet!!!! Great work for your second paint job.

Progressing nicely too. Keep the pics coming.
05-13-2008 #6 Registered User
- Join Date
- Jun 2007
- Location
- Dayton Ohio
- Posts
- 1,283
very nice
GTO Project https://www.pro-touring.com/showthre...-The-Great-One
Colorado Project https://www.pro-touring.com/showthre...cab-CodeRedZQ8
Check Out My YouTube Channel http://www.youtube.com/c/geedsgarage

 Reply With Quote