


Results 1 to 20 of 20
Thread: SickSpeedMonte
Threaded View


-
11-22-2011 #18
 Registered User
- Join Date
- Apr 2006
- Location
- MD
- Posts
- 232

SSSLLLOOWWW progress for me, the focus has been on keeping my damn truck running and the house, but I'm hoping to start paying more attention to the Monte now.
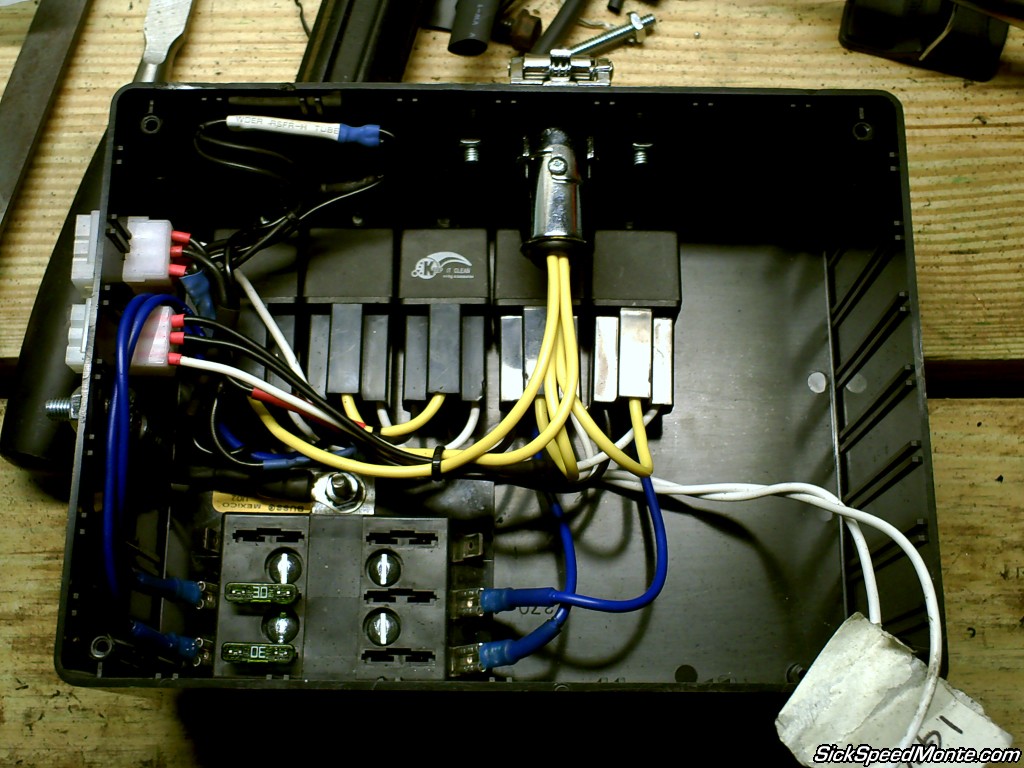
New relay box for the fans and headlights (have $100 into this, I honestly didn't expect it to be that much). I'll probably have another relay in there for the fuel pump eventually. The connectors can be unplugged and the entire box can be easily removed.
Dash mods:


4" of extra clearance behind the dash, which should mean I can cut clearance into the firewall for downpipes if needed. I also was able to mount the electrical box behind the head unit. I like having the dash a little closer, it gives the car a more modern feel and the dash flows into the console, making the console feel like less of an afterthought.

I know some people go ape sh*t with their crazy fiberglass interiors, but I want this to look like something the factory might do. I haven't decided how to finish it off (either paint or upholstery) but it won't be glossey. These pieces are just plugs, which will be used to make the molds, which will be used to make the final part. I will keep the molds around.
I've got body filler on it right now, with a few hours to go before it's ready for primer and more sanding. Still have to put filler on the dash foam parts, and I'll probably use some slick sand or something to ready it for mold making.

Doug (sicmonte) sold me his old blower engine.
4340 forged steel Eagle crank

Forged eagle H-beams with forged SRP aluminum pistons and ARP rod bolts

1970 010 casting 4 bolt main 350, .030 over, honed, decked

Dart Pro 1 215 cc heads, should make about 8.5:1 compression with the dished pistons


Timing chain, oil pump, crank bearings, (cam bearings are installed), (incorrect) lifters... need to get retrofit roller lifters, rings, and pushrods

It's going to be getting a pair of snails with Megasquirt injection. I bought a PCB from radioshack and a bunch of resistors to practice my soldering, and then I bought a better soldering iron station with temp control after I realized my pencil iron sucks.
I'm not really sure what to do for the intake manifold. The edelbrock pro flow xt looks like a nice manifold. I don't want to run an HSR because I don't like the way the upper to lower plenum bolts have bosses that go right through the upper plenum, and I don't know how much positive pressure that plenum can take before it wants to rip those tiny bolts out of the aluminum lower. The pro flow is all one casting so that takes car of both concerns. It's a good bit more money though.
The plan is to start the conversion to fuel injection this winter, try to finish the never ending dash project, fix the heavy clutch pedal, and drive it next summer. I don't drive this car enough. I know the car/frame will need to be reinforced to take the power I'm planning for, and it has some rot in the rear body mount areas... I'm not sure if I should try to repair it or get another cheap clean roller. This car has a lot of sentimental value which might make that decision (or the solution) difficult.
I bought a used steering box with lower miles, brought it in to work and stuck it in the parts washer, and then threw some paint at it.

And here is a Jeep Cherokee steering shaft that I installed, it eliminates the rag joint. I'm thinking about tightening up the tilt column now that spring is over.

Doug also gave me his Hellwig front bar, and that's in there. The car handles so much better with that bar, it feels a lot more balanced at the autocross that I went to a couple weeks ago.
Here's a picture of the Hellwig bar. The travel limiting straps are not installed yet.

I also fixed some wiring on the power window switches. I had a wire sever from the terminal on the driver side switch which actually made the passenger side window stop working all together (from either switch). Turns out the passenger window switch grounds through the driver switch. I found an online store that sells the little post connectors and got that straightened out. I installed a new window motor on the passenger side, removed/cleaned/greased/reinstalled all of the tracks and regulator, and now the window goes up just like a new car. The driver's side wasn't as bad to begin with, but I still plan on doing the same to that side.
-


 Reply With Quote



