


Results 21 to 40 of 61
Thread: Angry Johnny's 69 Camaro Build
-
04-13-2020 #21

 Registered User
- Join Date
- Jun 2012
- Location
- Golden Valley AZ
- Posts
- 77

Body is stripped of all paint
You just never know what lurks under the primer that someone else did. Till you get down to a clean slate, you just never know.
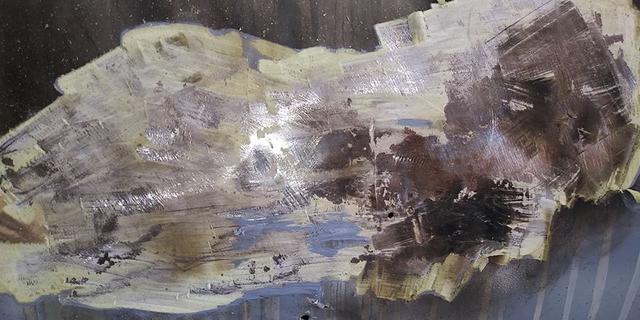
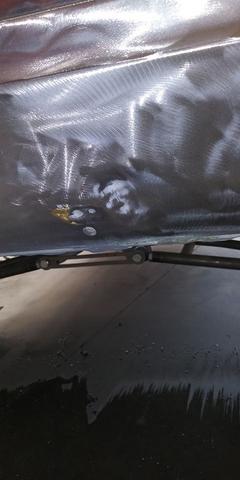
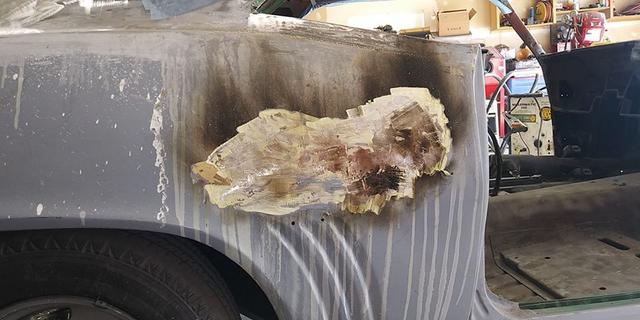
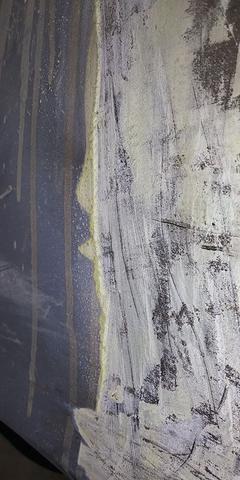
Little MAP gas torch works well for taking filler off. Just have to be careful not to get the panel too hot.
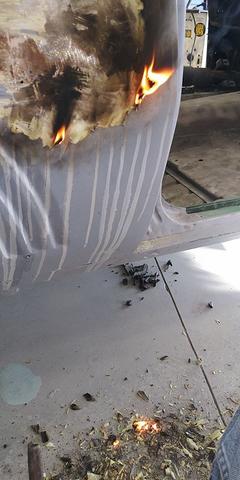
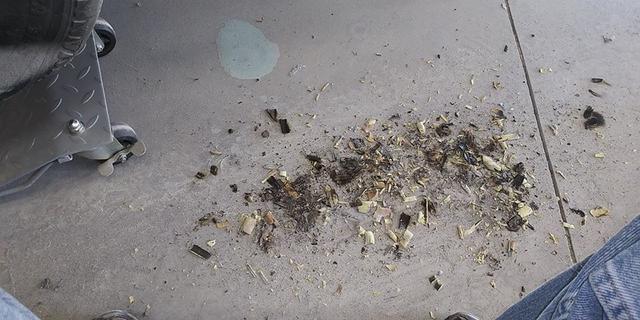
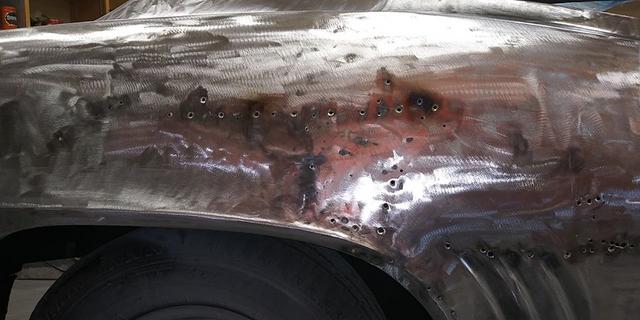
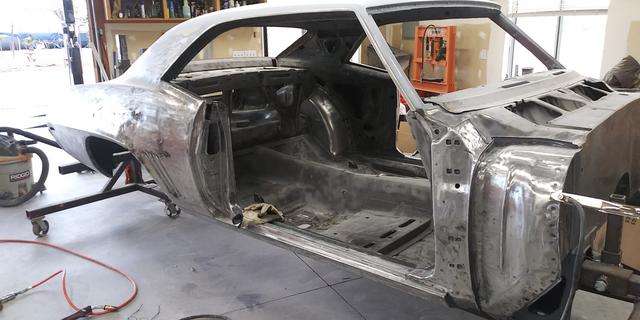
Clean slate. It was suggested on a FB page that I should replace the quarter panels, but, I said no way!! After all the issues I had with front sheet metal fitment, there was no way, I was going to deal with full quarter panel replacement. Besides these are still the original panels, and the door gaps are perfect. Somebody did a decent job of getting that passenger side pulled out with a slide hammer, it just need the holes welded shut. No big deal. I think I counted 54 holes total though

- - - Updated - - -
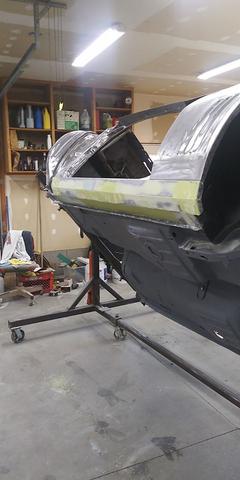
Just a quickie. Driver side rocker panel. On this car, I plan to weld all the holes shut. If I decide later to do chrome trim, it will be attached with 2 sided tape of some type.
Skim coat for the rocker, after welding the trim holes closed, and trying to pull out some dents in the bottom, that were likely caused from a jack. That metal under there is thick and tough!!
- - - Updated - - -
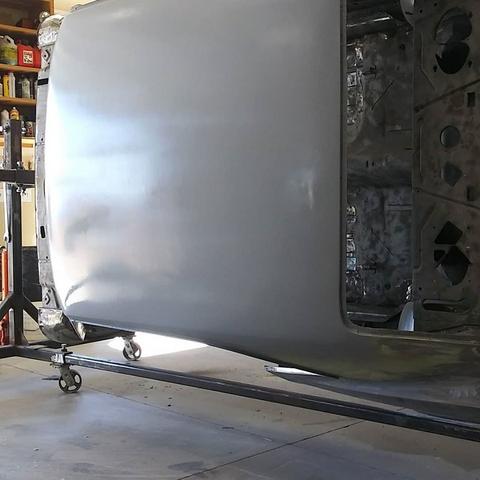
Since I was mostly finished with the roof, I decided to put it in primer, since it has been exposed for several weeks. Luckily out here in the AZ desert, it is very dry.
- - - Updated - - -
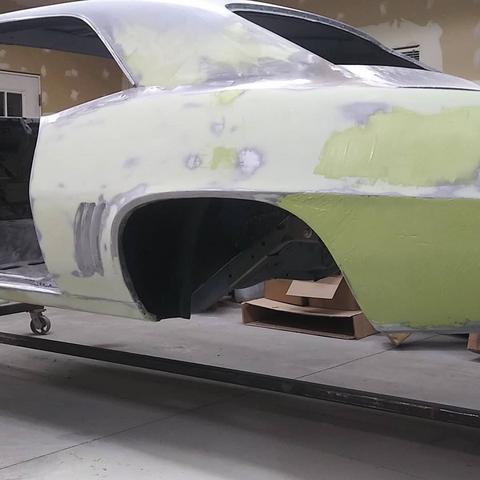
This is more or less where I left off about a week ago. Got called to work and only part way finished it. I still have a few high spots, to deal with, as you can see from the exposed metal.
 John Rodko
69 RS/SS Camaro.
Heidts Pro G IRS w/ 3:90 gear, Heidts Pro G front
6.0L LQ4 to be TT
6 speed or 4L80E, that is the question..hmmm
Future plans for full TMI interior
-
04-13-2020 #22
Registered User
- Join Date
- Jun 2012
- Location
- Golden Valley AZ
- Posts
- 77
If you have been following along up to this point, thank you. It's pretty boring I know.
This is really exciting though!! At least to me it is. This is color choice, which I have spent over a year, trying to figure out. For me, wheel choice was easier than this!!
A little (boring) history, as to how this all started.
I was working in Alliance NE (I work for the railroad), and was there for over a year (Jan 2015 till March 2016) During my idle time, which there was a lot of, I found myself building 1/12 scale Foose models of the 69 Camaro, to test paint schemes.
So here's some examples:
At first, I thought blue.
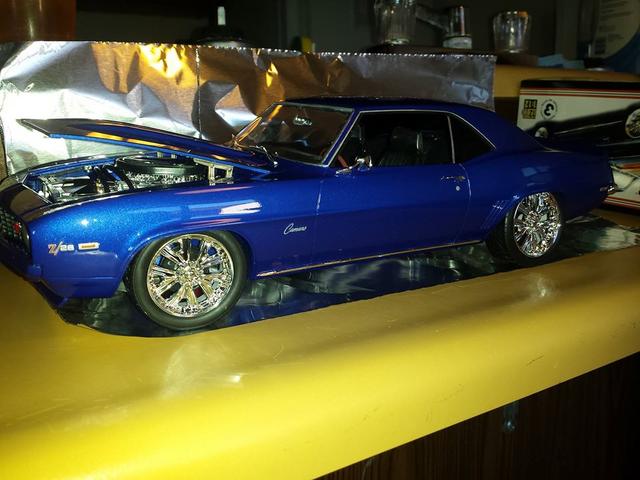
Then I thought, why not be different, and try something other than the red, blue, black, Camaro. I liked it, but I didn't love it.
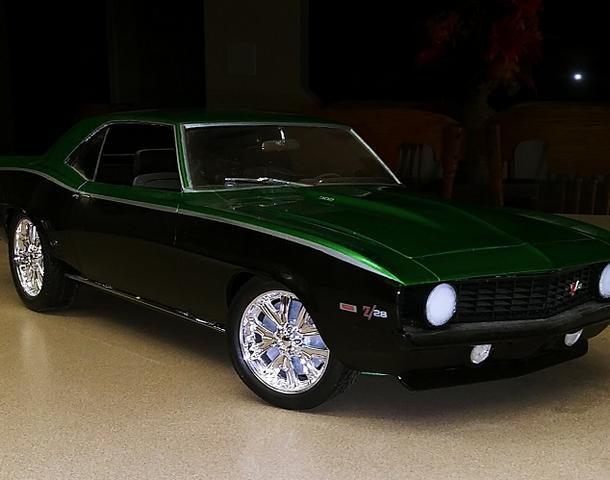
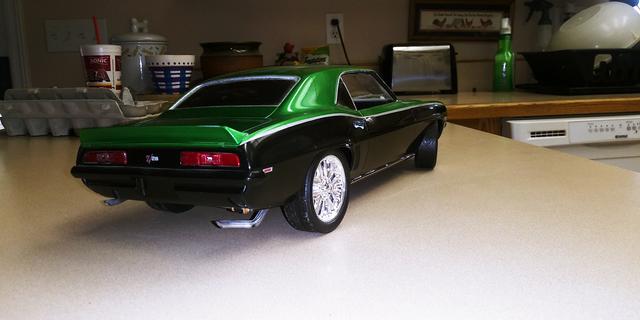
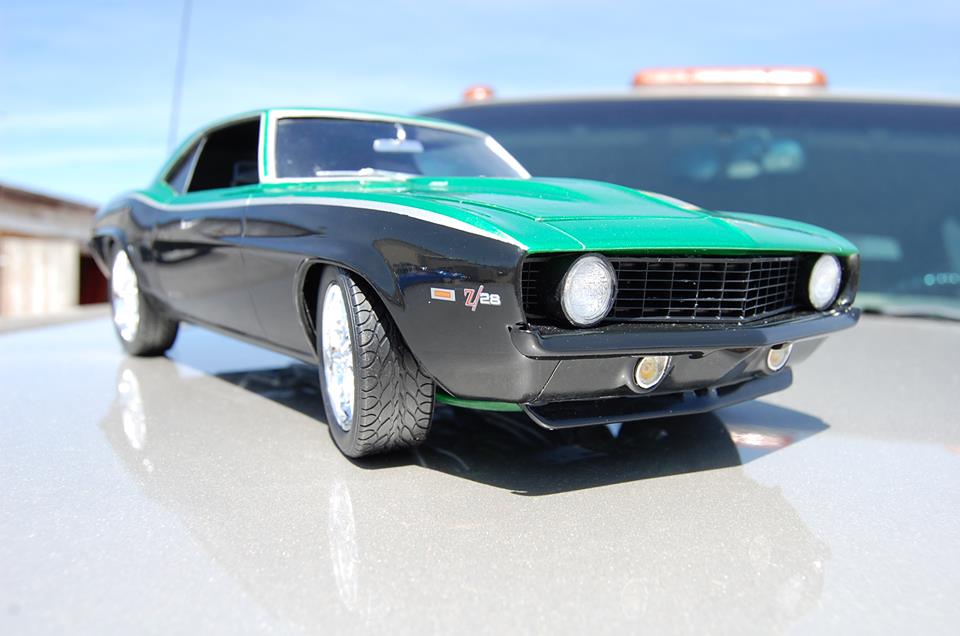
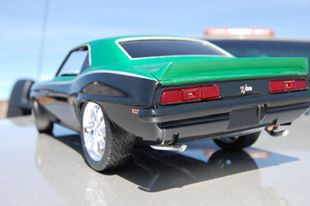
Then I found this one online, which I liked better than the models I built, since it had the colors flipped
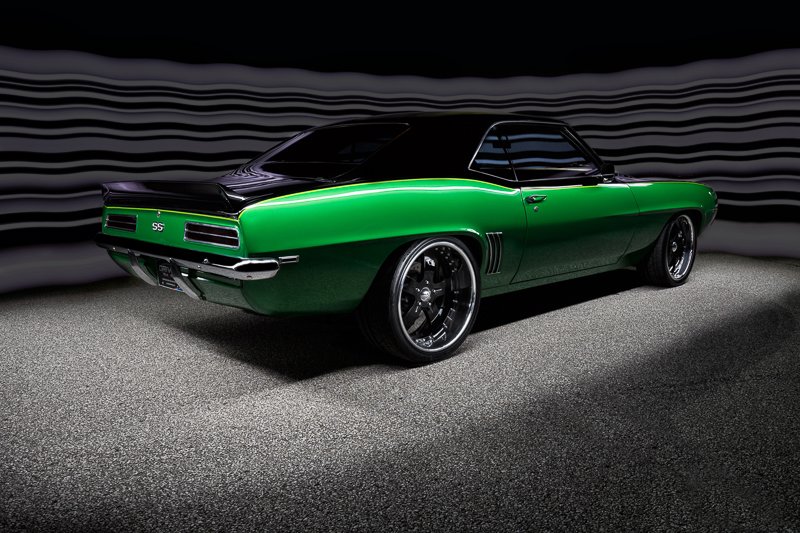
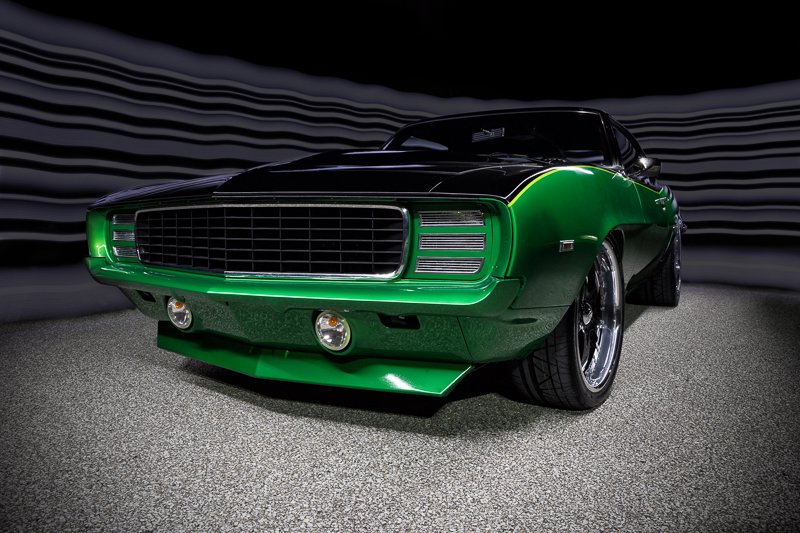
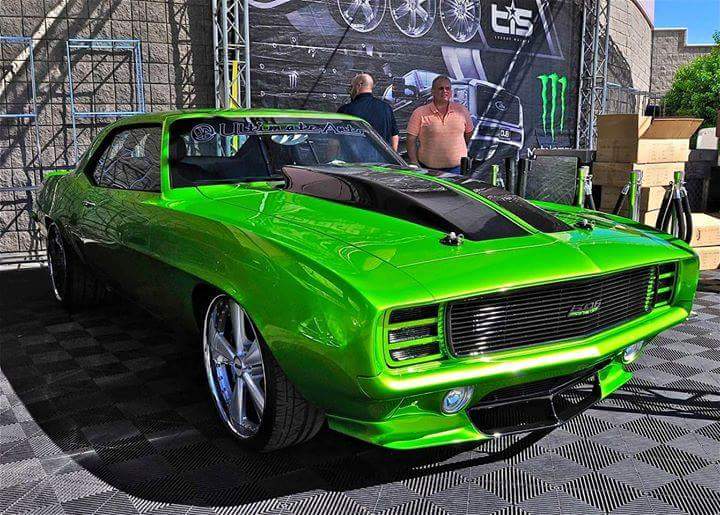
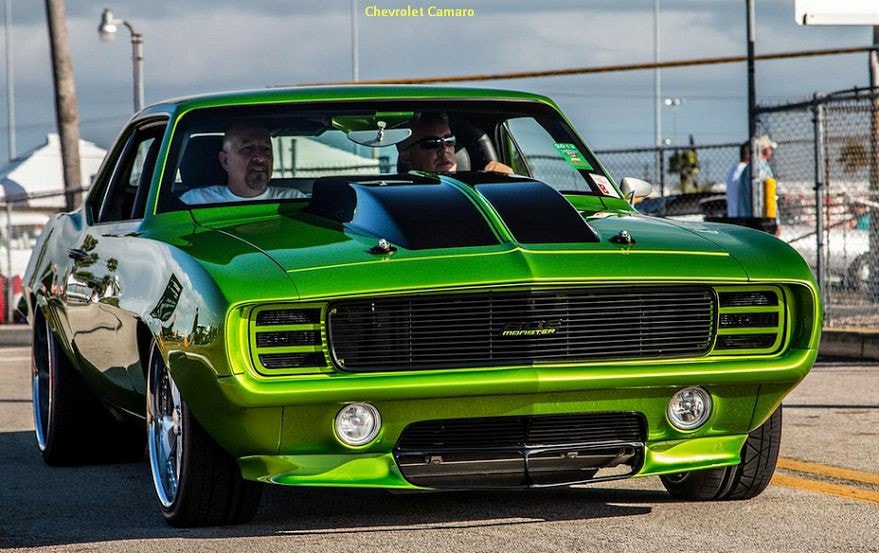
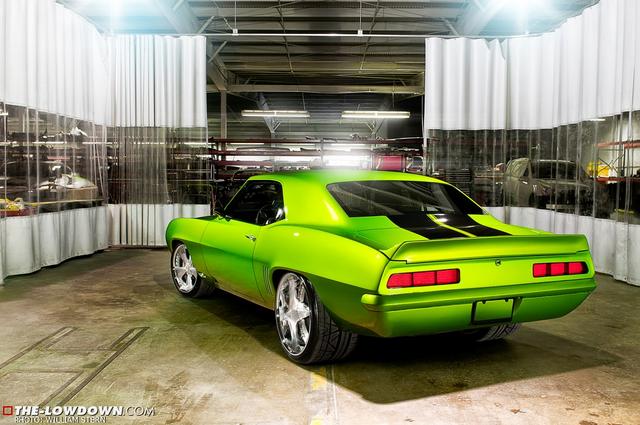
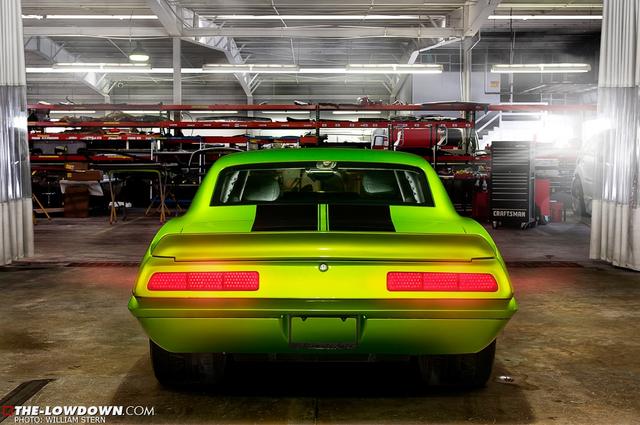
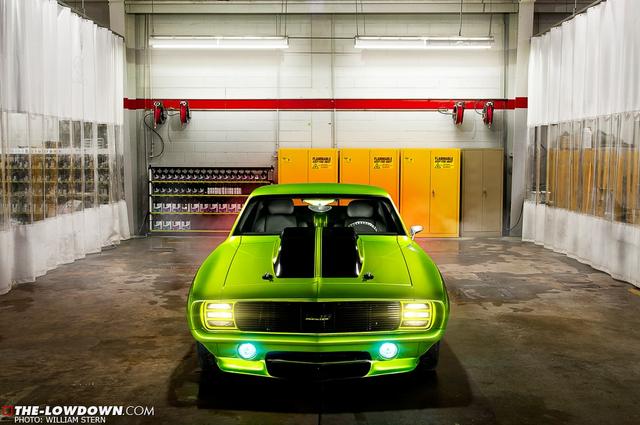
That's when another friend said, " Think about it. You like it now, but, will you still like it 2 years from now?" Hmmm, valid point. I didn't want to do something that would be considered out of style in a couple of years. So, back to the drawing board. I decided just to keep it simple (ish). Can't go wrong with a solid color, and good ol SS stripes!!So, the hunt for the perfect shade of green began, because I wanted it green. That's when I found this car, while doing a search. It was difficult to find pics of this car online. Seems like not too many exist. I fell in love with the look, and the color, the moment I saw it
 John Rodko
69 RS/SS Camaro.
Heidts Pro G IRS w/ 3:90 gear, Heidts Pro G front
6.0L LQ4 to be TT
6 speed or 4L80E, that is the question..hmmm
Future plans for full TMI interior
04-13-2020 #23
Registered User
- Join Date
- Jun 2012
- Location
- Golden Valley AZ
- Posts
- 77
HOK Lime Mist
The Camaro above is actually painted, Dodge Viper, Snakeskin Green.
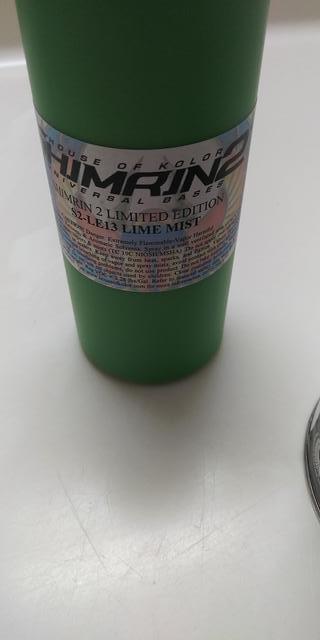
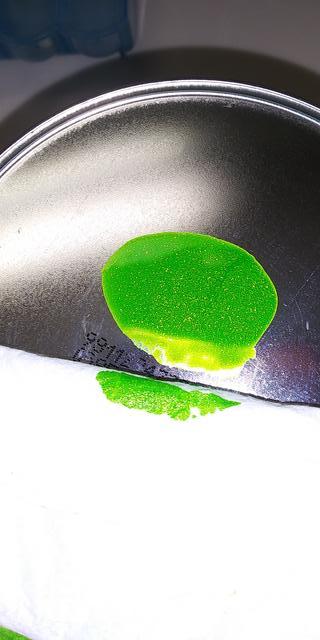
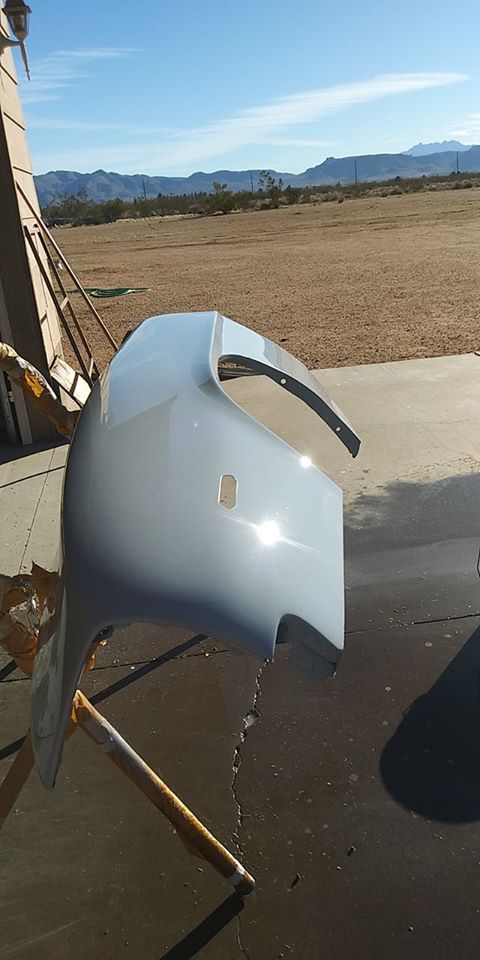
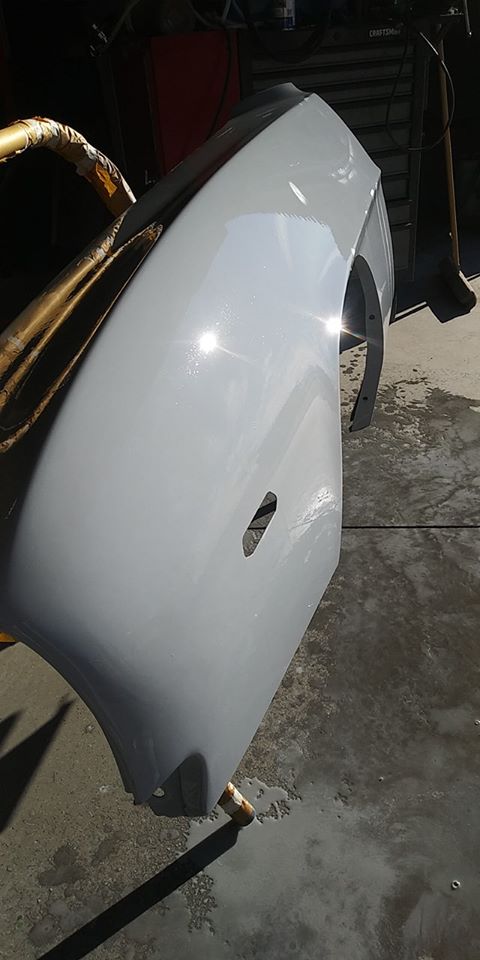
The color of choice for me is, HOK (House of Kolor) Lime Mist. It was a limited edition color. I was about 2 weeks too late in getting the factory offering of this color, but luckily I found a paint supplier, that has the formula to make it for me.
Here's C10 Chevy truck that was painted in this color
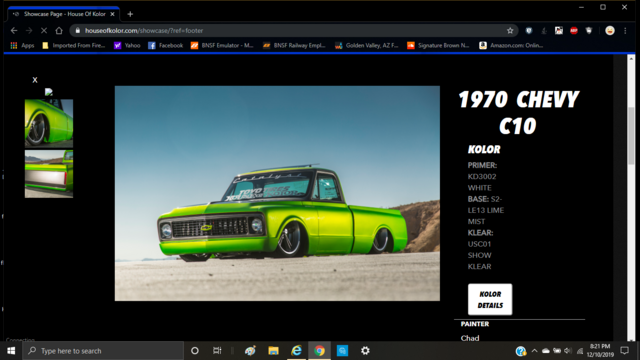
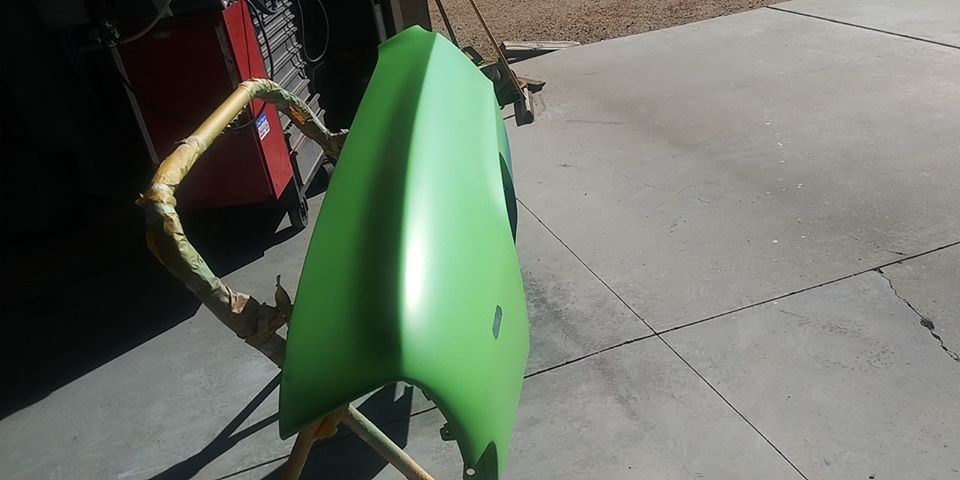
I painted a test fender, to see if I liked the color, and I just fell in love with it!! Even today, when I open the garage, and see it there on the stand,it still blows me away.
I first primed the fender with HOK KD 3000 primer/sufacer
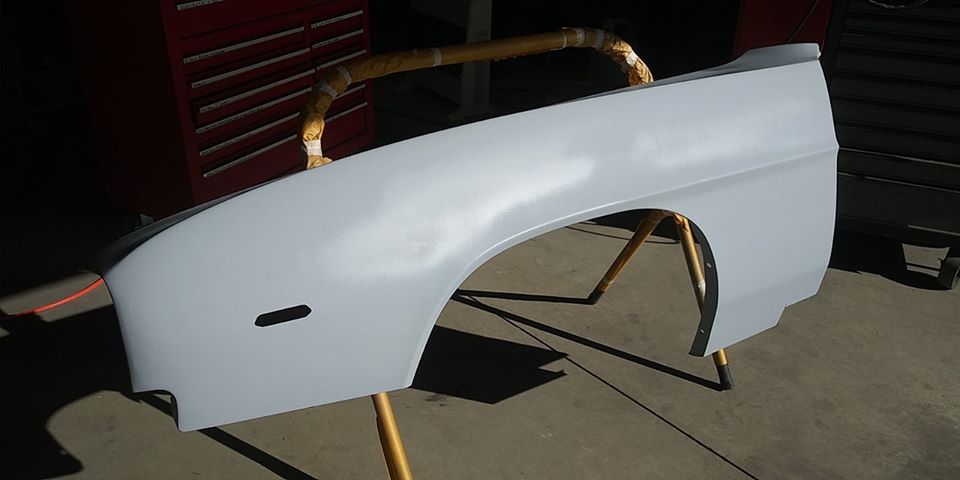
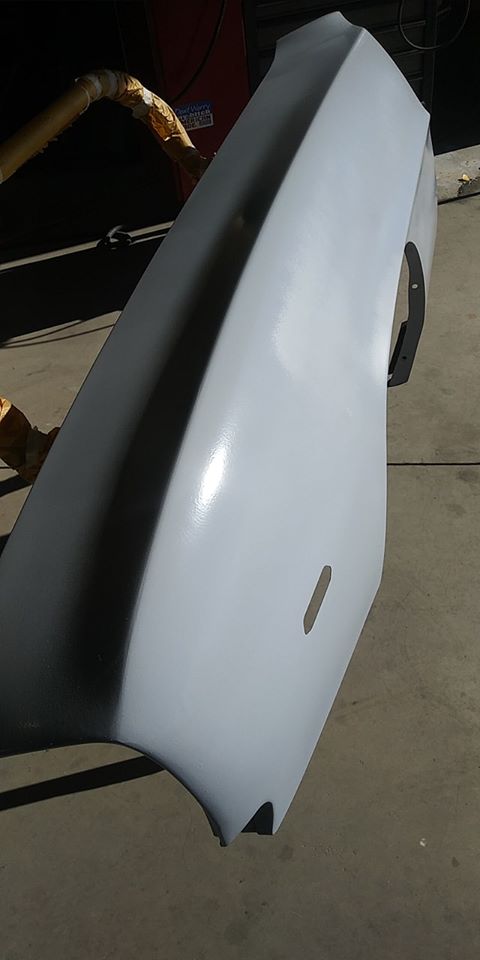
I then wet sanded it with 400 grit
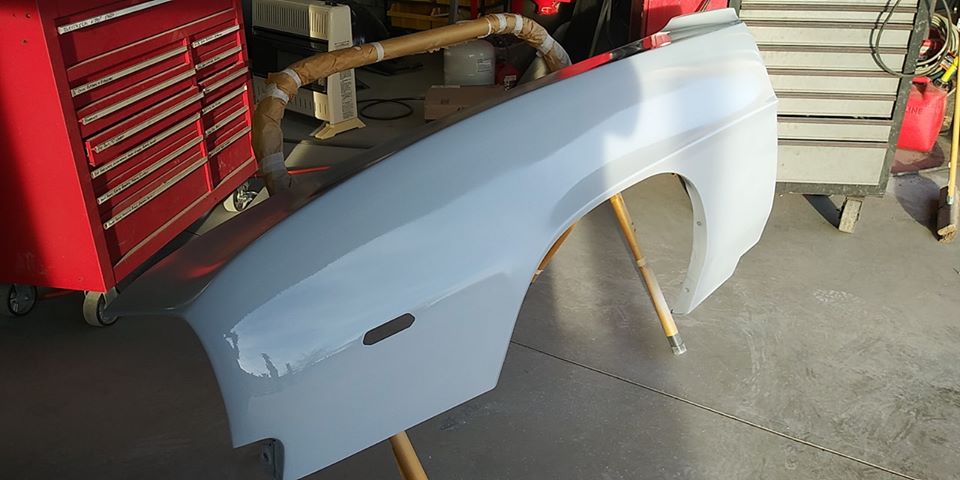
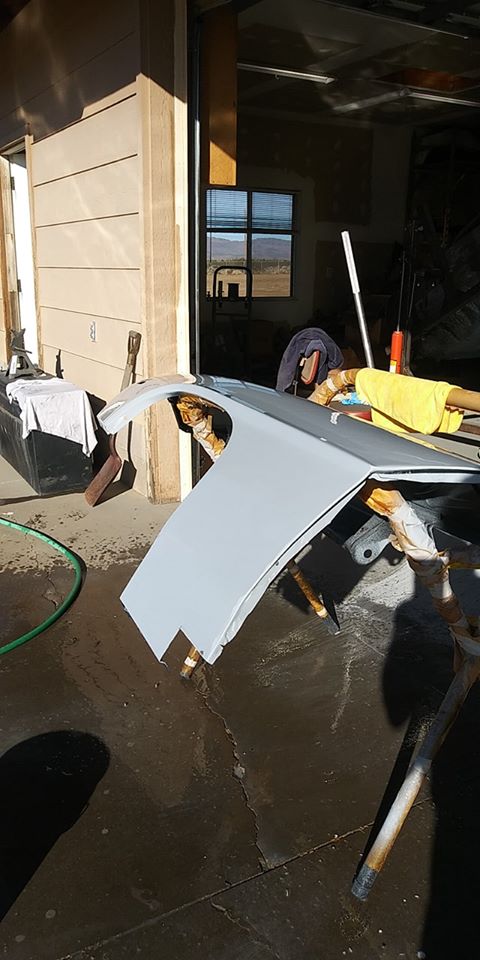
As my paint guy suggested, instead of using a silver, gold, or white base, he said to use a tinted sealer, that's close to the paint color, so as to not have use as much of the expensive paint, to get the same coverage.
 John Rodko
69 RS/SS Camaro.
Heidts Pro G IRS w/ 3:90 gear, Heidts Pro G front
6.0L LQ4 to be TT
6 speed or 4L80E, that is the question..hmmm
Future plans for full TMI interior
04-13-2020 #24
Registered User
- Join Date
- Jun 2012
- Location
- Golden Valley AZ
- Posts
- 77
The real test!
Base coat. 3 total coats
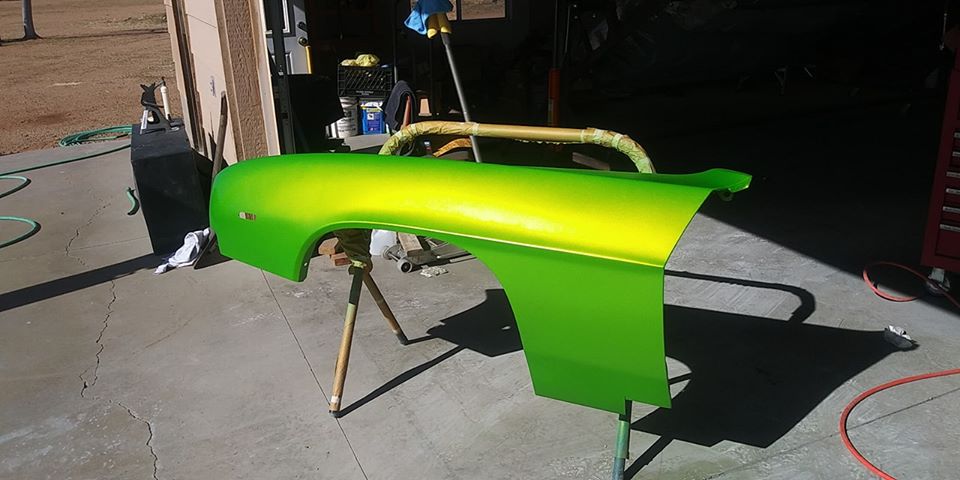
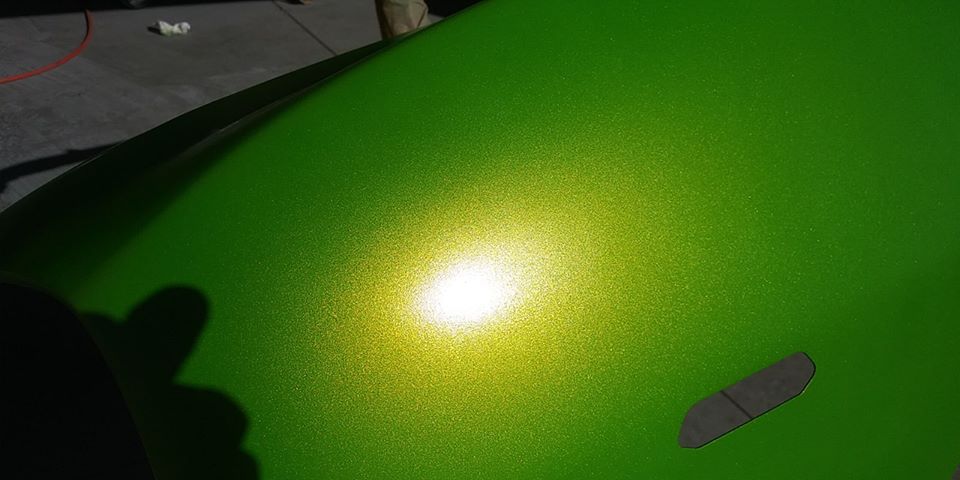
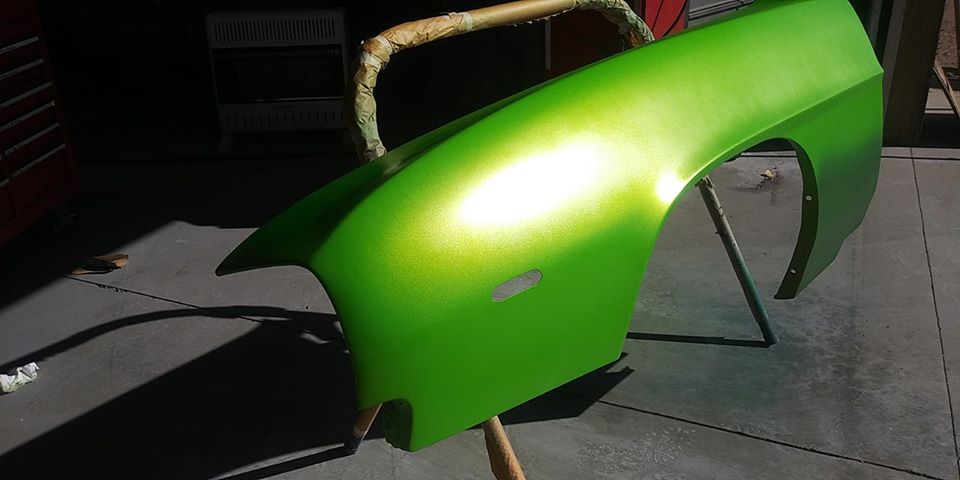
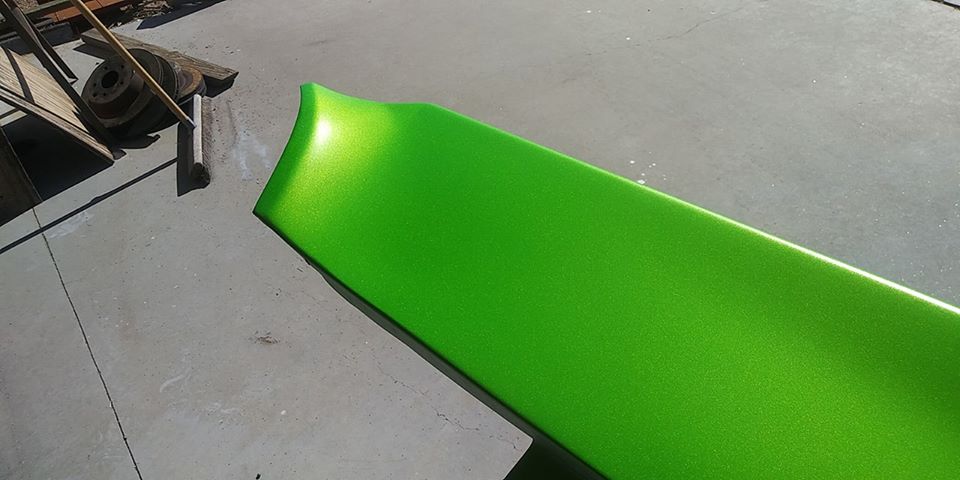
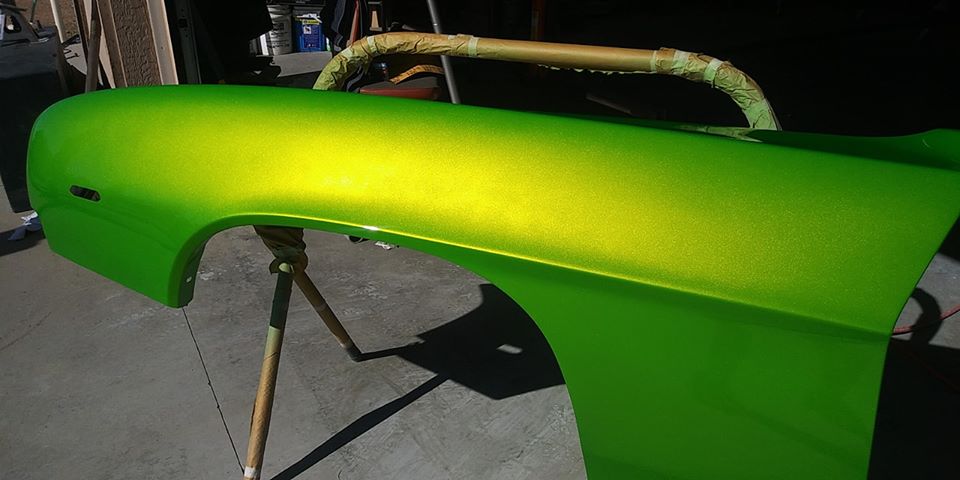
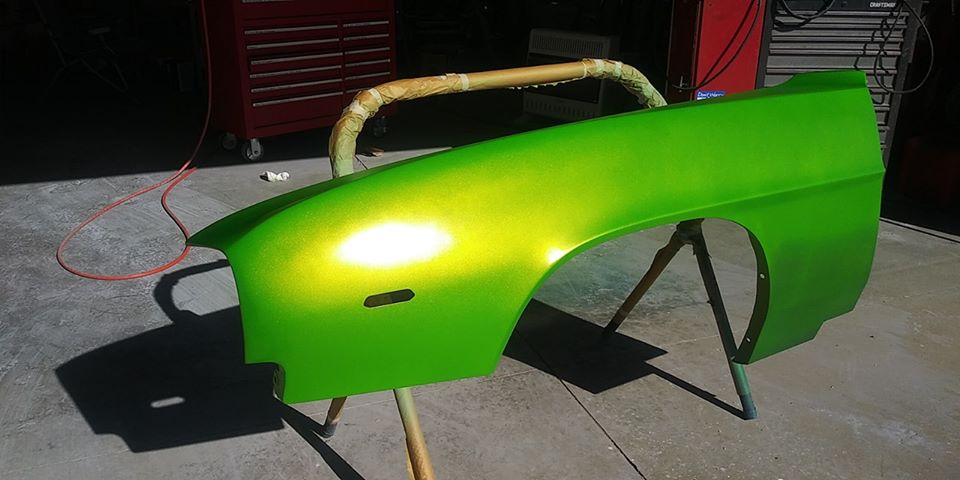
2 coats of clear
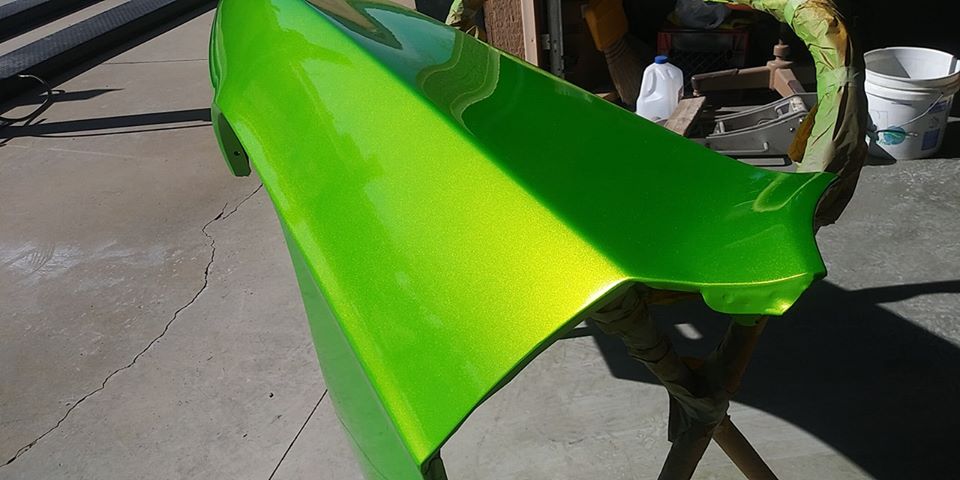
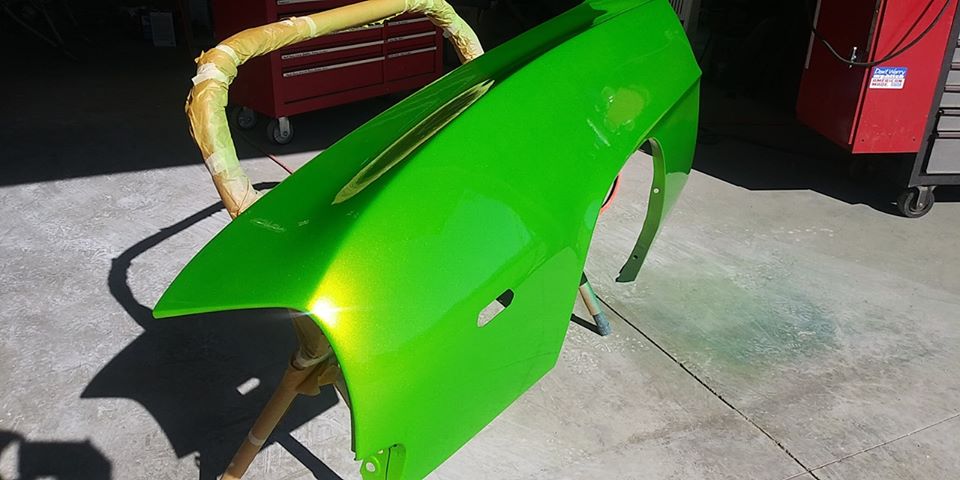
Videos below to show how it reflects the sunlight!!
Sd7BLjInJK8
17Q5giJb-ZEJohn Rodko
69 RS/SS Camaro.
Heidts Pro G IRS w/ 3:90 gear, Heidts Pro G front
6.0L LQ4 to be TT
6 speed or 4L80E, that is the question..hmmm
Future plans for full TMI interior
04-13-2020 #25
Registered User
- Join Date
- Jun 2012
- Location
- Golden Valley AZ
- Posts
- 77
Today's shenanigans! 2/19/2020
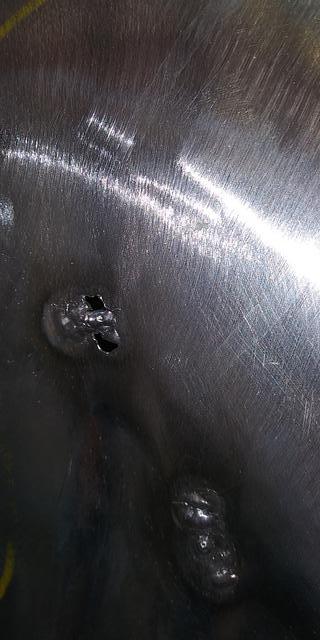
Today, I worked on the passenger side rear quarter. I had a lot of holes to weld shut, from a previous slide hammer experience (likely in the 70's) They actually did a decent job of getting the panel pulled out, so I basically just had to close the holes up. I'm not to handy with the welder on sheet metal, or it's just too hard to get it adjusted correctly (old Millermatic 200)
Had a guy tell me to just replace the whole quarter panel, but I just didn't feel it needed to be done. The fit of aftermarket panels sucks so bad, I just didn't want to deal with the headache, plus it would have been way more work that just closing up a few (50) holes. Only took a couple of hours, instead off weeks, for a quarter replacement. Plus the door gaps are perfect, and it's only original once.
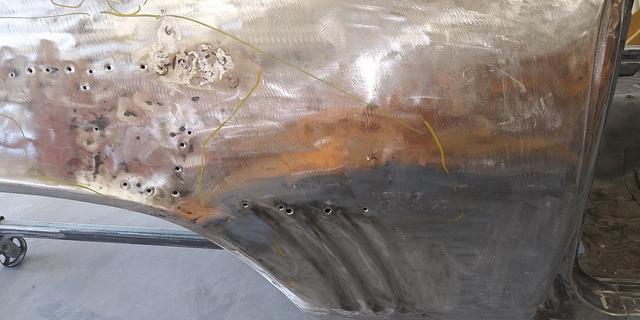
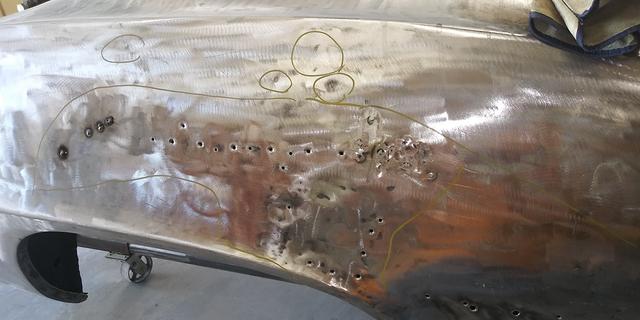
Using a brass rod or copper plate behind the holes, helped immensely with keeping me from blowing the sheet metal away like tissue paper.
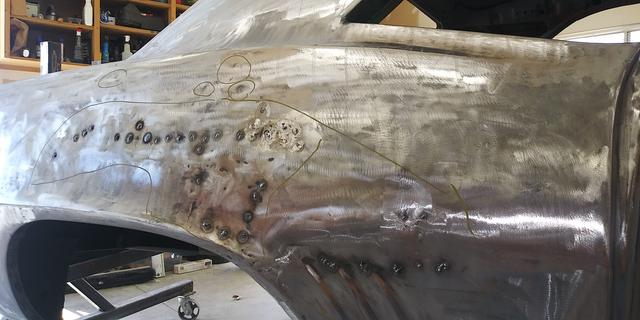
In some areas, I couldn't get anything behind the hole and it shows (yes Angry Johnny made his presence known
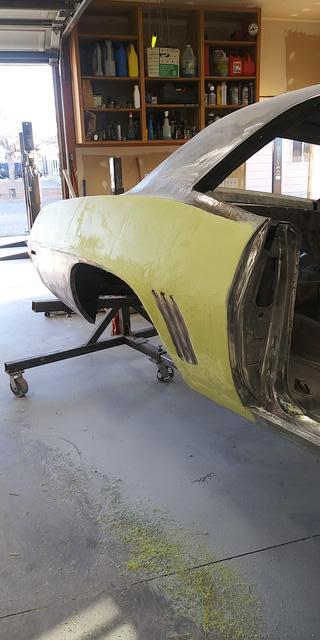
Finally cover up the mess
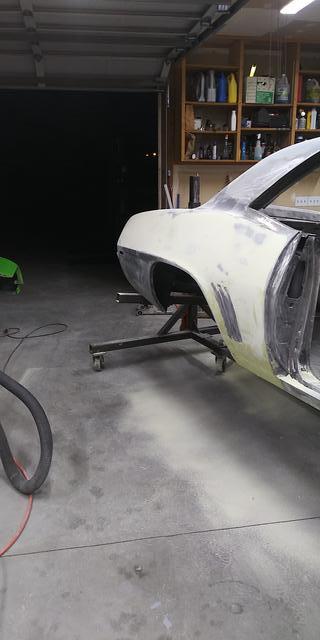
Geez, it got dark
 John Rodko
69 RS/SS Camaro.
Heidts Pro G IRS w/ 3:90 gear, Heidts Pro G front
6.0L LQ4 to be TT
6 speed or 4L80E, that is the question..hmmm
Future plans for full TMI interior
04-13-2020 #26
Registered User
- Join Date
- Jun 2012
- Location
- Golden Valley AZ
- Posts
- 77
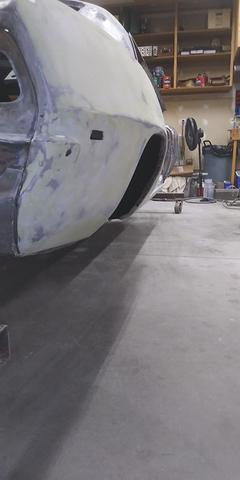
Rocker Panel/quarter panels
Finished out the skim coats on the passenger quarter and rocker panel. Next is the B pillars, but now the hardest part is behind me...I hope
Then, prime, block, repeat over and over.
Passenger rocker panels
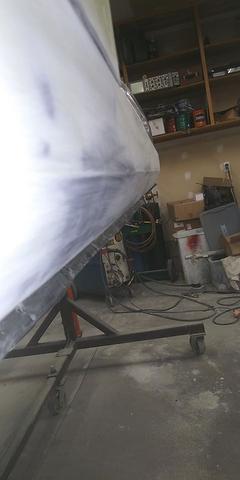
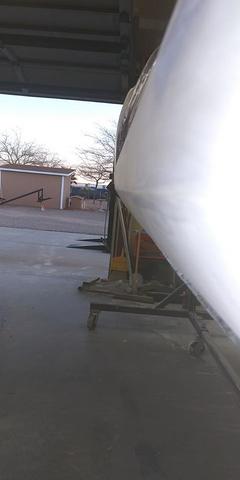
Driver side
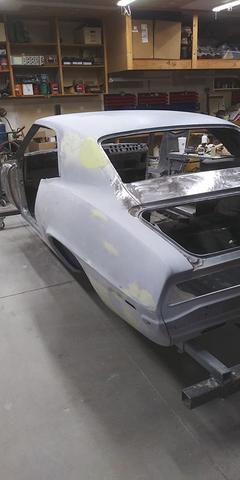
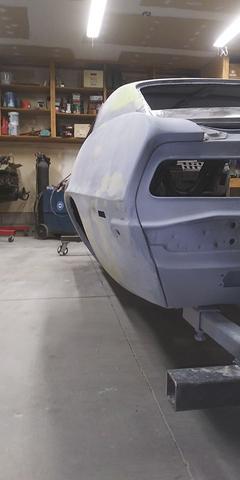
Passenger side
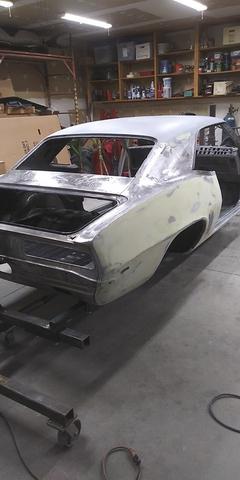
 John Rodko
69 RS/SS Camaro.
Heidts Pro G IRS w/ 3:90 gear, Heidts Pro G front
6.0L LQ4 to be TT
6 speed or 4L80E, that is the question..hmmm
Future plans for full TMI interior
04-13-2020 #27
Registered User
- Join Date
- Jun 2012
- Location
- Golden Valley AZ
- Posts
- 77
Some Blockage 3/4/2020
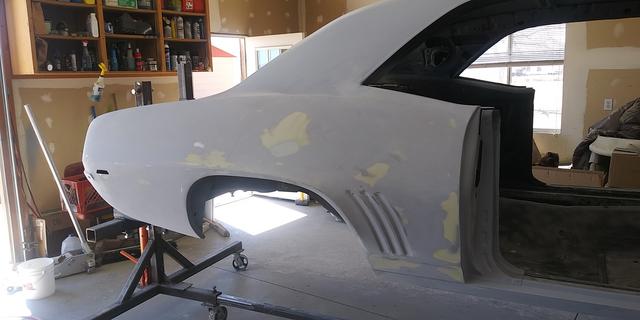
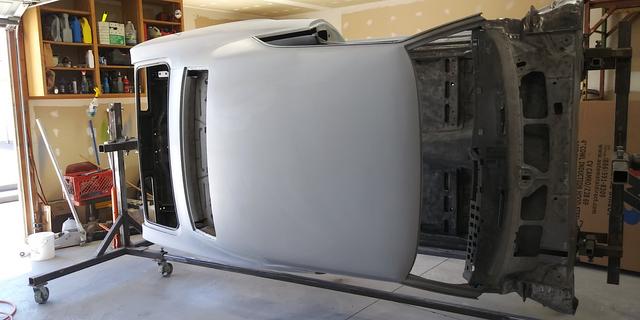
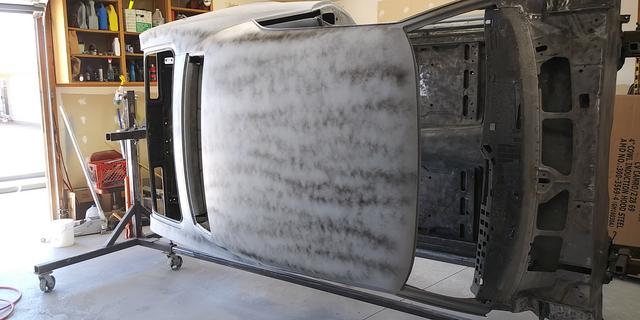
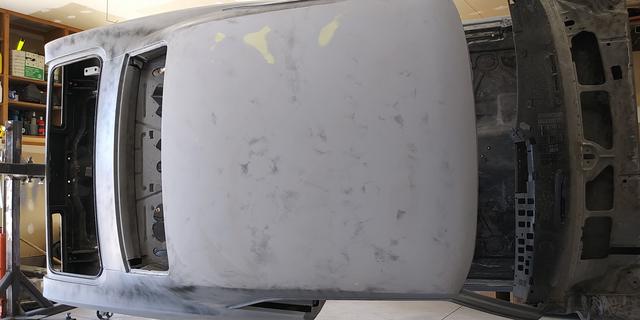
Did some more work today. Got the roof, B pillars, and quarters all blocked, but this is only the first pass, so there will be more.
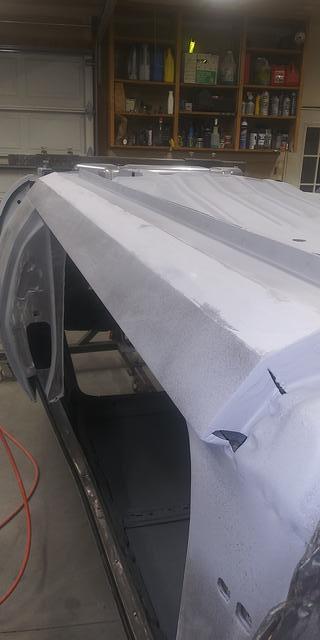
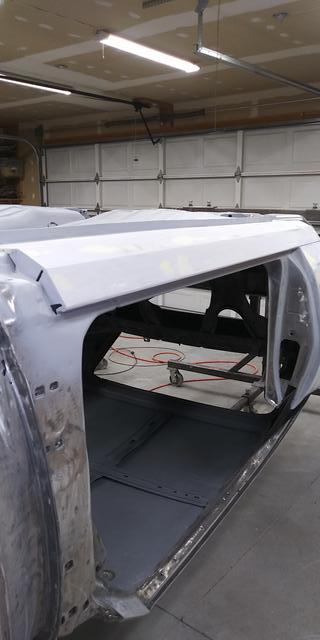
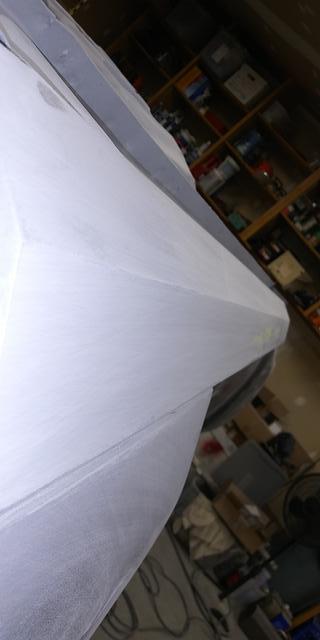
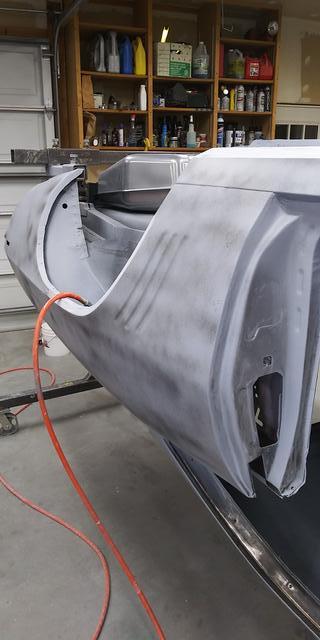
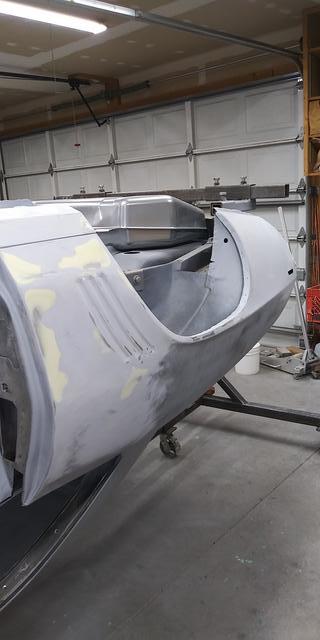
Low spot on driver side

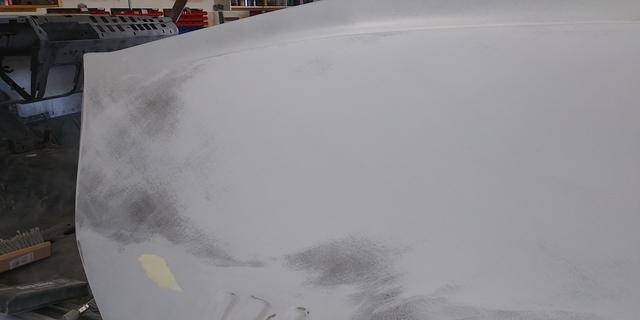
Finished with the first sand
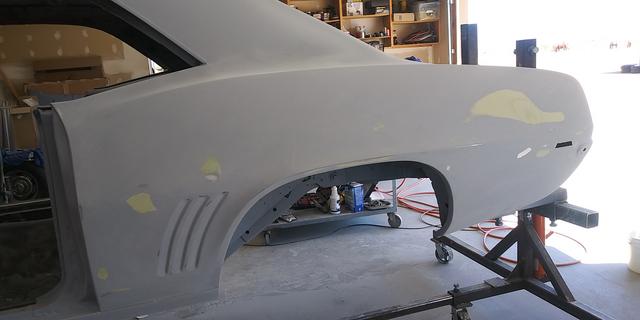
Roof
John Rodko
69 RS/SS Camaro.
Heidts Pro G IRS w/ 3:90 gear, Heidts Pro G front
6.0L LQ4 to be TT
6 speed or 4L80E, that is the question..hmmm
Future plans for full TMI interior
04-14-2020 #28
Registered User
- Join Date
- Jun 2012
- Location
- Golden Valley AZ
- Posts
- 77
Ride Tech fuel filler/cap
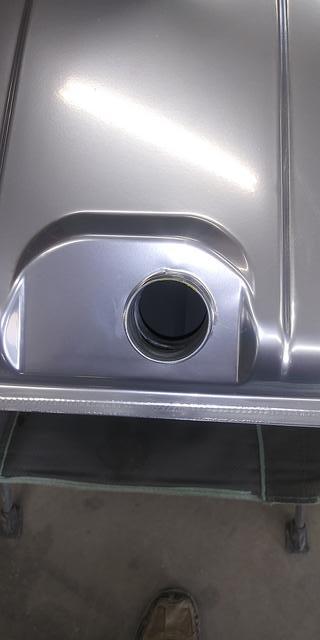
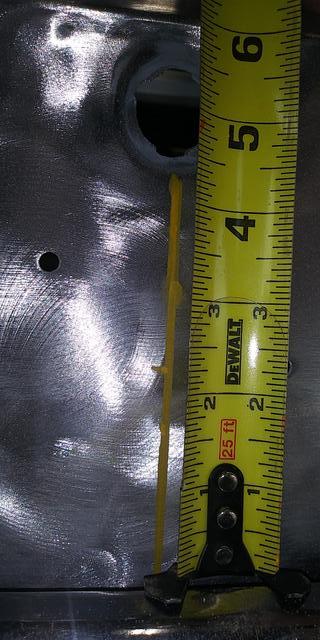
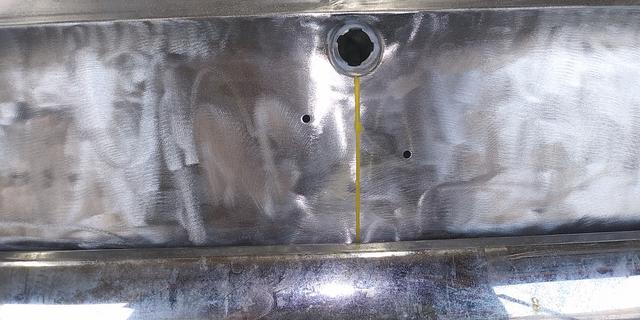
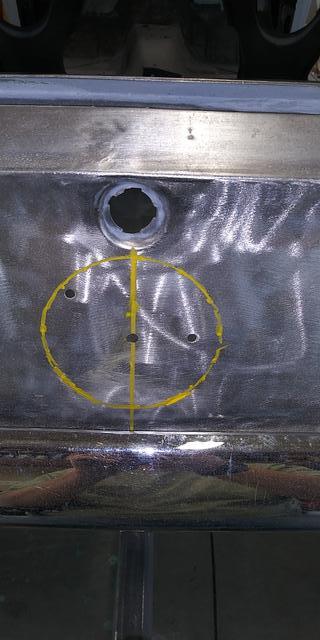
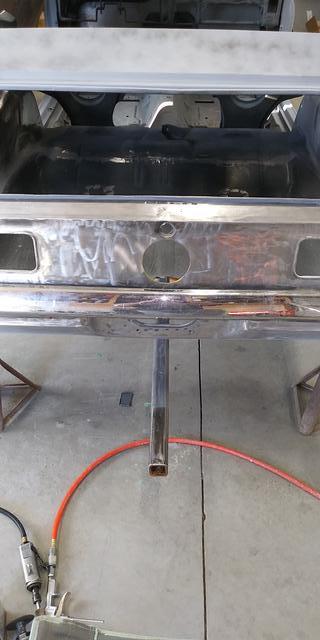
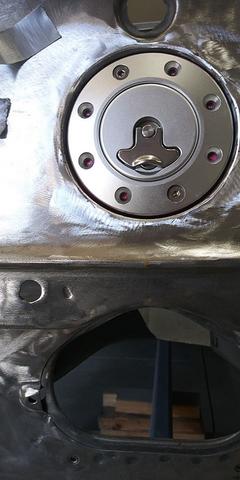
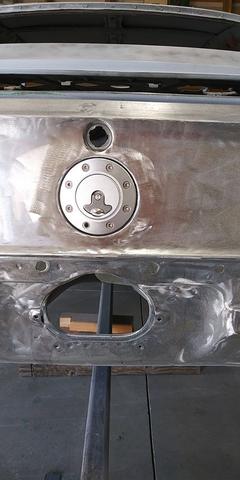
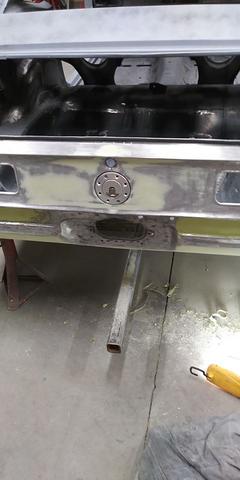
Got the hardest part of the Ride Tech fuel filler/cap finished. Installing a 67/68 tank in my 69 and using the 67/68 style Ride Tech fuel cap. Also purchased a nifty little plate from Holohans Hot Rod Shop. This was worth every penny of the $38 they charge for it. Saves a ton of fabrication time
https://holohanshotrods.com/product/...etmetal-panel/
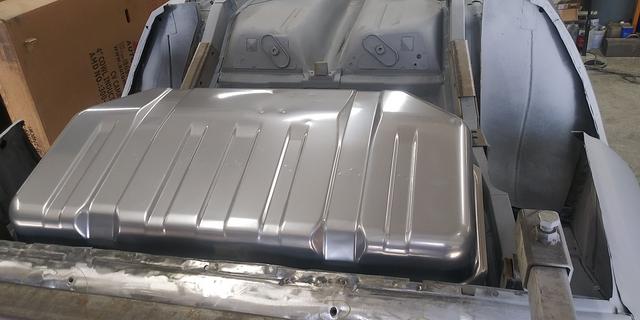
Tanks Inc tank. Nice piece


Of course the 67/68 Camaro fuel filler is offset to the passenger side. Didn't realize this, but luckily the ridetech cap is set up for it.
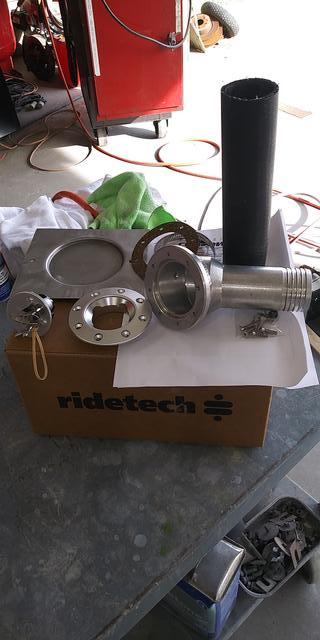
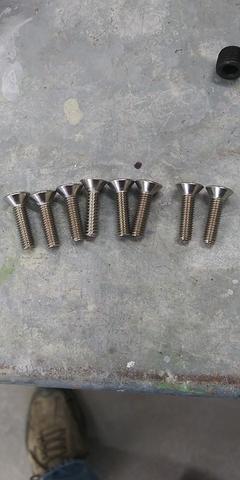
Here's all the pieces parts. It was really awesome of RideTech to supply me with 7 10-32 screws and one 10-24 screw. Lucky I caught it beofre I stripped the threads.
Test fit the tank and start cutting the floor
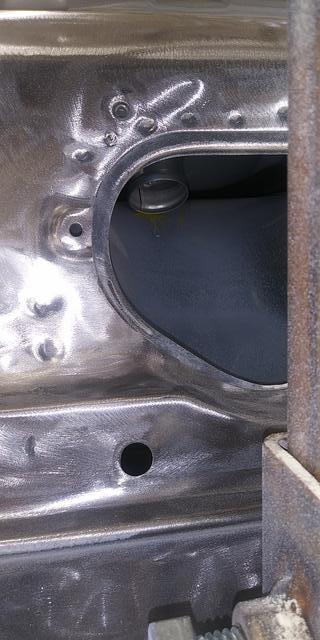
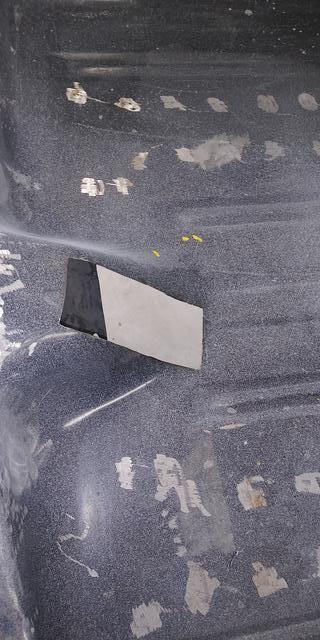
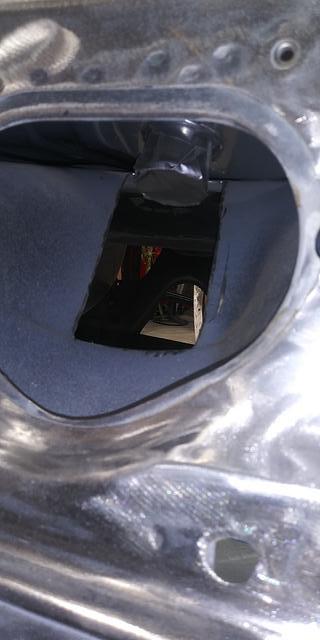
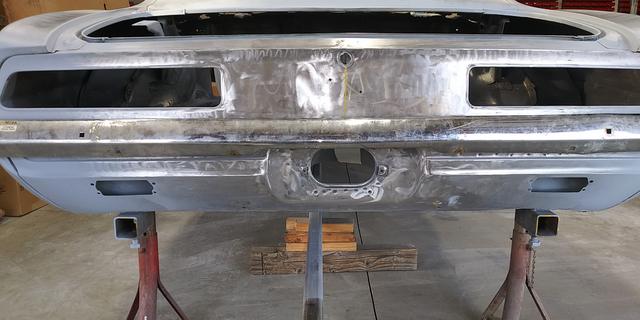
Measure twice (6 times) cut once. My 4" hole saw was dull, so I had a 1 day delay, till I picked up a new one. Didn't want to burn my way through and warp the panel. I just threw my dented and bent bumper up there for measuring purposes
 John Rodko
69 RS/SS Camaro.
Heidts Pro G IRS w/ 3:90 gear, Heidts Pro G front
6.0L LQ4 to be TT
6 speed or 4L80E, that is the question..hmmm
Future plans for full TMI interior
04-14-2020 #29
Registered User
- Join Date
- Jun 2012
- Location
- Golden Valley AZ
- Posts
- 77
Ride Tech fuel filler/cap thingy continued
OK, continuing on with the fuel stuff. My Eyecrometer says it good
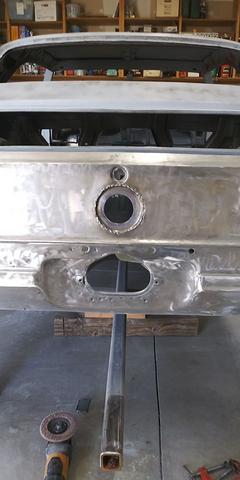
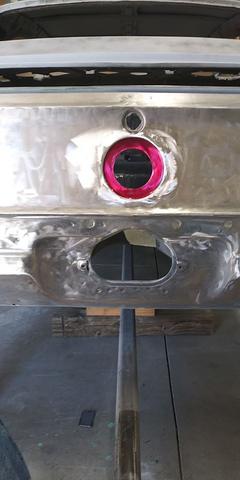
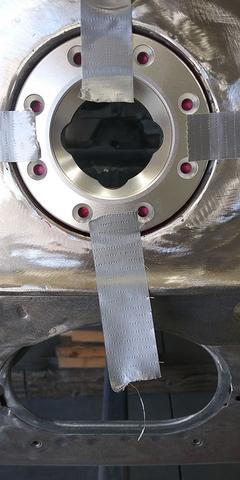
Notched the top to fit where the trunk lock is at, and trimmed it down a little. I figured I would keep it on the larger side, to help with possible flexing. Shouldn't hurt anything.
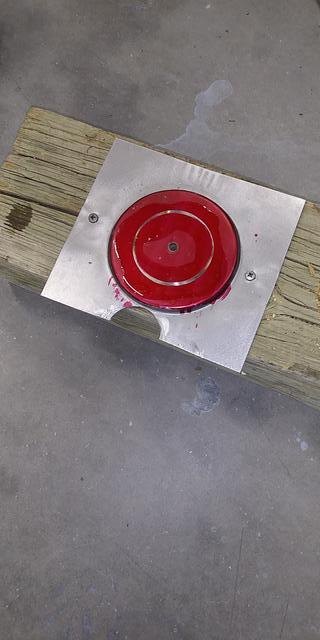
Welded in place. I got rid of the straight Argon gas I had in my mig welder, and picked up some 75/25 CO2 argon mix. Now the welder (not me, the machine), works like it's supposed to.
- - - Updated - - -
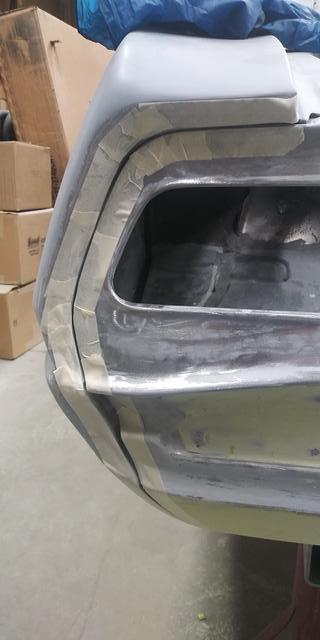
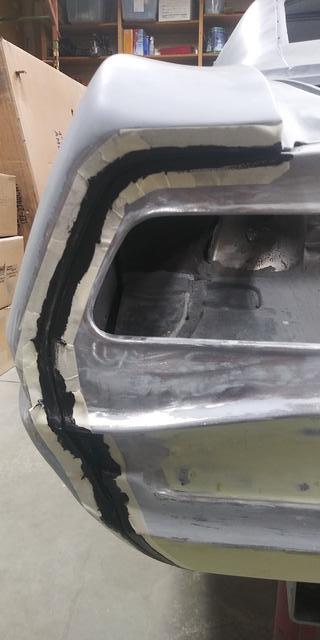
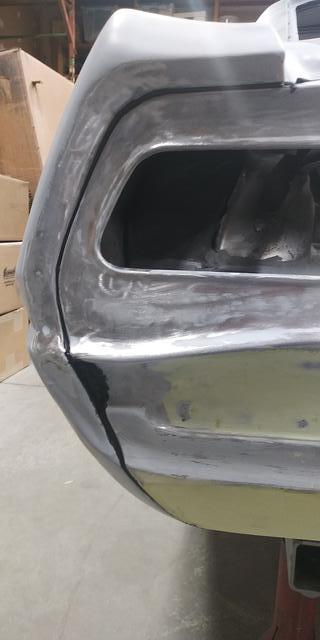
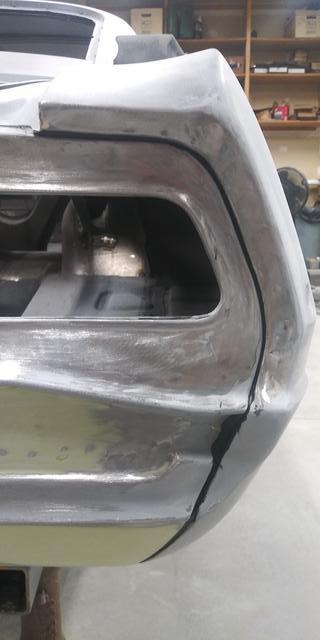
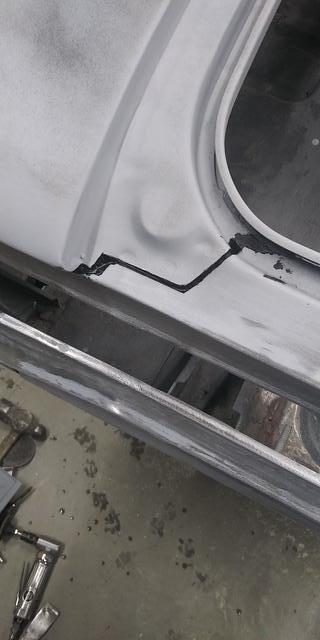
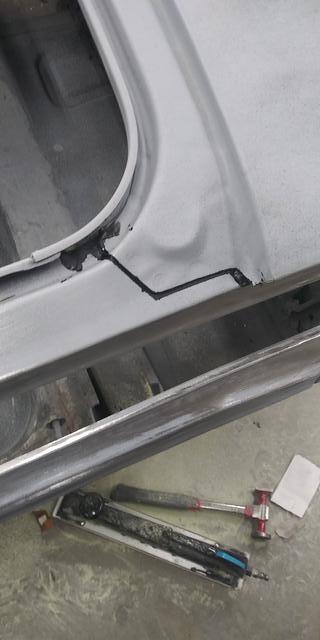
Been busy lately. I did a little seam sealer tonight, but that was it. In case anyone doesn't know, using masking tape before laying it down, helps keep it neat, and makes clean up a lot easier.
 John Rodko
69 RS/SS Camaro.
Heidts Pro G IRS w/ 3:90 gear, Heidts Pro G front
6.0L LQ4 to be TT
6 speed or 4L80E, that is the question..hmmm
Future plans for full TMI interior
04-14-2020 #30
Registered User
- Join Date
- Jun 2012
- Location
- Golden Valley AZ
- Posts
- 77
Block Sanding Round 2
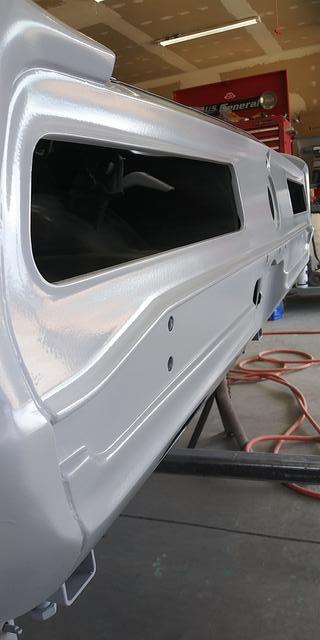
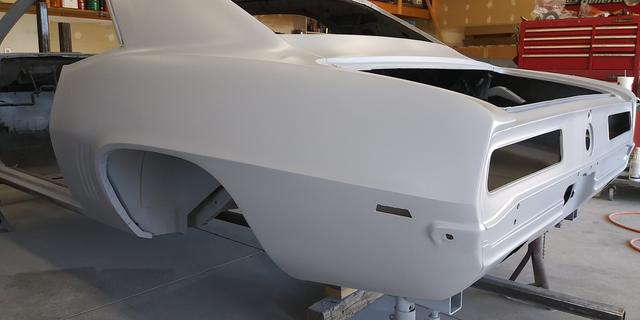
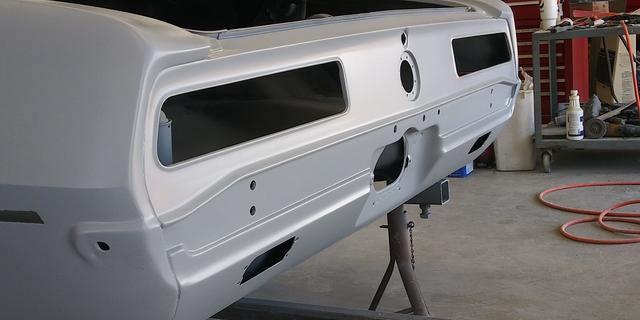
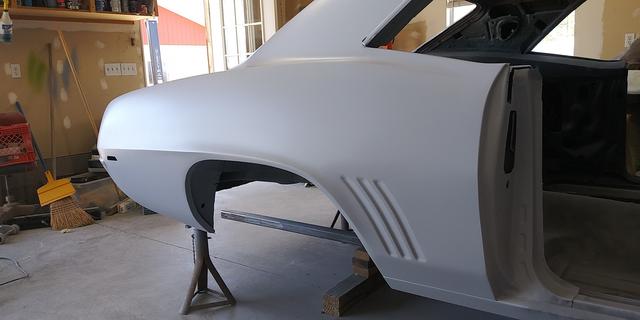
I'm finished with the second round of block sanding on the body. Still a little more fine tuning on the tail panel/valance, then I'll move up to the firewall, which should be pretty straightforward since it's flat and doesn't have all the contours the tail panel has.
Here's the primer still wet, so you can see it's getting straighter.
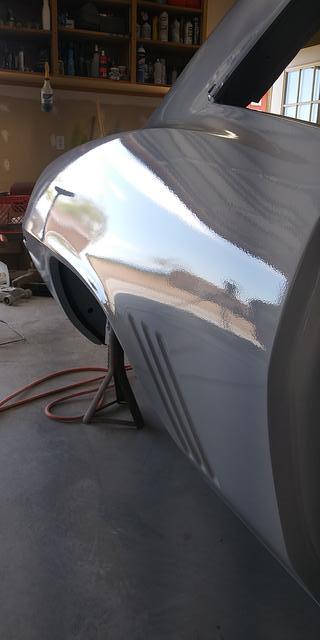
Close up of orange peel. It's just primer.
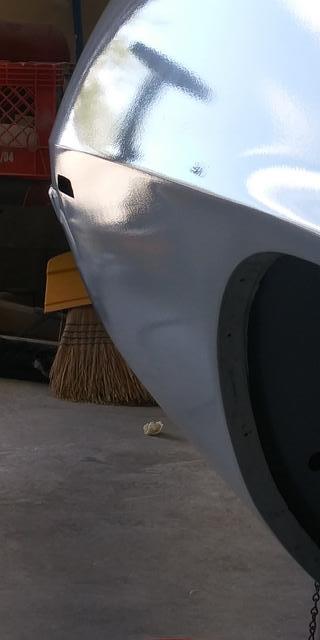
Primer all dry. Had to leave for work, so it will continue later. At least it will have time to dry.
 John Rodko
69 RS/SS Camaro.
Heidts Pro G IRS w/ 3:90 gear, Heidts Pro G front
6.0L LQ4 to be TT
6 speed or 4L80E, that is the question..hmmm
Future plans for full TMI interior
12-31-2020 #31
Registered User
- Join Date
- Jun 2012
- Location
- Golden Valley AZ
- Posts
- 77
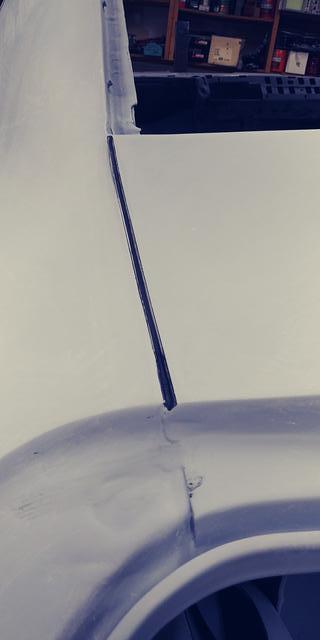
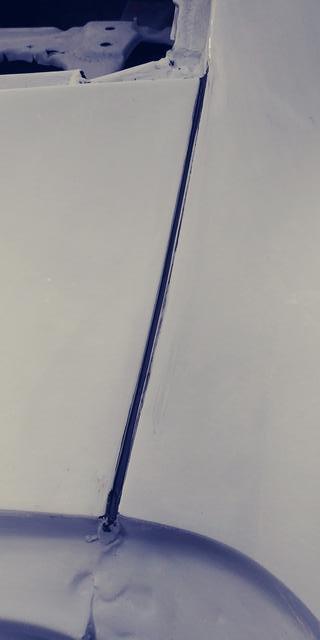
Re do of the seam sealer
I wasn't happy with the seam sealer. The primer ended up cracking on me, and as it turns out, paint prep melts it

We'll see how it turns out, when I prime it this time. As info, it was Eastwood seam sealer and their paint prep. I guess they're not compatible with each other.. Hmm
This side wasn't too bad, just had to do a small area
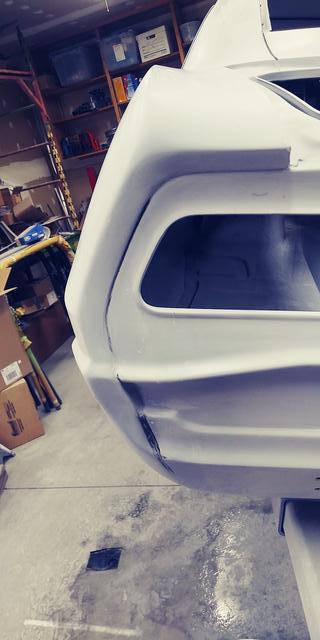
Redid this whole section here
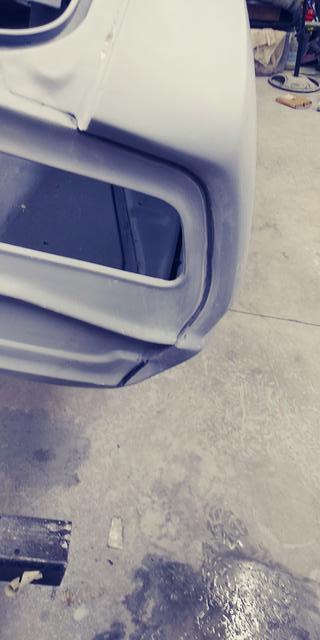
Had to re-do both sides of this panel.
- - - Updated - - -
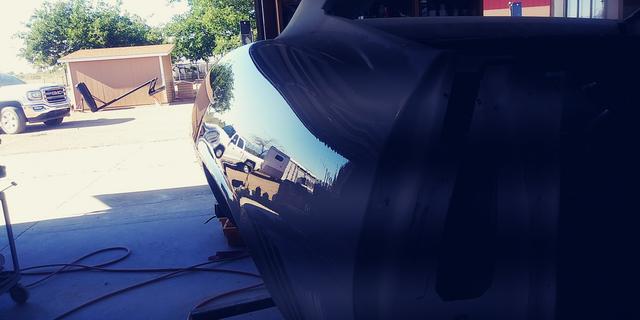
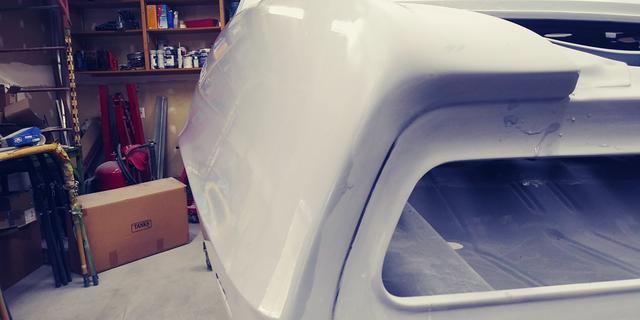
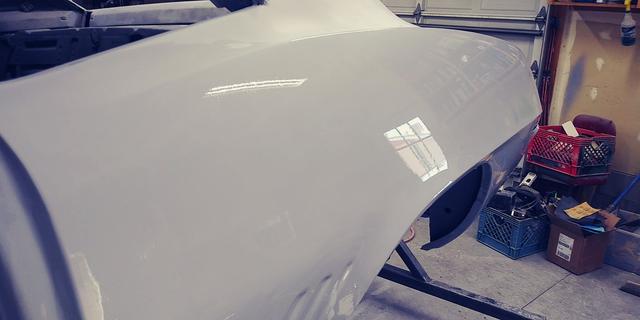
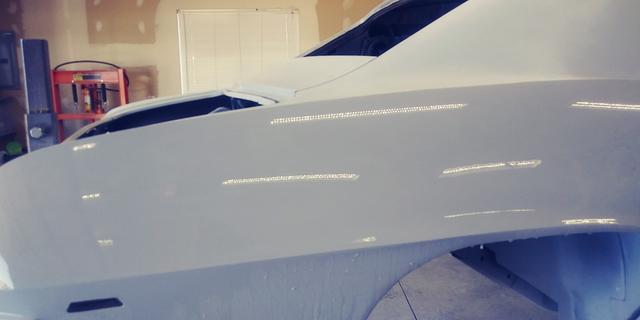
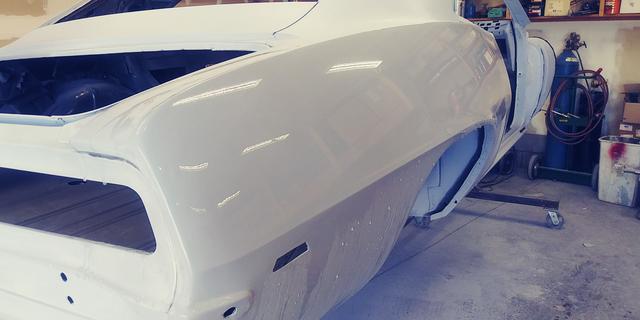
Finally finished blocking the body shell. Did some 320 wet, so I could see how it looked. Seems straight enough to live with it.
Even though it's just grey primer, being wet really shows the light reflection.
 John Rodko
69 RS/SS Camaro.
Heidts Pro G IRS w/ 3:90 gear, Heidts Pro G front
6.0L LQ4 to be TT
6 speed or 4L80E, that is the question..hmmm
Future plans for full TMI interior
12-31-2020 #32
Registered User
- Join Date
- Jun 2012
- Location
- Golden Valley AZ
- Posts
- 77
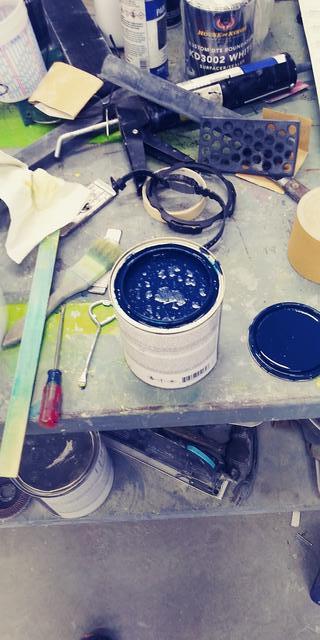
Mixing the tinted sealer
I started mixing the tinted sealer the other day, just to see how it looked.
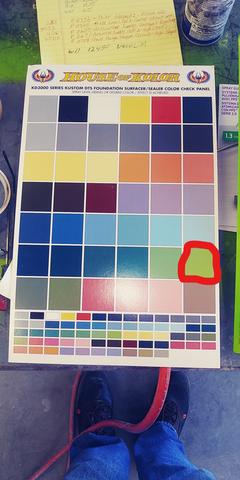
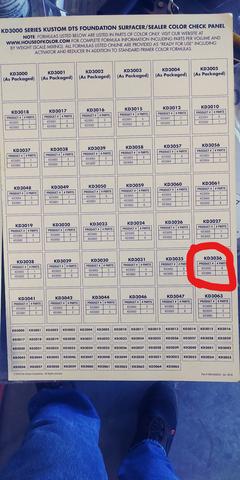
9 parts KD 3003 yellow to 1 part KD 3005 blue, to create a green, that's pretty close to what the color of the car will be.
These are cards listing some of the color capabilities using the HOK KD 3000 series primer/surfacers. Obviously the choices are limitless. You can actually spray your colors over this chart to see what your effect will look like.
I circled the one I'm using.
Close as it gets
John Rodko
69 RS/SS Camaro.
Heidts Pro G IRS w/ 3:90 gear, Heidts Pro G front
6.0L LQ4 to be TT
6 speed or 4L80E, that is the question..hmmm
Future plans for full TMI interior
12-31-2020 #33
Registered User
- Join Date
- Jun 2012
- Location
- Golden Valley AZ
- Posts
- 77
Summer's over, back to work
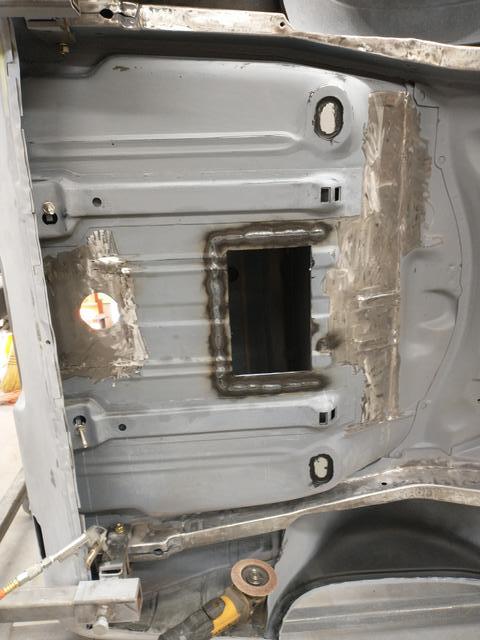
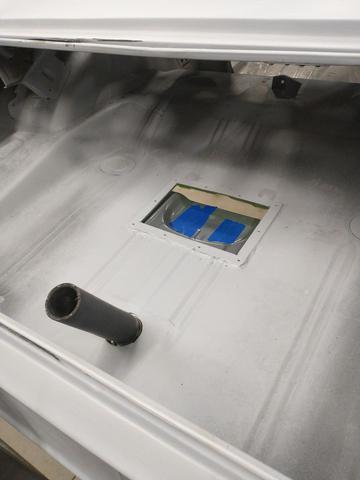
Now that 4 months of heat are over with, I can move along. Getting back to the fuel tank mounting, and also made a fuel pump/sending unit access panel.
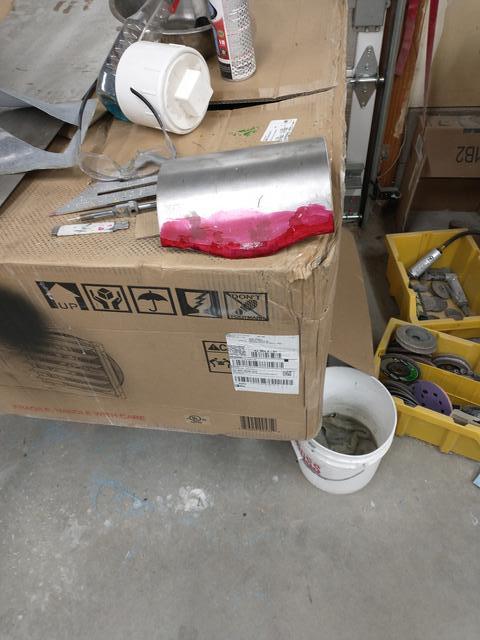
I originally wasn't going to make this large of a hole, but decided it would be best to do it like this after all. Just easier to work with flat surfaces.
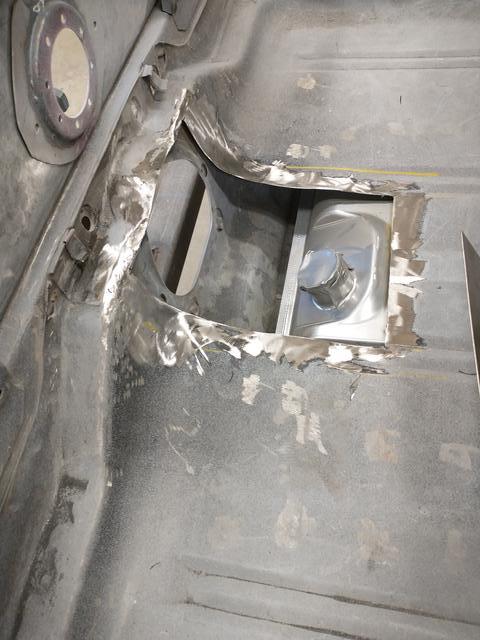
This is what you do when you don't have a roller to form sheet metal. Improvise..hahaha
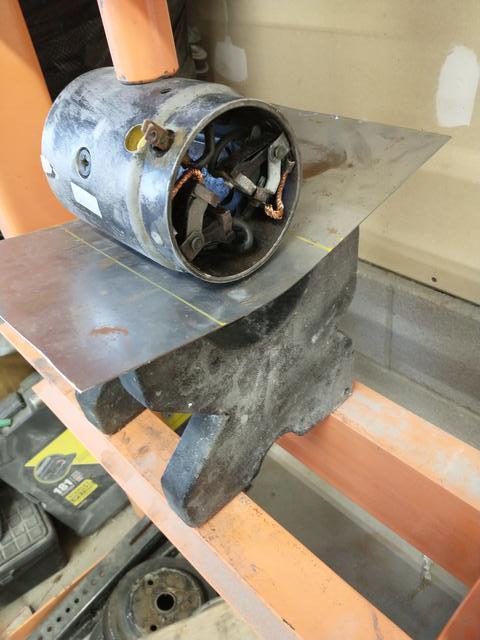
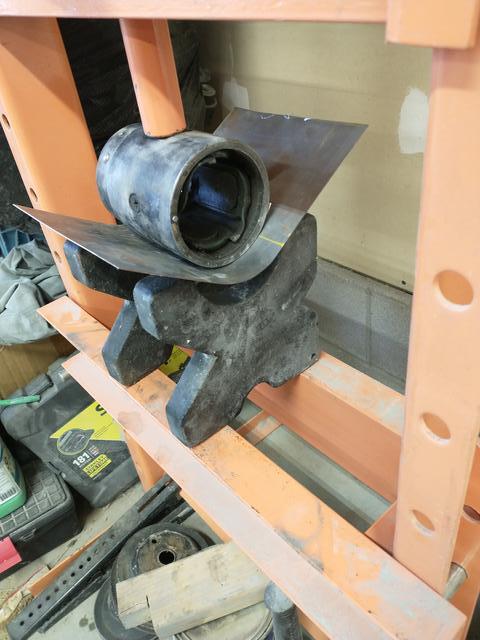
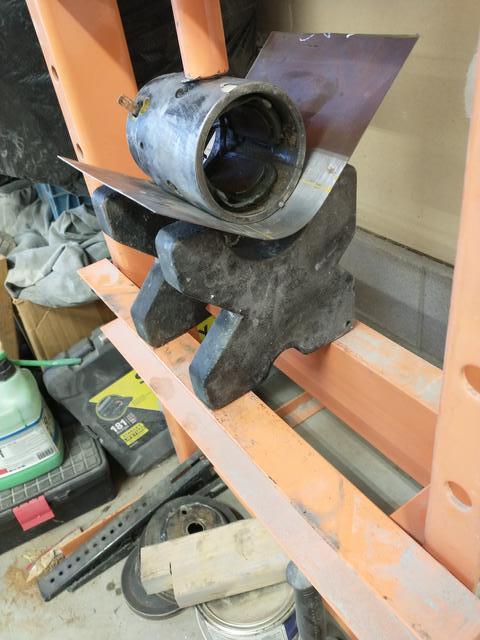
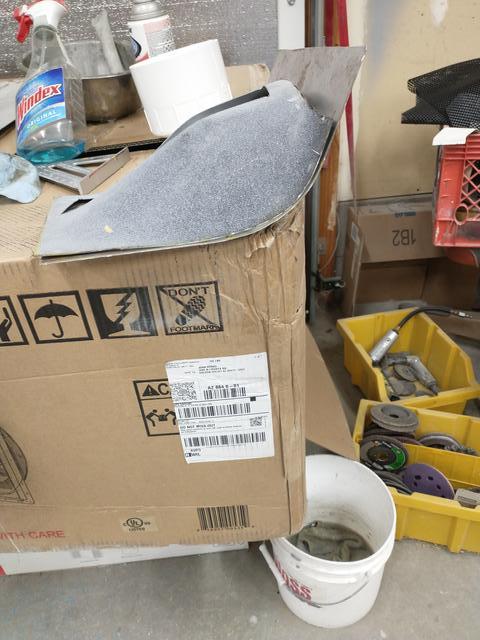
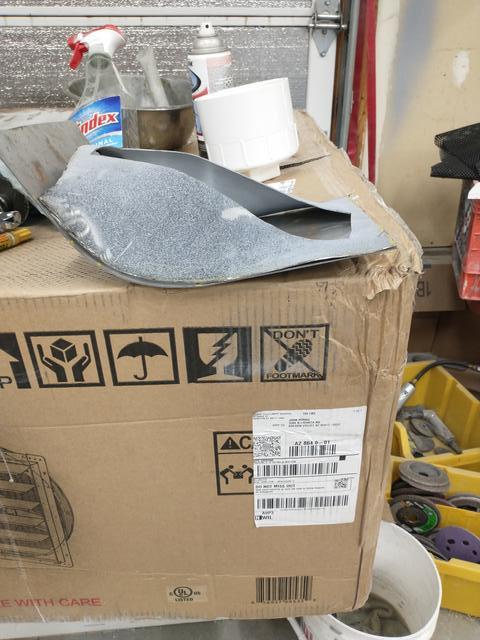
Lots of test fitting and trial and error
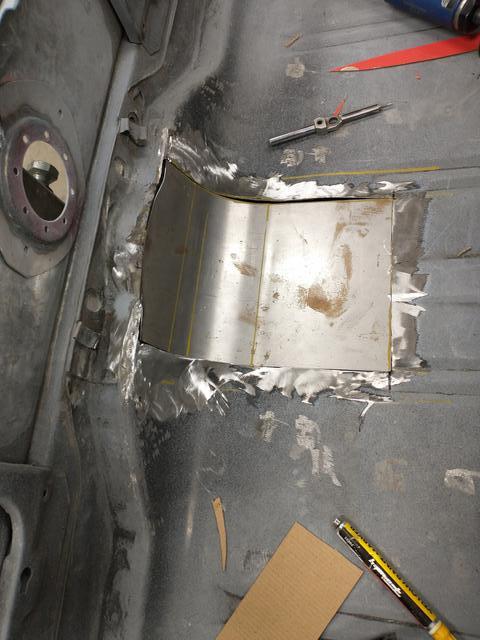
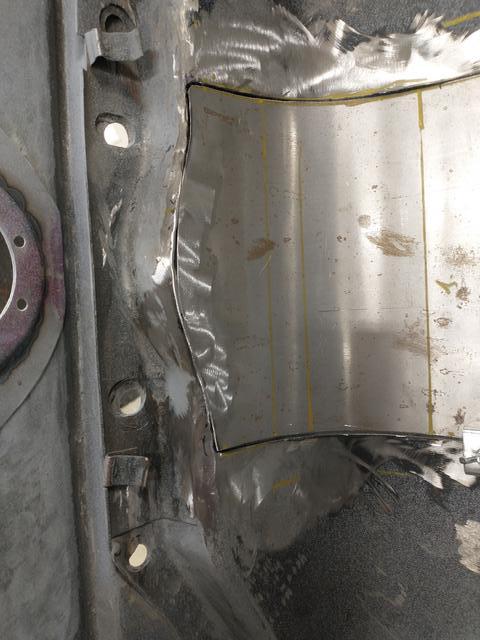
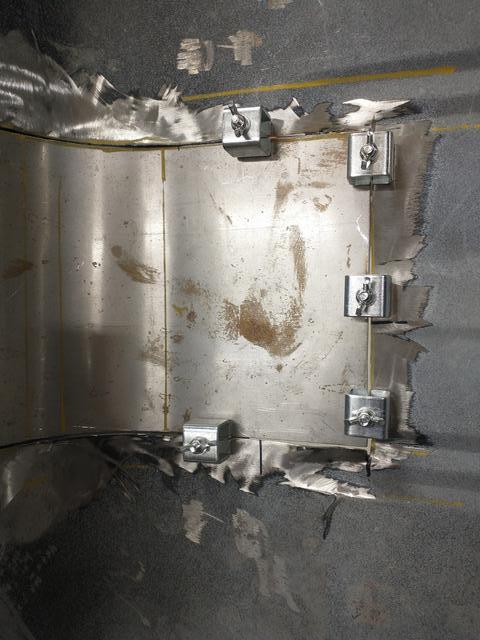
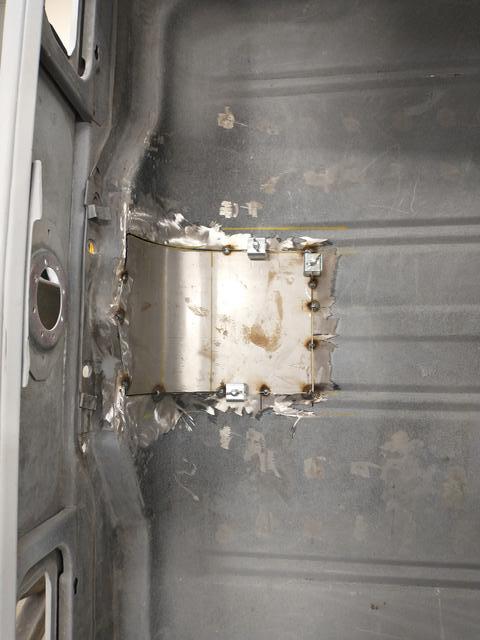
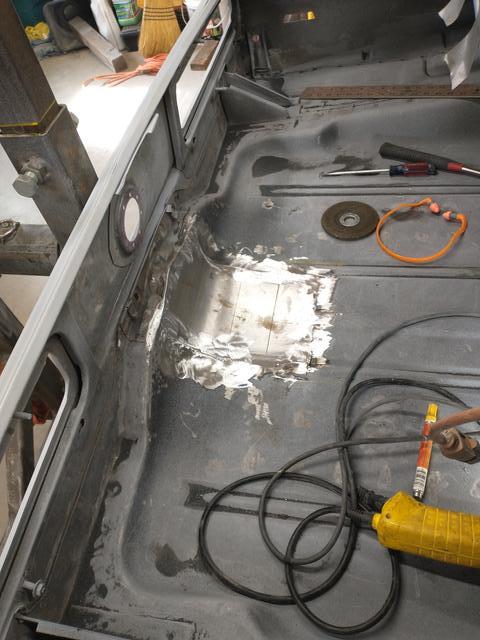
- - - Updated - - -
Made the hole in the wrong spot and had to redo it. Didn't allow for the angle of the neck.
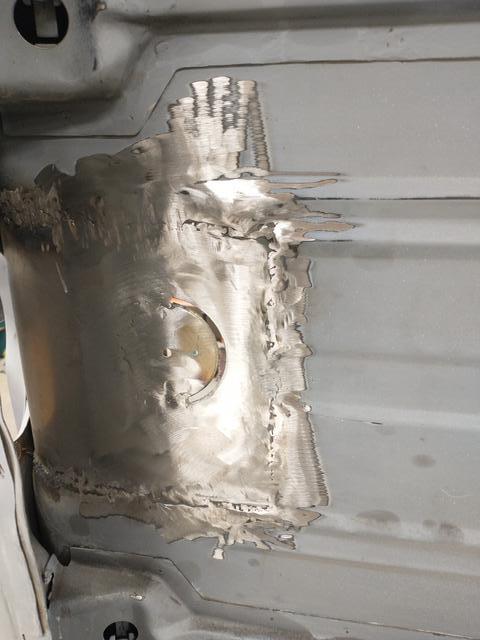
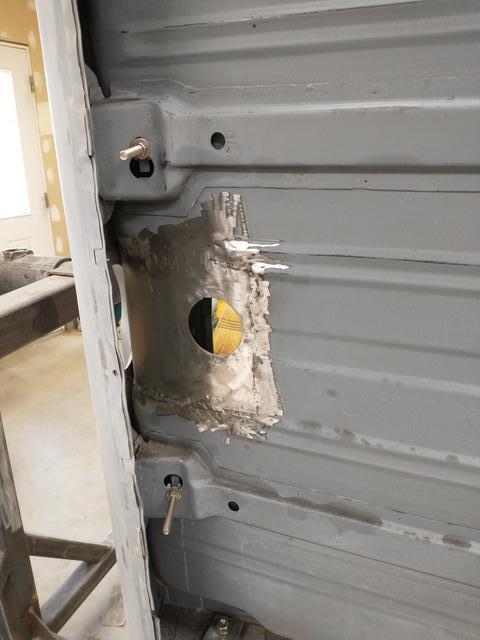
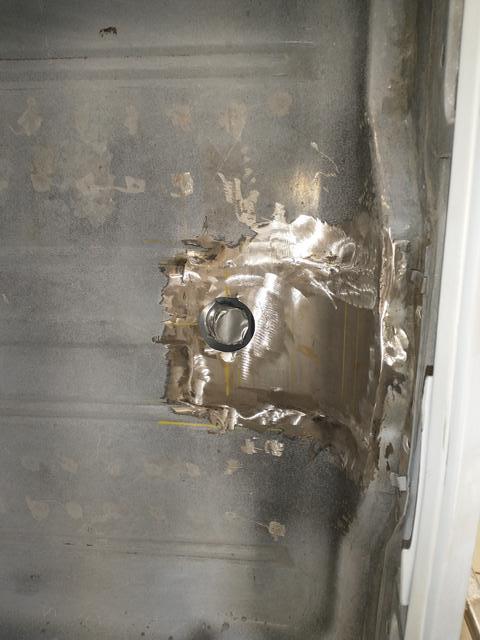
- - - Updated - - -
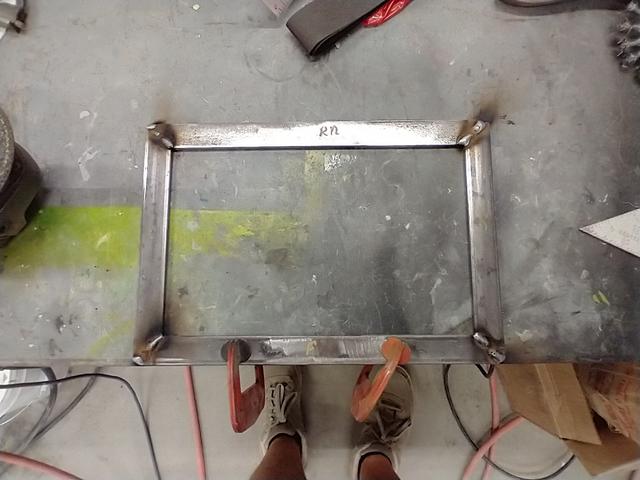
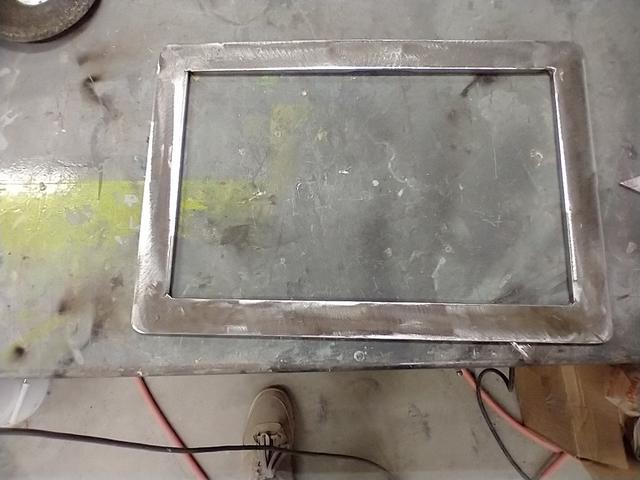
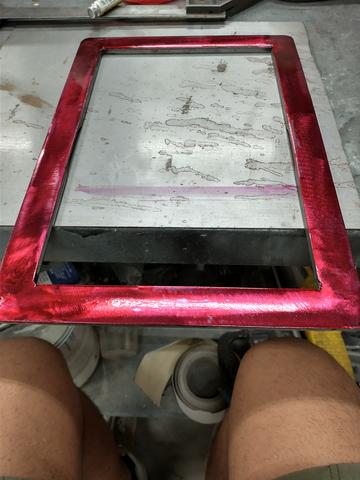
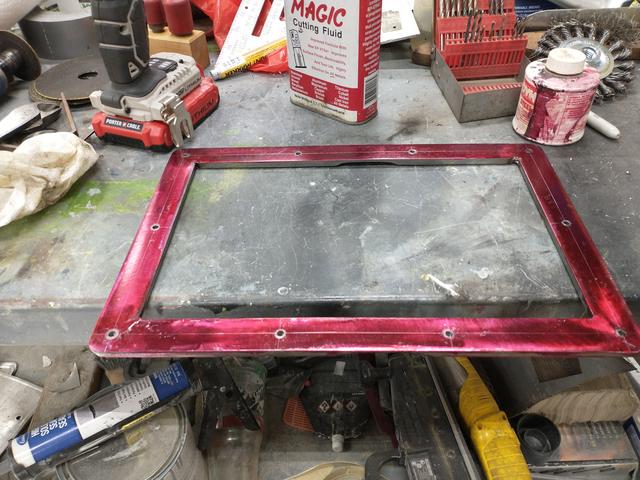
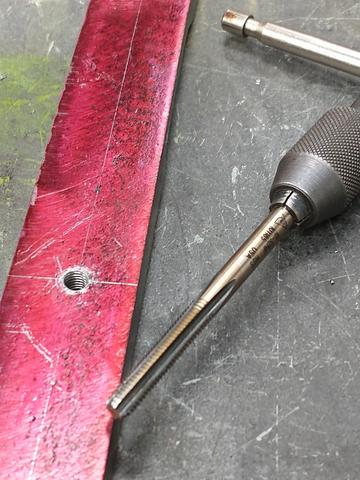
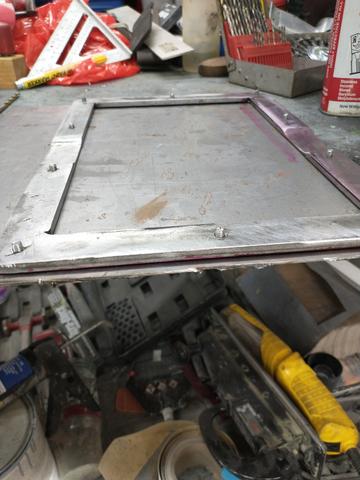
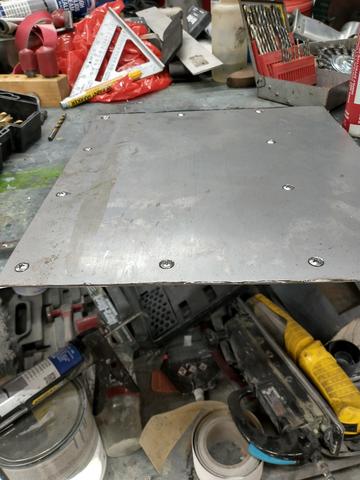
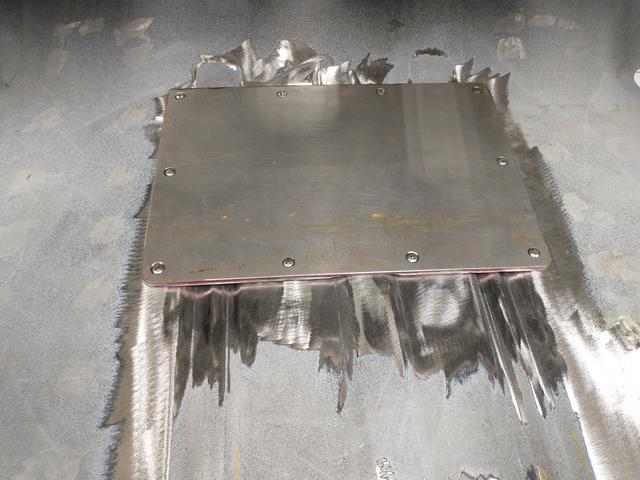
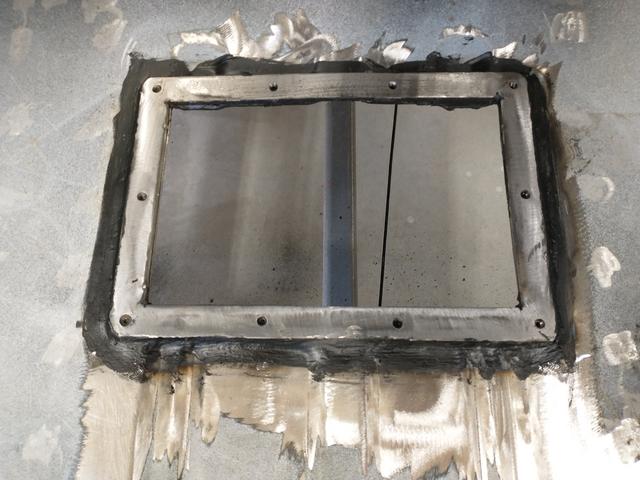
Decided to make a fuel pump/sending unit access panel. Found one online for $175 bucks. This cost me $20 and a couple of hours.
1" x 1/4" flat bar. Opening is approx 12" x 7"
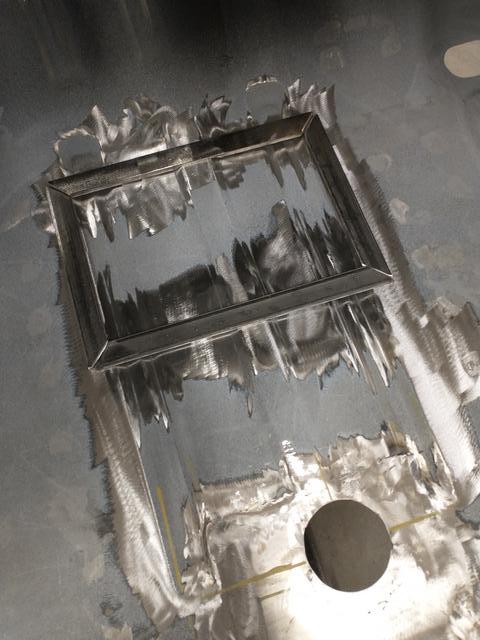
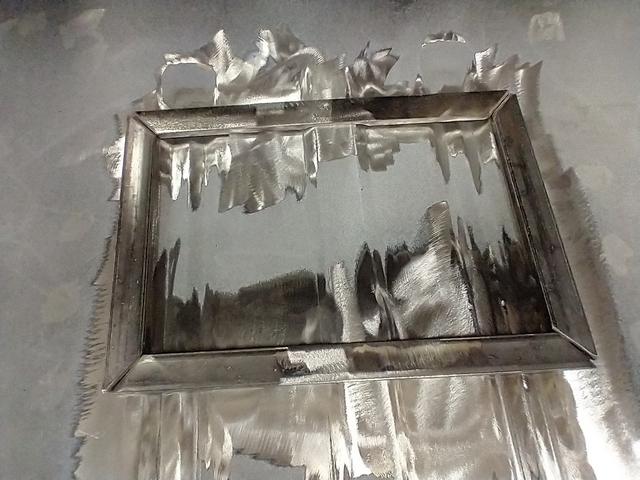
 John Rodko
69 RS/SS Camaro.
Heidts Pro G IRS w/ 3:90 gear, Heidts Pro G front
6.0L LQ4 to be TT
6 speed or 4L80E, that is the question..hmmm
Future plans for full TMI interior
12-31-2020 #34
Registered User
- Join Date
- Jun 2012
- Location
- Golden Valley AZ
- Posts
- 77
Under Body Detailing
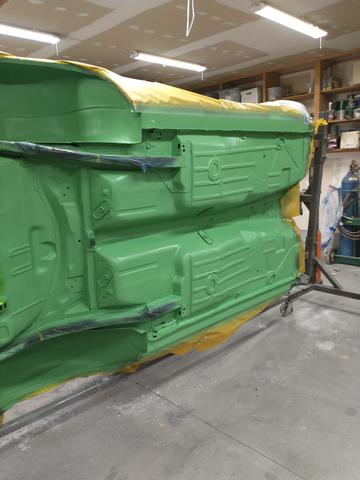
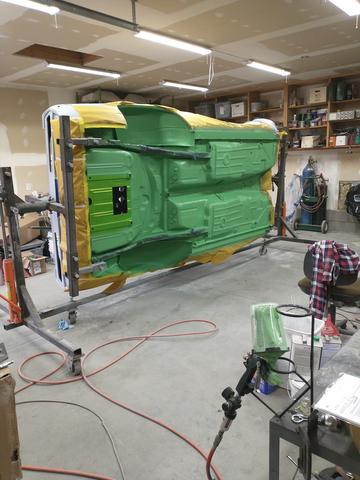
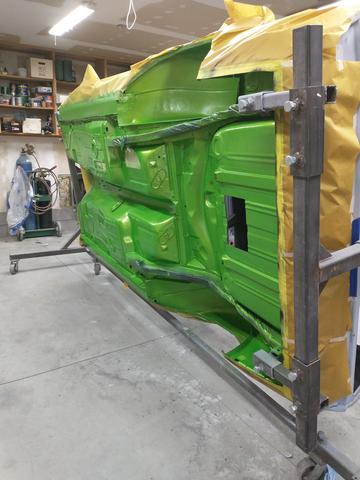
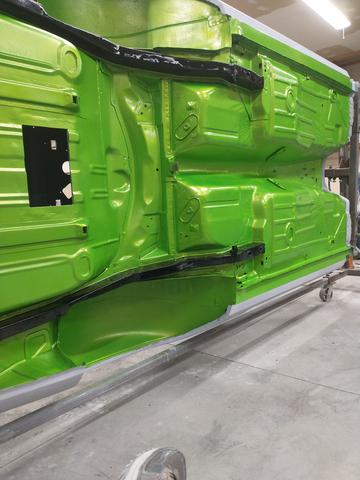
Time to work on the underbody. I painted the frame rails today. Tomorrow I'll mask off the frame rails and do the floors. I'll do them with Rustoleum bed liner, then I will paint it body color.
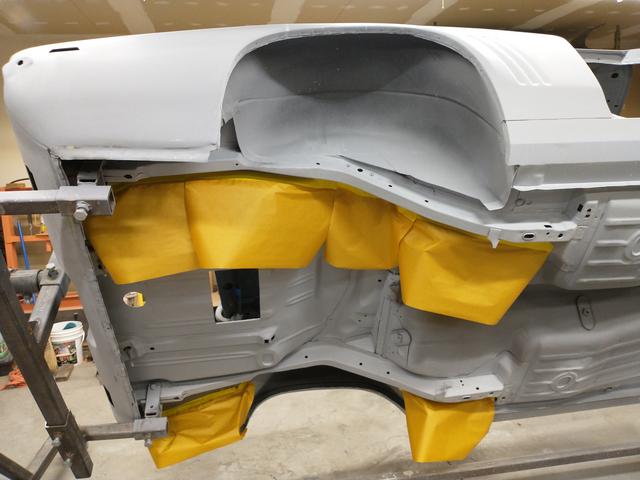
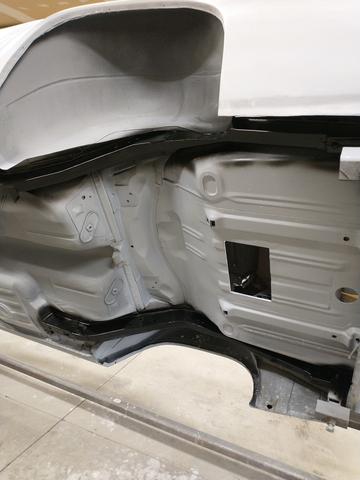
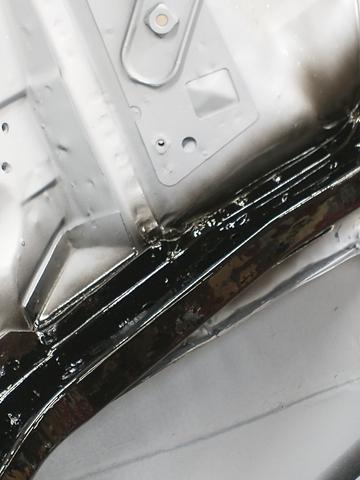
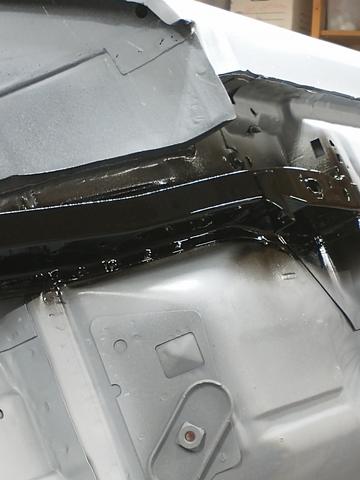
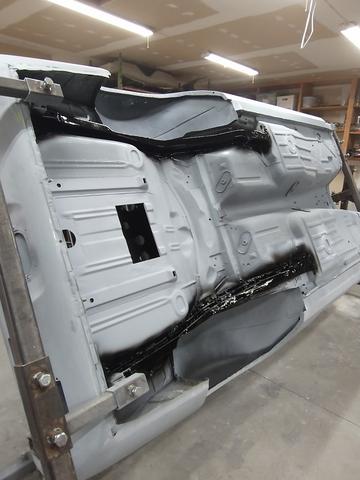
Ready for the floor tomorrow
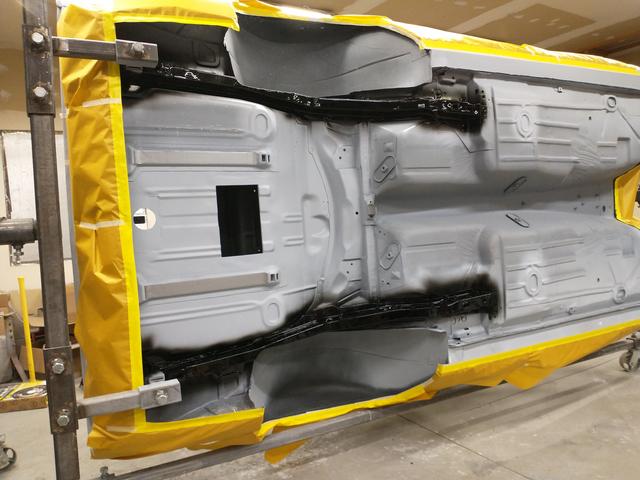
- - - Updated - - -
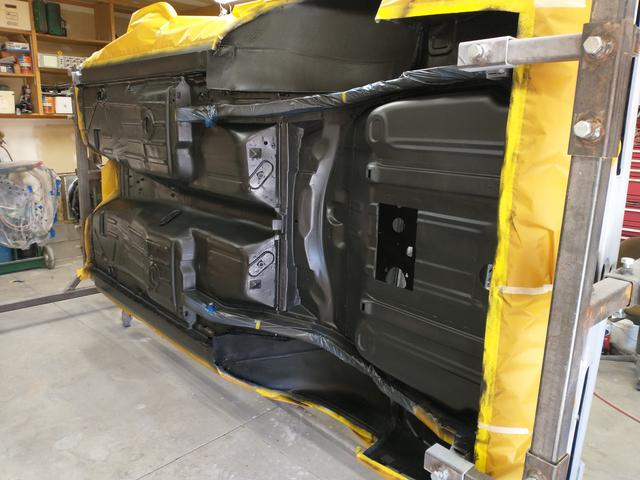
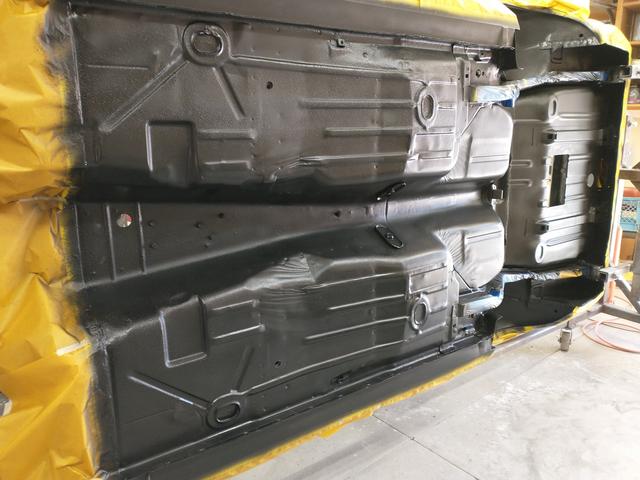
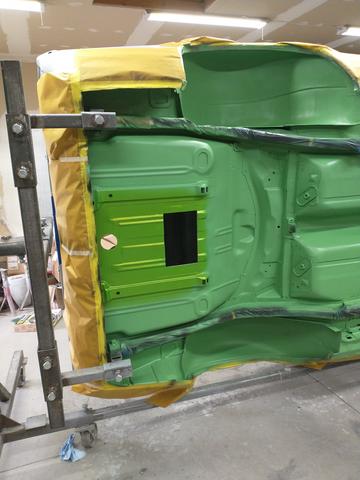
I sprayed Rust-O-Leum bedliner on the underside floor pan. I know everybody says to use Lizard Skin or something else, but this is what I had. I live on dirt road that is sand and also has wash board, so I wanted something tough, and I also painted it what the body color would be. Didn't know for sure if Lizard Skin could be top coated or not.
 John Rodko
69 RS/SS Camaro.
Heidts Pro G IRS w/ 3:90 gear, Heidts Pro G front
6.0L LQ4 to be TT
6 speed or 4L80E, that is the question..hmmm
Future plans for full TMI interior
12-31-2020 #35
Registered User
- Join Date
- Jun 2012
- Location
- Golden Valley AZ
- Posts
- 77
Under Body Detailing Paint
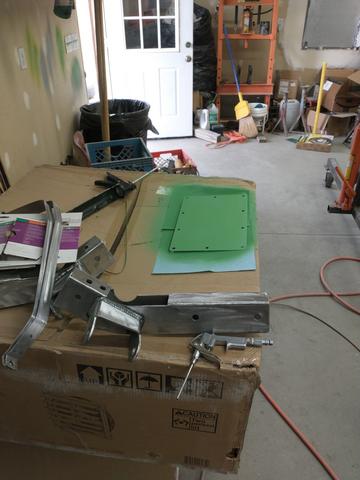
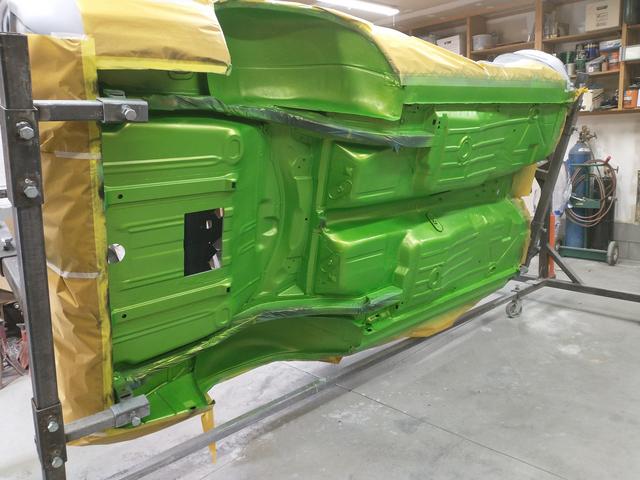
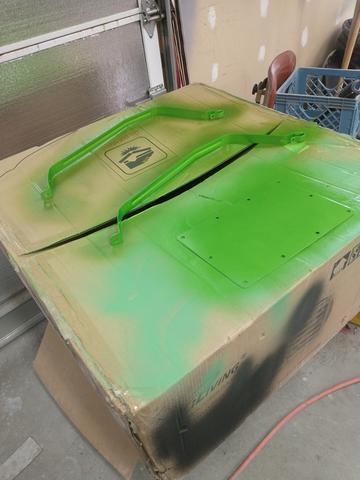
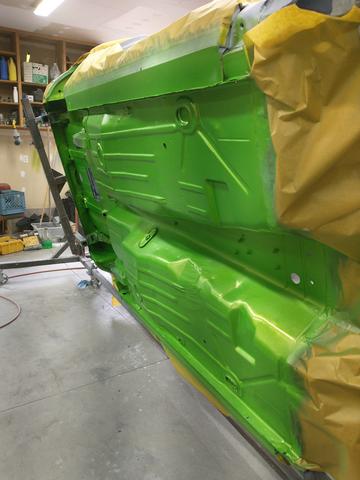
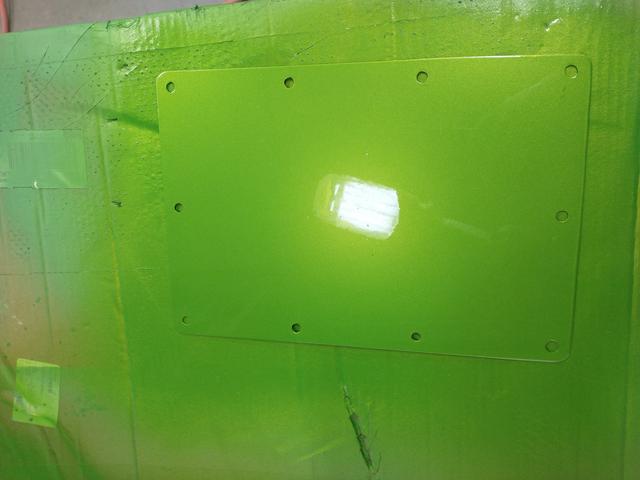
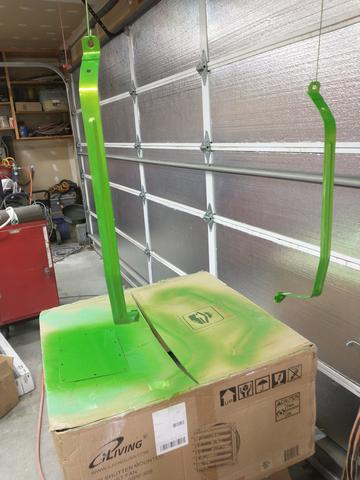
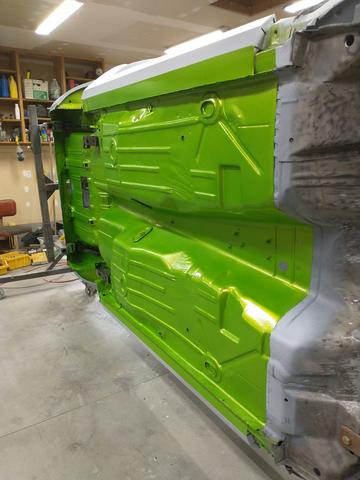
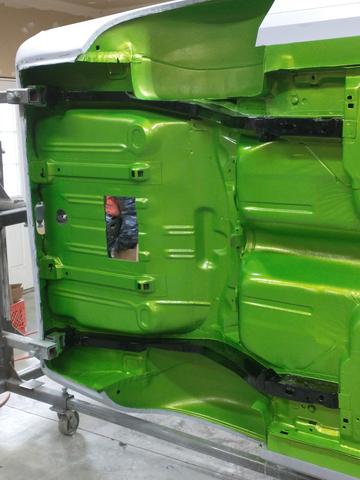
After letting the bed liner dry for 24 hours, I painted over it. First with a green sealer, then the base coat, then the clear coat. ALmost didn't have enough clear. Could have probably used another good coat, but that's ok, it will work. It looks grainy, because it's going over the bedliner texture coat. If I would have been motivated enough to body work the floor, I might have skipped the bedliner, but it does cover up imperfections.
I first tried an inconspicuous spot to see if it would look ok, and not have any bad reaction with the bed liner.
Time for base coat
Time for clear coat

 John Rodko
69 RS/SS Camaro.
Heidts Pro G IRS w/ 3:90 gear, Heidts Pro G front
6.0L LQ4 to be TT
6 speed or 4L80E, that is the question..hmmm
Future plans for full TMI interior
12-31-2020 #36
Registered User
- Join Date
- Jun 2012
- Location
- Golden Valley AZ
- Posts
- 77
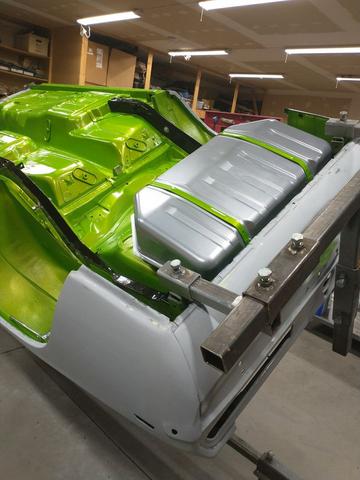
Fuel Tank Mounted
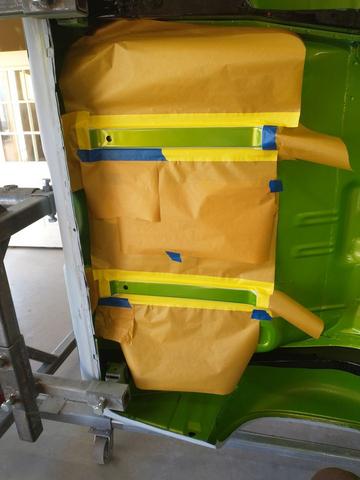
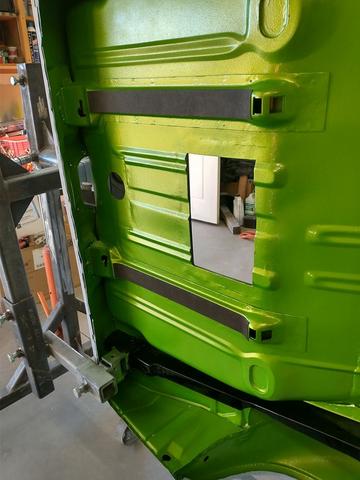
Got the fuel tank, somewhat permanently mounted. I think I'll have to yank it back out to replace the filler hose. I need an angled one to work with the ridetech fuel filler.
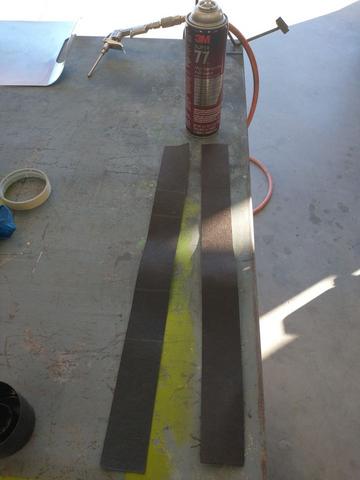
Prepping the anti-rattle strips. I decided to attach them to the vehicle instead of the tank itself. I don't know if it really matter either way.
Only 30,246 more parts to go
 John Rodko
69 RS/SS Camaro.
Heidts Pro G IRS w/ 3:90 gear, Heidts Pro G front
6.0L LQ4 to be TT
6 speed or 4L80E, that is the question..hmmm
Future plans for full TMI interior
12-31-2020 #37
Registered User
- Join Date
- Jun 2012
- Location
- Golden Valley AZ
- Posts
- 77
Rear Suspension install
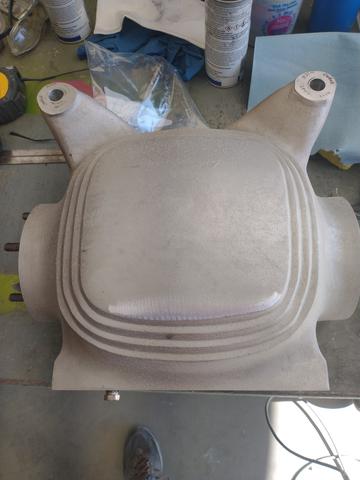
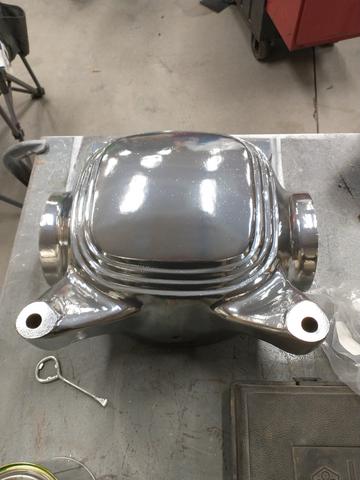
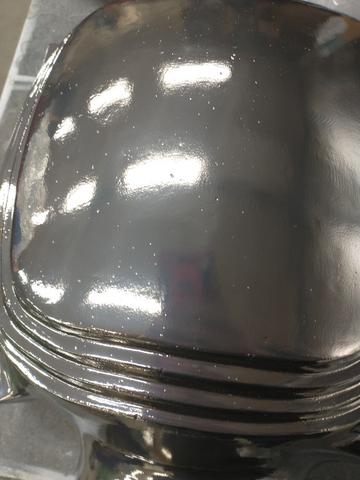
Started installing some of the rear suspension components. I was going to polish the Heidts aluminum center section, but it was recommended to just do "chrome" powder coating. Sadly, that didn't turn out so well, but I'll live with it. Not really going to show under the car anyway. The powder coater felt really bad about it. He said it might happen (gassing). He cooked it in the oven for 5 hours, hoping to get the impurities out of it, but it still pitted. Just cheap dirty casting from the mfg. Nothing he could do. Only charged me $100, instead of the original $200 quote. I can't fault him, he tried. Even put several hours of prep into it before hand, to smooth it out.
Before
After
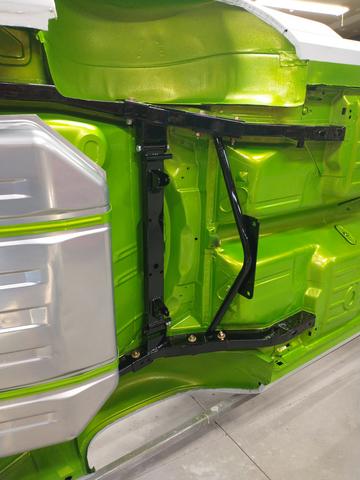
Other stuff going in
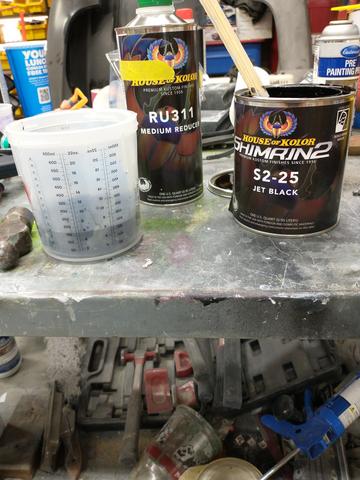
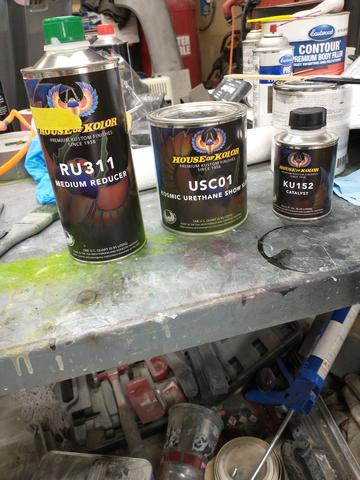
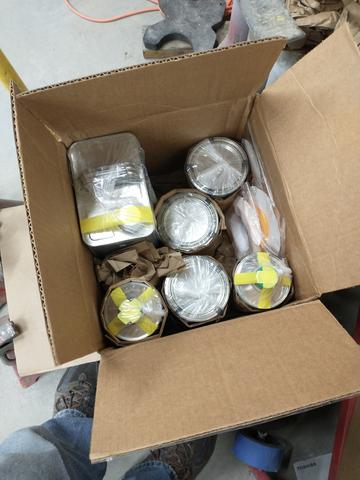
$500 doesn't buy much in the quality paint scene these days. The color I chose is up to $880 a gallon. I bought it a year ago for $600 a gallon. This is 2 quarts of jet black, 1 quart of black primer, and 1 gallon of clear, and the catalysts to go with them
 John Rodko
69 RS/SS Camaro.
Heidts Pro G IRS w/ 3:90 gear, Heidts Pro G front
6.0L LQ4 to be TT
6 speed or 4L80E, that is the question..hmmm
Future plans for full TMI interior
12-31-2020 #38
Registered User
- Join Date
- Jun 2012
- Location
- Golden Valley AZ
- Posts
- 77
More rear suspension part2
Got just a little bit more done before I got called to work. Was expecting to do more, but a plumbing leak at home, and getting called to work 11 hours earlier than expected, sorta changed things.
Got the third member installed into the housing, and got it all bolted up. Started installing the stub shafts, but that's as far as I got. I realized, after moving 3 different times, since I bought all this stuff, I am missing some hardware.
Don't have a brake caliper mounting bolts. Not sure what happened with those, so I'll have to find some.
Tried putting that heavy ass iron third member in with the housing in place...that's a negative ghost rider
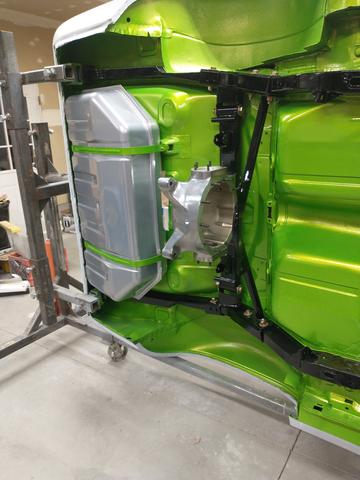
This'll work
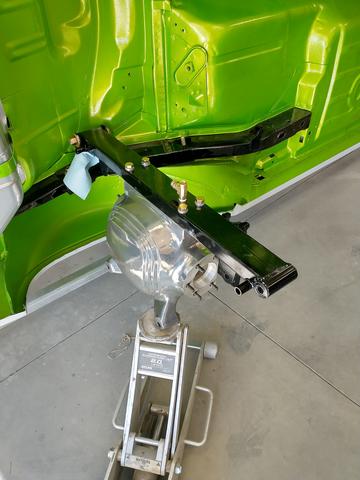
There it is
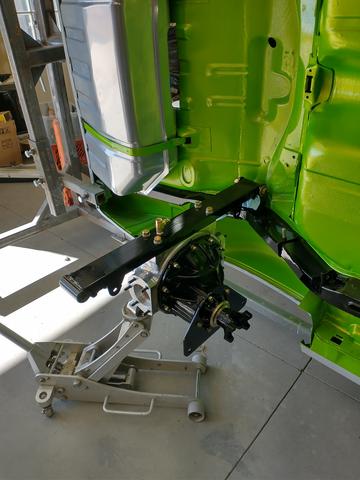
Just swing it up into place
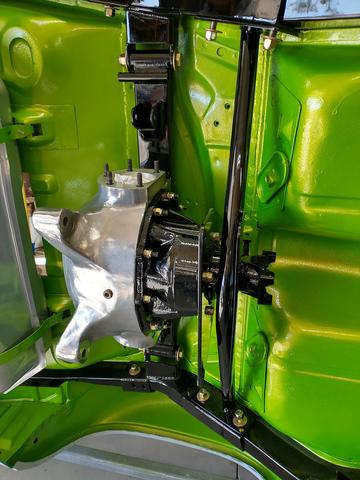
- - - Updated - - -
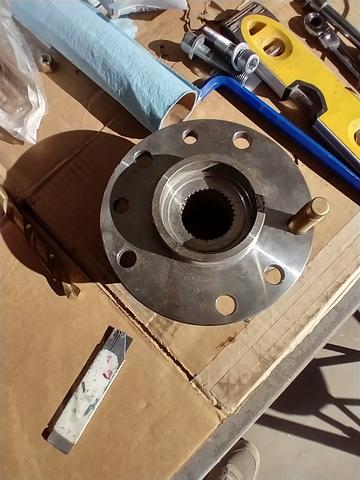
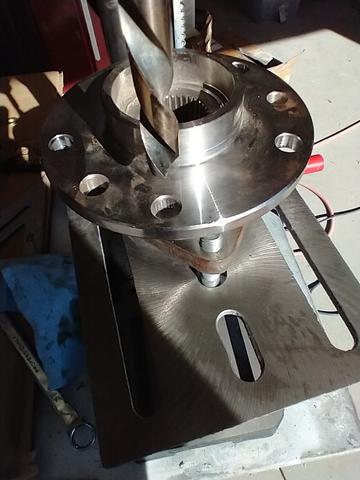
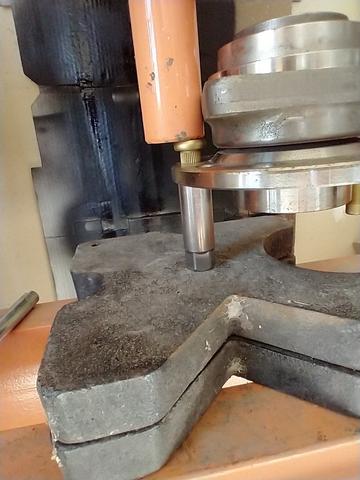
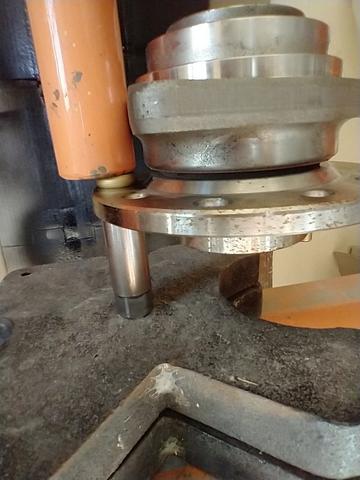
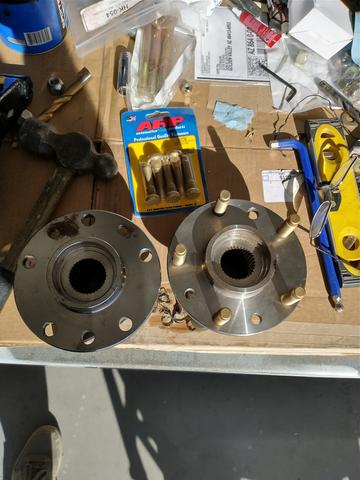
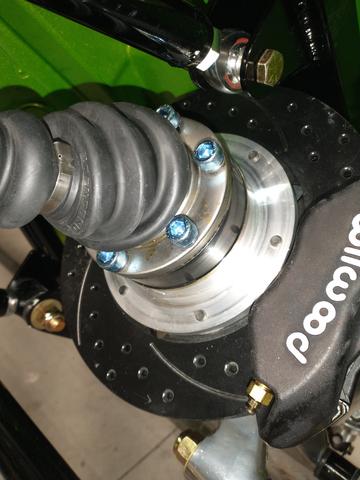
For those contemplating a Heidt's setup, some of their stuff is kinda quirky. For instance, the front aluminum hubs are Willwood, and take a 1/2" wheel stud, but the rear hubs, are apparently Corvette hubs and have a 12mm wheel stud. Had to spend $100 for 10 new wheel studs from ARP. These are specific for converting C5 hubs to SAE 1/2" studs. Just drill out the hole with a 1/2" drill, and good to go.
Don't make fun of my spark plug socket on the press. As soon as the stud bottomed, I stopped. It was the perfect fit for what I needed to do.
Get out the BFH
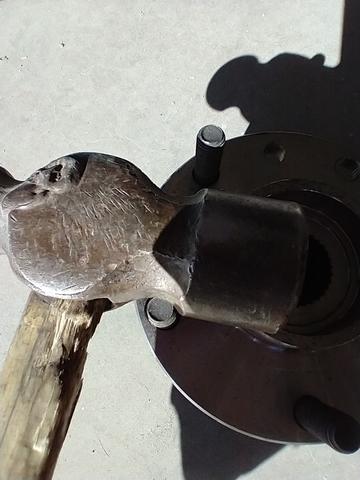
I made sure the table was level with the drill head. Don't want it to be angled
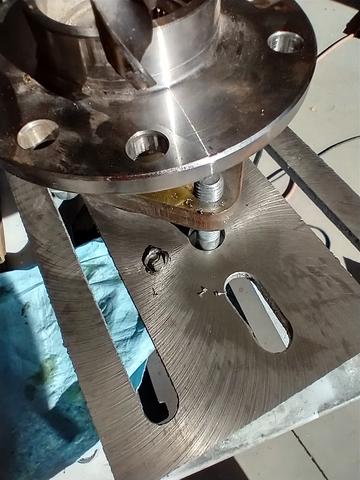
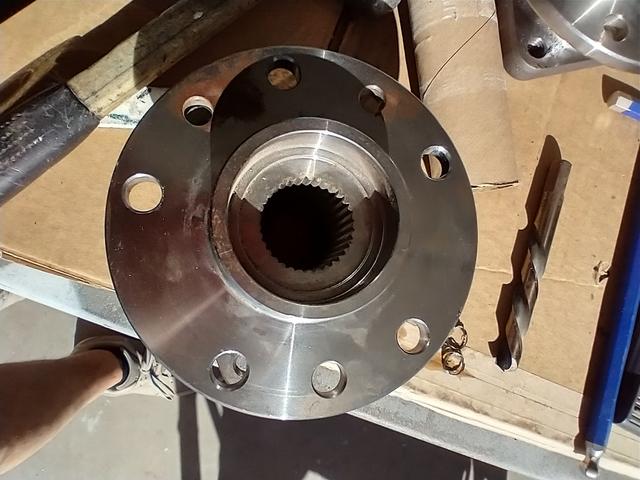
Don't laugh, it worked
 John Rodko
69 RS/SS Camaro.
Heidts Pro G IRS w/ 3:90 gear, Heidts Pro G front
6.0L LQ4 to be TT
6 speed or 4L80E, that is the question..hmmm
Future plans for full TMI interior
12-31-2020 #39
Registered User
- Join Date
- Jun 2012
- Location
- Golden Valley AZ
- Posts
- 77
Rear Suspension part 3
Assembled more of the rear suspension stuff. Waiting on some Grade 8 fasteners to come in. Heidt's supplies Grade 5, which I'm sure is sufficient, but I like the pretty gold color of Grade 8

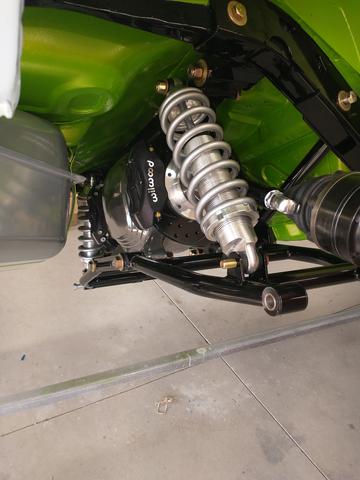
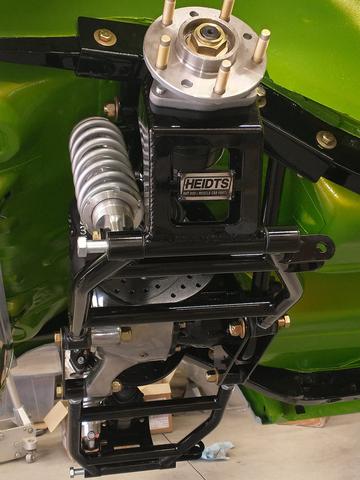
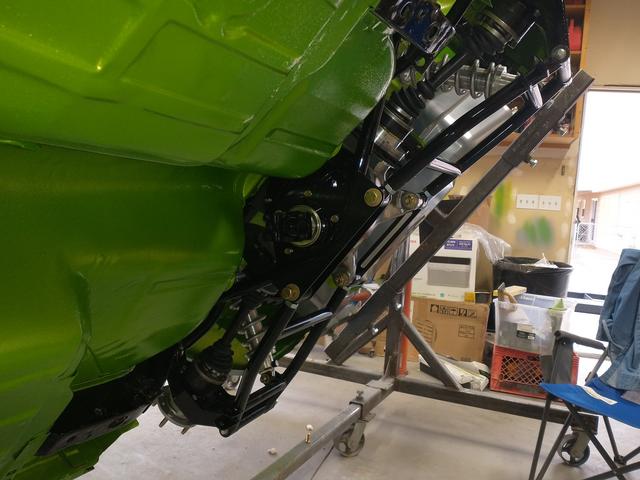
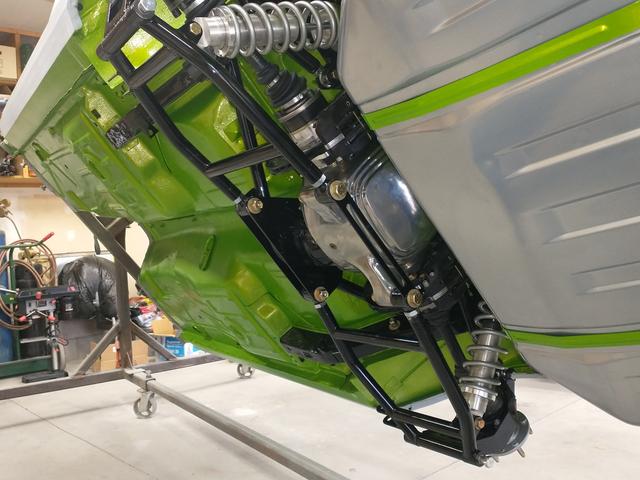
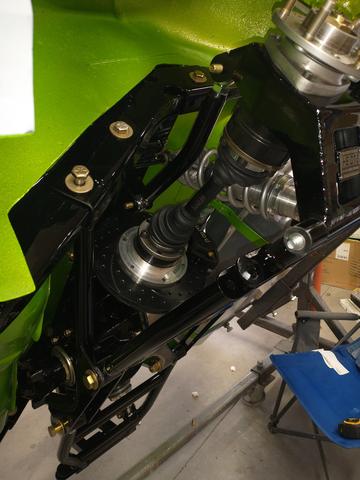
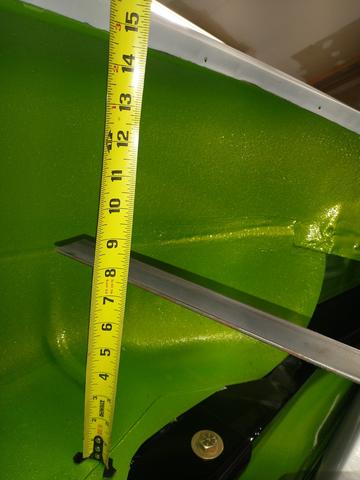
Almost time for wheel measuring!!345's babay!!
- - - Updated - - -
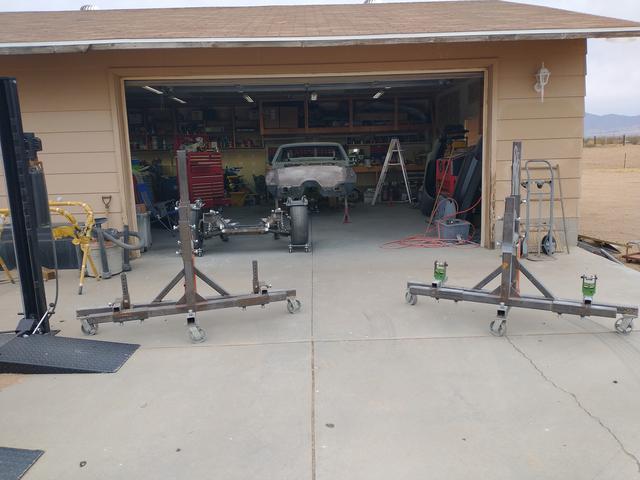
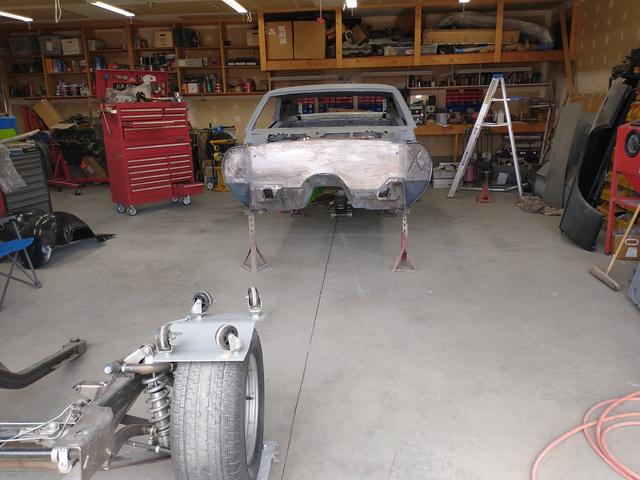
Buttoned up the rear suspension stuff, and took the car off the rotisserie, for the last time...maybe
Straightened and cleaned the garage a little. Time to strip the doors to bare metal, and get everything hung, and body worked.
 John Rodko
69 RS/SS Camaro.
Heidts Pro G IRS w/ 3:90 gear, Heidts Pro G front
6.0L LQ4 to be TT
6 speed or 4L80E, that is the question..hmmm
Future plans for full TMI interior
12-31-2020 #40
Registered User
- Join Date
- Jun 2012
- Location
- Golden Valley AZ
- Posts
- 77
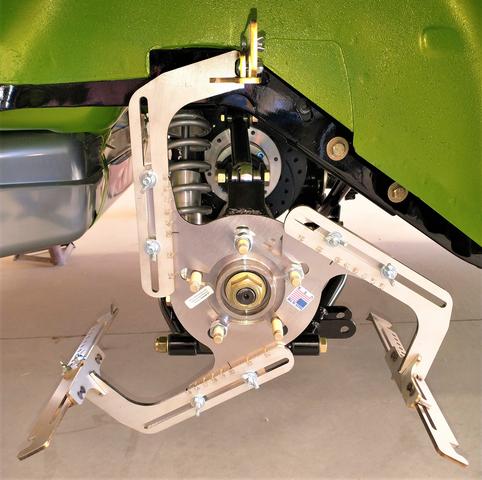
Trick Tool Post
This is a pretty neat, but not cheap tool, to figure out wheel size, backspacing, width, etc. Made by a gentleman named Mike Keller, who owns a company named Verified Fabrication. It is a very well made and thought out design. The tires (when I get them) actually mounts to it, and you can move your suspension through it's travel, with wheel turned (up front) and see where you might have clearance issues. I figure a $400 tool is a lot cheaper than $2000 wheels I can't use, if I got the measurements wrong.

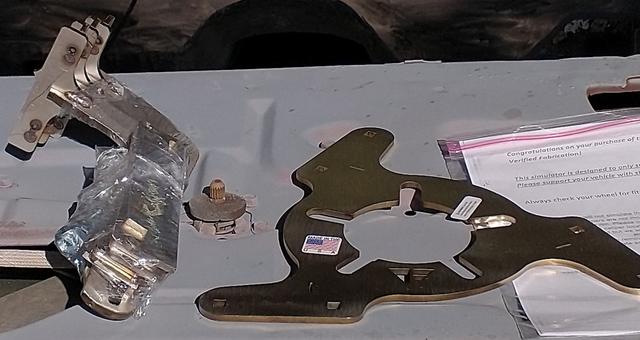
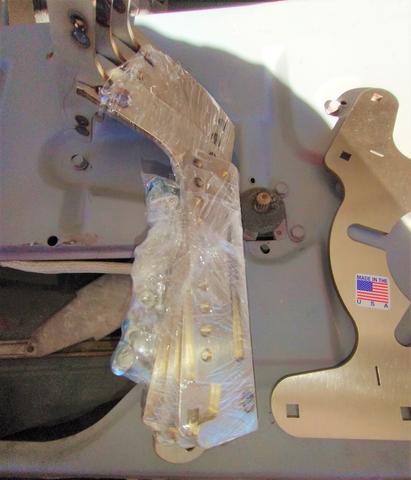
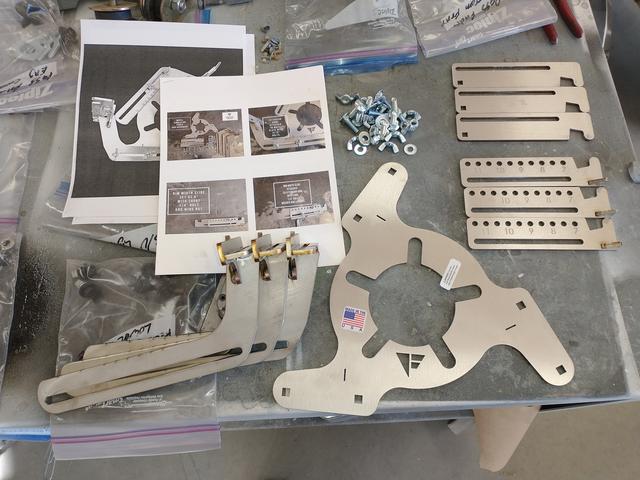
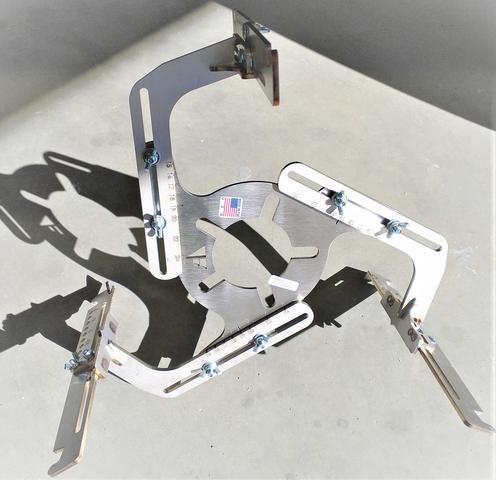
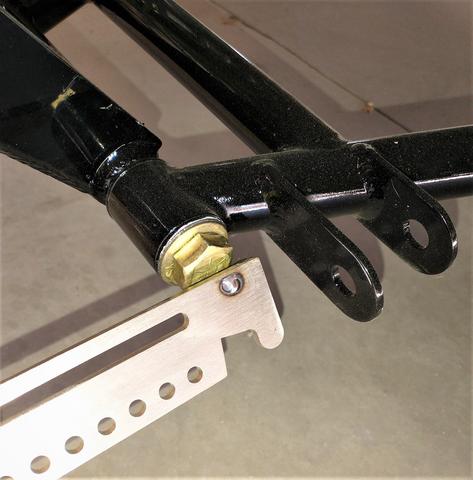
This was the only issue I ran in to with the tool. Of course it's not designed necessarily to use with the IRS suspension. I called mike, and he told me the tool is thicker in that area for strength to hold the tire, which is what I thought. So I can roughly take away about 5/8" from the thickness, and it should be good to go with 19" wheels. If I set the slides to 20" wheels it clears, but I don't want 20's and rubber band tires..lol
 John Rodko
69 RS/SS Camaro.
Heidts Pro G IRS w/ 3:90 gear, Heidts Pro G front
6.0L LQ4 to be TT
6 speed or 4L80E, that is the question..hmmm
Future plans for full TMI interior

 Reply With Quote



