


Results 1 to 20 of 48
Hybrid View


-
07-05-2017 #1
 Registered User
- Join Date
- Aug 2008
- Posts
- 43
70 Chevelle "Not a Space Shuttle"
I normally post over on the Chevelle forums, but figured that much of my car was actually inspired by a lot of the builds on here...
So I finally got some motivation after not really touching my project car for almost 6 years. I bought this car in 2008 with the intention of it being a 8-10 year project for me. It was a relatively clean 70 with a few minor spots of rust, but was in fairly good condition, and had most of the bits and pieces that I needed. During this build, I am somewhat of a perfectionist, and it can bog me down quite a bit at times if I'm not sure how to tackle something, or something doesn't quite work the way that I thought it should. It's happened a few times over the last 8 years and I always think back to a friend of mine when I was building my rock crawler. Anytime I'd get worried about details, or get hung up on something that didn't matter, he'd always tell me, "Look man, we're not building a space shuttle here. It's good enough!" Over the course of this build I have to tell myself that over and over. Anyway enjoy the pictures, I'll do my best to keep updating this tread as the build progresses.
My preliminary vision for the car was an image that I saw online, and although over time my vision has changed a bit, this is what my goals were...

My story starts off like many others. a 70 Chevelle has been my dream car since I was about 10 years old. I loved the look of the car, the sound of the car, but wanted many of the modern conveniences that we all take for granted in todays modern cars. Effectively I wanted something that looked the part of a 70 Chevelle, but that was reliable, comfortable, and powerful. So I bought this shell of a car.


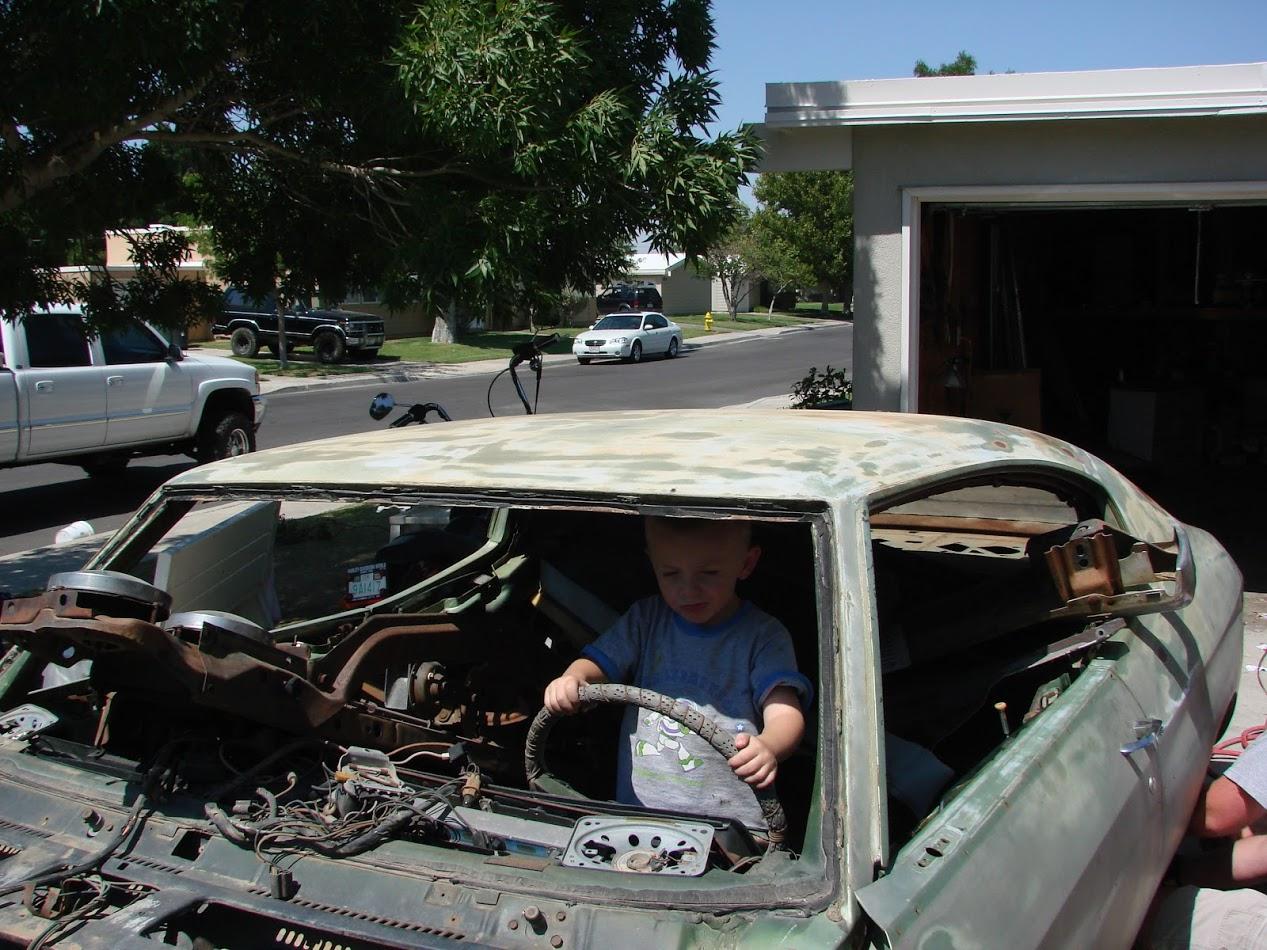
After I got it home I started to work on stuff that I could manage in my garage without spending a bunch of cash on. My plans for the car was LS7 (yeah right)... T-56, Nice smooth lowered suspension, Great AC (a must in Arizona), The car itself smelled like rat turds, so I tore everything out of the inside and pressure washed the whole thing. After it was clean of the dirt, grime, and turds, I smelled a lot better, and it also allowed me to evaluate fully what I'd brought home.
Progress on this build will be painfully slow. Although I've gotten the urge to get this thing back on track, I have a VERY full time job, my wife is in grad school, and I have 3 kids at home. I am working on some innovative (cheap) stuff here in an effort to achieve my goals without breaking the bank. So far ALL of the work has been done by myself, and the either my dad or my son. The only outside assistance has been the custom engine mounts that I had made at a friends machine shop.
-
07-06-2017 #2
Registered User
- Join Date
- Aug 2008
- Posts
- 43
I mentioned that there was a couple of spots of rust that I wanted to take care of, and since I just dropped a bit of coin on the car itself, I was looking for stuff to do on the cheap... So Rust repair was what I started to tackle. Being a Southern California car, it spent it's life in the high desert, so all of the weather-stripping was more or less trashed. I bought some panels from ebay, craigslist, and OPGI to get me going.
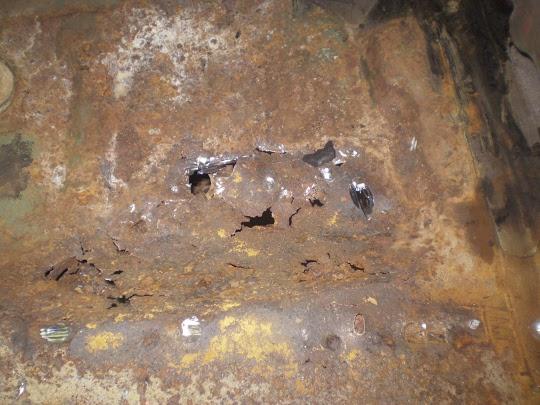
First spot was the floor pans right under the front seats. Although there were only a small spots that had holes, there was heavy pitting, and I didn't like it.
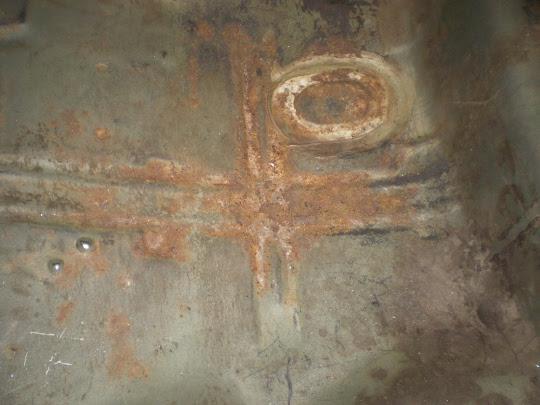
So out it came:
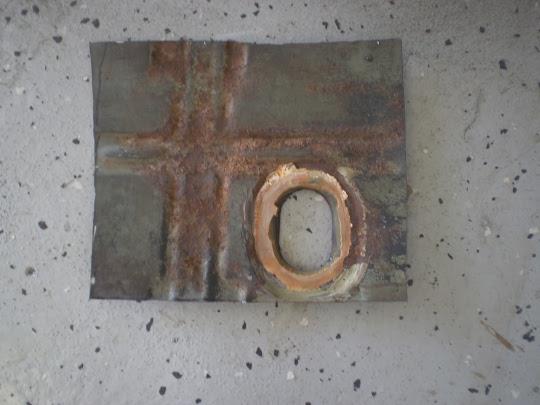
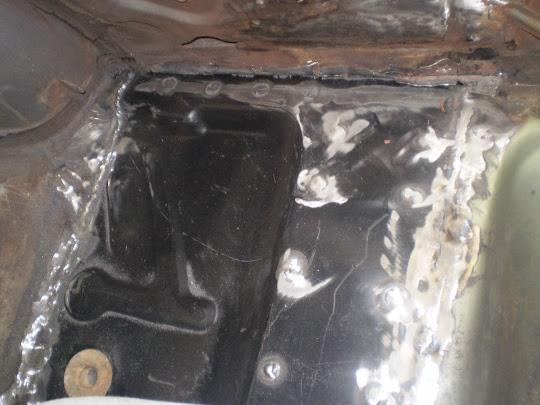
and in went the new metal:
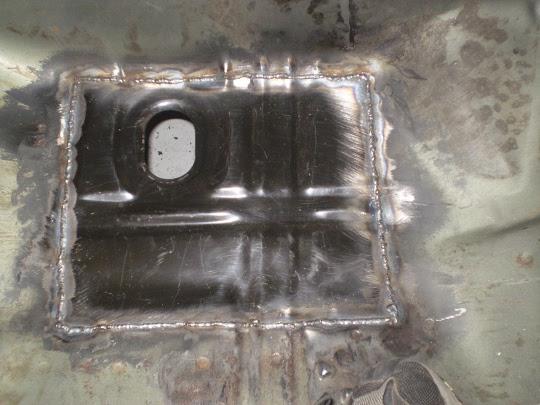
Repeated the same process for both front seats, and also had issues with the rear seat pans that turned out to be worse when I got the braces off... So those were replaced too.
 [/QUOTE]
07-07-2017 #3
Registered User
- Join Date
- Aug 2008
- Posts
- 43
So Rust repair continued:
After the floors were in good shape, I decided to tackle the rear window rust. Most of it looked pretty good, but there were a couple little holes that I didn't like...
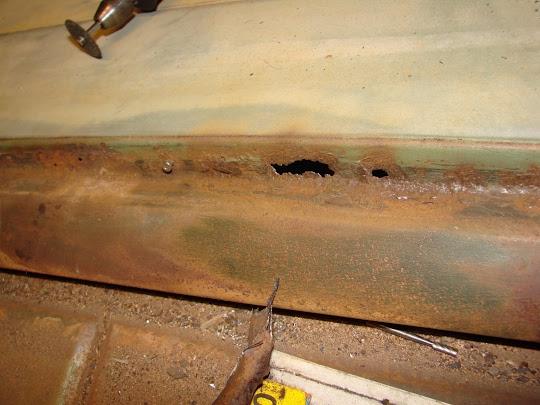
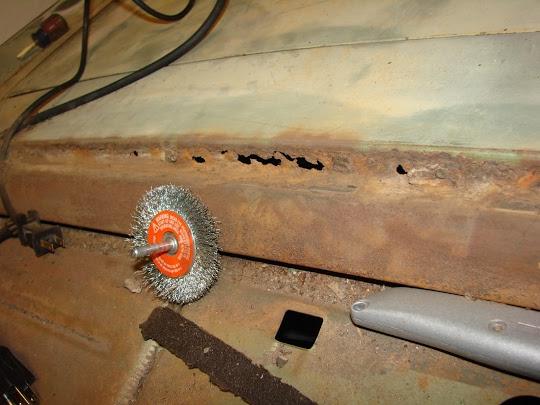
Started making small cuts...
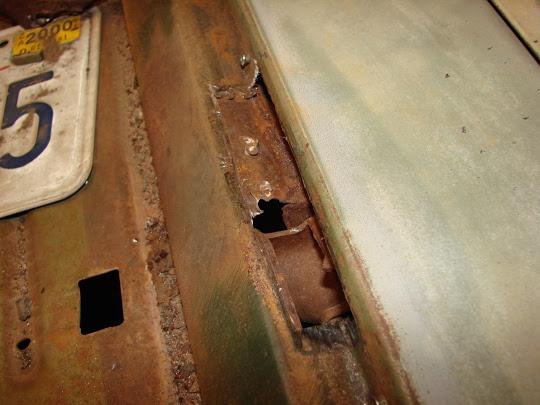
Then they got bigger, as I kept finding more:
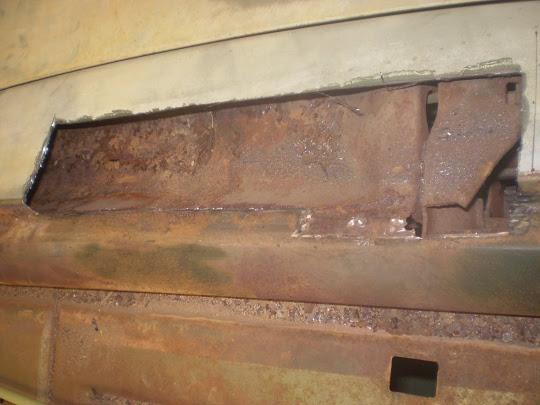
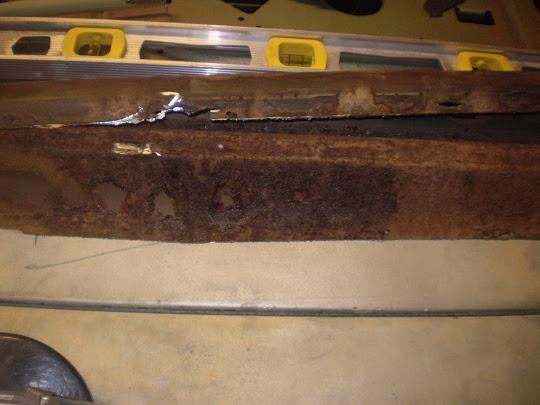
Until the whole damn thing came off.
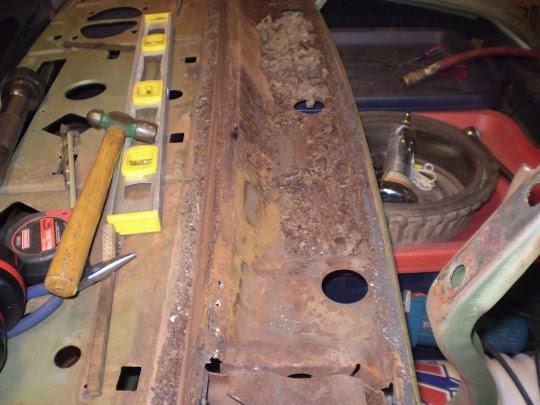
and Santblasted:
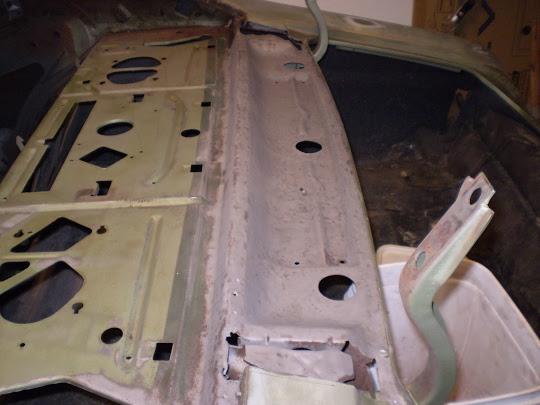
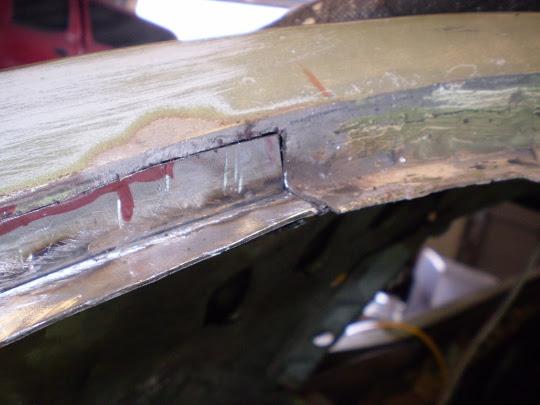
Both sides of the window channel had some deep pitting that had to be fixed.
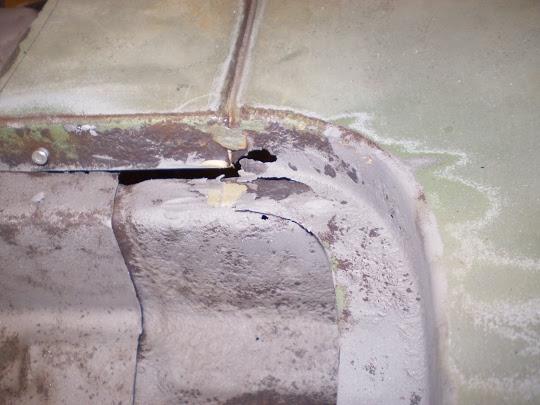
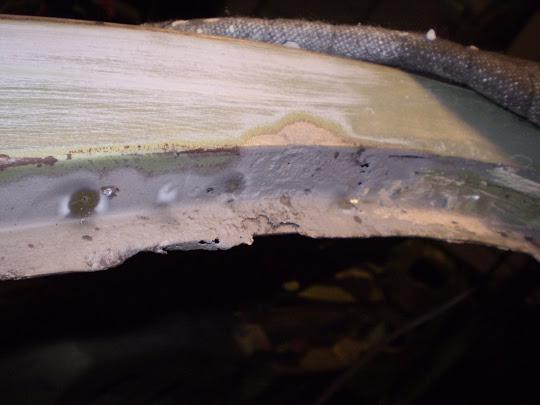
So I cut it out:
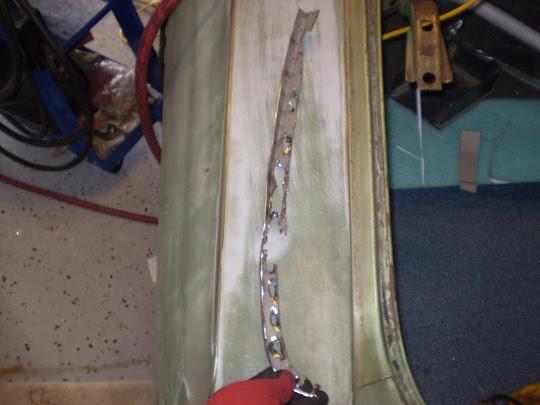
New piece fabricated. I cut the original piece just below the curve of the corner to preserve the trim and how it fit.
07-13-2017 #4
Registered User
- Join Date
- Aug 2008
- Posts
- 43
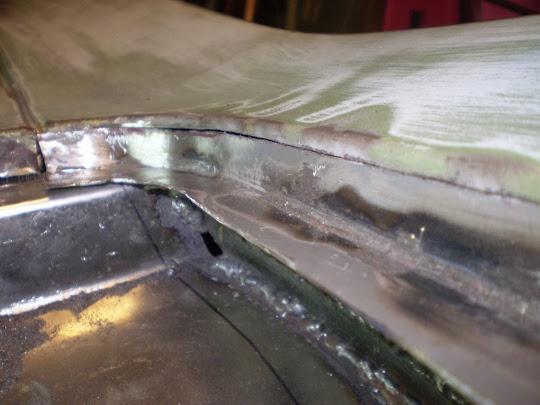
And all welded up with new pins for the trim:
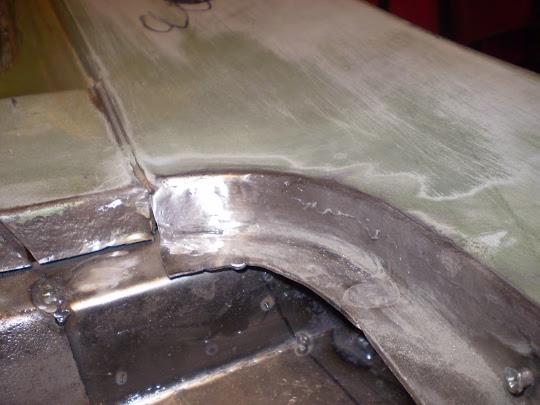
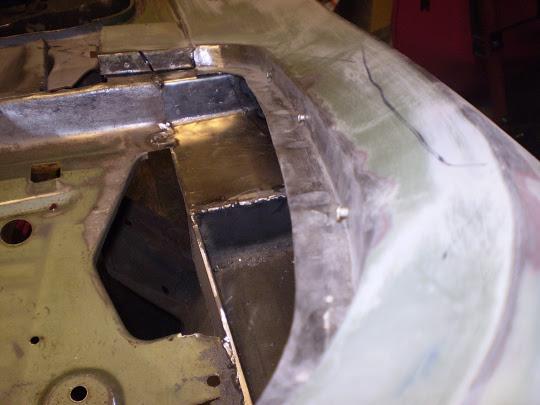
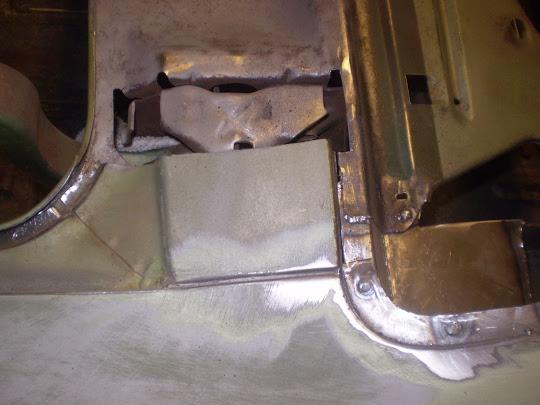
I trimmed the tulip panel so that about 1 inch of the original panel was left to preserve the factory seam. Cleaned up with a wire brush and various abrasives.
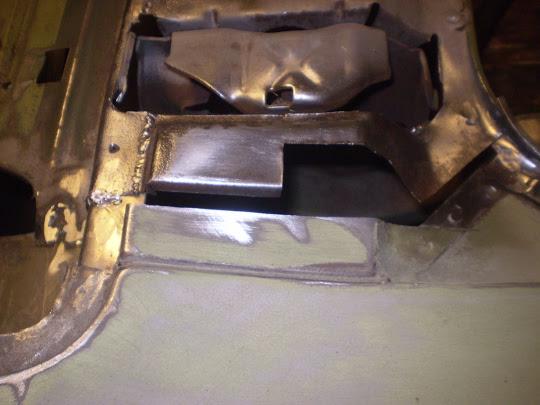
Trimmed the aftermarket tulip panel to match:
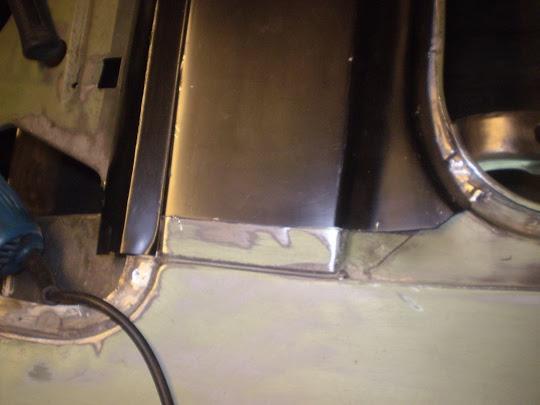
But the rearmost portion of the panel didn't line up with the original curvature of the opening of the trunk panel:
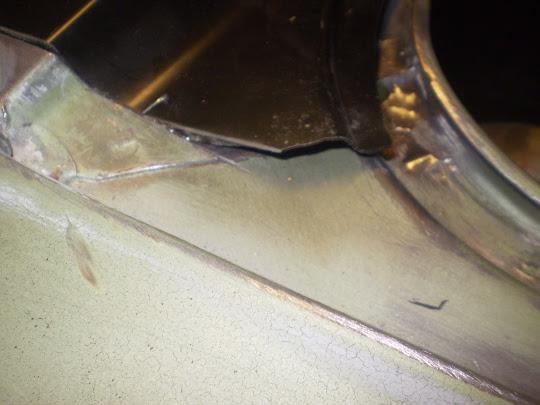
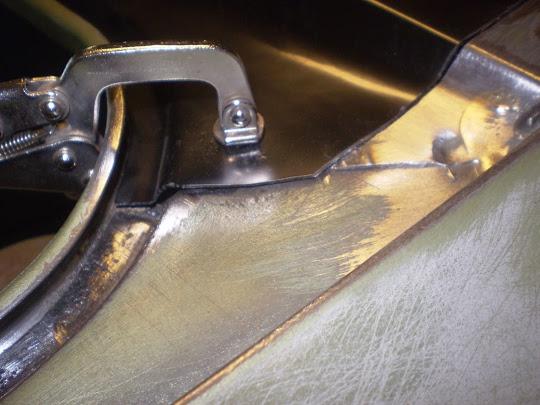
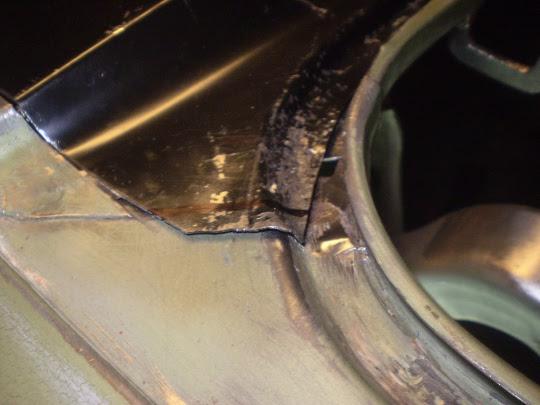
Now that's where the fun stopped. Because I didn't have the weatherstripping, I didn't want to weld this on permanently. So it's still in this condition. I'll permanently attach it once I'm doing the body work...
- - - Updated - - -
So when I started this project, I was a service engineer fixing medical equipment. I spent my life behind the wheel of a car driving 50-60K miles per year, and most of that time for the first few years was spent with my backside planted in a Dodge Magnum. It was gutless as it gets, but it was quiet and comfortable, so I sourced a set of pristine black cloth (I dislike leather and pleather).
The front seats look like they are a bit tall, but with some trimming of the bracketry, they should fit nicely, The rear seats however fit like they were made for this thing... width wise anyway. The bottom of the seat follows the contour of the floor perfectly, and I only had to trim a little bit of foam from the bottom to get it to sit nicely. The seat backs were a little tall, so I modified them to fit.
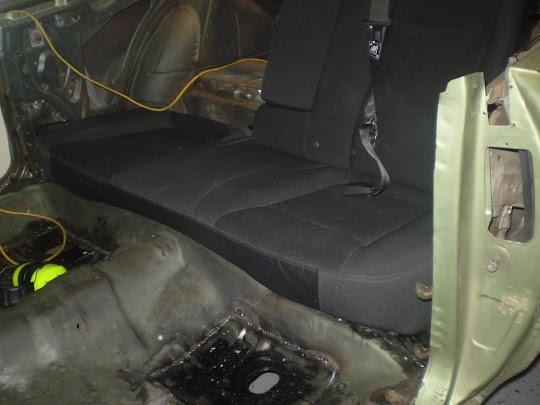
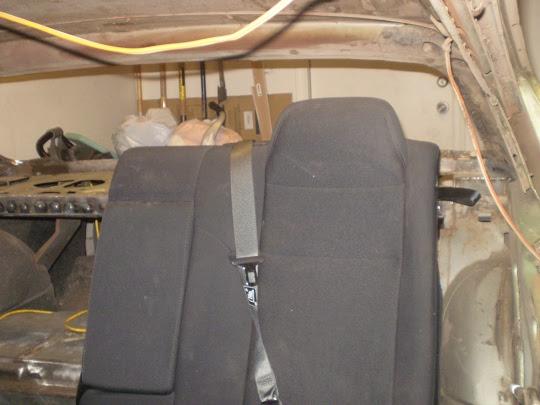
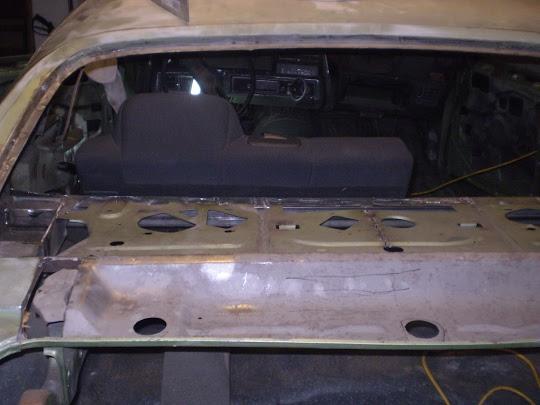
This is post surgery...
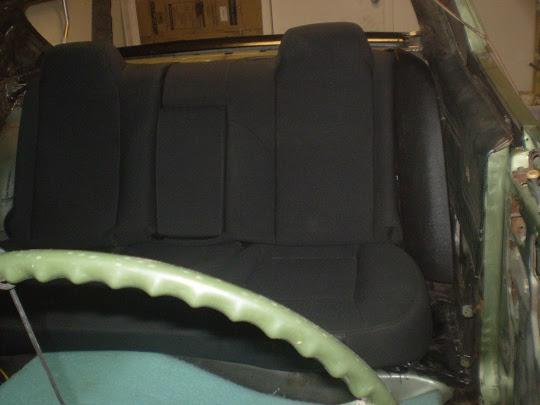
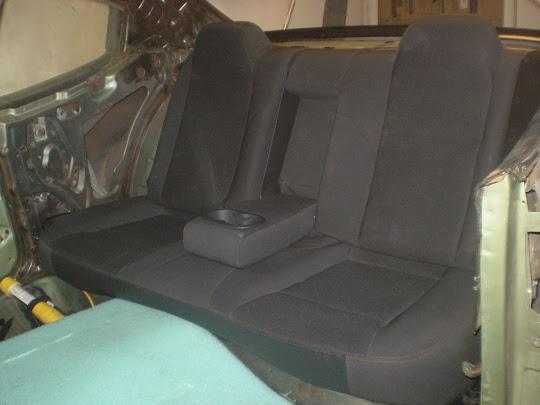
Now those seats are just mocked into place, and the covers aren't trimmed yet, just tucked underneath. An upholstery guy I am not, so I'll have to leave that to professionals so it doesn't look like crap...
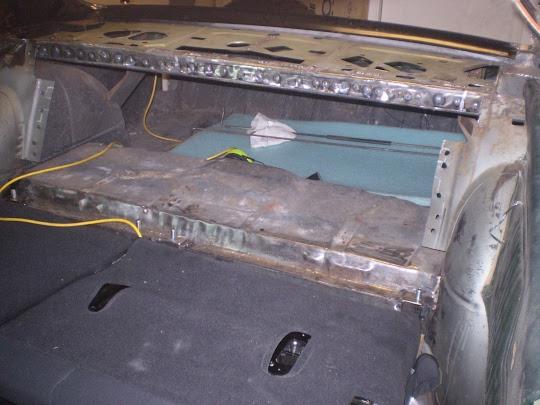
There is some extra bracing that I need to do because I removed the separator, but the 2X2 tubing at the top of the seat backs will be the start of that bracing.
This is effectively where that project stopped for now until I get farther along with the interior. I didn't mount the front seats yet because I didn't know what was going to happen with the transmission tunnel, I didn't want to mount them, then have to move them because I needed to widen the tunnel.
- - - Updated - - -
So like I mentioned in the first post, my plans were for an LS7 and T-56, that was until I saw how expensive those damn things are... So I thought my goals were a little lofty with my miniscule budget (wife and 3 kids at home), so I started keeping my eye on ebay, craigslist, and the local classifieds. Every once in a while, I'd see the wrecked F-Body with an LS1, but more often than not they had a 4 speed auto, the ones that had a 6 speed still commanded a bit of money. I also kept my eye out for an 04-06 GTO, and wouldn't you know it. a relatively low mileage 06-GTO came up on craigslist for 5K in the California desert,
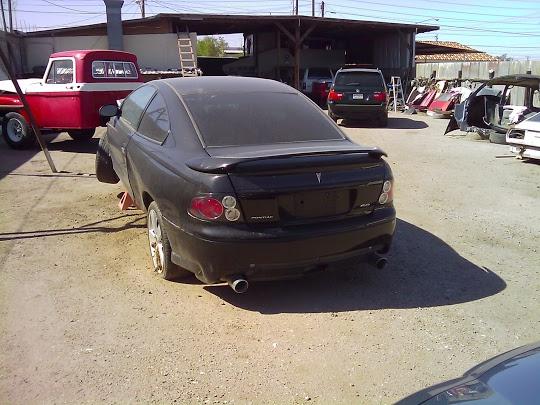
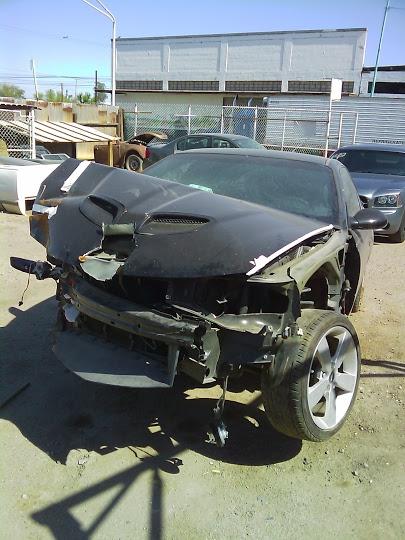
I contacted the guy. on the phone he was pretty sketchy but confirmed that it was an LS2 with a 6 speed. I was worried about the condition of the engine from the picture above, but he confirmed that the engine was OK, and that he was able to turn it over. I grabbed my dad, and headed out to So Cal that day with cash in pocket. I didn't have a truck or trailer, so I drove out in my van, and planned on renting a U-Haul and trailer to tow it back if I ended up purchasing it.
When we got to El Centro, the guy was just as sketchy as he was on the phone, and told me that the car was in Calexico, and just like it sounds, it's right on the border to Mexico... We go check out the car, and it looks WAY worse than the pictures that he sent me.
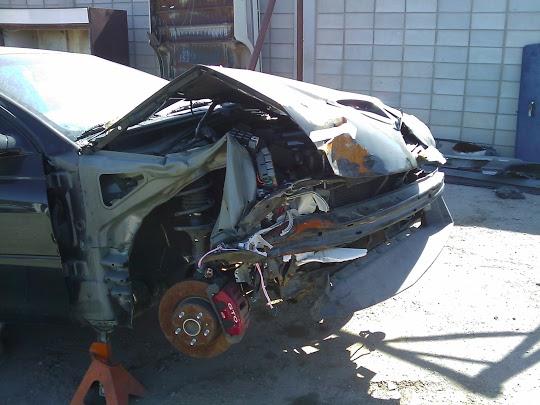
The core support is so entangled around the engine that there is NO way there was any movement from the engine. Both engine mounts were ripped apart, and so was the transmission mount. The entire drivetrain was shoved back almost 6 inches. I waffled on buying it because I couldn't tell if the engine was any good. The interior was in pretty good shape, as was the rest of the body. I decided to pull the dipstick and it was dry. I told the guy that the whole reason I wanted the car was for the drivetrain, and started to pack up my stuff. He asked me if I was going to buy it, and I told him No, that there was too much damage, and I couldn't verify that the engine was good. He asked me what I would pay for the car, and my dad piped up that it's really only worth about 2K. The guy countered back at 3K, and we settled on $2800. We traded the title for cash, and went to get the truck and trailer and loaded it up to head back to Arizona.
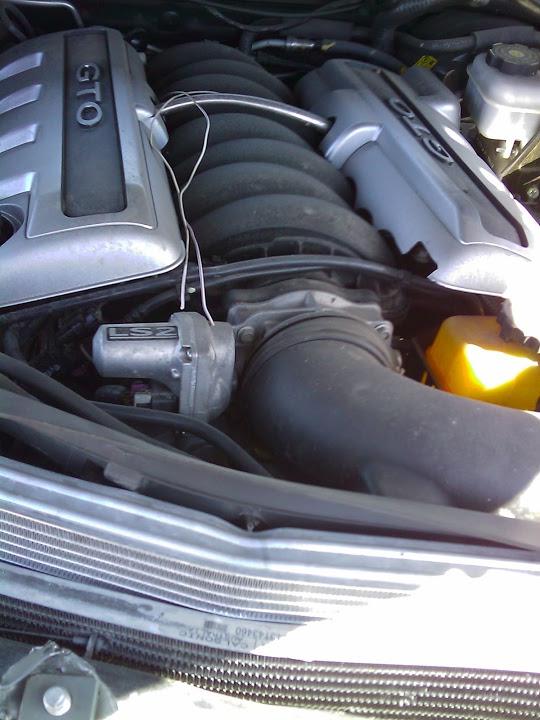
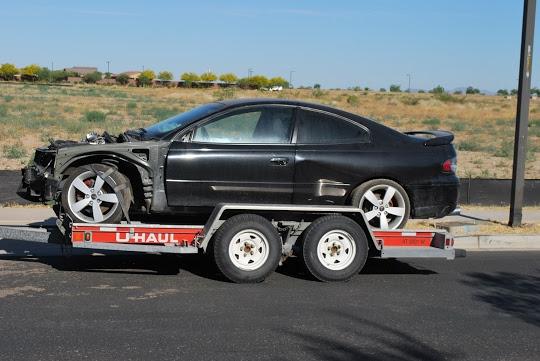
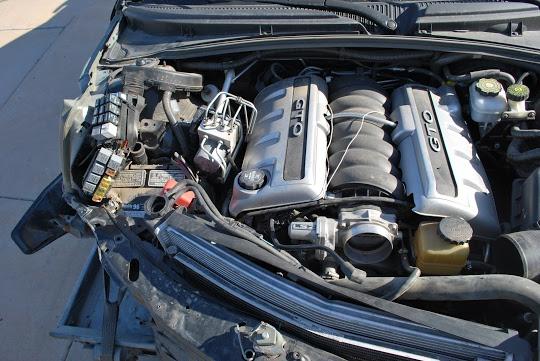
Made it back to AZ and bot the car rolled back into my garage.
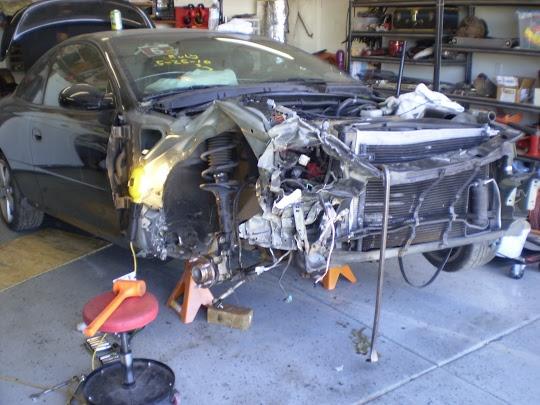
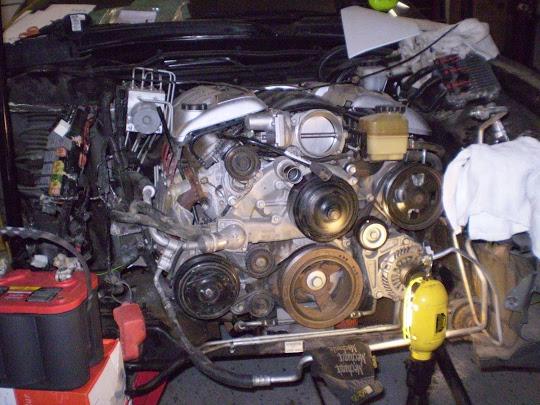
After a couple hours with a sledge hammer, Sawzall, portapower, and jacks, I had this:
07-13-2017 #5
Registered User
- Join Date
- Aug 2008
- Posts
- 43
Spent a couple of hours fixing damaged wiring, and throwing some JB Weld on the cracked oil pan. I borrowed the battery from my rock crawler, and put the key in the ignition...
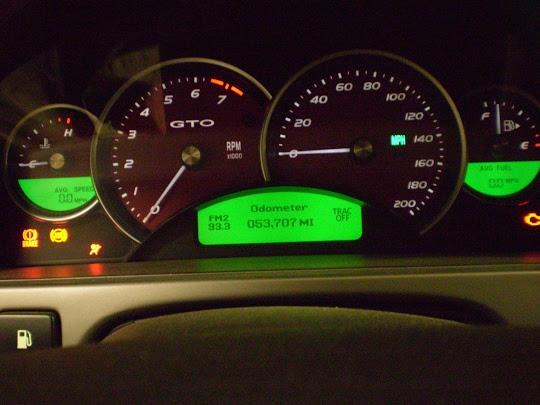
a Quick turn of the key, Netted me a running engine!!!! It sounded great!
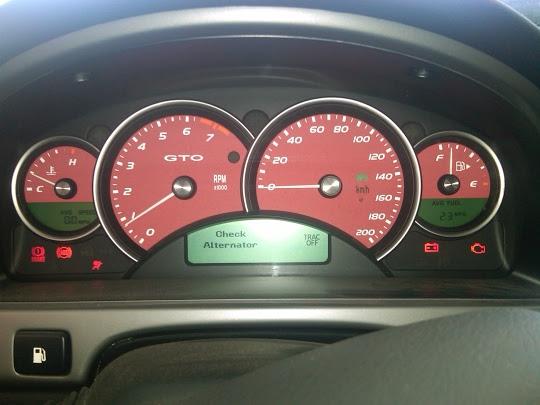
Over the course of the next 8 months, I parted that GTO out and sold off anything I didn't think I could use. Those GTO guys are strange. They wanted the strangest things from that car. Finally I was left with all of the parts and pieces that I wanted, (Engine, Transmission, complete drivetrain and body wiring harnesses, HVAC, Exhaust, tons of little parts and pieces, I cut the pieces of the core support out for the radiator and condenser so I can just mount a GTO radiator to the Chevelle... Finally I was left with the body shell, doors and that was about it. I cut them up with a sawzall and dropped it off at a scrap yard...
My Prize.... :laugh:
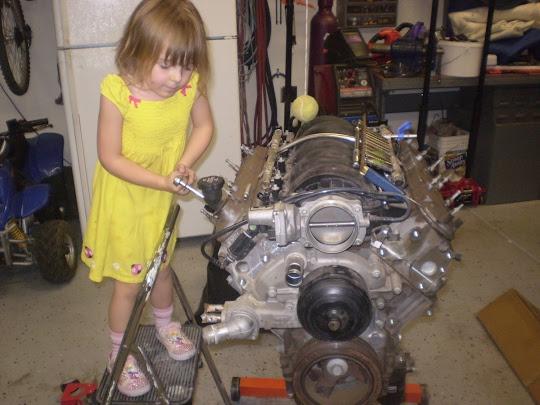
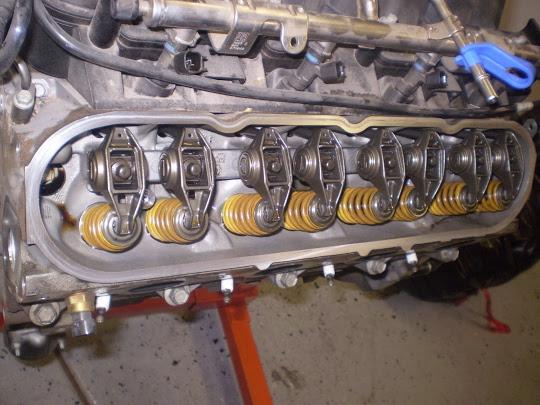
The inside of the engine looked AMAZING!!!!
Now came time to marry the old with the new. This is what I started with. Pretty crusty
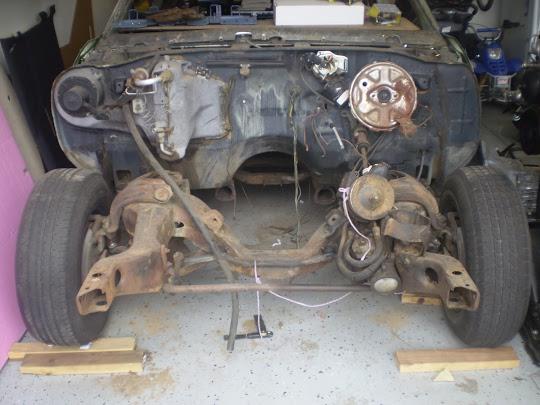
I spent a little time with a wire wheel cleaning up the framerails and crossmember and with the Edelbrock adapter plates I ended up with this...
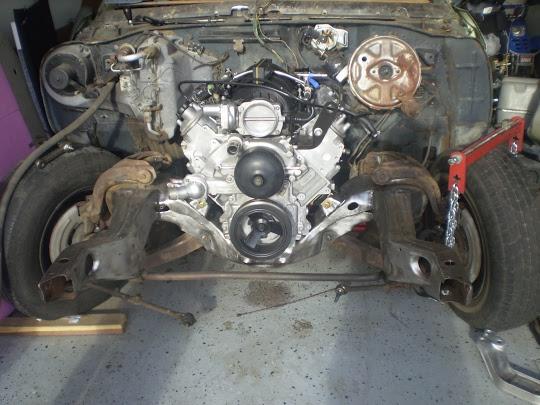
Pretty good (At First, This is one of those times my OCD kicks in and I have to remind myself that I'm not building the space shuttle.).... I sourced a CTS-V oil pan and didn't like what I saw...
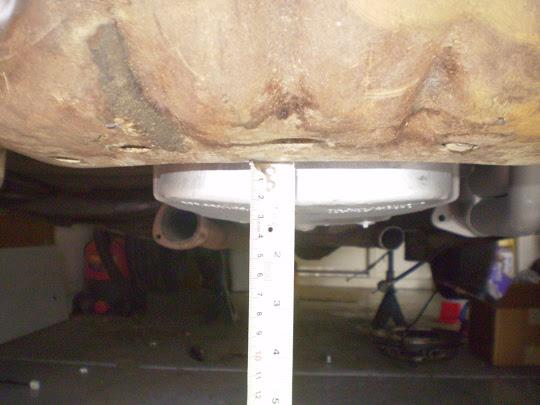
So I monkied around with it, ended up making my own engine mounts to get the engine and exhaust where I wanted it where the oil pan was flush with the crossmember and the exhaust was about 3/4 of an inch from the floor pans. They were pretty ugly and heavy, so I had a friend make me some out of aluminum so they were lighter and prettier.. Those pics will be later because it took him 5 years to actually get them made... (I wasn't really pushing him either. I wanted some adjustability with these mounts so you'll see my vision in a later post.
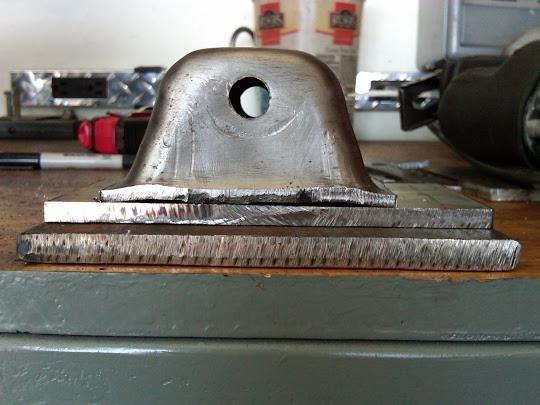
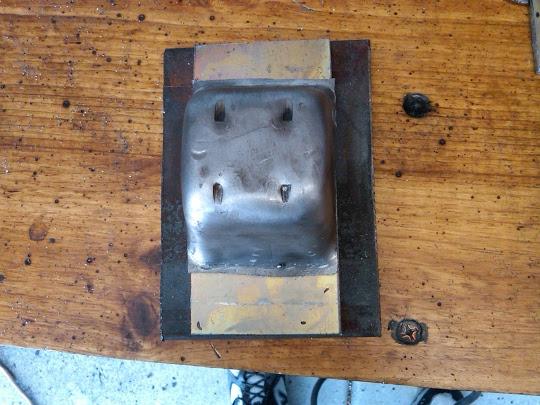
Since I was at a point where I was waiting on engine mounts, that's where this part stalled...
- - - Updated - - -
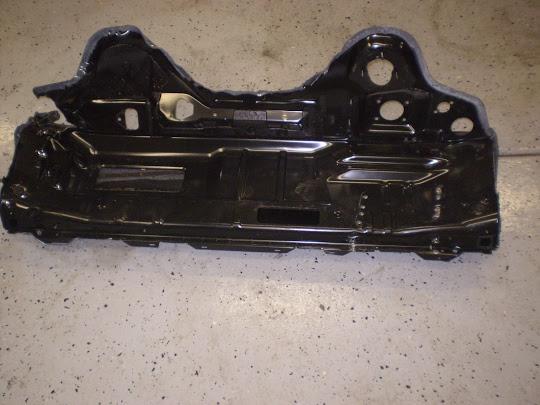
Now for the part that made me probably the most nervous... I am cheap... and I wanted to use as much of the GTO as I could because it all worked together. My Chevelle was a factory AC car, but it was in extremely poor condition. I also wanted a smooth firewall, so I decided to use the GTO cowl, and HVAC unit... Well can't have Chevelle HVAC and GTO HVAC living in the same space, so out came the cut off wheels and sawzall. I started pretty small, but ended up going big! I started off by removing the upper cowl by the spot welds, this took me a LONG time to separate the two pieces without damaging either.
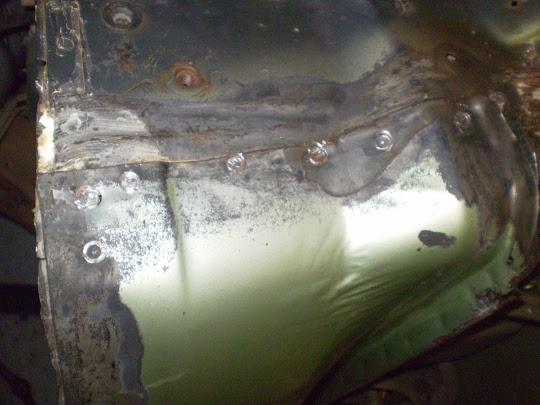
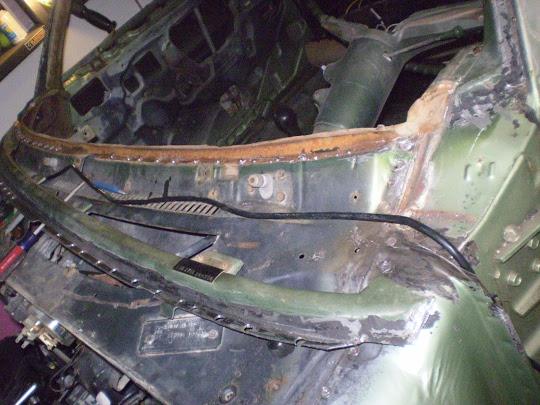
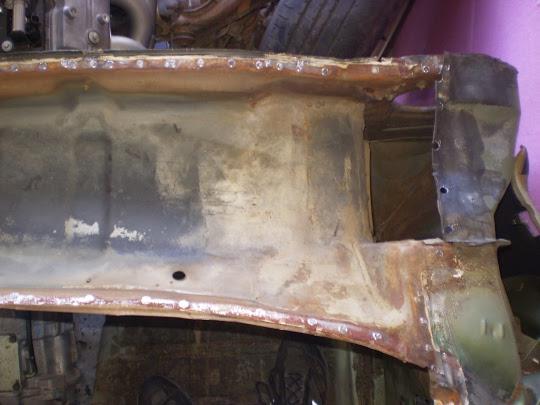
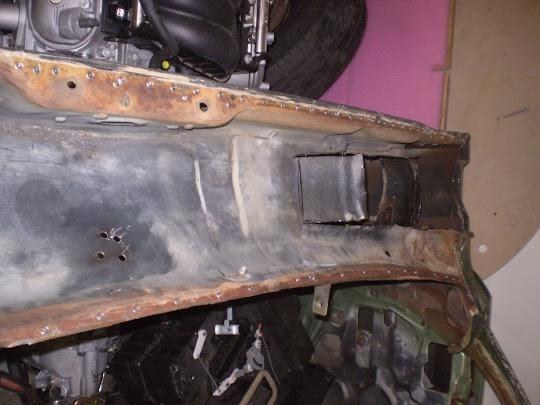
I kept the cowl from the GTO (along with some other body pieces) so I decided to use it form this.
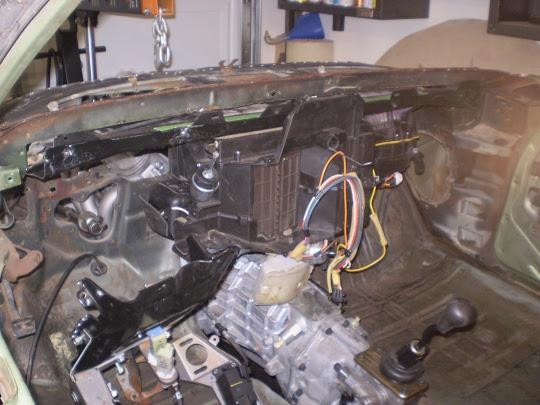
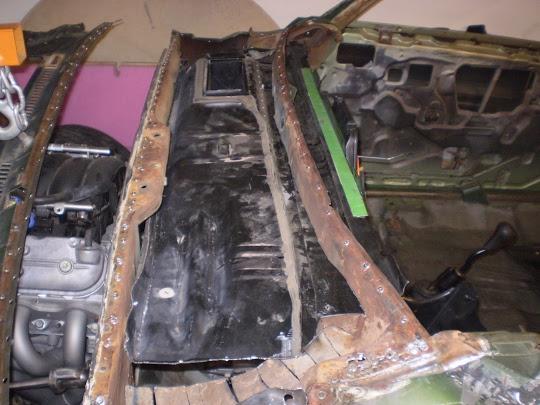
And it all fits under the factory Chevelle cowl...
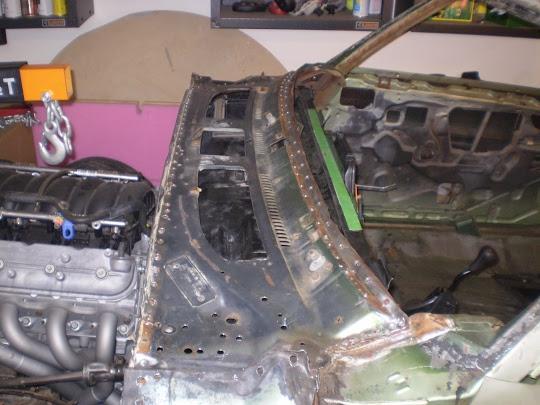
Now at this point, I didn't know where the transmission tunnel, or Firewall were going to end up because I didn't have the engine placement finalized, so this project stopped here.
After this was done, The car took a back seat, as I was working on rebuilding the suspension on my rock crawler. I also changed jobs, moved to Vegas, then changed jobs again and am back here in Arizona. When I moved out of state, my wife and kids stayed here in Arizona... So did my projects. I didn't really touch the Chevelle for almost 6 years. Partially from a lack of motivation, but also because of a lack of time and resources. My kids are extremely active, and now my wife is in grad school... I can't tell you what happened to me over the last month or so, but I have gotten the drive back to get this build back on track again. I've made a goal to have the engine running by this time next year. I'm hoping to have some frame modifications, and the underside of the body cleaned and painted. Since the car was on the back burner, didn't mean that I didn't keep an eye out for good deals on parts and supplies. Again because I'm cheap! I've made some progress recently, so I'm hoping to get this thread updated in the next few days with current pictures and descriptions in hopes of keeping me motivated. Now summertime here in Arizona isn't the most ideal time to work on a car in the garage, so the updates for the next few months will be a little sparse.
07-13-2017 #6
Registered User
- Join Date
- Aug 2008
- Posts
- 43
Alright.. So fast forward 6 years and my buddy with the machine shop called me and said, "Hey, your engine mounts are done"... So I went down and picked them up. They were about 80% done, so I set them on my work bench for a few weeks. There is a spot on the engine mounts that needed to be recessed into the mounts, and 28 holes to drill and tap. I wanted the mounts to be adjustable so if I needed to move the engine forward or back, I could do it easily. I really wanted it done at the machine shop, because I don't really have the tools to line everything up to make the holes straight, but figured that it took over 5 years to get them done the first time, I didn't want to wait any longer... One night a few weeks ago, I walked by the mounts sitting on my work bench and decided that I needed to finish them myself. (again, This isn't a space shuttle....). So I set up my drill press, and went to town drilling the holes as straight and evenly spaced as possible. I got all of the holes drilled After breaking 5 taps cutting the threads, I was finally done! I test fit them onto the engine and frame with the headers and starter installed to make sure there was clearance:
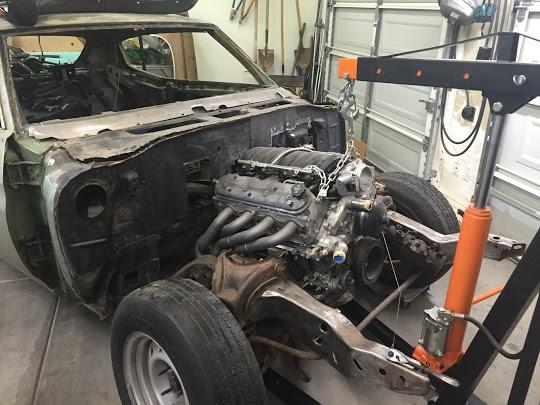
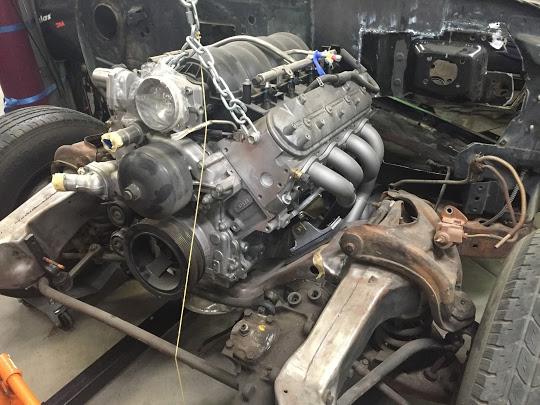
I liked the fitment, so I pulled the engine after they were tacked in.
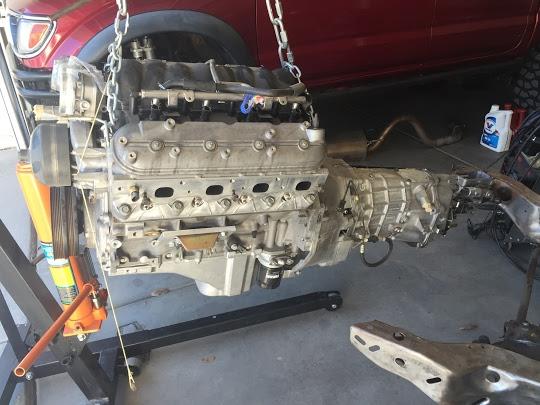
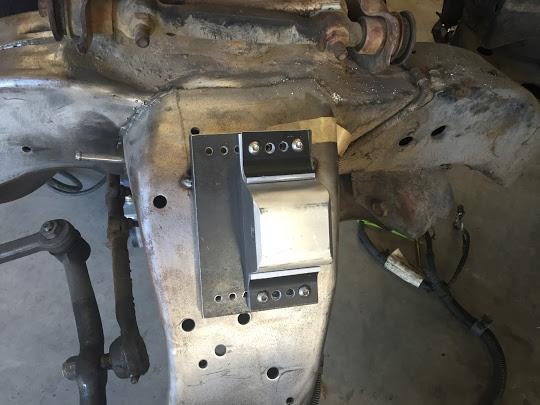
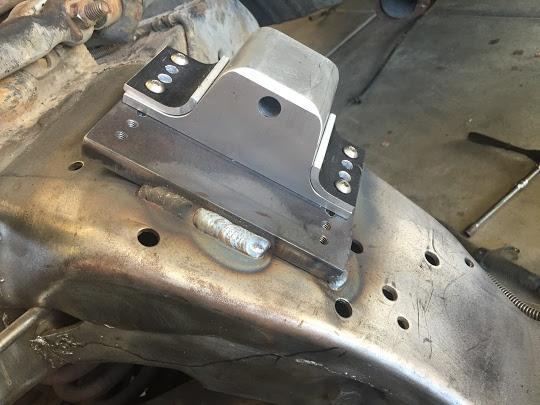
So now that my engine location was finalized... It was time to get the transmission tunnel figured out. In order for me to set the transmission height, I needed to set my rideheight to make sure the driveline angles were ok. My car came with a 12 bolt that I was not planning on using, it's got a welded tube, missing spider gears, one of the shock mounts was repaired badly at one point. A few years ago I scored a nice Moser 9 inch with a junk yard 3rd member from ebay a few years back, so I removed the 12 bolt and installed the 9 inch... I didn't get any pictures of that....
- - - Updated - - -
So the transmission tunnel has really been a big concern for me for some time. When I cut up the GTO and dropped it off at the scrap yard, I cut out the transmission tunnel from it. I figured that it was the right price... it already fit around the transmission, and it is a solid piece... It's been kicking around my garage floor for more than 6 years now, so it was finally time. I did an initial cut to remove as much of the floor as I could (on the GTO tunnel) to make it a little lighter. I also drilled out all of the spot welds that the GTO used for bracing as well as the extra brackets and crap. I also spent a bit of time removing the factory sound barrier and repairing the shifter hole (remember the drivetrain was pushed back 6 inches in the GTO and the shifter mangled the opening a bit...)
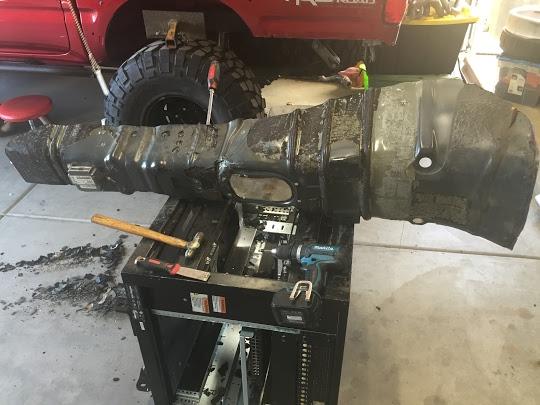
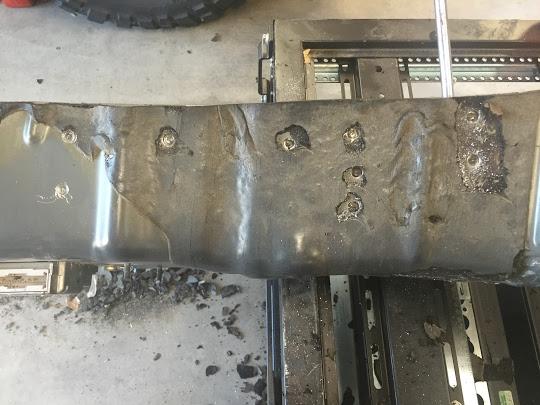
My first real test fit.
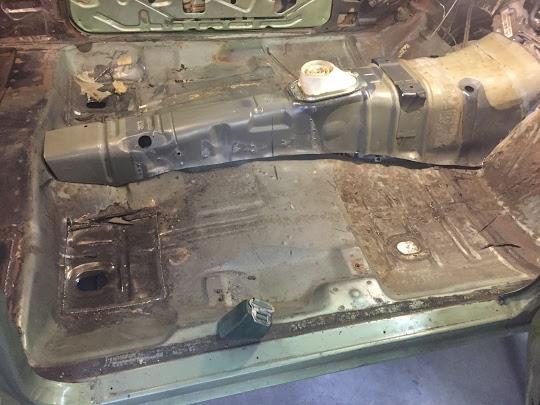
So I removed more of the original Chevelle floor. you'll notice that the output yoke of the transmission is pointed directly at that floor brace. The brace was left intact for now so I didn't ruin the structural integrity of the floor.
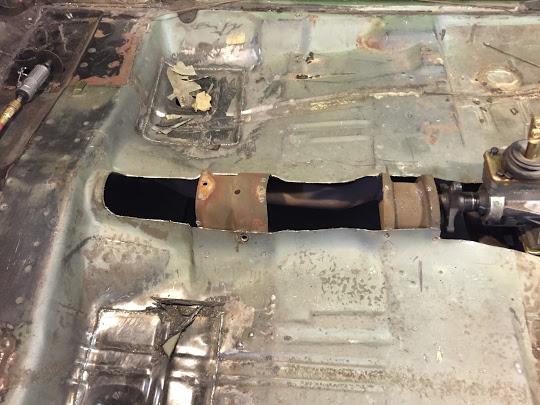
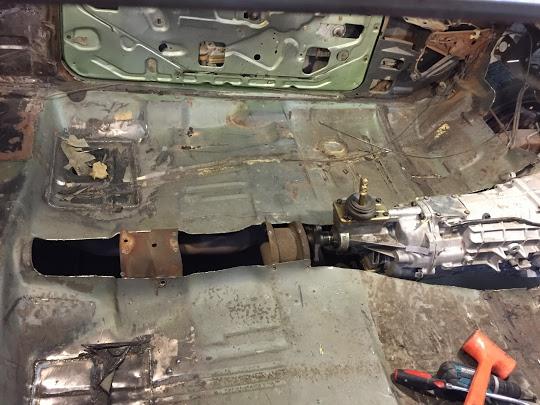
So I spent some time filling in the some of the holes that weren't going to be used. I again started to get bound up and stressing about how I was going to marry the two pieces and make it not look like crap... originally I was going to butt weld the two pieces, but in my experience that never really works as well in reality as it does in my head... I then had an epiphany and decided that I'd overlap them and spot weld them... Now I'd like the car to be/stay as rust free as possible, so I wanted to ensure that water intrusion wouldn't be an issue so I had to figure out a way to get the GTO tunnel "Under" the Chevelle floor while still leaving the factory Chevelle braces in place... So I used some Vice Grips and just folded the Chevelle floor back enough to allow me to slip the GTO tunnel in place. This took LOTS of trial and error to get the two to fit together.
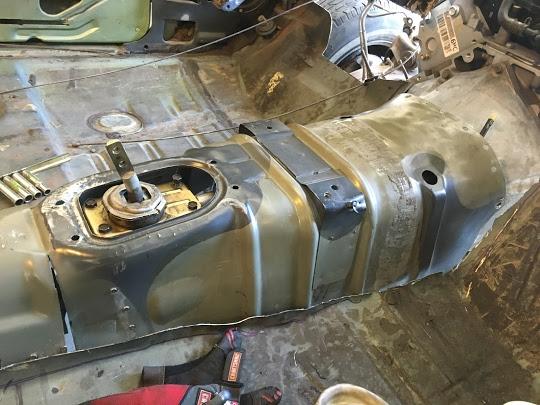
In the above picture you see the split I had to cut in the GTO tunnel to drop the tunnel down enough to get the shifter through the hole, but still allow the tunnel enough room for the driveshaft to move up and down without hitting.
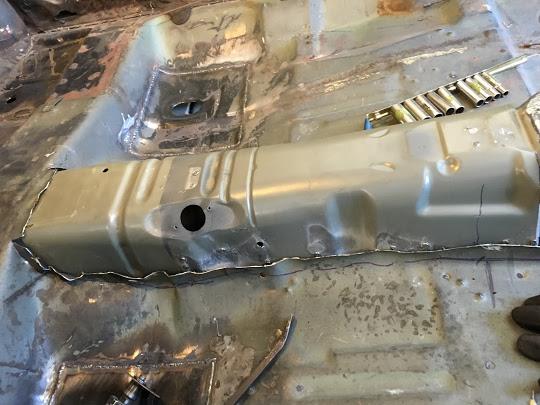
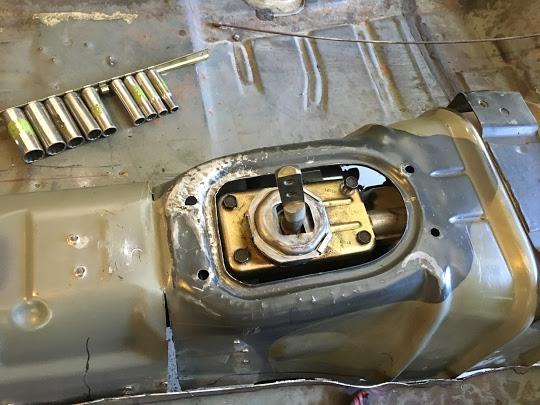
- - - Updated - - -
Here it is with the GTO shifter boot.
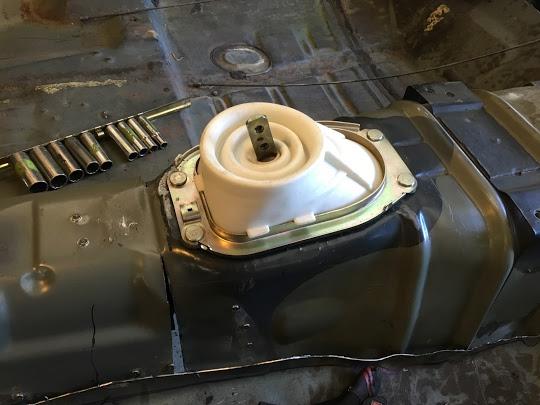
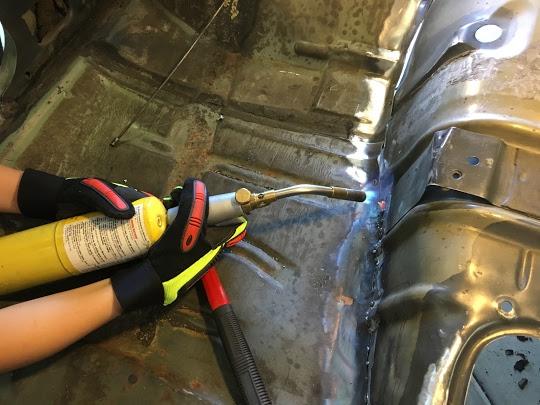
so I got out the MAPP gas torch, and some Harbor Freight body hammers and went to town. I am just worried about the top side for now, and will finish the bottom side after I separate the body and chassis.
.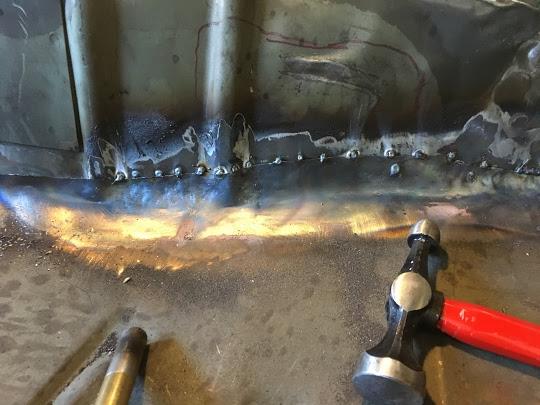
We tried to follow the contours of the metal as best we could. Actually I am extremely happy with the way that this turned out.
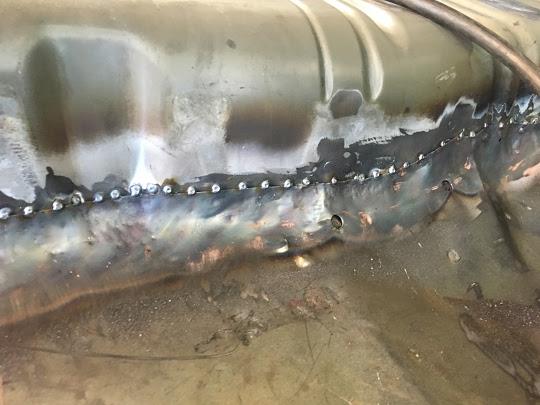
there were a few spots where we had to draw the GTO tunnel out to meet the Chevelle floor.
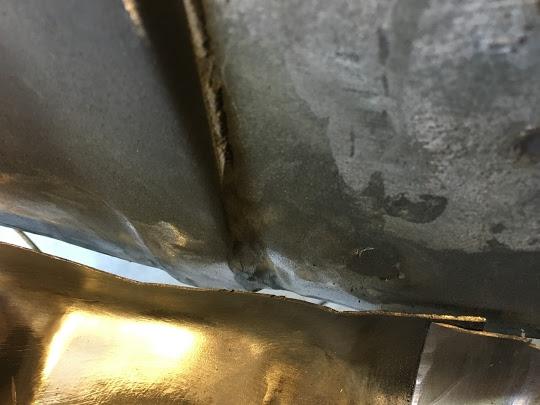
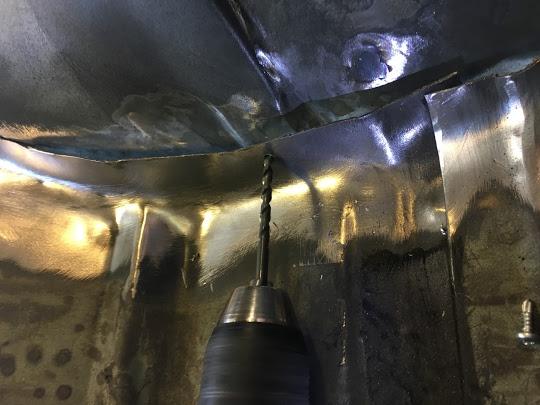
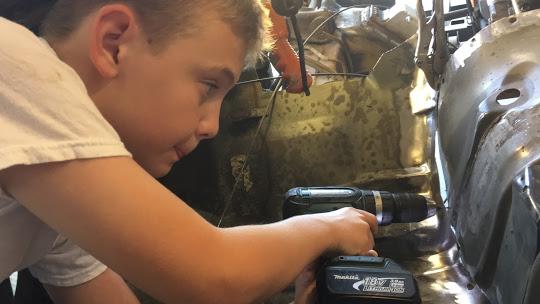
but with some creative placement of some screws and holes we were able to draw the two pieces together.
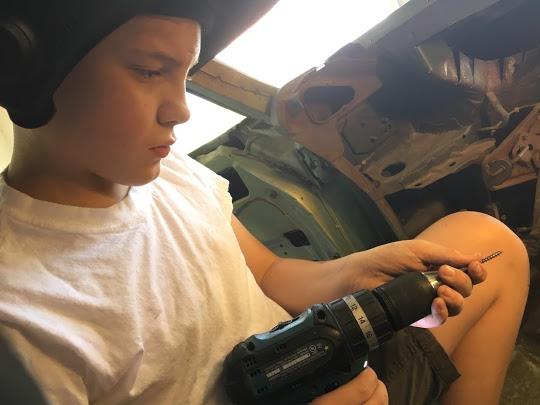
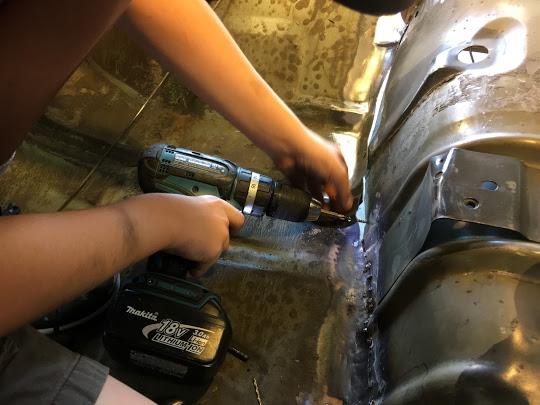
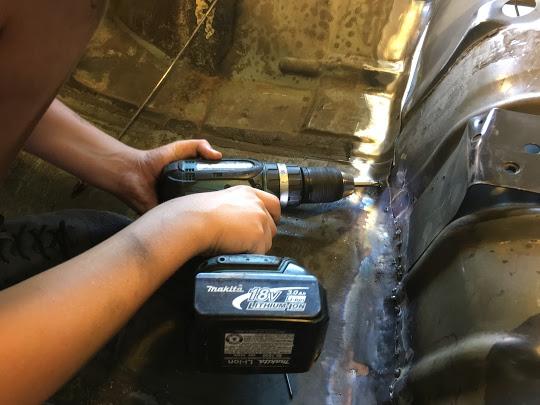
07-13-2017 #7
Registered User
- Join Date
- Aug 2008
- Posts
- 43
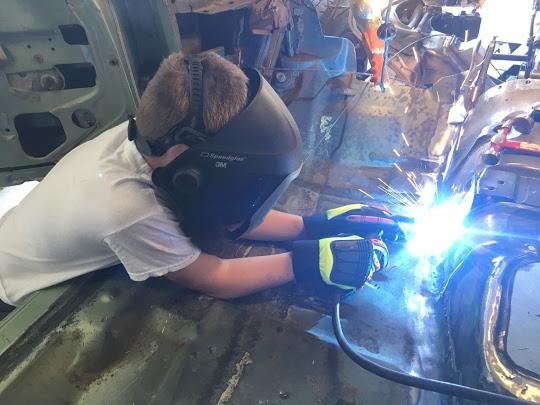
Then a little work with the torch and hammer to bring them nice and tight. (And yes, that's the same kid in the first post of the thread that was behind the wheel...)
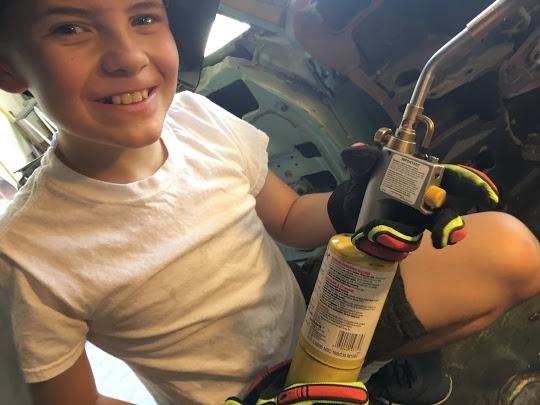
Then "Tack" both pieces together. We did that for almost all of the rest of the tunnel. The largest gap we have right now is about 1/16-1/32 or so. Once I get the body off of the chassis, We'll get that cleaned up and finished.
Once I was happy with that, I decided to move onto mocking up the cowl with the GTO HVAC, and Pedals.
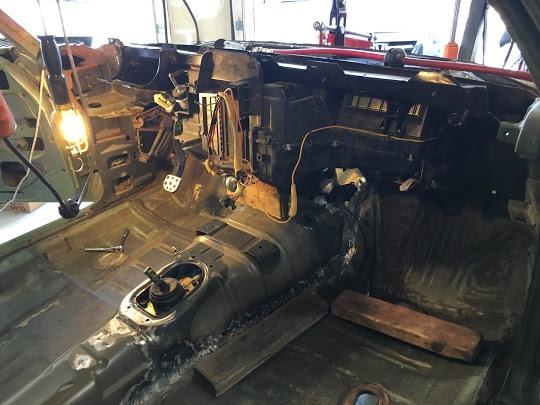
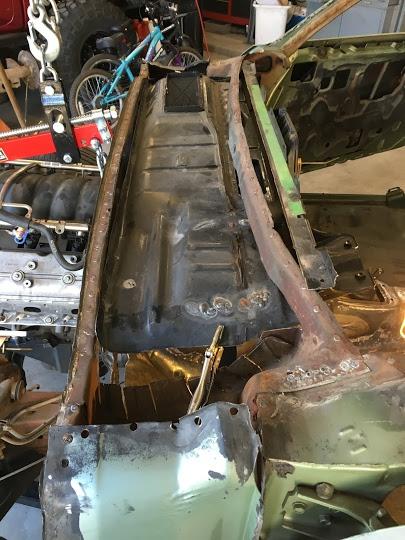
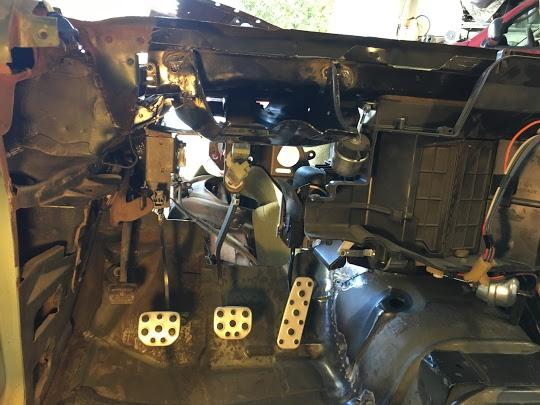
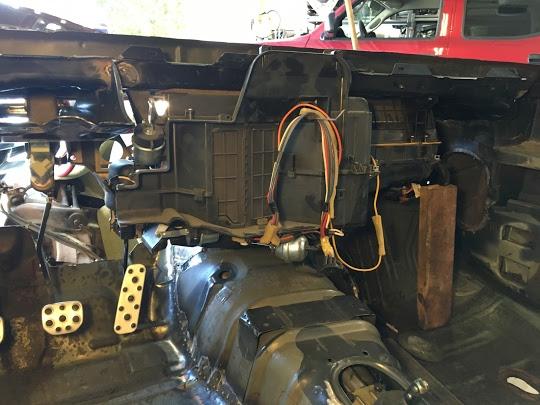
And that's where I'm at as of today. A LOT more work needs to be done to the Cowl, then I'll move on to building a nice smooth firewall. That will probably take me through August-September to complete. Then I'll be in a position to pull the body off of the chassis and start working on the Chassis.
07-13-2017 #8
Registered User
- Join Date
- Aug 2008
- Posts
- 43
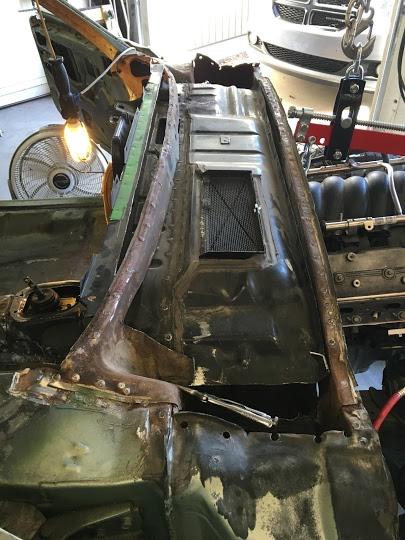
My focus is going to be on the Cowl, and then the Firewall. The Cowl is going to be a challenge, as there are so many things that build off of it. Wipers, Pedals, HVAC, Steering, etc...
I started by bolting the GTO Cowl to the Chevelle Firewall at roughly the height I wanted it, and roughly the position I wanted it to be in.
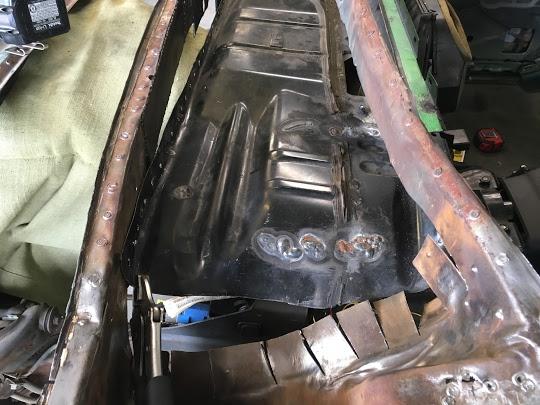
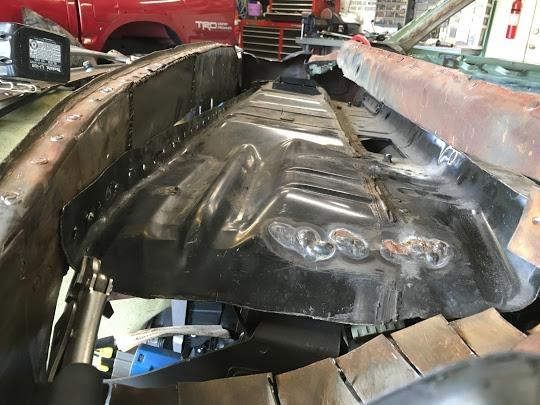
I then laid the upper cowl onto the lower cowl with the windshield wipers and linkages attached There are a few issues of interference with the linkages and the arms, so out came the grinder.
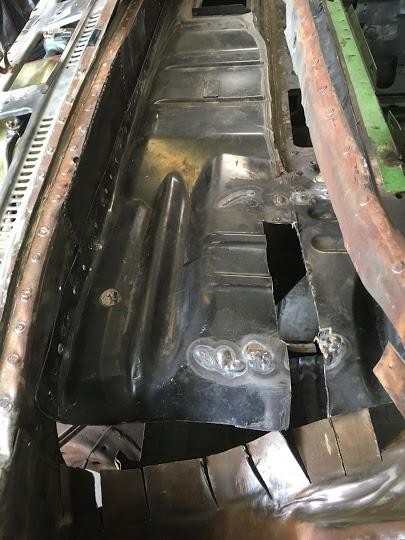
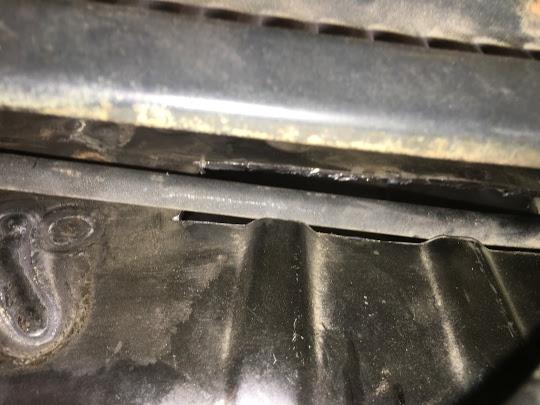
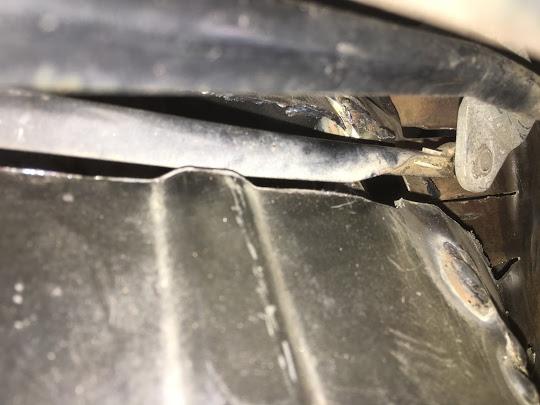
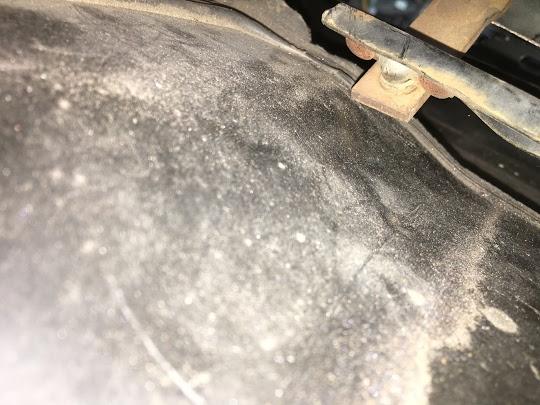
I wanted to make sure that side to side the cowl was level, and front to back, it was angled down in the front. Right now I have about 1.5 degrees down, and perfectly level with the rest of the car. So in order to get the linkages to clear, I needed an extra .9 inches, and the linkages move forward and back during their arc, so I needed the trough to be about an inch and a half to two inches wide. So I looked around to see what I had that would fit the bill. My car came with a mild steel 2.5 inch exhaust that will be replaced with stainless anyway. and there were some nice straight runs that I could salvage.
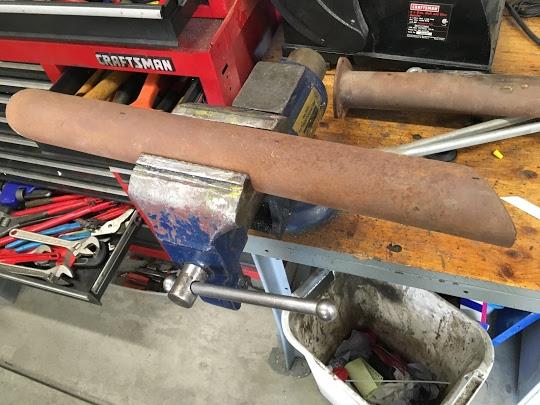
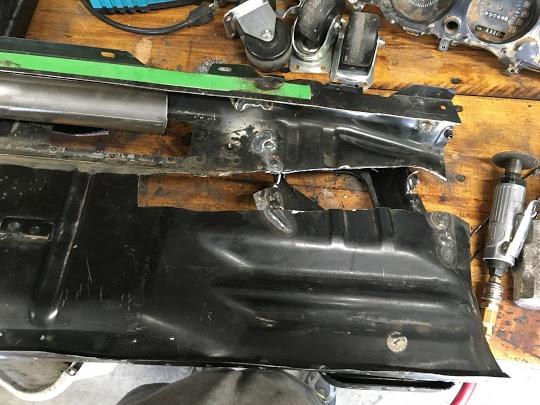
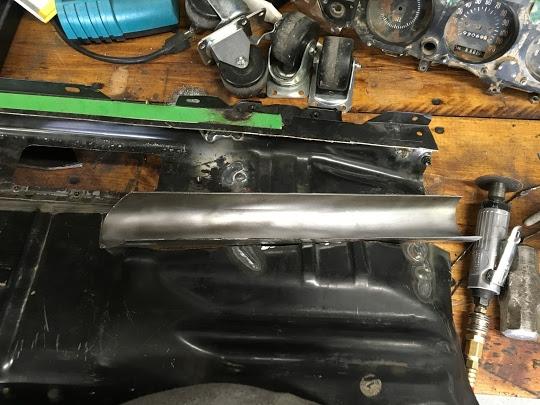
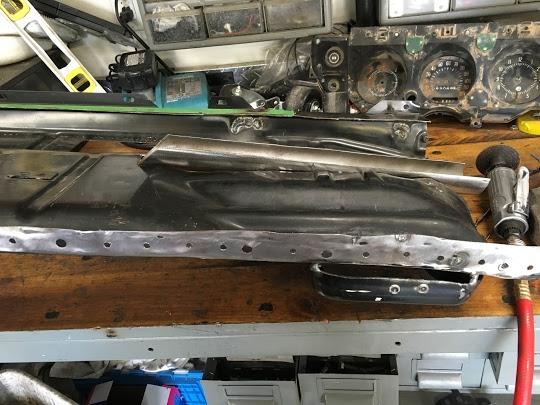
At that point it was getting too hot and humid, so I called it a day. Next I'll be welding it up (Tacking it first and refitting to make sure that everything fits and functions), then I'll have to build the mount for the new wiper motor.
- - - Updated - - -
So after a nice vacation, I've been able to spend a little time and get this wiper system working... I built a wiring harness that will allow the GTO Stalk to talk to the Monte Carlo Wiper motor. All of the functions work although the delay needs a little work, but it does work... So I was able to utilize a little real estate in the left cowl right behind the firewall, Since my GTO lower cowl basically ends about 6 inches short of the original vertical pieces, it will let me place the Monte Carlo motor there. I had to perform some pretty extensive modifications to the trigger plate, and relocate the "Tab" that activates the park feature. I am also using the stock rubber mounts for the motor from the Monte Carlo. Unfortunately I didn't take a lot of pictures of the process... Too busy working. Oh and one more thing Engineering is HARD!!!! making all of this stuff work like it's supposed to without interfering with anything else is a chore.
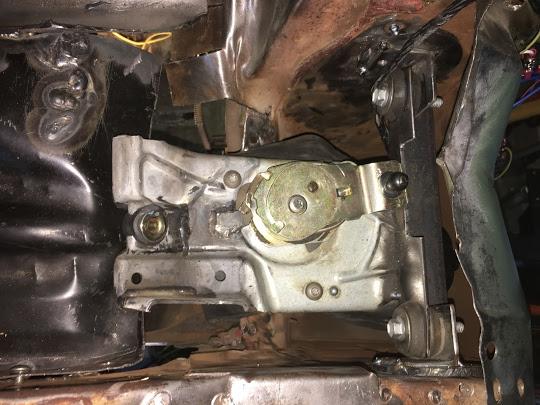
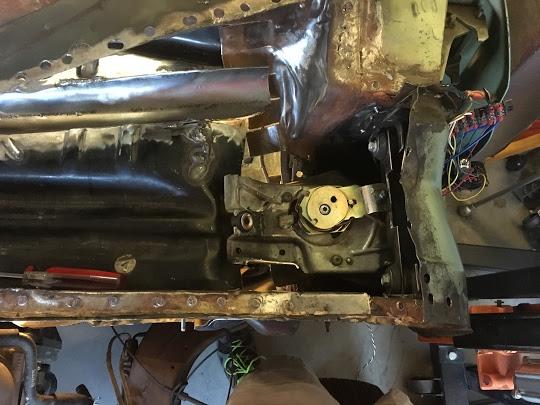
Here it is all nessled under the original upper cowl (Just sitting there for now)
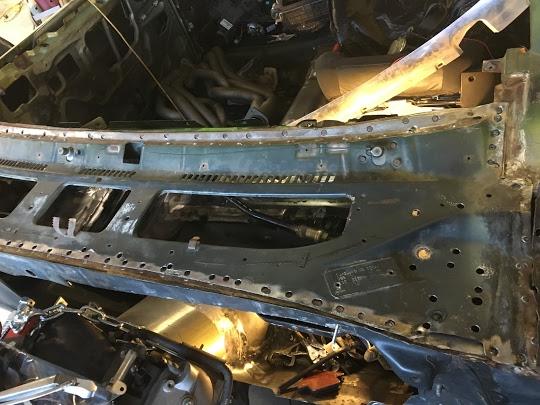
Now I have a Dilemma with this setup in its current form. If I reattach the upper cowl as is, I won't be able to get to this wiper motor, or the linkage. I will need to have an access portal somewhere, and I'm trying to figure out if that portal should be in the upper cowl, or the firewall behind the fender, or maybe that left cowl piece... Anyway I'm open to ideas, Let me know what you guys think.
This is an image of the adjustable linkage that I made using some hardware that I had laying around from other projects. It'll let me lengthen it by almost 3/4" and shorten it by about 1/2". That way I can dial in the positions perfectly...
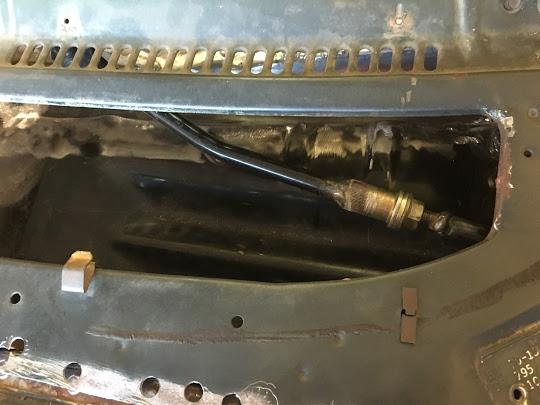
So here it is in all of it's glory!!! So this will be intermittent wipers, with the hidden park feature and the whole thing will be hidden in the cowl.
Just the Motor in the Cowl
With the upper cowl on
I wish there was a way to embed those videos, but I haven't been able to figure it out yet....
- - - Updated - - -
Finished up the Wiper mount and painted it.
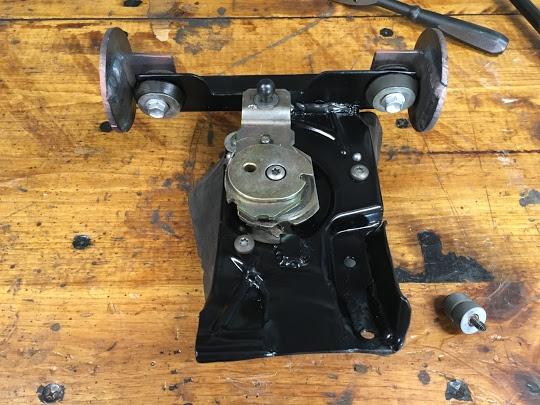
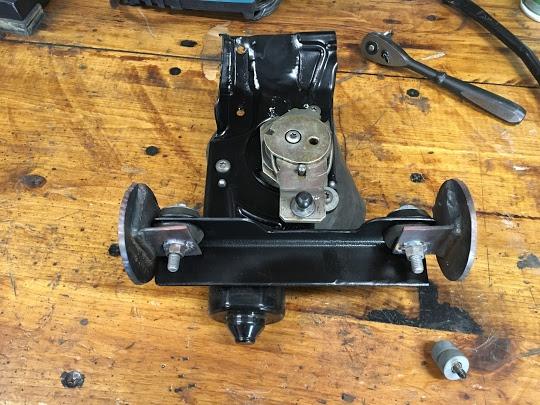
Then sprayed in some weld through primer into the cowl, and attached the mounts. There is no a lot of room here, so welding I was a pain in the rear.
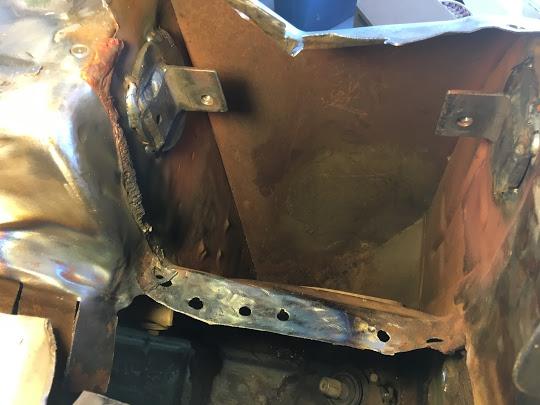
Then I drilled a nice hole for the wiring to go through. I already have the pigtail done. This is to the left of the steering column, and you can se the door hinge bolts to the left.
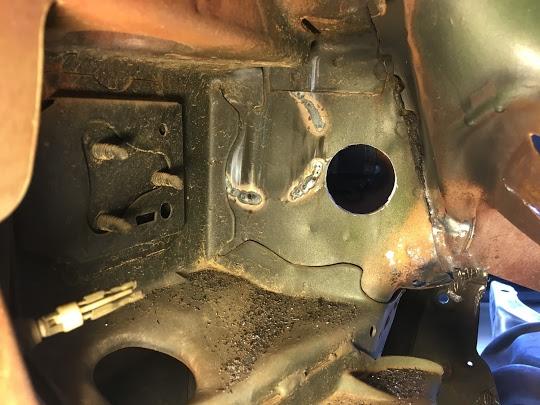
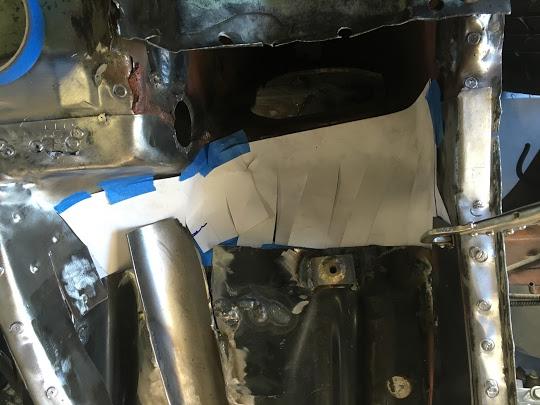
After I was satisfied with the wiper motor mounts, it was time to start closing up the cowl area. Keep in mind that I don't really have any sheetmetal tools besides a vise and a few body hammers... So some of this will be a little crude.... So I started with some cardboard templates, and although it changed a few times make everything fit the way I wanted, this is how it started...
This is directly below the motor and attaching the GTO cowl to the Chevelle Cowl. A little final welding and smoothing.
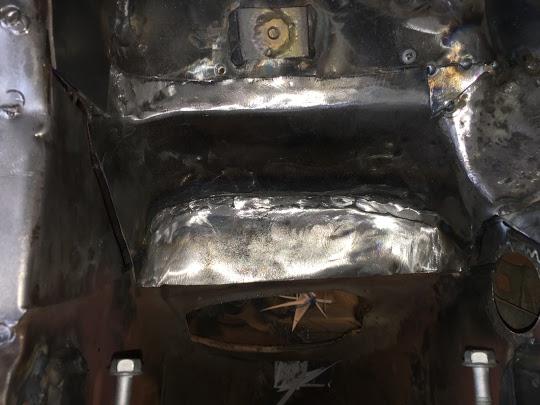
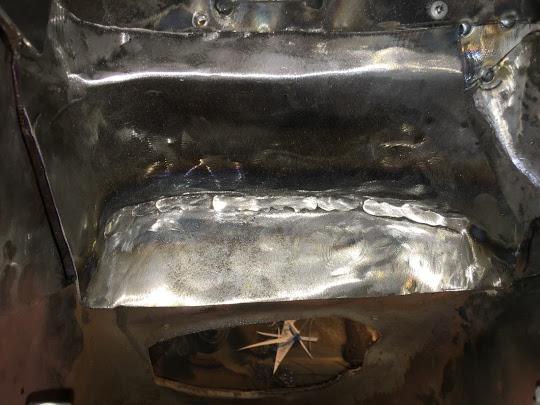
I haven't final welded this in yet, but have painted with weld through primer. This will go in at the same time as the GTO cowl being attached to the Chevelle which will hopefully happen in the next week or two.
07-13-2017 #9
Registered User
- Join Date
- Aug 2008
- Posts
- 43
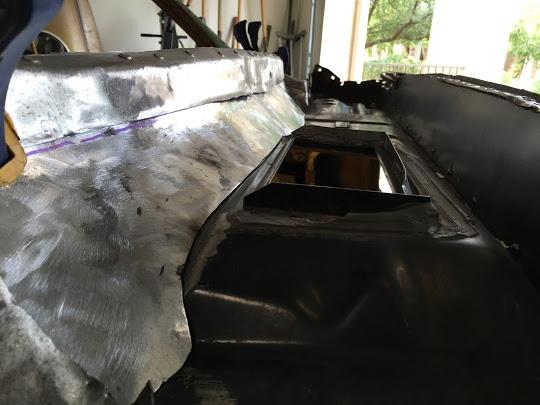
Next task was to fill the hole in the Chevelle Cowl right under the windshield. I guess I got a little excited when I was cutting this all apart...
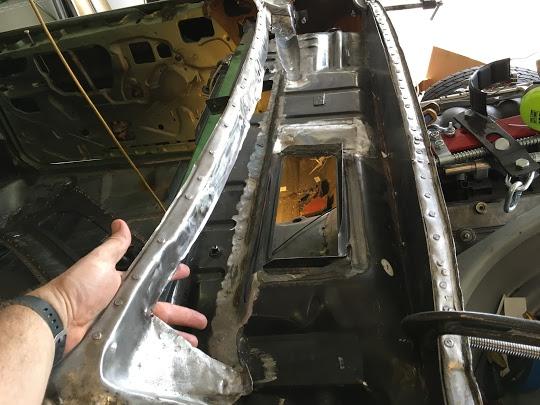
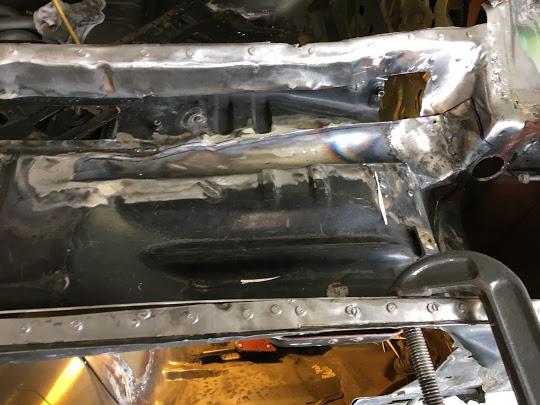
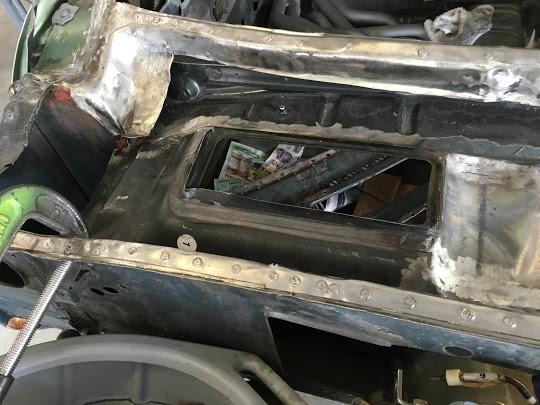
Lots of compound curves, different heights, and shapes to deal with here. I ended up cutting three individual pieces and working them one at a time. Then welding them back together. This is what it ended up looking like. Not welded in just yet...
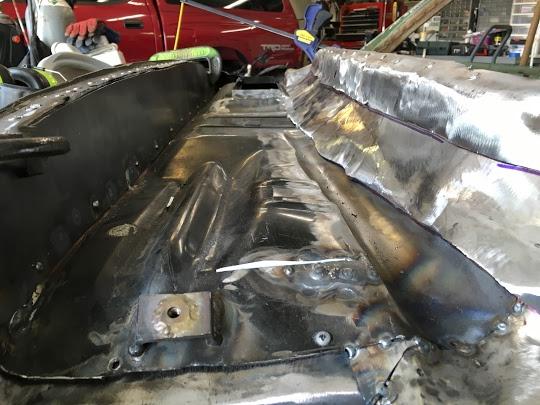
- - - Updated - - -
So I have spent a bunch of time over the last few months/years looking and searching for specific parts and pieces of the car depending on what I'm working on at that moment. Any of you who have completely torn a car apart can understand the sheer volume of parts and pieces that you have from these things. On Saturday, I had finally had enough after I spent 4 hours looking for some parts to the cowl that I removed 6 years ago, and I needed. So I started to organize my garage, and although I had grand plans, Now I just have a HUGE mess as I'm trying to sort the parts and pieces. I also found a few parts that I can get rid of because plans have changed.
While I was doing that, I decided to spend some time and do something that I've been putting off. My car is relatively rust free, and I want to keep it that way for a LONG time. So since I have the cowl off, I decided that I wanted to remove all of the surface rust from inside the cowl, and that led me to wonder what the inside of the rocker panels looked like... One thing led to another, and I borrowed my dad's flexible camera. The thing was pretty slick, but difficult to maneuver into the tiny gaps in the sheetmetal, Once I did, I had mixed emotions, because although there wasn't a ton of rust, there was a TON of crap down inside those rockers. So I first grabbed a hose and started washing out the crap. I was amazed/horrified to see all of the junk that has built up inside of the rocker panels of this car over almost 50 years. Sticks, Twigs, Leaves, Washers, Dirt, Dust, Sand, and silt all came out of the passenger side. It took me over an hour to get just clean water to flow through the rocker... After that, I wanted to see what it looked like, so back in the camera went. It was clean, and no rot, but surface rust. So I created a recirculating system to run Evaporust through the cowl and rocker panel. I used clay to plug up all of the trim holes, and the gaps in the bottom of the rocker, and a plastic bin under the rocker at the back to catch the evaporust as it exited the rocker. I plugged the hole at the bottom, and the square hole on the back side so that the rocker would "Fill up" and the evaporust would have an opportunity to get as much of the rocker as possible. This is just tubing from home depot, a couple of bins that I had around the garage, and a $20 submersible pump from Amazon. The most expensive part was the Evaporust at about $18 per gallon. and I used 3-4 gallons for the exercise, and it's all about used up.
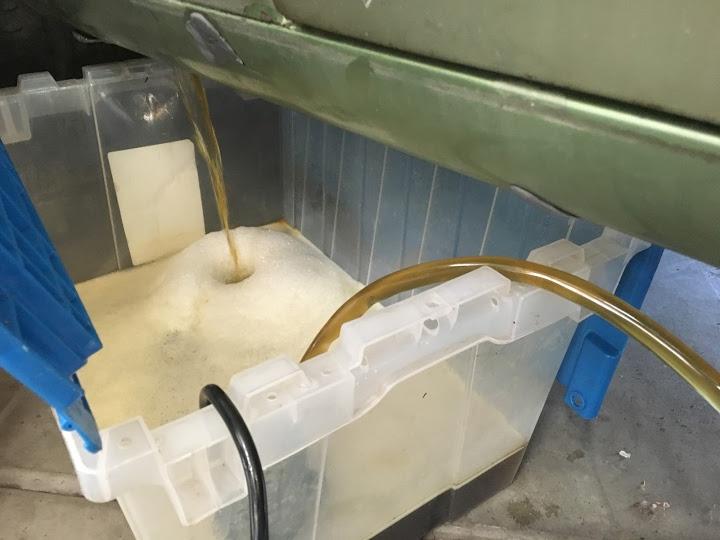
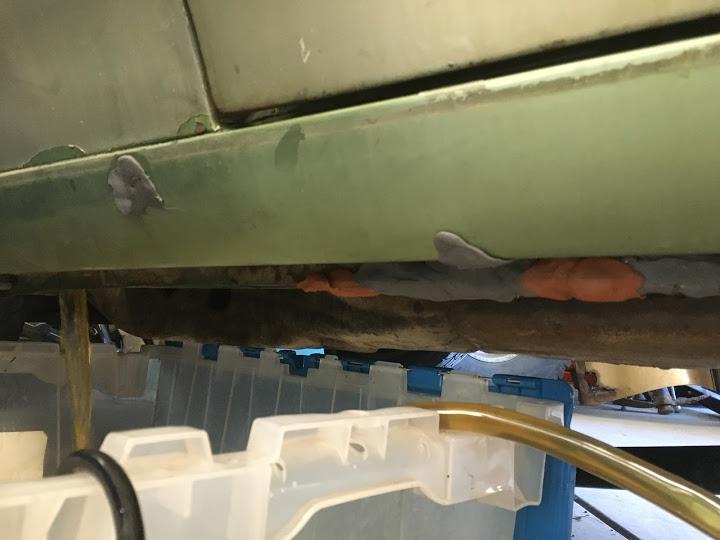
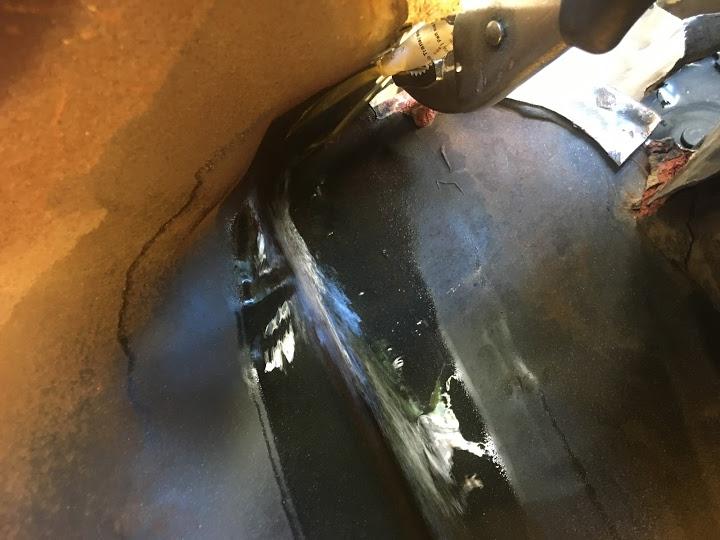
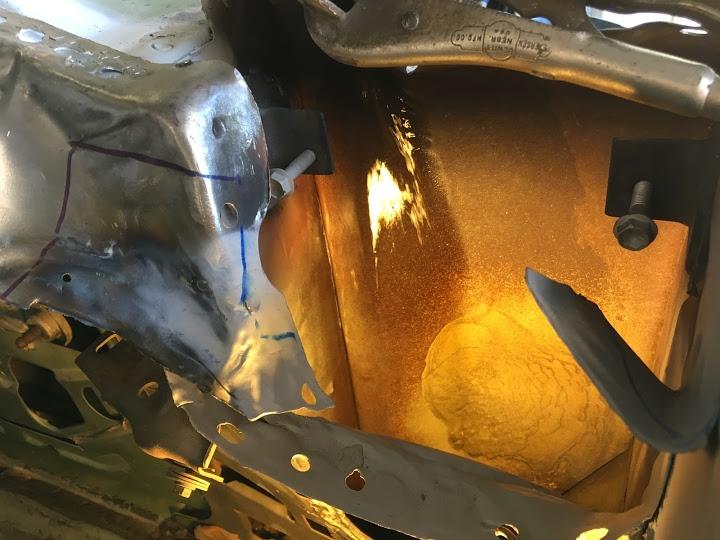
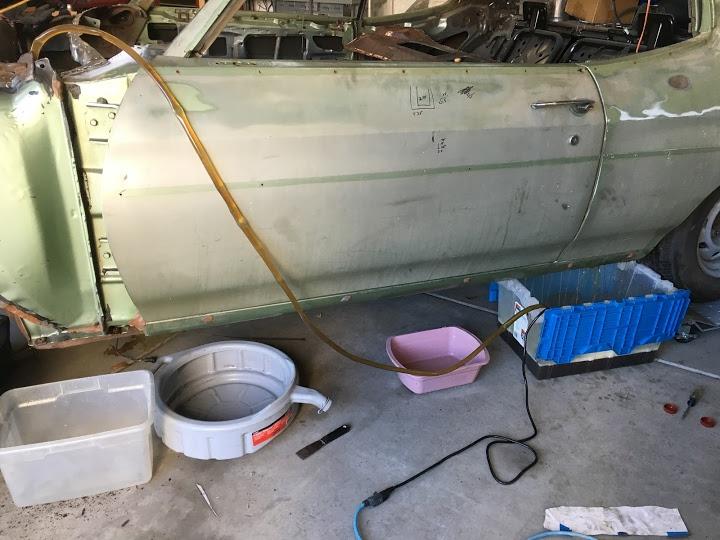
It actually works pretty good, I was able to get almost all of the surface rust out of the rockers and cowl with very little effort, After that was done, I rinsed it thoroughly with water and let it air dry. Unfortunately I did find a little rot that I need to fix on the drivers side, So I have the cowl shoulder coming in later this week. I'll do my best to document that work.
- - - Updated - - -
Alright, So it's been a little while since an update. Been very busy with work and family stuff. Lost some motivation when I found the rust in the lower cowl on the drivers side where it meets the rocker. I bought the AMD panel to replace the outer cowl, but didn't want to bone over the repair... This is that perfectionist in me. Anyway, here's the current progress...
I was able to get all of the test fitting done for the GTO Cowl, and liked the fit. I epoxy primed the bottom of it, and the parts that will be hidden once installed. I left the top side bare for the moment, because I figure there's more work to be done here...
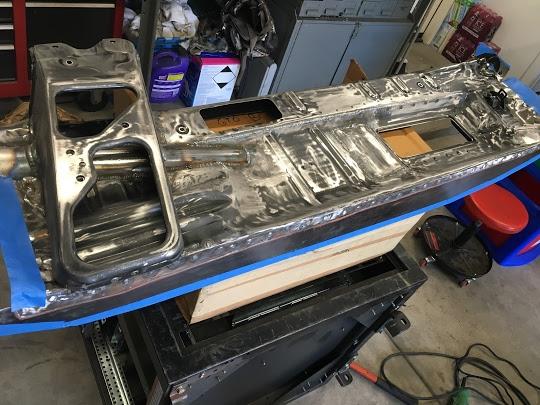
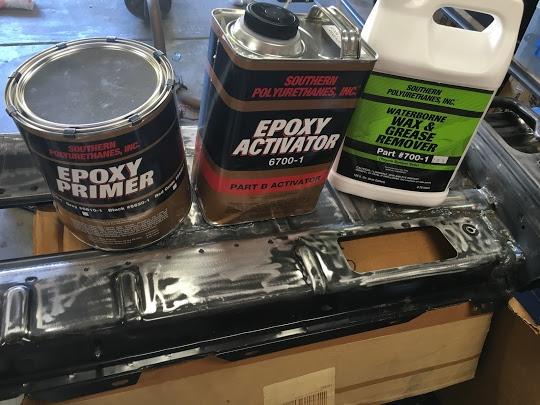
I also used weld through primer on all of the areas where there would be welding. I seam sealed all of the parts that were modified just in case...
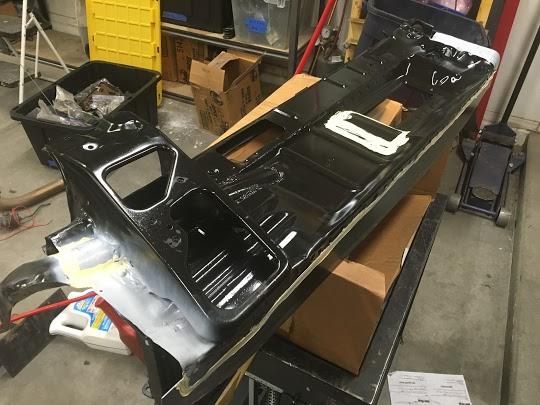
And All Welded In. Still need to finish the edges, and the sides, but it's in there solid....
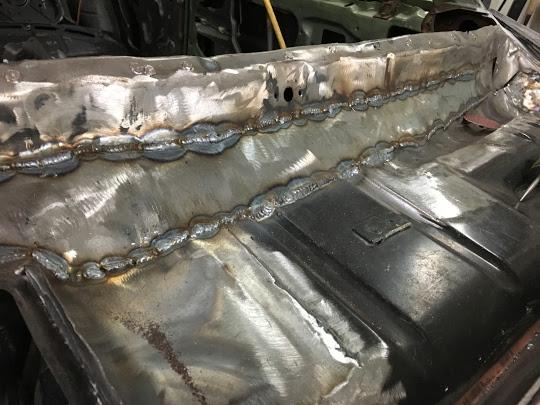
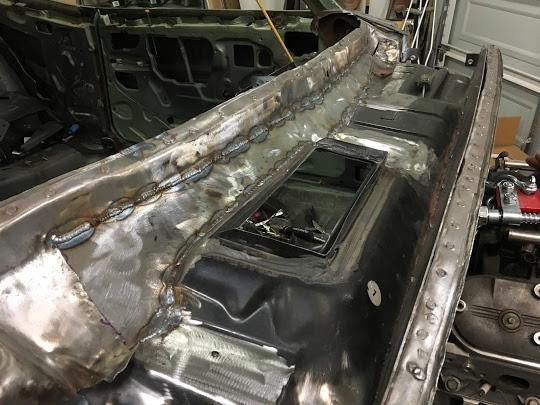
Next up was to weld up the rocker trim holes...
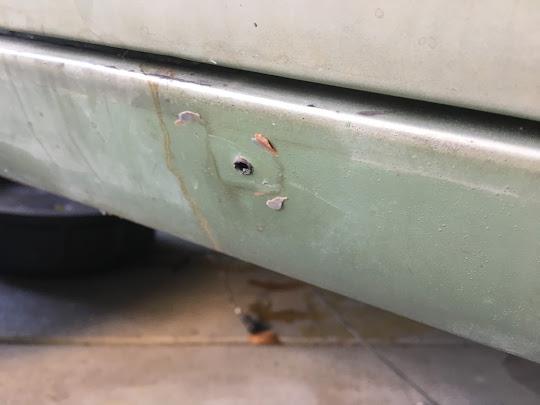
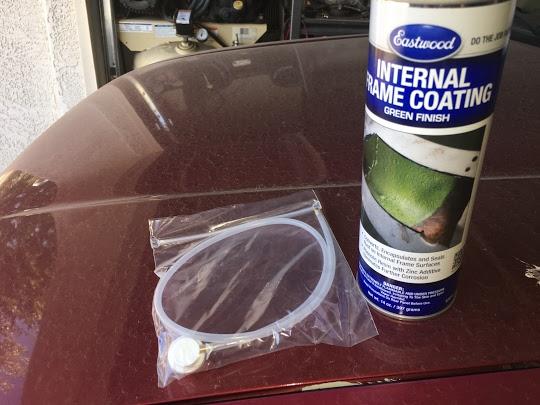
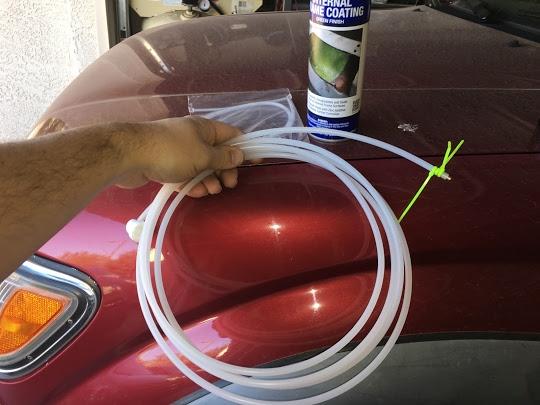
Now that the holes were plugged, I wanted to coat the inner rocker panels with some sort of coating to keep them from deteriorating any more. Actually inside of them is pretty clean, It looks like they are galvanized... So I found this internal frame coating from Eastwood. Looks like it would foot the bill, and I really wanted it for the fogger fitting so I could get a nice 360 degree pattern. Problem is that the hose that comes with it is only about 20 inches long. I needed about 7 feet, so I purchased some tubing from amazon that was the same ID and voilà!
Then attached a couple of zipties to the end of the nozzle to keep it relatively centered in the rocker panel to get even coverage, It actually worked pretty good... I'll be running a camera down the rockers before sealing them up.
07-13-2017 #10
Registered User
- Join Date
- Aug 2008
- Posts
- 43
So before I can go much further on the Cowl I have to figure out what to do for my windshield wipers. I want to have a completely smooth firewall, and have already removed the depression in the fire wall for the OE wiper motor. This car came with hidden wipers and I'd like to keep that. It doesn't rain much here in Arizona, so I'd like to keep them tucked under the hood, but have them available when needed.
So I have a few issues to sort out. Right now with the upper cowl set into place, the wiper linkage hits the lower cowl on both wipers, so I have three choices. I can lower the cowl, I can modify the linkages, or I can make reliefs in the lower cowl. I'll probably be a combination of all three.
Next is that the original wiper motor I had was trash. there were quite a few broken pieces, and pieces that were missing. It's also HUGE! and it's only Hi, Low, or off. I like that most modern cars have Hi, Low, and intermittent. I really liked the DSE kit, but HOLY SMOKES!!! $600!!! NOPE! and it doesn't solve my problem of mounting the motor... So I decided that I'll come up with my own. I searched around and found that many GM cars in the 90's and early 2000's had hidden intermittent wipers. So I started searching around and found a 2003 Chevy Monte Carlo at a local U-Pick-It yard, and went to go check it out. This is all that was left of the car...

Luckily the whole wiper system was untouched, so I removed it in about 15 minutes. I also grabbed about 12 inches of wiring, and the stalk from the column. I figure that the wiper motor should be brand new having been on a car here in AZ. Probably hasn't been used that much.
So I took the whole shebang up to the counter and the lady told me $50 for all of the pieces! I sad DONE! tossed everything in my van and ended up with this!
Has the hidden wiper mechanism and everything still attached.
When I got home I searched around and found the schematic, wiring diagrams, and pinouts to make it all work. Now I just have to figure out how to make this live together with the Chevelle and GTO bodywork.
07-13-2017 #11
Registered User
- Join Date
- Aug 2008
- Posts
- 43
Now came the fun part of repairing the rust in the lower cowl panel. Doesn't look so bad from the outside does it? No real signs of rust...
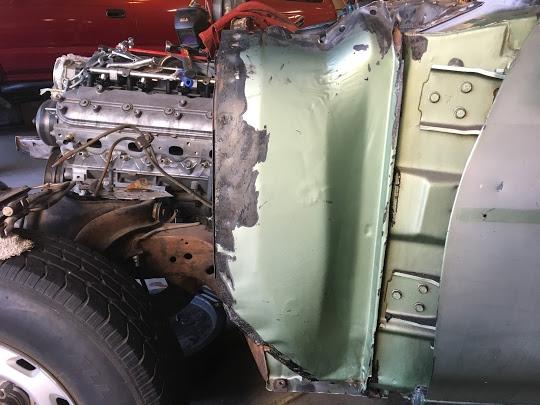
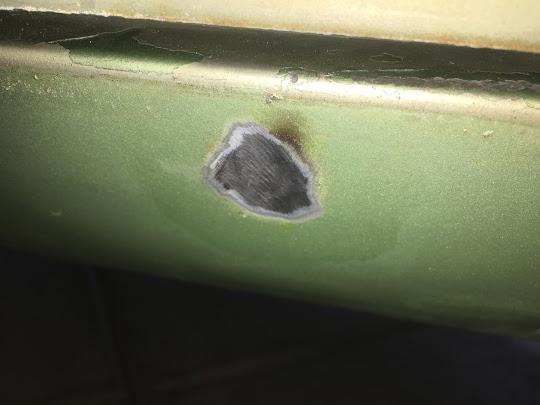
Just look deeper... This was a little disappointing. you can see where the evaporust ran down the sides of the cowl, but missed right under the opening....
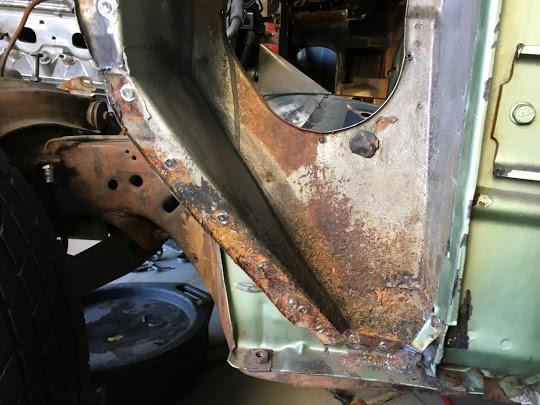
Here you can see that part of the panel is actually missing, and the piece behind is pretty pitted....
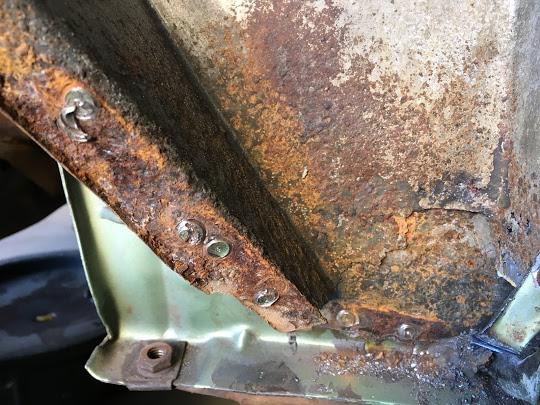
Now here it is after a little elbow grease, you can see my cut line. Keep in mind that this panel is double/triple layered in some places, so if you are using this as a guide, cut with care...
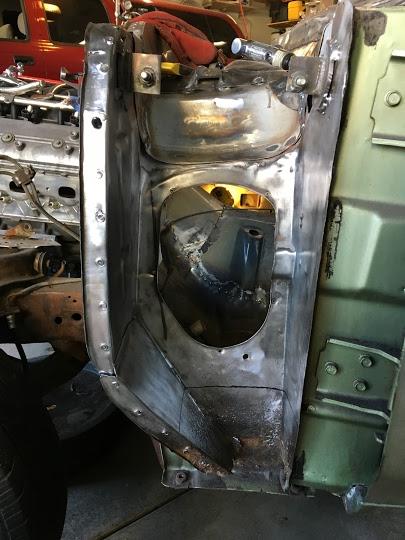
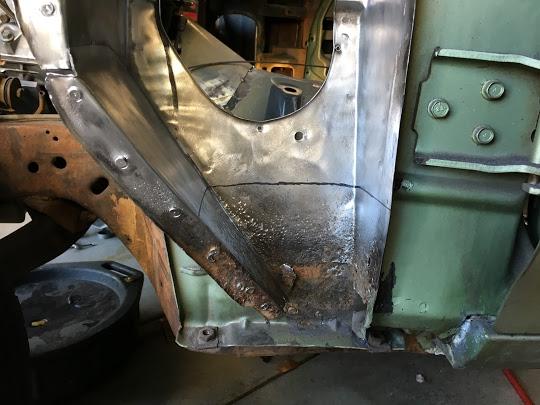
I still have a little repair work to do here, but ran out of time for today...
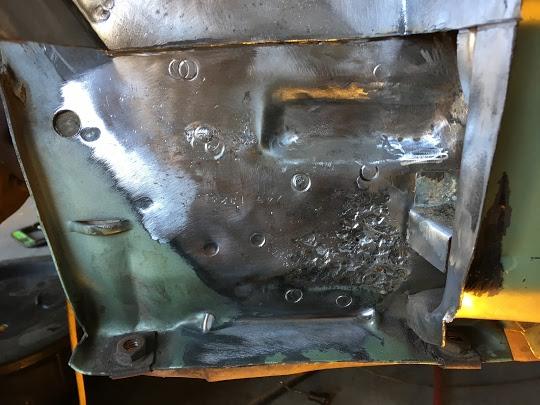
Now here's the new piece, Made from the good metal from the removed outer lower cowl.
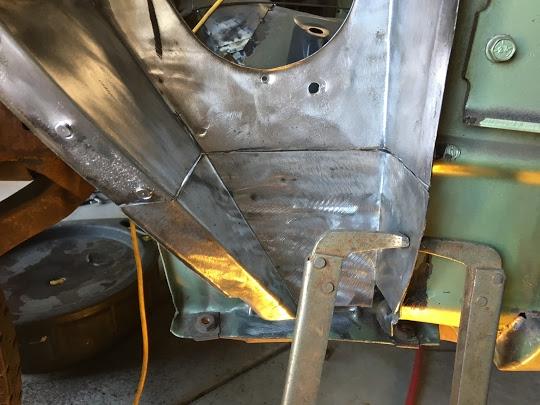
- - - Updated - - -
I was finally able to get back out this weekend and finish up the drivers side cowl rust repair. The damage wasn't as bad as I thought, but it was time consuming to repair. I put some more detailed pics in the body shop forum.
Here's the completed repaired, Epoxy primed cowl.
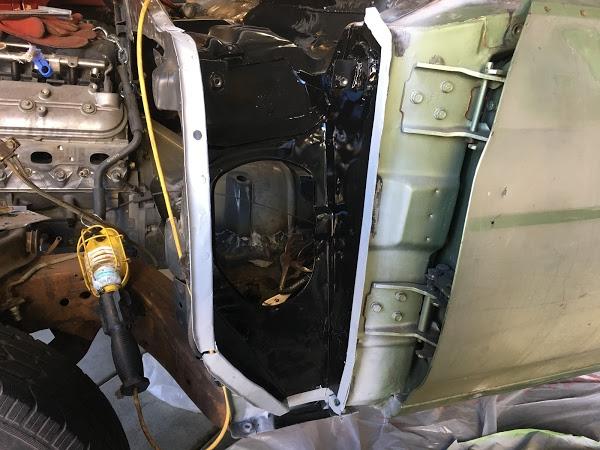
I slathered some seam sealer on everything that I welded to make sure that there weren't any pinholes, and welded the outer sheetmetal on.
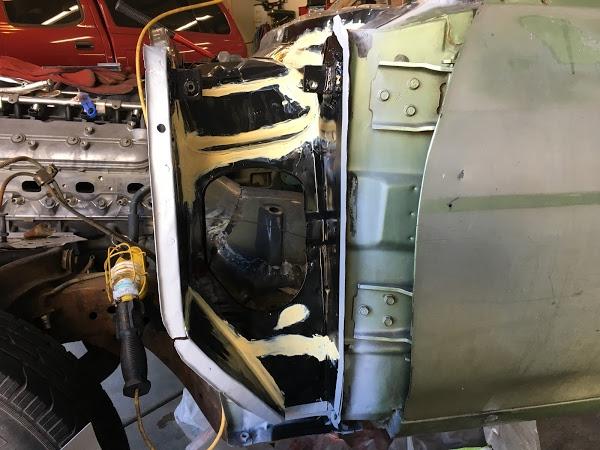
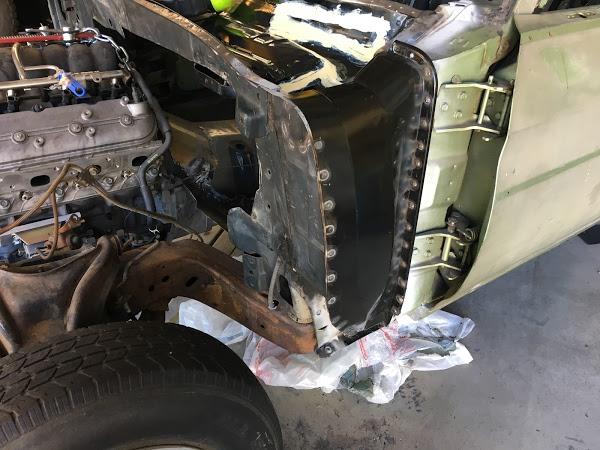
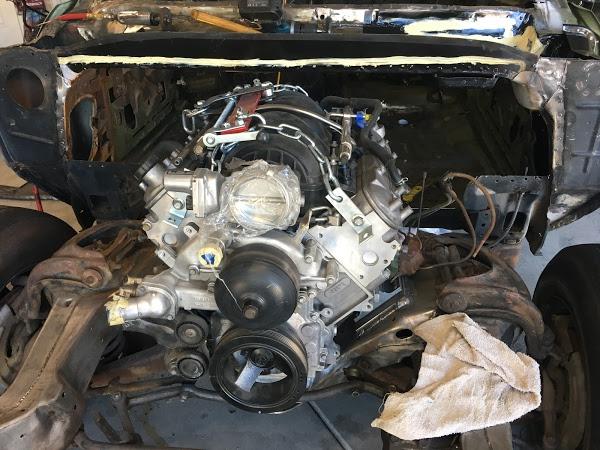
Now that that's repaired to my satisfaction... onto the firewall.... I decided to remove the old firewall at the spot welds on both cowls, and 1/2 way through the body mount braces so that I could mount the new flat firewall in it's place with as little visible welding as possible. The top rail is gone completely, so from side to side, top to bottom it'll be one solid piece of metal.// >
- - - Updated - - -
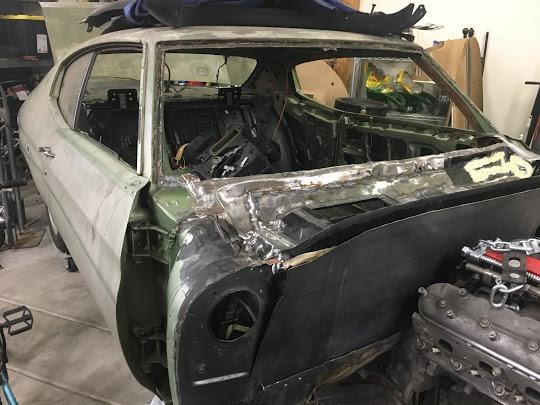
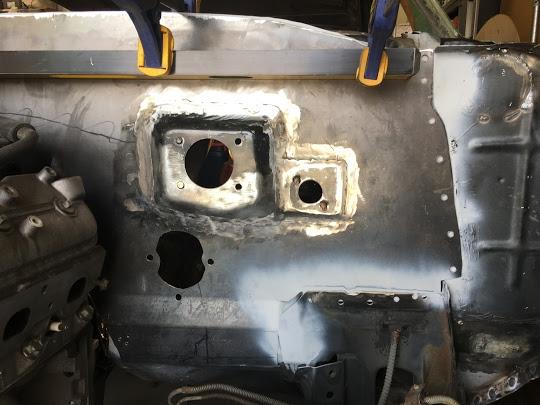
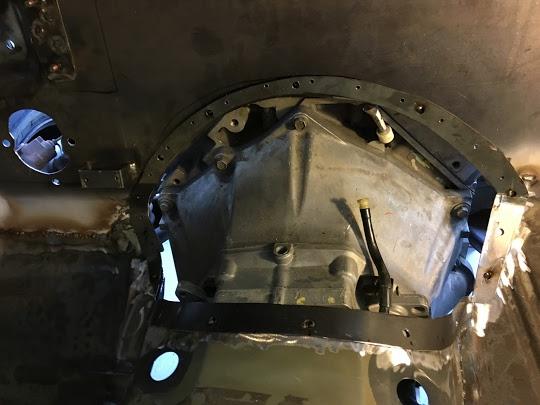
My Firewall started out as a flat sheet of 16 gauge steel, rough trimmed to match the old original firewall that was removed from the car. My plan is to reattach the upper cowl and butt it up to the new firewall as nice rounded edge with no lip. There was a lot of planning that went into this firewall, as I wanted to use my stock '06 GTO brakes, pedals, clutch M/C, (modified) steering column, and HVAC unit... That's a tall order, and it's taken a few months to figure it all out in a manner that works. First things first, I wanted to build a removable cover for the bell housing so that if I wanted to change the clutch or pull the transmission, I don't have to remove the engine also. It'll require the removal of the HVAC box, but I can live with that as long as I keep the hoses flexible enough to move it out of the way without breaking the AC connections. This cover has a ring that is welded to the floor, and it'll be secured with 10-32 screws (not finalized yet).
Sprayed a little weld through primer...
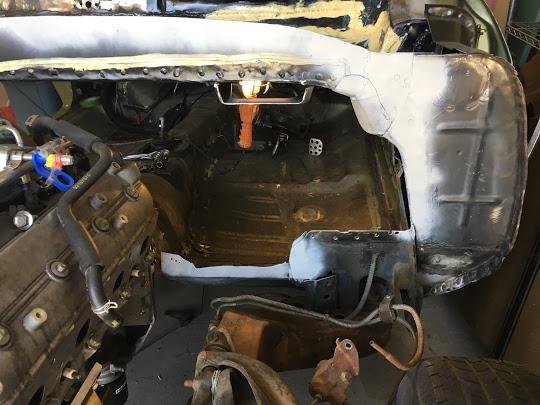
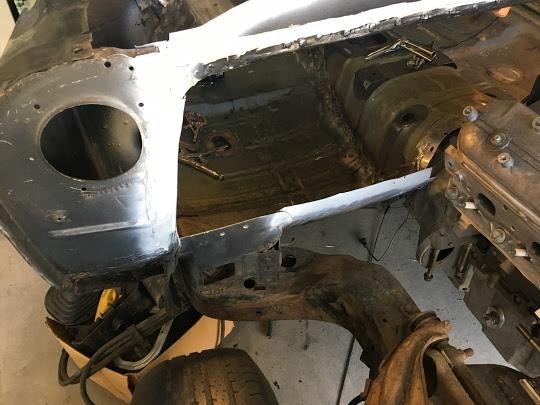
Here you can see the sharpie mark where the flanged cover panel will go covering the bell housing. you can also see the GTO pedals for the brakes and clutch. The big panel to the right is the mount for the gas pedal.
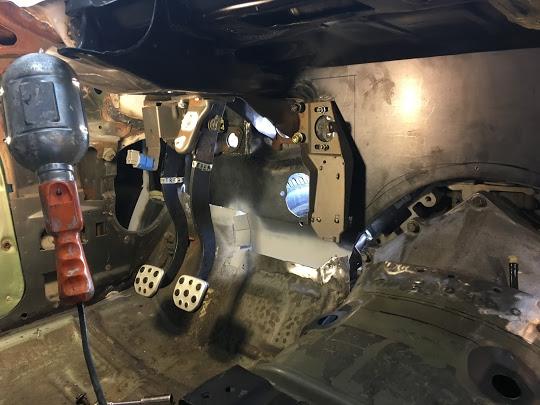
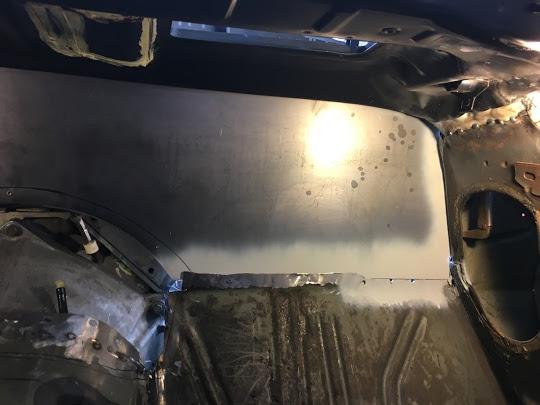
I decided to use a level clamped to the firewall and the lower cowl to keep everything as straight as possible, so any body work would be minimal...
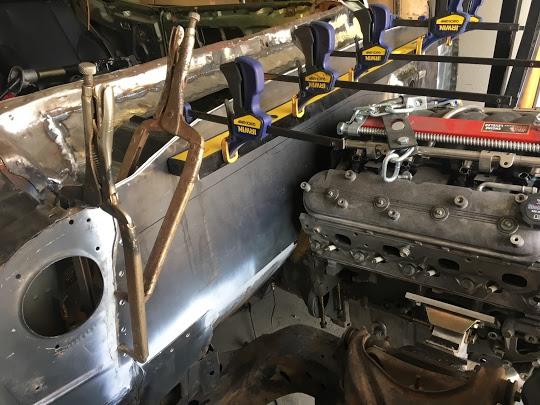
This picture was pre-welding, and I had a bit of anxiety before burning this piece in..... In this picture you can see a small fraction of the GTO firewall grafted into my fabricated one. The same for the clutch mount.
Here is the ring for the cover I build for the Transmission..
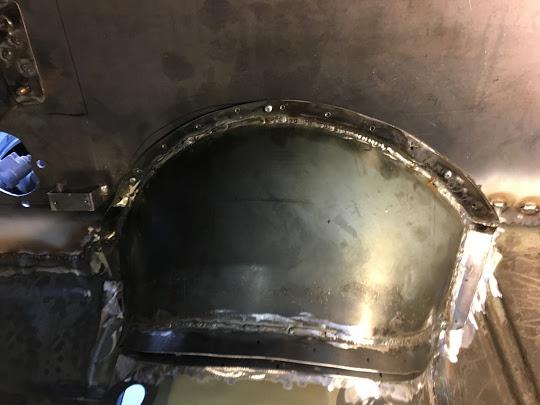
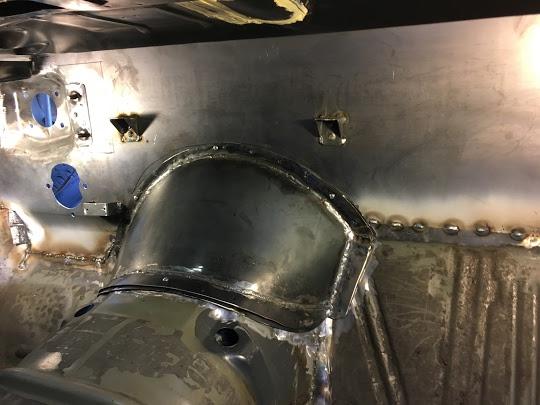
And here is the completed Firewall. The two brackets you see there above the transmission tunnel are there to mount the GTO HVAC to. I will need to modify the heater and AC lines so that they come out of the firewall under the fender so they are hidden. That'll be for another day.
The hole you see below the brake booster mounts is for the steering shaft. The stock GTO steering shafts diverts down to a steering rack and has this really nifty aluminum bulkhead cover, but by turning that cover 180 degrees, it mounts perfectly flat on the firewall so the shaft is supported by a bearing. I'll try to get pictures of that here this week.
07-13-2017 #12
Registered User
- Join Date
- Aug 2008
- Posts
- 43
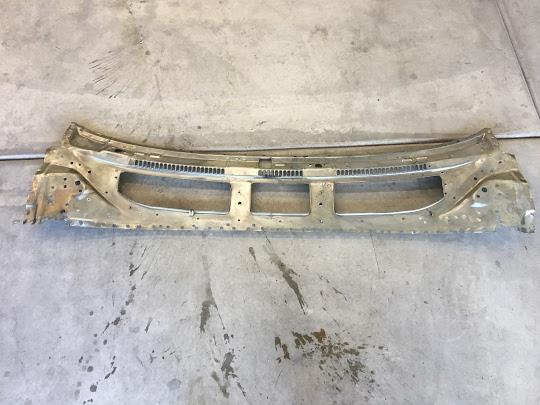
Finished up a bunch of odds and ends today. Getting closer and closer to getting the upper cowl back on. Over the last few days, I've been De-Rusting the top cowl in a bath of Evaporust... Only I didn't have enough to do the whole thing, So I did it in three parts. One day for each end, and one day for the center section. I have a cheapie throw away blow up pool I got from Amazon for cheap as my container. I tell you, this stuff is great! saves me a ton of labor, and all I have to do it go over it really lightly with a wire brush to get the Schmoo off. This should be done tomorrow, so I can start modifying it to fit the smooth firewall, and the cutout for the wiper motor. Hoping to get this mocked up for install tomorrow...
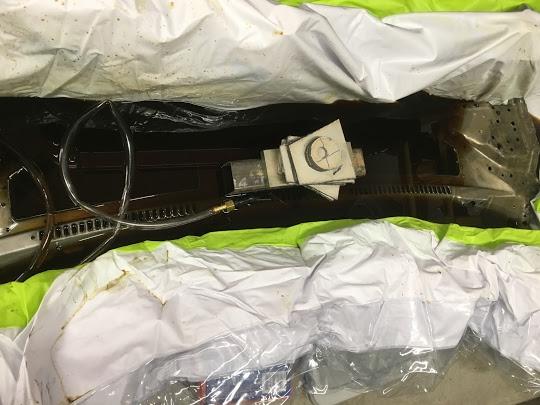
Did a bunch of grinding on the lower cowl to get it ready for paint and seam sealer. I'm also trying to prep everything else that will no longer be accessible once the upper cowl gets welded back on again... The GTO HVAC opening for fresh air will be partially exposed, and the lip for the fresh air vent wasn't a whole lot higher than the surrounding sheetmetal, so I solved two problems with one piece. This will help channel any water away from the opening, and also shield the opening from water, leaves, and crap from above coming through the upper cowl I rounded the edges, and added some supports to the front to keep everything nice and tight. There is also a nice screen mesh filter in there to keep big chunks of crap out. The vertical pieces are bent in to increase airflow while still keeping crap out. I also welded the firewall in completely, so it's ready to receive the upper cowl.
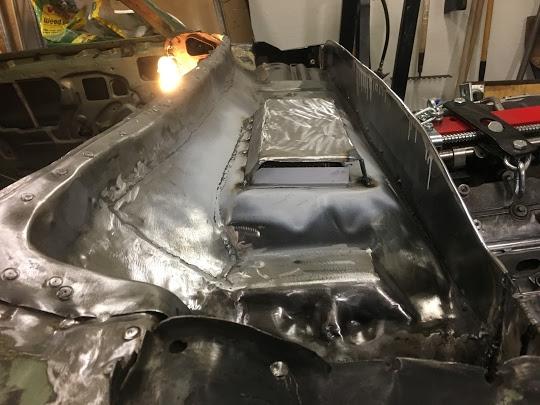
This little piece took me a few hours to make, It's actually a piece of sheetmetal from the original firewall... Right size, right thickness, and it seemed like a good idea to use it here. You can see the supports and the rounded edges. That dark grey crap in the background is just grinding dust.
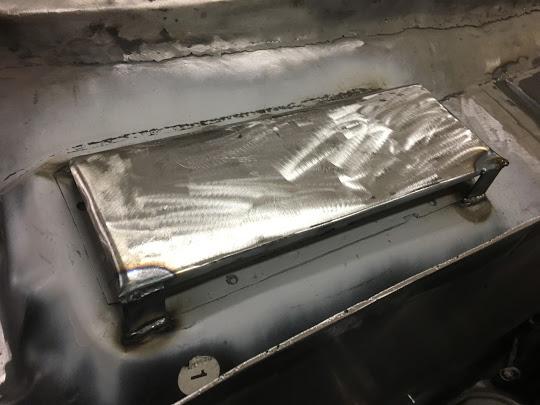
Another view. Still need to do a little grinding on this part, Throw on some seam sealer, then paint.
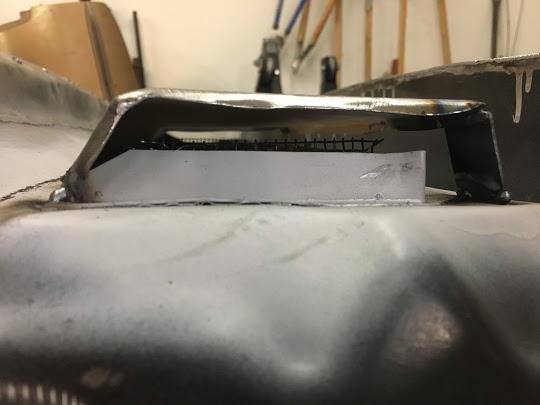
I was also able to mock up the stock Monte Carlo (70-72) Dash that I picked up several years ago, and a craptacular dash pad today. Everything looks great!!! I'm going to have to modify the dash for the HVAC, and the console that I'm going to put in it. I will also need to modify the bracing on the dash around the column, because the mount is very different. Everything else tucks neatly behind the dash.
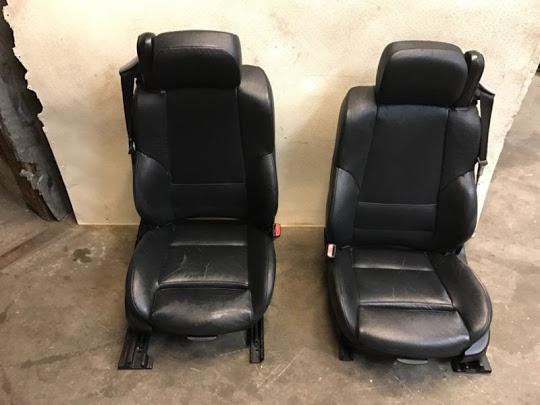
Tomorrow and the next few days, I'm hoping to get the Defroster vents completed, and the upper cowl on. Hopefully, get the dash bracing modified. Then my plan is to get the seats mounted... I've changed directions on the seats too... I found me some -04 BMW 3 series convertible seats. They have an integrated seat belt and go much lower than the magnum seats... I'll eventually get them recovered, but for now they'll stay black leather...
So here's the under side of the upper cowl after the 3 day bath in the Evaporust...
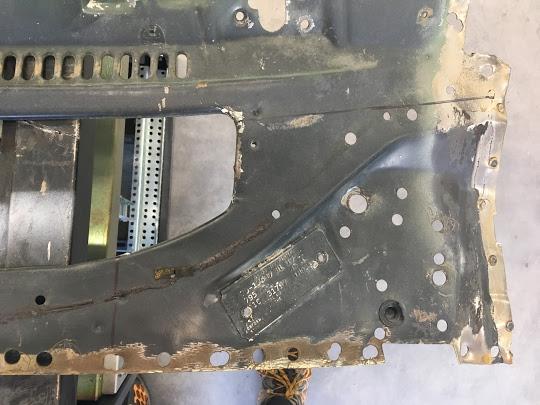
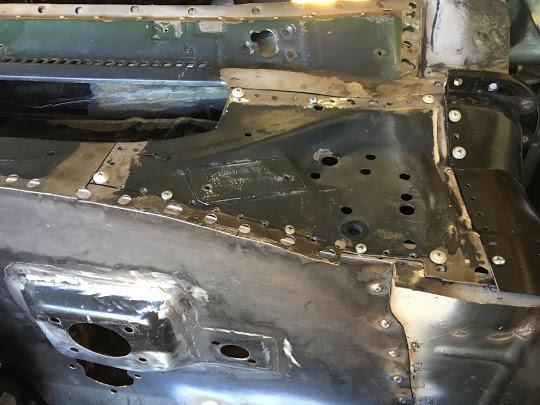
This was my planned cut. This will keep all of the hardware out of the way of the mechanism (hopefully)...
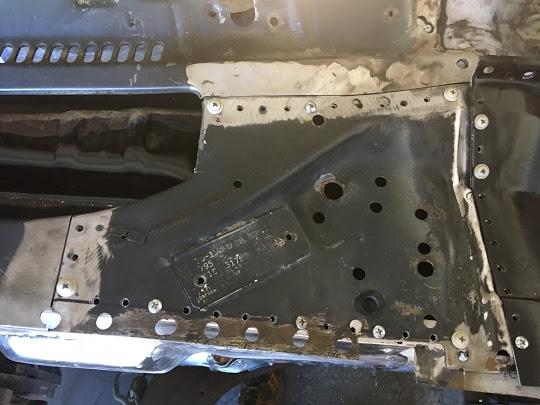
Here's a preview of what I have done with the removable panel, It still needs some clean up work, but it's pretty close to being there.
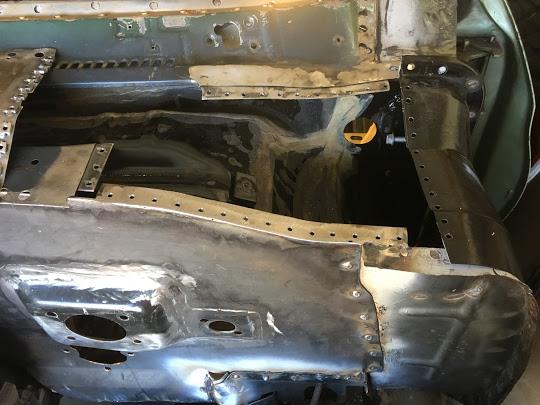
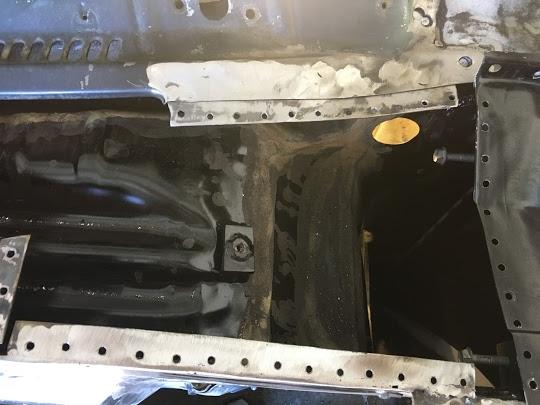
Here it is with the wiper motor and linkage in place.
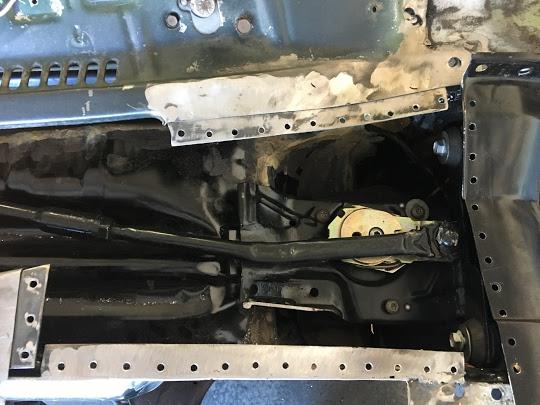
07-13-2017 #13
Registered User
- Join Date
- Aug 2008
- Posts
- 43
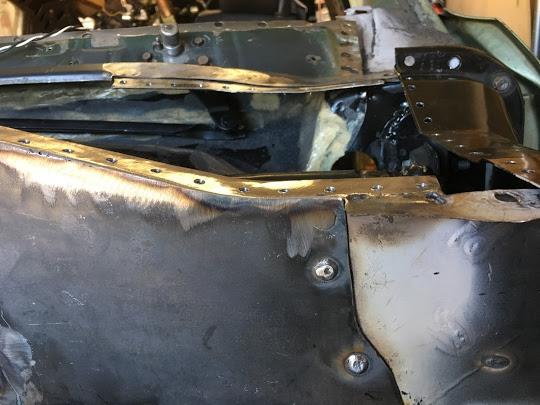
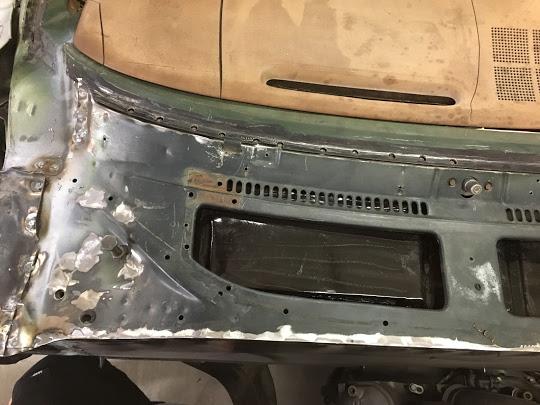
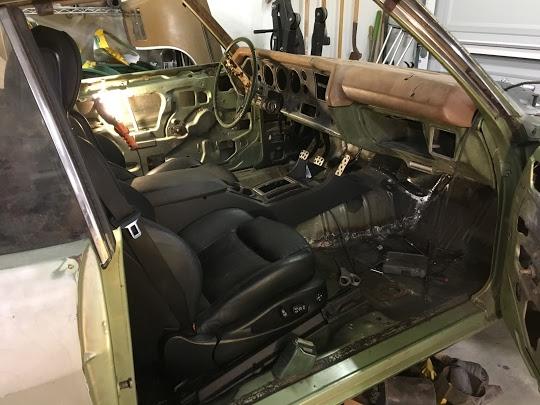
Last day of vacation from work, got just a bit more done. It'll probably be a little while before I can update further. It's nice to see some of these projects coming to a close. This firewall, and Cowl has been a huge drain on me, and I have actually dreaded working on it because I at times felt in WAY over my head... That being said, It's turning out nicely and I can't be happier with the results. Here are the photos from yesterday and today. I was able to prime, seam seal, then prime again the entire cowl, the bottom of the upper cowl, and my bolt in piece. All of the holes have been drilled, and tapped. The upper cowl has been reattached permanently, and my bolt in cover is reattached. The only things left to do on this part of the project, is to trim the junction on my bolt in cowl piece and the new smooth firewall, then weld in the windshield channel. Then this will be DONE!!!
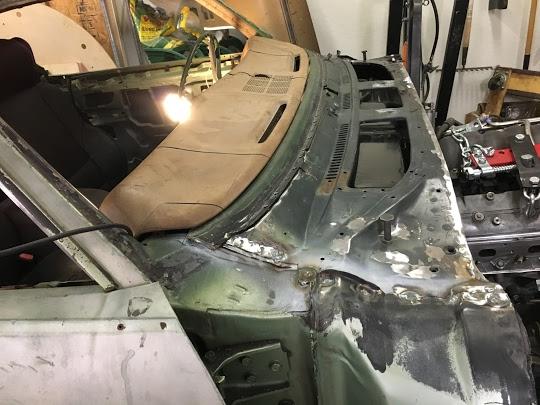
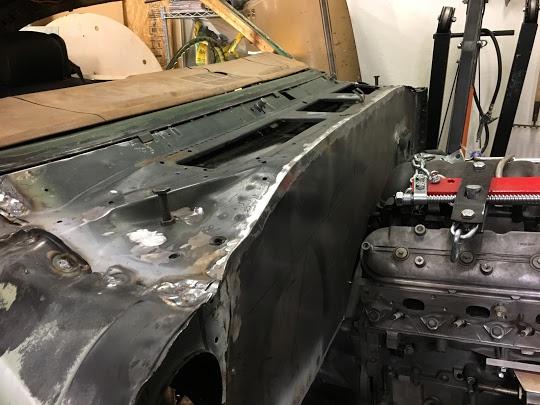
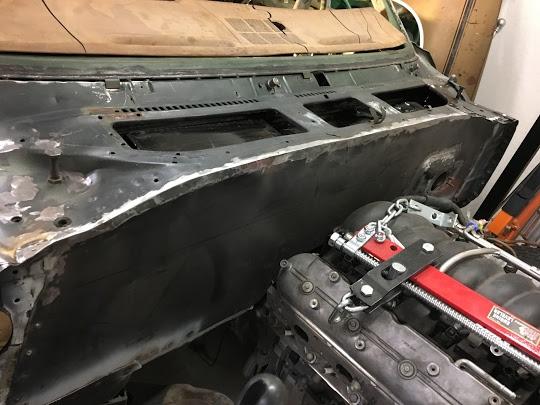
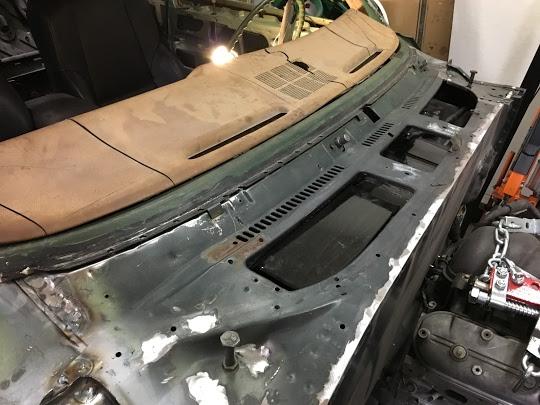
Pay no attention to the hardware, I was using any 10-32 screw I could get my hands on.. They will all be replaced with some nice black headed hardware so it'll blend in a bit more...
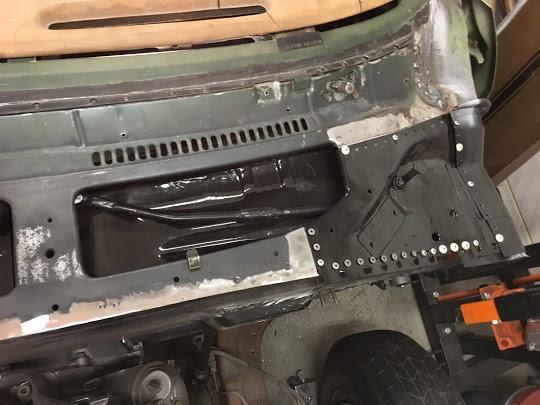
I tested everything and the wiper linkages are able to be installed and removed, the motor is servicable, and nothing touches/rubs during manual cycling of the wiper system.
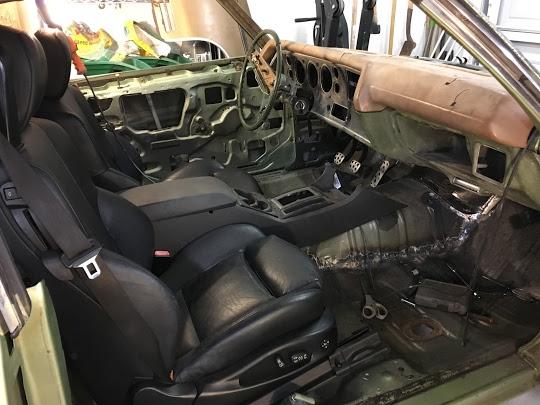
And just for fun, I set the seats, Dash, Dashpad, and console in the car to see what it looks like... I'm liking what I see....
- - - Updated - - -
So what an AWESOME Day!
I woke up (without any sort of alarm) this morning at 5:30AM. The sun was just coming up, and I checked the temperature on my phone and it showed 77 degrees... I decided to get up and get moving. The rest of the house was pretty quiet with my wife and kids still sleeping. I told my dad that I'd probably get started around 7AM or so, and since it was so early I decided on hand tools only (don't want to piss off the neighbors any more than I already do...)
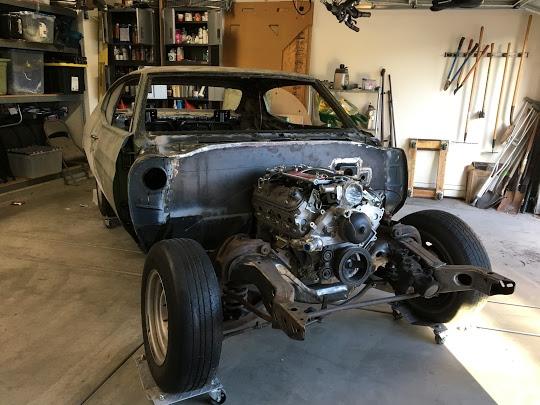
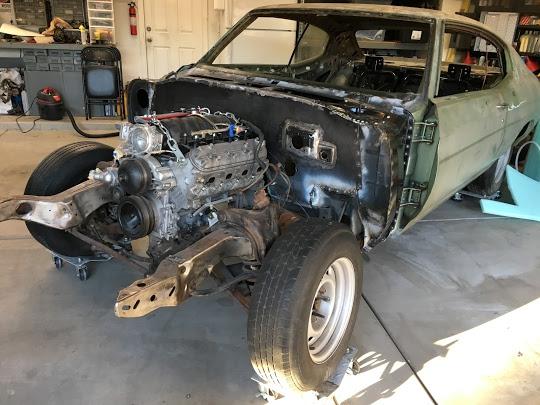
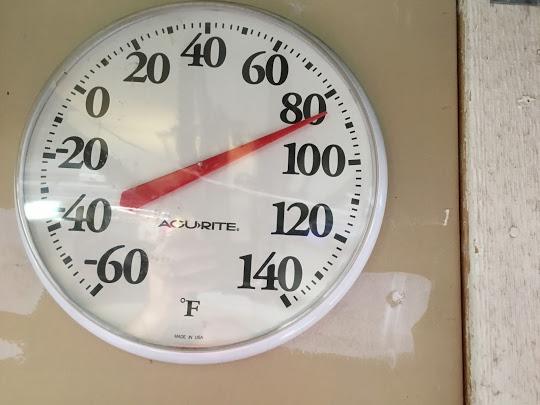
That's right at 5:30 AM it was 85 degrees inside my garage, so the fans came out, and every door was opened to try to cool it off as quickly as possible...
Started out pulling the engine and transmission out, it was really only held in by the engine mounts, and the transmission was just sitting on the crossmember.
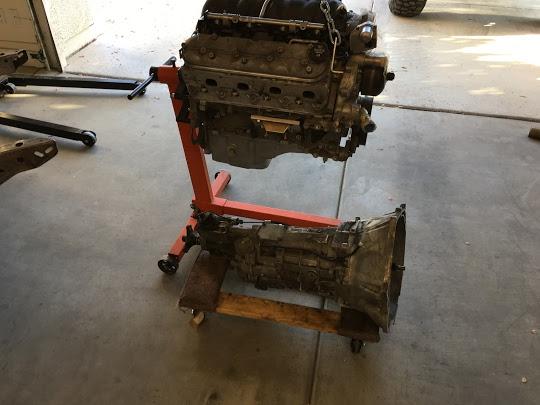
So here's what I was left with. I found it was interesting that this thing only had one ground strap... on the passenger side cowl body mount... Shouldn't there be more?
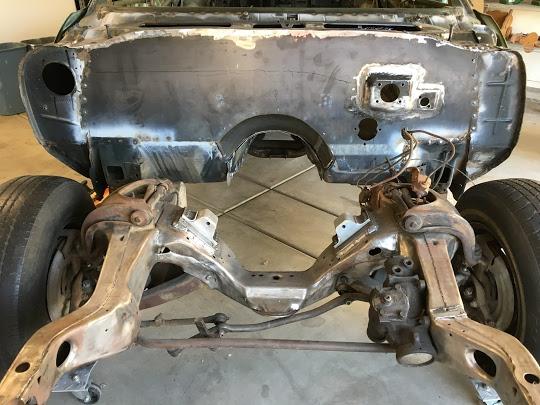
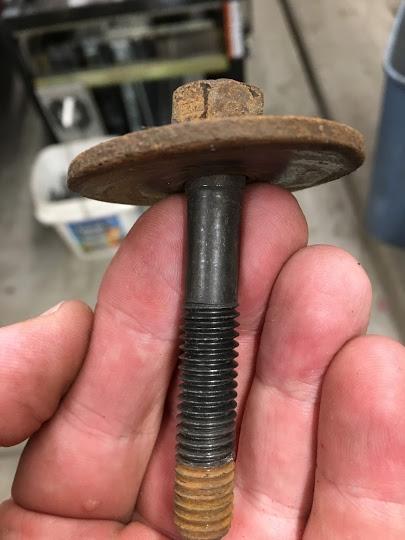
You guys from the Northeast and Midwest may want to skip over this next picture.... Not too bad after almost 50 years. Every bolt came out nice and easy. Only the drivers side front cowl bolt showed any real signs of corrosion. One interesting thing.. The center body pucks did not have any bolts through them, in fact, the one on the passenger side didn't even have a hole for a bolt in it. The drivers side did... Should this have a bolt? Any ideas if the nut for the body bolt is present? I didn't look before I put the body down...
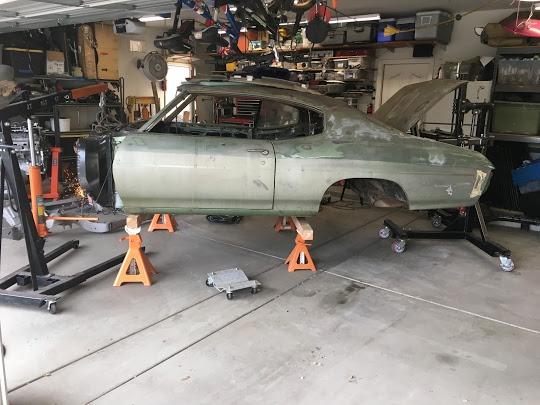
So after sifting through all of the body/frame separation threads on the board, I cobbled a few ideas together and I decided to use my engine hoist to lift the body. I have a few folding steel saw horses that I used to support the body once separated. I started from the back end because I figured it'd be the heaviest. I used chain from the engine tilter and ran a few bolts through the bumper mounts then some rope that I've had in the garage for a few years to connect the two to the hoist. I was a little concerned when we started, but it really did work out fantastic.
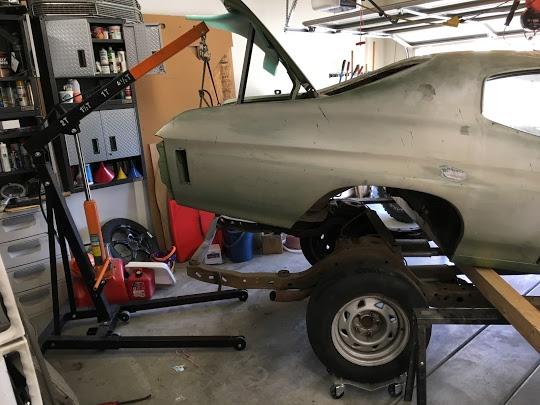
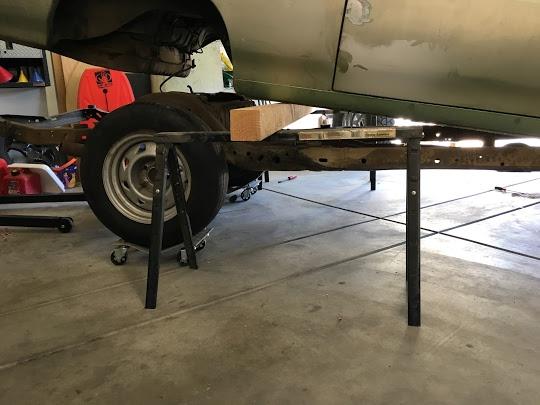
Then I ran some rope through the fender mounts on the firewall and did the same thing. I just threaded a 4X4 between the framerails
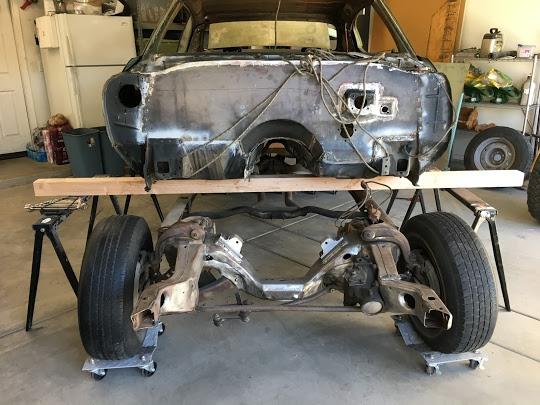
Then we pulled the rear tires off, and rested the rear diff on a jack, We wheeled the frame out from the body. We lifted the body up again, then set the front on some shorter jackstands, then the back down onto the 4X4 on the wheel dolly's. Then the front. So now it's basically on the ground, mobile with one hand.
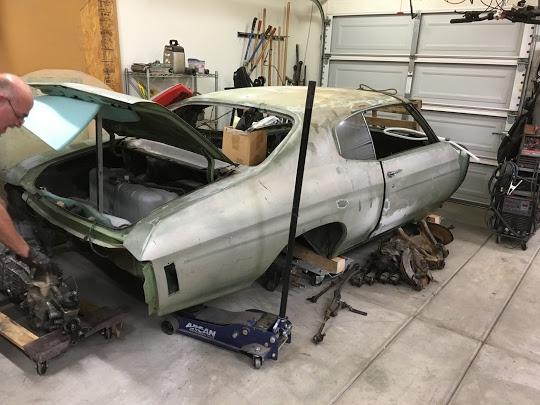
Then after we had the body tucked away, we started stripping the frame to get it ready to go to the blaster... Took about 90 minutes to tear it down. The front springs were a little sketchy, as there's a ton of stored energy there. We used some rachet straps, the shocks as a limiter (actually worked really good, and I'm not planning on reusing the shocks anyway), Loosened both ball joints so the crown of the nut was off of the threads, but the rest of the stud was still in the threads. With a very slow careful hand, and we had a floor jack about 4 inches below the control arm to catch it. The ratchet strap went through the spring, arm, and around the frame a few times to keep the spring captured on the arm. All in all, it worked really well. I'm planning on keeping these stock springs, as a starting point for whatever I put in here. so when we were done with disassembly, I was left with this. If the blaster was open today, I'd have taken it there. I found a local place about 5 miles away that will blast the bare frame with no suspension for $150 (No coating or paint afterwards). I think that it's worth my time to not do it myself, so Monday it'll go off to blasting...
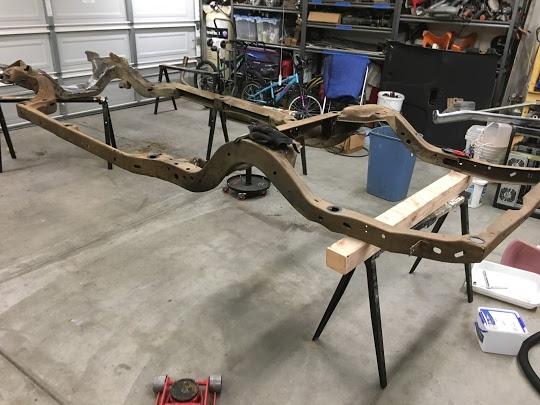
We finished cleaning up, moving cars around, and putting all of the crap away by about 11AM. By the time we finished it was about 95 degrees in the garage, so we wrapped up for the day. Hopefully by next weekend, I'll have a clean, blasted frame sitting in the same spot, ready for the Hellwig Frame bracing that is queued up...
07-13-2017 #14
Registered User
- Join Date
- Aug 2008
- Posts
- 43
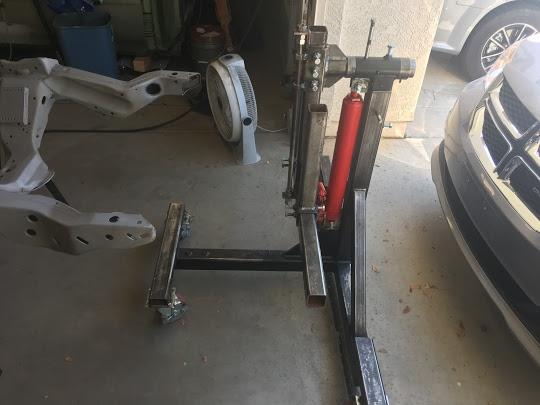
Scored a relatively inexpensive Rotisserie this morning. Drove up to Cottonwood AZ (About a 2 hour drive each way), I stumbled across this on Craigslist about two weeks ago, and was asking the owner about measurements, as it looked like the pivot height was fixed in the photos. It's only about 40 inches from the bottom to the center of the pivot. The day I was going to head up to look at it (last weekend), he sent me a message that he just sold it to someone in Colorado... This week, I was going to just plunk down the cash to buy a new one, and it showed back up on Craigslist, so I emailed the guy, and said that I was still interested. We arranged to meet this morning. Super nice guy, had a Shelby Cobra in the garage. I measured, and figured that I could pretty easily modify this to suit my needs, so a little cash was exchanged, and we loaded this thing into my Minivan... Yes.. My parts hauler is a minivan...
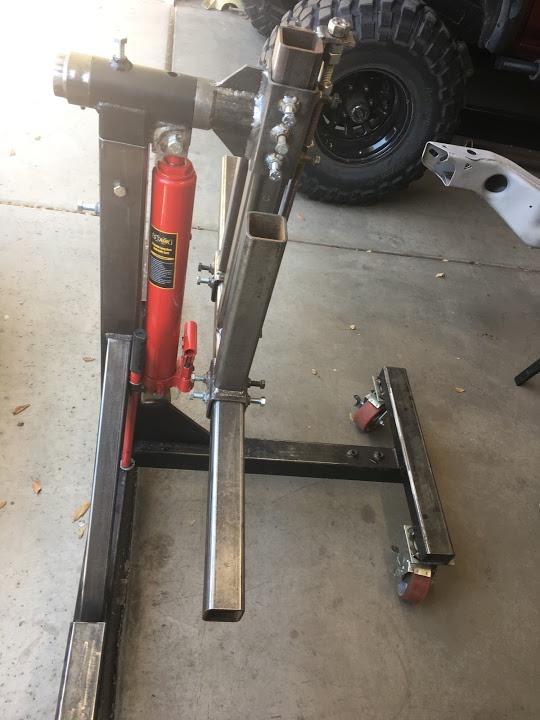
Anyway, This thing is pretty beefy, It looks like the main tube, and caster mounts are made of 1/4 inch wall tubing. There's a 19 foot spreader bar (cut in half), and it's got all of the pieces I need to make it work on my car. I want to make some mods to it before the body goes onto it. The first is making the height adjustable, so I ordered two hydraulic rams (8 ton), some 1000lb casters (8 of them), and I'll need to pick up some steel next week to make the mods.
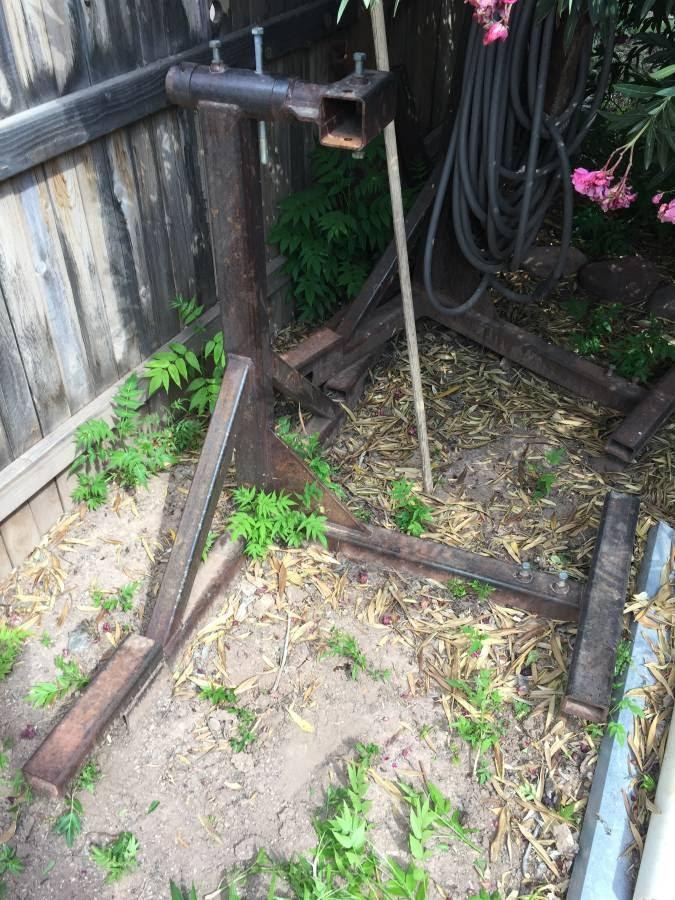
By the time it's all said and done, I should have about $500 into this thing, and a weekend of time cleaning, modifying and painting it... I feel much better about that then dropping over 1K on a pretty new one... Plus I can take that $500 saved, and buy more go-fast parts, or suspension parts...
Weather is getting hot here in Phoenix, so I spent a few hours working on getting this thing setup the way I want. I don't think the Casters and Hydraulic's will be here until at least the end of the week or next week, So I was out in the garage at about 7AM starting work.
Started with this:
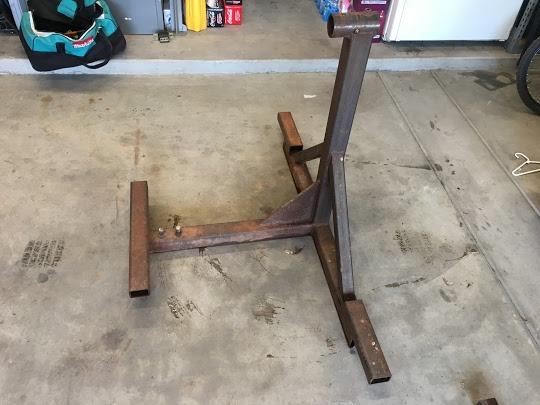
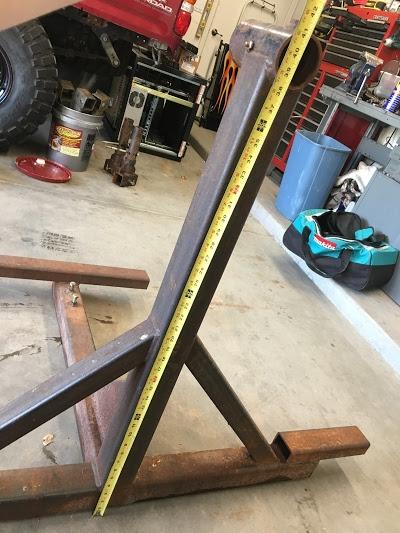
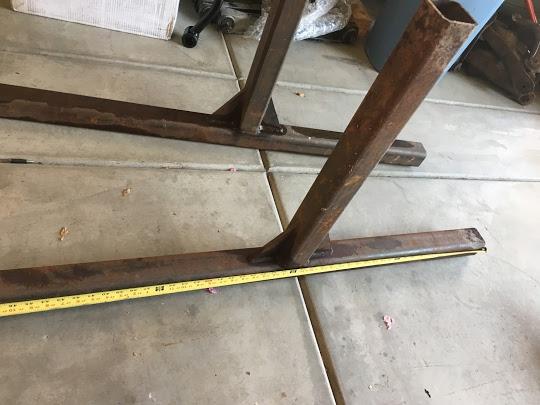
and
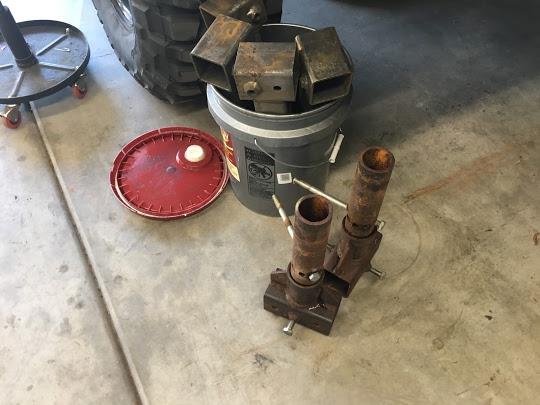
I started soaking the body mounts in some Evaporust, and will get the main pivots in there as soon as the mounts are done. I love this stuff... Then I spent the better part of about 3 hours cleaning, sanding, and grinding the steel so that there was no more rust. This thing was bare metal, and was left outside in the dirt, so the bottom piece was the worst, The top pieces cleaned up pretty darn quick.
Next was to chop off the main pivot. I started with my chop saw, and after blowing the breaker about a dozen times, I broke out the sawzall. The main upright tube is 3"X3" 3/16" wall tubing. The main spreader bar was 19 feet of 2.5"X2.5" 3/16" tubing that I cut in half to fit it in my van yesterday to bring home.
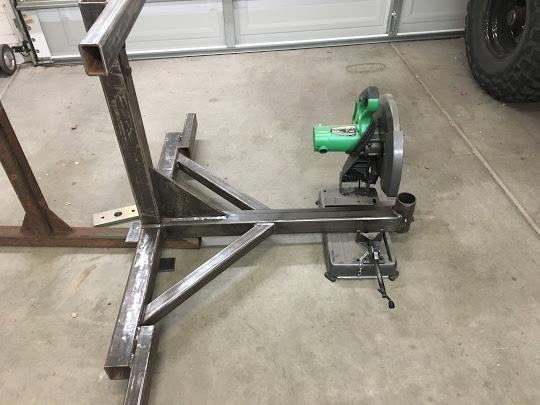
Here it is with the main pivot removed...
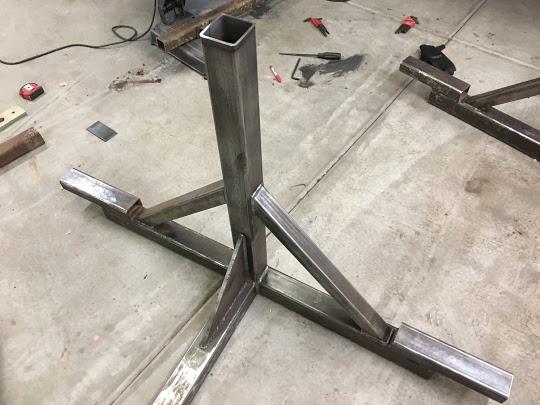
This is a length of the 2.5"X2.5" 3/16 Wall tubing to sleeve the inner main support. This is 35"
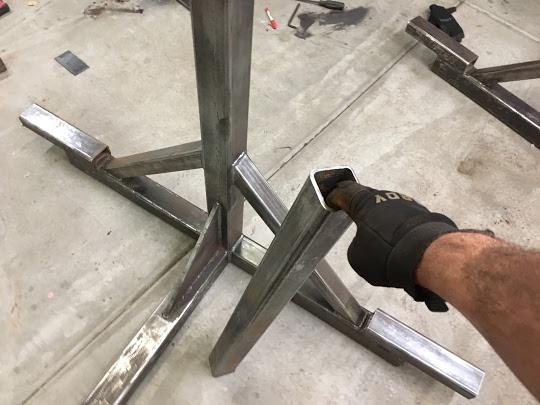
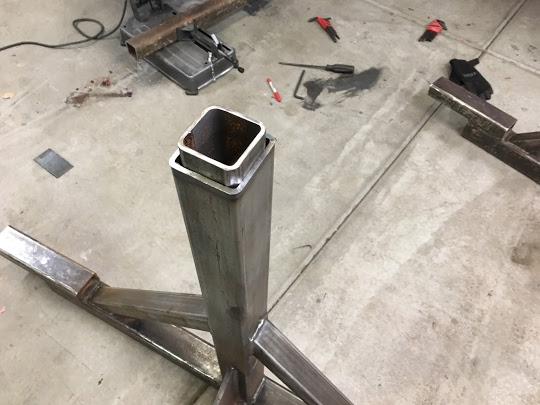
Now with the main pivot reattached to the new sleeve:
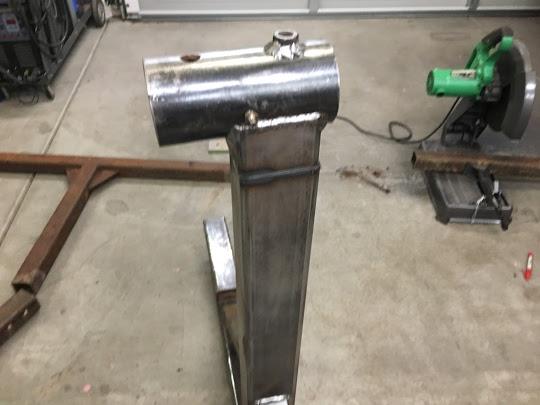
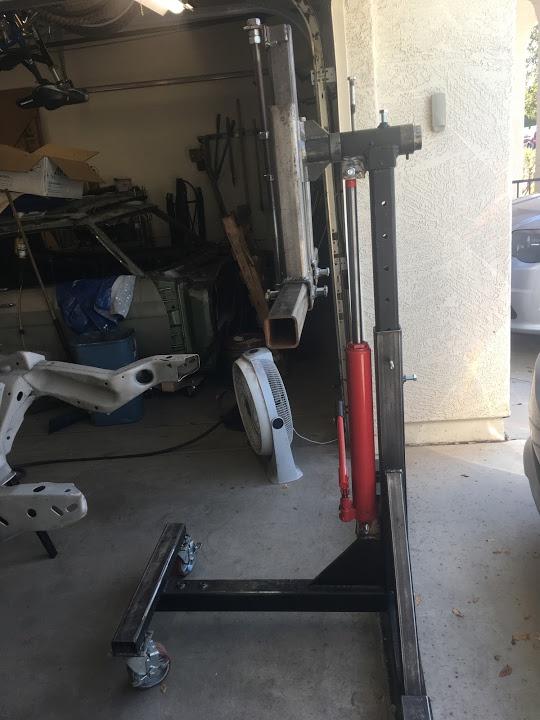
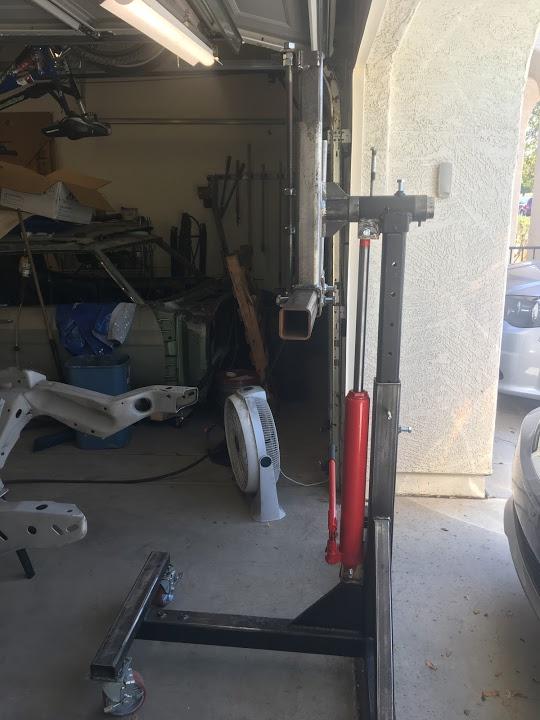
And now with the height adjustable an additional 2.5 feet or so...
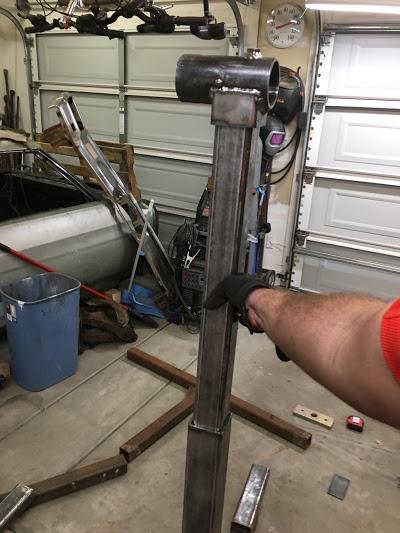
I used a few cans of satin black Krylon to make sure this thing doesn't rust again... Then it got pretty freaking hot, so I shoved it all away. I'm hoping the Casters and Rams will be here by Friday, so I can fully assemble this thing. I'll also need to get some 2"x2" Square tubing to make the main spreader bar adjustable to fit both the frame and the body shell. I still have some cleaning to do on the spreader, and the down tubes... But all In all, I'm pretty excited to have this thing almost operational after just a few hours and a lot of elbow grease.
I didn't take a lot of pictures along the way, but I wanted to document the modifications I made to this rotisserie. In hopes that it'll inspire someone to build one, or modify it to suit their needs...
The first order of business was to get some decent wheels for this thing. Since I'm a build to last kind of guy, I got some 1000lb (Each) casters from amazon. They ran me about $120 shipped to my house. They are 5" X 2". I was going to get the plates to bolt the casters, but decided to just weld them. So I ground off the galvanizing and welded them on. I placed the welds where they'd be easy enough to cut off should one of them need to be replaced.
Then I drilled holes in the main post so that I can pin the post about every 4-5 inches or so.
I mounted an 8 TON cylinder to both ends,
After everything was together, I found a couple things that I wanted to improve upon. The steel that was used all has 1/8 inch gap, so It's 3X3 3/16 wall, and 2.5X2.5 3/16 wall tubing. The same with the main pivot point, So when you stack the tollerances, it was a little too sloppy for my liking. I ended up plating the main pivot with some 18 gauge sheetmetal, and made the pivot nice and smooth with no slop. Then I made pinch bolts for all of the movable parts, This will allow movement, but make it so I can tighten everything up when I have the car/frame on the rotisserie. I also made an adjuster out of allthread so that I can adjust the center of Gravity easily without taking a bunch of crap apart, or getting jacks.
About the only thing I have left to do to this thing is to paint it... Well, I finished one of the towers, Still have another that needs to be finished up (should take 2-3 more hours)...
Anyway, here are the pictures...
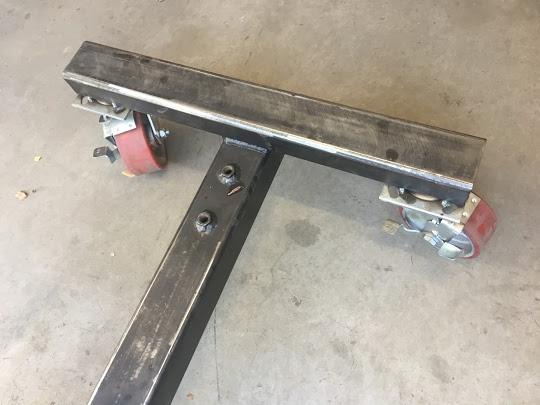
- - - Updated - - -
And this last post will bring me current where the project is today...
Frame back from the blaster.
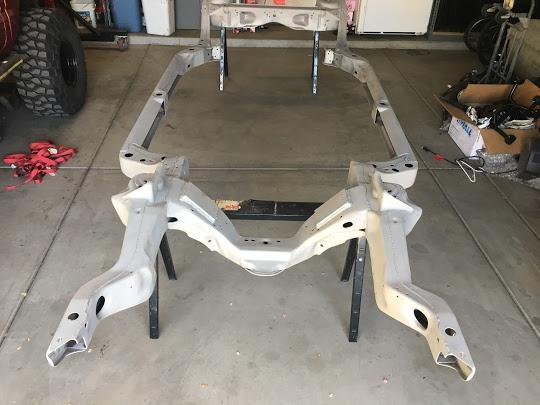
It amazes me the weld quality on these frames... It sure makes me feel a whole heck of a lot better about my welding skills after looking over this thing...
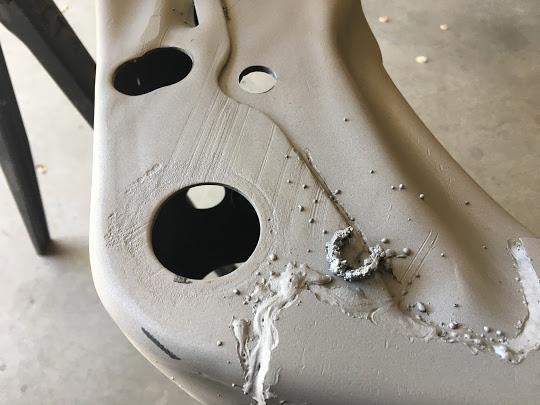
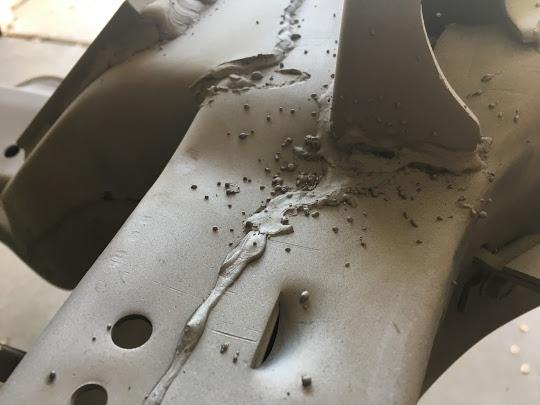
Only one real spot with any pitting was right under the evaporator box, I'm guessing the box drained onto this area of the frame when the A/C was running?
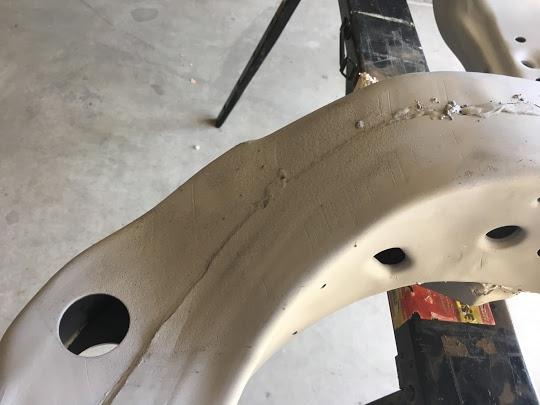
This is one of those moments that I'm a little nervous about proceeding. I know what I have to do, I have all of the parts and supplies needed to perform the task, but I worry about screwing this up. It's been pretty hot lately, so it'll probably take me a few weekends to get the FrameFX bracing installed. But I'll hopefully start this weekend...
Updates to follow
07-13-2017 #15
Registered User
- Join Date
- Feb 2013
- Location
- Ft Worth, TX
- Posts
- 188

Awesome project! I love exploring salvage yards and finding ways to make late model parts work.
1970 Chevelle: 6.0 L96, T56, Strange 9 Inch, Ridetech Coilovers, Wilwood brakes
1978 Firebird: 6.0 LQ4, T56
2007 Sierra 2500HD LBZ
07-13-2017 #16 Starting The Transformation
- Join Date
- Aug 2015
- Location
- Heber City Utah
- Posts
- 167
Wow you have a ton of work into it already !! Look good !!
Keep them pics coming !!
07-14-2017 #17
Registered User
- Join Date
- May 2010
- Location
- kitchener,Ontario,Canada
- Posts
- 2,358

Wow...i like some of you engineering skills , keep up the good work. Love it
 Spinnin'my tires in life's fast lane
Ryan Austin
On twitter ... soon to be revived ...
On Instagram ryanaustinss70
07-15-2017 #18
Registered User
- Join Date
- Aug 2008
- Posts
- 43
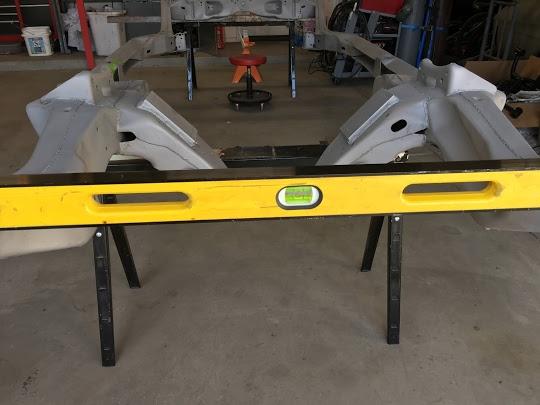
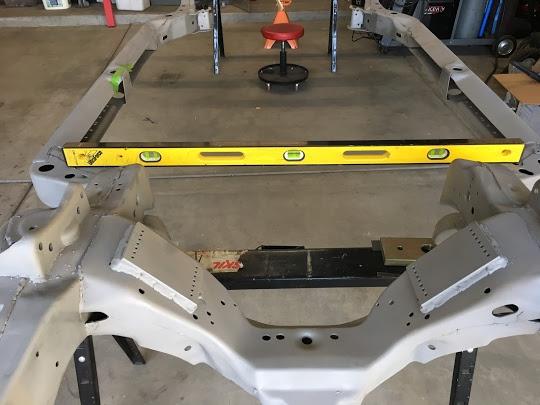
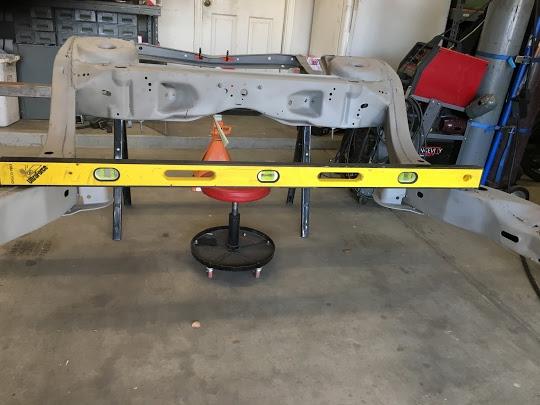
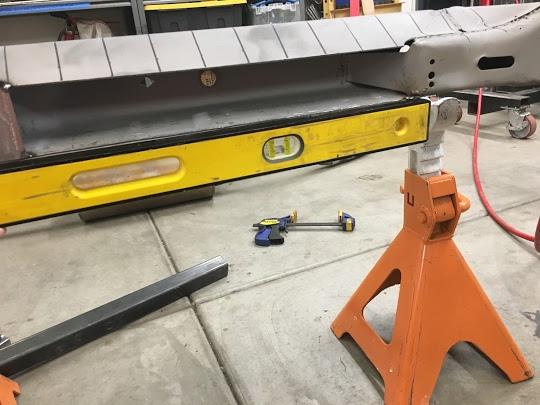
I took Monday and Tuesday off of work because the weather here in Phoenix is only supposed to be 98 on Monday and 96 on Tuesday... Yesterday I finished the last little bit on the Rotisserie except paint (which I'm not sure I'm going to worry about...) Anyway I wanted to start the process of getting the Hellwig FrameFX bracing kit installed. So the first thing I wanted to do this morning before I started cutting and welding is to make sure the frame is square and level.
The first thing I wanted to do was make sure that my frame was straight and level in both directions. The Frame FX installation instructions has the OE measurements, but it's a little hard to read, so I used my chassis service manual for a much clearer picture. I took measurements to make sure everything was in spec, and the frame was not twisted. I set the frame up on sawhorses, and leveled it from to back, and side to side. (My measurements were 52 5/16" across the front cowl body mounts, 53" between the middle body mounts, and 48" between the mounts by the LCA mounts. Both diagonals were 78 1/2".)
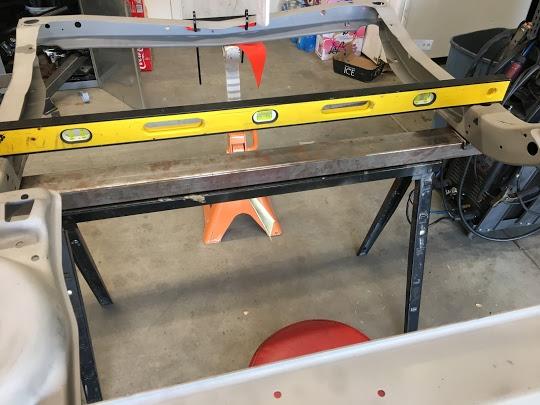
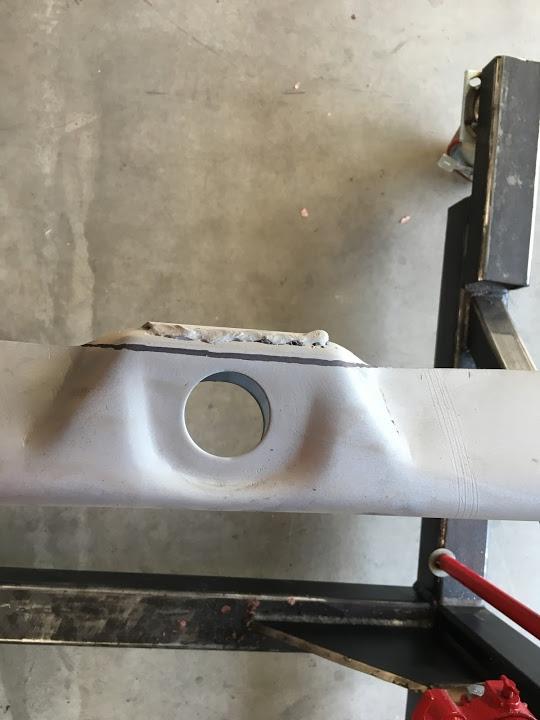
So next step was to remove the bracing between the upper and lower part of the C-Channel frame in the middle. The Instructions tell you to do this in several steps, I did everything at once. I have heard some guys have a hard time getting this cut straight, and that makes the next step a little more difficult, so I wanted to make sure that I only removed as little metal as possible. So from work I had this really fancy laser level, and I decided that I'd use it to project a nice straight line for my cut. In order to keep it projecting where I needed it to go, I used my rotisserie and make sure that it was nice and level, the laser level uses a magnet, so it stuck right to it....
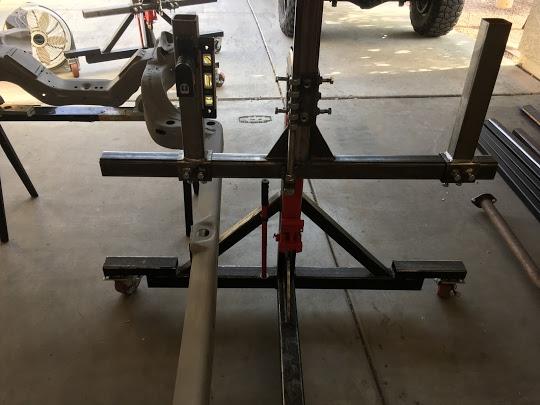
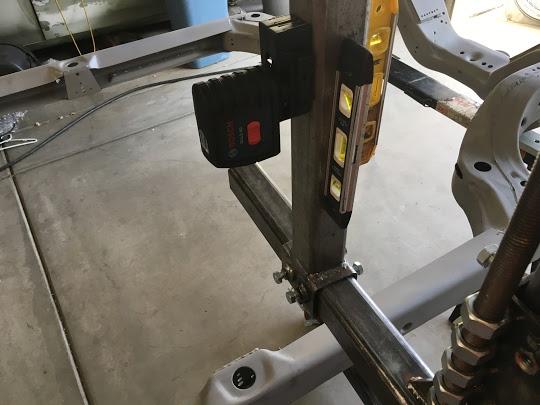
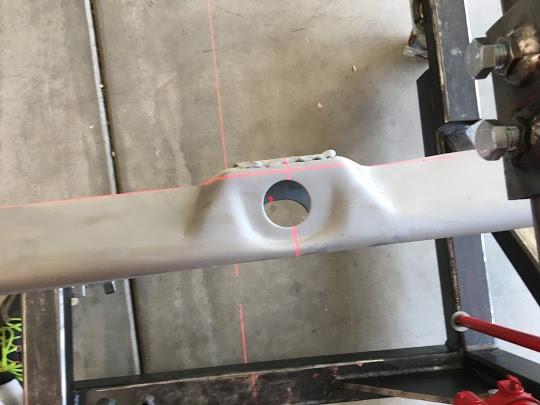
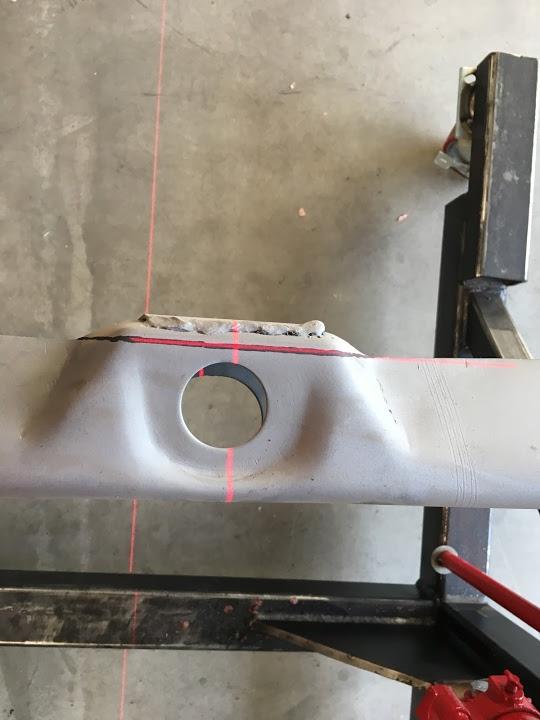
This gave me a nice clean cut line.
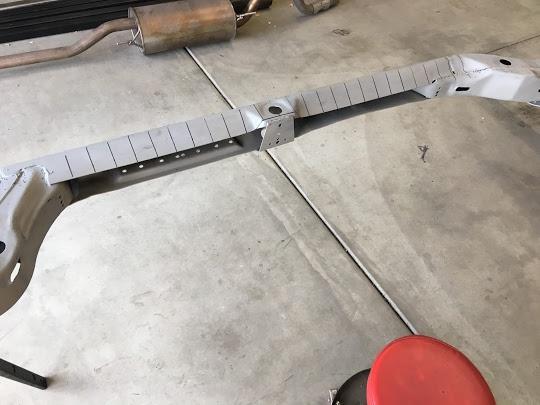
One thing I really wanted to avoid with this project was warping my good condition frame by getting a little overzealous with the welds... So I decided that I'd start by marking the frame every two inches. This will give me the ability to stagger my welds and still keep it looking nice. Effectively stitch welding.
Then I made my first cut on the drivers side of the frame... Gotta love those factory welds...
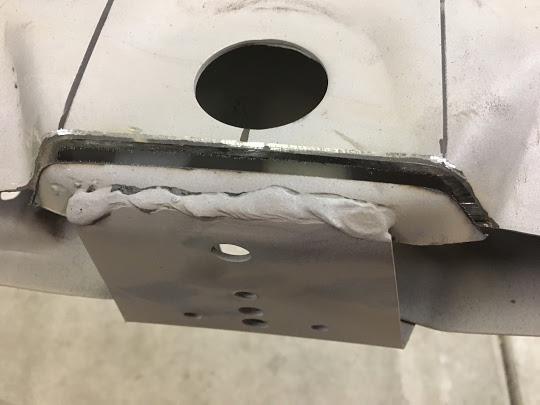
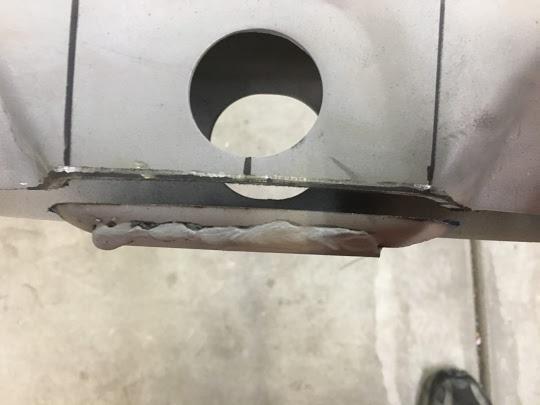
I cut the bracket right at the weld on the bottom, so the frame itself is untouched, and the weld will just need to be ground down a little on the bottom to allow all of the pieces to sit nice and flush.
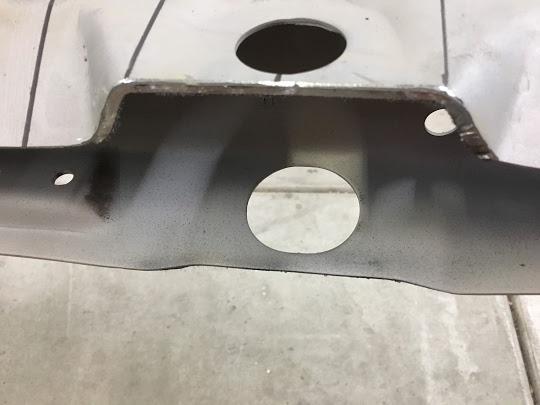
I sprayed the back side of the plates, and the inside of the frame where these plates are going to be installed with some weld through primer. I would like this frame to outlast me...
The top plate was tacked to the upper and lower rail, making sure that it was level to the ground (as was the frame), so this piece will be nice and square.
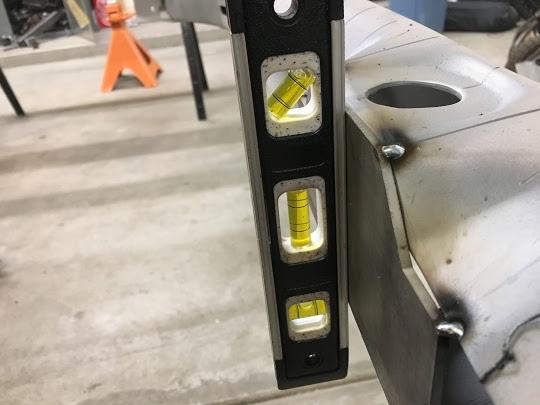
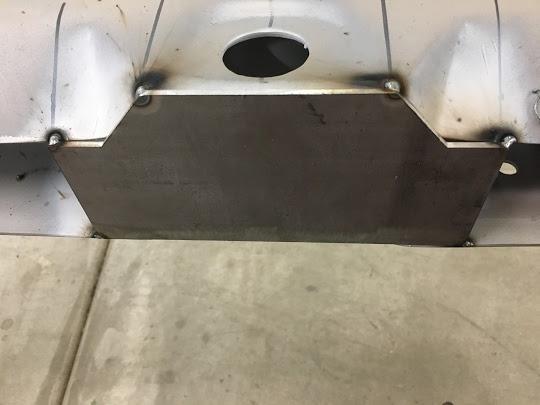
I was not so lucky with the passenger side of the frame. Apparently someone in the last 47 years used the frame as a jacking point, and bowed the heck out of the bottom rail, so the plate didn't fit.
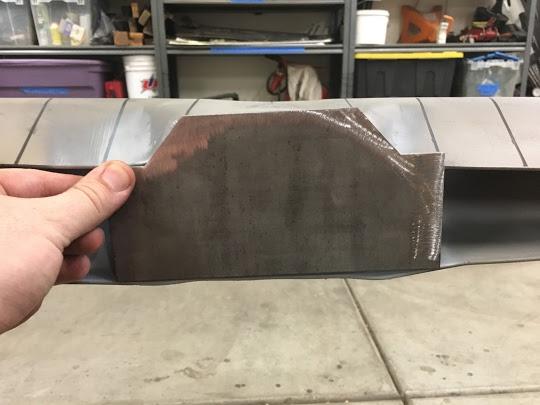
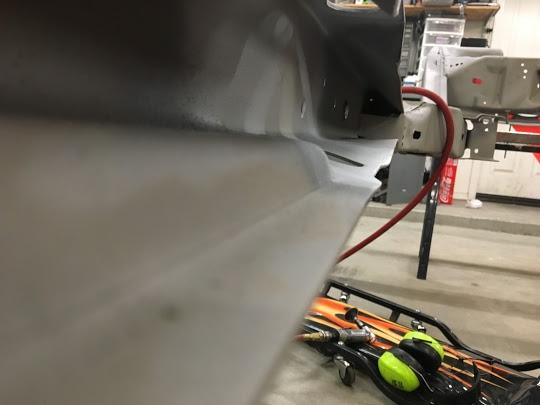
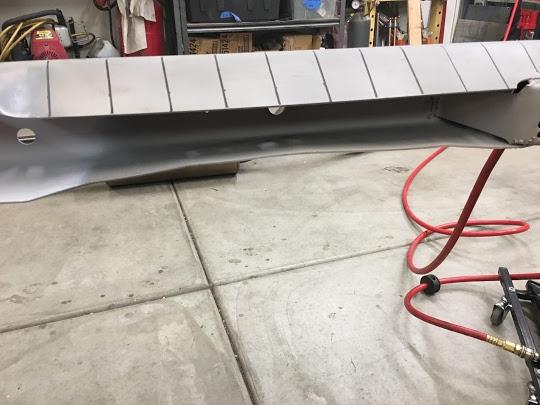
In this picture you can see the 3/8" or so that the lower portion of the frame is bent up. The plate is square and true on the other side...
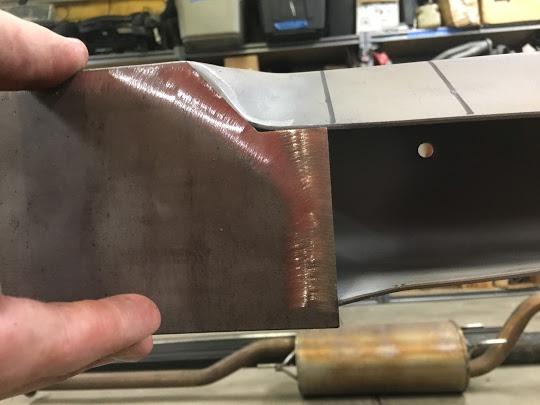
Here is that same lower frame have a little work with a sledge hammer, 2X2" Tubing, some pretty big C-Clamps, and some Cresent Wrenches.
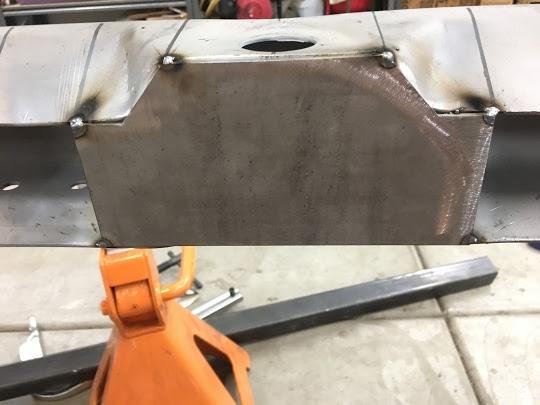
And the passenger side reinforcement plate is tacked in place...
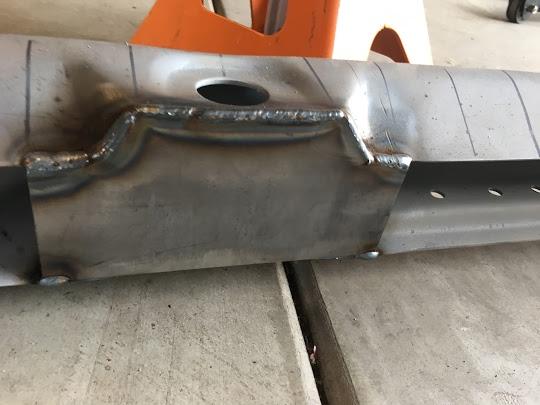
It started to get pretty hot, so that's where I ended for today, I'll be back at it again tomorrow.
07-16-2017 #19
Registered User
- Join Date
- May 2010
- Location
- kitchener,Ontario,Canada
- Posts
- 2,358
My frame was used in the same Manor.... Lol oh screw it just jack anywhere
Spinnin'my tires in life's fast lane
Ryan Austin
On twitter ... soon to be revived ...
On Instagram ryanaustinss70
07-16-2017 #20
Registered User
- Join Date
- Aug 2008
- Posts
- 43
Tried to start pretty early today. Wasn't supposed to be "AS" hot as yesterday, but it turned out to be a VERY humid day. I tried leaving my side door open with a fan blowing cool(er) outside air into the garage, but alas... at 6:00 this morning, it was still 95 degrees inside my garage. I was never the less pretty grumpy for a while.
I continued where I left off yesterday by fully welding the plates where the center body cushion (Mine will be a full blown mount as I purchased the convertible supplement body mounts, and the nut is already there...)
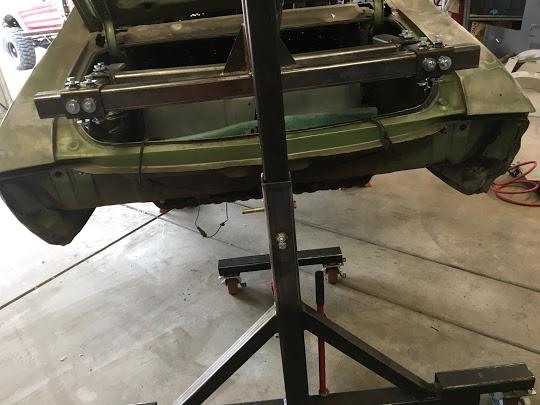
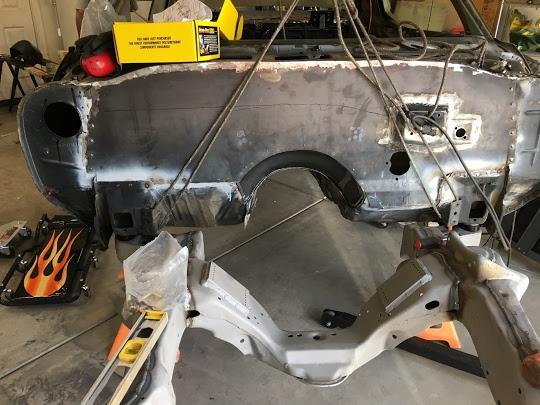
Since the body was tucked away, It took me about an hour to move cars around, move all of the crap around that I stacked around the car, and I was able to lift the body up high enough to get the bare frame under the body to mock up for the extra mount. I used my engine hoist for the front with just some 1/2 inch rope that I've had kicking around the garage for about 15 years.
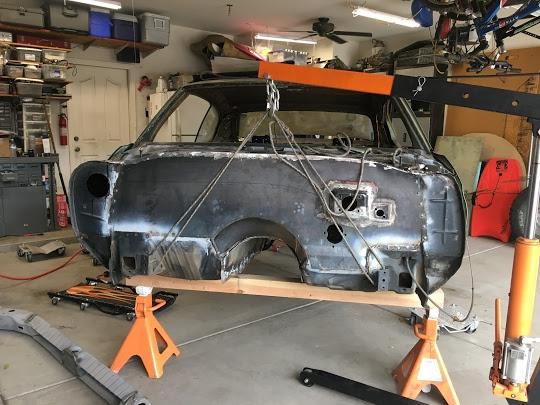
I used one of my newly finished Rotisserie lifts to lift up the rear, This worked really good, and allowed me to stabilize the rear and prevent any rotation or movement by locking out the movements.
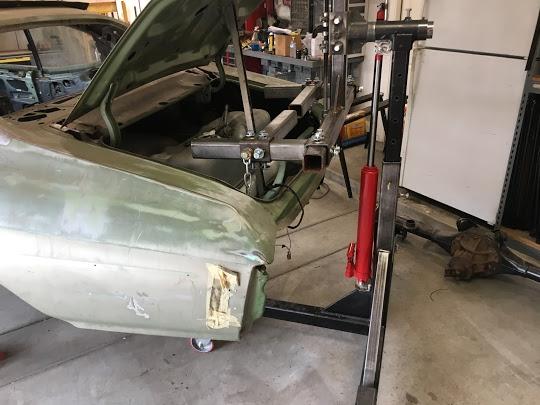
This is just two pieces of chain bolted to the bumper mounts inside the trunk, then bolted to the arm of the rotisserie.
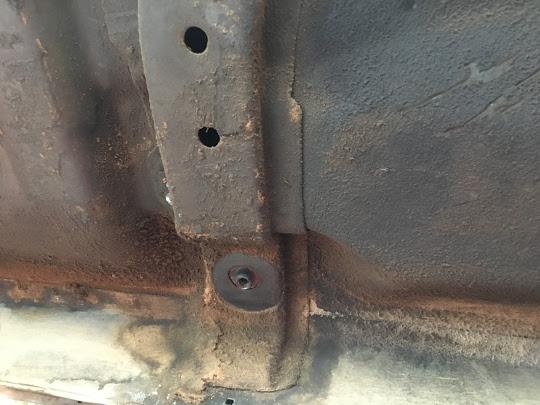
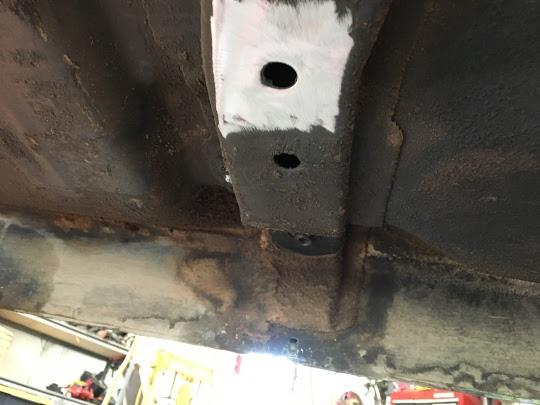
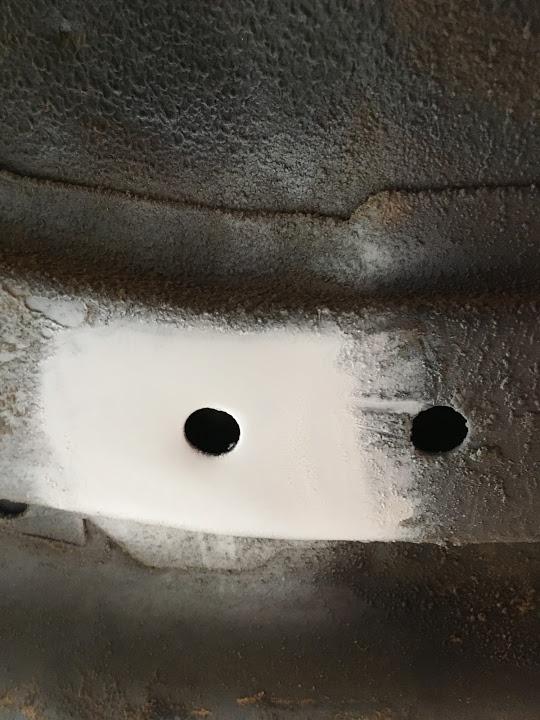
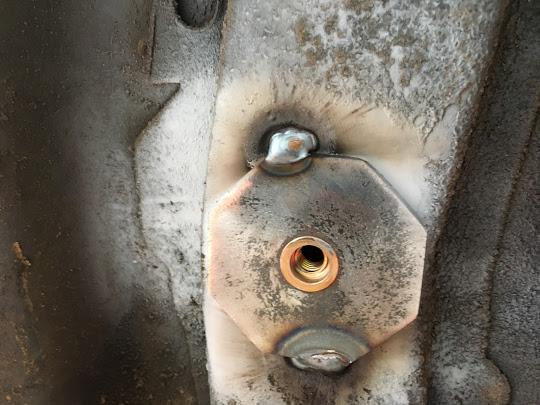
So this is the body mount where the coupes generally have a cushion. My car did not have your typical captive nut, As you can see, there is almost like a nutsert here... It extends about 1/2" down from the brace. The hole right at the top of the picture will become an additional body mount.
Here is that same hole prepped for welding (not to worry, I'll clean off the rest of the floor at a later date. I didn't have any interest in laying on my back scraping all of the crap off of the bottom of the floor...
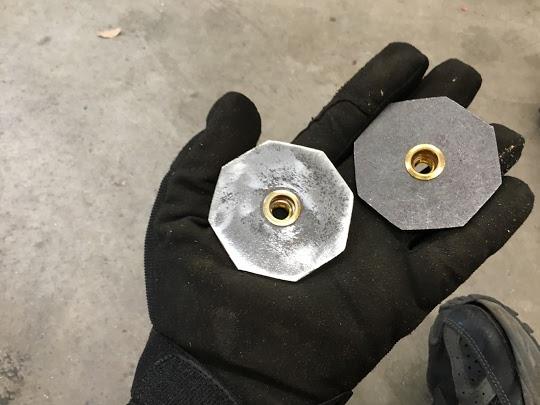
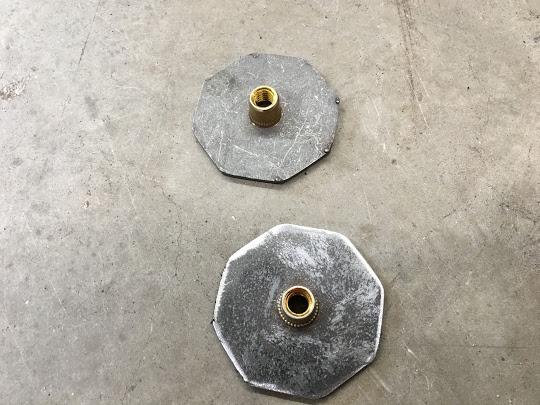
These are the weld in "Nuts" from the Hellwig kit. The one on the left, I cleaned up, and prepped for welding. If I have one complaint about the kit (and It's a minor bitch, because this kit is excellent...) it's that some of the pieces have areas of surface rust on them, so I spent a little time cleaning that rust off prior to installing anything. What you can't see in the picture is that from cutting these out, there were dingleberries on almost all of the edges, and I wanted these to sit nice and flush with the floor brace, so I buzzed the edges with my grinder...
Pic of the dingleberries...
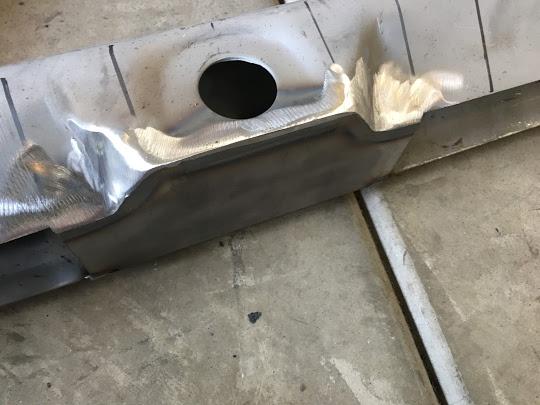
So here's the cleaned up frame and the Helwig brace after grinding the weld down so the body mount would sit nice and flush.
Little bit of weld through primer...
And the new body mount nutserts tacked in place. They'll be fully welded after I get the body on a rotisserie. Welding flat on my back is no bueno... (I could/would do that if I did not have my rotisserie)
Now comes the part that I dreaded the most... I wasn't sure how this was going to go, but all in all it only took about 25 minutes to reunite the body and frame. We started by moving the frame under the body while it was suspended by the hoists. Then set the frame on Jack Stands and got it as close as possible to the body without actually touching it. We then installed the new polyurethane body bushings and started all of the bolts.
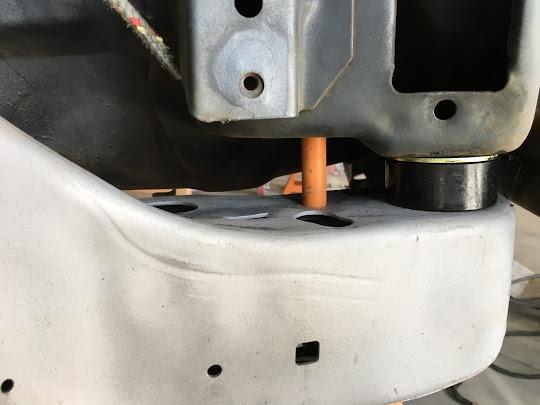
Pro Tip: Use a 5/8" OD dowel rod as seen in the picture below at this location, and right in front of the drivers side LCA there is another spot. The holes that these dowels go into is round, but there are two slits 180 degrees apart. There are corresponding holes in the body mounts/floor braces. I was lucky enough to have two old bottle jack handles that were 5/8" and allowed me to quickly and easily line up the body and frame.
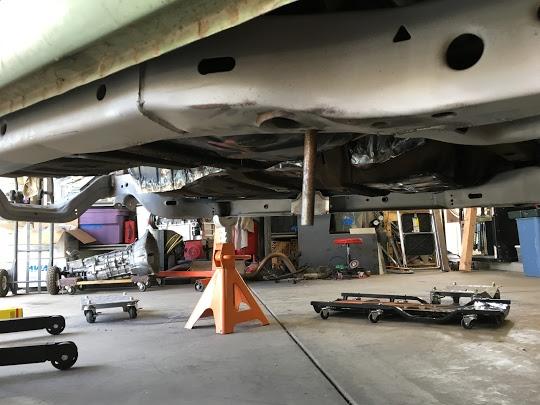
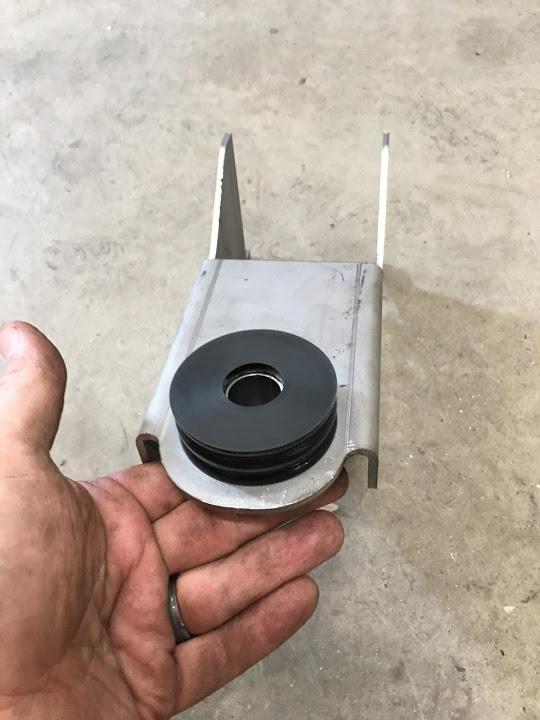
Here is the assembled Hellwig body mount and frame stand.
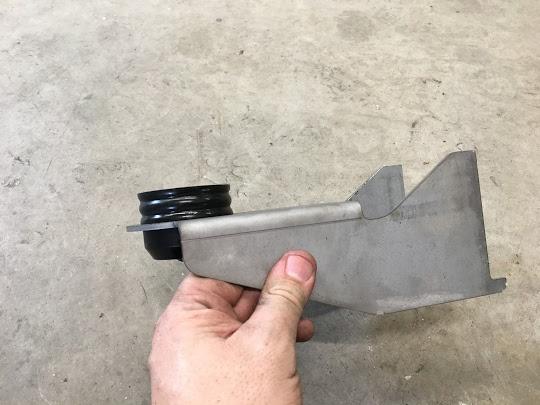
Here's the mount lined up to the body, and the bracing that I welded in yesterday. Here's another Pro-Tip. Grind the bottom weld of the original frame brace. If you don't, the brace will not sit flush, and you'll have to take it apart again grind then reassemble before welding.
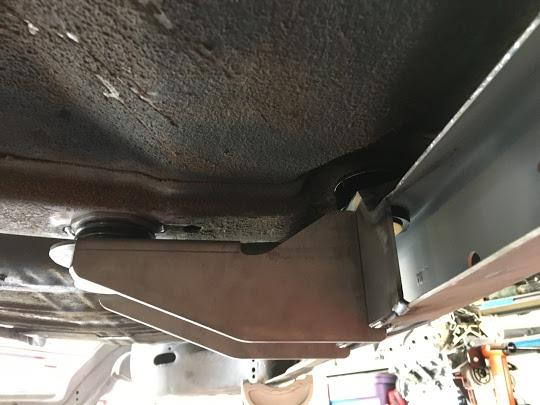
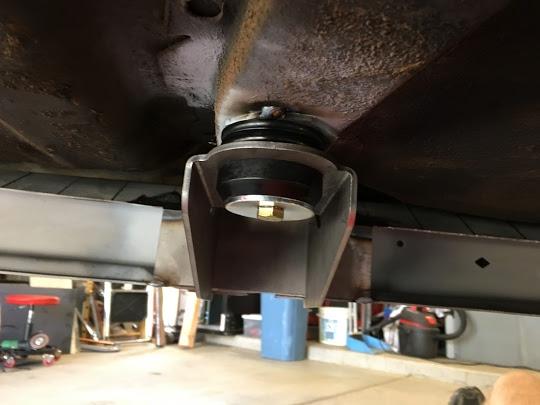
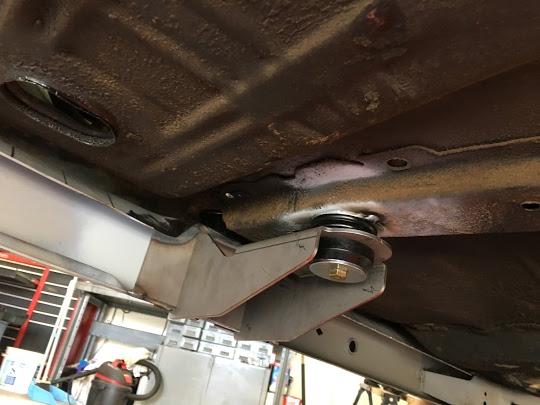
See what I mean???
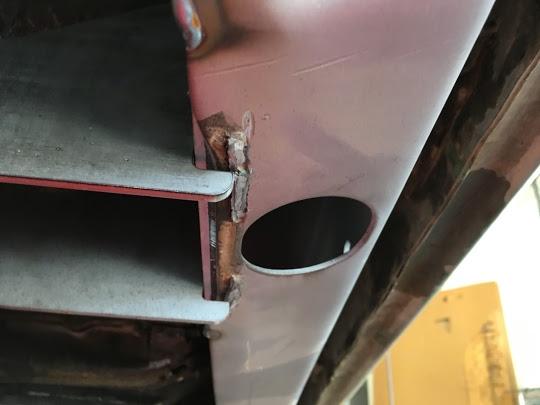
More better....
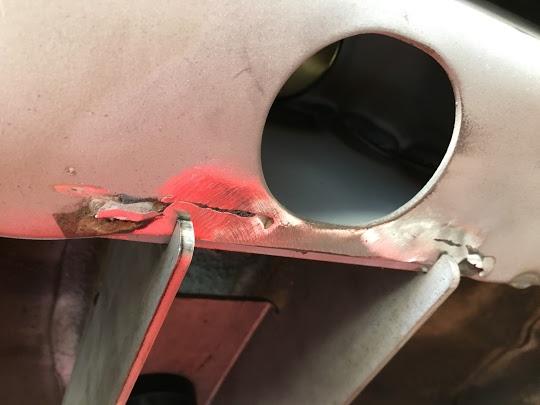
And the frame stands tacked in place...
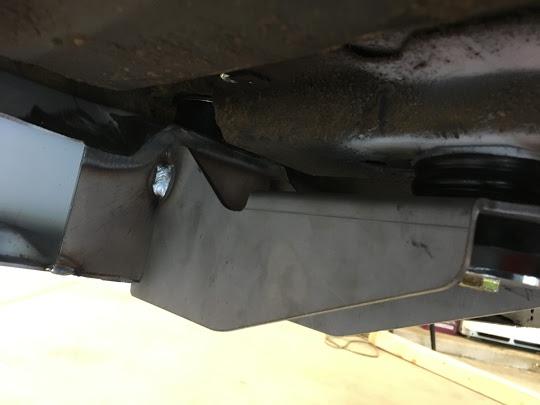
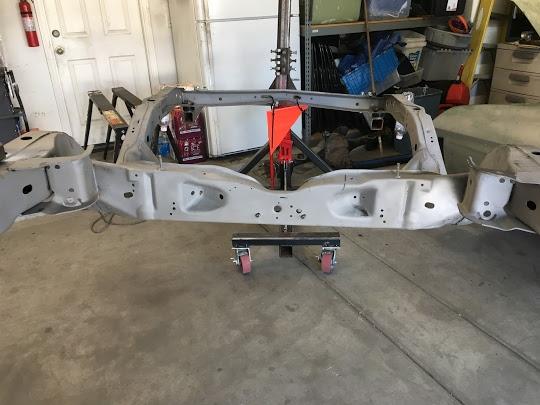
Now you get to take everything back apart again... Remove all of the body mounts, Drop the frame, and set the body aside again. The rest of the kit is welded off of the car. So this is the first test of the rotisserie since I finished it earlier this week. We used the body cushions and mounted the frame upside down in hopes of getting the COG as close to the pivot as possible. We can't quite get there, but we're pretty darn close.

 Reply With Quote