


Results 1 to 20 of 39
Thread: 1969 Sportsroof Build
-
04-03-2017 #1
 Registered User
- Join Date
- Jun 2016
- Location
- MD
- Posts
- 17

1969 Sportsroof Build
First off, let me say how much I appreciate all the knowledge and support that is available on this site and how freely it is given. I am starting this build thread in the hopes of not only getting ideas for the build, but also to get advice or suggestions from other people who have done this before. I am fairly mechanically inclined and not afraid to tackle a large project like this; hopefully I can get it to a drivable stage within my deadline. I will be working within a budget, so somethings may be done differently then I would prefer,but I will try and not cut corners with the important stuff. I am working in a small garage, with limited tools and have limited fabrication and welding abilities and this is my first attempt at working on a car that is in completely unusable condition.
My goal is to save a‘69 Sportsroof from the crusher, while turning it into a nice,modernized driver with a full frame and couple of hair driers. I searched for a while to find one that was far gone enough that I wouldn't feel bad about hacking it up. The car was the cheapest ‘69 Mach 1, with a title(more on the title later) that I could find. It was a complete car,all interior, trim,engine rear and trans were there, but in the shape one would expect from a car left sitting outside in Missouri for 30 years. The floor pans and frame rails were in the final state of ruination and completely unusable for anything. The front suspension components were mostly usable, but not what I wanted to go with.
I commenced the partial tear-down, while coming up with a front suspension solution. After reading the Ron S. $5K Mustang build thread, I decided to use a C5/C6 Corvette front suspension, as it seemed to be the best bang for the buck. I set about scouring ebay for parts and ended up getting the entire front, including brakes (minus shocks and transverse spring) for less than 300 dollars shipped. I'd like to run a coil over, but this IS a budget build.
Car being delivered
The moving company was informed the car needed to be delivered to a small cul-de-sac. They showed up with a 10 car transport and called from the nearest Target parking lot. I didn't think we would get the car unloaded due to the passers-by wanting to buy the car and generally ask questions about it.
Car in driveway (Quick, get in the garage before the HOA shows up!)
While the pictures above don't look too bad, as we all know, malignancy can lurk beneath even the cleanest of project cars, and this thing was far from clean looking. I bought the car sight unseen and a ridiculously low price, and was actually surprised that it was delivered in one piece, I knew what to expect and got exactly that (a portion potentially larger then I can masticate) but I intend on saving this car and have already learned a lot and had fun along the way. I knew there would be lots of rust to eliminate once the car was stripped, but little did I realize the mess that three decades of squirrel, rodent and snake families would leave behind.
I'm certain my microbiology classes warned me about things like this. Hantavirus anyone? This is one place where dust masks and rubber gloves are a must.
Squirrels had been defecating in this car longer than humans used it for transportation and it was now my job to clean it.
Thanks,
Michael
-
04-04-2017 #2 New to Pro-Touring
- Join Date
- Jan 2017
- Location
- Live in Owensboro KY. Work in Jasper IN
- Posts
- 72
At least you've got one and the motivation to do something with it. Regardless of its condition, its YOUR car and you can build it how you want. Good luck with your build, you are in good hands here!
04-04-2017 #3 Registered User
- Join Date
- Aug 2007
- Location
- Jonesboro, Arkansas
- Posts
- 2,506
This will be interesting. These cars can look pretty awesome when finished.. Good luck and I'm going to watch.
Carl Wilson
1968 Camaro - T-56 6 speed - 383 Stroker, 2014 Mustang GT seats. FiTech EFI, Tanks Inc. Tank with Deutschwerks fuel pump.
04-04-2017 #4
Registered User
- Join Date
- Jun 2016
- Location
- MD
- Posts
- 17
Thanks for good wishes! Sometimes when I looked at this car, I thought I would never get as far as I am now (this post is a bit behind where I am, but I should be caught up soon).
After getting the car towed home from the car carrier, I started taking stock of the car. I noticed the rear end was low and figured the leaf springs had de-arched and were sagging, I liked it at that height, so I made measurements for later use. The doors, hood and trunk would not open (N.B. Its pretty difficult for a 6 ft tall 210 lbs. person to get in and out of a 1969 Mustang Dukes of Hazzard style). After some research on google, I pulled up a diagram of the door mechanism and was able to get the doors open.
Despite the damage on the passenger door, the doors are in surprisingly good shape and will only require a skin on this passenger door.
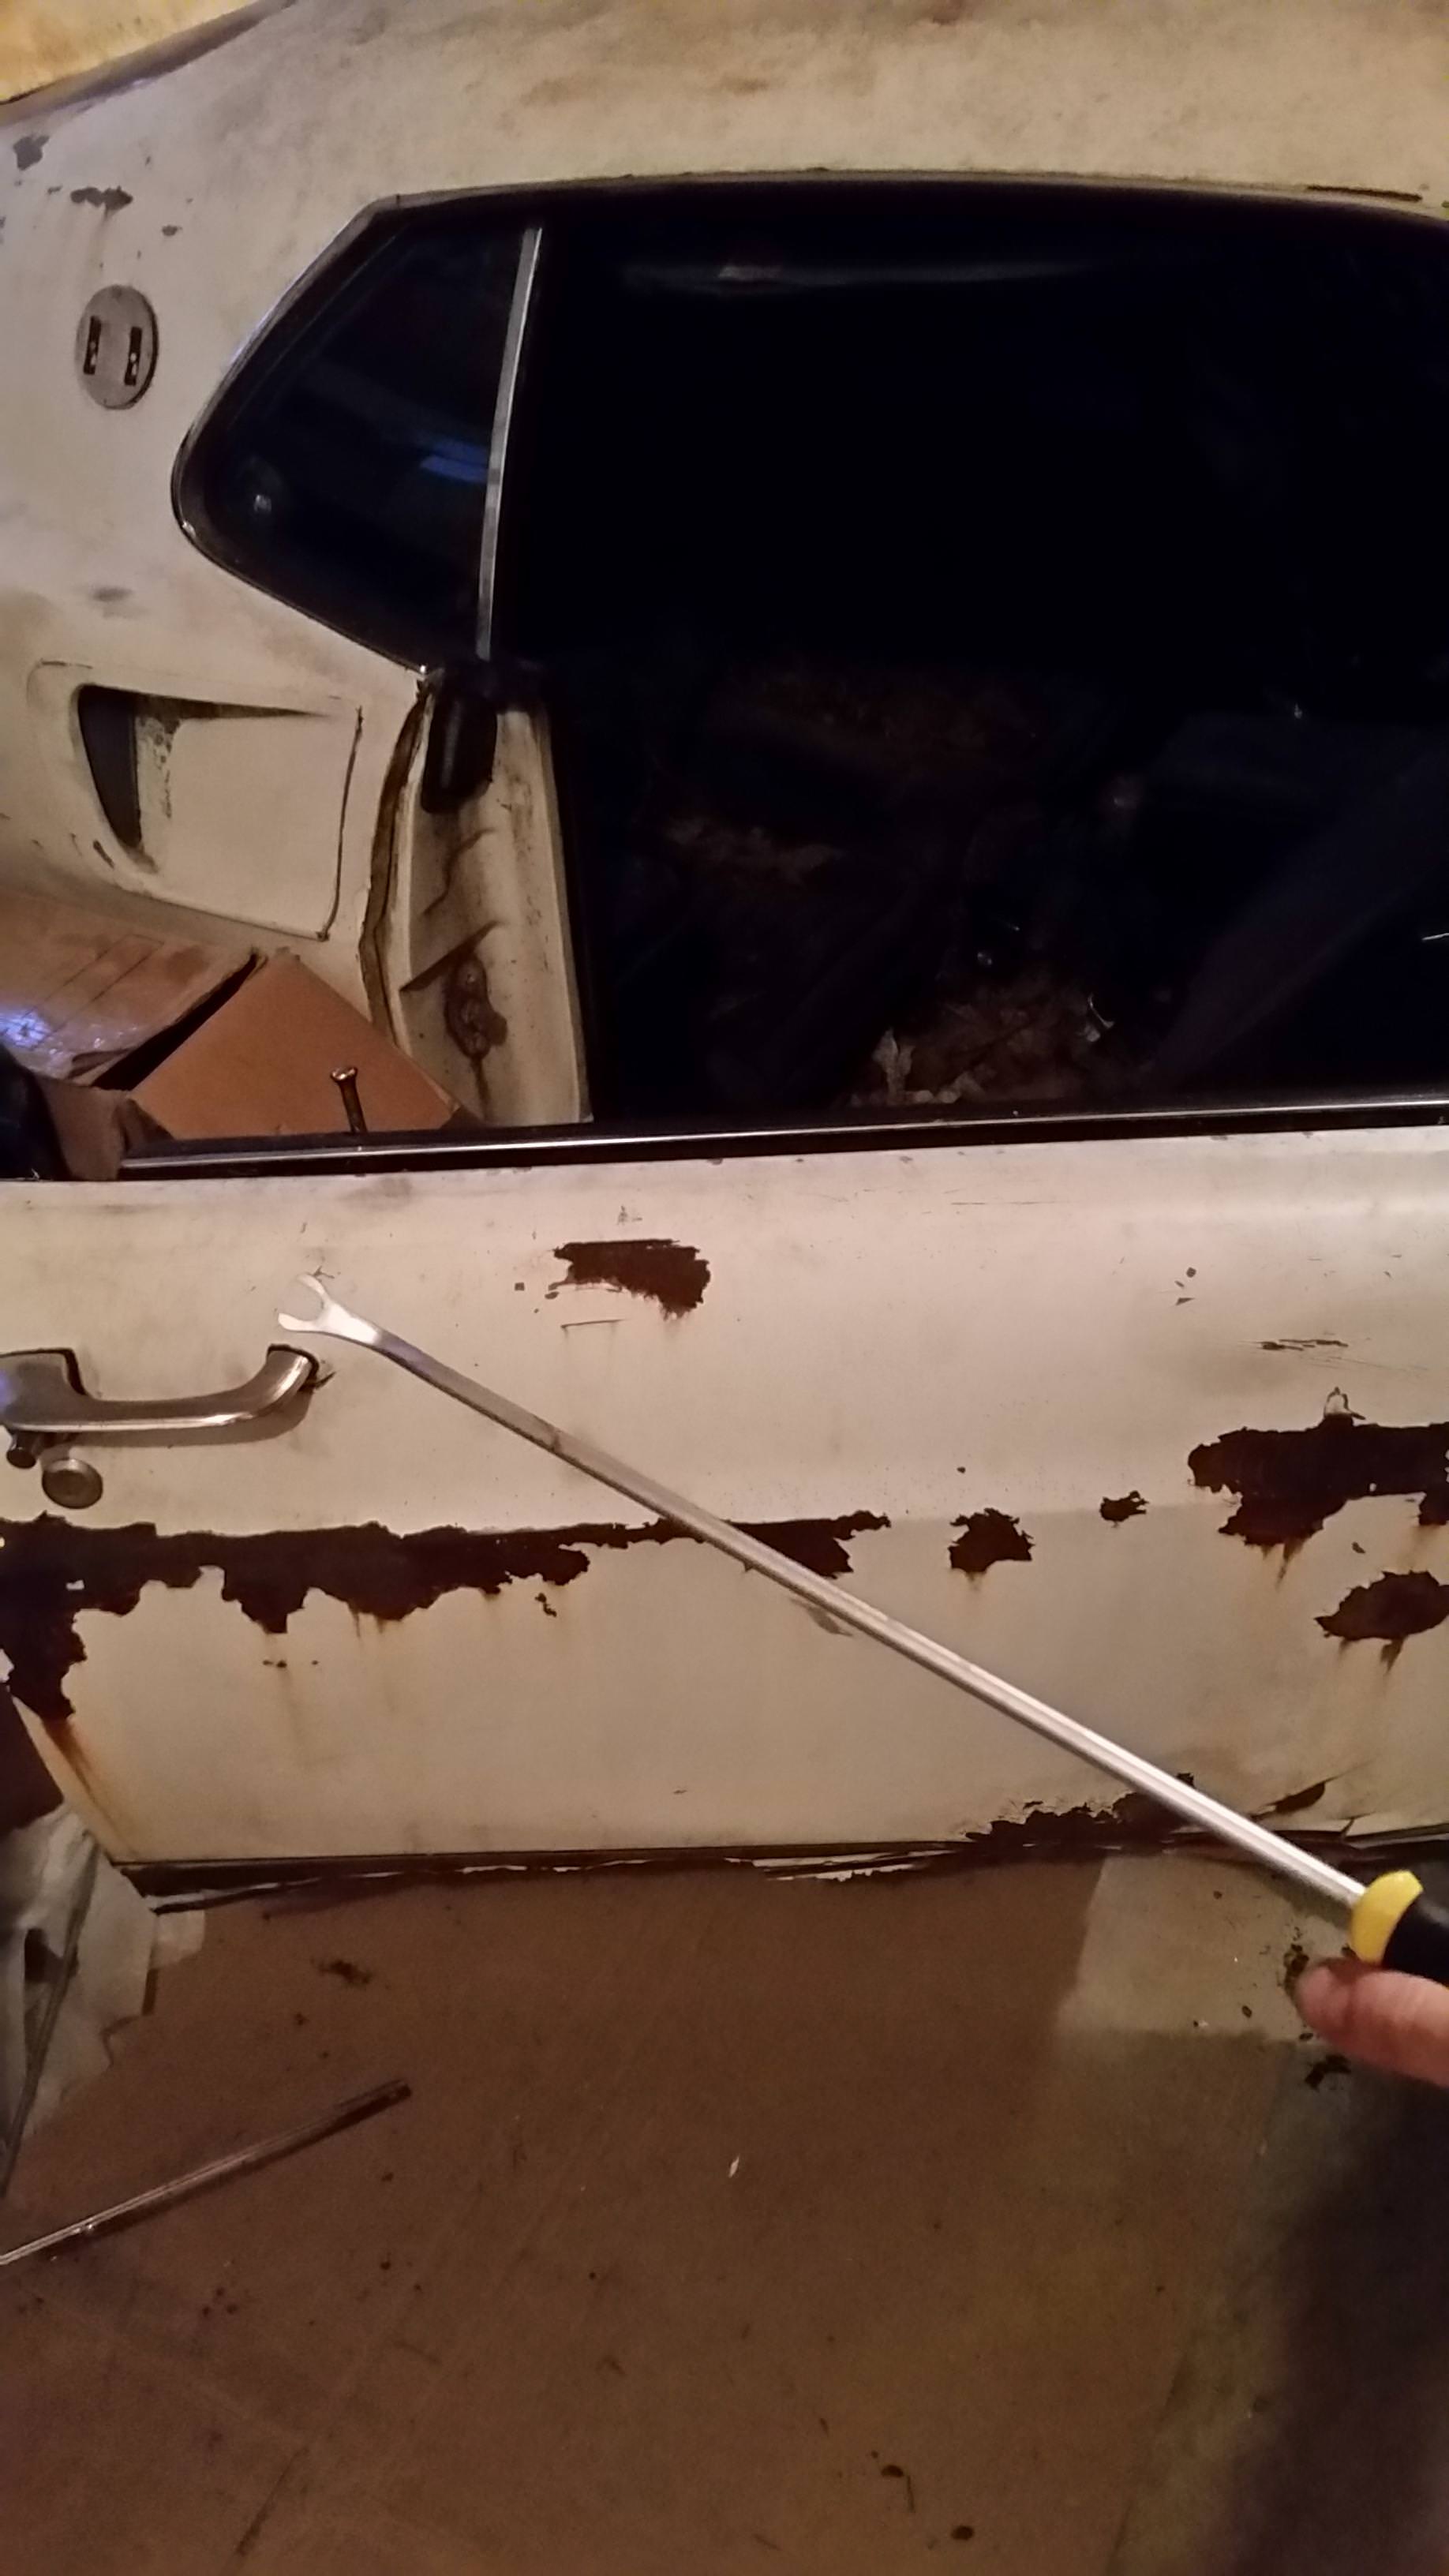
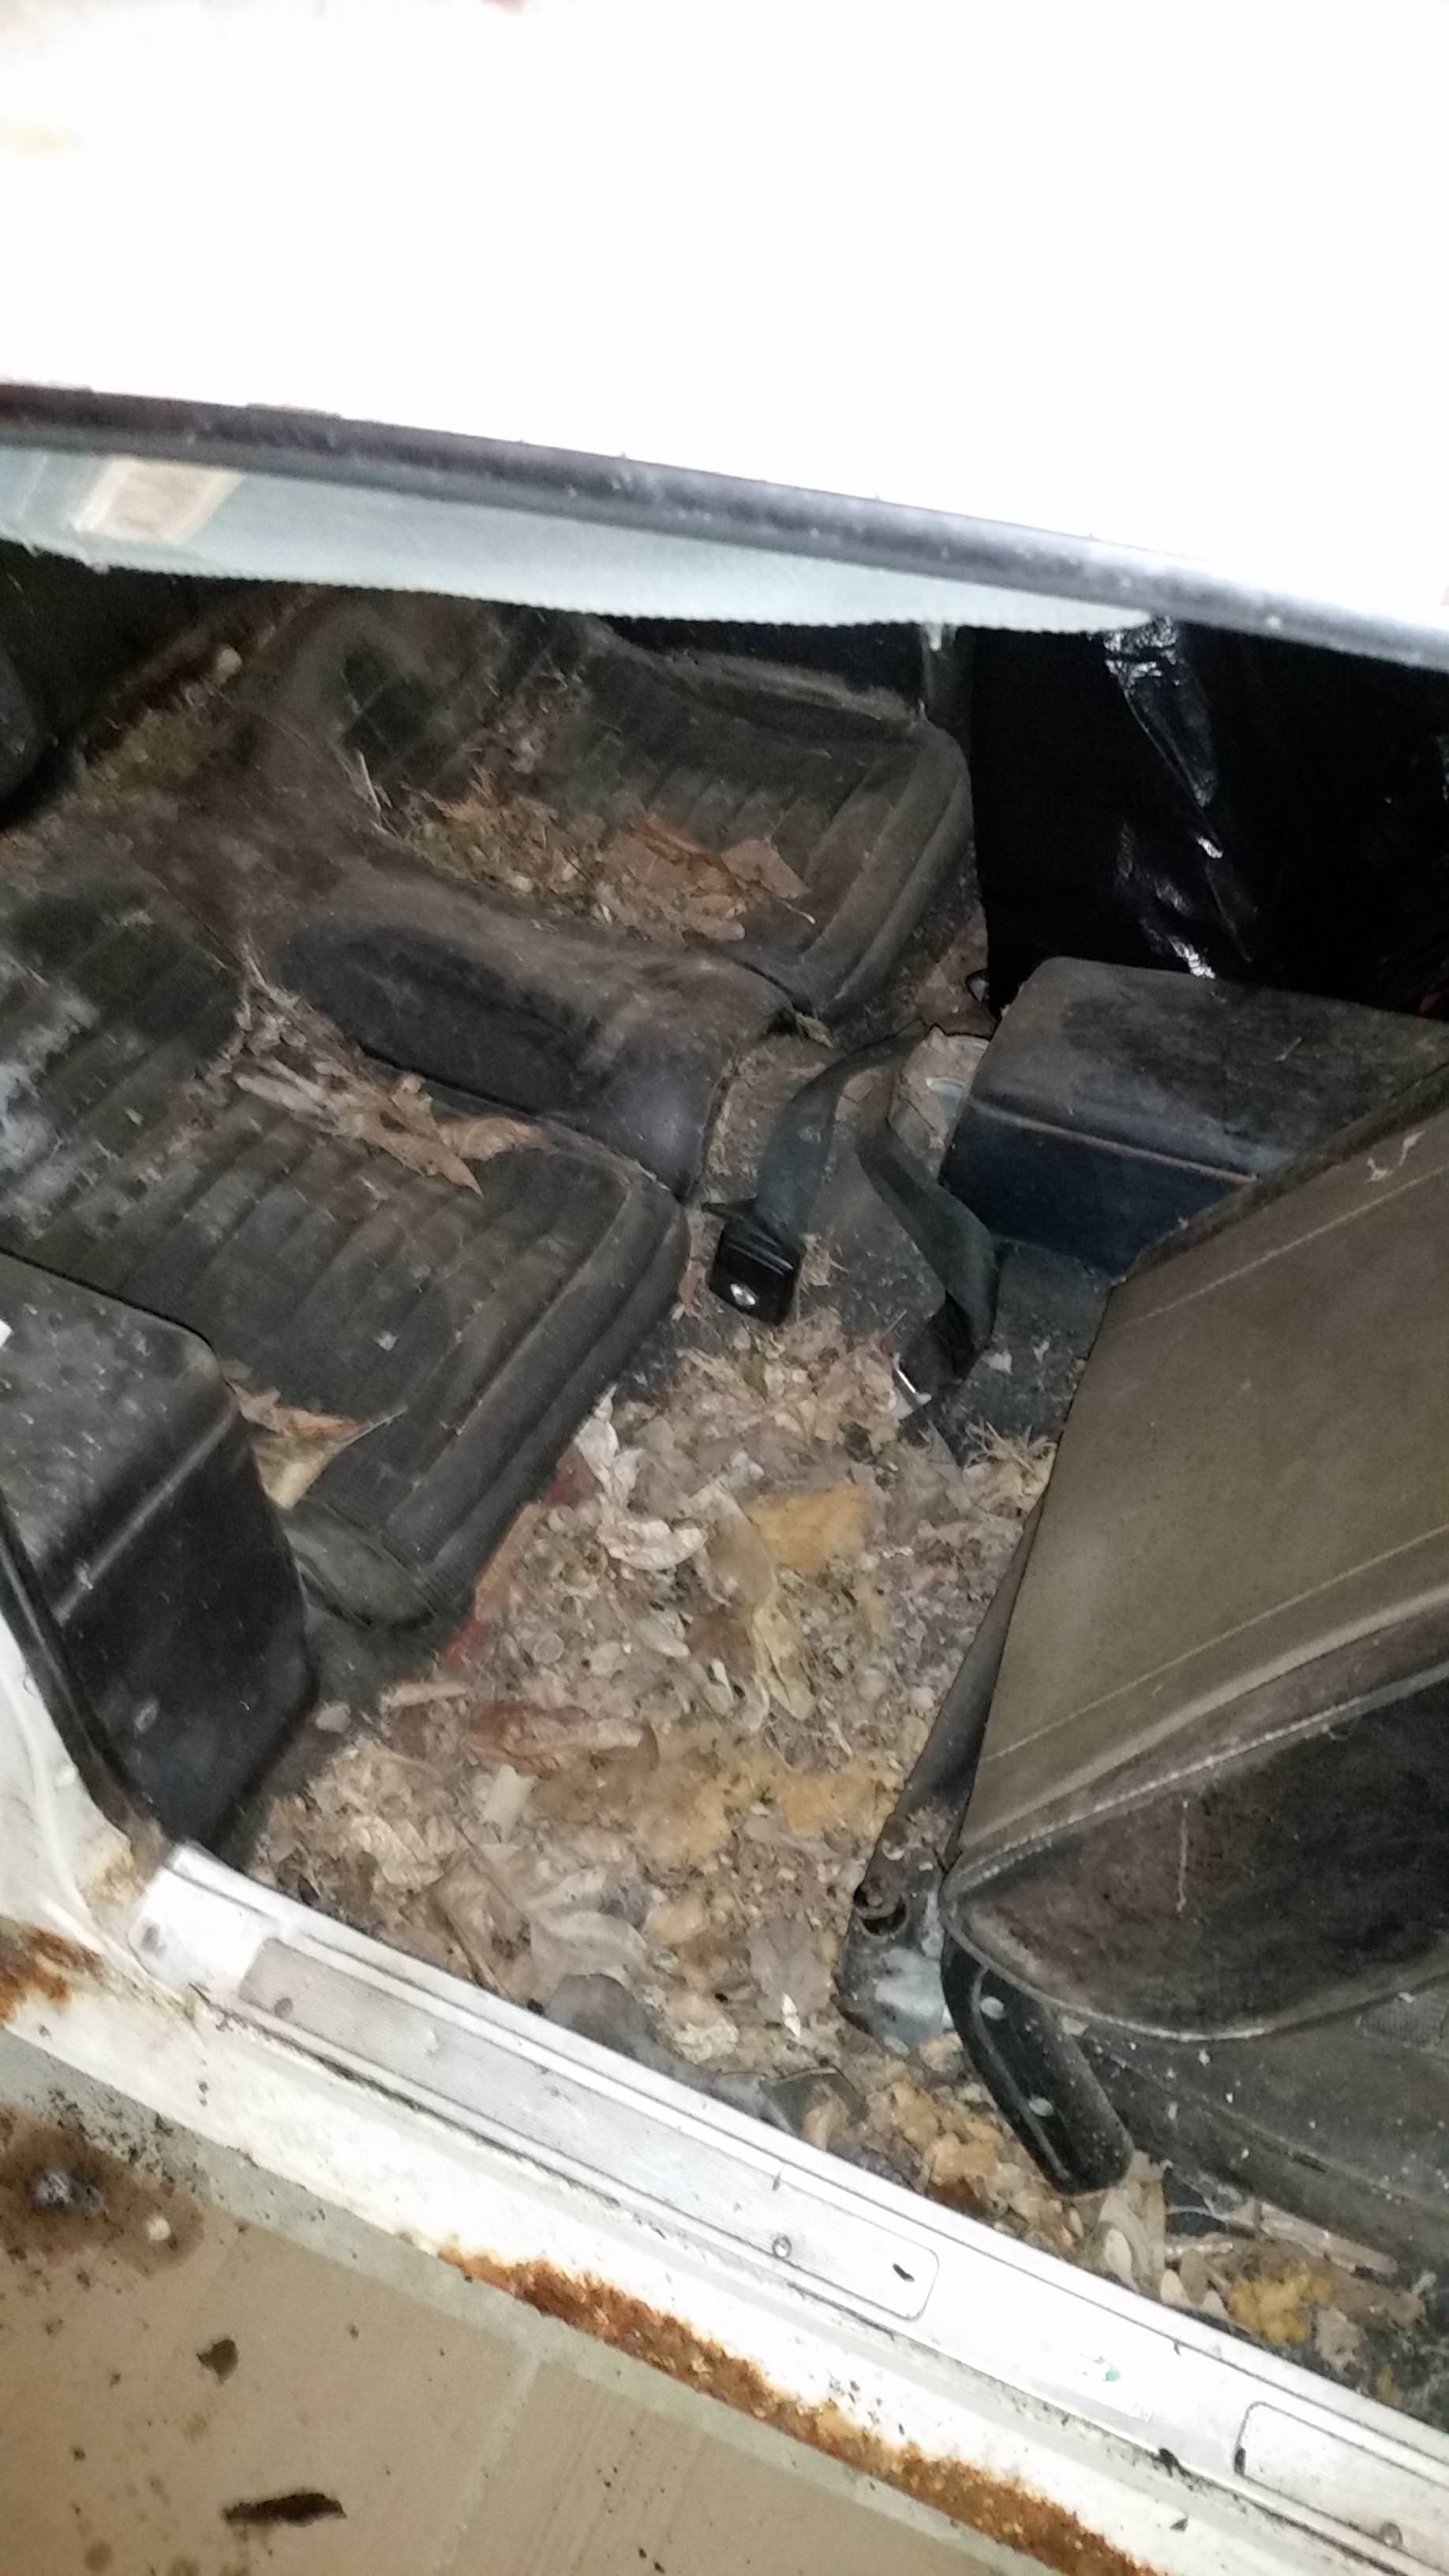
With the doors opened, I commenced project Yersinia Pestis (Plague) Eradication. It took several days to get the car cleaned out and eliminate all the potential health hazards.
After a couple hours with a shop vac, I still had plenty of filth in the interior.
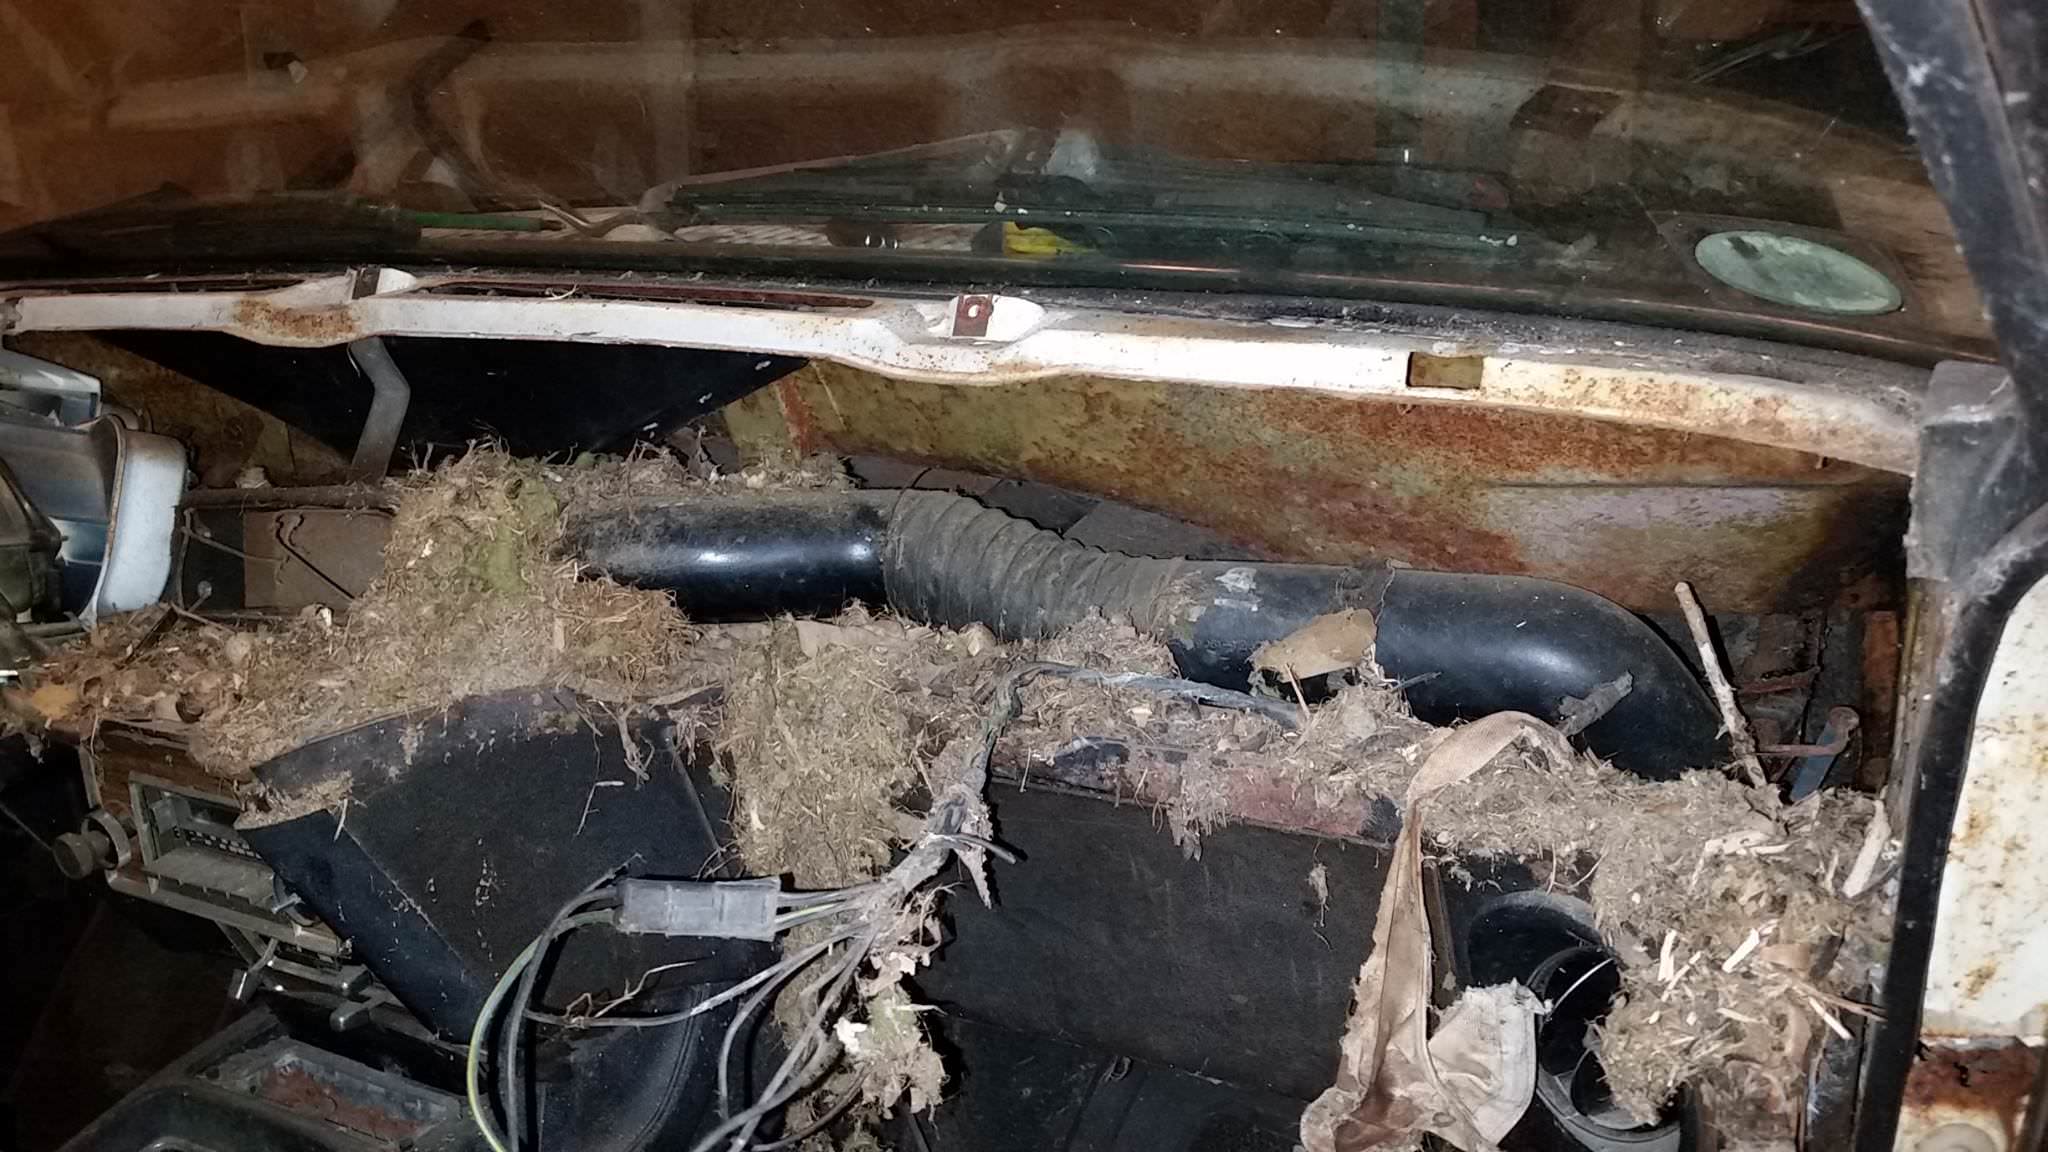
Finally got around to the dash...I don't even know how this much stuff got in there.
Eventually the console came out, revealing even more disease infested stuff.
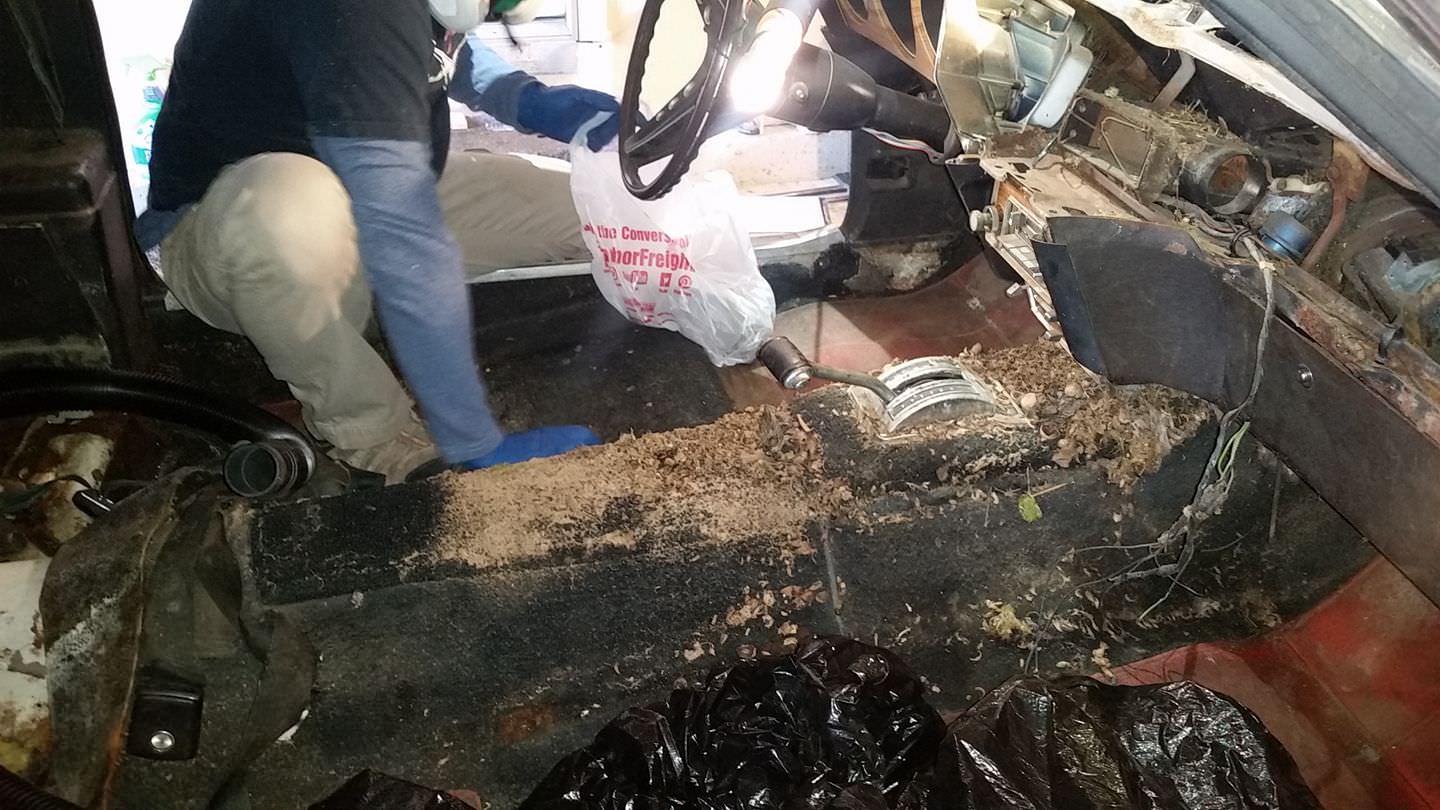
After removing the carpet and enough rodent droppings, decayed nuts and desiccated animal parts, I'm, ready to start on the important stuff: Getting the hood open and off, so I can pull the engine and inspect the front fame rails.Last edited by mts23; 08-02-2017 at 04:02 PM. Reason: update old photobucket links
04-04-2017 #5
Registered User
- Join Date
- Jun 2016
- Location
- MD
- Posts
- 17
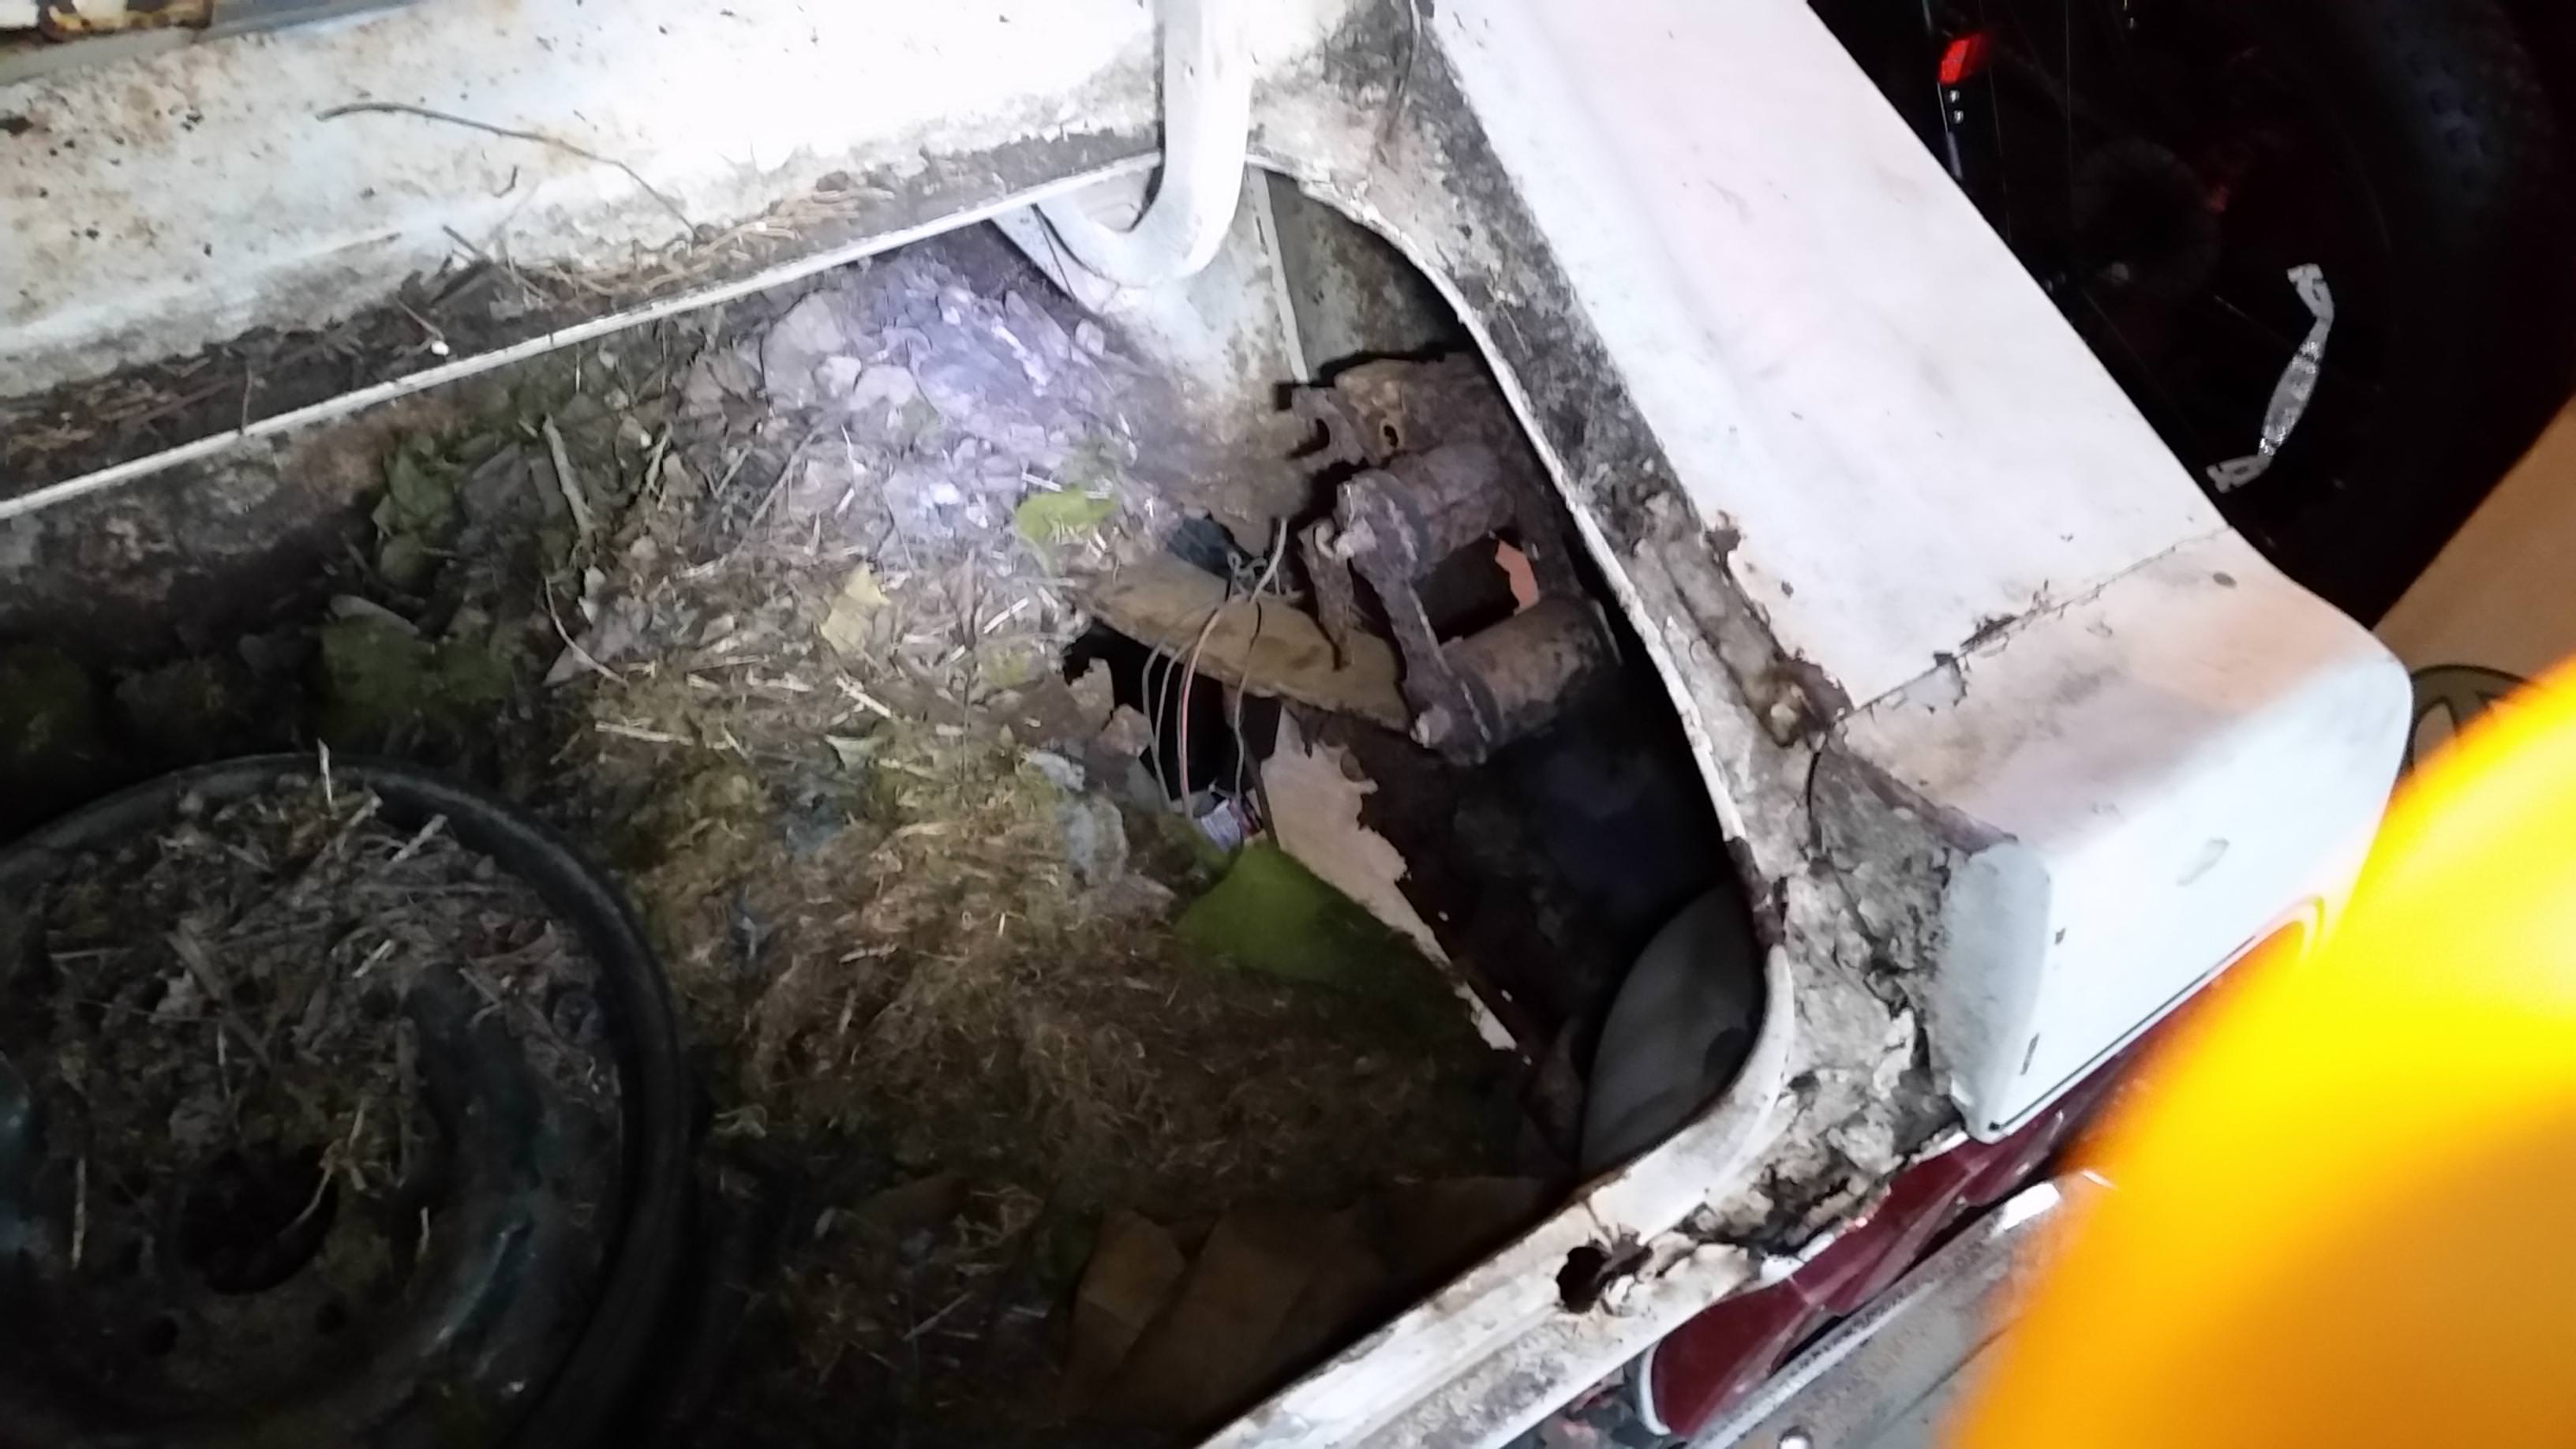
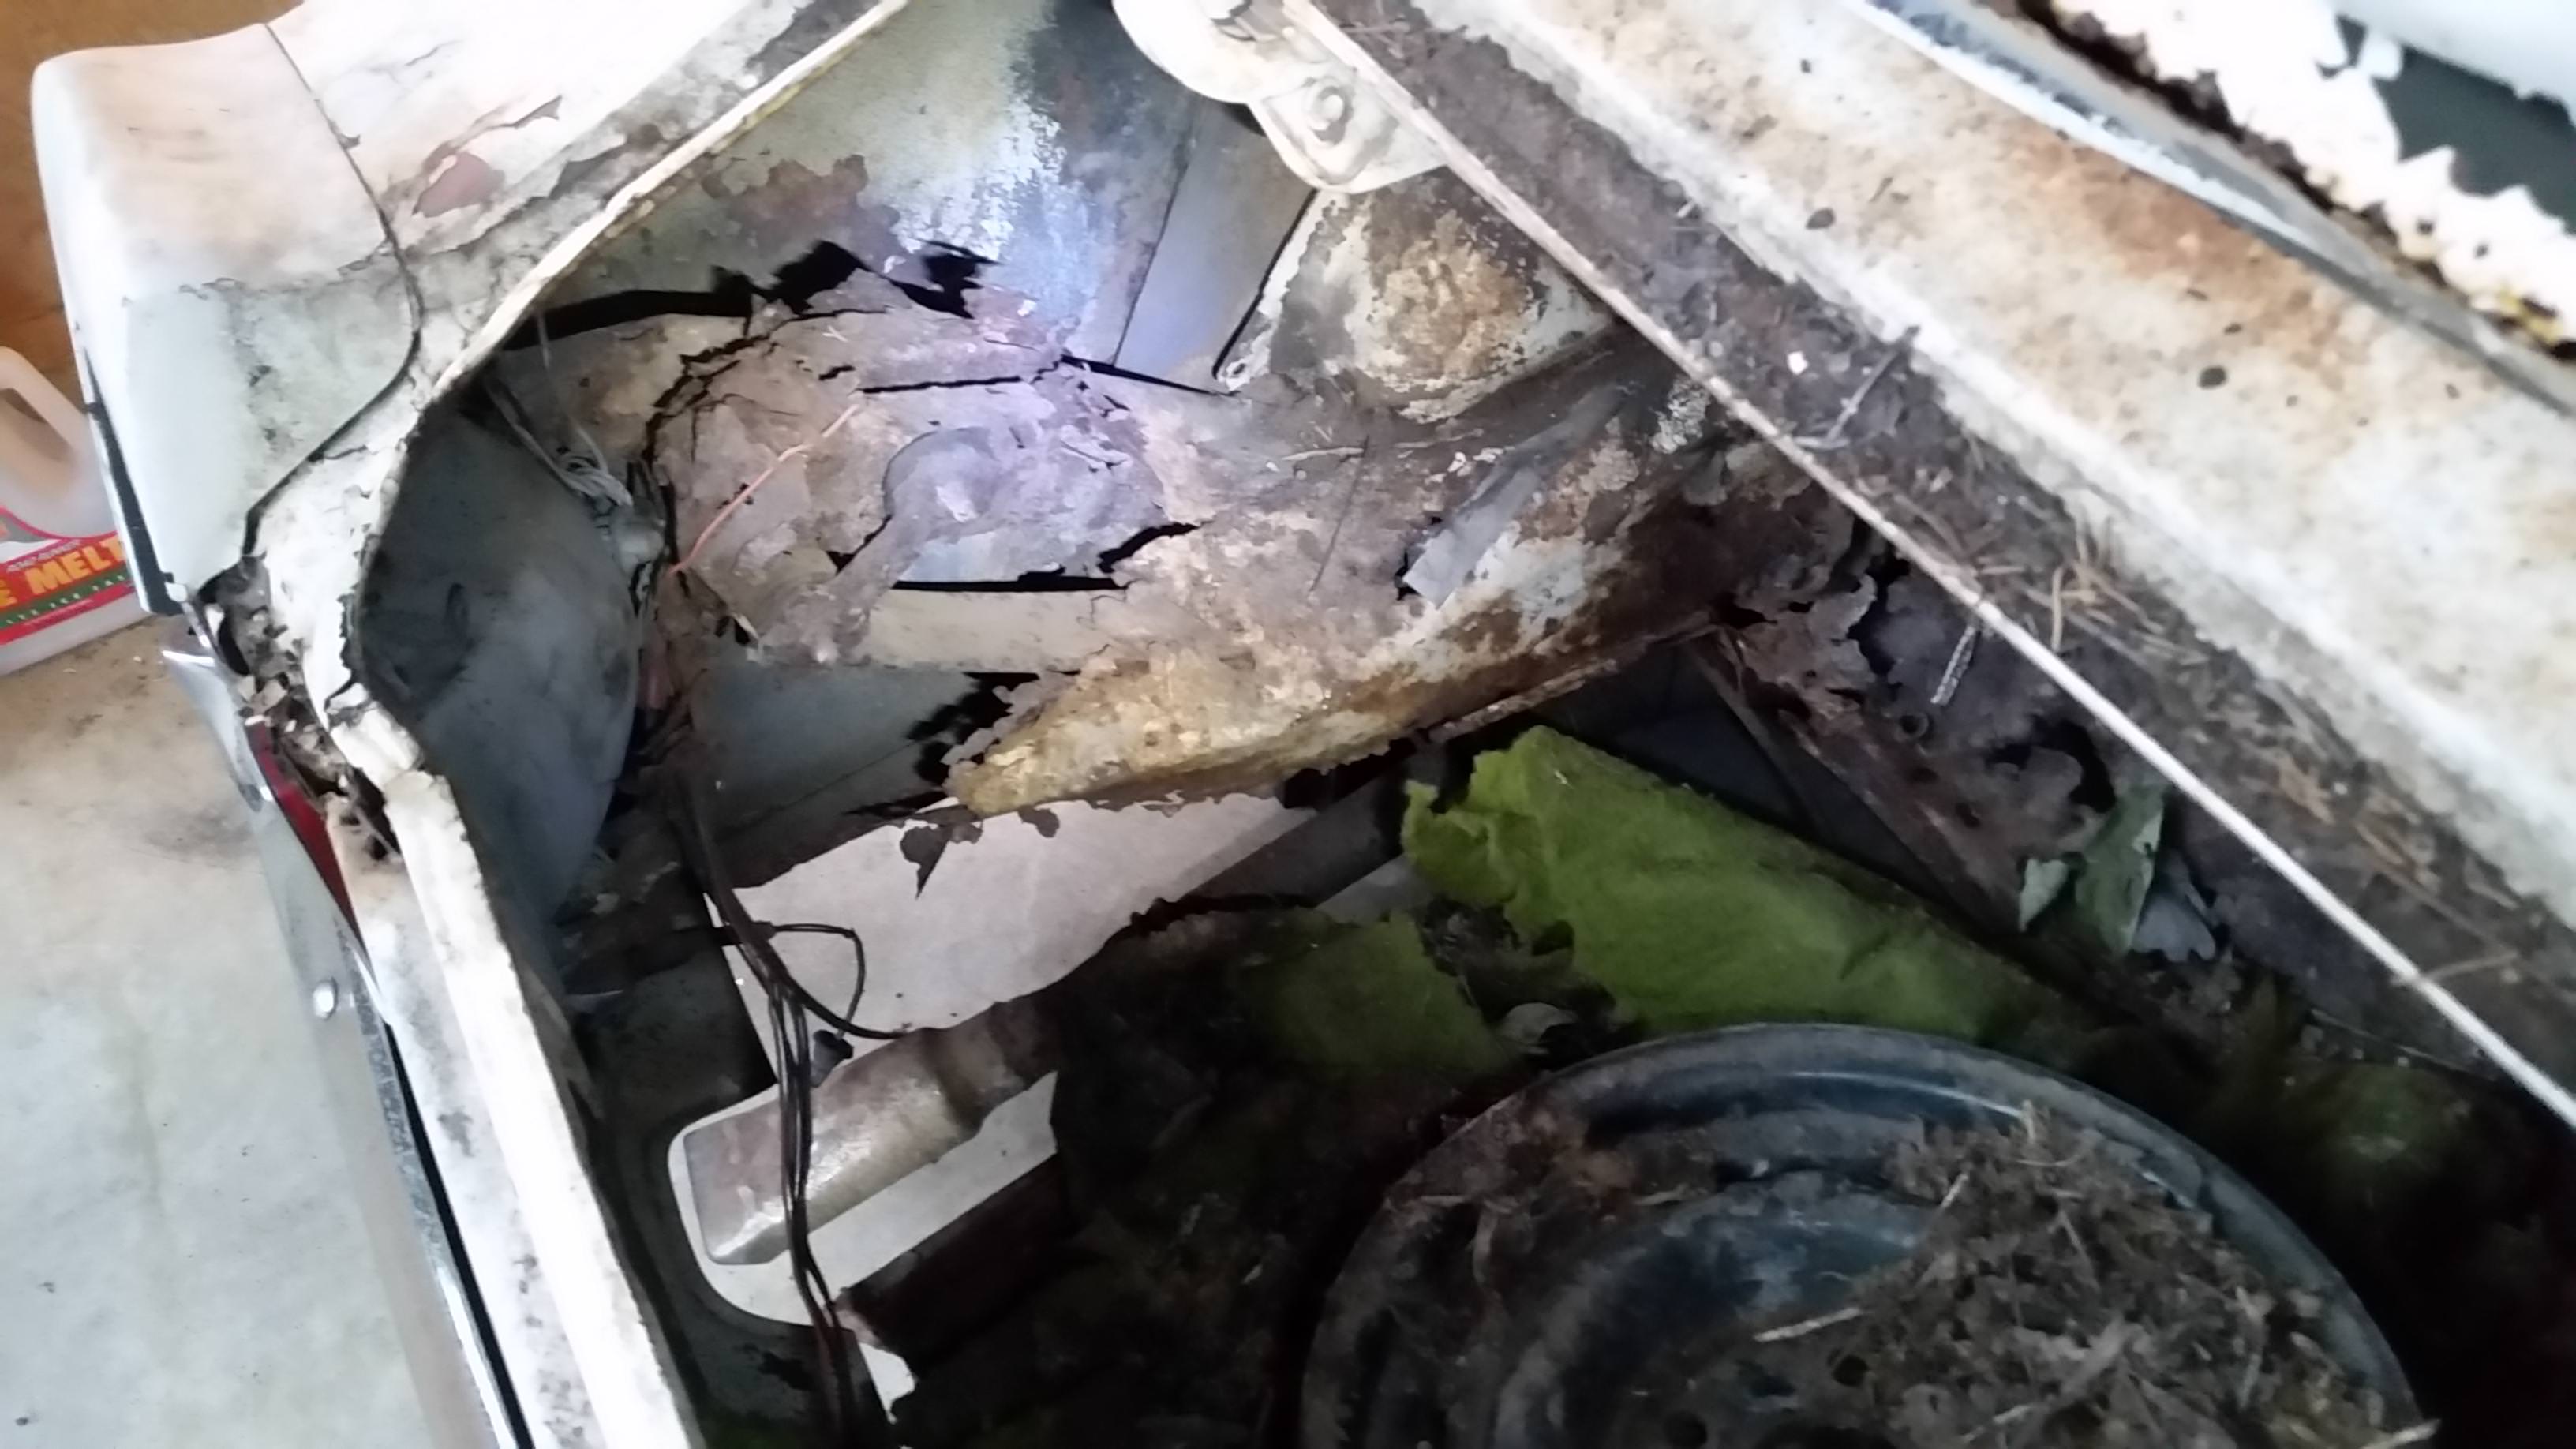
Before I got to the hood, I decided to pick the trunk lock and see if anything was in it.
Nope, nothing, not even a trunk pan!
I did find out why it sat so low in the rear, though. Some sort of floating leaf spring relocation modification had been done on the car in the past. I'm envisioning a 8.8 with a torque arm set up taking the place of the 9 inch and leaf springs.
04-04-2017 #6
Registered User
- Join Date
- Dec 2004
- Location
- Central MA
- Posts
- 39
Great read!! Appreciate the entertainment on a Tuesday nite! Rock on!! Wish you all the best and already looking forward to your next post. I'm in!
04-05-2017 #7 -Moderator/Sponsor-
- Join Date
- Apr 2001
- Location
- The City of Fountains
- Posts
- 16,125
Looking forward to more updates!
Andrew1970 GTO Version 3.0
1967 Cougar build
GM High-Tech Performance feature
My YouTube Channel Please Subscribe!
Instagram @dr__efi
I deliver what EFI promises.
Remote Holley EFI tuning.
Please get in touch if I can be of service.
"You were the gun, your voice was the trigger, your bravery was the barrel, your eyes were the bullets." ~ Her
04-05-2017 #8
Registered User
- Join Date
- Jul 2005
- Location
- Houston
- Posts
- 93
prayers sent your way! good luck
04-05-2017 #9
Registered User
- Join Date
- Jun 2016
- Location
- MD
- Posts
- 17
Got the hood latch undone and the hood raised.
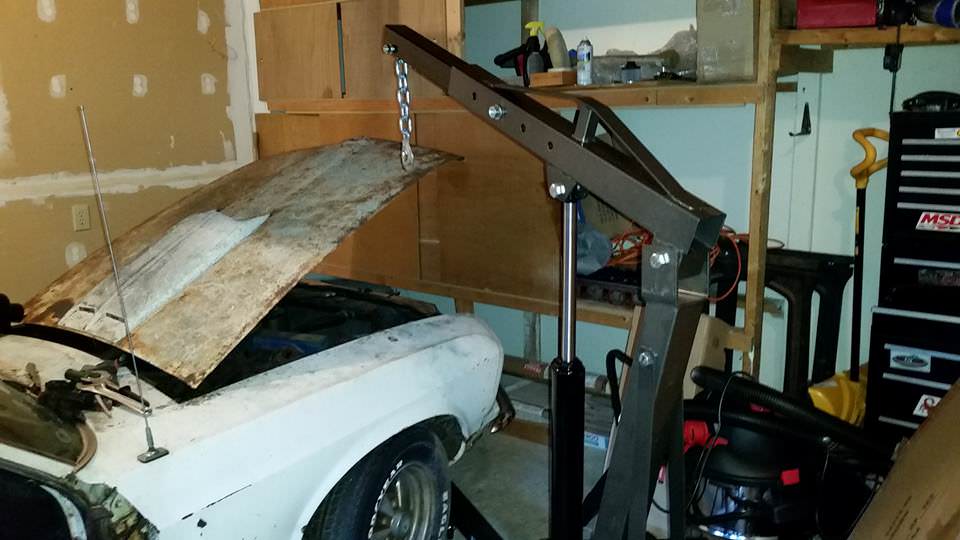
This is what was under the hood...I don't know if it is as engine or just a pile of hoses and rust.
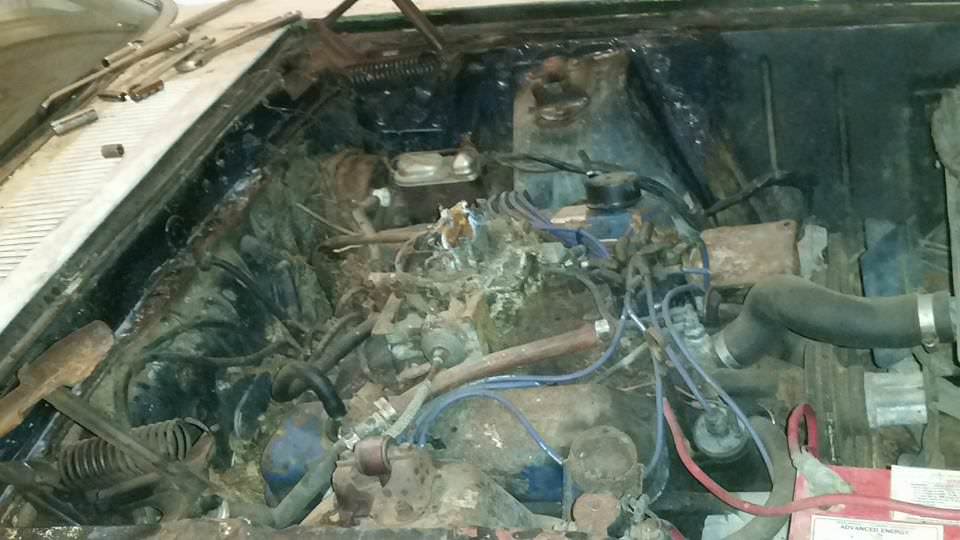
The inner fender/aprons were crumbling apart and held in place with some stuff that looked like asphalt roofing material.
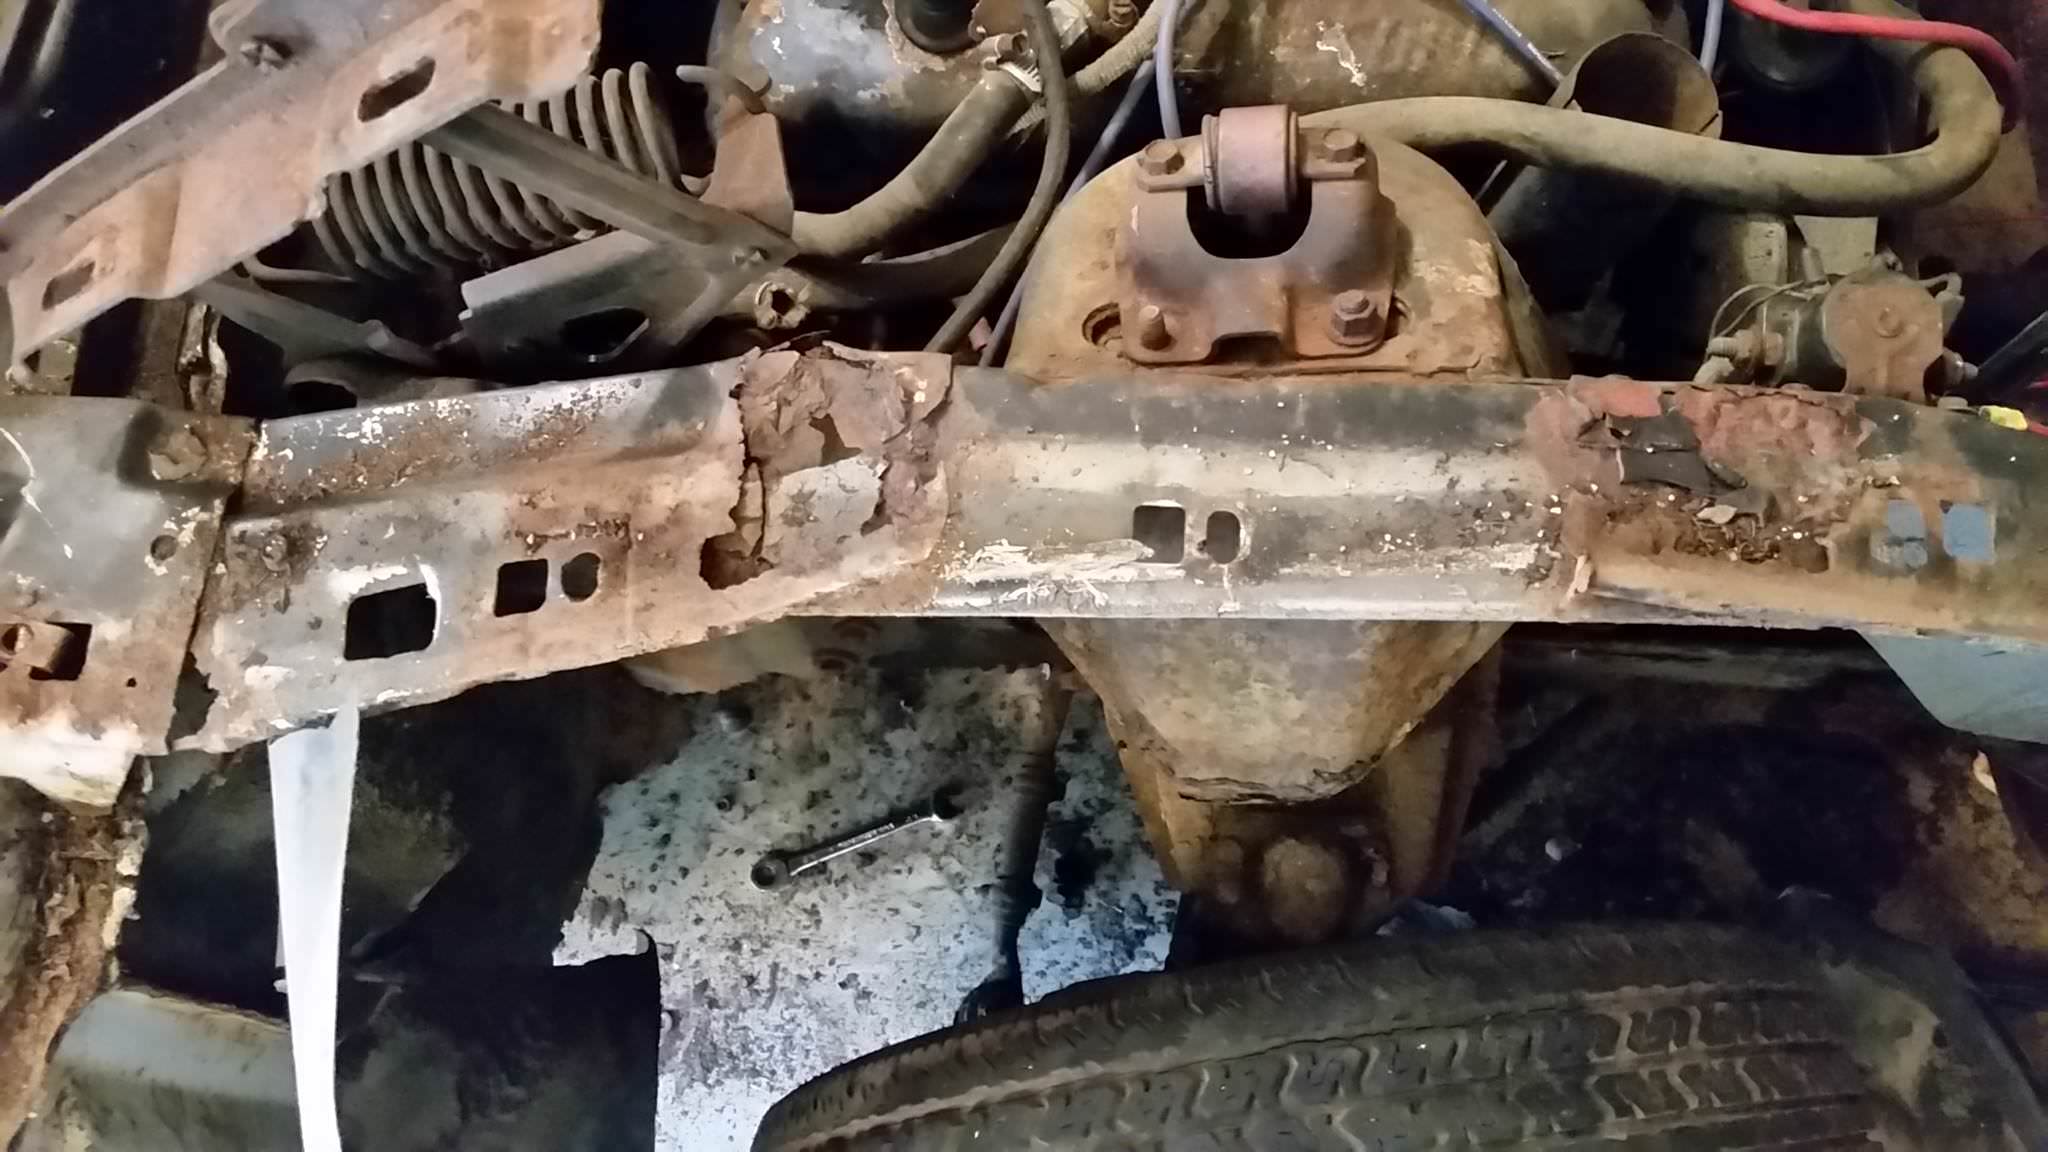
Surprisingly enough the engine would turn over with a breaker bar, so it may be usable. Now if it would just come out easily!
04-07-2017 #10 Registered User
- Join Date
- Oct 2009
- Location
- CT.
- Posts
- 742
Good read, looks like a fun project.
Glenn
1955 Chevy BelAir
1951 Chevy 3100
1987 Chevy Silverado
My last project....
https://www.pro-touring.com/threads/...my-72-Maverick!!
04-07-2017 #11
Registered User
- Join Date
- Aug 2007
- Location
- Jonesboro, Arkansas
- Posts
- 2,506
Man, you've got your work cut out! I can't believe all the critters that have set up home in that car!
Carl Wilson
1968 Camaro - T-56 6 speed - 383 Stroker, 2014 Mustang GT seats. FiTech EFI, Tanks Inc. Tank with Deutschwerks fuel pump.
04-07-2017 #12 Registered User
- Join Date
- Nov 2010
- Location
- Ma.
- Posts
- 579
You're a brave man, best of luck on the build....
04-07-2017 #13
Registered User
- Join Date
- Oct 2012
- Posts
- 118
Sad to say it but this looks like one of those cars where you have the A pillars and the vin tag left to build from. I hope it just looks that way and you have more than that, best of luck.
Eddie
04-10-2017 #14
Registered User
- Join Date
- Jun 2016
- Location
- MD
- Posts
- 17
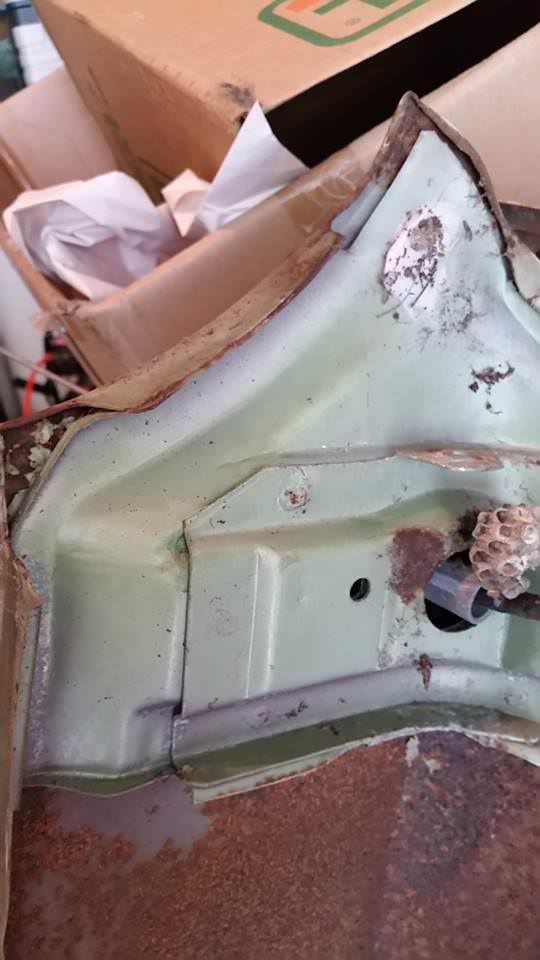
Got around to getting the engine out. Started by removing the front clip. One of the fenders was green and had evidence of more animal life taking up residence in the car.
Getting ready to pull the engine, hoping the front subframe doesn't rip away from the car just yet.
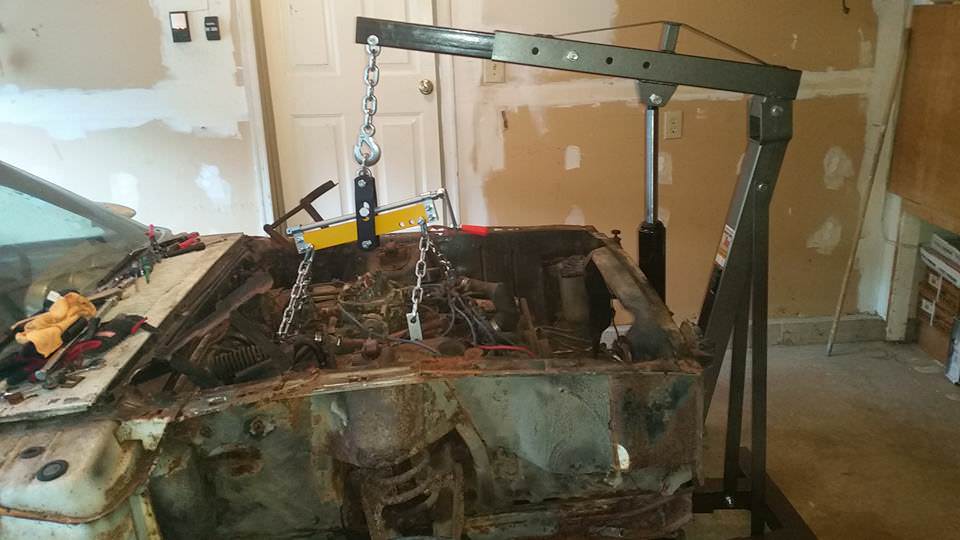
The transmission crossmember was rusted in place and I couldn't get the bolts to turn. I was bent on pulling the engine and transmission in one piece. Enter the Sawzall!
5 Minutes later and it's FREE!
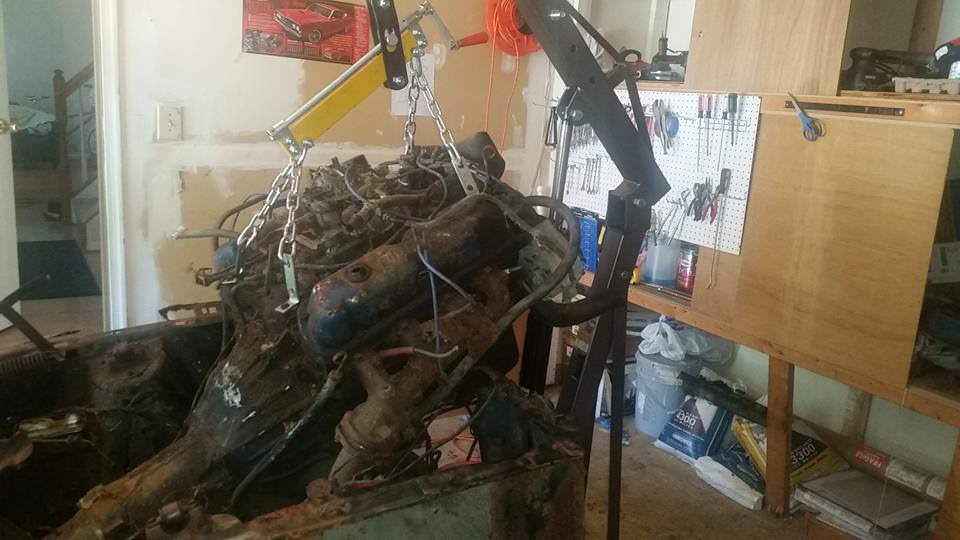
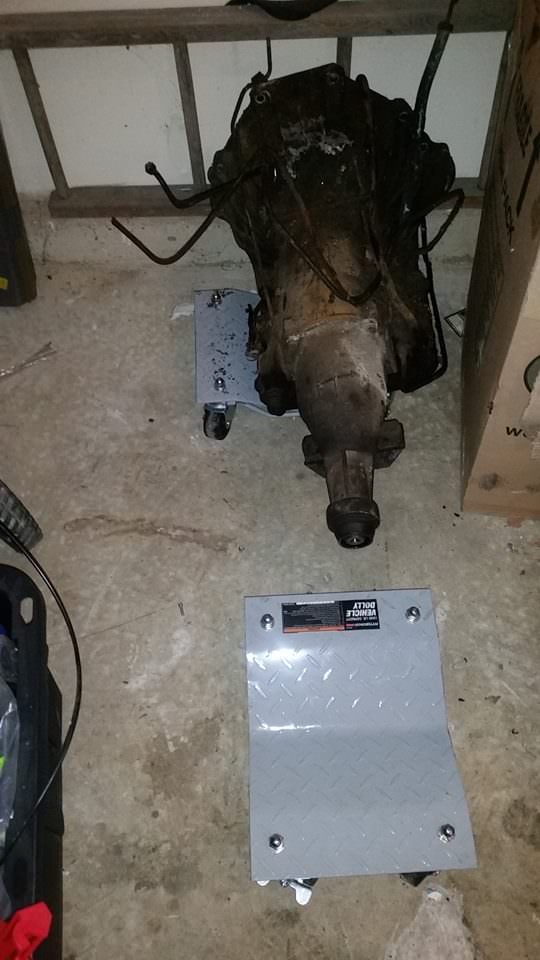
Two things I learned: #1 the engine turns over easily. I may have a rebuildable block (If I don't go with a 4V 5.4 or a newer 351W) and second, while I found these style of wheel dollies to be almost totally useless for moving the car car around, they do make a great FMX transmission dolly.
04-10-2017 #15
Registered User
- Join Date
- Jun 2016
- Location
- MD
- Posts
- 17
$149 for this:
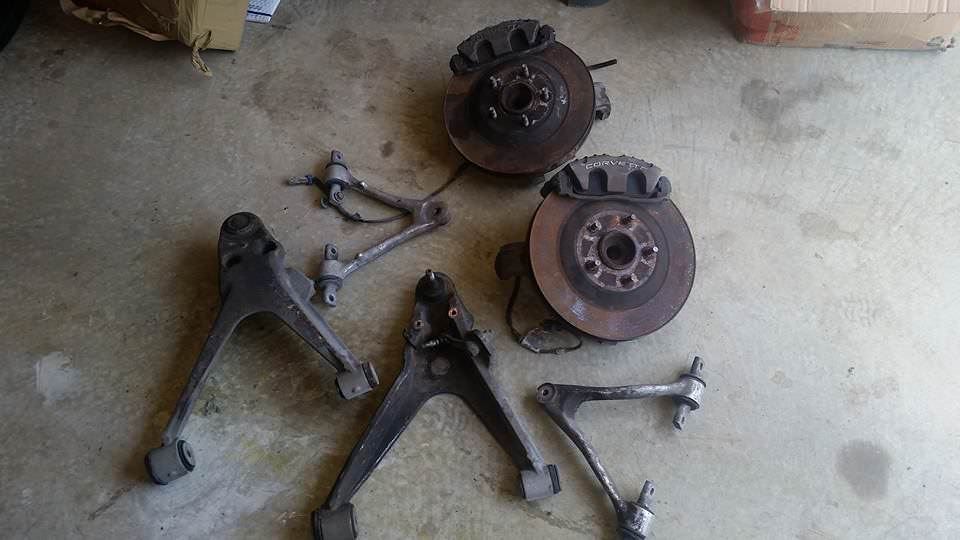
and 60 bucks for a cradle.
I can't be the only person mocking up a C5 front suspension in their living room...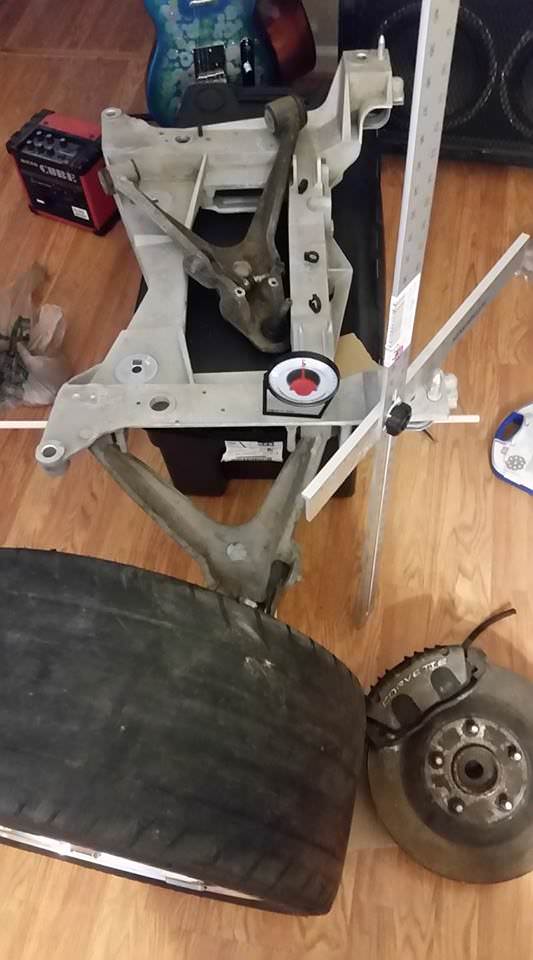
I'll mock the front up based on normal C5 specs and design the front frame rails from the cradle mount points and my desired ride height. I am guessing that if GM can bolt these things on, then I should be able to as well.
04-11-2017 #16 Registered User
- Join Date
- Apr 2015
- Location
- Burlington KY
- Posts
- 357
if you havent, you need to look up the $5000 wide body mustang on here. Was the first post i ever read on this forum and looks much like where you are (or need to be) headed. Good luck.
"Racing is life. Everything else is just, waiting"
04-12-2017 #17
Registered User
- Join Date
- Jun 2016
- Location
- MD
- Posts
- 17
xsboost90, that $5k Mustang is what originally got me interested in using the c5/c6 front suspension and going the route I am with a rusted out shell instead of a much nicer starting point. I am not quite the fabricator that Ron is, but I can get by. Hopefully, I'll have the car full-framed and turned into a roller with floor pans with steering and brakes by the end of the year.
With the engine out, I figured the next course of action was to remove the front suspension...
I came up with several methods to remove everything, but the sawzall seemed to be the quickest method.
There is no turning back now!
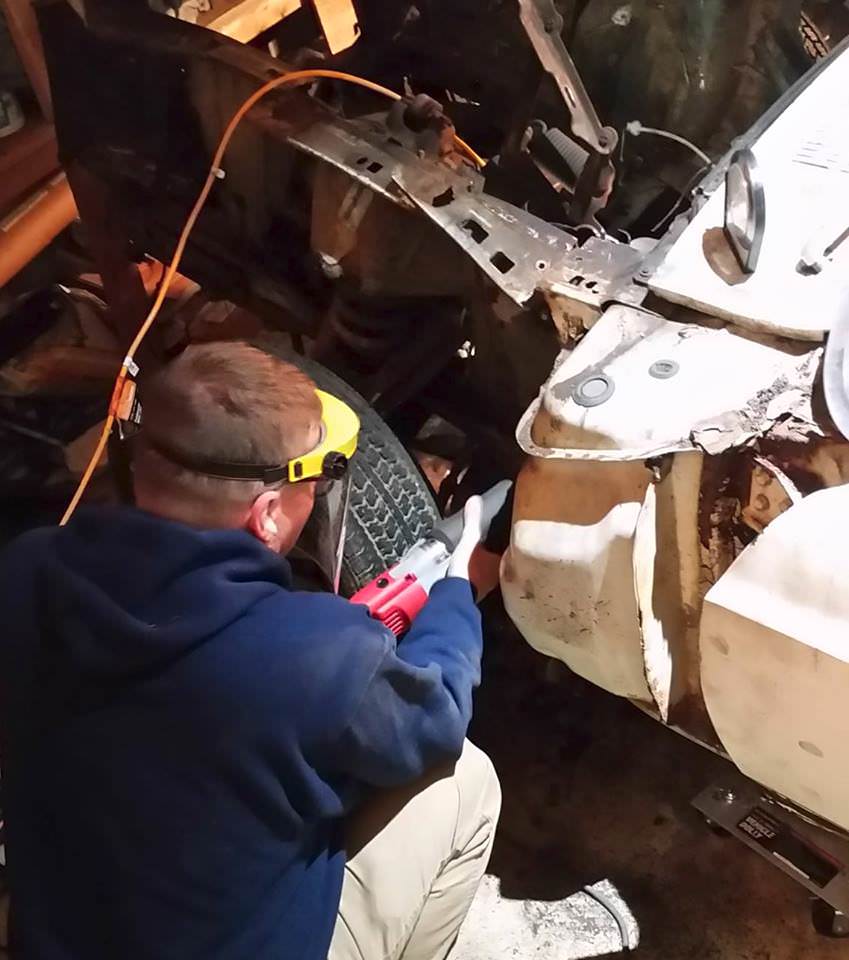
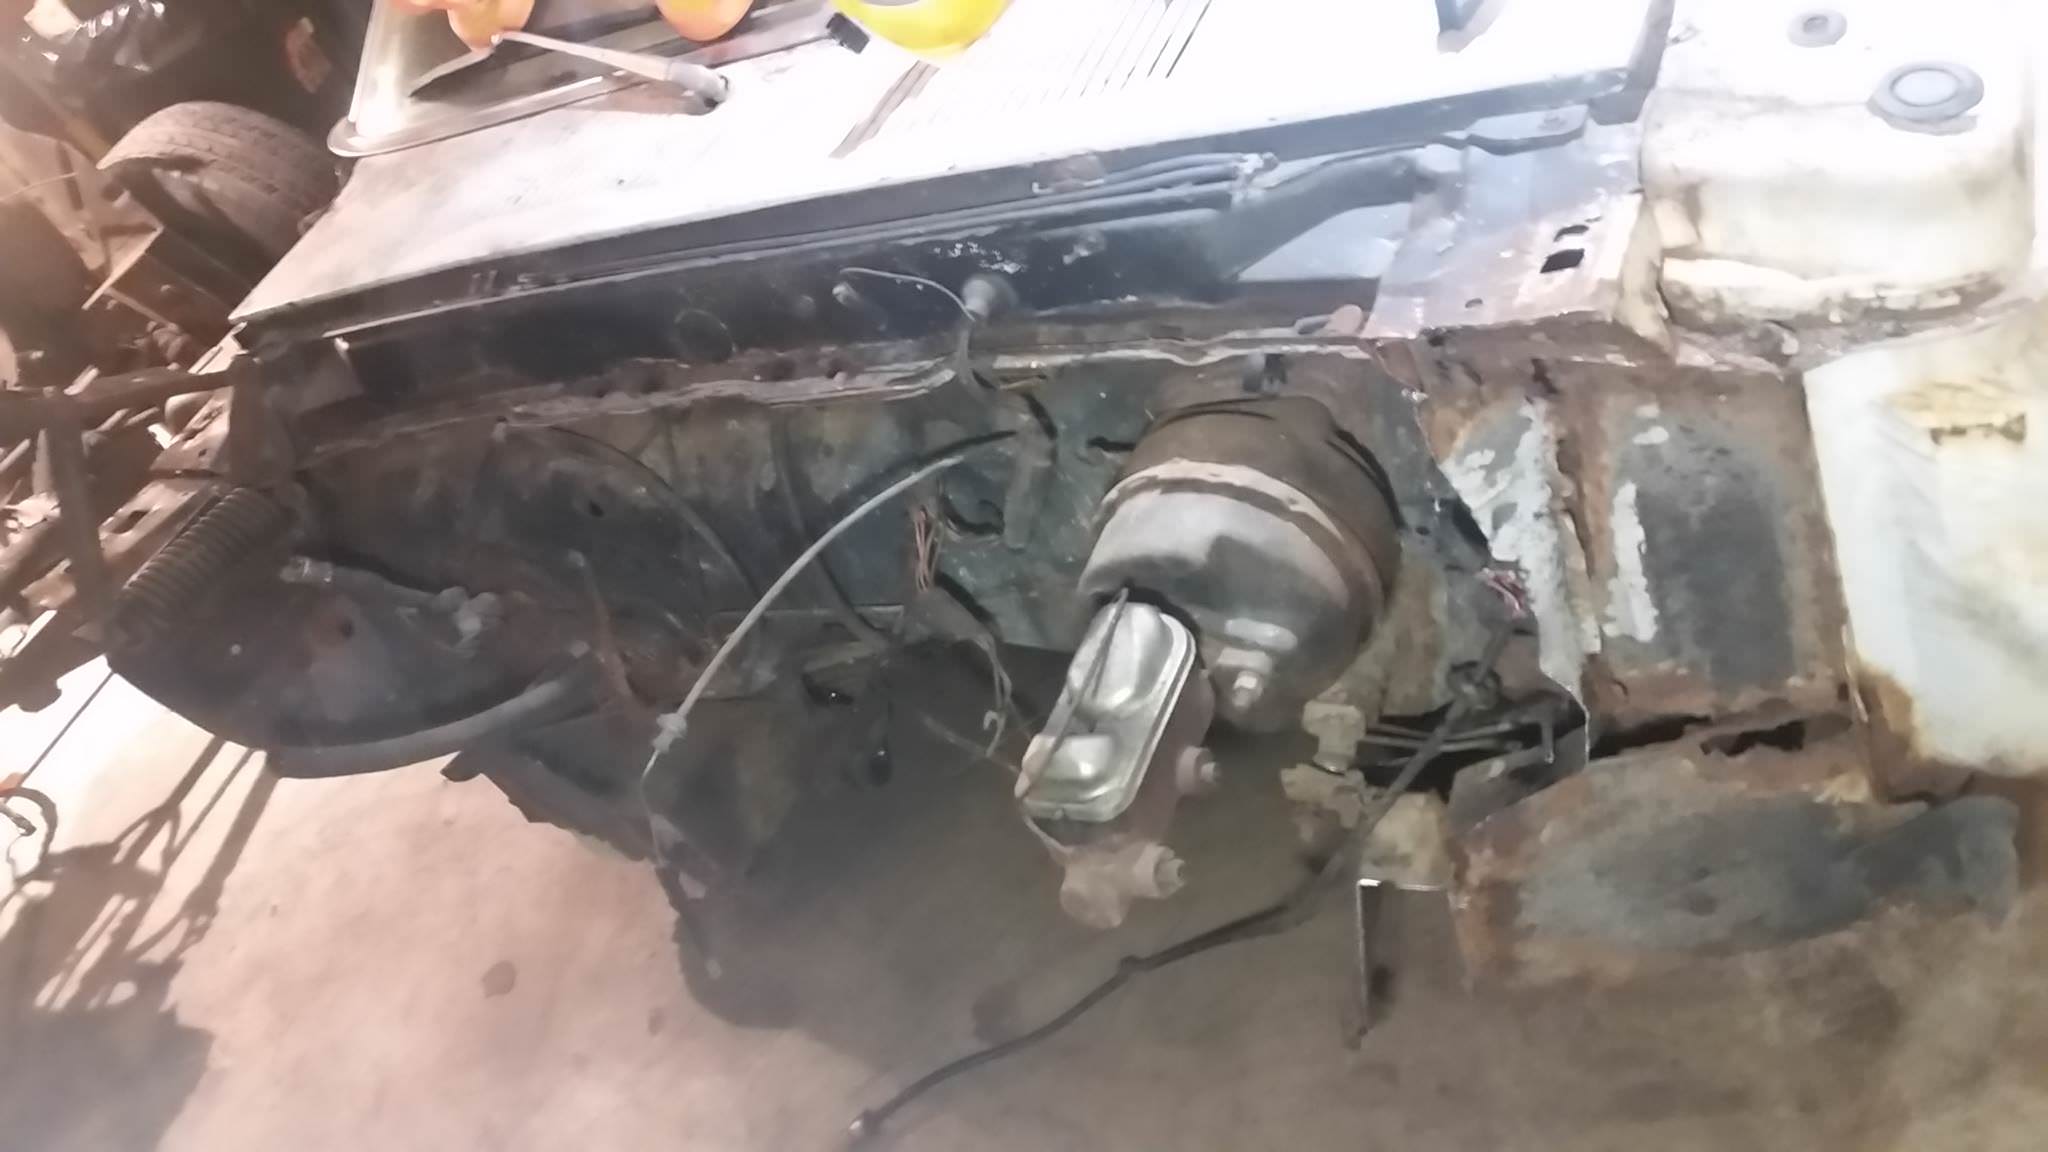
The firewall will come out, I'll need to set the engine back a few inches. Almost all of the cowl is in surprisingly good shape; I was worried I'd have to drill out all those spot welds and replace everything, but the only serious spot of rust will get removed for the engine setback.
The firewall will eventually get hacked up and replaced, but I'll try to leave most of it intact until the front frame rails are ready.
04-16-2017 #18
Registered User
- Join Date
- Jun 2016
- Location
- MD
- Posts
- 17
After a lot of measuring, calculating, more measuring and re-calculating, I ordered a set of front frame rails.
I called a bunch of places and got lots of great advice, but in the end, Art Morrison was the company who was able to deliver what I was looking for.
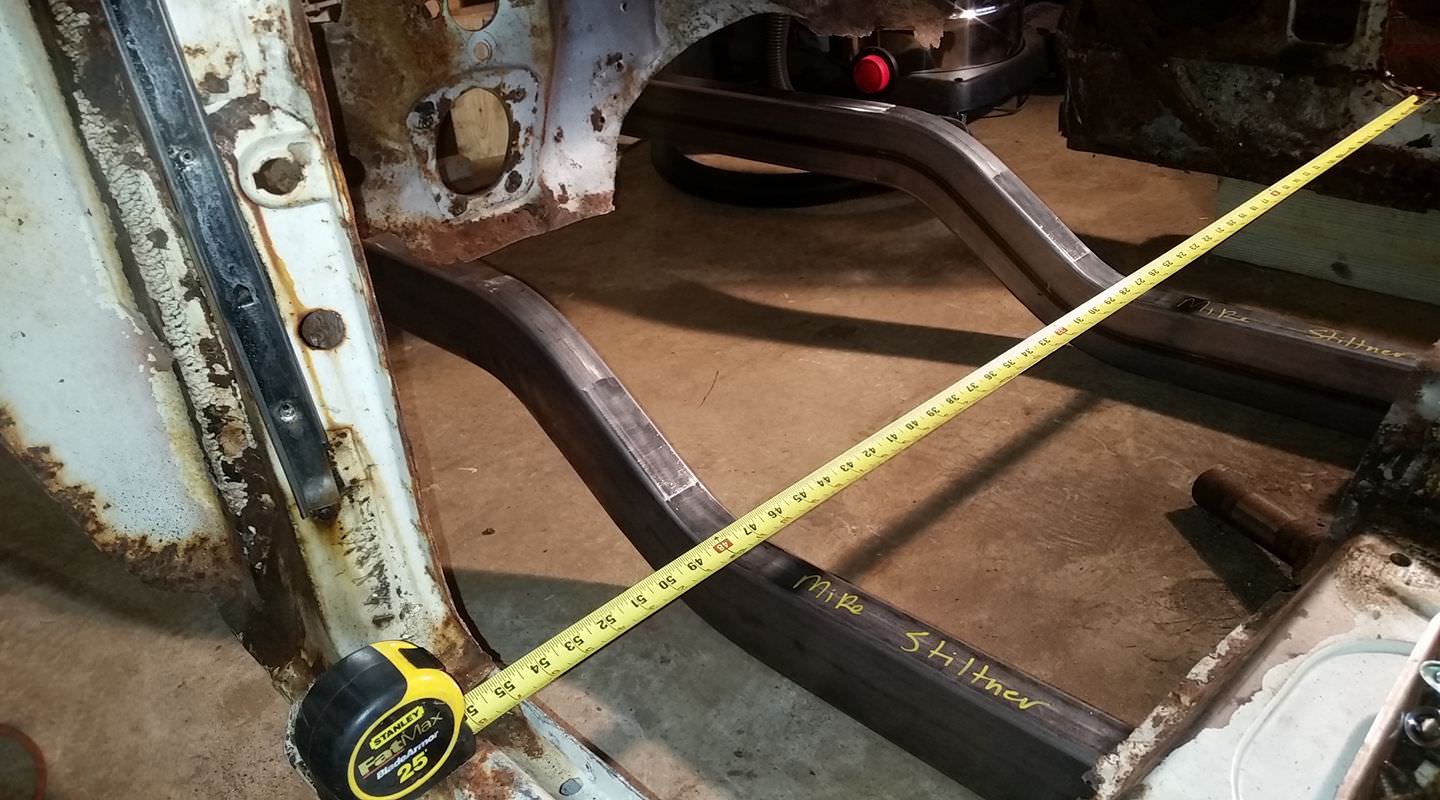
More measuring, adjusting, leveling, squaring up and remeasuring, leveling and adjusting repeated over and over and I finally I have something that is beginning to look like a project instead of a pile of scrap and animal remnants.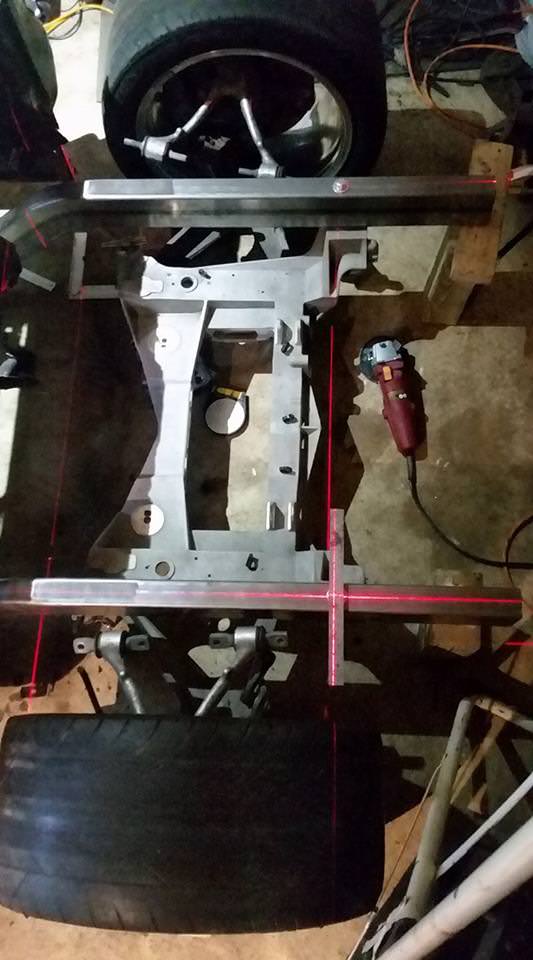
Once I had the C5 cradle and front suspension squared up, I was able to set the wheelbase. I tossed on one of the fenders to get an idea of how much hacking will be required to clear the front wheels. The front wheels are a set of oem vette 18 inch rims w/ 295 40s that I picked up for $200.
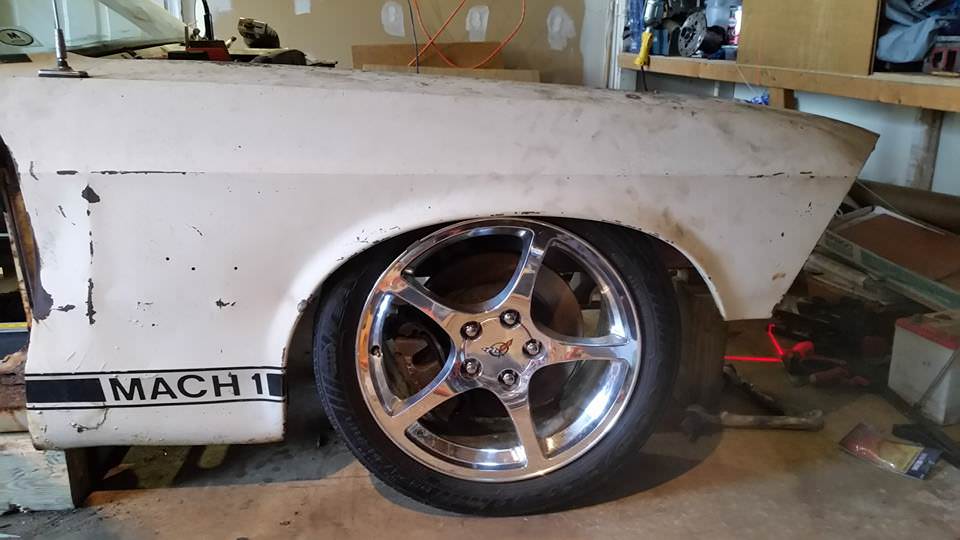
I ordered some rectangular tubing and some plate to start building the outriggers to install the front frame rails. I foresee a lot of measuring and adjusting followed by a lot of re-measuring and re-adjusting.
Thanks for looking,
Michael
04-16-2017 #19
Registered User
- Join Date
- Oct 2009
- Location
- CT.
- Posts
- 742
Hard to tell by that picture, but the wheel looks close to the fender as it is tucked up in there. Is there much room for turning radius?
Glenn
1955 Chevy BelAir
1951 Chevy 3100
1987 Chevy Silverado
My last project....
https://www.pro-touring.com/threads/...my-72-Maverick!!
04-16-2017 #20
Registered User
- Join Date
- Jun 2016
- Location
- MD
- Posts
- 17
Glenn, plenty of room in regards to the suspension and frame to turn, not so much with the fender. The fender is certainly going to require some cutting and rework to fit properly. I kept the C5 track width, so it's about 4.25 inches or so wider than the original Mustang track width of 59 and something inches not including the difference in wheel / tire size. I'll need to flare the fronts about 2.5 inches each. Anvil makes some sweet carbon fiber fenders, but they would more than likely blow the budget.

 Reply With Quote


