Results 1 to 14 of 14
-
01-22-2016 #1
 Registered User
- Join Date
- Jan 2016
- Location
- South Shore, Mass
- Posts
- 13

1st Gen GTO, Square C10, and whatever else
I've been lurking on this site for a few years admiring all of the outstanding builds and learning a lot, so I figured I would finally sign up over here and introduce myself. I rent a small shop as a side hobby place to work on my cars, projects and some other peoples stuff. I've had my 84 c10 as a 4 or 5 year project now that im hoping to atleast take around the block this year, and theres also a 66 GTO that's getting some rust repair attention and some other changes along the way, as well as a '37 Plymouth coupe with Shockwaves up front and ridetech sleeve bags over a small leaf pack out back that's been collecting dust, waiting its turn to be put back together.
I have quite a few pictures, so I figure I will start with some GTO
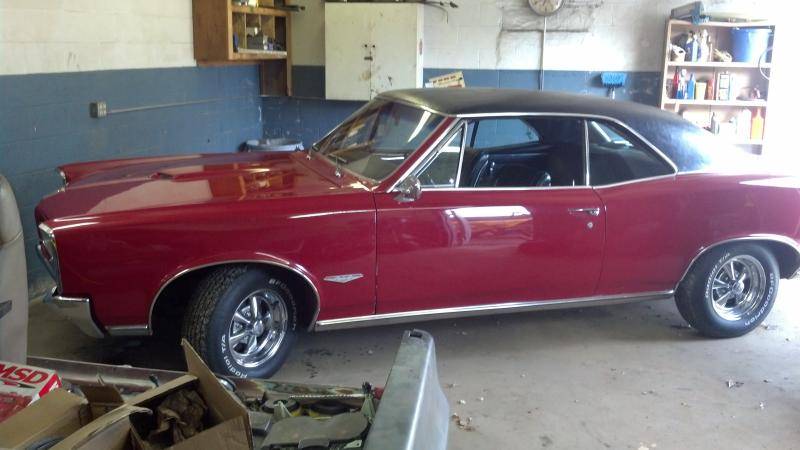
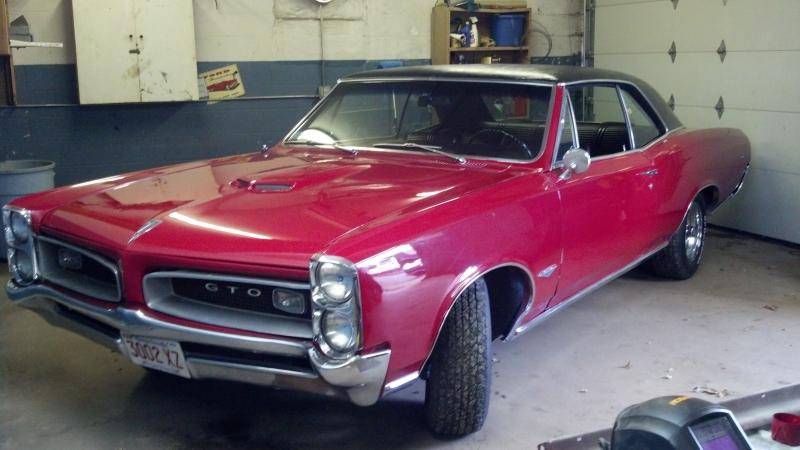
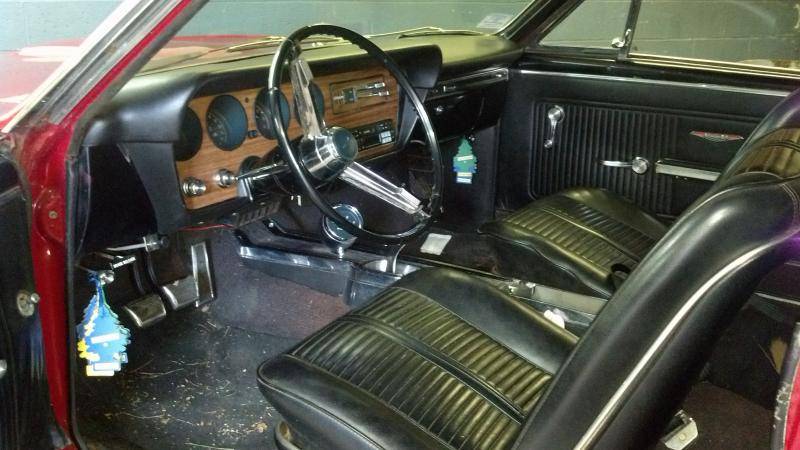
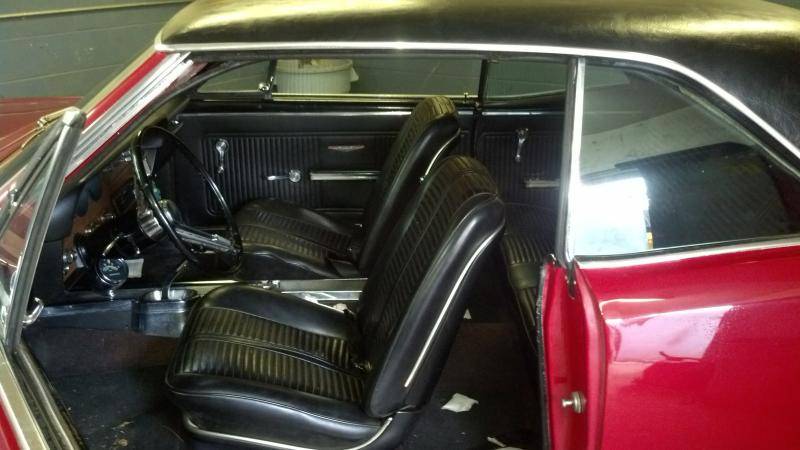
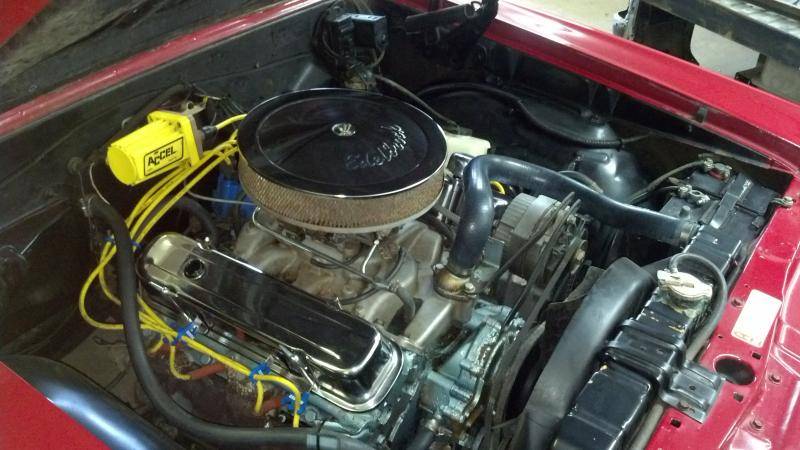
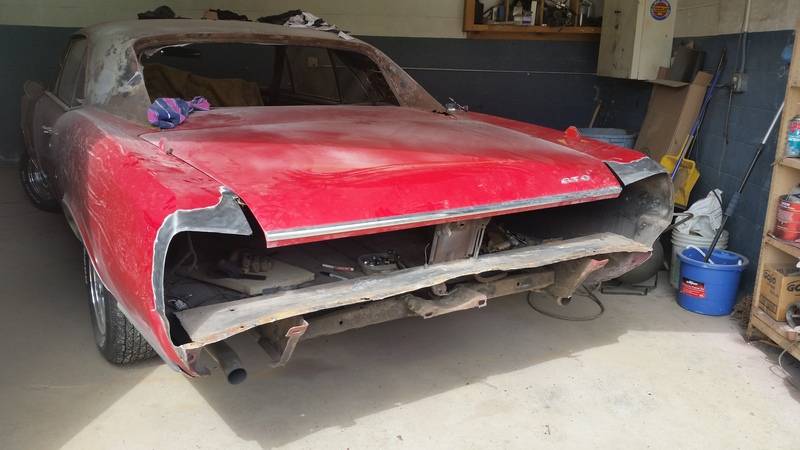
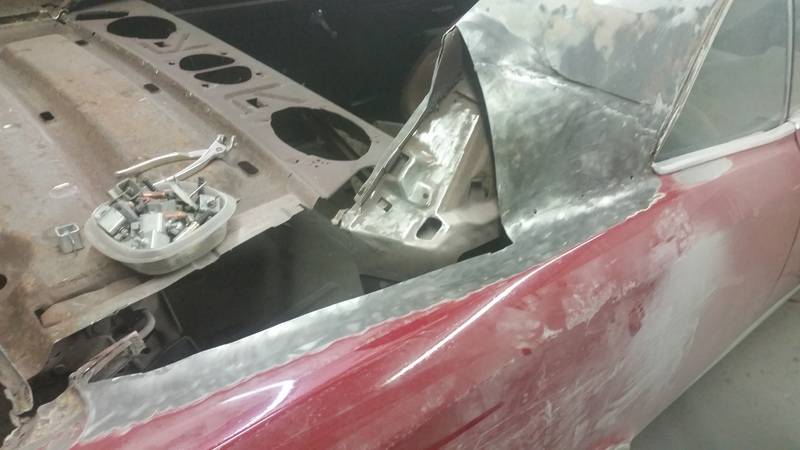
66 GTO, matching #'s 389 in front of what I believe is the orginal 4speed with manual drums all around. owner has had it for close to 20 years and is starting to show its age after its last round of bodywork right after he bought it. A lot of brazing, pop rivets, underlapped patch panels and a lot of old bondo, some of it still soft. Plans are to fix all of the sheet metal that is needed, discs up front atleast, and either a Wilwood manual MC and pedal assembly, or add a booster and correct MC and pedal, and he is looking at options for a budget friendlier 5 speed, and some slightly bigger wheels than the 14s that are on it now. Engine will be coming out for some cleaning and I think he wants the heads done over, from the Engine builder/ machine shop out front who also happens to have several nitro and funny cars.
****A lot of this will be copied and pasted from an ongoing thread I have on a c10 forum, so if the writing sounds weird, blame it being out of context and not all just me being absent minded!
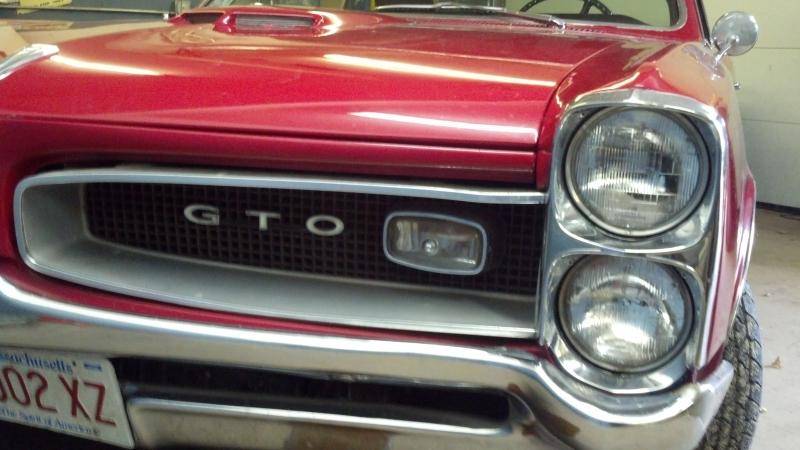
Original 389!
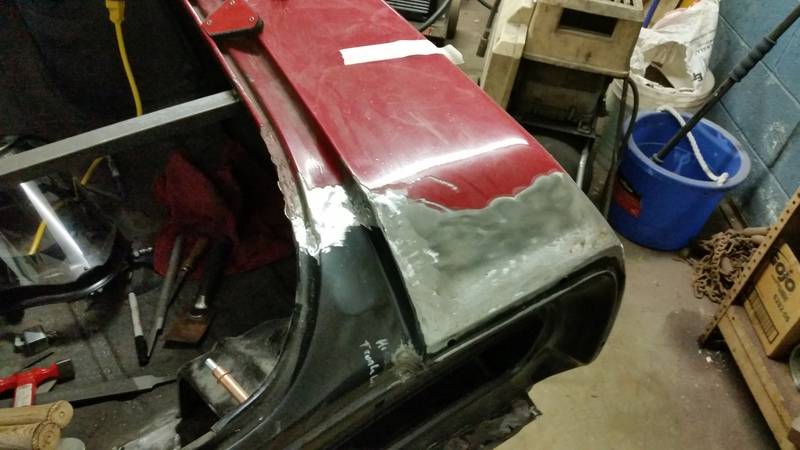
i was concerned about the areas around the drip rails with the polished trim and assumed it would be pretty far gone but i was actually pleasantly surprised with THOSE areas as well as the roof overall looks perfect. when the glass is pulled, we will have to see those hidden trim areas look.
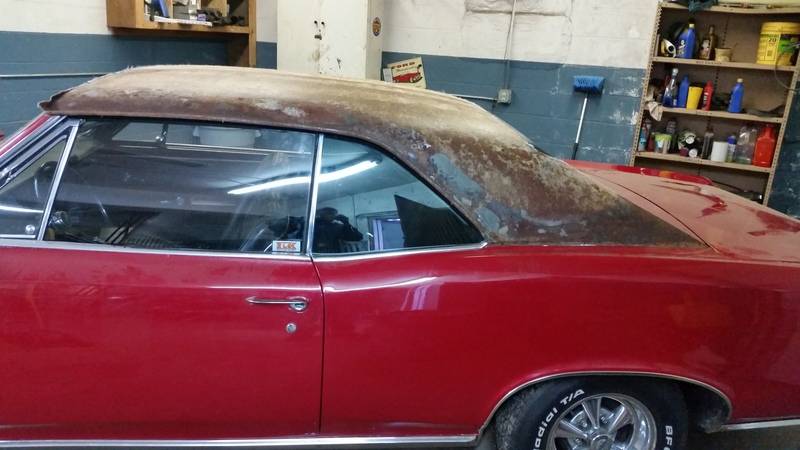
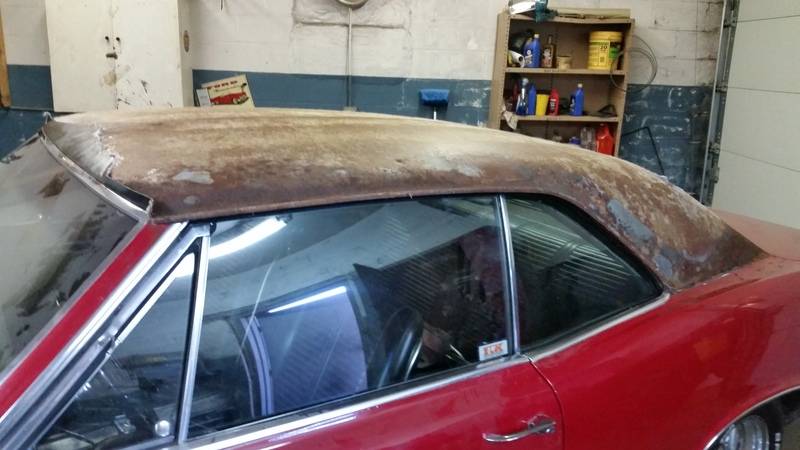
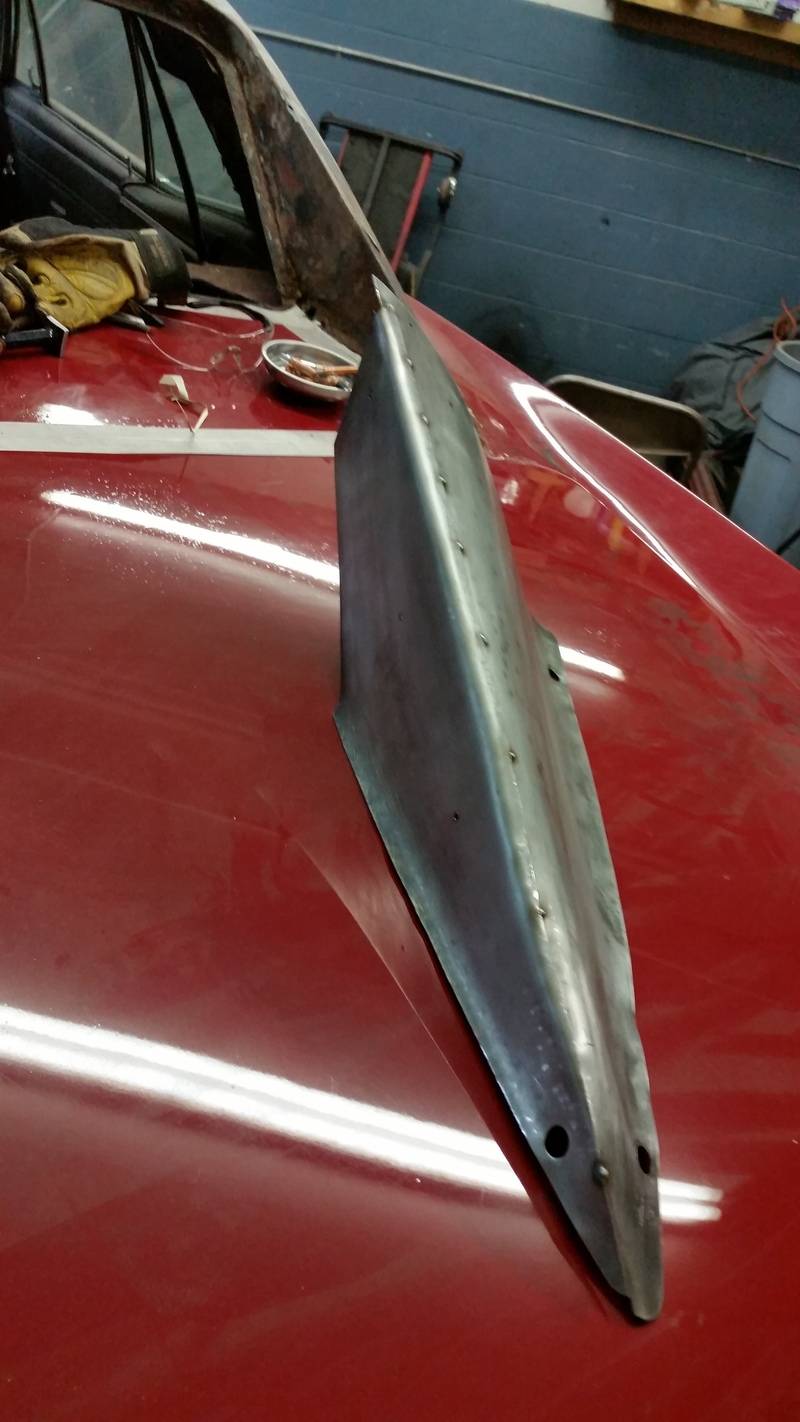
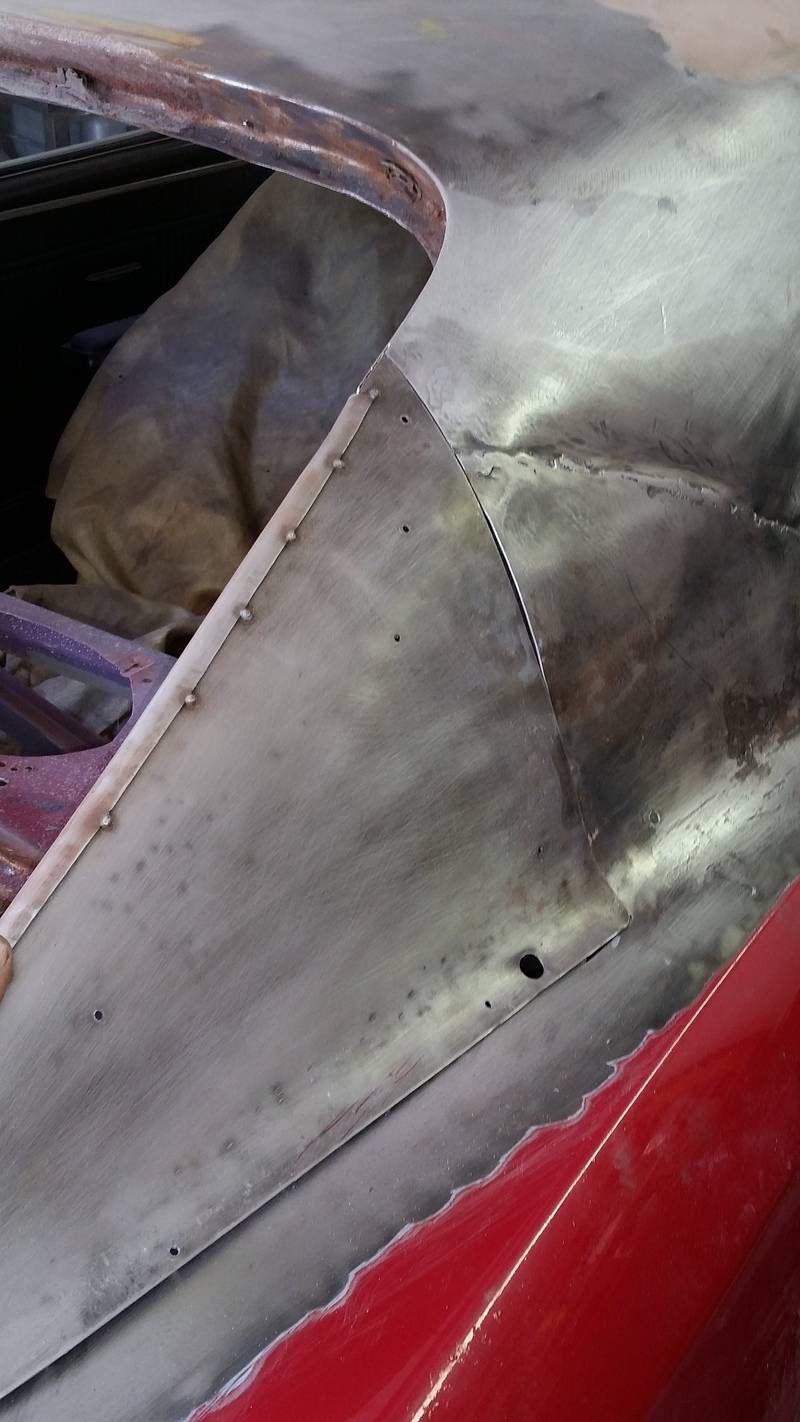
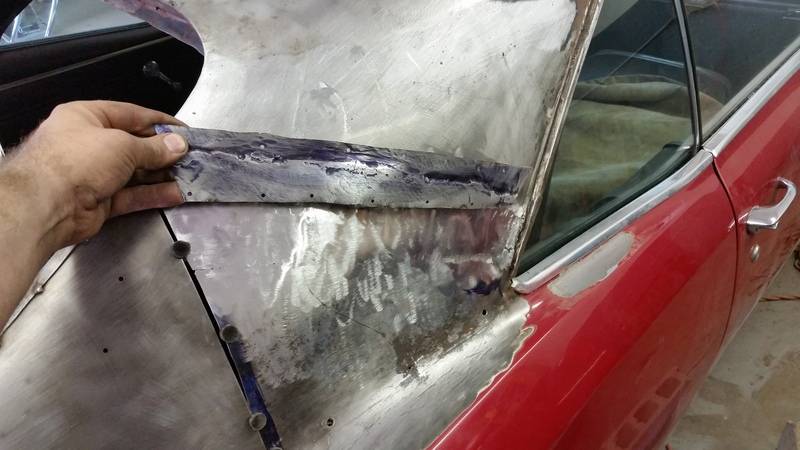
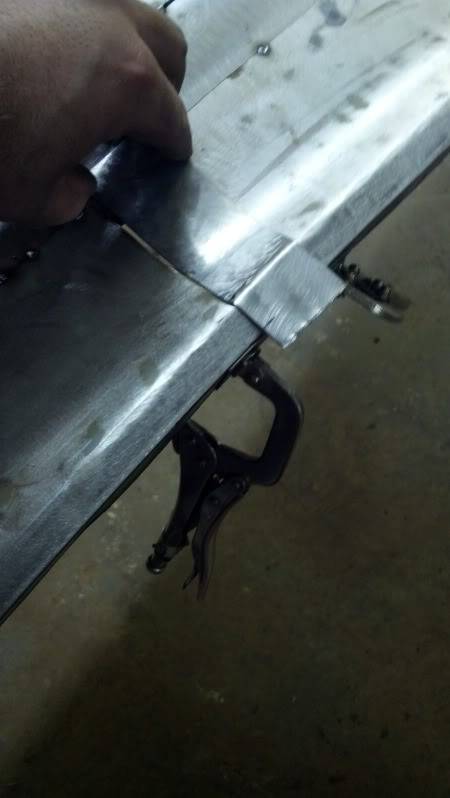
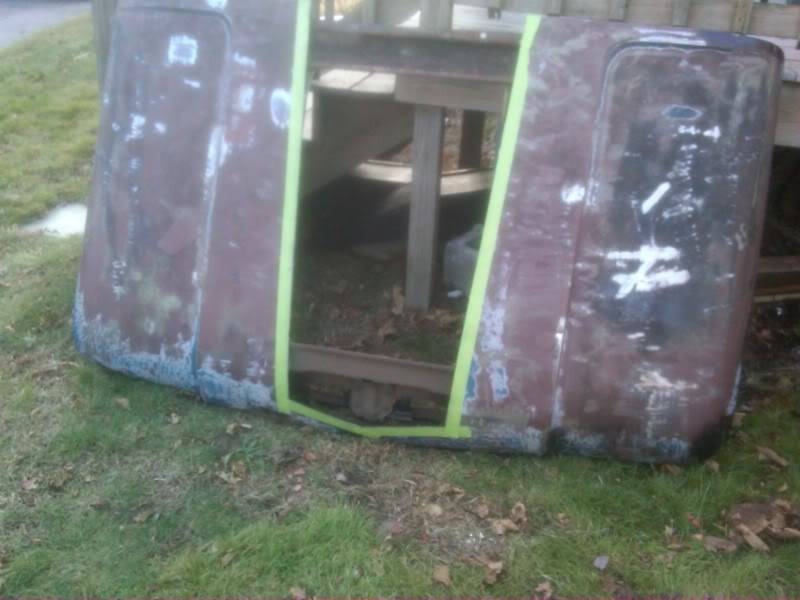
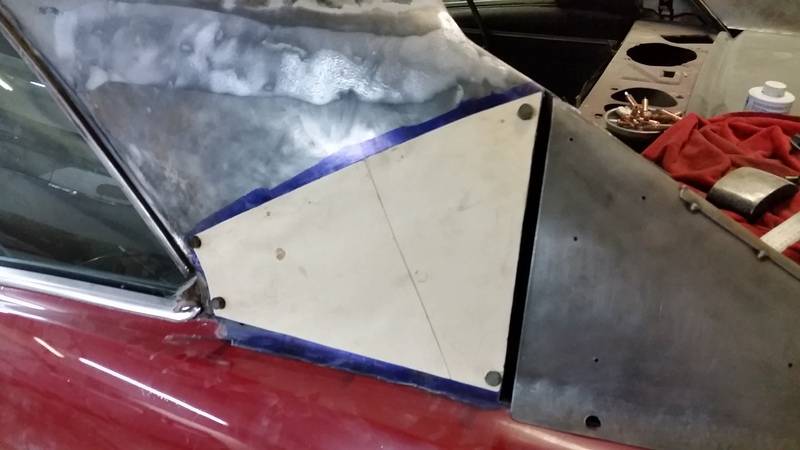
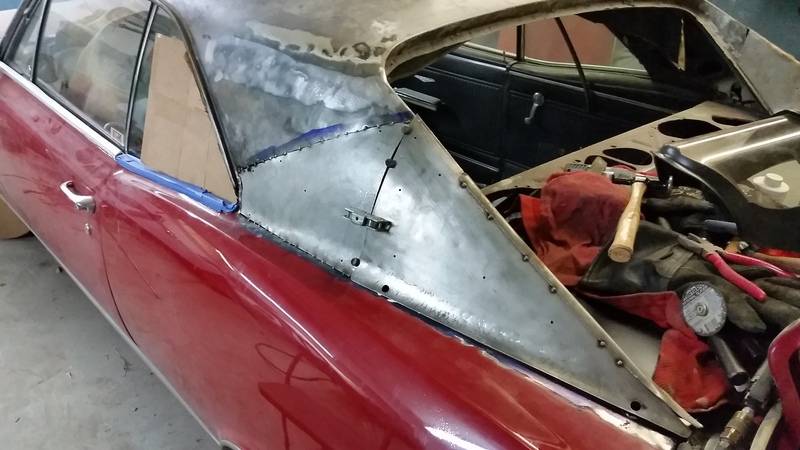
driver side upper quarter "sail" panel is a little soft
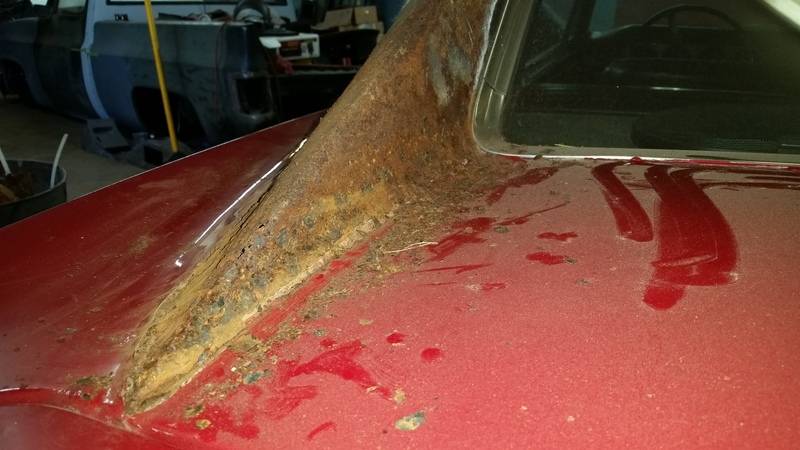
the passenger side isnt as friendly

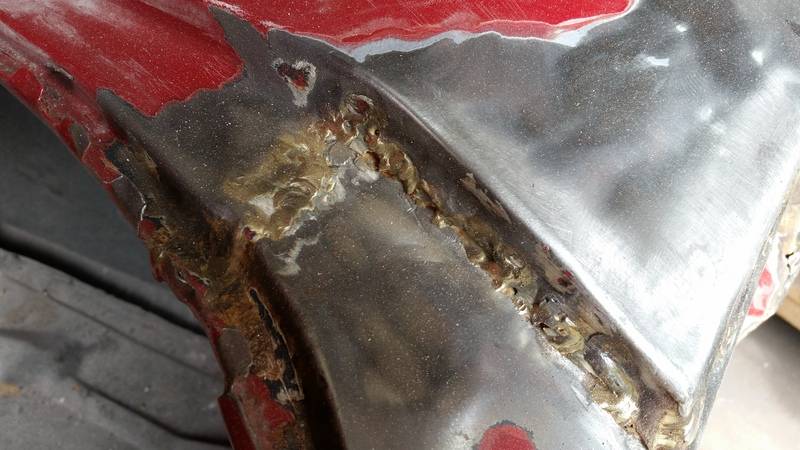
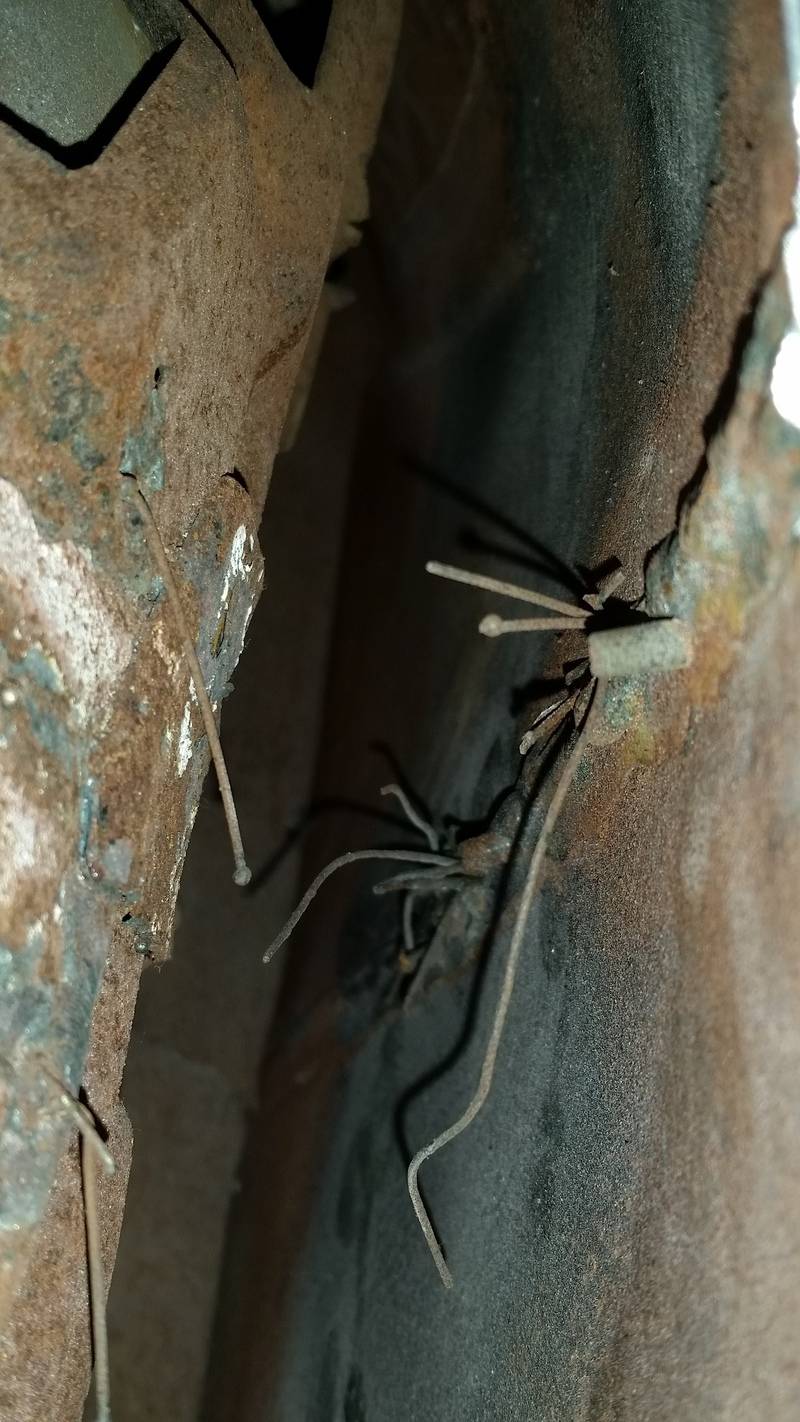
And a few pop rivets here and there for good measure

-
01-22-2016 #2
Registered User
- Join Date
- Jan 2016
- Location
- South Shore, Mass
- Posts
- 13


 [/QUOTE]
01-22-2016 #3
Registered User
- Join Date
- Jan 2016
- Location
- South Shore, Mass
- Posts
- 13
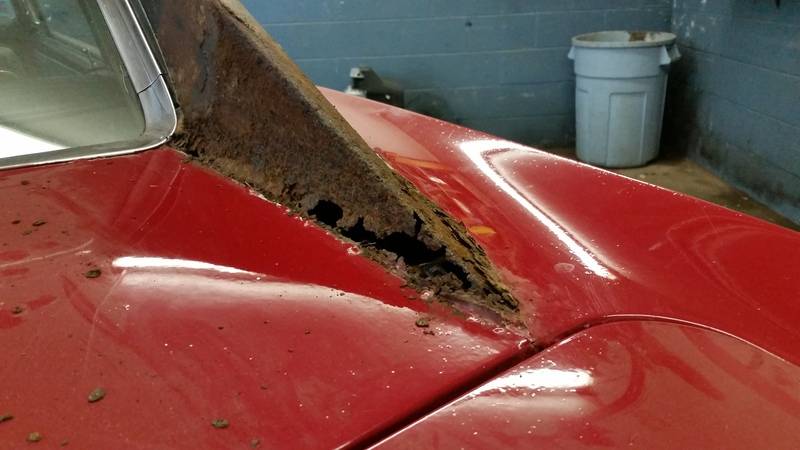
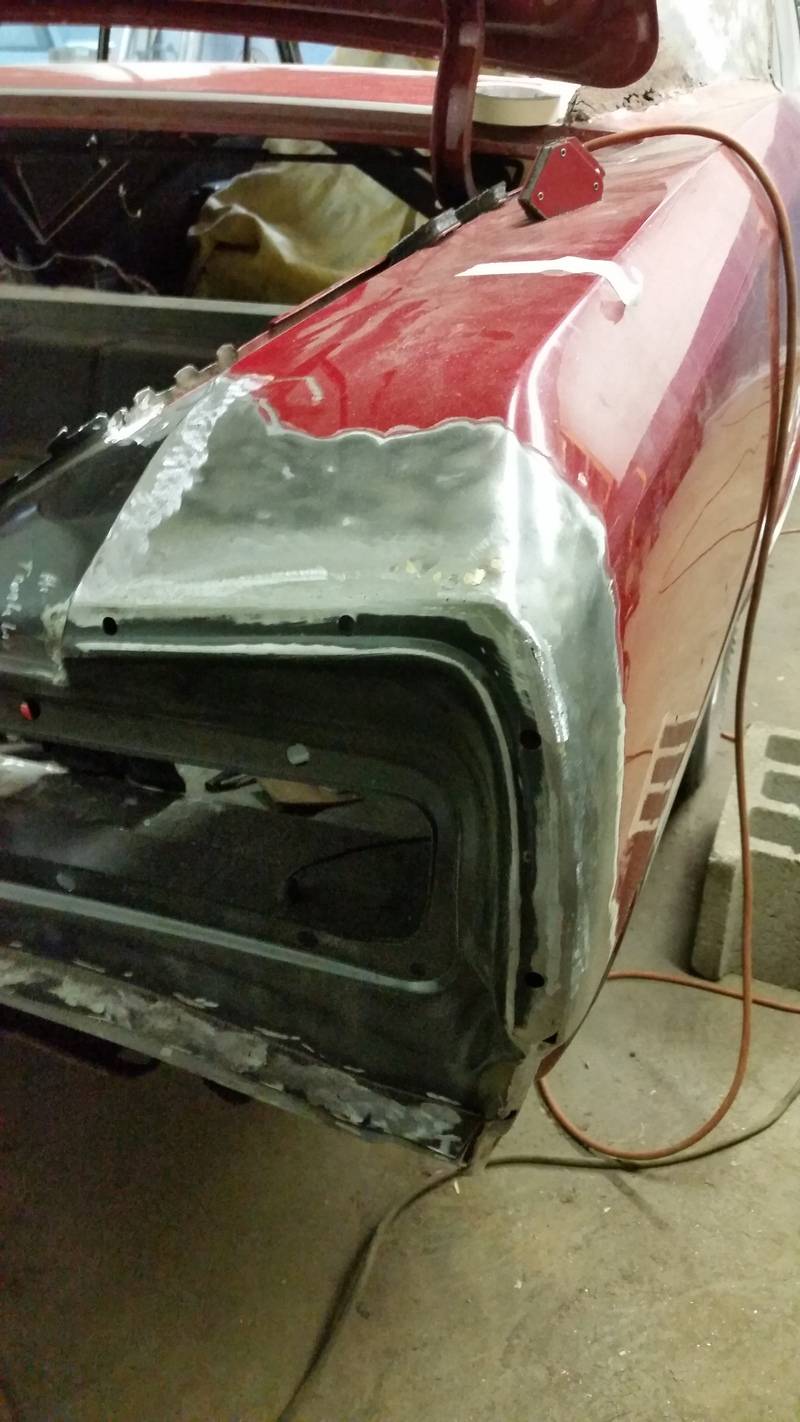
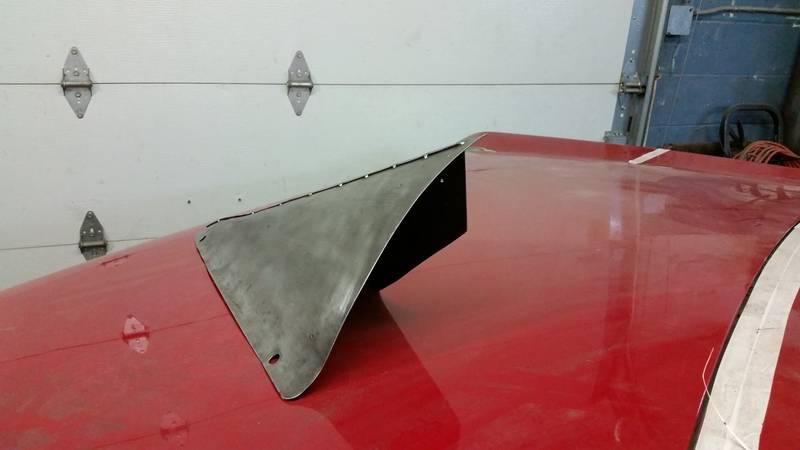
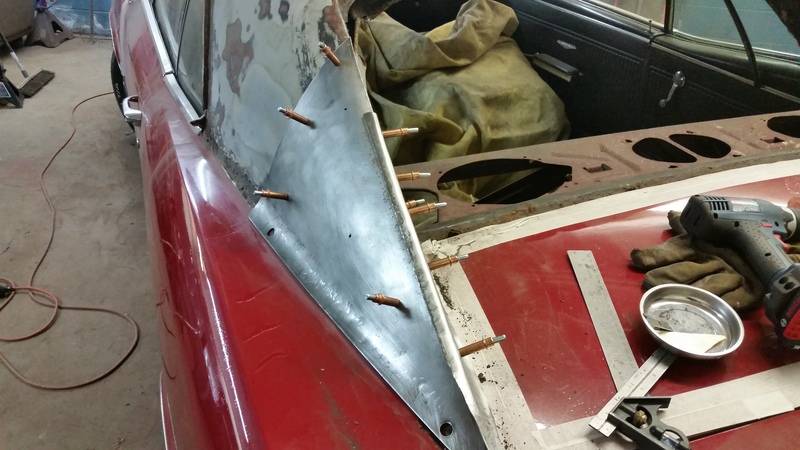
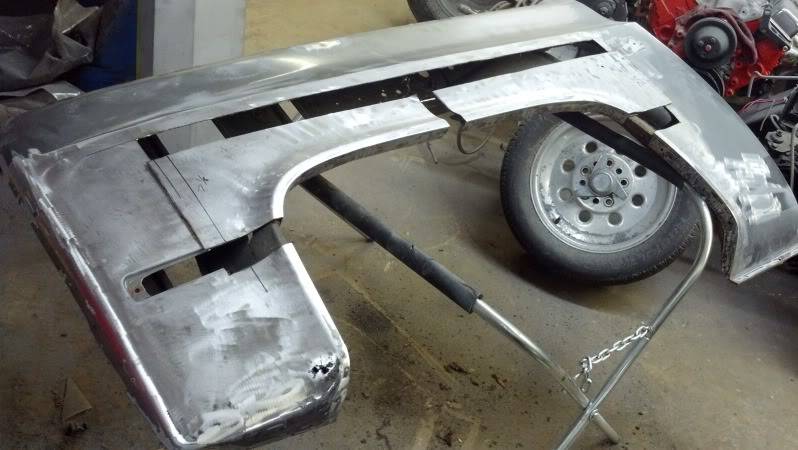
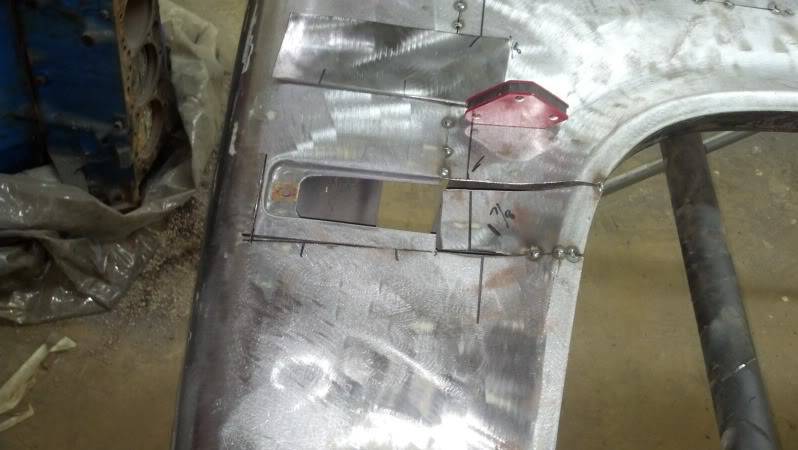
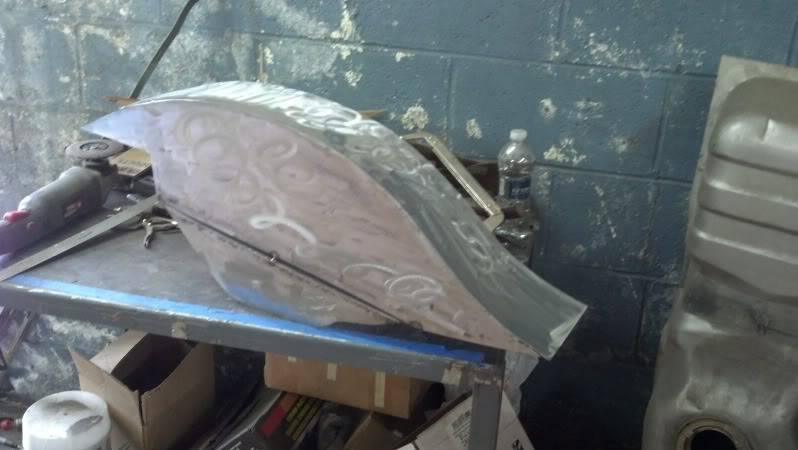
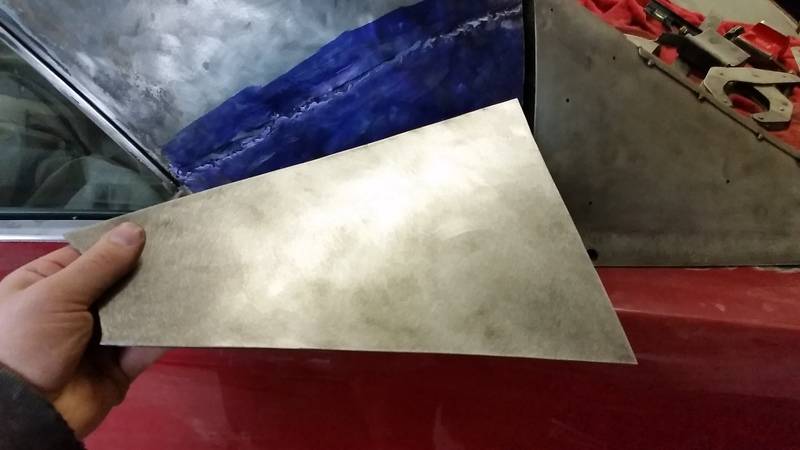
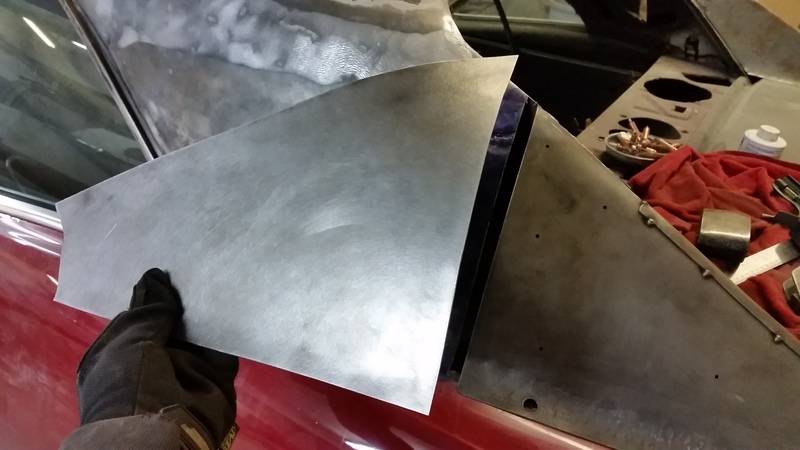
starting to make up the replacement "sail" panel piece, I thought we were planning on just doing replacement quarters, but after looking into it, the quarters for the 66 didn't seem to cover all of the areas we needed, as well as the majority of the stock quarters were in good shape.
 [/QUOTE]
01-22-2016 #4
Registered User
- Join Date
- Jan 2016
- Location
- South Shore, Mass
- Posts
- 13
Started sanding the rest of the sail/upper quarter to find 1/4" of cave and pave bondo to cover up a hastily welded in previous patch panel. The plan for that is to cut out where the old patch overlapped the stock quarter,massage out the low side created by the overlap and butt weld in a new piece and make it pretty.
Ends of mig wire and a few pop rivets


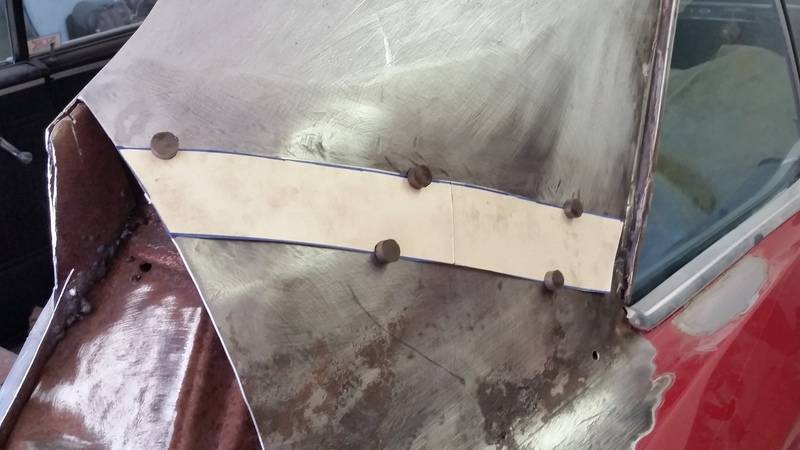

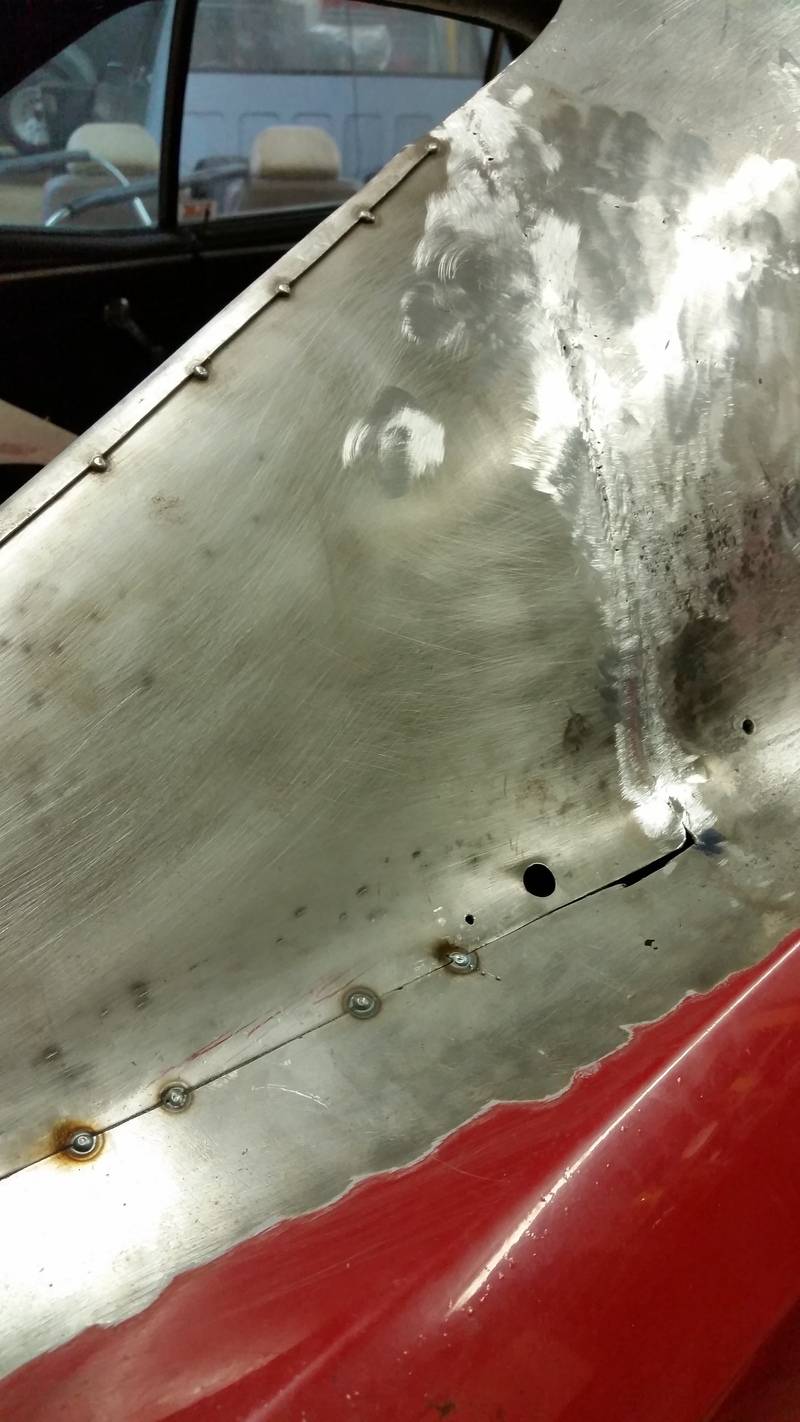

that Overlap/ fold at the top of the panel will get cut off, its just there for when I was mating the 2 panels I was making. I will keep updating as time allows, theres still 4 or 5 years of truck stuff that will also get posted
01-22-2016 #5 Registered User
- Join Date
- Oct 2015
- Posts
- 122

Looking good. Going to be a great car. I would love to have a 66.
01-22-2016 #6
Registered User
- Join Date
- Jan 2016
- Location
- South Shore, Mass
- Posts
- 13
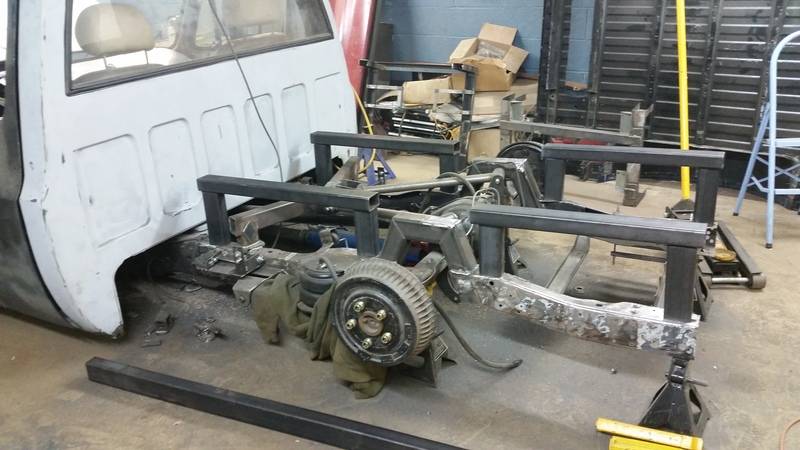
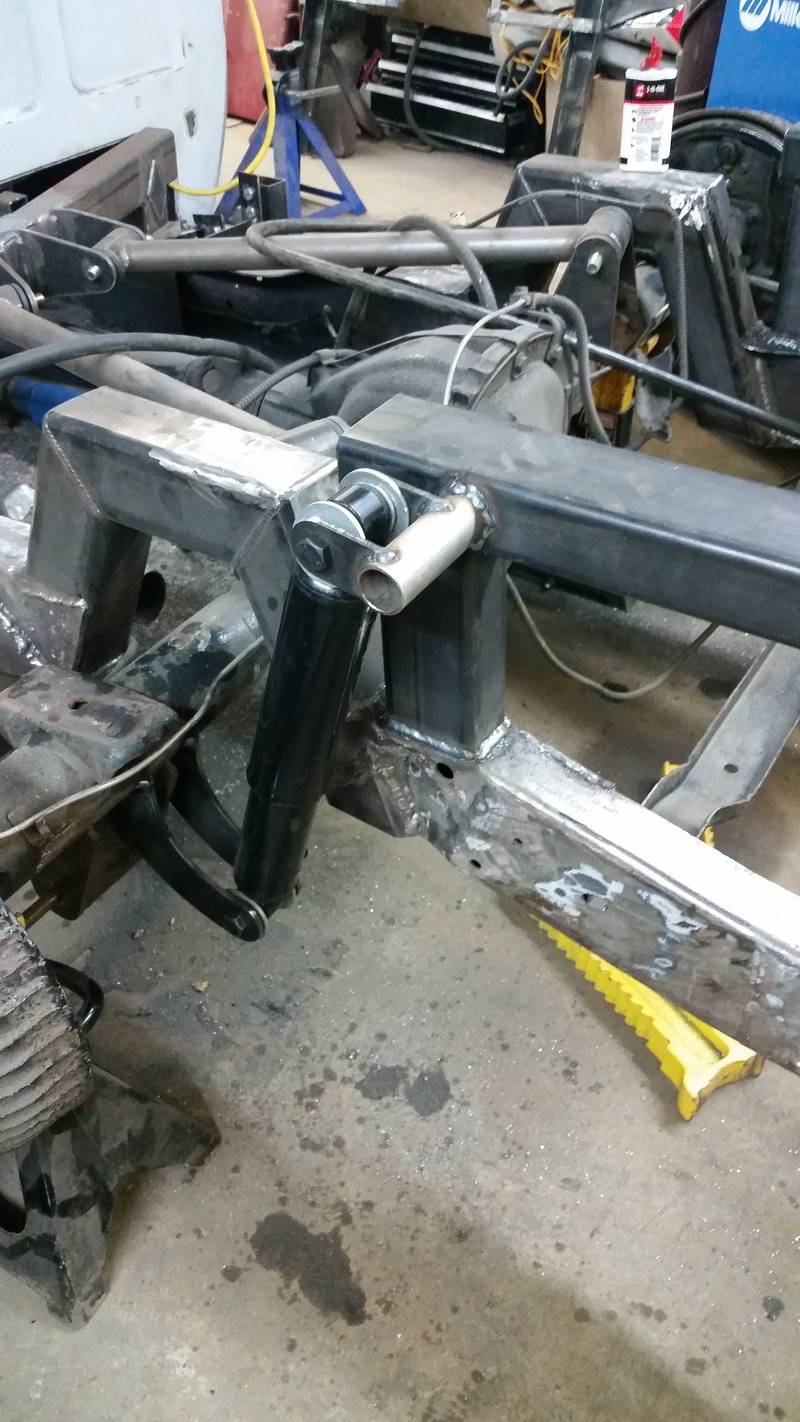
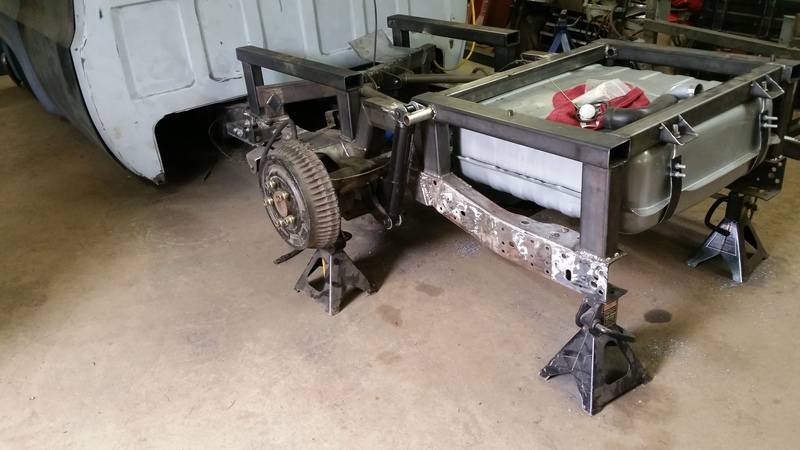
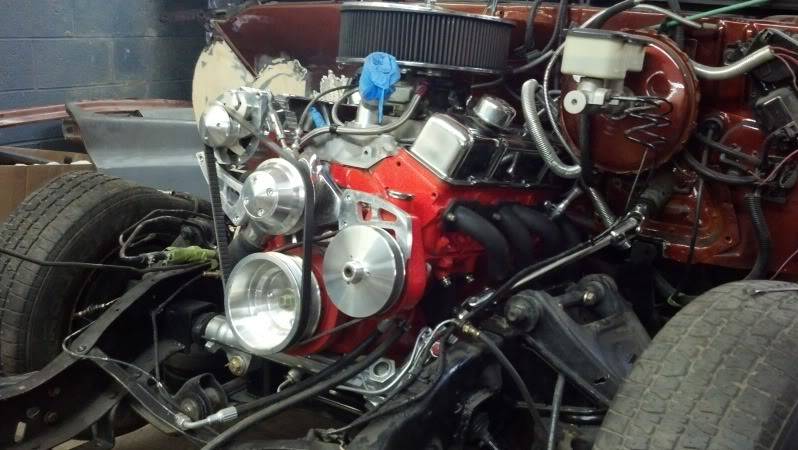
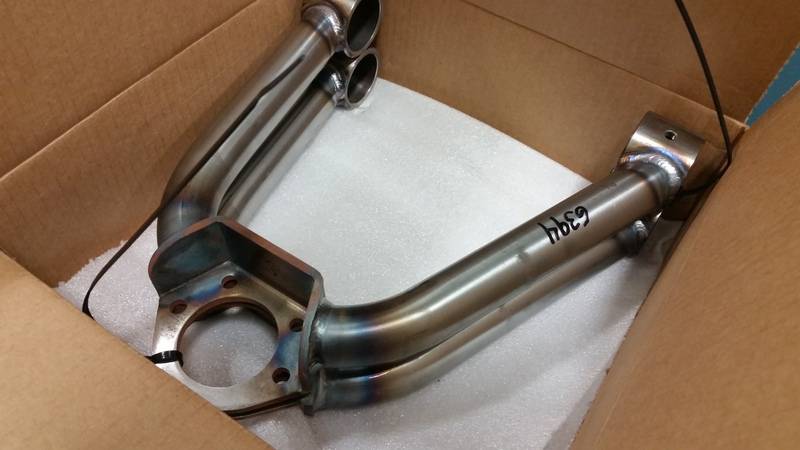
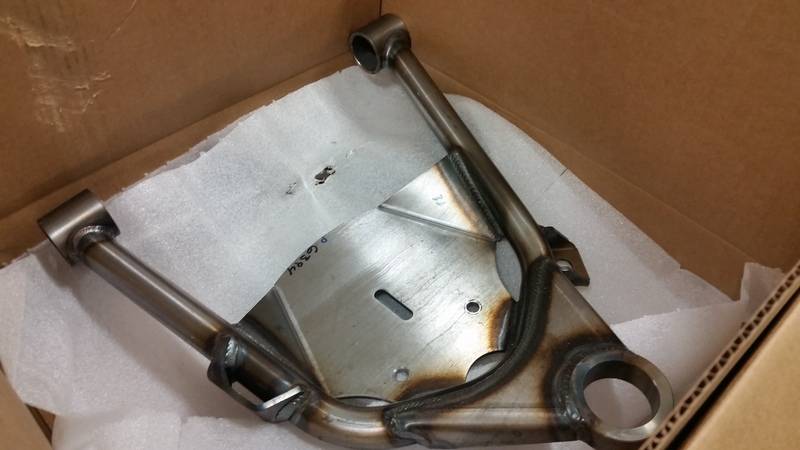
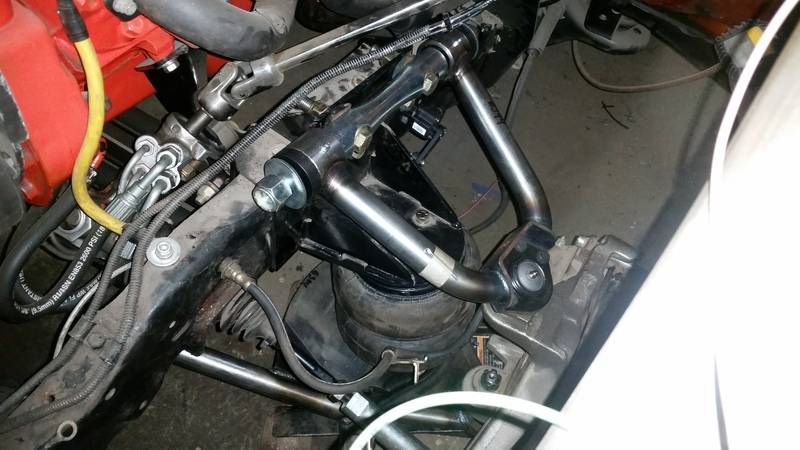
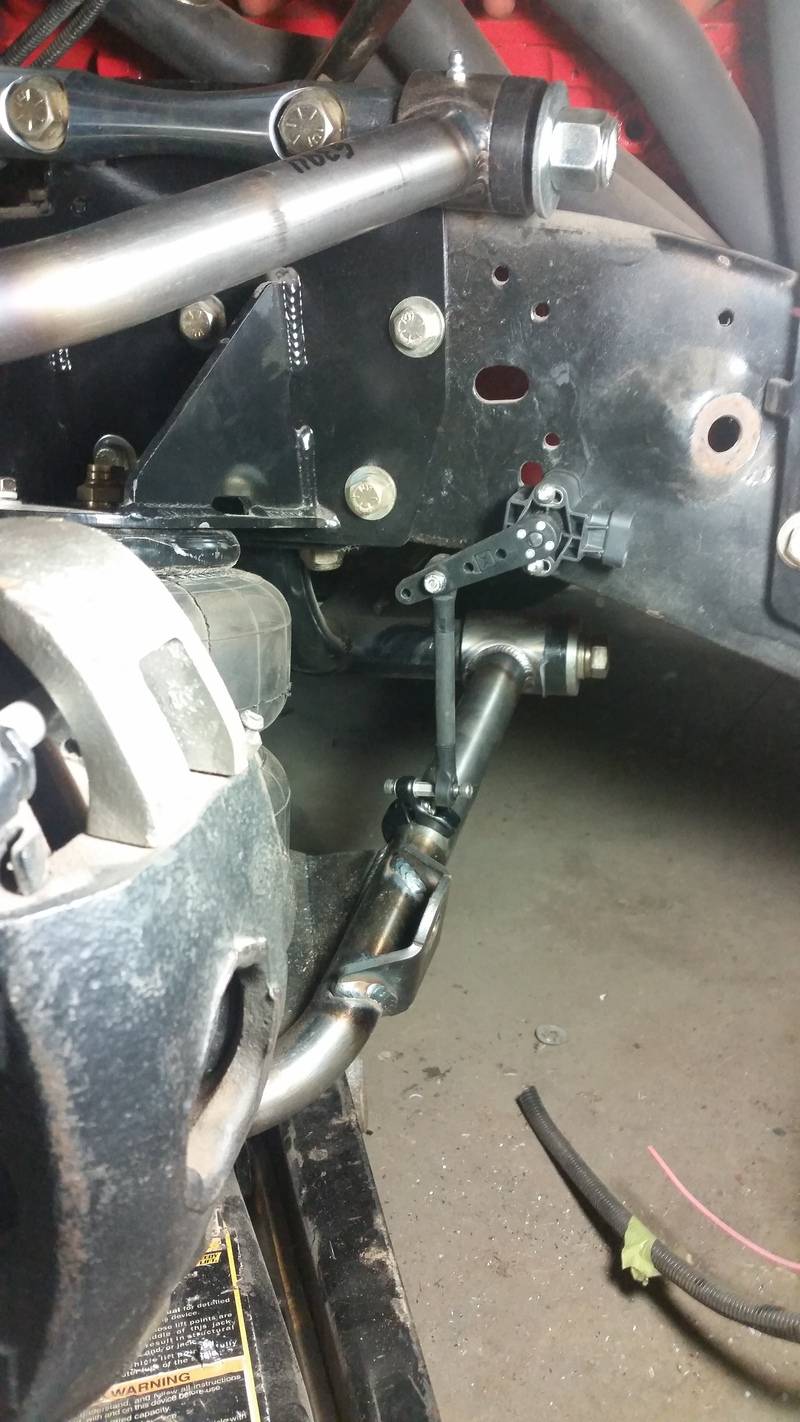
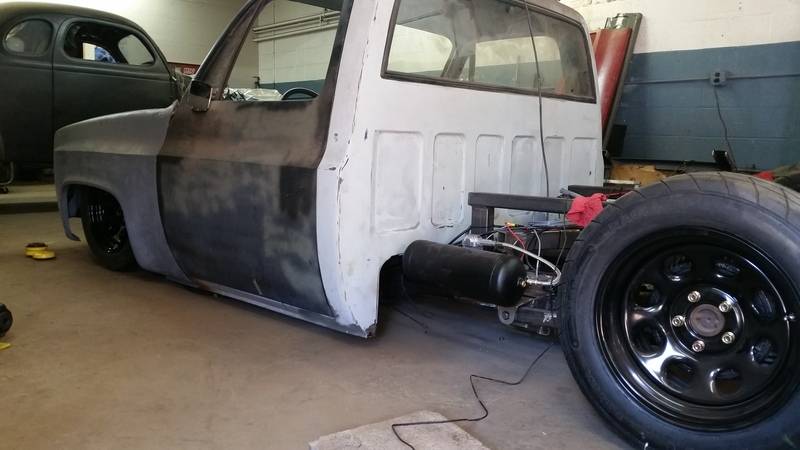
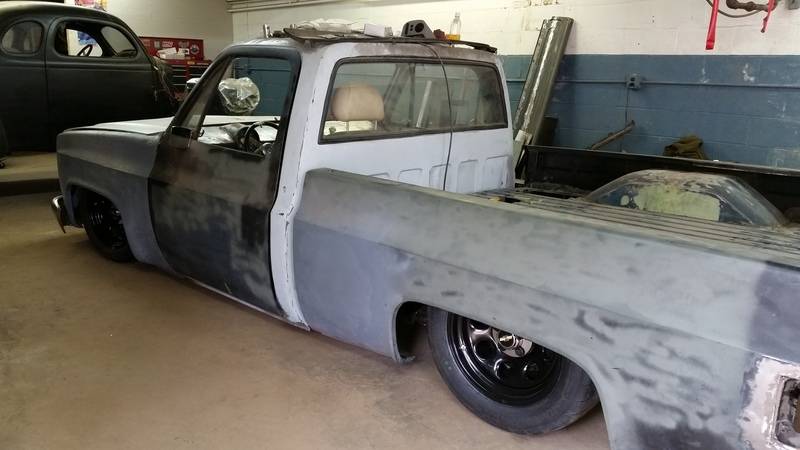
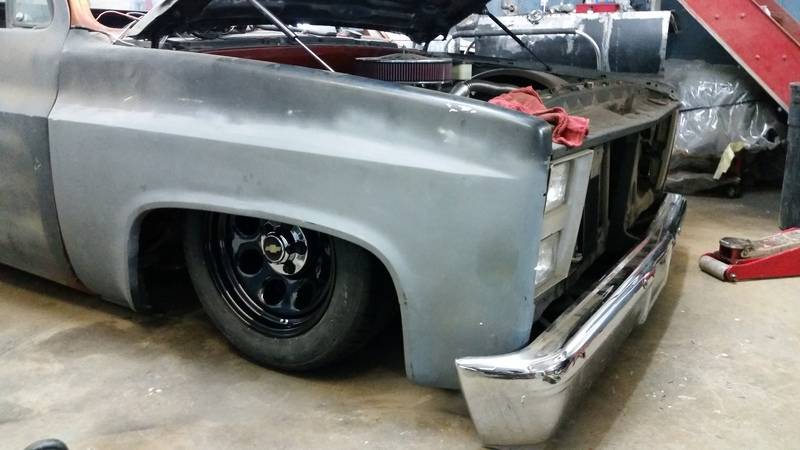
the 84 has gone through a few configurations in the time that I have had it, but for the sake of posting whats actually on there now, I am using the front Porterbuilt Fabrication Dropmember raised crossmember which narrows the track width and also converts over to a mustang rack and pinion, (im using a flaming river rack), Porterbuilt's tubular upper and lower control arms, and an Addco spec'd 1.25" front sway bar, and a triangulated 4 link out back to eliminate the need for a panhard or wats centering device, powered by a nicely warmed up 350 with MSD pro billet HEI, March performance pulley system, Hooker headers, and Porter Steel packs that will be getting swapped out for mostly likely a pair of Borla XR1's, and eventually either the FItech efi or the new Holley Sniper efi copy, freshly built 700r4 and an eaton posi 3.73 10 bolt, mickey Thompson street comps up front and M&H Drag radials out back. it started off with Boze forged wheels, then traded those for some Centerlines, and now I have cragars because I like the utilitarian look with the stock caps over them.
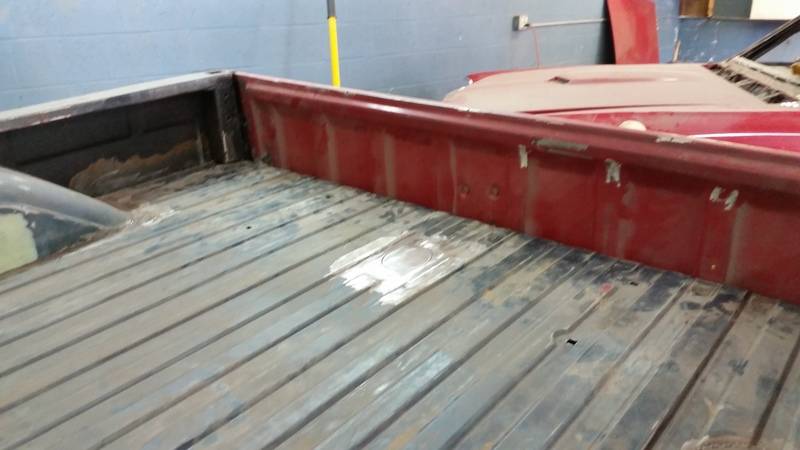
starting at the last time I did the rear over and the raised bed floor support structure.
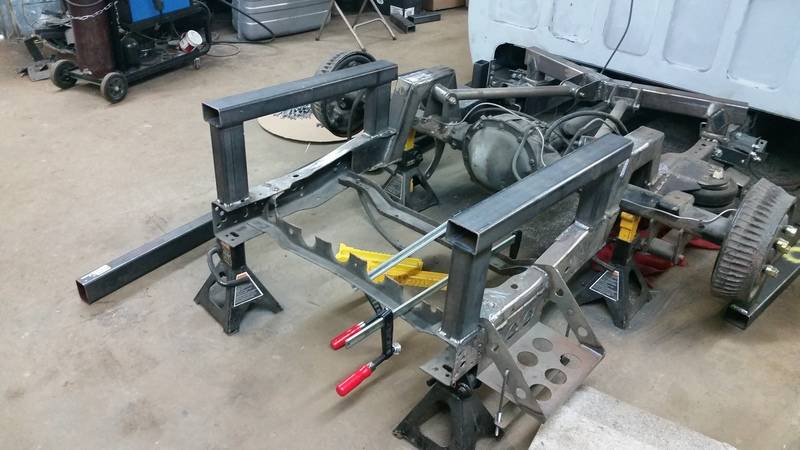
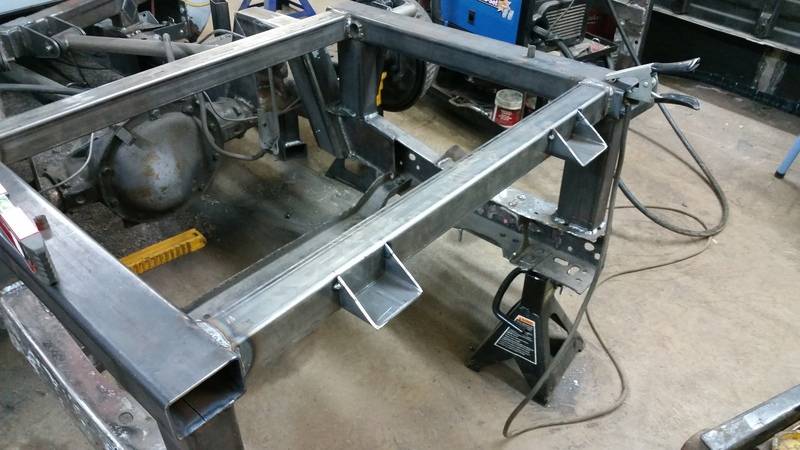
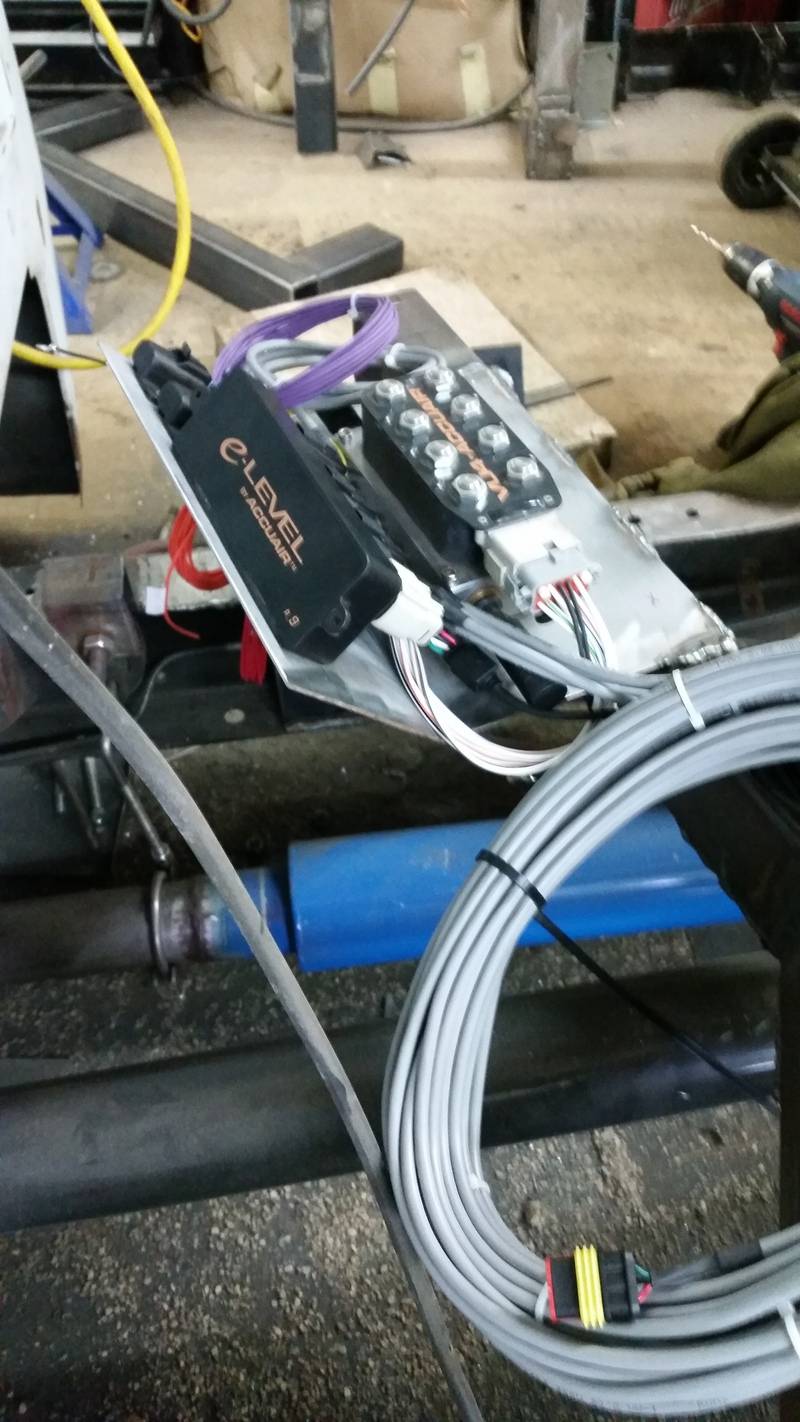
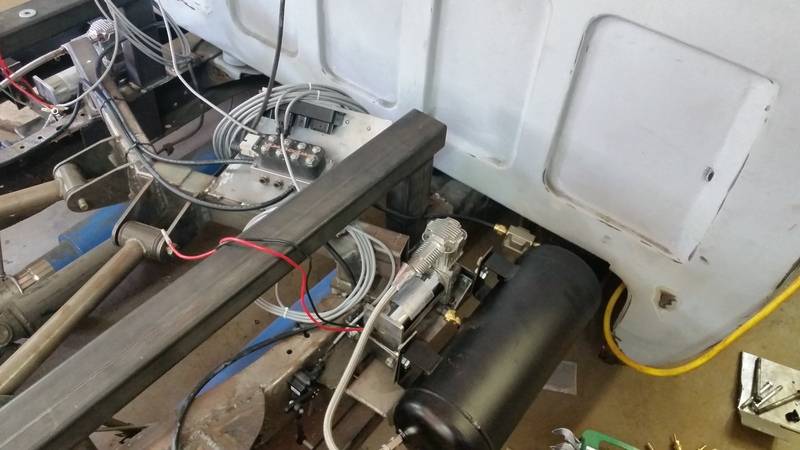
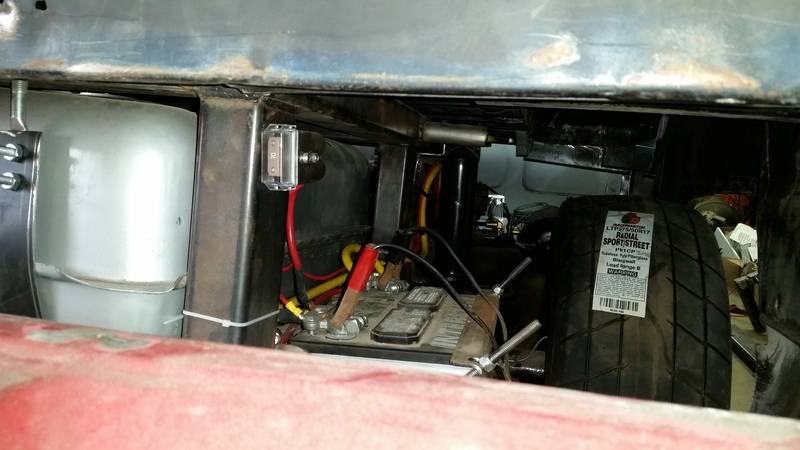
The tray is a little bigger than necessary but i wanted to mount whatever relays i need for the compressors and use the upper link crossmember as a bridge to run air lines and cables with the airlines being as straigjt as possible to avoid any future issues.
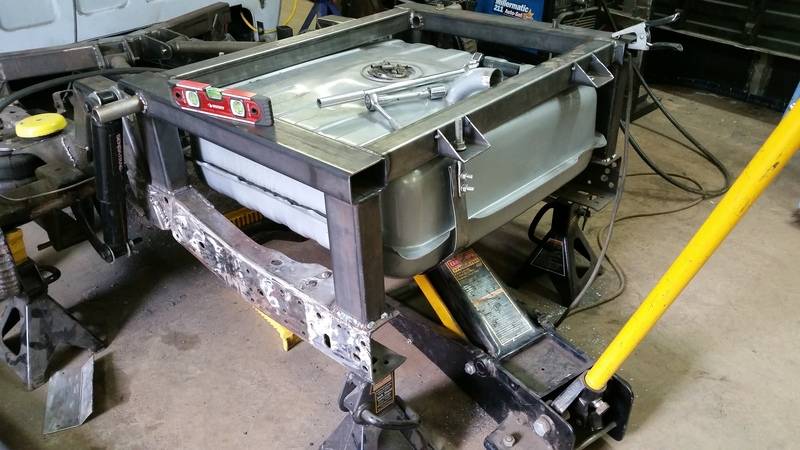
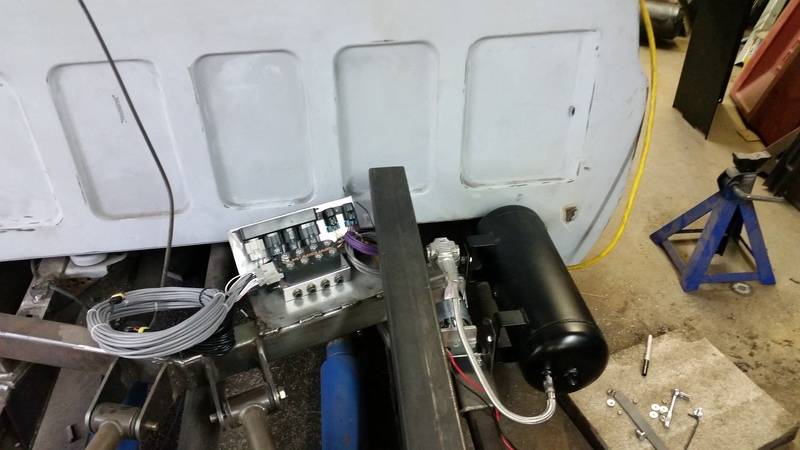
Put one of the tanks and compressors in for something to look at
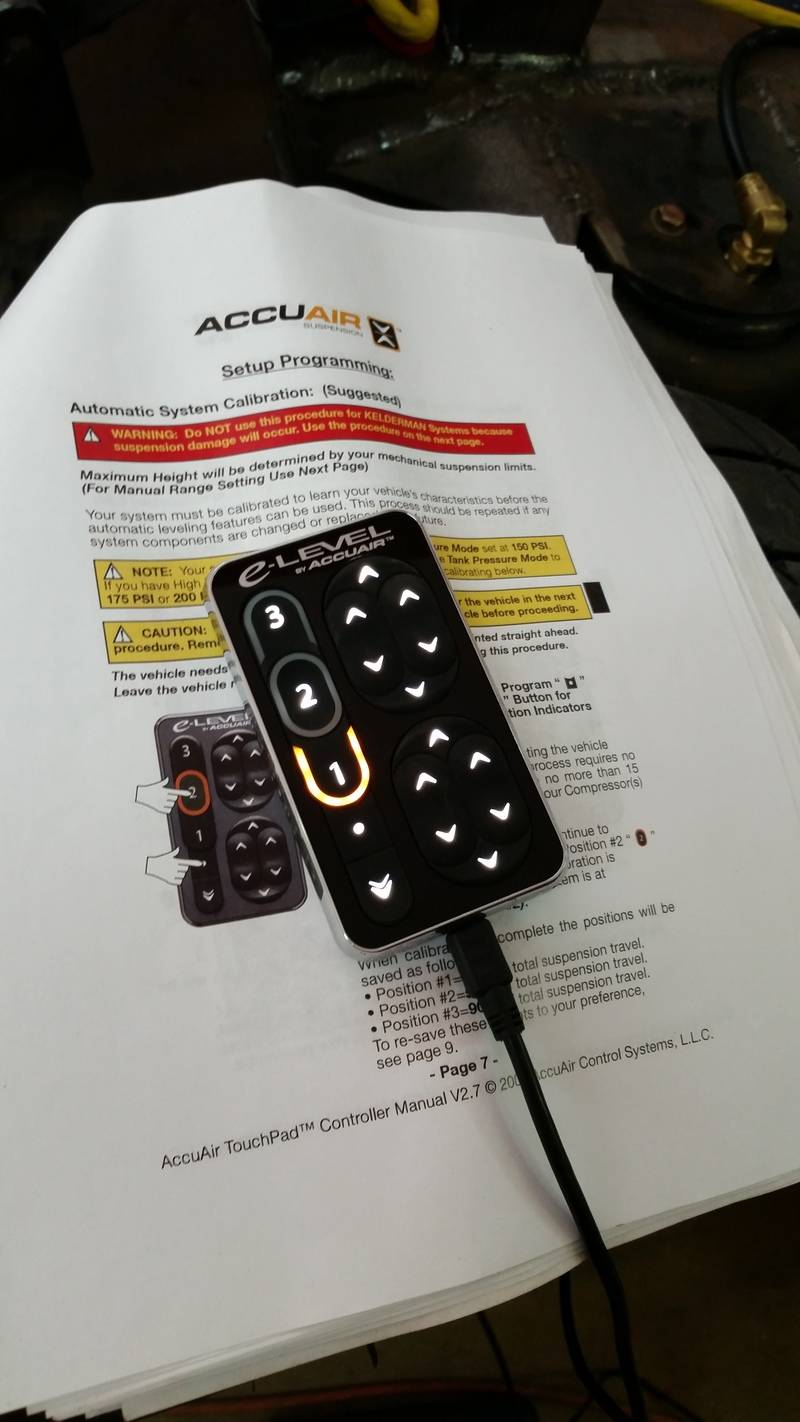
After i make sure everything with the accuair is working, i'll shorten up the e-level sensor cables quite a bit, left a little bit of extra length on the air lines for when i permanently install them with the clamp clips to make it nice and neat looking, big zipties for the time being.


testing out the Accuair remote and E-level sensors


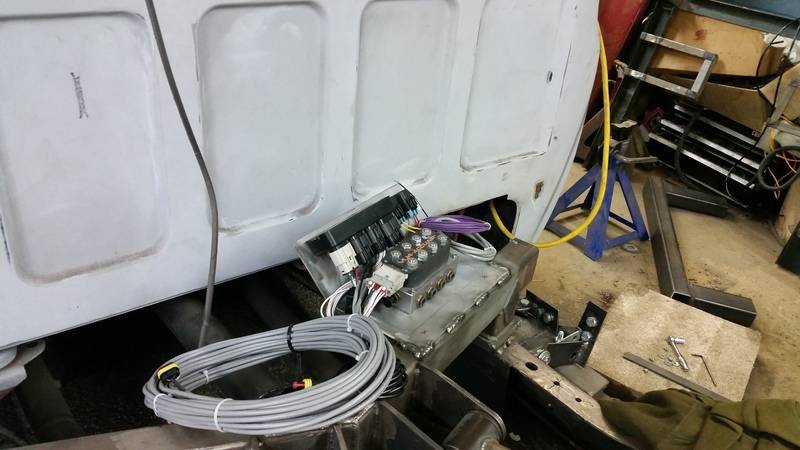
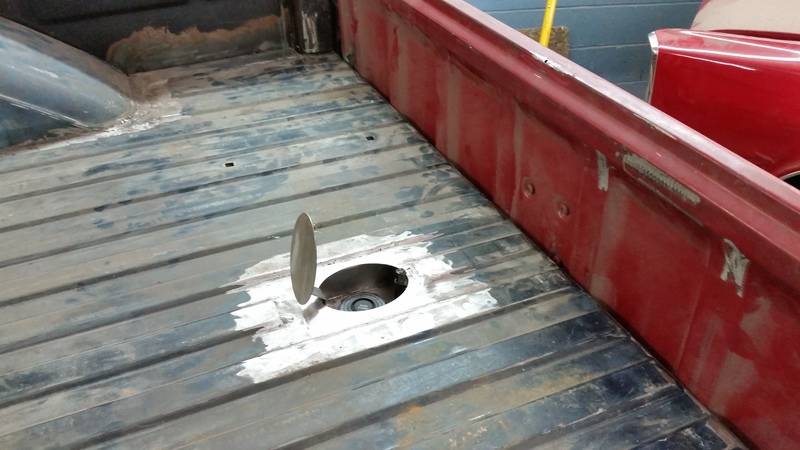
With the tailgate down, i can still get to the battery and main fuse for the accuair stuff. Im planning on finding something similar to a master cylinder floor mounted access door for the bed so i can get to manifold and stuff, just trying to find a locking one
i'll start compiling all of the sheet metal changes in the next posting, theres a lot of them
01-23-2016 #7
Registered User
- Join Date
- May 2011
- Location
- Brisbane, Australia
- Posts
- 453

Those wheels look great on that truck. Nice work.
1967 Mustang Fastback - widebody https://www.pro-touring.com/threads/...stang-Fastback
1966 Plymouth Fury III
1961 Oldsmobile 88 "bubbletop" = next project
01-23-2016 #8 Registered User
- Join Date
- Jun 2014
- Posts
- 177
Really cool, nice projects.
01-23-2016 #9
Registered User
- Join Date
- Jan 2016
- Location
- South Shore, Mass
- Posts
- 13
And even better, with the exception of the centercaps and tires, they were free from a buddy who had bought them for a B-body impala he had sold. i had been planning on going with Intro's or Racelines after I had sold the Centerlines and Boze forged wheels, but I really want to drive this often and I would have just been too paranoid to really enjoy it around here with how awful the roads are in Massachusetts. Originally Posted by Godbolt

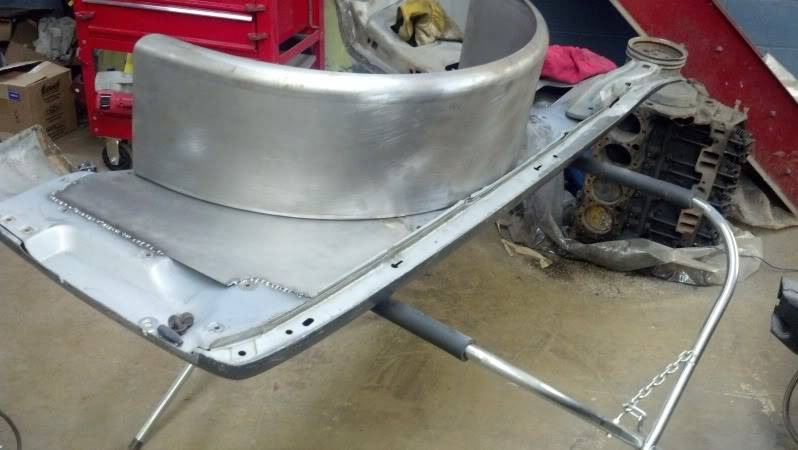
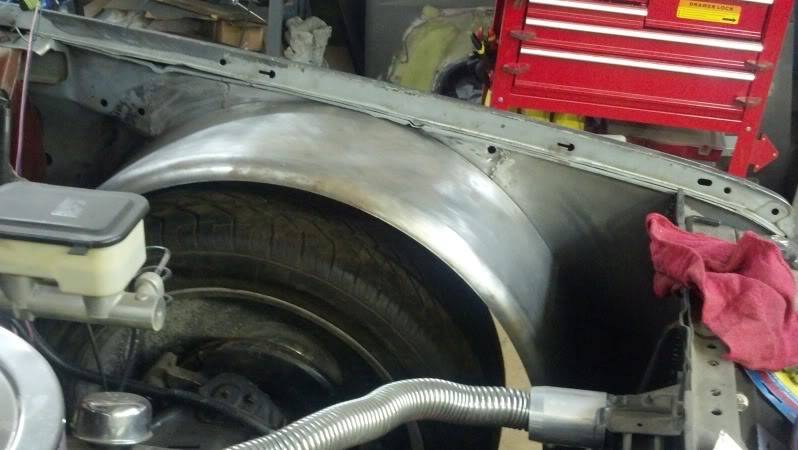
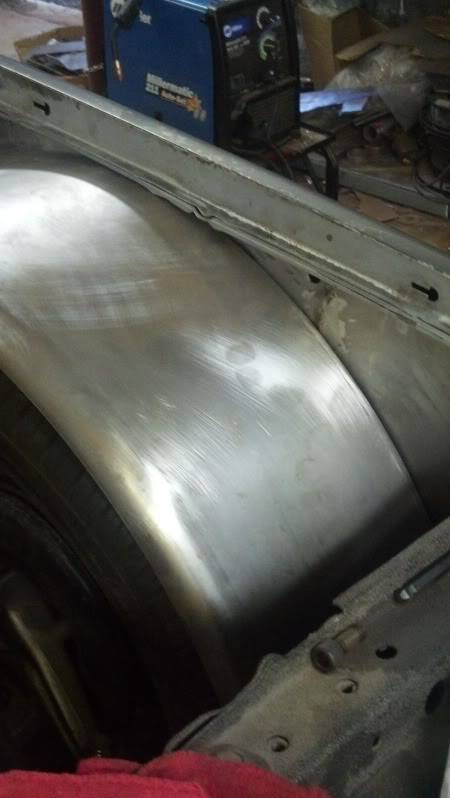
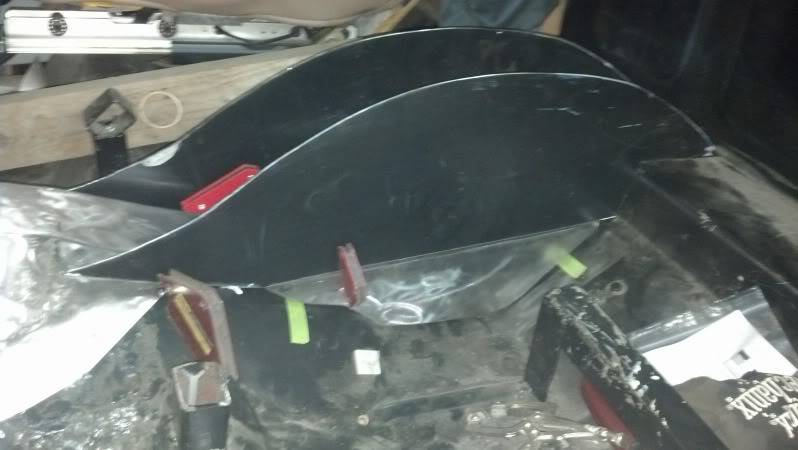
something that sort of bothered me on these trucks was the difference between the front and rear wheel arch openings, especially on a low/ level trucks where it is especially noticeable

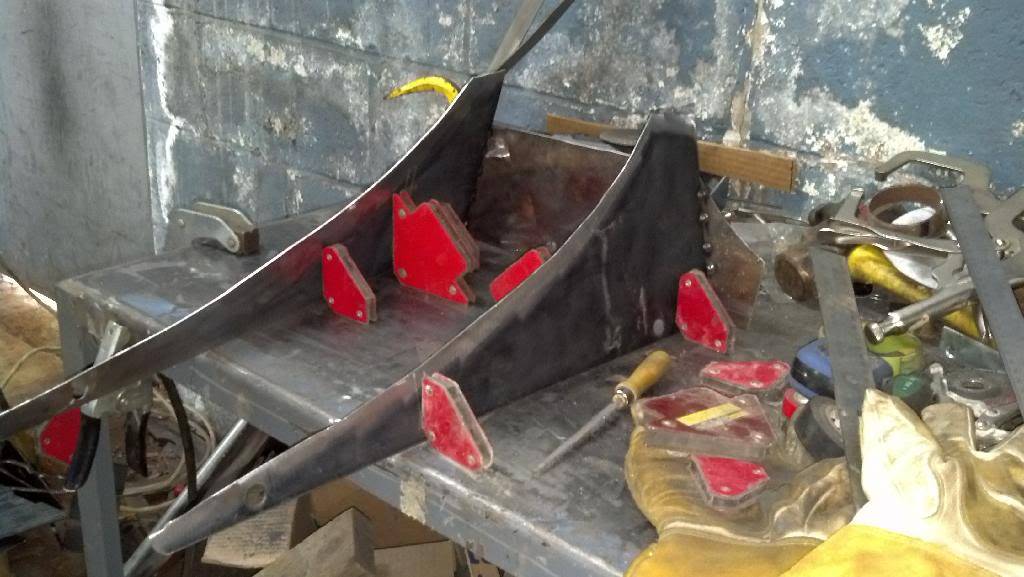
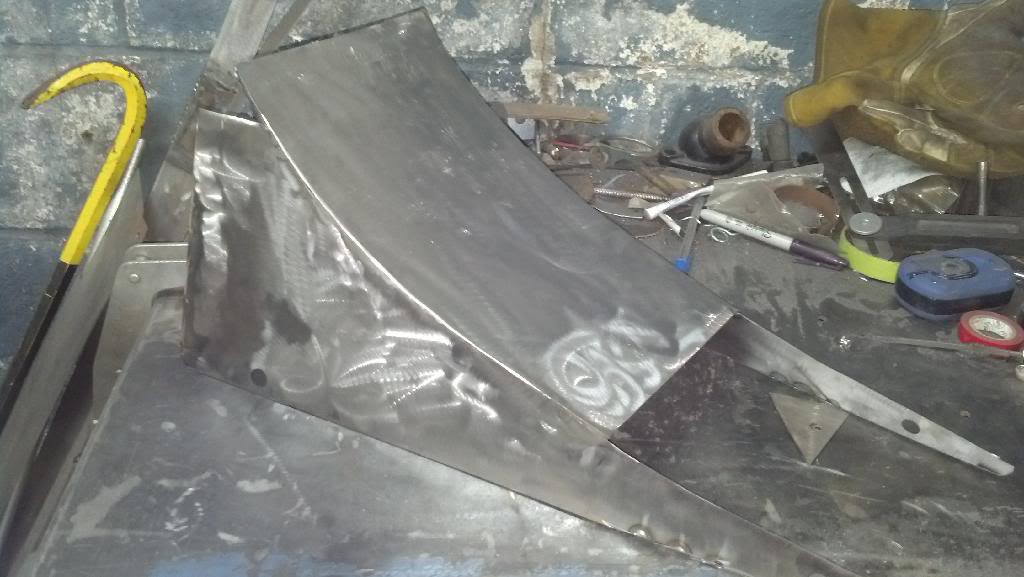
hammering out some filler pieces

and also started making the inner wheel tubs, trailer fenders from tractor supply for about $30
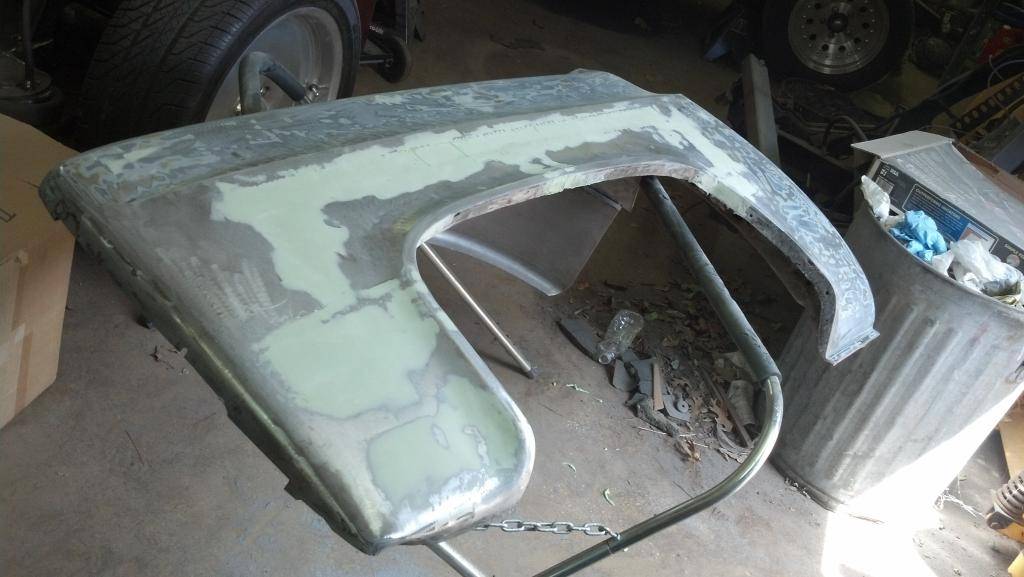
Before I picked up the 84, I was really on the search for a 60-66 truck, but without travelling across the country for a nice one, pickings were slim so theres a small ode to those
picked up a 63 hood off craigslist for cheap and got ambitious with the tape

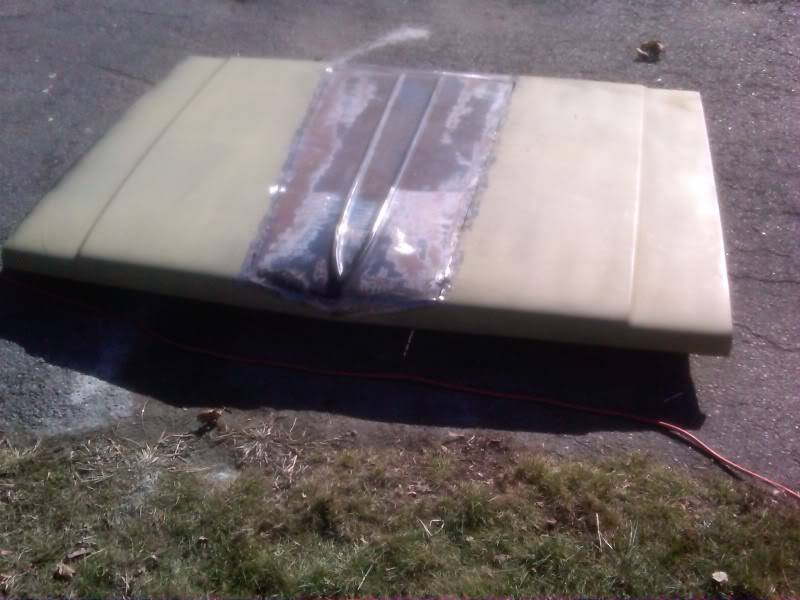

and a quick shot of primer

01-23-2016 #10
Registered User
- Join Date
- Jan 2016
- Location
- South Shore, Mass
- Posts
- 13
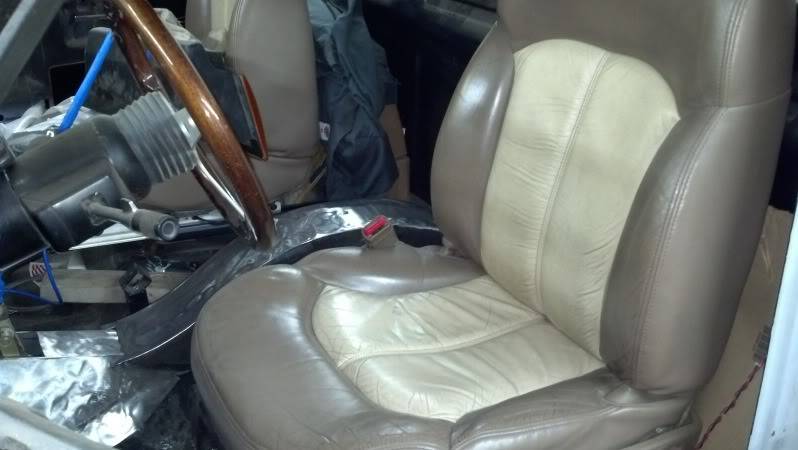
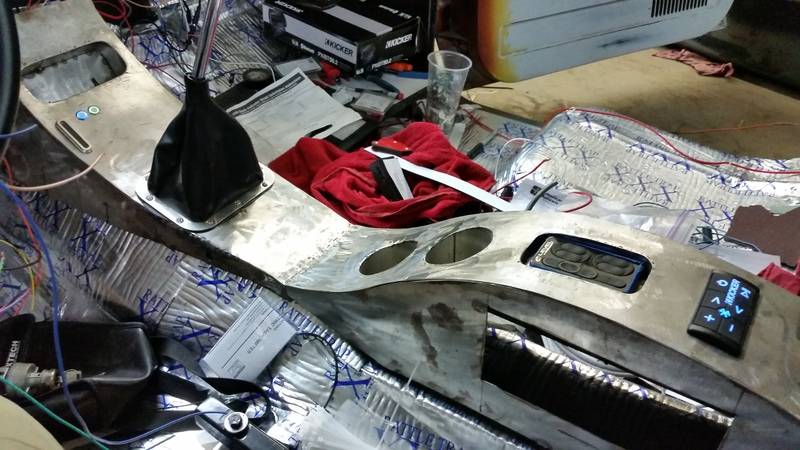
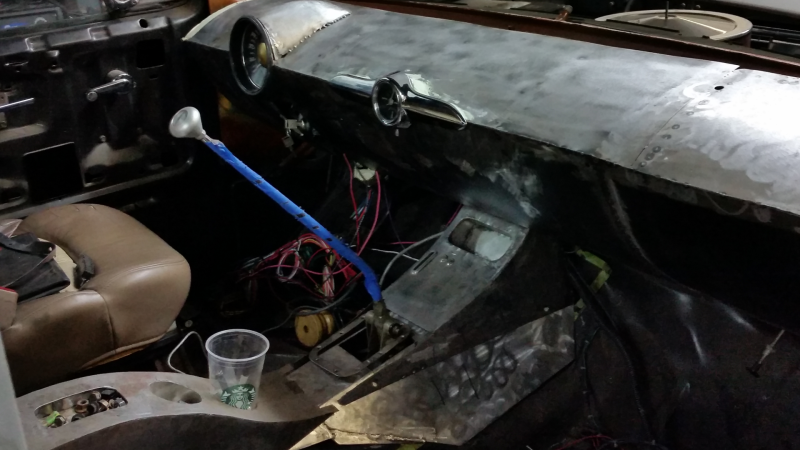
i'll sort of glass over some of this interior work since theres too many pictures of it in my other thread but its also my favorite parts
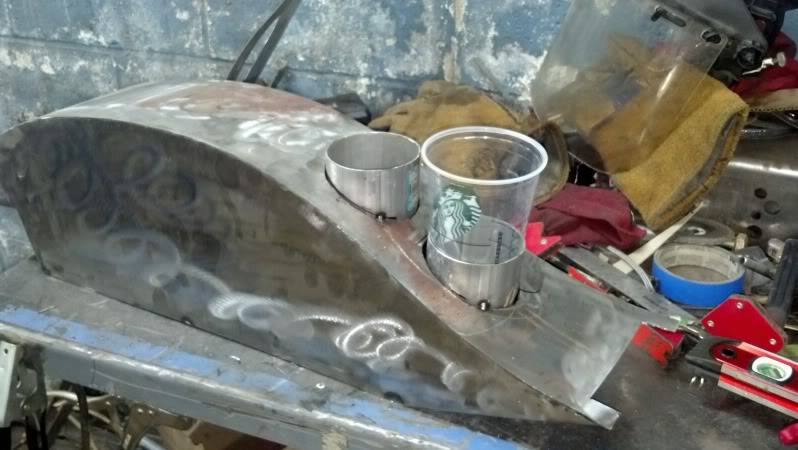
I've always really liked the flowing fiberglass center consoles, problem being, I am absolutely terrible with fiberglass and just do not have the patience to work with it and really learn how to use it better. I do generally have quite a bit of large piece of scrap sheet metal so I gave it a try....full discretion, a lot of this seat divider and center console was to 1) cover the driveshaft tunnel and trans hump, and 2) so I could get away with just cutting the stock carpet in half since there was no way it was going to fit with the floor modifications and Im cheap.

followed by a big piece of what used to be a cantilever shelf that wasnt being used

a few cutting wheel discs later ...
the start of the cupholders, cost me $7 for the 2 exhaust adaptors at the local parts store

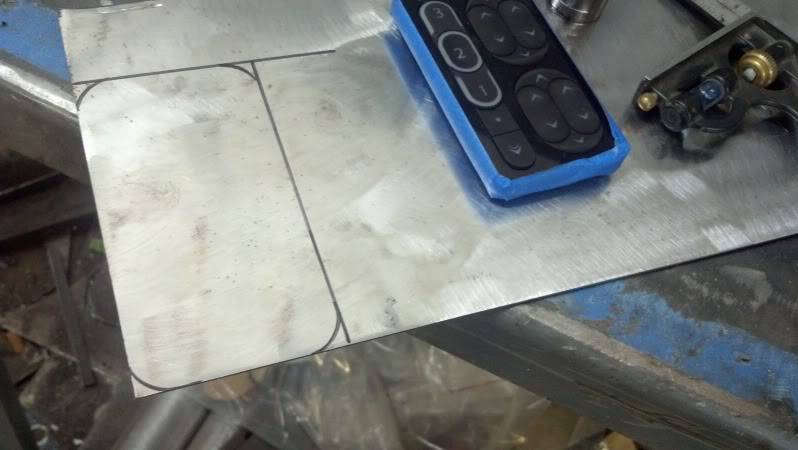
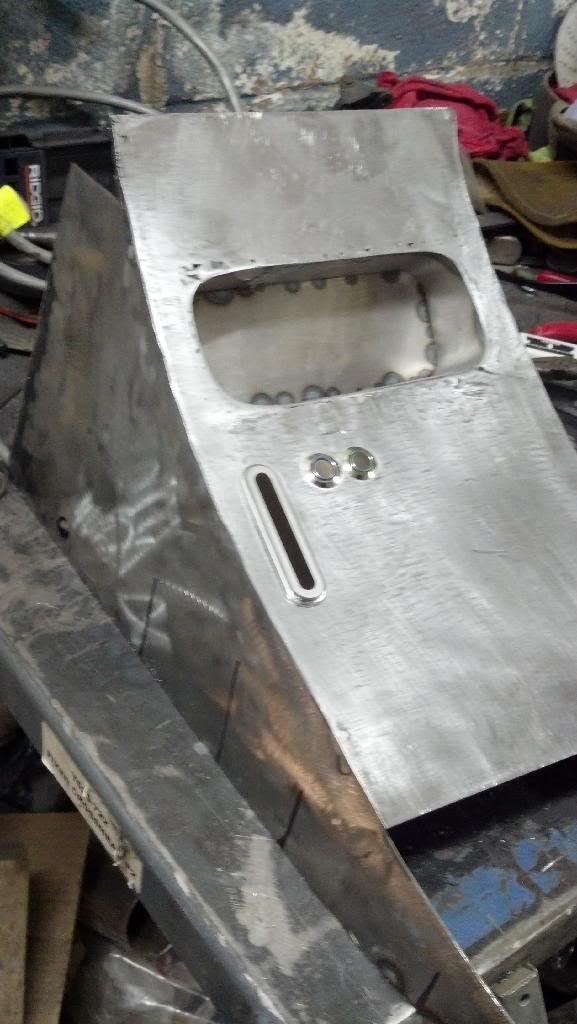
Part of my air suspension management is the Accuair E-level system, which is all controlled by a small remote control. i didnt like the idea of the remote just kind of hanging out somewhere so i built a little tray for it as well
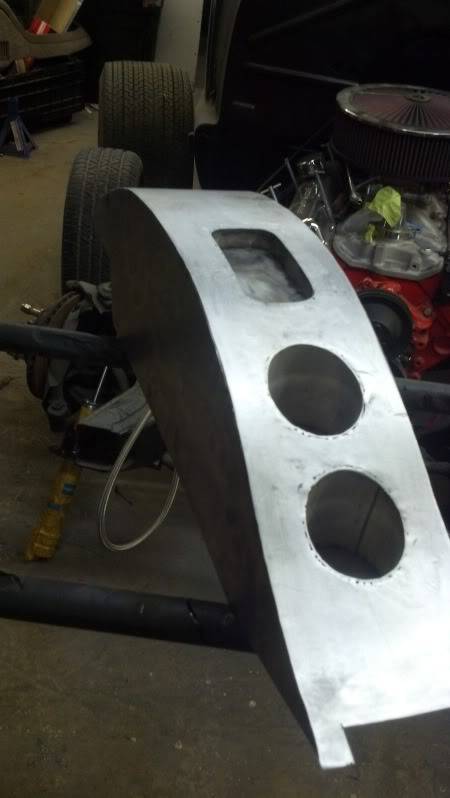
The start of what is essentially a sunglasses/ phone cubby, but also houses the Lokar shift indicator as well as some momentary switches for the door solenoids.
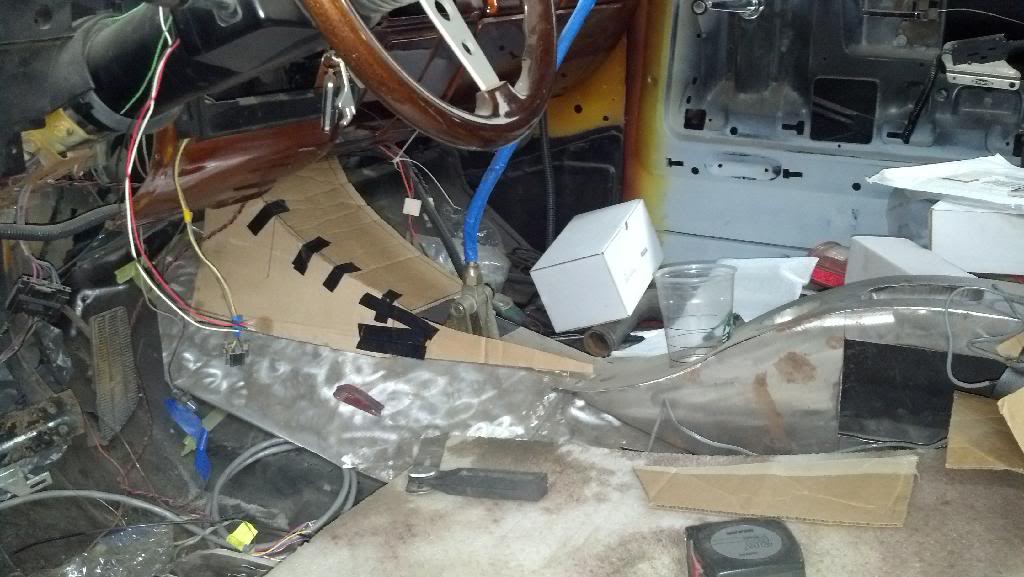
it eventually became 1 long piece stretching from the back of the cab to under the dash. out of order time wise, but I also added a kicker Bluetooth stereo so I did not have to have a radio face anywhere

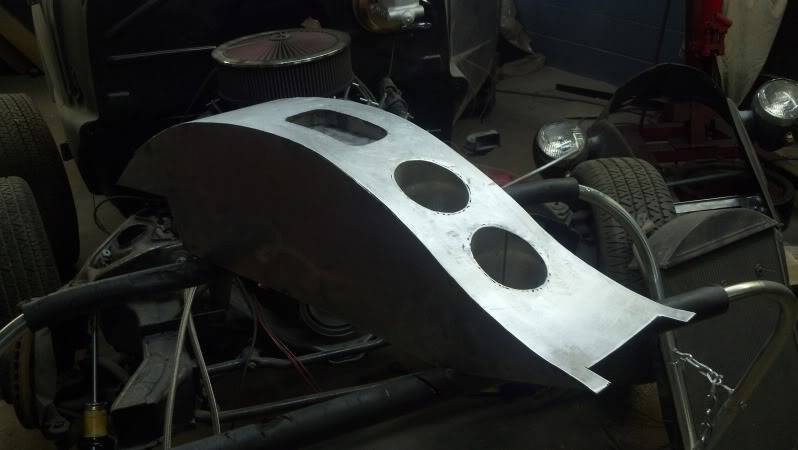
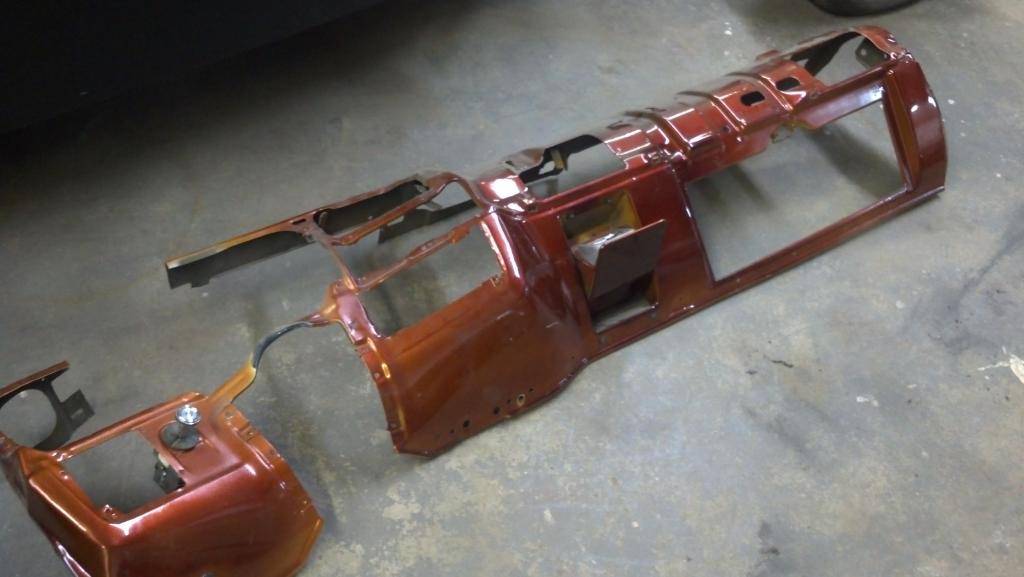
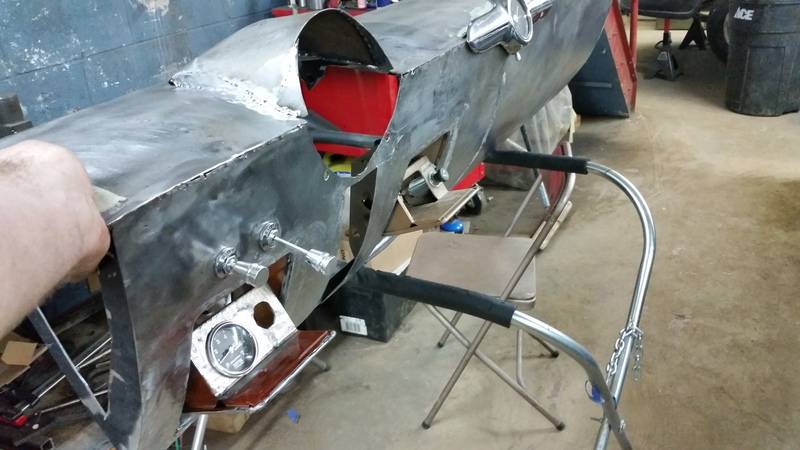
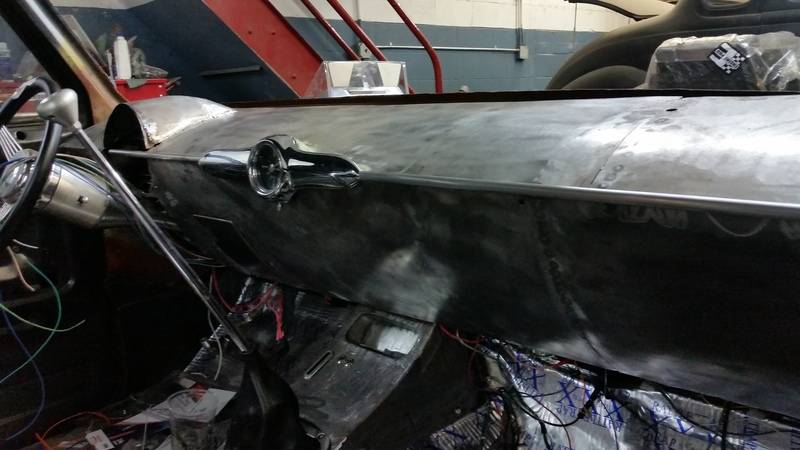
I have been looking for 49-54 chevy coupes fairly regularly for the past 5 or 6 years, im sure i'll eventually build one, but to hold me over, I decided I was going to build a dash loosely based around the dashes in late 40's/early 50's chevy and ford coupes and sedans. I was also convinced that I may be able to spend about the same amount of money building the dash/ sourcing the gauges and buying a universal wiring kit, rather than a kit specific to c10s, and if was spending the same amount, might as well have something I may like better.
so this started, these stock dashes are not removeable and had to get cut out with an air saw
01-25-2016 #11
Registered User
- Join Date
- Jan 2016
- Location
- South Shore, Mass
- Posts
- 13
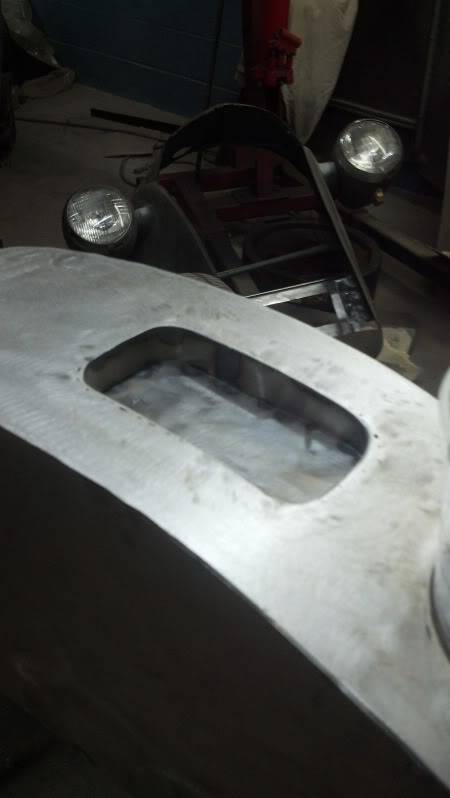
for the start of the dash, and the late 40's look I was loosely basing it off of, I had grand dreams of breaking out the compass and pattern stencils but instead just scribbled a shape with a sharpie and cut it out with an old razor blade
which eventually after cutting out a lot of "ribbing" supports, turned to this
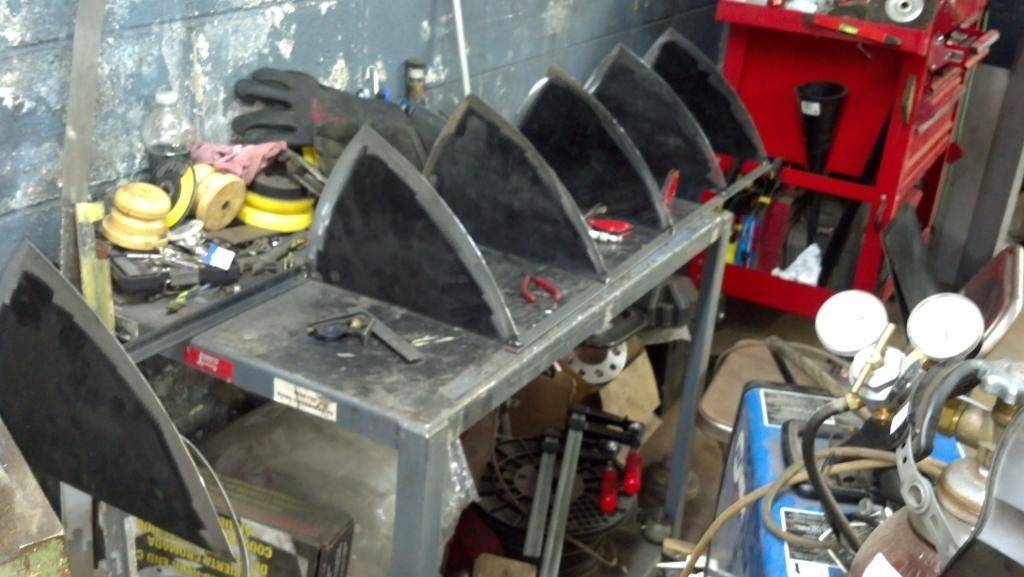
and once skinned became this
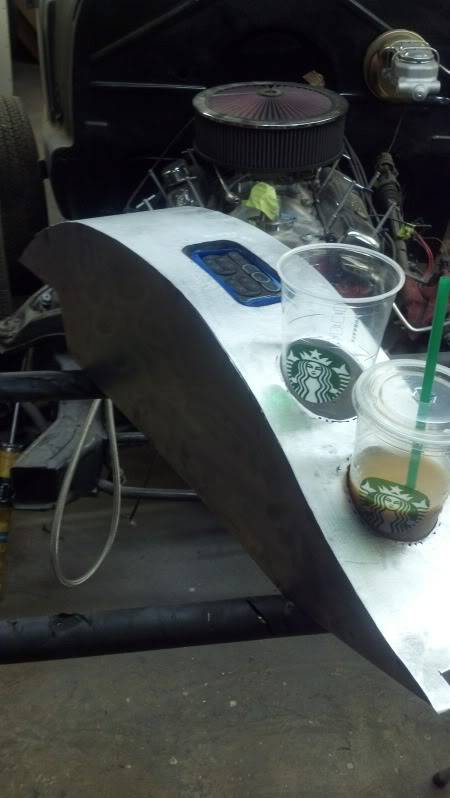
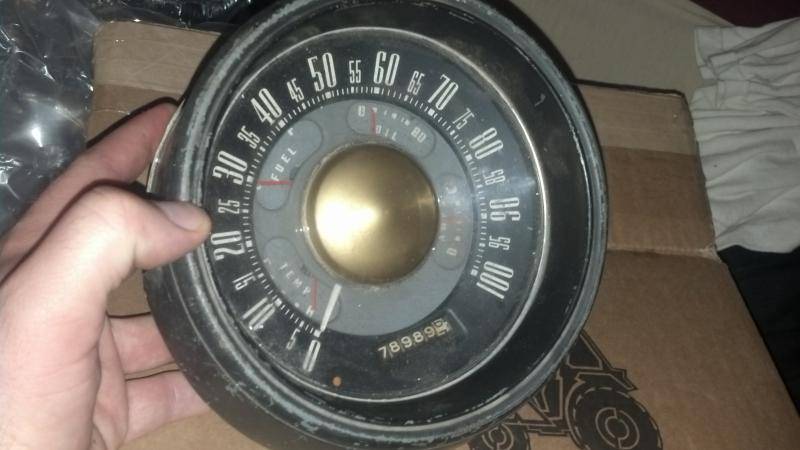
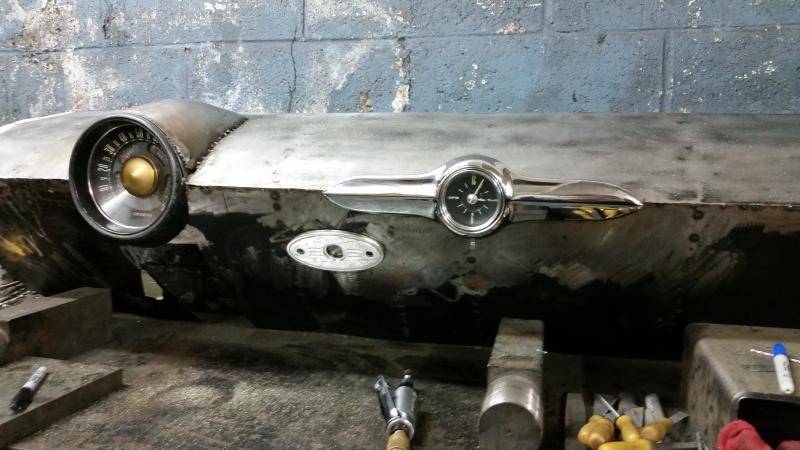
a 5 in 1 gauge from a 49 Ford shoebox was procured for cheap off of ebay, and after a little trimming and shaping, I ended up with it starting to look like something

along with a '48 ford analog clock and repro bezel from ebay.

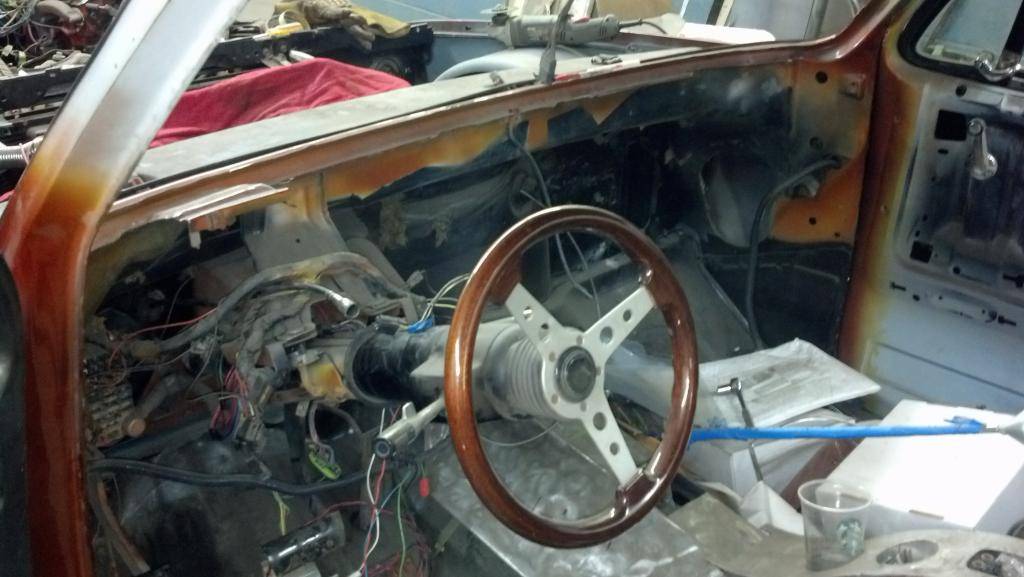
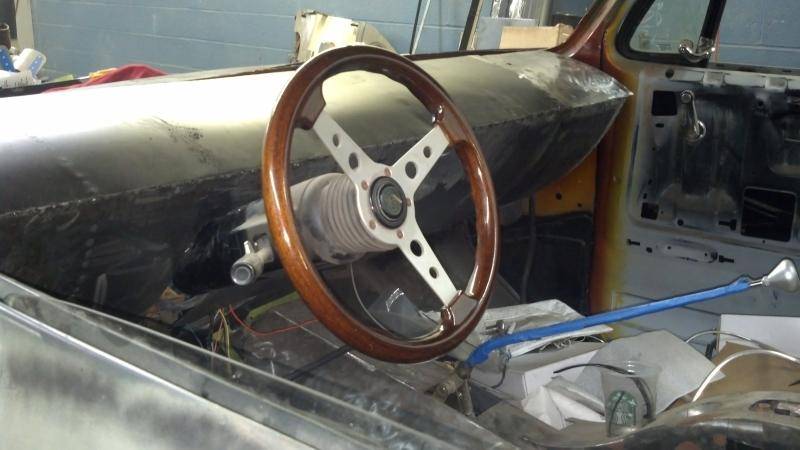
new flaming river tilt and wheel from Forever sharpe
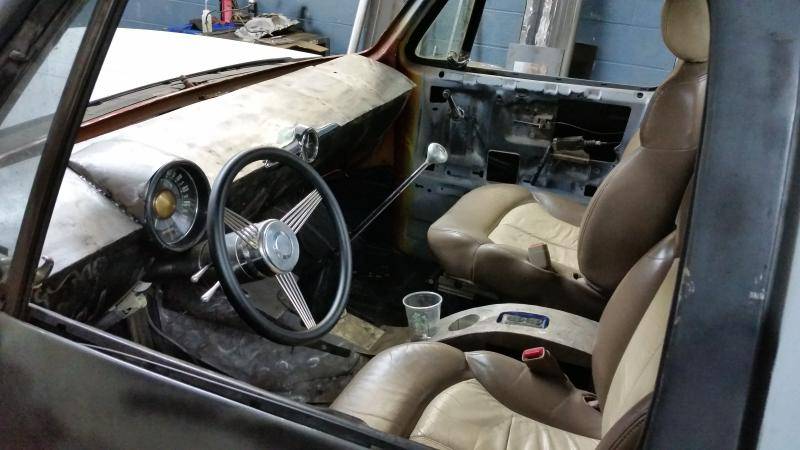
to try and keep the dash as simple and clean looking as possible, I cut the old ashtray assembly out of the stock c10 dash, and fit a small autometer tach and the ignition switch

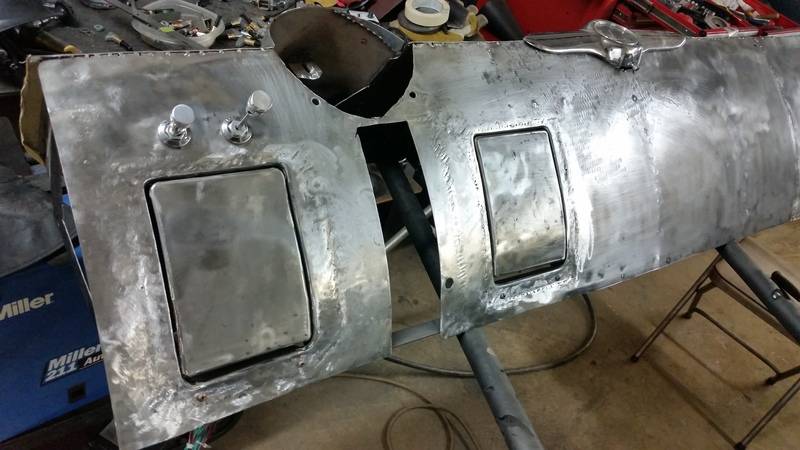
to make the dividing line trim pieces, I found some lengths of tubing, and cut basically 3/5th of it out of the circumference and tacked some button head screws into the backside of it

and some body filler and primer to get a look at it, still need to go back and sand a few more times, but this is basically how it sits now

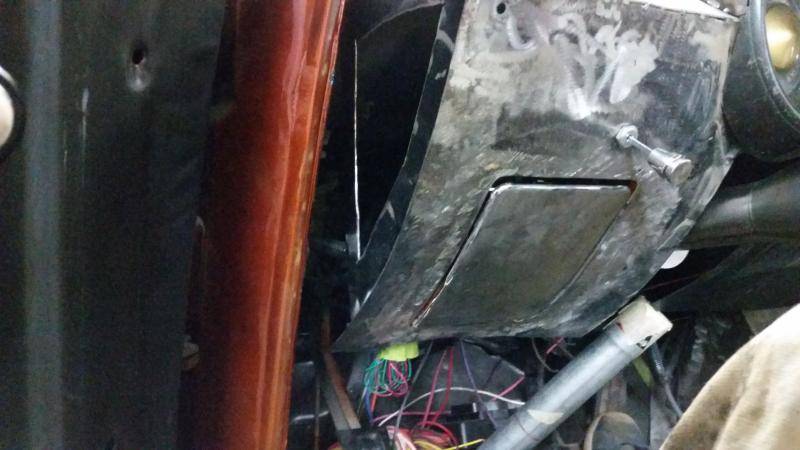
the Hide away ashtray door to the right of the steering column is housing the adjustable torque converter lock up controller as well as a 12volt plug in for chargers and such.
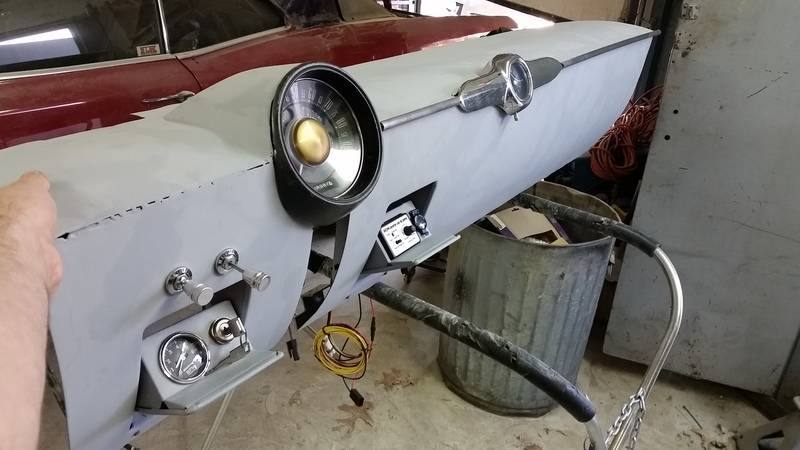
and with the under dash lights and some accessories lit up for effect,


obviously utilizing a positive ground 2volt input to 6volt output for the gauges as well as the analog 6volt dash clock and adapting the correct ford sensors to fit the chevy motor, luckily it all seems to be working after a few trial and error parts being swapped around.
01-26-2016 #12
Registered User
- Join Date
- Sep 2015
- Location
- SW KS
- Posts
- 162
The dash is my favorite part of this project! Love your work. Keep it up!
Chris
03-07-2016 #13
Registered User
- Join Date
- Jan 2016
- Location
- South Shore, Mass
- Posts
- 13
after a few month hiatus from the owner of the GTO's spare money going to fixing up his daughter's new house, he dropped off some cash to get back on his car.
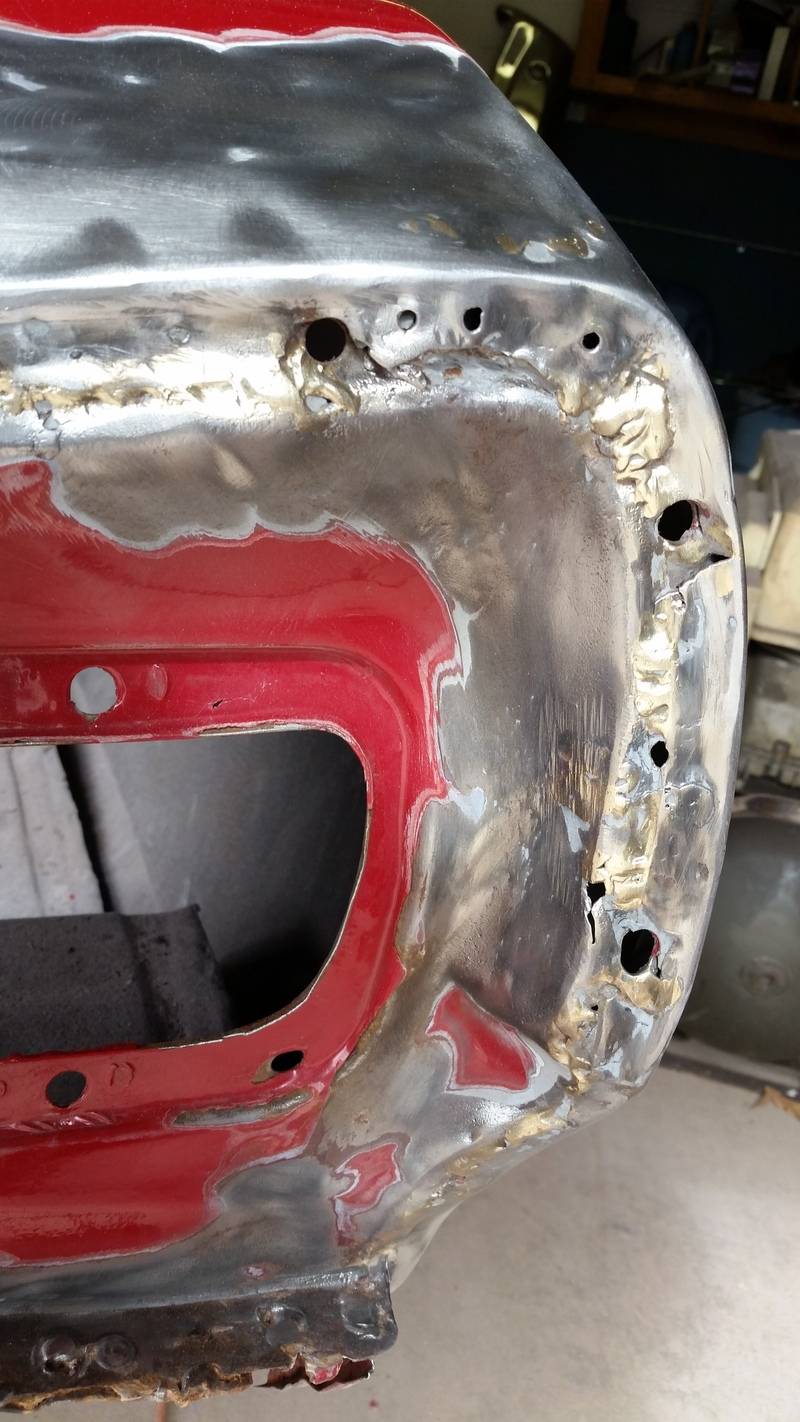
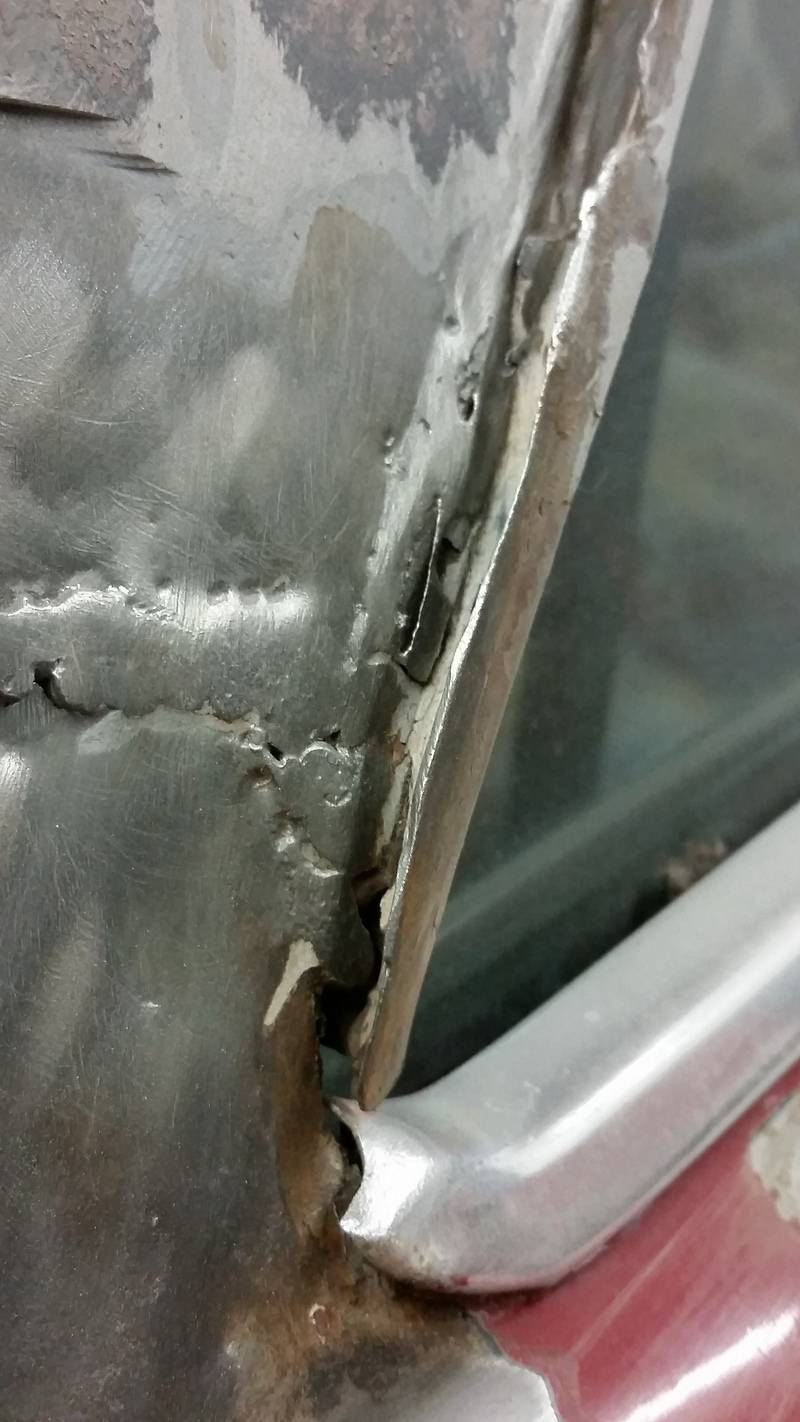
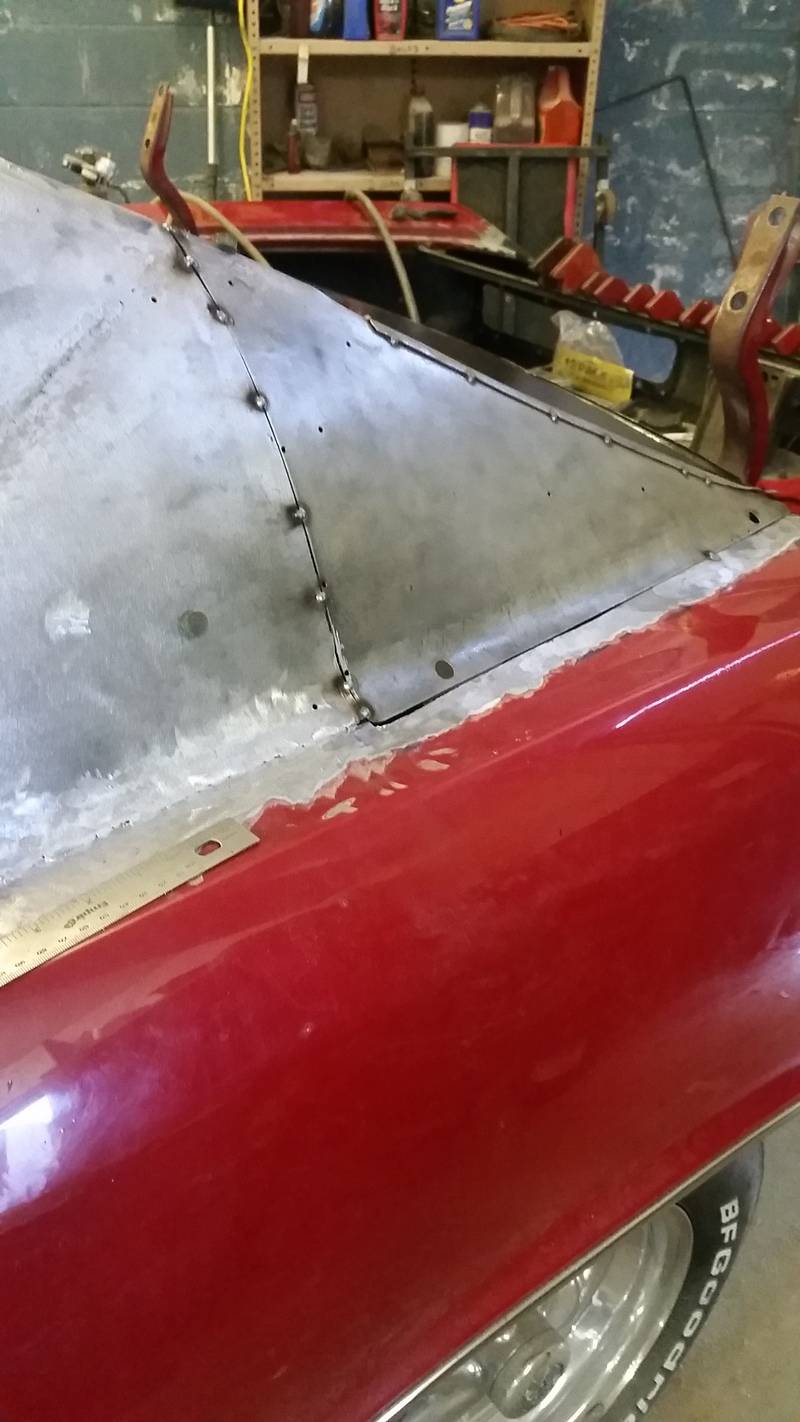
Mostly just replacing the previous owners patch work and some very pitted metal where the vinyl top ends and trim collects water and i figured it would just be easier to replace both offending sections with 1 piece rather than making 2 separate patch panels.
With all of the curves and no space behind to brace to keep whatever i cut out from spreading open and lose the original shape, i alternated cutting out the old section as i was welding in the new material, and also made for a perfect fit.

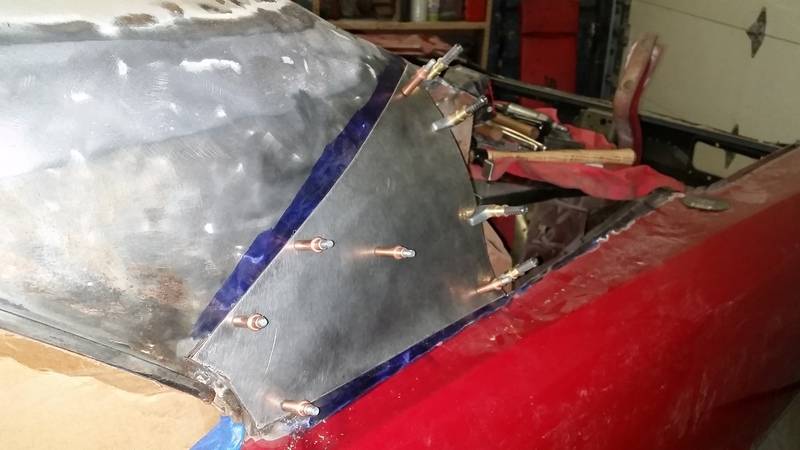
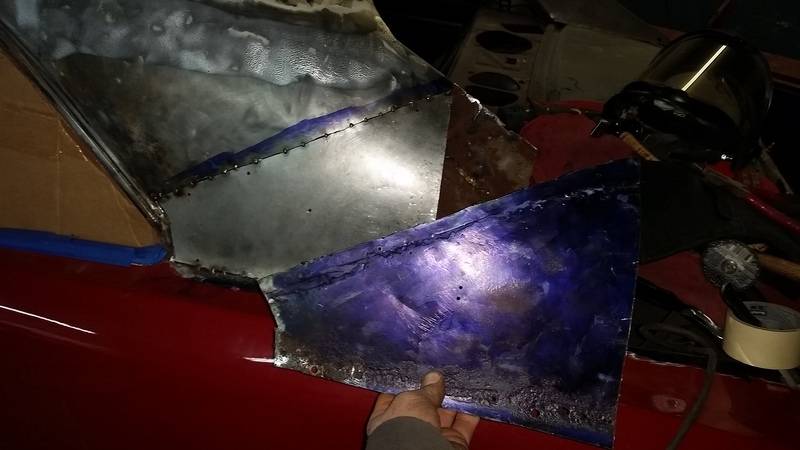
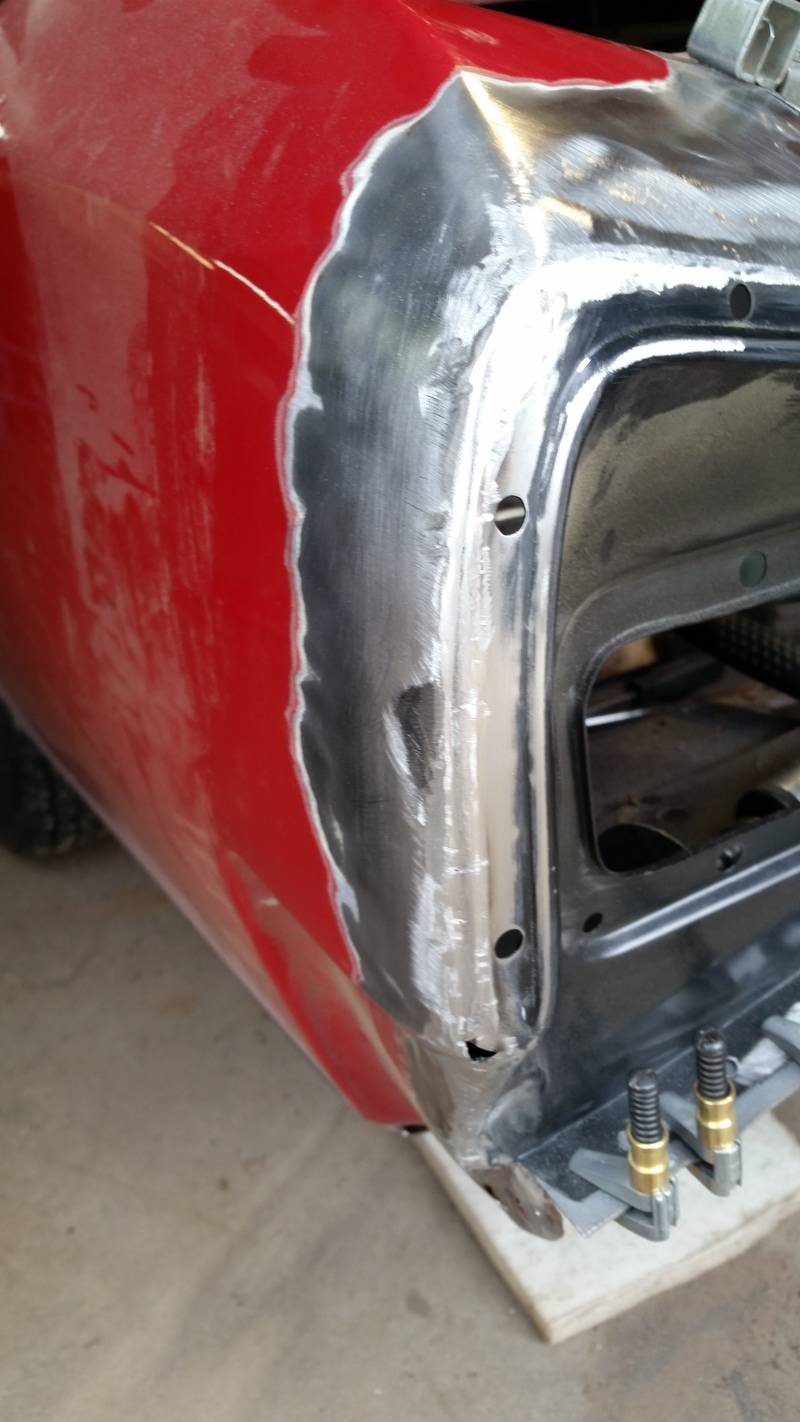
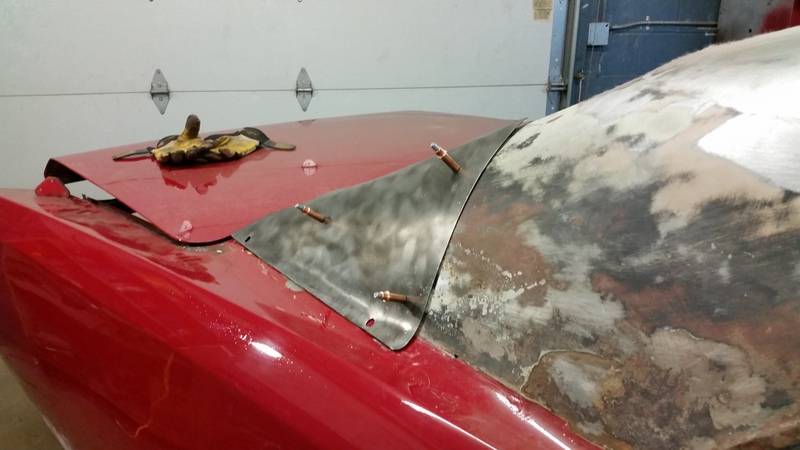
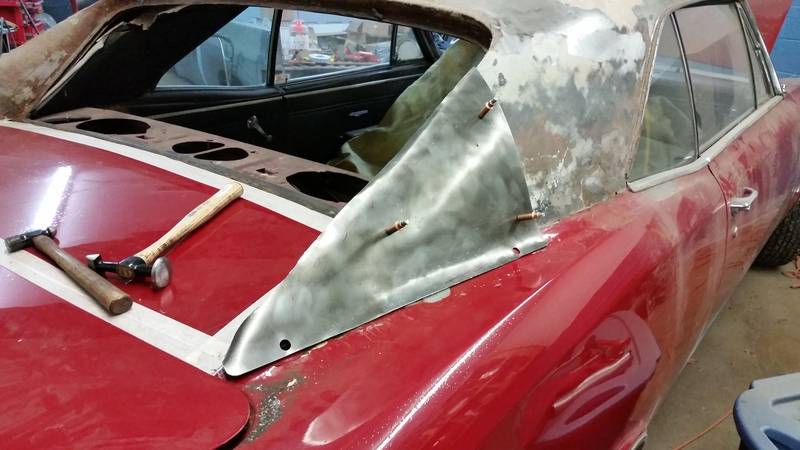
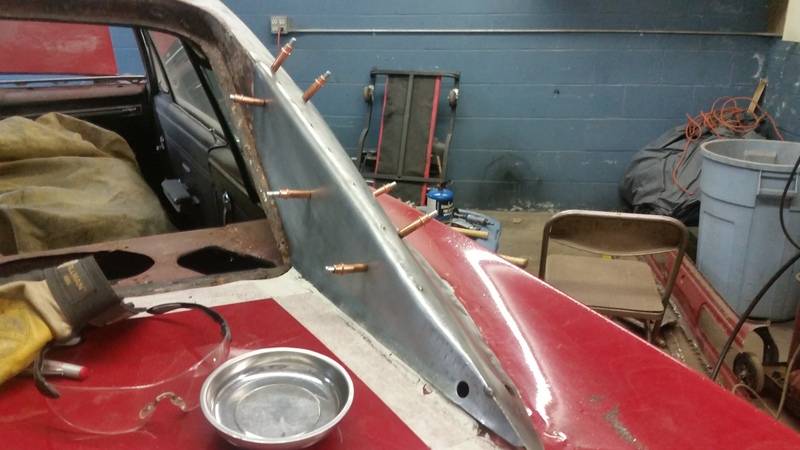
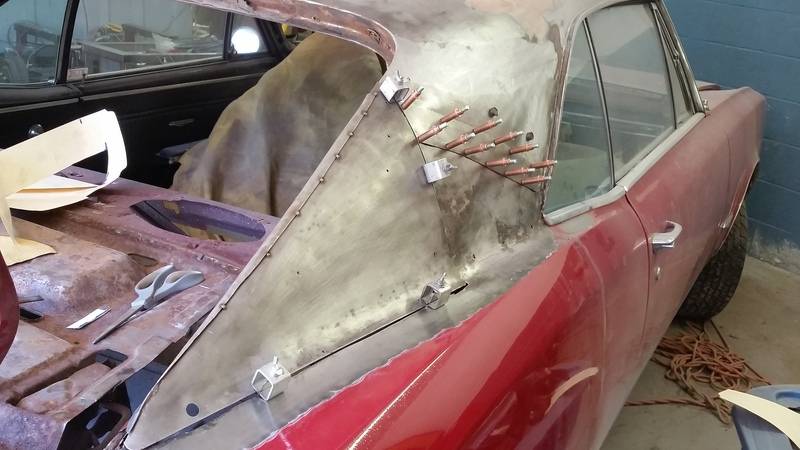
some trimming and reshaping the sail panel i made since when i made it , i was referencing a out 1/3" of bondo that has since been removed.
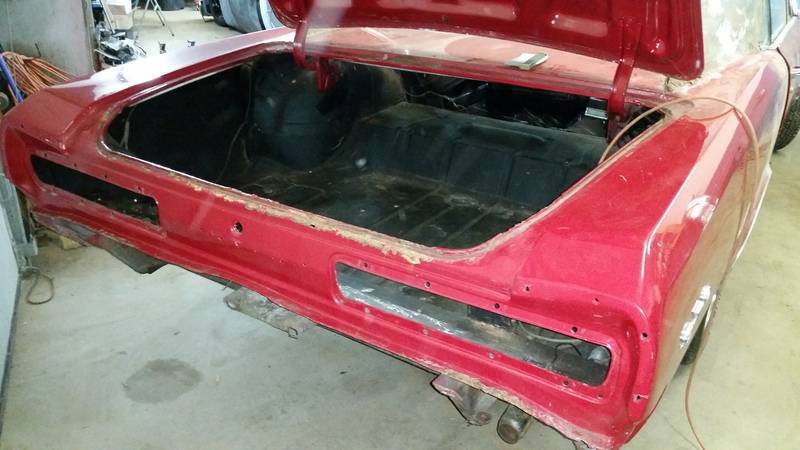
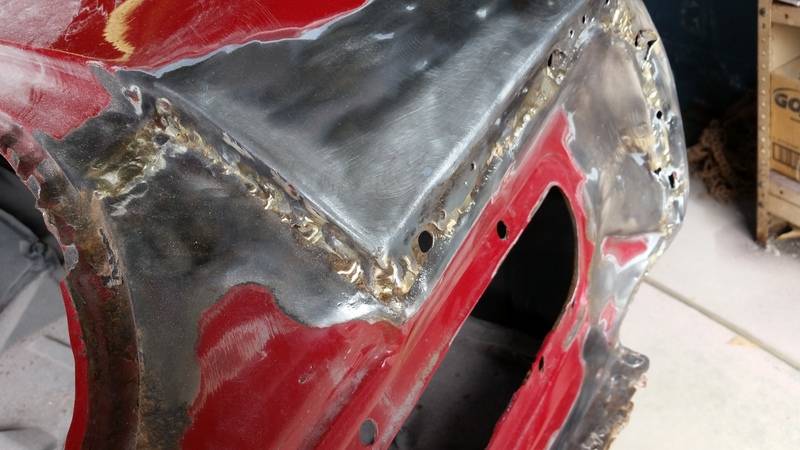
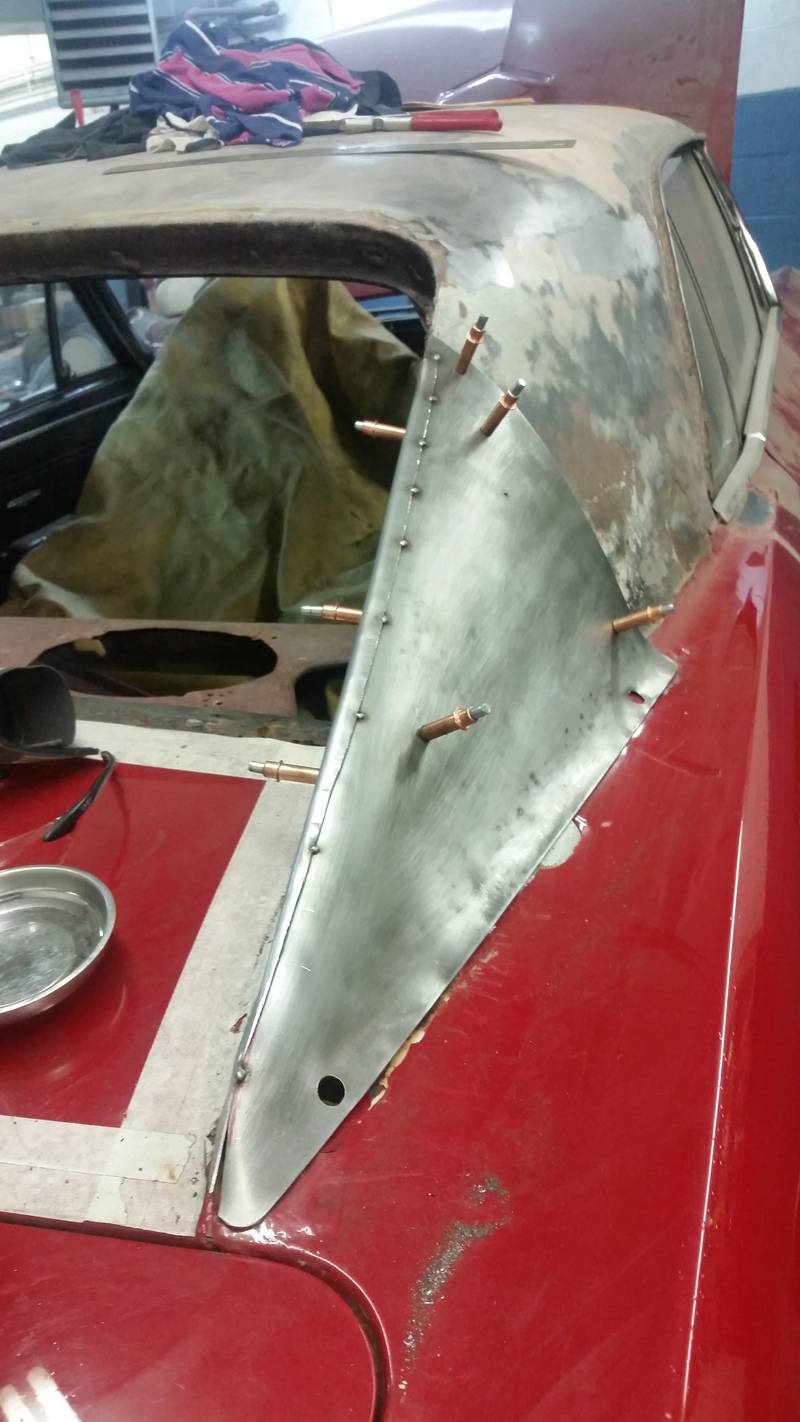
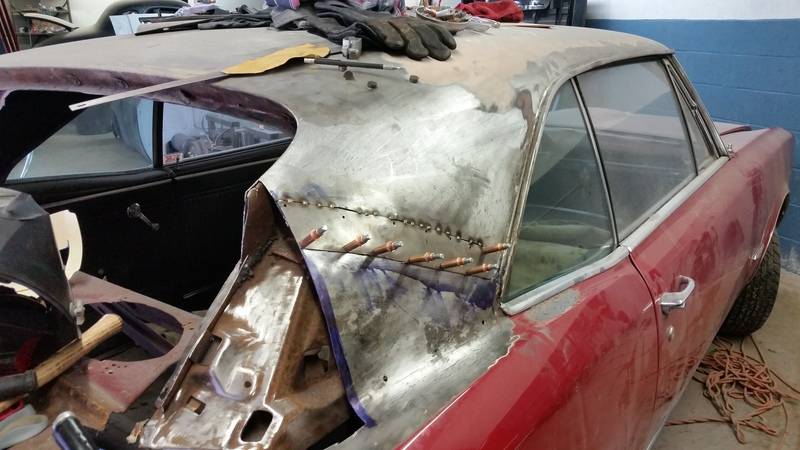
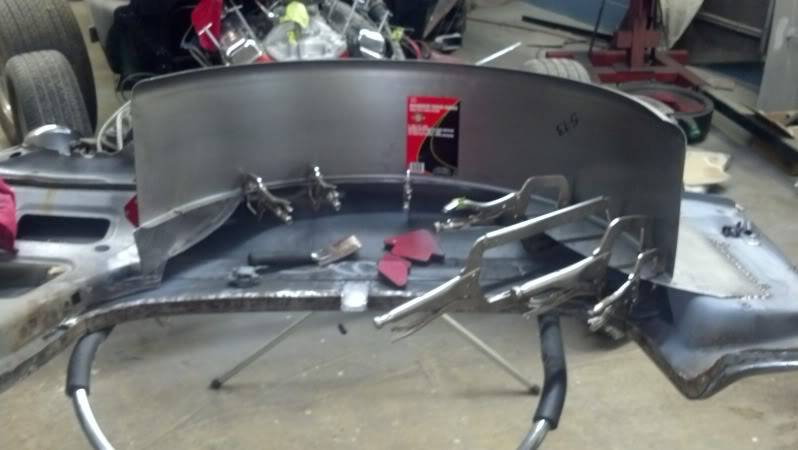
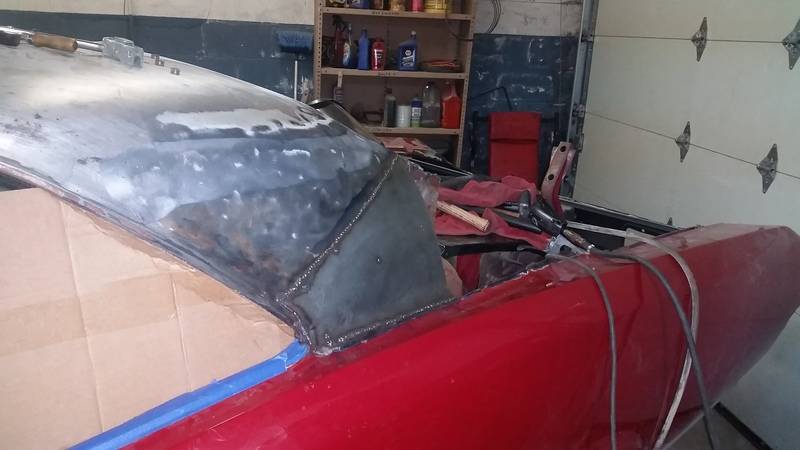
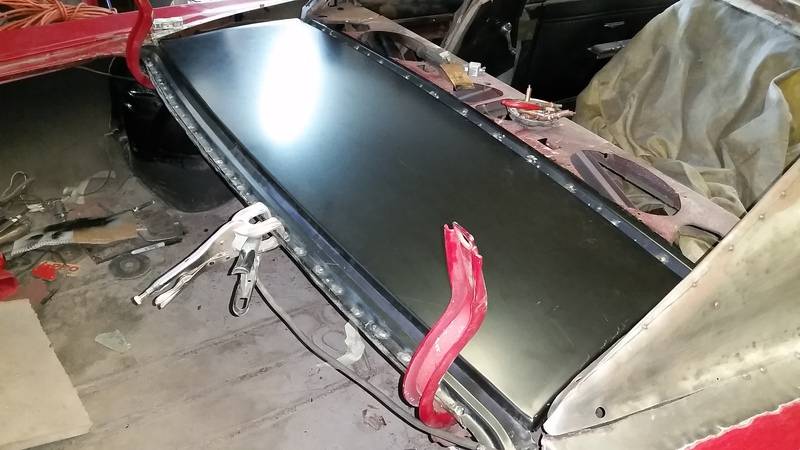
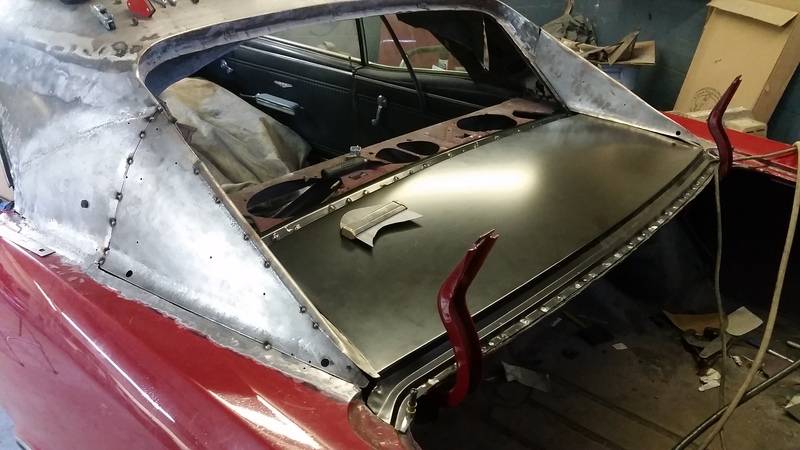
After speaking with the owner, we opted to do away with the factory seam dividing the deck lid and sail panels and weld it smooth to lessen the chance of water having somewhere to penetrate, as this was a big reason for why there is so much damage to this car. Inner structure of the deck lid was pretty flimsy so that was reinforced and a few spots cut out and replaced with non-rusted metal. POR'd the whole thing with the exception of about an 1.25" lip on the side facing the backseat tray and the lip facing the trunk where the plug welds would be for the new outer panel, that was just rattlecanned with some rustoleum auto something or other. i Couldnt think of a good way to mask the spots for the plug welds as I didn't have any sheets of tape dots on hand so i just drlled all 40+ holes in the new panel, lined it up on the car and marked the holes and hit the marks with a ball end die grinder bit just enough to clear the paint off those specific areas, worked well and was quick.

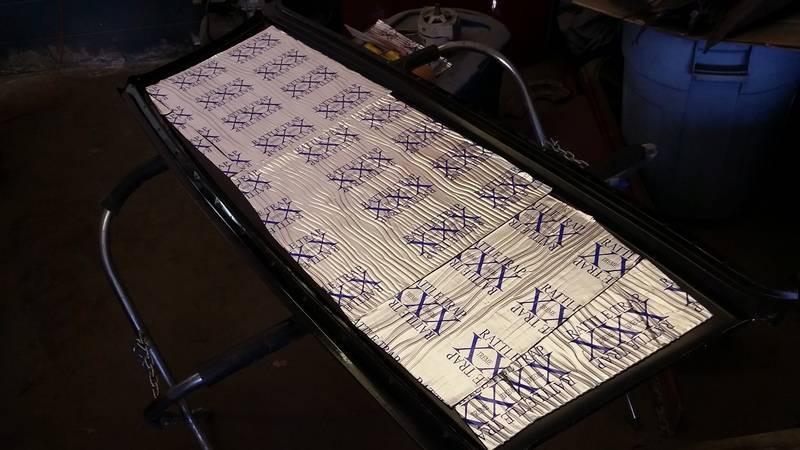
I remember when i originally took it apart there was some sort of rubbery cardboard/ jute type mats inbetween the panels. I couldnt find them where the rest of the parts were, i didnt see any repro ones in the Ames catalog or what they did but for good measure just put some sound deadener on the backside of the new panel
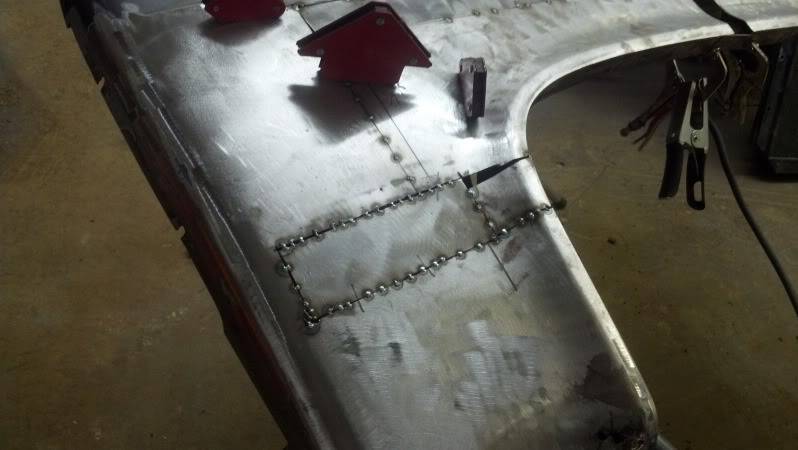
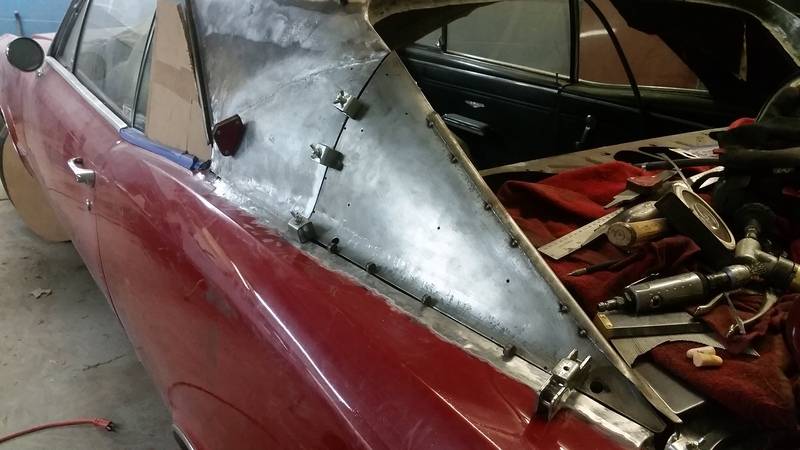
A lot of plug welds and filling in all of the cleco holes
A few tacks to position the new sail panel
And sort of starting to look like something
03-07-2016 #14
Registered User
- Join Date
- Jan 2016
- Location
- South Shore, Mass
- Posts
- 13
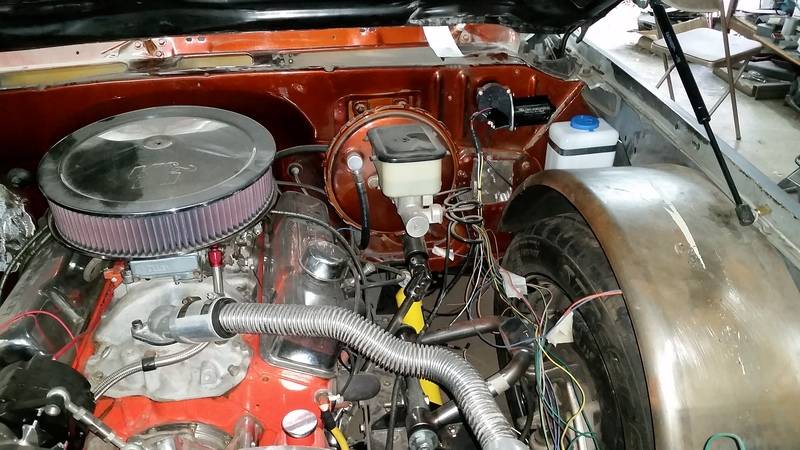
Not much to write home about with the C10 unfortunately but in an effort to finish off the wiring on the front, I was tired of screwing around with getting the factory wiper motor to work with the aftermarket switch and after losing a few ebays for the DSE system, ( I was thinking of buying new but I knew I was going to have to modify it a bit to work with the truck and they are too expensive new to not get that queasy stomach feeling of having to modify an expensive new part!) I bought a New Port engineering system for a 70's nova, I believe, along with the cheapest washer tank and pump I could find on amazon, $25 I think.
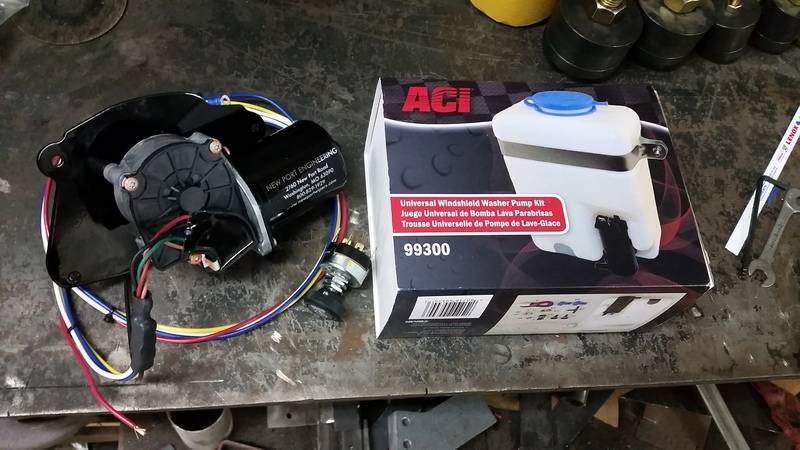
Wiper install was ALOT less than i was expecting. It came with a firewall mounting plate and linkage bracket attached and was meant to just bolt to the outside firewall, but with the ribbing in the firewall, i mounted the plate on the inside of the cowl and replaced the new linkage bracket with the factory one. All that had to be done was to drill out original slotted hole in the bracket, big enough that it would press fit over the spline of the new motor when you tighten down the retaining nut....i didnt take any pictures of this.

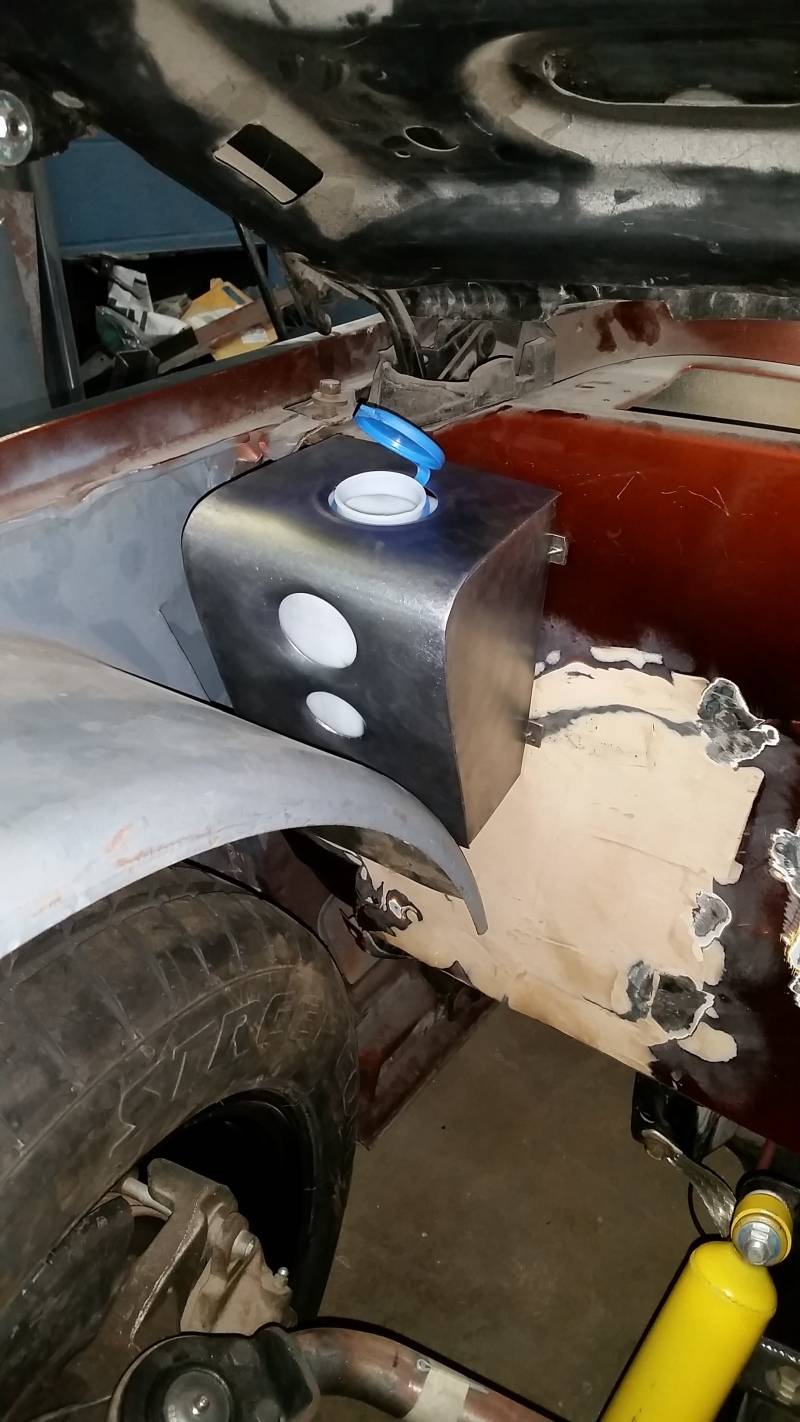
Next was to find a spot for the washer jug
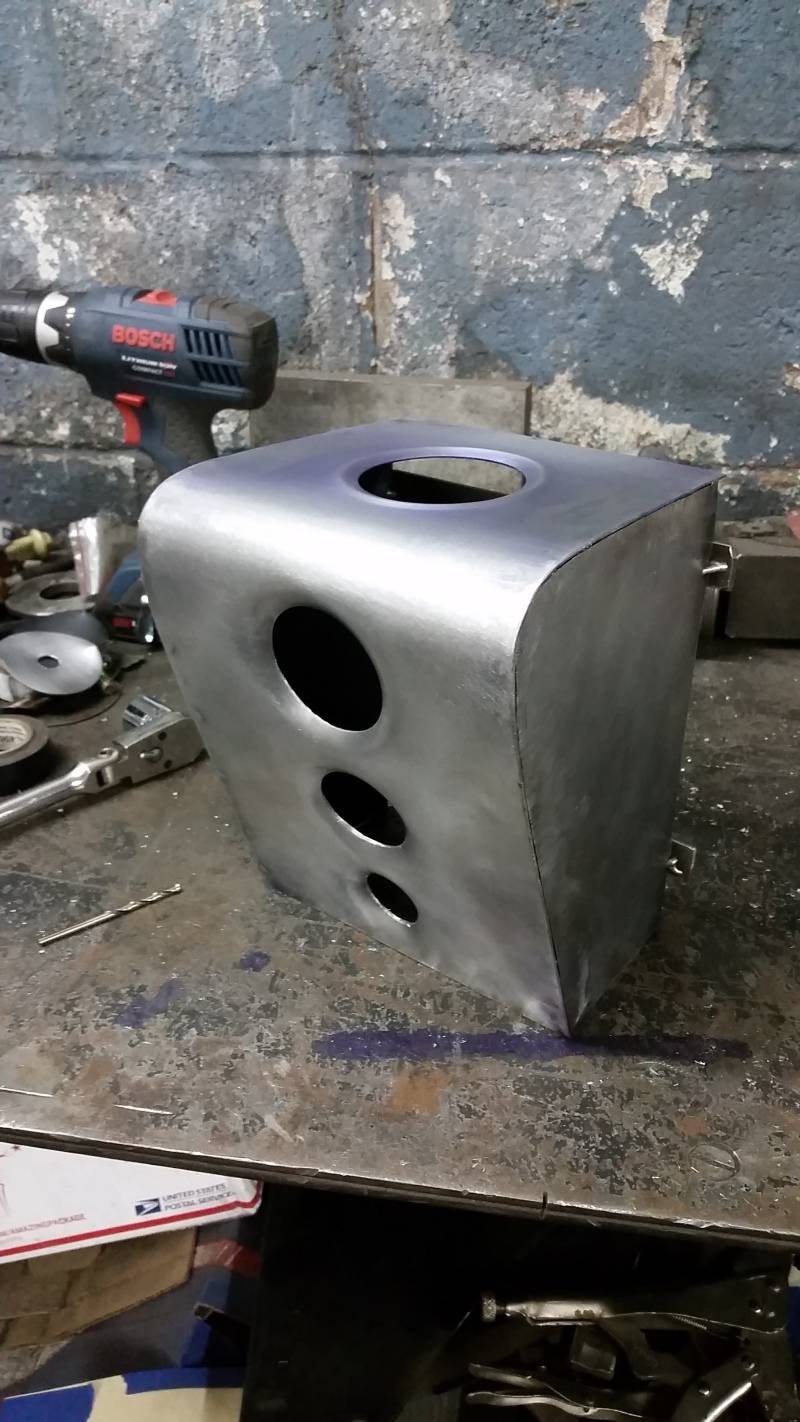
I didnt like this
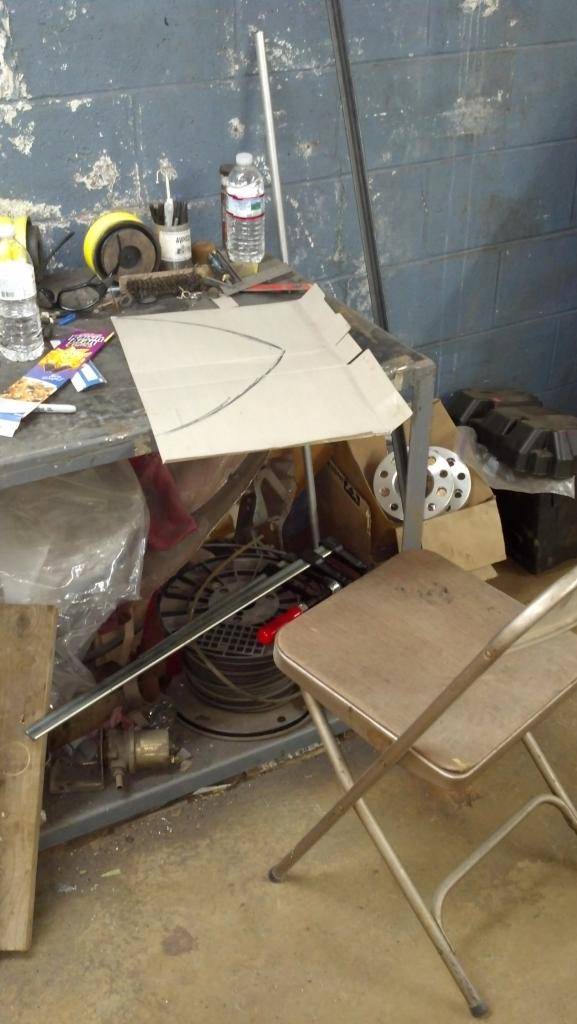
So i started making a cover, scribbled out a shape on a piece of oak tag, cut out some sde profiles and made some temporary braces to hold it together.

Bought a new punch and bead die from Mittler Bros, so that along with the $25 for the washer tank, and the not including the cost of the dimple dies, far exceeds the cost of a nice aluminum tank from summit or jegs, thus making my get off cheap plan a miserable failure. im happy enough with it, the tank will get spray painted black I think and I may add a dimpled hole on the sides of it but im not sure yet. those 2 straps tacked to the back of it will get cut off, just to help hold the shape during construction and while using the different dies.
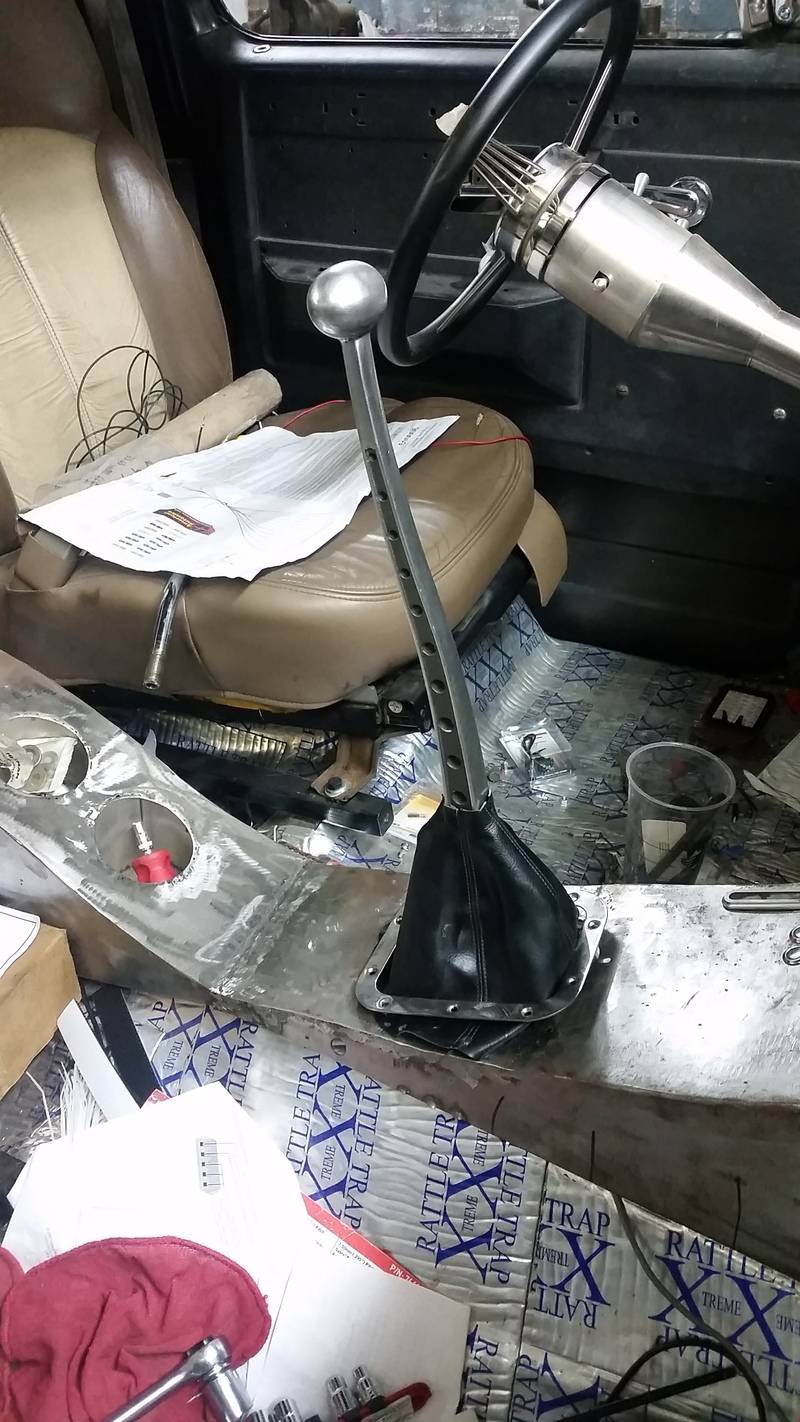
also purchased a new cast aluminum shifter from Crafty-B to replace the extra long Lokar shifter I had. I was thinking of swapping in a Gennie shifter mechanism to make the swap easier in one aspect, but it would have made changing the led gear indicator mechanism harder so I went with just modifying what I already had. I really need to throw the dash back in sometime to get the full effect since its never been back in since I started bodyworking and primed it.
5/8-18 2" bolt with a 21/64 (if i remember correcty) hole drilled through about 1.75" of the threaded portion to allow for a short section of cable from the lokar assembly that i needed to keep for the detents. Then i made a 1/8" 'shackle' that i may or may not make over again since this was sort of a test one. Drilled a matching hole in the shifter front to back as insurance incase it ever loosens, it wont be as dangerous as a side to side bolt setup. A few jam nuts to hold the bolt to the shackle and tighten it down to the lokar threaded block.
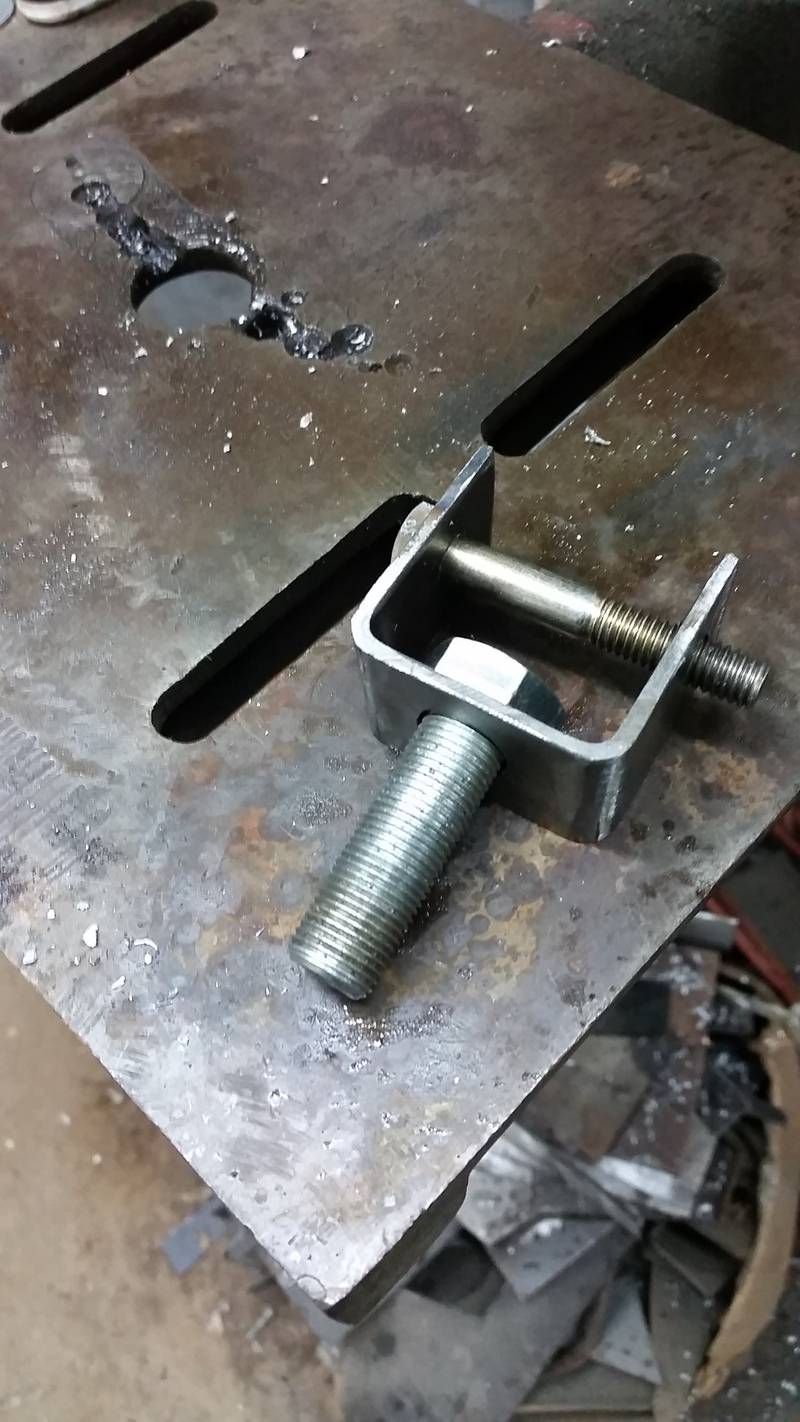


I'll need to find a new boot/cover but in the mean time i just cut the end off to open it up enough to fit. Happy enough with it, feels good through the gears with enough detent engagement to give confidence that it wont slip out out of gear


 Reply With Quote