


Results 81 to 100 of 208
Thread: My 66 Chevelle P/T build
Hybrid View


-
01-22-2015 #1
 Registered User
- Join Date
- Sep 2014
- Location
- Rochester, IL
- Posts
- 143

That's good to know Kerry, thank you!
MikeMy 66 Chevelle build thread- https://www.pro-touring.com/threads/...elle-P-T-build
-
02-09-2015 #2
 Registered User
- Join Date
- Nov 2006
- Location
- Ma.
- Posts
- 5,560
Nice job, the frame is looking good.
Wayne
Car FINALLY home !!!!!! lol
Project FNQUIK https://www.pro-touring.com/showthre...ghlight=FNQUIK
-
02-09-2015 #3
Registered User
- Join Date
- Sep 2014
- Location
- Rochester, IL
- Posts
- 143
Thanks Wayne!
My 66 Chevelle build thread- https://www.pro-touring.com/threads/...elle-P-T-build
-
02-12-2015 #4
Registered User
- Join Date
- Sep 2014
- Location
- Rochester, IL
- Posts
- 143
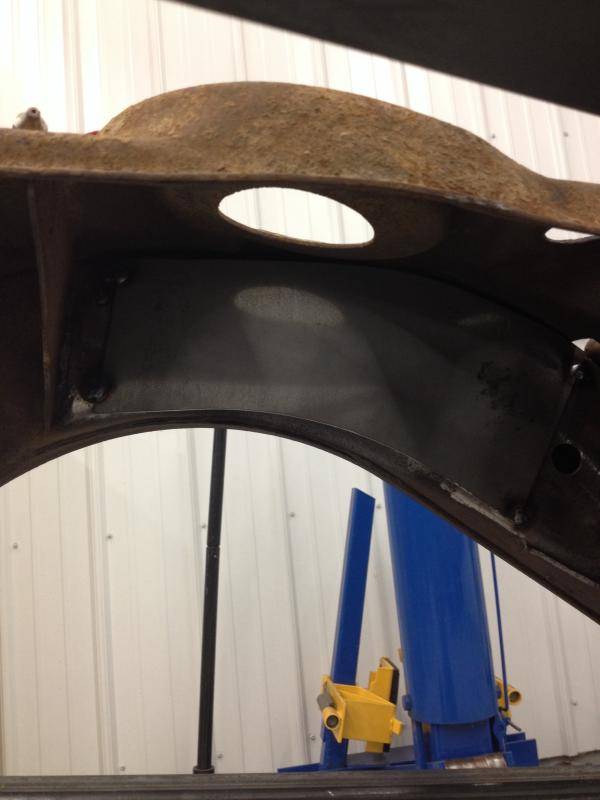
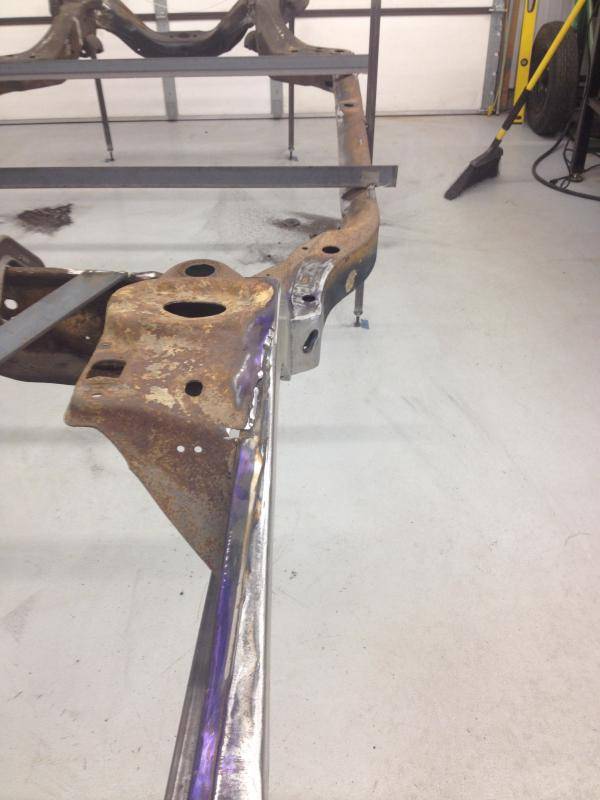
I took today off and made some good progress today. I started by welding in a reinforcement plate inside of the c notch.
Then I laid out my cut line. I used Dykem so I had a clear scribe line. I put tape on my line and used a 4 1/2" cut off wheel to make my cuts.
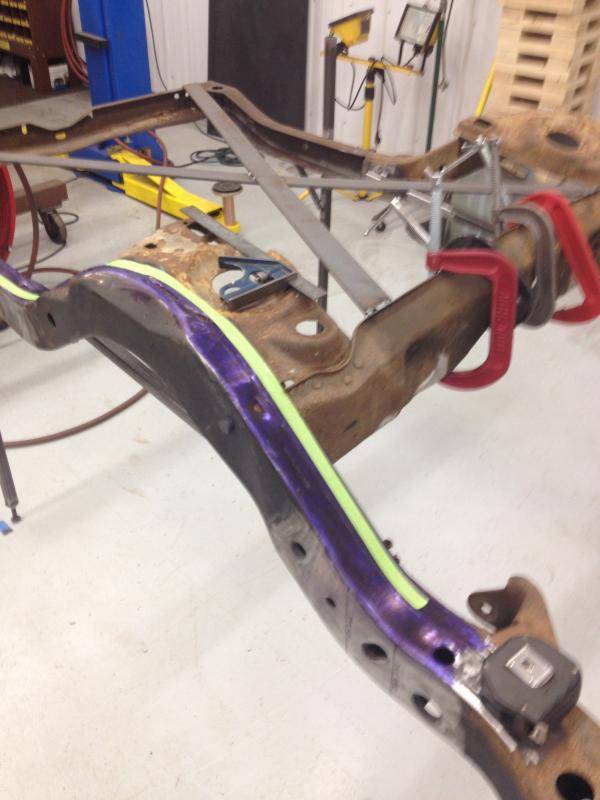
ABC provides a template to mark your front cut/bend lines to blend the new outer box plate to the front of the frame.
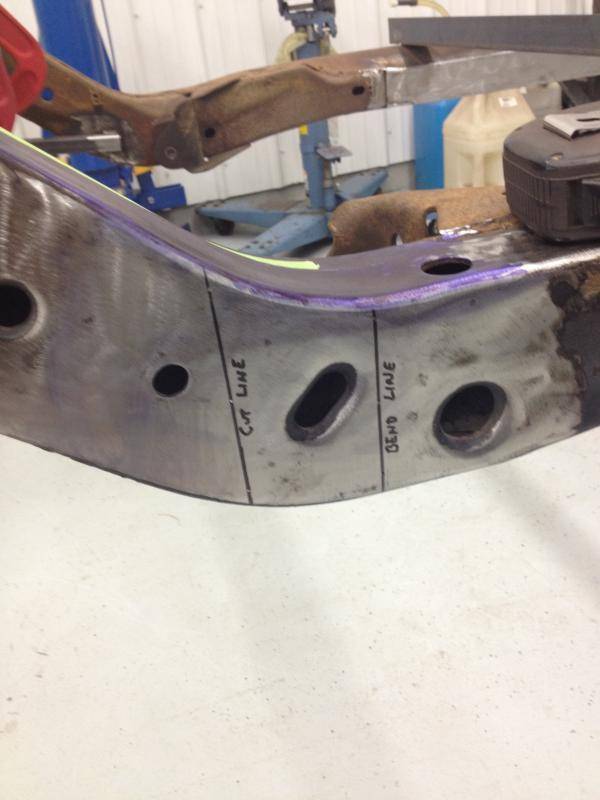
Outer rail removed. You can see where I marked a new cut line just inside of my penetration line. This area gets removed and you weld the edge to the reinforcing plate I put in earlier.
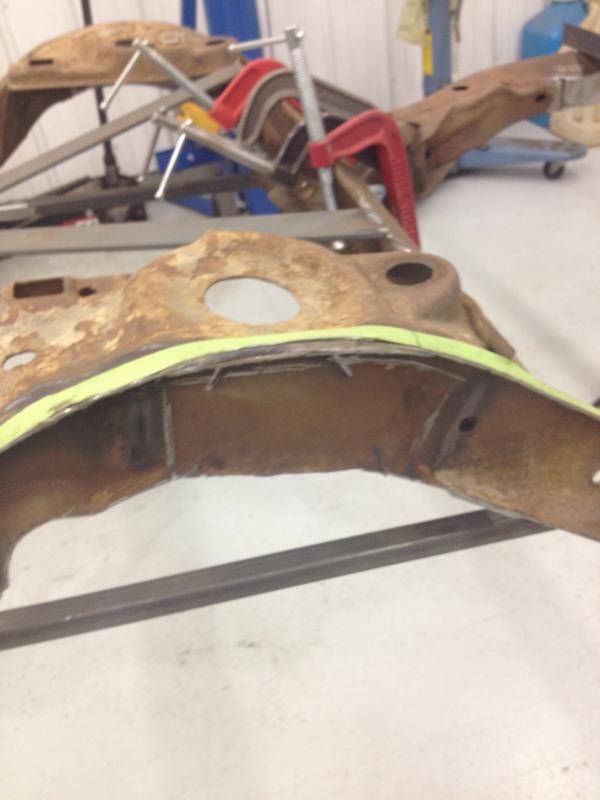
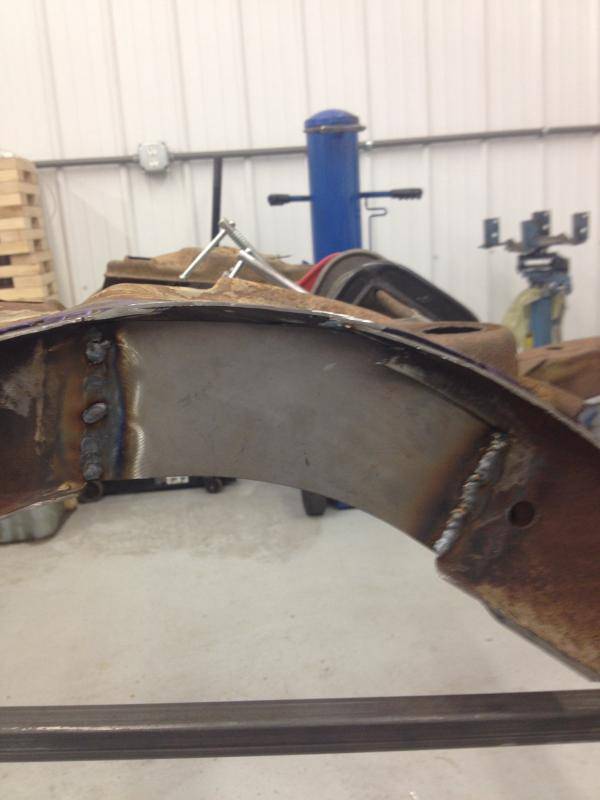
New outer boxing plate fitted and tacked in.
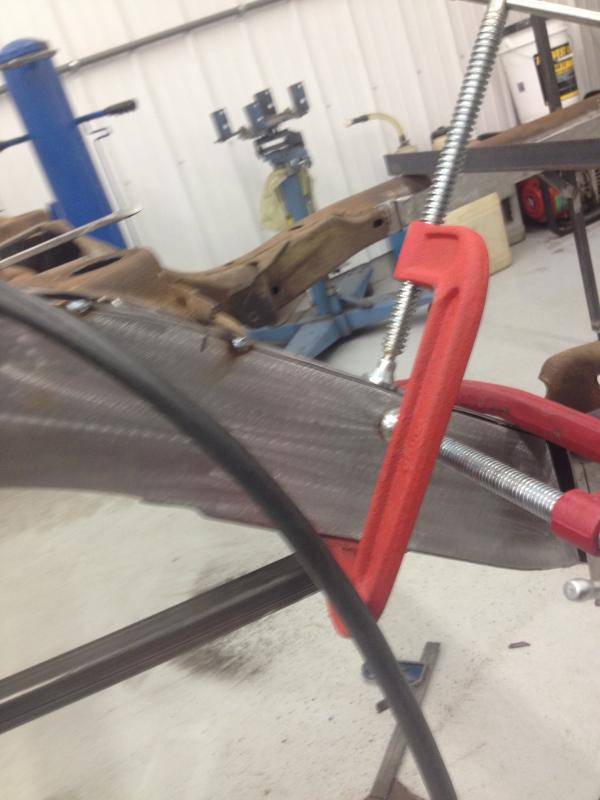
Pie cut where the new box plate meets the rear frame rail.
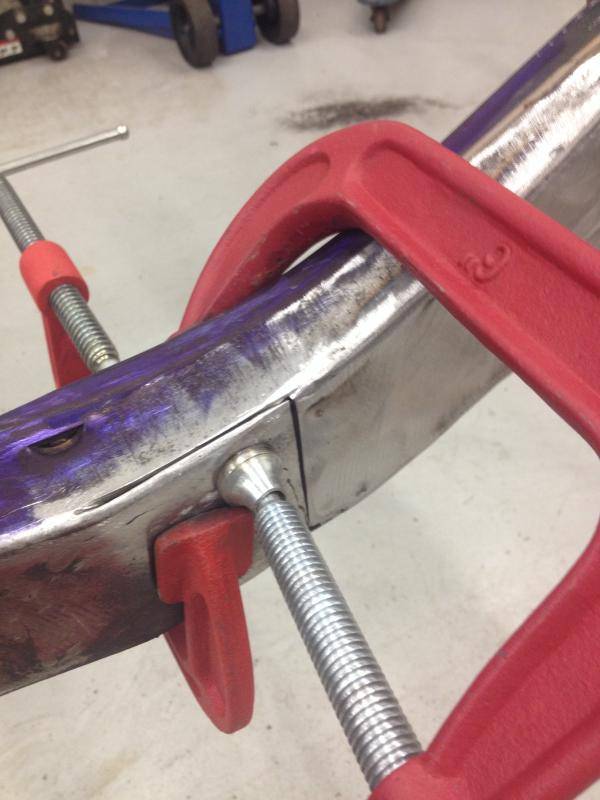
All weld dressed to a nice radius. I'm going to start on the inner c notch tomorrow. All in all, I have 8 hours in this and maybe 2 more tomorrow to finish this side. Then I get to re load and do the other side:D
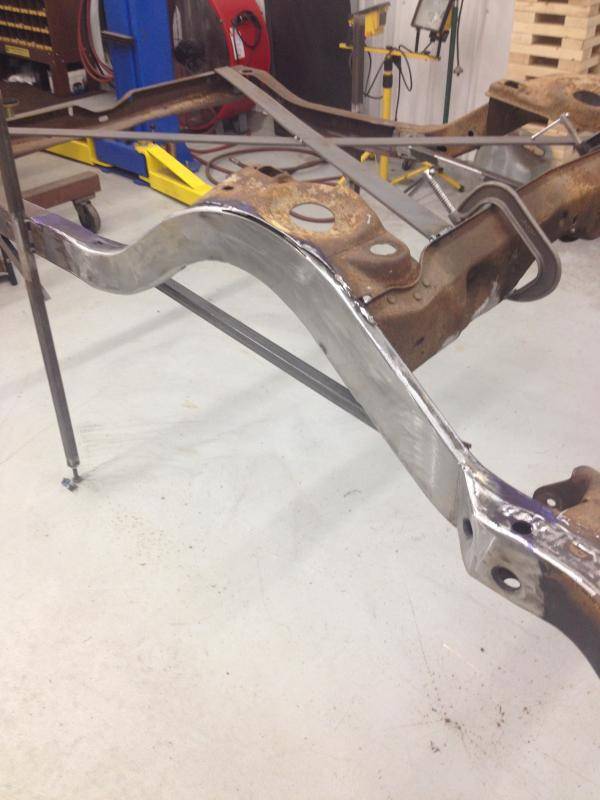
MikeMy 66 Chevelle build thread- https://www.pro-touring.com/threads/...elle-P-T-build
-
02-12-2015 #5
 Registered User
- Join Date
- Apr 2011
- Location
- Omaha, NE
- Posts
- 10
Wow moving right along... You sure work fast. It would have taken me 8 hours to get brave enough to make the first cut. I'm thinking of doing the ABC kit so I am definitely following this build!
Subscribed
T.J.T.J. Vedral
1966 Chevelle
1971 Nova
1977 Nova
-
02-13-2015 #6
 Rat Pack Member

- Join Date
- May 2007
- Location
- Mooresville, Indiana
- Posts
- 1,874
Amazing work as always! Kind of makes me want to get on Sam's frame sooner than later.
Tom Farrington
66 Chevelle hardtop (ours) https://www.pro-touring.com/showthre...PT-build-(ours)
64 Chevelle 4-dr wagon (wife's) https://www.pro-touring.com/showthre...HAUL-LONG-ROOF
The new shop build https://www.pro-touring.com/showthre...53#post1016553
-
02-13-2015 #7
Registered User
- Join Date
- Sep 2014
- Location
- Rochester, IL
- Posts
- 143
I appreciate the kind words Tom!! I'm willing to come hang out and help when you do Sam's frame. I can sweep the shop, go pick up food or just generally get in the way
 My 66 Chevelle build thread- https://www.pro-touring.com/threads/...elle-P-T-build
-
02-13-2015 #8
Registered User
- Join Date
- Sep 2014
- Location
- Rochester, IL
- Posts
- 143
Well I only got a couple hours in the shop today. In typical fashion for me, I waited until the last minute to get something for my better half for Valentines Day. I cut my shop day short, went and got her a few things and made reservations for dinner.
Here are a few pictures of what I got done this morning. First thing was removing the spring pocket and upper shock mount. Then I fit the new inner c channel and tacked it in.
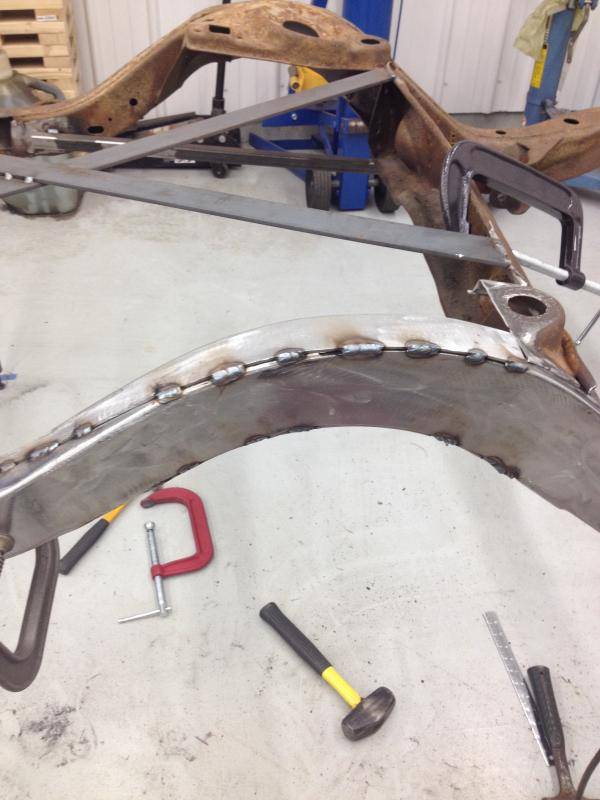
When the spring pocket is removed, you measure 3 1/4" from the rear crossmember and make a cut line. This leaves the body mount which must be boxed in.
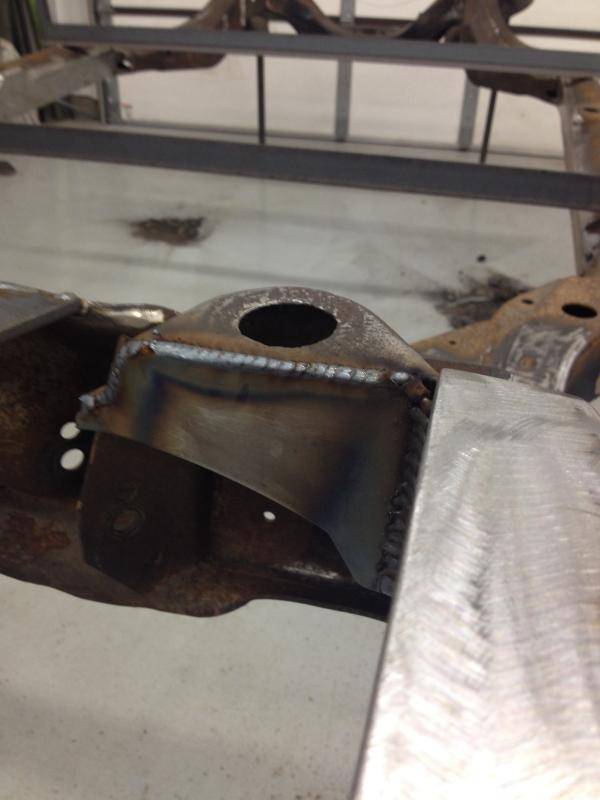
Next step is to weld in a reinforcement plate in the kick up just in front of the rear crossmember.
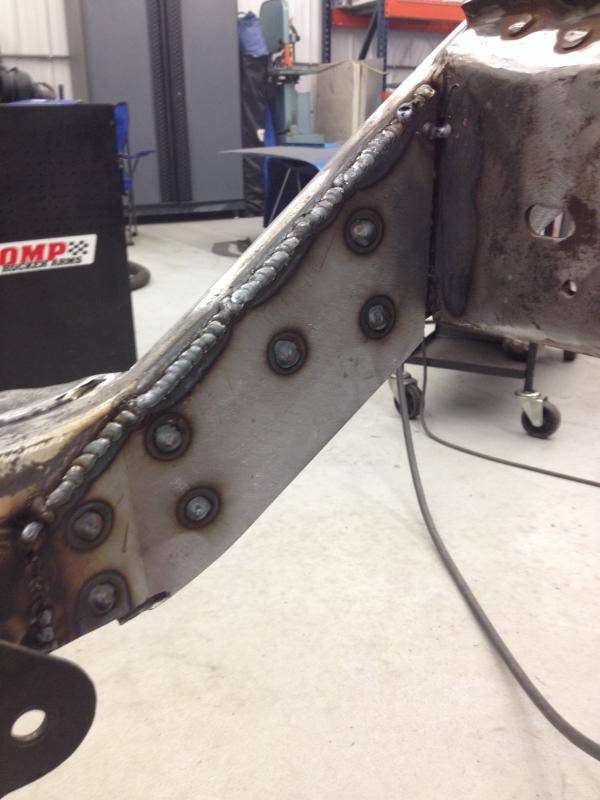
Once I dressed the welds on the kick up plate, I welded in this gusset at the kick up.
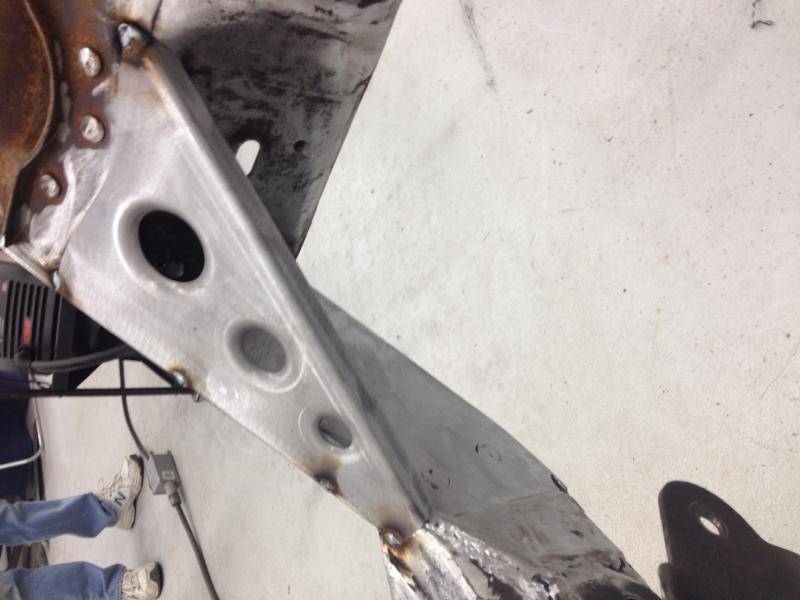
Passenger side is done, now on to the drivers side. Now that I have a better idea of what I'm doing, the other side should go a little quicker. Here is the finished rail.
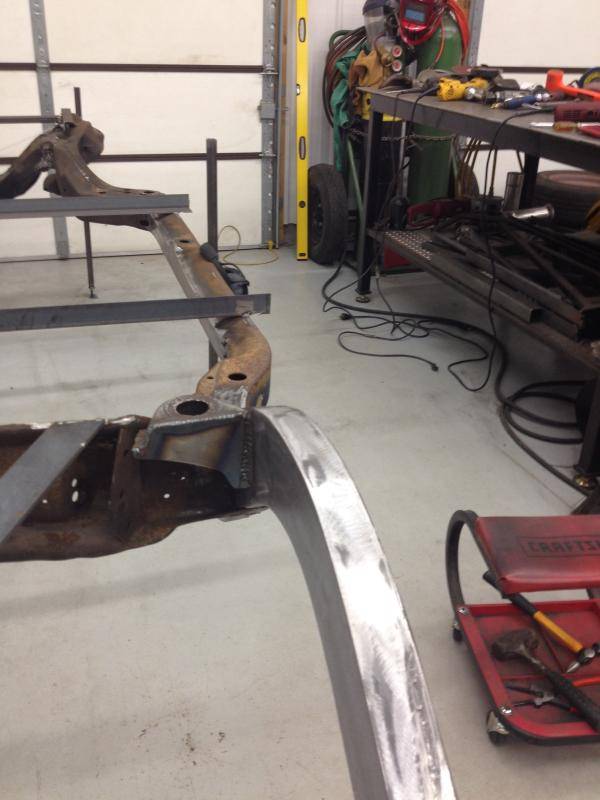
MikeMy 66 Chevelle build thread- https://www.pro-touring.com/threads/...elle-P-T-build
-
02-13-2015 #9
 Registered User
- Join Date
- Aug 2009
- Location
- Chandler, Az (from west NE)
- Posts
- 240
Moving right along, Mike, and looking very good! I back-halved and caged my Malibu to fit 14-32 tires years ago, so now I have to try to make it work on the street. Will probably be adding a few more tubing braces and the ABC plates to the frame rails. Don't know if I can afford wheels and tires big enough to fill up the rear wheel wells. Probably be doing some horse trading. I like your choice of suspension, but don't think it will work for me.
Your pics could be used in an instructional manual for ABC!Ric
2002 s10, DD and AutoX.
1966 Malibu owned since 1971. Drag car converting to track toy!
-
02-14-2015 #10
Registered User
- Join Date
- Sep 2014
- Location
- Rochester, IL
- Posts
- 143
Thanks Ric..I hope the pictures are some help to someone down the road as others posts and pictures have helped me on other projects.
MikeMy 66 Chevelle build thread- https://www.pro-touring.com/threads/...elle-P-T-build
-
02-15-2015 #11
Registered User
- Join Date
- Sep 2014
- Location
- Rochester, IL
- Posts
- 143
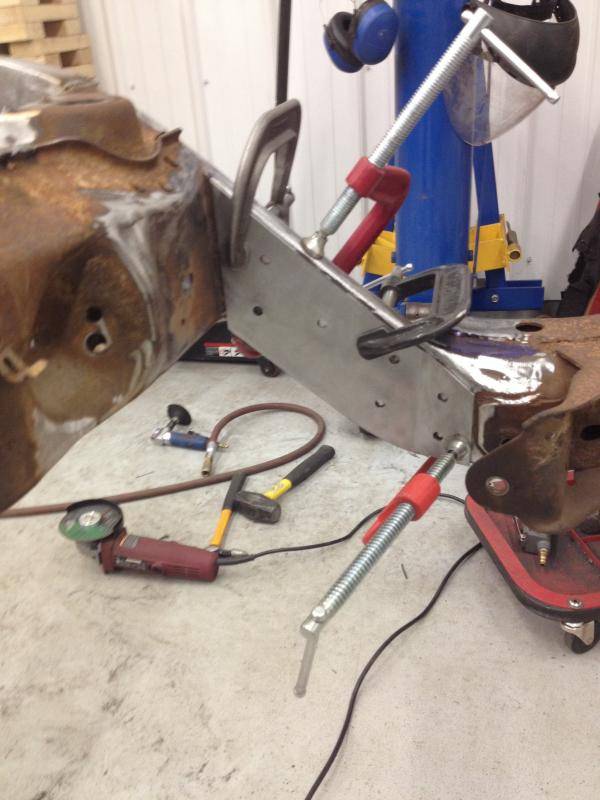
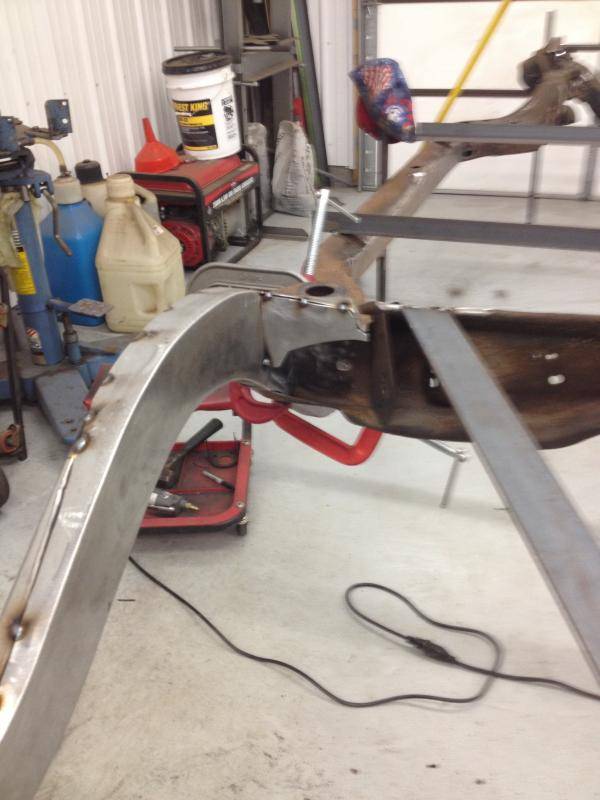
I finished the driver's side yesterday and it went very good. I didn't run into any issues at all. I still need to dress the welds on this side but I ran out of 7" discs so I'll take care of that this week.
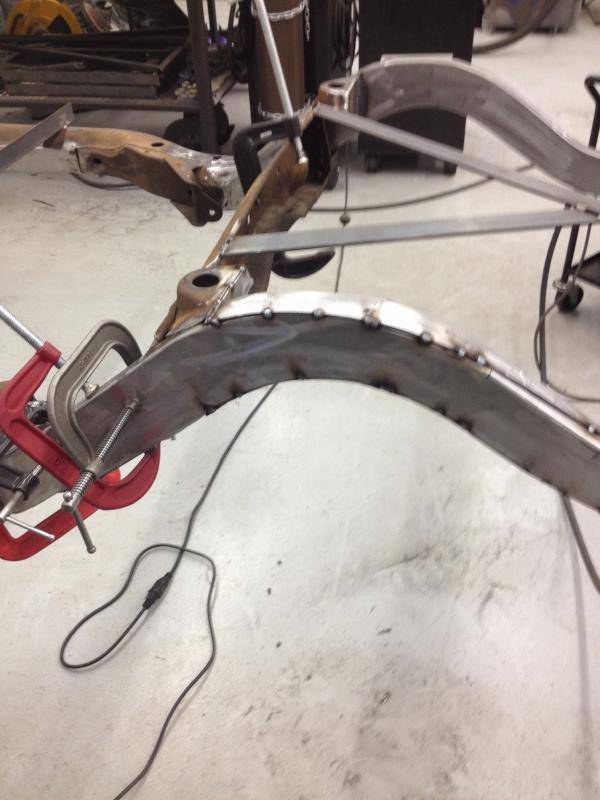
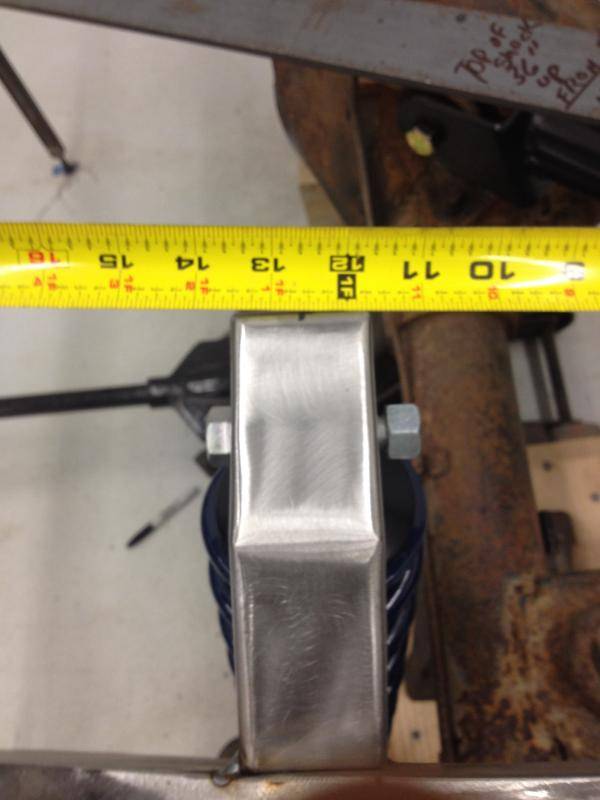
Next up today was the upper shock mounts. Of all of the steps this was the one that I was a little unsure of because the directions were not very clear. I took a chance today and sent Tony at ABC a text asking for some clarification. I was shocked that he called me right away and explained it. Thats unheard of customer service, on a Sunday no less. Thanks Tony!!
After Tony explained how simple it is, I had them on in short order. You measure from the rear of rear crossmember to the rear edge of the new shock bracket and set it at 13 1/2". The back corner is flush with the top of the frame rail. Then use an angle finder and set the bracket at 8* towards the front of the car. I tacked both in and referenced all of my measurements that I wrote down prior to cutting off the original upper shock mount and it was perfect.
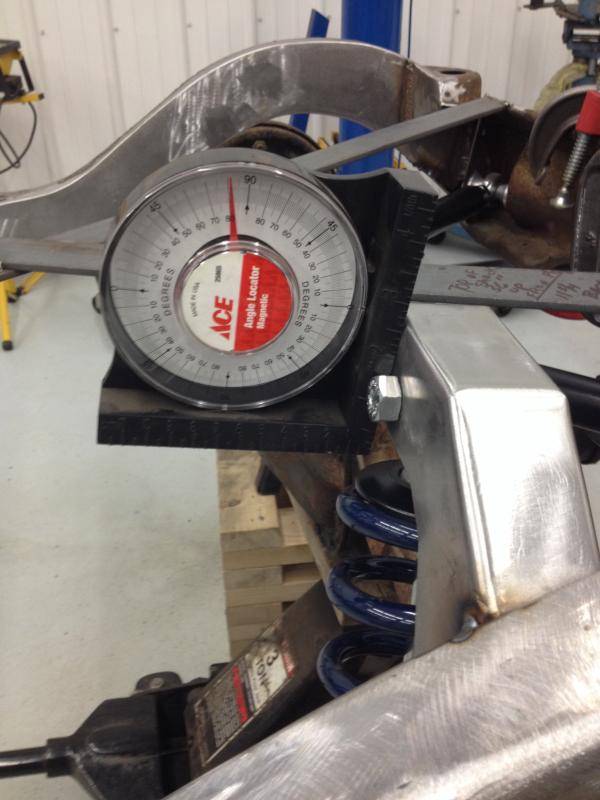
I mocked up the rear end, and installed the new ridetech lower shock brackets, control arms and shocks. Everything went together like it's supposed too.
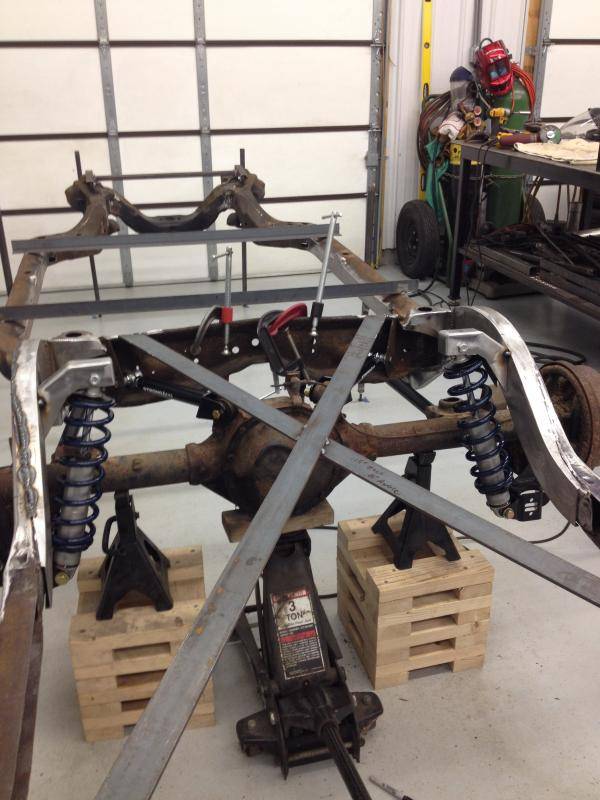
I havn't welded in the crossmember between the upper shock mounts yet. The mounts are just tacked in for now. The plan for tomorrow is to remove all of the bracing and cut the supports stands down to frame height so I can test fit the body. This will also allow me to relocate the #6 body mount that was removed during the mini tub. I'm really starting to get excited now!! This thing might actually start looking like a car again.
MikeMy 66 Chevelle build thread- https://www.pro-touring.com/threads/...elle-P-T-build
-
02-16-2015 #12
Rat Pack Member
- Join Date
- May 2007
- Location
- Mooresville, Indiana
- Posts
- 1,874
Awesome progress Mike. Looks like the upper coilover mounts have changed since I did our 66 and bought the kit to do Sam's. I like it!
Tom Farrington
66 Chevelle hardtop (ours) https://www.pro-touring.com/showthre...PT-build-(ours)
64 Chevelle 4-dr wagon (wife's) https://www.pro-touring.com/showthre...HAUL-LONG-ROOF
The new shop build https://www.pro-touring.com/showthre...53#post1016553
-
02-16-2015 #13
Starting The Transformation
- Join Date
- Jan 2015
- Location
- Charlotte, NC
- Posts
- 309
Right on!
-
02-16-2015 #14
Registered User
- Join Date
- Sep 2014
- Location
- Rochester, IL
- Posts
- 143
I had a long list of things I wanted to accomplish today and I was able to get almost all of it done. I removed all of the bracing from the frame and cut my support stands down to the top edge of the frame rail.
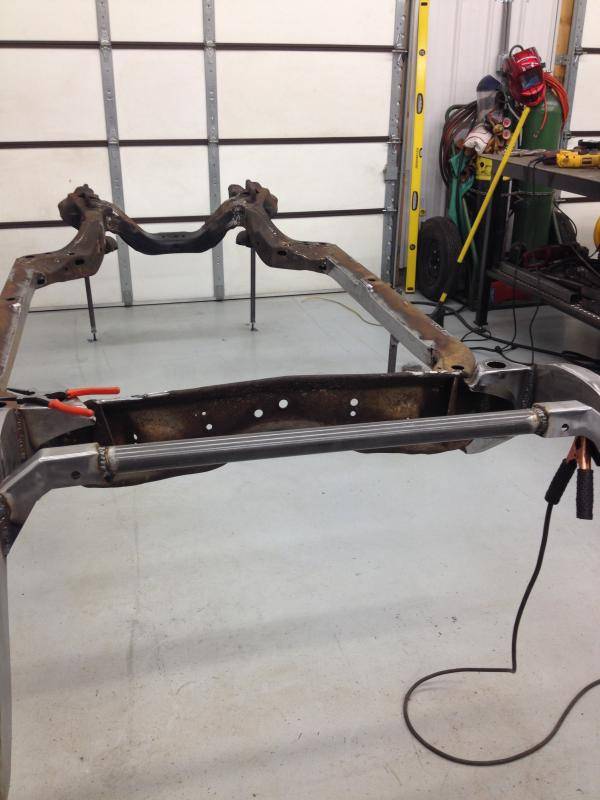
I took the body off of the rotisserie and test fit the frame. I wanted to verify the new upper shock brackets would clear the floor pan and I also wanted to re-install the #6 body mounts to the trunk pan and the #6 frame mounts as well.
The shock mounts cleared and the body mounts went on with just a little trimming. I put the body back on the rotisserie and got back to work on the frame. I welded the brackets in permanently and welded in the shock crossmember.
I use my I-Phone for all of my pictures and for whatever reason my phone kept locking up when I tried to use the camera. I was only able to take one picture today. It's pretty boring stuff but here is the only picture for today.
 My 66 Chevelle build thread- https://www.pro-touring.com/threads/...elle-P-T-build
-
02-22-2015 #15
Registered User
- Join Date
- Sep 2014
- Location
- Rochester, IL
- Posts
- 143
I'm waiting on a few pieces which hopefully will ship this Monday so I have been keeping busy with mocking up the suspension and knocking some little things off my punch list. The upper shock hole had to be drilled out to 3/4" to accept the shock bushing on the new coilovers. The Ride Tech muscle bar needed a few things too.
I had to drill out the stock sway bar mount holes to 5/16 and tap them to 3/8. The muscle bar bracket is bolted up and I used it as a guide to drill and tap a third hole. The bar is pretty cool and very stout.
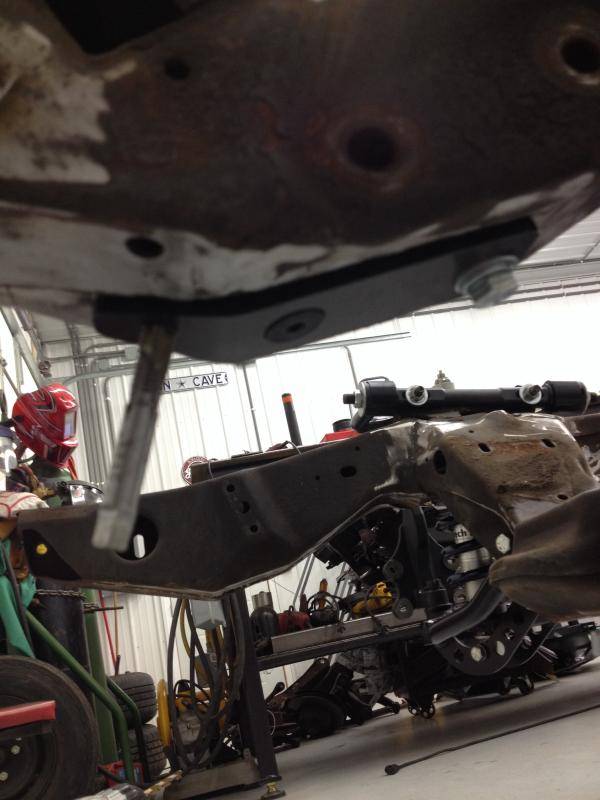
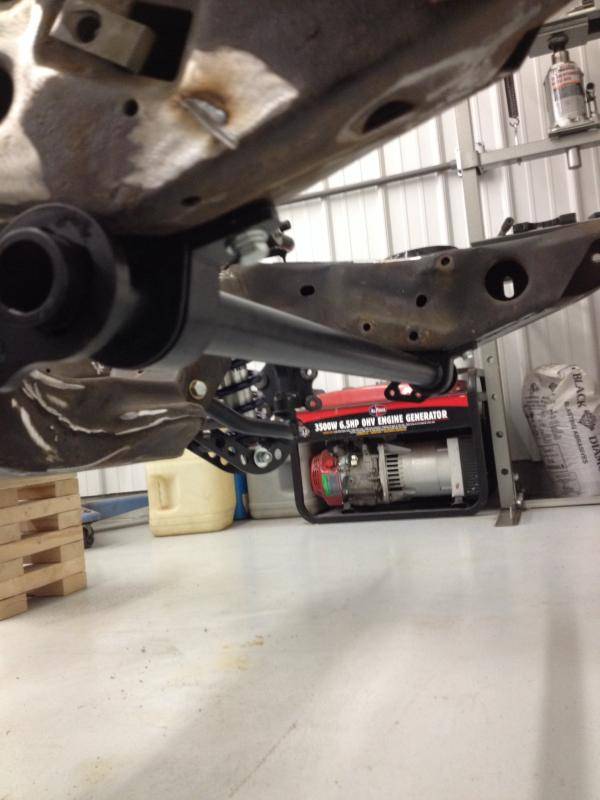
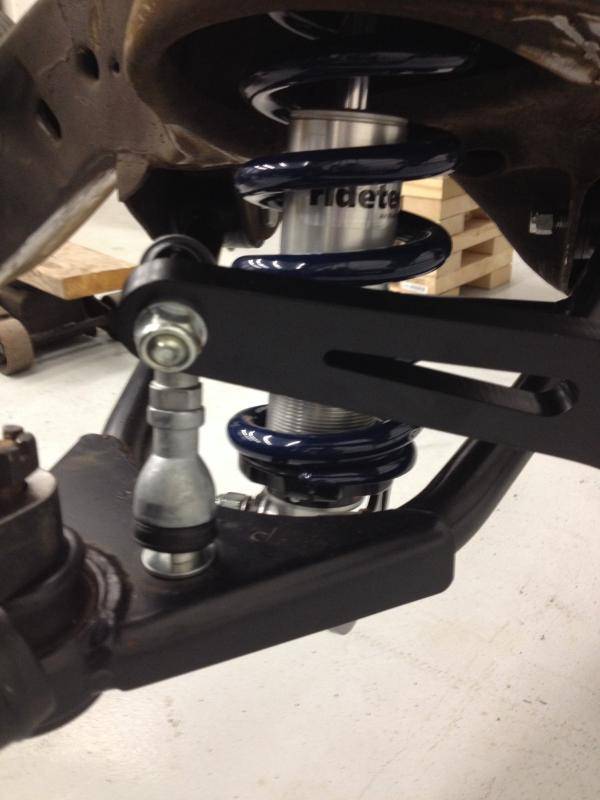
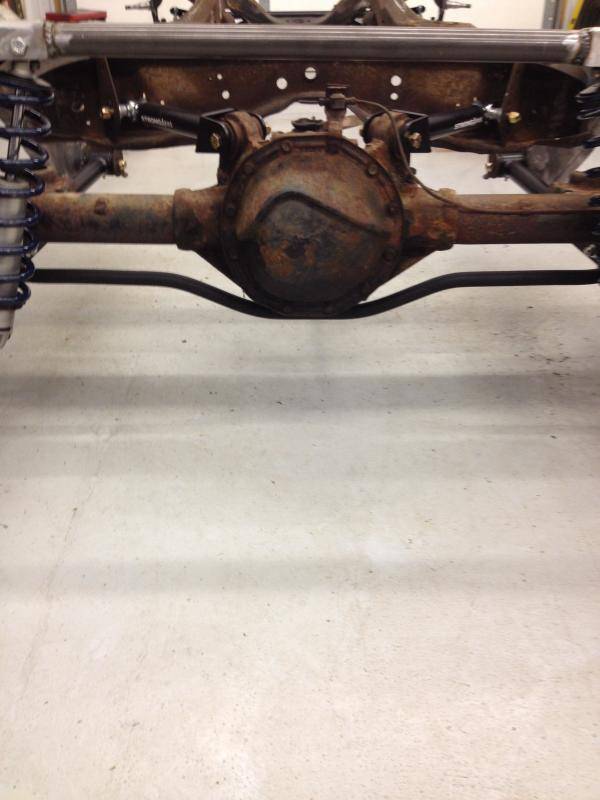
I also got the #6 body mounts finish welded to the floor and got the trunk seam sealed.
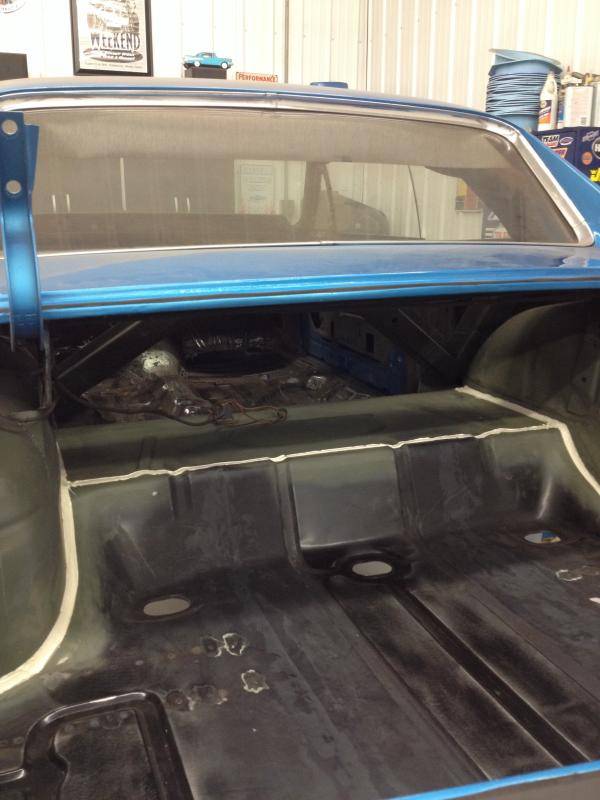
Modest progress but I guess thats better than nothing. I hoping the Fed Ex guy brings me some more stuff to work on this week.
MikeMy 66 Chevelle build thread- https://www.pro-touring.com/threads/...elle-P-T-build
-
02-26-2015 #16
Registered User
- Join Date
- Sep 2014
- Location
- Rochester, IL
- Posts
- 143
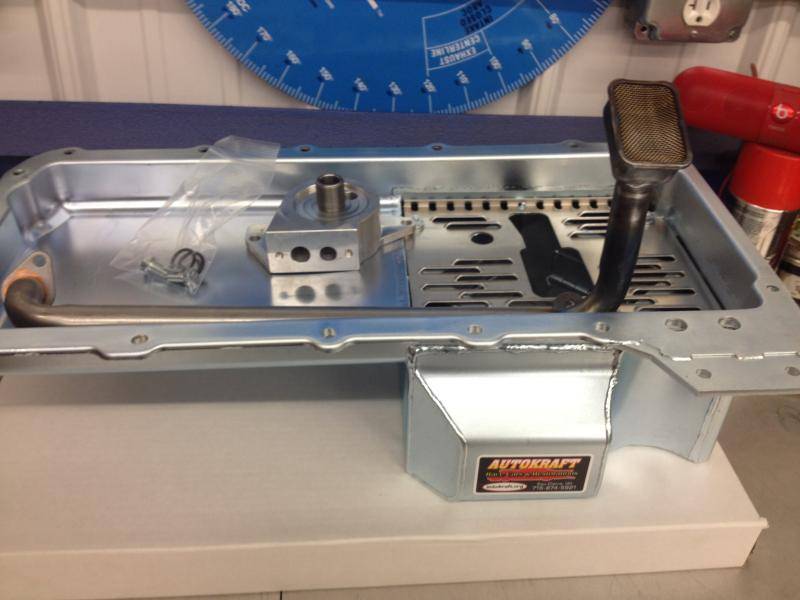
A few things showed up today, thank you Jody Haag "Jody's Transmissions" for the new Transmission! I'm sure it will be worth the wait.
I should get the mock up block in this weekend to verify oil pan fitment, tie rod clearance and get a trans cross member welded up.
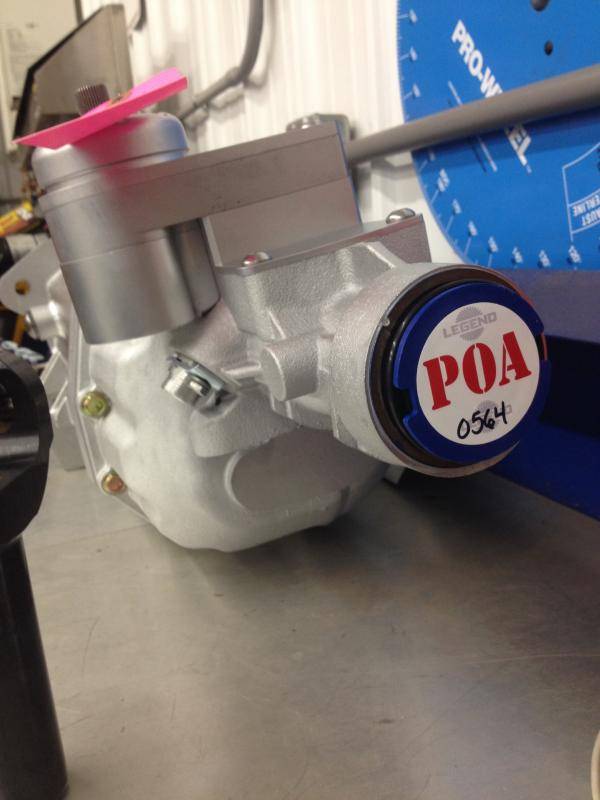
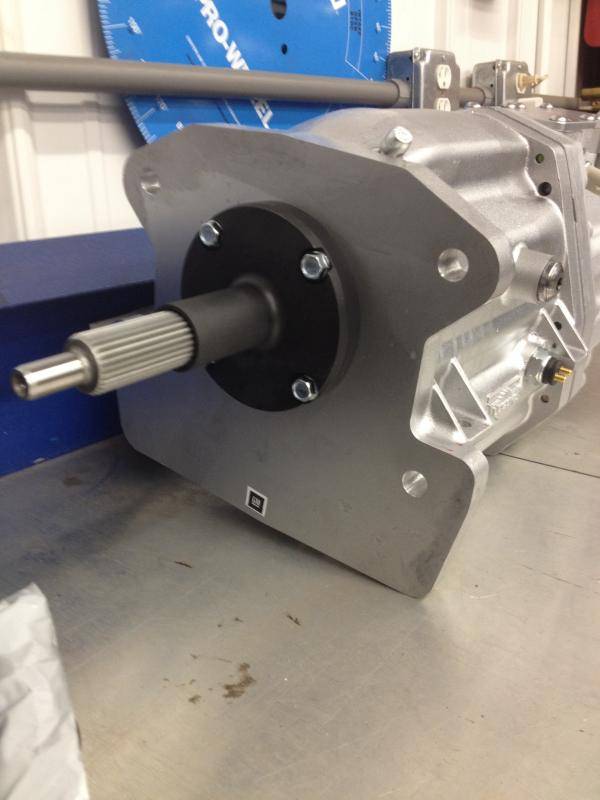
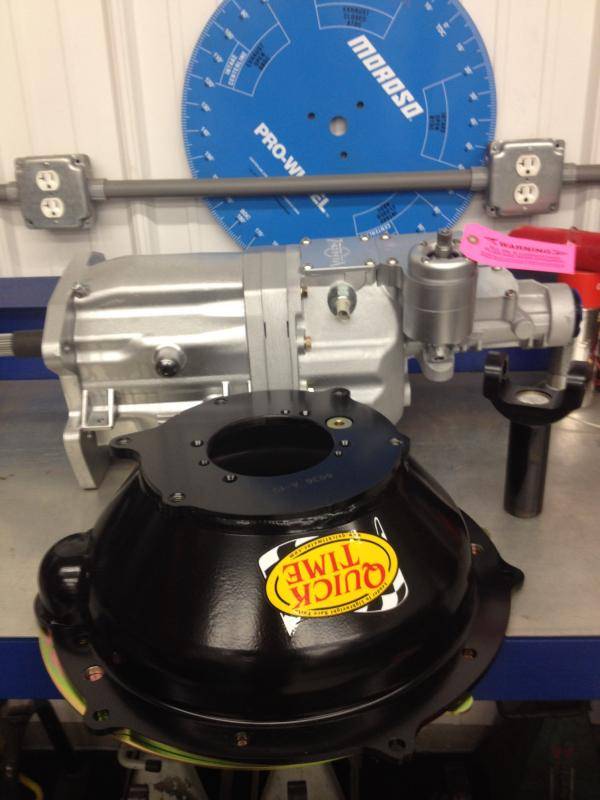
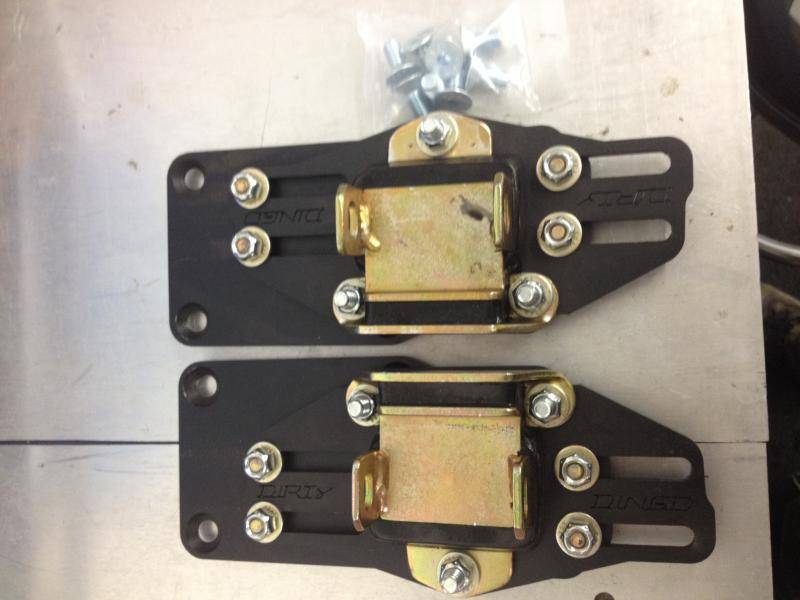
MikeMy 66 Chevelle build thread- https://www.pro-touring.com/threads/...elle-P-T-build
-
02-26-2015 #17
 -Moderator/Sponsor-
- Join Date
- Apr 2001
- Location
- The City of Fountains
- Posts
- 16,126
Mike,
Great work.
I suggest you get that bellhousing mounted to your block asap (if you have one) to check alignment. Bob's had a rough time with a QT bell recently. Measure the dowel holes in the bell and report what you find.
Also remember, you need to get that engine down as low as possible in the front crossmember. You'll definitely need to notch that pan to make that happen and still clear the inner tie rods.
Andrew1970 GTO Version 3.0
1967 Cougar build
GM High-Tech Performance feature
My YouTube Channel Please Subscribe!
Instagram @dr__efi
I deliver what EFI promises.
Remote Holley EFI tuning.
Please get in touch if I can be of service.
"You were the gun, your voice was the trigger, your bravery was the barrel, your eyes were the bullets." ~ Her
-
02-26-2015 #18
Registered User
- Join Date
- Sep 2014
- Location
- Rochester, IL
- Posts
- 143
Andrew,
I won't have the block I plan to build for a while, I'm using a damaged Block for mockup. Unless you think this might buff out
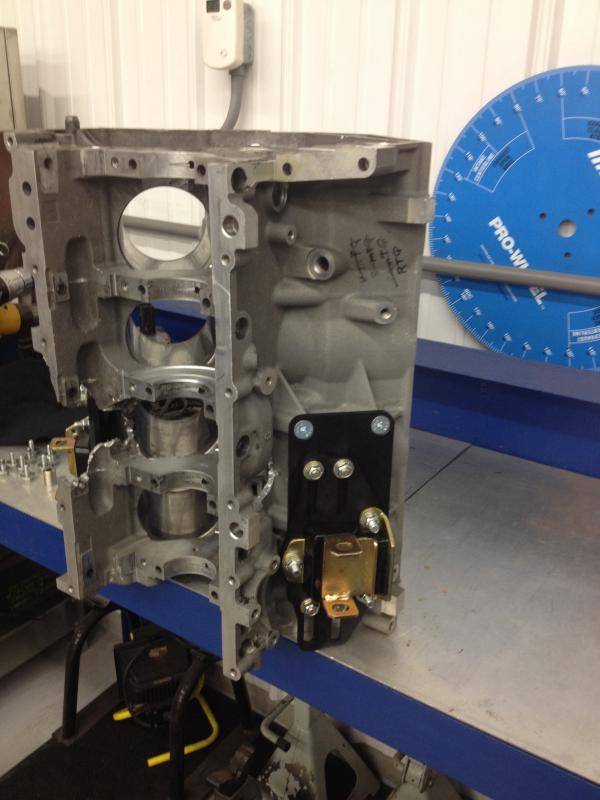
I know how important both parallel and concentric alignment are for a long lasting, smooth shifting transmission. I will definitely report when I get to that point.
MikeMy 66 Chevelle build thread- https://www.pro-touring.com/threads/...elle-P-T-build
-
02-26-2015 #19
-Moderator/Sponsor-
- Join Date
- Apr 2001
- Location
- The City of Fountains
- Posts
- 16,126
Mike, Originally Posted by MMcMasters

I didn't mean to imply that you don't, but Bob (I forget his name here...he has a 67 GTO LS swap in progress) got a QT bell and the holes for the dowels were oversized. At least measure those now, so you can address it now.
Andrew1970 GTO Version 3.0
1967 Cougar build
GM High-Tech Performance feature
My YouTube Channel Please Subscribe!
Instagram @dr__efi
I deliver what EFI promises.
Remote Holley EFI tuning.
Please get in touch if I can be of service.
"You were the gun, your voice was the trigger, your bravery was the barrel, your eyes were the bullets." ~ Her
-
02-26-2015 #20
Registered User
- Join Date
- Sep 2014
- Location
- Rochester, IL
- Posts
- 143
Andrew, Originally Posted by andrewb70
No problem, I didn't think your were implying anything man and I really appreciate the heads up. I will go out and check the dowel holes right now. I think I know who you are talking about, "OldTiger" I think is his user name. Was he able to send the bell back? How did he address this?
MikeMy 66 Chevelle build thread- https://www.pro-touring.com/threads/...elle-P-T-build

 Reply With Quote





