


Results 21 to 40 of 124
-
08-01-2014 #21

 Registered User
- Join Date
- Jul 2014
- Location
- orlando FL where the hot panties are
- Posts
- 102

UPDATE AND BIG ANNOUNCEMENT:
well since I did the repairs to my T5 and bell housing the car is actually driving very well. the fuel rail was stopping the dizzy from turning, so I thought I would have some fun and turned the timing up to 20 degrees advanced and WOW! it was a savage!, but if you shift too soon and load the engine you get detonation, so I turned it back down to 18 degrees and it still feels good, but man that 20 degrees was crazy!
I have a good source for the breakdown of a brand new pro 5.0 shifter, so I can see what mine is missing. so I'll be fixing that soon when I get some pics of the internal workings.
now for the big announcement, I'm going another direction with my restoration with my stang and I won't say yet, but here's a pic to get an idea.
more pics and catalogue soon
The Enemy of my Enemy is my Friend...
MY BUILD https://www.pro-touring.com/threads/...ra-1-Contender
-
08-01-2014 #22
Registered User
- Join Date
- Jul 2014
- Location
- orlando FL where the hot panties are
- Posts
- 102
starting off with this unaltered, rust free, accident free, straight , clean tight body seam v6 shell with only 75,000 miles! it's already white and mostly gutted. this thing is CLEAN! there isn't even a bent jacking point or rust in the bolt holes under the body!
my plan, with the help of you guys, is to stitch weld the major seams, brace the hell out of it using stifflers full length sub frame connectors with rocker web support, lizard skin inside and outside of the car with acoustic and thermal barrier, juke and other sound deading materials, and building/extending the engine harness using what I can from the V6 and V8 harnesses for a wire tuck.
first question I have is what are the major seams to be welded inside and outside?
a google search helped some, but not enough and I couldn't find anything SN95 specific. I will try to call saleen or steeda to see if they can give me some blueprints on it.
The Enemy of my Enemy is my Friend...
MY BUILD https://www.pro-touring.com/threads/...ra-1-Contender
08-01-2014 #23
Registered User
- Join Date
- Jul 2014
- Location
- orlando FL where the hot panties are
- Posts
- 102
just a small update guys,
I have removed all of the seam sealer and sound deading out of the carcass, from roof to underbody, from front to the trunk. i'll say this, I can see why these cars are pepsi cans. the panels are all spot welded and the gaps are huge that hide behind the seam sealer. i'll try to make a video and post it to show you what I mean. I need to learn how to upload a youtube video in my post.
in a few days, i'll start to grind the seams down to bare metal in preparation of welding. I'm gonna seam weld EVERY seam except for the core support and the trunk area where the tail lights sit in and that's just so if I ever need to do a core support it won't be an act of congress. the trunk area under the striker is very hard to get to, so I will leave it.
The Enemy of my Enemy is my Friend...
MY BUILD https://www.pro-touring.com/threads/...ra-1-Contender
08-01-2014 #24
Registered User
- Join Date
- Jul 2014
- Location
- orlando FL where the hot panties are
- Posts
- 102
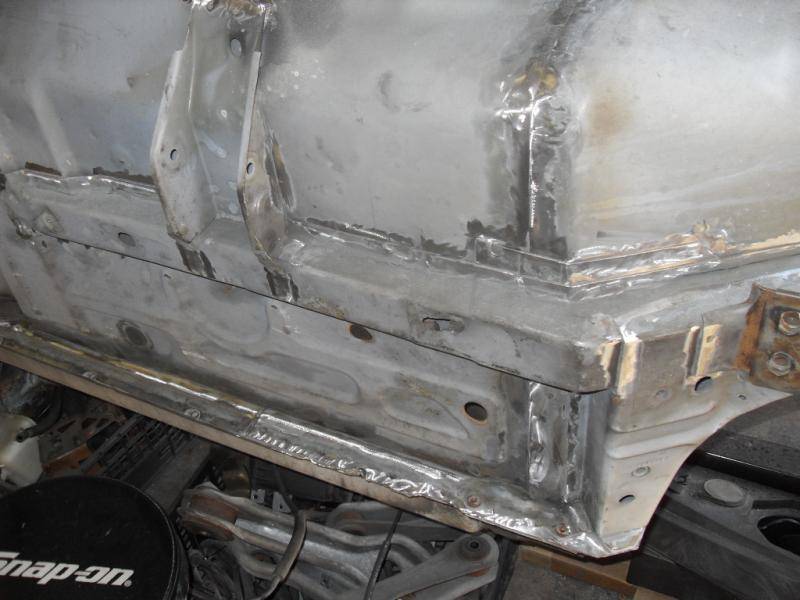
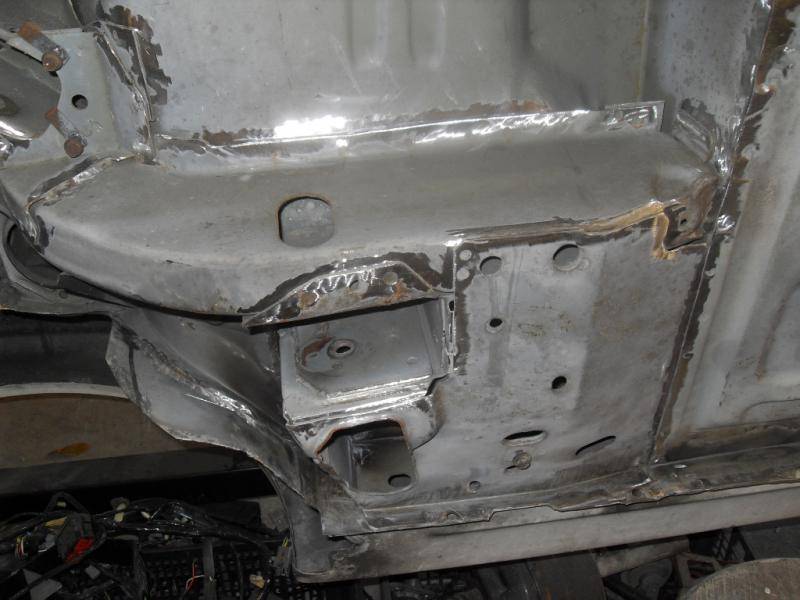
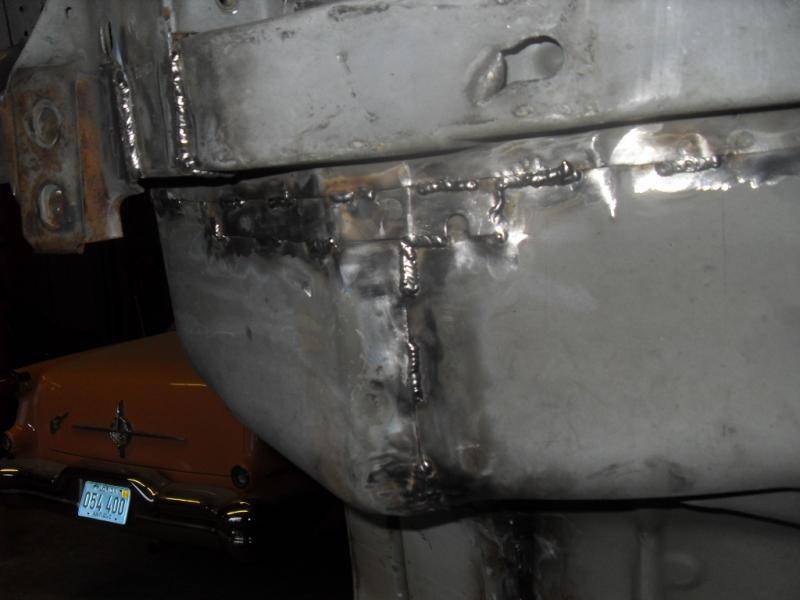
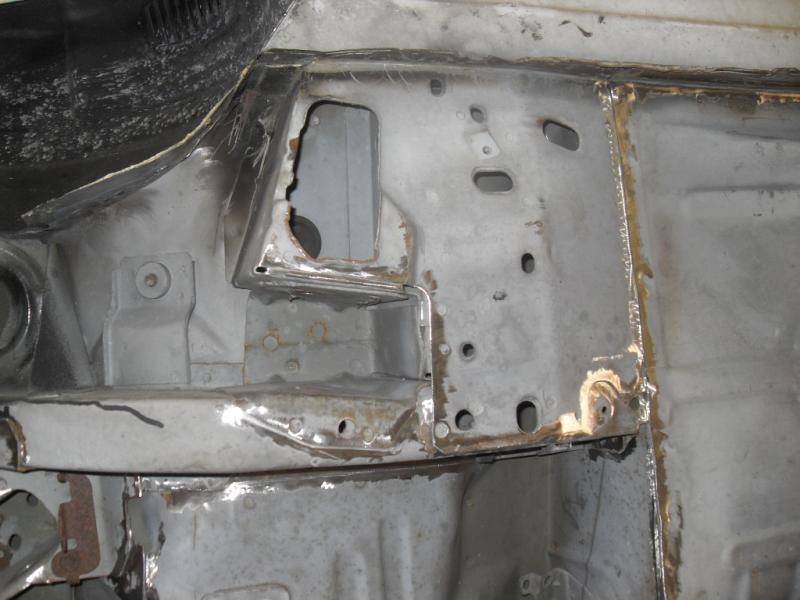
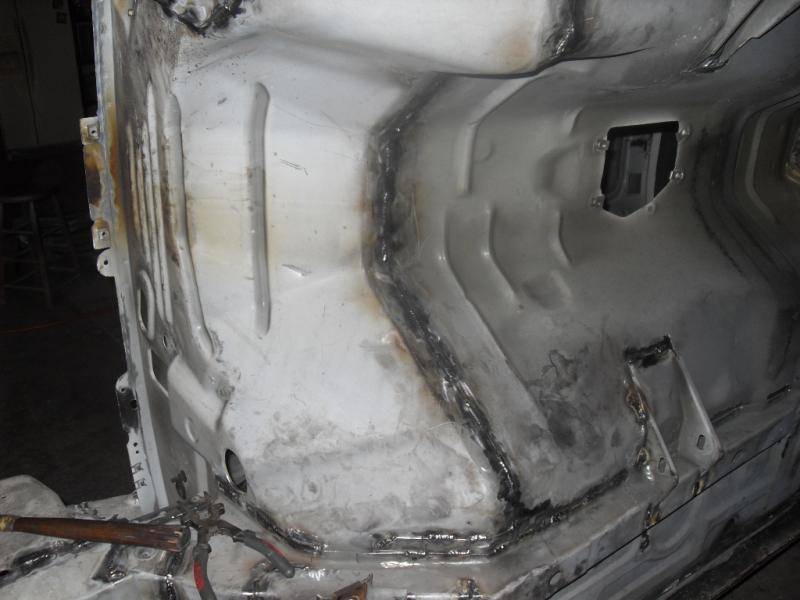
well guys, here are some pics just showing how clean some of my seams are and how hard some are to get to. the really hard ones to get a tool into for cleaning will be burned in very hot with the MIG like the torque box area.
I also started some of the welding today and man I'm having fun burning all this metal in. I started on the bottom of the car since most of the seams are clean, but as I started welding I noticed spots that I missed with the grinder. i'll get them. I have more grinding to do in the cab of the car before I can move inside there.
anyway enjoy the pics...
The Enemy of my Enemy is my Friend...
MY BUILD https://www.pro-touring.com/threads/...ra-1-Contender
08-01-2014 #25
Registered User
- Join Date
- Jul 2014
- Location
- orlando FL where the hot panties are
- Posts
- 102
 The Enemy of my Enemy is my Friend...
MY BUILD https://www.pro-touring.com/threads/...ra-1-Contender
08-01-2014 #26
Registered User
- Join Date
- Jul 2014
- Location
- orlando FL where the hot panties are
- Posts
- 102
here is video 2 of my seam welding. I'm about 3/4 of the way done on the outside of the carcass. enjoy
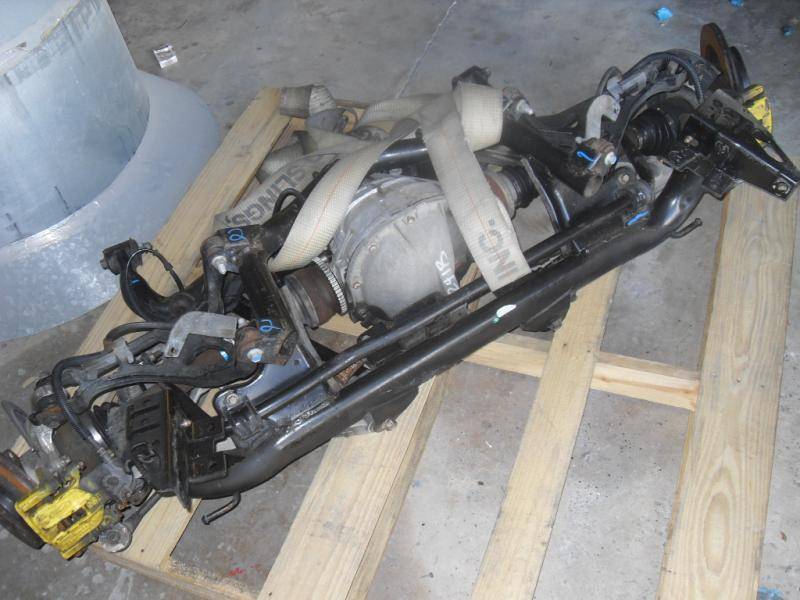
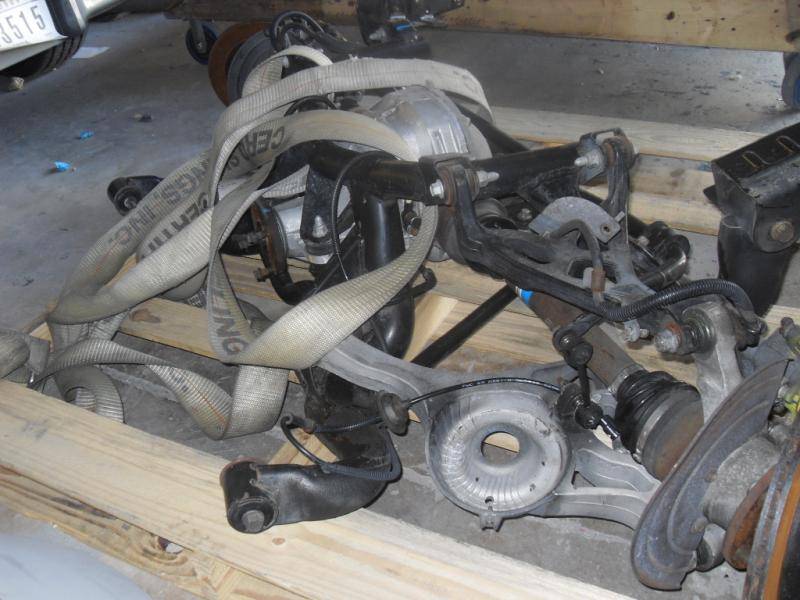
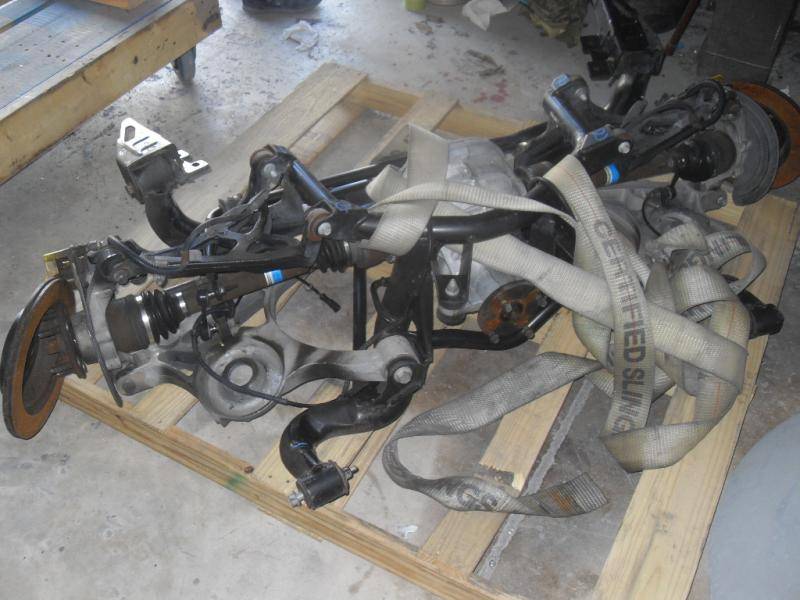
AND NOW 2 OF THE MAJOR COMPONENTS HAVE BEEN AQUIRED! YAY!!!
3 more major parts to go and it's on!
if you looked at the IRS and want to know what year it's from, there are 2 clues that give away the year that you can see.
time to save up for the full tilt boogie treatment now...
 The Enemy of my Enemy is my Friend...
MY BUILD https://www.pro-touring.com/threads/...ra-1-Contender
08-01-2014 #27
Registered User
- Join Date
- Jul 2014
- Location
- orlando FL where the hot panties are
- Posts
- 102
I have done extensive research on all the IRSs and the one from the 99 cobra is nothing to shy away from. the same thing that breaks the 99 cobra IRS, breaks 01-04 cobra IRS. the 2 things that break these units are soft bushings that allow too much movement and too much HP with slicks.
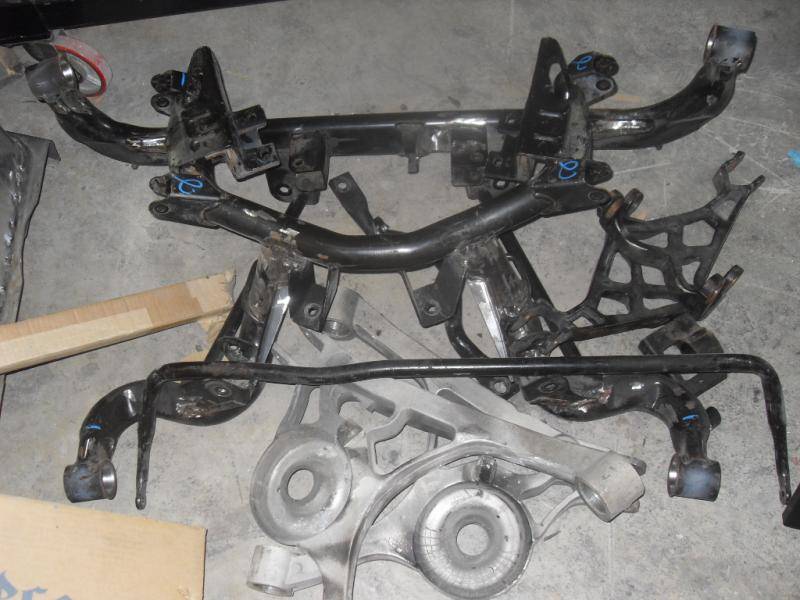
no matter what IRS you get, it will have to be built up. with that said I'm getting everything I can from full-tilt boogie racing. then a ford racing gear set, 3:31 or a 3:55 to replace the 3:27 that the 99 cobras came with. A ford racing diff cover. A Quaife LSD to replace the trac-lok and powder coating of various parts.
today, the last bit of seam welding was finished and I'm kind of happy cause I was getting bored with it. I wanted to move on to another part of the project. we all know what the spare tire area looks like in the trunk.
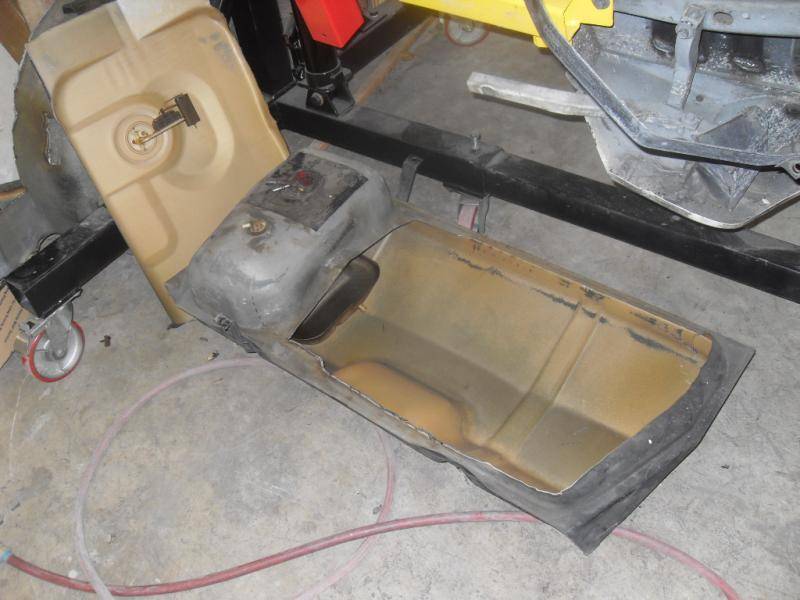
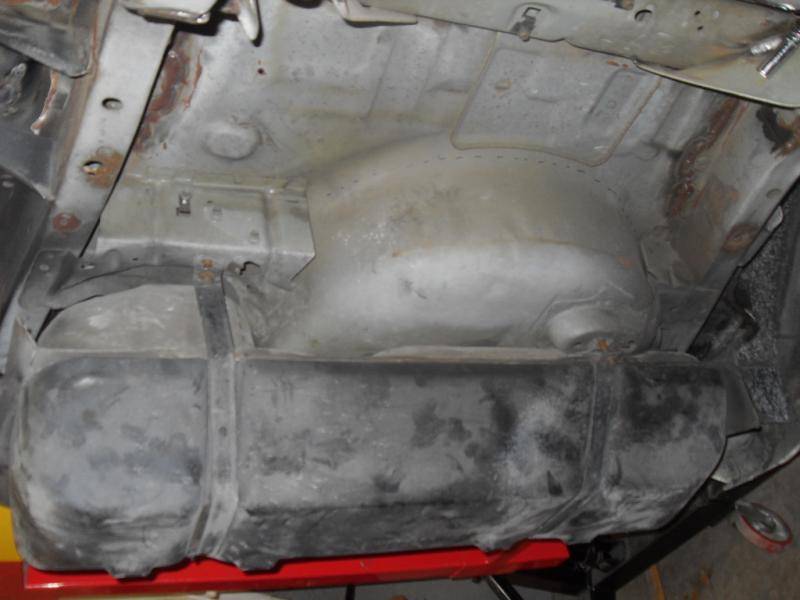
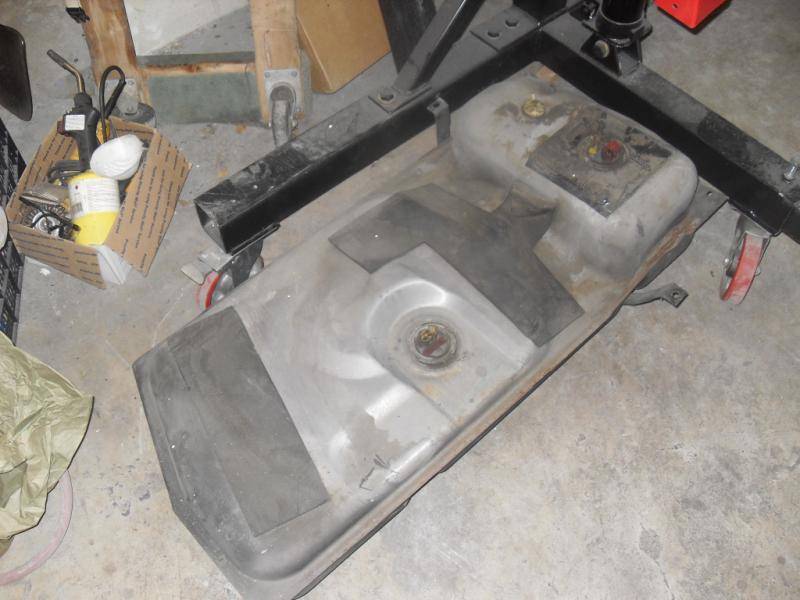
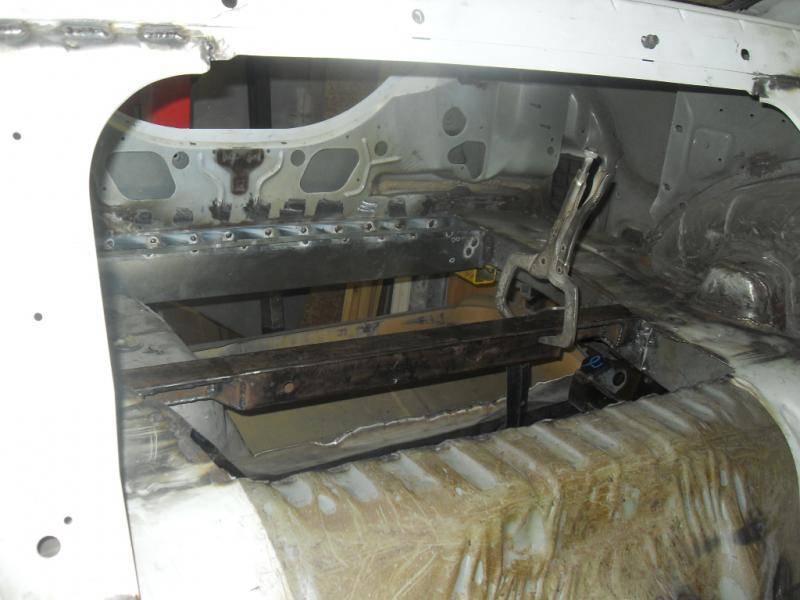
what I plan on doing is increasing the capacity of the fuel tank and still have it look and work like factory. instead of building the tank deeper and lower, I'll be building it up into the spare tire well area.
that will allow me to service the fuel level sender and fuel pump without dropping the tank, out of the bottom. it will allow me to carry more fuel, I bet more than the 21 gal. that's in the cobra R! the trunk will be flat with bead rolls in it and the tank and will be detachable should I ever need to take the tank out for whatever reason. this will be cool
 The Enemy of my Enemy is my Friend...
MY BUILD https://www.pro-touring.com/threads/...ra-1-Contender
08-02-2014 #28
Registered User
- Join Date
- Jul 2014
- Location
- orlando FL where the hot panties are
- Posts
- 102
so, I completely cut out the floor of the trunk instead of trying to build up the parts of the tank that are only covered by the spare tire well.
then I made a template that will be the flat portion of the trunk floor. I also made a
2"x 2" square tube cross member, so I would have a place to mount my fuel filter and new fuel tank straps. I could have used 2 of the long tank straps that come on the mustang, but my buddy was having a hard time getting them for me, so I made them.
to clean up the rear of the trunk I boxed it in and put 2 lips on it for the flat trunk floor panel to be welded to. before I weld it in tho, I will have 2 access panels cut in, so I can service either the fuel pump or the level sender without dropping the tank at all.
the way I plan on increasing the fuel tank capacity is by building the tank going up instead of going down. it will look factory from the outside. I'll build it equal to or slightly higher than the heist point on the tank right now. then i'lll figure out where to relocate the EVAP vent and the filler neck.
it's a good thing I mocked up the IRS cause the cross member was making contact with the upper control arm tab. I notched it out, boxed it back in and there's plenty of room now. I placed the tank in the factory location, so I can figure where the tank straps will bolt in at. that will be done tomorrow.
 [/URL][/IMG]
[/URL][/IMG]
[/URL][/IMG]
[/URL][/IMG]
[/URL][/IMG]
[/URL][/IMG]
[/URL][/IMG]
[/URL][/IMG]
[/URL][/IMG]
The Enemy of my Enemy is my Friend...
MY BUILD https://www.pro-touring.com/threads/...ra-1-Contender
08-02-2014 #29
Registered User
- Join Date
- Jul 2014
- Location
- orlando FL where the hot panties are
- Posts
- 102
guys this is the time where I turn my attention to the fuel tank. my plan is to increase the capacity from 15.3 gal to over 21 gal. and have it all look factory from the outside of the car.
I planned on doing this by raising the portion of the factory tank that minimized by the spare tire well. since my spare tire well is gone that would leave room for this modification. I needed to also make new mounting points for the tank straps since the ones from the factory are attached to the trunk floor and spare tire well. then to make things simple, I chose to use 2 of the longer tank straps (yes one strap is longer than the other FYI). when I couldn't find another long tank strap I decided to make my own in their image out of galvanized 20ga steel which will be powder coated black later.
[/URL][/IMG]
[/URL][/IMG]
[/URL][/IMG]
[/URL][/IMG]
so, I mocked everything up and started building the tank. things were going well until I decided to research "tank baffle design" and found this website by accident....
http://glennsperformance.com/
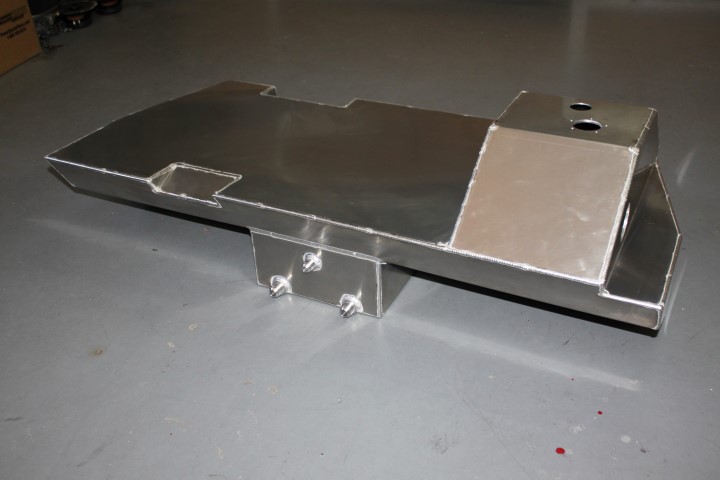
that's right, I stumbled on a shop that builds higher capacity aluminum fuel tanks for various years of mustangs, 94-98 included. these tanks are cheaper than getting the fuel safe cobra R tank too. so mission aborted on this one, but when I get this tanks from Glenn's, I'll modify it to fully utilize the space I have now that my spare tire well is gone. I think I could increase Glenn's tank from 22 gal - 30 gal!
I wasted time on this factory tank that could have gone to prepping the body for lizard skin, removing the bushings from the IRS and powder coating parts. I will take more pics tomorrow of where I'm at so far.The Enemy of my Enemy is my Friend...
MY BUILD https://www.pro-touring.com/threads/...ra-1-Contender
08-02-2014 #30
Registered User
- Join Date
- Jul 2014
- Location
- orlando FL where the hot panties are
- Posts
- 102
today, I mocked-up the stifflers sub frame connector system. the system is very well thought out and fits very well! I dare say perfect. I put the system together so I can weld the rocker web ends together before I send it to the powder coaters.
the IRS is completely broken down and the factory rubber bushings are gone. all of the factory welding slag was ground off and the forging/ casting lines too. these parts are going to the powder coaters as well. once they come back they will get the full tilt boogie racing treatment.
while everything is out, I'm gonna get the lizard skin coatings both acoustic and ceramic and prep the outside floor pan for that. then once the parts come from the powder coaters, weld in everything and move to the inside of the car with the lizard skin.
[/URL][/IMG]
[/URL][/IMG]
[/URL][/IMG]
[/URL][/IMG]
[/URL][/IMG]
The Enemy of my Enemy is my Friend...
MY BUILD https://www.pro-touring.com/threads/...ra-1-Contender
08-02-2014 #31
Registered User
- Join Date
- Jul 2014
- Location
- orlando FL where the hot panties are
- Posts
- 102
all I did was build the mounting holes for the rear IRS bracket that goes into the trunk area. there are 2 bolts that do this, the other 2 bolts go into the quad shock bracket holes that are threaded already. the way I'm doing the trunk area will allow everything to be flush with the trunk floor, unlike some ppl that just through bolt through the floor of the trunk and you have nuts and bolts sticking out.
[/URL][/IMG]
[/URL][/IMG]
[/URL][/IMG]
[/URL][/IMG]
[/URL][/IMG]
[/URL][/IMG]
[/URL][/IMG]
The Enemy of my Enemy is my Friend...
MY BUILD https://www.pro-touring.com/threads/...ra-1-Contender
08-02-2014 #32
Registered User
- Join Date
- Jul 2014
- Location
- orlando FL where the hot panties are
- Posts
- 102
I built this removable rear strut tower brace according to the mustang performance handbook 2 ,but I did it with a lil more flare than what's in the book. (2) 3/4" heim joints and a 29" long, .095 wall chromoly tube all TIG welded by my me.
the IRS parts that I have, the rear sway bar and STIFFLERS sub frame connector system are at the powder coaters getting the silver and new ford blue treatment.
after these things come back, i'll start prepping the underbody for lizard skin and welding in the trunk floor and subframe connectors. then I can look into getting the Glenn's performance fuel tank....
[/URL][/IMG]
[/URL][/IMG][/URL][/IMG]
[/URL][/IMG]
[/URL][/IMG]
[/URL][/IMG]
[/URL][/IMG]
[/URL][/IMG]
[/URL][/IMG]
The Enemy of my Enemy is my Friend...
MY BUILD https://www.pro-touring.com/threads/...ra-1-Contender
08-02-2014 #33
Registered User
- Join Date
- Jul 2014
- Location
- orlando FL where the hot panties are
- Posts
- 102
a small update as I'm waiting for powder coated parts to get back to me. I scored some IRS rear cobra brake rotors that are drilled and slotted. they look like baer units, but I can't find any markings proving so. found them on CL for $90 and they only have 500 miles on them.
so I bead blasted the IRS rear rotors, calipers, caliper brackets and half shafts, then painted everything. new ford blue for the brake parts and silver for the shafts. now they won't ever rust again.
[/URL][/IMG]
[/URL][/IMG]
[/URL][/IMG]
[/URL][/IMG]
[/URL][/IMG]
The Enemy of my Enemy is my Friend...
MY BUILD https://www.pro-touring.com/threads/...ra-1-Contender
08-02-2014 #34
Registered User
- Join Date
- Jul 2014
- Location
- orlando FL where the hot panties are
- Posts
- 102
I decided to upgrade the cluster lighting and interior lighting with LEDs. I opened the cluster, scrapped the green color tinting off of the backside of the gauge film, inserted some aluminum tape to help reflect the light through the numbers better and installed the LEDs replacing the halogens.
I didn't get any pics of the dome light cause it's hard to take that pic at night, but with the dome light on at night it looks like I don't even have window tint on and I do, one step above limo! it looks like a Florissant light when looking from the outside to the inside...
[/URL][/IMG]
[/URL][/IMG]
[/URL][/IMG]
[/URL][/IMG]
[/URL][/IMG]
The Enemy of my Enemy is my Friend...
MY BUILD https://www.pro-touring.com/threads/...ra-1-Contender
08-02-2014 #35
Registered User
- Join Date
- Jul 2014
- Location
- orlando FL where the hot panties are
- Posts
- 102
yesterday I picked up my IRS parts from the powder coaters and man the pics don't do it justice! I also had my subframe connectors, rear strut tower brace and rear sway bar done as well. the color is sparkle sky blue + clear powder coat and silver sparkle + clear powder coat. this blue they had was the closest thing to new ford blue, so I went with it. it's a little darker than the new ford blue, but it's close enough to be under the car.
I then painted the rear cobra brake rotors, calipers, brackets with new ford blue engine paint. the axles are painted with engine paint aluminum and cleared with automotive
[/URL][/IMG]
[/URL][/IMG]
[/URL][/IMG]
[/URL][/IMG]
[/URL][/IMG]
lastly I made some needed upgrades....well improvements.
I had to buy a new optima battery, it was a 570 CCA yellow top (that I painted new ford blue) and it was only putting out 70A and wouldn't crank the car. I bought a optima red top and perfectly painted it new ford blue with automotive clear on top.
I re-wired my battery cables and terminals cause they looked like butt! then I added a fuel pressure gauge....
with all the electrics ironed out the car is running allot better and maybe another dyno tune is in order...
[/URL][/IMG]
[/URL][/IMG]
[/URL][/IMG]
this is where I currently stand. my gas tank is on the way, so I can finish the trunk floor, modify the tank for more capacity and start my lizard skin.The Enemy of my Enemy is my Friend...
MY BUILD https://www.pro-touring.com/threads/...ra-1-Contender
08-06-2014 #36
Registered User
- Join Date
- Jul 2014
- Location
- orlando FL where the hot panties are
- Posts
- 102
just a small update
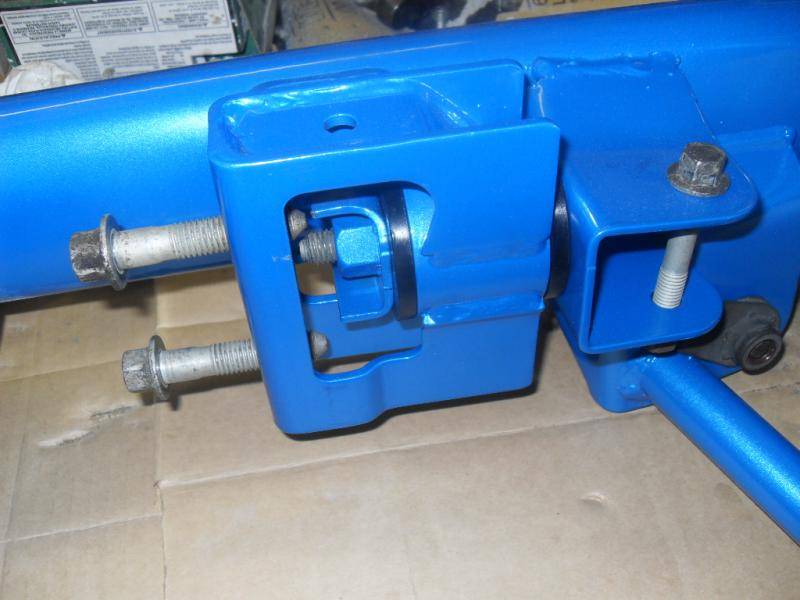
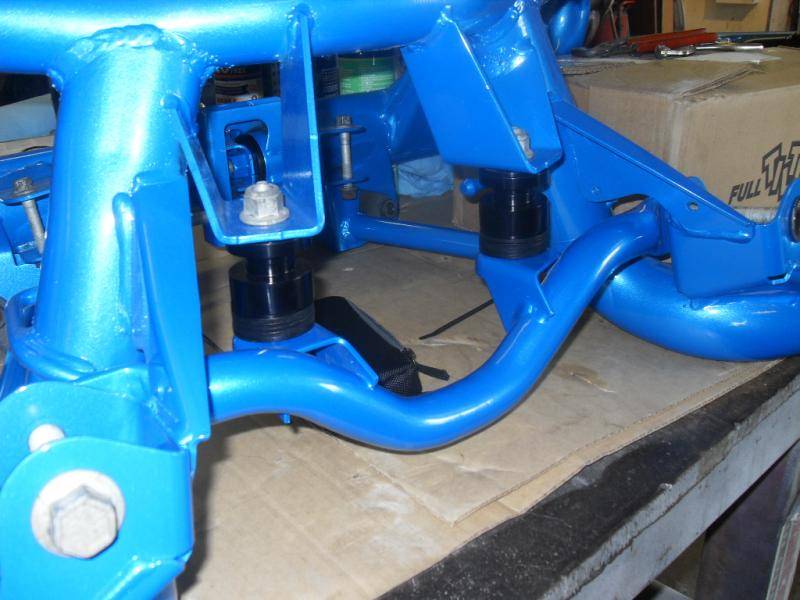
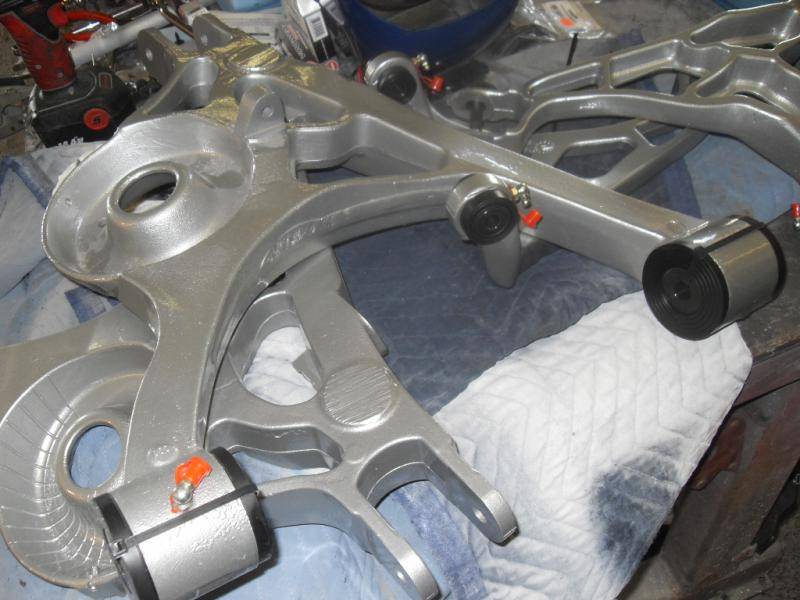
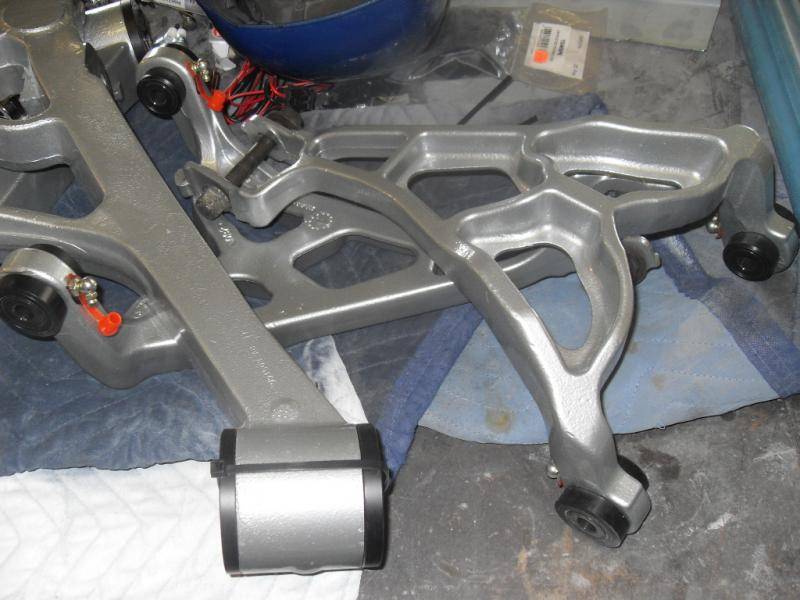
I have my gas tank from Glenns performance on the way, it should be here next week. it's an all aluminum, 18-22 gallon tank with -10 and -8 AN bungs. once that comes I can finish the trunk area followed by lizard skin.
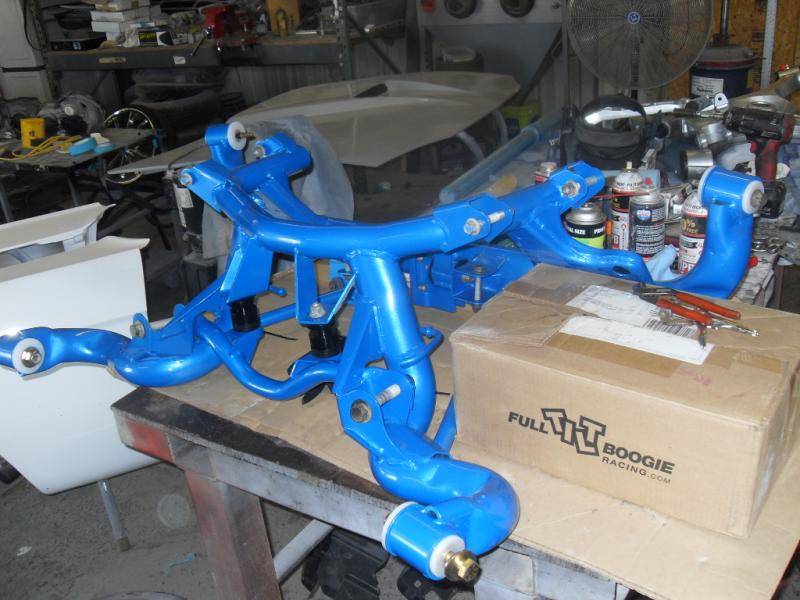
yesterday I installed the Full Tilt Boogie bushings and grease fittings. they were a pleasure to install and the quality is top notch.
 The Enemy of my Enemy is my Friend...
MY BUILD https://www.pro-touring.com/threads/...ra-1-Contender
08-06-2014 #37
Registered User
- Join Date
- Oct 2006
- Location
- Stillwater Oklahoma
- Posts
- 183
Dig the build keep up the good work!
08-06-2014 #38
Registered User
- Join Date
- Jul 2014
- Location
- orlando FL where the hot panties are
- Posts
- 102
I'm humbled, thanks so much. I wonder where 95RioRed is an if he's gonna comment on his #1 contender??? Originally Posted by pist0lpete

 lol
The Enemy of my Enemy is my Friend...
lol
The Enemy of my Enemy is my Friend...
MY BUILD https://www.pro-touring.com/threads/...ra-1-Contender
08-08-2014 #39
Registered User
- Join Date
- Jul 2014
- Location
- orlando FL where the hot panties are
- Posts
- 102
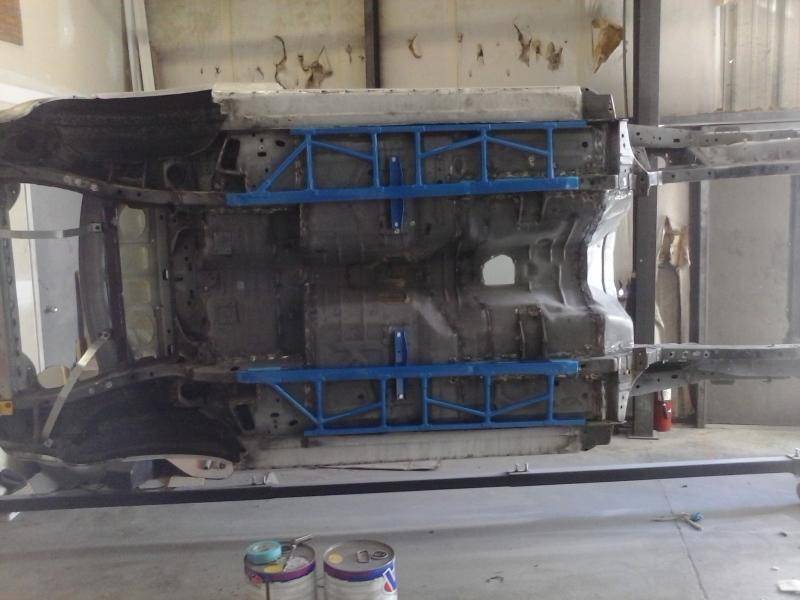
today I just mocked up my stifflers subframe connectors that came back from powdercoat. I applied tape to the weld areas on the subframes and the body, so when I do the lizard skin, I won't have to grind through that stuff to get to bare metal in order to weld them in. after they are welded in I will have very small areas to touch-up paint...
 The Enemy of my Enemy is my Friend...
MY BUILD https://www.pro-touring.com/threads/...ra-1-Contender
08-16-2014 #40
Registered User
- Join Date
- Jul 2014
- Location
- orlando FL where the hot panties are
- Posts
- 102
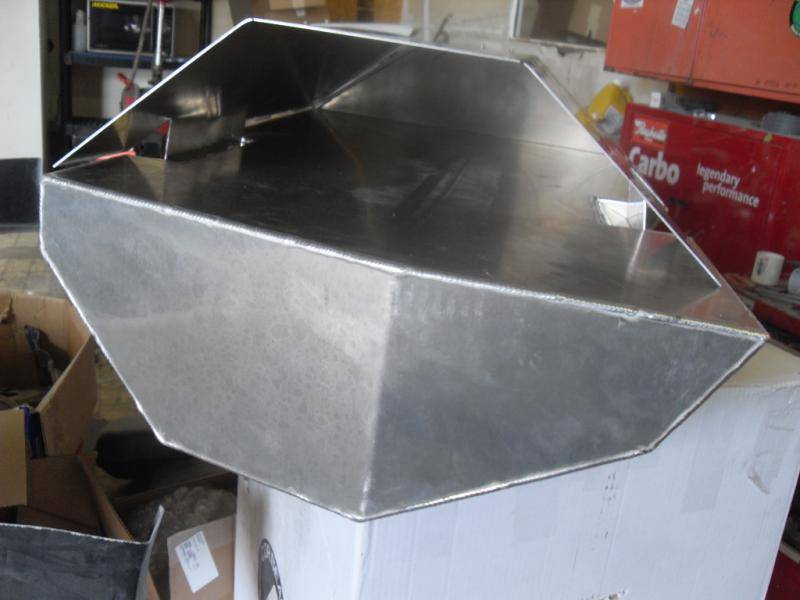
LADIES & GENTS, I present the Glenn's performance aluminum stealth tank. this tank is masterfully TIG welded and holds 22 gallons w/o exhaust cut-outs, 18 gallons with the exhaust cut-outs that will allow 3" tail pipes.
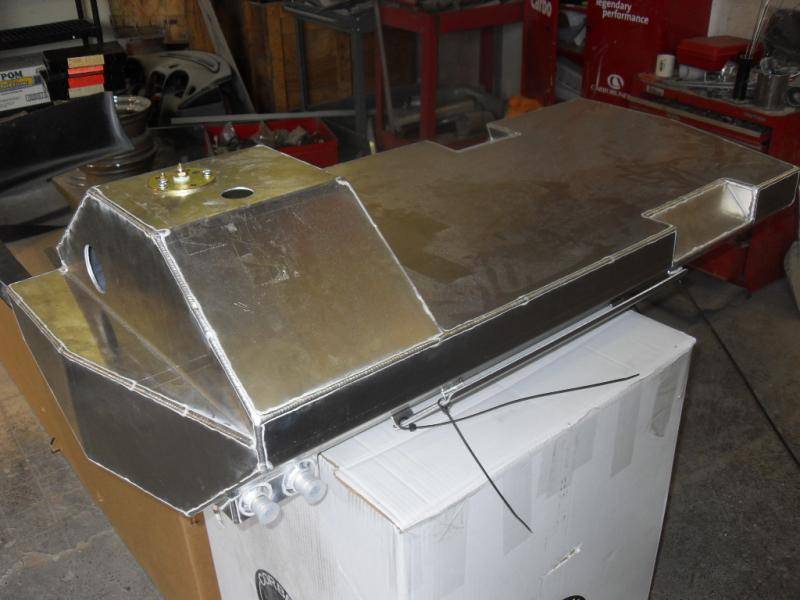
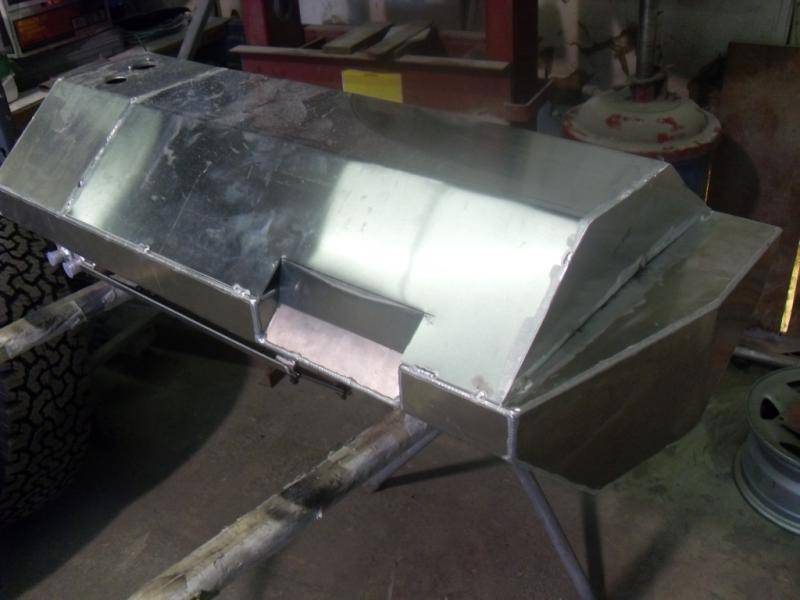
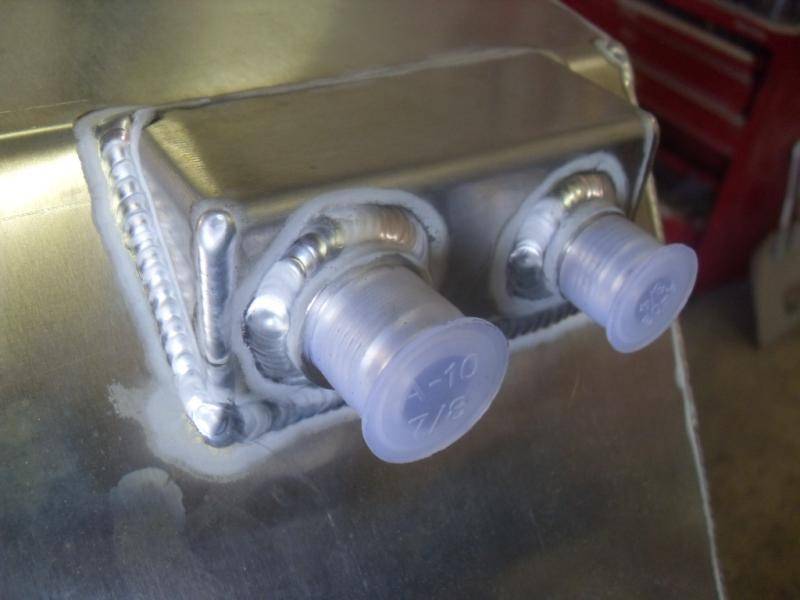
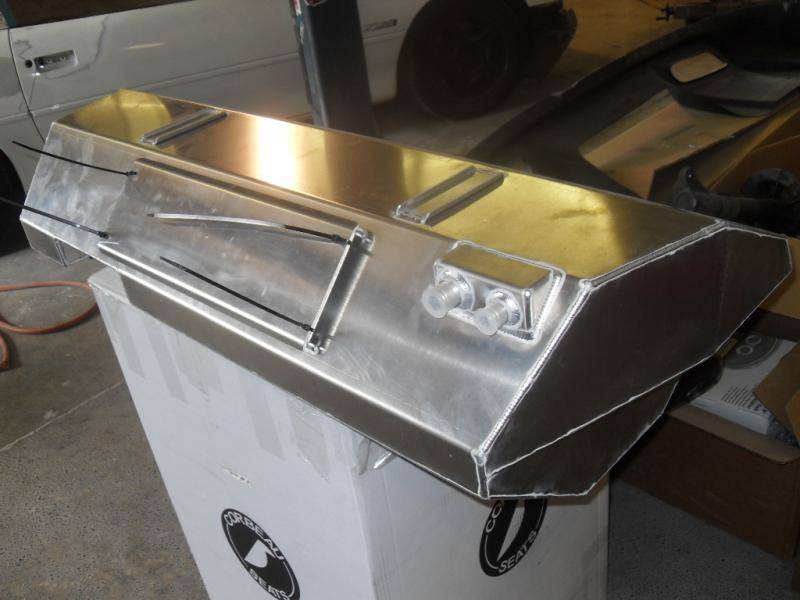
the AN bungs are on the diff side of the tank (-8AN and -10AN) for that stealth factor and the mounting plate is also on the diff side to mount fuel pumps and filters should you choose to do so. internally the sumps, baffling and siphon tubes are all upgraded for maximum fuel control and directing. I also purchased the VDO fuel level sender that will work with the factory cluster.
if you know anything about me up to this point, I cant leave anything alone, so I decided to modify a perfectly good and expensive tank to increase capacity. this tank is made to fit your mustang trunk area with a spare tire well. as you know I deleted the spare tire area and that's where my extra capacity will live.
I started out by mounting the tank in the car to see where I can increase capacity and where the space was to do so. I made my marks and pulled it out for template making. once the templates were made and marked for brake locations, I transferred it to .063 sheet aluminum. then with a 2.5" hole saw, I cut holes for the fuel to #1. be able to drain to the lower part of the to feed fuel sumps and #2. these holes will slow the sloshing of the fuel like a baffle would.
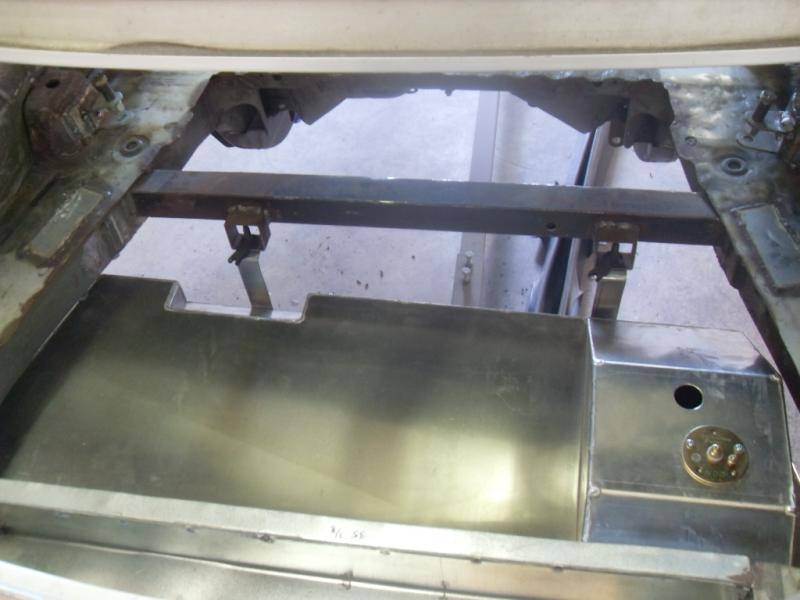
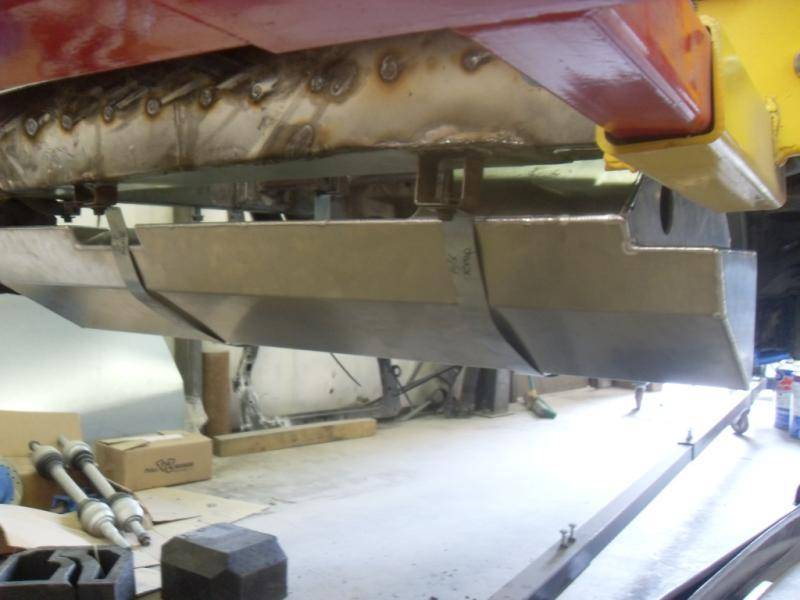
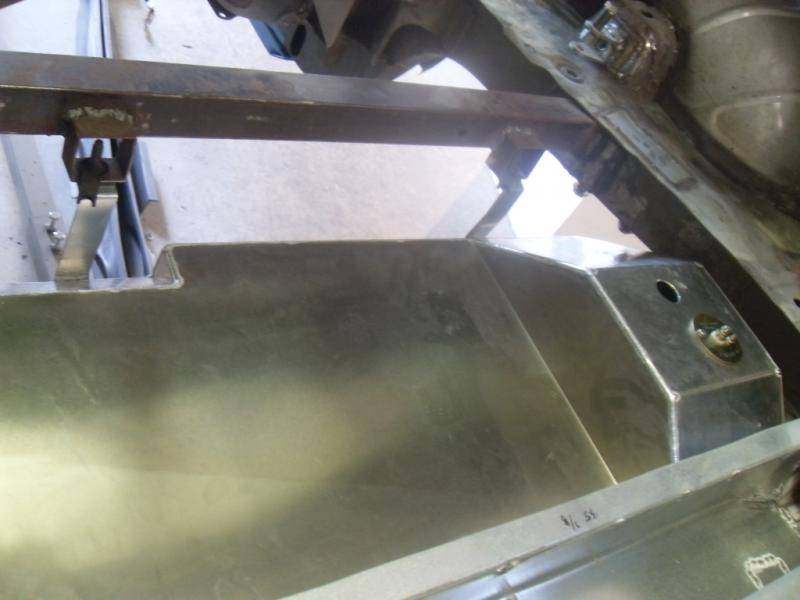
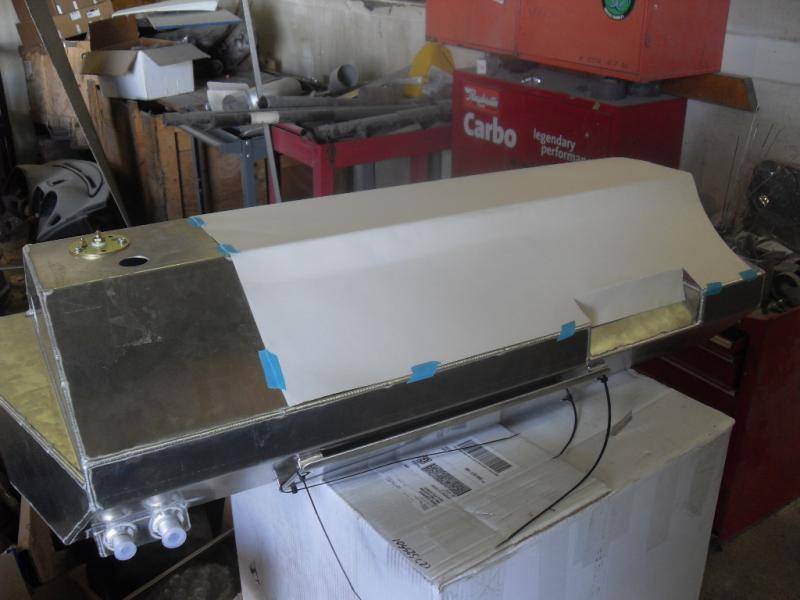
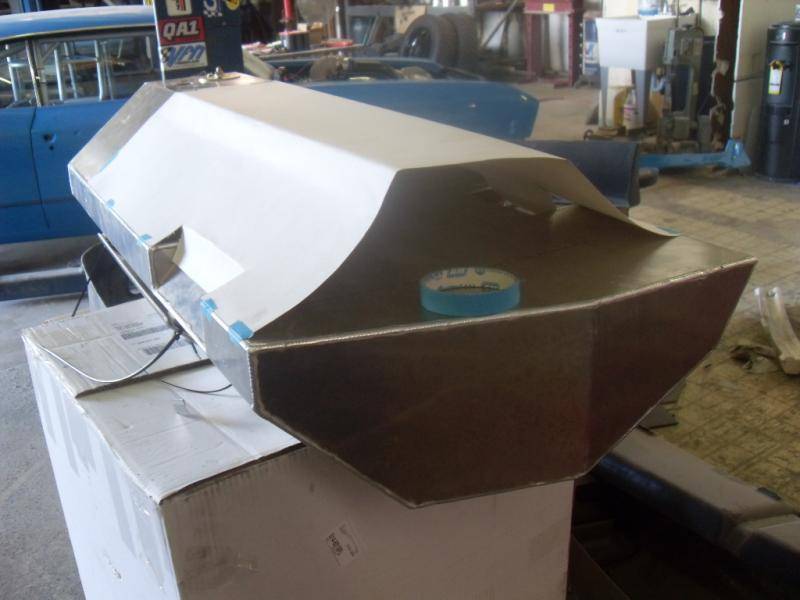
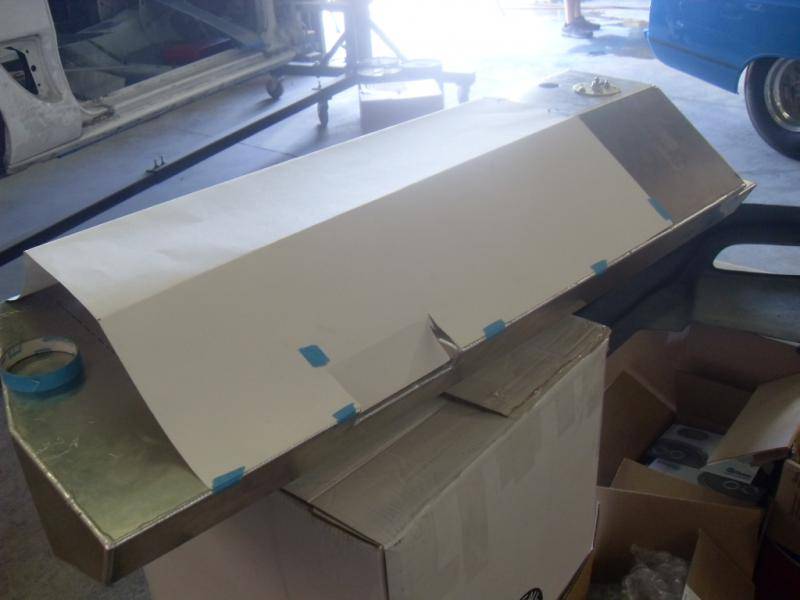
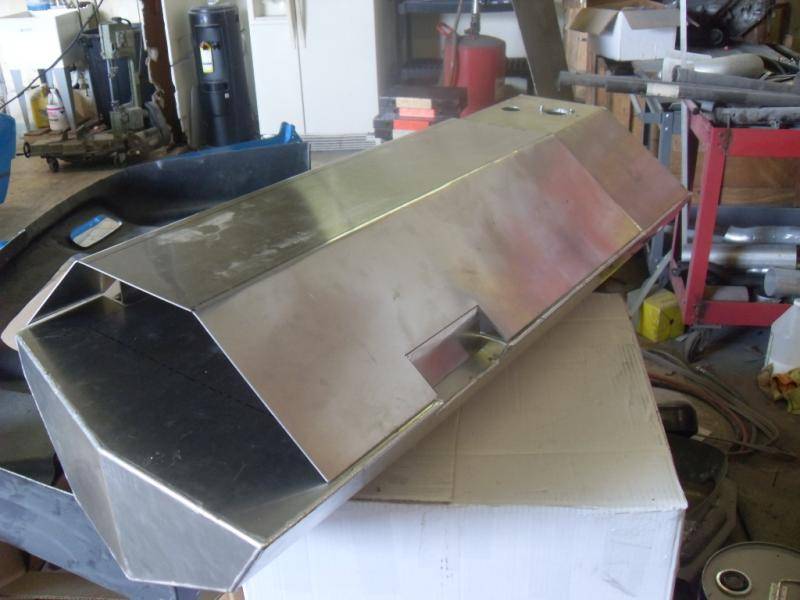
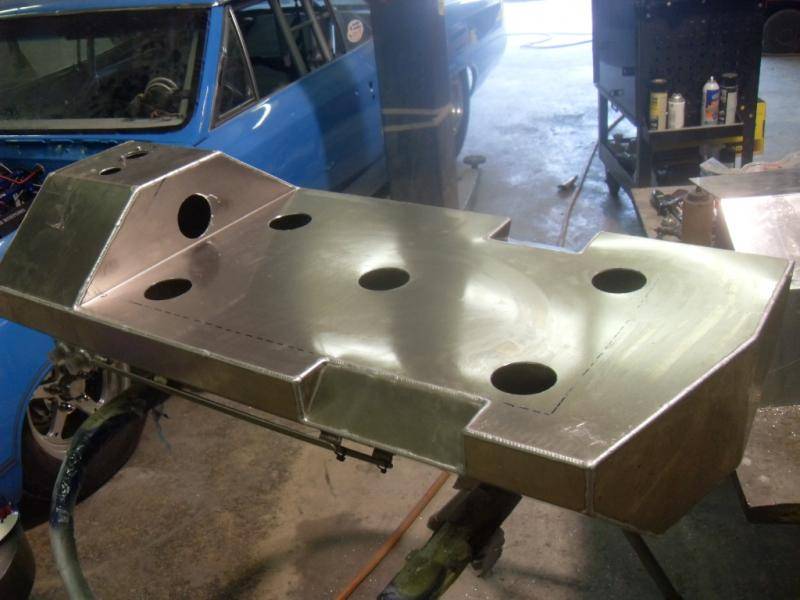
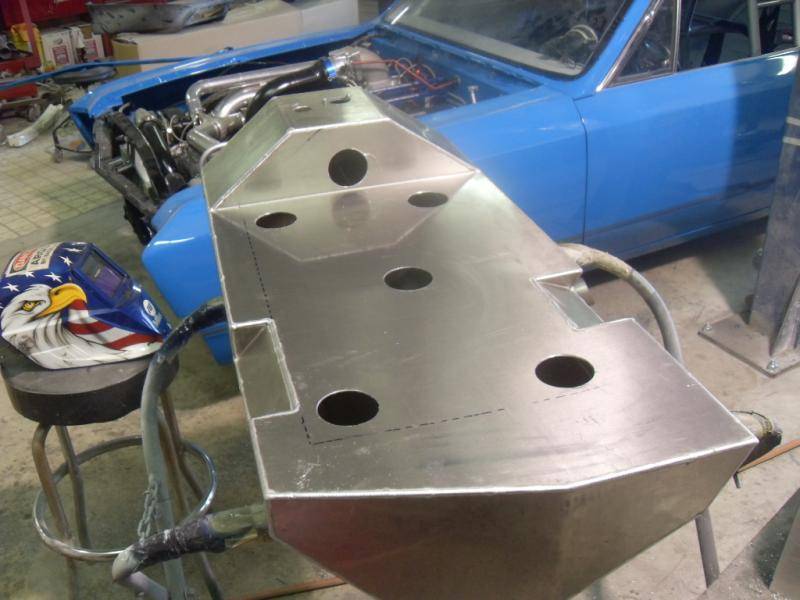
I used the sheet metal brake to make the bends and tack welded the new top on. then I did the end cap and that's how it sits for now. I also plan on re-locating the fuel fill hole that's in the factory location and made to use the factory fill tube grommet, more to the top. that way the fuel won't "click off" once it gets above the fill hole.
enjoyThe Enemy of my Enemy is my Friend...
MY BUILD https://www.pro-touring.com/threads/...ra-1-Contender

 Reply With Quote





