


Results 1 to 20 of 102
-
01-10-2014 #1

 Registered User
- Join Date
- Nov 2013
- Location
- FL
- Posts
- 92

68 Firebird - Build My Way - UnProEverything
Hi Crew,
Long time reader of Pro-Touring.com and now it is my turn. I have learned a lot on this site for my ride. What to do and what NOT to do, what style I like and what I do not like. I like that there are some rust buckets (like mine) and some really pro stuff on this site. Seems that everybody just wants to enjoy cars and I like that!
Well, I started working on cars in JR High and my first car back in the 90's was a 1968 Firebird. I am proud to say I still have that rust bucket. I drove it in High school, killed the 400 in it, put in an awesome 389, killed it and put in another 400 and it died too. They were all used engines but were fun. I parked the car at my parents when I went to college, then got married and after finishing my masters degree brought it home. As you see here, it needed LOTS of attention. It did not run but did have lots of RUST. I am in FL so the wet environment brings rust.
This is my journey and it is going to be built my way (slow and on a budget). I brought the car home back in 2005, shortly after bringing it home my wife delivered our first child, so it sat for more time. As my daughter got older I worked on it more. Well, one kid was fun, so lets add to the mix, we had another child and then slowly worked on it more. Made what I consider good progress, got it running and got wheels and then we had our last kid in spring of 2013. Not much progress until this past Christmas when I did more work, I am looking forward to this next stage to finish up a few things and get it out on the road.
These pictures are of it back in 1999 and when I brought it home in 2005. I will post some of the work I did since I brought it home.
-
01-10-2014 #2 Registered User
- Join Date
- Aug 2011
- Location
- Connecticut
- Posts
- 925
Looks like you have some work ahead of you!
I will be following this, please update often ;)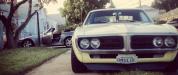
1967 Firebird "Poor-Boy Build"
New updated thread
https://www.pro-touring.com/threads/...bird-(Updates)
Follow me on Instagram @NaturalLivingMan
01-10-2014 #3
Registered User
- Join Date
- Nov 2013
- Location
- FL
- Posts
- 92
Hey Buryingthesun, I like your ride. I have followed it for about a year. Keep up the work and I will post more progress soon on my car.
01-10-2014 #4
Registered User
- Join Date
- Nov 2013
- Location
- FL
- Posts
- 92
So this is another beauty shot of rust when I brought it home and a cool pic of the original dash sticker.
01-10-2014 #5
Registered User
- Join Date
- Nov 2013
- Location
- FL
- Posts
- 92
So a while back I set out to get it running. When I brought it home it had a 400 that was freshly built ( fresh is relative since years had passed). I bought it off my brother put in in while I was in college home for breaks, but it had been sitting for a few years. The carb needed a rebuild, the fuel sending filter was mush inside the tank, so I replaced it and swapped in some new plugs and it started up.
It has a electrical fuel pump. The engine was not pretty so I set out to clean it up and paint it along with the engine bay.
01-10-2014 #6
Registered User
- Join Date
- Nov 2013
- Location
- FL
- Posts
- 92
original dip stick shape
So those of you that want to use a TH400 in your first Gen and use an original dip stick tube, you will have to look hard. This is what it looks like, check out the multiple bends.
After getting the car running it liked to smoke, and that was not good with me or with the wife. I set out to stop the leaks.
I tried to find a good dip stick and due to the bends, I ended up putting in a braided hose, like a Lokar. It now looks good and the leaks is gone. Next I replaced the trans filter, and gasket. I moved to the valve cover gaskets.
I learned this trick somewhere. I used RTV and clothe pins to keep it in place while it dried. It worked awesome. I have had the valve covers off a few times and each time I put it back on, no leaks. I took them off to adjust the valve lash. I also picked up some chrome valve covers, because you know they make you go faster....
01-10-2014 #7
Registered User
- Join Date
- Nov 2013
- Location
- FL
- Posts
- 92
ok, So I had the car running, but not stopping. I grabbed some front discs from my Dads when I brought it home. Not pretty but it was a start. I can say that it was a PIA to get the spindles to seperate from the ball joints. Well the car is 45 years old. I broke the pickle fork and the actual ball joint seperator from Harbor Freight.
I used the old threaded rod to hold the control arms and springs together while I swapped out the spindles.
01-10-2014 #8
Registered User
- Join Date
- Nov 2013
- Location
- FL
- Posts
- 92
I know the rotors are ugly, but back then it was to get it rolling and stopping. The replacements are on the way. I also had to replace the master cylinder and in the back where the hard line meets the rubber hose, the pee bend was rusted along with the rubber hose was fully blocked. That all got replaced.
After making progress to running and mostly stopping, I made a purchase to keep the encouragement going. I sold many old parts and picked up some wheels a few years back. I had a full miss match of wheels, and wanted to step up to 18's.
01-10-2014 #9
Registered User
- Join Date
- Nov 2013
- Location
- FL
- Posts
- 92
I read all the pages and sites about what fits and what does not. I found some good affordable wheels and got them on the car.
Ridler 695 18x8 Front
Ridler 695 18x9.5 Back
The car looks totally different from the day I brought it home with the new wheels. My wife could see some of the vision I was going for.
This is a big lesson. Yes 18's will fit, but each car is different, I rubbed the passenger side front wheel when turning right. Well that was the next project.
01-10-2014 #10
Registered User
- Join Date
- Nov 2013
- Location
- FL
- Posts
- 92
Front Body Rust Gone
I had lots of rust as mentioned. I did not want to do rust repair on the front panels, so I opted to buy front panels.
I picked up L/R Front fenders, L/R front lower side panels and front lower valance. More on that to come.
Well again the car is 45 yrs old and bolts do not come off right away. While replacing the front end pieces I broke a bolt off, ok, 2 bolts off. No big deal but they were in the body tub. I then broke off the darn drill in the bolt I was working to back out. That was a good lessen about tools. I bought two different cheep drill bits and back out sets, both broke. I then spent some money and bought quality set and was able to complete the job.
01-10-2014 #11
Registered User
- Join Date
- Nov 2013
- Location
- FL
- Posts
- 92
Cleaning, prepping and test painting
So I mentioned I ripped off the front end and purchased new front end parts. I might as well clean the front end and make things look good.
I cleaned and painted the firewall.
I had my little helper clean the underside of the hood.
I cleaned and painted the inner fender wells.
And I did some test painting on the new body panels that I picked up.
I have since realized that I need a much higher quality spray gun and paint.
01-10-2014 #12
Registered User
- Join Date
- Aug 2011
- Location
- Connecticut
- Posts
- 925
So many updates!
Thank you for checking my build, no one ever comments they just seem to be looking
1967 Firebird "Poor-Boy Build"
New updated thread
https://www.pro-touring.com/threads/...bird-(Updates)
Follow me on Instagram @NaturalLivingMan
01-10-2014 #13
Registered User
- Join Date
- Nov 2013
- Location
- FL
- Posts
- 92
alright so more progress,
I put my ride back together (front panels, etc) and I am glad to see it in one piece for now. Nicer wheels, and nicer paint and front clean engine bay.
When people ask to see pictures or I show it off, I like to show the front, well simply because it looks better. So you can see what I have come from and where I stand.
front half is a start and well back half needs a little work.
I used original color paint for the engine. Still a few more touch ups but better then it was by a long mile.

01-10-2014 #14
Registered User
- Join Date
- Nov 2013
- Location
- FL
- Posts
- 92
Next I am going to dive into the suspension. Having 45yr old suspension is not cool!
I plan on rebuilding the front and the rear. I have some ideas.
Also, I plan on adding discs to the rear. I would like to stop you know!
01-10-2014 #15
Registered User
- Join Date
- May 2009
- Posts
- 45
Good job, keep going it always takes longer then you think. I work on my car and never seem to see progress, then one day it all starts coming together.
01-12-2014 #16
Registered User
- Join Date
- Nov 2013
- Location
- FL
- Posts
- 92
I tell people that this is just the first phase build, later on when I have more money for the car, I will go into phase II. At that time it would be way more professional.
So with this phase, I am making it a car that I can have fun, enjoy and do some increased cornering. When this thing was built in 1968 the technology was not like it is today.
So I am going to update the body mounts. I am set on Energy Suspension for now. I want a firm ride but not a hard ride. I will not be doing weekly autocross any time soon.
01-12-2014 #17
Registered User
- Join Date
- Feb 2008
- Location
- Los Angeles, SFV, CA
- Posts
- 51
Nice work on the build. I understand exactly what you are saying about the extended phase 1. I have the same philosophy about my build. I am trying to just get it running and have it a fun driver, then phase 2.
01-16-2014 #18
Registered User
- Join Date
- Nov 2013
- Location
- FL
- Posts
- 92
So I am going to order some new suspension parts. I would love to do some wild upgrades. But for starters I am going to go with the Hotchkiss TVS. This is pretty awesome!!! I have see the red 1968 Hotchkis Camaro and it can kick butt.
Also I am going with Global West upper control arms and lower control arm bushings from Global West.
I will keep you posted..1968 Firebird - My Way
https://www.pro-touring.com/threads/...nProEverything
01-16-2014 #19 Registered User
- Join Date
- May 2013
- Location
- Moody,Al
- Posts
- 91
Looking good. It is nice to have a little helper also! My little helper is 3 and loves our black truck and Smokey and the Bandit. What else could you ask for!
01-16-2014 #20 Registered User
- Join Date
- Apr 2004
- Location
- Cedar Rapids, IA
- Posts
- 999
subscribing
Some times I'm fast sometimes I'm half-fast
Tags for this Thread

 Reply With Quote



