


Results 1,561 to 1,580 of 1611
-
06-30-2025 #1561

 Registered User
- Join Date
- Oct 2010
- Location
- SLC
- Posts
- 660
not sure if the LSA tensioner is the same as the LS3 (probably is) but I found pieces of mine in the oil pan after 1000 miles. I switched to the LS2. Originally Posted by andrewb70
 Zach
1970 Mach 1 build - Half-Breed (pro-touring.com)
-
06-30-2025 #1562
 -Moderator/Sponsor-
- Join Date
- Apr 2001
- Location
- The City of Fountains
- Posts
- 16,129
 Thanks for the input. I am glad I swapped it out. I don't enjoy taking the engine apart for silly reasons. Originally Posted by Zachalanche
Little things like this are much easier to do when the engine is out. Since I am using the GTO front sump pan which has the dipstick on the side of the pan, the dipstick hole in the block needs to be sealed.
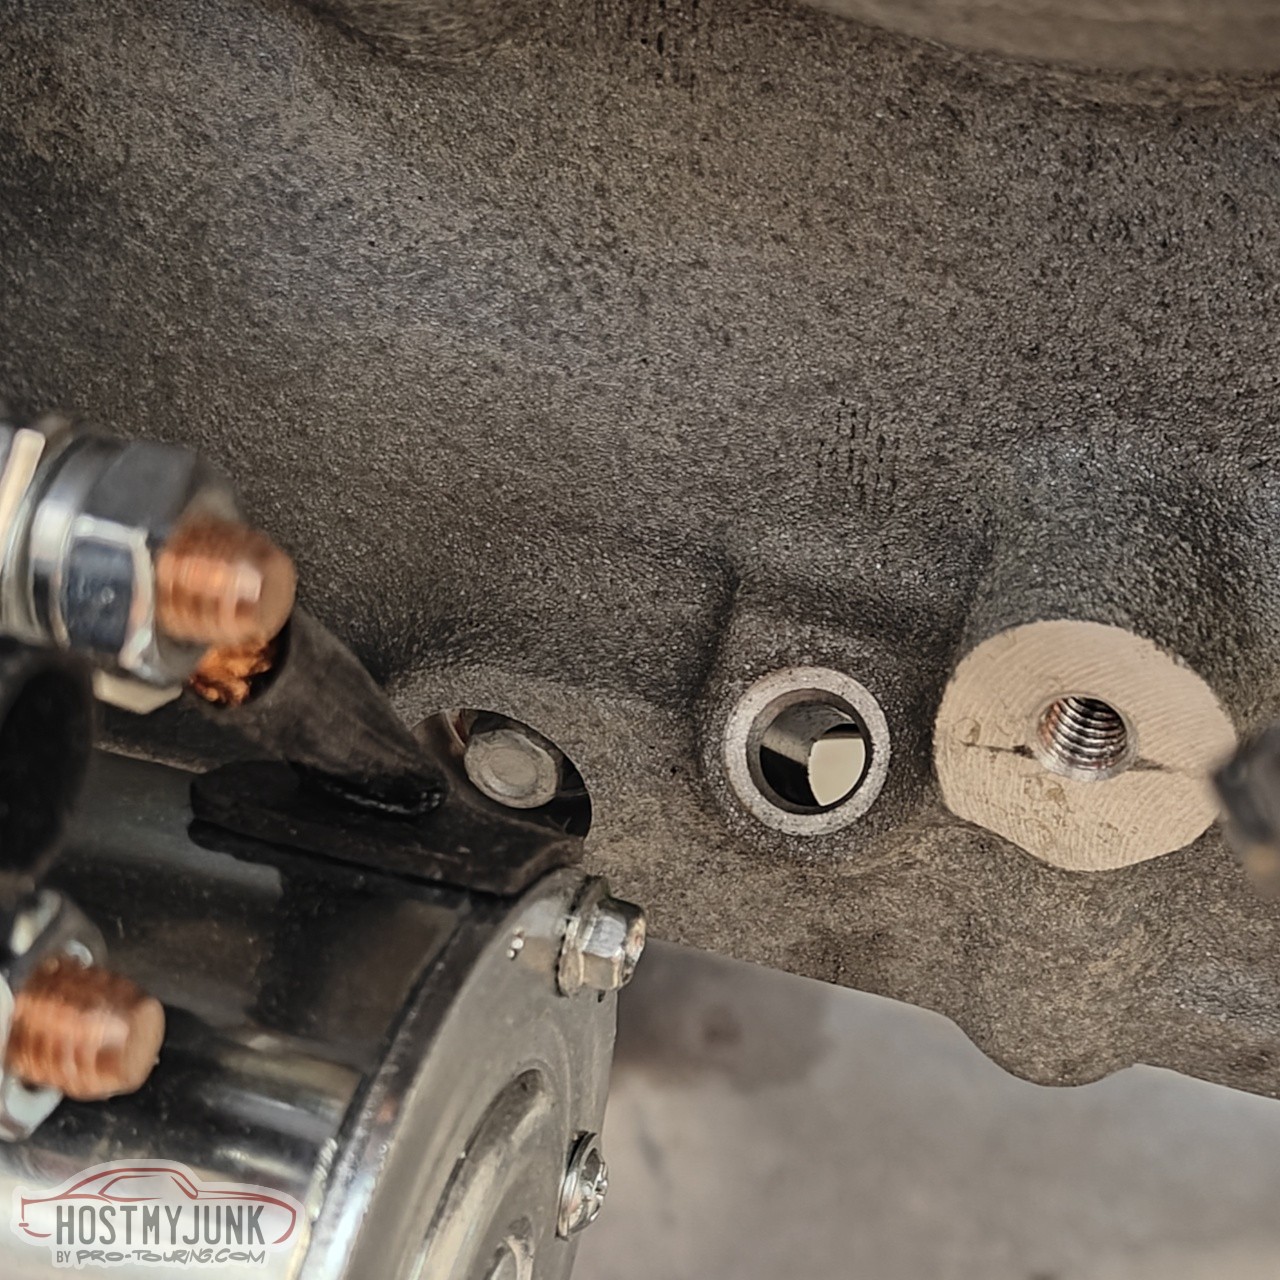
This is a little freeze plug that is used for this purpose.
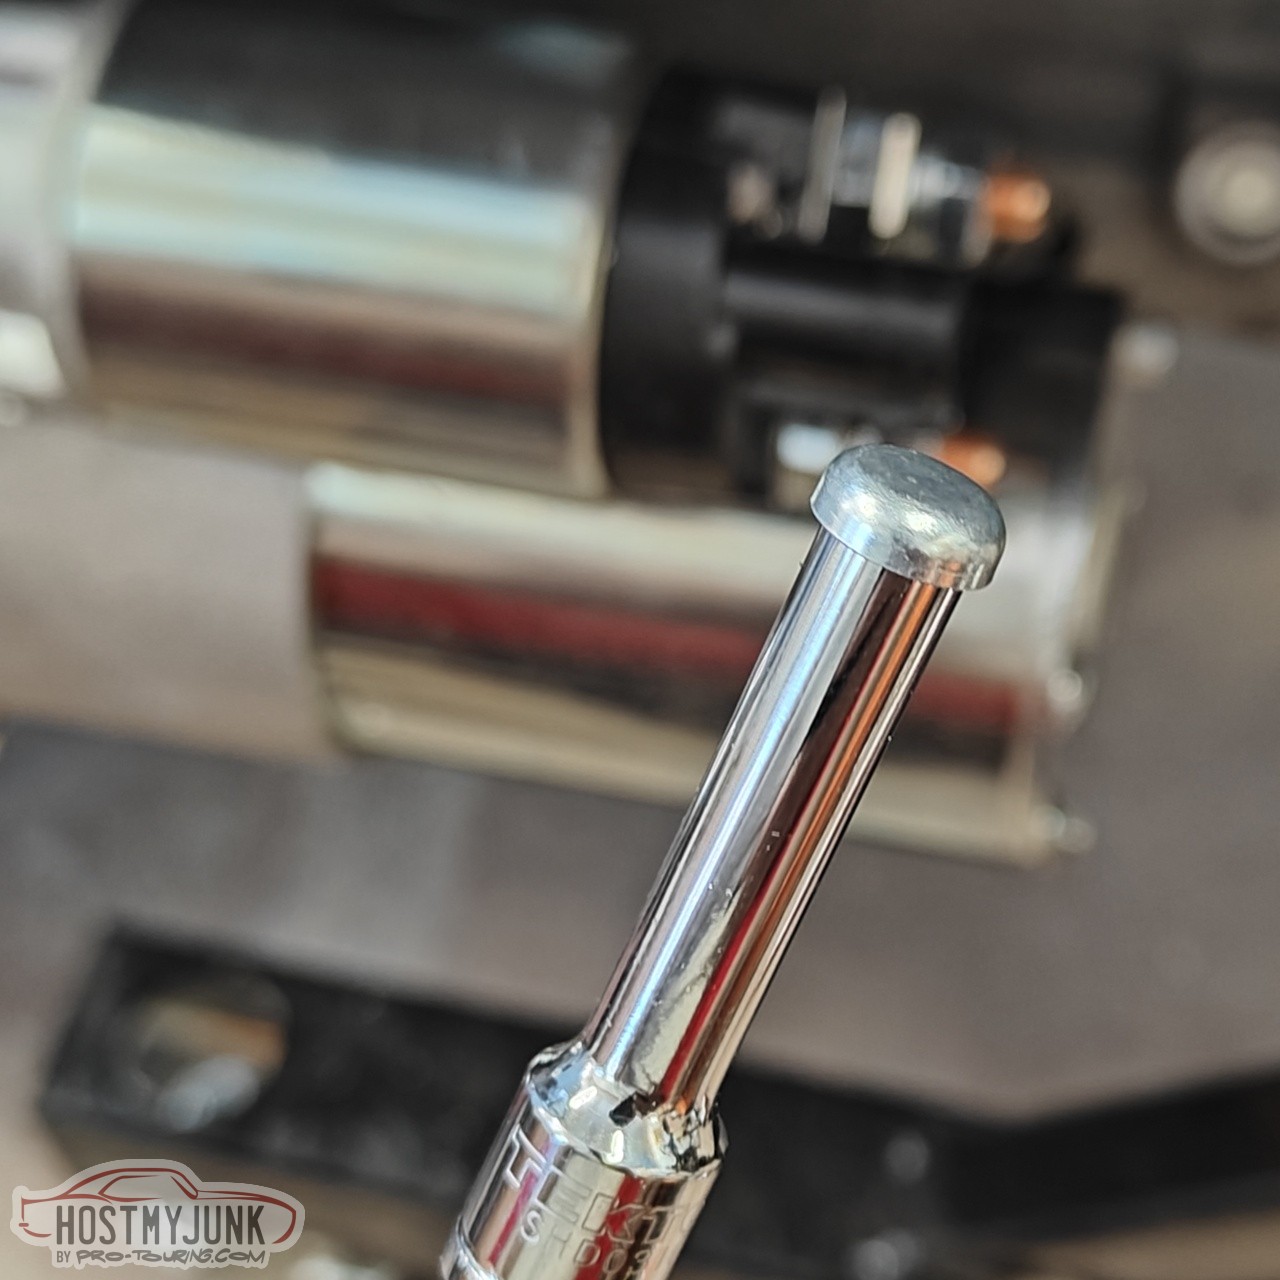
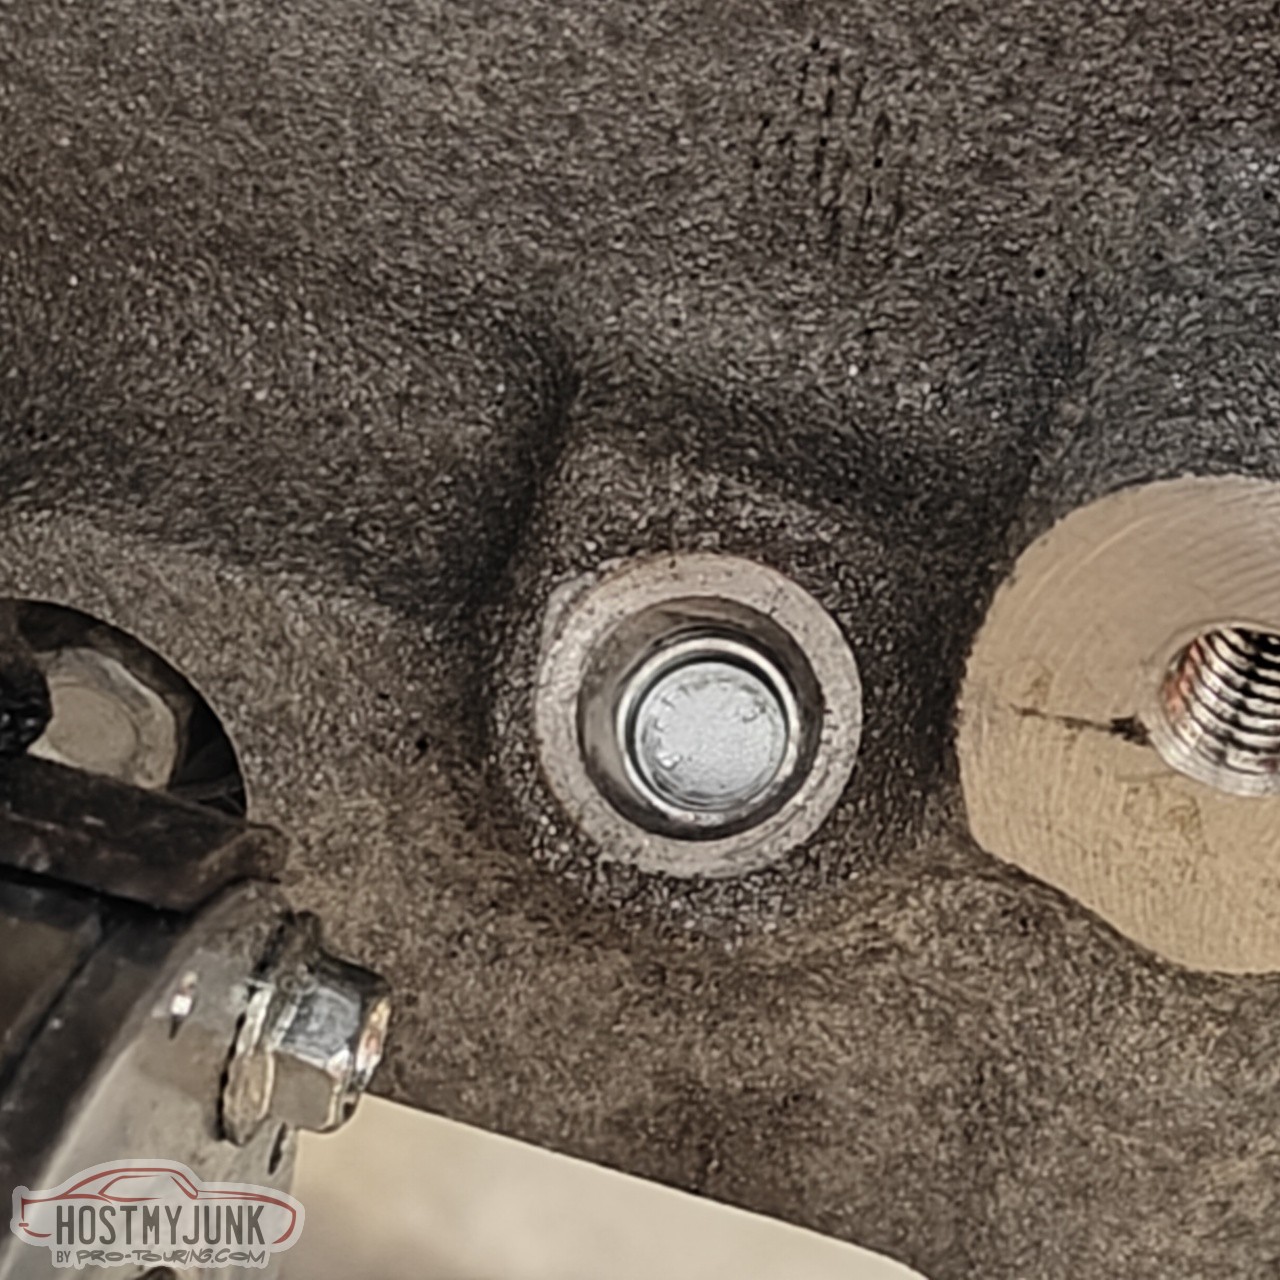
I put a little teflon thread sealer around it and tapped it into the dipstick tube hole in the block.
Now back to the starter. I stated earlier that I was using the 5th gen Camaro starter. Well, that starter has a unique nose on it and it does not work well with the Domiworks adapter. I recall having a similar clearance issue when I used that starter with a stock T56 bellhousing. Instead of butchering the adapter (more than I already did) I ordered this truck starter. It has a different nose, but still have the connector for the solenoid wire.
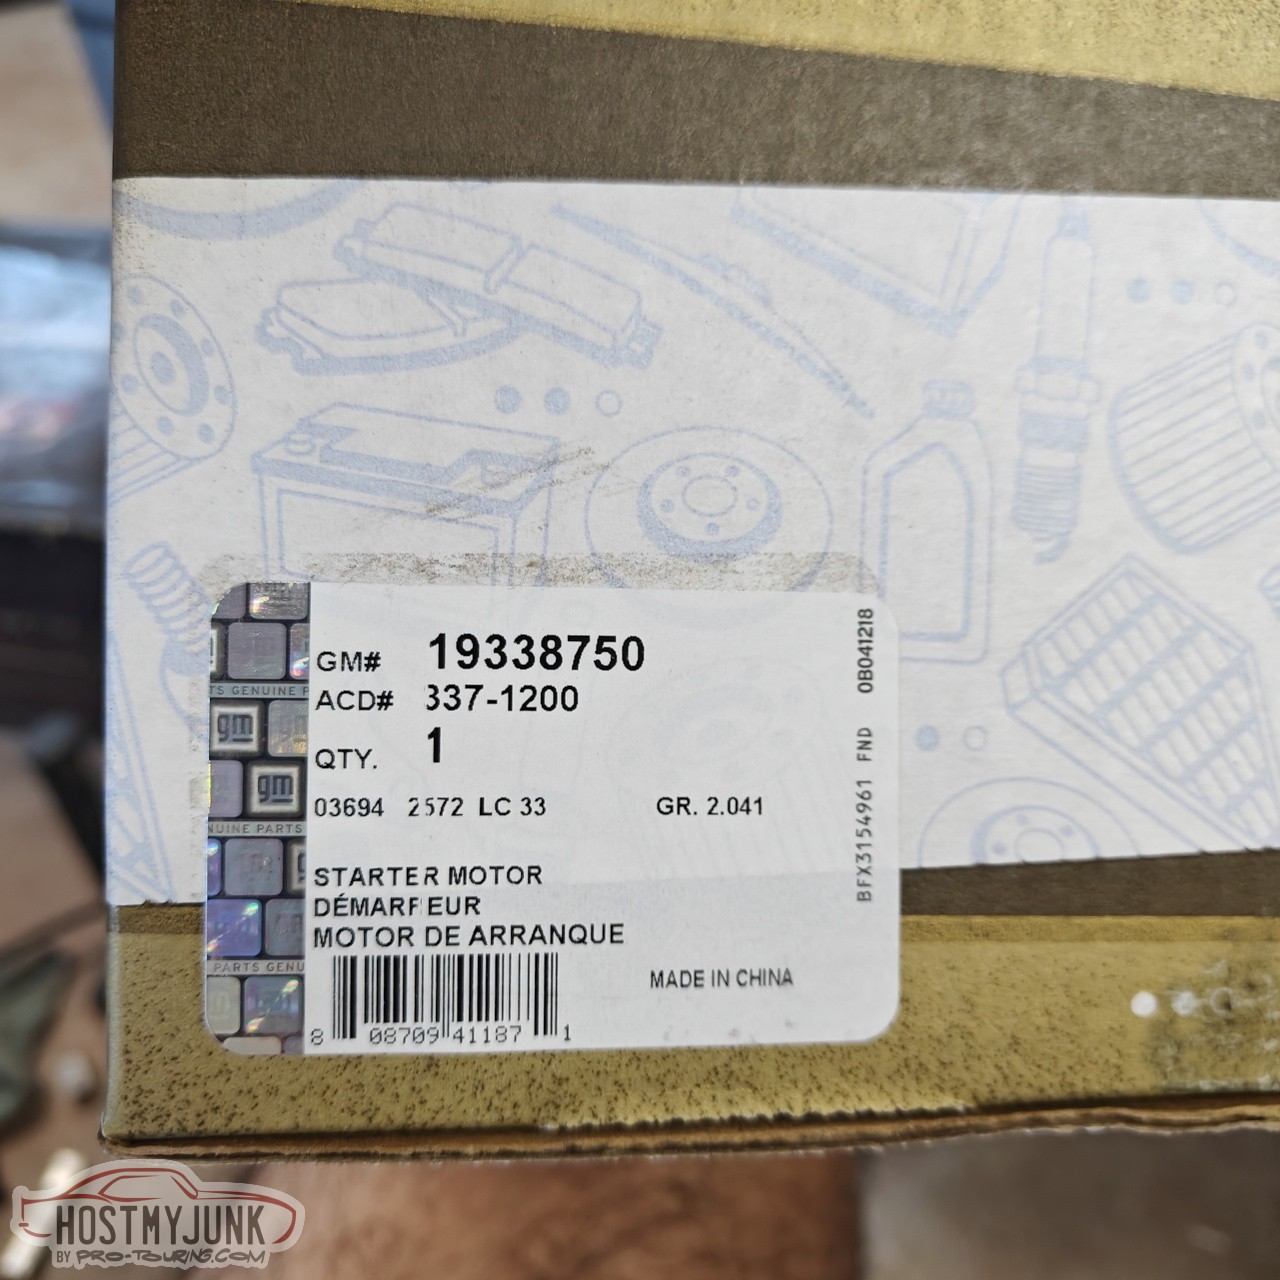
You can see where I have already clearanced the adapter, but had I used this starter from the beginning, that would not have been necessary.
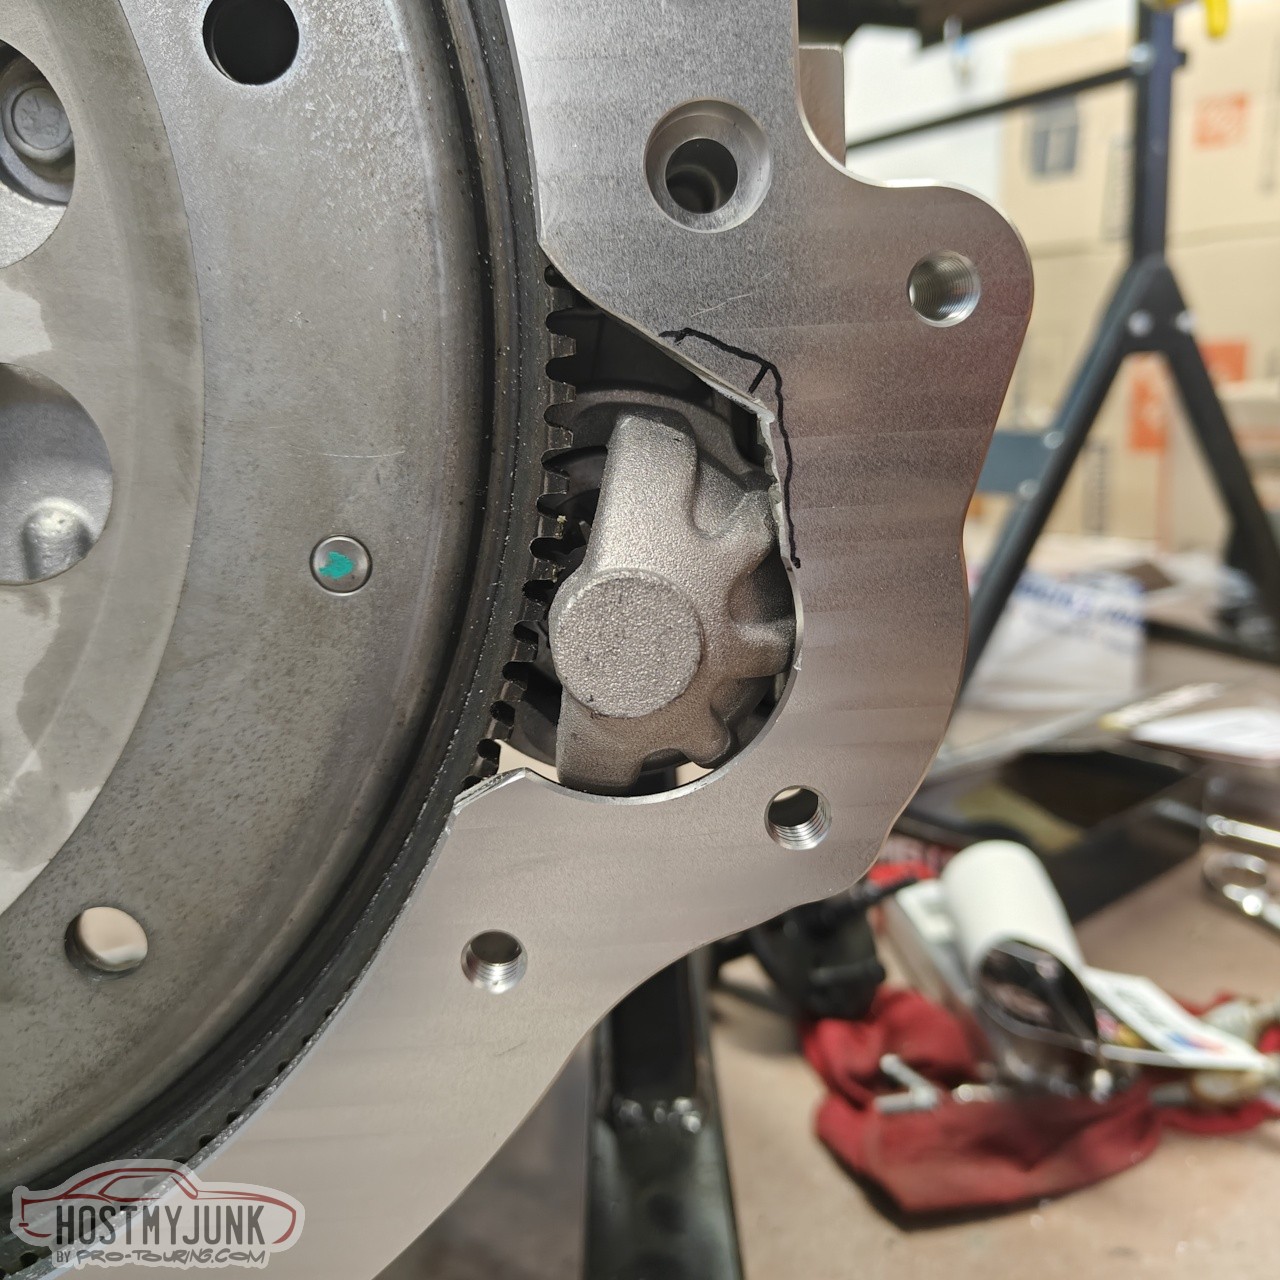
The other difference with this starter is that it does not have provisions for the heat shield, like the one that is used on the 5th gen Camaro starter. I don't think this will present any issues.
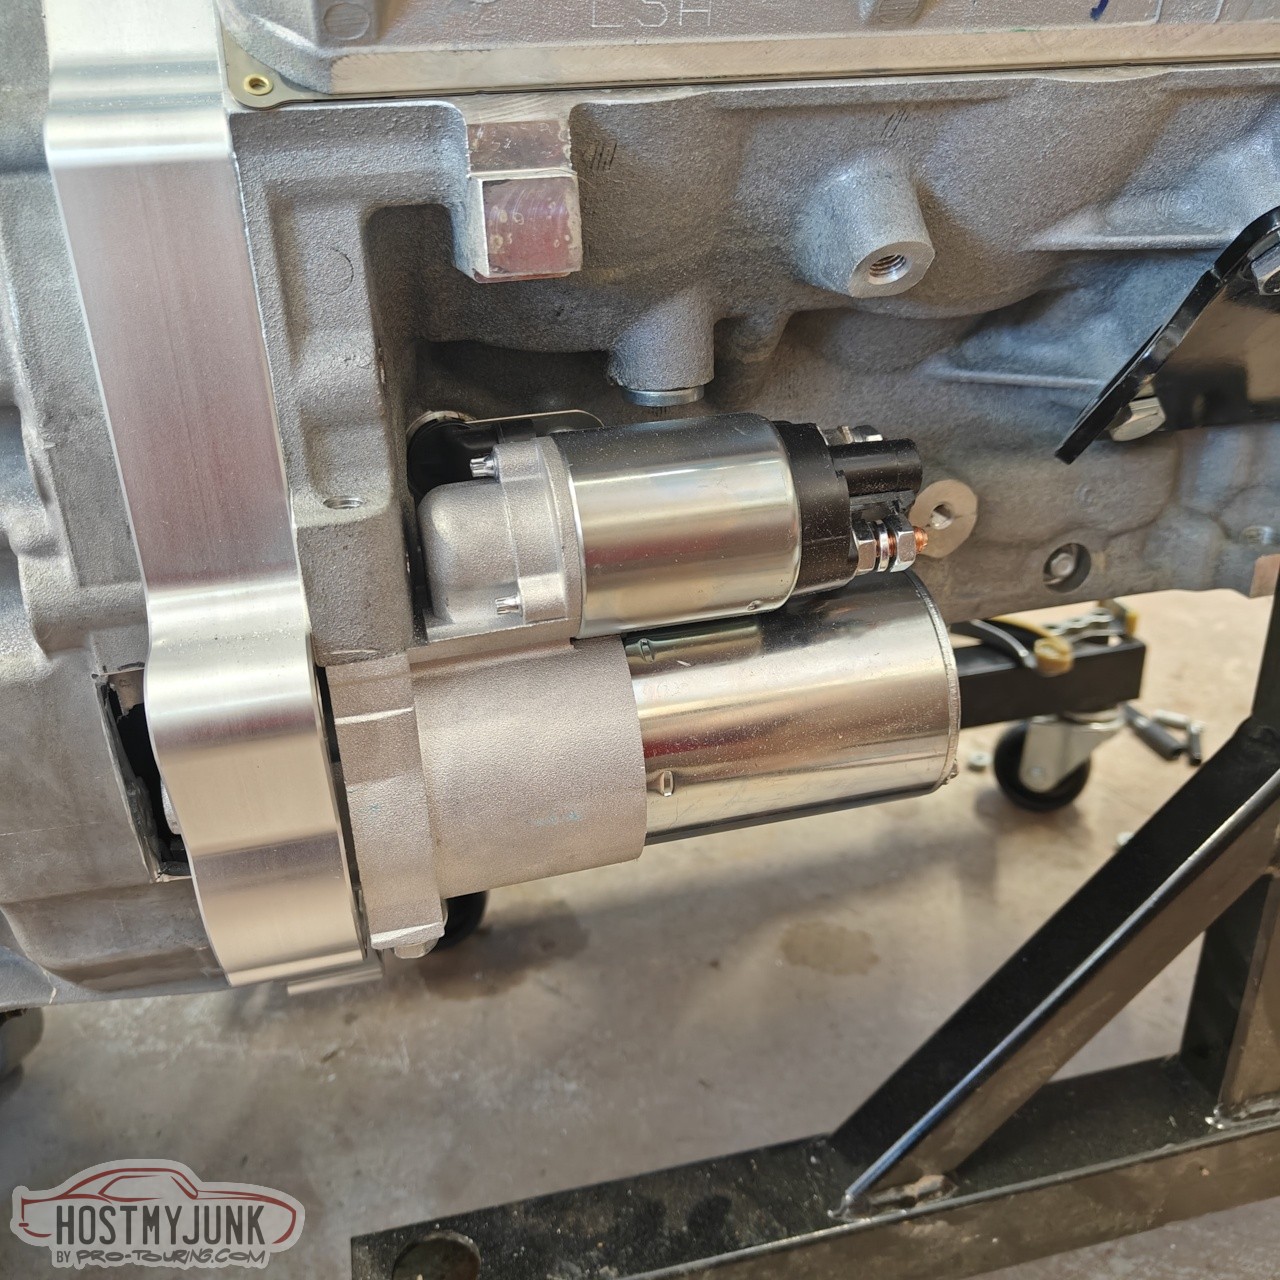
This shows how much the bellhousing has to be notched in order to clear the nose of the starter. I could have done a slightly smaller notch, but I didn't want to keep messing with it.
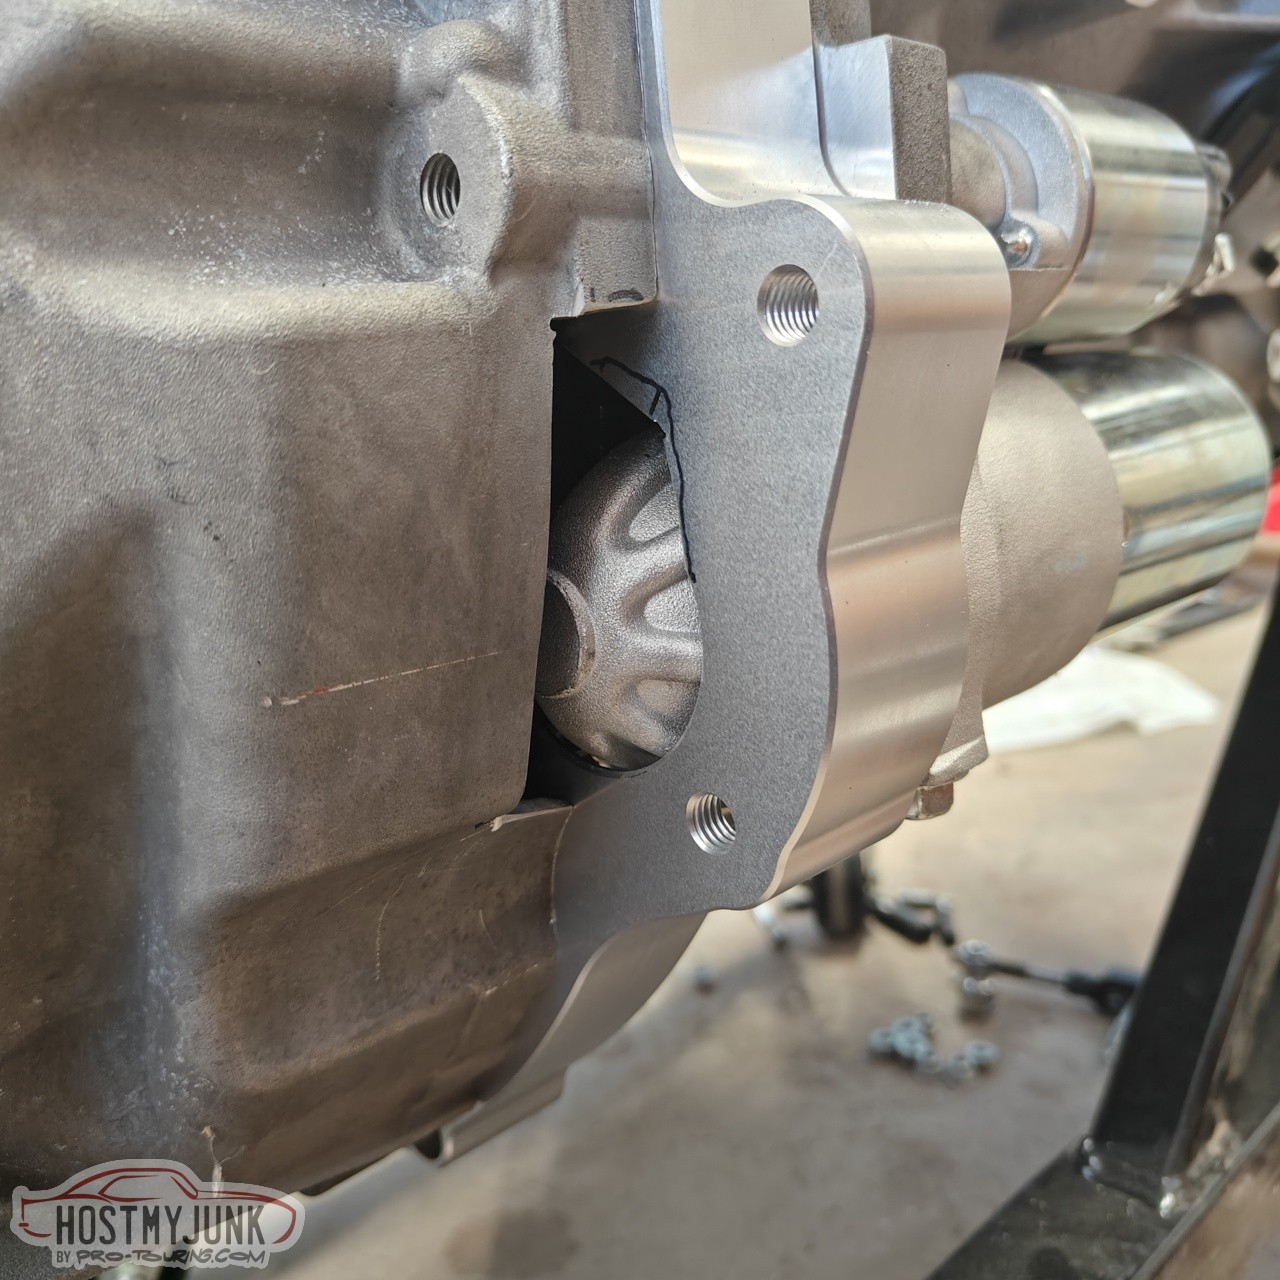
I plan to 3D scan that area and have a small cover designed and 3D printed. The engine swap party is a little over 2 weeks away.
Andrew1970 GTO Version 3.0
1967 Cougar build
GM High-Tech Performance feature
My YouTube Channel Please Subscribe!
Instagram @dr__efi
I deliver what EFI promises.
Remote Holley EFI tuning.
Please get in touch if I can be of service.
"You were the gun, your voice was the trigger, your bravery was the barrel, your eyes were the bullets." ~ Her
-
07-14-2025 #1563
-Moderator/Sponsor-
- Join Date
- Apr 2001
- Location
- The City of Fountains
- Posts
- 16,129
The Cougar is at home again and I got a little head start to make life easier when my friends arrive.
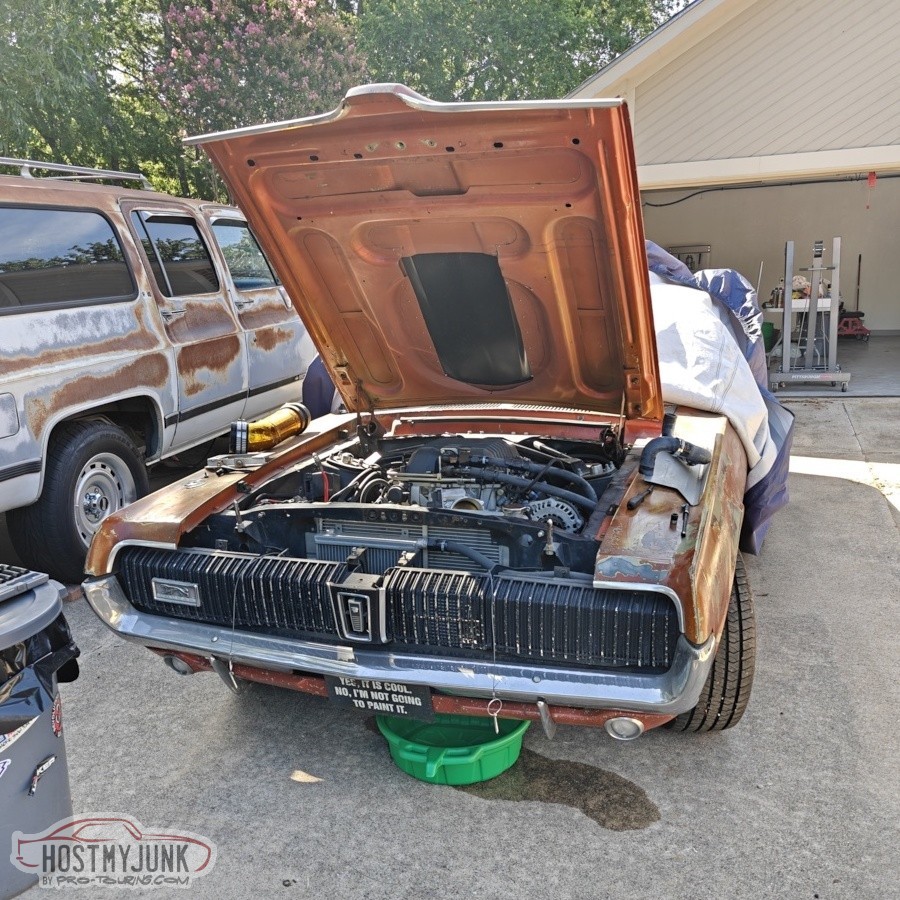
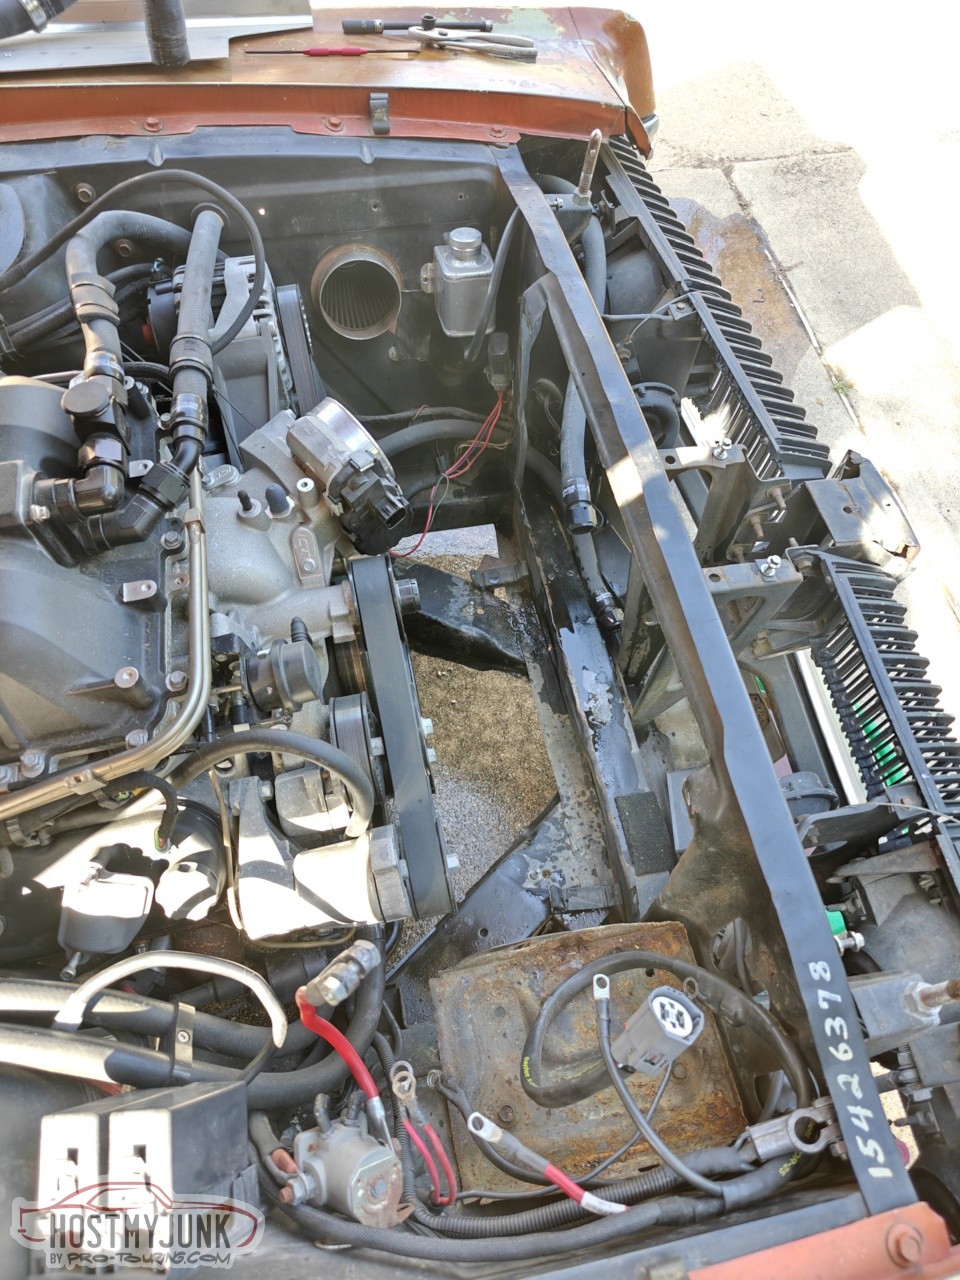
I removed the battery, cooling stack, and the fresh air intake.
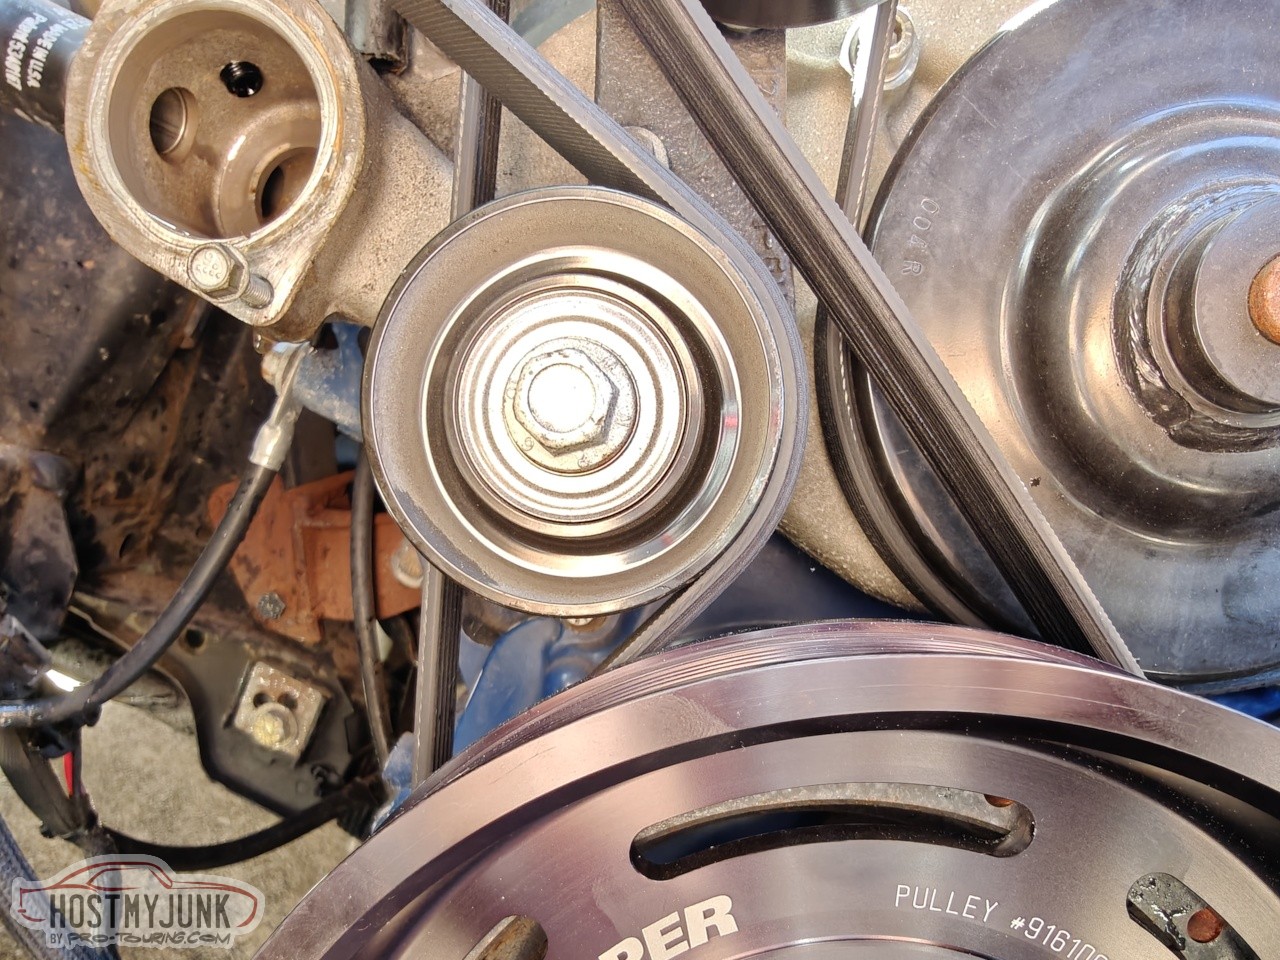
I got nervous when I saw how close the blower pulley is to the idler pulley. Doing a little research it appears that the stock idler pulley location works with up to a 9" blower crank pulley. Mine is 8.625 and this is the approximate clearance.
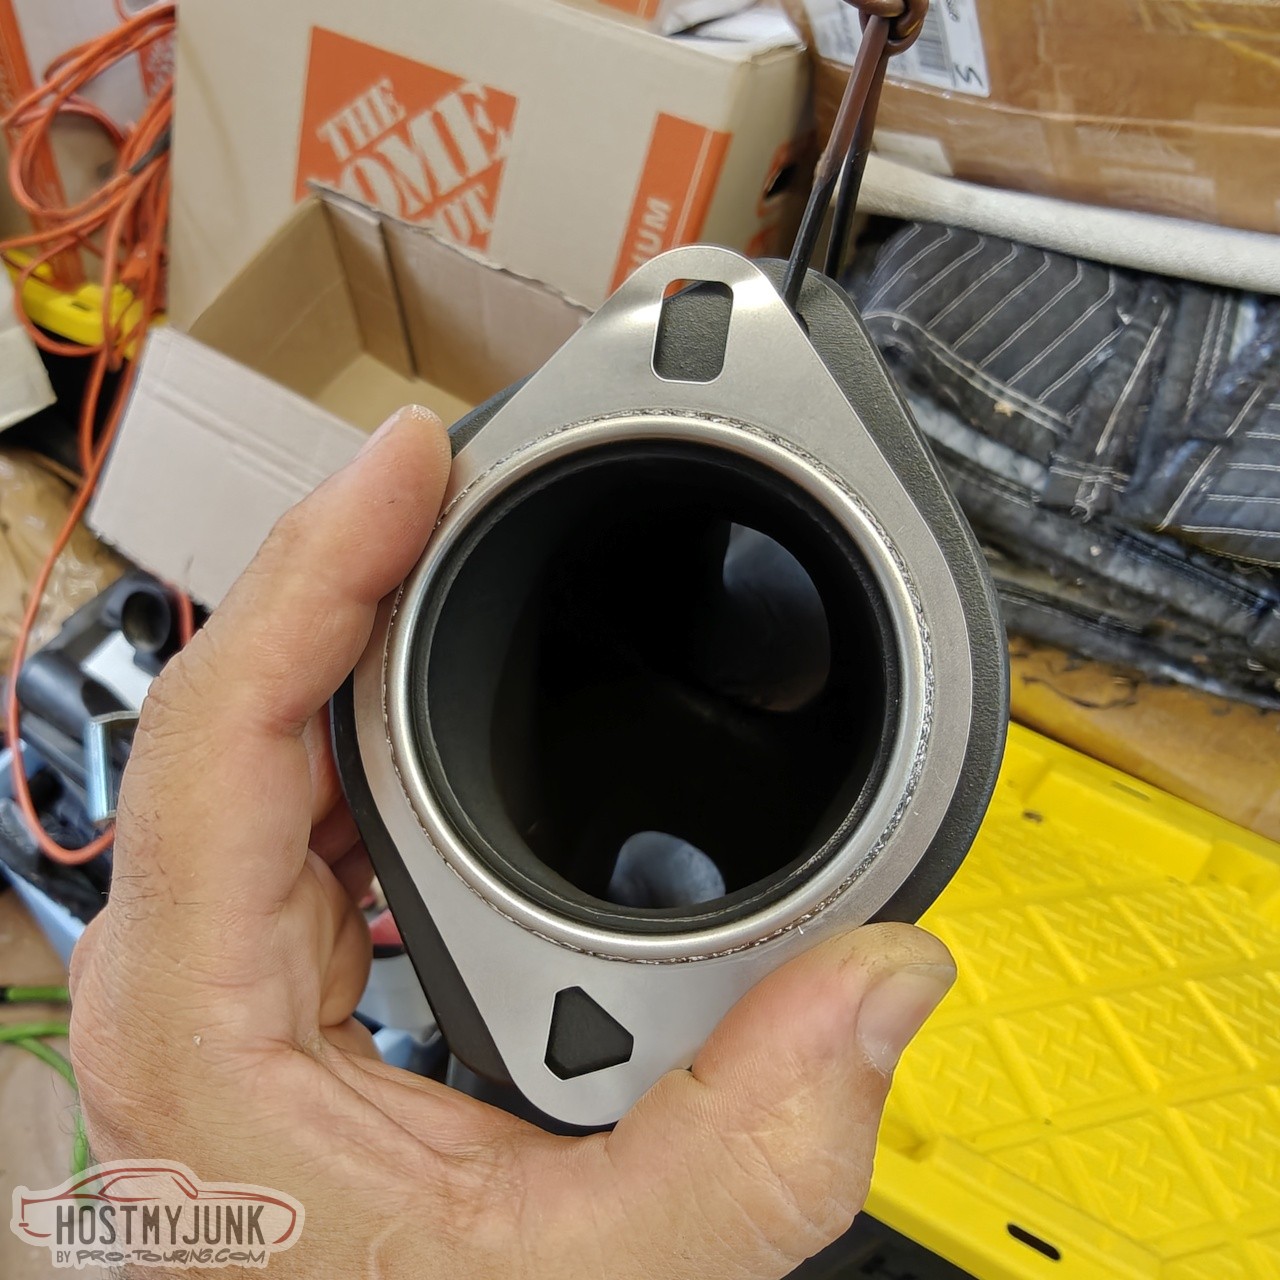
This is a stock 5th Gen Camaro exhaust manifold gasket placed against the outlet of the Hooker 2.5" outlet exhaust manifolds. Seems like a nice fit.
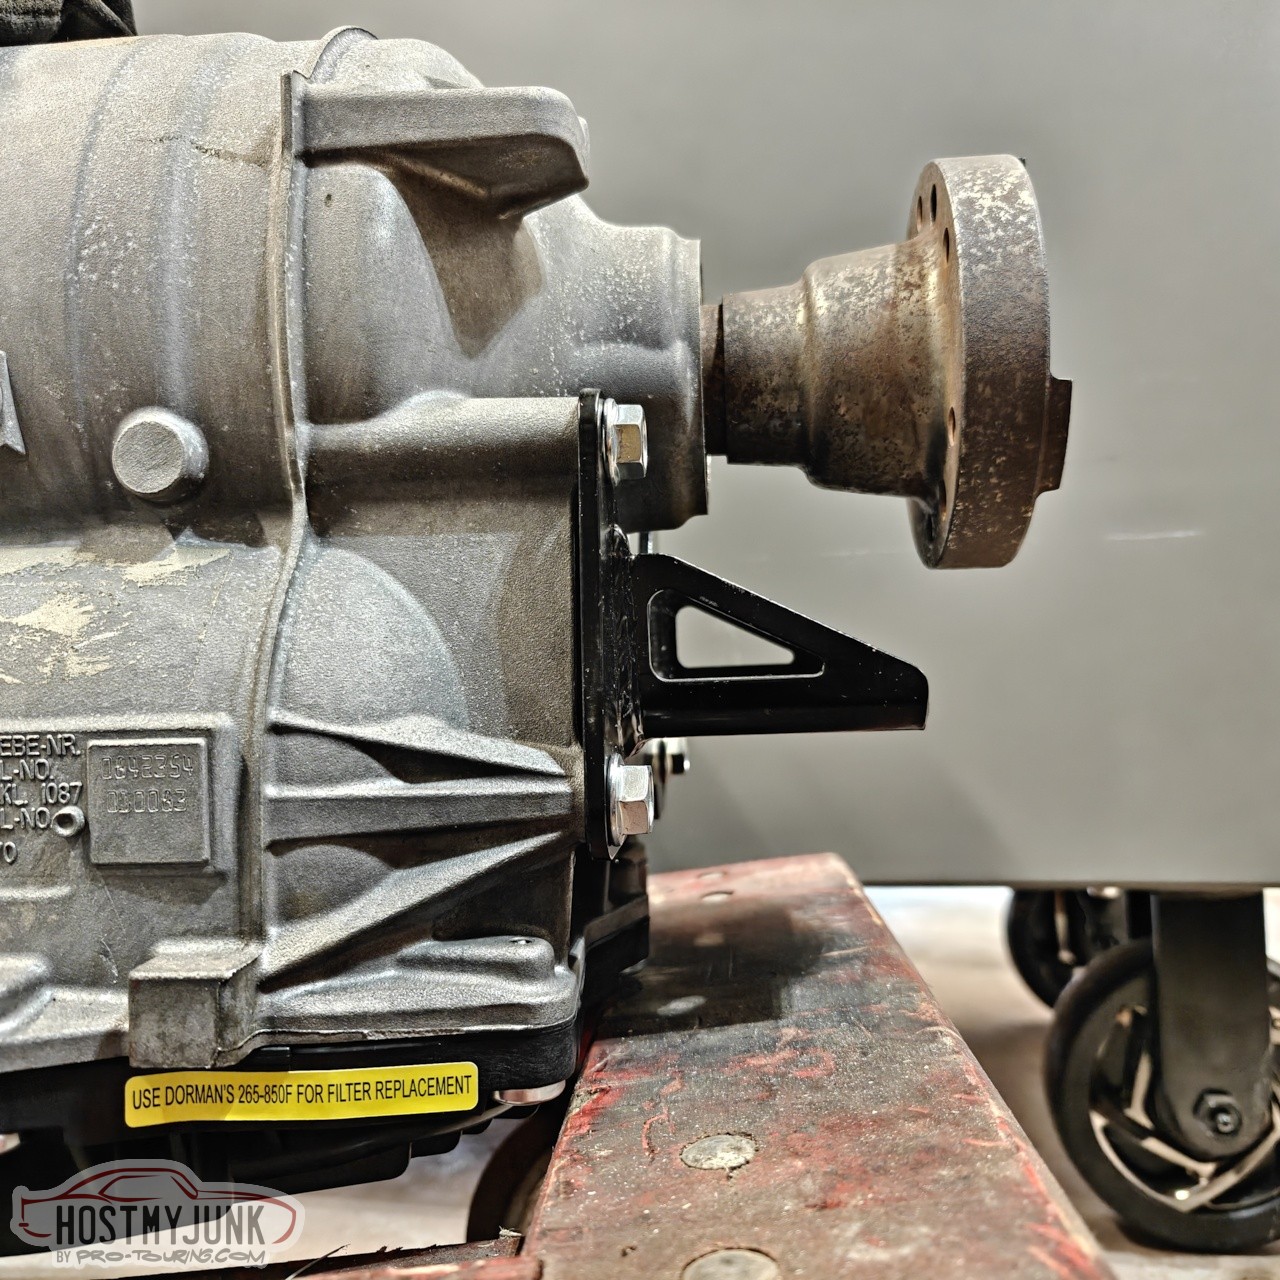
I have several options for the transmission mount, but I think this Holley 8HP70 mount will work perfectly. I might even be able to use the stock T56 transmission mount and the existing crossmember, which might have to slide forward about an inch.
My friends are arriving on Thursday evening and the engine swap party starts on Friday morning.
Andrew1970 GTO Version 3.0
1967 Cougar build
GM High-Tech Performance feature
My YouTube Channel Please Subscribe!
Instagram @dr__efi
I deliver what EFI promises.
Remote Holley EFI tuning.
Please get in touch if I can be of service.
"You were the gun, your voice was the trigger, your bravery was the barrel, your eyes were the bullets." ~ Her
-
07-21-2025 #1564
-Moderator/Sponsor-
- Join Date
- Apr 2001
- Location
- The City of Fountains
- Posts
- 16,129
My friends Tom (on the left) and Brian (on the right) arrived on Thursday and at 7am Friday morning we got to work. My driveway has shade on it until about 10am, so we had to move fast.
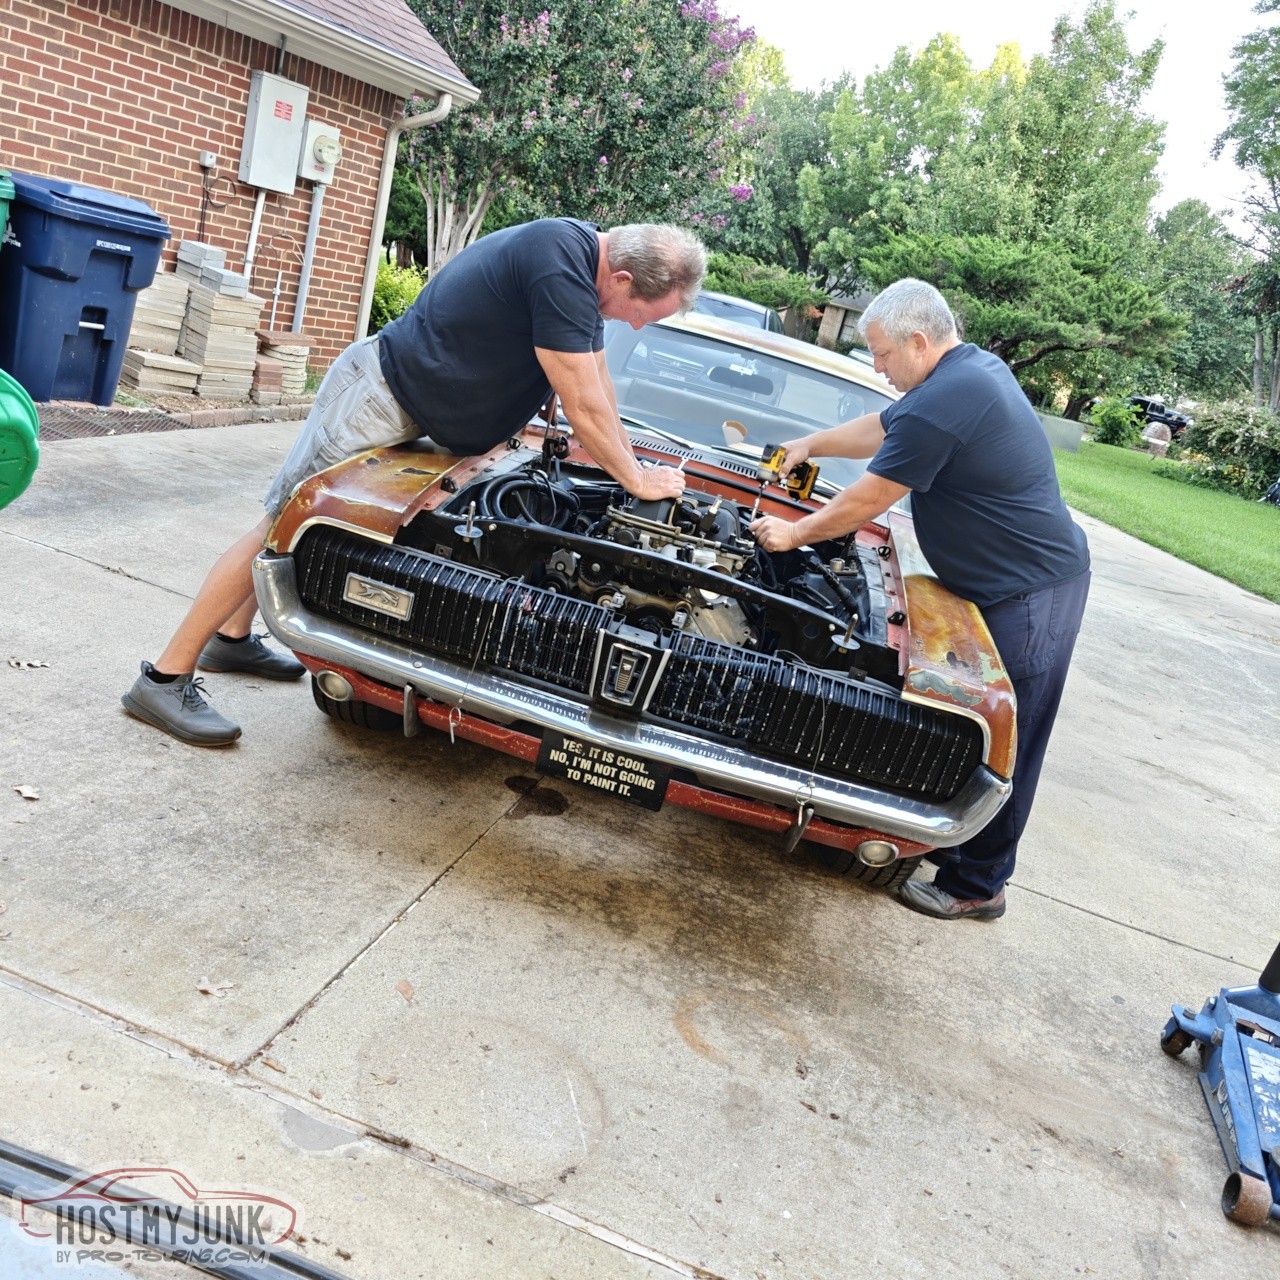
BA is a goofball but he is a beast of a mechanic. He is one of just a small number of people who I would trust to do anything on my car.
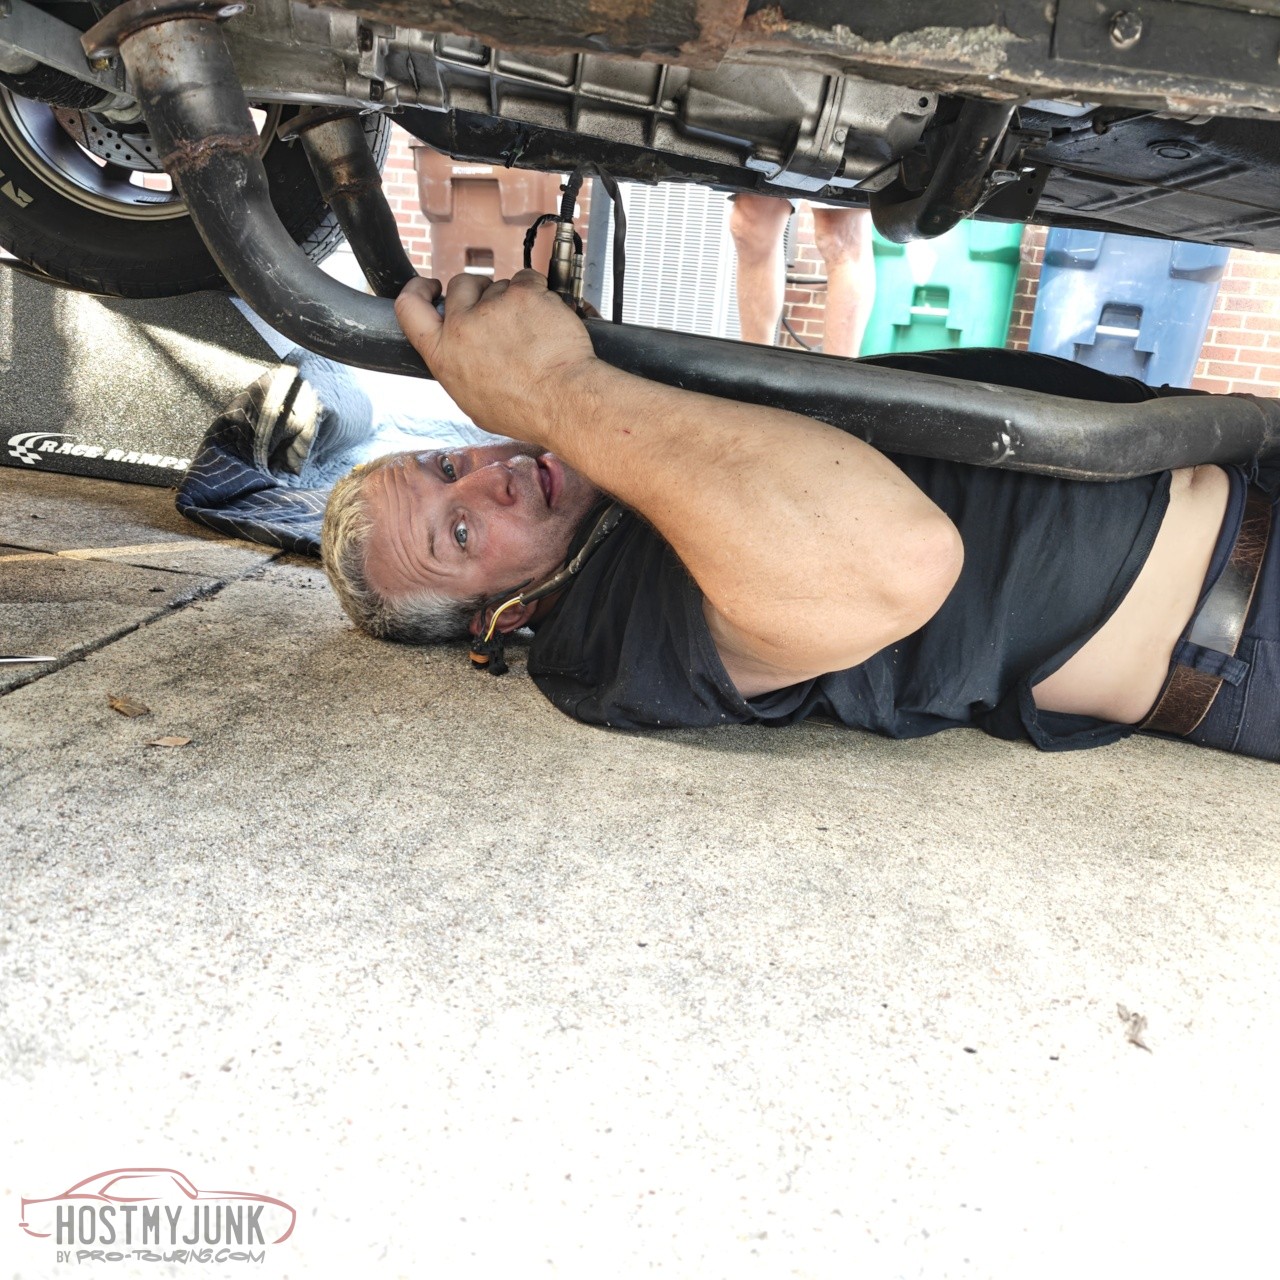
By about 8:45am the engine was out of the Cougar.
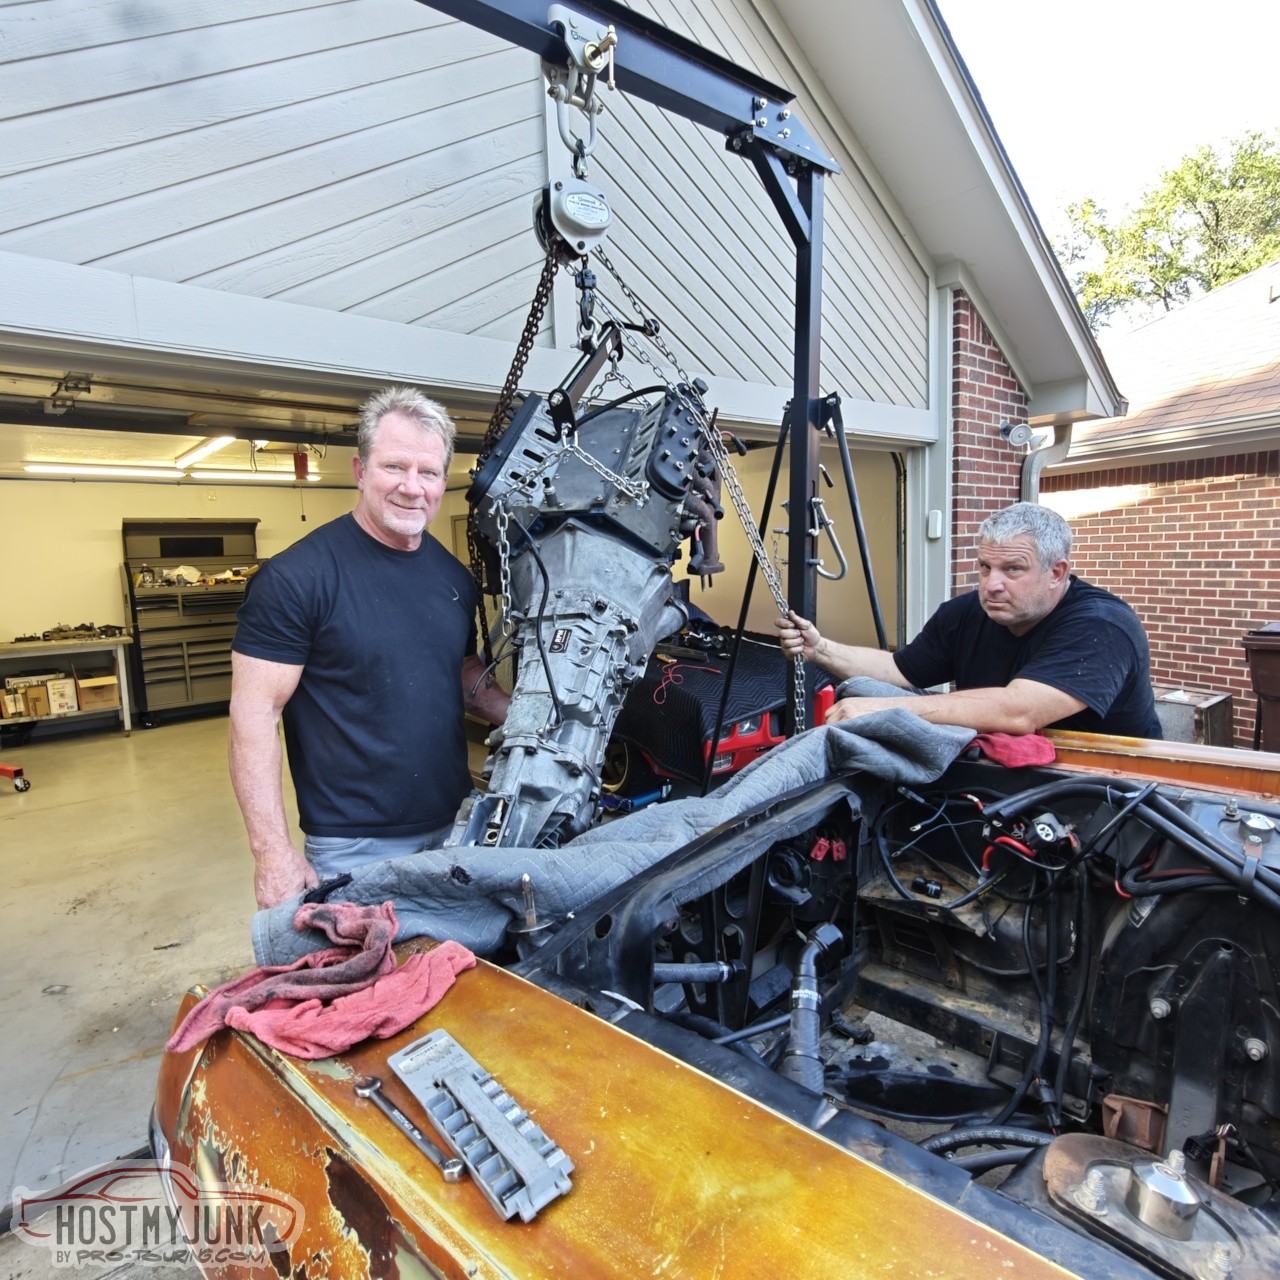
At that point we could move inside the garage, which has AC. I have to give a big "Thank you" to my buddy Ryan Karl who installed the mini split back at the end of February when we had my Suburban engine swap party. Without the AC this weekend would have been miserable.
The only part that was needed off the old engine was the oil pan and pick-up tube. These are the metal bits that were stuck in the pickup tube.
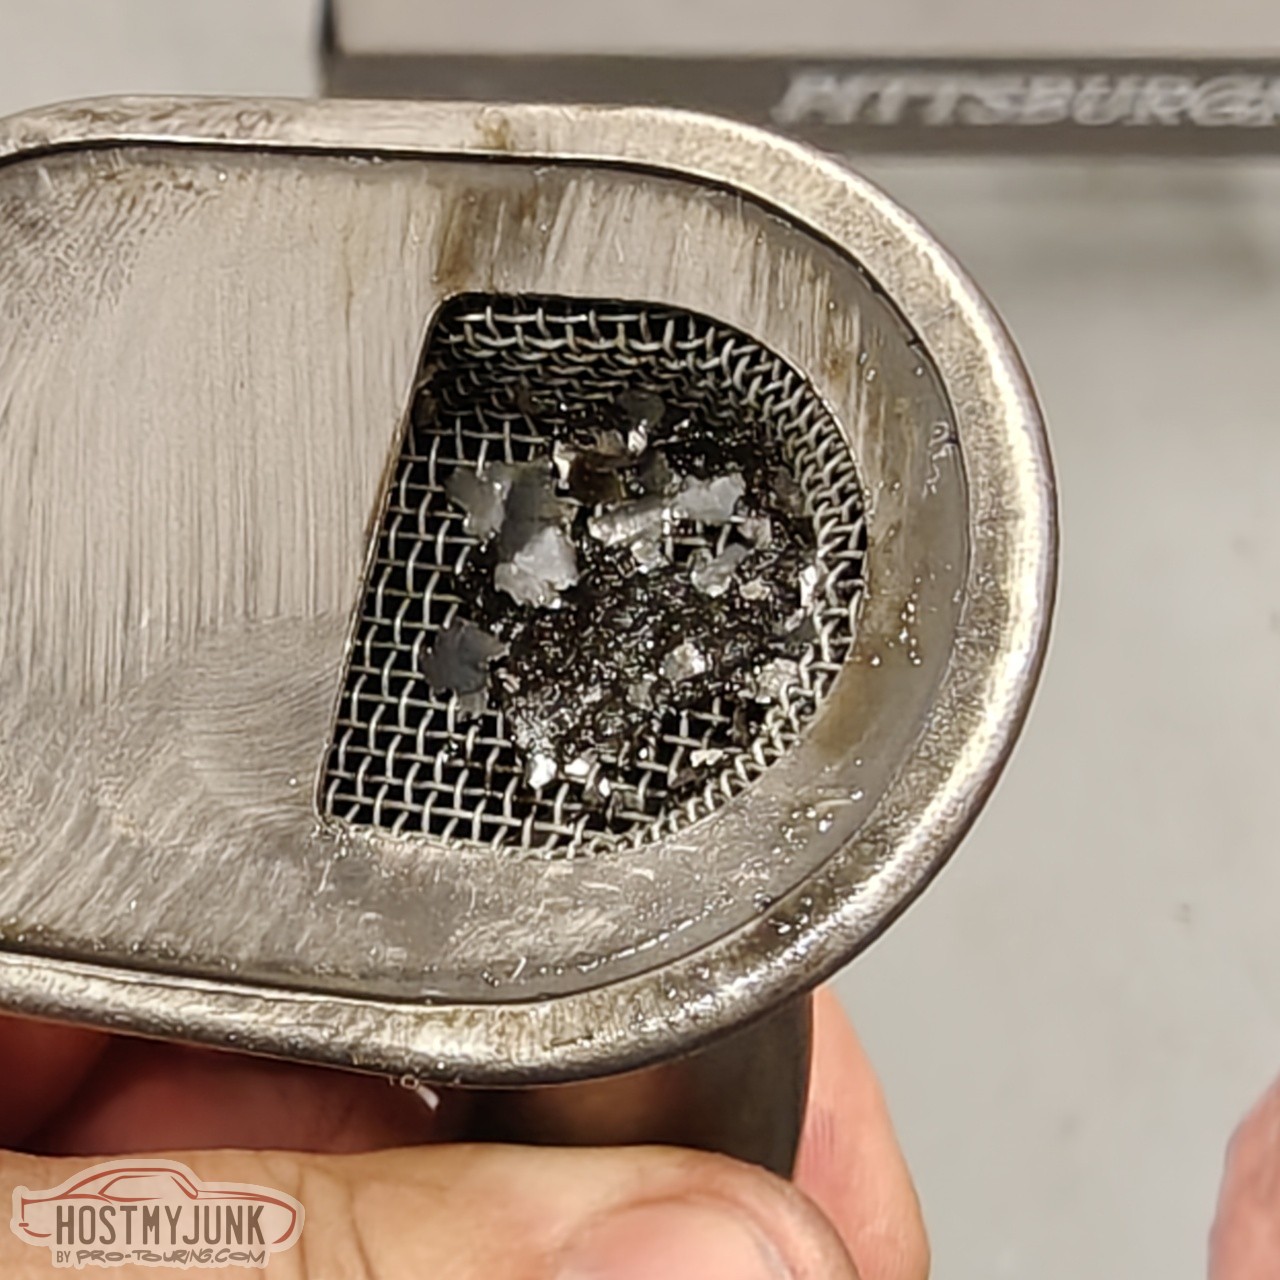
The oil pan was cleaned thoroughly inside and out. The inner tubes were removed and rinsed out and new gaskets installed where the tubes mate with the pan. Also added was a baffle from Improved Racing. These front sump GTO pans suffer from poor baffling inside the pan. You can see the trap doors built into the Improved Racing baffle which will hopefully help maintain consistent oil pressure.
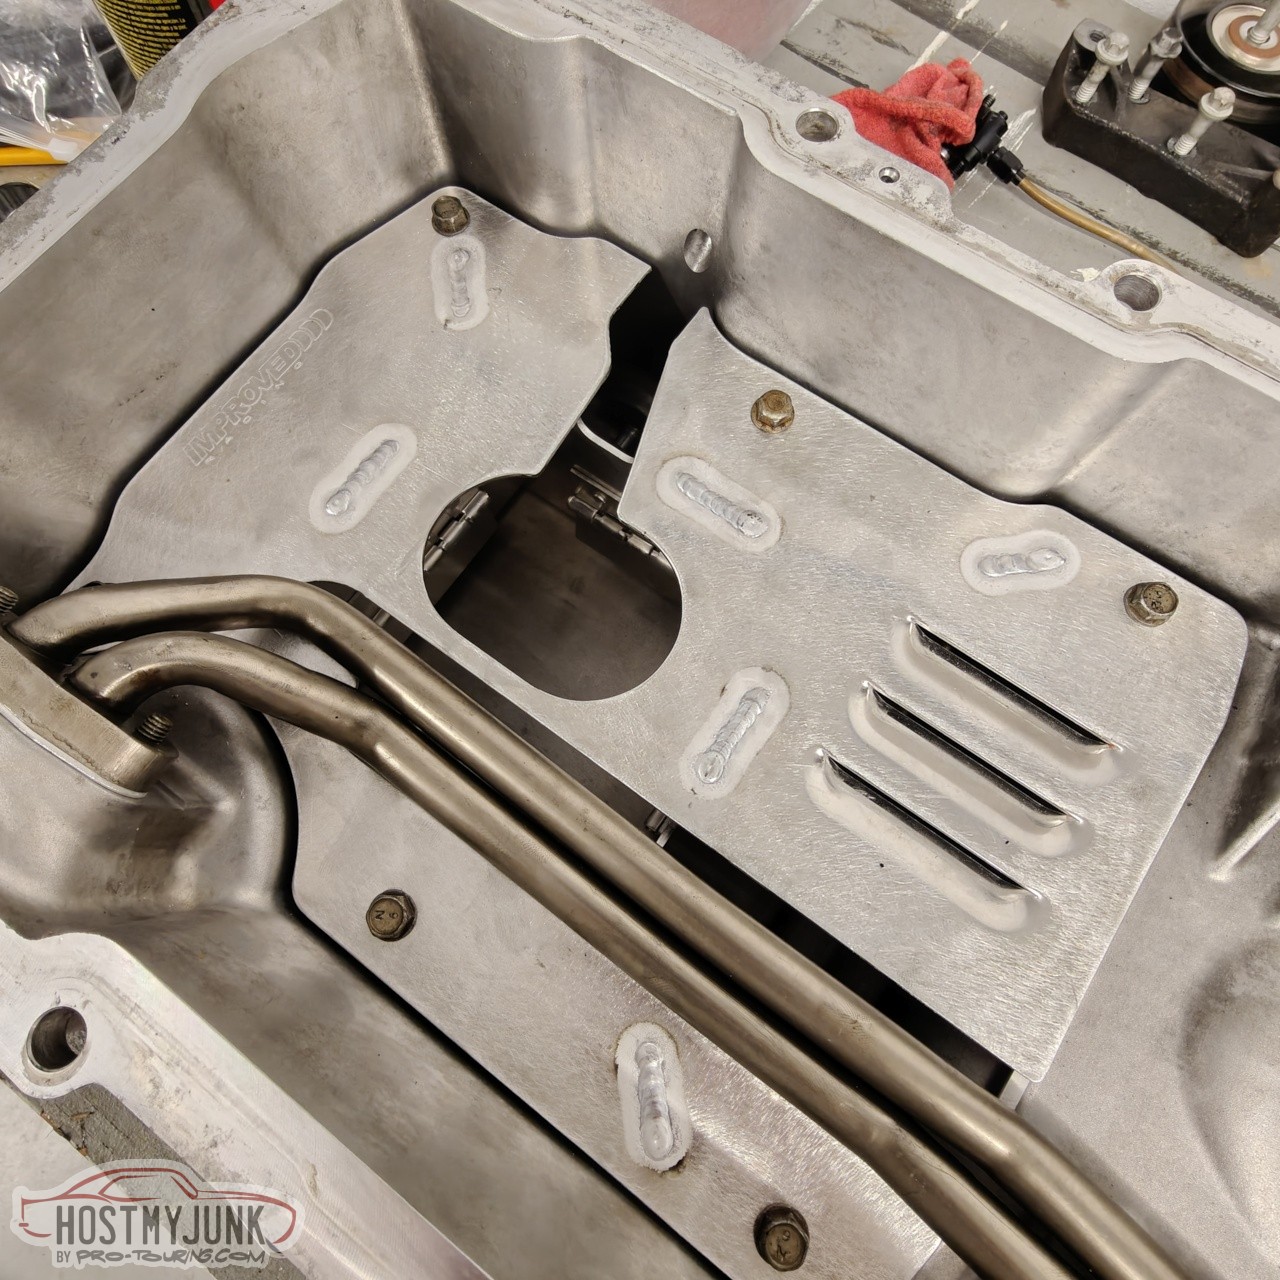
Here the windage tray and the pickup are installed and Tom is getting the block ready for a little dab of gray sealer at the corners of the oil pan.
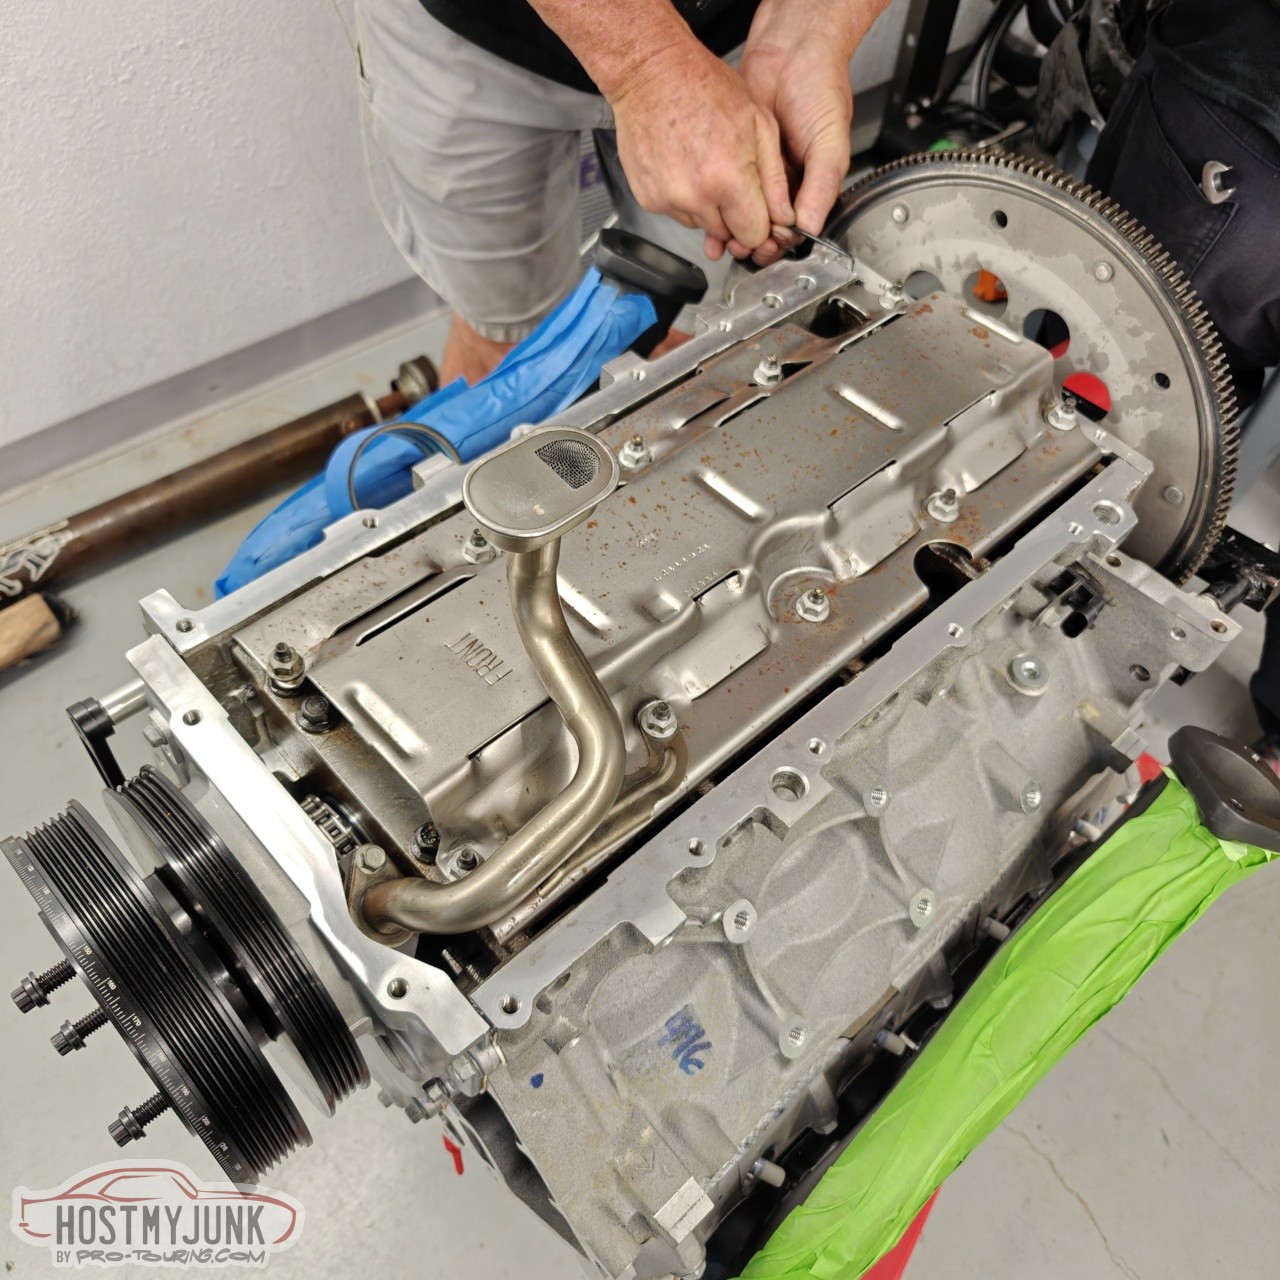
This is the engine ready to go, with the pan attached for the last time.
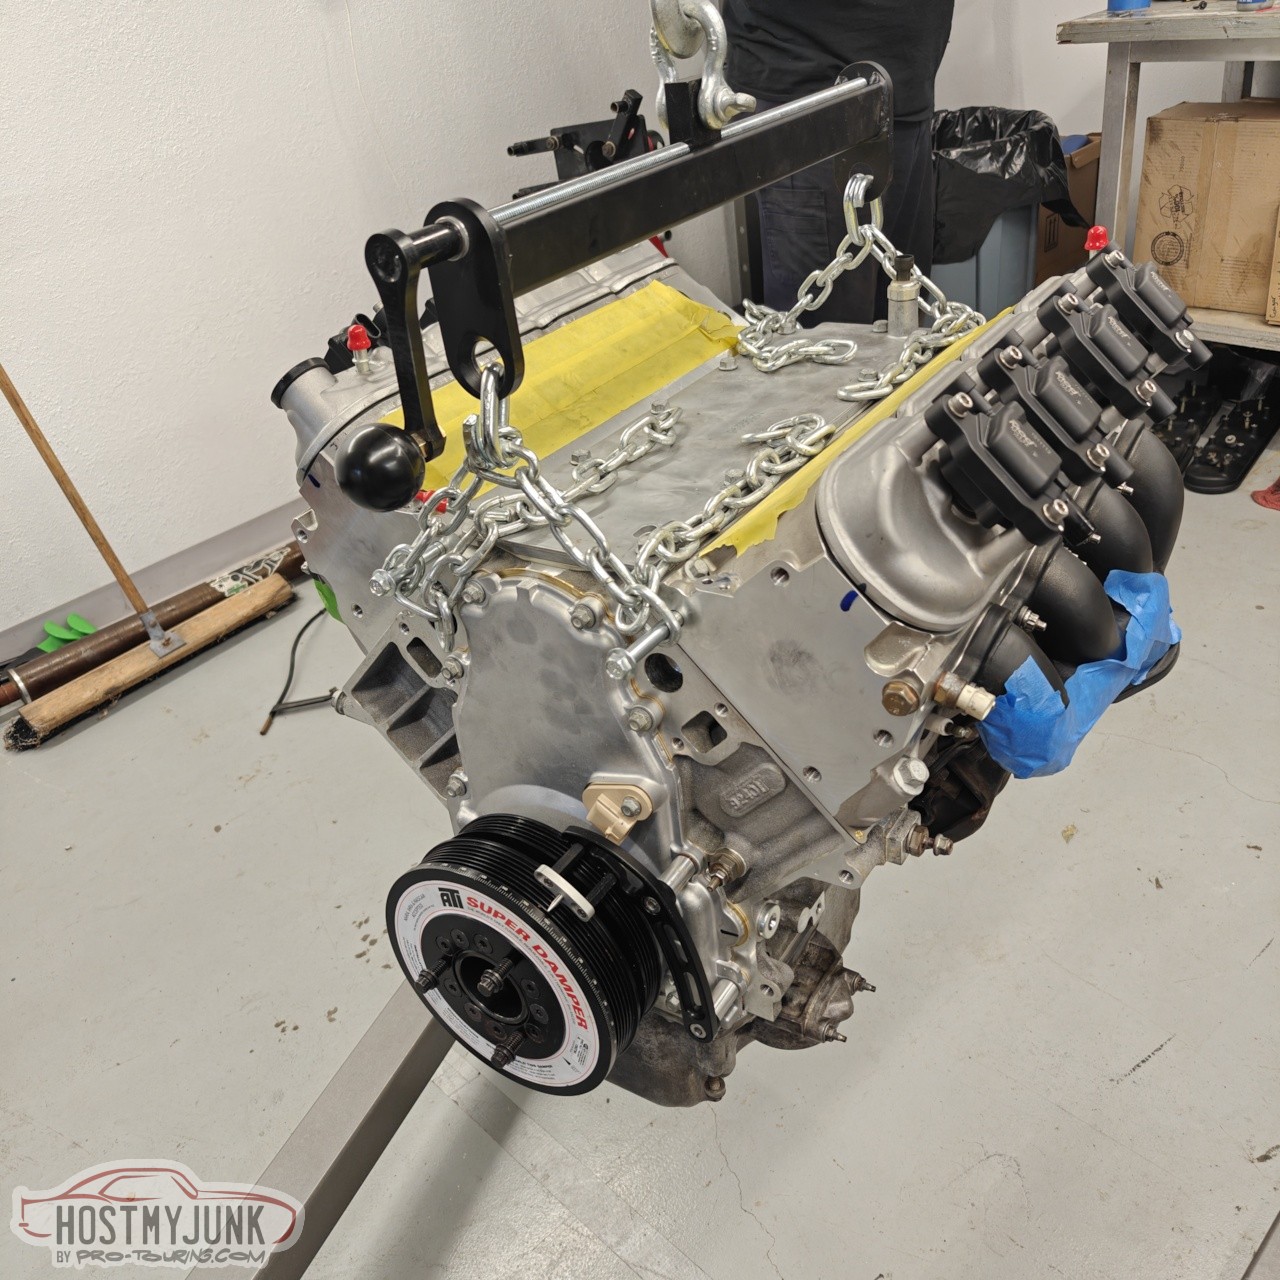
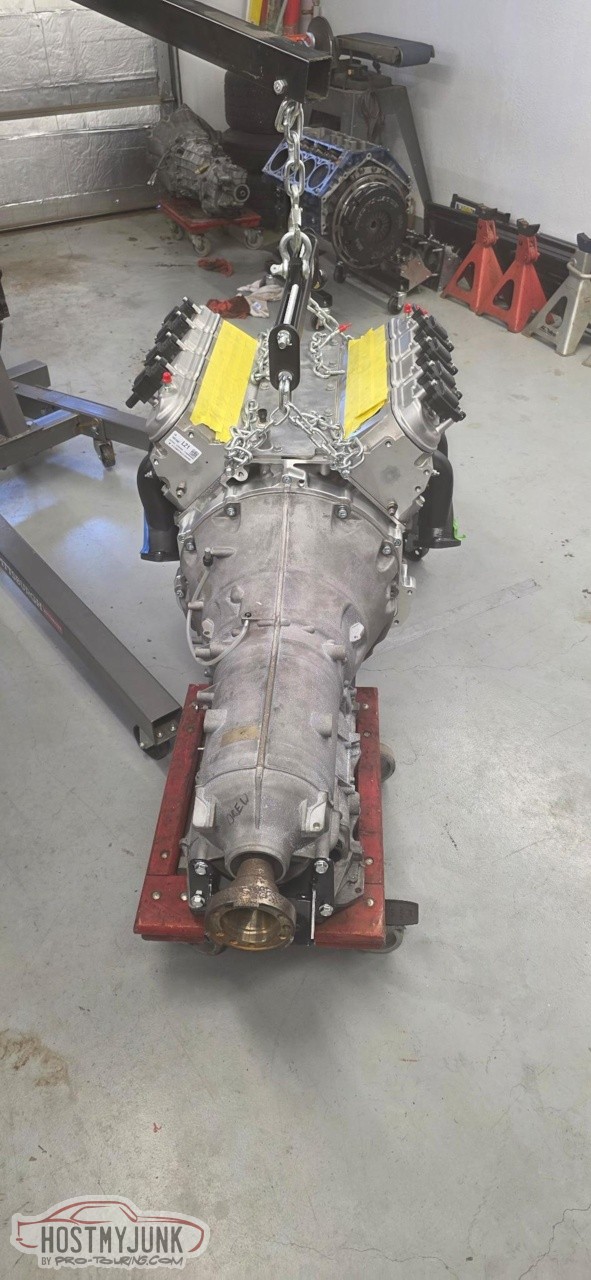
Then the Domiworks adapter and the 8HP70 with the converter were installed for the final time.
I didn't get pictures, but we used a Summit Racing engine pre-luber. It is a 4 qt tank that gets pressurized with compressed air and the oil is pushed into the engine through the oil galley plug on the front driver's side of the block.
Andrew1970 GTO Version 3.0
1967 Cougar build
GM High-Tech Performance feature
My YouTube Channel Please Subscribe!
Instagram @dr__efi
I deliver what EFI promises.
Remote Holley EFI tuning.
Please get in touch if I can be of service.
"You were the gun, your voice was the trigger, your bravery was the barrel, your eyes were the bullets." ~ Her
-
07-21-2025 #1565

 Registered User
- Join Date
- Sep 2009
- Posts
- 3,004
Love it!!!
1955 Nomad project LC9, 4L80e, C5 brakes, Vision wheels
1968 Camaro 6.2 w/ LSA, TR6060-Magnum hybrid and etc SOLD
1976 T/A LS1 6 Speed, and etc. SOLD
Follow me on Instagram: ryeguy2006a
-
07-22-2025 #1566
-Moderator/Sponsor-
- Join Date
- Apr 2001
- Location
- The City of Fountains
- Posts
- 16,129
By Friday afternoon she was almost back together. All that was left to start it was a longer blower belt. A little internet searching and I was able to order the correct belt from Autozone for next day home delivery. The correct length of a stock LSA drive with a stock upper pulley and a 10% overdrive lower pulley is Gates K080675
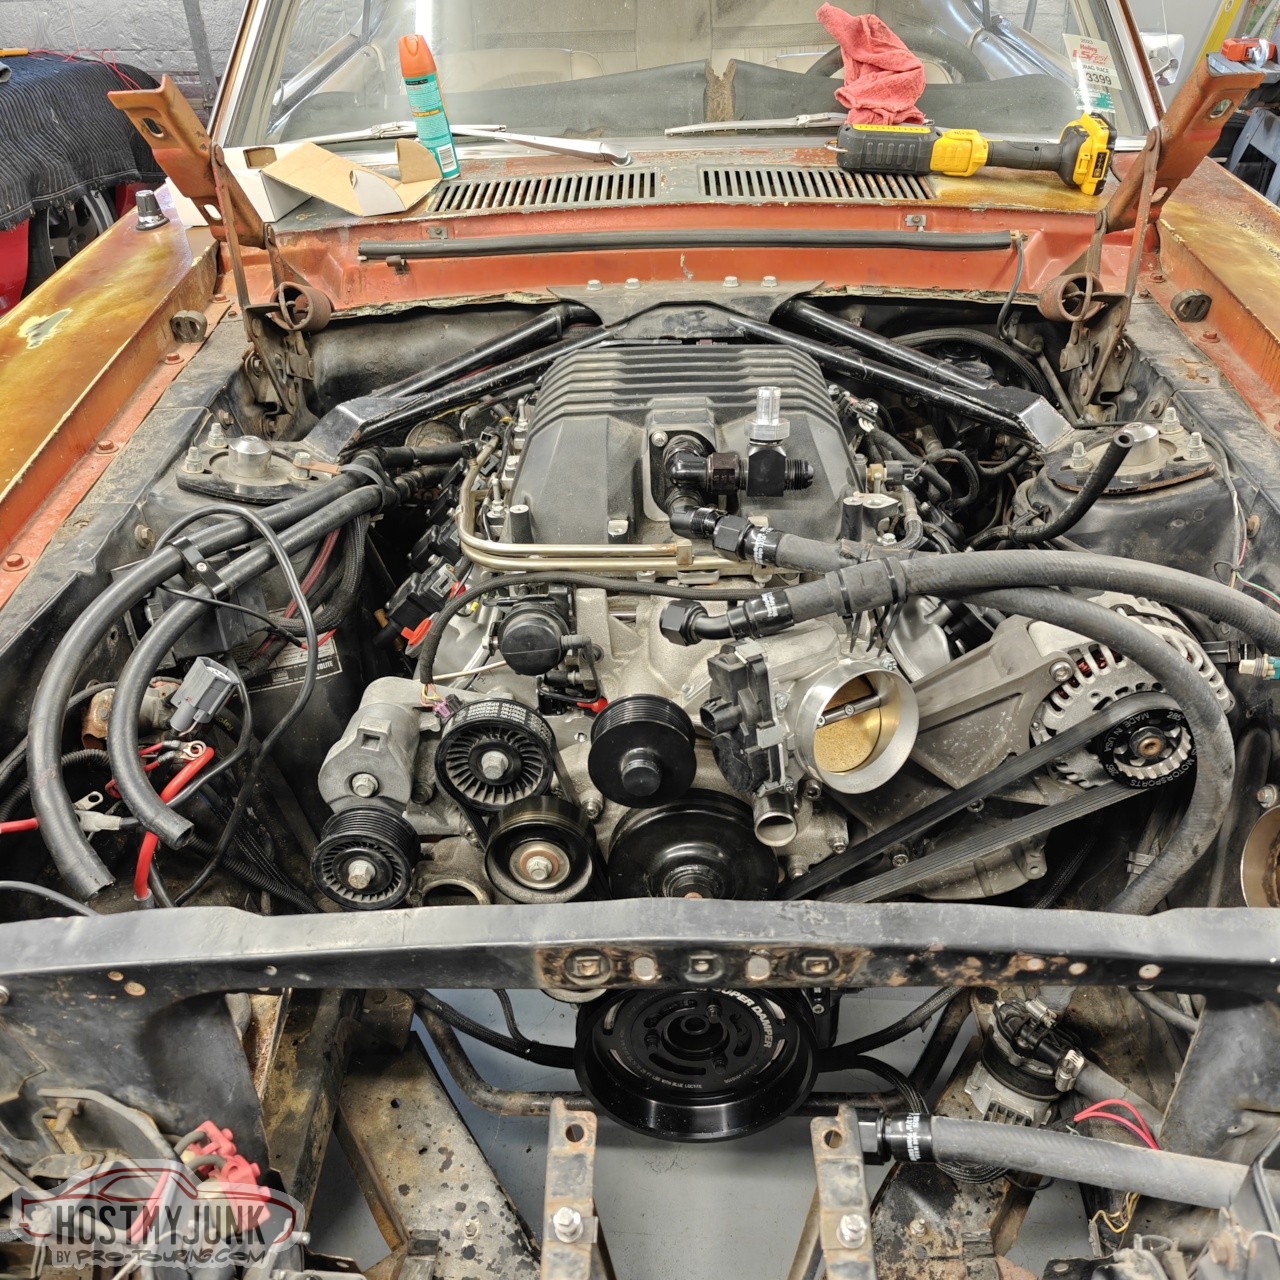
The ZF8hp70 transmission fits better than the T56. I was able to raise the back of the engine about an extra inch, which actually improved the relative angle of the engine to the rockers.
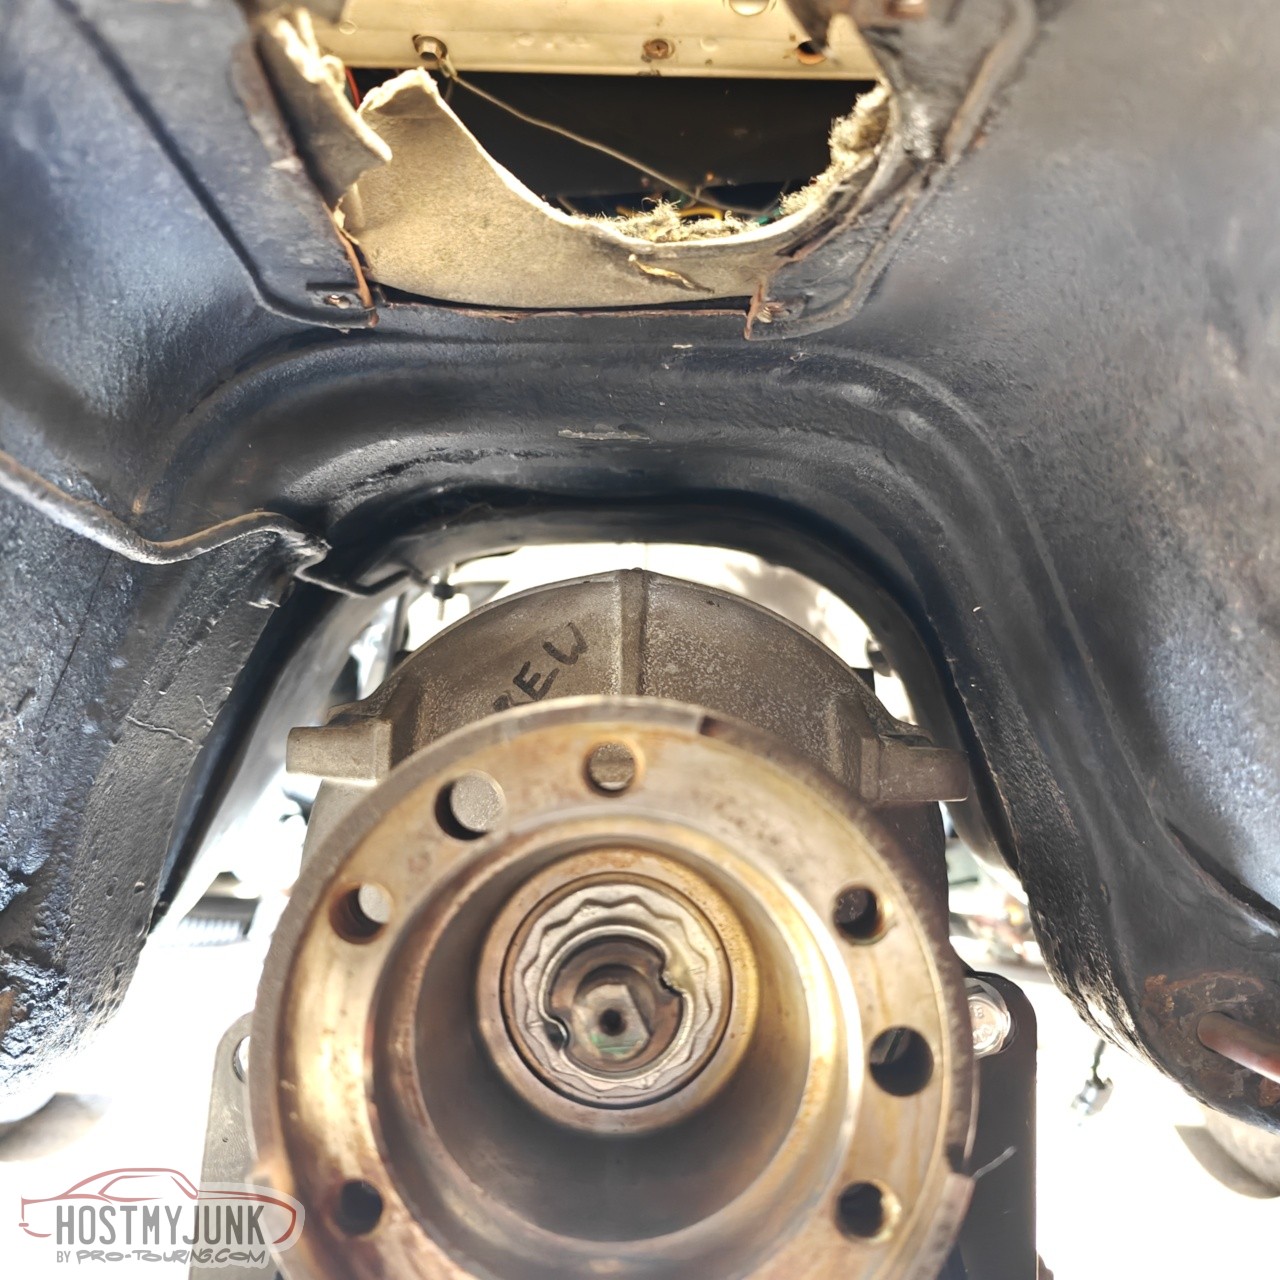
This is the view on the driver's side.
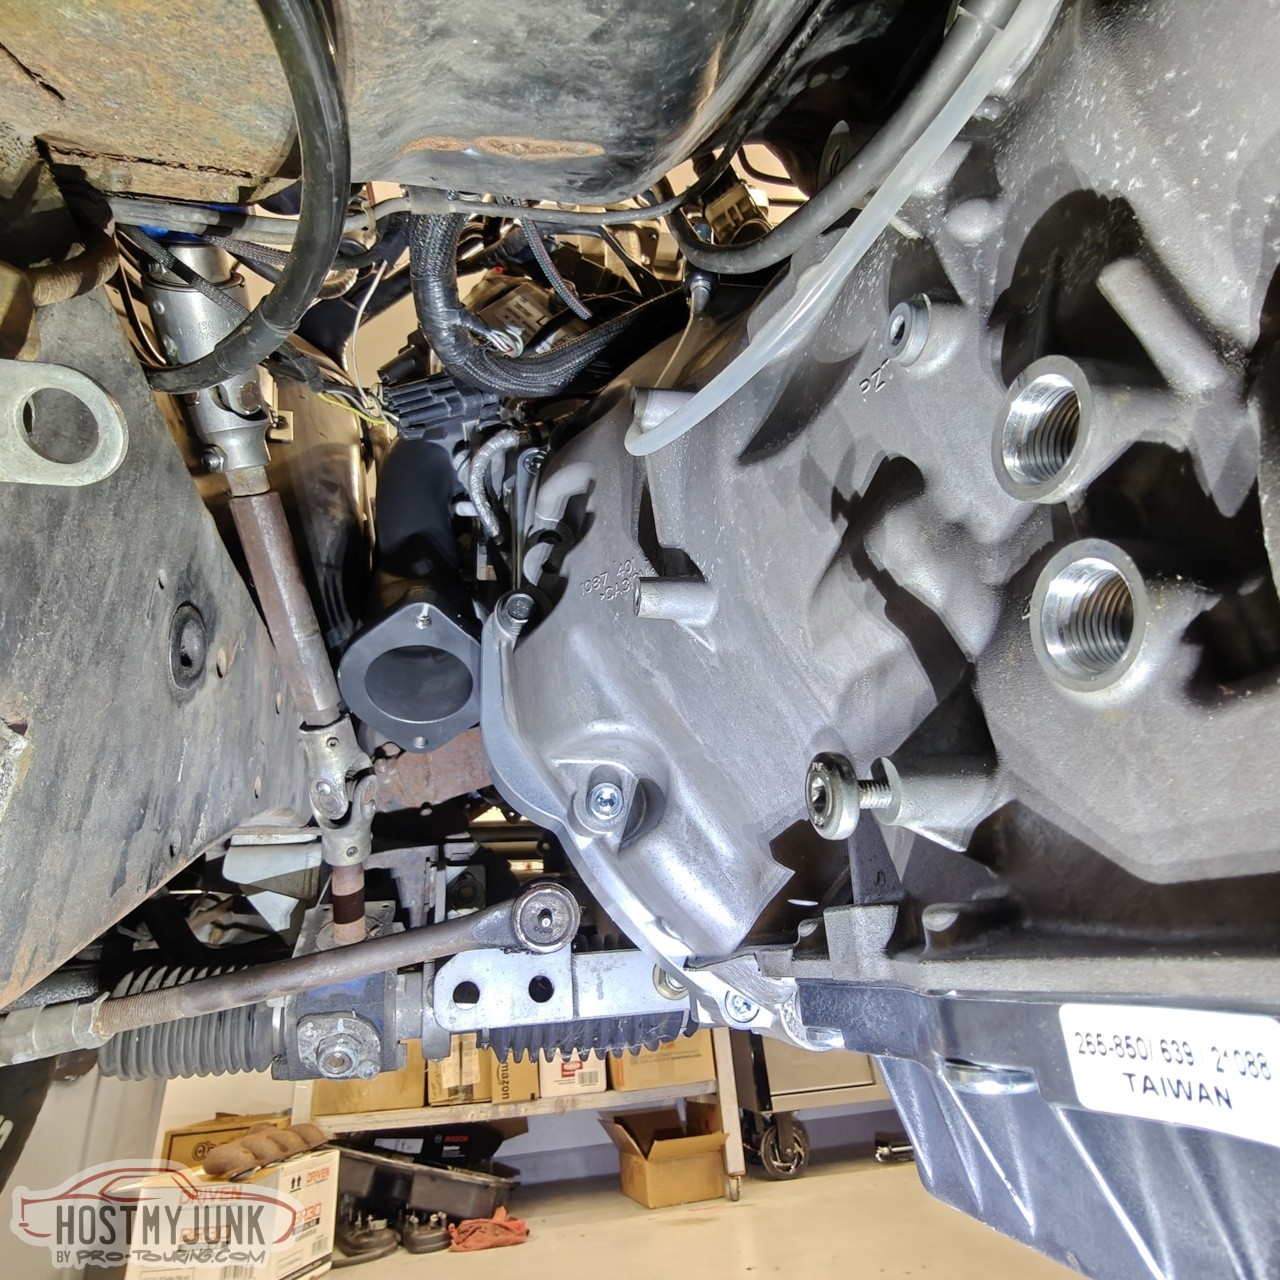
and the view on the passenger side.
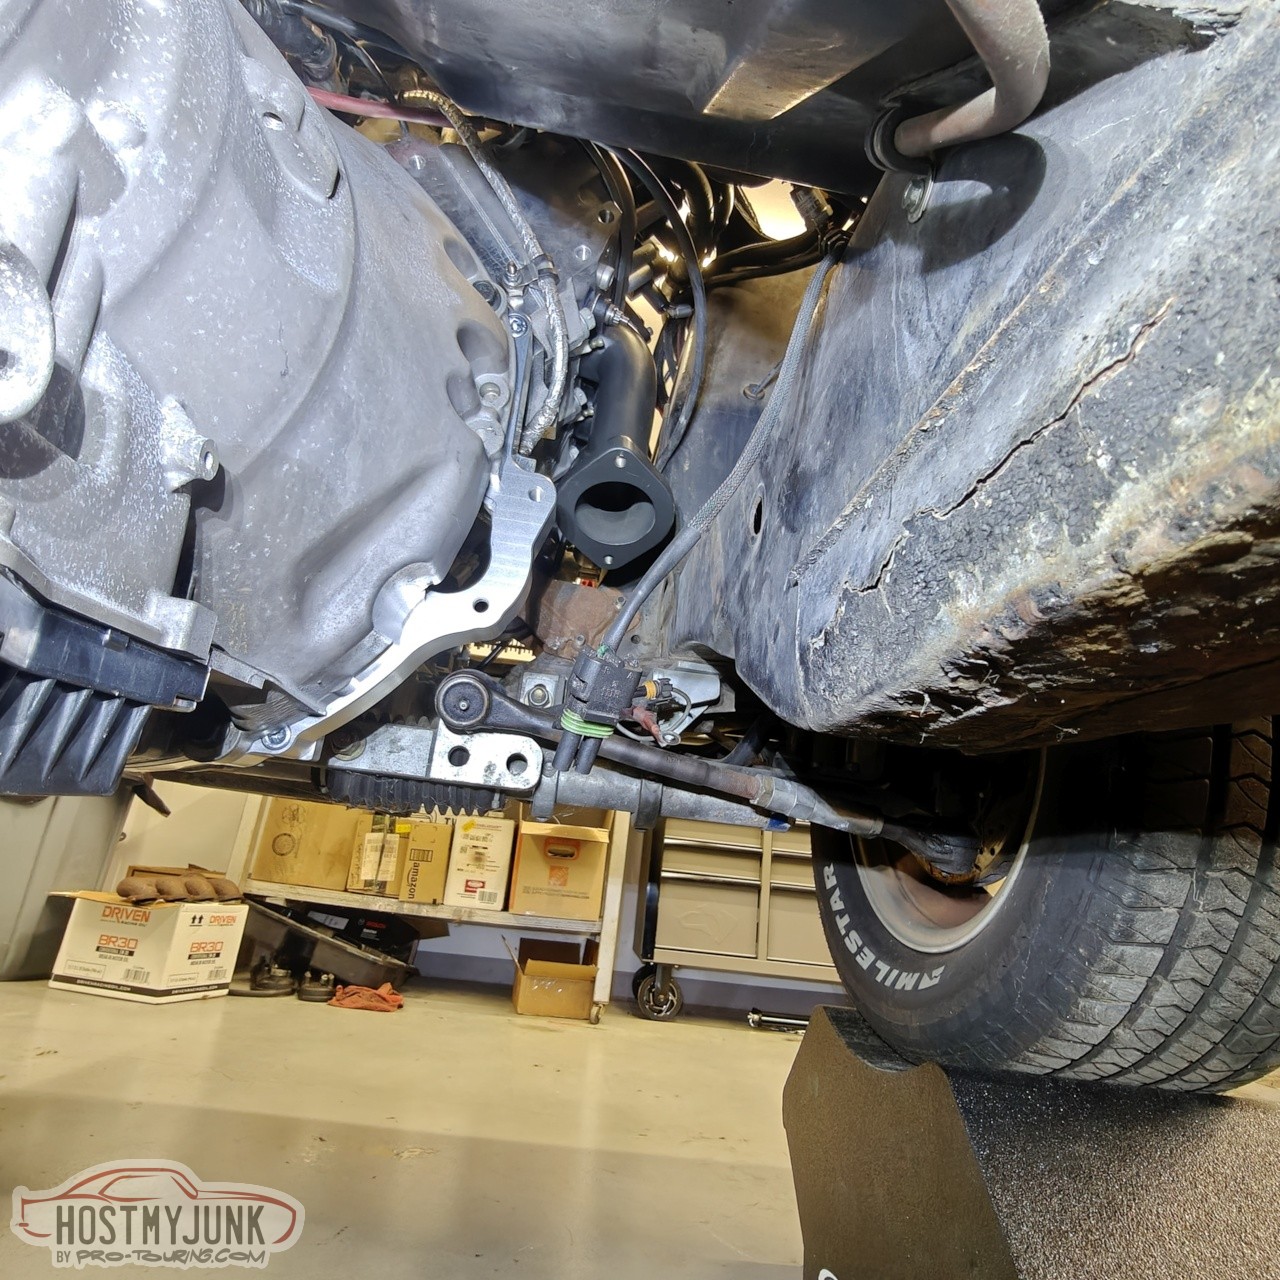
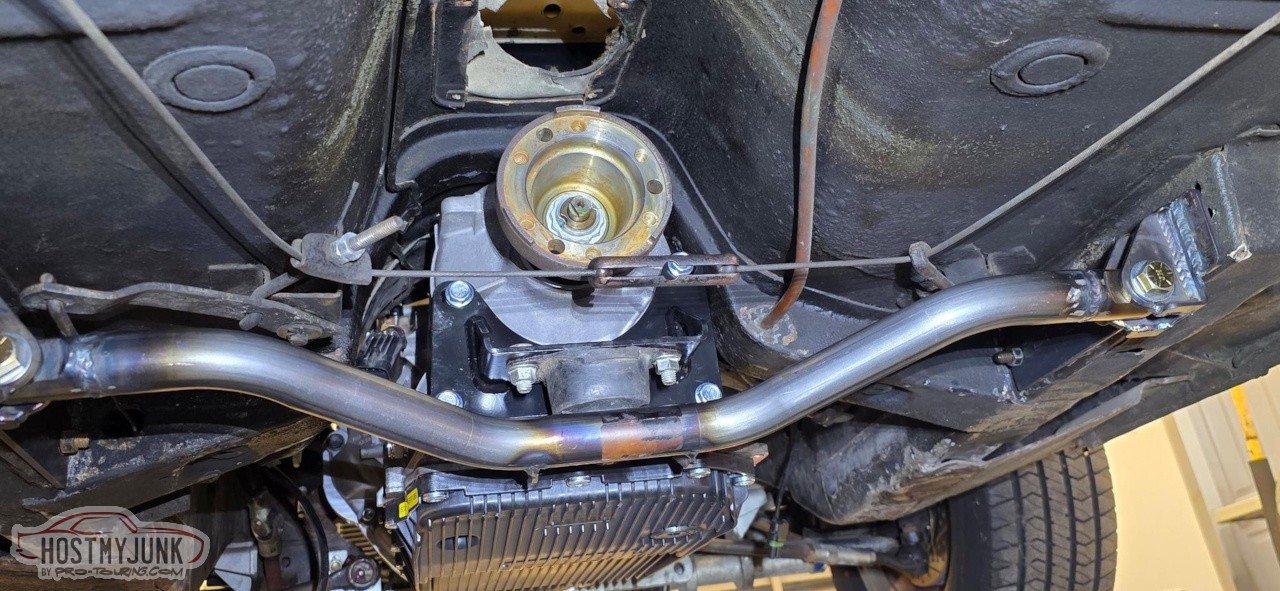
I used an 8HP70 mount from Holley and even recycled the transmission mount from my 89 Suburban project. I also made a new crossmember by starting with a Chris Alston Chassisworks Mustang crossmember kit. The new crossmember turned out pretty good, except when we went to install the exhaust, it hit the crossmember. ::facepalm::
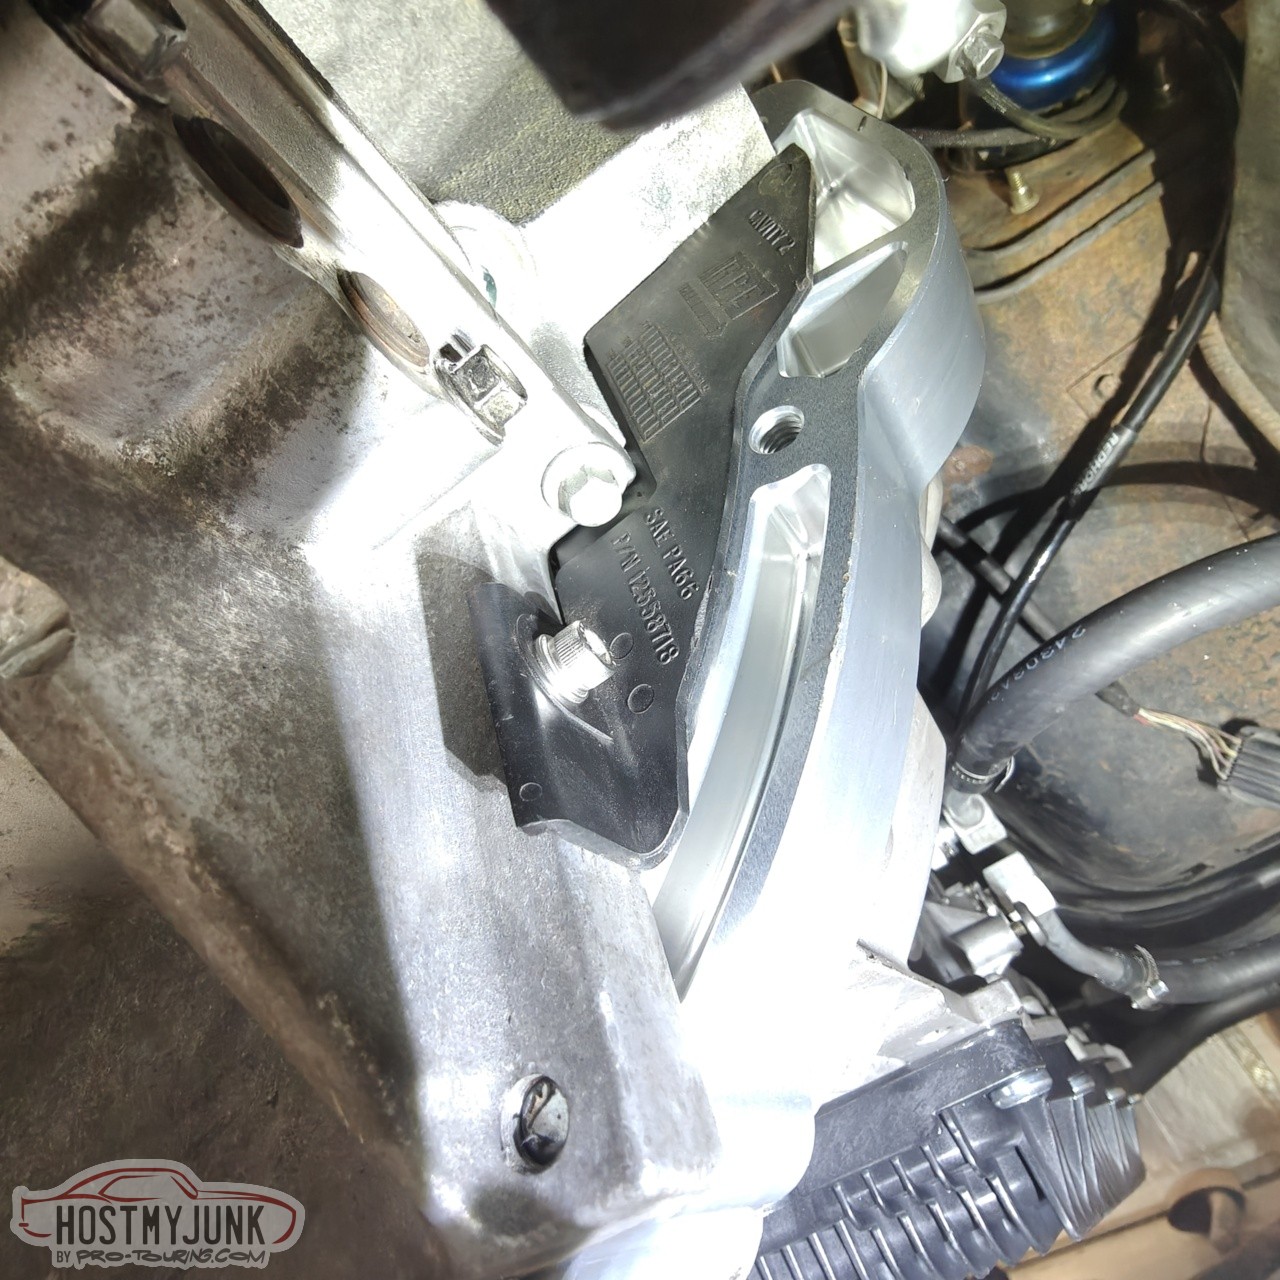
I've had these little plastic bellhousing block off plates in my tool box for 15 years and I finally have a chance to use them. This one seals off the driver's side of the bellhousing.
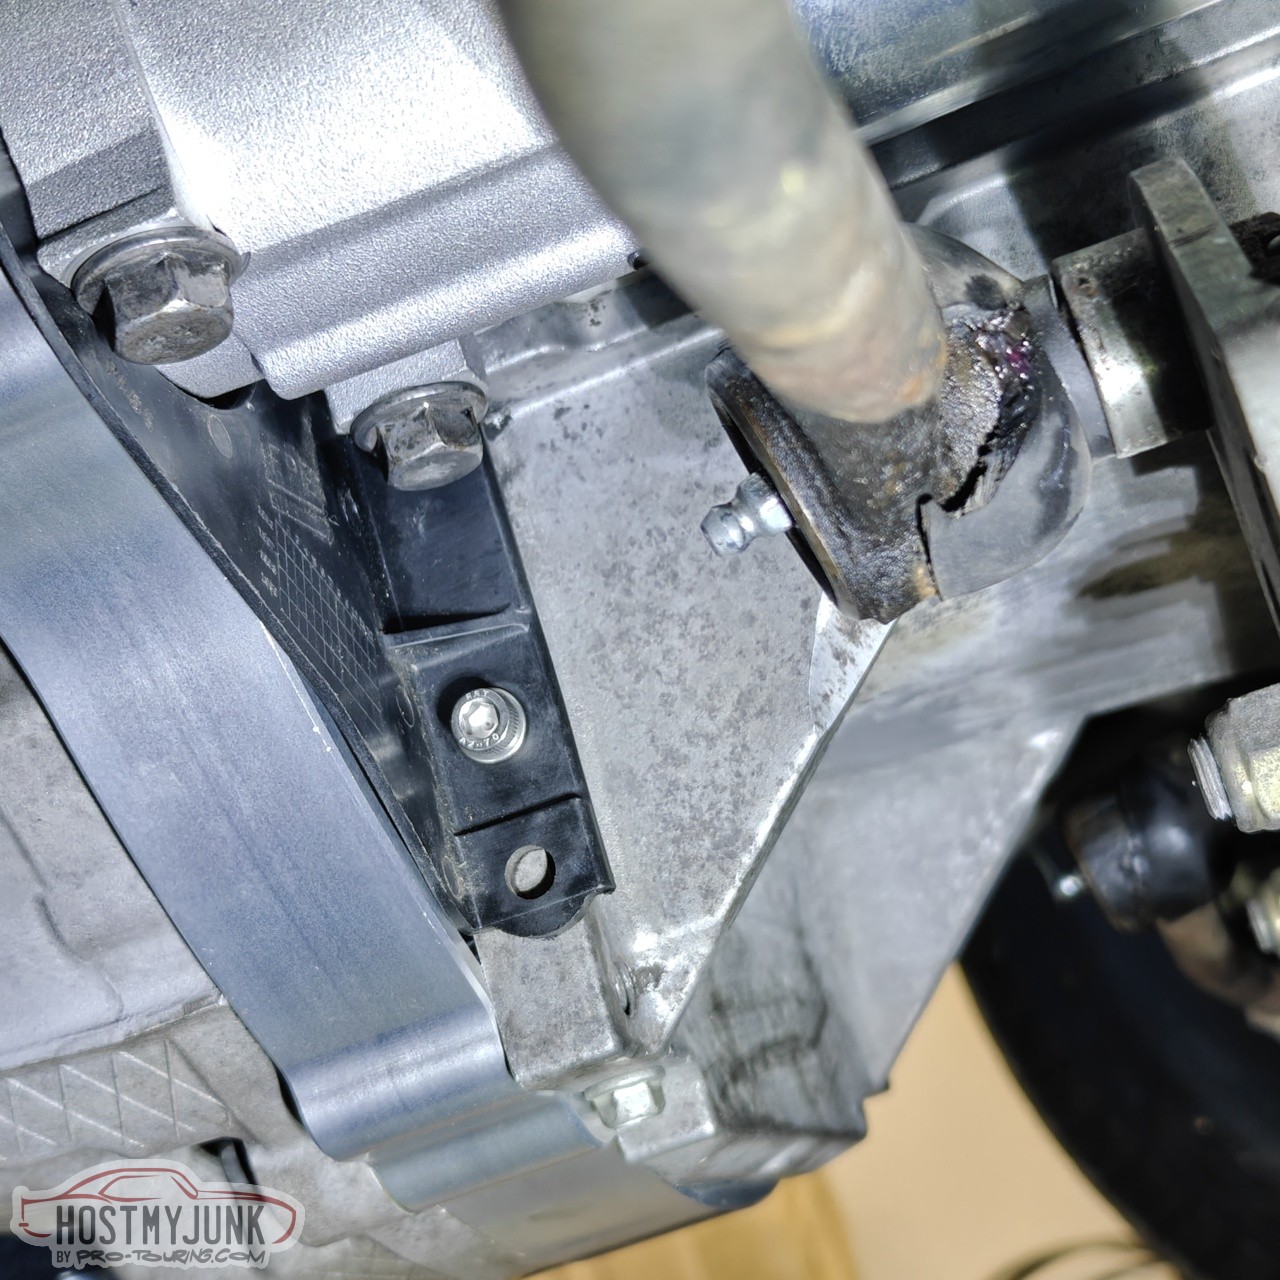
This side loops around the started nose and seals off the passenger side opening.
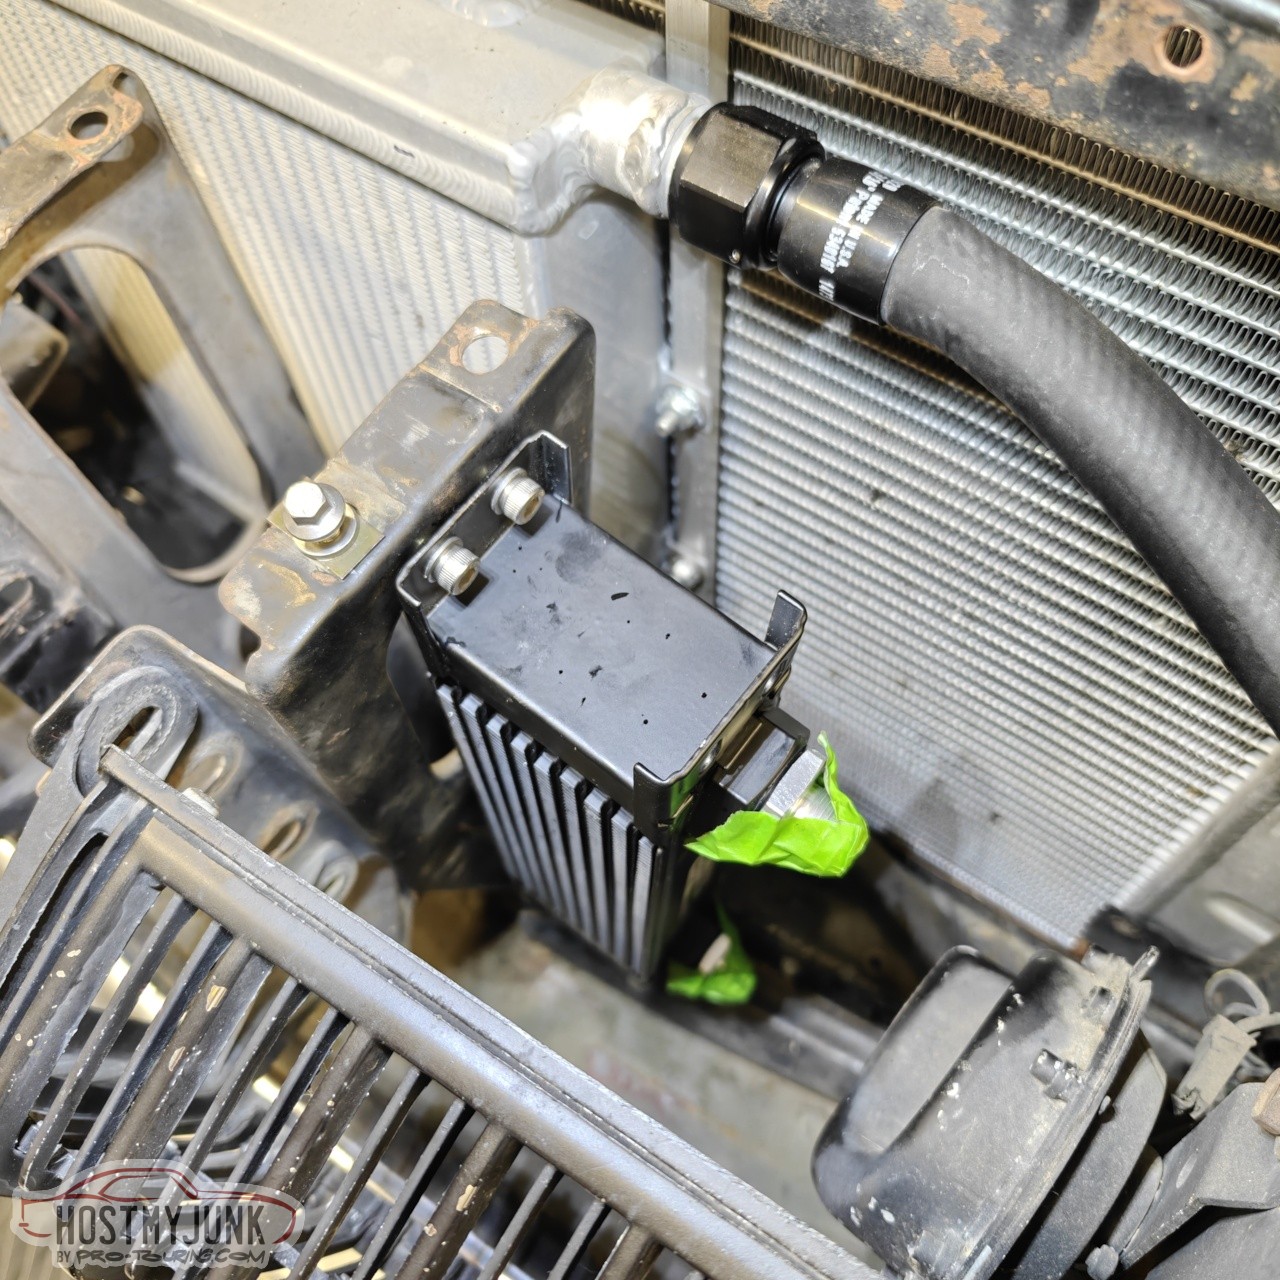
I ordered a small Earl's cooler to use for the transmission and we found a good place for it on the side of the hood latch support.
My buddy Brian took this shot after we got the hood back on it.
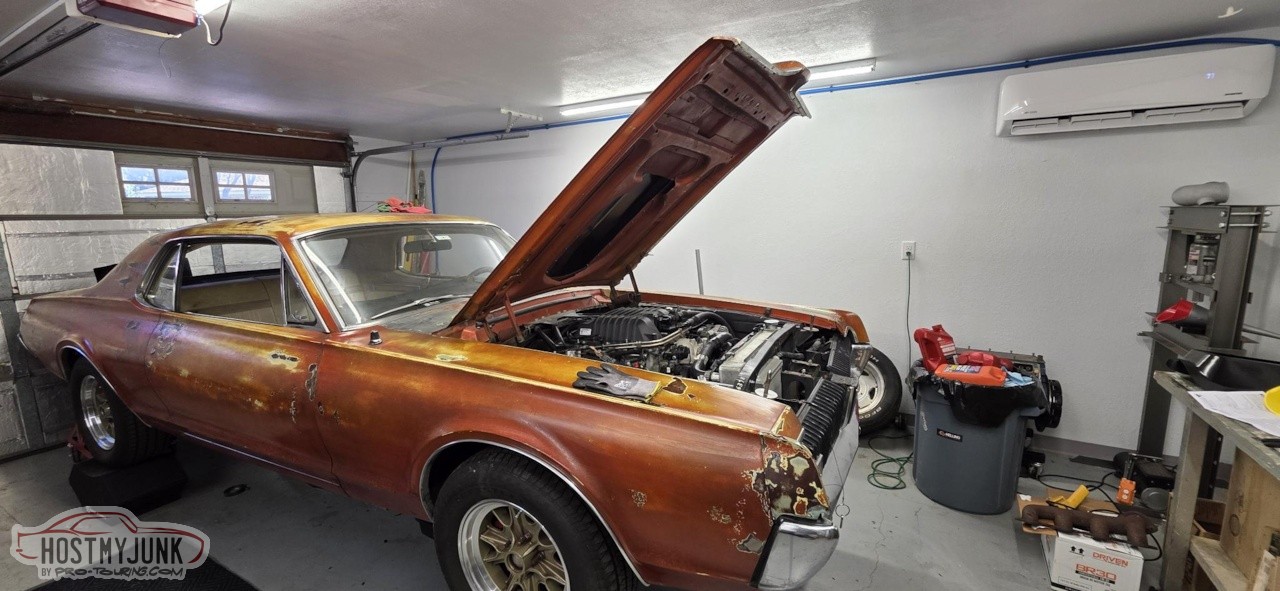
Saturday afternoon FedEx delivered the blower belt and a few minutes later....
Tom handled the transmission fluid fill procedure while Brian shifted through the gears, which is required to fully fill these transmissions.
Yesterday I ordered a dual CV driveshaft from The Driveshaft Shop. In the meantime I need to permanently wire the TurboLamik and figure out a way to mount the BMW shifter. Ideally I would make a console, but there isn't time to do that before LS Fest.
Andrew1970 GTO Version 3.0
1967 Cougar build
GM High-Tech Performance feature
My YouTube Channel Please Subscribe!
Instagram @dr__efi
I deliver what EFI promises.
Remote Holley EFI tuning.
Please get in touch if I can be of service.
"You were the gun, your voice was the trigger, your bravery was the barrel, your eyes were the bullets." ~ Her
-
07-24-2025 #1567
Registered User
- Join Date
- Sep 2013
- Location
- sw Kansas
- Posts
- 1,662
I love the fact that you have competent friends who help. Having 3 brains might keep stupid out of the shop.
 Looks to me like you are about to overpower your chassis.
-
08-04-2025 #1568
-Moderator/Sponsor-
- Join Date
- Apr 2001
- Location
- The City of Fountains
- Posts
- 16,129
Time is ticking and LS Fest is about 5 weeks away!
I started to think about how I want to wire the TurboLamik, and of course that lead me down a rabbit hole. When I built this car 10 years ago, I had decent wiring skills, but knowing what I know now, I could not leave this untouched.
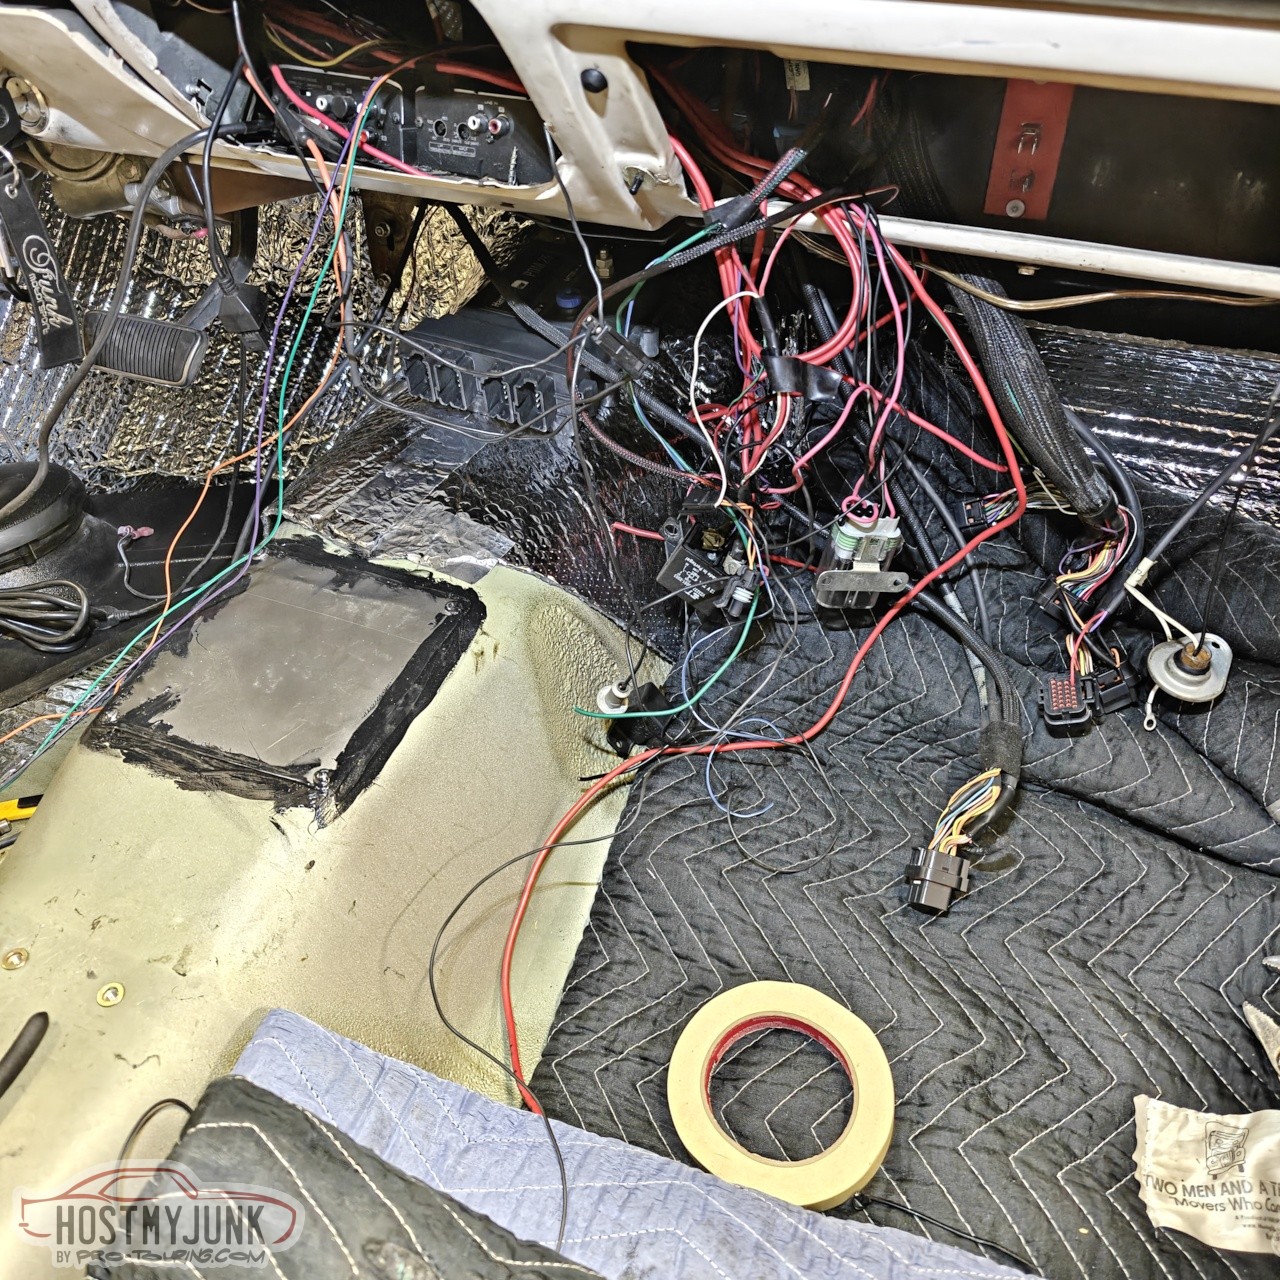
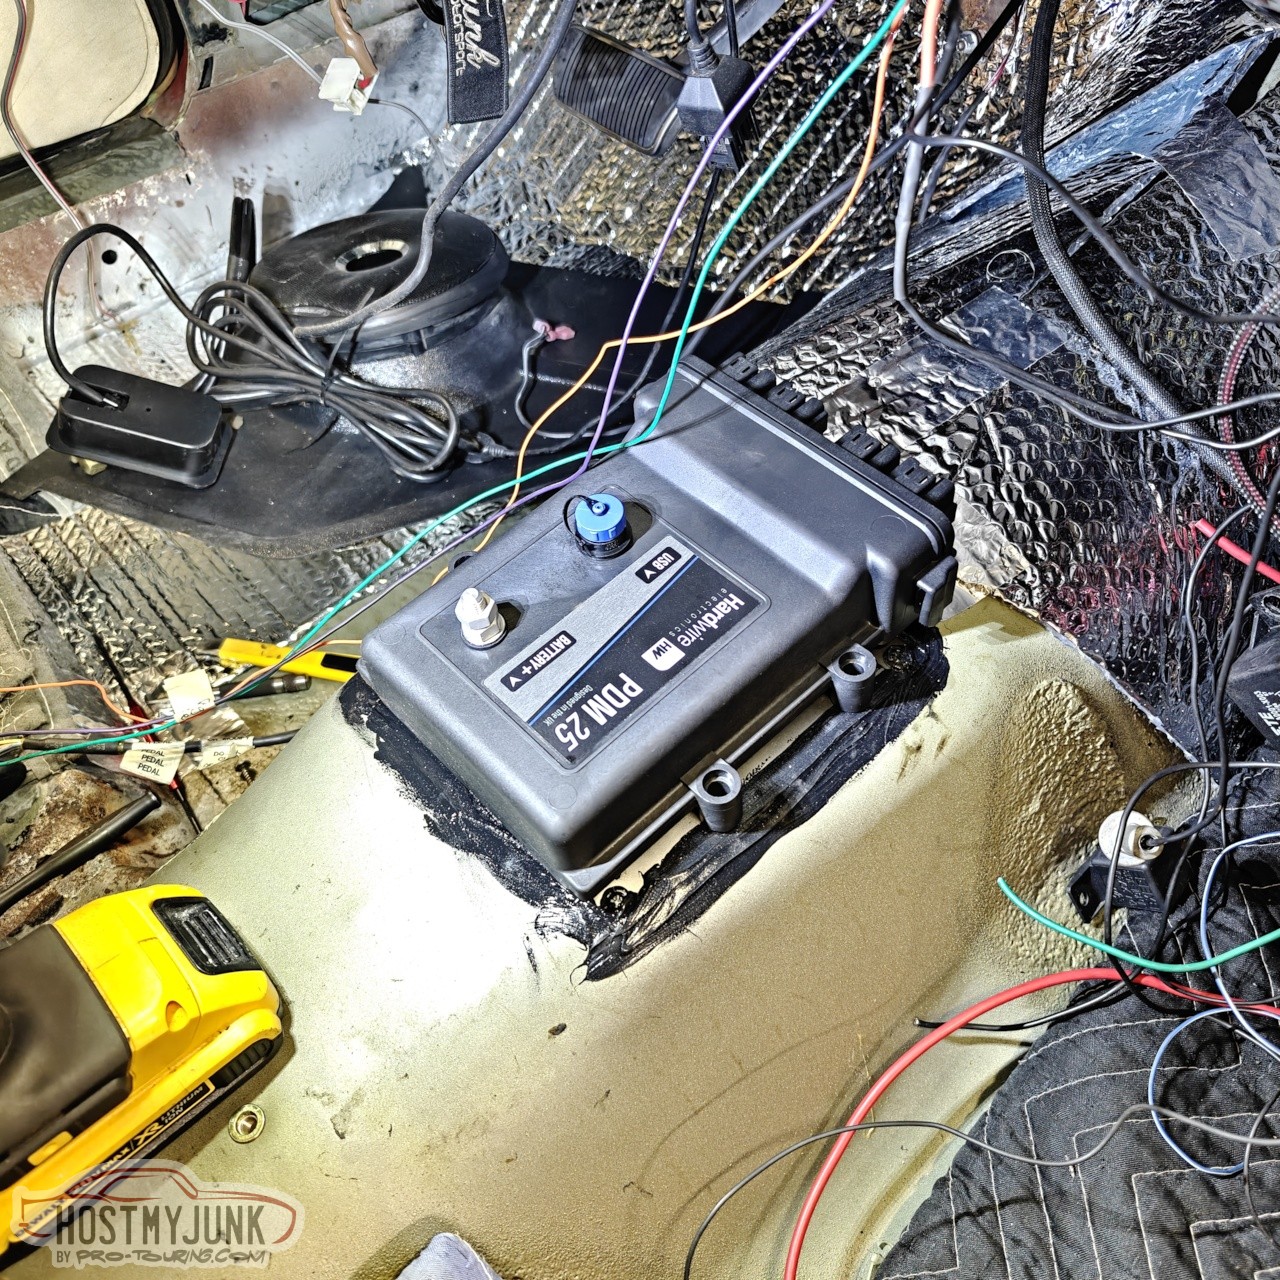
I removed all of the different relays that were cluttering the space under the dash and decided to use the Hardwire Electronics PDM 25. This was in the GTO, but the GTO is getting a PDM 28, so this was available. The PDM will handle everything that I need it to handle and have plenty of room for future expansion if needed.
The battery is a little bit of a cluster f$$k but I can't redo all of that now. I added a Bussmann fuse at the battery and a 4 gauge wire that goes to a bulkhead to feed power into the cabin and the Hardwire.
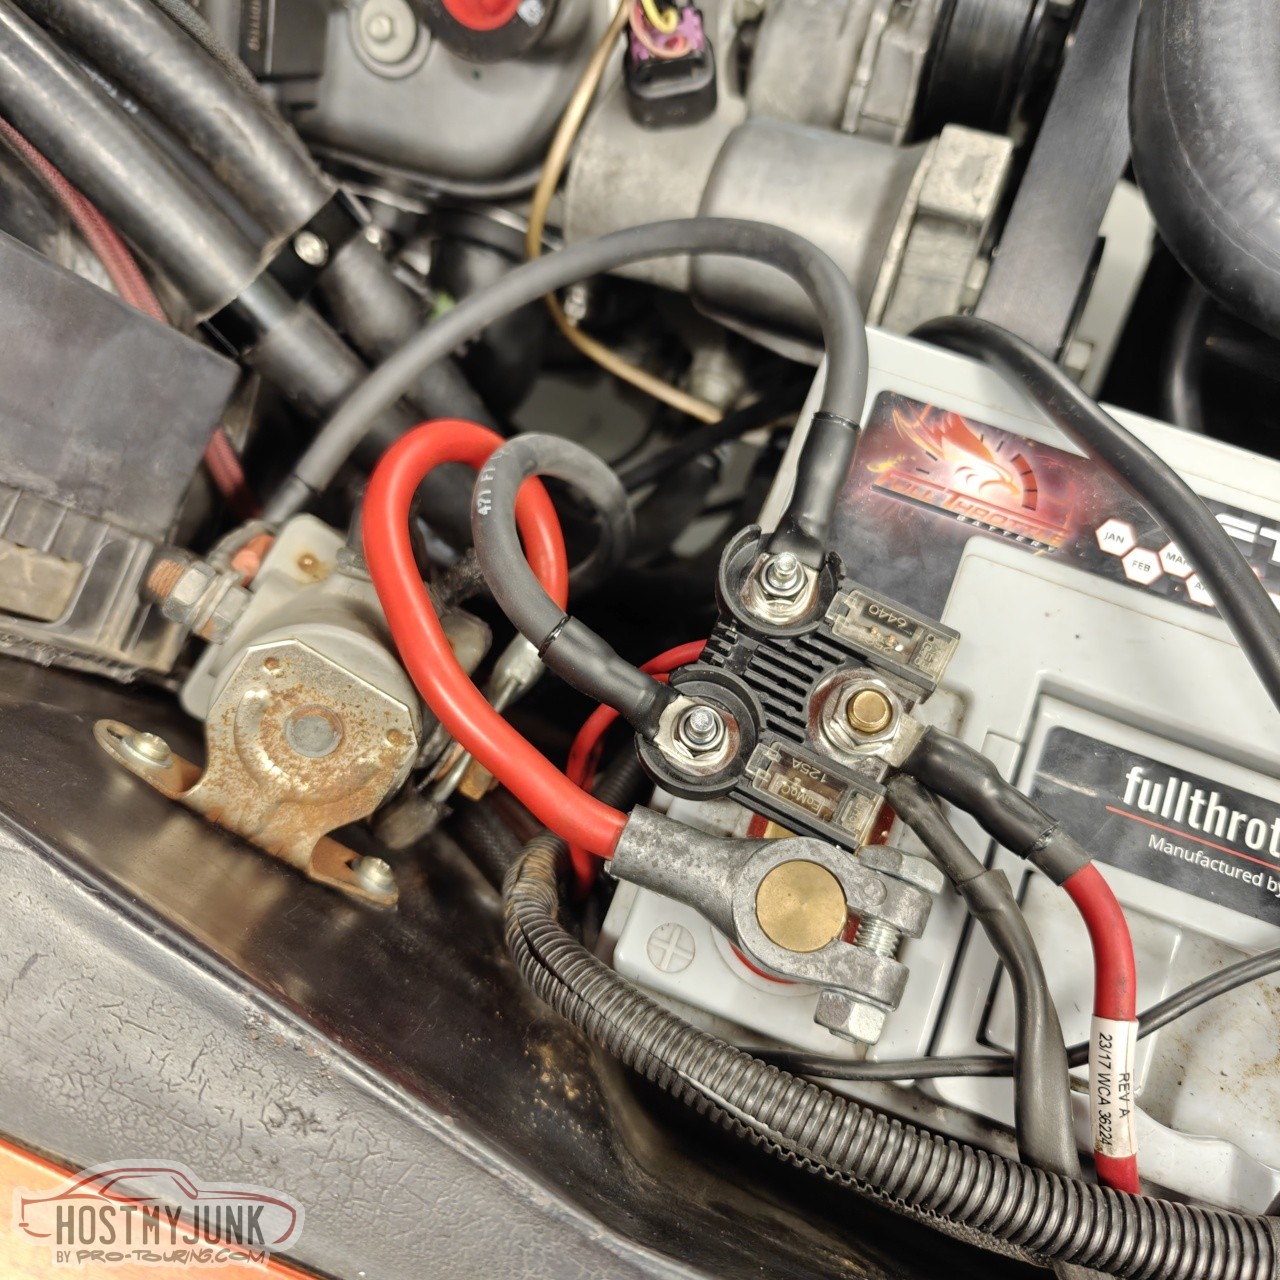
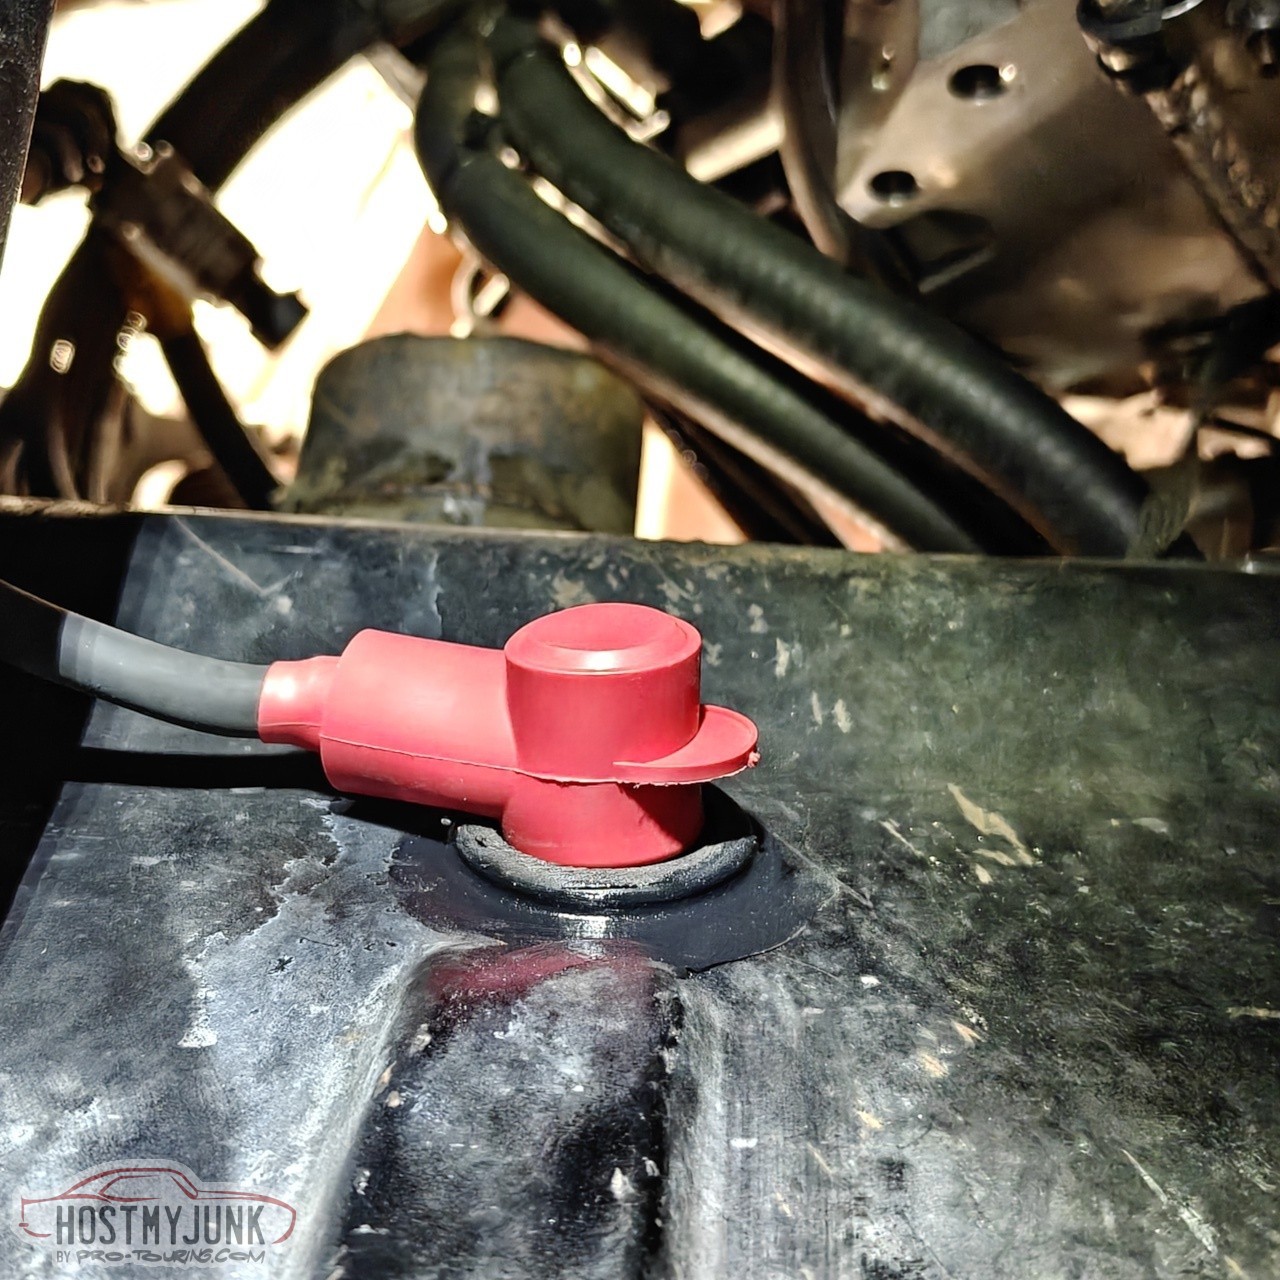
Here is the bulkhead for the power feed. I added a little seam sealer around it to make sure it does not leak. It is located at the top of the toe kick panel on the passenger side and inside it is just under the heater box.
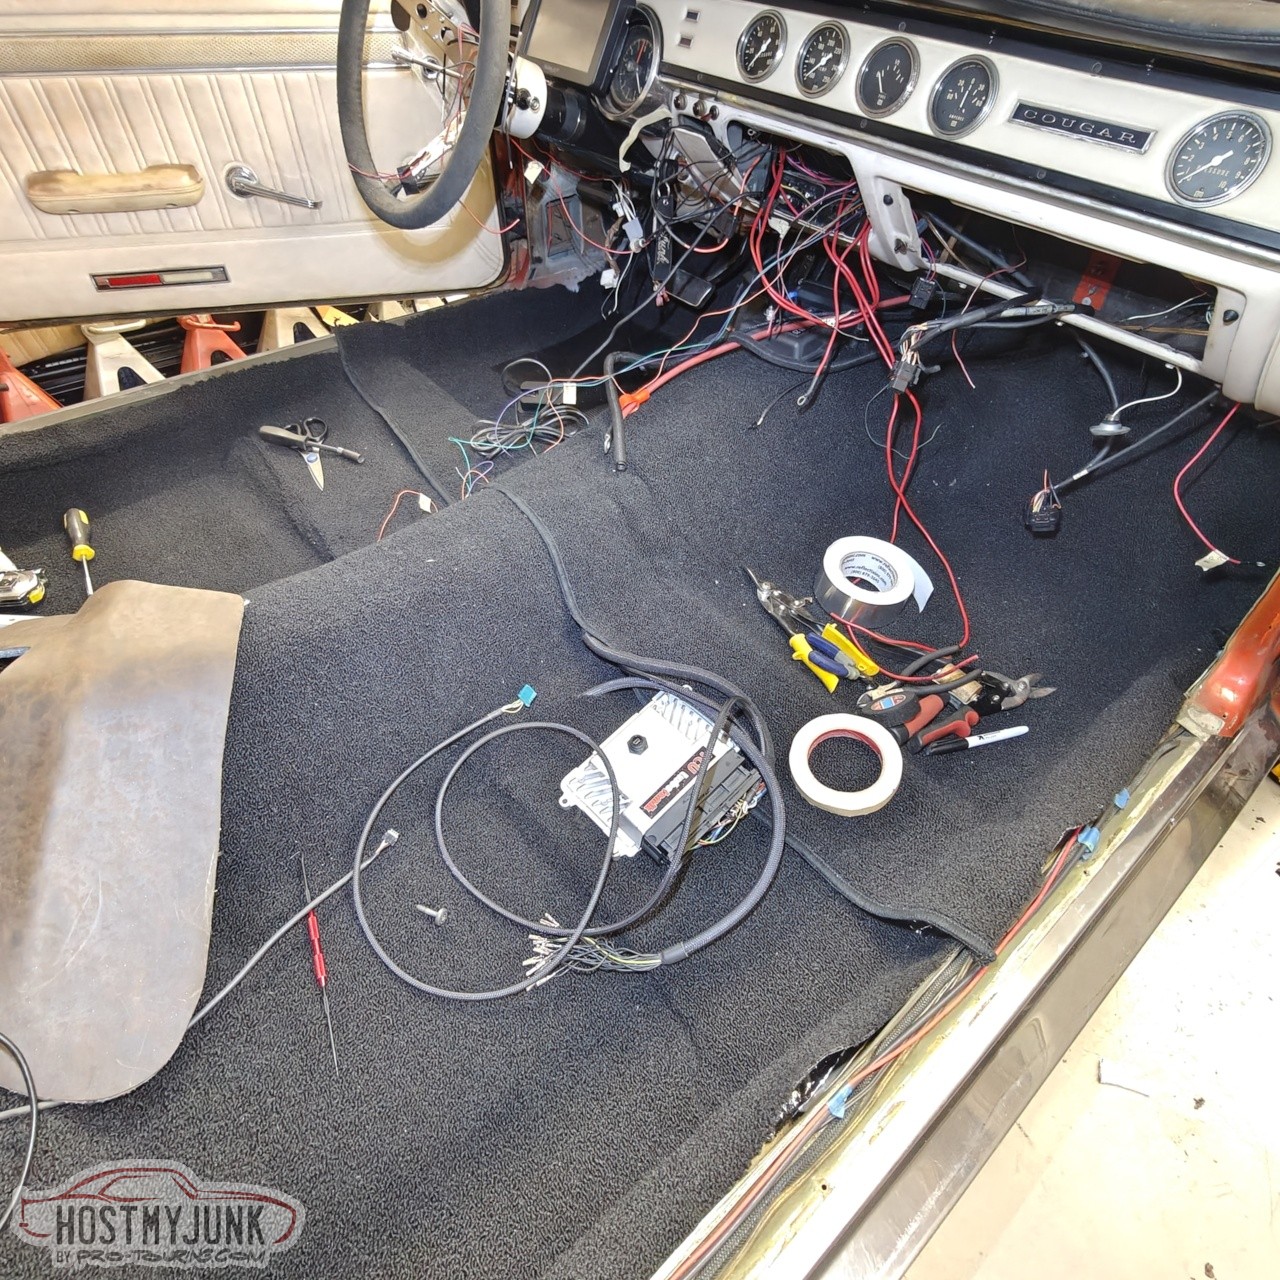
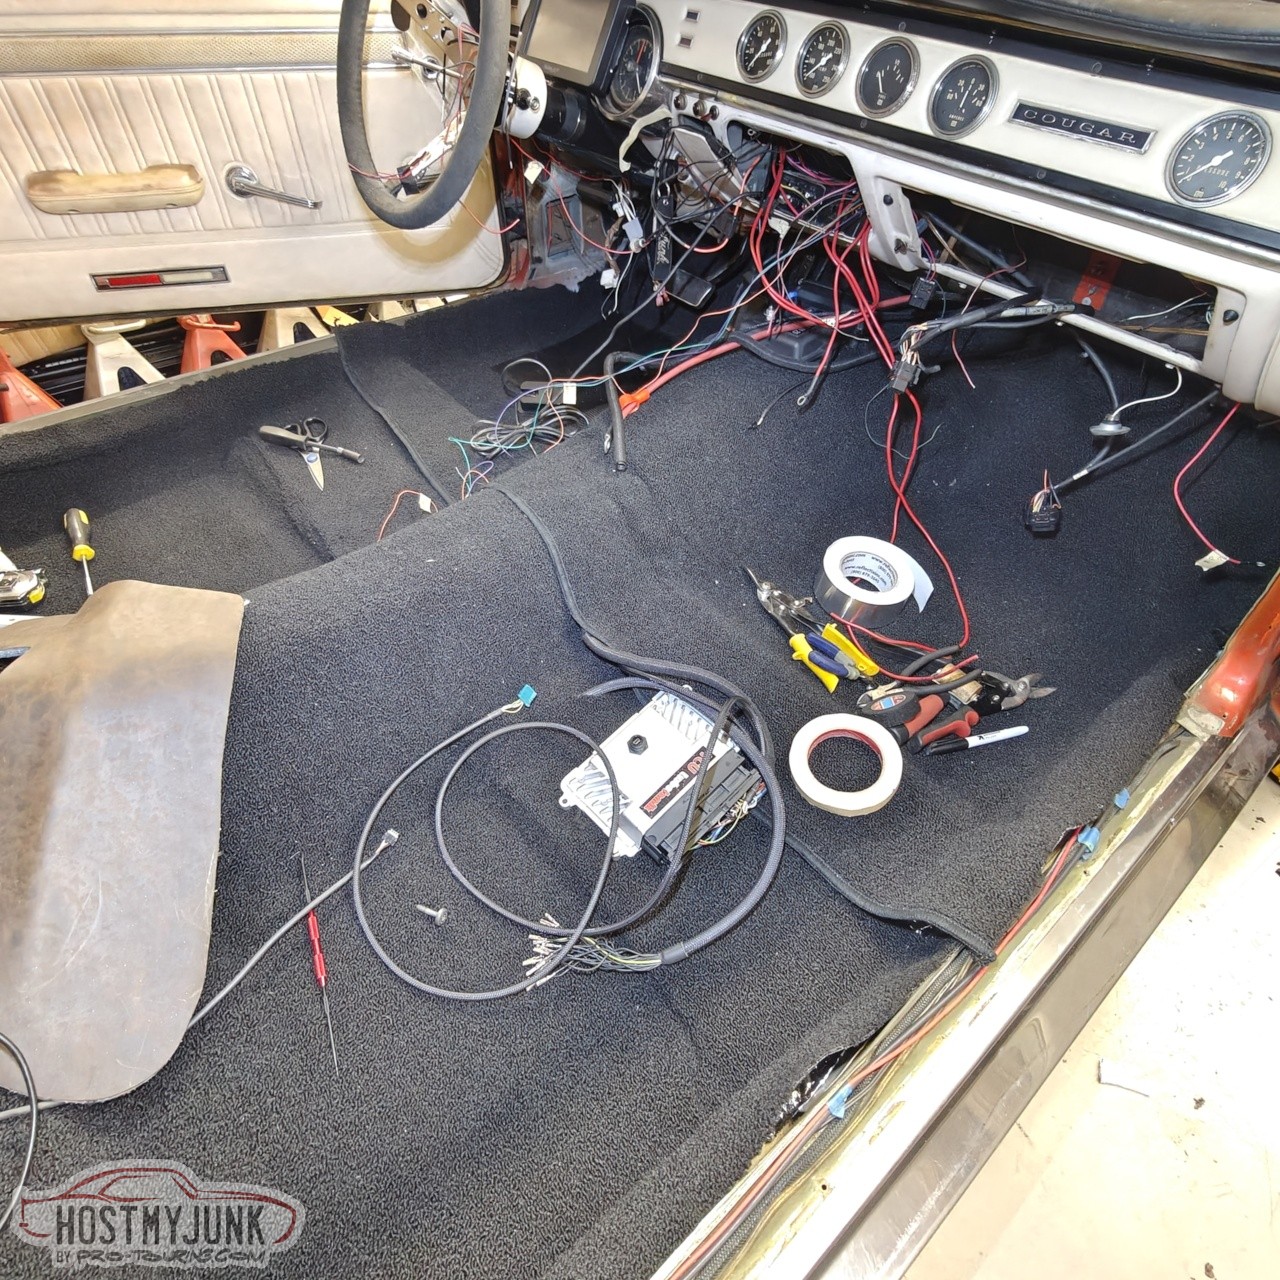
This is actually showing a lot of progress. I have new carpet and new underlayment installed. The TurboLamik will live under the passenger seat.
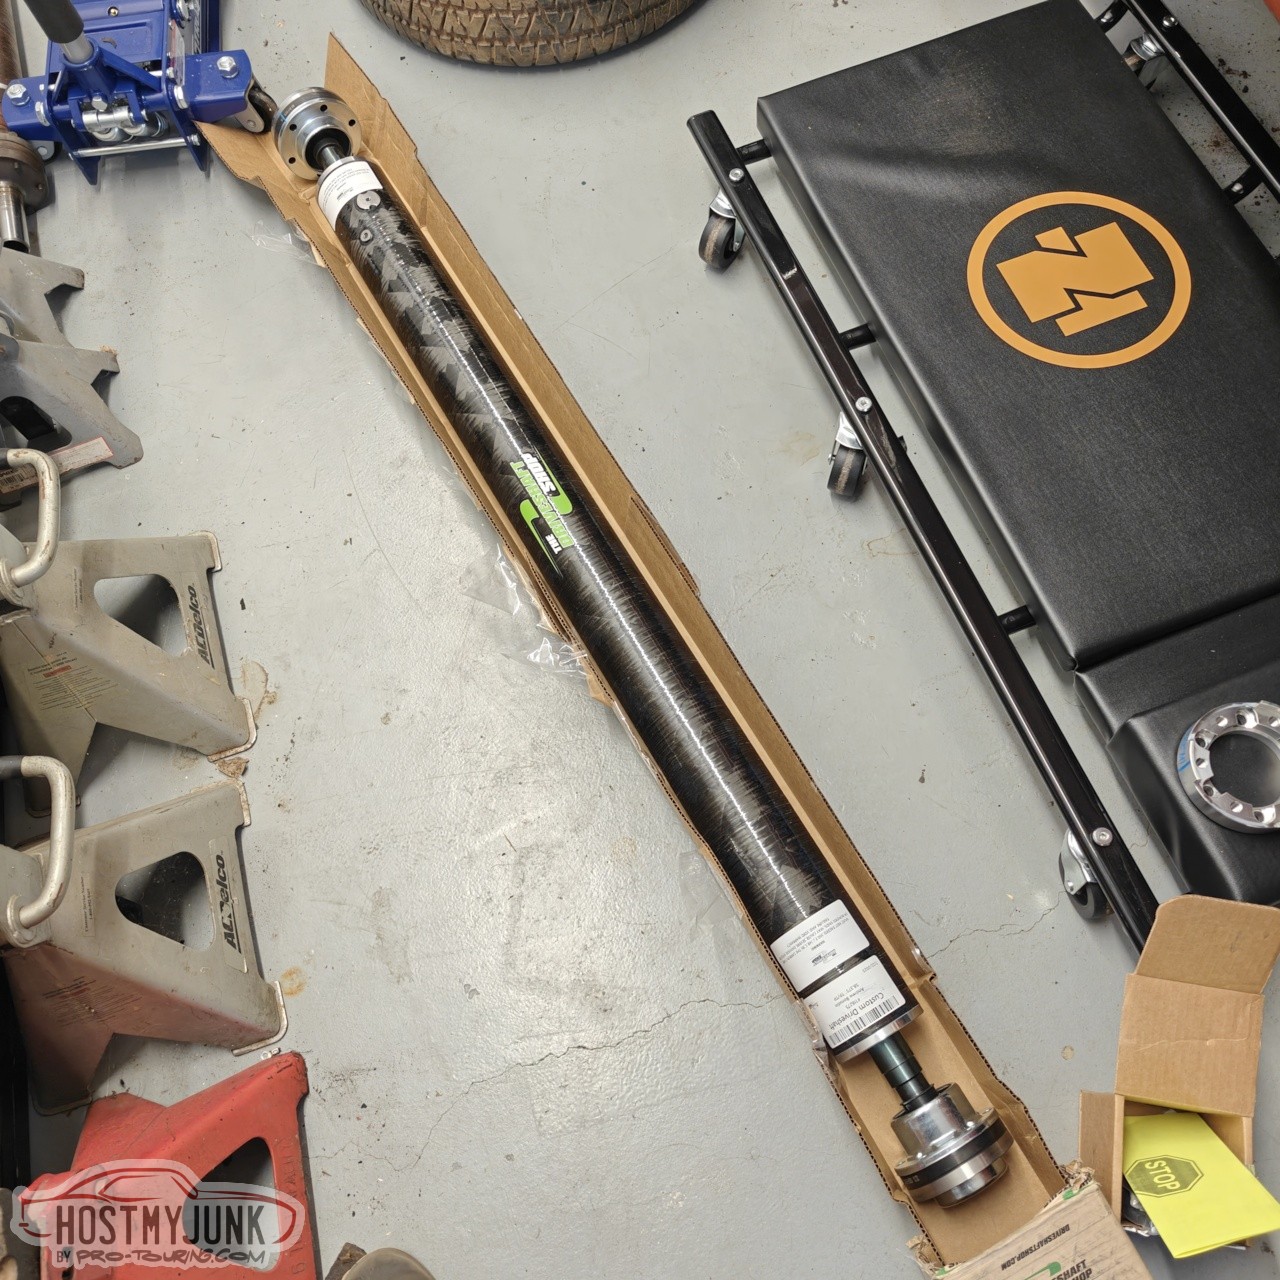
I also received the dual CV driveshaft from The Driveshaft Shop. This is the 3.8" carbon fiber tube version with the non-plunging 108mm CV in the rear and a plunging CV in the front.
Tick tock...tick tock...
Andrew1970 GTO Version 3.0
1967 Cougar build
GM High-Tech Performance feature
My YouTube Channel Please Subscribe!
Instagram @dr__efi
I deliver what EFI promises.
Remote Holley EFI tuning.
Please get in touch if I can be of service.
"You were the gun, your voice was the trigger, your bravery was the barrel, your eyes were the bullets." ~ Her
-
08-04-2025 #1569
Registered User
- Join Date
- Sep 2009
- Posts
- 3,004
You've got this Andrew!
1955 Nomad project LC9, 4L80e, C5 brakes, Vision wheels
1968 Camaro 6.2 w/ LSA, TR6060-Magnum hybrid and etc SOLD
1976 T/A LS1 6 Speed, and etc. SOLD
Follow me on Instagram: ryeguy2006a
-
08-08-2025 #1570
-Moderator/Sponsor-
- Join Date
- Apr 2001
- Location
- The City of Fountains
- Posts
- 16,129
The interior is coming together nicely. The carpet could fit a little tighter to the contours of the floor pan, but it is still pretty nice.
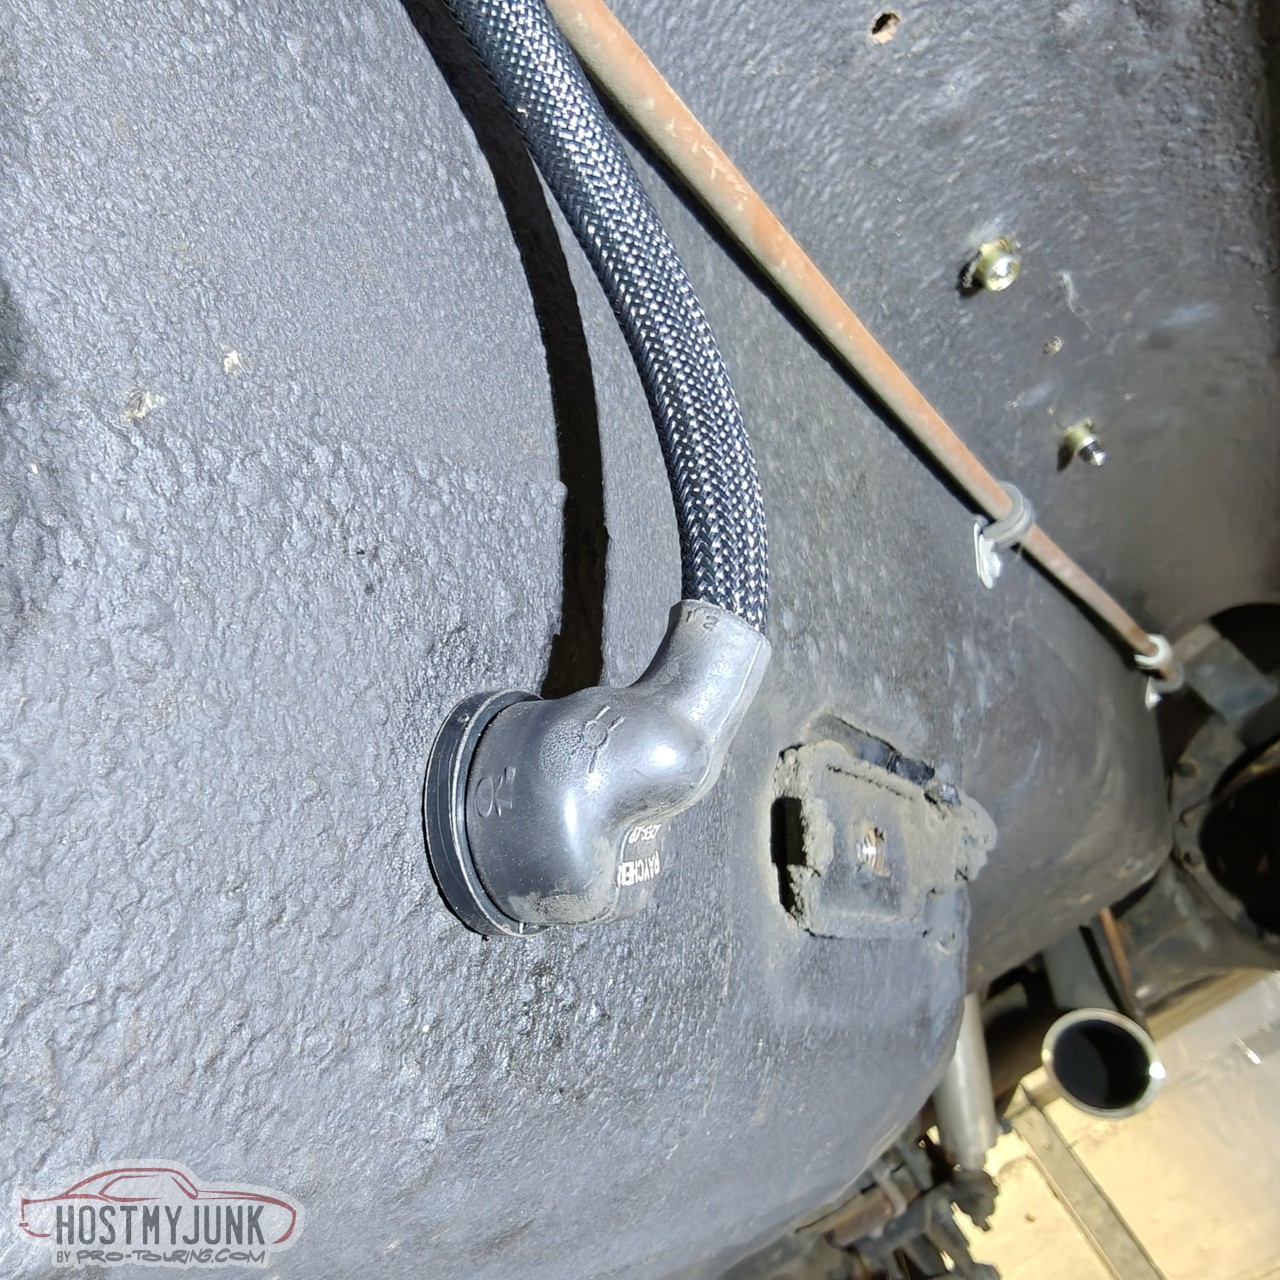
This is the how the transmission harness goes from being under the car, to being in the car. The boot is heat shrunk and glued tightly to the wire bundle. It exists into the interior next to the passenger seat and goes to the TurboLamik, which is under the passenger seat.
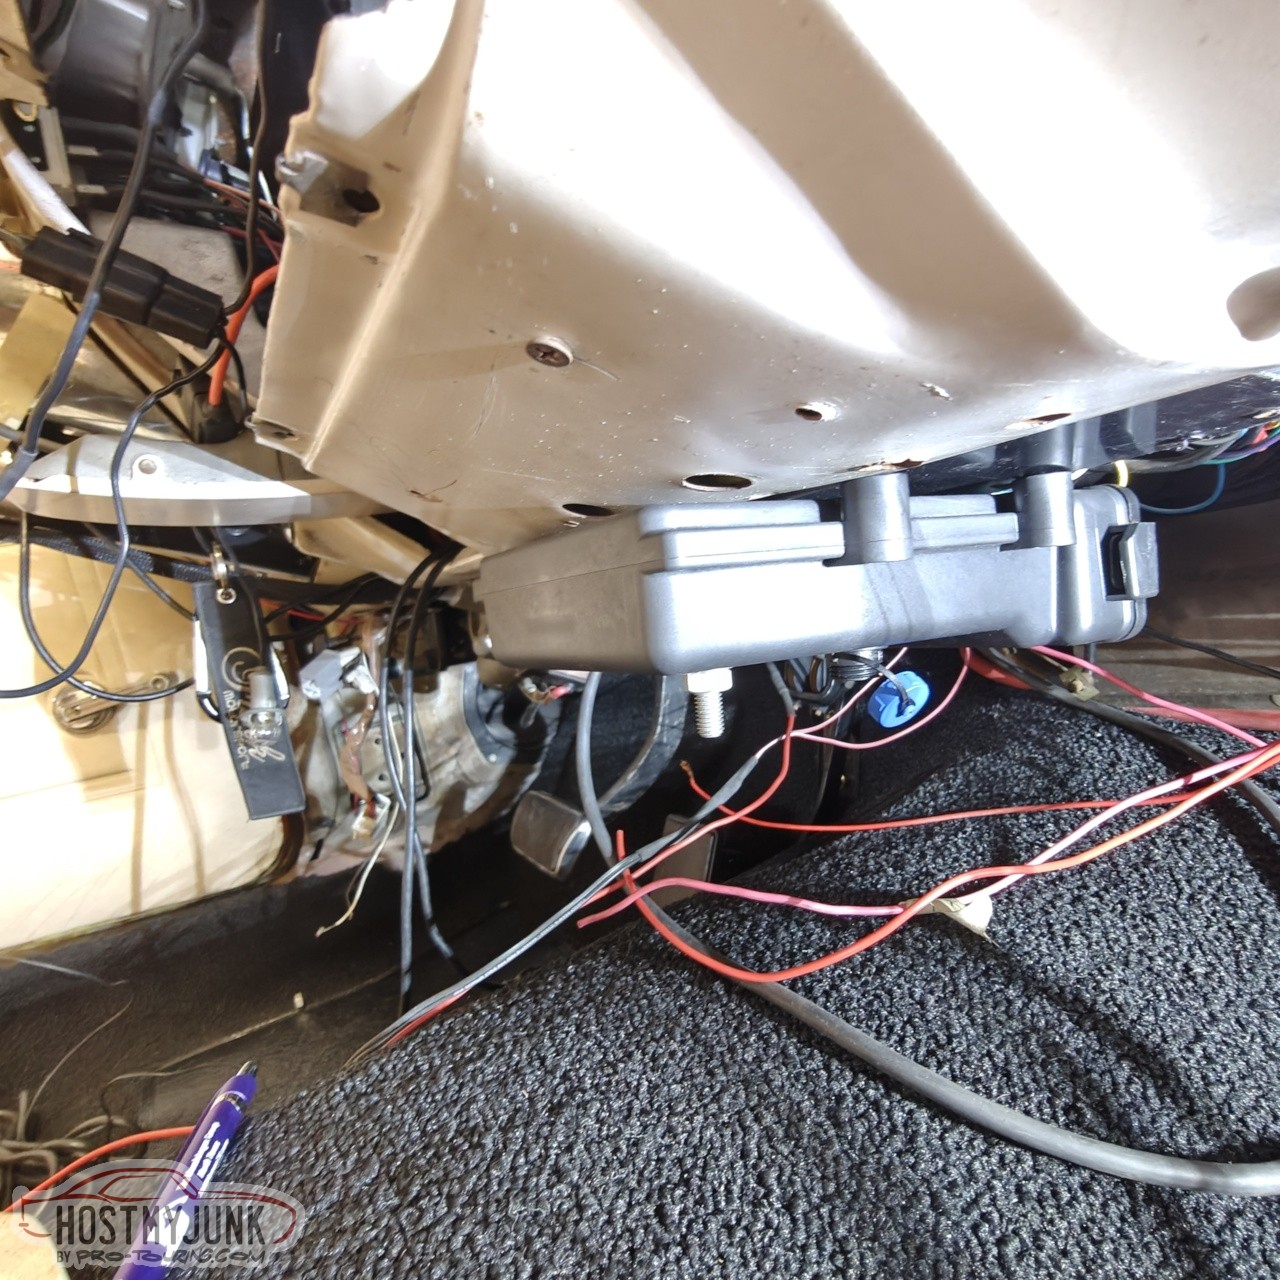
This is the final mounting location for the Hardwire PDM 25. It is under the dash...
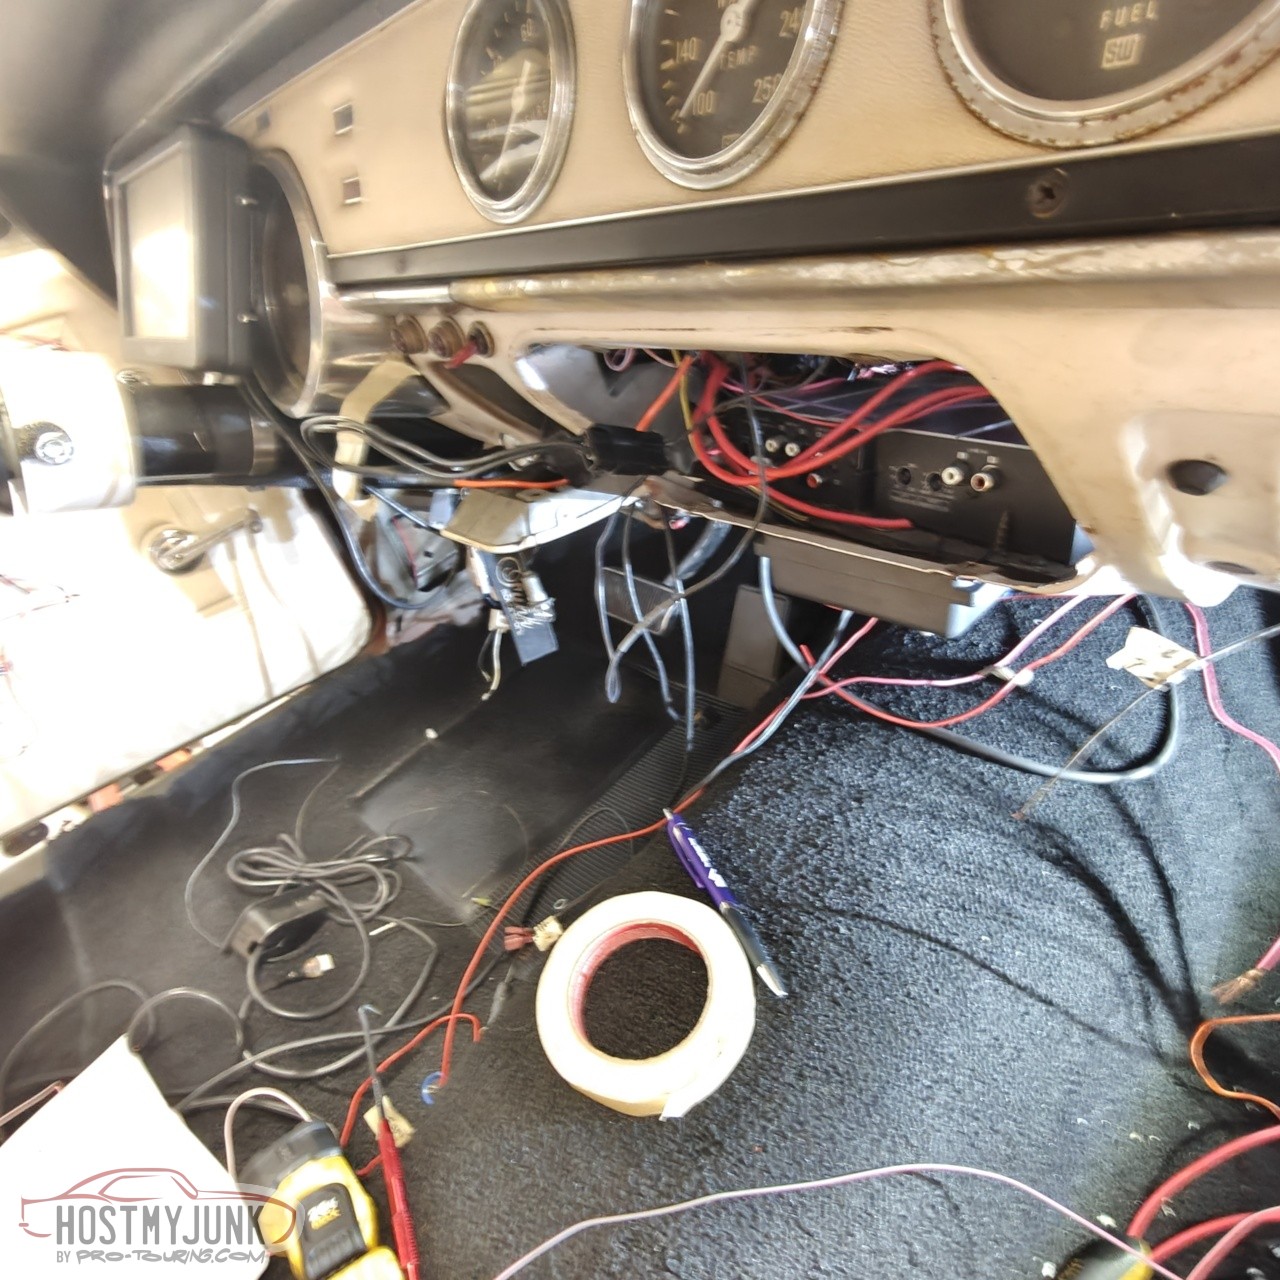
but not very visible when sitting upright in the seats.
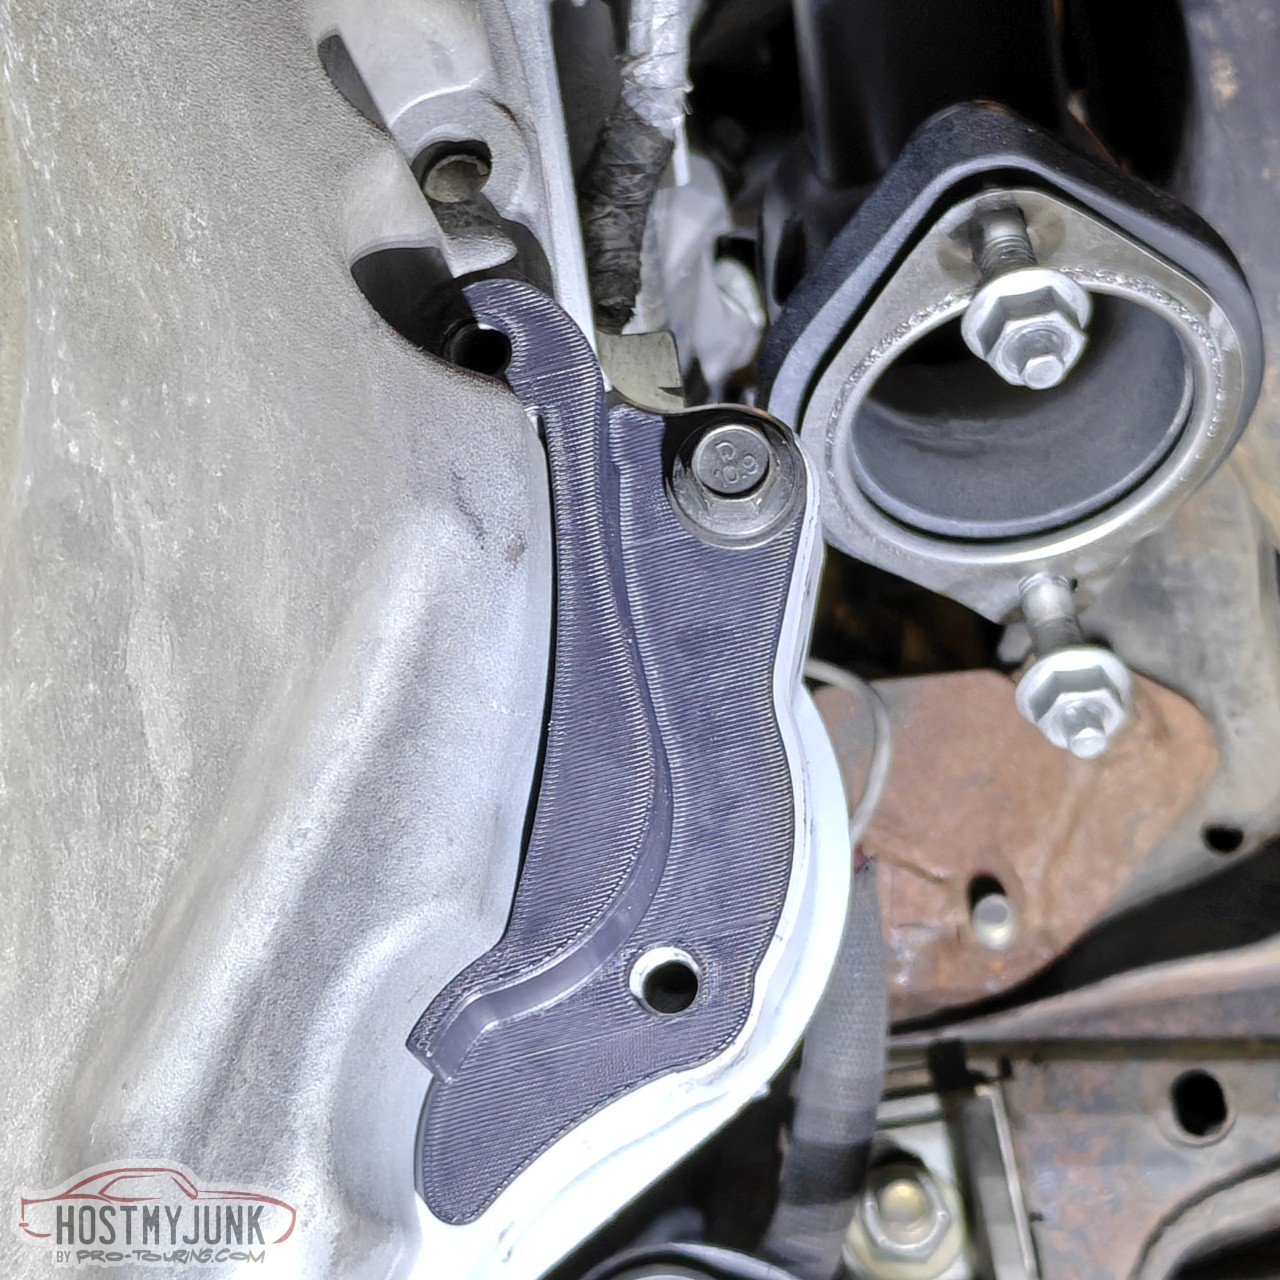
Lastly, I 3D scanned the area where I trimmed the bellhousing to make room for the starter nose. Then one of my customers designed and 3D printed a cover for the starter nose.
Andrew1970 GTO Version 3.0
1967 Cougar build
GM High-Tech Performance feature
My YouTube Channel Please Subscribe!
Instagram @dr__efi
I deliver what EFI promises.
Remote Holley EFI tuning.
Please get in touch if I can be of service.
"You were the gun, your voice was the trigger, your bravery was the barrel, your eyes were the bullets." ~ Her
-
08-09-2025 #1571
Registered User
- Join Date
- Jan 2014
- Location
- Austin, TX
- Posts
- 667
Andrew, have you gotten into programming the PDM yet? Im curious how complex that part of the operation is.
1972 C20 Suburban
1964 Corvette Coupe
-
08-18-2025 #1572
-Moderator/Sponsor-
- Join Date
- Apr 2001
- Location
- The City of Fountains
- Posts
- 16,129
The PDM software is pretty intuitive and the documentation is excellent. Originally Posted by FLYNAVY53
Last Monday morning I was able to drive it with open exhaust to a local muffler shop so that the exhaust could be modified to fit around the new transmission crossmember. All that went great and I was able to take my first drive of about 10 miles.
The next day I went to start it again and I noticed that I was getting a Code 31 on my TurboLamik display. Everytime I turned on the key I noticed that the transmission temperature would read -40C and then the code would pop up. This meant a open circuit to the temperature sensor or the sensor had gone bad.
On the TurboLamik the sensor ground and signal are on pins 1 and 13, located as shown below.
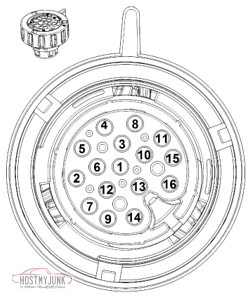
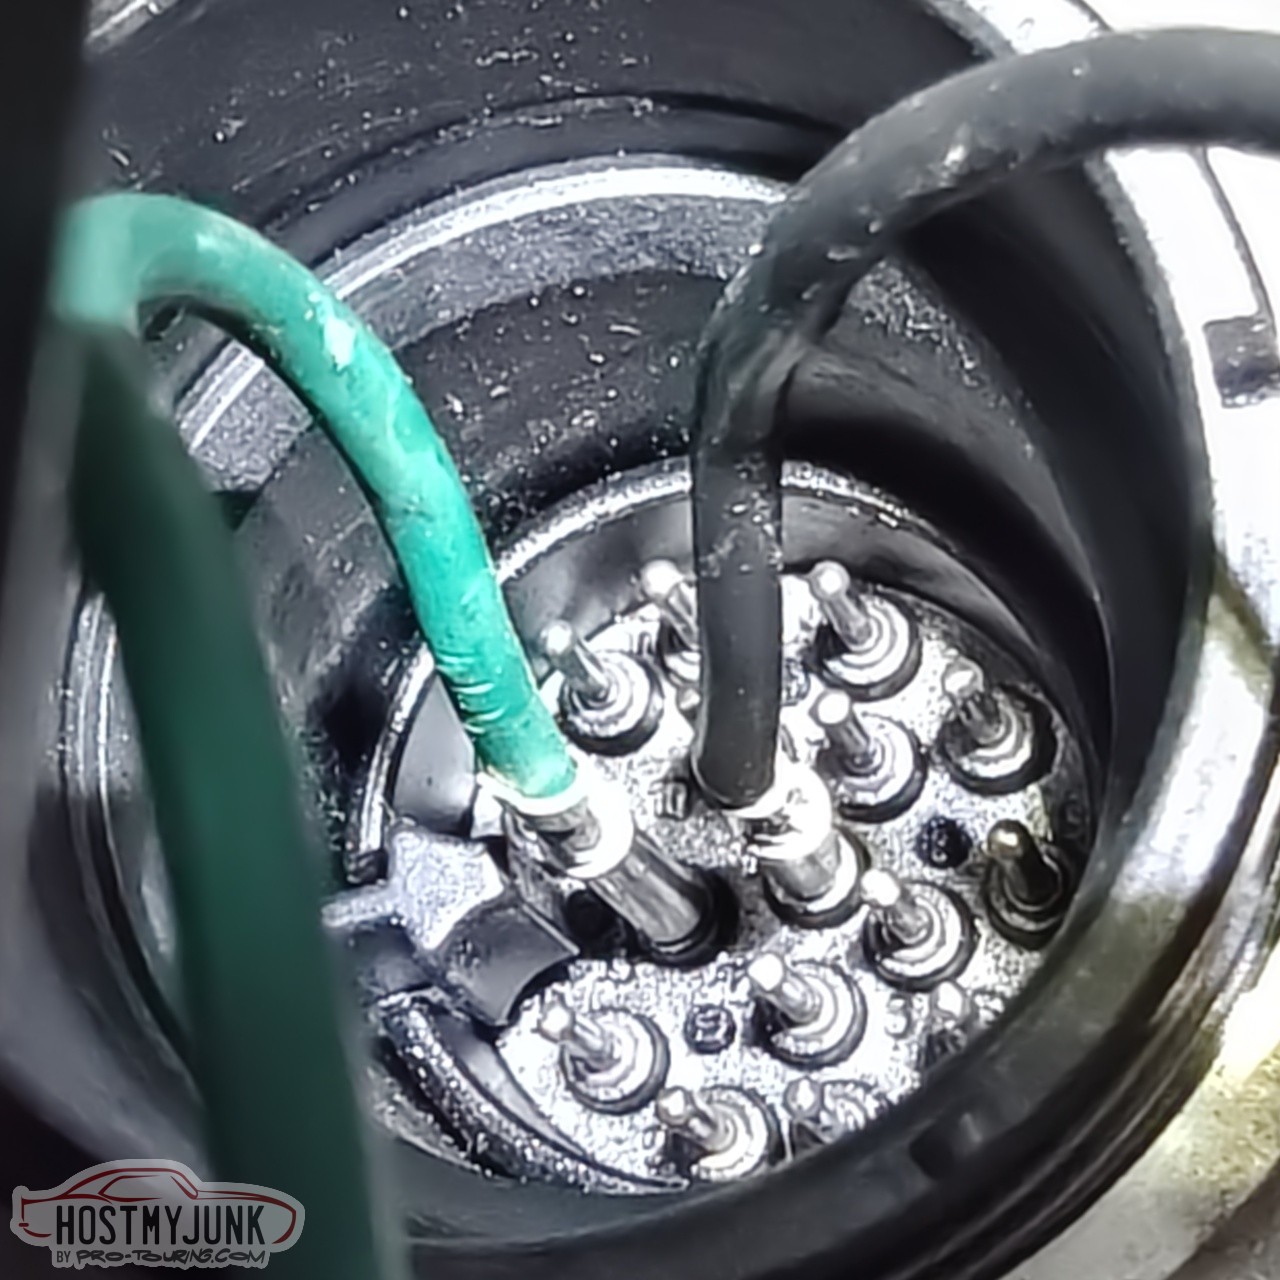
It was hard to access those pins, but I managed to use Deutsch DT terminals and push them over the appropriate pins. I measured over 2M ohms, which is super high resistance. For reference, at room temperature the reading should be about 2.5k ohms. There was no way around it. The pan had to be dropped and the mechatronics had to be examined.
I used a big tote to catch the fluid and the pan itself and let the valve body drip for a while.
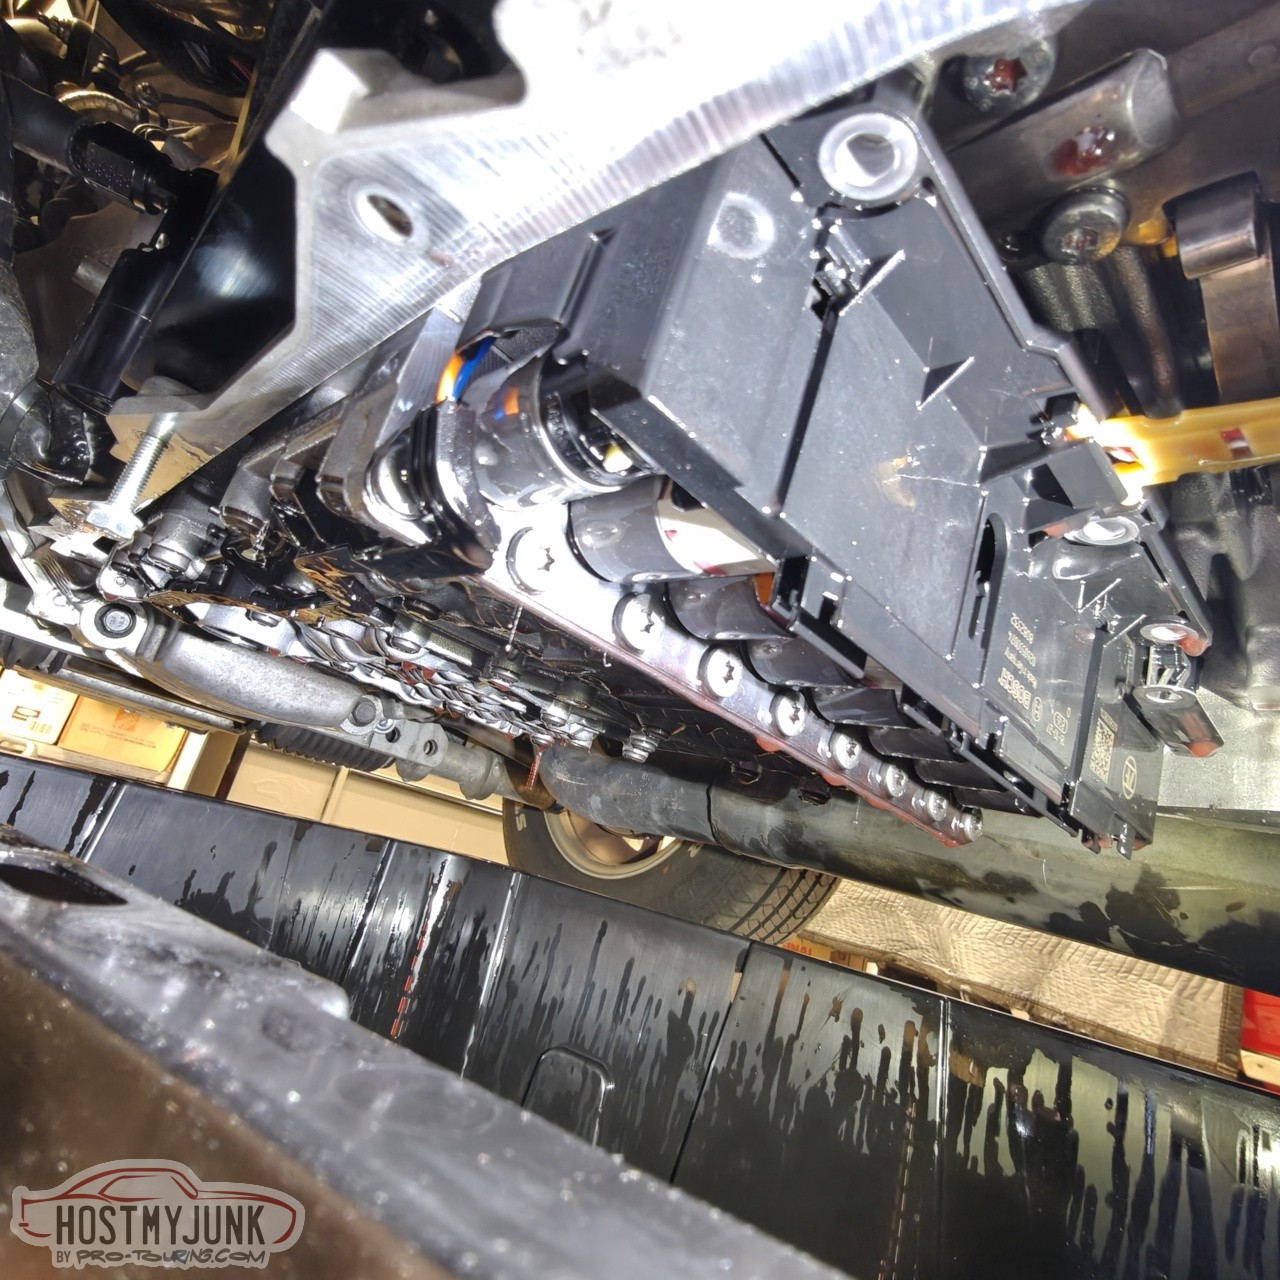
I found a few things, including the output speed sensor that had a mangled alignment tip. This doesn't effect functionality, it was not installed correctly.
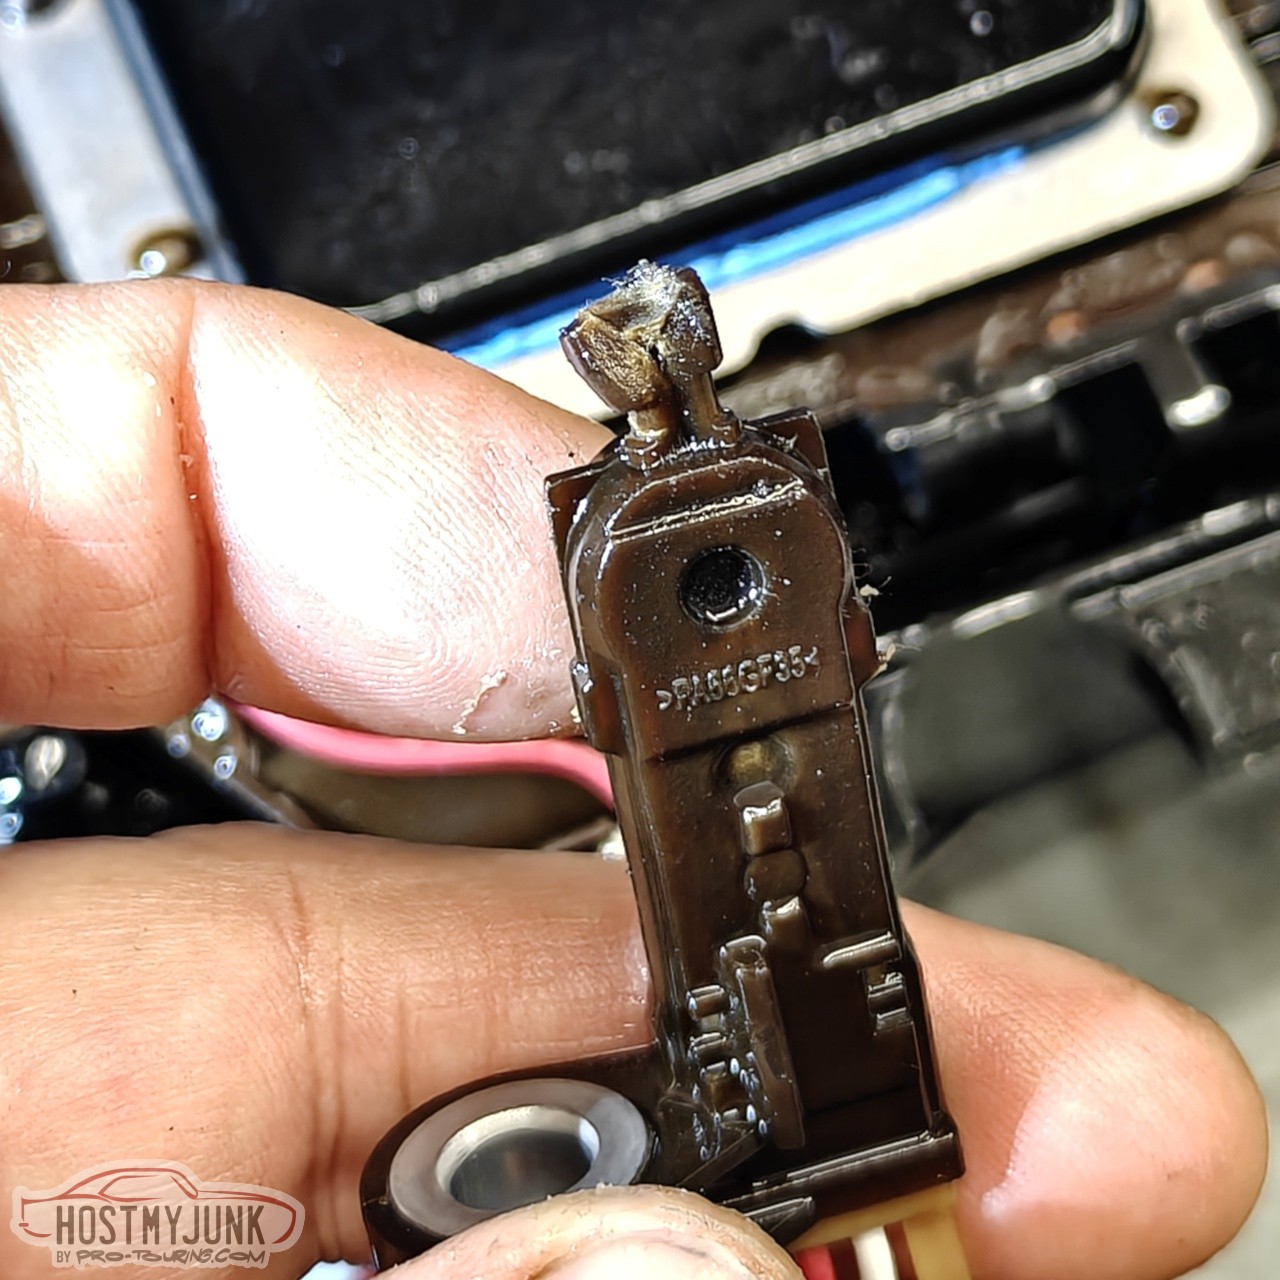
This is the oil temperature sensor itself and when I measured resistance across the two terminals I got about 2.5k ohms, which meant the sensor was good. I needed to go deeper.
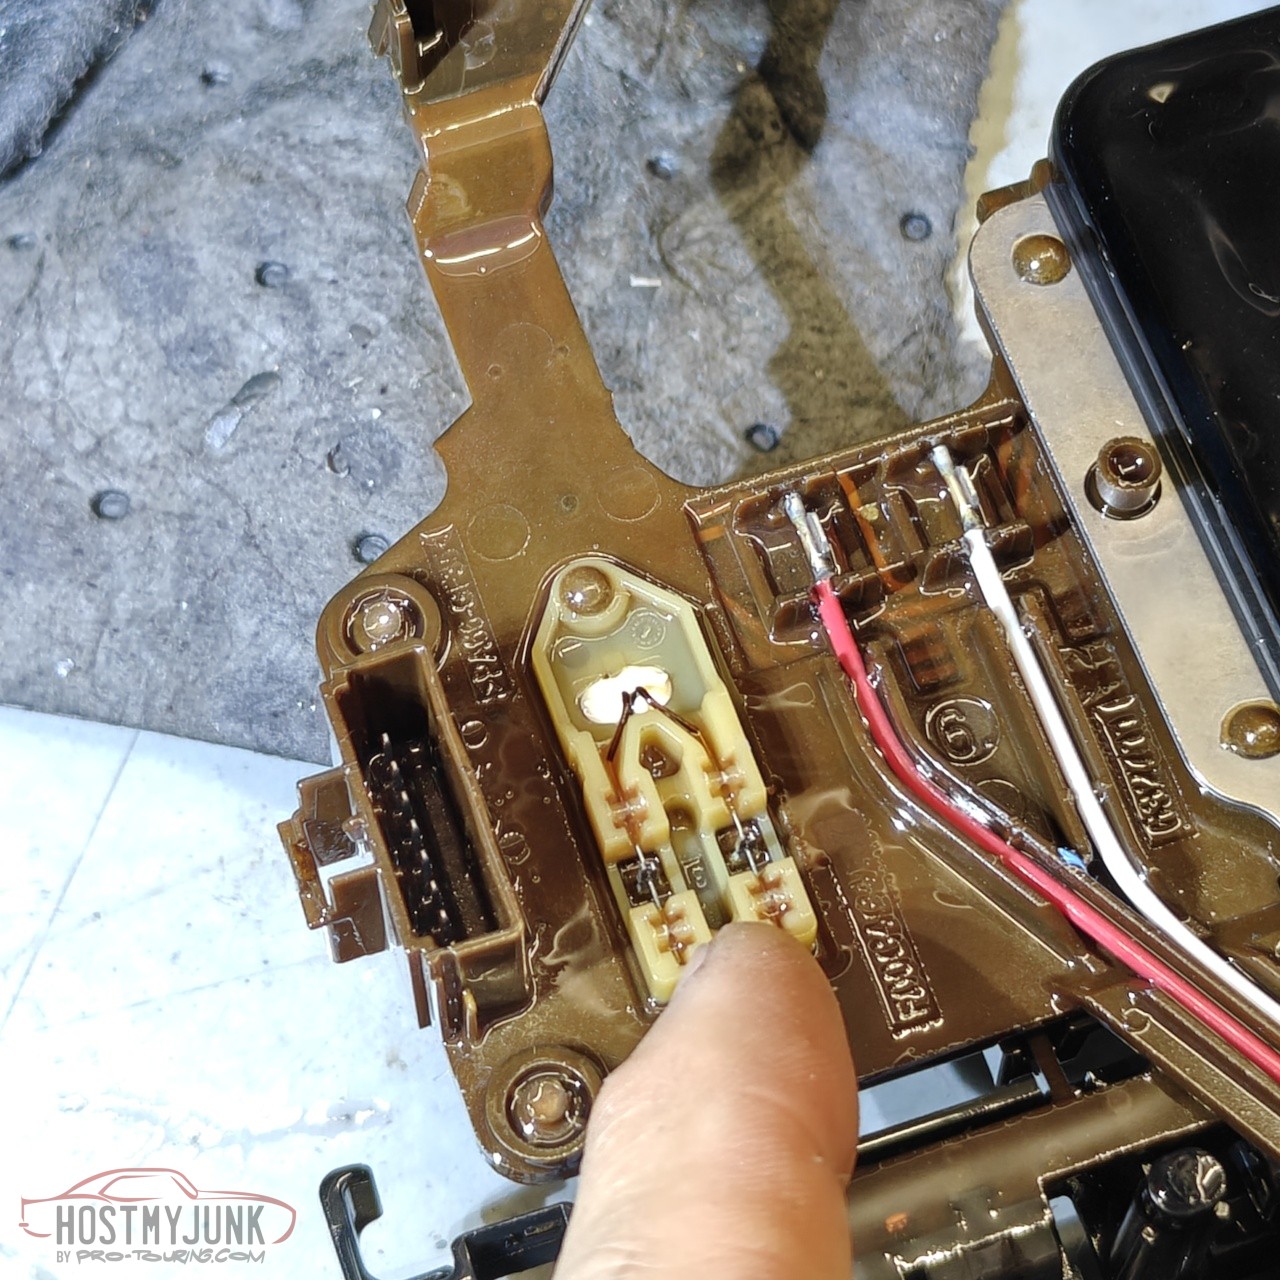
This was the cover that was installed after the TCU lid was cut off. This work was done by an electronics repair shop and I am not sure that they fully understood what needed to be done. Lesson learned...
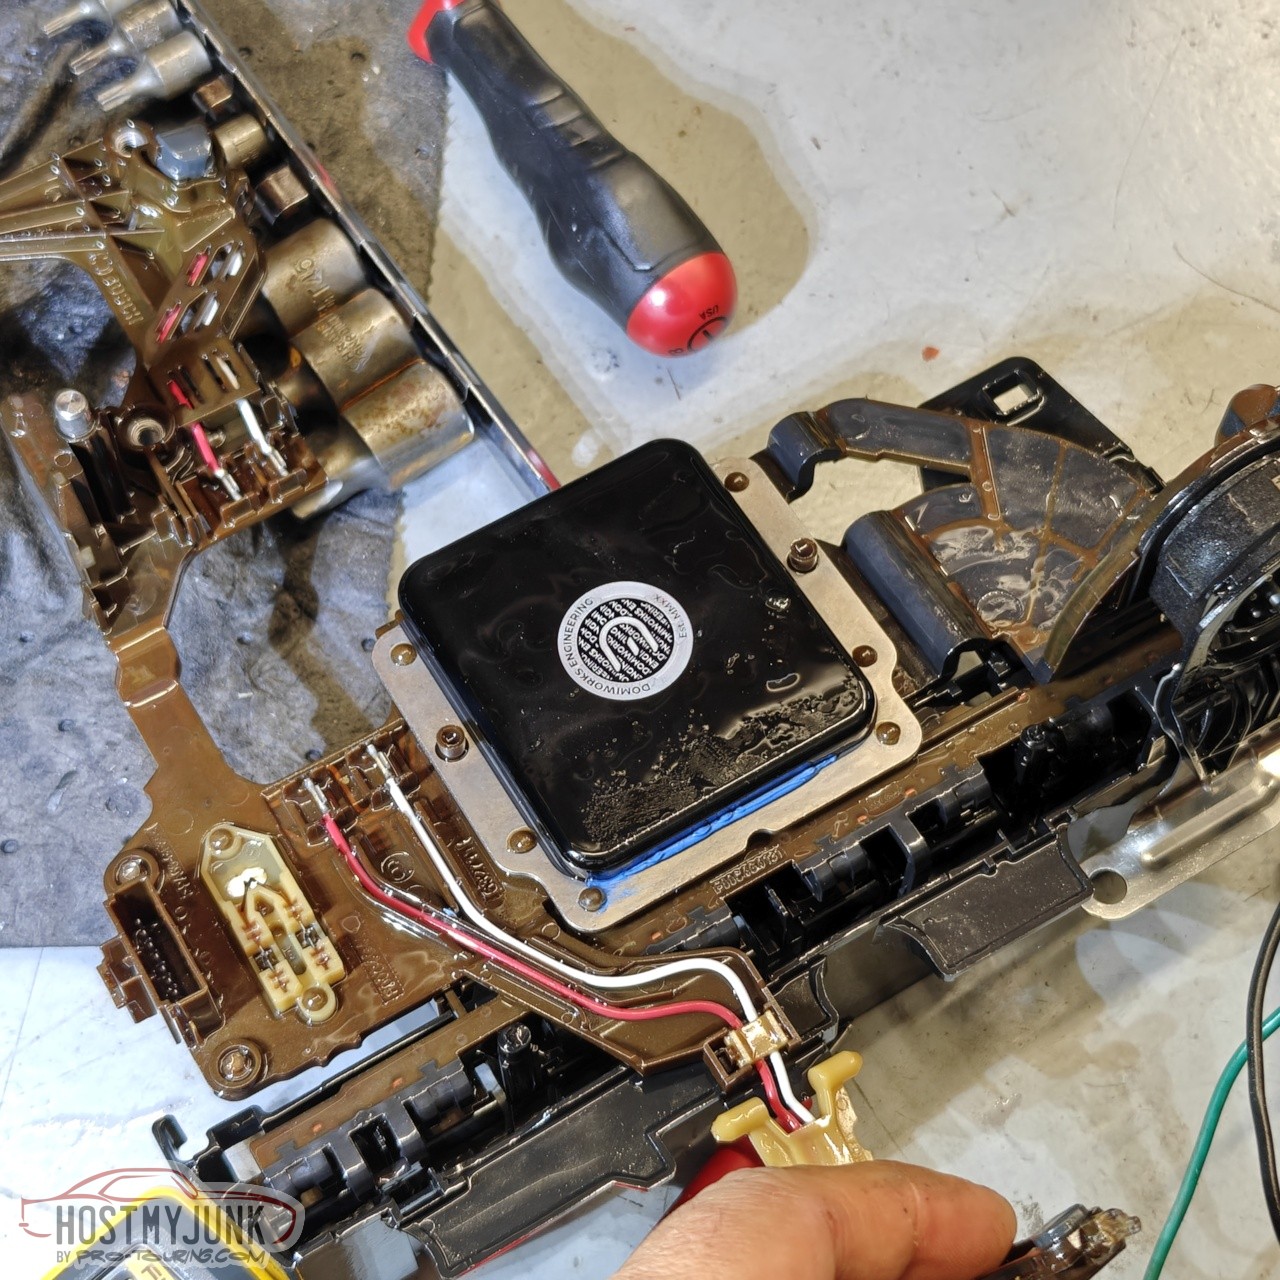
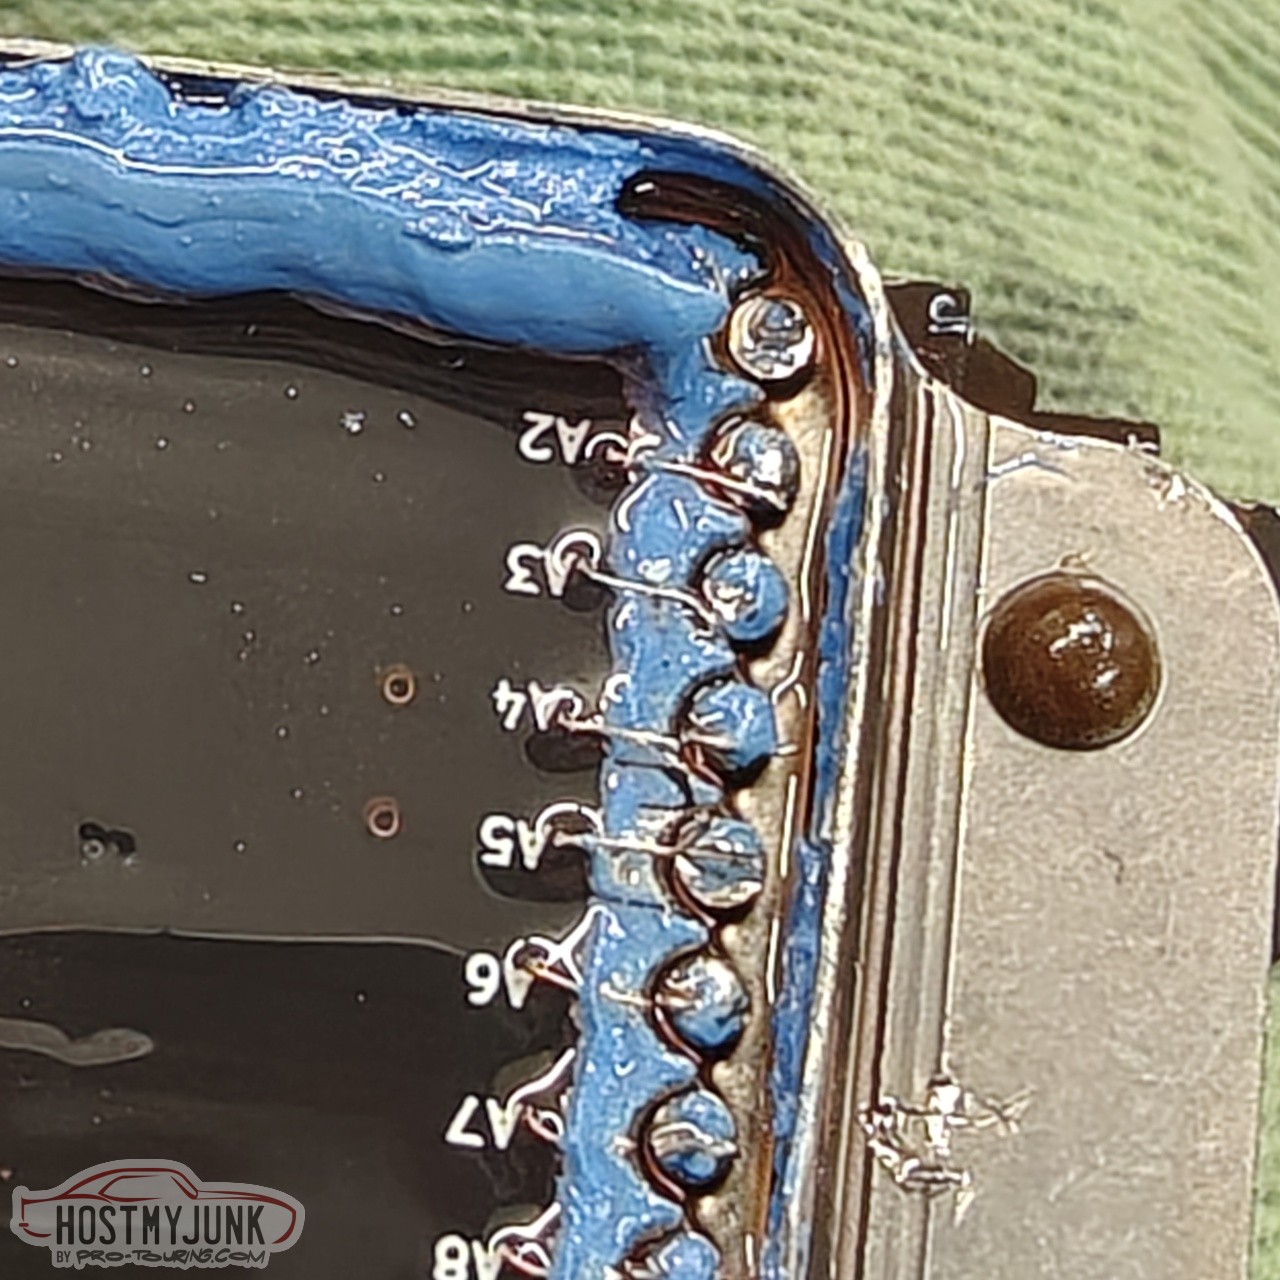
I pried the lid off and I found that instead of soldering the PCB to the contact pads, they used tiny wires to bridge the gap.
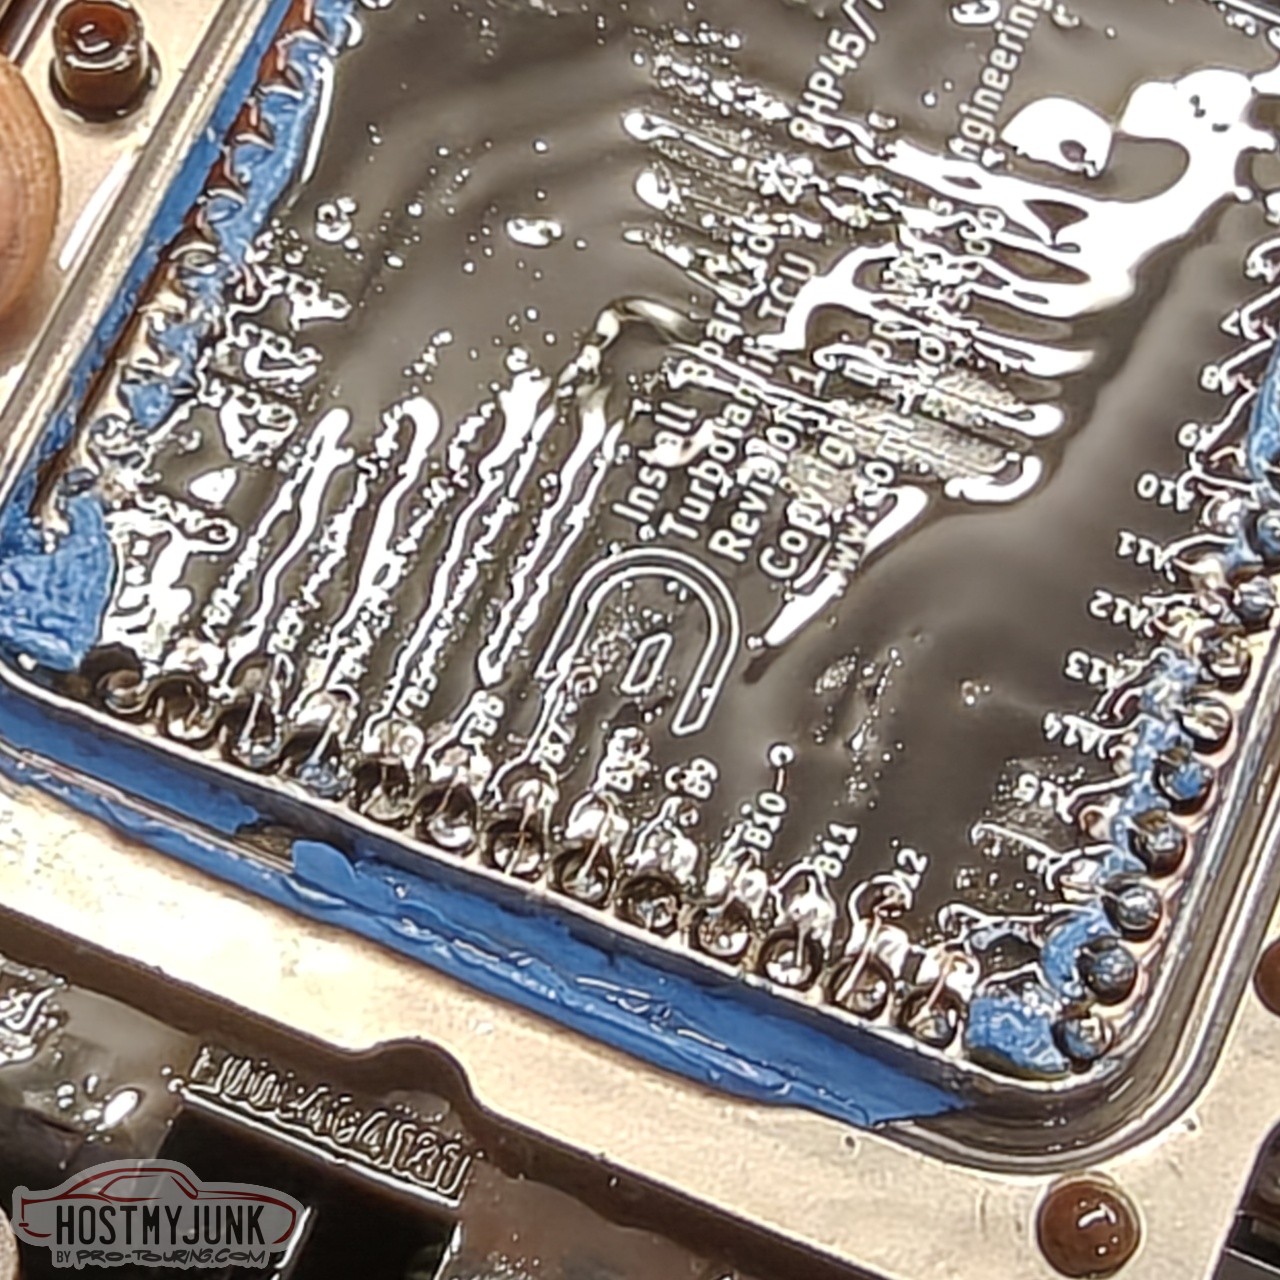
You can see that clearly here. The wires were broken from me prying off the lid, but clearly more failures were going to occur.
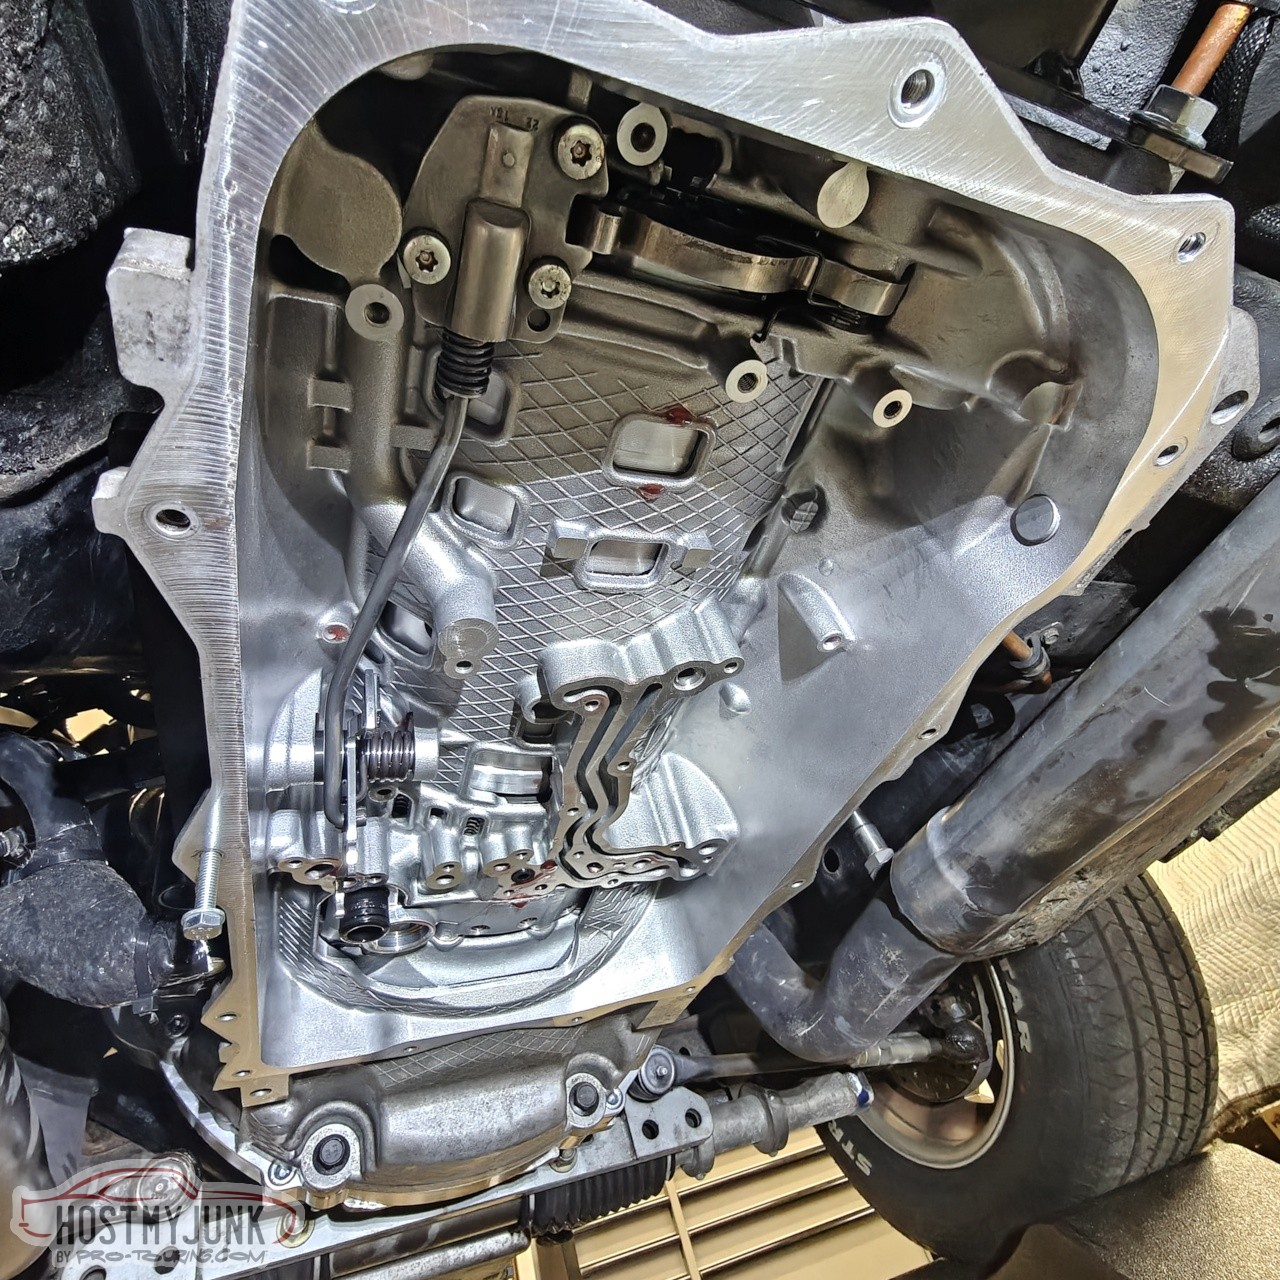
On the bright side, the inside of the transmission looks absolutely mint.
I texted Greg at TurboLamik US and he had a spare mechatronics that he modified himself and it was sent to me today. With any luck it will be back together by the end of the week.
Andrew1970 GTO Version 3.0
1967 Cougar build
GM High-Tech Performance feature
My YouTube Channel Please Subscribe!
Instagram @dr__efi
I deliver what EFI promises.
Remote Holley EFI tuning.
Please get in touch if I can be of service.
"You were the gun, your voice was the trigger, your bravery was the barrel, your eyes were the bullets." ~ Her
-
08-19-2025 #1573
 Registered User
- Join Date
- Sep 2010
- Location
- Beach Park IL
- Posts
- 3,054
Does Greg do this as a service?
Also, your thoughts on the board vs jumper wires. I can argue that one either way but I feel like the board makes the most sense.Donny
Support your local hot rod shop!
-
08-19-2025 #1574
-Moderator/Sponsor-
- Join Date
- Apr 2001
- Location
- The City of Fountains
- Posts
- 16,129
Yes, Greg offers this as a service and I highly recommend taking advantage of it, because dropping the valve body is not fun. Originally Posted by dontlifttoshift
Greg likes to use the board, others swear by the wire method. I think both methods work well, provided they are done correctly.
Andrew1970 GTO Version 3.0
1967 Cougar build
GM High-Tech Performance feature
My YouTube Channel Please Subscribe!
Instagram @dr__efi
I deliver what EFI promises.
Remote Holley EFI tuning.
Please get in touch if I can be of service.
"You were the gun, your voice was the trigger, your bravery was the barrel, your eyes were the bullets." ~ Her
-
08-20-2025 #1575
Registered User
- Join Date
- Sep 2009
- Posts
- 3,004
Glad that this happened now and not in the middle of the road trip! Glad you got some miles on it.
1955 Nomad project LC9, 4L80e, C5 brakes, Vision wheels
1968 Camaro 6.2 w/ LSA, TR6060-Magnum hybrid and etc SOLD
1976 T/A LS1 6 Speed, and etc. SOLD
Follow me on Instagram: ryeguy2006a
-
08-22-2025 #1576
-Moderator/Sponsor-
- Join Date
- Apr 2001
- Location
- The City of Fountains
- Posts
- 16,129
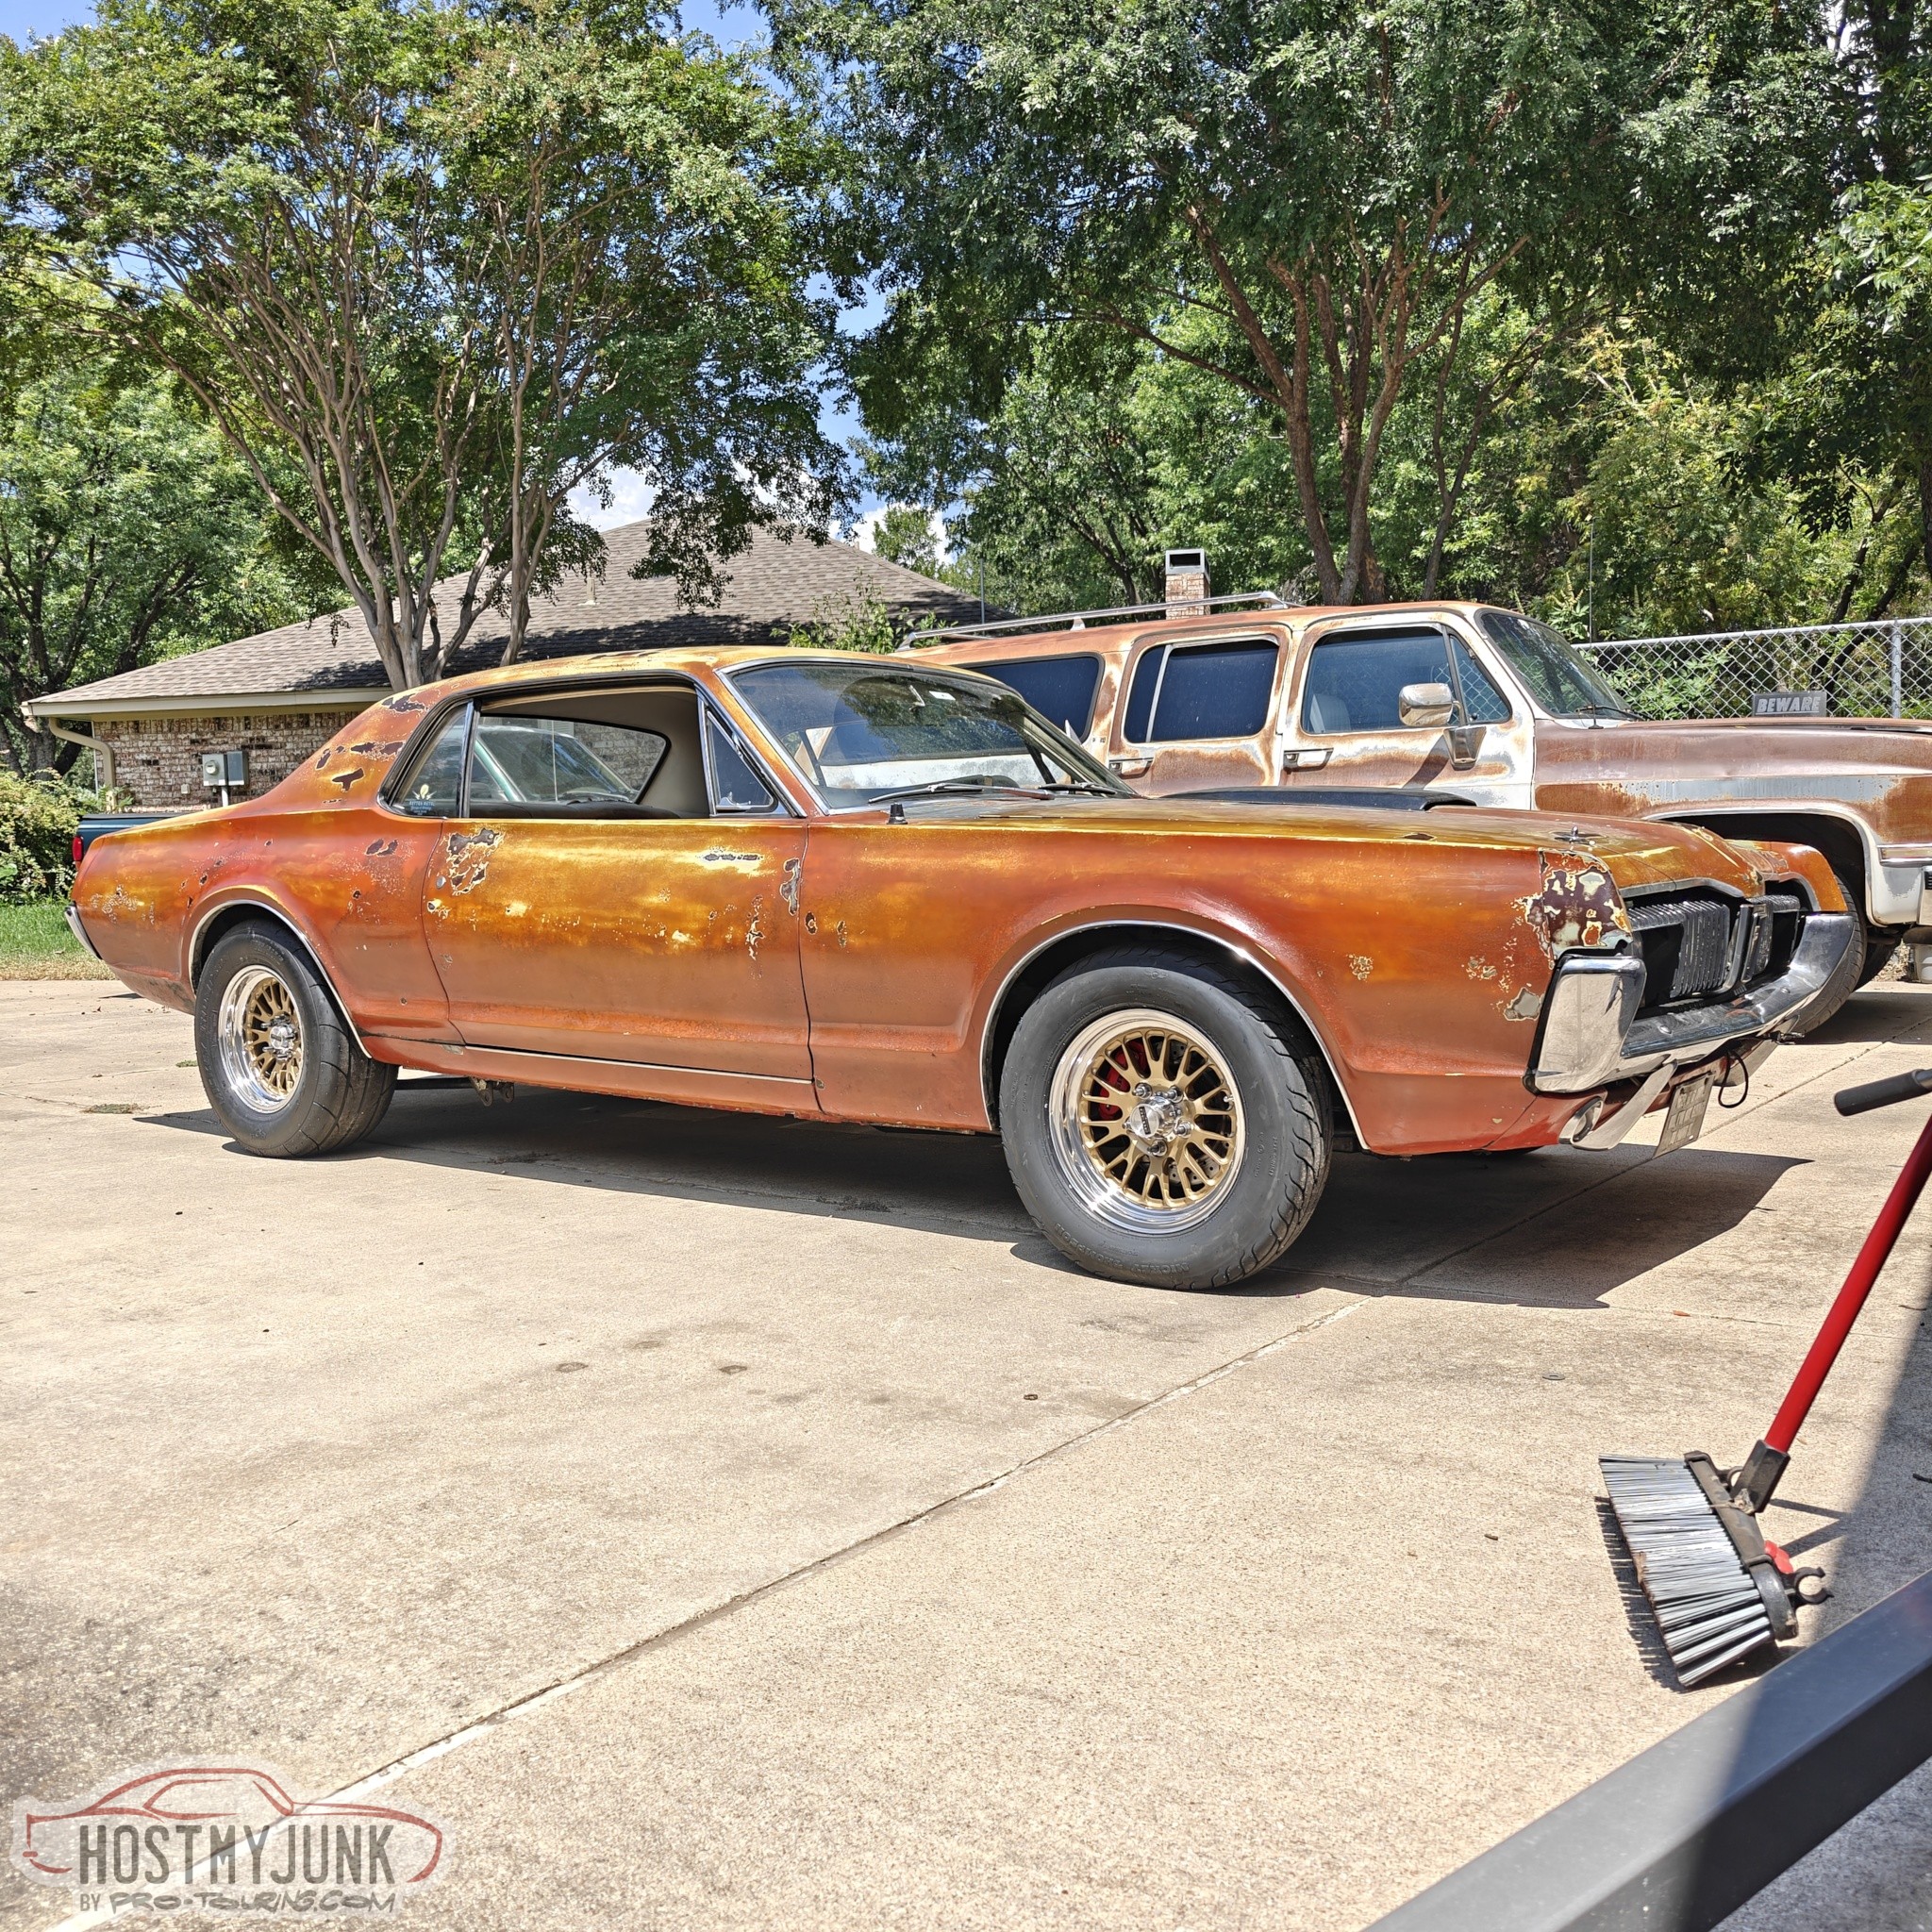
Yesterday I installed the new mechatronics that Greg sent me and filled the transmission. One thing about these transmissions is the fill procedure. It is a real pain in the a$$.
I also installed the new wheels and tires. The wheels are from 3030 Autosport and the tires are MT drag radials in the rear and matching skinnies up front.
I also have some dyno time scheduled for Tuesday.
Andrew1970 GTO Version 3.0
1967 Cougar build
GM High-Tech Performance feature
My YouTube Channel Please Subscribe!
Instagram @dr__efi
I deliver what EFI promises.
Remote Holley EFI tuning.
Please get in touch if I can be of service.
"You were the gun, your voice was the trigger, your bravery was the barrel, your eyes were the bullets." ~ Her
-
08-24-2025 #1577
Registered User
- Join Date
- Sep 2013
- Location
- sw Kansas
- Posts
- 1,662
Just a little "debugging".
-
08-24-2025 #1578
Registered User
- Join Date
- Jan 2014
- Location
- Austin, TX
- Posts
- 667
Love the wheel choice! I was actually just looking at something VERY similar for my Corvette....CCW classics with the same gold center and polished barrel....I think the combo would look good on the dark blue car if I decide to go to 17s now that the 15" Avon CR6zz tires are up to $650 a piece
 1972 C20 Suburban
1964 Corvette Coupe
-
08-25-2025 #1579
-Moderator/Sponsor-
- Join Date
- Apr 2001
- Location
- The City of Fountains
- Posts
- 16,129
A while back I posted about scanning the intake area. Here is a part that resulted from that scan and print.
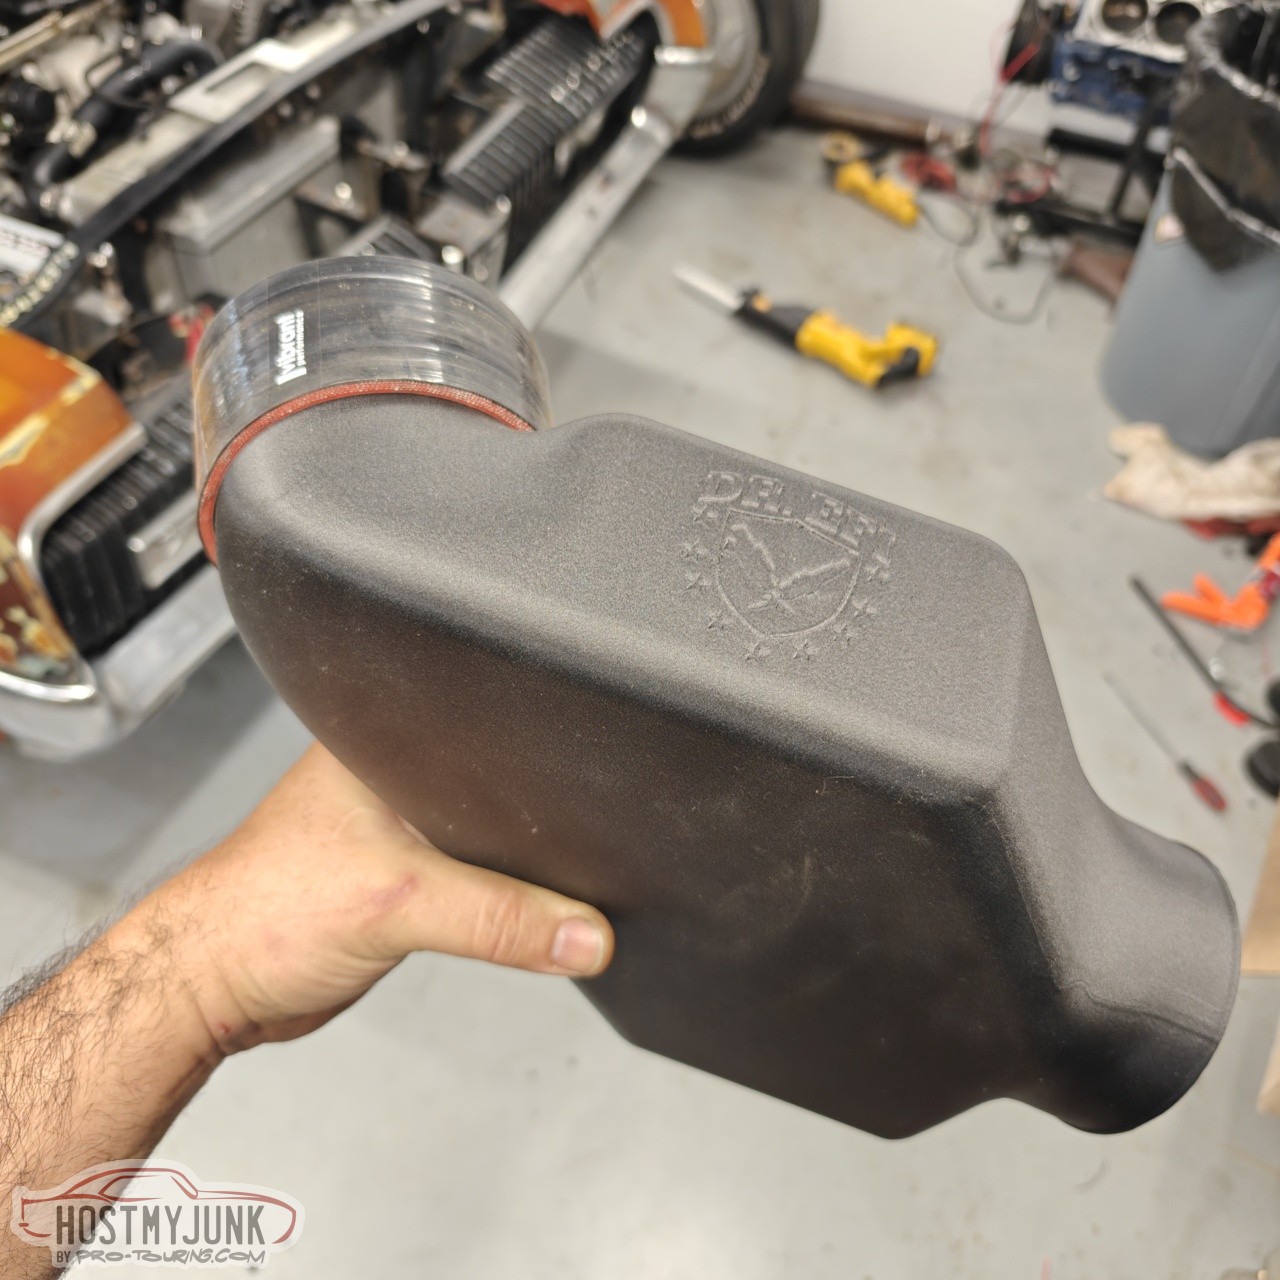
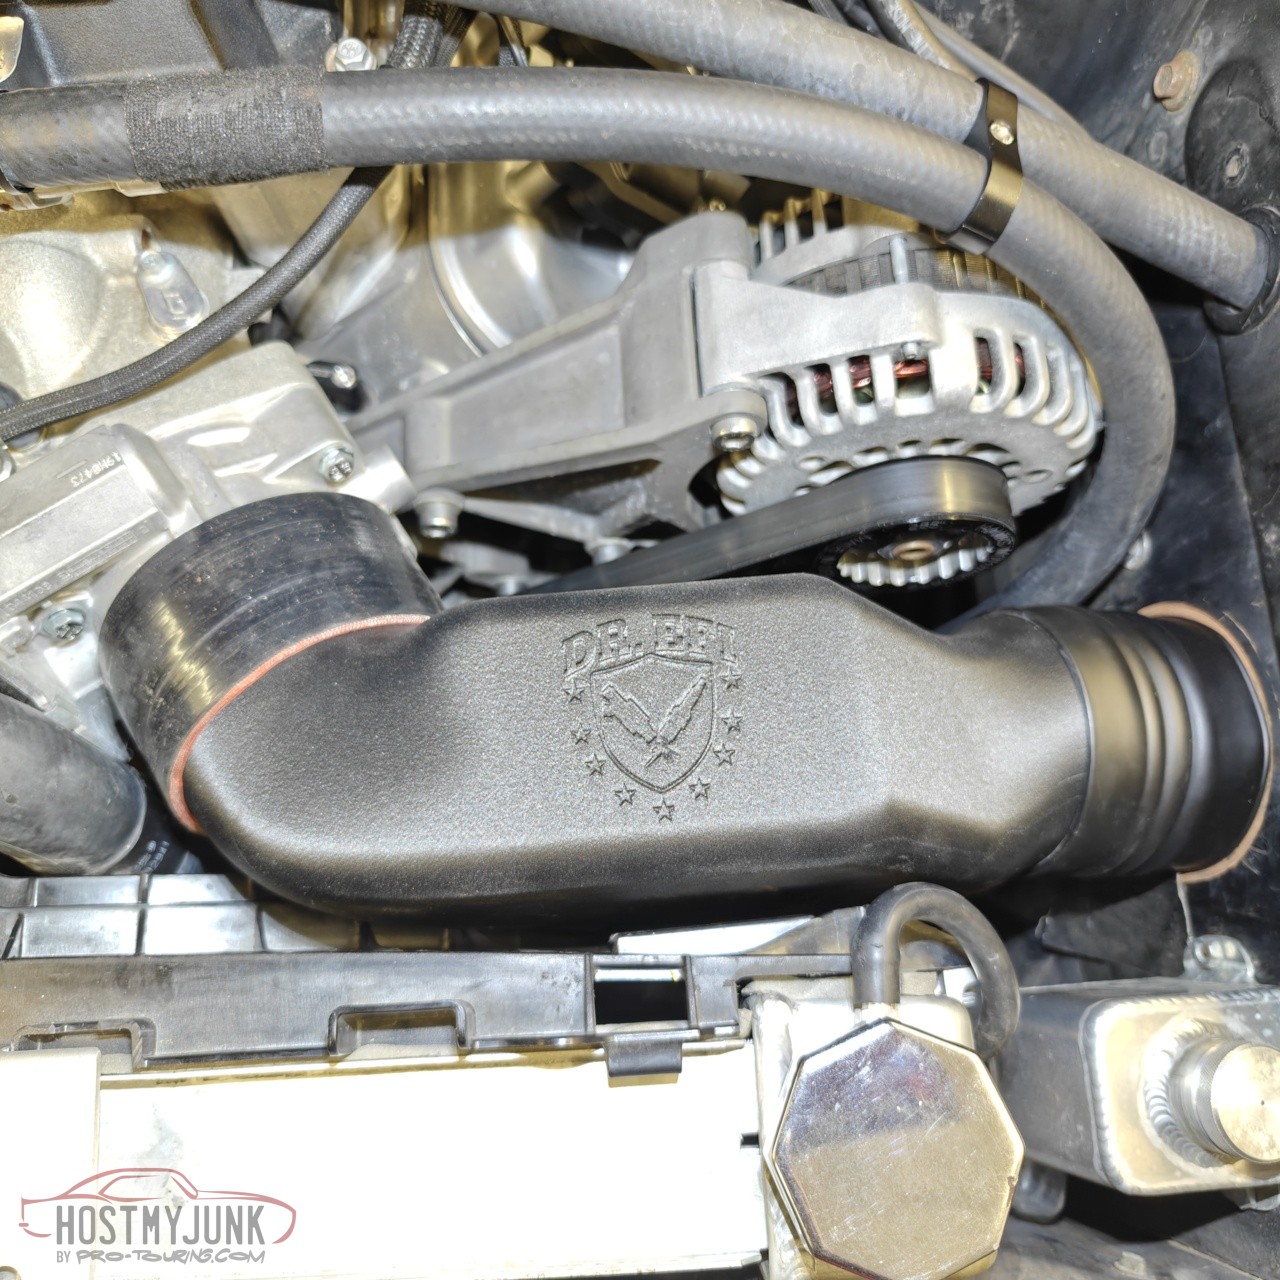
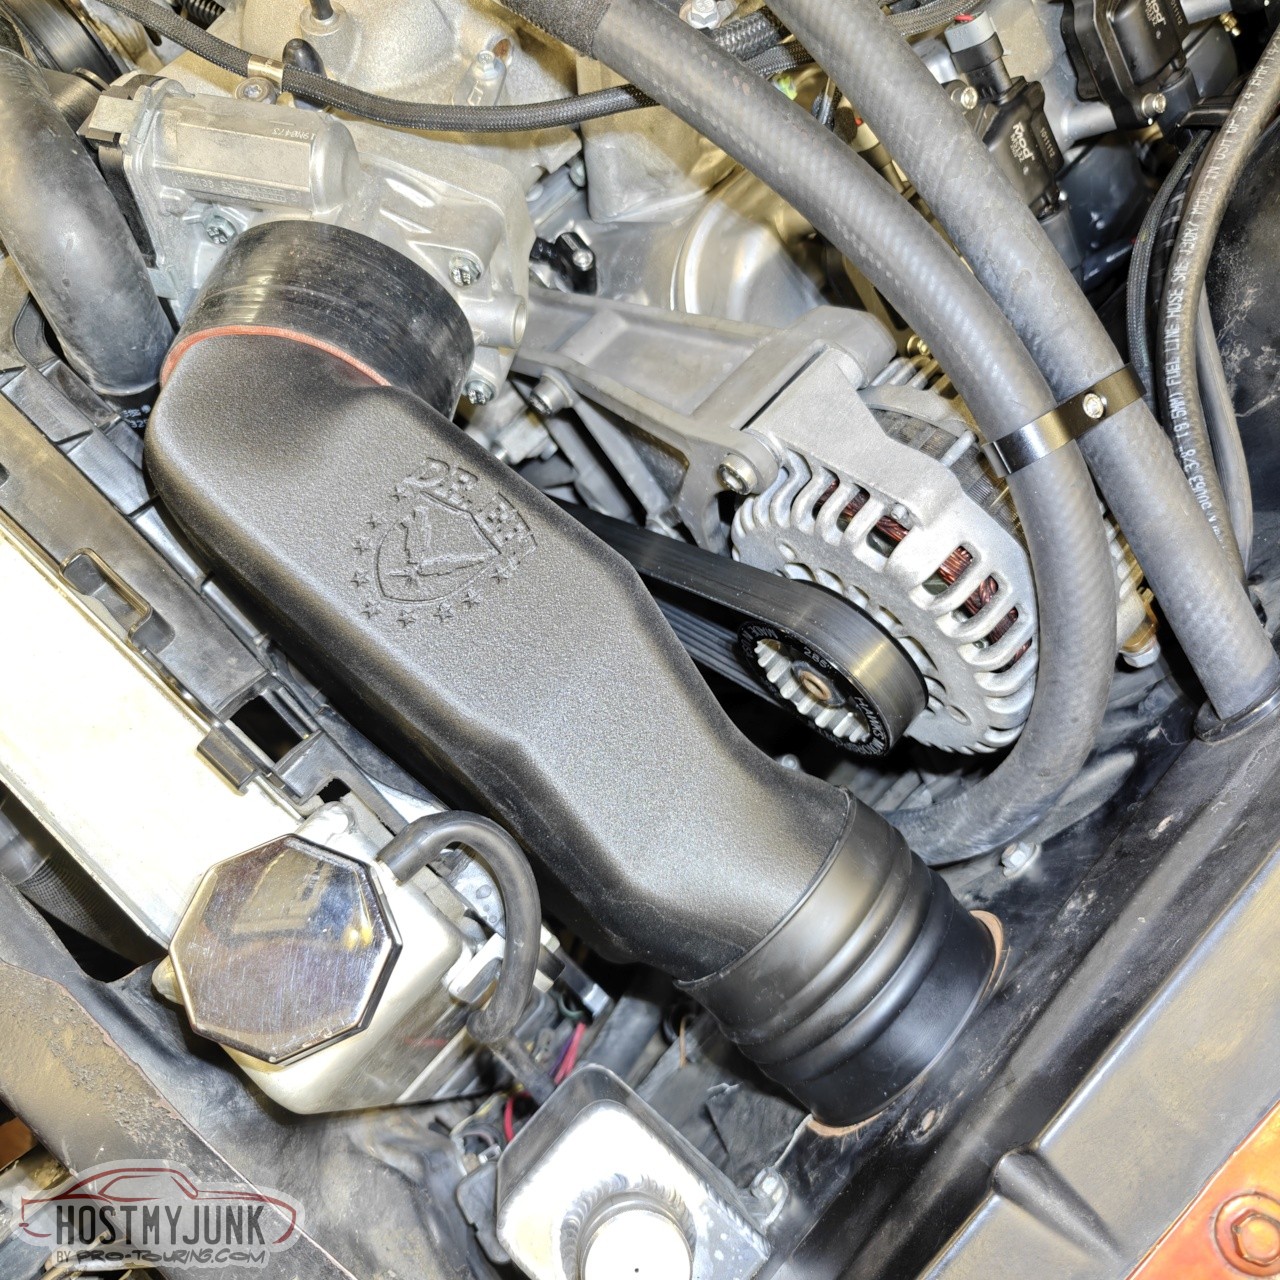
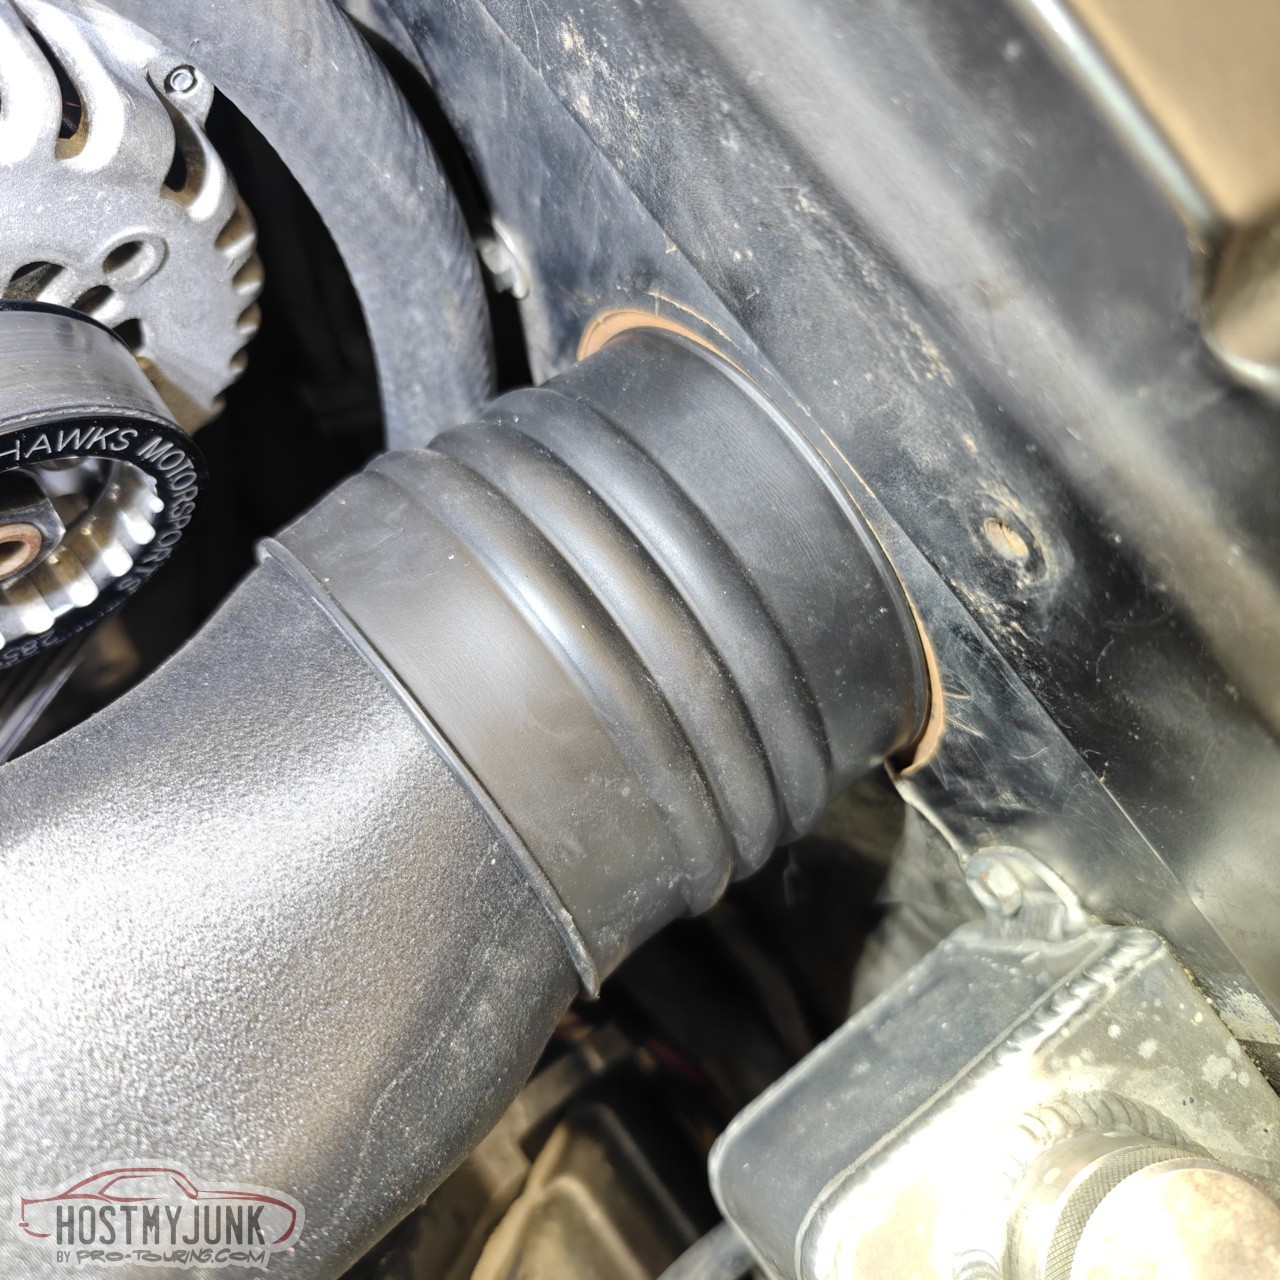
This rubber coupler was also 3D printed.
Andrew1970 GTO Version 3.0
1967 Cougar build
GM High-Tech Performance feature
My YouTube Channel Please Subscribe!
Instagram @dr__efi
I deliver what EFI promises.
Remote Holley EFI tuning.
Please get in touch if I can be of service.
"You were the gun, your voice was the trigger, your bravery was the barrel, your eyes were the bullets." ~ Her
-
08-27-2025 #1580
Registered User
- Join Date
- Sep 2013
- Location
- sw Kansas
- Posts
- 1,662
Those who master technology make cool parts.
-

 Reply With Quote