

Results 61 to 80 of 108
Thread: 1984 "Rustang" GT (Slow Build)
-
12-06-2018 #61

 Registered User
- Join Date
- Mar 2014
- Location
- Yuma, AZ
- Posts
- 635
 I yanked out the fender liners prior to rolling the lip. I was not sure how I was going to be able to roll the lip and keep them in, so I opted just to get rid of them. They probably would have ended up rubbing anyways if I left them. I read about many people not taking that screw out to roll the fenders and end up punching it through lol
 Originally Posted by frink84

Yes, the wheels are rubbing the fender lip, there is a spot where the paint is worn off and the tires have marks. I will get a picture tonight. If you look at the closeup of the wheel and fender further up you can actually see rubber hanging off the fender where it was rubbing.
For lack of a better description, after rolling the front fenders the lip went from an "L" shape to a "U" shape if you took a cross section of the lip. The entire lip did not want to roll when I used the roller tool, only the most inner part where it was weaker away from the bend at the edge. I thought it would be ok, but when the car ended up lower than expected it was not good. Now that I've got the car up a bit I have more clearance, but not enough to be comfortable. I'm going to pull the fenders off and through a combination of cutting and hammering make the fender lip completely flat. That should gain me at least 1/4"-3/8" from the tire to fender. I might try sticking the GoPro on the fender and driving it a bit just so I can see what is going on.
And those spats are going to get trimmed. They are clear on the outside, but further in they are perilously close to touching at full lock. Those should be easy enough to clearance.
Thanks for the tips!Nelson
1969 Chevelle "Cone Smasher" Family Project
https://www.pro-touring.com/threads/...uot?highlight=
1984 "Rustang" GT, 5.0, 5 Speed Project
https://www.pro-touring.com/threads/...T-(Slow-Build)
-
12-06-2018 #62
Registered User
- Join Date
- Jan 2016
- Location
- Chino Valley, AZ
- Posts
- 134
Understood, my fenders are U-shape rolled and clear with the 18x9's up front. I wonder if the 4-eye cars had smaller fender openings? I know 91+ fenders are larger to fit the factory 16" wheels, but I havent looked at below 87. With the work you are doing, it might be worth it to update to a 91+ fender... but you might run into an issue with the beltline molding. Originally Posted by WallaceMFG
-
12-06-2018 #63
Registered User
- Join Date
- Mar 2014
- Location
- Yuma, AZ
- Posts
- 635
I think the biggest thing for me is that I used the SN95 control arms on my car. Even with the early narrower K member, I still added nearly 2 inches to the track width up front. If I ran Fox length arms I would have cleared the fender, but would have been tight to the k member inside and needed spacers. If your car still had the Fox arms with the later wide K member that would explain the difference. I still may change to Fox arms if the fight is too great for these. Originally Posted by frink84
As far as I'm aware, the only difference between 87-90 and 91+ fenders is the front lip like we talked about on your thread. If they are different from the 4 eye fenders, I'm not aware.
But the belt moldings are a valid concern. I need a new rear bumper cover which is impossible to find for my car. I don't want to change all my moldings because it would drive me nuts to not have the bumpers match the side moldings.Nelson
1969 Chevelle "Cone Smasher" Family Project
https://www.pro-touring.com/threads/...uot?highlight=
1984 "Rustang" GT, 5.0, 5 Speed Project
https://www.pro-touring.com/threads/...T-(Slow-Build)
-
12-06-2018 #64
Registered User
- Join Date
- Jan 2016
- Location
- Chino Valley, AZ
- Posts
- 134
Guess I'm starting to lose my mind in my old age, haha! Originally Posted by WallaceMFG
I had a set of MM SN95 a-arms that I ended up selling to a buddy with a SN95, since by my measuremements, all hell would break loose in terms of clearance up front.
-
12-10-2018 #65
Registered User
- Join Date
- Mar 2014
- Location
- Yuma, AZ
- Posts
- 635
Originally Posted by frink84
I think my measurements are agreeing with yours! My dad was in town for the weekend and was looking over the car with me, I had never noticed that the rim itself was outside of the wheel lip. No matter how much I beat on the fenders, they will never clear the wheels. I think I'm going to have to back up and put the Fox arms back in the car. After that I can space the wheels back out to improve clearance to the K member if needed.
Dad suggested just going with the fender flares since I wanted to do them later anyways, but that would mean I need to change the rear also after I just spent all the time and $$ getting parts to keep the Fox width out back. For a set of bushings, ball joints, and some time I can get the front end sorted out. If it wasn't so much effort I would consider doing a K member swap to gain the width back vs spacers, but that is a big job. And a k member is much more costly.Nelson
1969 Chevelle "Cone Smasher" Family Project
https://www.pro-touring.com/threads/...uot?highlight=
1984 "Rustang" GT, 5.0, 5 Speed Project
https://www.pro-touring.com/threads/...T-(Slow-Build)
-
01-04-2019 #66
Registered User
- Join Date
- Mar 2014
- Location
- Yuma, AZ
- Posts
- 635
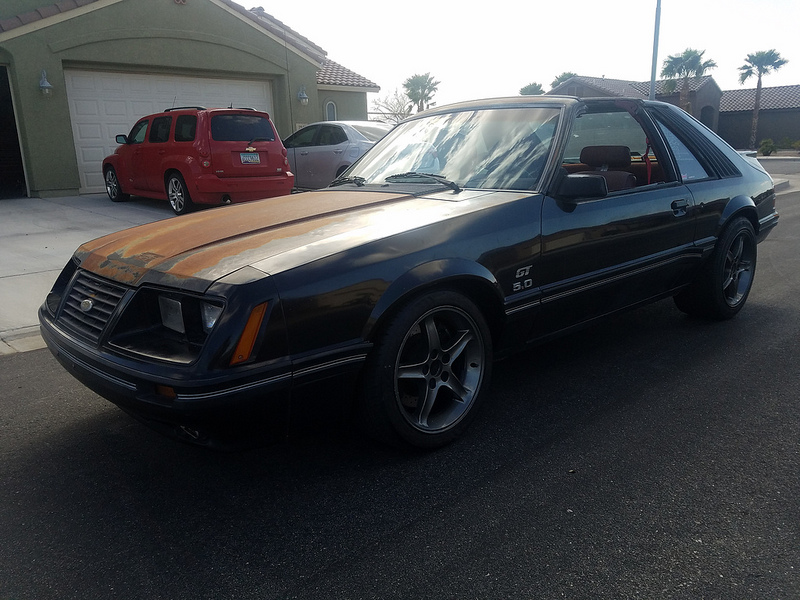
It Drives....Again
I was able to make quite a bit of progress over the holidays on the Rustang. I was out of town seeing family for Christmas, but while I was up there I was able to get the original control arms form the car rebuilt with new ball joints and poly bushings. After the holidays, we came back home and I was able to set about swapping them.
Since I'm well versed in taking the car apart now, It only took me a couple afternoons to get everything swapped out. It was actually fun, my now stepdaughter showed interest in working on the Rustang with me, so I was letting here help with the things she could. I can make a car girl out of her yet!
The only adjusting I had to do was to trim the inner tie rod ends shorter since they were too long. Even so, I ran out of threads while running the toe in, so I bought a set of Fox inner and outer tie rods to put in soon. But the car was good enough to drive, so I did!
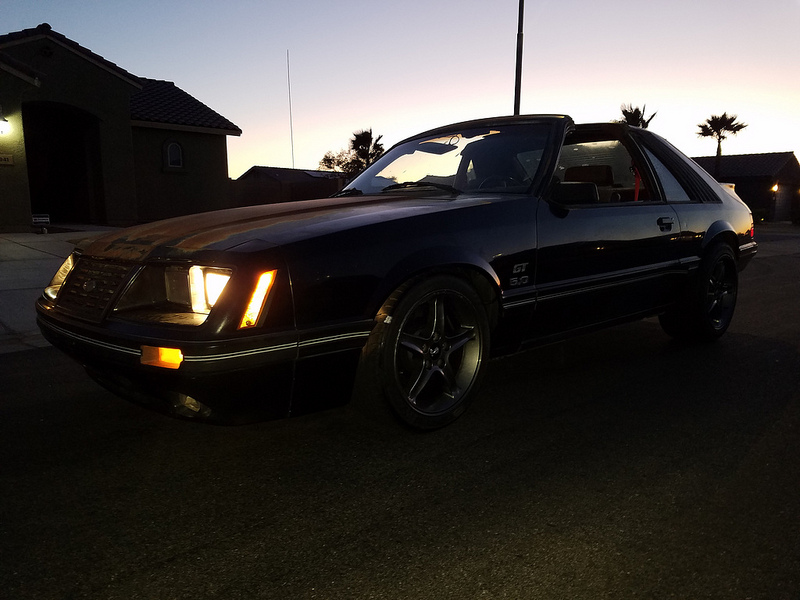 20190101_180502 by Nelson Wallace, on Flickr
 20190101_180510 by Nelson Wallace, on Flickr
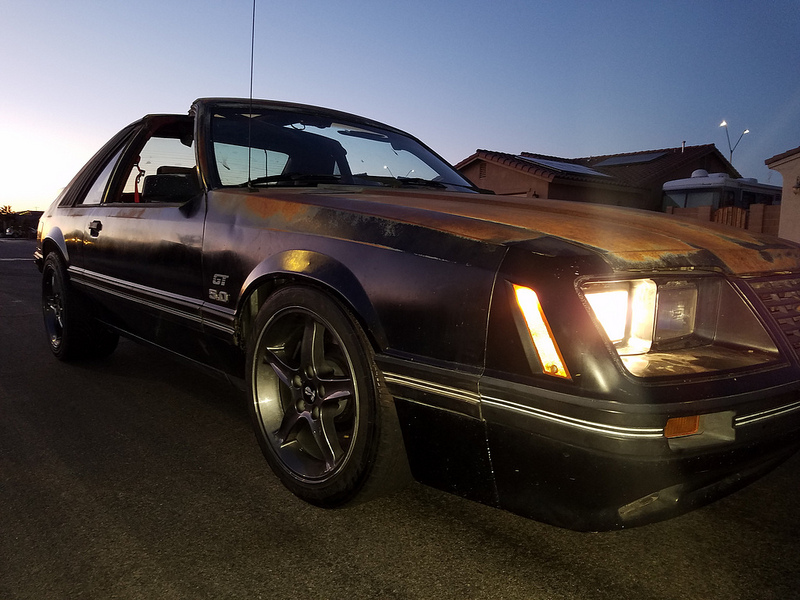
The car is actually sitting lower than before, but since the wheels are moved in there are no rubbing issues. I can turn lock to lock and have no issues. The car still turns super sharp like it did before, which makes me happy. As evidenced by my sharpie marks, no rubbing!
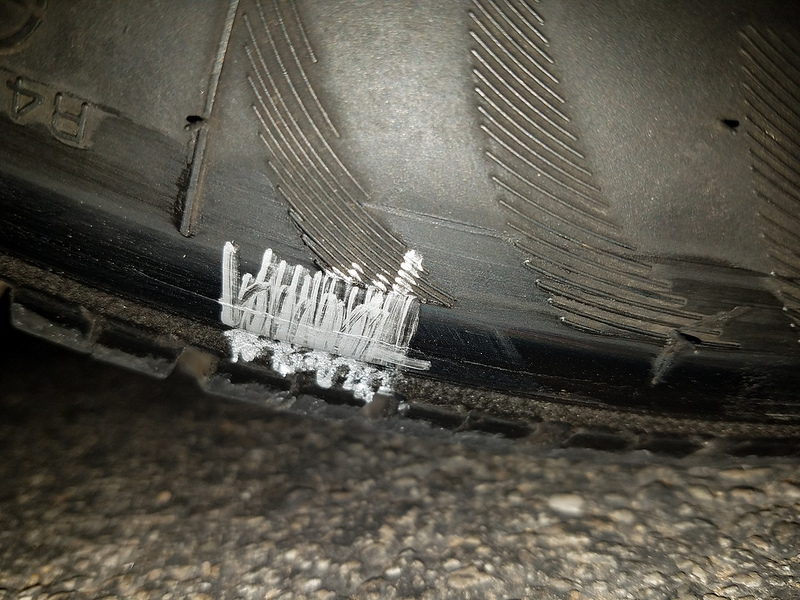 20190101_180520 by Nelson Wallace, on Flickr
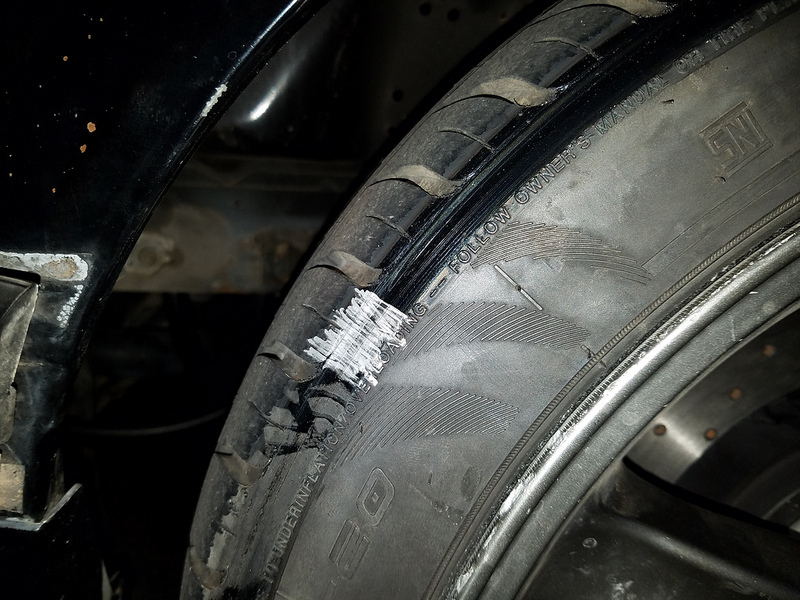 20190101_180528 by Nelson Wallace, on Flickr
Even after my short drive, it feels like I've created a monster. Even with shocks that are probably worn out, it feels like our Chevelle with ridetech shocks on it. I can't wait to get good shocks on it.
For now I need to get more camber in it. I've maxed out the plates, so I've got to get a solution to gain more camber from the struts. I'll pick away at that this weekend, and hopefully get is aligned soon so I can start driving!Nelson
1969 Chevelle "Cone Smasher" Family Project
https://www.pro-touring.com/threads/...uot?highlight=
1984 "Rustang" GT, 5.0, 5 Speed Project
https://www.pro-touring.com/threads/...T-(Slow-Build)
-
01-04-2019 #67
Registered User
- Join Date
- Jan 2016
- Location
- Chino Valley, AZ
- Posts
- 134
some struts have slotted ears at the spindle, allowing you to add or subtract a little bit of camber. Might be worth checking. I know with bilstein fronts, if you arent paying attention they tend to rest at the more positive camber side of the slot, so when you tighten all the bolts, you hurt your camber abilities (ask me how i know!). you may also be able to re-configure the spacer stack on your c-c plates to make sure no part of the strut is interfering with the inner fender/strut tower when maxing out camber. also, looking at a shot of the c-c plates on page 3, you have additional camber range in the plates. Originally Posted by WallaceMFG
-
01-04-2019 #68
Registered User
- Join Date
- Mar 2014
- Location
- Yuma, AZ
- Posts
- 635
Pretty sure they were not slotted, but that is what I will most likely do to gain some camber. I thought about using camber bolts, but I don't want to put a weaker fastener in that important of a place. Originally Posted by frink84
I forgot to add, while I had the car apart to swap the control arms I cut the top of the tower to gain more clearance for the strut. After that I put the c-c plates back in and got the car together and maxed out the camber adjustment. I think is still has positive camber as it sits, but not much.
Again, this goes back to the narrow K member in my opinion. I read several forums that stated this would probably happen with the early car, so I'm not shocked. Just need to figure out a solution now that doesn't involve a K member swap. For now if I can get 0.5-1* negative camber in it I will call it a victory.Nelson
1969 Chevelle "Cone Smasher" Family Project
https://www.pro-touring.com/threads/...uot?highlight=
1984 "Rustang" GT, 5.0, 5 Speed Project
https://www.pro-touring.com/threads/...T-(Slow-Build)
-
01-30-2019 #69
Registered User
- Join Date
- Mar 2014
- Location
- Yuma, AZ
- Posts
- 635
No pictures but progress is coming along!
I had to spend some time at my friends house to make some adapters for the Intercomp alignment tool to mount on the wheel. We got those done, so I brought the parts back down to Yuma with me.
Before starting the alignment, I had to address the lack of camber. I elected to pull off the struts and modify the mounting holes. A quick investigation showed that modifying the lower hole allowed for much more adjustment than the top hole, so I started working on them. After getting annoyed with a cheap die grinder and my wimpy compressor, I got frustrated and got out the drill & unibits. I punched out the lower hole as large as the smaller unibit would drill, then finished it with the larger one. All in all, it was much faster and did the trick. Once I reinstalled the struts I could tip the spindle in and tighten the bolts.
I reset the CC plates back to the middle of the adjustment range and settled the suspension. After modification, I ended up with -1* on the passenger side with the CC plate in the middle, and on the driver side I was at -1* but with the plate maxed out. Goes to show how not symmetrical cars can be. I will probably lift the car up and make sure everything looks good and maybe tweak on the drivers side more.
Otherwise, I did a rough alignment to set the toe so I could drive the car and took it out! Amazing how much better it drives with the suspension somewhat right. I got to claim my victory, now just need to finish up some small details and I can enjoy driving the car for a bit. I'll get some pictures next time I roll it out of the garage.Nelson
1969 Chevelle "Cone Smasher" Family Project
https://www.pro-touring.com/threads/...uot?highlight=
1984 "Rustang" GT, 5.0, 5 Speed Project
https://www.pro-touring.com/threads/...T-(Slow-Build)
-
02-18-2019 #70
Registered User
- Join Date
- Mar 2014
- Location
- Yuma, AZ
- Posts
- 635
Finally, reaching the point where I wanted to get the car before it gets hot.
The car was running like crap, likely from sitting for the better part of a year. I got a rebuild kit from a local hot rod shop and went through the carb. I also took the time to replace the fuel line from the pump to the car. I had been using the original hard line from the pump to the car, it was only 1/4". I got adapter to go from the inverted flare to -6AN and replaced the hard line with 3/8" hose. I would have liked to do real AN line, but I'll worry about it later. The car is still running rich, but no longer puffing black at idle. Need to get a wide band on it and see how it looks.
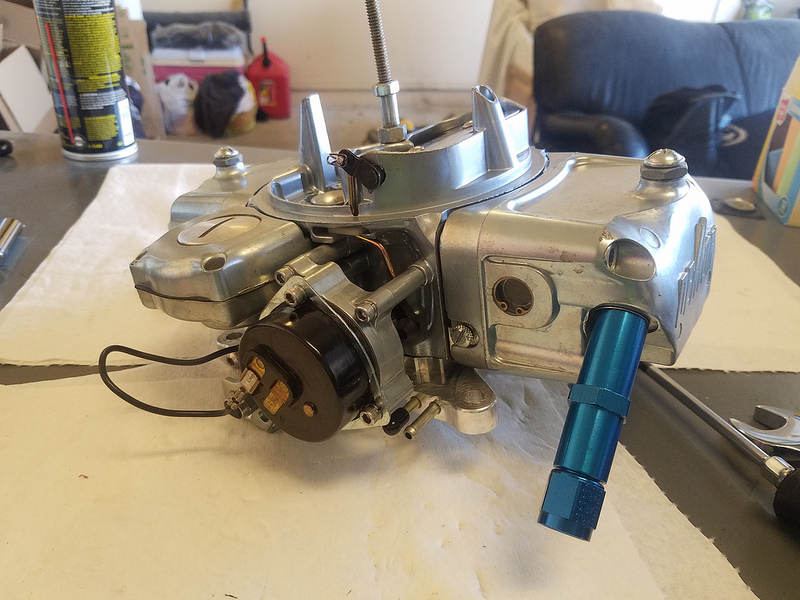 20190216_144749 by Nelson Wallace, on Flickr
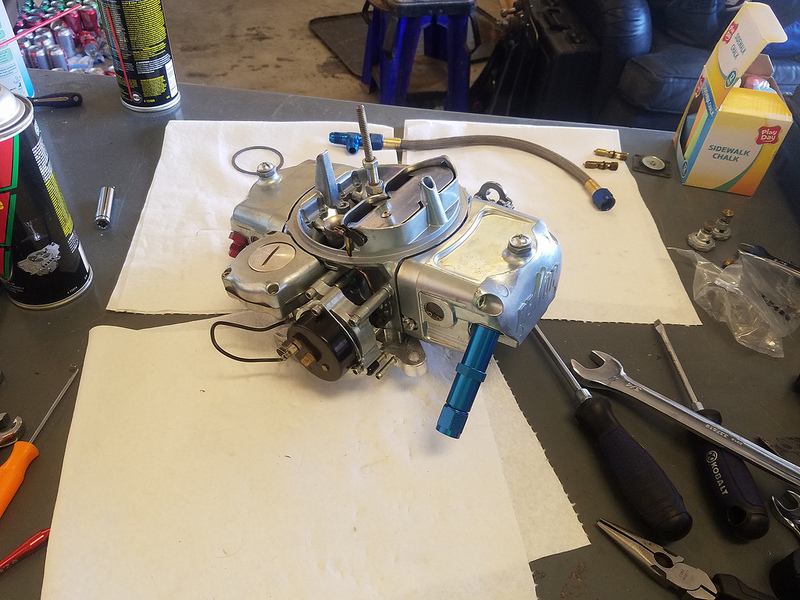 20190216_144751 by Nelson Wallace, on Flickr
Here's a quick pic of the alignment setup. I had to make these adapters at a friends house, the normal clamp on rim style hits the body when you try to measure caster.
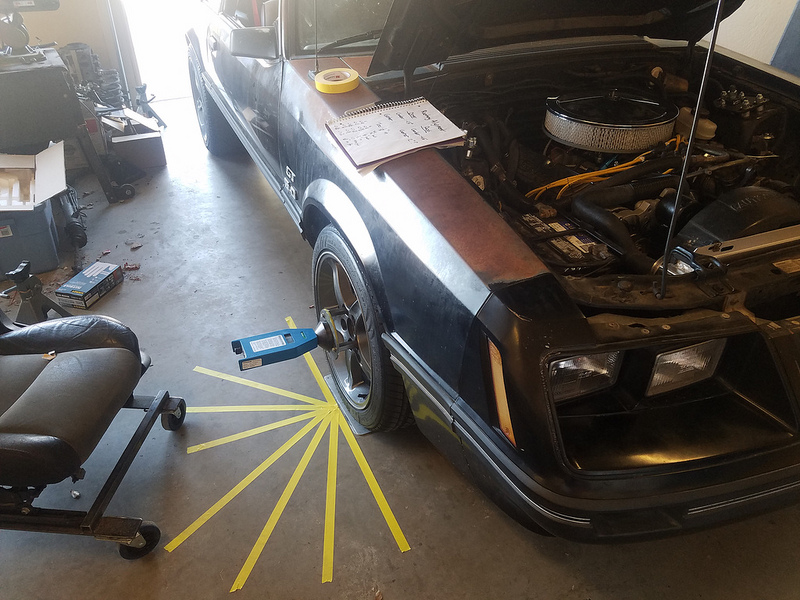 20190217_162603 by Nelson Wallace, on Flickr
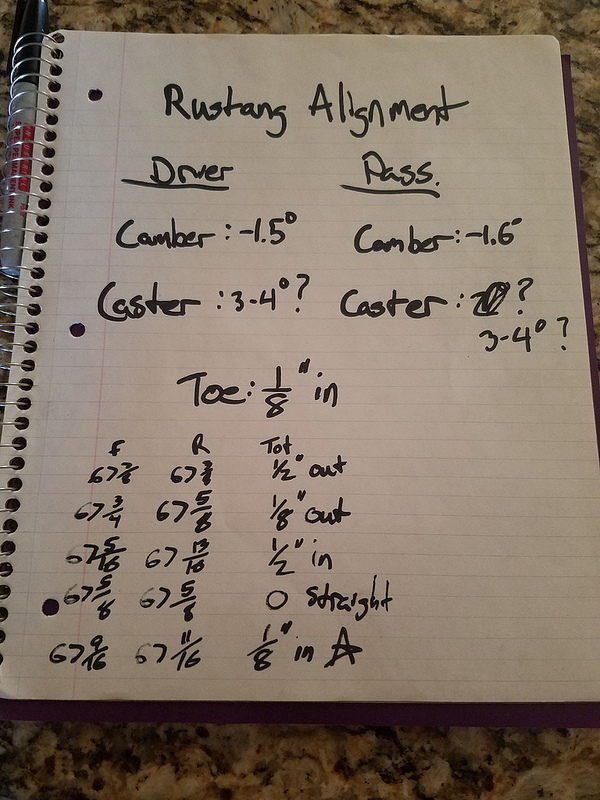
And here is what I ended up with for final alignment.
 20190217_173608 by Nelson Wallace, on Flickr
Took me a couple tries to get the toe right as you can see. And after my strut modifications, those camber numbers are with the CC plates in the middle of their adjustment range. So I can still do a track alignment if I want to! For caster, I just maxed out the plates and called it good. The process to check caster was a little complicated, and I did not have an accurate way to measure the wheel angle, so that is my guess for caster. I stuck with the "Caster is Faster" plan I was told at a ridetech seminar one time lol.
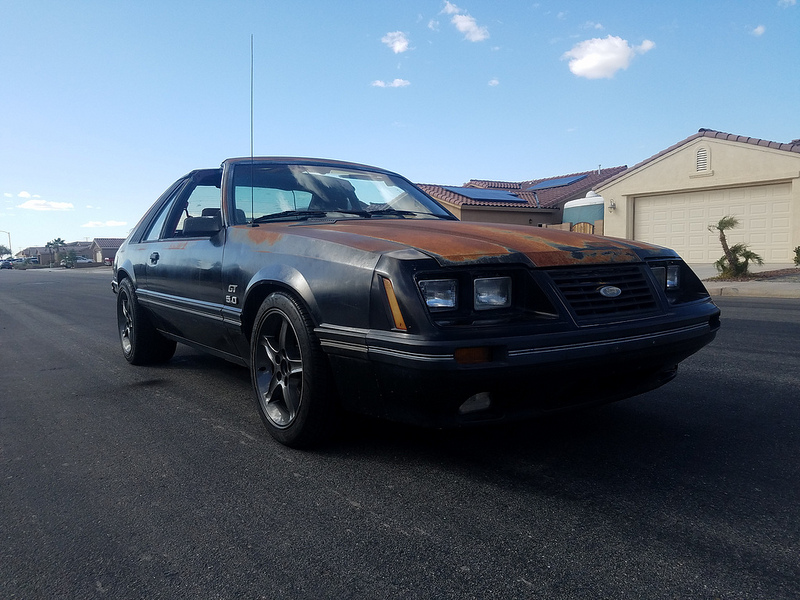
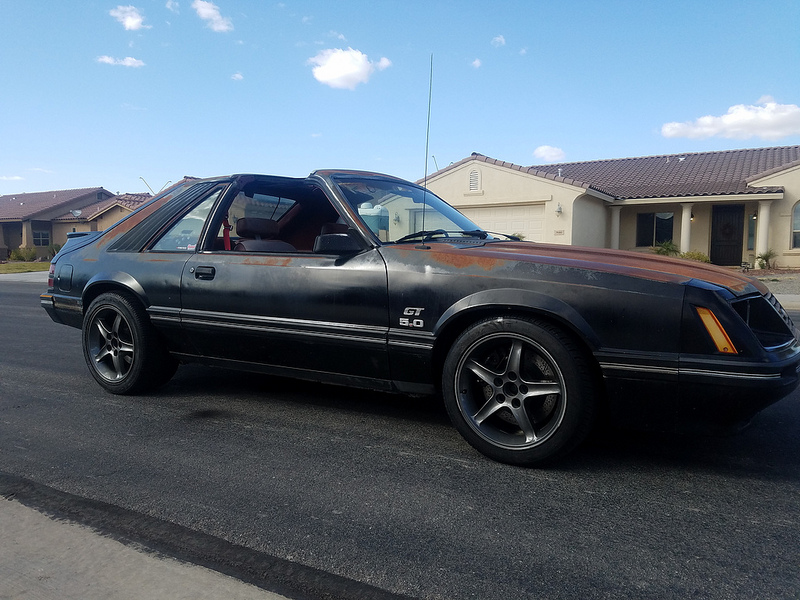
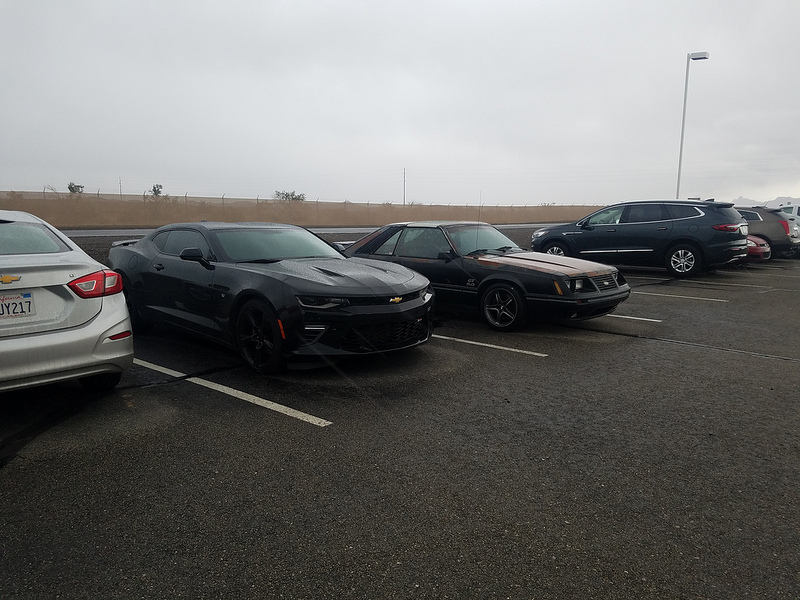
Here's the car out of the garage. Took it down to the gas station since it was empty and it drives pretty good. I can tell the rear shocks are shot, need to get some replacements. And the rear is still sitting too high, but I will leave it alone for now. I just want to drive the damn thing. However, I'm probably going to need some engine work in the future. There was a large cloud of blue smoke on startup, I think the valve guides are no good and taking out the new seals. Turns out junkyard head valve guides aren't very good, or they don't like 6,500 rpm a lot lol.
 20190217_152525 by Nelson Wallace, on Flickr
 20190217_152535 by Nelson Wallace, on Flickr
 20190217_152542 by Nelson Wallace, on Flickr
Nelson
20190217_152542 by Nelson Wallace, on Flickr
Nelson
1969 Chevelle "Cone Smasher" Family Project
https://www.pro-touring.com/threads/...uot?highlight=
1984 "Rustang" GT, 5.0, 5 Speed Project
https://www.pro-touring.com/threads/...T-(Slow-Build)
-
02-18-2019 #71
 Registered User
- Join Date
- Aug 2011
- Location
- Connecticut
- Posts
- 926
Cool build!
1967 Firebird "Poor-Boy Build"
New updated thread
https://www.pro-touring.com/threads/...bird-(Updates)
Follow me on Instagram @NaturalLivingMan
-
02-19-2019 #72
Registered User
- Join Date
- Jan 2016
- Location
- Chino Valley, AZ
- Posts
- 134
looking good! foxes always seem to sit high in the back. i went to coilovers for ultimate adjustability.
-
02-19-2019 #73
Registered User
- Join Date
- Mar 2014
- Location
- Yuma, AZ
- Posts
- 635
Thanks! Originally Posted by Buryingthesun
Originally Posted by frink84
Those are definitely in the future, just not in the budget at the moment. A full tank of fuel help the issue slightly lol.Nelson
1969 Chevelle "Cone Smasher" Family Project
https://www.pro-touring.com/threads/...uot?highlight=
1984 "Rustang" GT, 5.0, 5 Speed Project
https://www.pro-touring.com/threads/...T-(Slow-Build)
-
02-28-2019 #74
Registered User
- Join Date
- Mar 2014
- Location
- Yuma, AZ
- Posts
- 635
Nothing much to report at the moment, just been driving the car when I can. I took it to work last week, and it figures the time I can finally drive it, it rains lol.
 20190221_152620 by Nelson Wallace, on Flickr
That being said, I'm going to do a few things to the car. The rear shocks are definitely blown and need to go. I don't think the struts are much better. So I'm going to throw some cheap shocks & struts in the car just to make it behave better. I want to just go straight to Bilsteins, but can't do them at the moment. I figure now is a good time to do the struts since I will have to redo the alignment. While I'm at it, I'm going to take a little bit of camber out of it, the car is a little twitchy for street driving.
I also ordered a set of tail pipes for the car. Right now it has dumps, and the drone inside is horrible. I have to wear headphones when I drive it to work to keep my ears from hurting. The pipes should get rid of most of the drone, if not all of it.
I'm also going to pick away at small things here and there. Put a radio & speakers in, I found some LED headlights I like, I want to build a splitter. I also started drawing up door panels to see what I want the interior to look like. I'm going to try to keep the projects small for a while so the car can still be driven and have fun with it.Nelson
1969 Chevelle "Cone Smasher" Family Project
https://www.pro-touring.com/threads/...uot?highlight=
1984 "Rustang" GT, 5.0, 5 Speed Project
https://www.pro-touring.com/threads/...T-(Slow-Build)
-
02-28-2019 #75
Registered User
- Join Date
- Jan 2016
- Location
- Chino Valley, AZ
- Posts
- 134
Its all about the amenities! I lucked out in that converting the MAC exhaust to dumps didnt increase noise a crazy amount, and there isnt any additional drone. interested to see what you do for LED headlights.
-
03-18-2019 #76
Registered User
- Join Date
- Mar 2014
- Location
- Yuma, AZ
- Posts
- 635
In my case I'm guessing that the mufflers being small is the source of my drone. With no Cats in the system there is nothing except the mufflers to tone the exhaust down, and they are small lol Originally Posted by frink84
I actually ended up buying the entire cat back system from my co-worker. So now I have the headers, X pipe, and cat back from his car lol. It is a Pypes brand, unsure of the mufflers until I get my hands on it. I know it is a stainless system which makes me happy. He says his car was loud, but no drone so that is good enough for me.
As for headlights, I was going to give these a try: https://www.amazon.com/dp/B0748DPYD6...v_ov_lig_dp_it
I watched a video on youtube where a guy did a review, they look really nice. Have a good cutoff, and the high beams were epic.
I'm going to wire them up with relays and set them up for 4 on low / 4 on high, since they have a good cutoff they won't blind people. And obviously wire up the DRLs for daytime use.
Only other update is I threw a set of cheap struts in the car over the weekend and redid the alignment. I knocked the camber back to -1.2* on both sides, that is the spec Maximum Motorsport suggests for a street car. It seems to have helped, the car felt smoother and less twitchy on my short test drive. I've got rear shocks to put in, but I'm waiting until I have the cat back to put in and do it all at once.
Car is going on a spending ban for a while, the wife and I are taking our honeymoon in a few months and need to prepare for that. At least the car is road worthy!Nelson
1969 Chevelle "Cone Smasher" Family Project
https://www.pro-touring.com/threads/...uot?highlight=
1984 "Rustang" GT, 5.0, 5 Speed Project
https://www.pro-touring.com/threads/...T-(Slow-Build)
-
04-25-2019 #77
Registered User
- Join Date
- Mar 2014
- Location
- Yuma, AZ
- Posts
- 635
Pictures coming shortly, some small progress was made. I hauled the car up to Mesa over the Easter holiday since my dad had a lift installed in his shop. The thought of installing mufflers on a hoist instead of the garage floor sounded good. I also attempted to get the A/C working, and got the carb tuned up. Had a good weekend, I'll elaborate more once I get some pictures.
Nelson
1969 Chevelle "Cone Smasher" Family Project
https://www.pro-touring.com/threads/...uot?highlight=
1984 "Rustang" GT, 5.0, 5 Speed Project
https://www.pro-touring.com/threads/...T-(Slow-Build)
-
05-01-2019 #78
Registered User
- Join Date
- Mar 2014
- Location
- Yuma, AZ
- Posts
- 635
Tuns out I didn't take any pictures while installing the tailpipes, so nothing to show there. However, I did grab a quick idle clip to show the sound difference.
It is a Pypes Stainless system with Violator mufflers. Overall I'm very happy with the muffler swap. I loved the Spintechs crackle, but the drone was horrible. I didn't realize how bad it was until the new pipes were in. This setup is dead silent inside at idles, and even cruising there is no drone. The car is still loud when you stand on it, so I'm happy.
My Dad helped me with tuning the carb, an area I am very inexperienced at. With his help we were able to get the car from idling at 10:1 and 1200 rpm down to 13.5:1 at 800. The car sounded much better and was no longer smoking out the pipes. After I got the vacuum advance hooked back up and final adjusted the carb the idle was sitting at 14.5:1 at 800 rpm. I'm thrilled to have the carb under control, it feels like a whole new car. I've got a wideband rigged in the car, i'm going to see how it is under power to see if my jet change made a difference.
While up there I also attempted to get the A/C working. When I took the engine out, the system still had refrigerant in it, so I thought all I needed to replace was the one hose that had split and put back together at some point. I got a new hose, and some new refrigerant to try. It is called Envirosafe and it is a HC (Hydrocarbon) based refrigerant. It is compatible with both R12 and R134a refrigerant & oils. Here is a link to a website with more info: https://autorefrigerants.com/hydroca...n-refrigerants
It was cheap enough on Amazon and I read enough to think it was worth a try. So we replaced the hose and evacuated the system and it held. But, as soon as we started putting refrigerant in the front compressor seal failed and it all came back out so we had to give up on that until I can get a new compressor.
Otherwise, all went well until I got the car home. The other day I took my stepdaughter to school, and when leaving, the clutch pedal went to the floor and didn't come back. The clutch was still engaged fine, so I assume the cable snapped. I was able to drive the car home without the clutch, difficult but doable. I haven't had a chance to look at the car yet to see what the cause is.
The other thing is I'm worried the motor might be starting to knock or have lifters failing. Now that the car is quieter, I'm hearing more noise from the engine that I couldn't before. When driving between 2000-3500 rpm I can hear a tapping noise from the engine. If the engine is under load it seems to go away, it is most prevalent under light throttle. I don't think it is detonation, the timing is 12 base, 20 mechanical, not sure how much vacuum gives, so about 32* total with no vacuum advance. I always run 91 octane in it. There is no noise at idle and I cannot recall if I heard it at WOT, but the car gets loud and I probably wouldn't hear it anyways. I might try undoing the vacuum advance and see if it is better, or back the timing off a bit. It needs an oil change, so I'll see how it looks on the way out. And probably step up from 5W30 to 10W40 or 20W50.Nelson
1969 Chevelle "Cone Smasher" Family Project
https://www.pro-touring.com/threads/...uot?highlight=
1984 "Rustang" GT, 5.0, 5 Speed Project
https://www.pro-touring.com/threads/...T-(Slow-Build)
-
05-03-2019 #79
Registered User
- Join Date
- Mar 2014
- Location
- Yuma, AZ
- Posts
- 635
Well I hopefully discovered the source of the clutch issue. I was messing around with it, and by using a pry bar on the clutch fork I was able to cycle the clutch like normal. So the pressure plate appeared to be fine, I turned my attention to the clutch cable. I used some washers and vise grips to take up the slack in the cable, and the clutch operated normally. So I assumed the cable had started tearing and took it out. On the firewall side of the cable the inner sections had pulled through the mount, effectively making the cable too long.
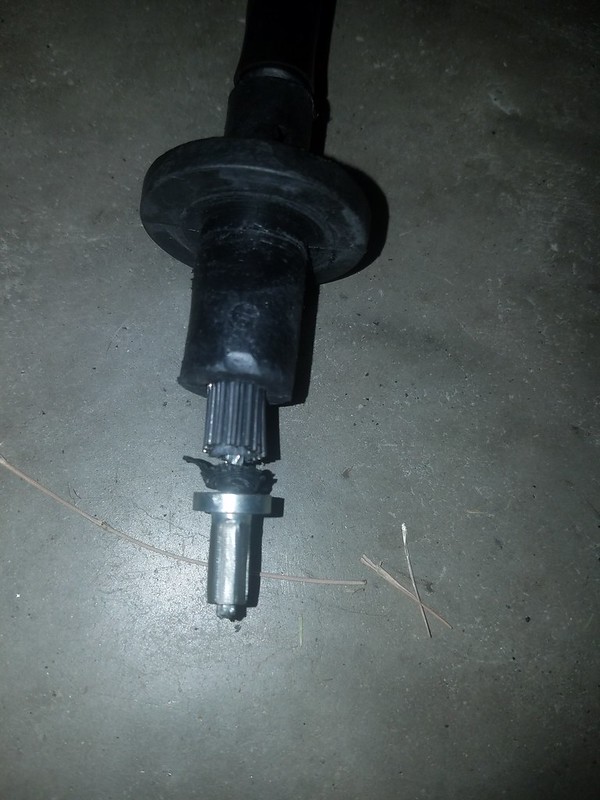 20190502_190137 by Nelson Wallace, on Flickr
I think the cable has also stretched, I've already had to adjust it a couple times and add some shims because my adjuster was hitting the brake booster. It was a cheap cable, so I ordered a replacement from Maximum Motorsport. Hopefully this gets the car back on the road.
I also found a rebuild kit for my A/C compressor, so I plan to get that and continue trying to get the A/C working.Nelson
1969 Chevelle "Cone Smasher" Family Project
https://www.pro-touring.com/threads/...uot?highlight=
1984 "Rustang" GT, 5.0, 5 Speed Project
https://www.pro-touring.com/threads/...T-(Slow-Build)
-
05-06-2019 #80
Registered User
- Join Date
- Jan 2016
- Location
- Chino Valley, AZ
- Posts
- 134
MM clutch cable should be a worthwhile upgrade. I would pay special attention to how its run when you install it. MM's instructions are pretty detailed, but in general keeping it away from heat and tight turns is the name of the game.
-

 Reply With Quote


