


Results 1 to 14 of 14
Thread: Rozelle Camaro USCA Buildup
-
01-01-2015 #1

 Registered User
- Join Date
- Mar 2012
- Location
- Orange County, CA
- Posts
- 40

Rozelle Camaro USCA Buildup
Hello everyone,
Many of you already know me or are familiar with the car but I thought I would do my best to share what has gone into our Camaro throughout the past year to take it from the car that was a basic driver with bolt on parts to the beast it is today.
[FONT=Arial][URL=[/FONT]http://s346.photobucket.com/user/jak...a019.jpg.html]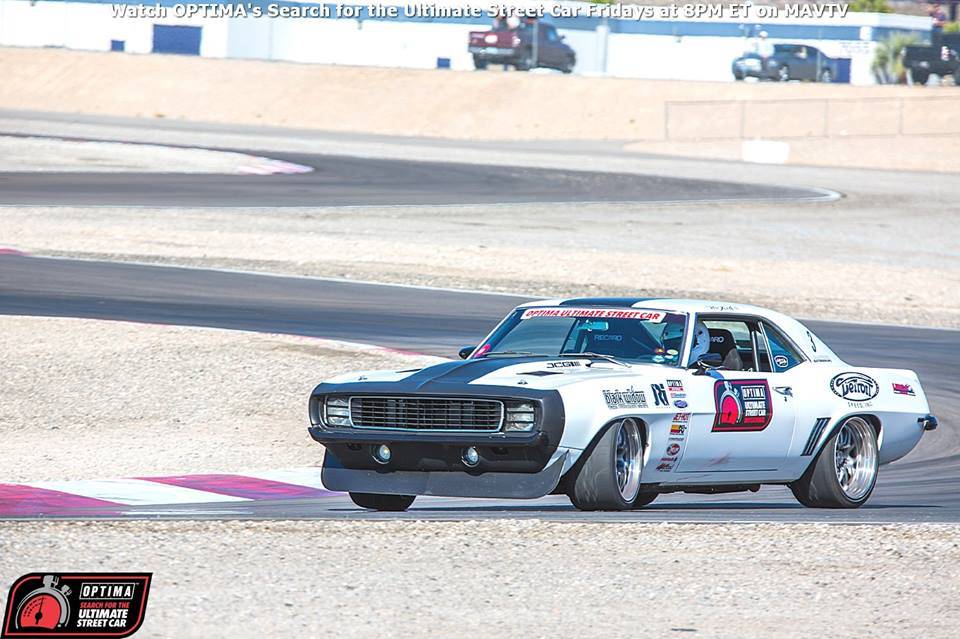 [/URL]
Just a quick note, for the most current information on our racing and the car make sure to follow me on instagram @jakerozelle and on Facebook! You can also check out my website: http://jakerozelle12.wix.com/jakerozelleracing
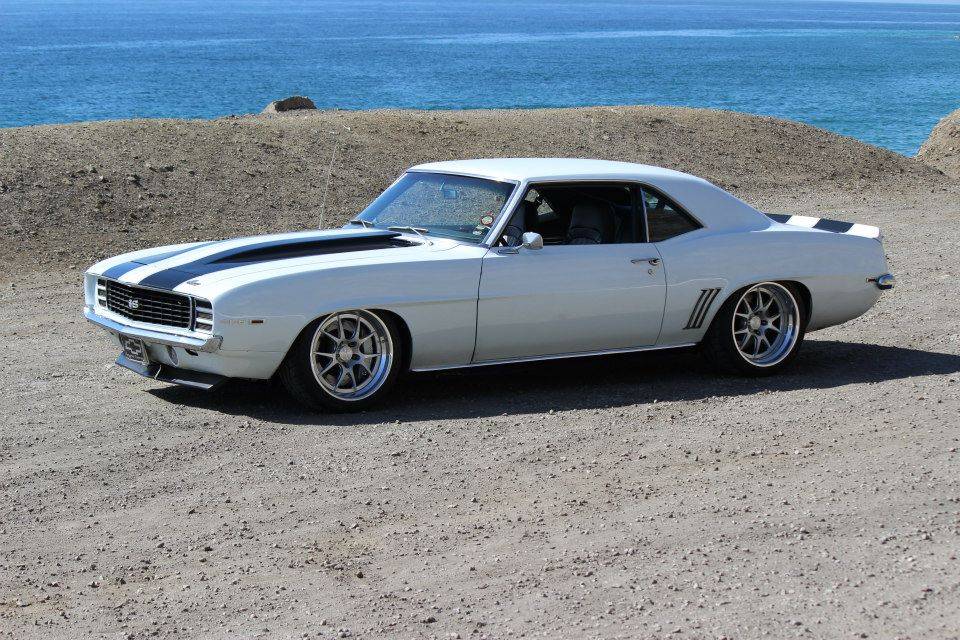
To start my name is Jake Rozelle, I grew up racing motorcycles off road in Southern California with my dad Roy and this year switched over to primarily competing in cars, focusing on the USCA series while also doing Goodguys and countless local autocrosses. My dad bought this 1969 Camaro RS for his 40th Birthday 10 years ago with the white paint and the black stripes already on it. I was only 10 years old at the time.
Throughout the first 9 years of ownership we did purely bolt on mods, outfitting the car with front Global West tubular control arms and their rear leaf springs. We also upgraded the brakes with c5 corvette components and my dad had a 536hp 400ci gm bow tie block small block built that found its way into the car. The car rode on American Racing hopster wheels with 245/18 front tires and 275/18 rear tires with Falken rubber. We began autocrossing the car like this and that is where it all started.
[FONT=Arial][URL=[/FONT]http://s346.photobucket.com/user/jak...1cf1.jpg.html]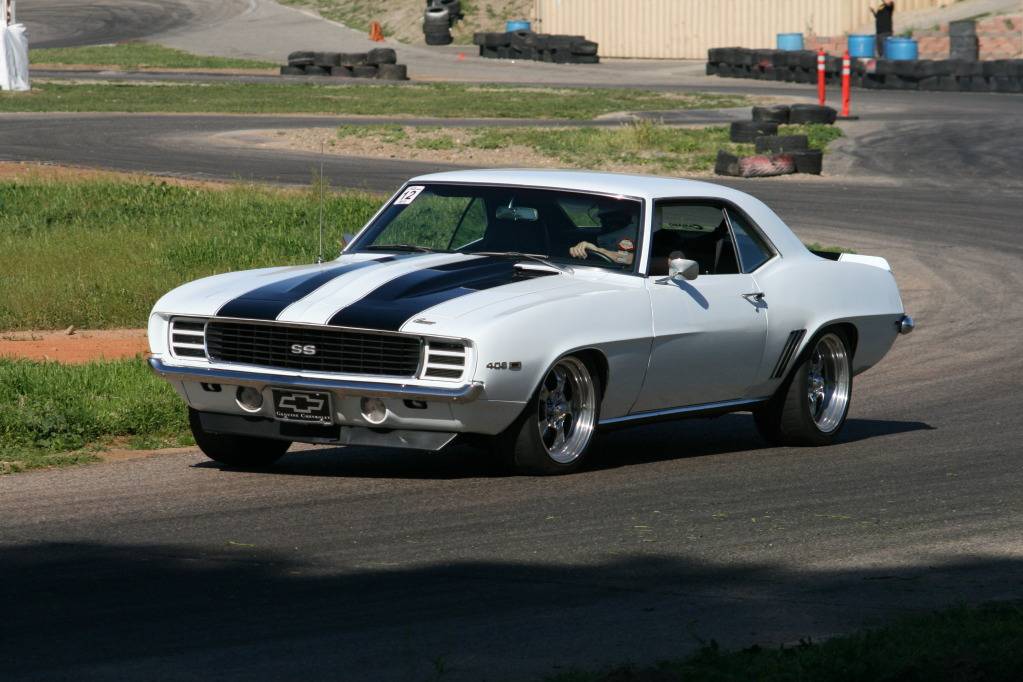 [/URL]
Jake Rozelle
@jakerozelle
jakerozelle12.wix.com/jakerozelleracing
-
01-01-2015 #2
Registered User
- Join Date
- Mar 2012
- Location
- Orange County, CA
- Posts
- 40
After deciding to get more involved in driving, we turned to Cris at JCG Restorations and Customs. We put together a plan to simply mini tub the car and add the DSE four link which would allow us to run a 315 rear tire. Since new wheels were in order, we turned to Forgeline and ordered their GA3R three piece wheels in a brushed finish center with polished lips.
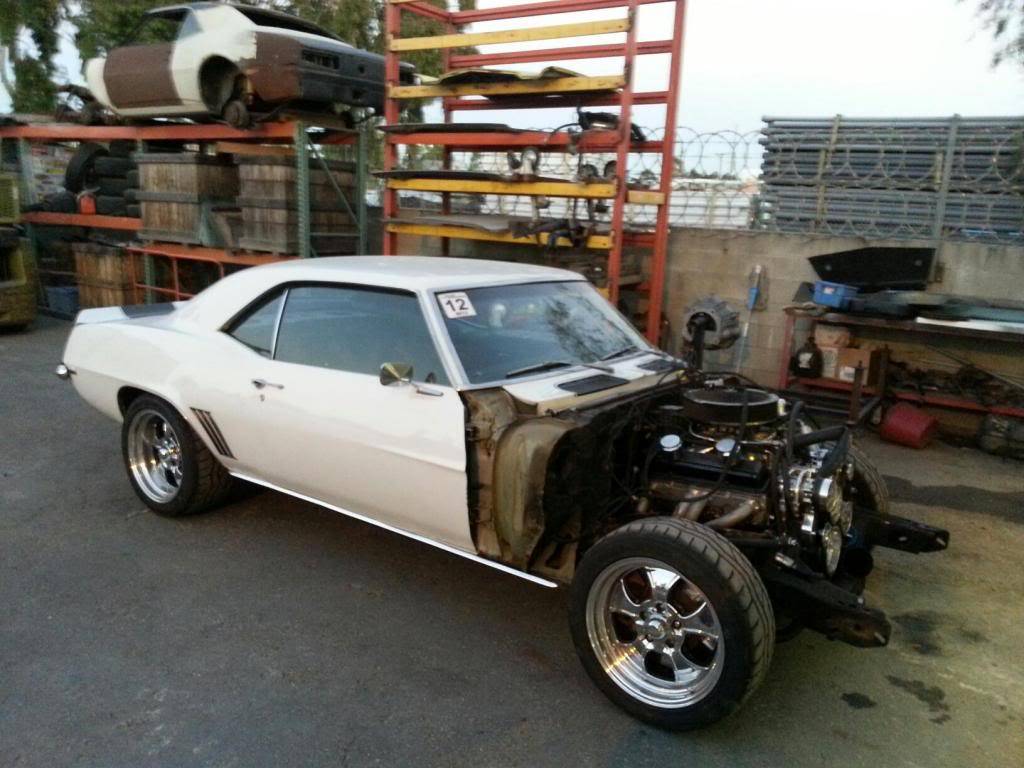
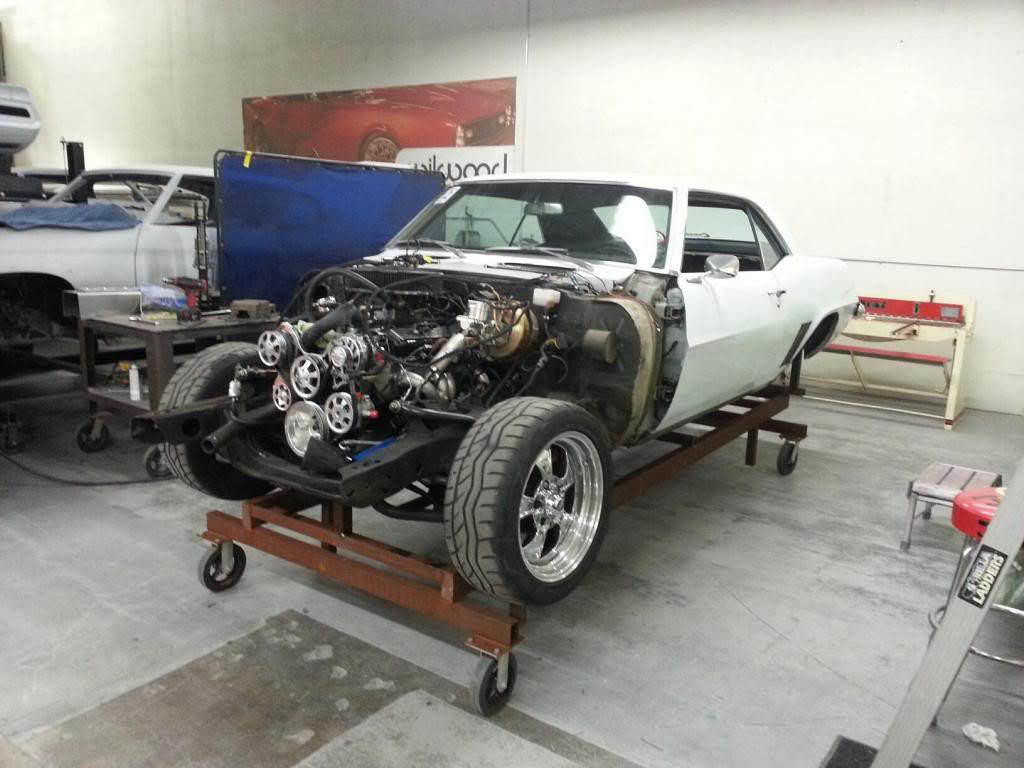
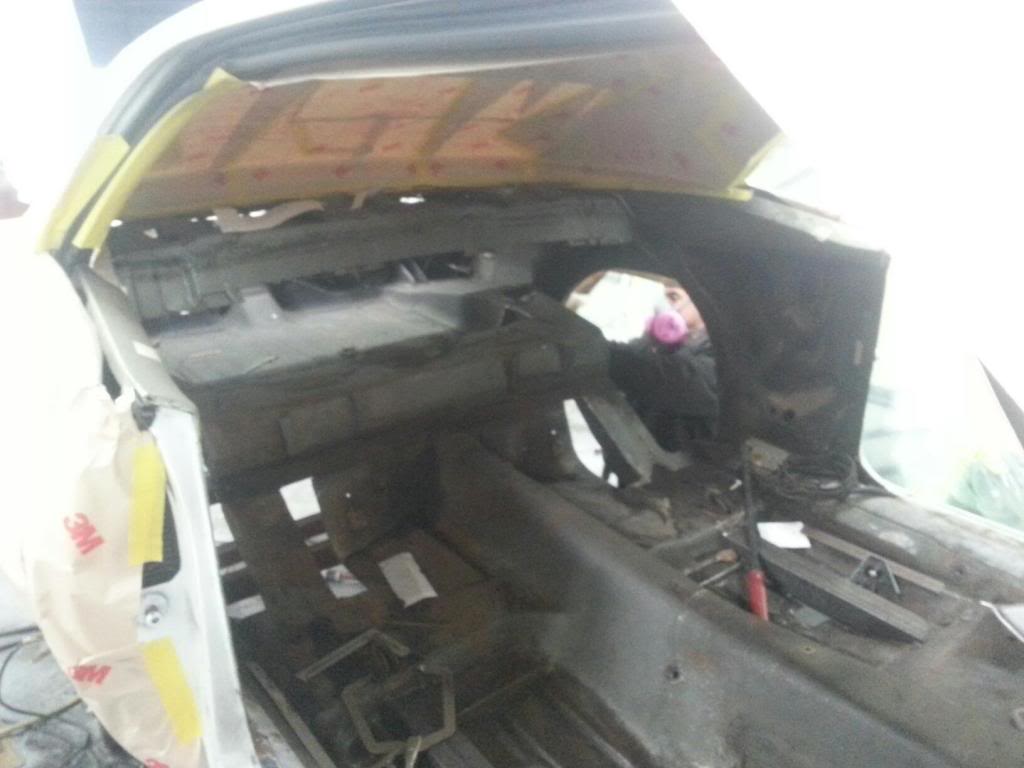
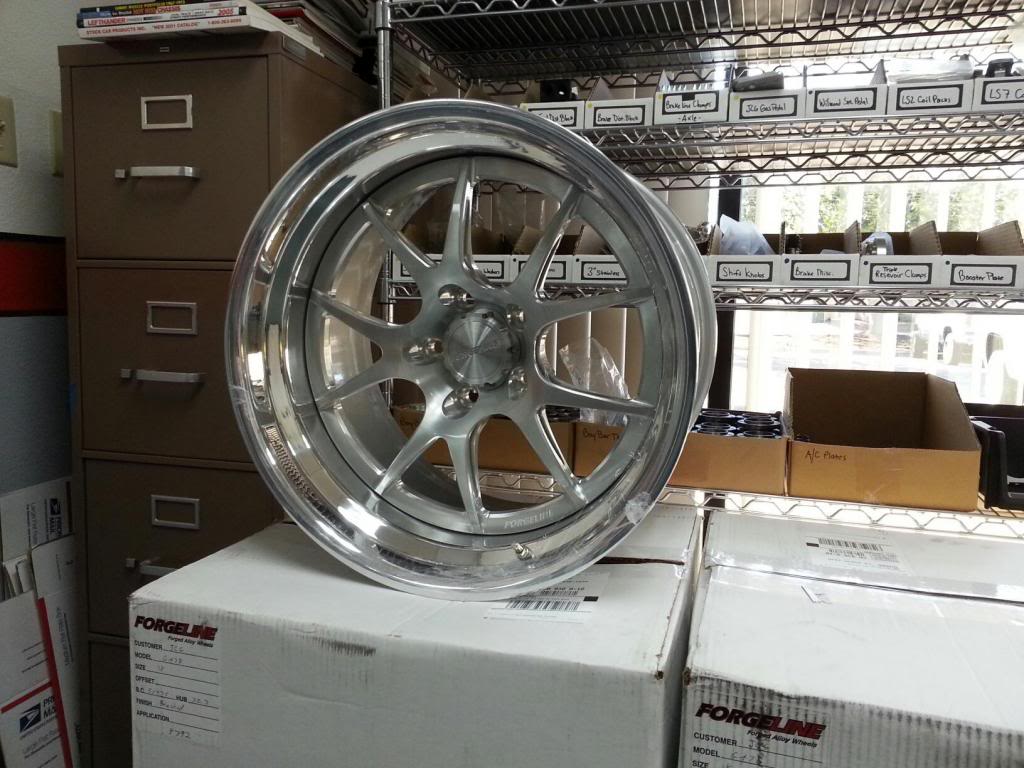
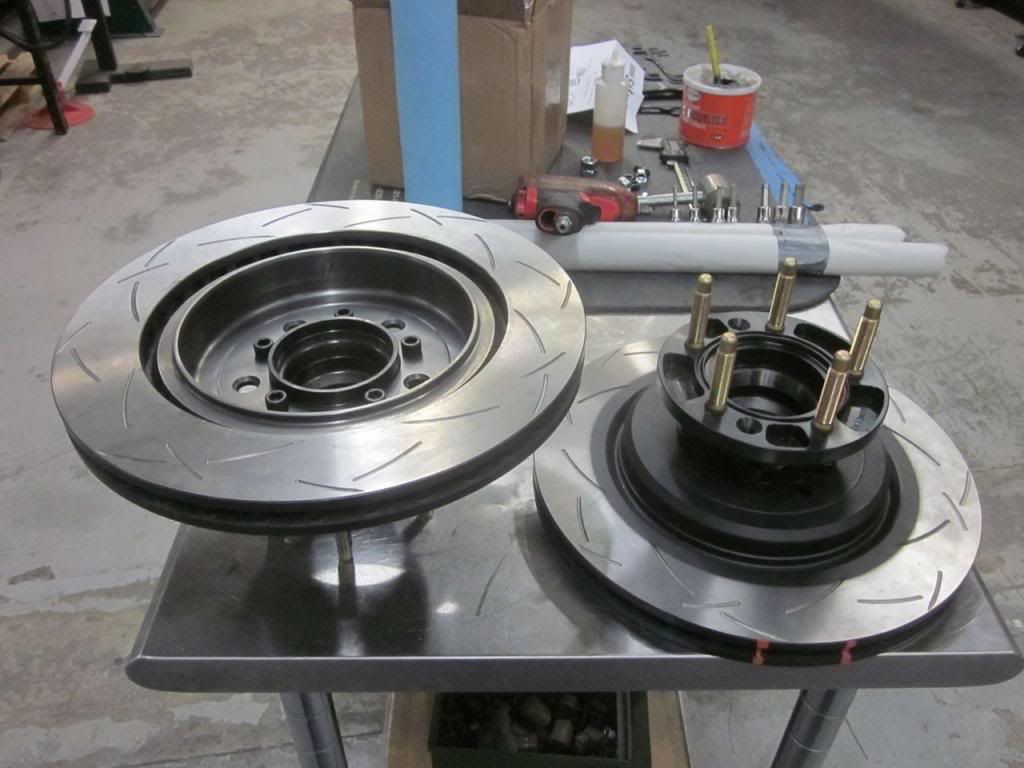
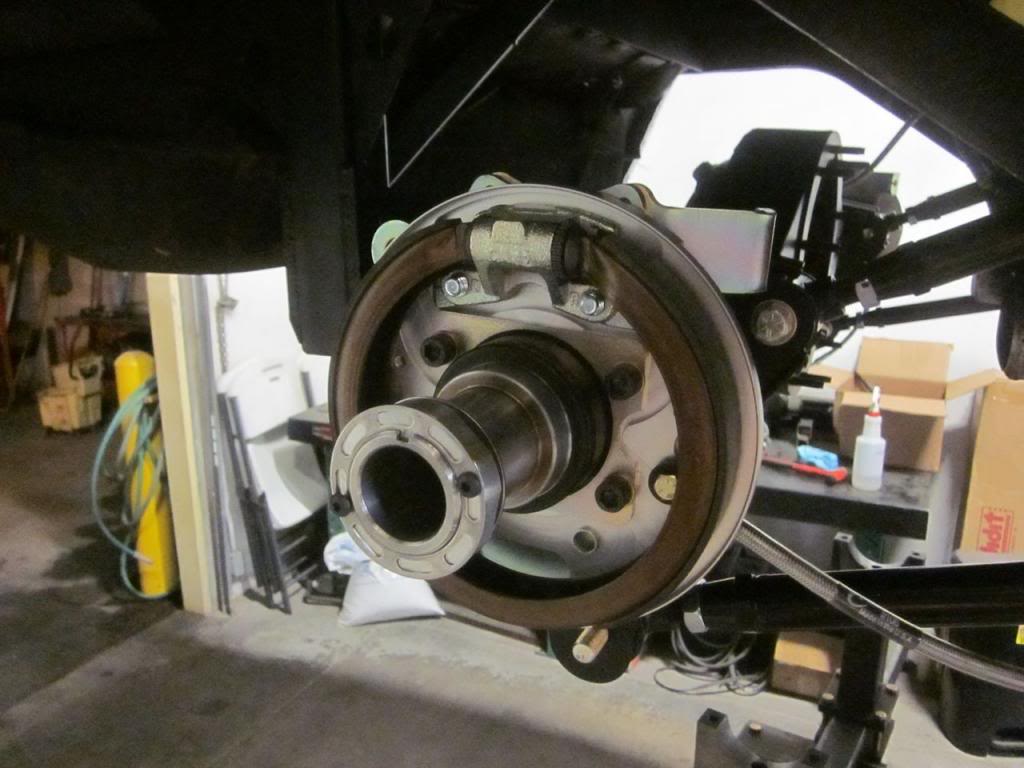
Since the rear end was coming out we upgraded to a Ford 9 inch with a Speedway full floater system. My dad LOVES parking brakes, something Cris and I always joke about but it was important to him that this car has one so it does. To do so took a little creativity since we were using C6 Corvette Z06 brakes from Kore3. However with a little thinking from us, Cris, and Tobin at Kore 3 this car has an amazing stock-style parking brake and everyone is happy! The rear end is also equipped with a gear driven pump to an oil cooler for extended track sessions.
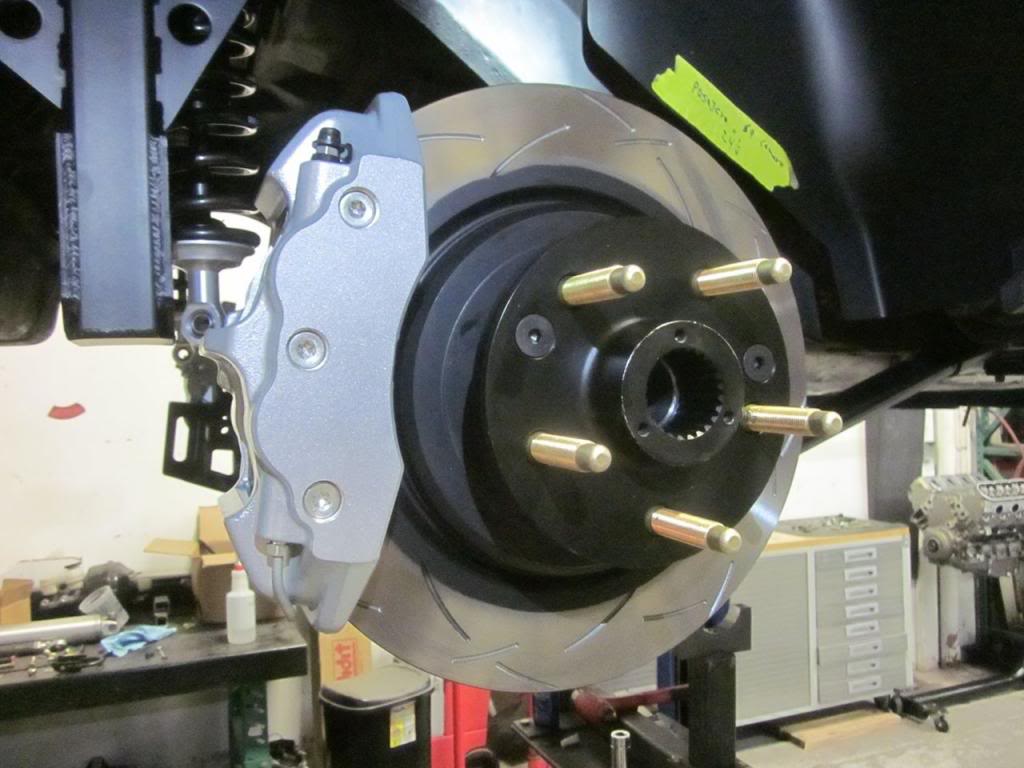
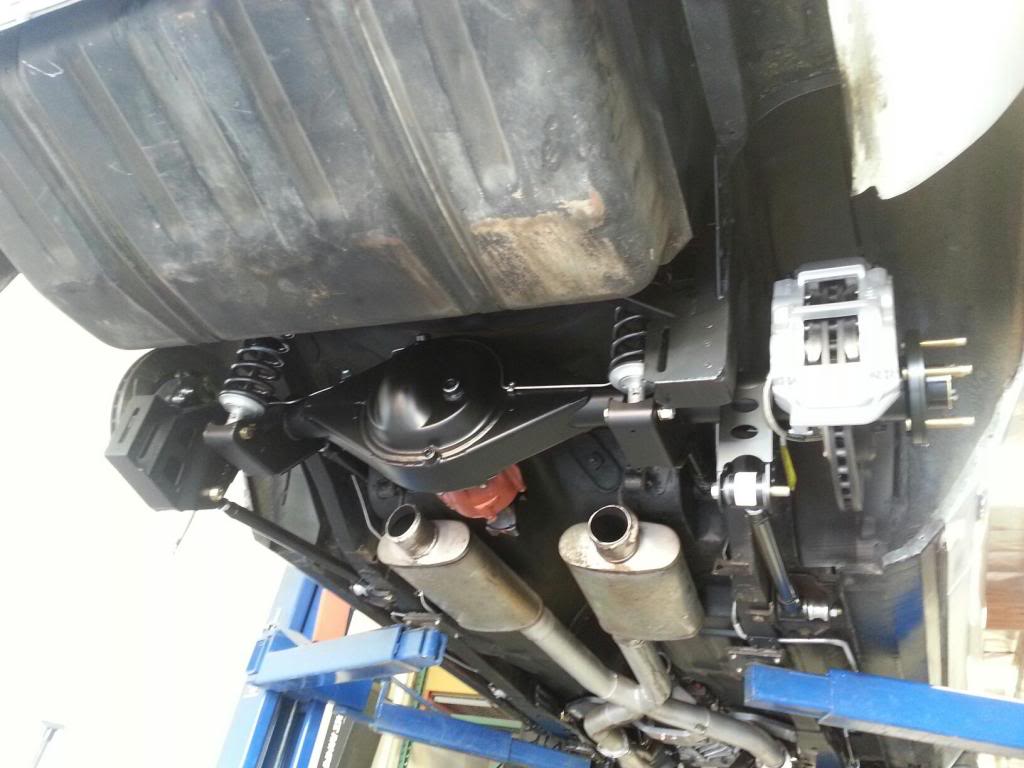
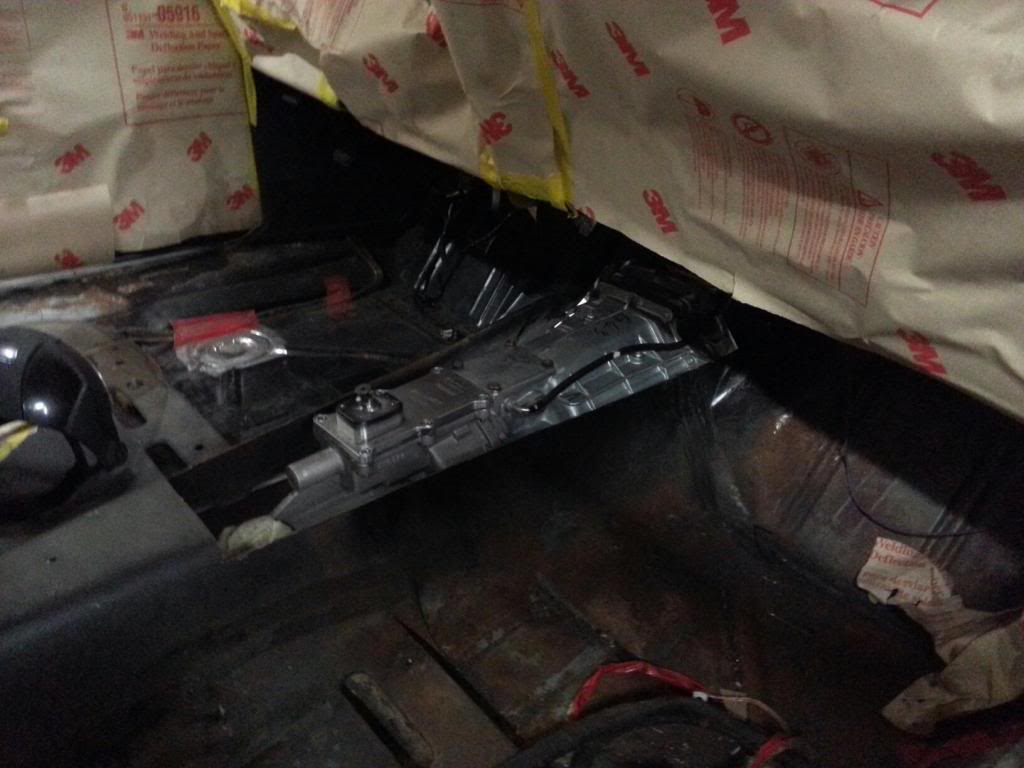
At this point in the story is where things started getting a bit out of control. Cris is a darned good salesman and convinced my dad that adding The Detroit speed hydroformed subframe would be the ‘right’ way to build the car to make it ‘balanced.’ Of course he was right so out came the old and in with the new. He also smoothed the firewall while he was at it.
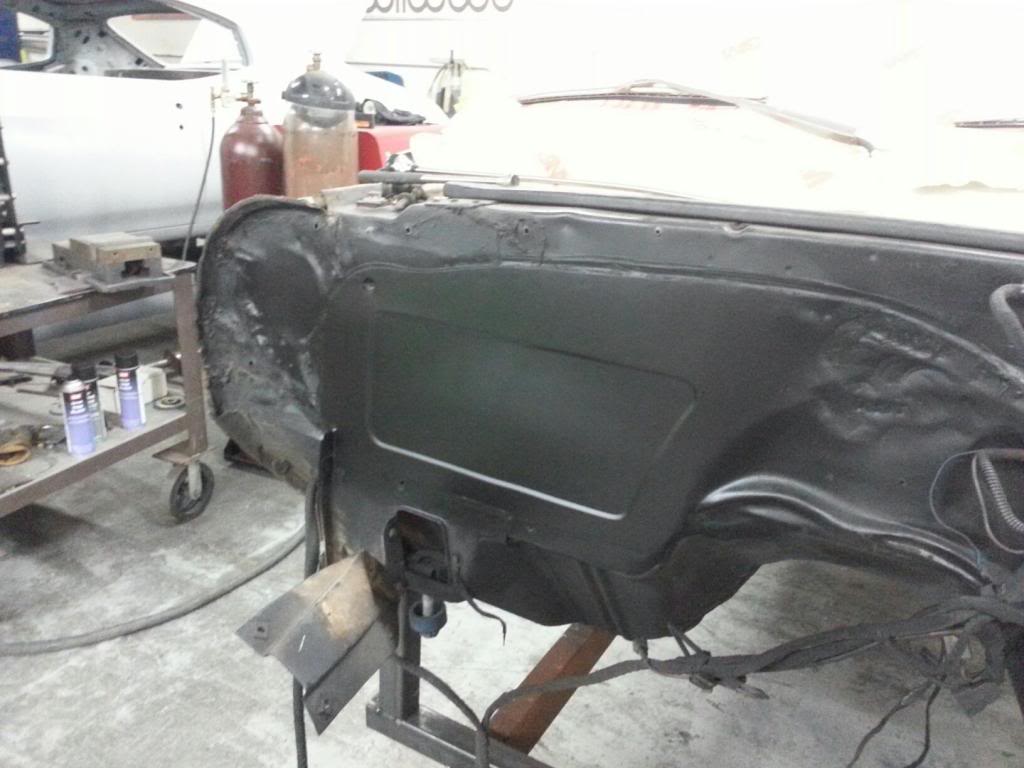
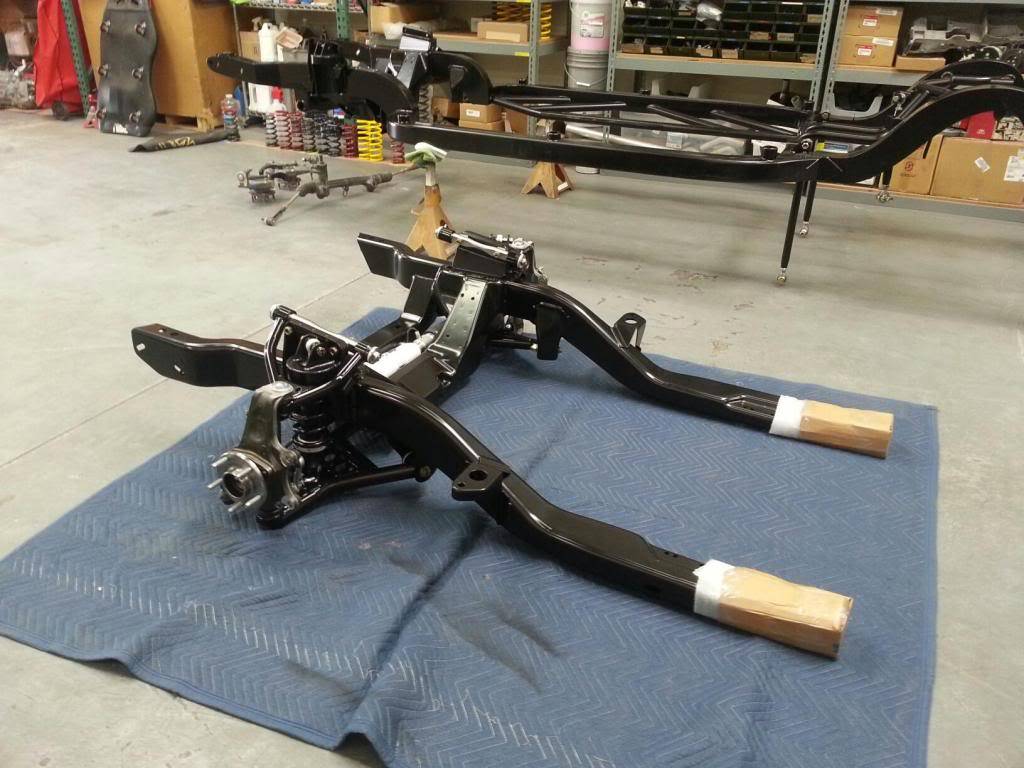
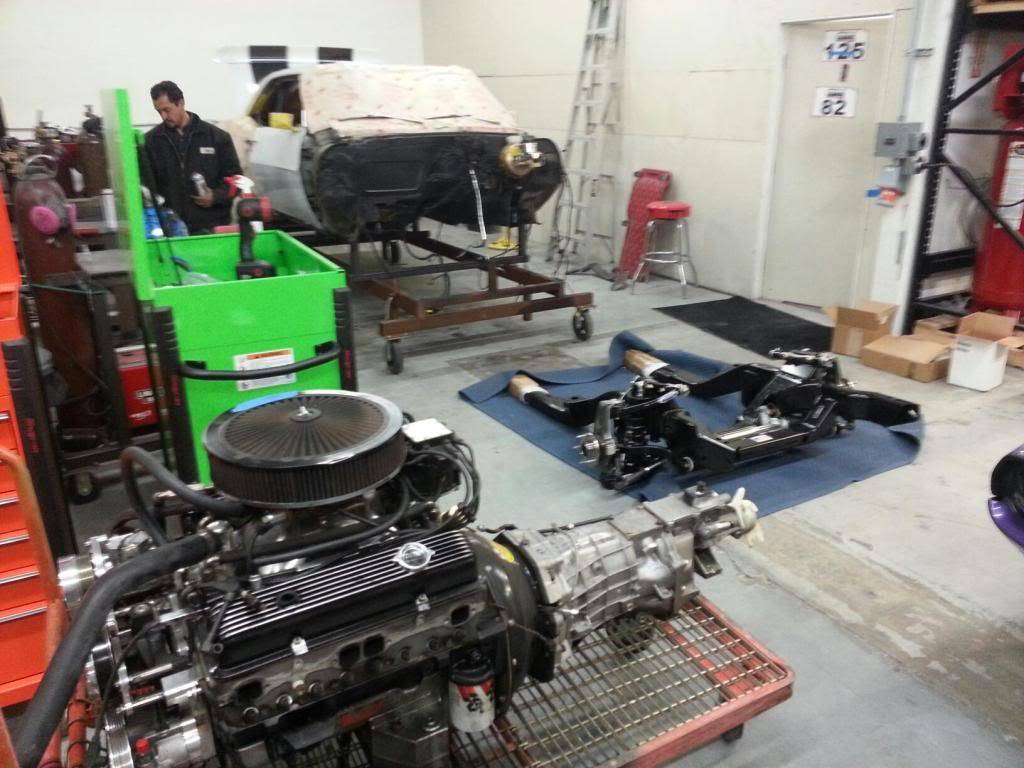
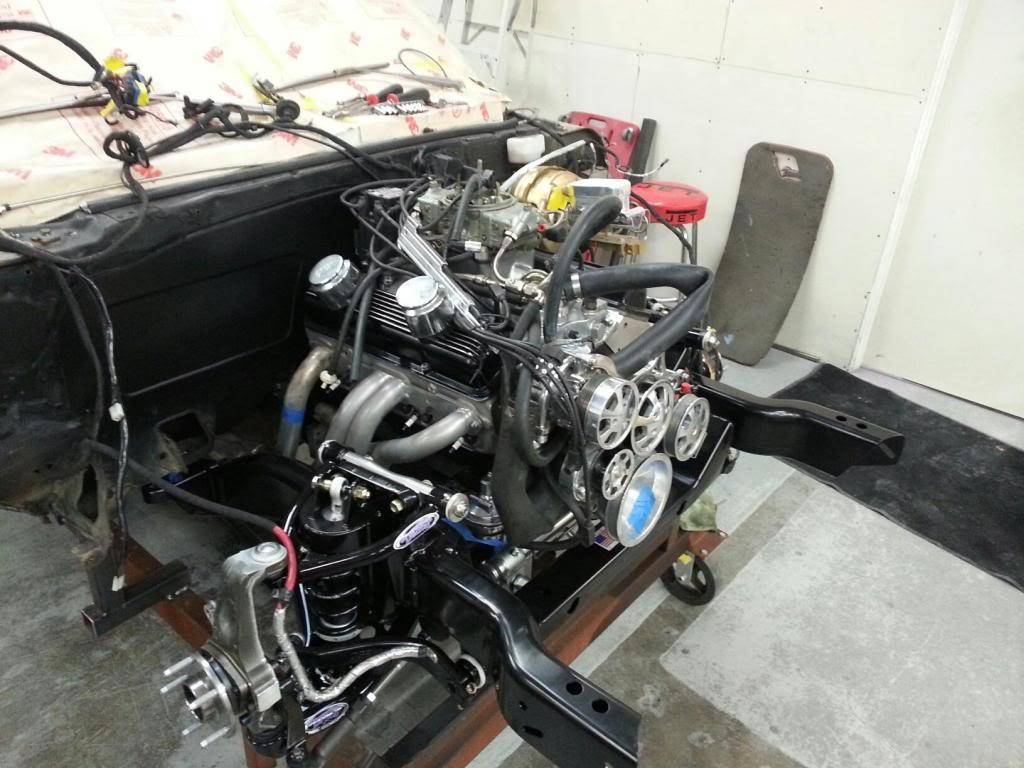
I don’t think I mentioned it already but the car already had a tremec t56 magnum that had been installed a few years earlier.
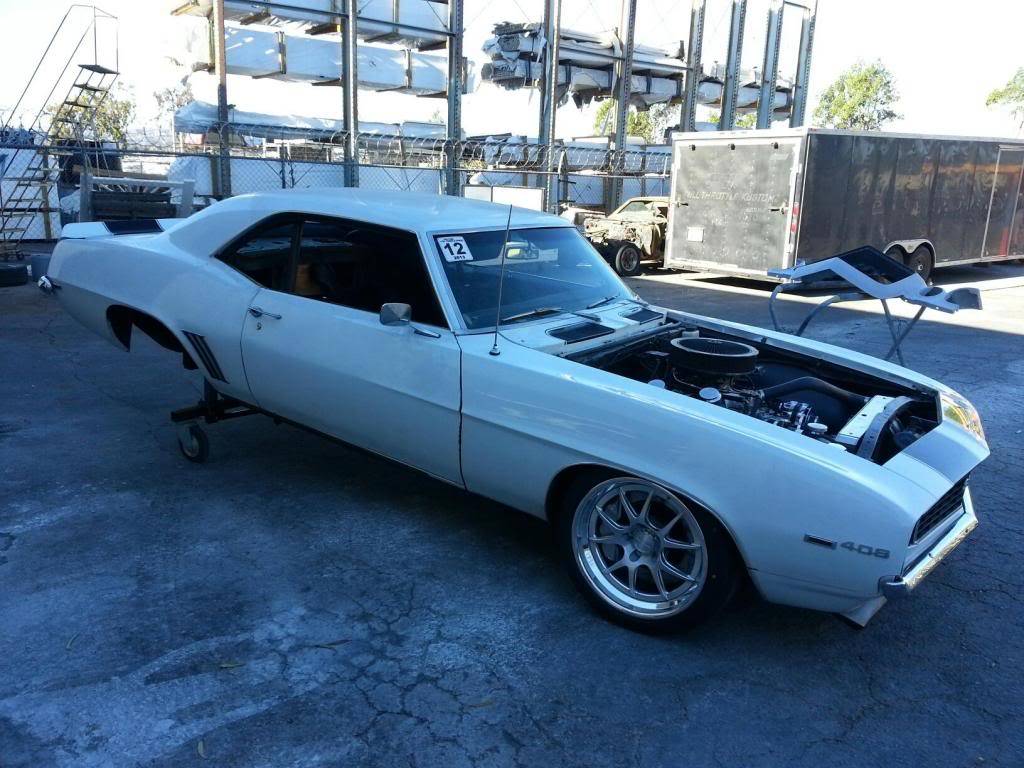
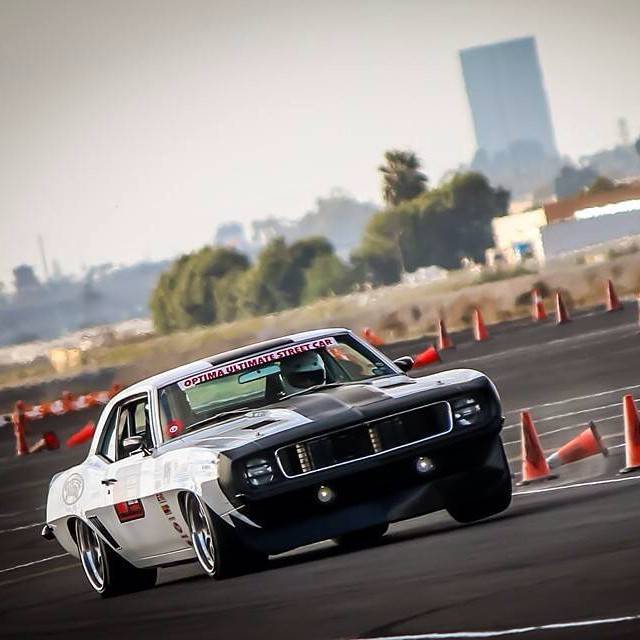
With the new wheels(Forgeline GA3R), wider tires front and rear (275/315) and the Detroit Speed Subframe and quadralink the Car went back together and was ready for its first test which is where I will leave it for tonight. I hope you all enjoyed it and I will continue to post more if there’s interest!
One last gratuitous completed pic:
 Jake Rozelle
@jakerozelle
jakerozelle12.wix.com/jakerozelleracing
01-02-2015 #3
Registered User
- Join Date
- Jul 2014
- Posts
- 29
406 Emblems
Car looks great, where did you get the 406 emblem you have on side? I have a 406 in my 69 Camaro and would like to get a set of these.
01-02-2015 #4 Registered User
- Join Date
- Nov 2008
- Location
- Lawrenceburg, TN
- Posts
- 4,098
I remember when it looked like this out at the Adams track...
 Originally Posted by JakeR.

01-02-2015 #5
Registered User
- Join Date
- Jul 2011
- Location
- Costa Mesa
- Posts
- 63
Jake, do you happen to have a current sound clip of your Camaro? Originally Posted by JakeR.
01-02-2015 #6 Registered User
- Join Date
- Mar 2013
- Location
- Oakdale, Ca.
- Posts
- 192
Car looks great!
George Dias
1973 Camaro
2002 SVT Lightning
2003 Z06 Corvette
2015 Truckin Throwdown Champion http://www.trucktrend.com/events/tru...by-ebc-brakes/
01-02-2015 #7
Registered User
- Join Date
- Mar 2012
- Location
- Orange County, CA
- Posts
- 40
Rodney those were the good old days when I wasn't even old enough to sign my own liability waivers! haha good times.
Freedom_Road I cannot remember off the top of my head, I'll dig a little and let you know if I find anything.
A.I.I. here ya go! Not the best camera work but it gets the sound across, Black Widow mufflers through 3" exhaust with an x-pipe on the autocross: http://www.enjoygram.com/m/854631260...476_1395458664Jake Rozelle
@jakerozelle
jakerozelle12.wix.com/jakerozelleracing
01-03-2015 #8 New to Pro-Touring
- Join Date
- Dec 2007
- Location
- Pomona, Ca
- Posts
- 26
We got those from Morris Classic Concepts. http://www.morrisclassicconcepts.com/emblems.html
69 Camaro RS, LS7,T56 Magnum, DSE Front Sub, DSE Rear, ZO6 Brakes from Kore 3, Full Floater 9", Forgelines. Built and set up by JCG.
01-10-2015 #9
Registered User
- Join Date
- Mar 2012
- Location
- Orange County, CA
- Posts
- 40
Picking up where I last left off….
Test #1 with the new suspension, wheels, tires, and brakes went incredibly well. The JCG crew have done their fair share of first gen camaros with DSE suspension and have considerable development on the Blu Balz ‘68. Utilizing this wealth of knowledge our car was pretty set up right off the bat, which was good because USCA Laguna Seca was less than a month from this first shakedown.
We tested at the Camarillo airport where you will see a lot of the California USCA crew practicing and that weekend I met Danny Popp who gave me a few pointers. He also confirmed that I wasn’t a half bad driver. Phew!
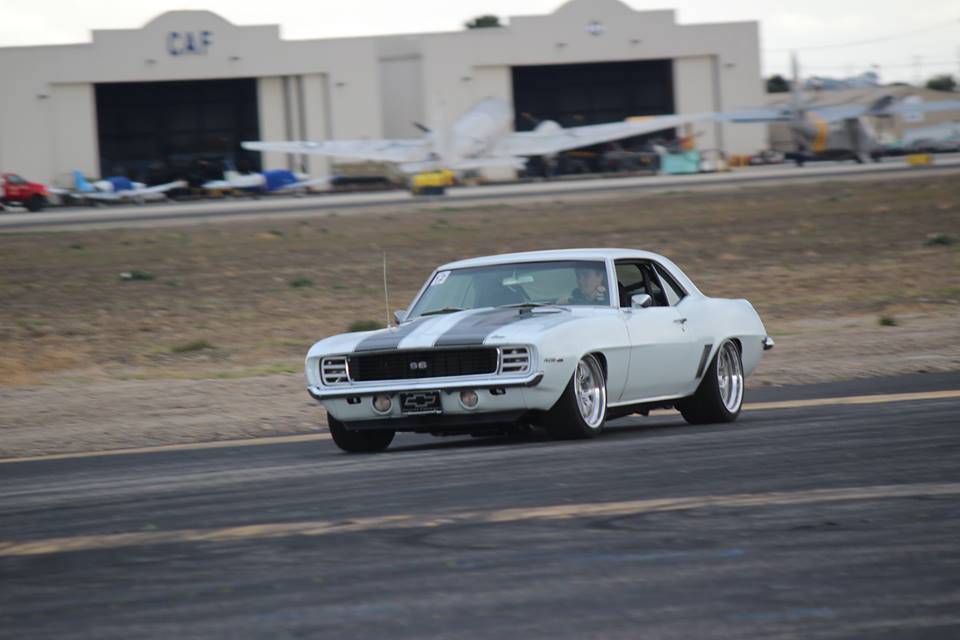
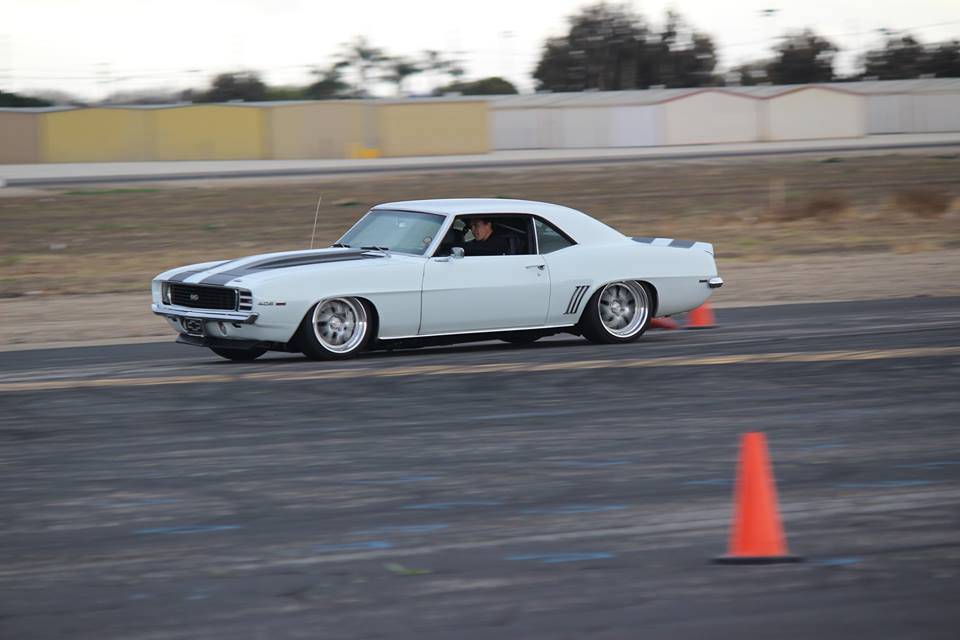
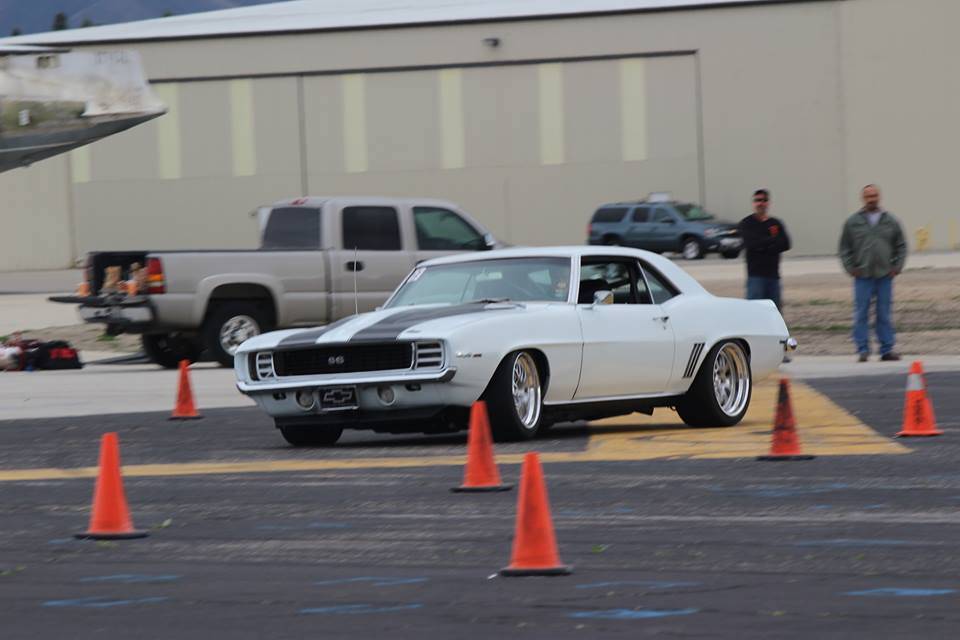
While the test went well what became painfully apparent was what the car was lacking most, motor. While the small block in the car made ample power, (540 HP/505 Lb/Ft) it was tired and was blowing smoke bad after thoroughly wringing its neck all weekend. It was obvious that an upgrade was going to be needed to get us through the season. With two weeks before our first event, USCA Laguna Seca, the decision was made to rip out the small block and replace it with a GM performance parts LS7.
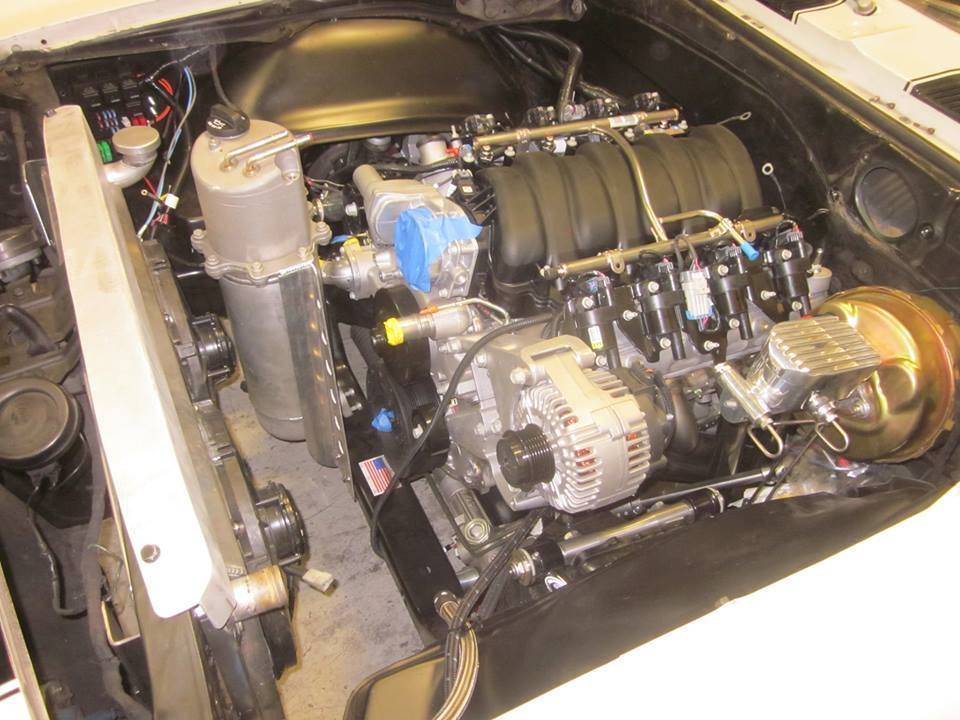
With input from Mr. Stielow, Cris decided to mount the stock Z06 dry sump tank from GMPP in between the radiator and the motor, very similar to a new Z/28. To do so the radiator had to move forward a little over an inch requiring modification to the core support. While this caused a little more work, it seemed to be the best option with our impending deadline and allowed us to keep our functional RS front end.
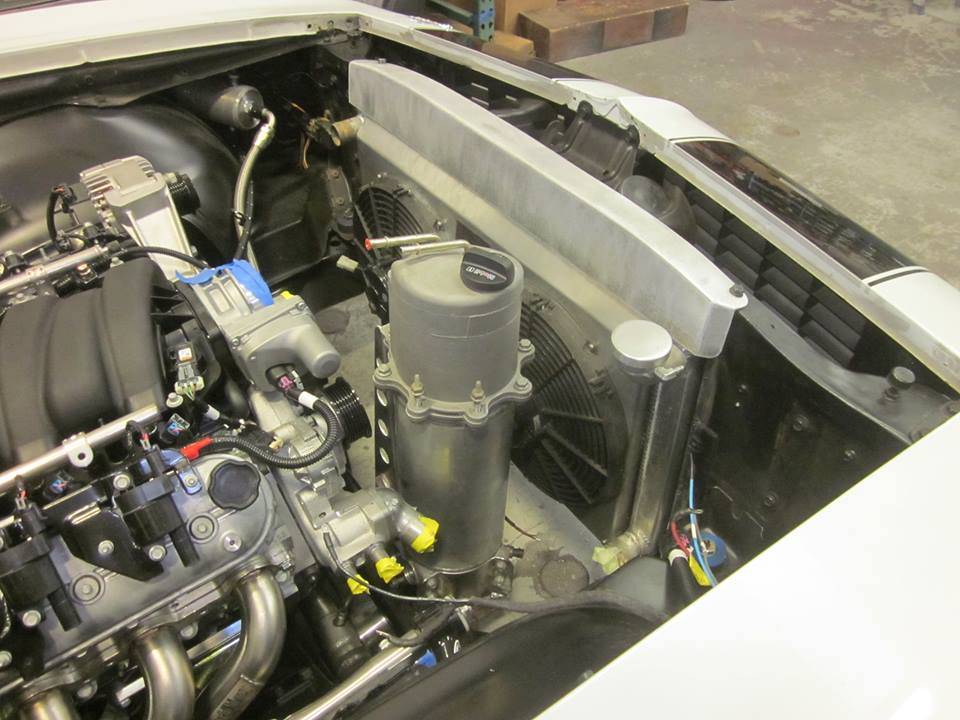
We chose to mount the computer on the passenger fender well for ease of access until we got the car sorted, and the JCG crew fabbed us up an intake.
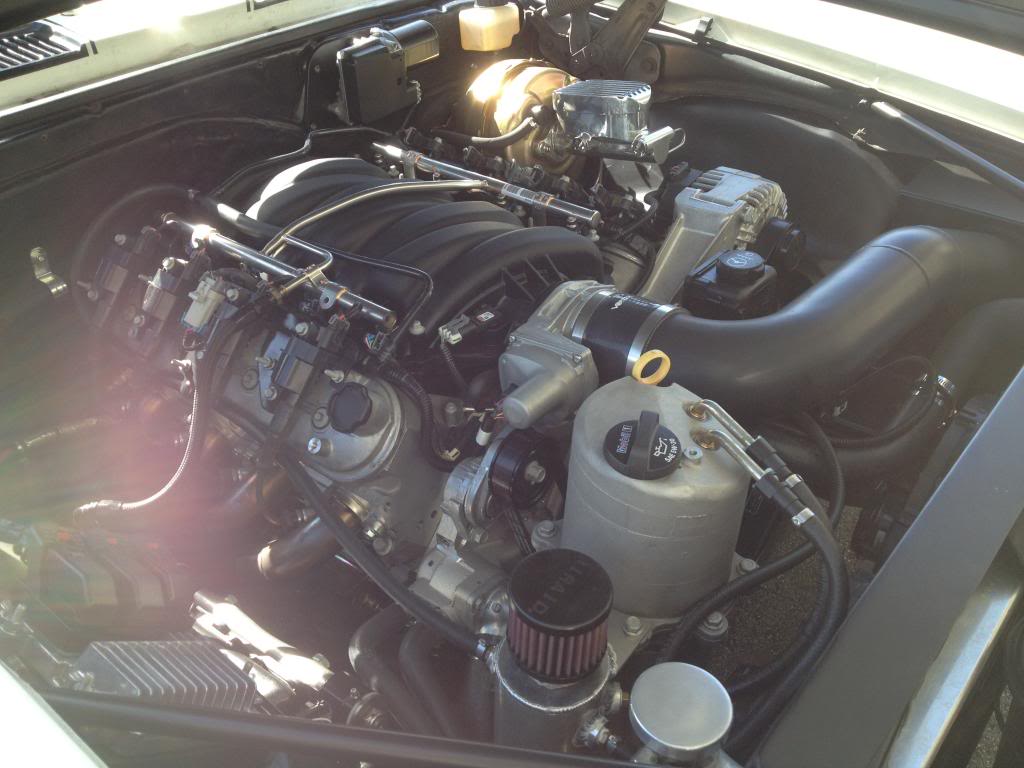
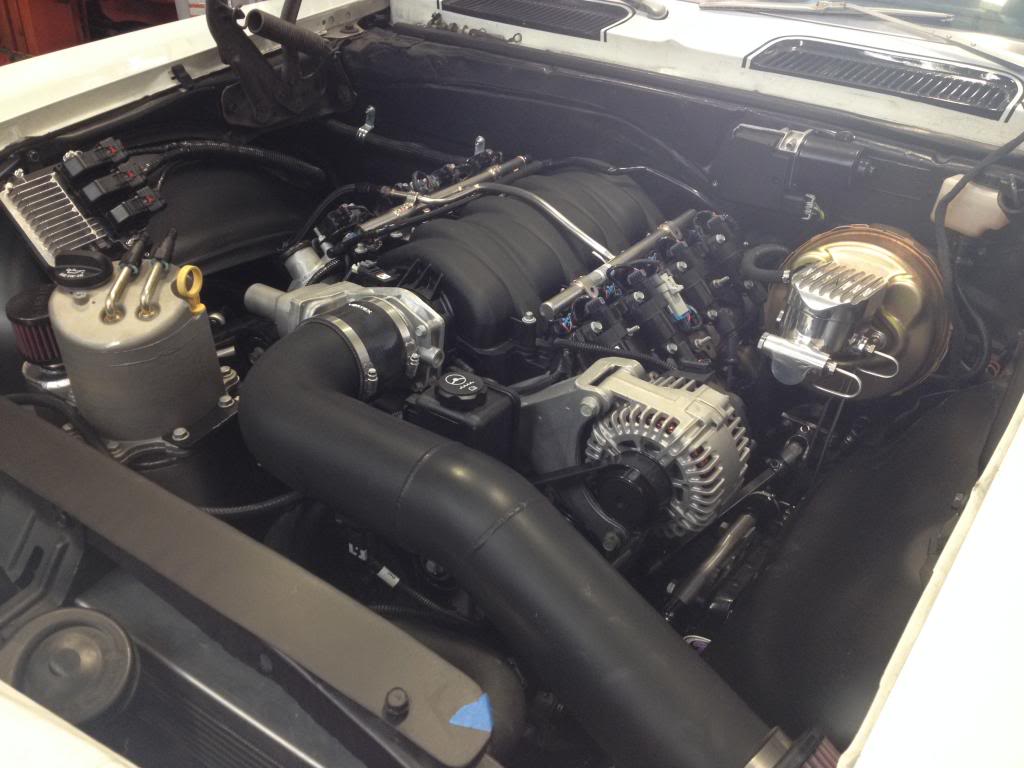
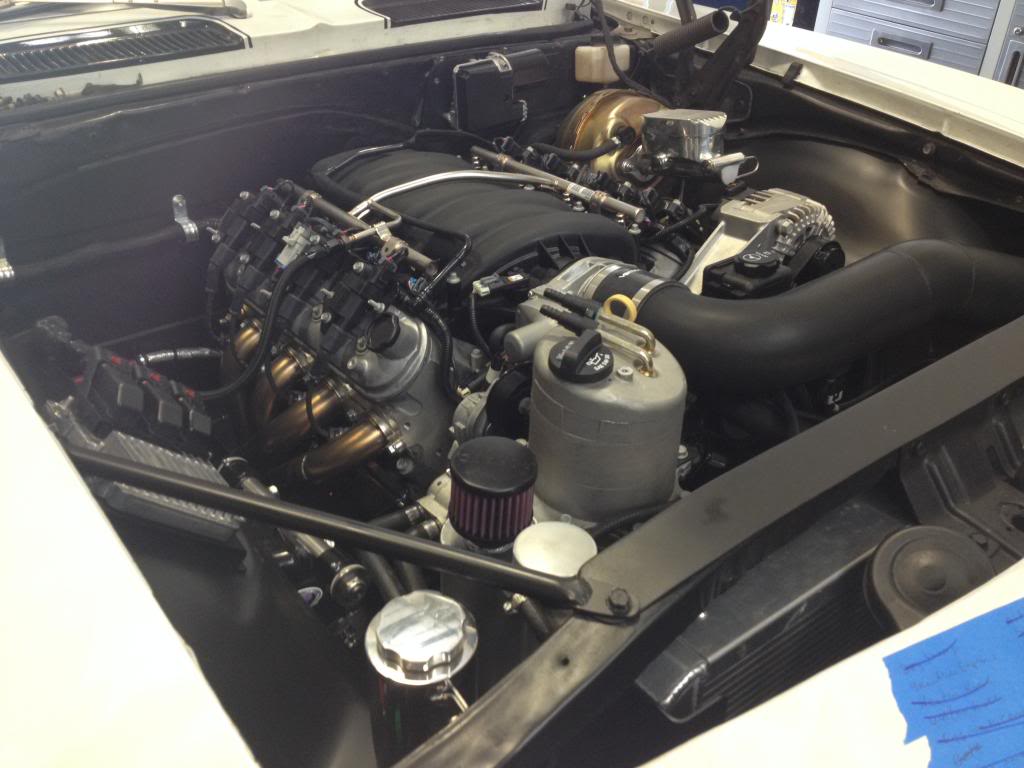
A new fuel tank was also fabbed up, fitted with vaporworks goodies:
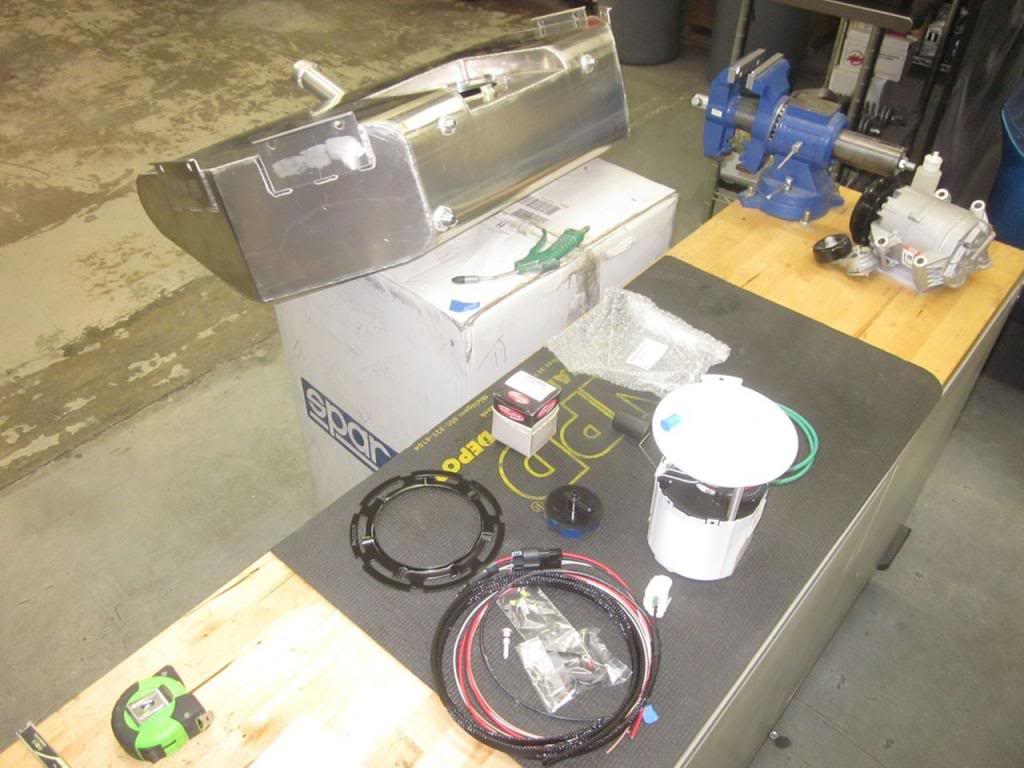
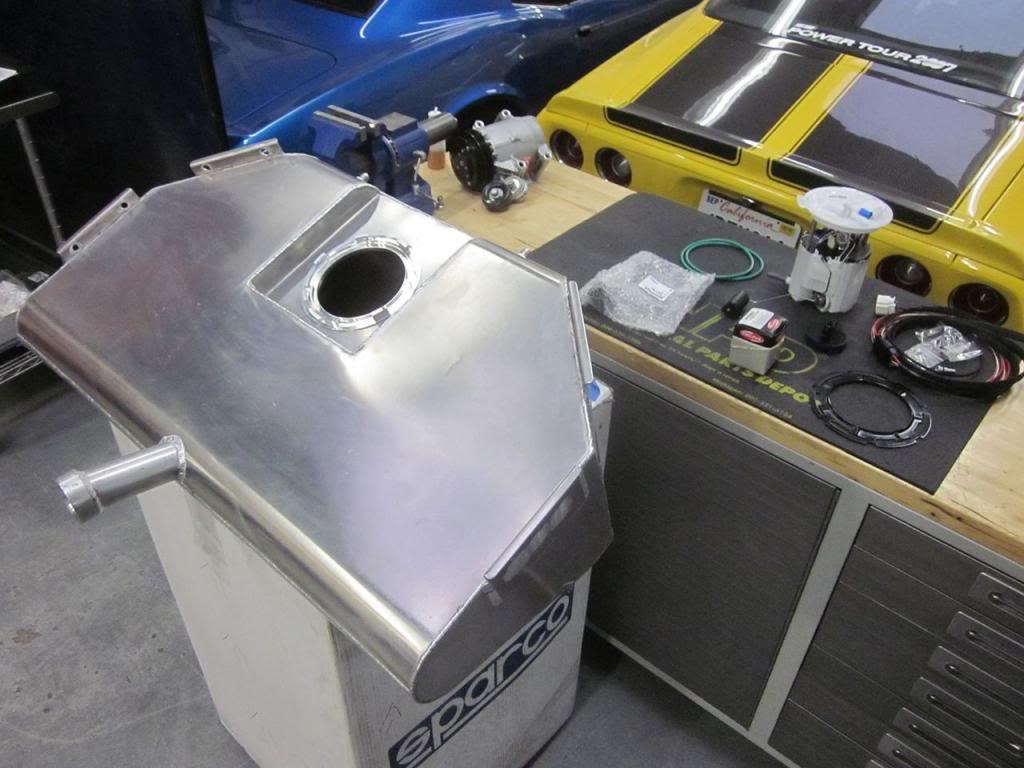
and just like that it was time for Laguna Seca! Cris finished the swap the night before the deadline and we picked it up on our way to Monterey the next morning, I can’t say enough about how the JCG crew has been able to crank out our projects under a time crunch.
Also, photo credit goes to Casey C. and Cris from JCG for most of the pics in this batch, thanks guys!Jake Rozelle
@jakerozelle
jakerozelle12.wix.com/jakerozelleracing
02-07-2015 #10
Registered User
- Join Date
- Mar 2012
- Location
- Orange County, CA
- Posts
- 40
With the first major batch of changes for the year complete, we now arrive at the car’s first event, USCA Laguna Seca. With such a crazy deadline the car had almost no break in miles when we picked it up from JCG while on the way to the event. I drove it for approximately 100 miles of the journey to get a feel for the new setup before pulling off the freeway and loading it in the trailer my dad was towing.
My dad was smiling on the inside, but we were all pretty nervous about how the car would perform.
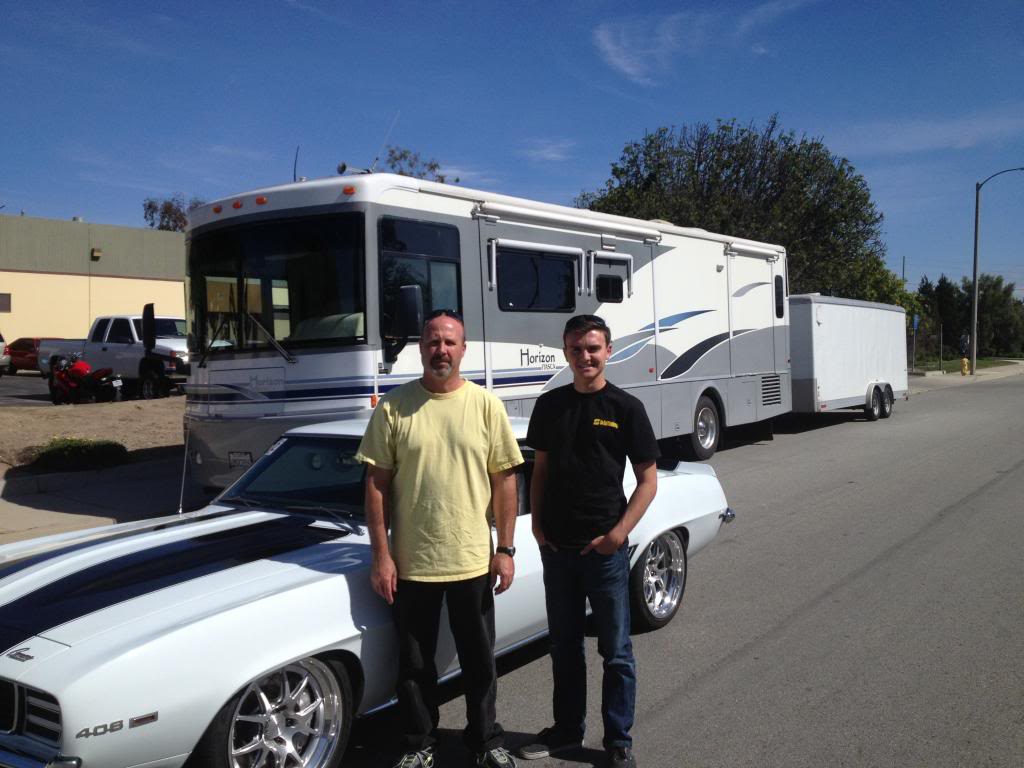
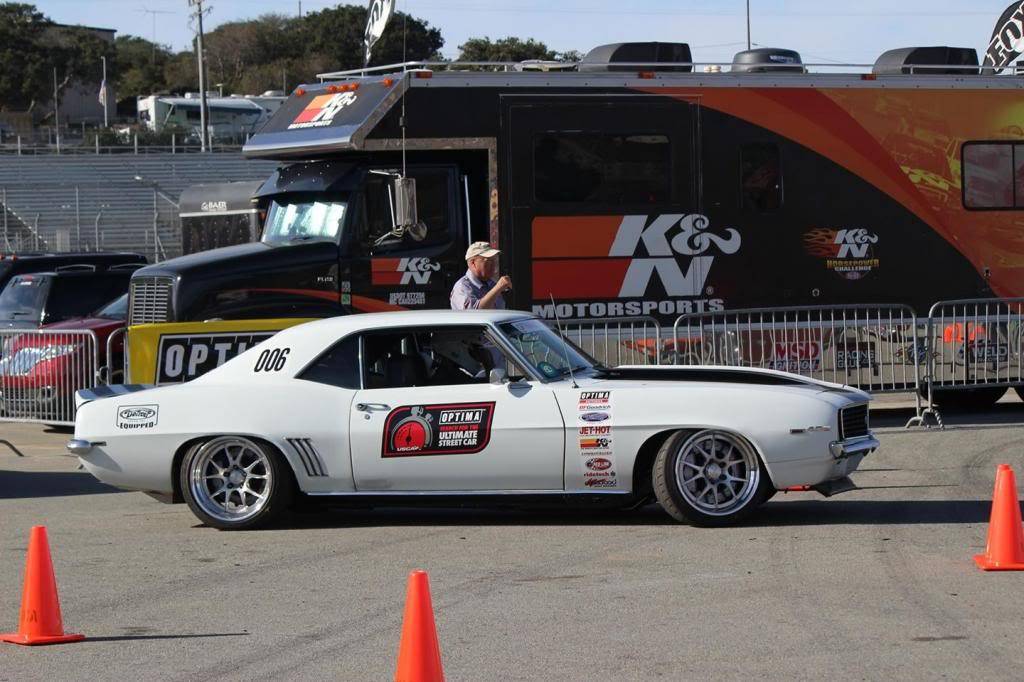
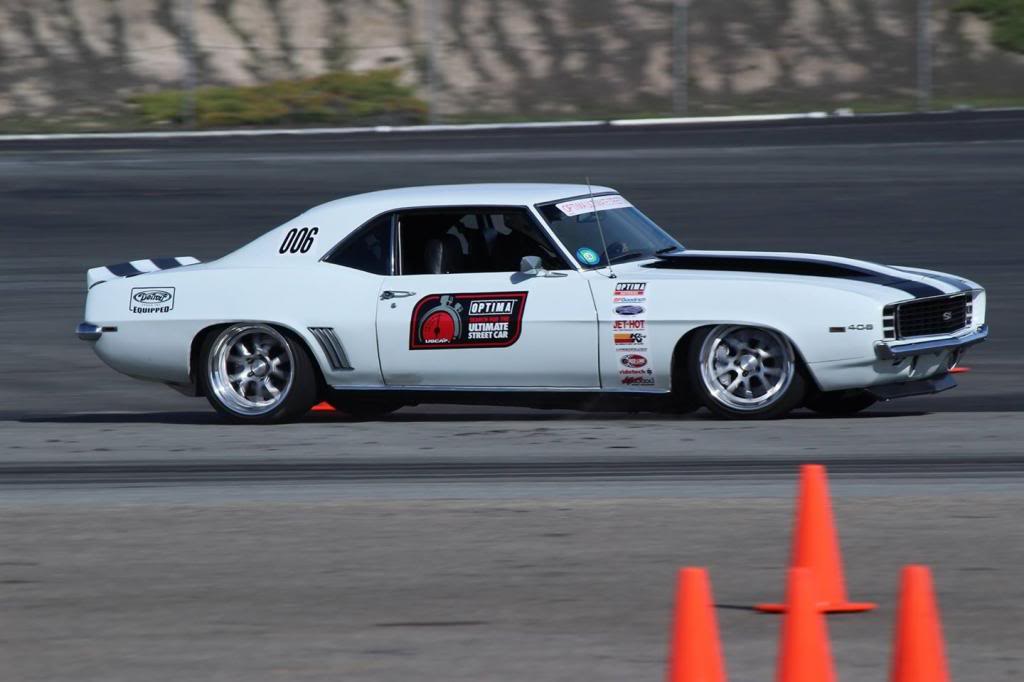
The car performed flawless all weekend aside from the minor issues like a couple minor leaks that popped up due to constant 7000 rpm abuse. Every little issue we had was quickly handled by my dad or Tony from Wilwood who both worked their butts off to get us the result we did.
 \
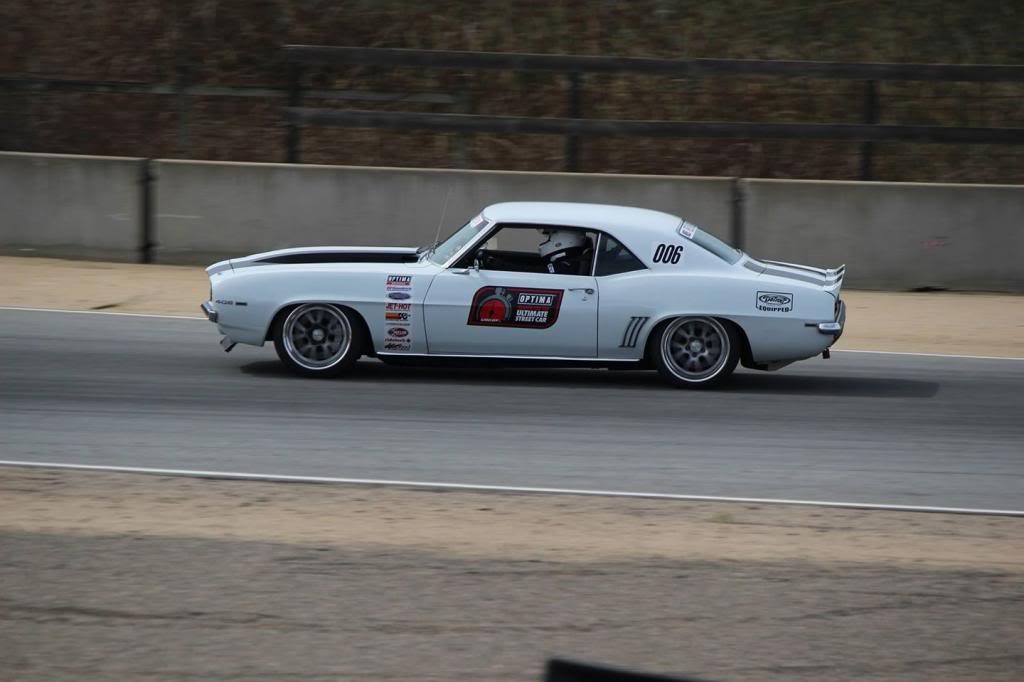
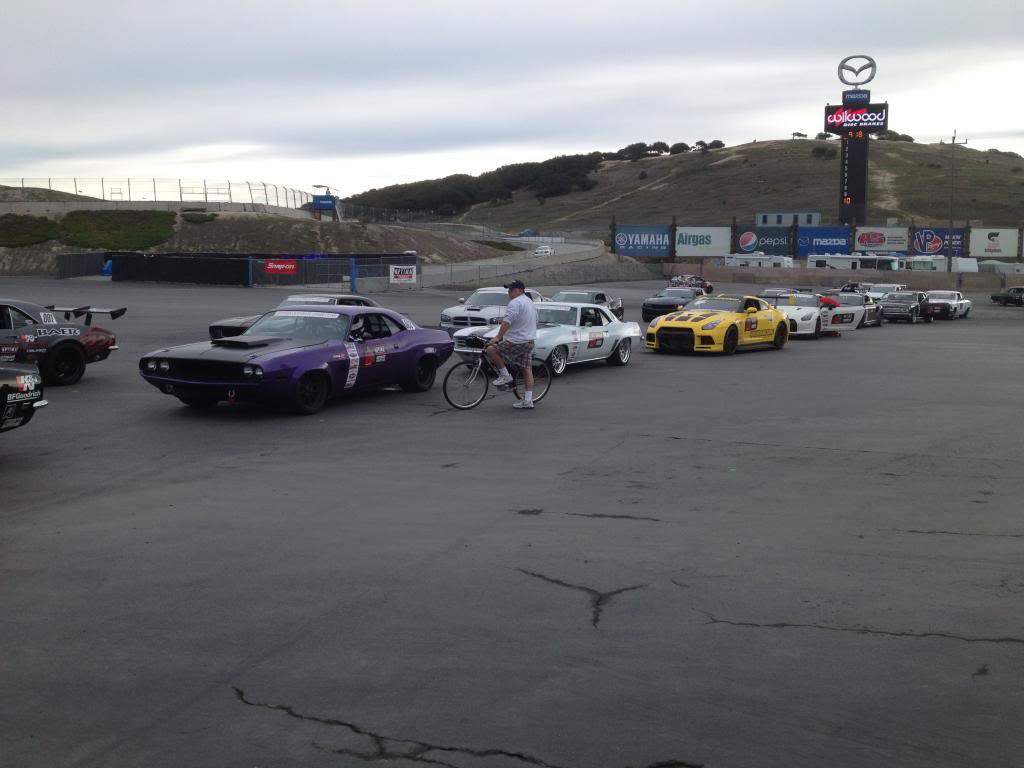
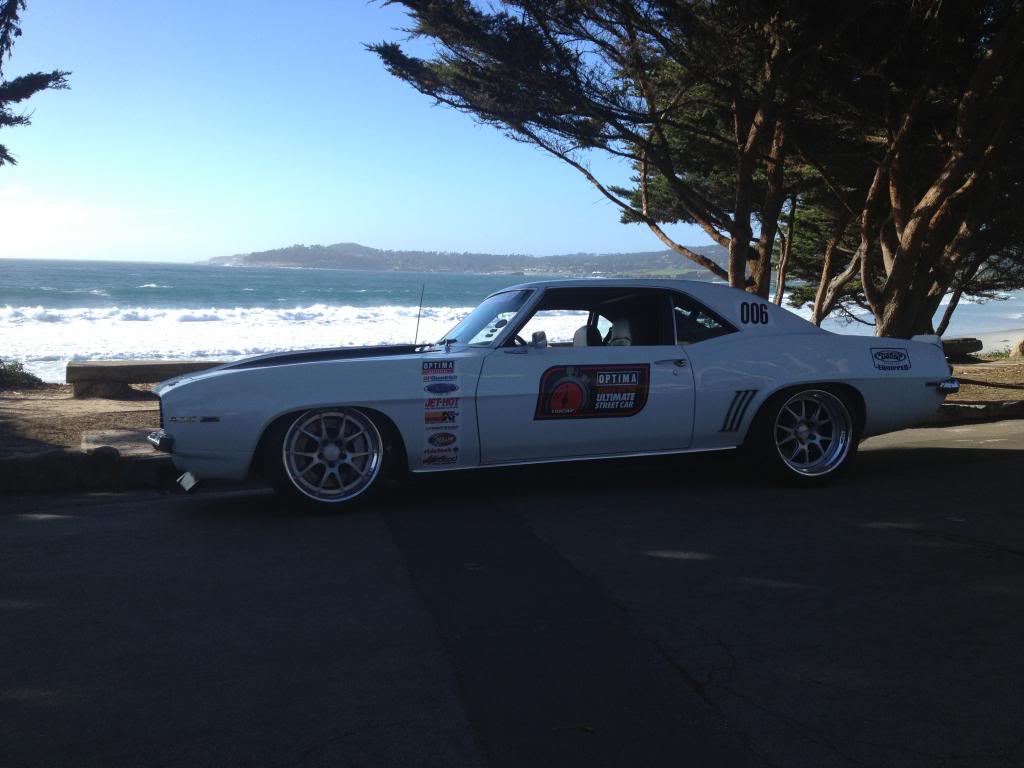
The road rally had some pretty incredible views:
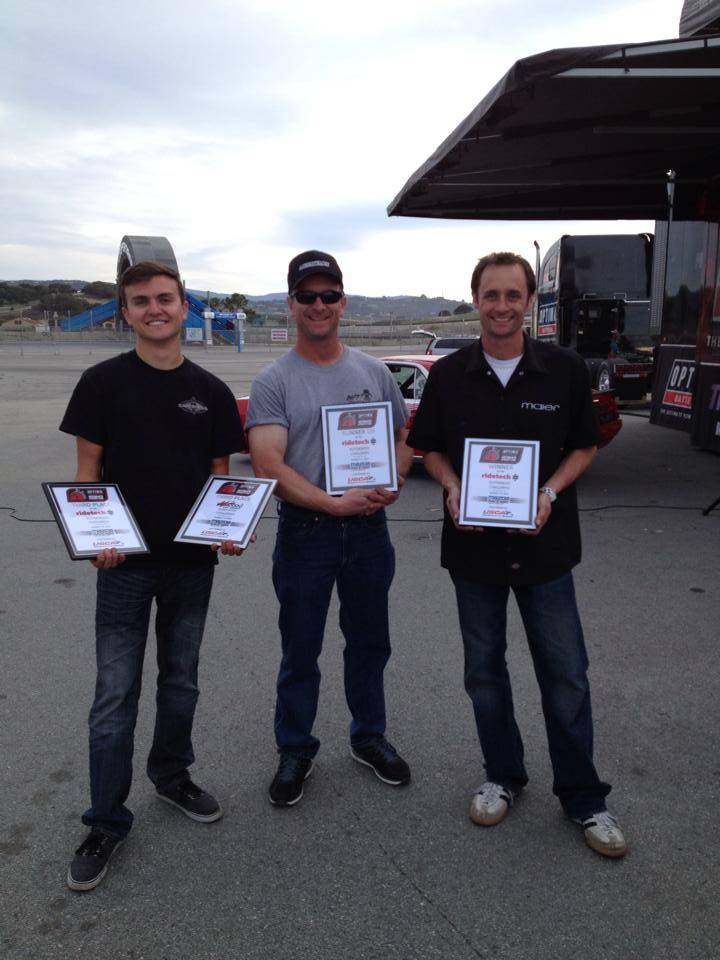
At the end of the event Mike Maier walked away with the win, followed by Danny Popp, and then yours truly in third, with there being hardly a gap between the three of us. To be competitive in a car with no previous testing against those two drivers was an honor and exceeded all expectations we had going into the event. Looking at the scores if we had taken the time to get our reverse lights working we might have even left with the win! No complaints for the first event though.
That weekend was extra special for us because my grandfather was also able to join us for the trip and got to watch me drive on track for the first time.
After Laguna Seca we drove the car at every event possible, racking up wins at Goodguys Del Mar, the Pomona Street Machine Nationals, and more. Meanwhile, the car was getting a ton of street miles as well, including 600 miles of highway driving to and from the event during the weekend of the Goodguys Del Mar Nationals alone. With multiple track days and autocrosses per month, by the time USCA Fontana rolled around, we were ready. Throughout this time period while we focused on setup we also made some changes such as adding 4 point Schroth harnesses and Recaro seats which are some of my favorite additions to the car.
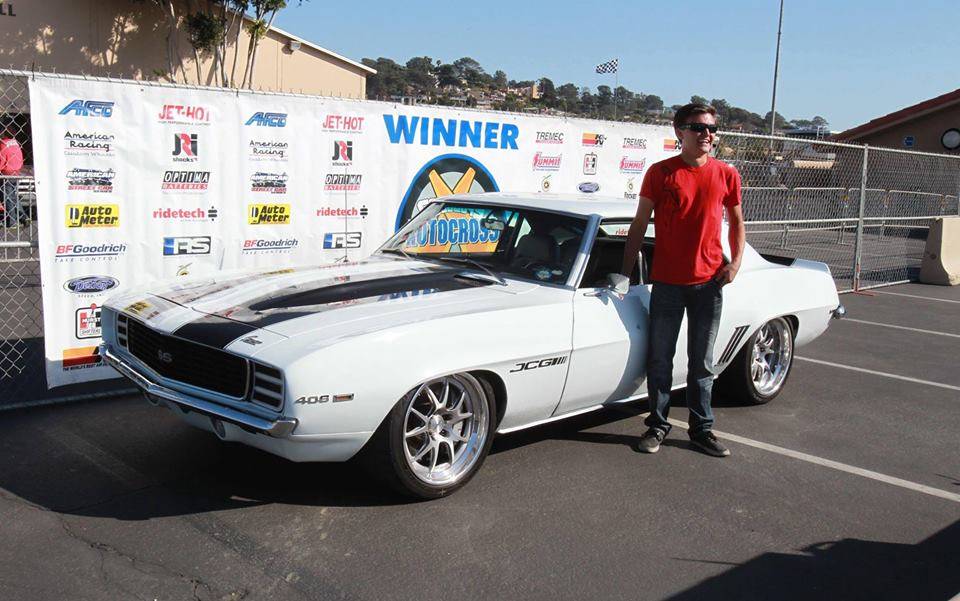
USCA Fontana turned out to be one of the most fun weekends of my life, taking the win in the GT3K class after a great battle with friend and competitor Jordan Priestley from JDP. Leading up to the event we had dialed in our set up and I had run multiple events at the track in the camaro and my daily driver Mustang which allowed us to set the fastest lap of the day for our class in only our second session on the road course.
The car performed flawless all weekend and my dad, myself, and the JCG crew couldn’t have been happier.
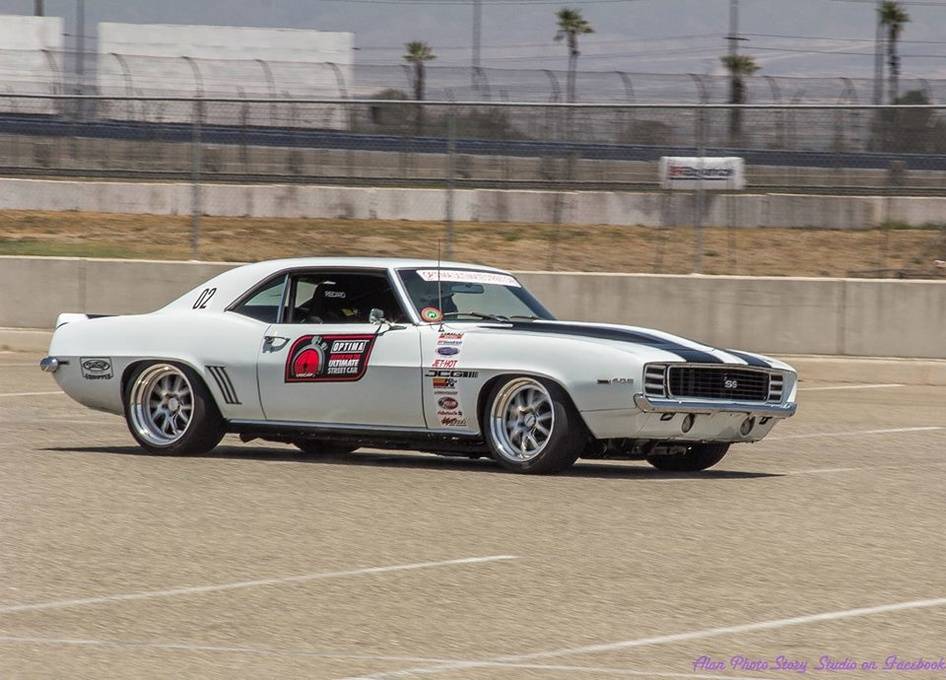
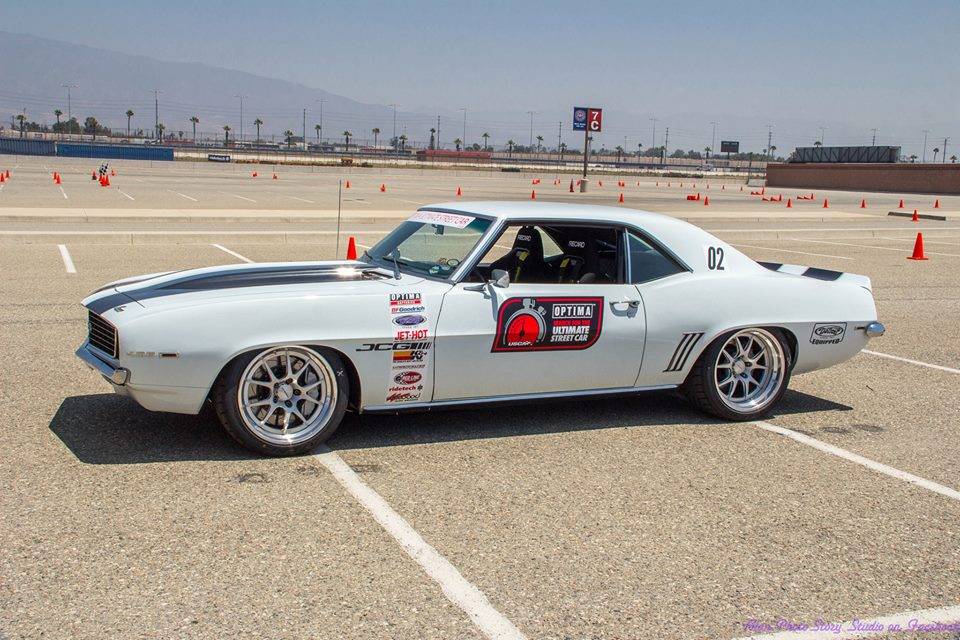
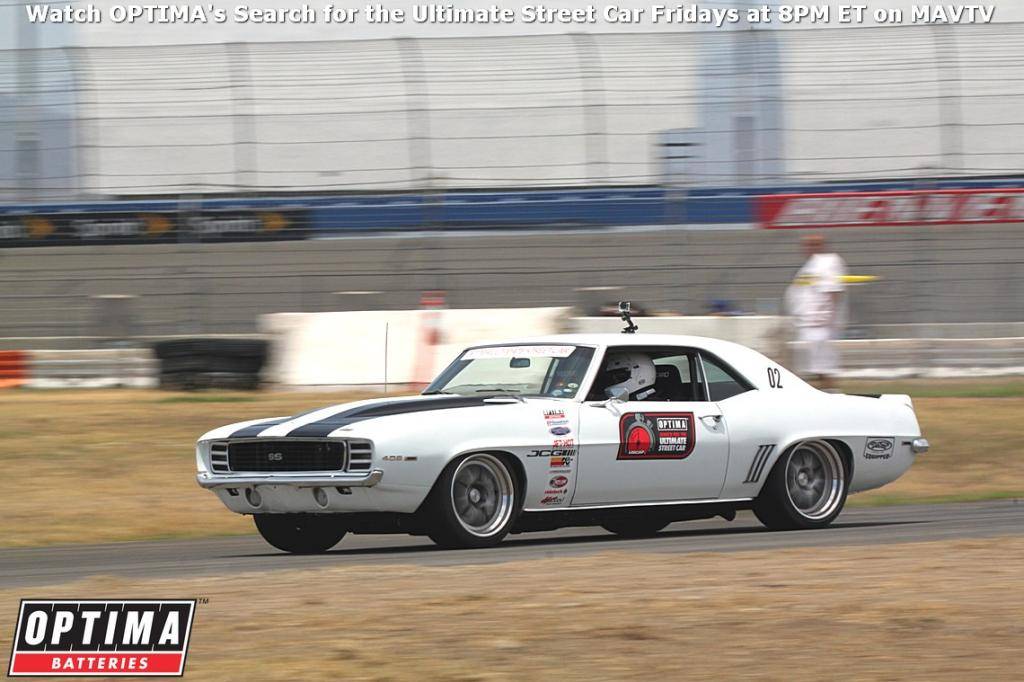
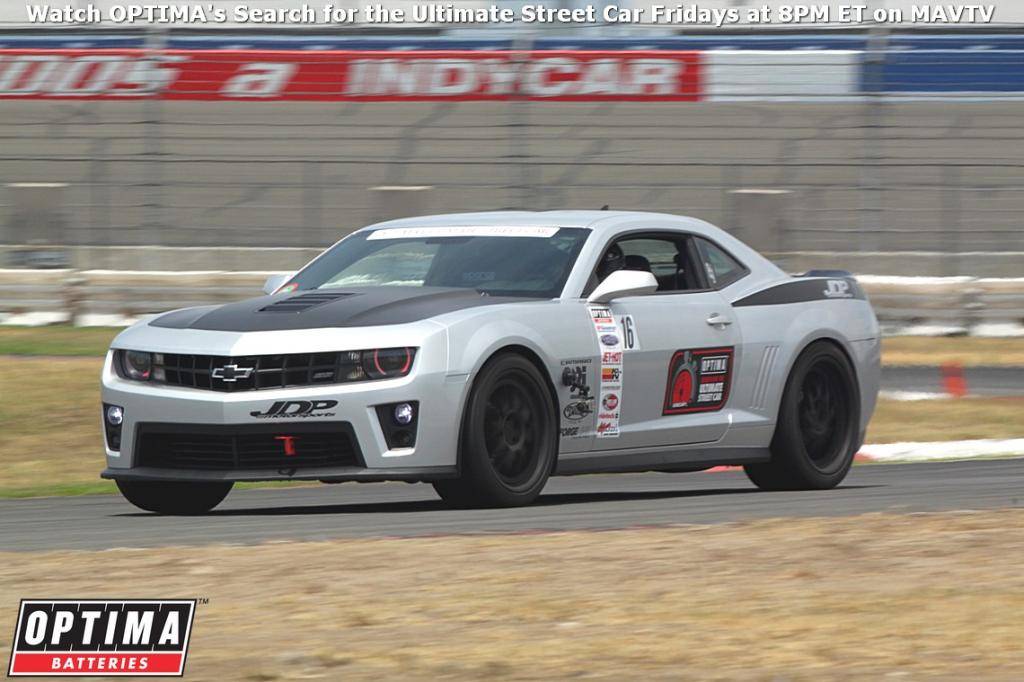
For more coverage of the event and some great shots of the car check out the article Chevy Hardcore did on the car, which was shot while the event was still being wrapped up!
http://www.chevyhardcore.com/feature...et-car-camaro/
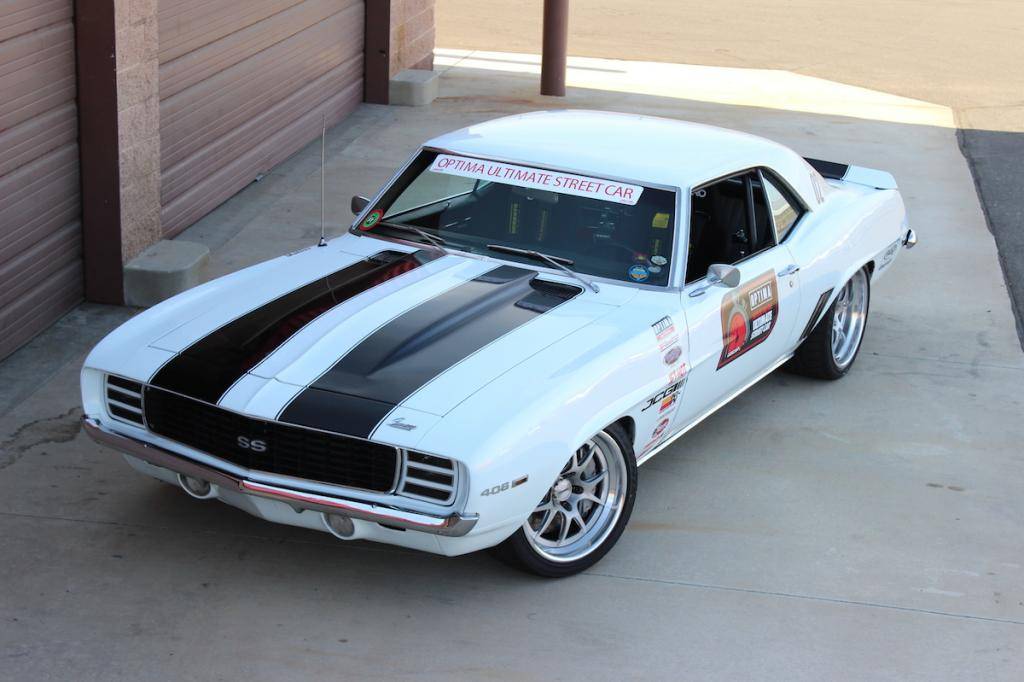
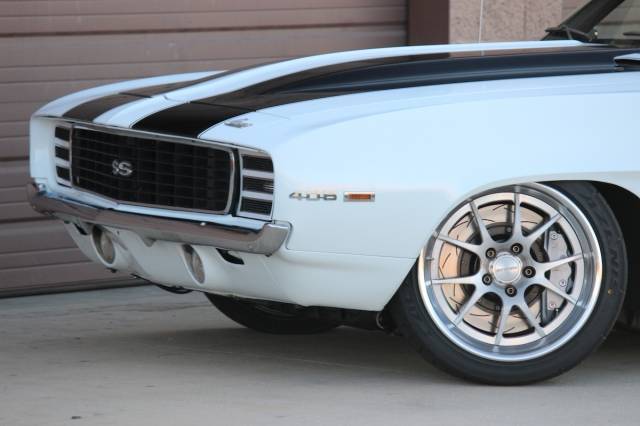
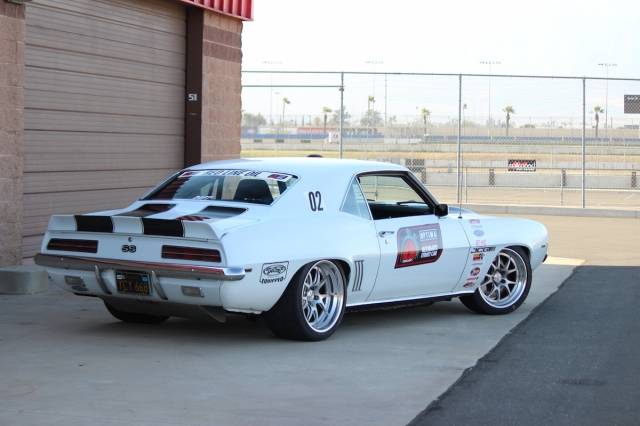
Following this event is when we tore the car apart one last time to get it ready for SEMA and OUSCI. That should all be covered in my next one or two posts!Jake Rozelle
@jakerozelle
jakerozelle12.wix.com/jakerozelleracing
04-02-2015 #11
Registered User
- Join Date
- Mar 2012
- Location
- Orange County, CA
- Posts
- 40
Alright here we go updates on the car from our win at USCA Fontana up until SEMA 2014 and the OUSCI. A lot happened and after this the build thread is pretty current(ish).
After Fontana we wanted to do something to help our chances in Vegas and needed to decide what. More horsepower and less weight were the obvious options and after we considered both we decided that although big power would be much appreciated on the road course, if we were able to drop weight it would help us on the autocross and the speed stop as well as on the road course so that is the route we decided to take.
Making the decision even easier was the option of running Anvil fenders which would bolt on and not only drop weight but allow us to fit a 315mm Falken front tire setup. Anvil's headquarters is less than half hour from our house so my dad and I met up there after work one day and did our best to clean out their 69 Camaro inventory. The owner was cool to work with and we ended up getting a good deal on everything by picking up 'blem' items which was fine with us since we would be covering all the panels with wrap or paint anyways. In total we left with a Carbon cowl hood, carbon flared fenders, carbon valence, carbon cowl panel, carbon trunk, and carbon rear spoiler which completely filled my dads truck and my mustang.
After talking with Matt A. about his experience with the Anvil stuff we decided to have the fenders fitted up and run them for awhile unfinished to allow any settling of the material that would cause changes in fitment. Best of Show in Escondido took care of fitting all the panels for the first time for us and did an excellent job. We then ran the car like this for a month or two which was fun since driving around southern California in a 69 camaro with a carbon clip definitely gets some funny looks.
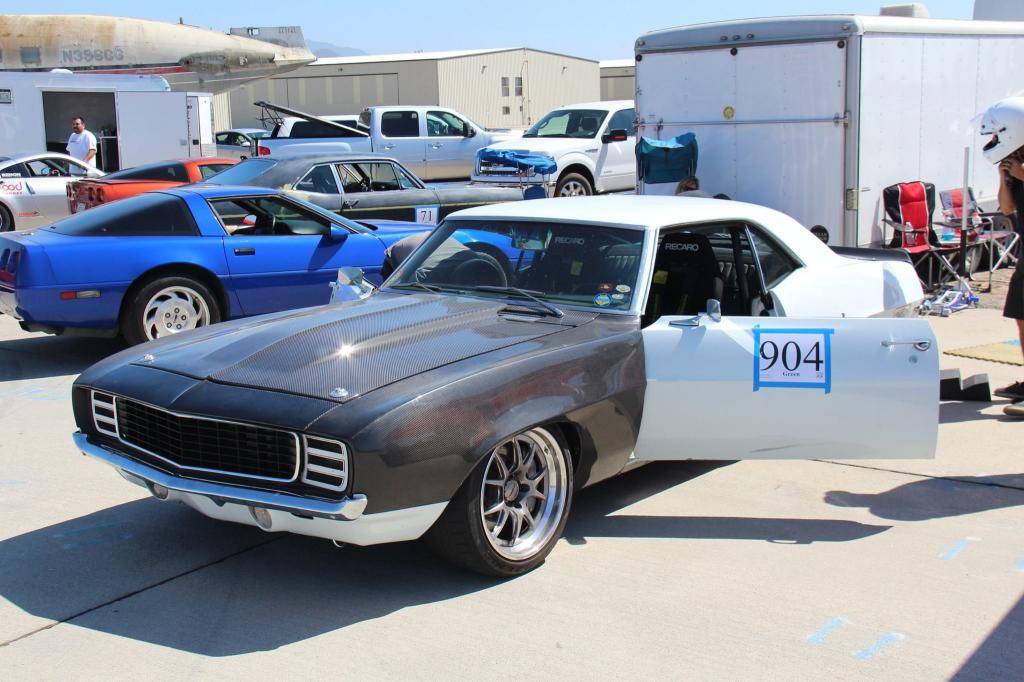
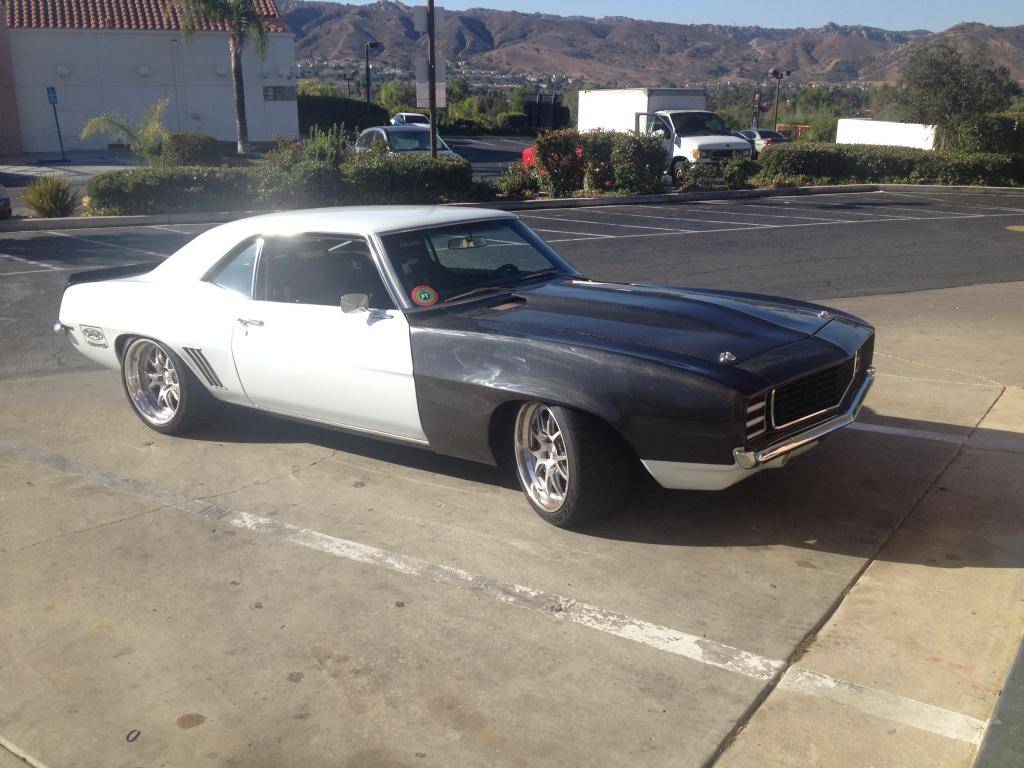
With the fenders on we measured and ordered up another pair of 18" Forgeline front wheels for the car. We could have rehooped our original wheels but we knew we would be able to repurpose the old ones for another project.
After testing was complete and with SEMA fast approaching we sent the car to JCG for bodywork and prep. As it always seems things were happening way too last minute and Cris and the crew only had 3 days to refit all the body panels and prep the body for its wrap appointment. Somehow they got the whole car straight and looking perfect and also found time to make hood vents that we requested out of aluminum and epoxy them in place.
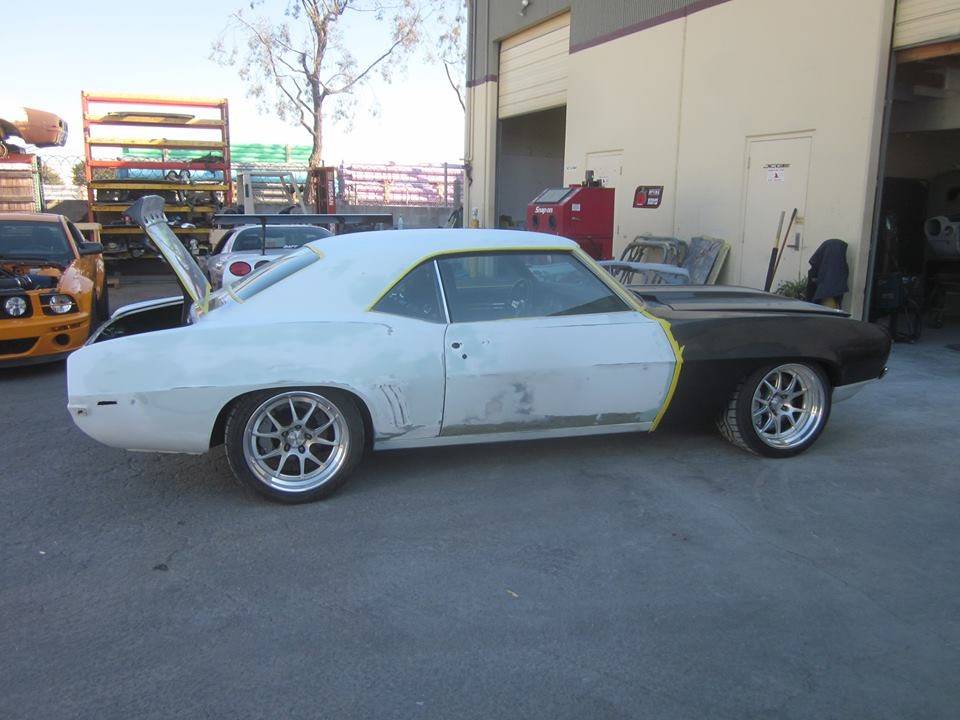
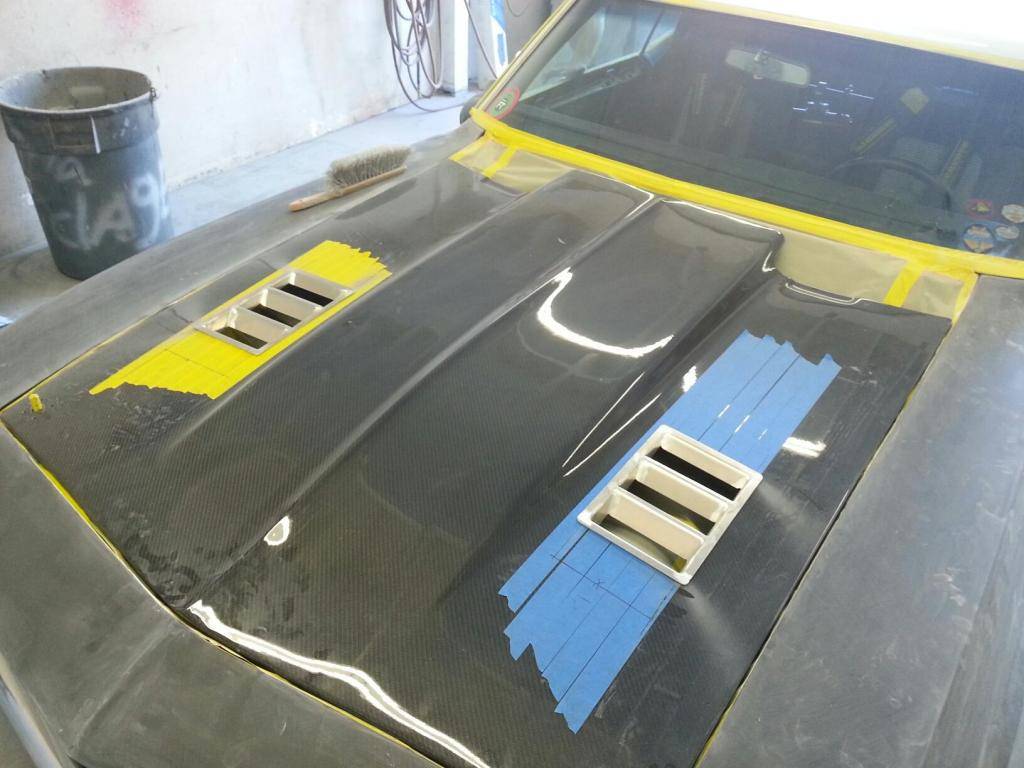
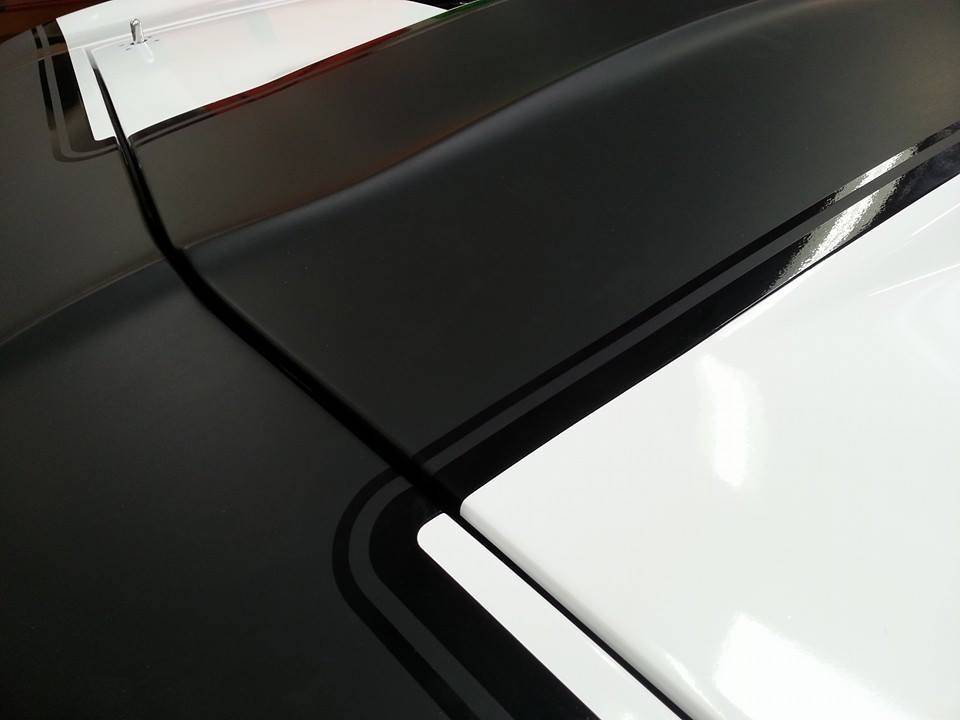
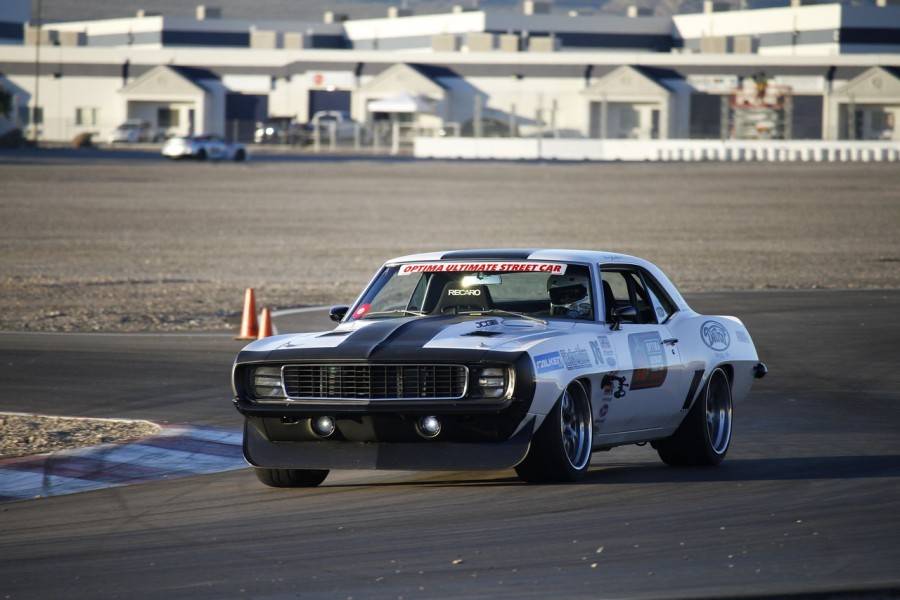
Here are the pics of the wrap process done by Troy Weeks, we collaborated on the phone and tried to create a design that was different and mean looking while also having the feel that it could have been an actual design option in 1969. I really like the Baldwin Motion cars in particular and you can see that influence as well. The colors are primarily white and matte black with gloss black accents. The whole wrap was completed in less than 48 hours and sent back to JCG for final assembly.
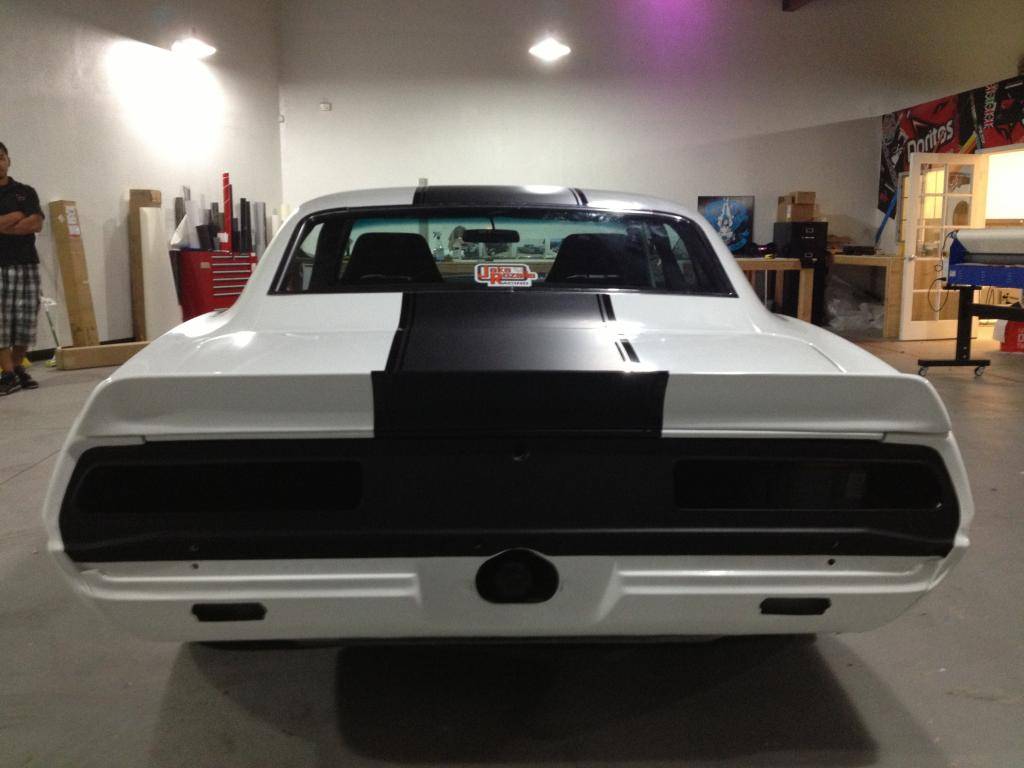
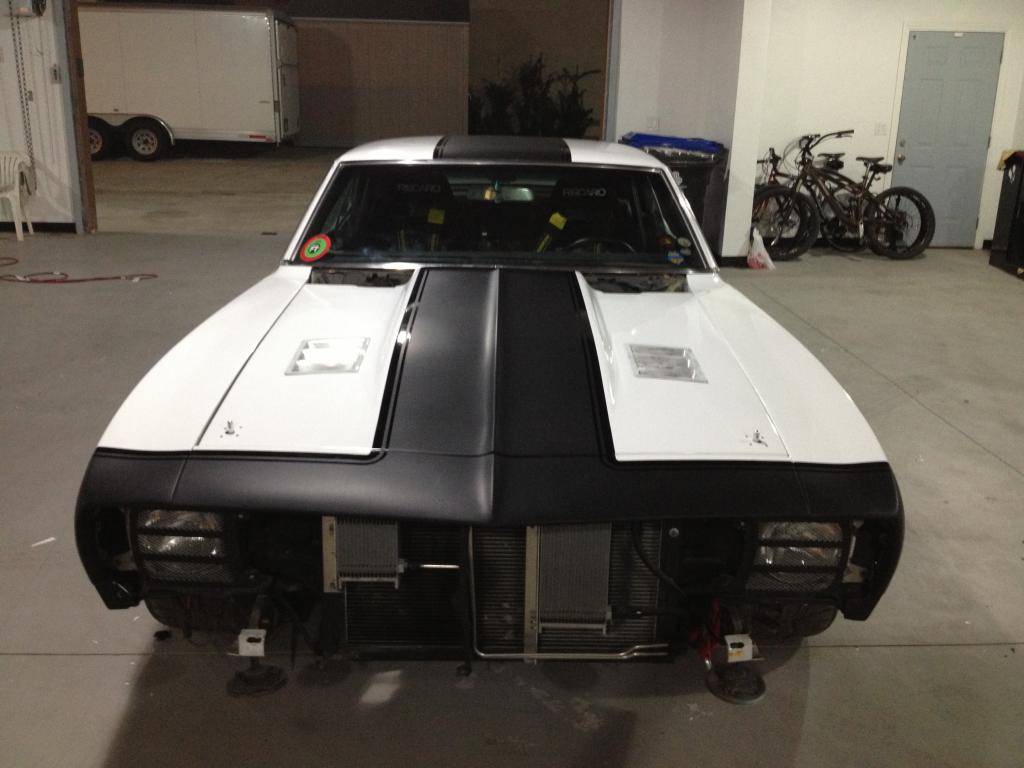
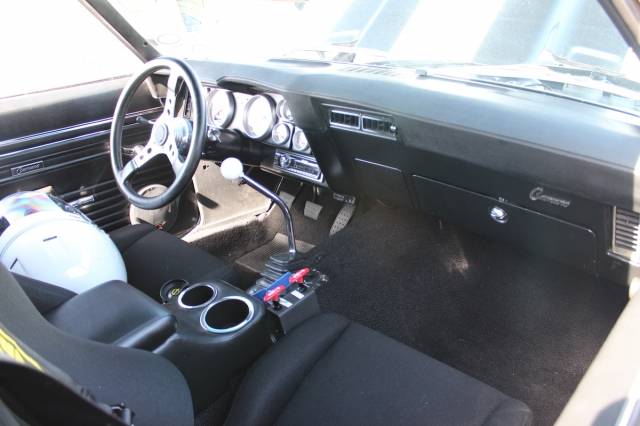
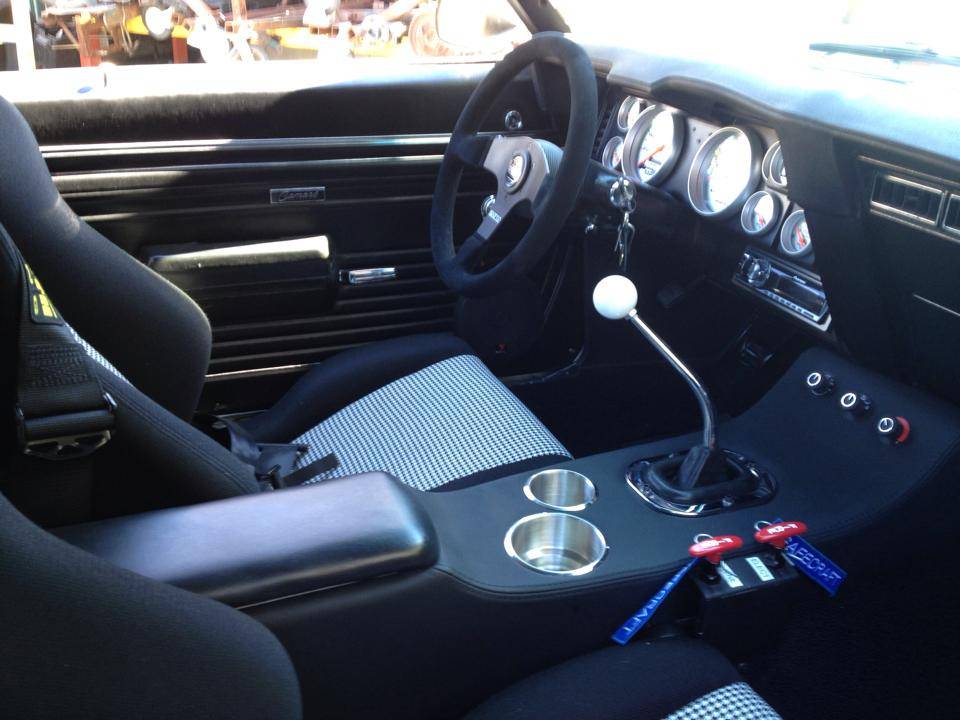
In an attempt to boost design score we had our front Recaro seat's centers reupholstered with houndstooth to match our back seat, and also had the trunk redone with lightweight close-our panels covered in the lightest black carpet possible. JCG also fabbed up an aluminum center console to keep all our track junk in as well as hold a couple drinks, including a Big Gulp if need be.
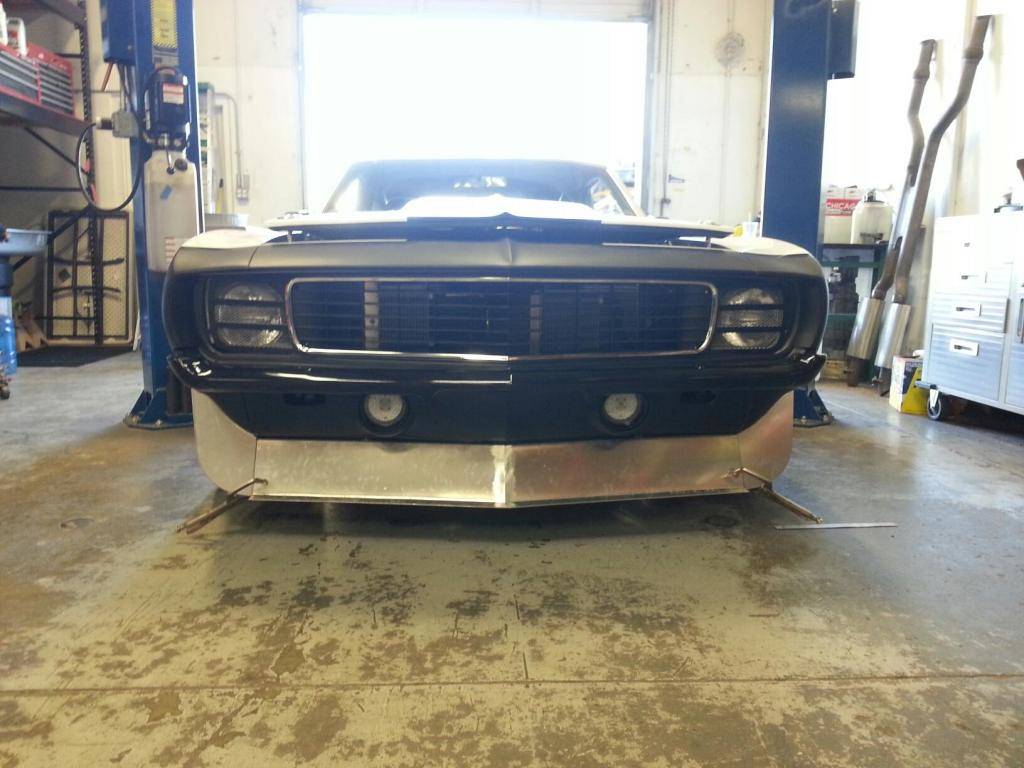
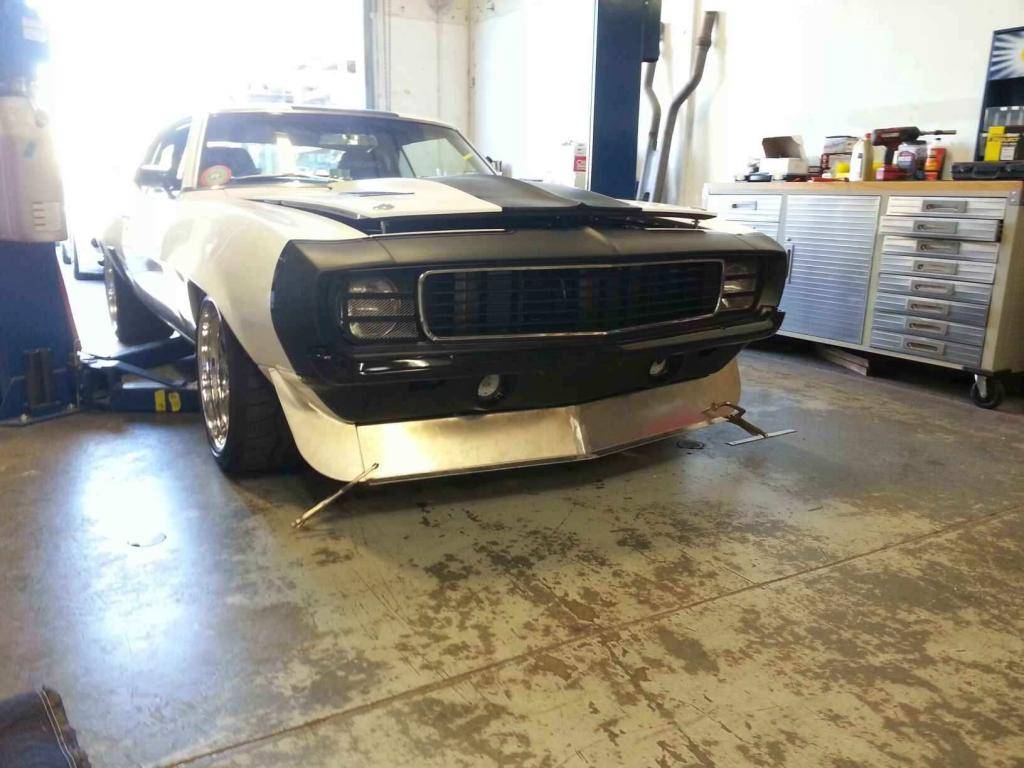
To help aero Primo at JCG quickly knocked out a new front spoiler out of aluminum which went down significantly more than the stock spoiler and went out wider to hopefully keep some of the air from lifting those big 315s up front. Since it is a streetcar it was still high enough for speed bumps and what not.
Completed shot:
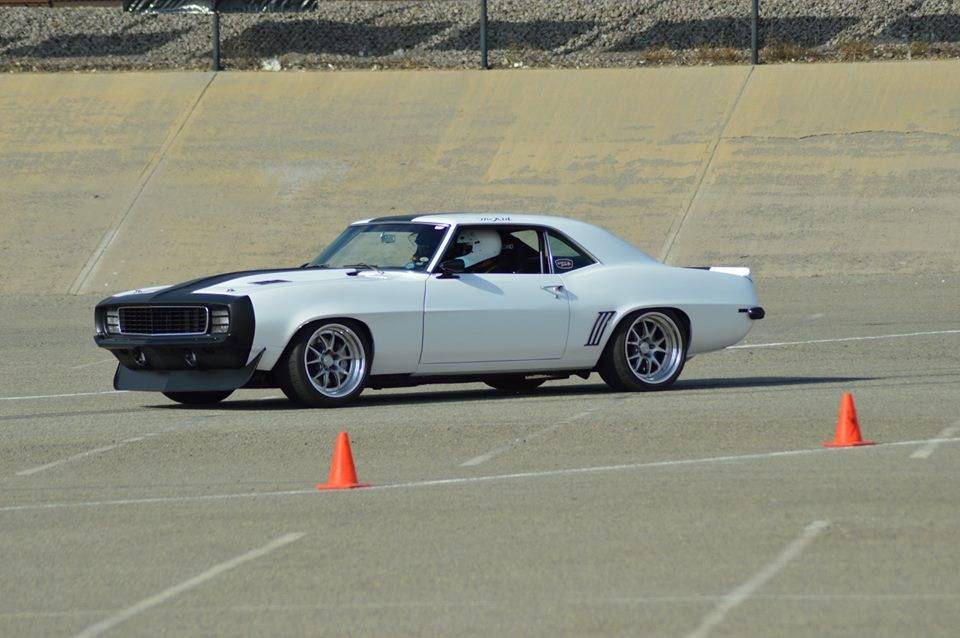
Huge thanks to JCG, Troy and Best of Show for doing such a great job on the car and especially to Cris and the guys at JCG for knocking out an insane amount of work in a completely unreasonable time frame right before SEMA. Some day we'll bring them an easy job... maybe.
 Jake Rozelle
@jakerozelle
jakerozelle12.wix.com/jakerozelleracing
05-06-2016 #12
Registered User
- Join Date
- Mar 2012
- Location
- Orange County, CA
- Posts
- 40
Wow, long time no update! Time to get this thread back up to date. To be competitive in the USCA we are constantly making the car better otherwise we would quickly fall behind so there's a lot to cover over the next few posts.
The next big change after my last update was the motor. We started running USCA events with a GM crate LS7. It held up well and was very easy to drive fast but when you’re going up against guys like Mike Maier who are great drivers and have 700 hp, it is time to step up your game!
Lingenfelter Performance was at all the USCA events in 2015 and when we talked to them about a solution to our “problem” this is what they came up with:
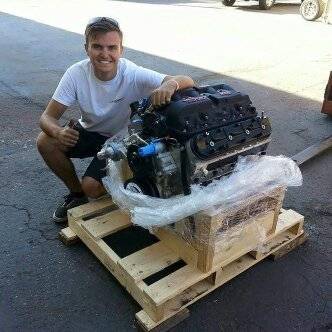
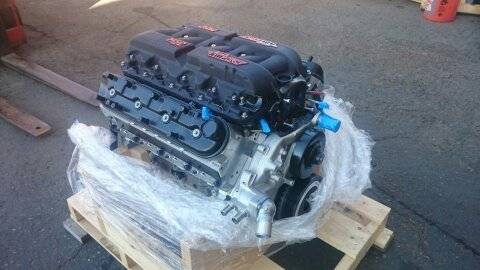
Its an LS7 block with a full forged rotating assembly so I can spin it nice and high in the RPM range like I wanted. It’s still 427ci displacement, naturally aspirated, and is setup to run on the 91 octane premium gasoline we have out here in California. Being naturally aspirated, it is super fun to drive and helps the reliability while keeping underhood temperatures under control.
The numbers:
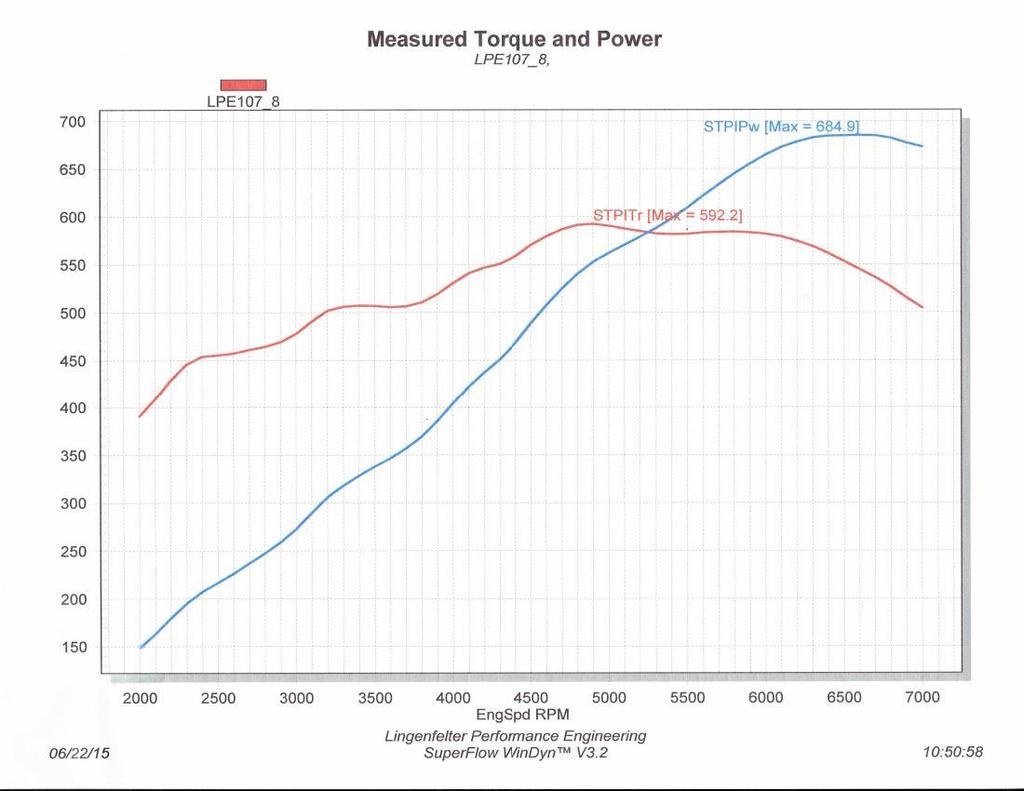
In the words of the guys at Lingenfelter “That should make driving fun.” Ya if you find 65+ mph burnouts with ease fun, this is definitely fun!
Even though it sounds nasty my dad is very particular about all our cars being very streetable. No lightweight clutches or crazy cams. Even with those numbers the car idles through LA traffic (which I do too often) like a champ and I wouldn’t hesitate to drive it anywhere.
And of course it’s more than enough power for me to have fun killing tires:
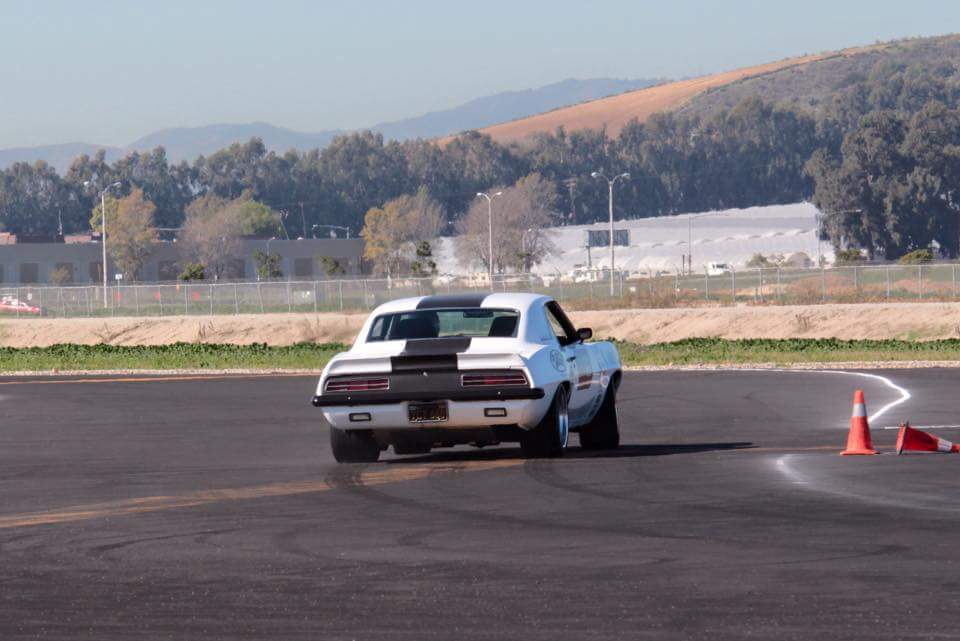
We did some different underhood stuff on the install that I thought was cool that I’ll cover in my next post. If you have any questions or want specific pictures let me know, I’m attempting to keep this thread more current so let me know what you want to see and I will do my best!Jake Rozelle
@jakerozelle
jakerozelle12.wix.com/jakerozelleracing
05-16-2016 #13
Registered User
- Join Date
- Mar 2012
- Location
- Orange County, CA
- Posts
- 40
Motor install pics!
Since we had the car apart anyways we decided to make some changes while the motor was out. The more driving I do the more particular I get about where the weight is at in our car. Previously our dry sump tank was located between the motor and radiator. For packaging and ease of access it was nice but it wasn’t where I liked it from a weight bias standpoint so back it went.
Cris and the JCG crew ordered a new, shorter dry sump tank and placed it along the firewall above the frame on the passenger side. Once it was as far back as possible they cut the tank apart and added volume to it so that our system holds a bit over 11 quarts of oil total. Thats a lot of weight!
Better pics of the completed tank at the end of this post.
Before:
After:
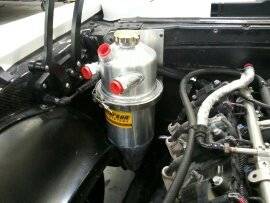
Why not put it farther back behind the fender like Mr. Stielow did? For us ease of access was too important to put it back there. This car gets flogged hard and we want everything easy to access and take in and out. Also, although his tank is likely 6” farther back so better for weight distribution it is also off to the very outside of the vehicle. Typically you want all the weight towards the center so by my logic it wasn’t worth the extra work for our car.
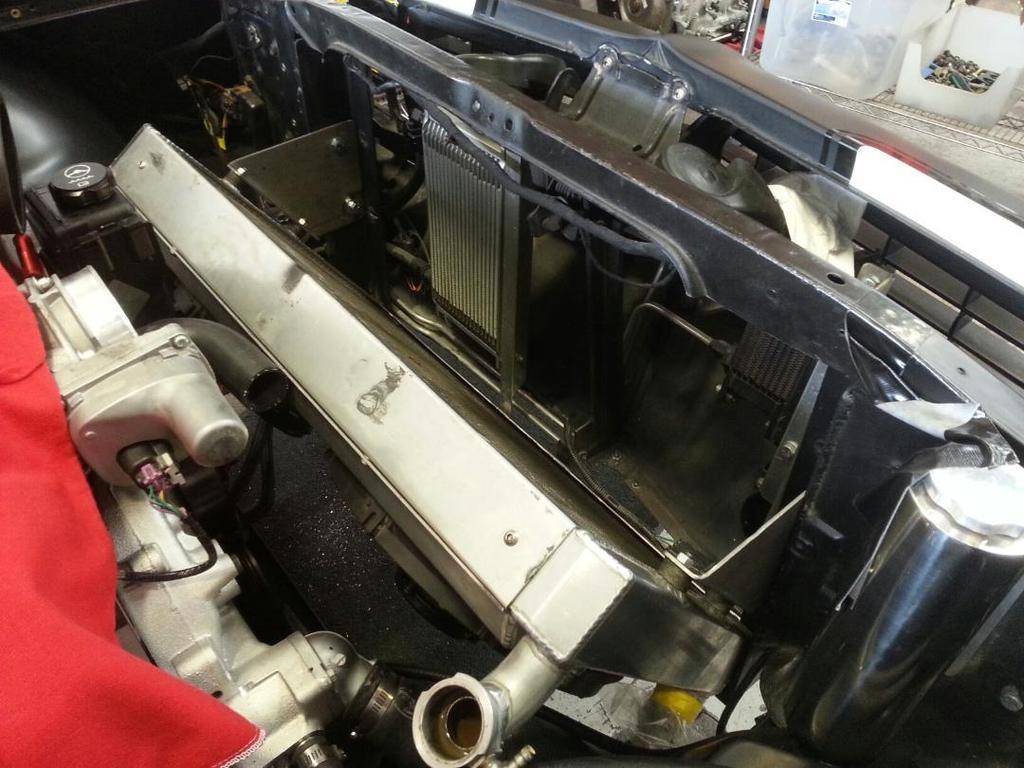
We also wanted to get the radiator back and lower. Ideally we would have laid it so the top went forward relative to the bottom and ducted air through the radiator then out the hood. However, under the time constraint before the next event and fearing messing up the classic good looks of the car we laid it the opposite way and moved it as far back as possible. JCG then made good ducting and closeout panels to make it look clean and like it belonged.
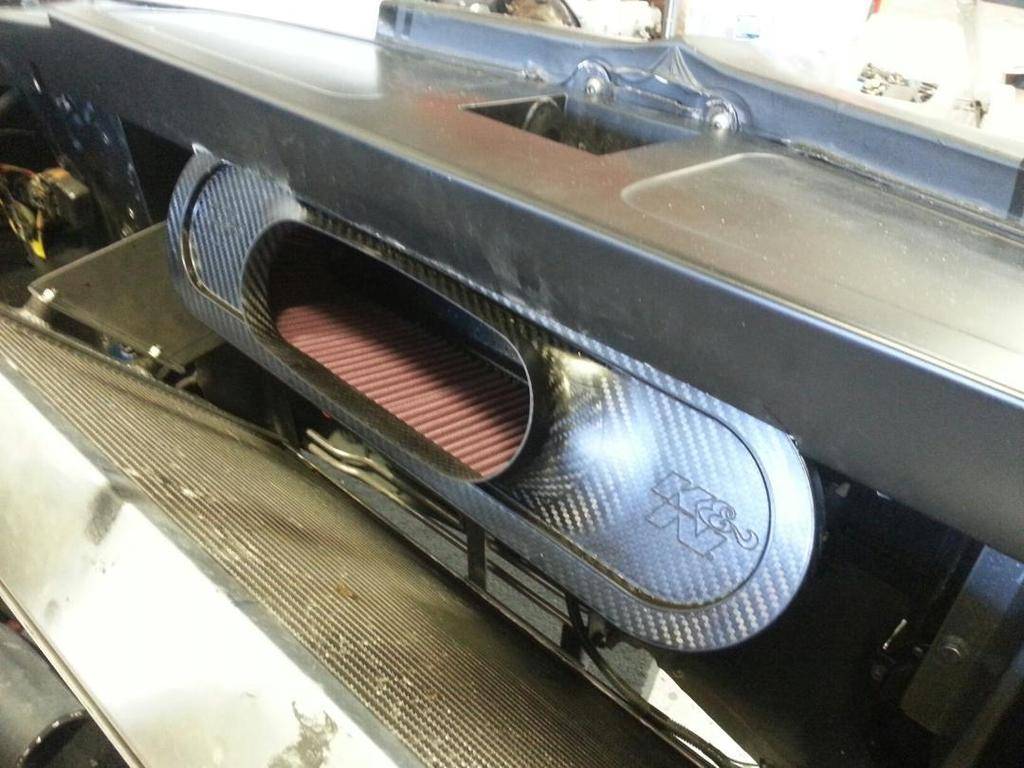
Cris then had the idea of using a C6 K&N air intake tube to draw air from on the other side of the radiator as this is how the modern vettes are set-up to draw cool air. Rumor has it the K&N C6 air intake tube makes pretty incredible power so in it went, some modification required. A little more aluminum ducting and it draws cool air separate from the heat of the engine now.
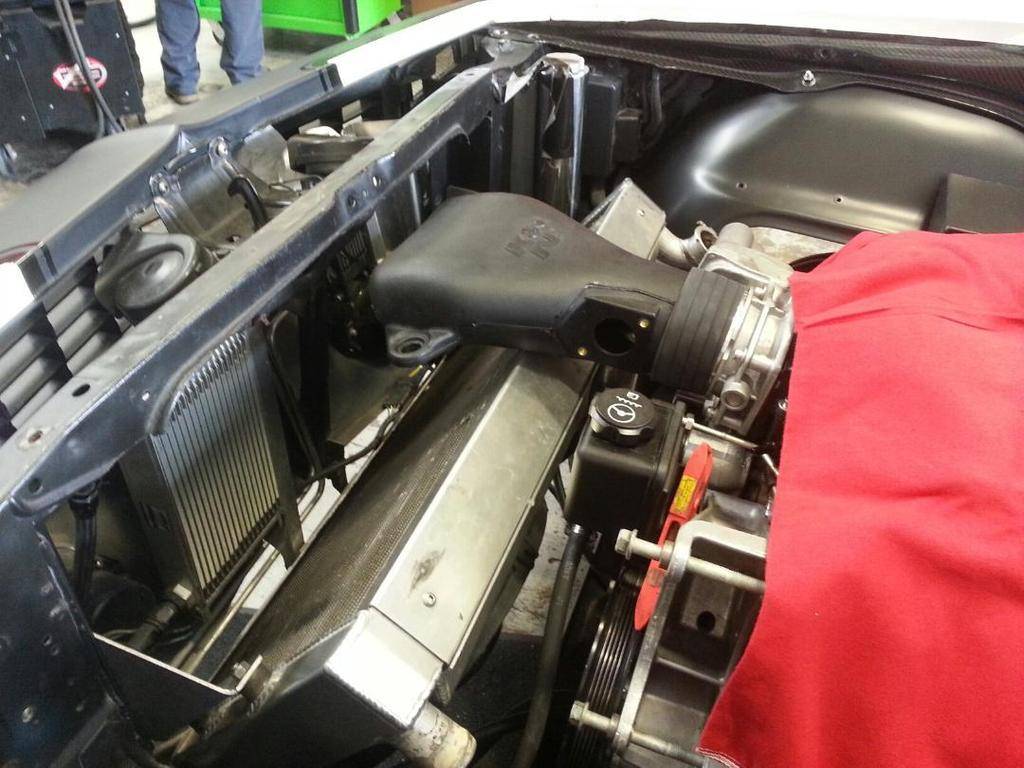
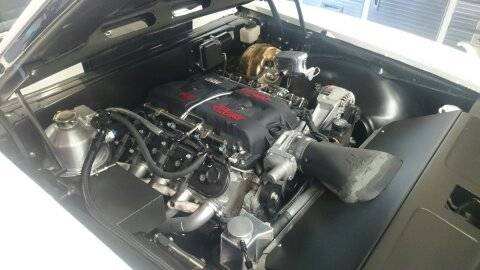
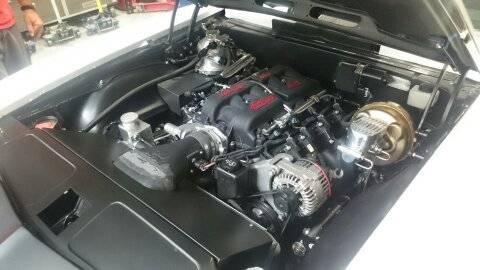
And as it looks now complete. Way cleaner than before and everything is still super easy to work on. Also this last pic is the best shot of how much volume was added to the dry sump tank.
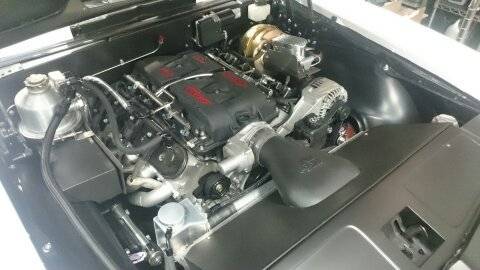
After this install the car immediately went to Pikes Peak International Raceway for the USCA event for trial by fire of the Lingenfelter engine and all the work done by JCG. With 7000+rpm shifts and close to 700 hp being delivered all weekend long everything was definitely put to the test!
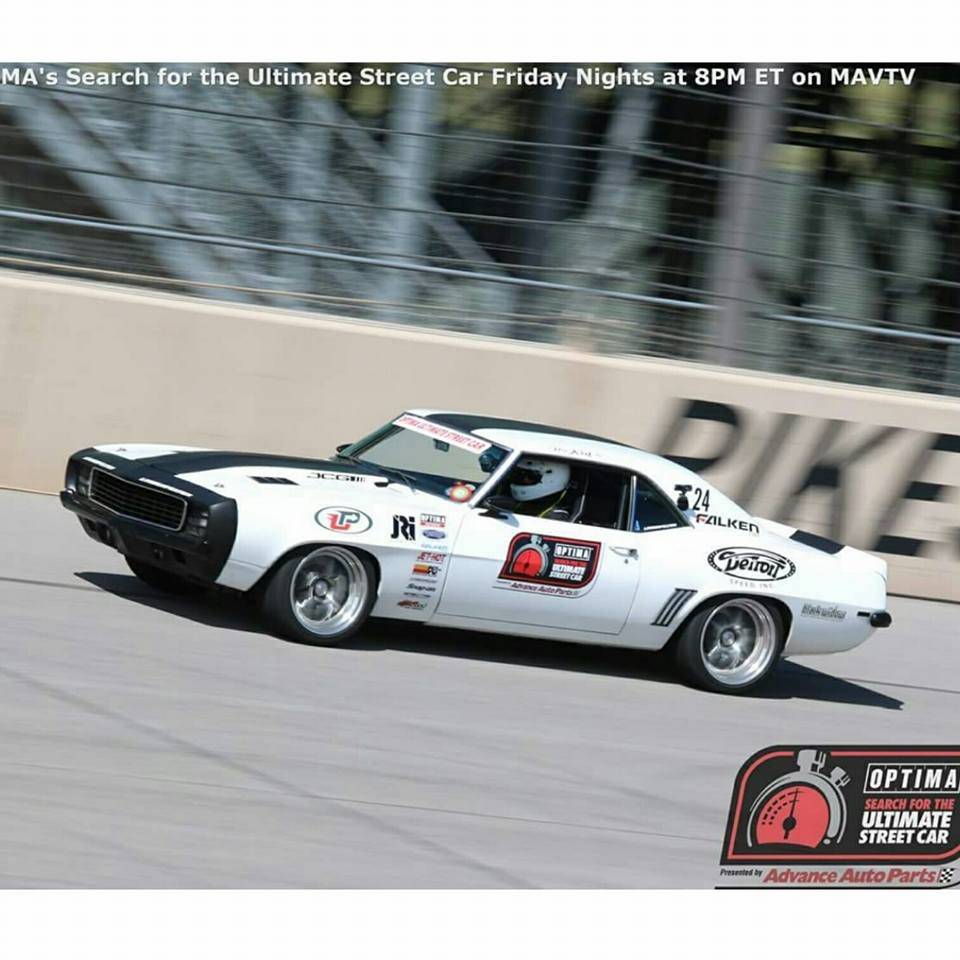
Luckily we had zero issues which allowed us to take the class win in every event and the overall GTV class win. Super fun weekend and a huge relief once we realized everything survived. Definitely a testament to the team that works on this car and the parts used.
More updates on their way! Let me know if there’s anything you want to see...Jake Rozelle
@jakerozelle
jakerozelle12.wix.com/jakerozelleracing
09-05-2016 #14
Registered User
- Join Date
- May 2010
- Posts
- 4
Amazing Camaro! Are you still running 315 rears on 18" wheels? Also i did not see remote reservoirs for the front shocks? Originally Posted by JakeR.

 Reply With Quote





