


Results 21 to 37 of 37
-
09-18-2026 #21

 Registered User
- Join Date
- Sep 2009
- Posts
- 3,002

Moving forward with the cooling system upgrades, I started working on the fitment for the cooling fans. I took a few days of looking at the fans to decide how to mount the fans so they were nice and secure. I wanted to use as many of the stock tabs as I could, so I built a tab that lined right up in the center of the passenger side. I didn't get a picture, but I used a piece of angle 1/8" scrap that I had and tapped it for M6x1 bolt.
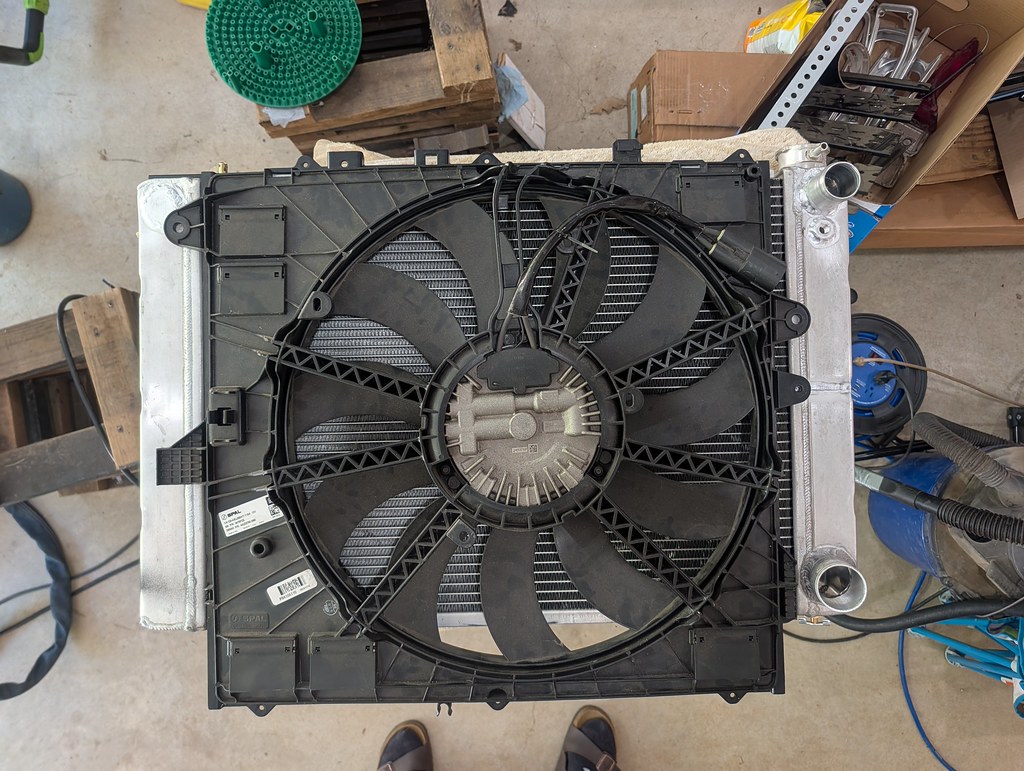
On the other side I bent up some tabs that hooked into the slot on the driver's side. I took my time to make sure that I had a nice tight fitment with both the radiator and the fan itself.
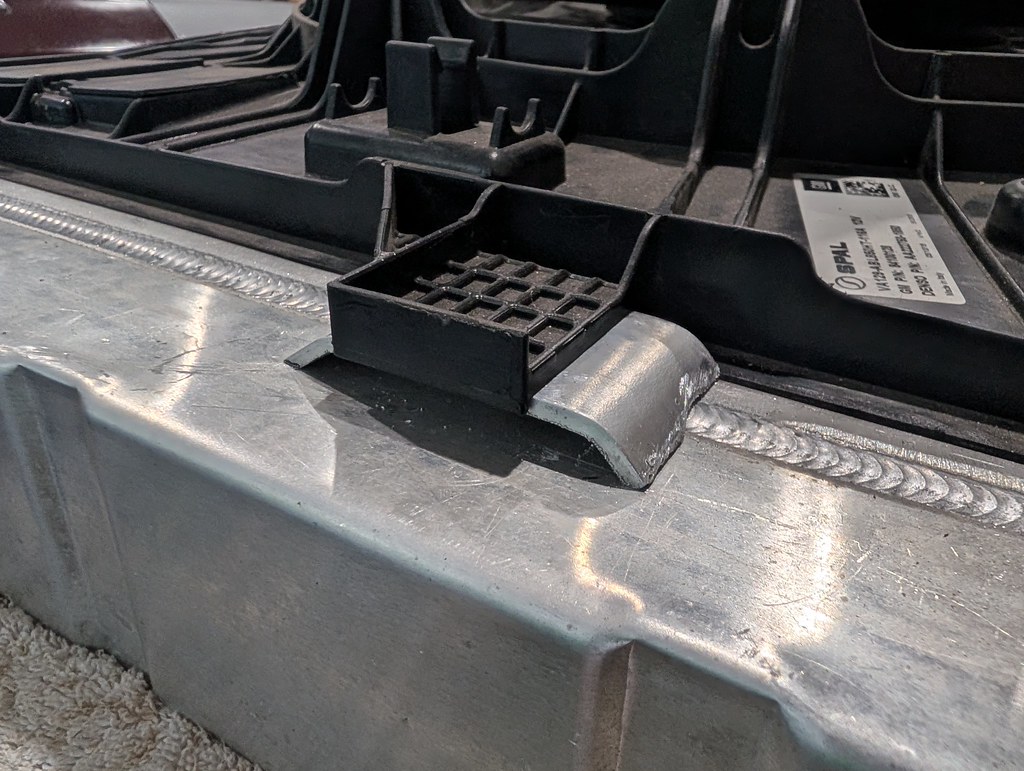
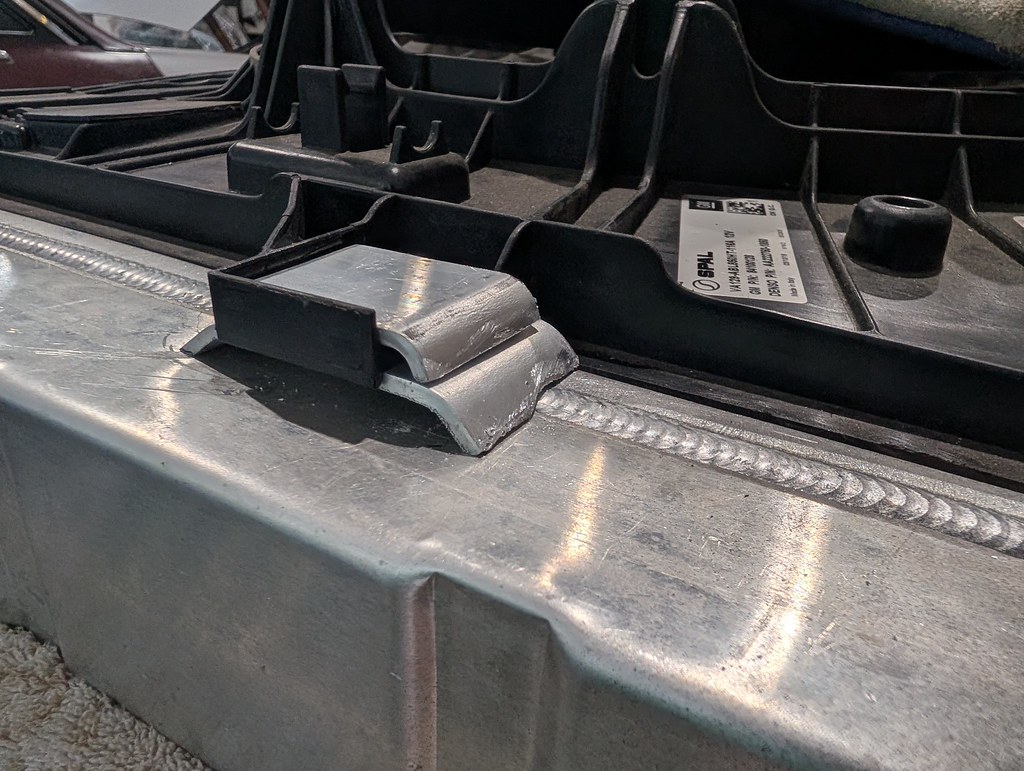
Weld's aren't Instagram pretty, but they are solid and getting better.
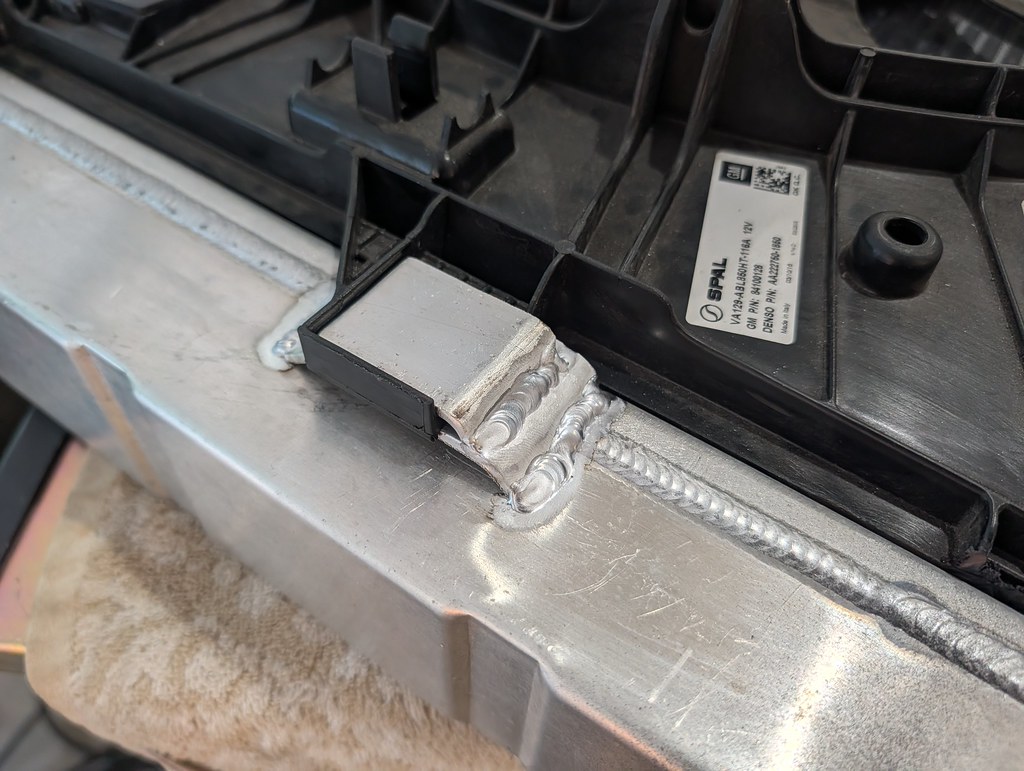
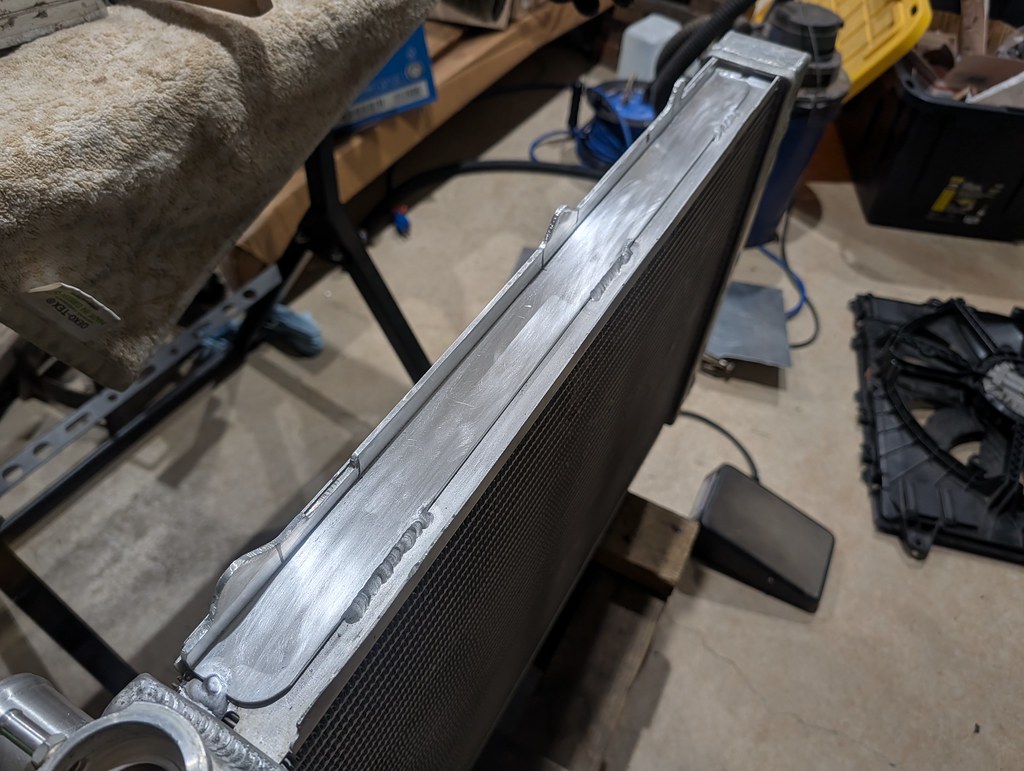
Once the sides were established, I wanted to turn my attention to the top side. The top has these nice clips that hook onto the radiator support bracket, but there was a lot of play front to rear. I wanted to tighten that up and used a piece of 1/8" angle. I trimmed it to fit the profile of the radiator fans and left enough room to tap for more M6x1 bolts. Once I was happy with the look and fitment I welded them in. I measured out 3 2" long welds to try and keep things uniform.
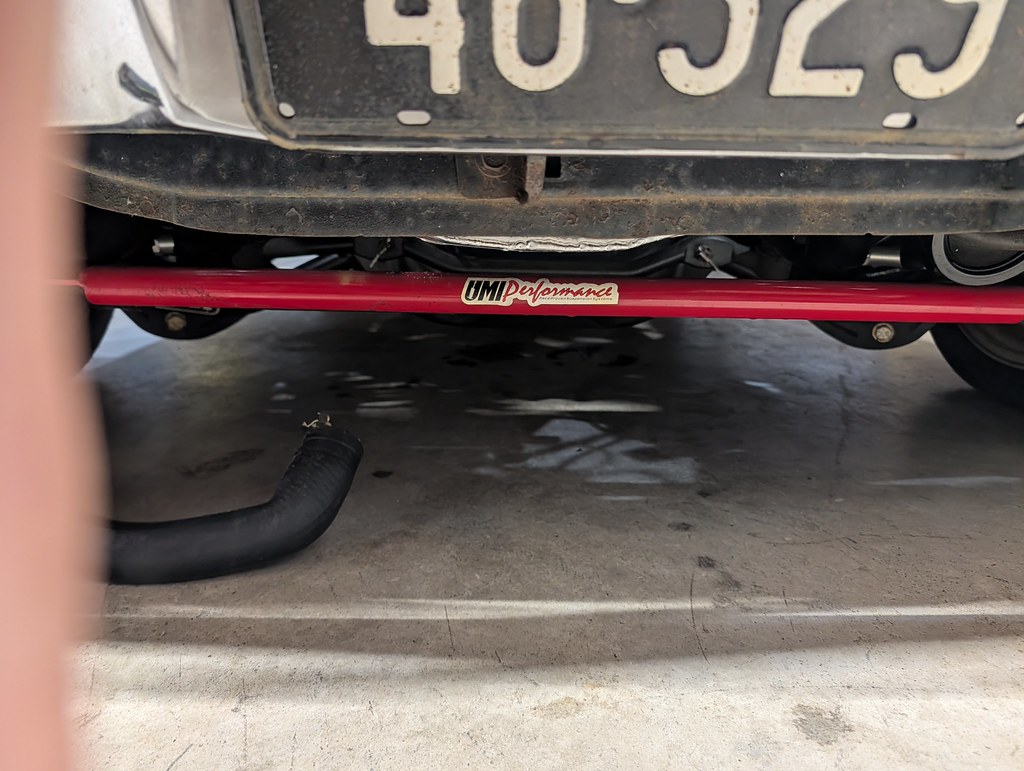
I took inspiration from my friend Andrew who installed nearly the same fan assembly in his 1967 Cougar with a radiator with nearly the same dimensions. By trimming the bottom of the radiator I was able to shorten the overhang from 3.5" to just over 1.5". Chop Chop!
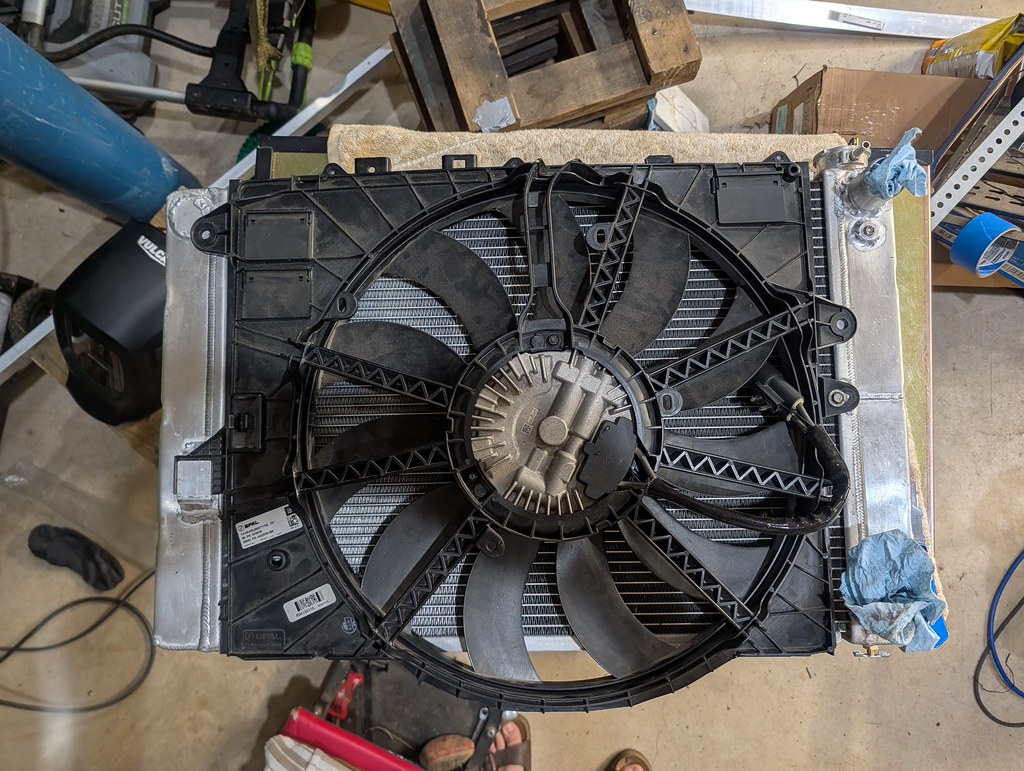
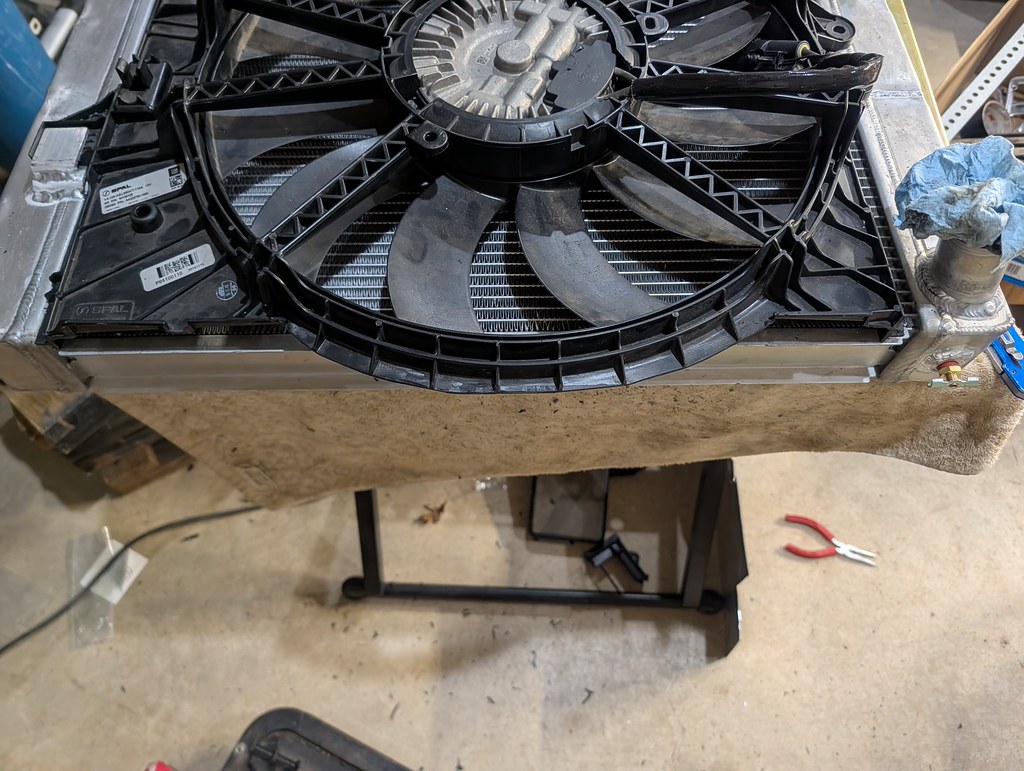
By cutting the bottom of the radiator shroud where I did, it required a filler panel on both sides. So I started there, and tacked them in place. Then I made a template for the shroud side to create a flange making sure to keep plenty of clearance for the fan blades to spin. I used some nice flanged screws to help secure the flange in place. Then I mirrored that flange that ran along the front of the radiator.
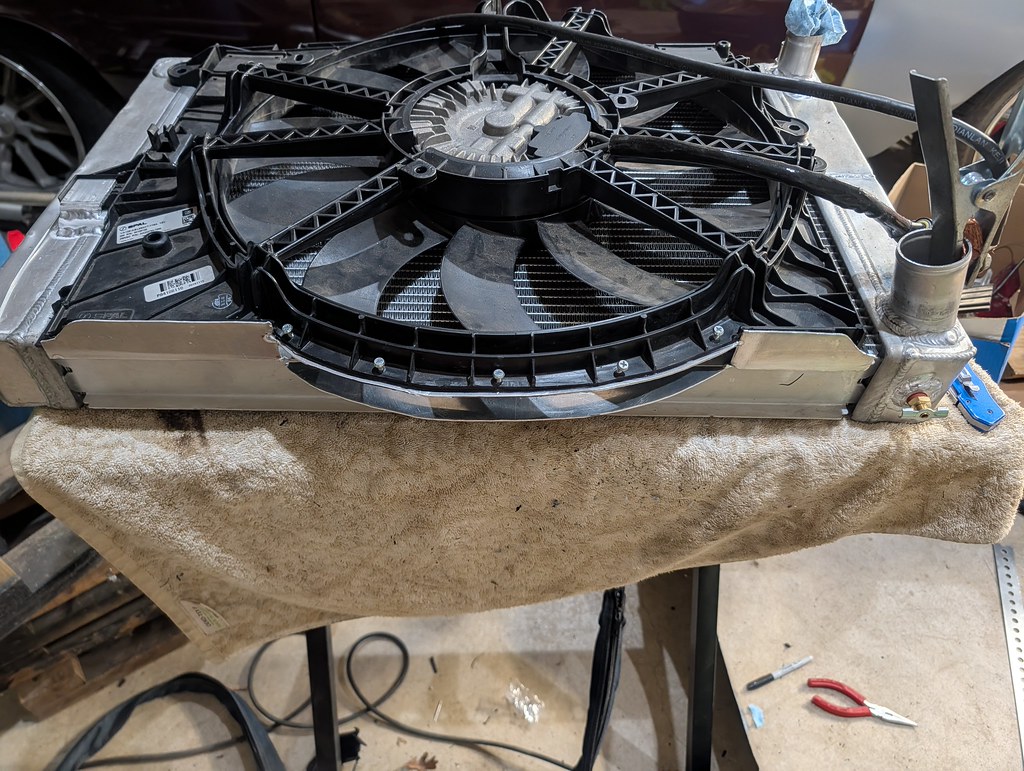
Then I worked my way around the panels to slowly make them one solid piece. I made sure to test fit the fans along the way. This picture you can also see the side tabs for mounting the shroud.
[url=https://www.flickr.com/gp/98271343@N03/sded95103n]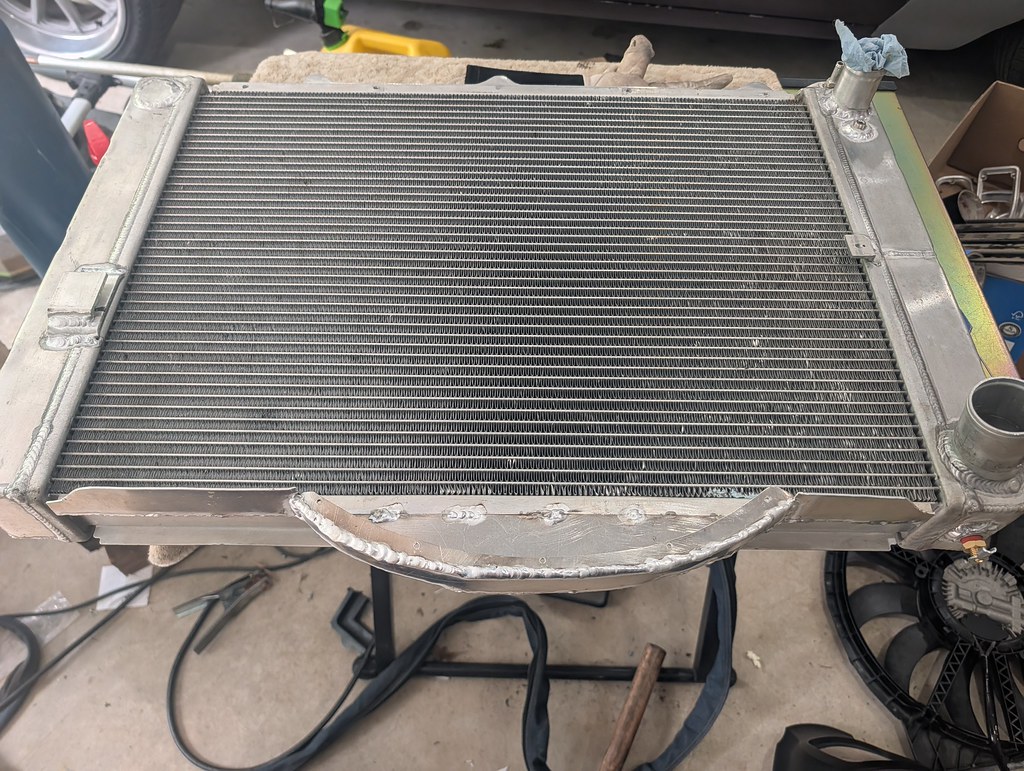
With that fully welded up, I'm going to all that done.
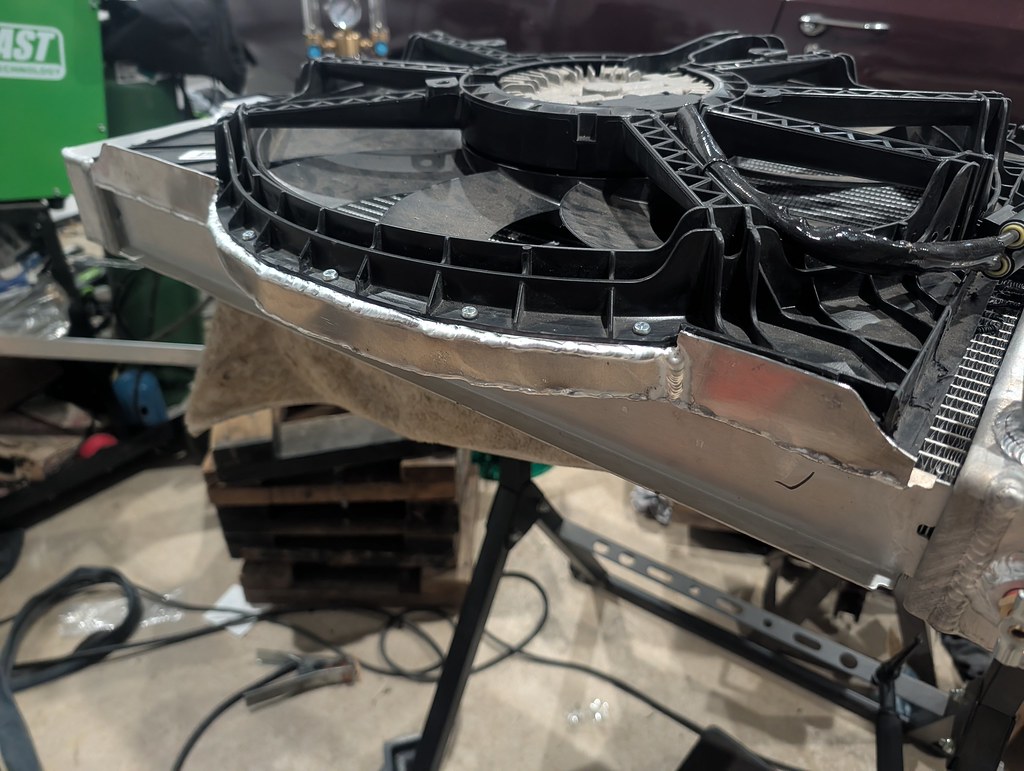
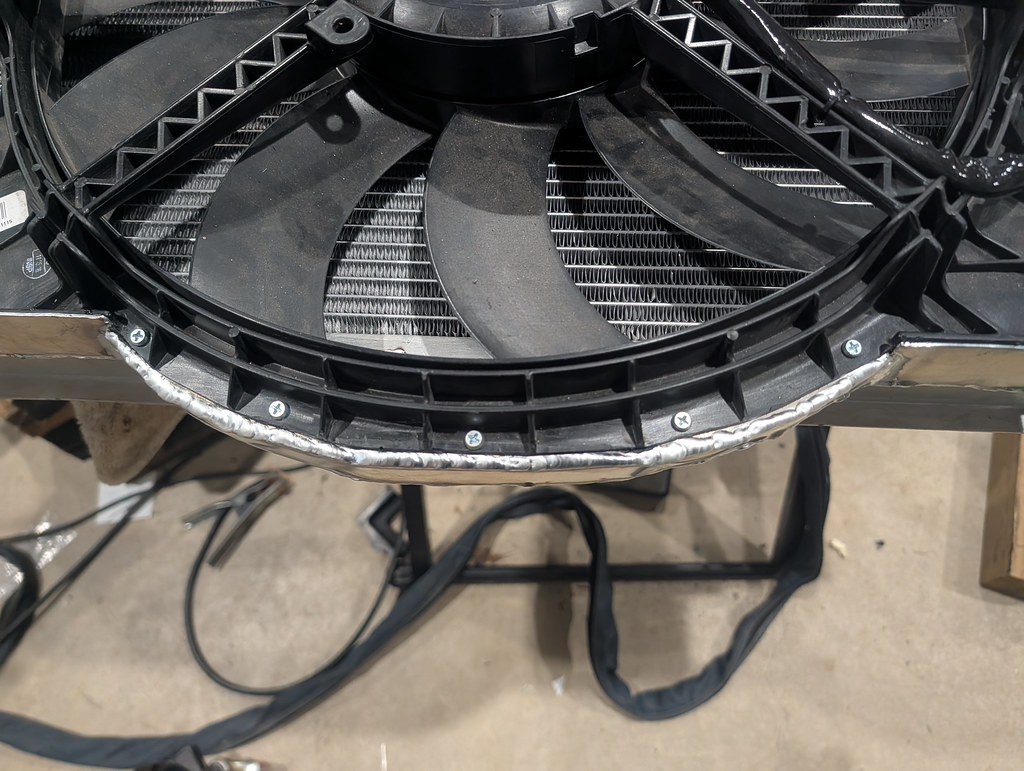
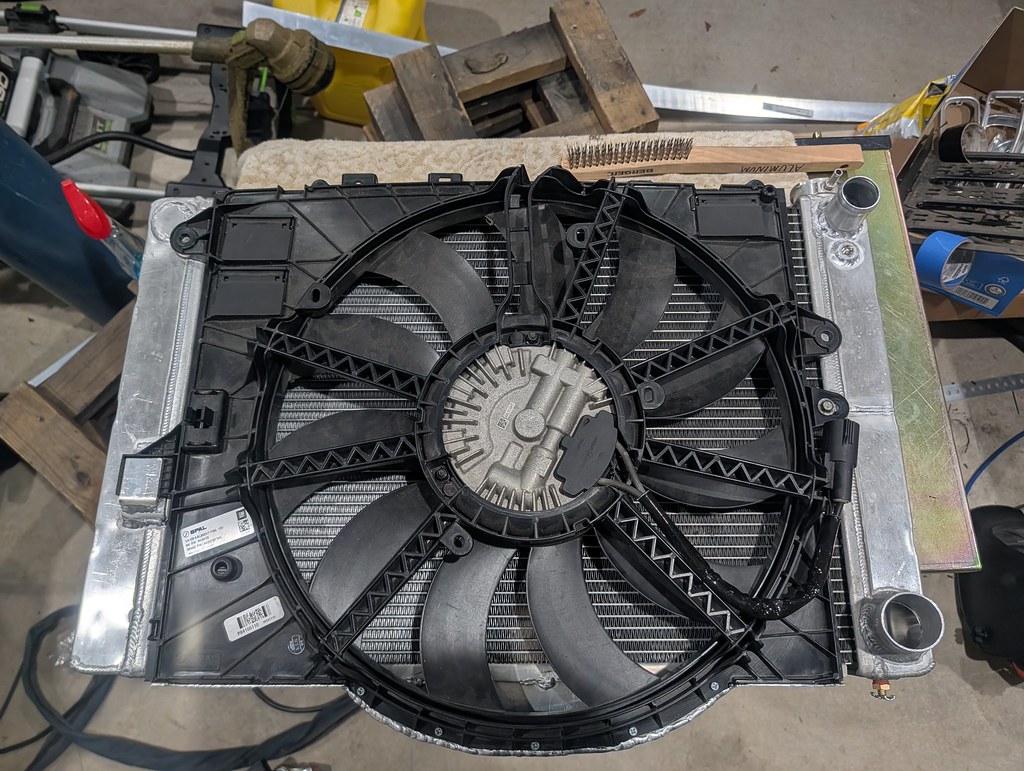
I couldn't wait to get it installed for a final test fit. Really happy with how it turned out. I bought the same radiator hose that I used on my 1968 Camaro with the LS swap radiator. Gates 22960. Unfortunately it was about 2" too short in the middle so I had to cut it and splice in another hose that I had handy. But very please with the fitment.
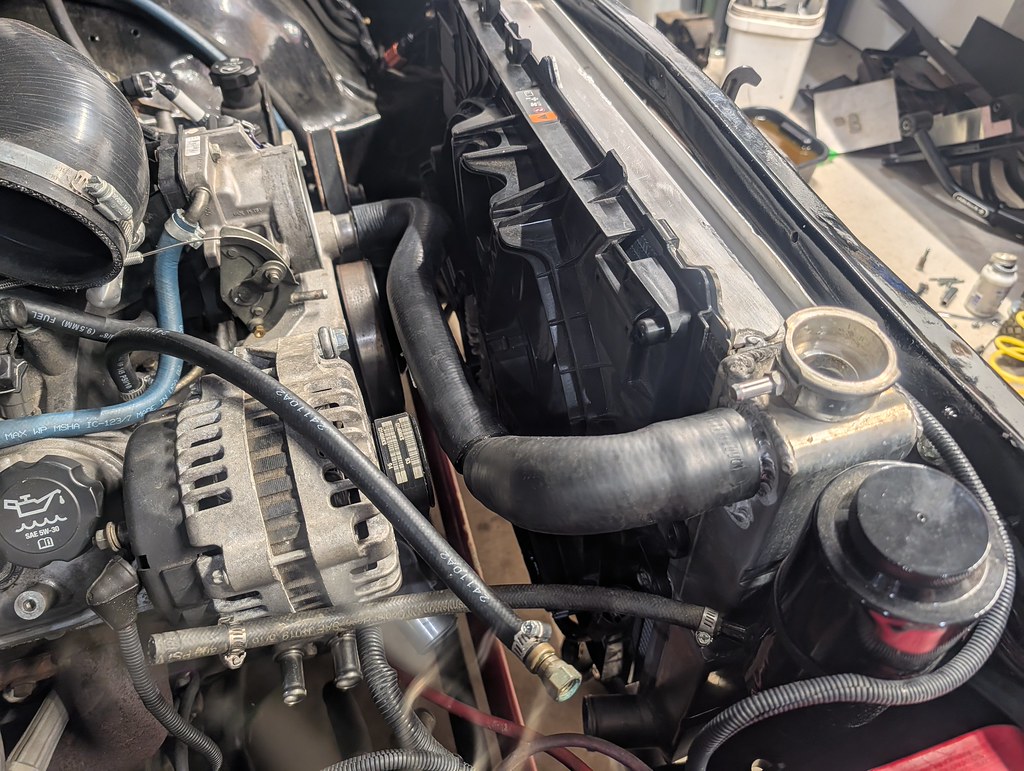
Plenty of room for the CAI too.
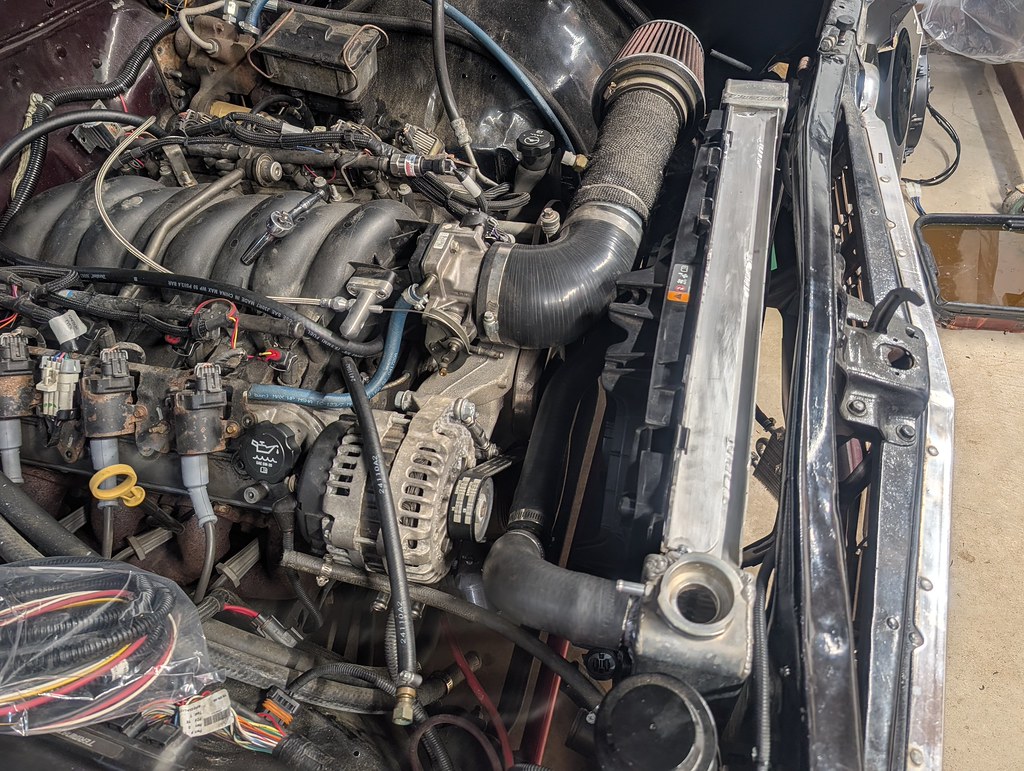
Kind of a bad picture, but there's just a small amount peaking from the front side of the car. Glad I trimmed it.
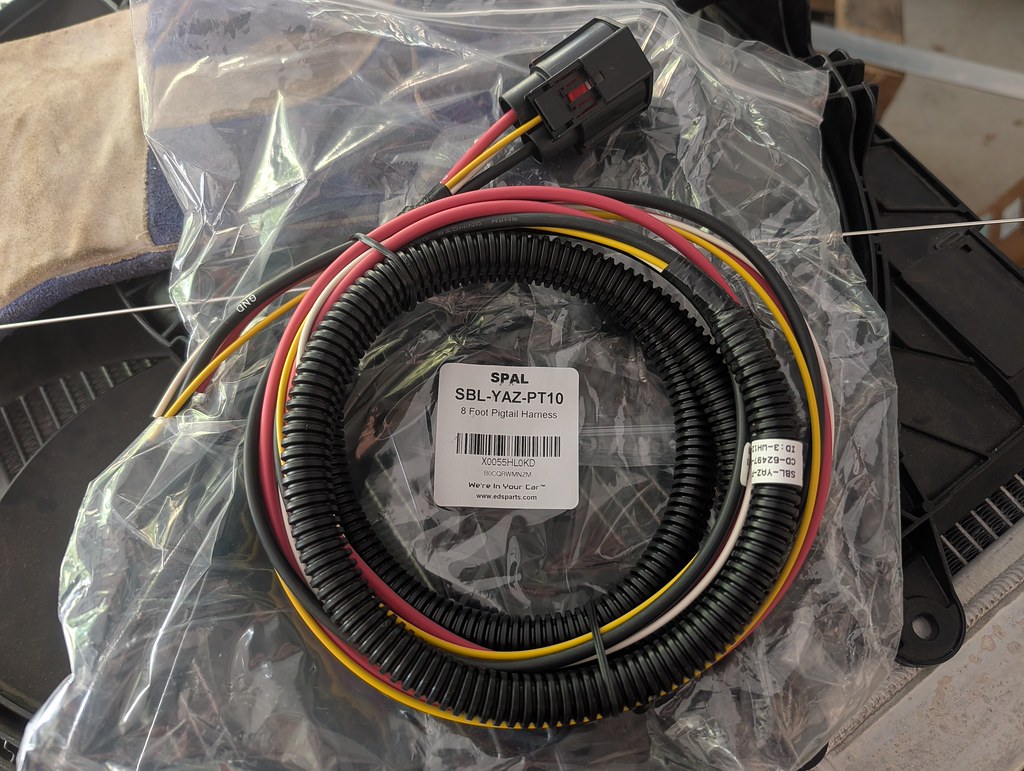
I also picked up a nice harness right from Spal that will make for a clean install. I probably should have gone with the 6ga wires, but I think I'll be ok with the 8ga. It would only be an issue at full speed, so I'll probably set the fan speeds to run at maybe 75% DC instead of the full 88%. If it becomes an issue I may need to step up to the 6ga wires.
Just need to make a few more connections and re-route some hoses and I'll be able to take the car out to test and see if that makes a difference with the operating temps. Certainly looks a lot cleaner!
Cheers,
Ryan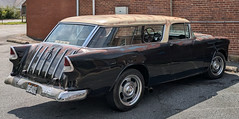
1955 Nomad project LC9, 4L80e, C5 brakes, Vision wheels
1968 Camaro 6.2 w/ LSA, TR6060-Magnum hybrid and etc SOLD
1976 T/A LS1 6 Speed, and etc. SOLD
Follow me on Instagram: ryeguy2006a
-
09-22-2026 #22
Registered User
- Join Date
- Sep 2009
- Posts
- 3,002
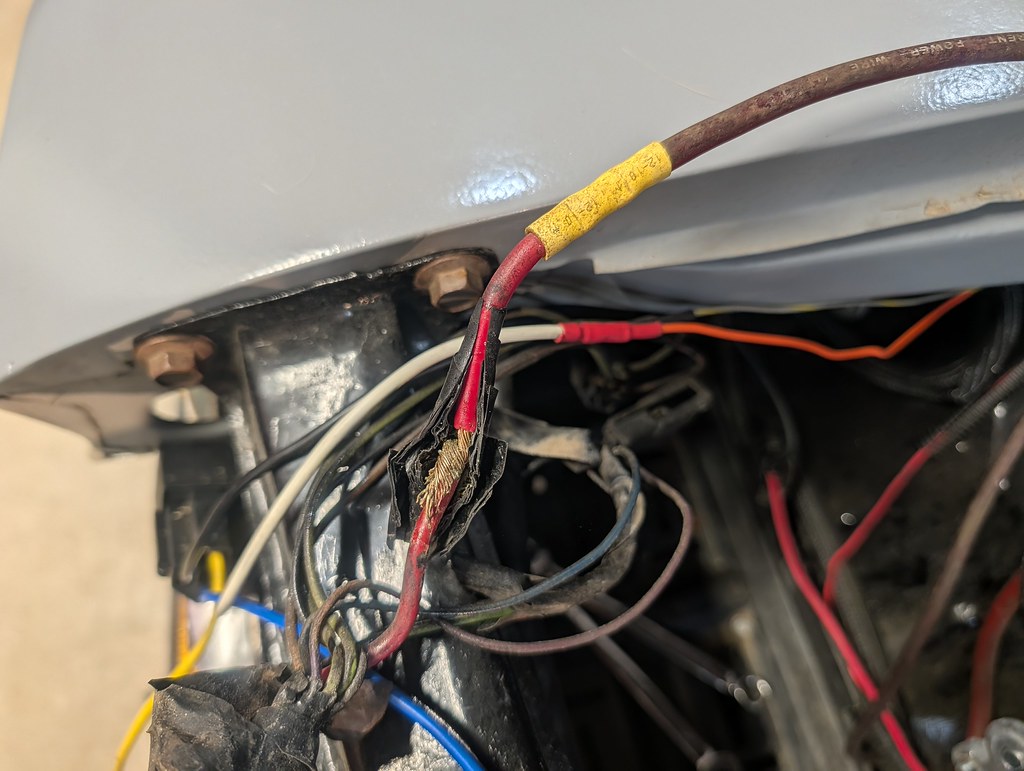
I pulled the battery, to have better access to the wiring since I needed to add the large gauge wires to the cooling fan. I was inspecting things and noticed that there was an amp wire going from the battery and traced it back to the original body harness where I found this beauty. Not a fan of this, so I trimmed it back to replace with a new piece of wiring I had. I used a seamless butt connector and heat shrink with glue.
Once everything was hooked up and the plumbing lines connected I got ahead of myself and filled the radiator with coolant. I knew I should have just taken the time to pressure test, but I got excited. Filled the radiator up completely and pretty soon after saw a few drips on the ground. The drips were coming from the dual pass plate that I added. Bummer...
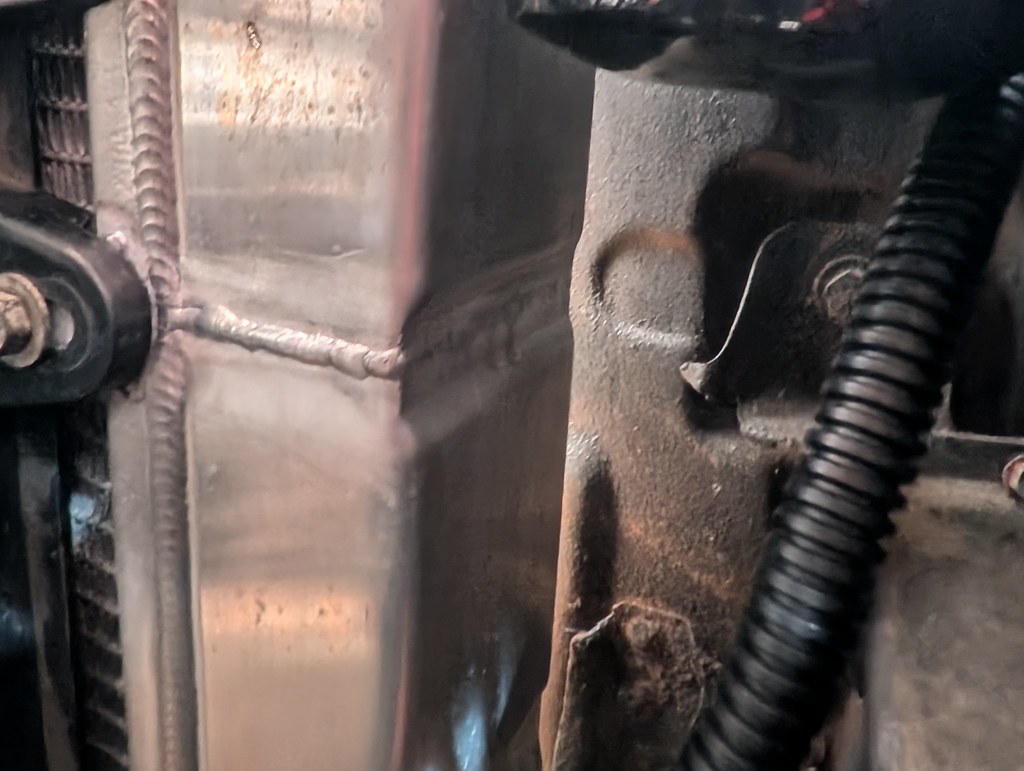
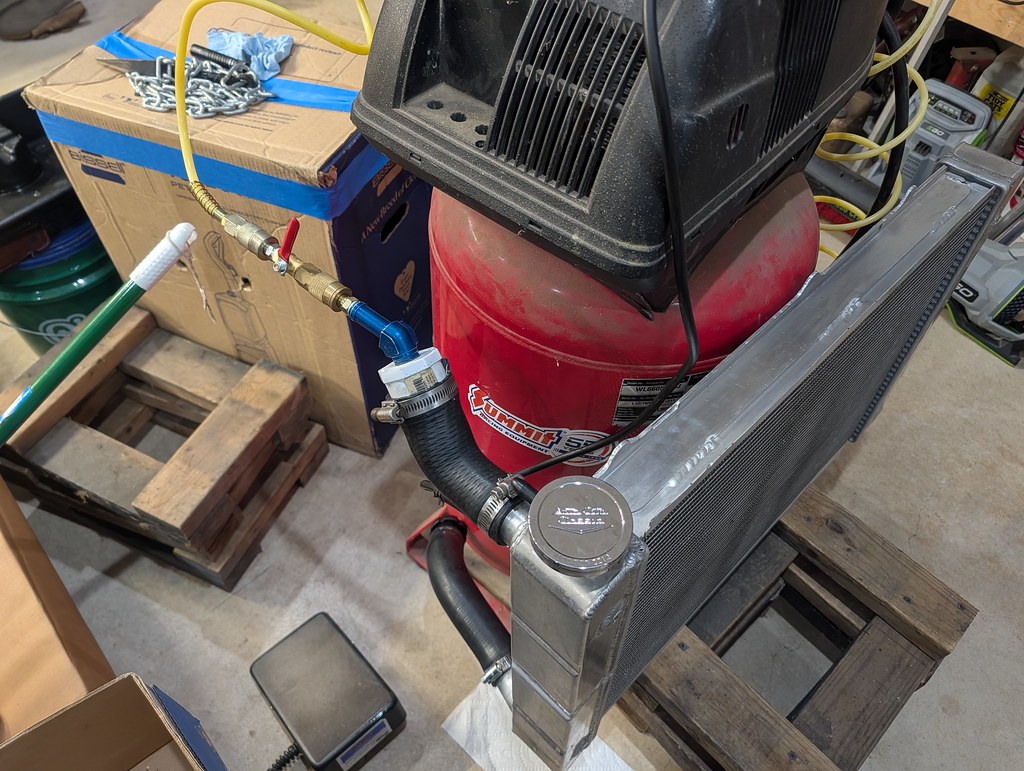
I drained the radiator with my handy new drain fitting, and then pulled it back out. It took me a while to find enough fittings and hoses to be able to seal up the radiator, but once I got it all sealed up, I pretty quickly confirmed there were two hairline cracks. The good news is that the only leaks I found were at the dual pass plate.
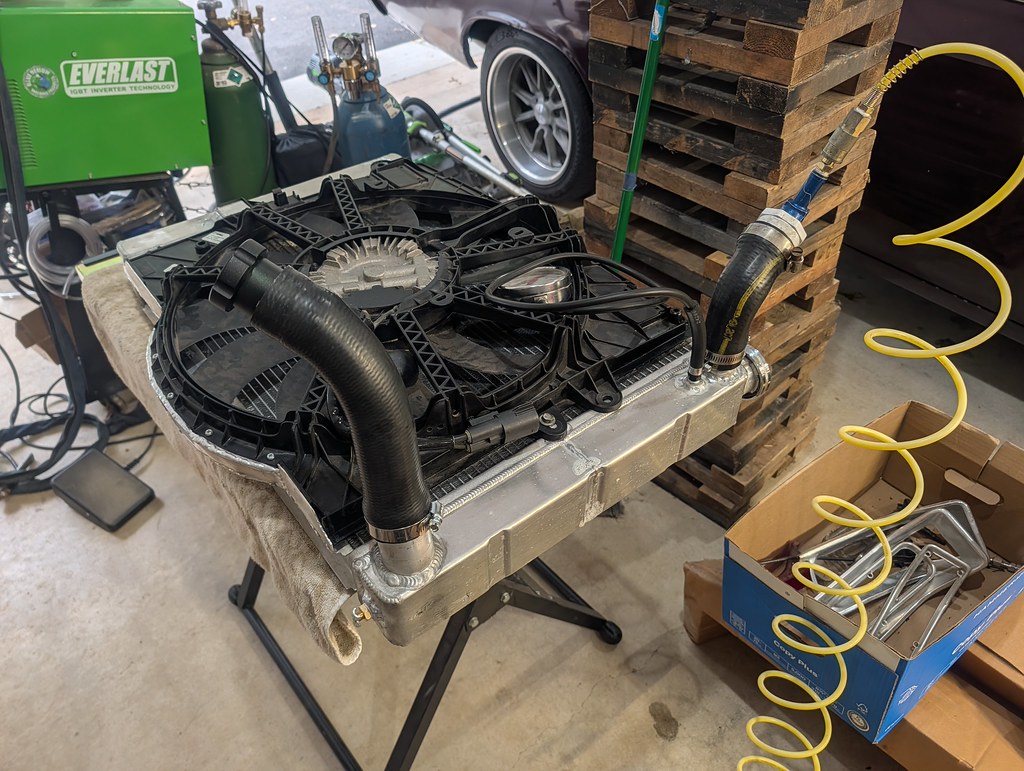
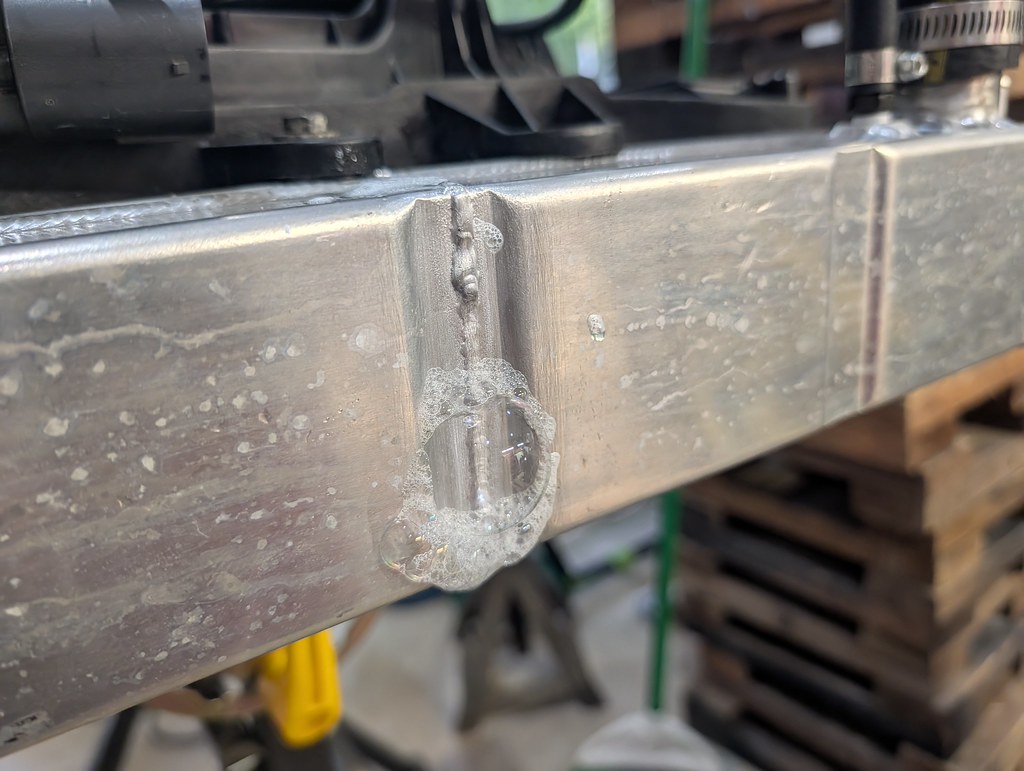
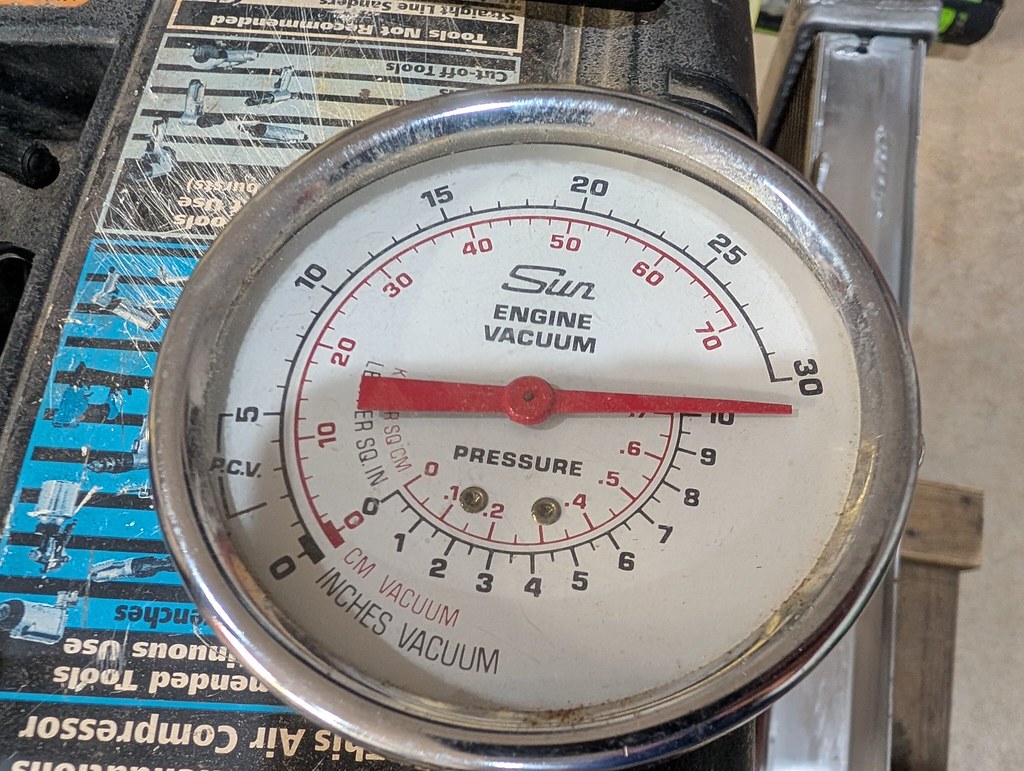
I used more heat this time, and added more filler to the pass. I was pretty confident that did the trick, because I have a better feel for the materials now. I retested with no bubbles. I came back and it had lost pressure, but I didn't see where there were any leaks in the radiator. I tried another way and filled the radiator with water, then put it under pressure. It still lost pressure, then I realized that my fitting adapter for the air hose was leaking air. I resealed that and it held 10psi for over an hour, so I was confident that it was fixed. I put some paper towels under to make sure I'd see any evidence of a weep of water, but it was completely dry. I'm calling that fixed.
It didn't take long at all to reinstall the radiator now that the hoses were all there. I rechecked all of my fittings and started the engine to make sure that coolant was circulating properly. I checked one more time for leaks and was good to go. Once the car was up to temperature, I got out on the highway. Was very pleased to see that the temps were much lower than it was before. It was running right around 200*, and yesterday it ran around 193*. I'm assuming that there is likely an air pocket somewhere since it never "burped", but I'm hoping it runs closer to 188-190 for a normal operating temp. I also let the car idle and the new Gen6 fan worked beautifully. It didn't go over 203* from what I saw I believe the fans kick on around 200*. Then took the car out on the highway and was very happy to see the temps drop pretty quickly from 203 down to 195 after about a half mile at 60 mph. Got home and no leaks or evidence of water. It was a little low on coolant, so I topped it off. Glad I made the water pump change to see the car running in the low 190's and the Gen6 cooling fan. Hopefully we get some more temps in the high 90s again to stress test the new cooling system.
1955 Nomad project LC9, 4L80e, C5 brakes, Vision wheels
1968 Camaro 6.2 w/ LSA, TR6060-Magnum hybrid and etc SOLD
1976 T/A LS1 6 Speed, and etc. SOLD
Follow me on Instagram: ryeguy2006a
4 Weeks Ago #23
 Registered User
- Join Date
- Feb 2007
- Location
- Tinley Park, IL
- Posts
- 1,221
Couldn't you use a dial indicator on the rocker to get the lift and then rotate the engine to figure out duration? Originally Posted by ryeguy2006a


Nick ~ 1969 Cutlass
4 Weeks Ago #24
Registered User
- Join Date
- Sep 2009
- Posts
- 3,002
That's true, I didn't think about using my dial indicator. I understand the lift figure, but how would you do the duration? Would I need to mark the balancer and calculate how long the lobes are open? And I'd probably need a second dial to check LSA?
Although, I have a leaky oil pan so I may pull out the motor this winter to replace the rear main and resilicone the 4 corners of the oil pan. I think they usually mark the rear of the cams with the specs. I was told it was a Texas Speed cam.
1955 Nomad project LC9, 4L80e, C5 brakes, Vision wheels
1968 Camaro 6.2 w/ LSA, TR6060-Magnum hybrid and etc SOLD
1976 T/A LS1 6 Speed, and etc. SOLD
Follow me on Instagram: ryeguy2006a
4 Weeks Ago #25
Registered User
- Join Date
- Aug 2007
- Posts
- 741
Yes the front the front of the cam should have at least a part number and the supplier.
I have used Texas Speed cams in the past and they had the details on the front of the cam.
4 Weeks Ago #26
Registered User
- Join Date
- Feb 2007
- Location
- Tinley Park, IL
- Posts
- 1,221
Zero the dial indicator at no lift, rotate till .050 opening and note the degrees then note again at .050 closing. Not sure how accurate it will be on the small diameter balance vs a degree wheel. But may get you close enough to figure out what it is unless it's a custom grind. You'll have to do an intake and exhaust lobe.
Now that I think of it, I'm not sure how accurate it would be in general assuming you have hydraulic lifters...
- - - Updated - - -
Zero the dial indicator at no lift, rotate till .050 opening and note the degrees then note again at .050 closing. Not sure how accurate it will be on the small diameter balance vs a degree wheel. But may get you close enough to figure out what it is unless it's a custom grind. You'll have to do an intake and exhaust lobe.
Now that I think of it, I'm not sure how accurate it would be in general assuming you have hydraulic lifters...
Nick ~ 1969 Cutlass
1 Week Ago #27
Registered User
- Join Date
- Sep 2009
- Posts
- 3,002
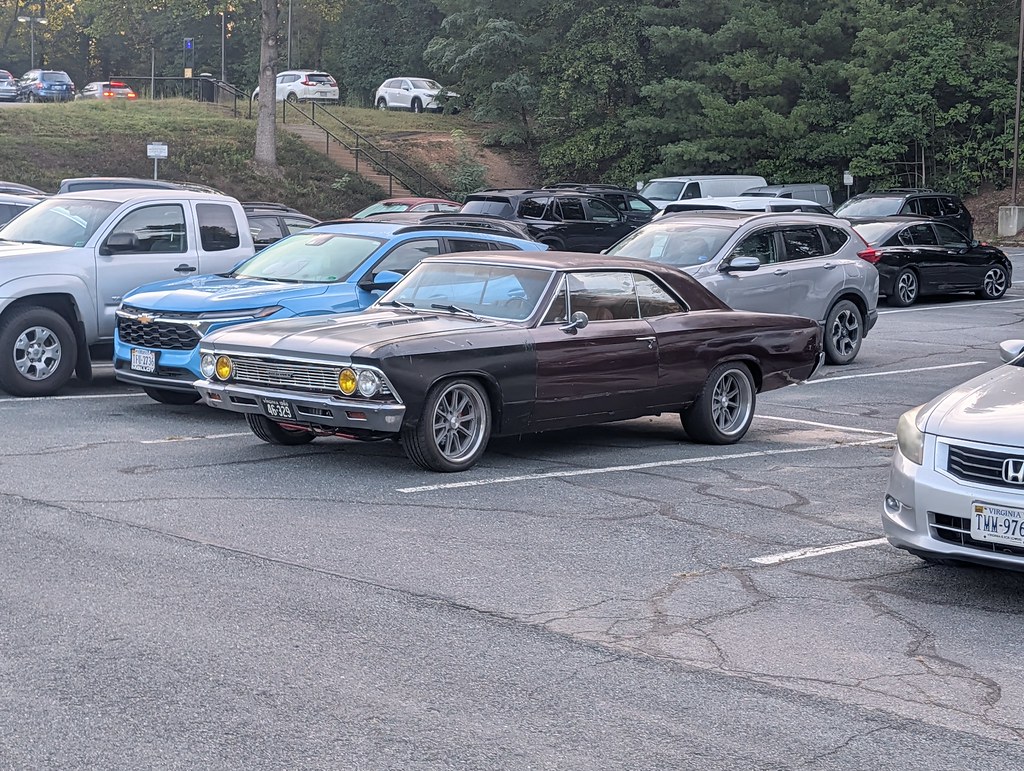
I've been enjoying the car for the last month or so after I fixed the cooling issues and upgraded the cooling fan. Been driving it back and forth to work, school pickup, groceries, and etc whenever I can. I've been tweaking the timing tables and fueling to where I'm very happy with it. I love the stance.
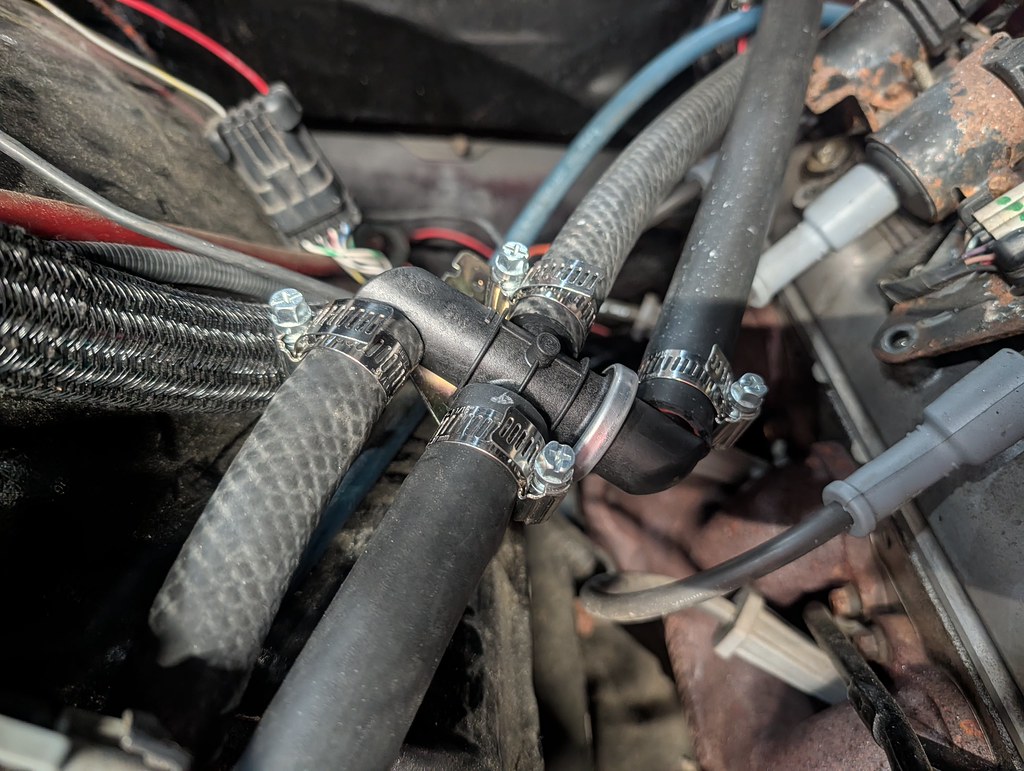
I bought this for my Nomad to install with the Vintage Air setup, but I sold the car before I had a chance to install. I forgot that I hadn't included that in my last updated, but it was the perfect opportunity to do this while I had the cooling system drained. It's a bypass valve but instead of cutting off the circulation when you flip the valve, it recirculates so that the LS water pump is happy. I found out that they now have an electronic version that will likely work well with the Gen5 VA units. I'll definitely look into that when it comes time for the AC swap.
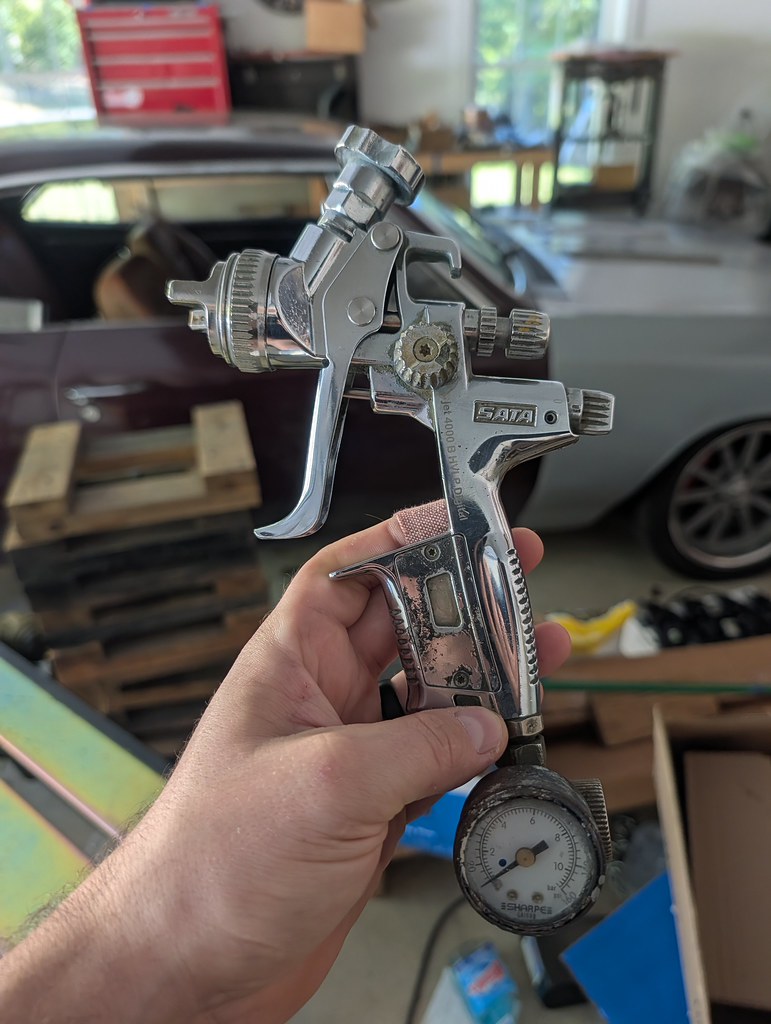
About a month ago I drove my car down to the local auto paint store and had them scan the paint so that I could eventually paint match the front end of the car so I would have one color. Then about 2 weeks ago I was shopping around for a new spray gun and found a guy selling this Sata 4000 gun for about half of what they normally sell for. It had a bunch of overspray, but cleaned up really nicely. This was the day I bought it.
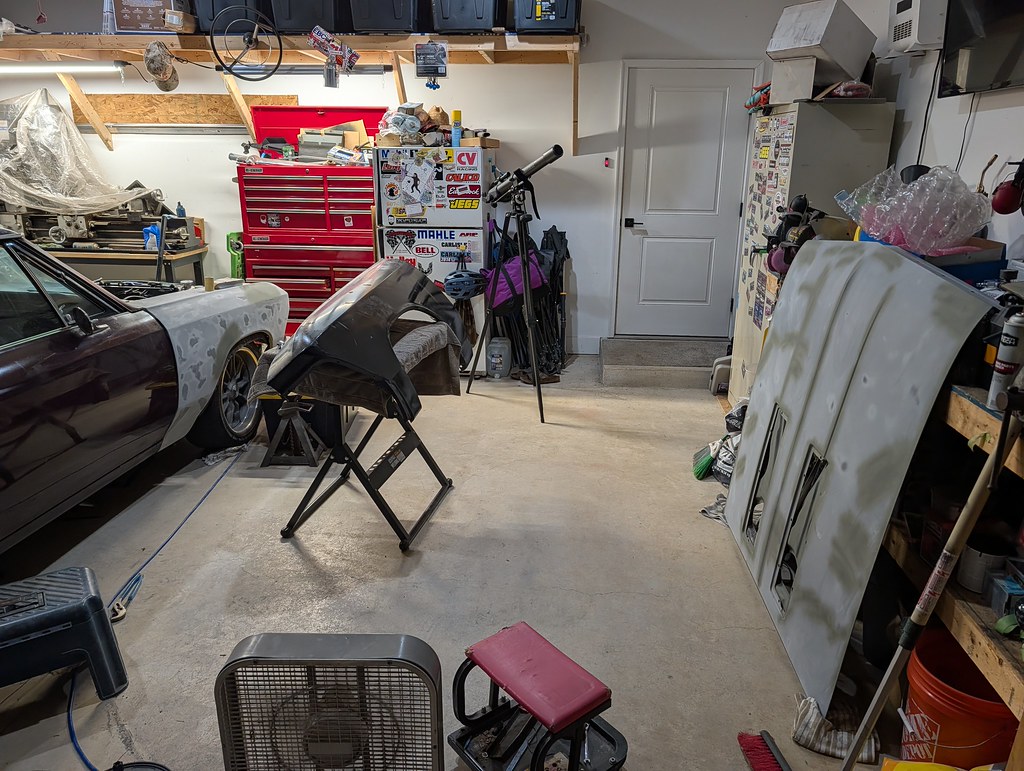
Then last weekend I decided it was go time. I started block sanding on the one fender that had the primer on it, but quickly realized that I needed to pull off the fender and hood to do a proper job. The whole goal of this is to do an ok job of paint matching the front, but is very much a scuff and shoot deal. I am just trying to make it look the best it can without going overboard. As I got into the fenders that was hard to do, but had to keep the end goal in mind that it will look substantially better than all primer. I'll blow the car all apart likely next year at this time to do full on rust repair and repaint down the road.
My youngest son wanted to help so he was peeling off the primer where someone didn't prep under the hood vents and did some sanding on the car too. Showed him the "x" pattern with the block sander
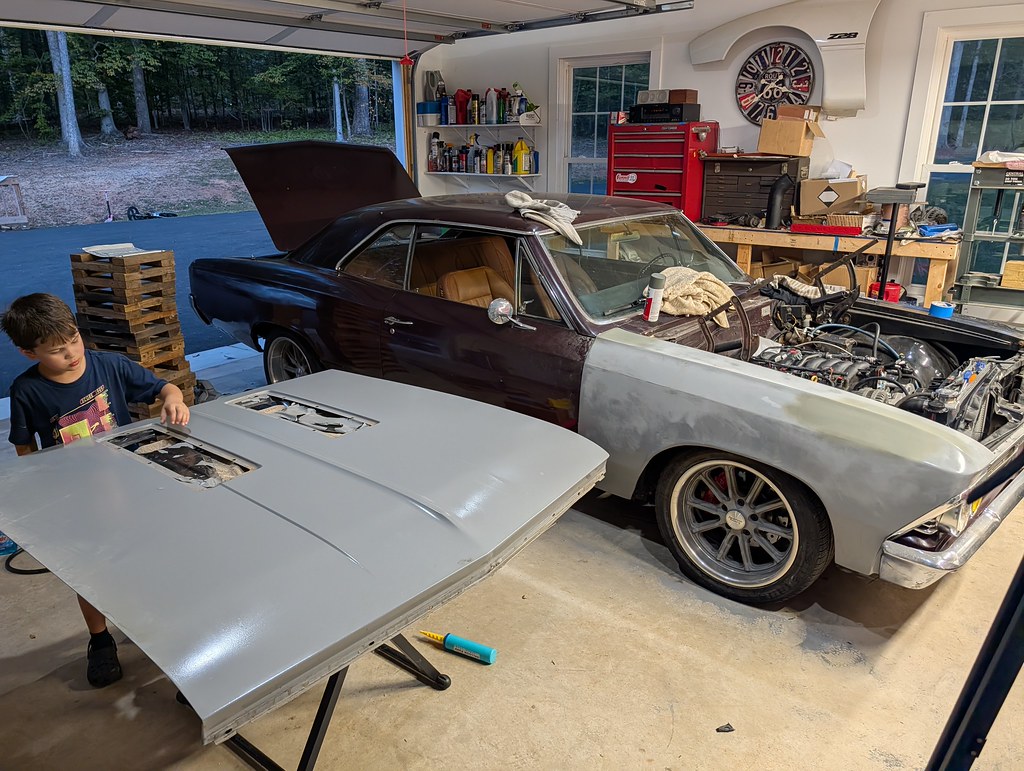
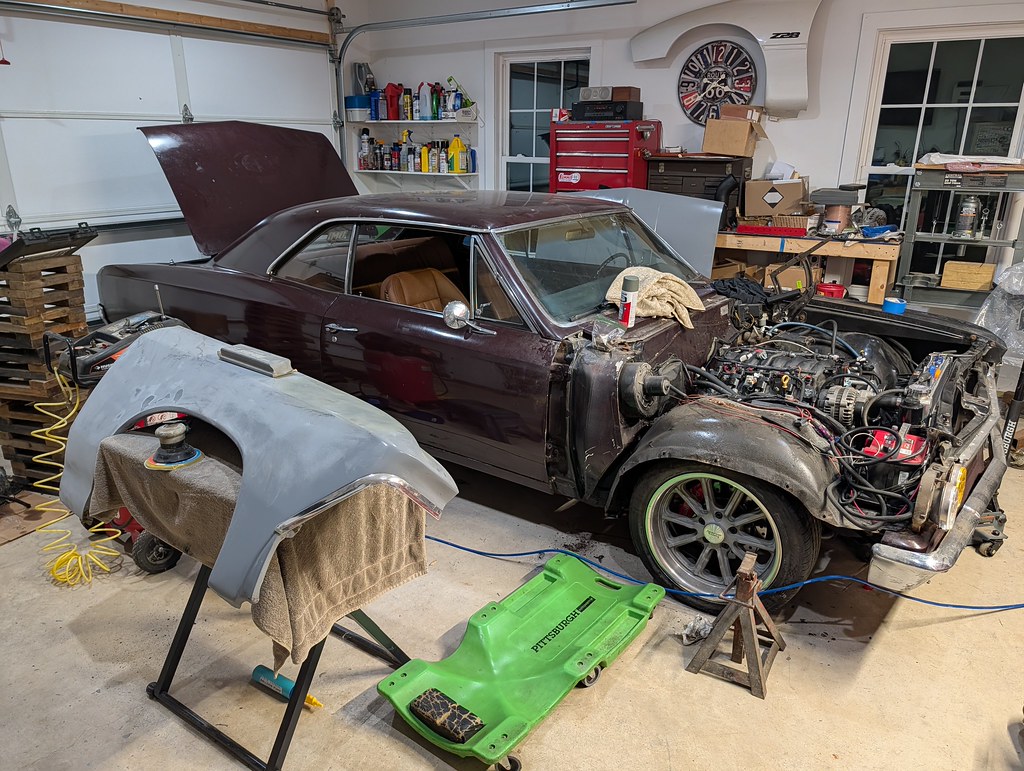
Passenger side and hood are done then pulled off the driver's side. The driver's side is a new AMD piece, and the passenger is original. I will probably opt to get another new fender to match down the road. The previous owner also applied the Poppy's Patina to both the hood and fenders. The other's were primed so that all came off with block sanding, but the driver's side was applied over the e-coat.
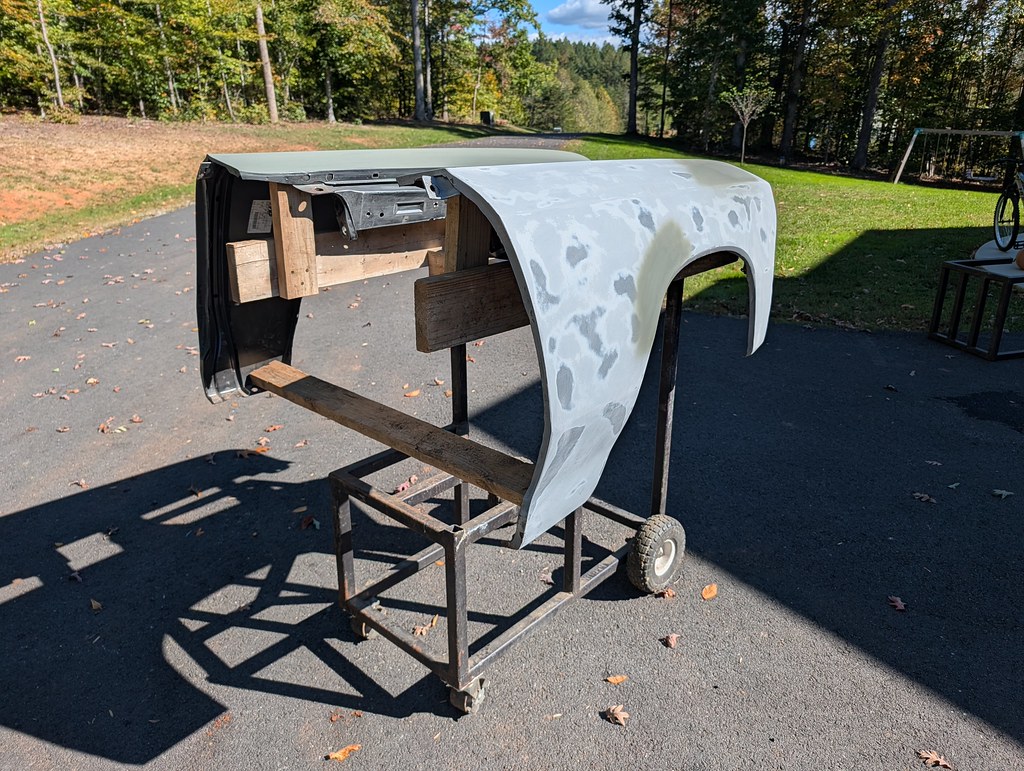
I have a cart that I picked up about 4 years ago that I'm going to make into a welding car, but it worked perfectly as a rack for painting these fenders. I took some scrap wood and modified it all to hold the fenders up so that I could paint everything and easily move it back into the garage to dry.
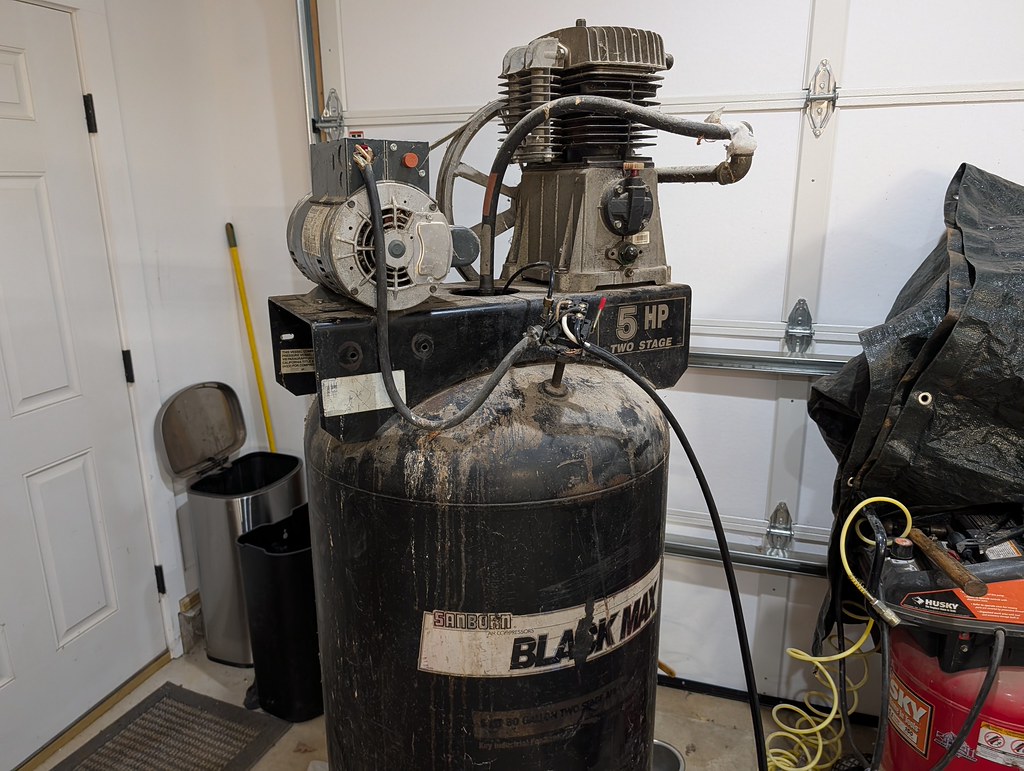
I had been keeping an eye on the weather and this Sunday's weather looked ideal. Low humidity, temps were 62* in the PM and it was actually on the weekend. But then as I was making sure that I had everything I needed, I realized that my little 21 gallon compressor will likely not be up to the task to spray everything. I was hunting on marketplace and came across someone selling an 80 gallon unit for really cheap that would work perfectly and wasn't crazy far away. The guy wasn't getting back to me all day Saturday, then finally did around 5:30 pm so I ran over and picked it up. I got it home and didn't love the wiring job that was done, so I opted to re-wire it. There was already an older, but functional water separator/drier inline so that was a nice win. I did some basic maintenance like drained the bottom of the tank, checked oil, and resealed some hose leaks. It fired right up with the new wiring and ran great. Runs up to pressure then kicks back off.
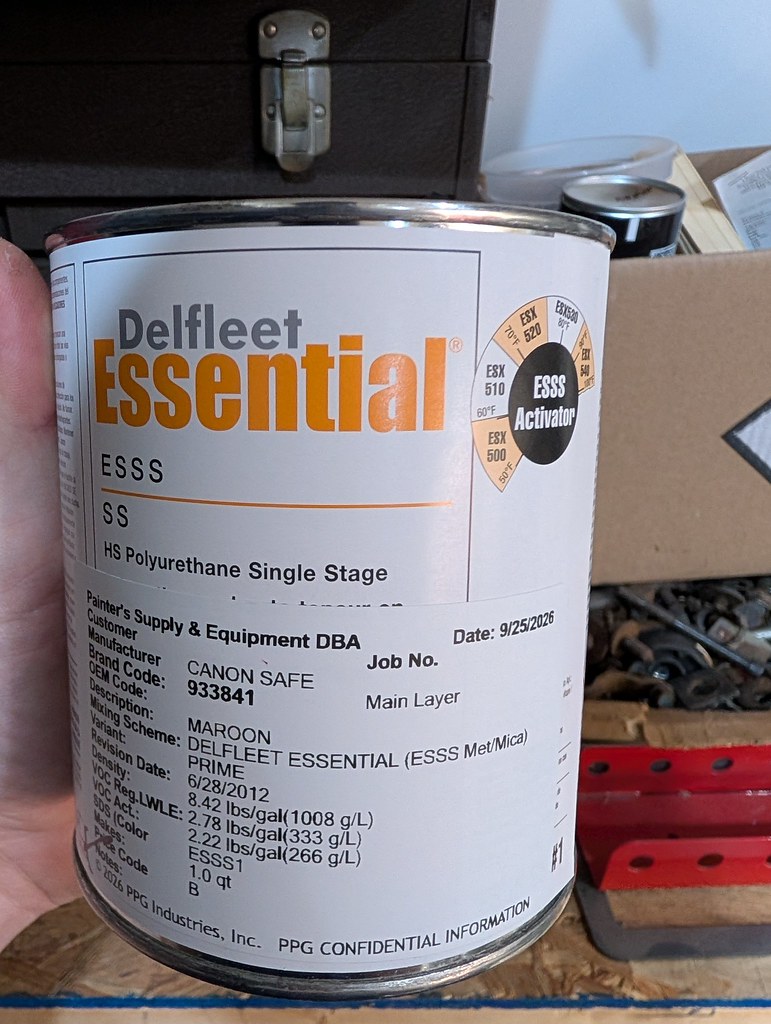
Here's the product that I used. It is the budget single stage paint from PPG's bottom line paint.
I thankfully just finished my state of the art downdraft paint booth, so I was able to get these parts sprayed in ideal conditions. JUST KIDDING!! I was thankful though that I somehow didn't get any bugs in the paint. Must have been from the lower temps in the AM. I did get some dust in the paint, but overall minimal contaminates. I did one medium coat followed by one heavy coat.
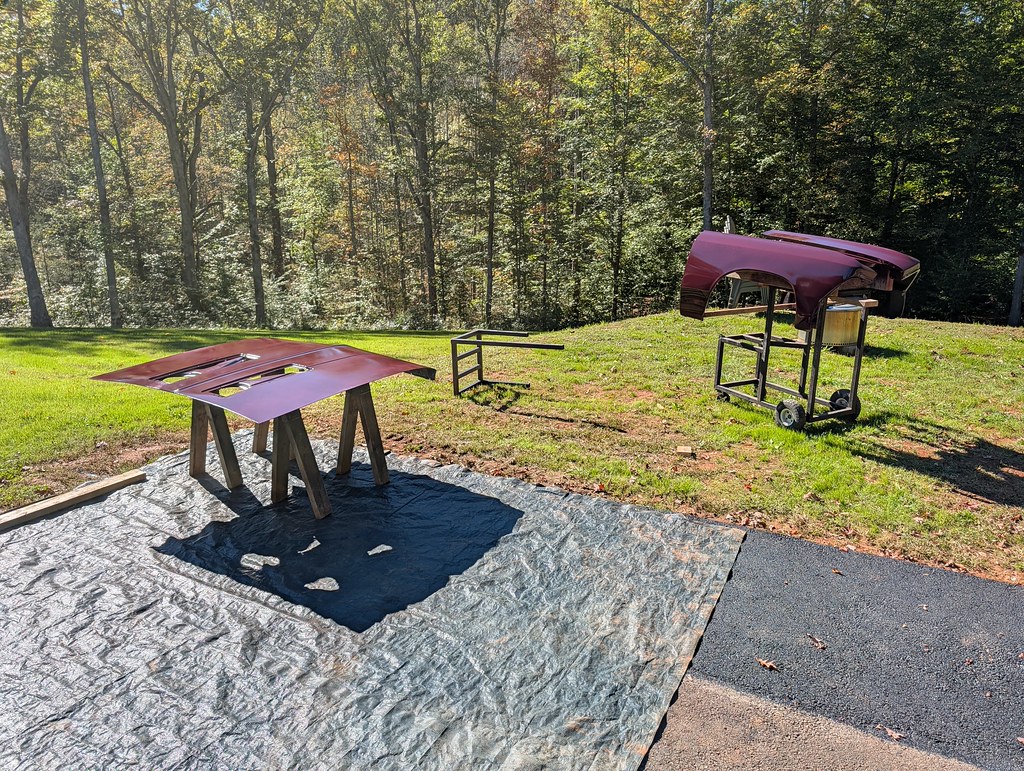
Once I laid down the paint and was satisfied I didn't miss any spots and got full coverage, I wheeled them back inside. I recruited my older son to help with the hood. My wife just had surgery so she couldn't pick anything up. He wasn't sure of himself, but did a great job as the hood is kinda heavy.
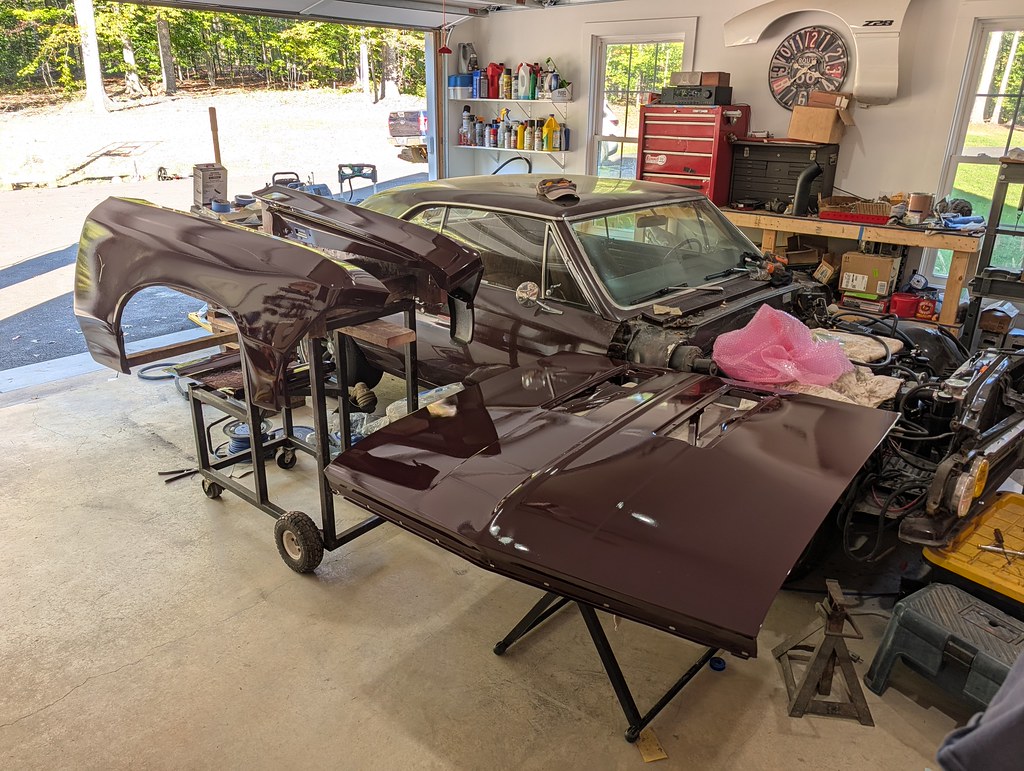
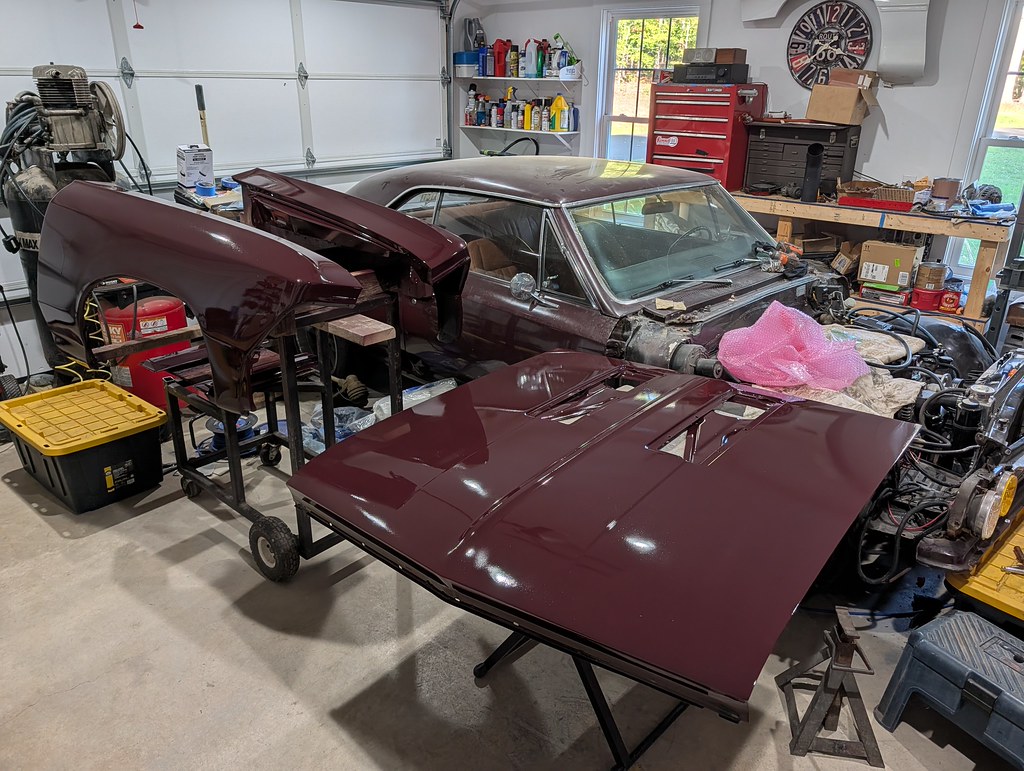
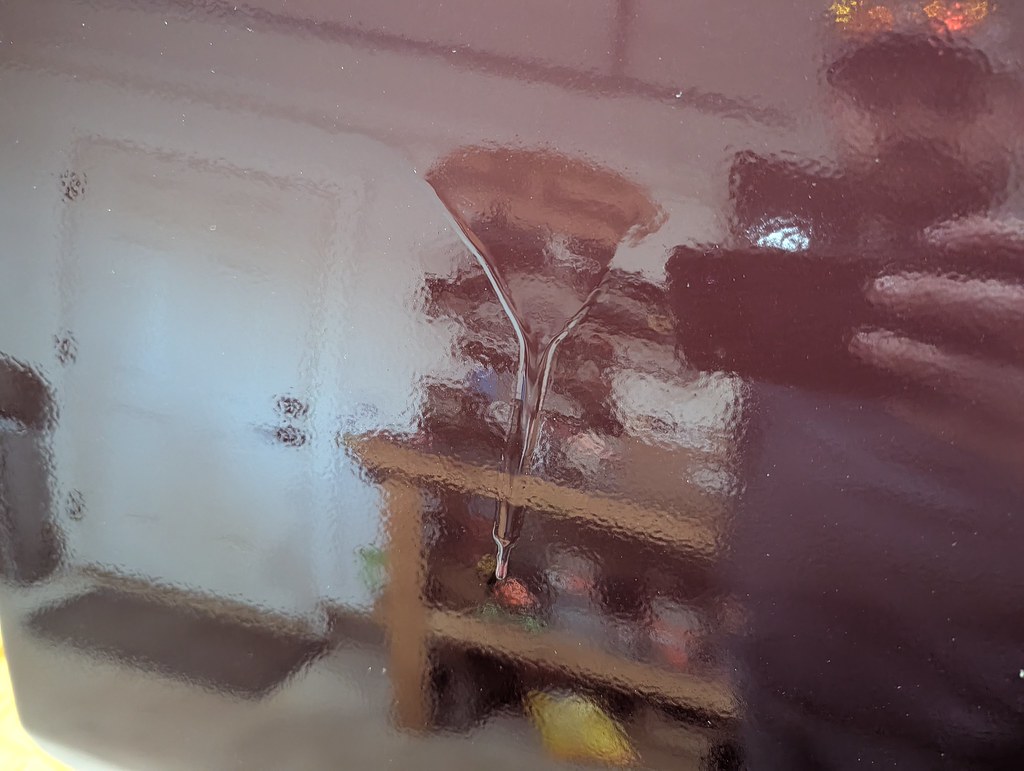
I only ended up with one run, which was a dumb mistake on my part. I was trying to adjust the fan settings and turned it almost completely off which blasted a bunch of paint right into one spot on the fender. Other than that, the rest of the panels had varying degrees of orange peel. The hood vents actually turned our really smooth and clear. Bummer because I was just getting the hang of it and dialed in the settings right at the end. Overall I'm happy with the results for what I was trying to accomplish. Getting the whole car into one color with a scuff and shoot.
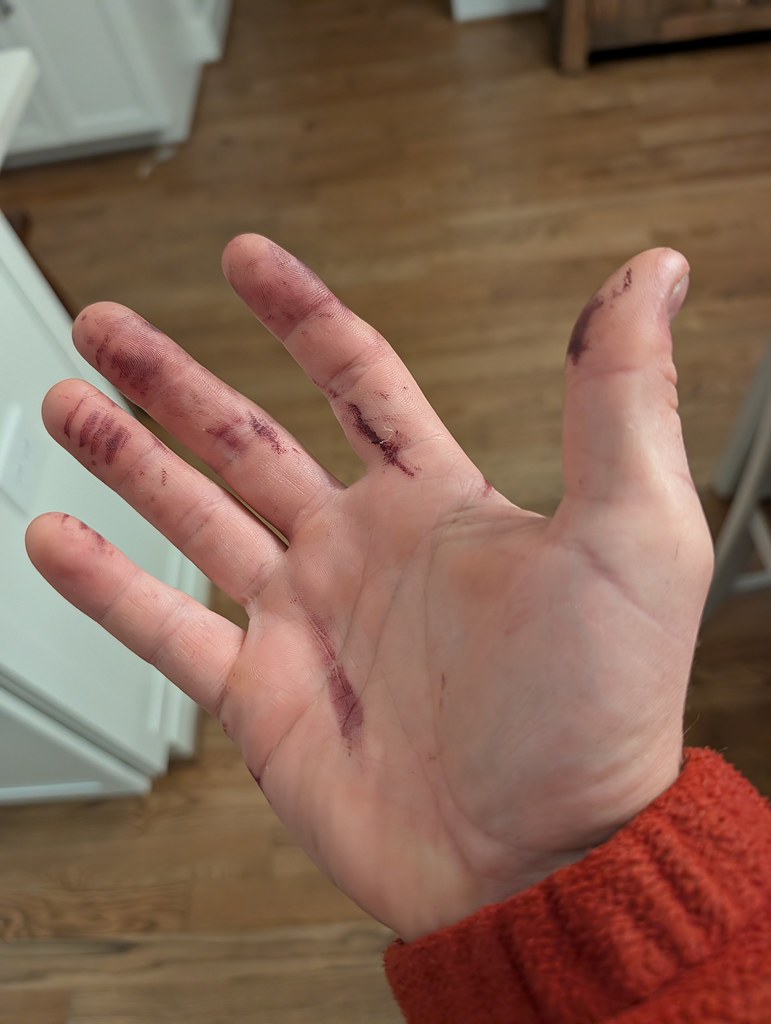
Can't wait for the stains to go away.
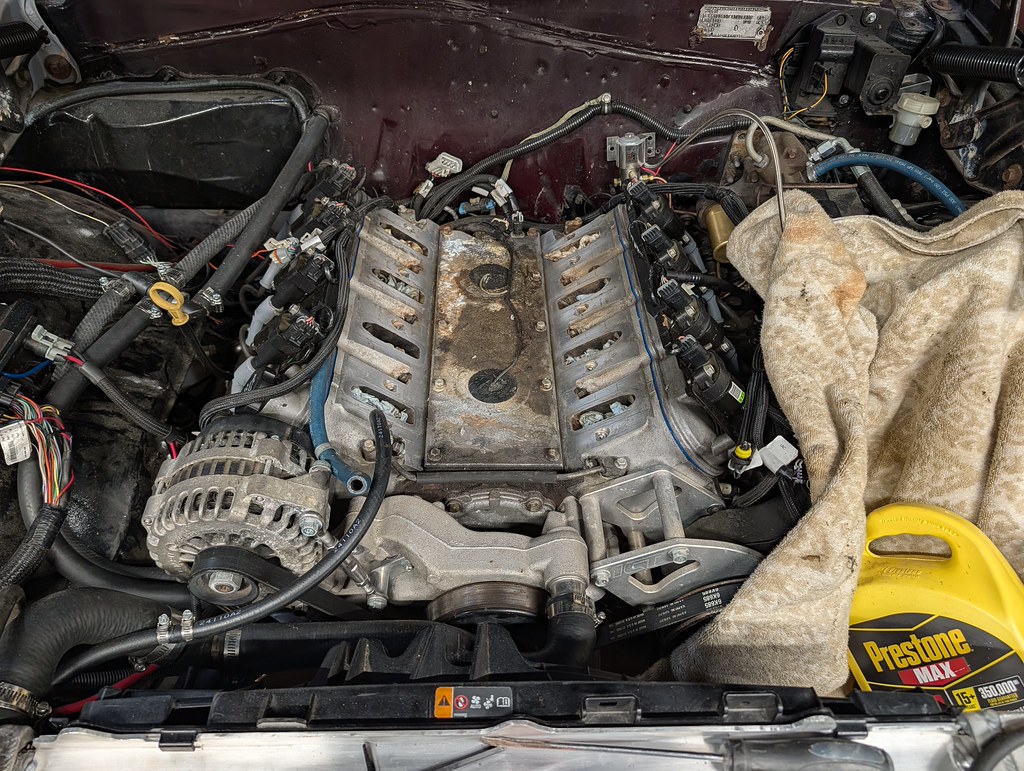
While the engine was easier to get to, I also pulled off the intake manifold to chase down a leak. I couldn't see exactly where it was coming from, but I was thinking either the valley cover or oil pressure sensor. I had also noticed the car was puffing smoke on startup which is normally an indication of bad valve seals, but these are new. After inspecting the PCV lines, it was pretty clear it was pulling oil from the valve cover. I opted to swap out for the LS6 style PCV valley cover that came with a new seal. So off with the intake, but that is as far as I got before I started sanding on the fenders.
While the intake and fenders are off, I'm also going to scuff and shoot the firewall, inner fenders and core support with SEM Trim Black for a more stock appearing engine bay. I'm going to let the fenders/hood dry for one more day, and then install them likely tomorrow night. There is a car show I'd like to attend this Saturday, so I'd like to get it all back together soon. Sounds like a lot, but the fenders were already fitting decent and I marked the hood before I pulled it off. The intake won't take long either and hopefully that solves my oily startups.
Cheers,
Ryan
1955 Nomad project LC9, 4L80e, C5 brakes, Vision wheels
1968 Camaro 6.2 w/ LSA, TR6060-Magnum hybrid and etc SOLD
1976 T/A LS1 6 Speed, and etc. SOLD
Follow me on Instagram: ryeguy2006a
2 Days Ago #28
Registered User
- Join Date
- Sep 2009
- Posts
- 3,002
Kept moving forward with progress since there was a ton of stuff that I needed to do. I got the firewall all cleaned up and prepped for paint. I had to wait until the afternoon so that the temps were warm enough, but got it all painted. I've been a huge fan of the SEM Trim Black paint, so that's what I used on the firewall again. I also scuffed up the inner fenders and sprayed those as well while they were out of the car.
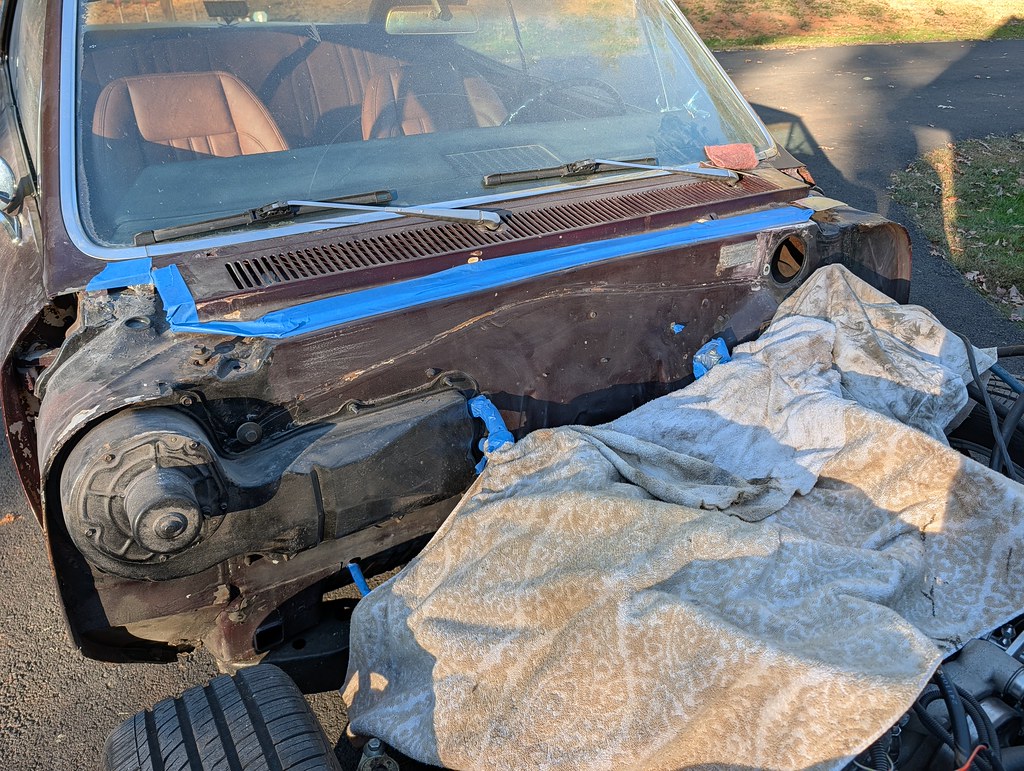
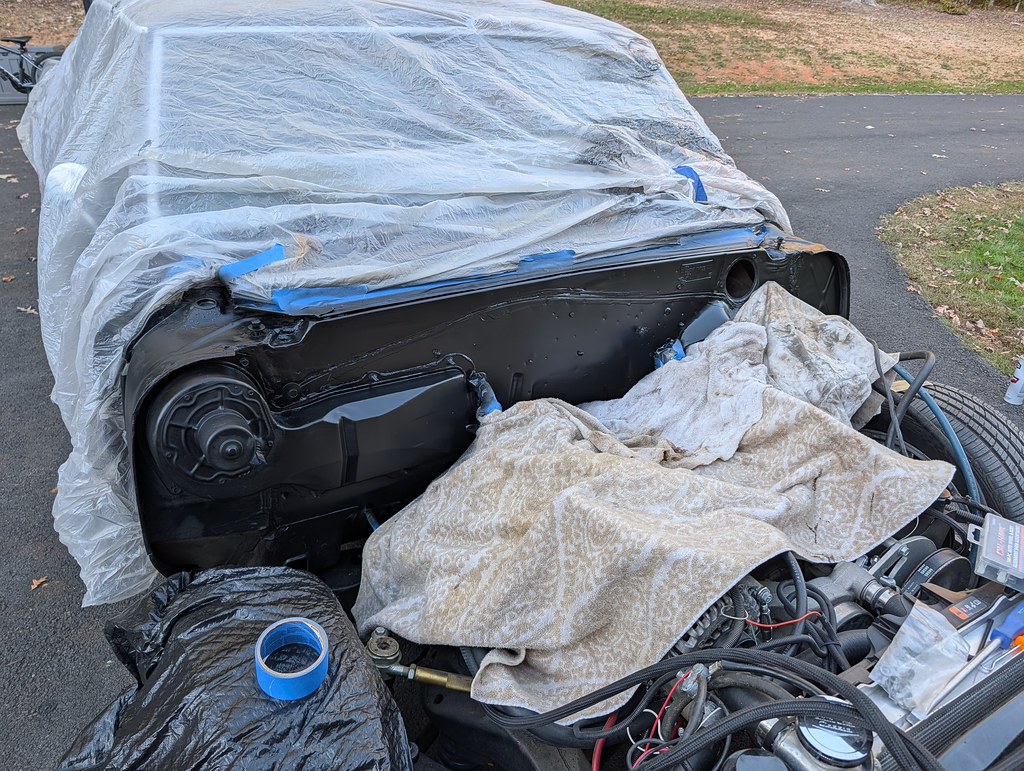
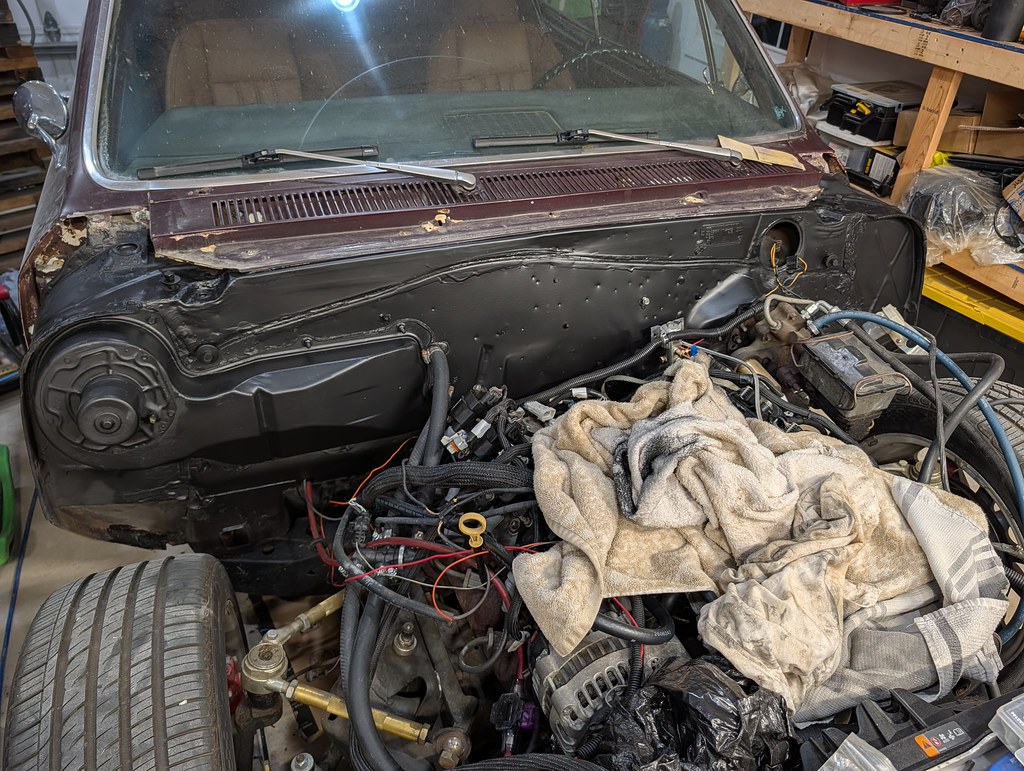
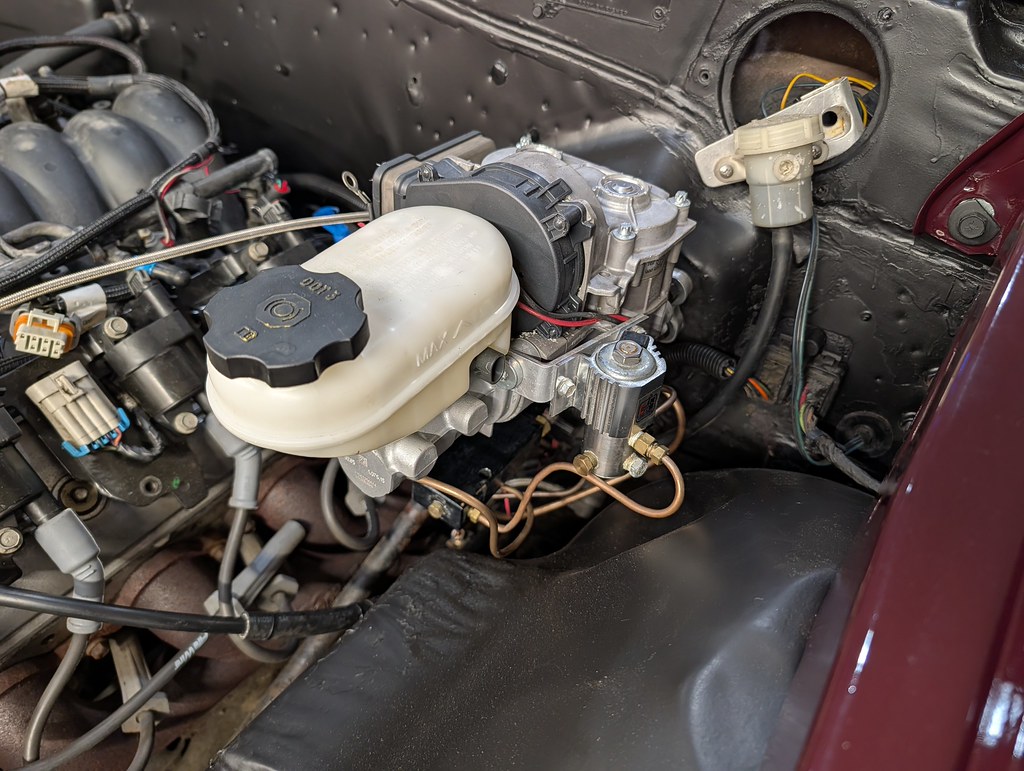
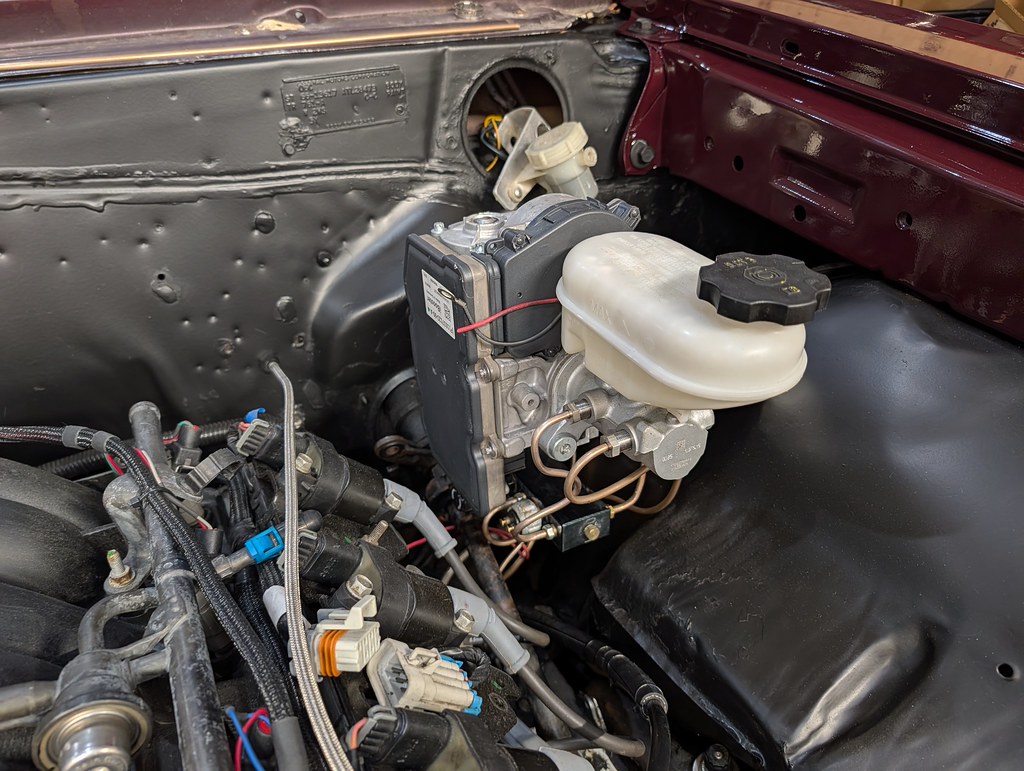
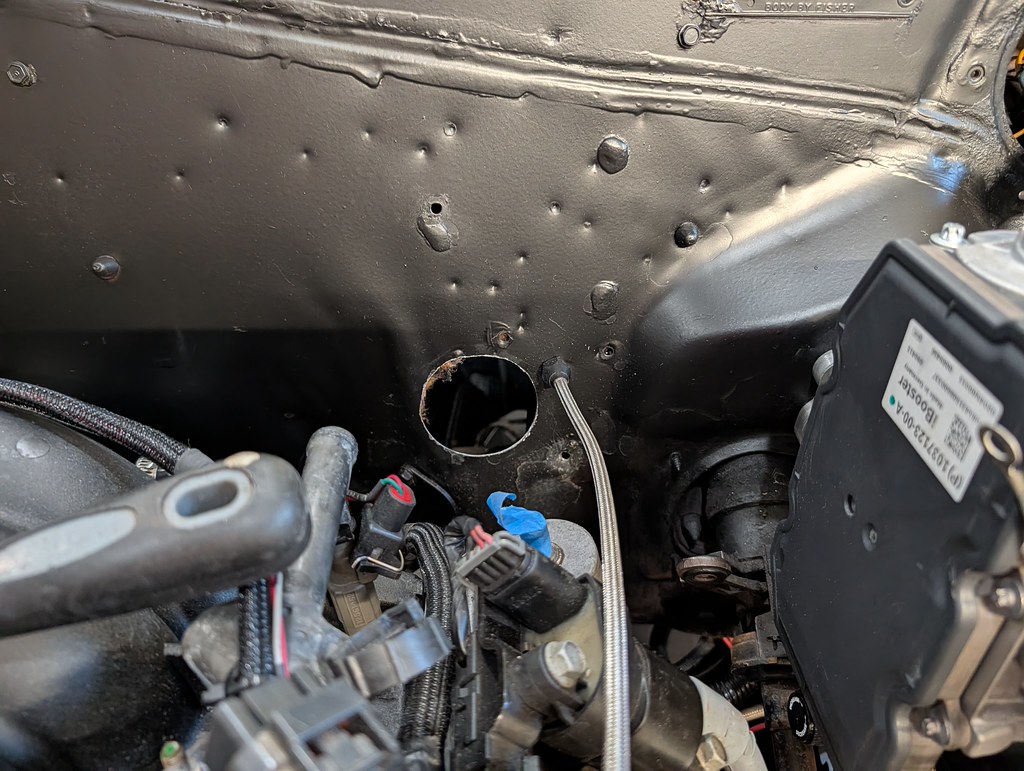
Very happy with the results, but here is where the project started to snowball a bit. As I'm looking at the firewall it became very obvious how ugly that hydroboost unit is. With the fender and inner fender removed, it would be very easy to swap out the brake booster and mmake new brake lines. I bought a Tesla Model S iBooster right when I first bought the car knowing that I wanted to get rid of the hydroboost unit. I also bought this super nice billet bracket from Intek Otto which I think used to be BBT fabrications.
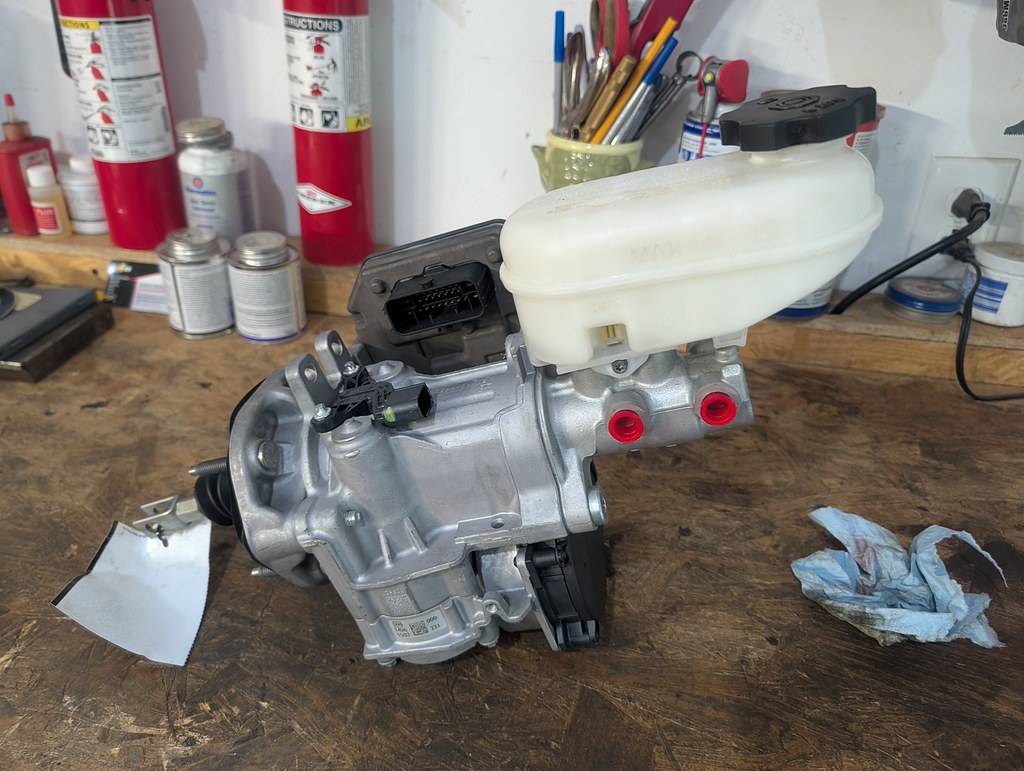
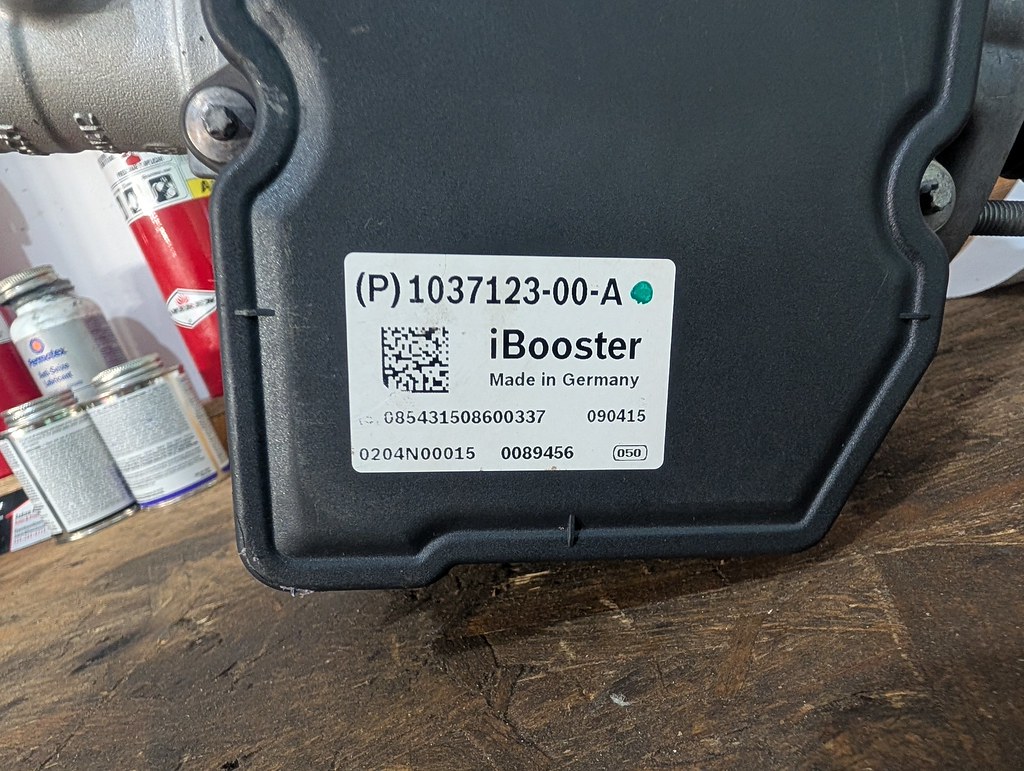
This is a really slick piece that completely allows you to directly bolt it to the firewall without needing an adapter like I used on my Nomad. Not cheap, but made for a really clean install.
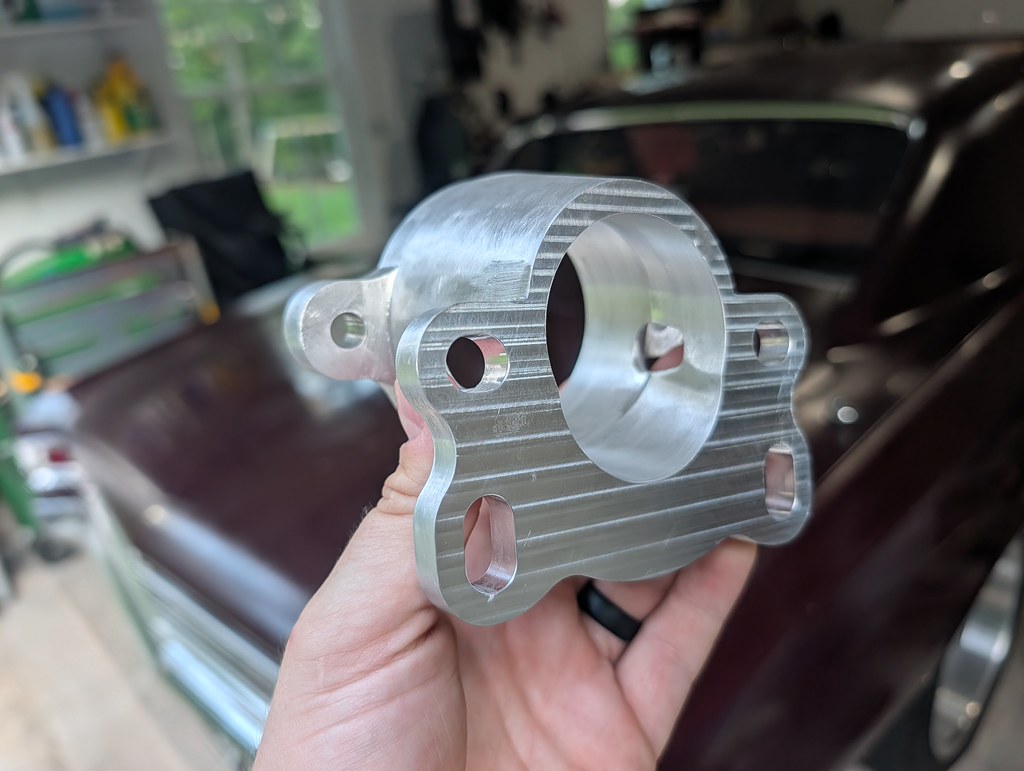
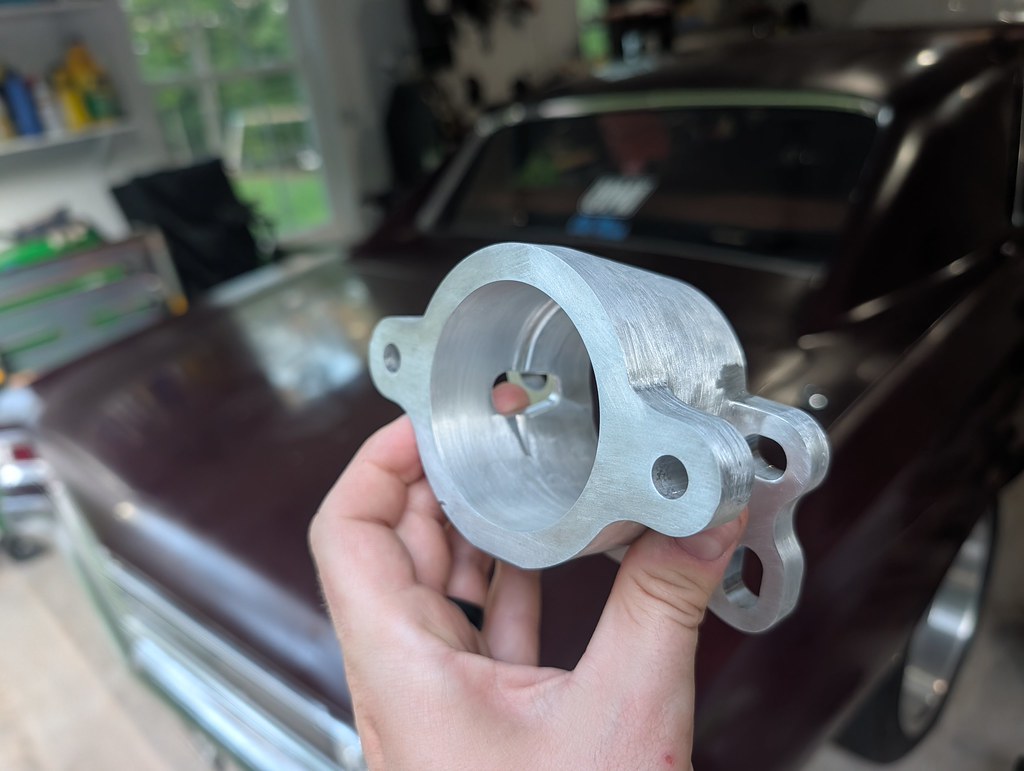
Out with the old booster and in with the new modern iBooster unit. Looks so much nicer. They also sell really nice harness kits now for these iBoosters so I picked one of them up from one of the vendors on eBay. Came with the nice connectors with extra long leads all labeled. One thing that I noticed upon disassembly is that whoever plumbed up the hydroboost unit had the front and rear lines mixed up going into the proportional valve. The port closest to the firewall is the front brakes and vice versa. Probably part of the reason the brakes felt funny. They worked fine, just felt off.
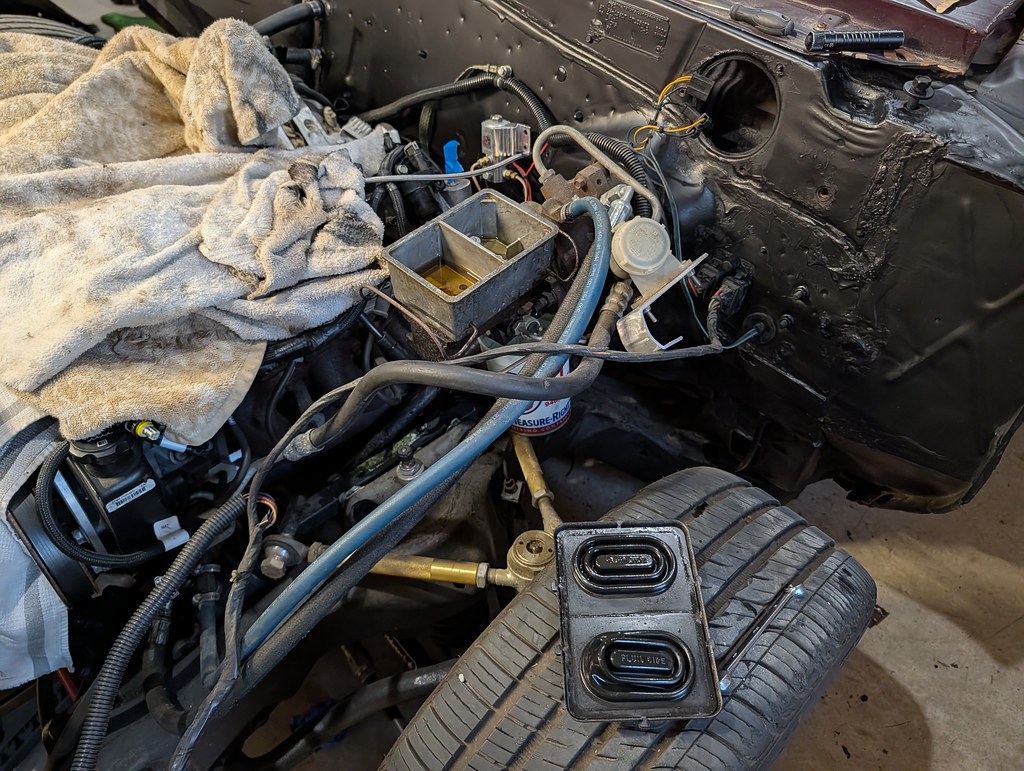
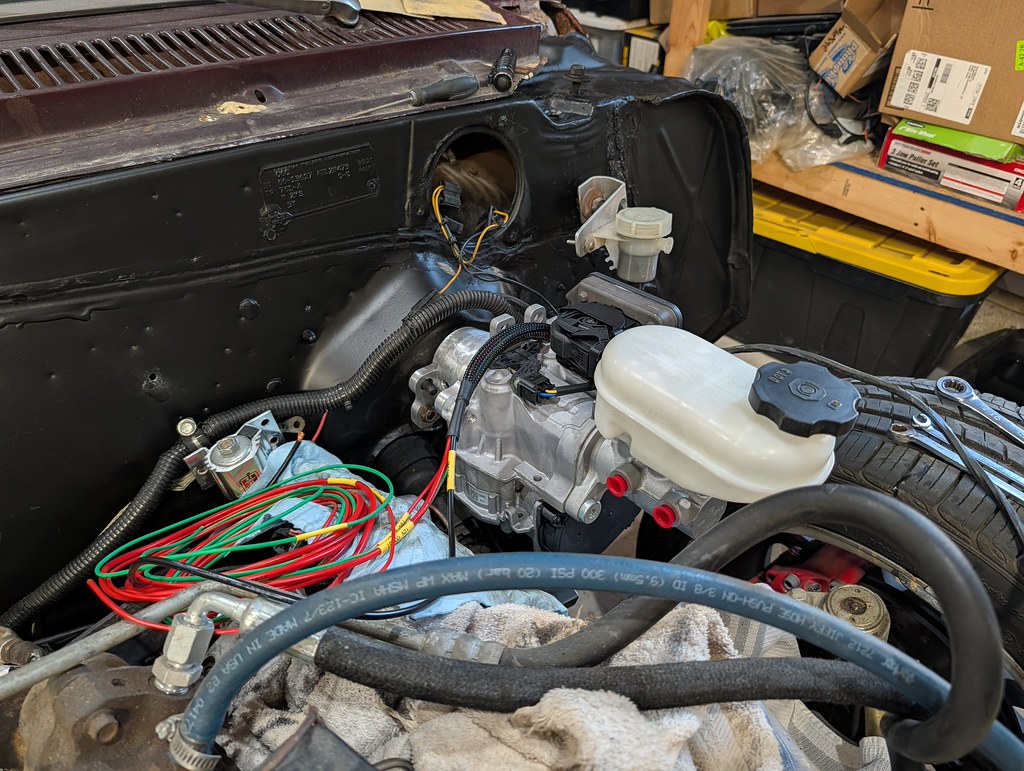
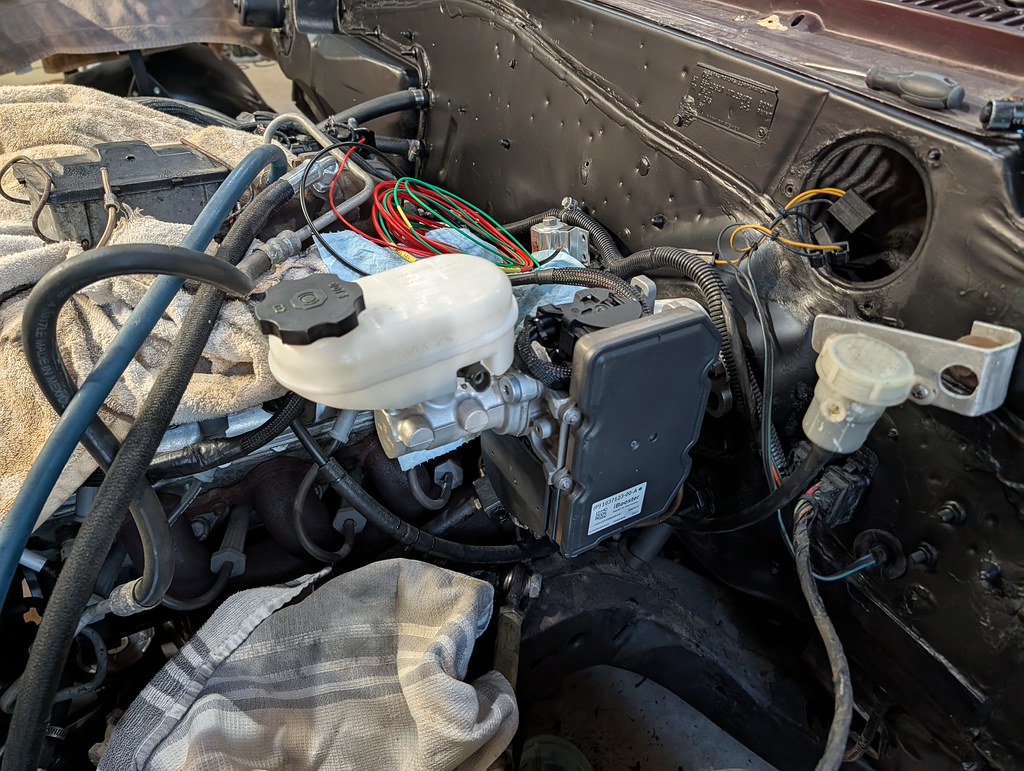
After test fitting the inner fender and fender I realized that I needed to reclock the unit 180* to clear the inner fender. Not a deal breaker since they are able to operate in both locations. Once I confirmed it cleared everything, I built a little bracket for the line lock and bent up new brake lines. I really love working with the NiCopp lines. They are so easy to use.
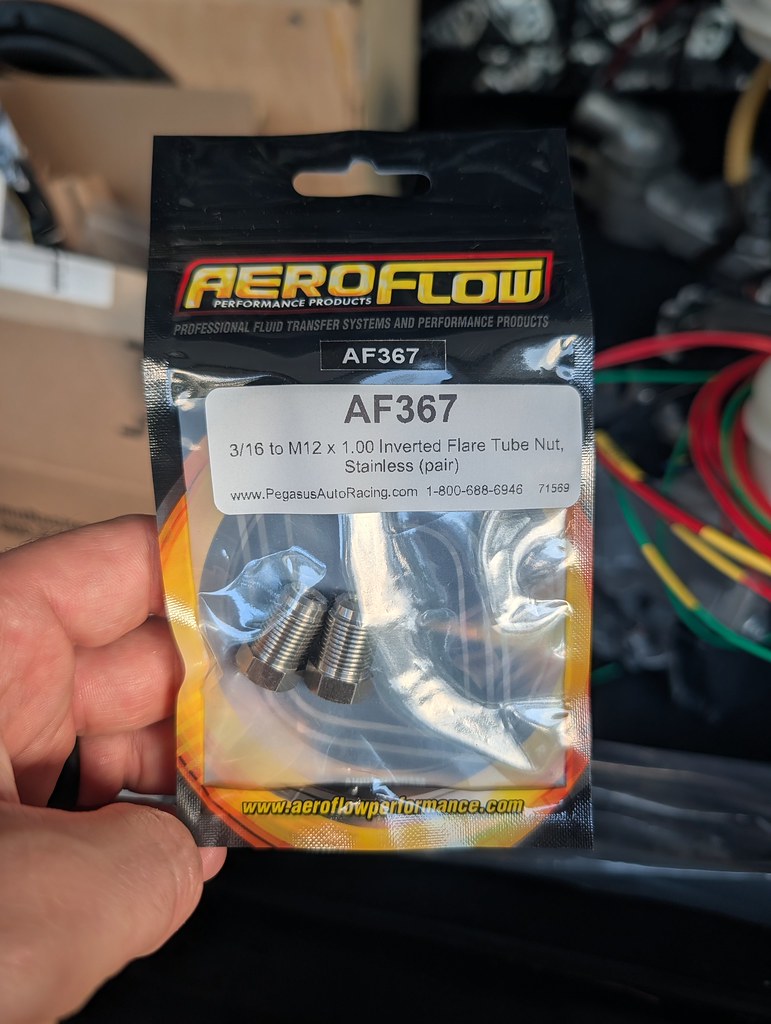
I also got a chance to use these really nice stainless steel brake line nuts too. Aeroflow is the only company I could find that sell M12x1.0 thread for 3/16" lines (AF367). That way you can use them without an adapter.
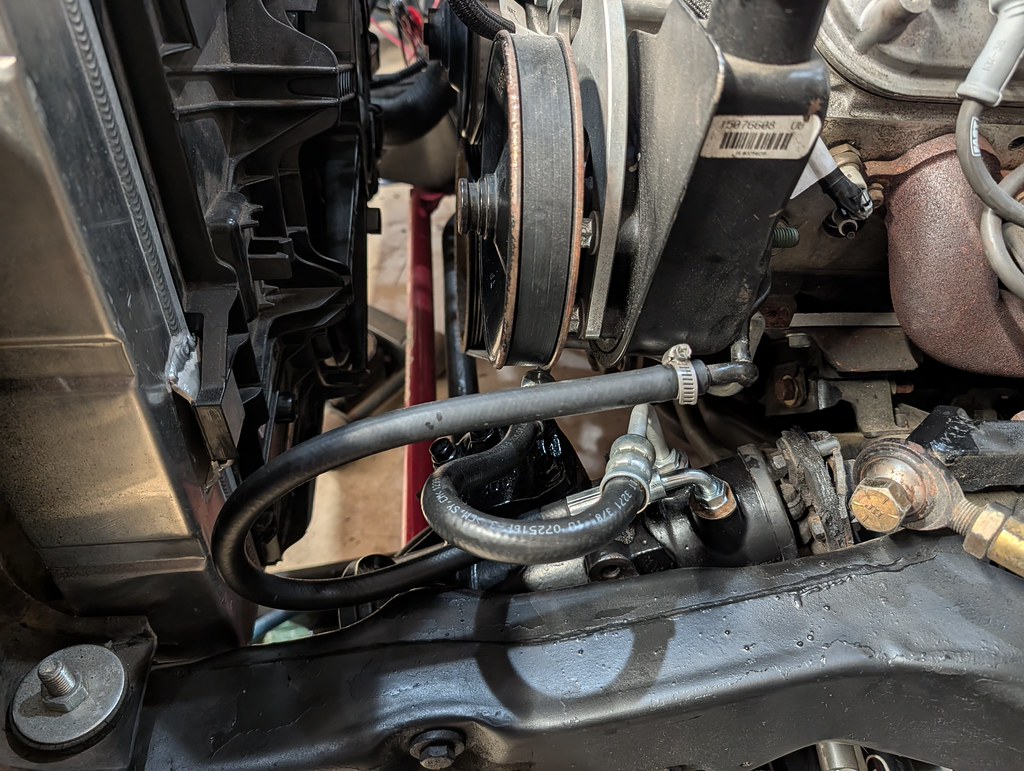
Since the hydroboost unit uses the power steering to assist the brakes, I needed to redo my power steering hoses. I had a heck of a time figuring this out. I bought a CPP hose adapter kit a while back, but the hose fittings didn't work at all with where the PS pump is located. I scratched my head for a while when I finally realized that I had a few extra hoses from other projects. The one that worked the best was actually a line that I had on my 1968 Camaro when it had the LS1 engine accessories. It was bent the right way, but needed a new fitting on the box side. I cut one of the nuts off of the hoses that I had and re-flared the line. It worked perfectly! I used the drain side from the CPP kit which was just low pressure.
Really happy with how that project turned out. The rusty old hydroboost unit was such an eyesore to me. With that part done, I was able to test fit the passenger side fender. I can't wait to see this whole front end back together, it's looking really good so far. Pretty soon after that, I had to see the driver's fender installed as well. So happy to not see them in primer!!
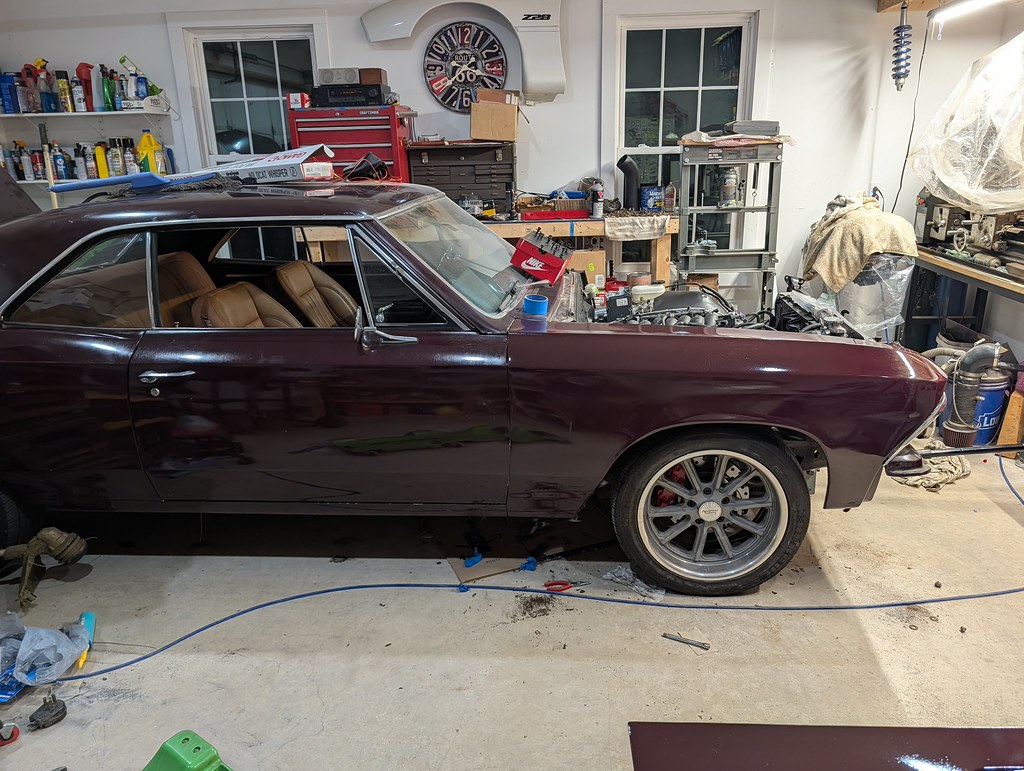
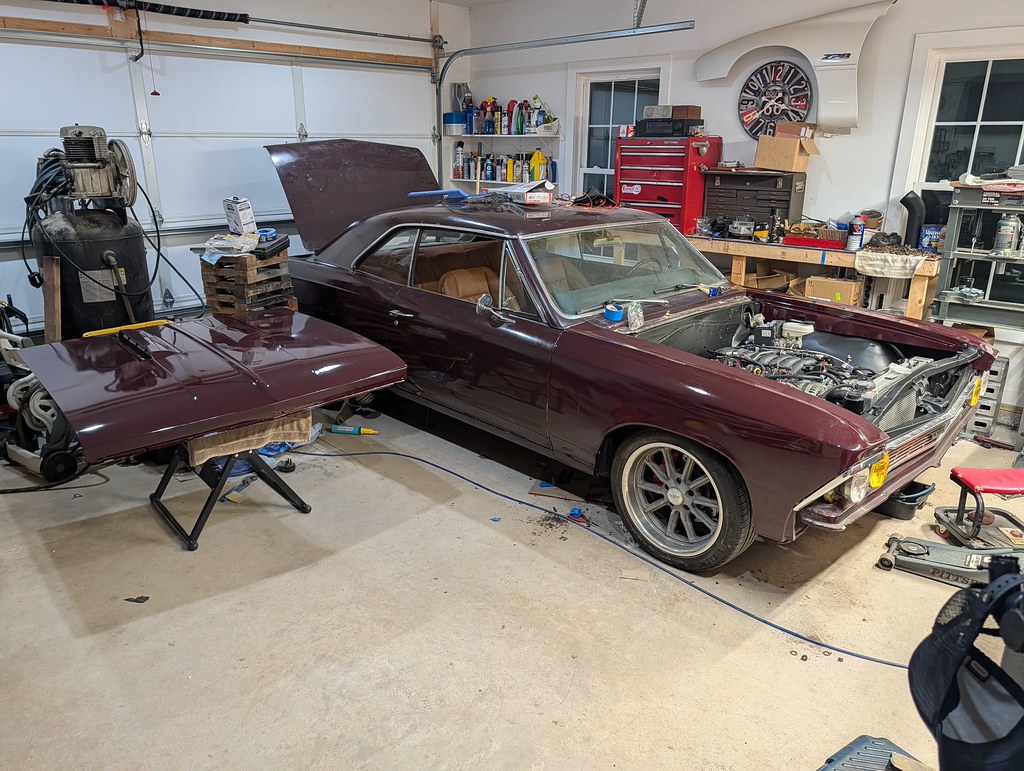
But one thing that really bugged me was the Terminator X ECU on the inner fender... One big issue I have is that it is not waterproof and for two IMO it's not as clean of an install. I bought a Haltech (HT-039005) 2.5" firewall grommet a few months ago knowing that I would eventually relocate the ECU into the cabin of the car. Now's the time.
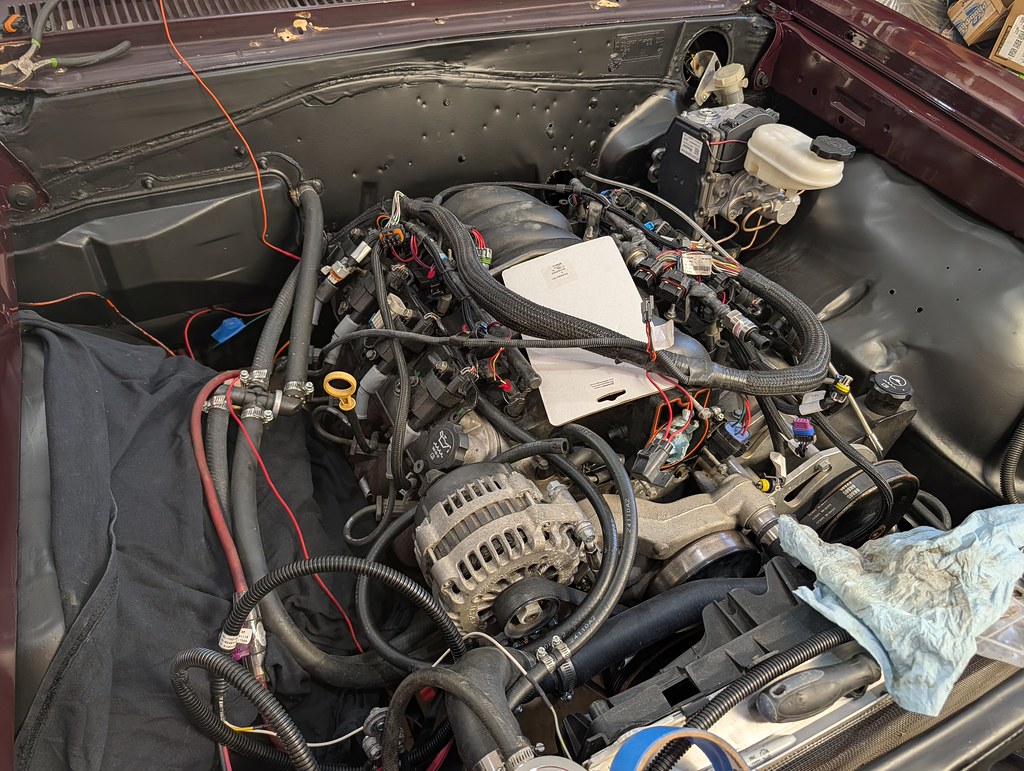
To be continued...
1955 Nomad project LC9, 4L80e, C5 brakes, Vision wheels
1968 Camaro 6.2 w/ LSA, TR6060-Magnum hybrid and etc SOLD
1976 T/A LS1 6 Speed, and etc. SOLD
Follow me on Instagram: ryeguy2006a
1 Day Ago #29
Registered User
- Join Date
- Aug 2007
- Posts
- 741
What no pics? LOL.
1 Day Ago #30
Registered User
- Join Date
- Feb 2007
- Location
- Tinley Park, IL
- Posts
- 1,221
I'm in a similar situation. My engine is out for a rebuild so I thought "may as well" add hydroboost. Got a new AC Delco unit, bracket from eBay, bent new lines, bought the hose kit etc... and while I wait for the engine to be rebuilt, I keep reading about the iBooster and I'm starting to think that's the way to go.
Nick ~ 1969 Cutlass
1 Day Ago #31 Registered User
- Join Date
- Nov 2018
- Posts
- 995
When I initally saw the plug I was all "wow that's a lot of wires!" but then your harness only has three? 12VDC, ground and what's the third wire for?
1 Day Ago #32
Registered User
- Join Date
- Sep 2009
- Posts
- 3,002
I'm in the process of dumping a bunch of pictures, don't worry!
Nick, I don't think there is anything wrong with Hydroboost, don't want to get that impression. What I didn't like about this particular one is that it was crudely installed with leaking fittings and mismatched hoses. Rather than fix all of that it made way more sense for me to just swap to an iBooster. However, the iBooster is a really nice unit. I will say that the first impressions are that the pedal is very sensitive. I'm hoping that at some point in the future somene cracks the CAN bus network and creates some sort of adjustment knob to dial back the assist. In the meantime I'm going to install a spring on the pedal to give more resistance for a better brake feel.
Vimes, are you referring to the iBooster? If so, there are 4 wires total with that harness. One heavy gauge battery 12v+ (40 Amp fuse), one heavy ground, one 18 ga 12v+ (5amp fuse), and one switched 12v+. I tied the two 12v+ battery wires together with separate fuses, so three total connections.
1955 Nomad project LC9, 4L80e, C5 brakes, Vision wheels
1968 Camaro 6.2 w/ LSA, TR6060-Magnum hybrid and etc SOLD
1976 T/A LS1 6 Speed, and etc. SOLD
Follow me on Instagram: ryeguy2006a
23 Hours Ago #33
Registered User
- Join Date
- Sep 2009
- Posts
- 3,002
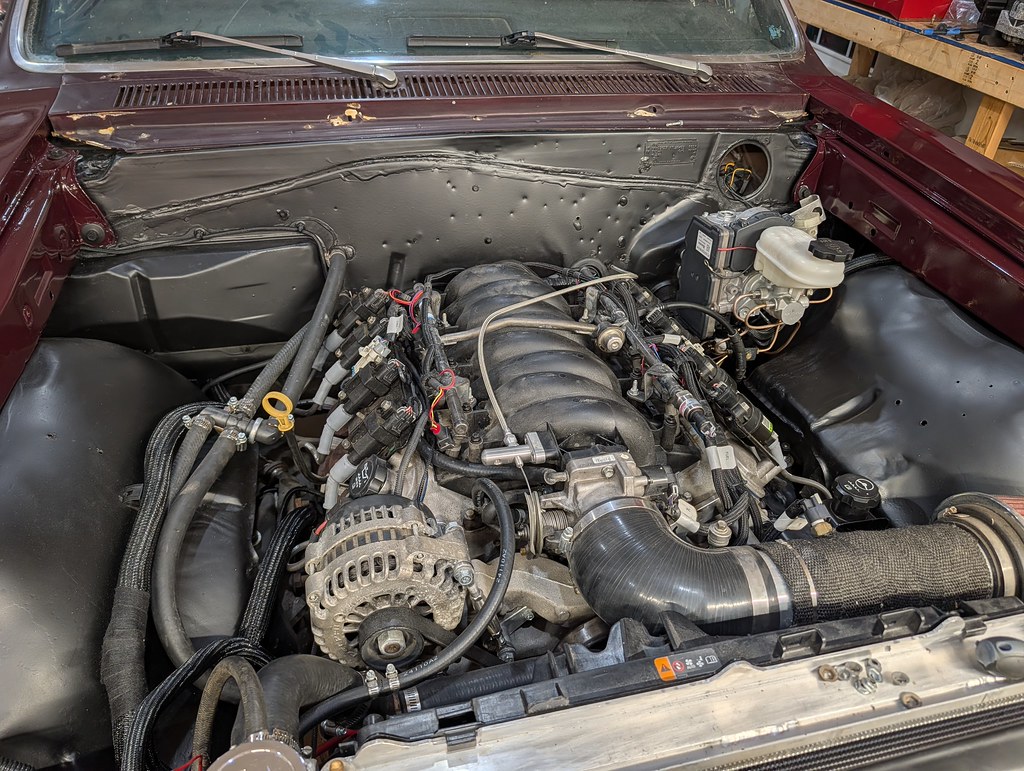
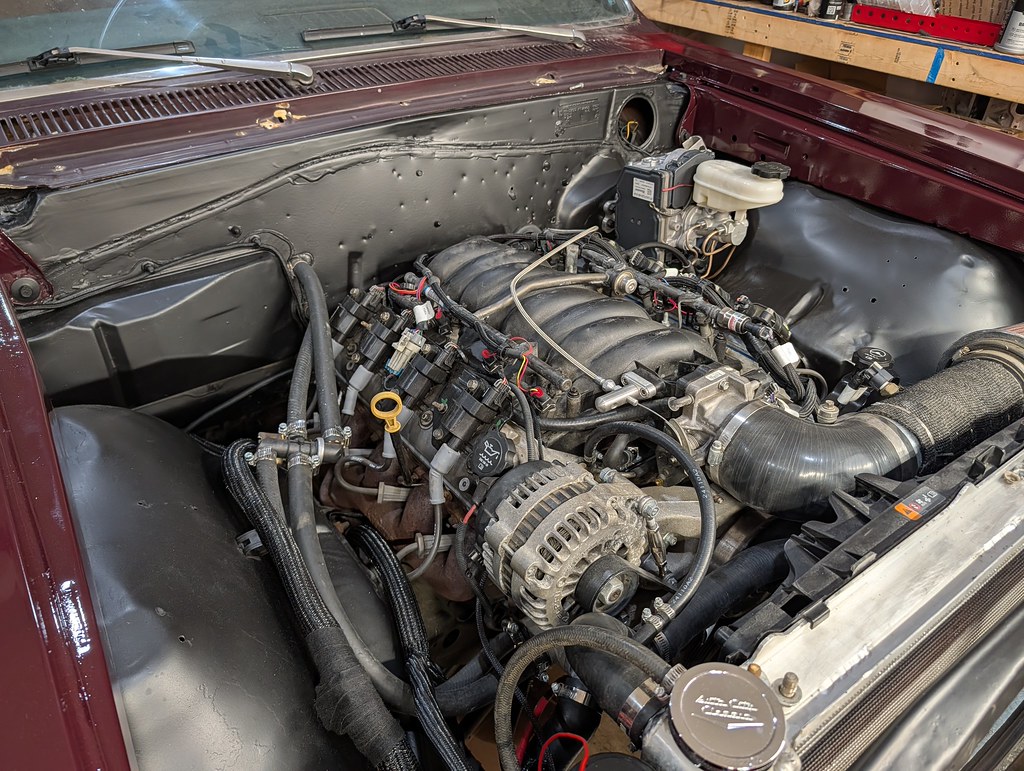
I hit the picture limit on my last post, so I'll pick up where I left off. Here is the engine compartment refresh after swapping to the iBooster, relocating the line lock off the firewall and relocating the ECU inside the car. I'm very happy with the efforts.
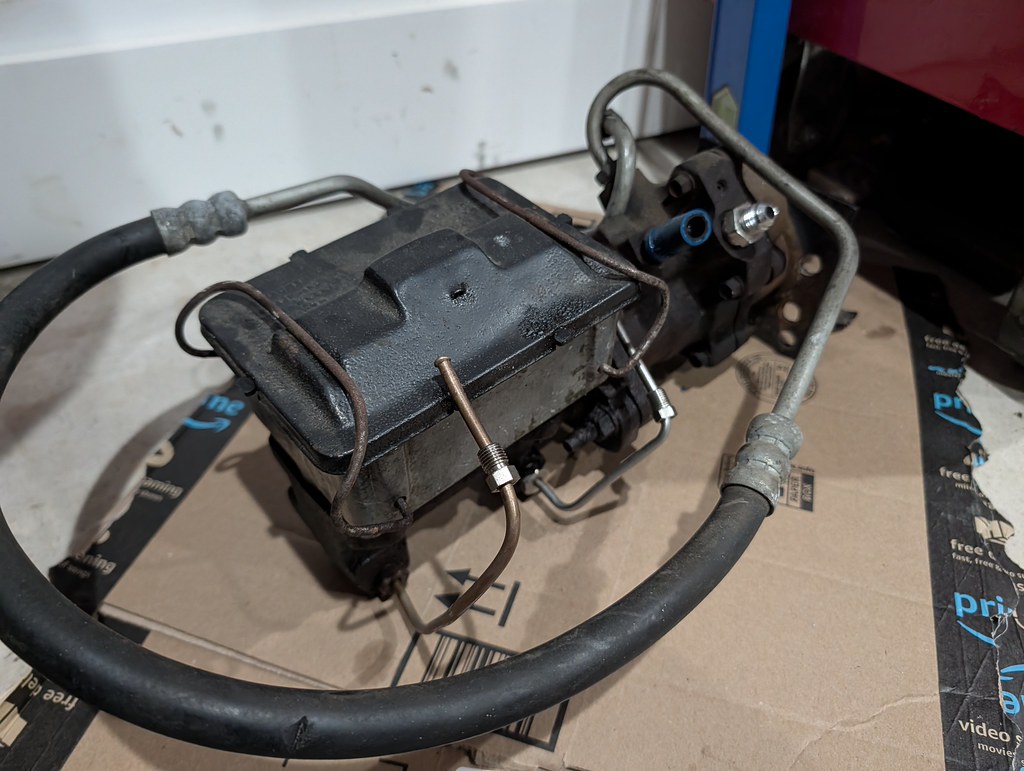
This unit is now on FB marketplace!
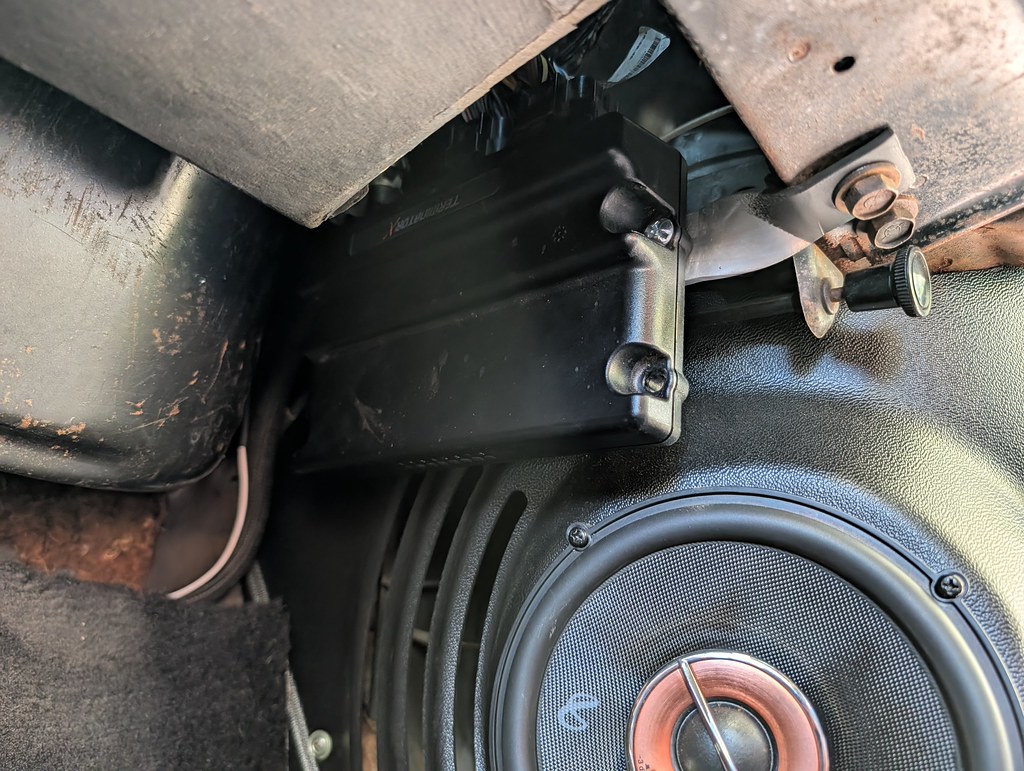
With the engine bay all cleaned up, it was time to figure out a spot to locate the ECU now. I went through many different options in my head, but finally decided to keep it simple. It fits really well right above the speaker by the kick panel, so I found a little piece of scrap aluminum strap I had and twisted it 90* in my vice to give and mounted it to one of the existing holes in the dash. It actually turned out really cleanly and will give me room for when I swap out the X ecu for an X Max to run the DBW and transmission harness to add VSS. The unmodified harness is the perfect length too so there wasn't any wiring looped around under the dash. Very happy with that location and the best part is the stock glove box fits unmodified.
I didn't grab a picture since there wasn't much to see. But I pulled all the wheels off of the car and had to bleed the brakes. I intended on getting my wife or one of my kids to pump the pedal for me, but unfortunately they were all busy. Ran to the parts store to get a vacuum bleeder, but saw this neat little one-man brake bleeder kit. It looked interesting so I gave it a try. Was very impressed. It worked really well and helped to purge all of the old fluid out in the process. Very handy little tool if you are by yourself.
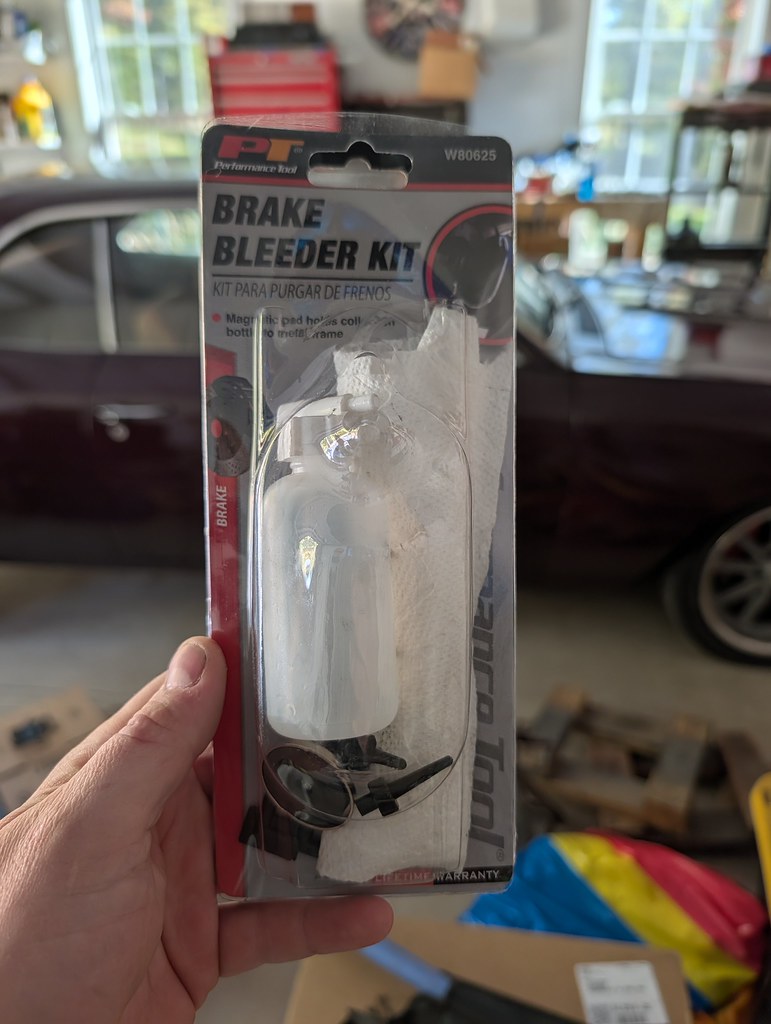
With that done, I was able to put the hood back on. Once again, wasn't able to get anyone to give me a hand so I carefully put it back on by myself. I borrowed a bunch of blankets from the living room and spread them all around the cowl area, glass and around the tops of the fenders. I made sure all of the bolts were ready along with the right socket and wrench too. Lifted the hood over the hinges and rested the back of the hood on the blankets. Then quickly put a bolt in both hinges. It is a bit risky, but I was able to get it on and returned the blankets and my wife will never know haha. No grease stains, so I'm in the clear!
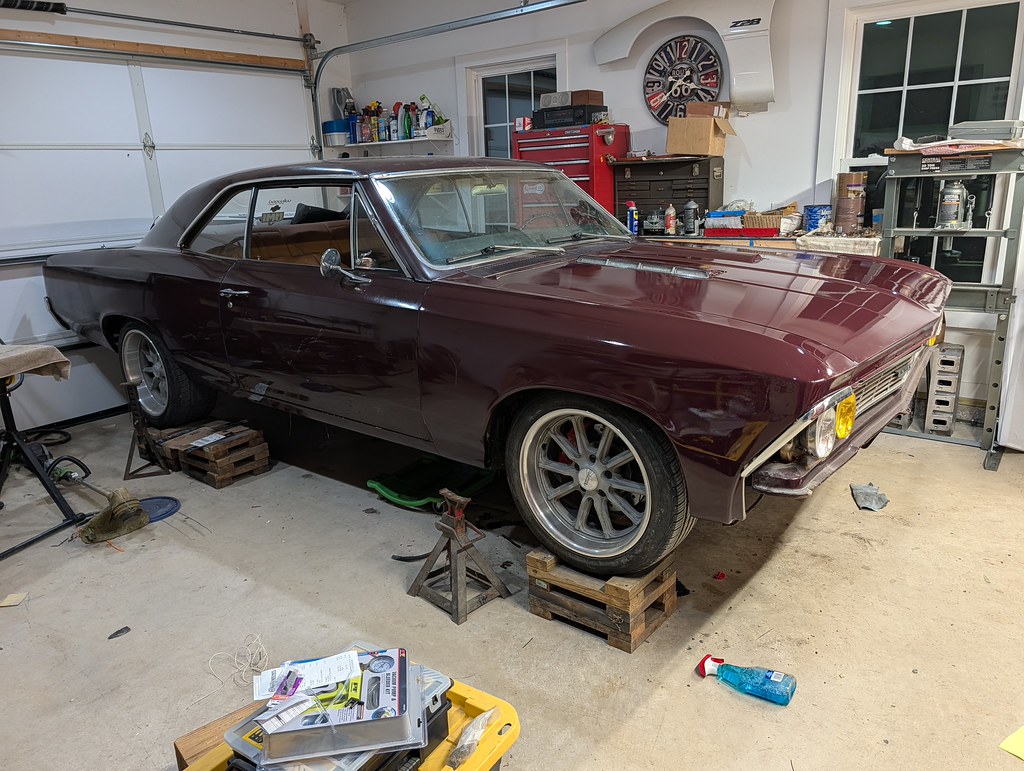
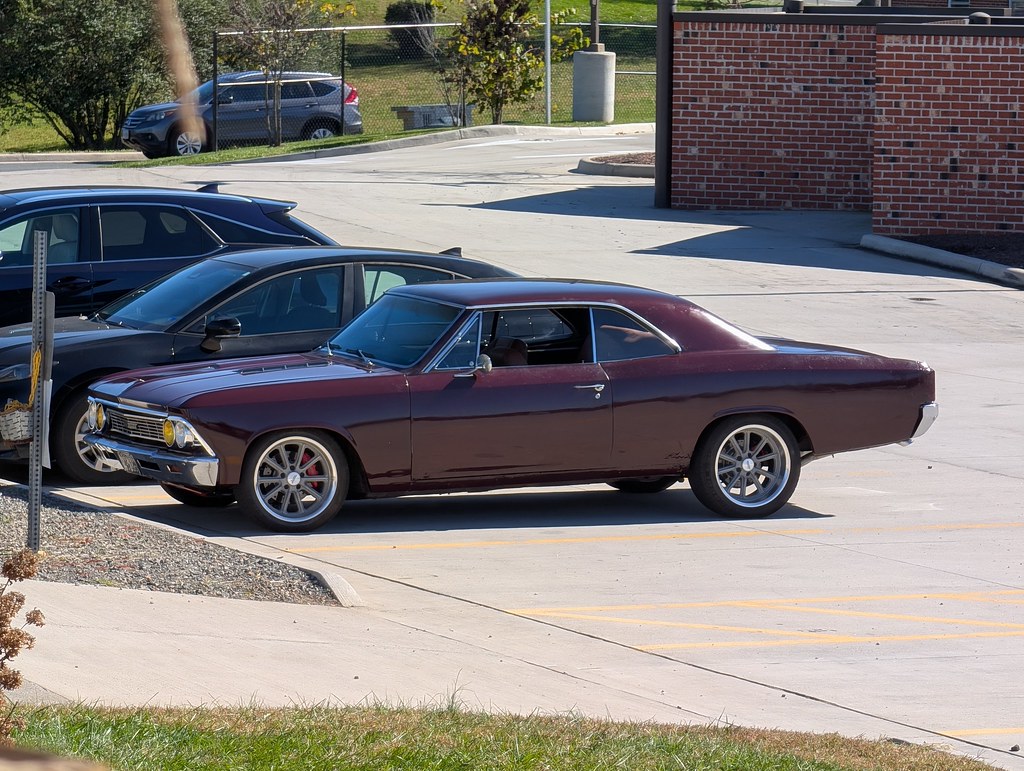
Spent the next few days cleaning things up, installing the trim and putting everything back together. Got out on Sunday for a little photoshoot and couldn't be happier with the results. I knew the paint wouldn't match 100%, but it matched better than I expected. Some angles the paint looks to be a dead on match.
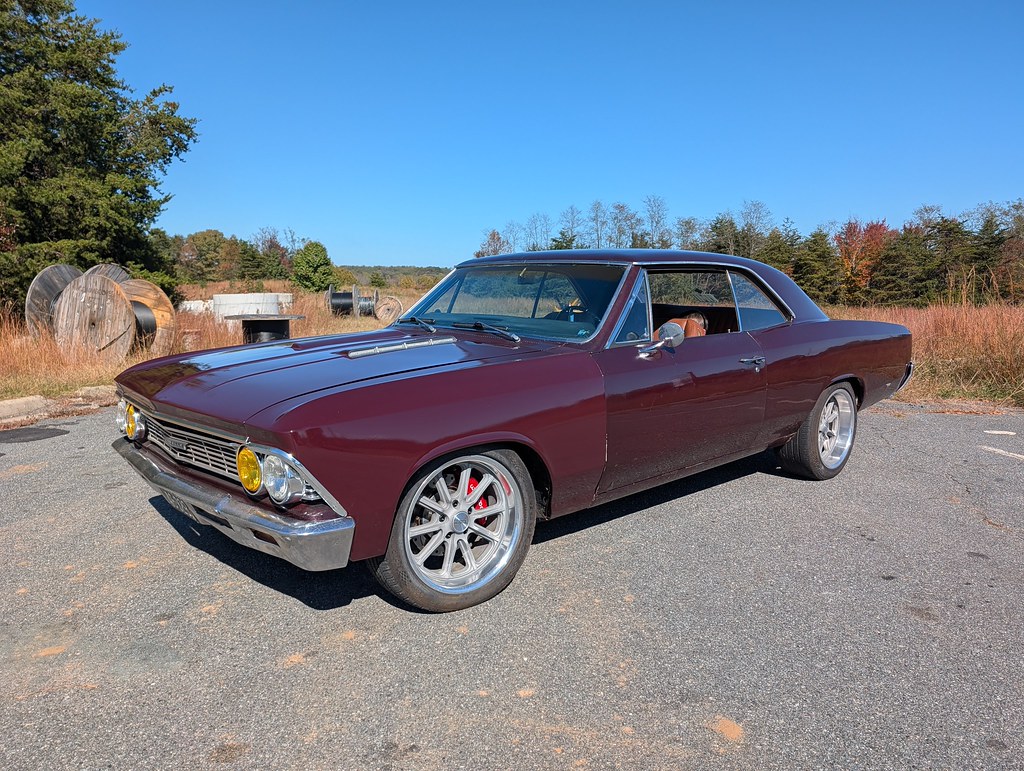
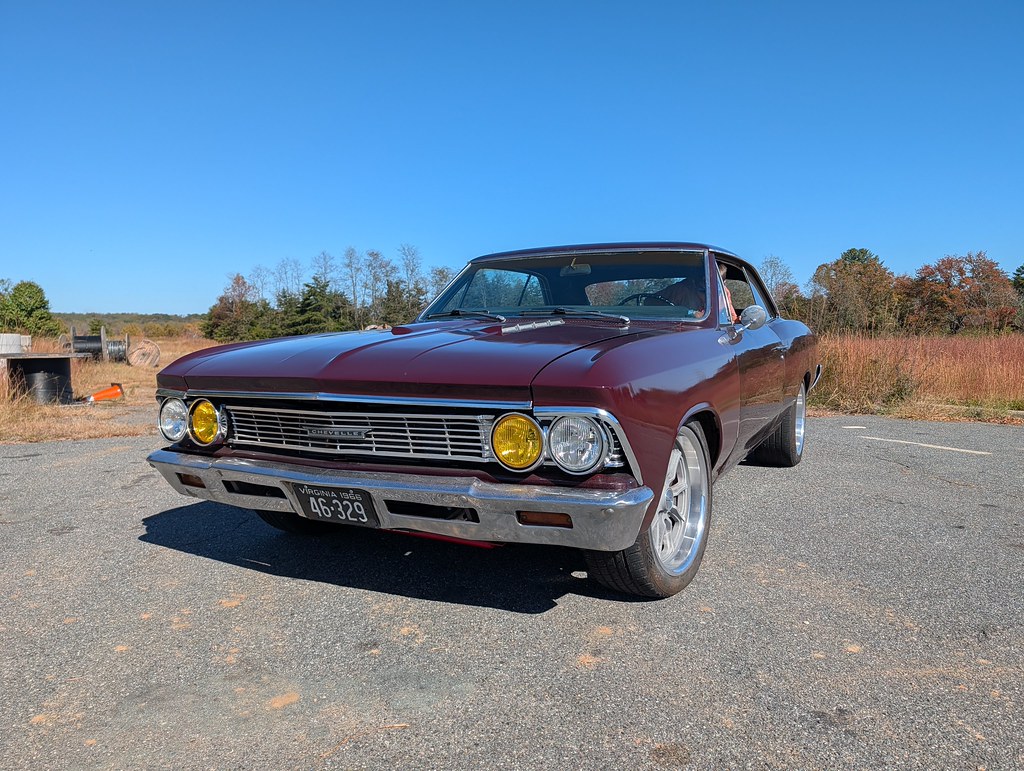
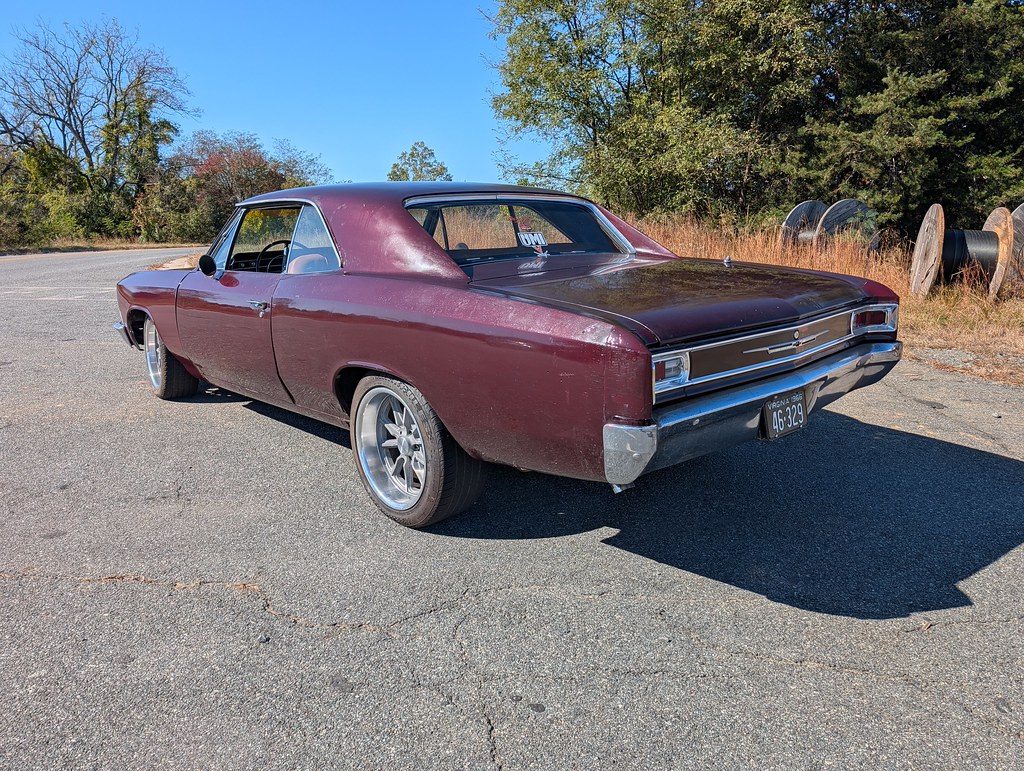
While we were out the kids picked out some pumpkins at this cool store.
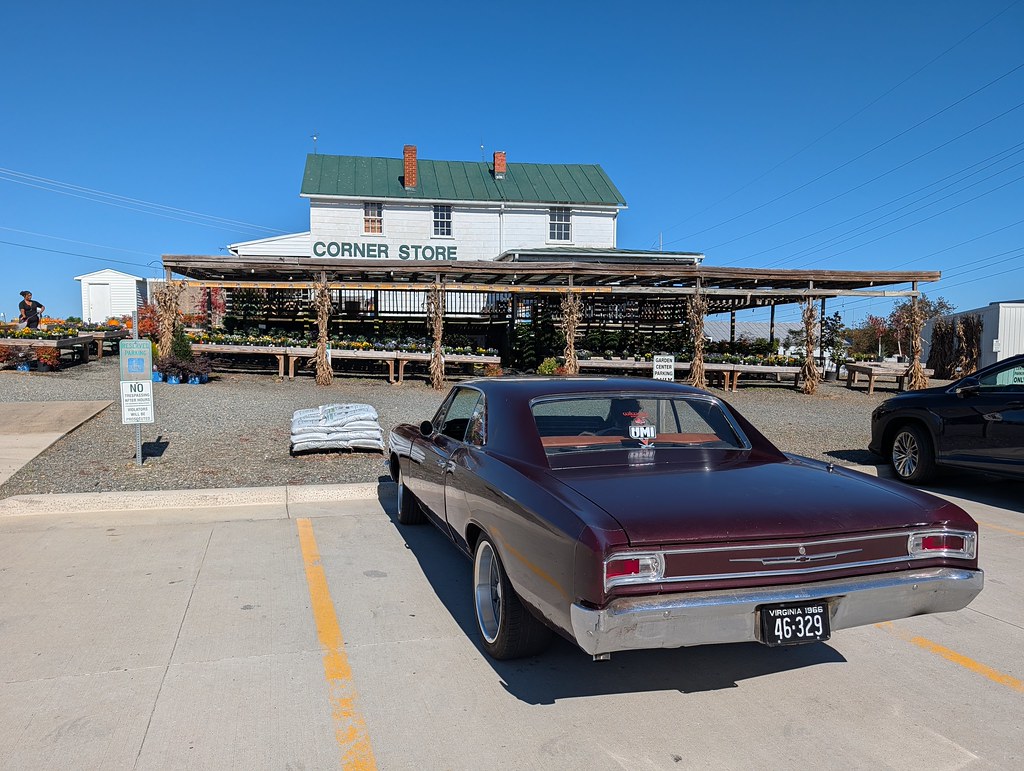
This angle makes the paint look dead on. I'm really falling in love with this color. I may end up sticking with the Maroon.
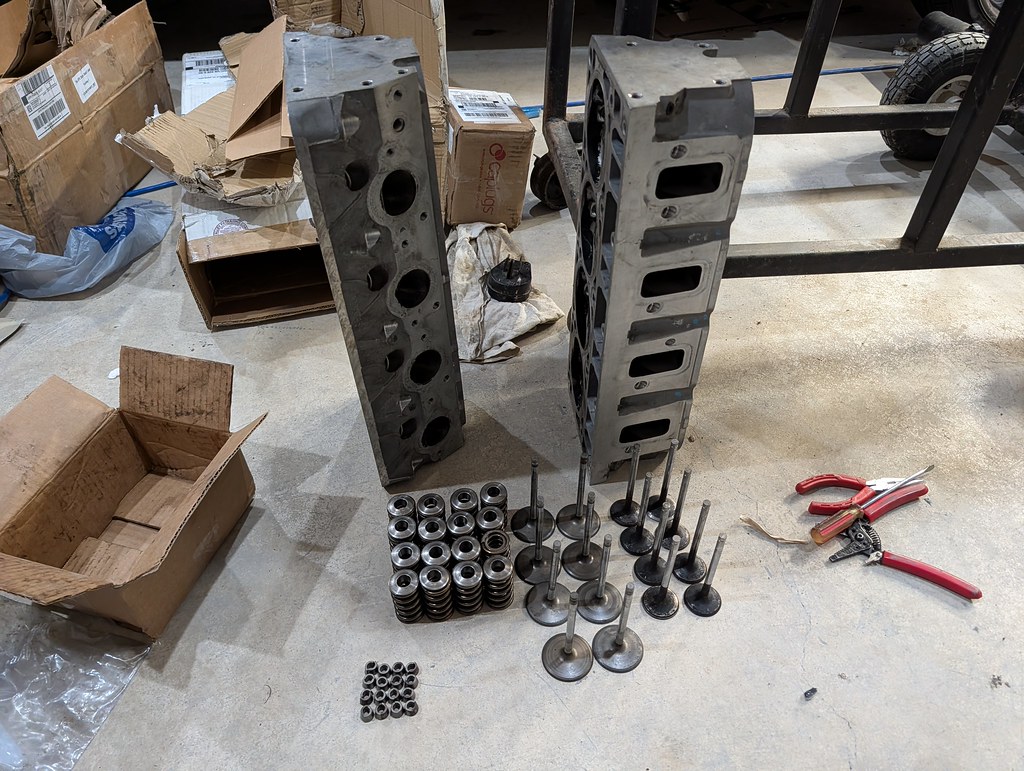
I have also simultaneously been collecting parts to build up the 6.2 L92 I picked up a few months ago from a buddy. I've been grabbing some ARP bolts for assembly, LS7 lifters/trays, LS3 front cover without VVT, and other small pieces. A buddy of mine posted some 821 heads recently that have been CNC ported on the exhaust side with larger exhaust valves for a price too good to pass up. The intake valves are the legit lightweight hollow valves, and upgraded Ferrea stainless exhaust valves. After talking with him, he also had a dual spring setup with titanium retainers he wasn't going to use, so he threw those in too with the deal. I will need a new set of exhaust valves though because it appears there was premature wear on the tips of the exhaust valves which appears to be from someone grinding off the tops? I'll need to check everything out, but they look to be a really good candidate for heads. I may end up having new valve seats installed to run stock LS3 exhaust valves.
I didn't necessarily set out to buy, but I had sold some of my old higher dollar Nomad parts and started looking to see what was out there for LSA superchargers. I guess I should know myself by now that if I'm "looking" I generally am buying. I found a guy on a FB group that buys various different LSA engines and parts them out to fund his projects. He bought a bunch of low hour Marine 7 engine take outs with low hours and had a bunch of different parts he was selling. After going back and forth, I bought a complete LSA setup with everything but a few pulleys and brackets for the 8 rib setup. I made sure to have him include all the hardware and sensors as well since I know that can be a pain to track down. He had a really good price, so I couldn't really pass it up.
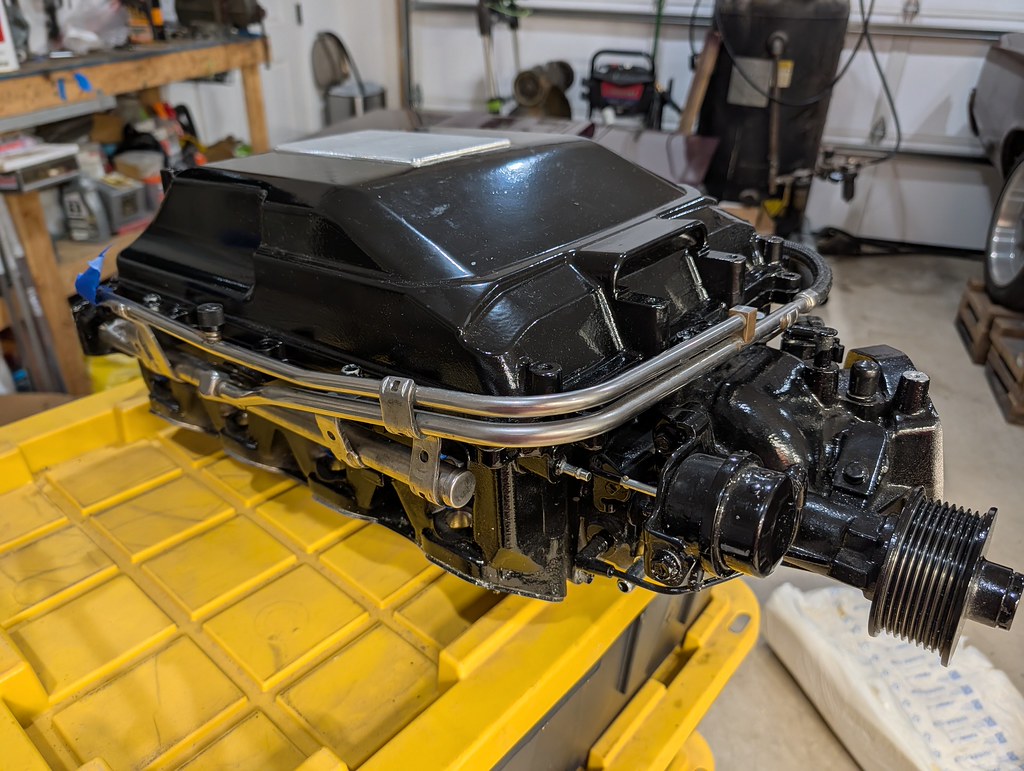
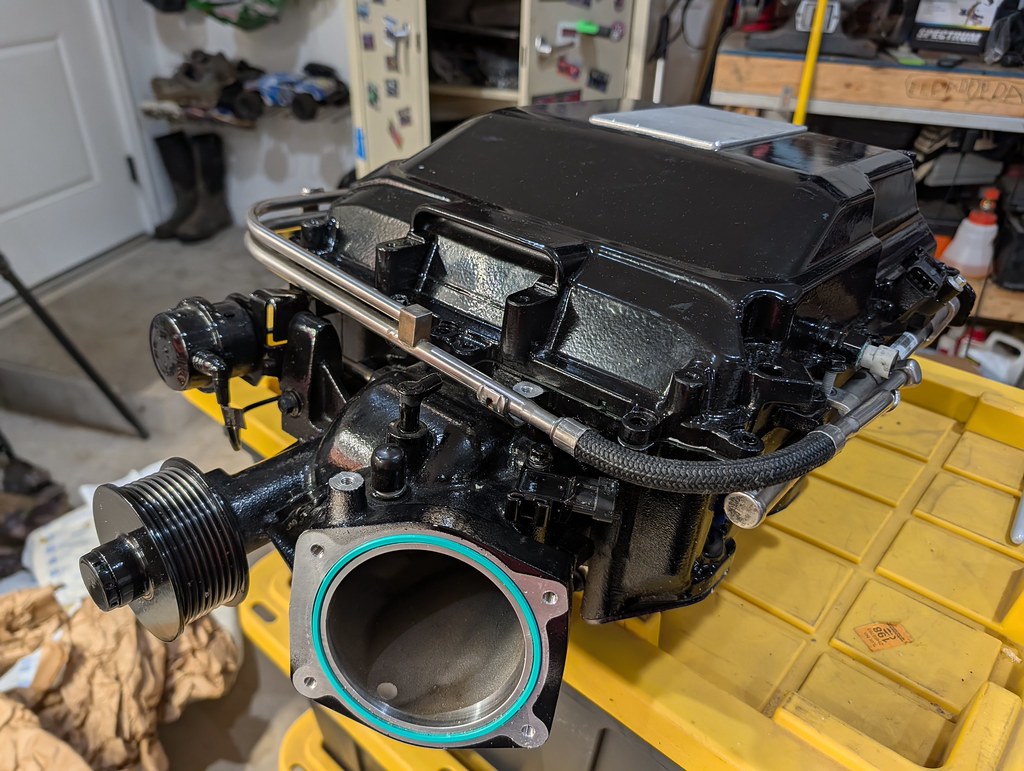
Everything is really tight (other than the spring coupler that I'll be replacing) and the rotors look really clean.
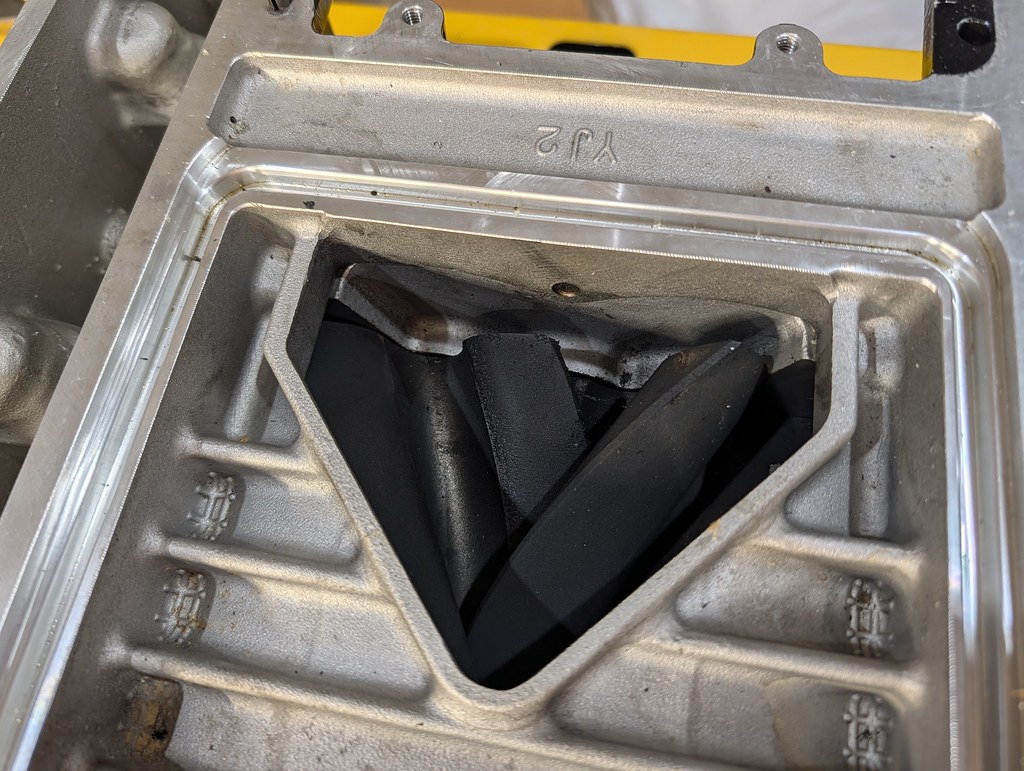
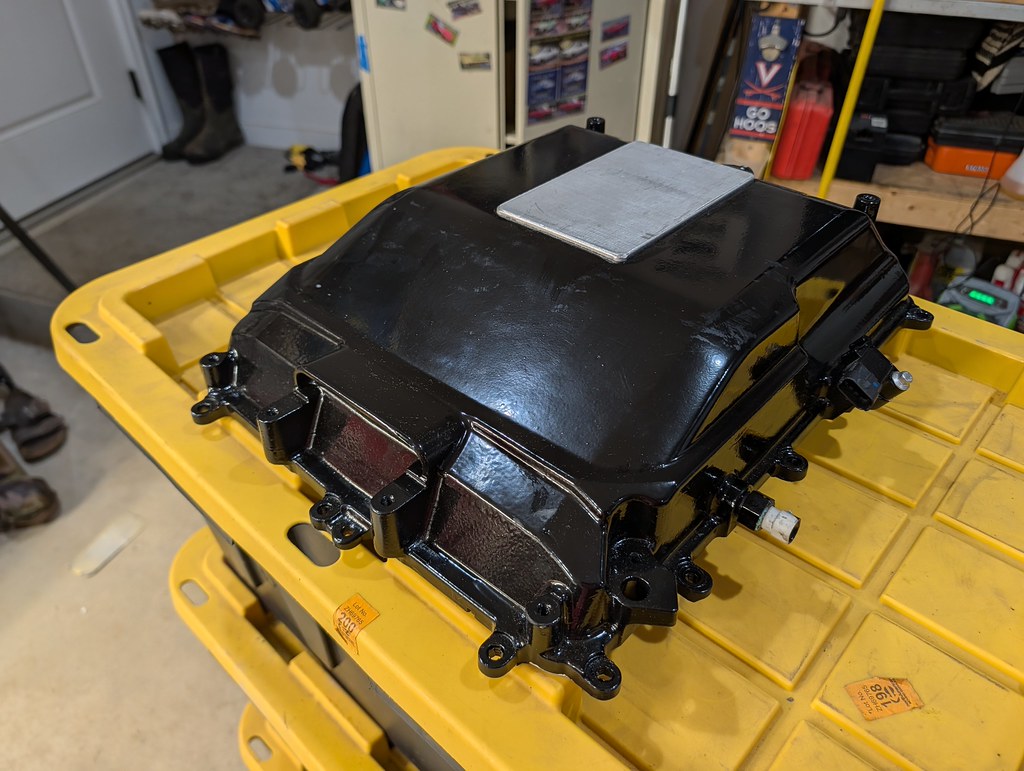
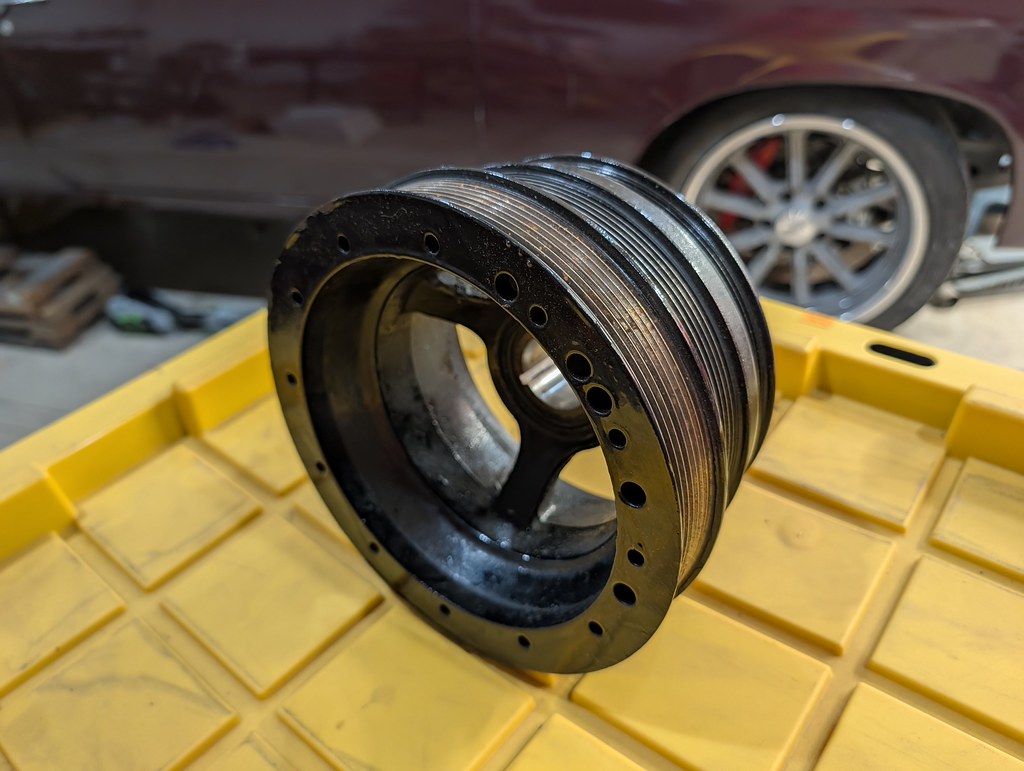
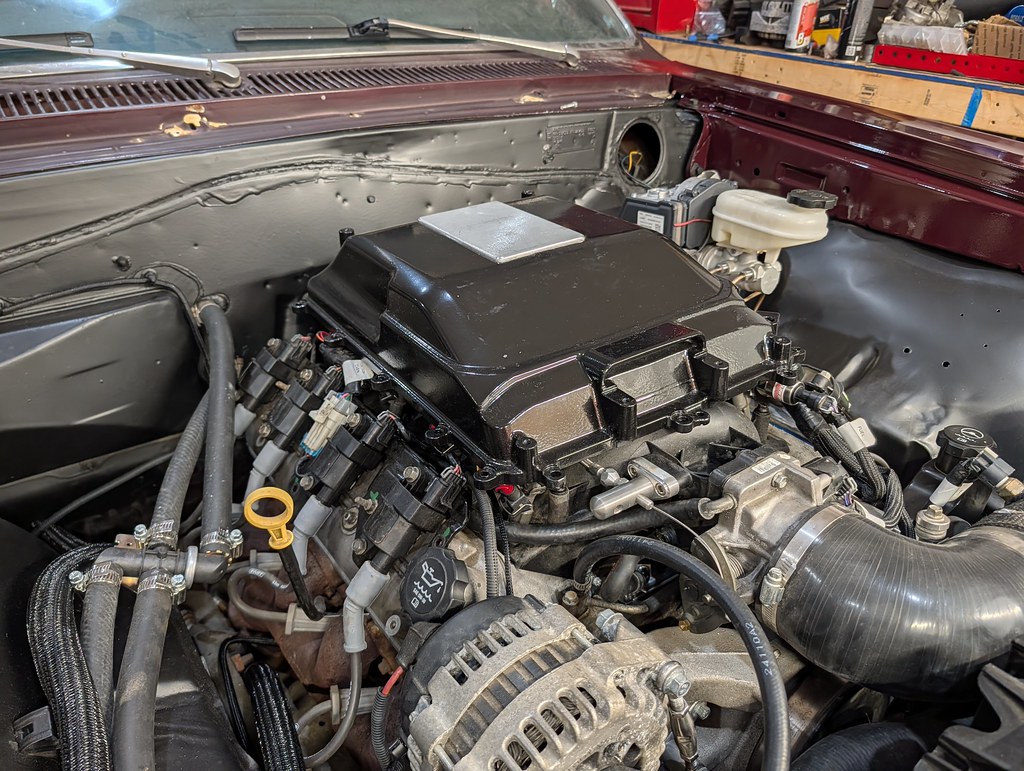
I also grabbed a set of stock LSA injectors, so for now I'll keep the pulley stock. I remember when I did the LSA swap on my Camaro the lower supercharger was almost exactly the same height as the stock intake manifolds, so I put the lid on top to see ballpark how high the intake will sit. I'll have plenty of room for this with no issues for hood clearance.
I will take some pictures when I open the boxes, but there currently is a pretty huge sale on Holley engine accessories recently so I picked up the 20-135 bracket that's based on the C5/C6 engine bracket for alternator and power steering. I used that same bracket on my Nomad and I really liked it. It is almost 50% off right now! My plan is to rebuild the 6.2, and when I'm ready to swap I'll list the 6.0 as is and sell it as a complete pull out engine. I'll be able to pay myself back at that point. These are all future upgrades so I'll keep collecting parts, but for now I'll be keeping the 6.0 as is in the car. I'll still need a fueling upgrade, header upgrade, and a bunch of other parts before I can go down that road. For now everything will sit on the shelf patiently waiting.
Cheers,
Ryan
1955 Nomad project LC9, 4L80e, C5 brakes, Vision wheels
1968 Camaro 6.2 w/ LSA, TR6060-Magnum hybrid and etc SOLD
1976 T/A LS1 6 Speed, and etc. SOLD
Follow me on Instagram: ryeguy2006a
19 Hours Ago #34
Registered User
- Join Date
- Aug 2007
- Posts
- 741
Yeah my wife really likes helping taking off and putting hoods back on our hit rods. LOL!
14 Hours Ago #35 Registered User
- Join Date
- Nov 2006
- Location
- Mountain Springs, Texas
- Posts
- 4,874
I bought one if these to save my marriage. :D Originally Posted by 79 Camaro
https://www.speedwaymotors.com/Speed...oK_Eb4kirO1AE-1969 Camaro - LSA 6L90E AME sub/IRS
1957 Buick Estate Wagon
1959 El Camino - Ironworks frame
1956 Cameo - full C5 suspension/drivetrain
1959 Apache Fleetside
13 Hours Ago #36
Registered User
- Join Date
- Nov 2018
- Posts
- 995
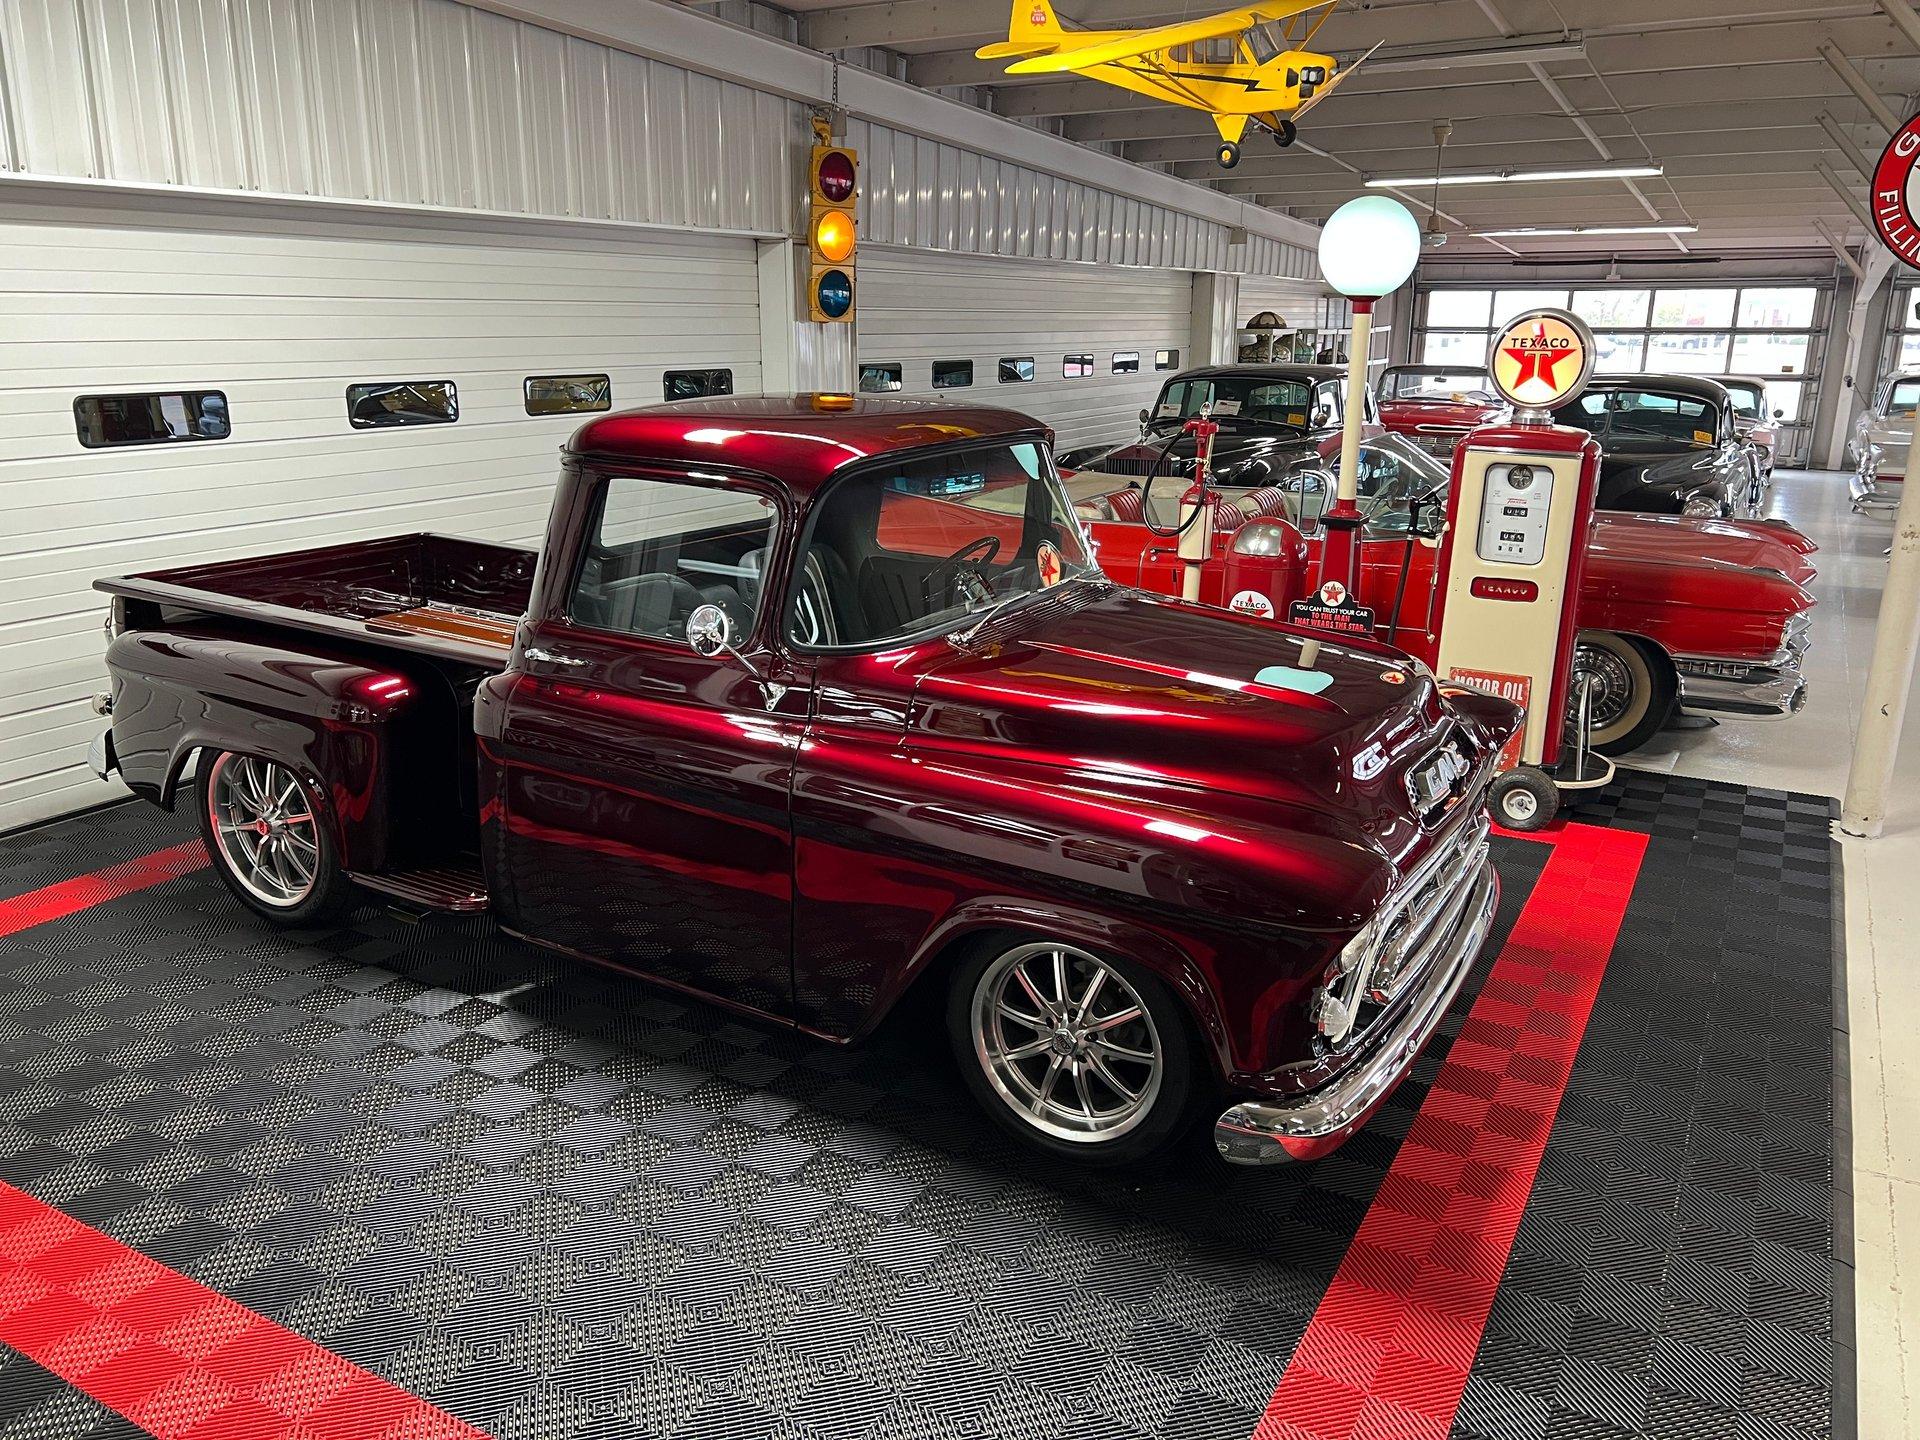
Looking sharp. When you go to get it properly painted, consider brandywine metallic. It's a slightly lighter maroon with a bit more red i t and would really pick the lines on that car up. It's what I would be using if I were going back with the stock color on mine (it started life as maroon), but I'm almost certain that I will be using a reddish brown like Root Beer or Allspice on mine.
A 57 GMC with Brandywine metallic
On the wiring, I missed that there were 4, I only saw 3. So heavy direct battery is main power, ground obvious, one of the switched 12VDC tells the unit when the car is running, did the directions say what the 4th wire is for? I'm guessing quite a lot of the unused wiring relate to regen vs actual braking.
3 Hours Ago #37
Registered User
- Join Date
- Sep 2009
- Posts
- 3,002
Don, that's a nice piece for installing the hoods. I will keep that in mind for the future.
Vimes, there are 4 wires total with that harness. One heavy gauge battery 12v+ (40 Amp fuse), one heavy ground, one 18 ga 12v+ (5amp fuse), and one switched 12v+. I tied the two 12v+ battery wires together with separate fuses, so three total connections.
1955 Nomad project LC9, 4L80e, C5 brakes, Vision wheels
1968 Camaro 6.2 w/ LSA, TR6060-Magnum hybrid and etc SOLD
1976 T/A LS1 6 Speed, and etc. SOLD
Follow me on Instagram: ryeguy2006a

 Reply With Quote



