


Results 1 to 20 of 38
-
08-13-2026 #1

 Registered User
- Join Date
- Sep 2009
- Posts
- 3,002

1966 Chevelle Restomod; Back to the Basics
Hey guys,
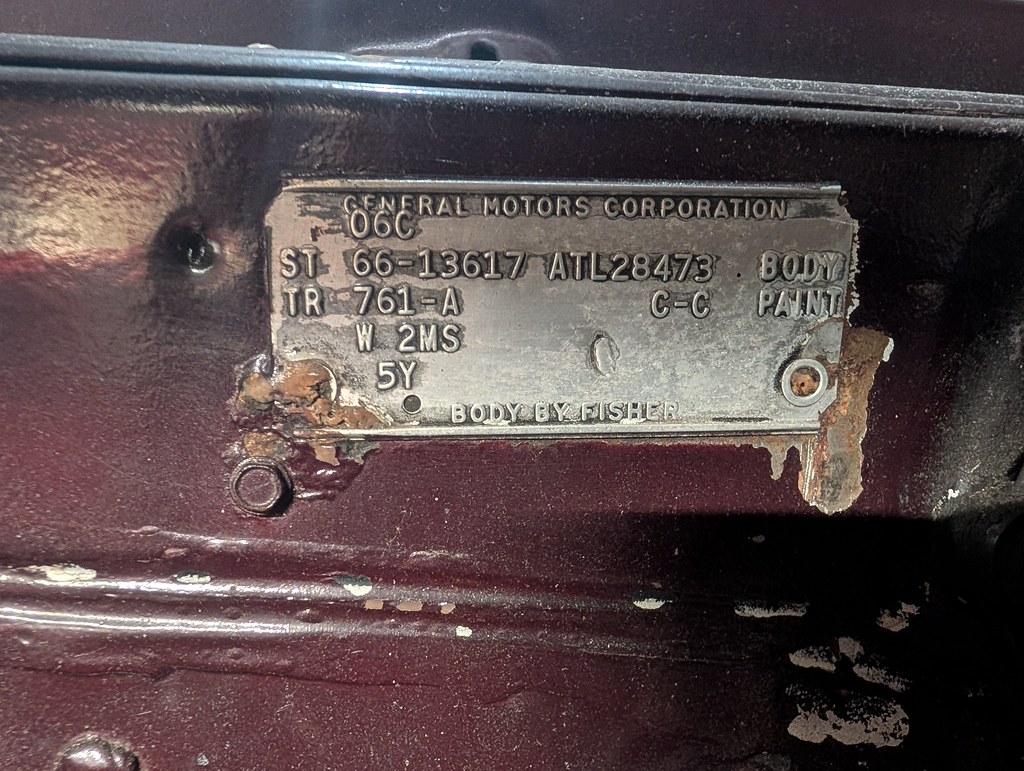
If you had been following along, I recently sold my 1955 Nomad. The car was great as it was, but I was really wanting to drive a car with a manual transmission again. That among some other things lead me to want a different platform. Ever since seeing Tom Farrington's 1966 Chevelle when I first joined this forum 15 years ago I've always loved that car. They have killer body lines, and when they are lowered a few inches, they have an amazing stance. I didn't necessarily have a car in mind as I was setting out for a new project car, but there was a local 1966 Chevelle that had popped up on Marketplace that really piqued my interest. The body was pretty solid with nice wheels and tires. As I looked at the ad more closely, I saw it had a cammed 6.0 running on Terminator X, T56 and a 8.8 rear, ridetech/UMI/SMP suspension parts, Big Wilwood brakes, New TMI interior, and much more. I went to look at the car and it was a little rough around the edges, but the body was really solid overall. It will need some lower quarter patches, door patches and window channel repair, but overall is a really clean car that hasn't been messed with. Even the original wiring harness looks really nice and uncut.
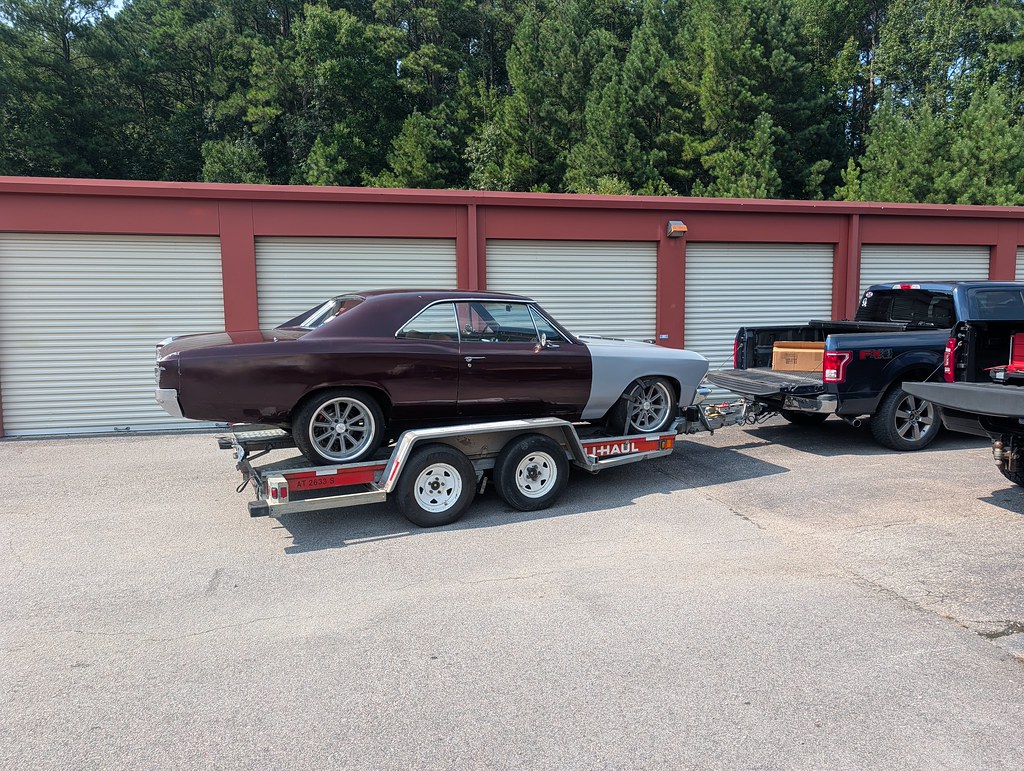
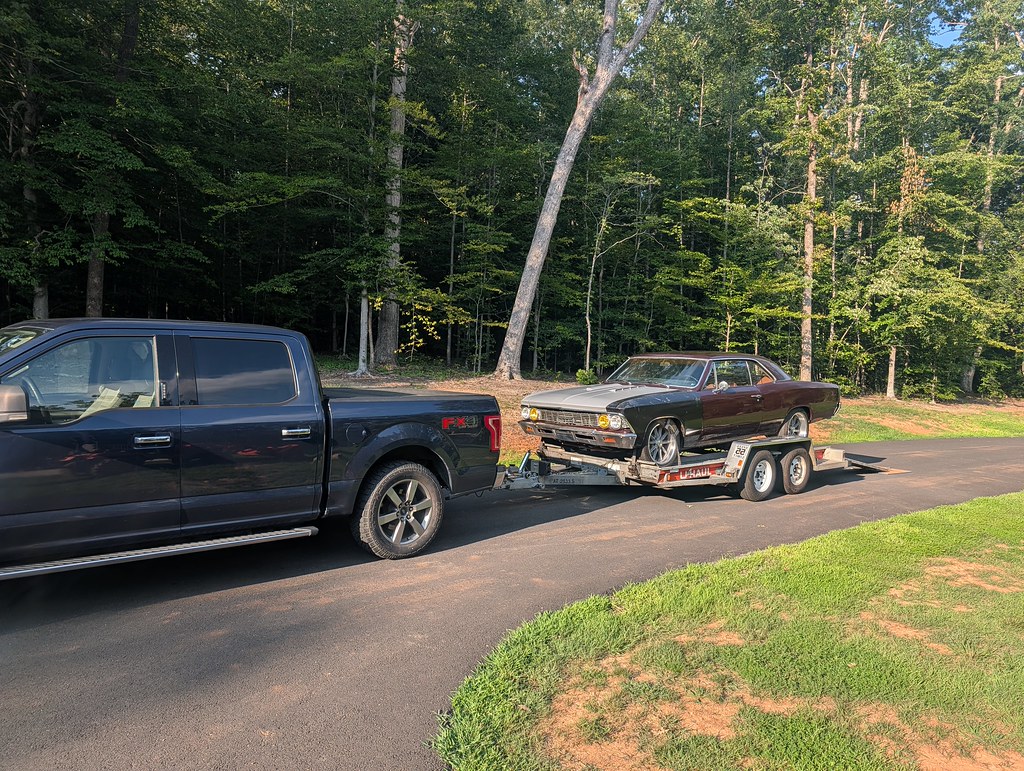
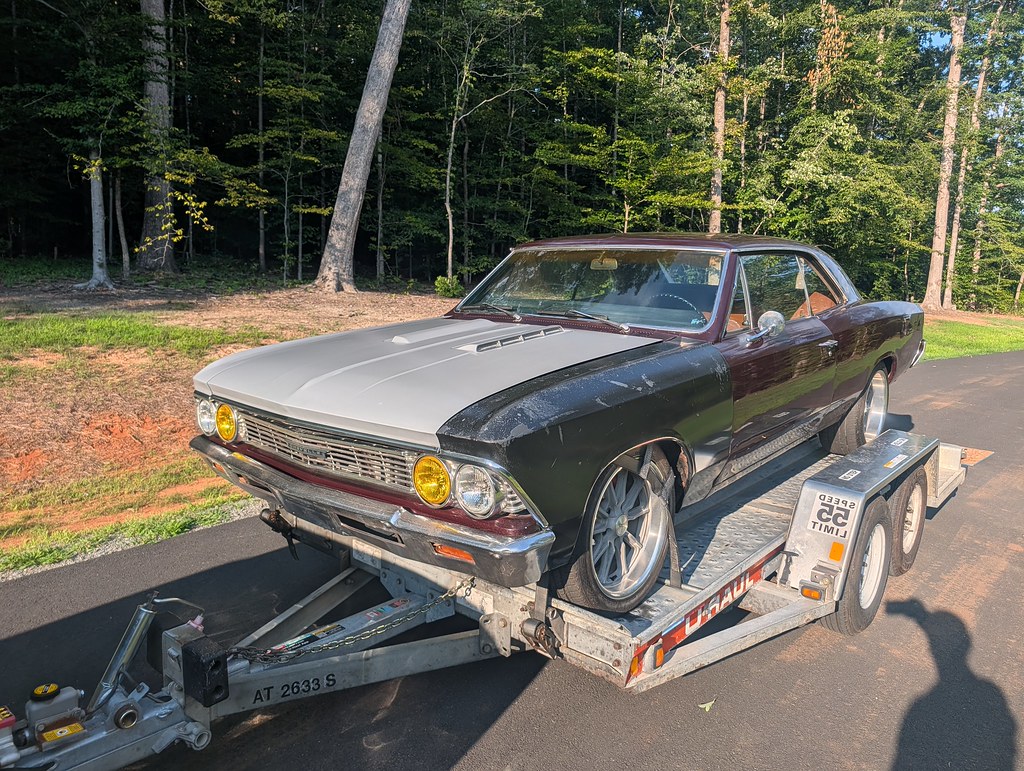
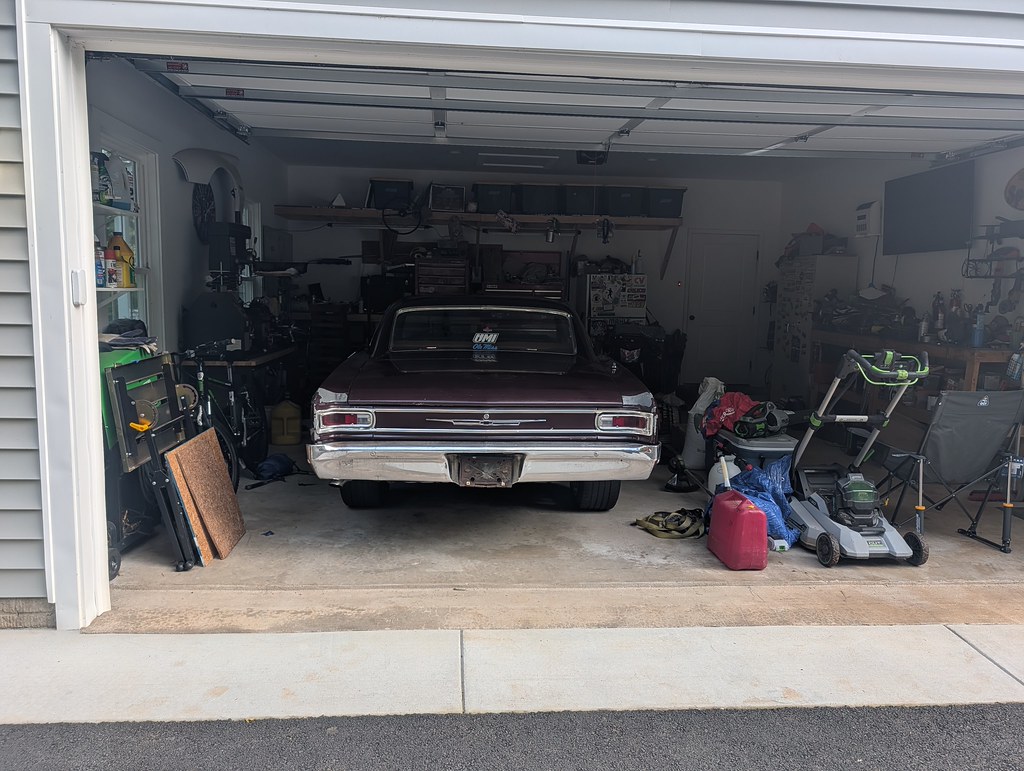
After I got it home, I took it for a quick ride up and down the road. The car handles really well and rides really nicely, but the tune needs a lot of help. I pulled it into the driveway and got some better pictures off the trailer.
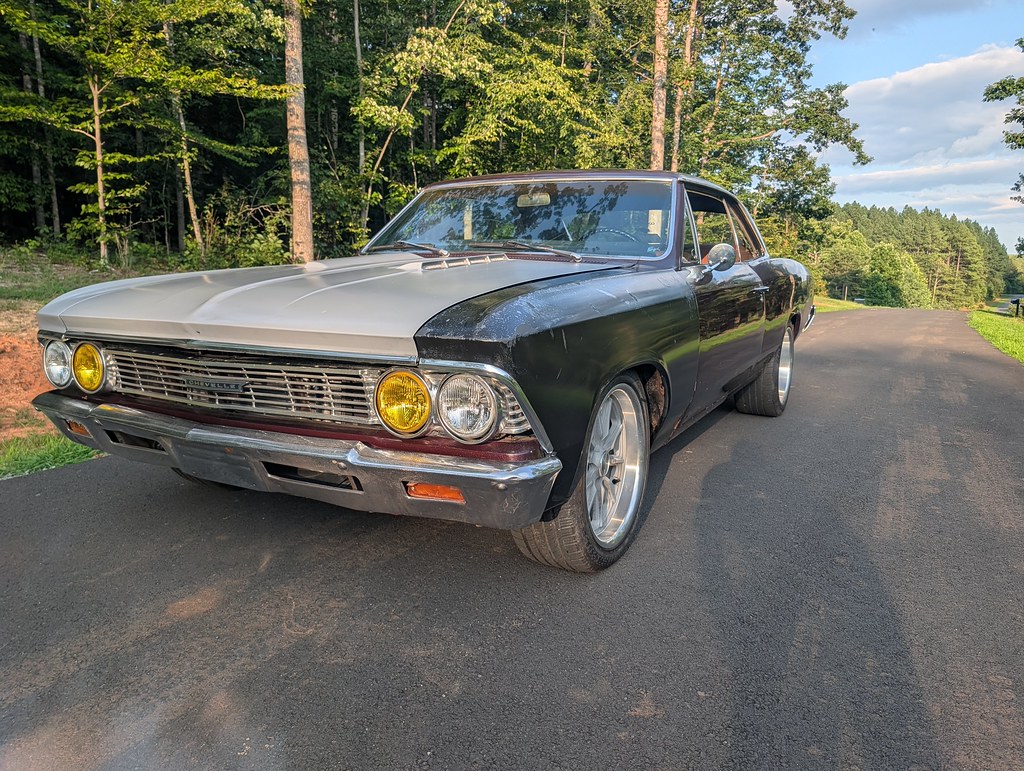
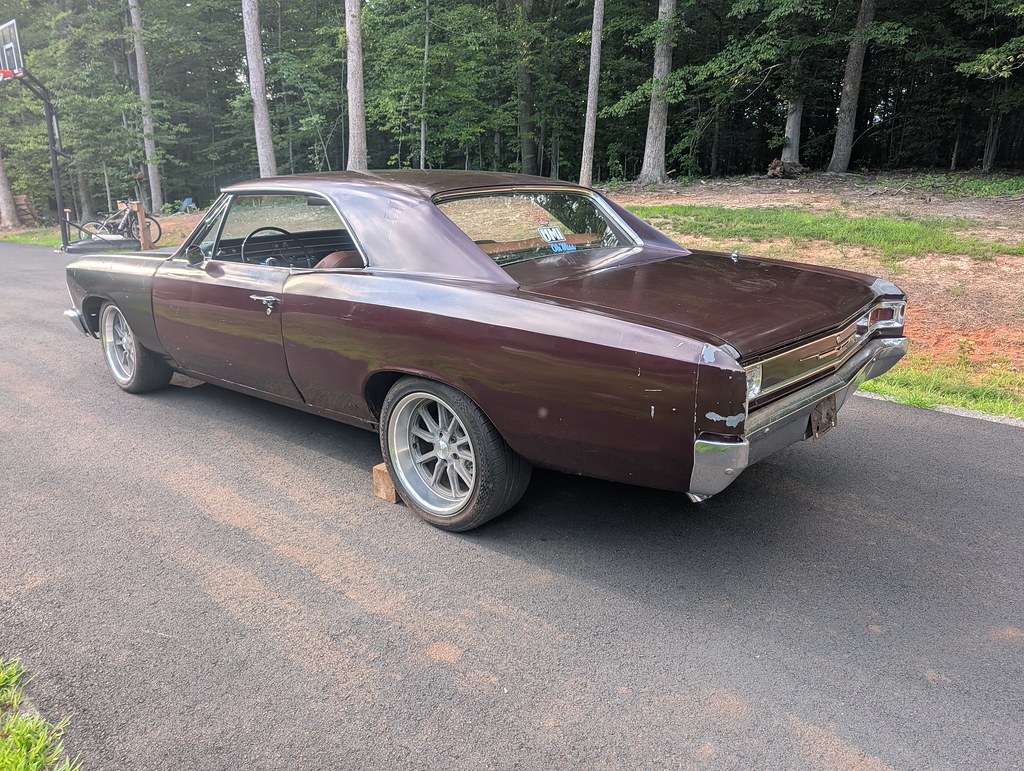
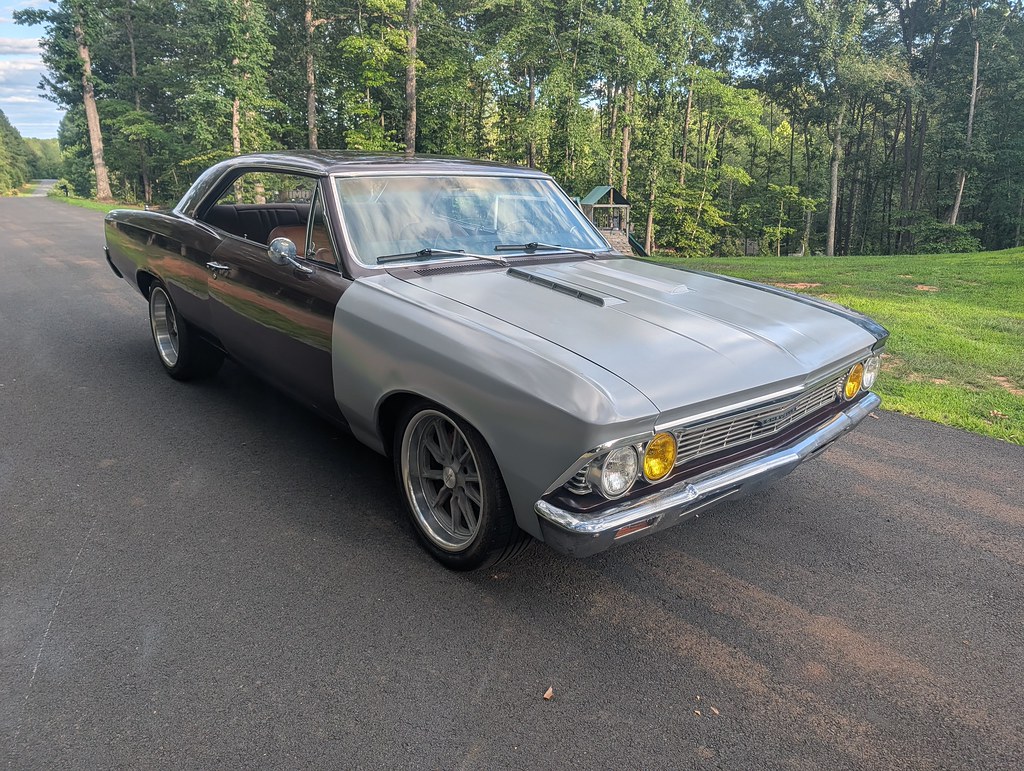
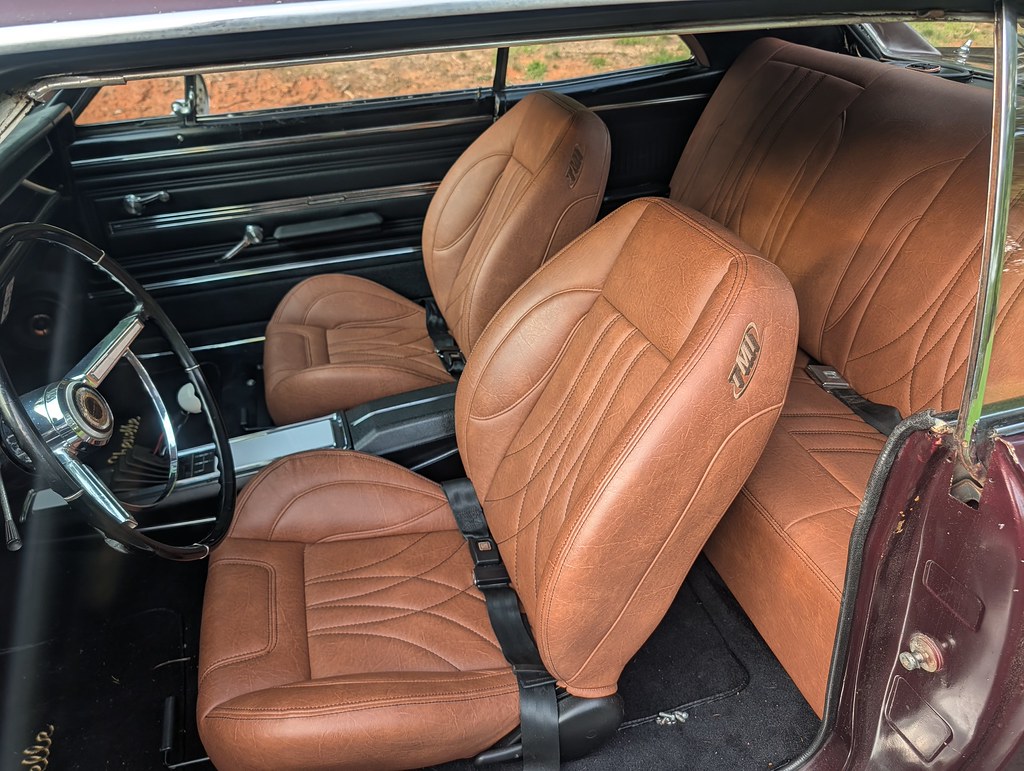
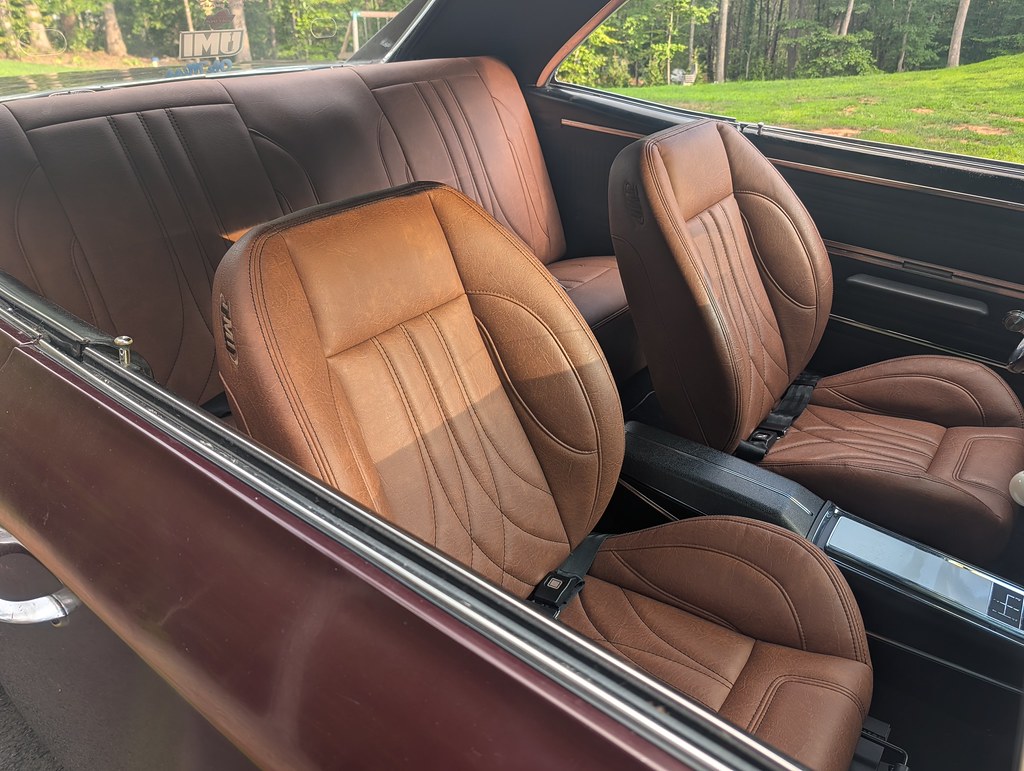
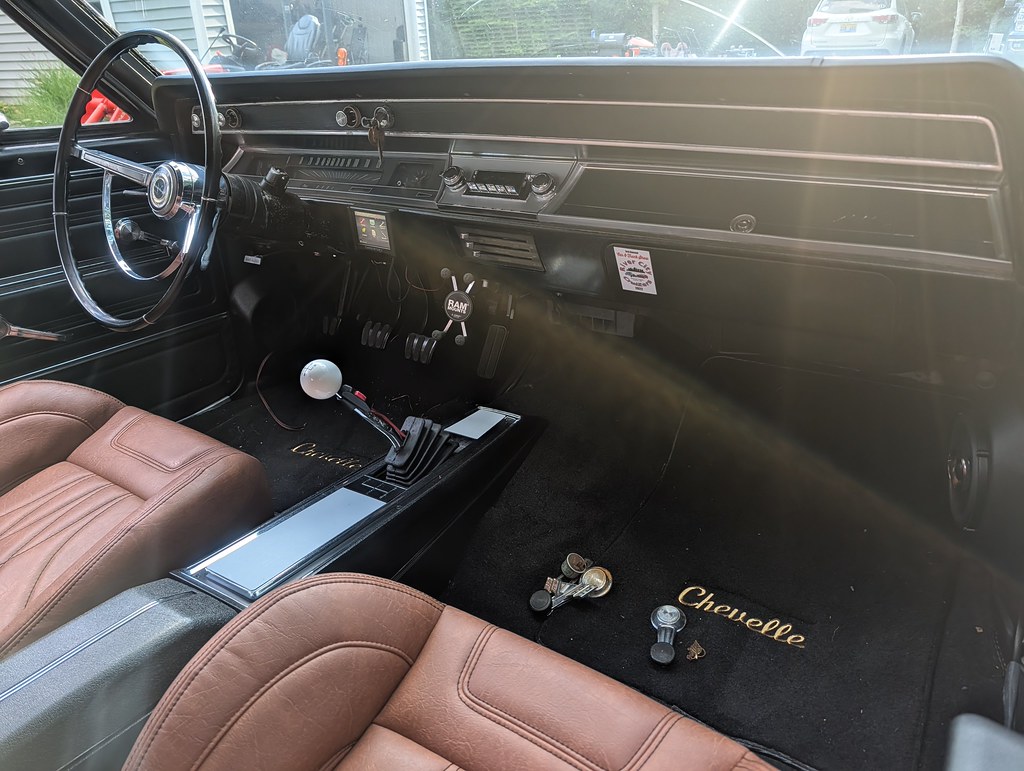
I'm not sure that I would have gone with the tan/cowhide interior if I was buying new, but it's growing on me. I think if the color was different that it would definitely pop more. But it's definitely growing on me and the seats are so comfortable.
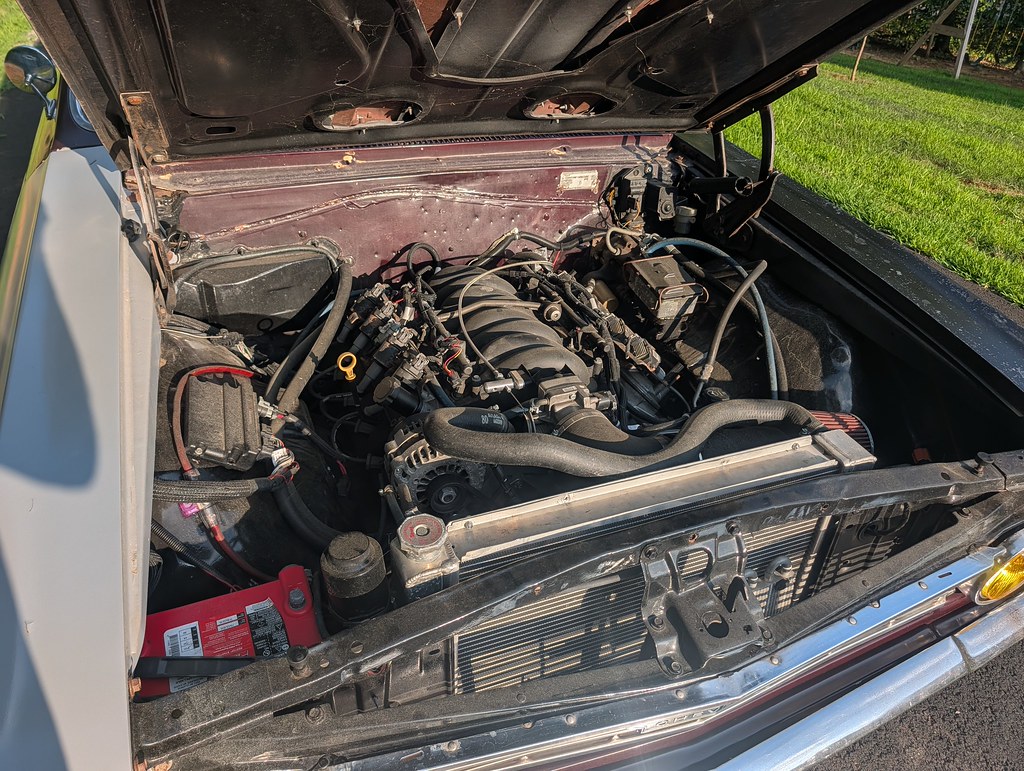
Here's a few shots under the hood. There are several things that I want to change in this engine bay, but first is going to be getting rid of the hydroboost and moving the Terminator X under the dash. The Hydroboost is leaking and the hoses that they used are mis-matched and not routed that well. I'm also going to swap out the truck water pump for something different so that I can route the hose in a cleaner path.
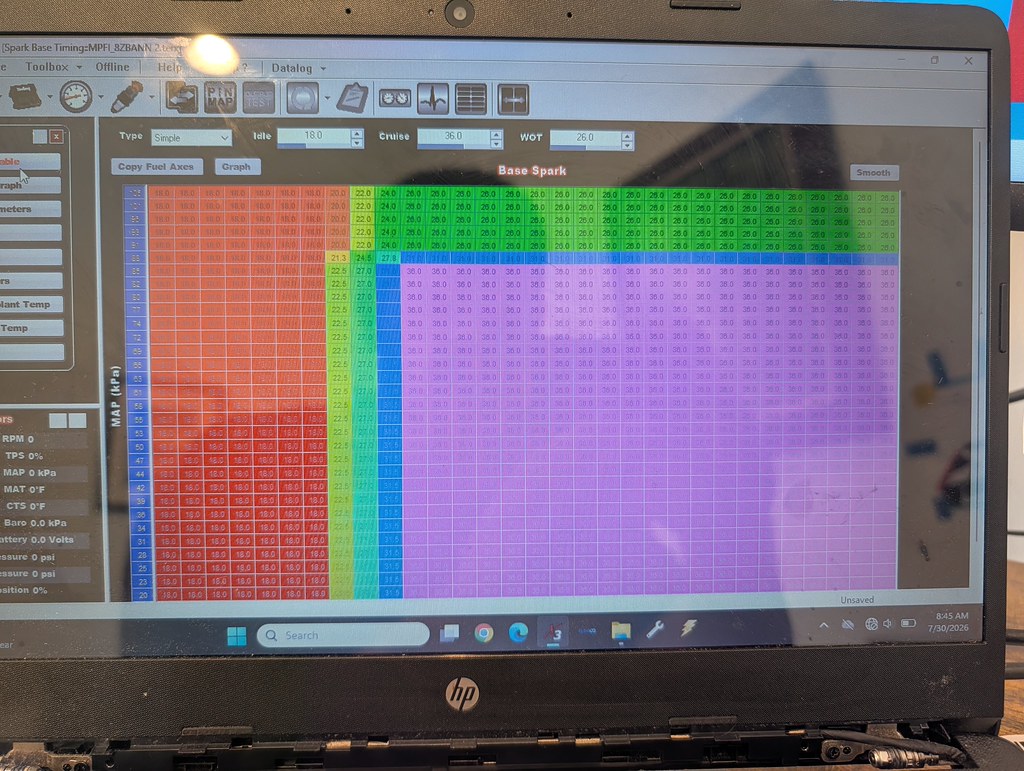
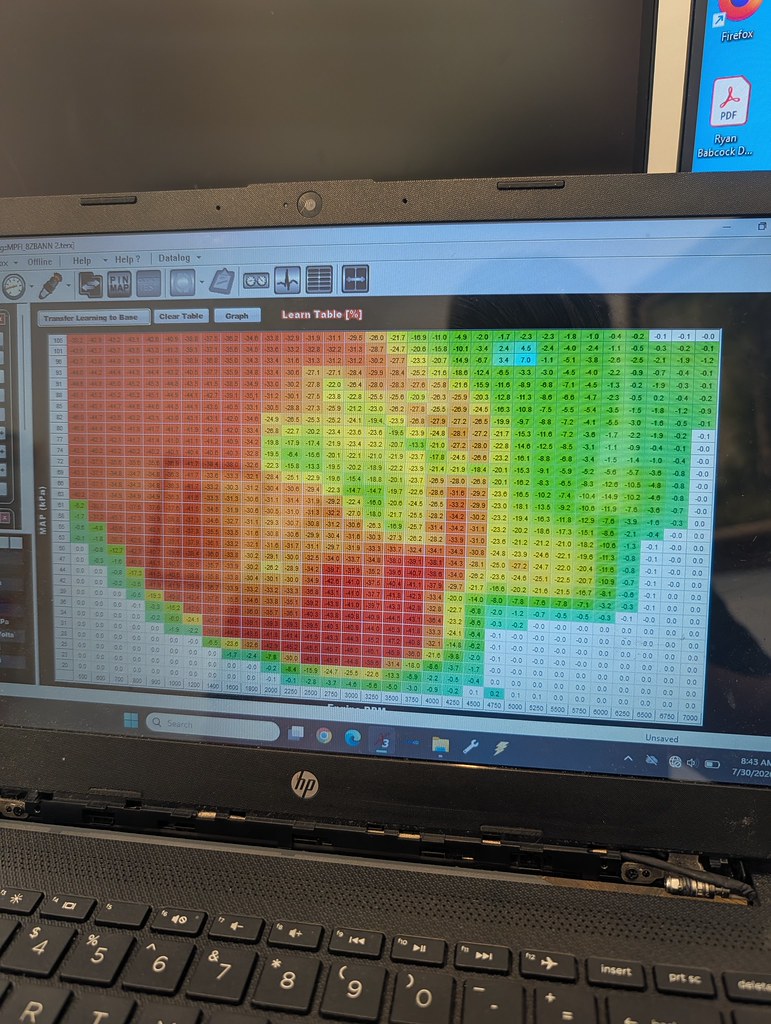
I downloaded the tune to my laptop to see what I was working with and it was pretty obvious by the VE table, timing table and AFR tables that no one ever adjusted anything after they installed the canned Holley tune. That would explain why it had a hard time transitioning between idle and 2500 rpm.
Timing Table
Learn Table. Yikes, it's way off
Got it pulled back into the garage and will continue to closely look everything over and see what all I got myself into. I have quite a few parts on the way.
So my main goals with a new project was first and foremost to have a manual transmission again. This time around I'd like to keep things more simple and stay N/A. While I loved the turbo, I think I prefer to have short gears and torque down low. At least for the short term, I'd like to stick to the basics and build a clean, fun to drive car. I picked up a nice 6.2 L92 short block from a buddy and will likely build that for this car at some point down the road. I've done the supercharger then turbo, but what I haven't done before is a big cubic inch engine. So I think that's the direction that I'd like to go for the future. Another big reason for selling my Nomad was to start a fund for building a 30x40 detached garage, but still have a cool car to drive around.
I'll be updating this along the way. Right now I'm waiting for some fittings and brackets for the first wave of upgrades to the car.
Cheers,
Ryan
1955 Nomad project LC9, 4L80e, C5 brakes, Vision wheels
1968 Camaro 6.2 w/ LSA, TR6060-Magnum hybrid and etc SOLD
1976 T/A LS1 6 Speed, and etc. SOLD
Follow me on Instagram: ryeguy2006a
-
08-13-2026 #2 Registered User
- Join Date
- Aug 2007
- Posts
- 741
Looks like a great winter project.
Not sure about front and back seats color wise with the rest of the black interior. I wonder if TMI would sell you a set of black seat covers?
08-13-2026 #3 Registered User
- Join Date
- Nov 2018
- Posts
- 996
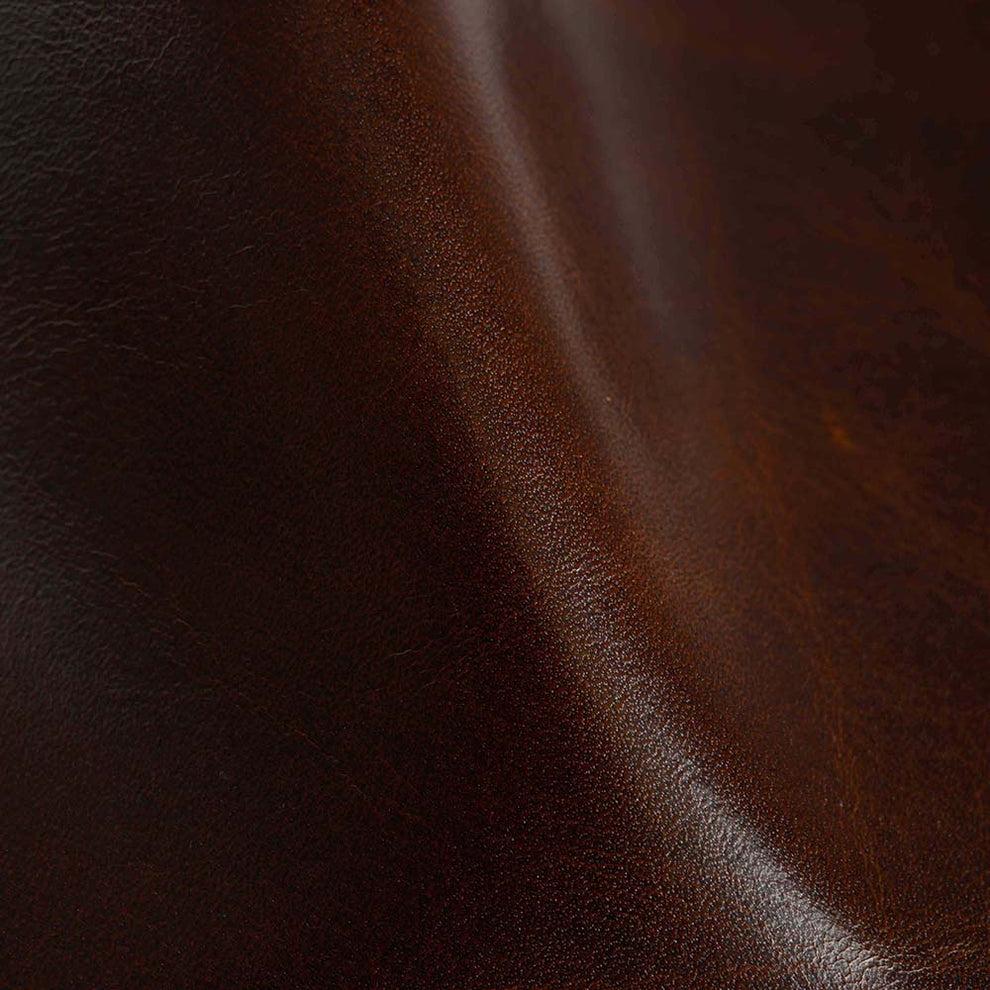
Nice. It sounds like you've got a good plan for that. I love a brown interior, but if going with brown (I saw that was what was in the car when you bought it) I would have gone with something like cordovan. Either that, or the color of a fine bourbon. The exterior color that's on there would be a good one to keep. My mother had a 72 Cutlass Supreme with a color very close to that on it, was a hair more brown, and it was gorgeous with a good wax job.
Cordovan
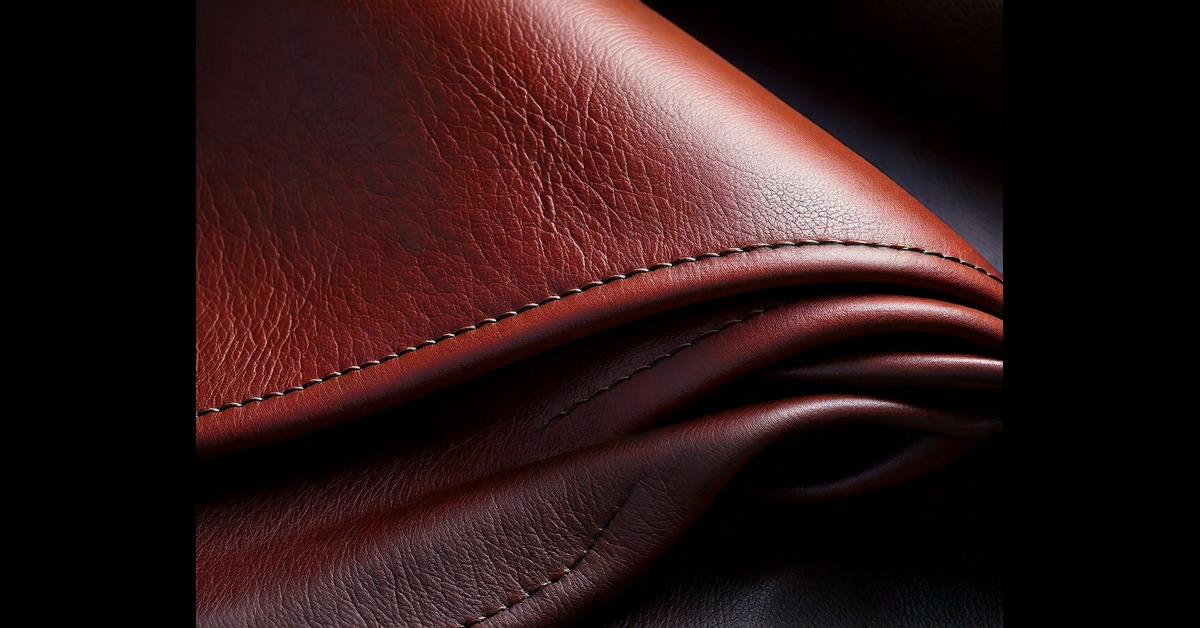
Bourbon
08-14-2026 #4
Registered User
- Join Date
- Sep 2009
- Posts
- 3,002
I reached out to TMI and I was surprised to find out that they do not sell replacement covers for their seats. So I'm going to stick with them. The guy also gave me a roll of matching brown leather. Not sure if the plan was to wrap the interior panels or what, but I may explore that option. Maybe if the door and rear panels were a matching brown, the seats wouldn't look as out of place.
1955 Nomad project LC9, 4L80e, C5 brakes, Vision wheels
1968 Camaro 6.2 w/ LSA, TR6060-Magnum hybrid and etc SOLD
1976 T/A LS1 6 Speed, and etc. SOLD
Follow me on Instagram: ryeguy2006a
08-14-2026 #5 Registered User
- Join Date
- Nov 2006
- Location
- Mountain Springs, Texas
- Posts
- 4,877
Nice project with a lot of good parts. Any good upholstery shop could make some custom door panels to match the seats. Not a big deal.
1969 Camaro - LSA 6L90E AME sub/IRS
1957 Buick Estate Wagon
1959 El Camino - Ironworks frame
1956 Cameo - full C5 suspension/drivetrain
1959 Apache Fleetside
08-14-2026 #6 Registered User
- Join Date
- Nov 2012
- Posts
- 373
Nice starting platform for sure. Get a good tune in it and all the mechanicals worked out while driving it and having fun. Then……..it’s paint jail!
1970 Camaro restomod power tour ride
1966 Buick Special restomod, the never ending project
1970 GTO My newest retirement project, time to gather parts!
08-18-2026 #7
Registered User
- Join Date
- Sep 2009
- Posts
- 3,002
That's exactly what the plan is. Fix what needs fixing and enjoy. 3 year plan is to have it in paint.
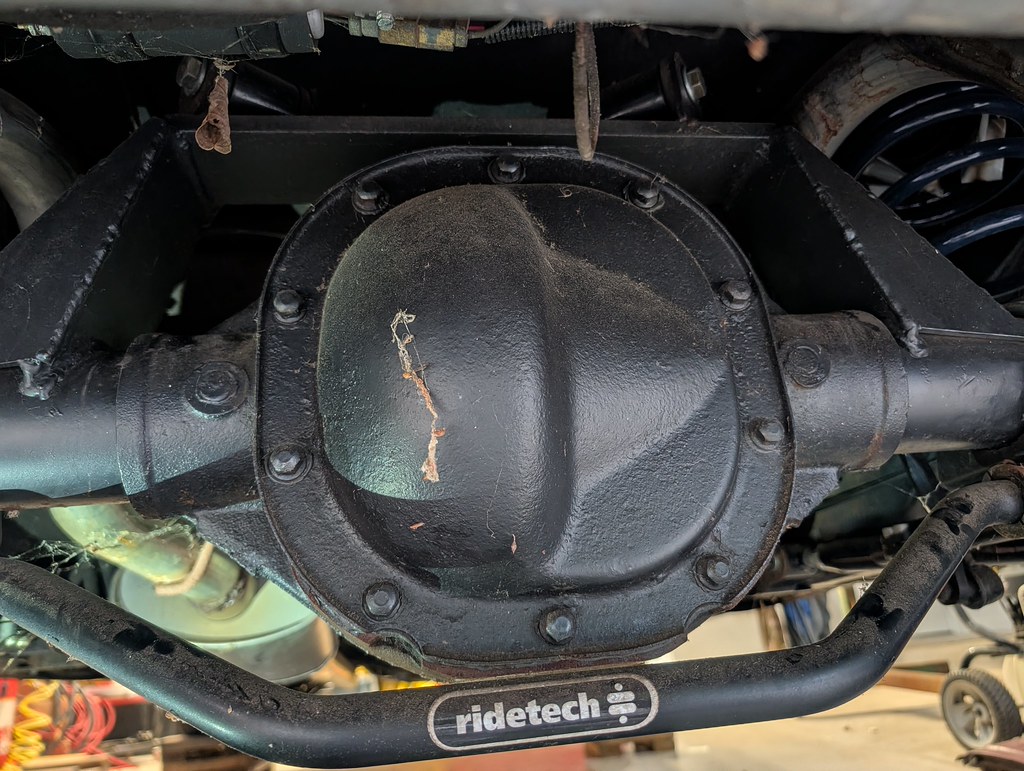
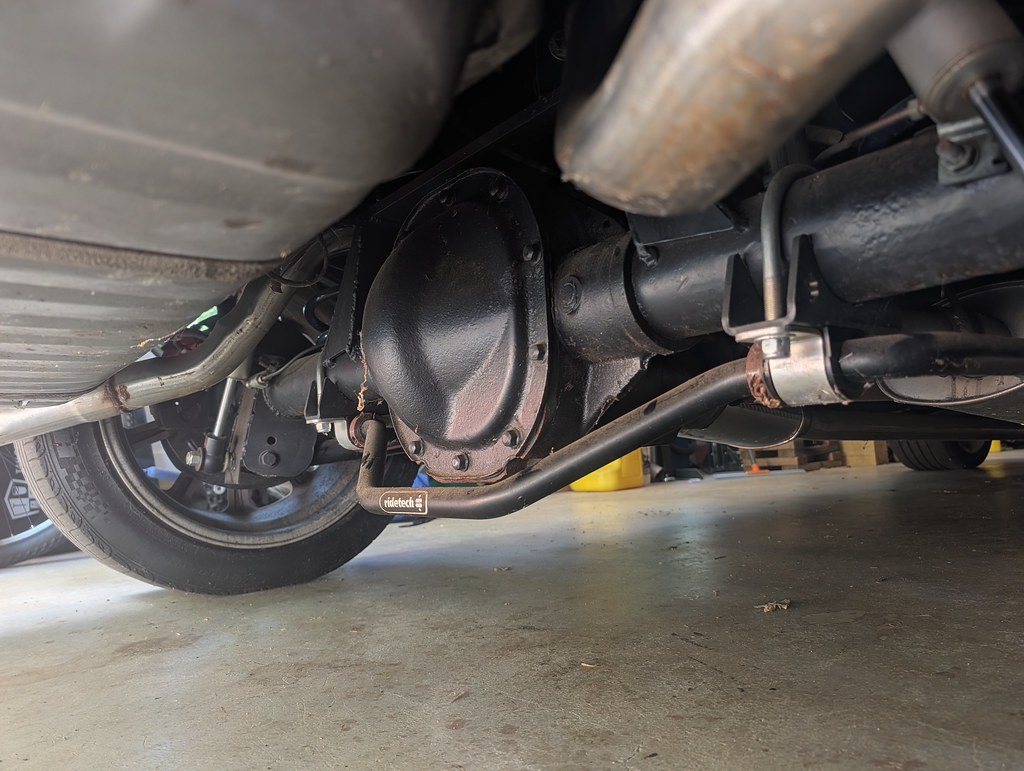
After I got it home, I wanted to look everything over really good to see what I actually purchased. I looked at all the high level details, but it's hard to take it all in when you are in the moment. I put the car up on wheel stands so that I could crawl underneath and really check things out. The first thing I wanted to check out was how they managed to get a 8.8 rear under the car. Upon further inspection it appears to be an explorer rear end, but I'm not entirely sure. If an expert could chime in to confirm that would be great.
And don't worry about the cobwebs. It just confirms the guys story that it had been a few years since he drove it.
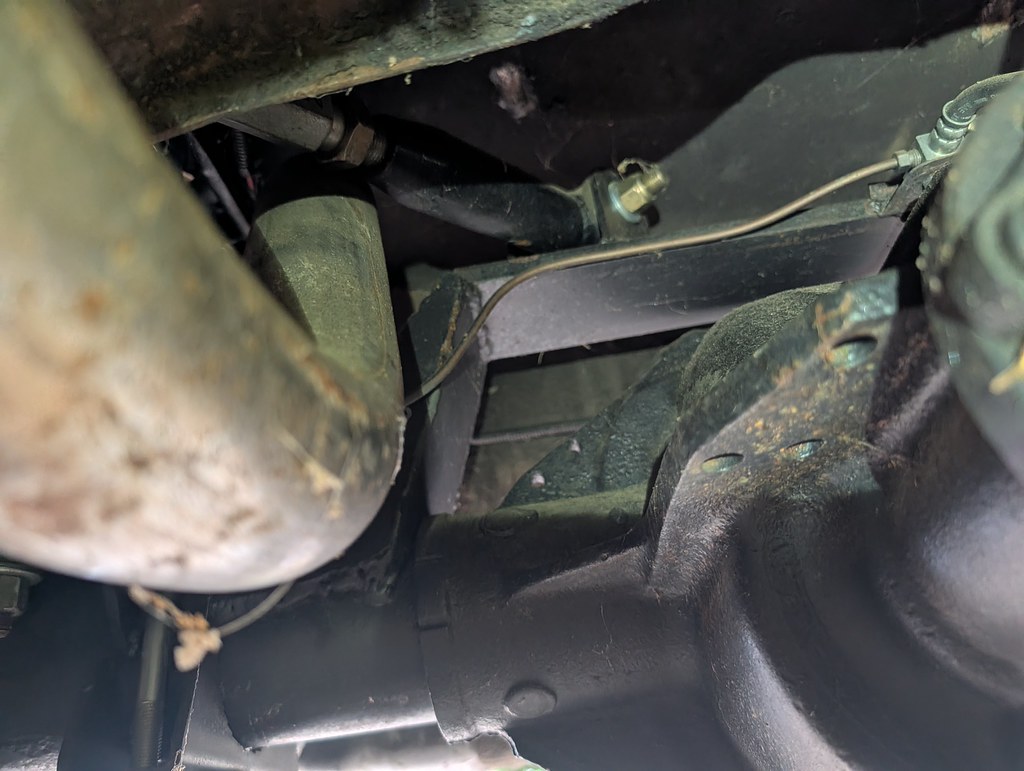
I also noticed a label on the lower links on the rear for a company called Southside Machine Performance. After going to the site, they sell a kit to swap in an 8.8 rear end along with their adjustable upper and lower links. Pretty cool option, but I'll need to redo the welds on the brackets. They are clearly holding and I see no indications of them starting to fail, but I'd expect them to have more penetration in spots. Also some additional bracing from the upper truss to the main case. I'll likely pull that this winter and fix it to my liking.
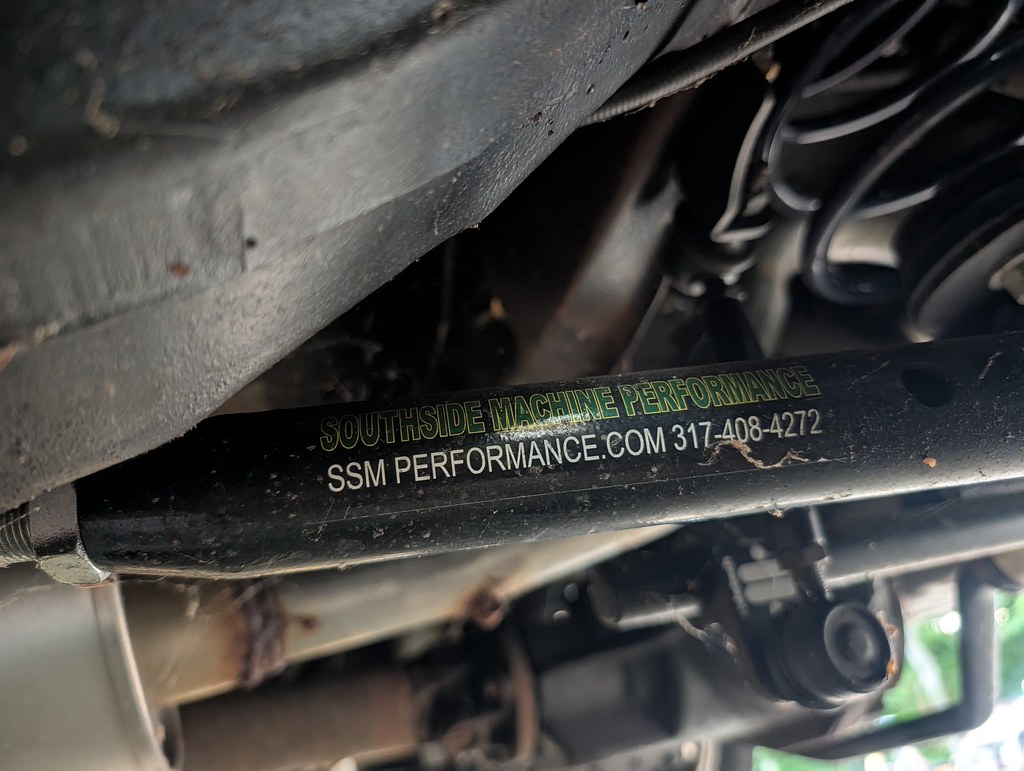
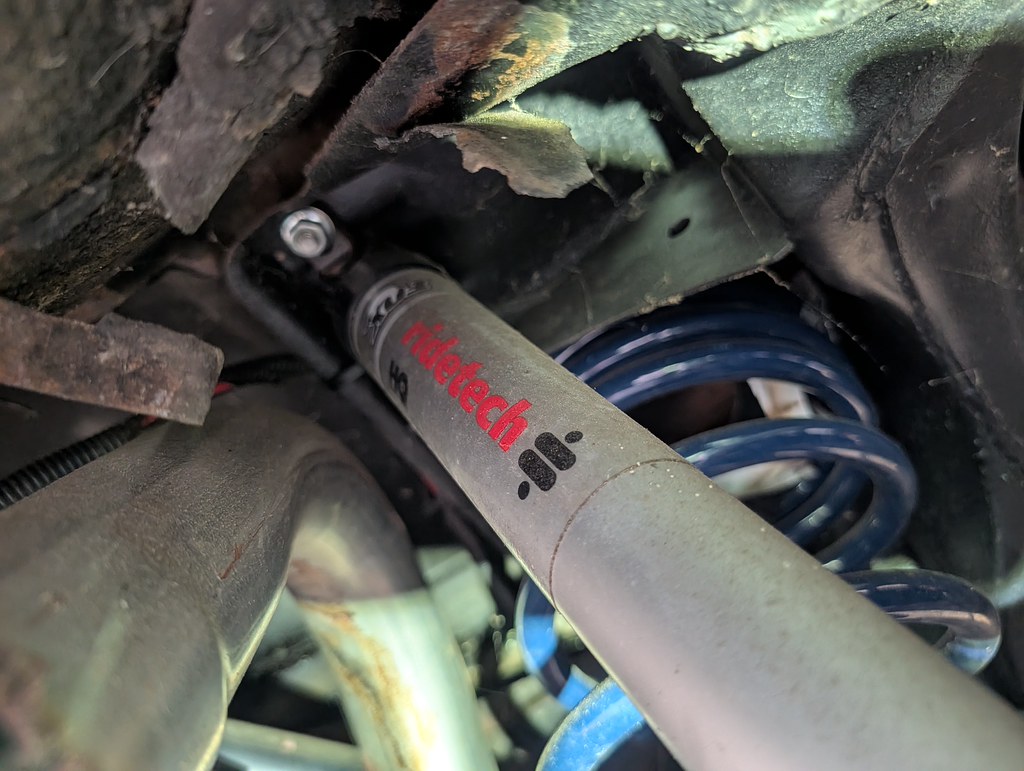
It also has ridetech rear springs, adjustable rear shocks and the rear sway bar. The factory clear coat is starting to peal off in places. When I start repairing the minor floor rust I'll strip that off and re-coat. I didn't get pictures, but it also has a rear disk brake kit that appears to be from an Explorer with new disks and pads.
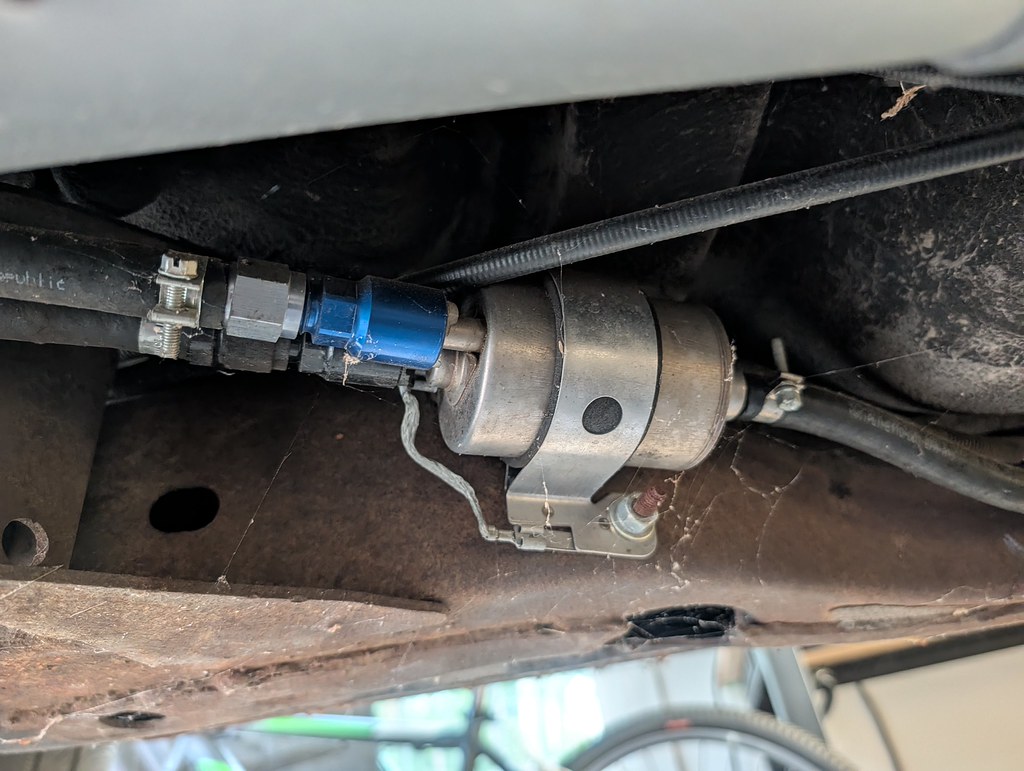
It has a pretty basic external Walbro 255 lph pump along with a Corvette style Filter/Reg. I don't love this setup, but as long as it works no point in fixing it. (Hint, Hint, it doesn't work)
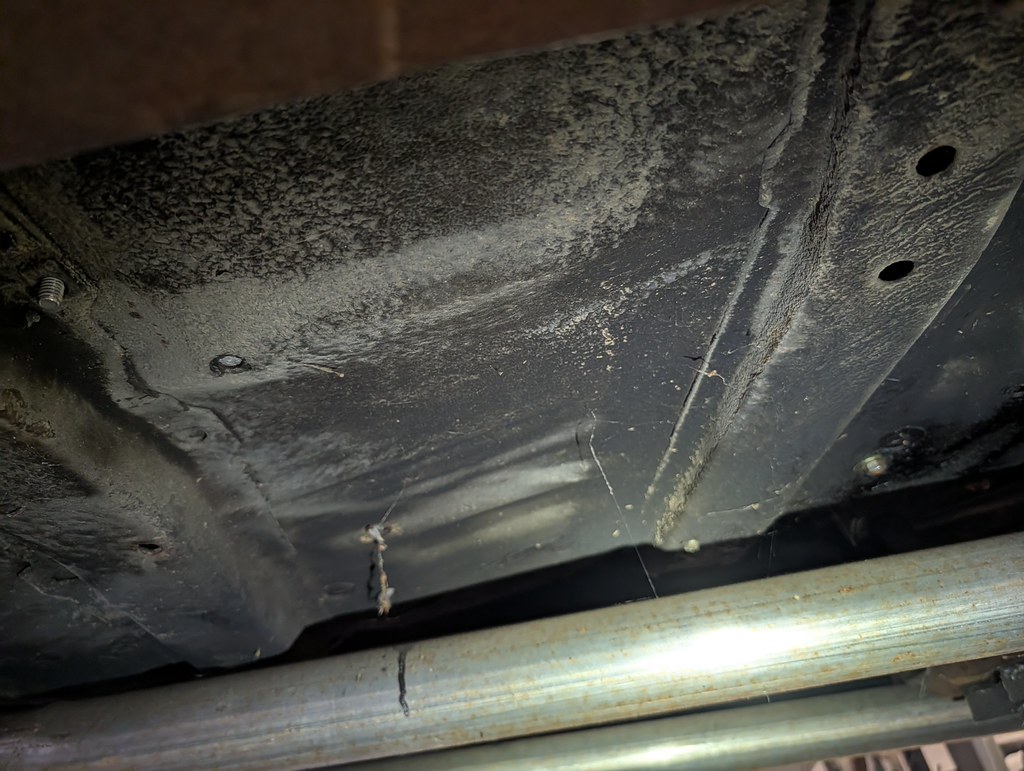
The floor pans are 95% rock solid and covered in what appears to be the original undercoating.
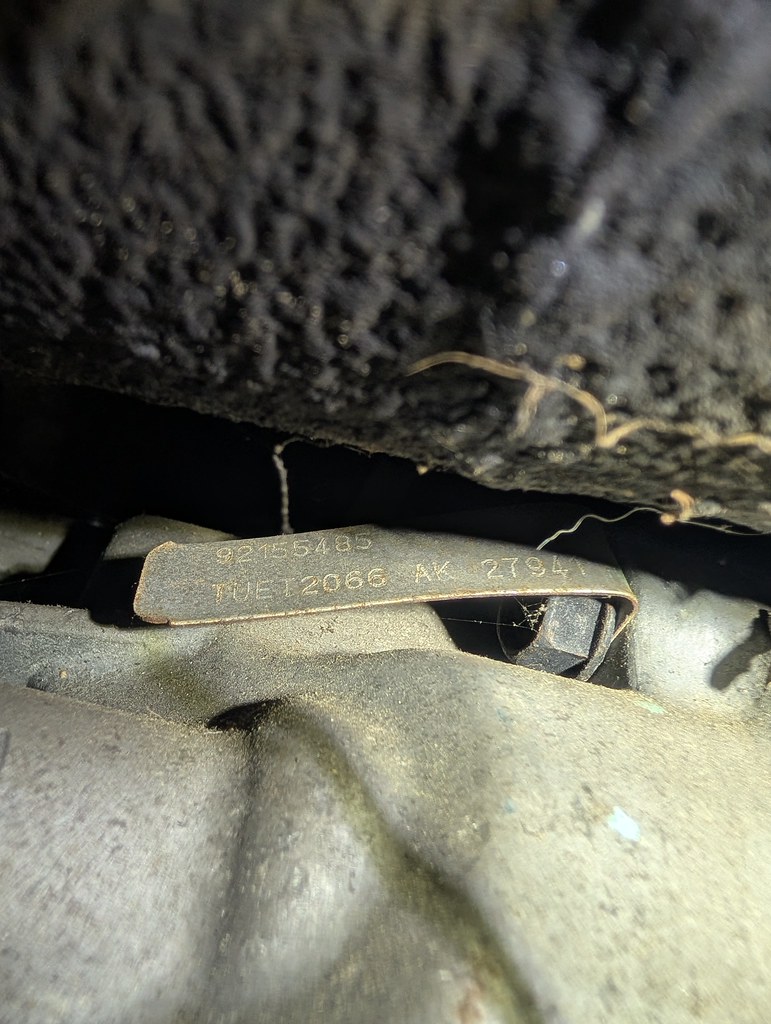
The T56 still had the tag on the side. After running the numbers it is a GTO T56 with the better synchro's and has an MGW shifter!
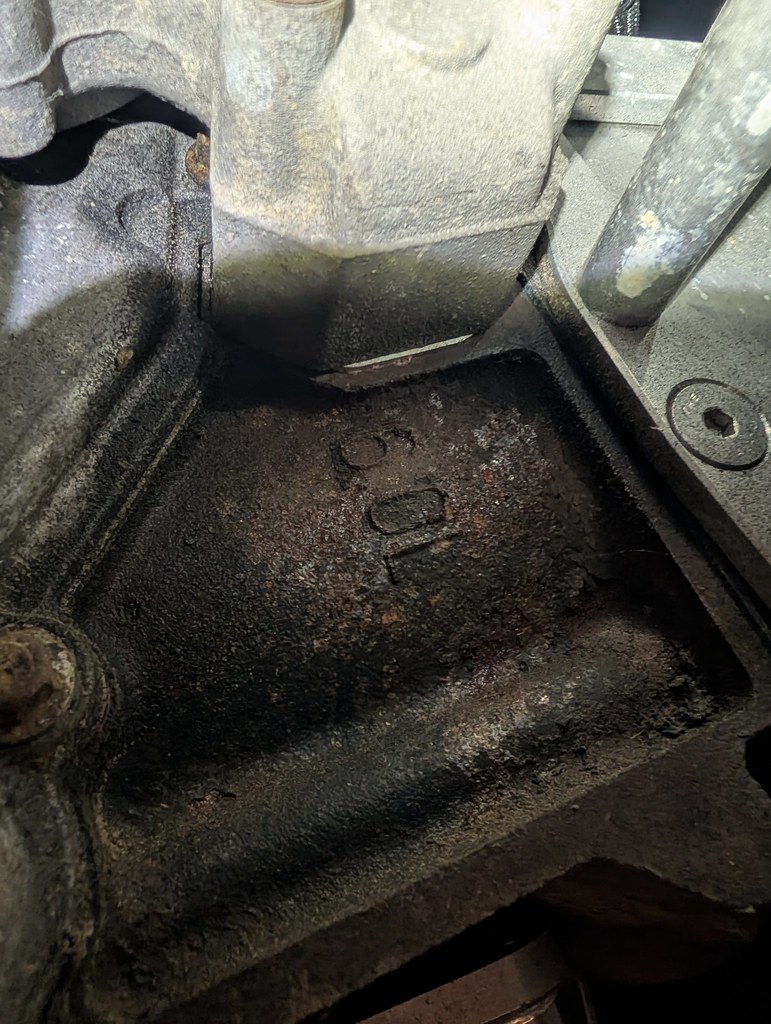
I also confirmed that the engine was in-fact a 6.0, but keeping my fingers crossed it's the LQ9 with flat top pistons!
Moving up front there are a bunch more goodies. ridetech lower control arms and coilover shocks.
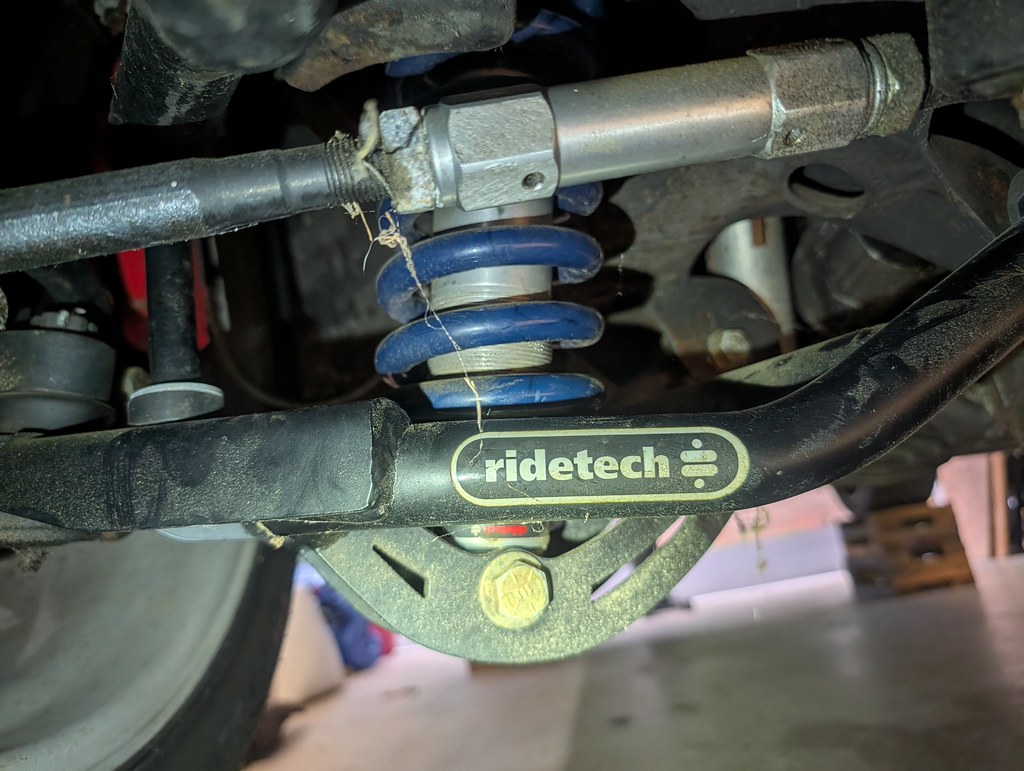
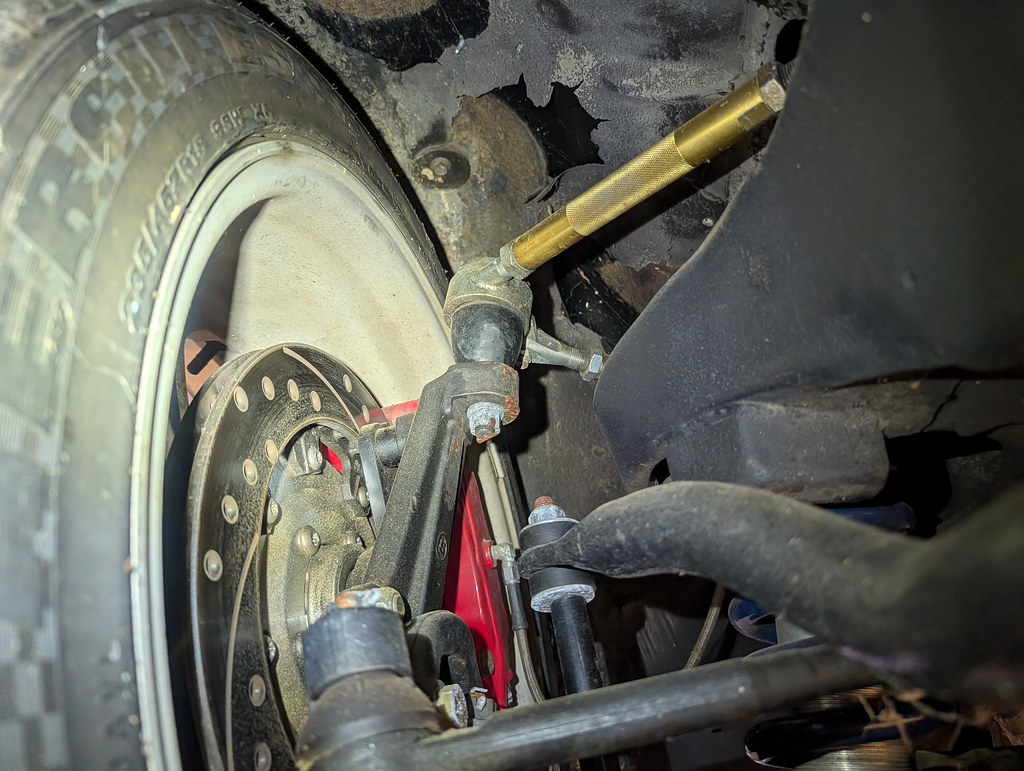
I could also see that the upper control arms were aftermarket, but when I was looking at the car they were a mystery. Upon further research it appears that they are the same Southside Machine Performance upper control arms, and what look like the tall spindle kit they offer. It looks like the tie rods and short steering links are also part of the same kit that they offer called the "Game Changer". There is also a UMI frame stiffener and the Ridetech front sway bar.
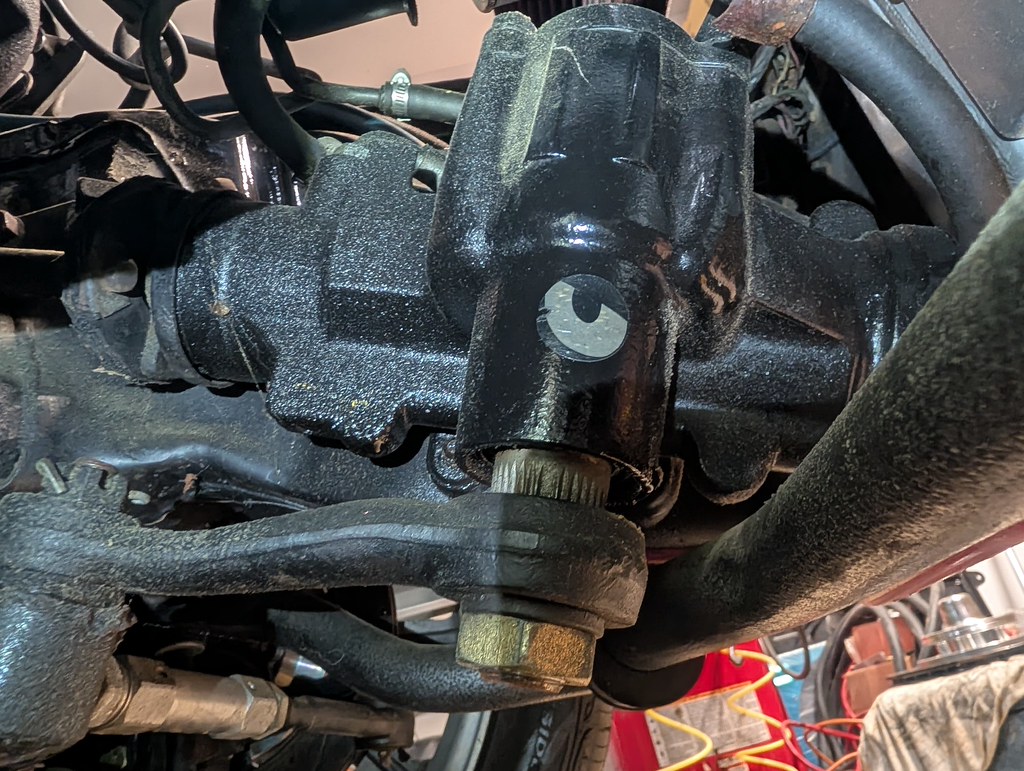
The steering box looks like a newer unit, but I'm not familiar with this logo. Does anyone recognize this? I searched for quite a while and came up with nothing. It does have the inverted SAE fittings.
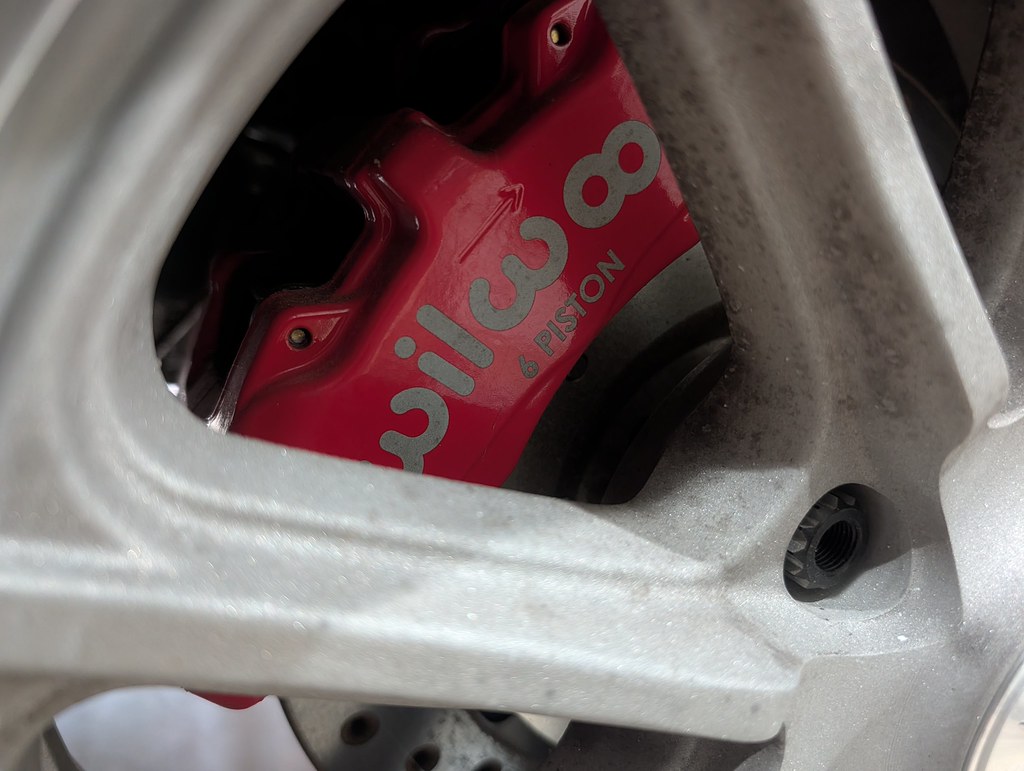
It also has the Wilwood 6 piston 12" front brake kit.
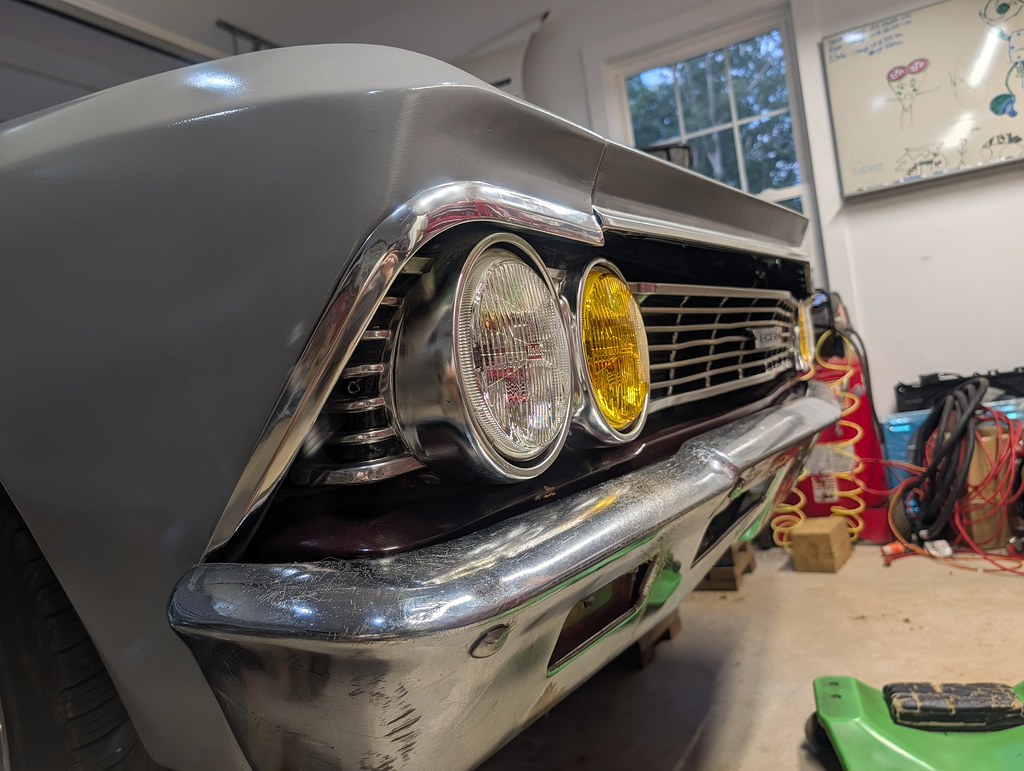
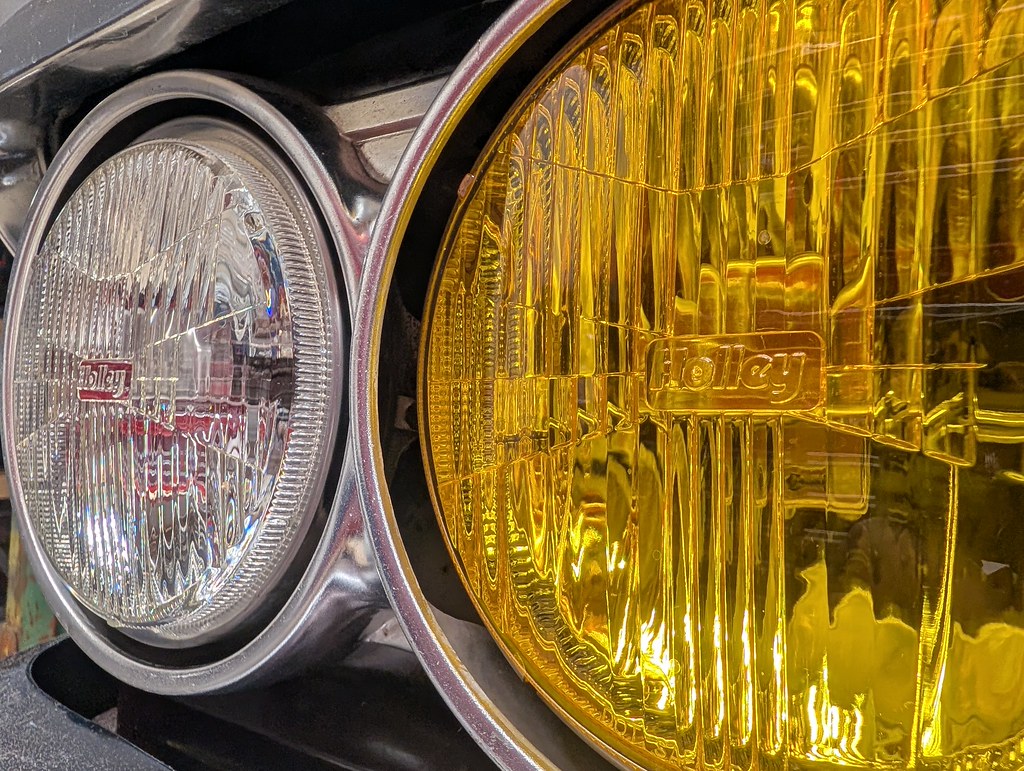
Up front it also has the Retrobright Holley lights.
In addition to the car, it also came with a ton of new parts for the car. New bumpers, trim, window felts, dash trim and bezels, etc.
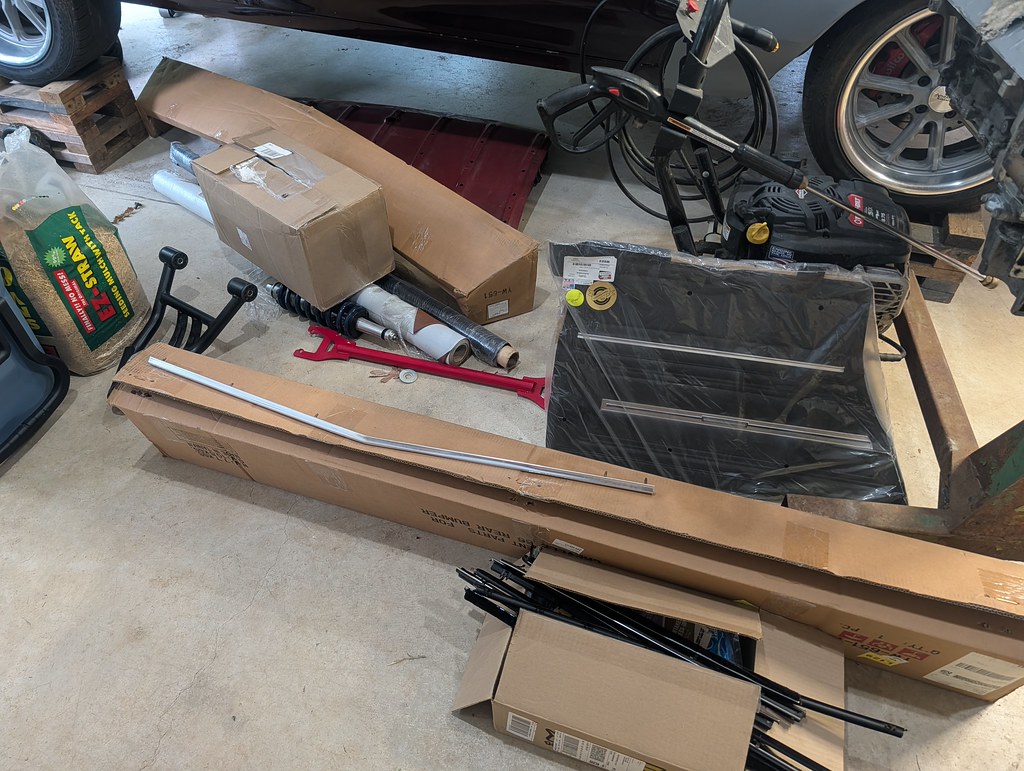
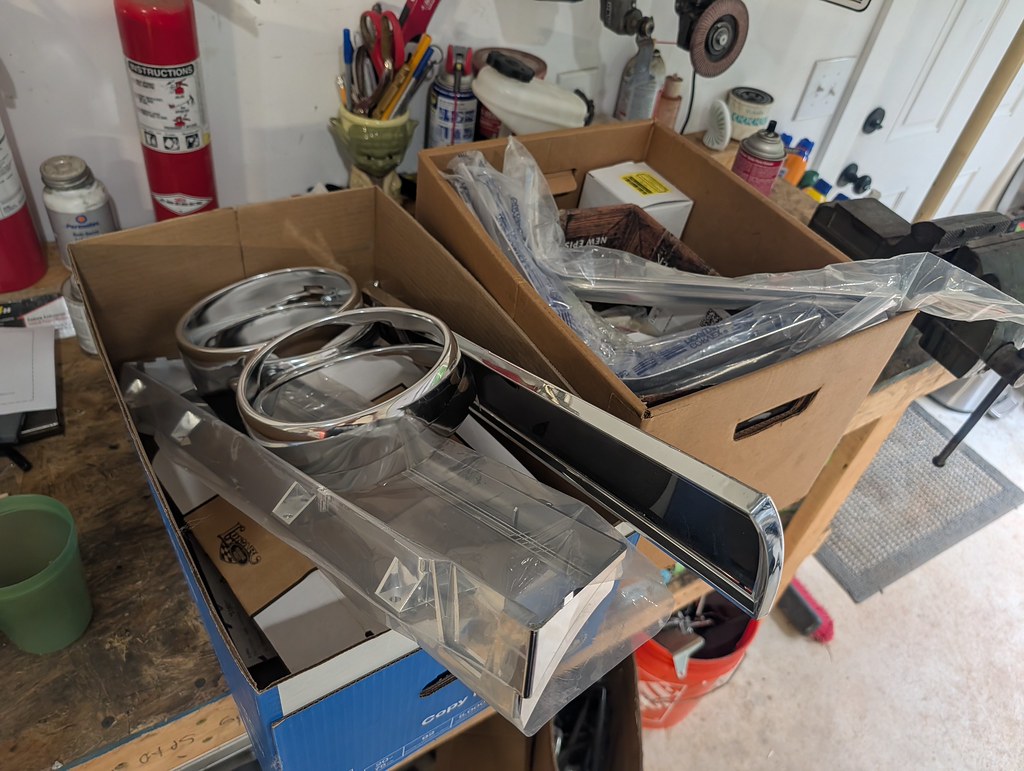
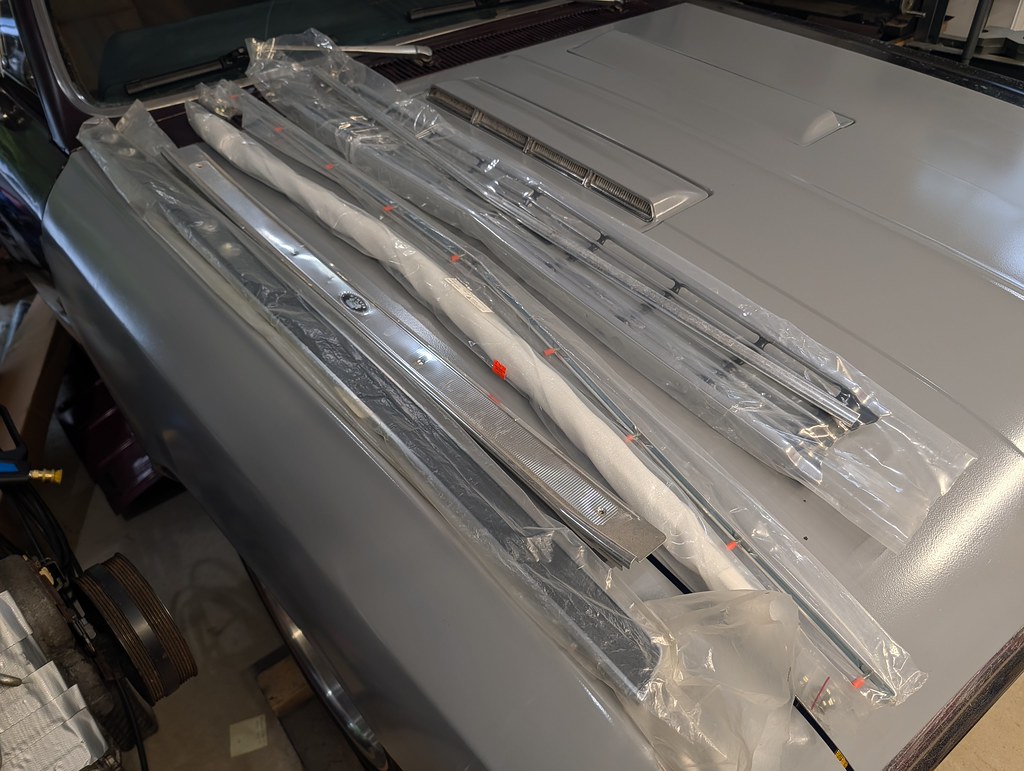
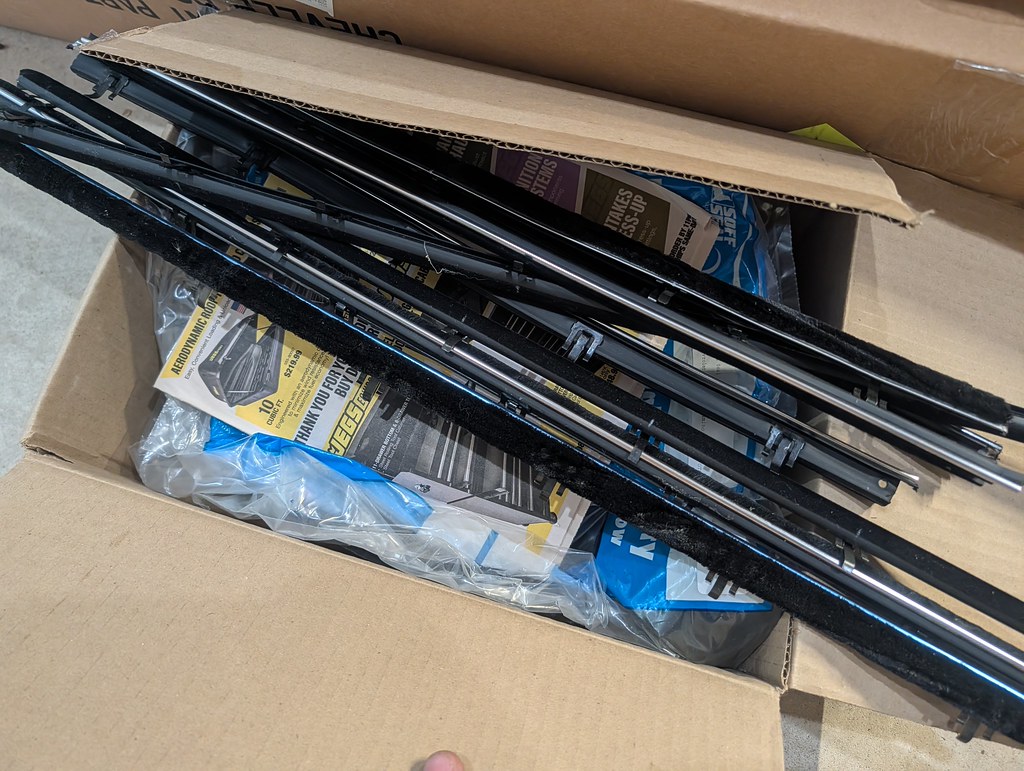
Overall, I'm thrilled with the purchase. This car appears to have had an easy life, with no significant body work or someone messing with wiring etc. It does need some help, but from what I can see the passenger side is completely original sheet metal with minimal rust considering it's age. The driver's side quarter had a skin put on it at one point, and is quite a bit more rusted. I won't know what it needs until I start cutting into it, but it will get a new full quarter panel and rocker panel at a minimum. Both doors need quarter patches, and the front and rear window channels need work. But all of this is what I knew going into the project. I love the choice of parts they used, drivetrain, stance and overall vibe. I'm really looking forward to getting some miles on the car this summer!
Cheers,
Ryan
1955 Nomad project LC9, 4L80e, C5 brakes, Vision wheels
1968 Camaro 6.2 w/ LSA, TR6060-Magnum hybrid and etc SOLD
1976 T/A LS1 6 Speed, and etc. SOLD
Follow me on Instagram: ryeguy2006a
08-19-2026 #8 Registered User
- Join Date
- Dec 2006
- Location
- SF Bay Area
- Posts
- 463
Neat project, always loved the lines of those A bodies. You're going to like the RetroBrites. Hands down the best bolt on mod I've ever done for driving at night.
chunger
'68 Ranchero 500
'70 Cougar XR-7 Convertible
'98 Mustang GT Convertible
08-19-2026 #9
Registered User
- Join Date
- Nov 2012
- Posts
- 373
You’ll end up ditching the Walbro255 if you want more power. Sadly that about all that corvette filter setup is good for. If you step up to a 340 it’ll handle about double the fuel by volume but you’ll need a better regulator than the vette filter.
1970 Camaro restomod power tour ride
1966 Buick Special restomod, the never ending project
1970 GTO My newest retirement project, time to gather parts!
08-25-2026 #10
Registered User
- Join Date
- Sep 2009
- Posts
- 3,002
I'm still working on the exploratory phase and getting used to the car. I pulled the plug, and it does seem to be running a little lean and could use more timing.
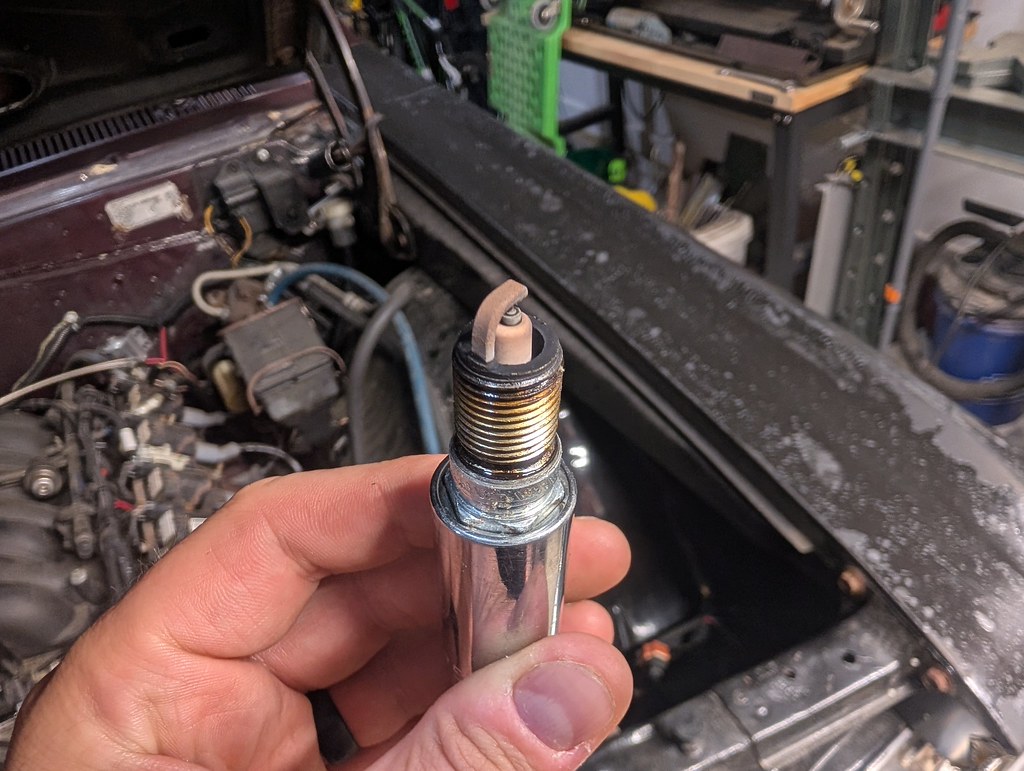
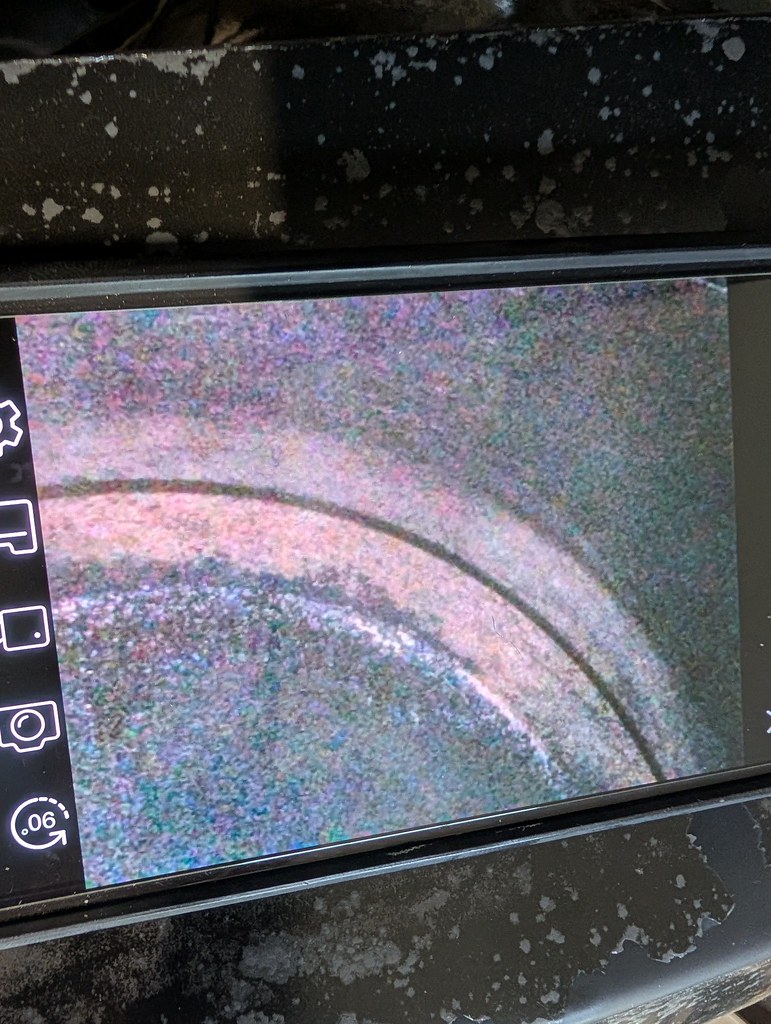
I used my cheap bore scope to see if I got lucky with it being an LQ9 6.0. It has dished pistons, so it's an LQ4. It's hard to see in the photo, but there are still cross hatch marks visible in the cylinder walls. I'm happy with what I'm seeing.
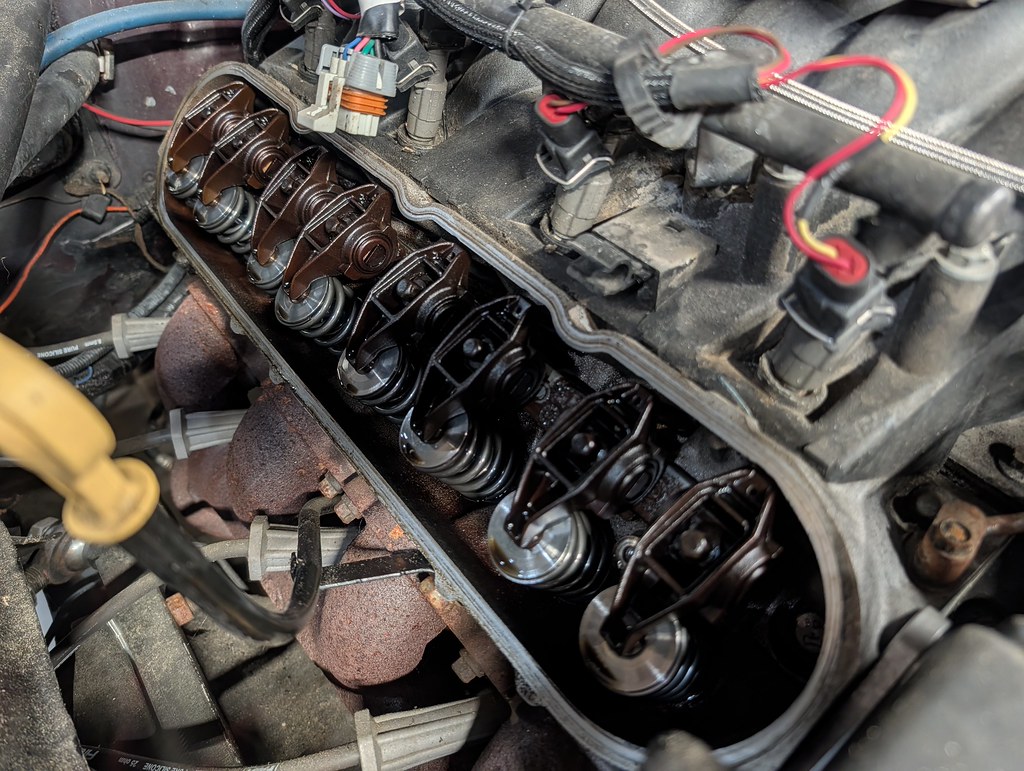
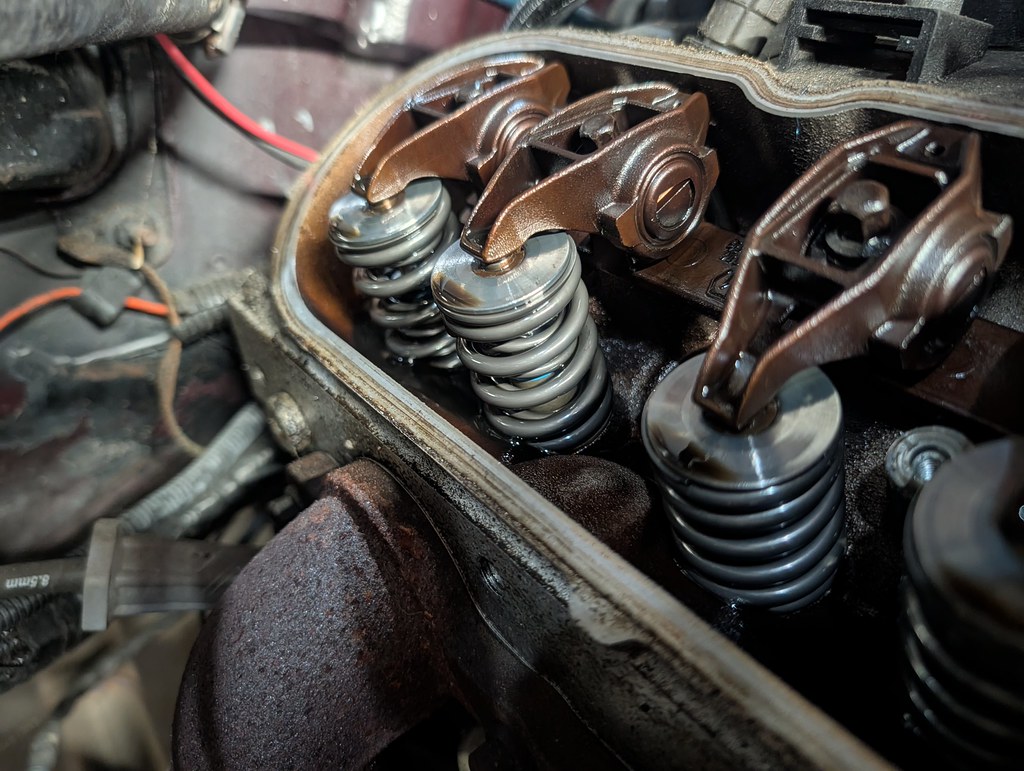
I would have liked to see less burnt oil in the engine, but I was very happy to see upgraded dual springs and push rods to go with the upgraded cam. I'd love to know what the cam is, but I really don't want to disassemble the engine just to see what the cam is.
1955 Nomad project LC9, 4L80e, C5 brakes, Vision wheels
1968 Camaro 6.2 w/ LSA, TR6060-Magnum hybrid and etc SOLD
1976 T/A LS1 6 Speed, and etc. SOLD
Follow me on Instagram: ryeguy2006a
08-25-2026 #11
Registered User
- Join Date
- Sep 2009
- Posts
- 3,002
The car seemed to run ok, but I pretty quickly downloaded the tune and fixed the timing, VE, and AFR tables. I don't think they changed one thing on the stock Holley Tune. I went through the whole tune to make sure that everything was setup correctly and as I was going over the tune I did notice that the oil pressure sensor was Holley, but it has the stock GM. Updated that and now the oil pressure is at 17-18 instead of 9-10. Much better.
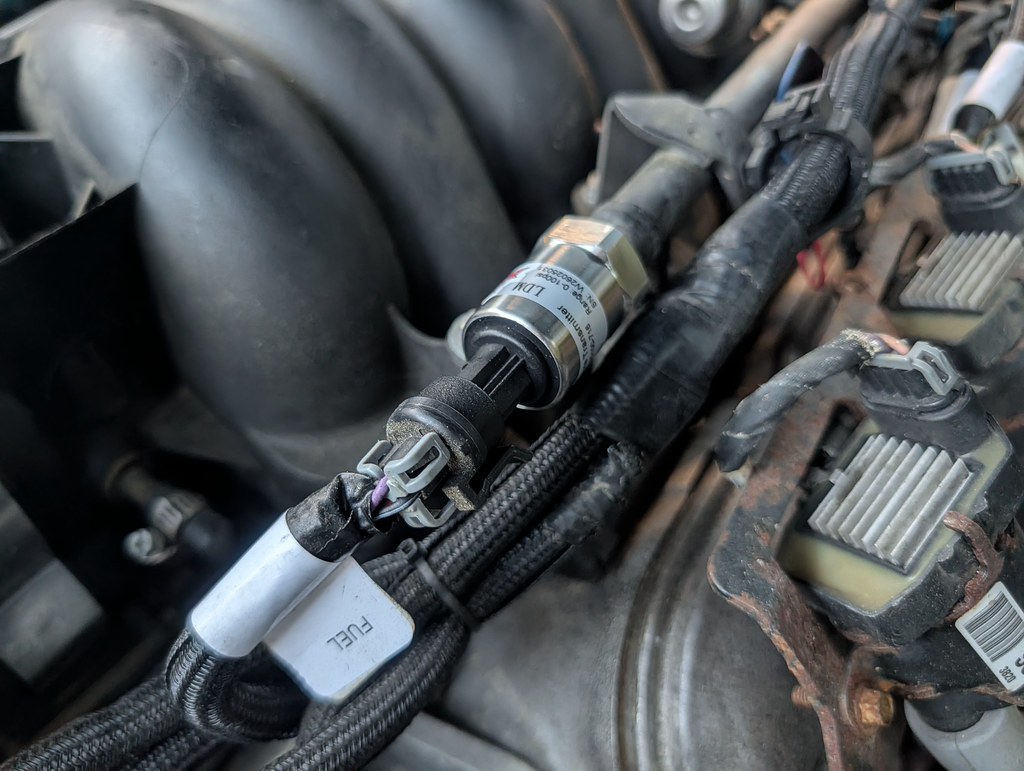
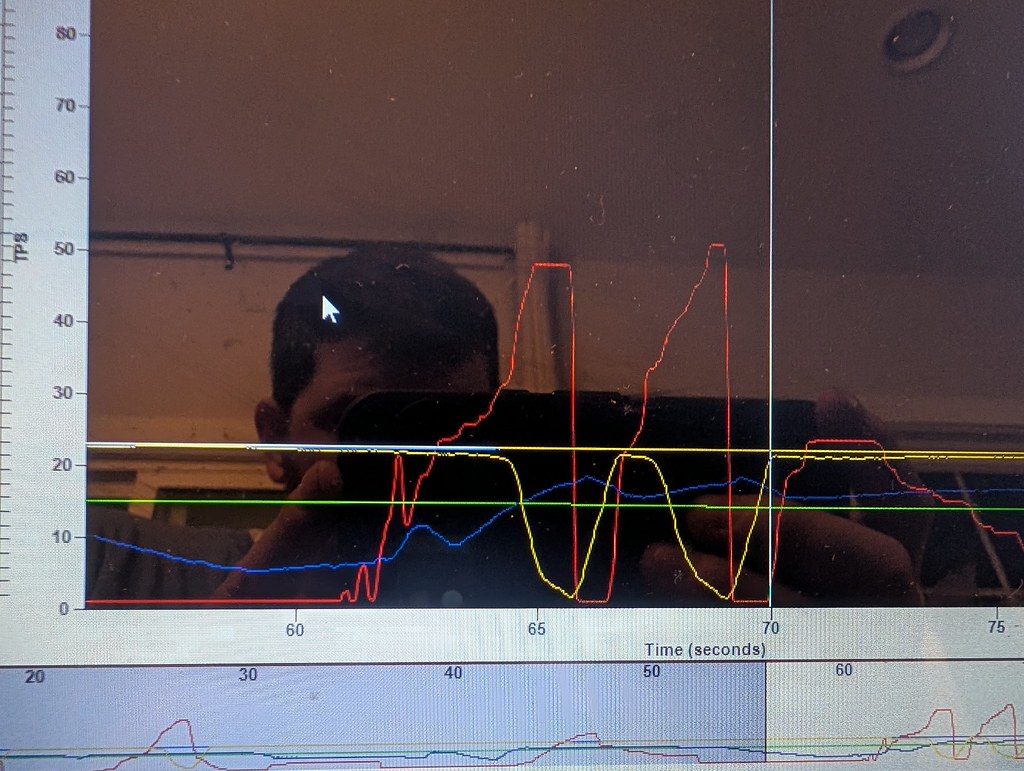
After I got the new tune uploaded and could log the fuel pressure I took it out for a drive. The bog under acceleration was getting progressively worse, but now it would really nose over. Then as I was logging the learn table spiked in a few spots under acceleration. When I got home and reviewed the data log, I could see where the fuel pressure dropped significantly. I wasn't sure if the fuel pump was failing or if there was something in the tank that plugged up the filter/reg.
The yellow line is the fuel pressure, and the red line is TPS. You can see almost immediately when you put a load on the engine, the fuel pressure drops significantly. I saw as low as 7psi. Thank goodness for the Holley EFI that can add a ton of fuel to save your engine!!
I opted to try to replace the easiest thing first and get a new filter/reg.
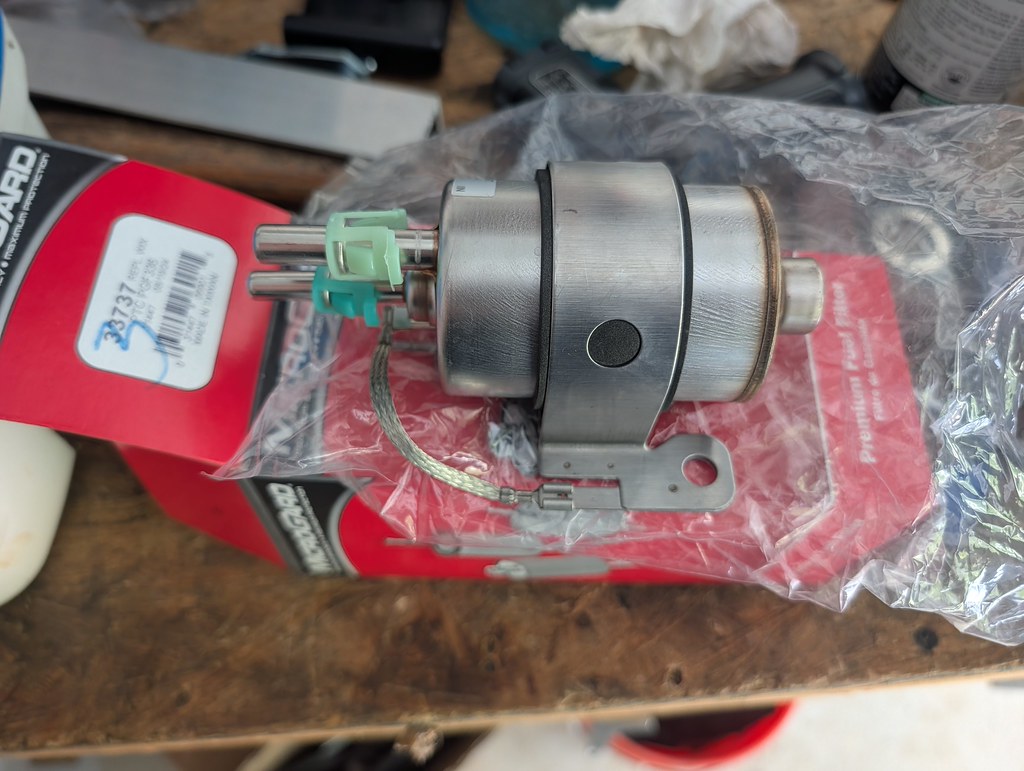
Took it out for a test drive and it was the exact same situation unfortunately. My guess is that likely the fuel pump is failing and that is causing the drop in pressure. If I'm going to replace the fuel pump, I'm going to go with a whole different setup. I'm not a fan of the external fuel pumps to begin with, but figured if it was working fine I'll do what my dad always said. If it ain't broke don't fix it! But it is broke, so I opted to get an in-tank unit. I found that Tanks Inc sells a nice EFI fuel tank that also is 1" deeper for additional fuel capacity of 4 gallons for a total of 24.
But what I really wanted was one of the Rick's Restomod fuel tanks that allows for you to drop in a 5th Gen Camaro or CTS-V fuel pump. They unfortunately stopped selling them about 4 years ago, so I was SOL on that. But I did see where they sell a really nice recess panel that you can weld into any tank. So that is the route that I am going.
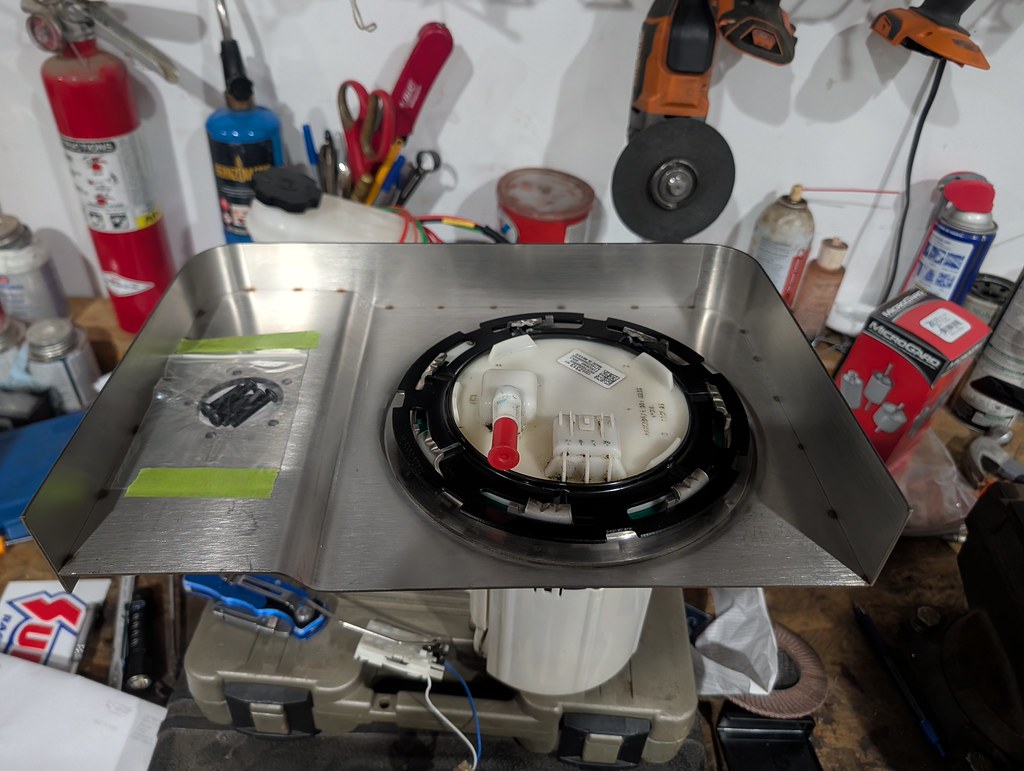
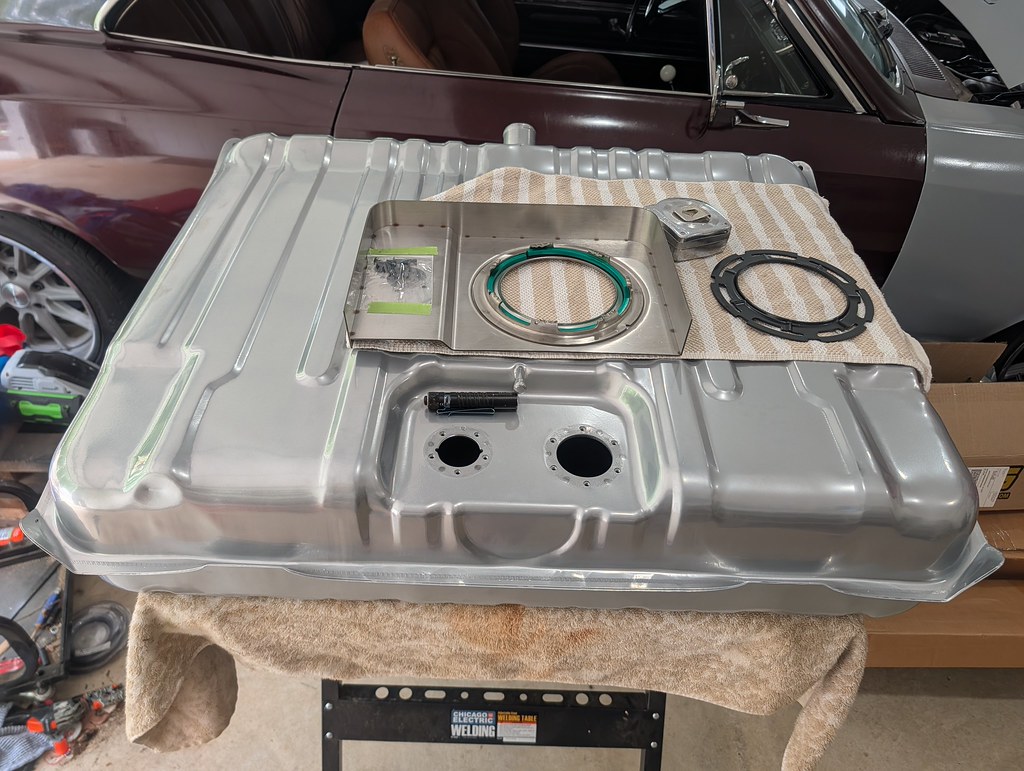
After having the car for a few weeks and getting a feel for what I like and things that I want to update, I've been ordering a bunch of parts. I hope to have some updates very soon.
Cheers,
Ryan
1955 Nomad project LC9, 4L80e, C5 brakes, Vision wheels
1968 Camaro 6.2 w/ LSA, TR6060-Magnum hybrid and etc SOLD
1976 T/A LS1 6 Speed, and etc. SOLD
Follow me on Instagram: ryeguy2006a
08-25-2026 #12
Registered User
- Join Date
- Nov 2006
- Location
- Mountain Springs, Texas
- Posts
- 4,877
I have used several of those Ricks fuel pump plates. They work well and can save you a lot of money over a custom stainless tank.
1969 Camaro - LSA 6L90E AME sub/IRS
1957 Buick Estate Wagon
1959 El Camino - Ironworks frame
1956 Cameo - full C5 suspension/drivetrain
1959 Apache Fleetside
08-25-2026 #13
Registered User
- Join Date
- Nov 2012
- Posts
- 373
I used an aeromotive tank for my 66 Skylark. Came with a walbro 340 pump and was a direct bolt-in so I’m happy. I had planned to use the corvette filter/regulator when I found out they couldn’t handle the bypass volume required with the 340. Had to go external filter and also an aeromotive regulator to keep it all happy. It’s overkill for my use but better to have too much than have to do it over for not enough! That being said I have two spare corvette filters to get rid of……NEW! lol
1970 Camaro restomod power tour ride
1966 Buick Special restomod, the never ending project
1970 GTO My newest retirement project, time to gather parts!
08-28-2026 #14
Registered User
- Join Date
- Sep 2009
- Posts
- 3,002
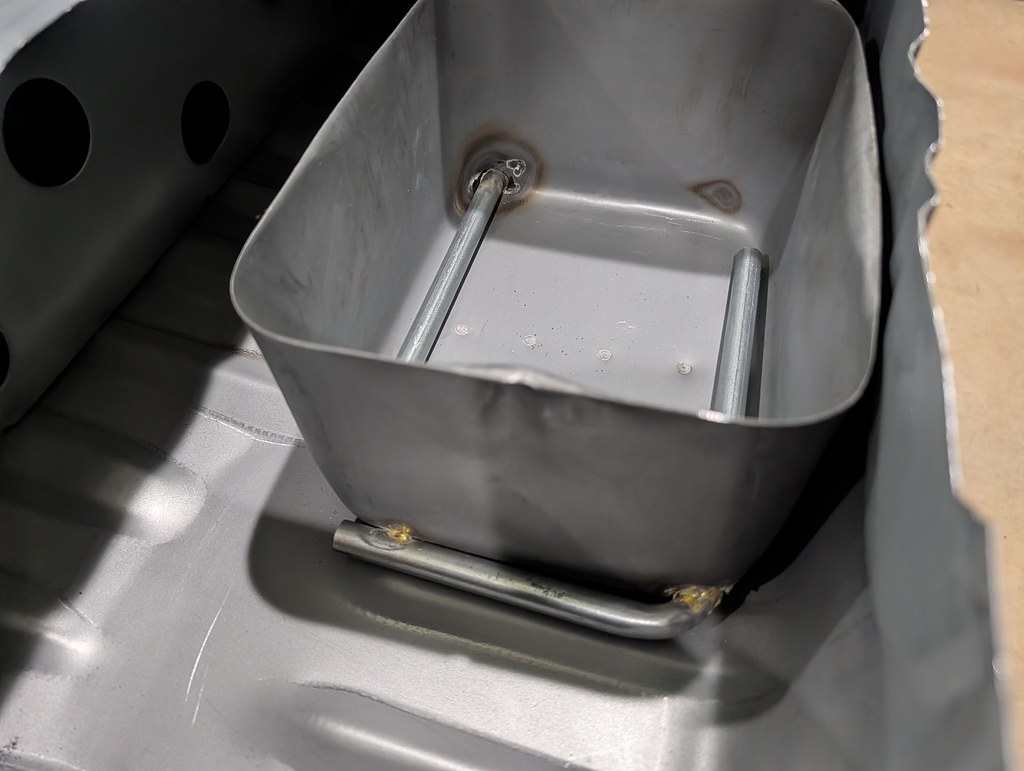
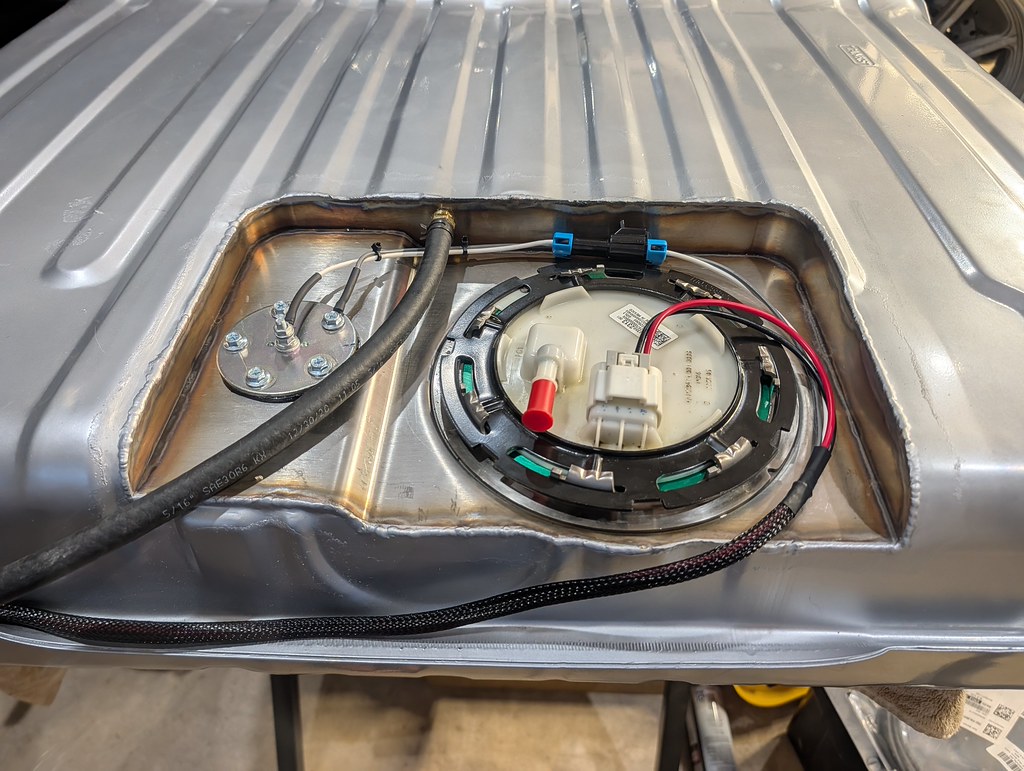
I'm not sure when Tanks, Inc. revised the EFI tanks to include a baffle, but I remember a lot of complaints with the early EFI tanks having fuel starvation issues below 1/2 tank of fuel. I wanted to center my fuel pump in between the baffle, so that I could take advantage of this nice feature. And since the fuel pump I'm running returns the fuel into the integrated bucket, I basically have dual baffling. After taking a bunch of careful measurements, I determined that this will be the best location for the fuel pump. After a brief (30 seconds) of contemplating if I should just run the tanks, Inc fuel pump I started cutting up my brand new tank.
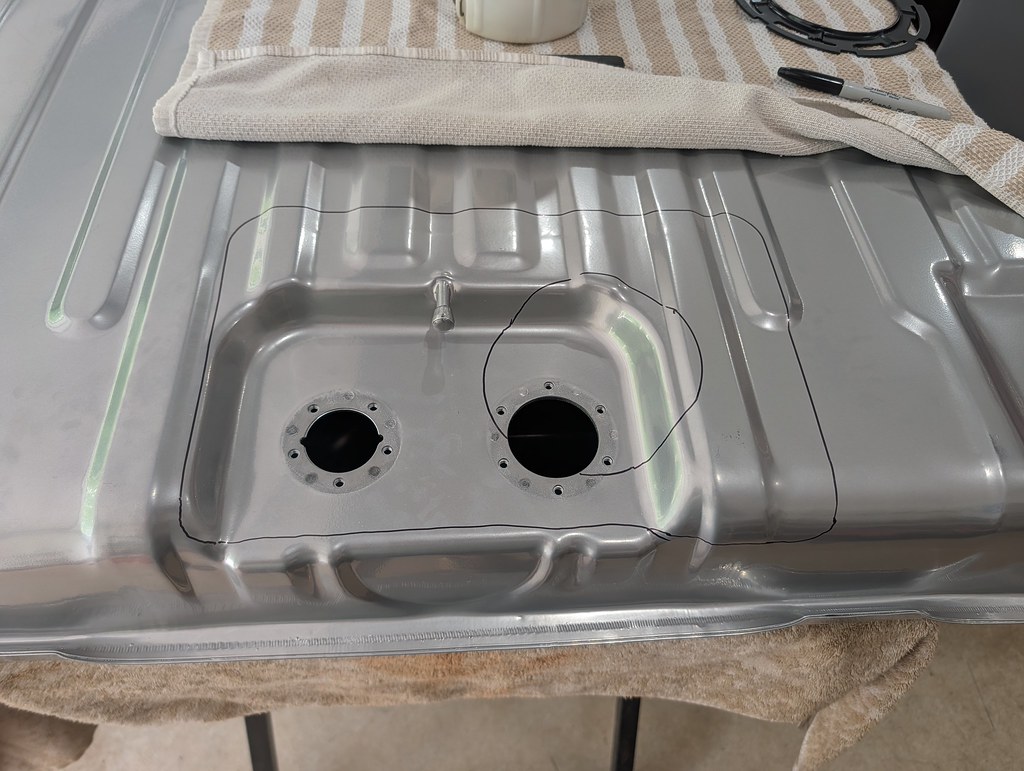
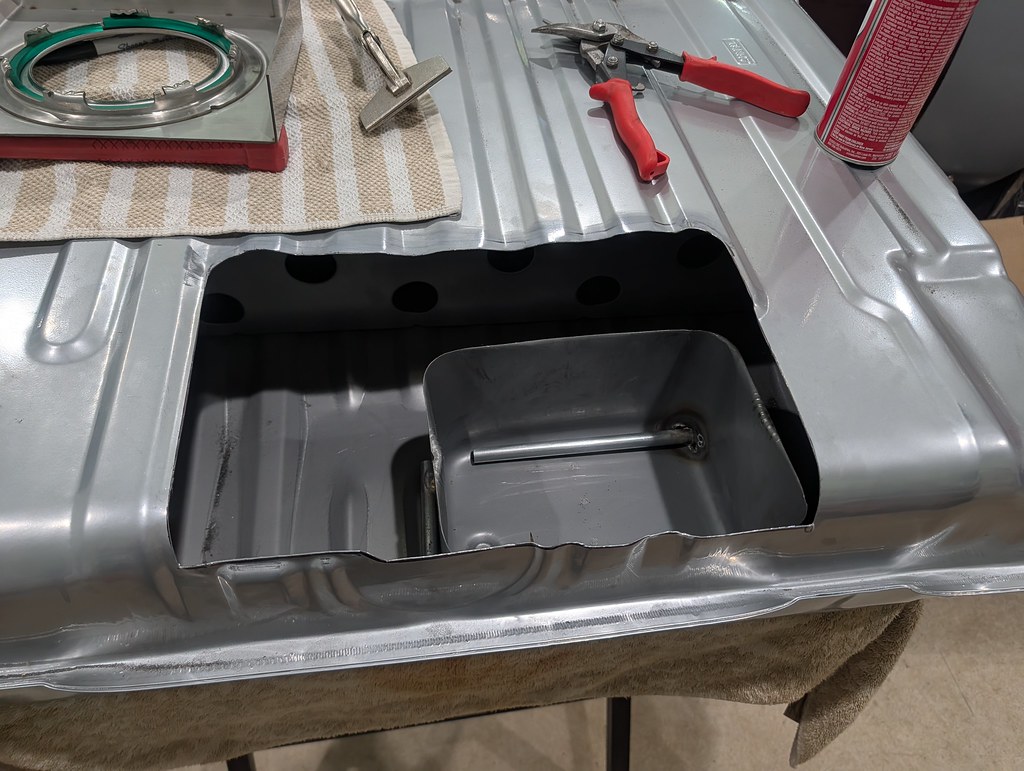
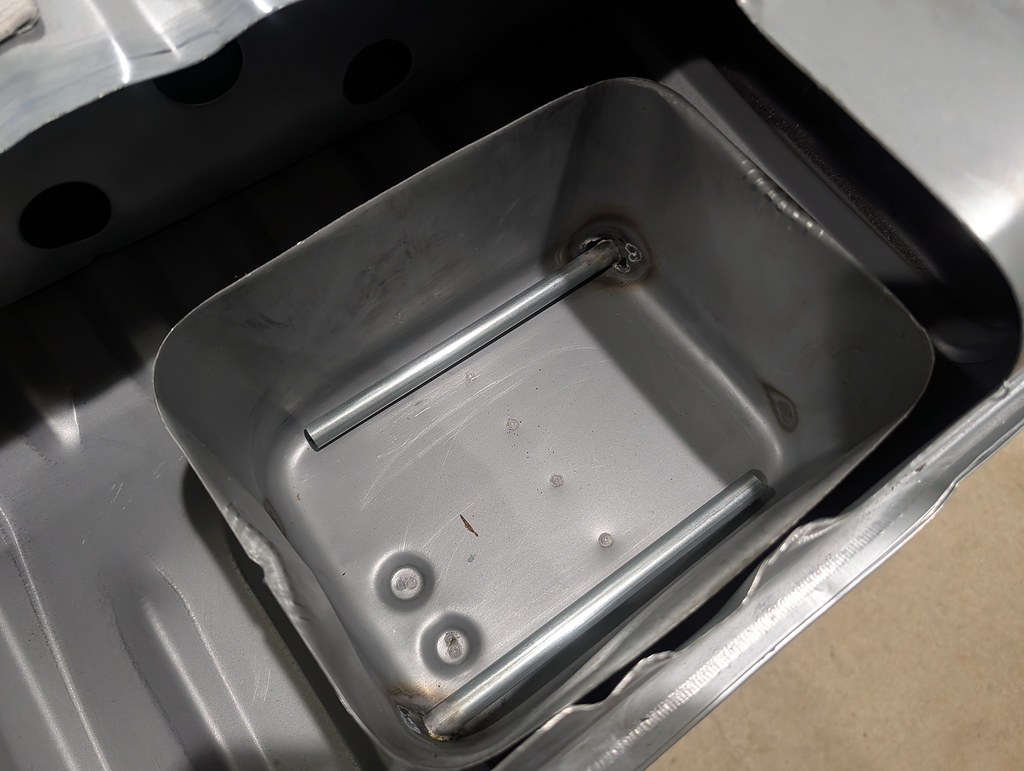
For anyone who wanted to see an up close view of the revised internal baffle/bucket, here's a picture. The way those tubes are, it keeps the fuel trapped in the baffle under hard accel and decel. Really nice design.
I cut everything about a 1/4" small so that I had some wiggle room after the main cut. I centered the fuel pump into the bucket, and then slowly kept trimming until the recess panel had a nice snug fit.
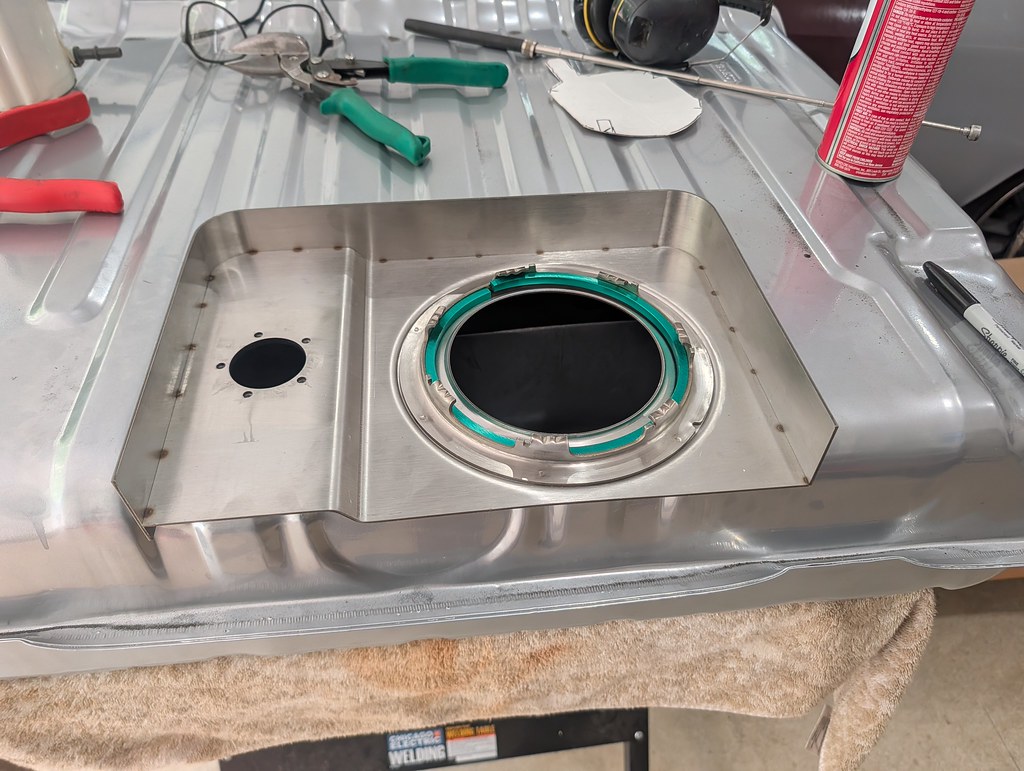
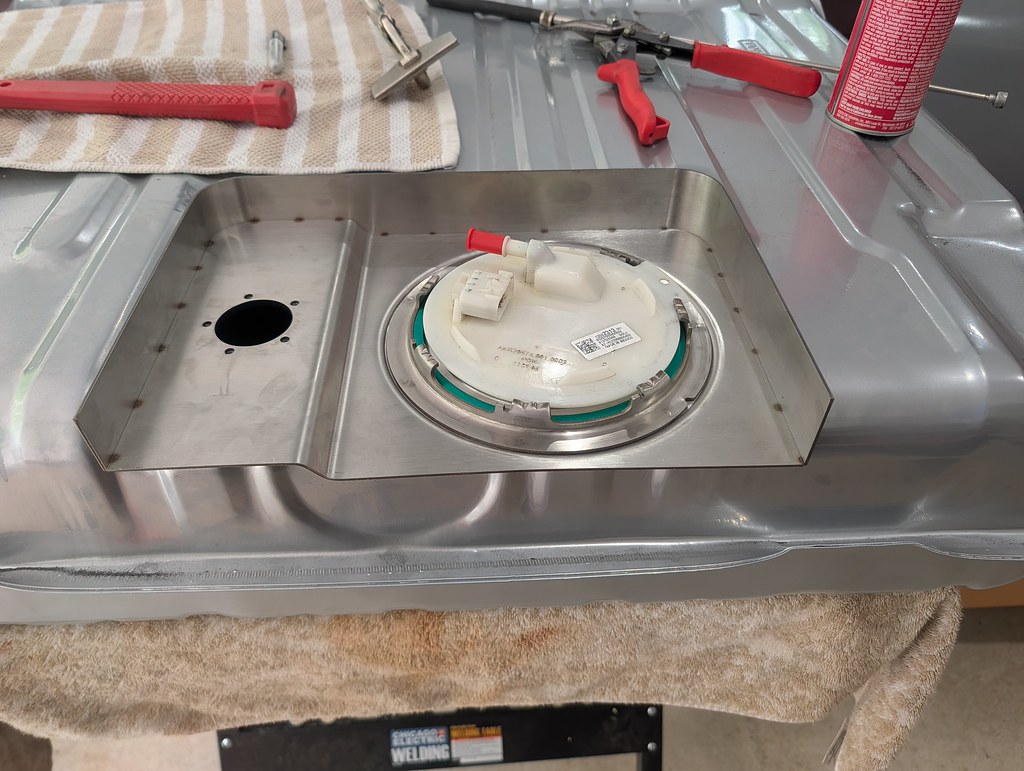
Once I was happy with the fitment of the recess panel, I flipped it over and welded the perimeter of the panel between the spot welds that came from Rick's. I feel like I'm continuing to learn to use my TIG welder, but I'm pretty happy with the welds. Stainless can be tricky because if you get it too hot the metal will crystalize on the back side of the weld from not having a purge. There really wasn't a great way to purge this so I just had to be careful to not overheat the panel.
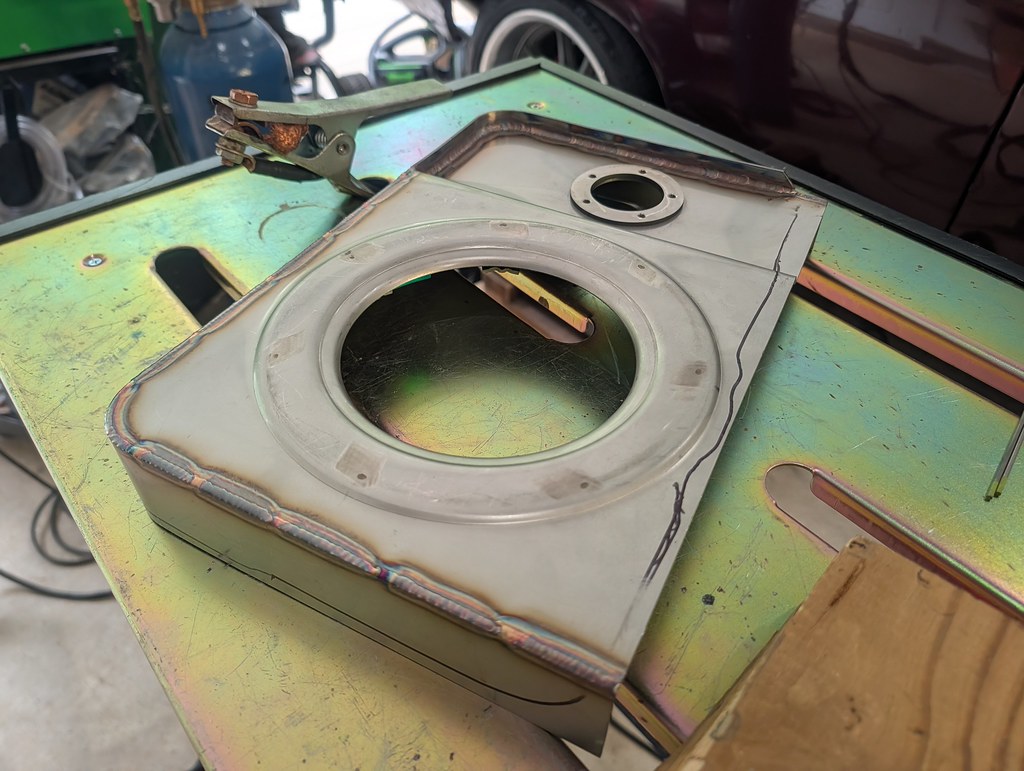
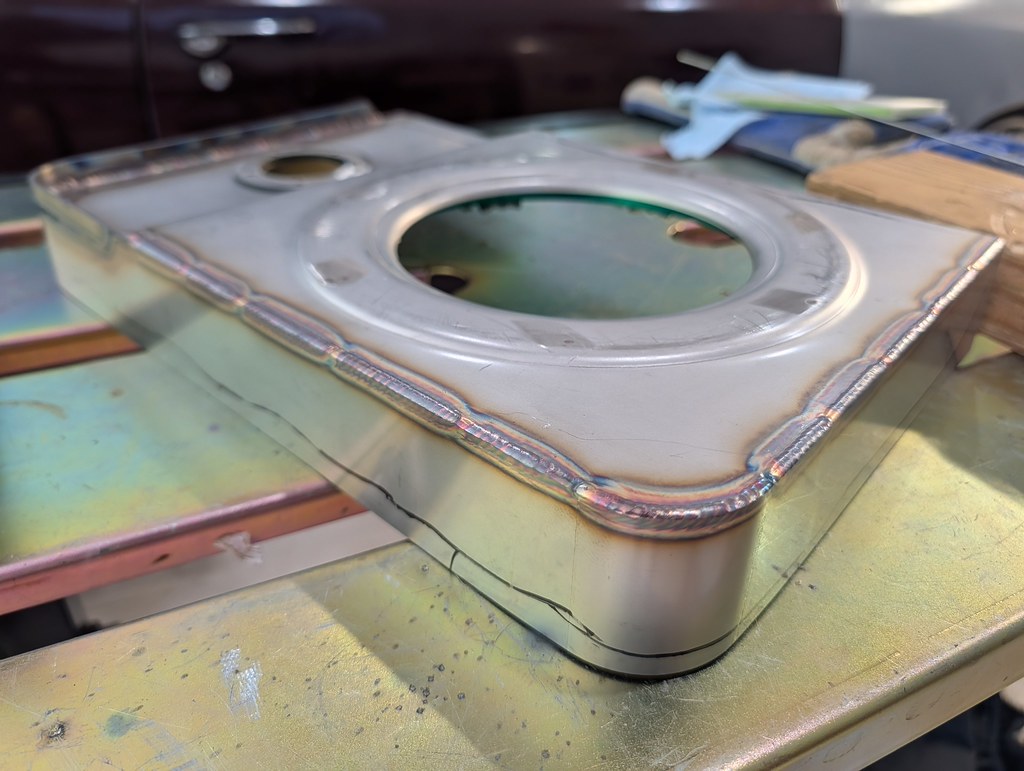
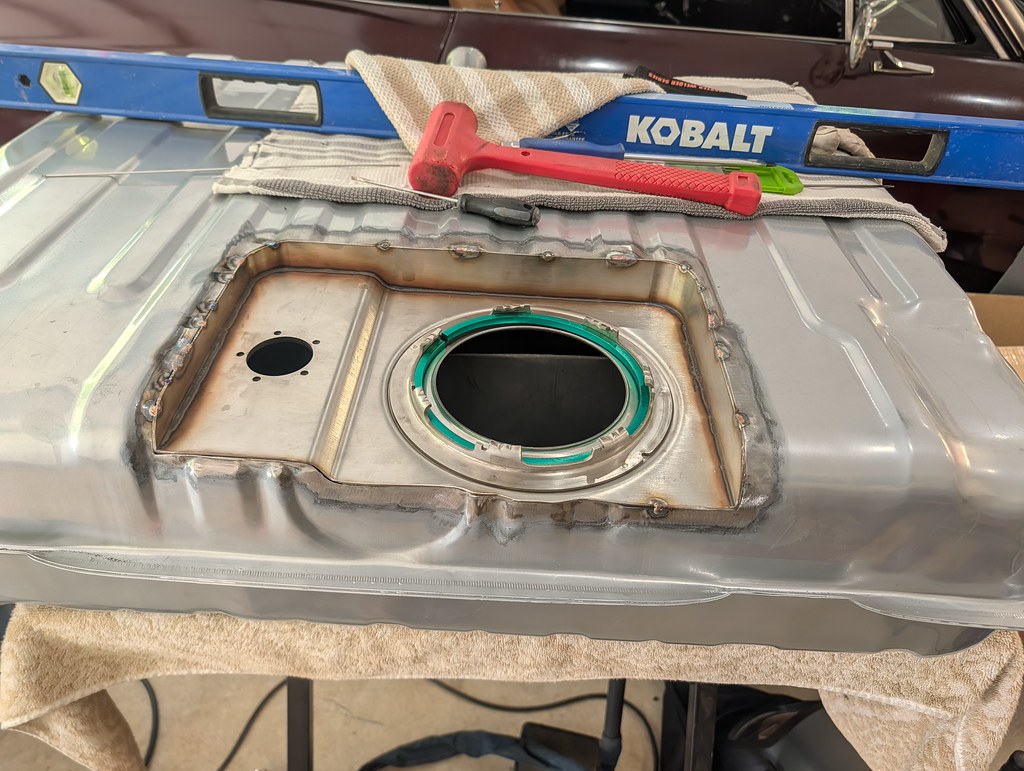
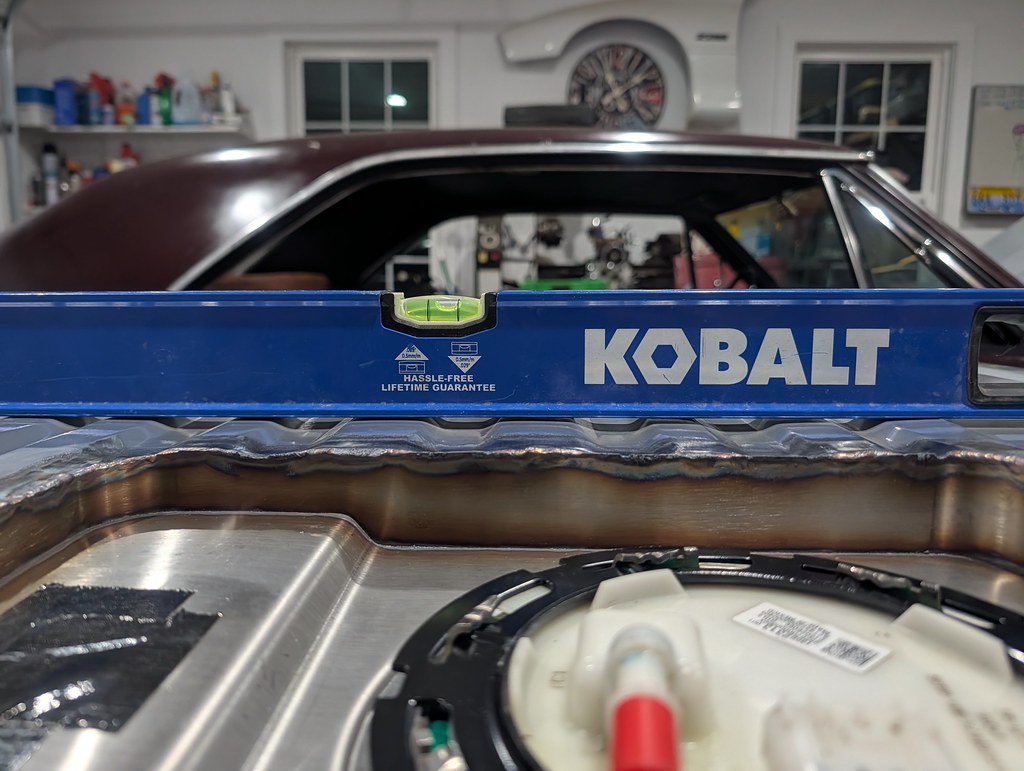
I forgot to take a picture, but I ended up trimming off about 1/4" of material off of the entire perimeter of the recess panel. I was very careful to only trim a little bit at a time so that I had a nice tight fitment. I wanted to TIG Weld this since I had some 309 rod that works well to weld mild steel to stainless. Plus I find it easier now to weld with my TIG than my MIG. Once I was happy with the fitment, I staggered my welds around the panel to keep heat low and not distort the tank. The middle of the tank sunk down, so as I was tacking the piece I made sure the top of the tank was flat with my 4' level.
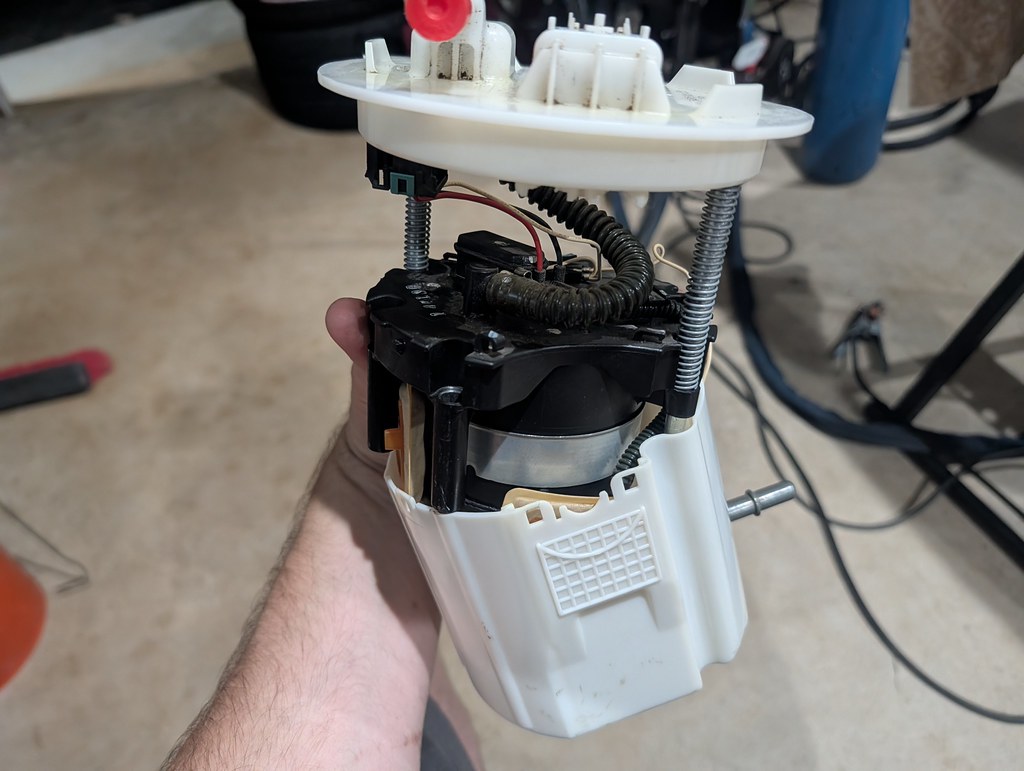
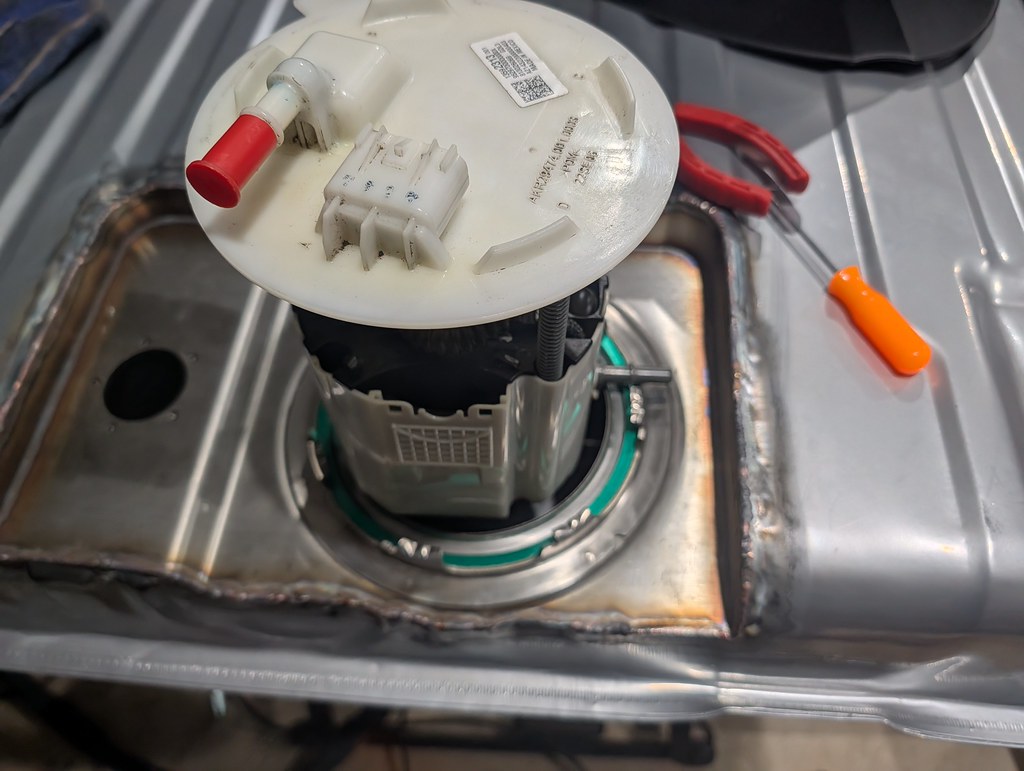
One thing I didn't mention earlier was that with the fuel pump installed with the outlet facing towards the engine, the inlet in the tank was pointed to the rear, but that would contact the tubes in the baffle, so I would need to install the fuel pump facing to the side. Not a complete deal breaker, but I was pretty sure I could clock the fuel pump 90*.
Here's what it looked like installed in stock form.
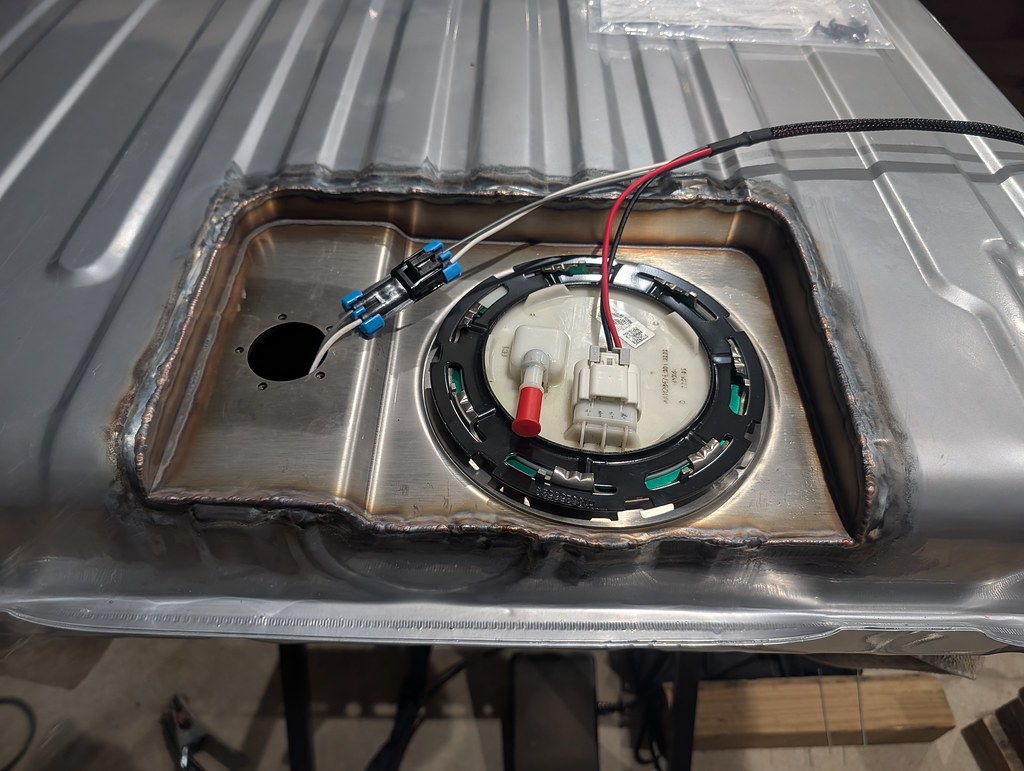
Thankfully some engineer at GM decided to put holes at 90* intervals, so I was able to disassemble the fuel pump pull off the c clips on the rods, twist 90* and put back together. Perfect!
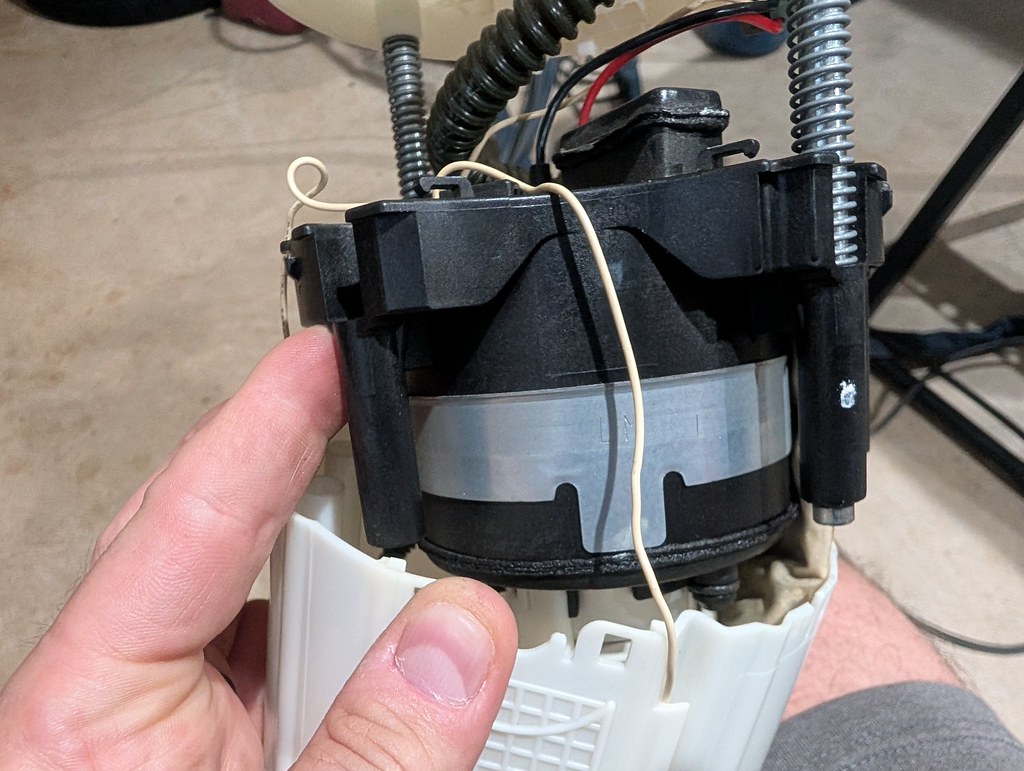
After
I slowly took my time and worked my way all the way across the perimeter to connect the spot welds. I again staggered the welding to help reduce the heat and warping in the tank. I couldn't wait to test fit the fuel pump. It feels good that it all slid in and had some wiggle room on all sides before the lid was compressed.
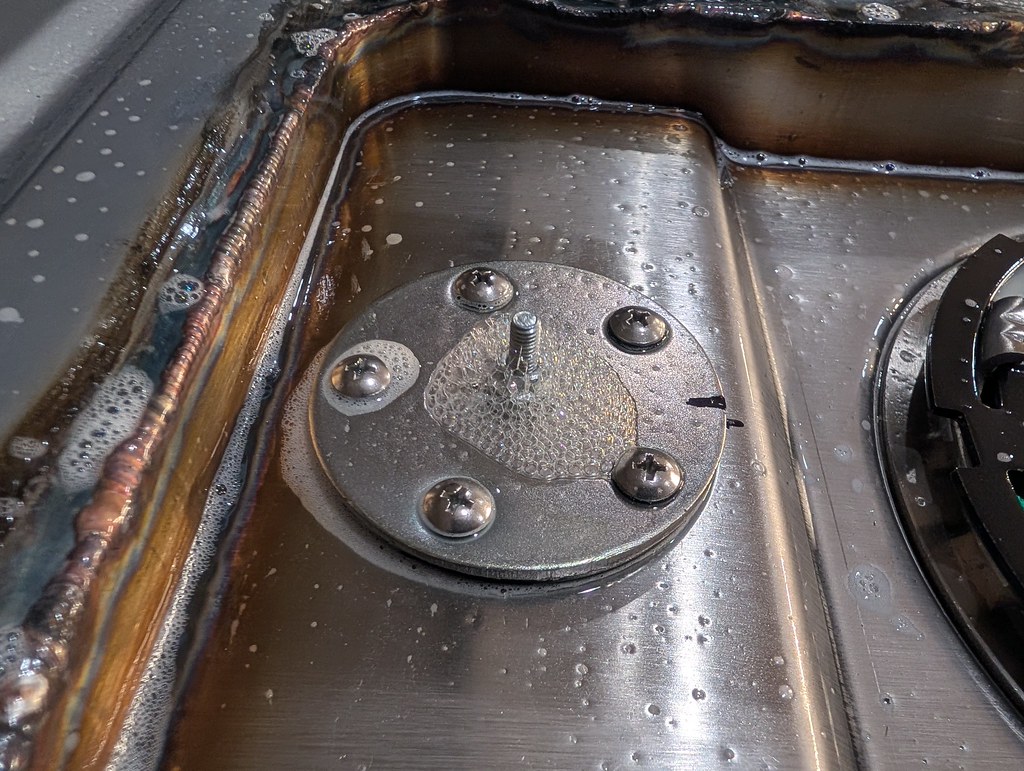
The final test was to confirm that there were no pinhole leaks. I rigged up this fitting to clamp into the fuel filler and use pressure from my air compressor. I put about 15 psi in and used soapy water. One thing to note is that the air will continue to come out of the hose regardless of what you set the regulator to. I wasn't thinking and put the regulator down to 10-15 psi, and then connected it but it continue to fill. I had to disconnect quickly because I could see the tank starting to bulge. Scary stuff, but I tried again and then just let it fill and shut the regulator off to zero.
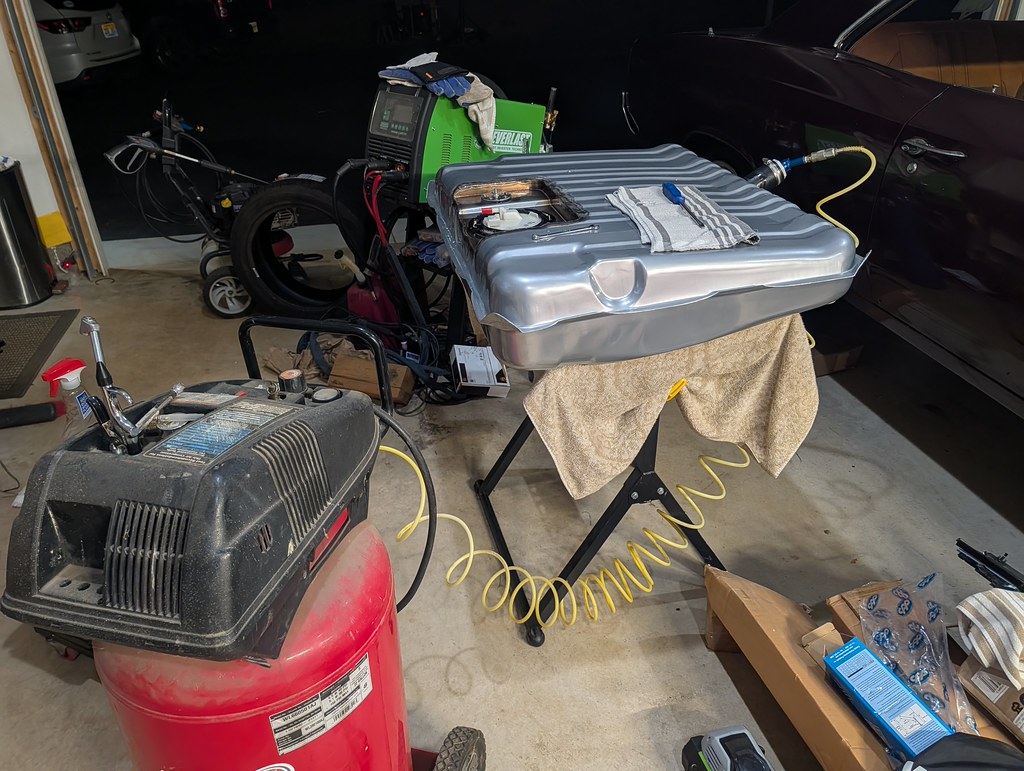
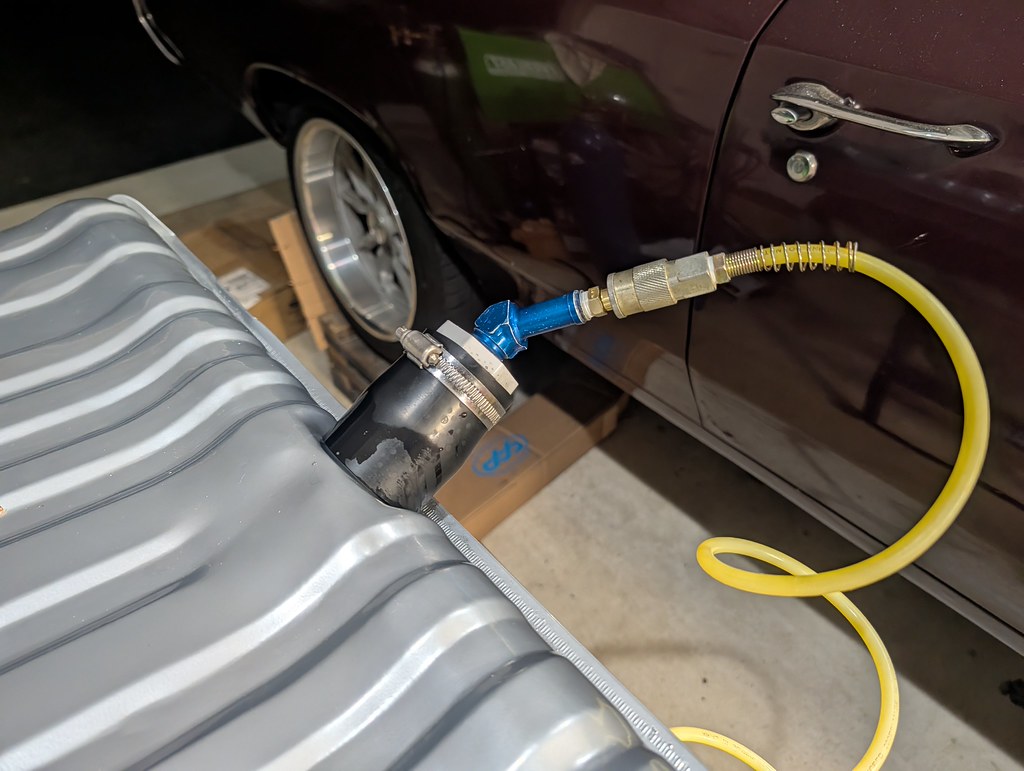
Only spot that leaked was the fuel sender. Gave it a quick 1/2 turn and no more bubbles. I let it sit for 10 minutes and kept rubbing the soapy water all welded surfaces. I'm a happy camper.
Last but not least, I wanted to get the bare metal painted. I had some old engine paint on the shelf that looked pretty close. Ended up being a dead ringer for the paint match. I taped it all off and gave it a few coats. Really happy with how this project turned out.
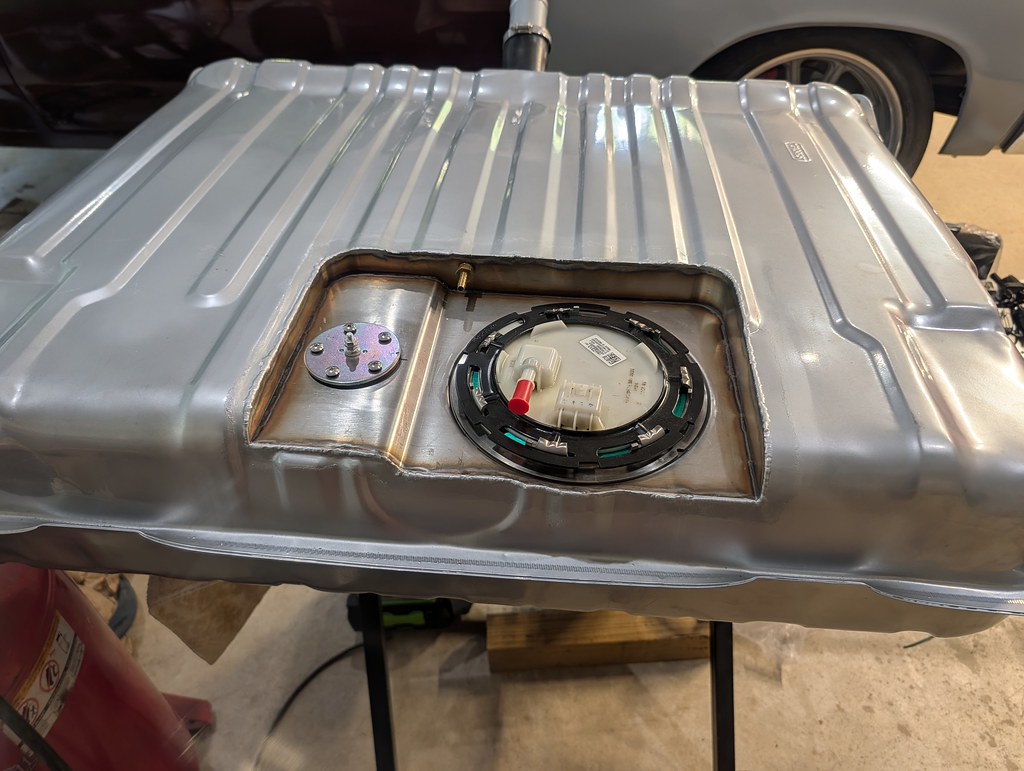
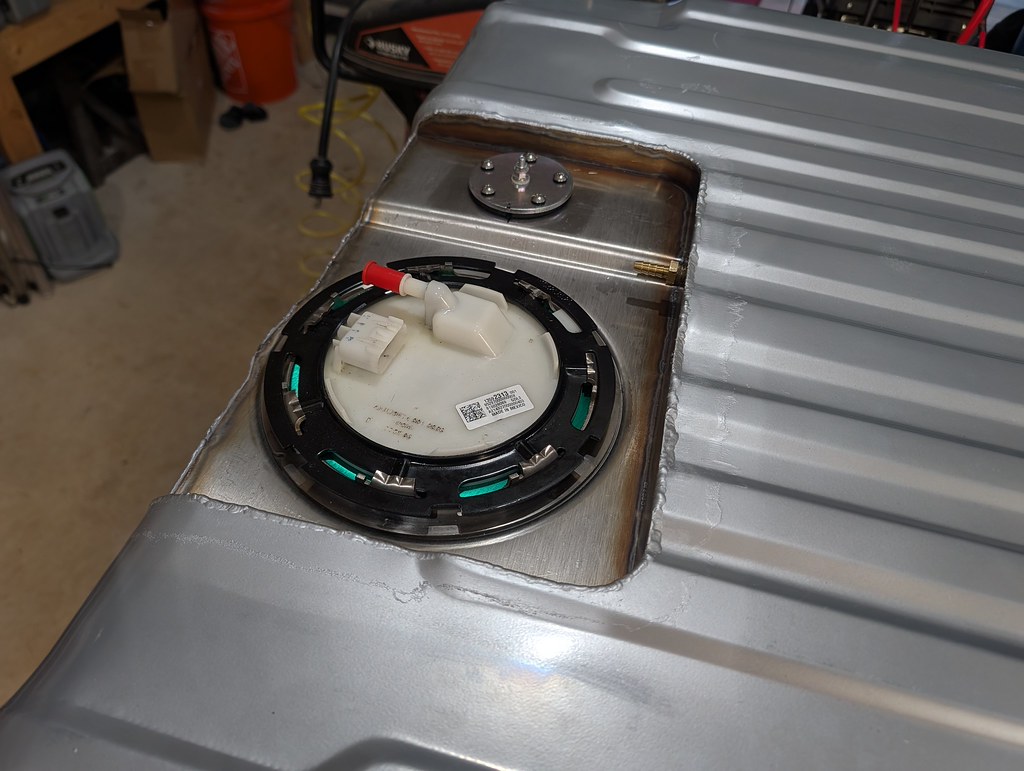
One thing that was irritating is that I forgot to reinstall a fuel vent... I had taken so much time and effort to keep metal out of the tank only to have to drill a hole and tap it. After several days of cleaning with various methods, I was happy and sealed up the tank. Now it's ready to install.
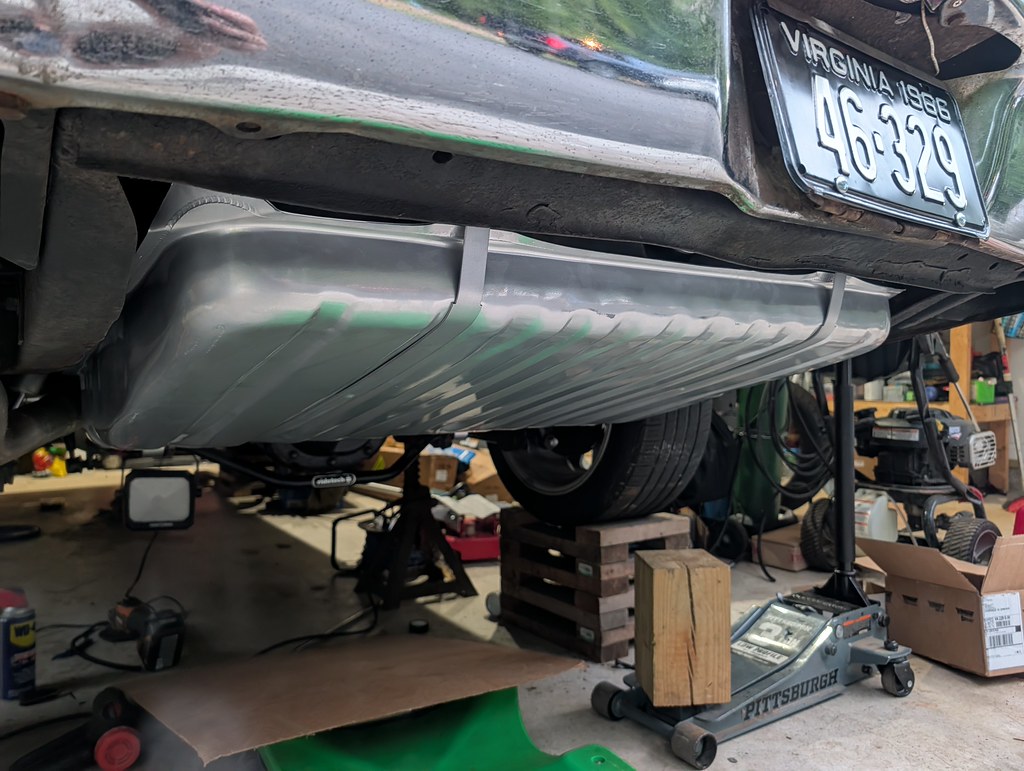
A few nights ago my youngest son asked if he could help me re-install the tank, so I gladly obliged. I think that he was just really interested in using the scissor transmission jack that I used to pull the old tank. But hey, I'll take it.
Next up is new fuel lines and a bit of rewiring.
Cheers,
Ryan
1955 Nomad project LC9, 4L80e, C5 brakes, Vision wheels
1968 Camaro 6.2 w/ LSA, TR6060-Magnum hybrid and etc SOLD
1976 T/A LS1 6 Speed, and etc. SOLD
Follow me on Instagram: ryeguy2006a
08-28-2026 #15
Registered User
- Join Date
- Sep 2009
- Posts
- 3,002
Now that the fuel tank was in, I was so close to firing the car back up. I'm really excited at this point because I really hadn't had a chance to drive the car since it would die under any sort of engine load with the failing fuel pump. The wife went to bed early and it was go time to get the new fuel lines installed and connect some wires. Well it never goes that easy. I wanted to do a clean and tidy job installing them so I paid careful attention to how it was routed, and wanted to go up and over the rear section of the frame which was way more difficult than I anticipated to do. Same for the fuel pump trigger wire. I routed it on the same side of the frame on the opposite side. Once I got those pulled through and was happy with how they were routed and protected I could move up to the front of the engine. Whoever installed the LS originally did a nice job routing the fuel lines, so I simply used the same route and P clamps. I didn't get any pictures because I was too busy with rust and undercoating falling in my eyes.
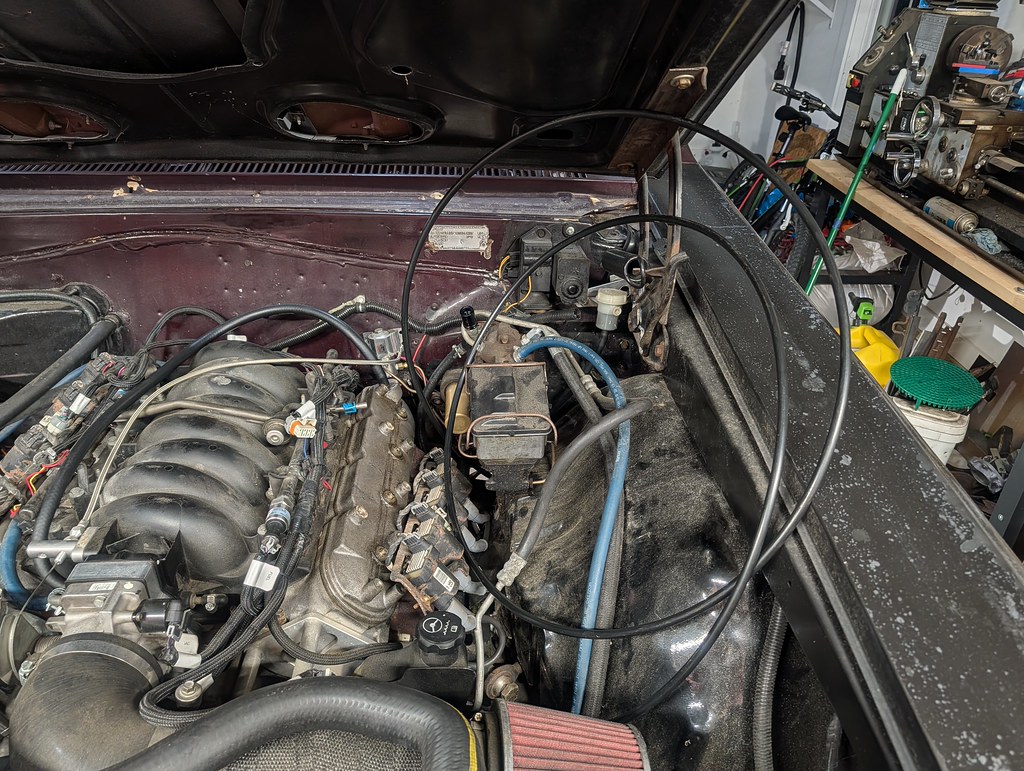
The fuel lines that I've run in all my cars are a basic 3/8" Dorman Nylon line. They are very easy to work with and relatively cheap. The lines and fittings were under $100 bucks. They do not let fumes escape, compatible with Ethanol, and are quite easy to install. I started at the fuel tank then worked my way to the fuel rails. I routed away from heat and protected from anything that could wear. Here's the spool into the engine compartment.
I took a few pictures as I was installing to the fuel rail. Here's what you start with. Cut the line to the length you want accounting for the barbed end.
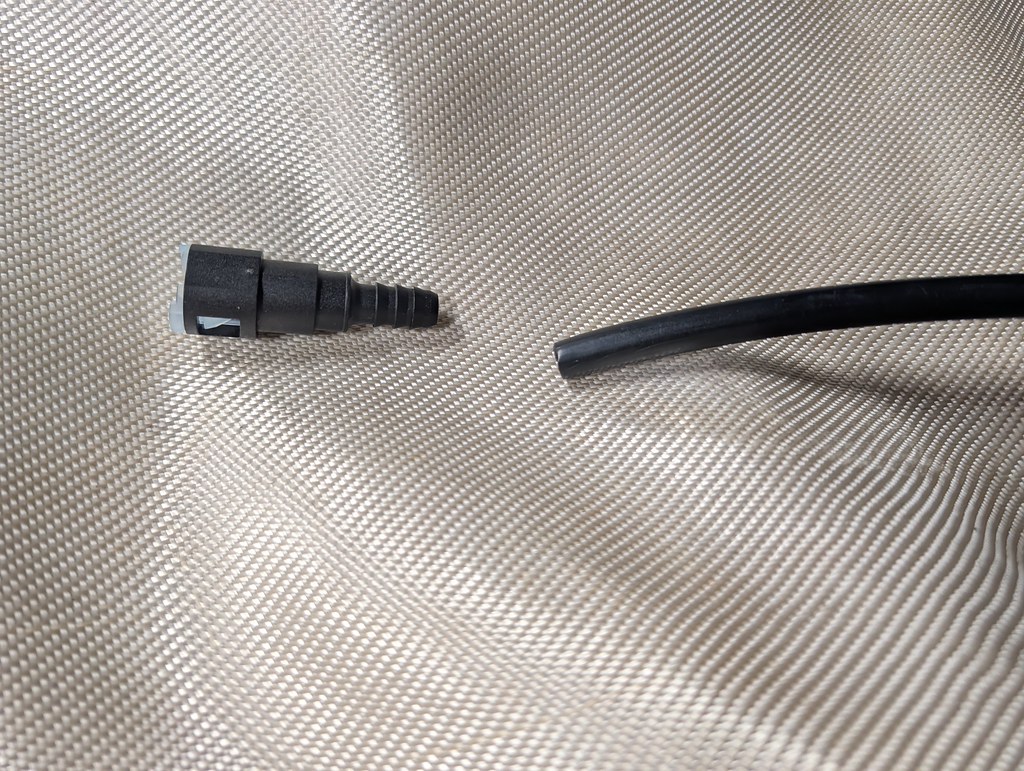
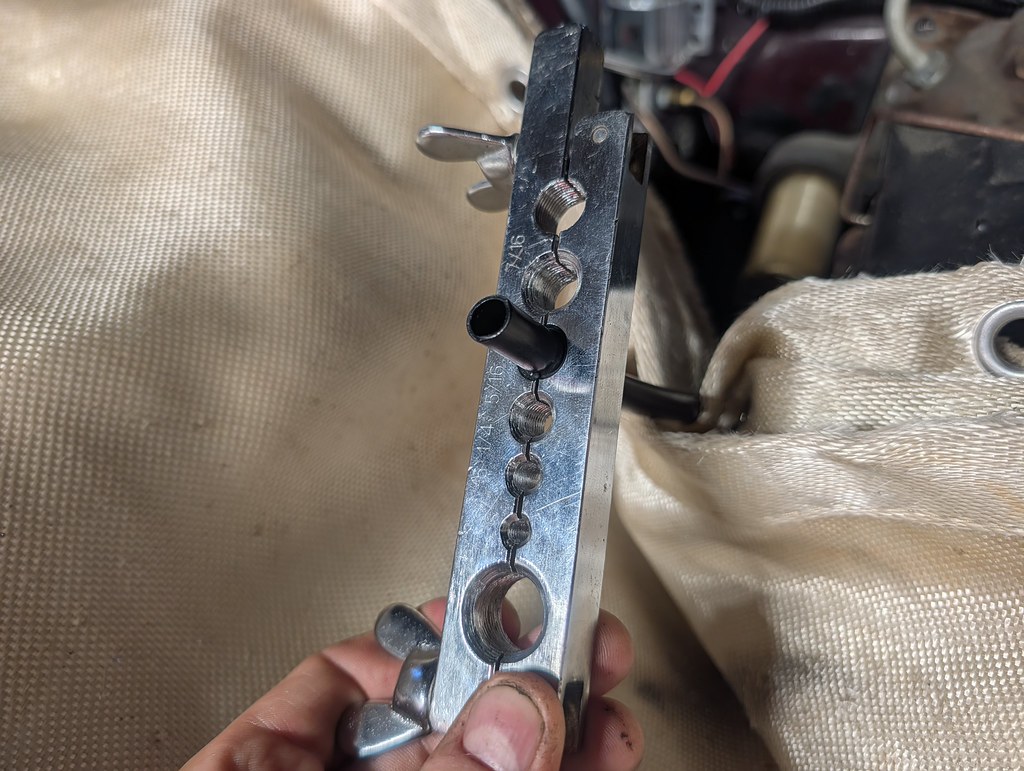
Grab any generic brake line flaring clamp, and put it in the 3/8" slot. I use the barbs to measure how much stickout is needed. As long as all the barbs are fully covered with a little hang over it's good. If too much of the nylon line is sticking out it will want to bend over.
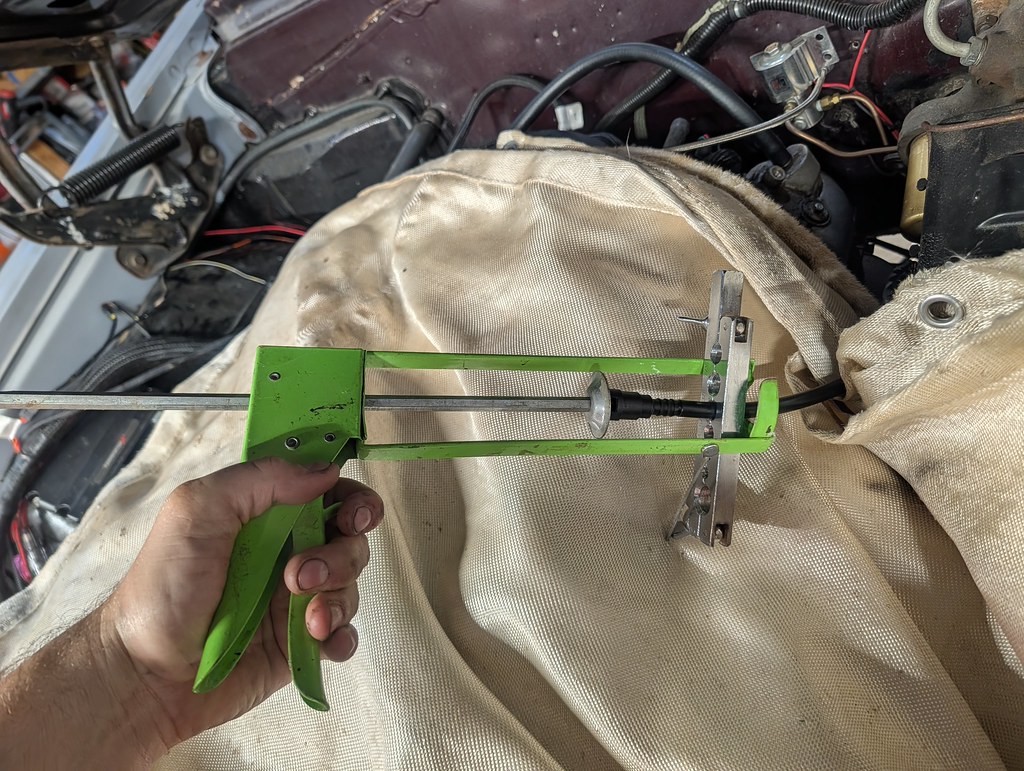
Grab a two post (not the open top style) caulk gun, and then sandwich the brake flare clamp into the opening. Line up the fitting so you are doing a straight shot into the tube. I steady the fitting with one hand and with a medium-fast speed, press the fitting into the nylon tube. If you go too slow the tube wants to bend over. If you haven't done it before it's a good idea to practice on a few spare pieces. You can reuse the fitting if you just cut off the excess. Something you need to play with a little, but is very easy once you get the hang of it. 1 or 2 is all it should take.
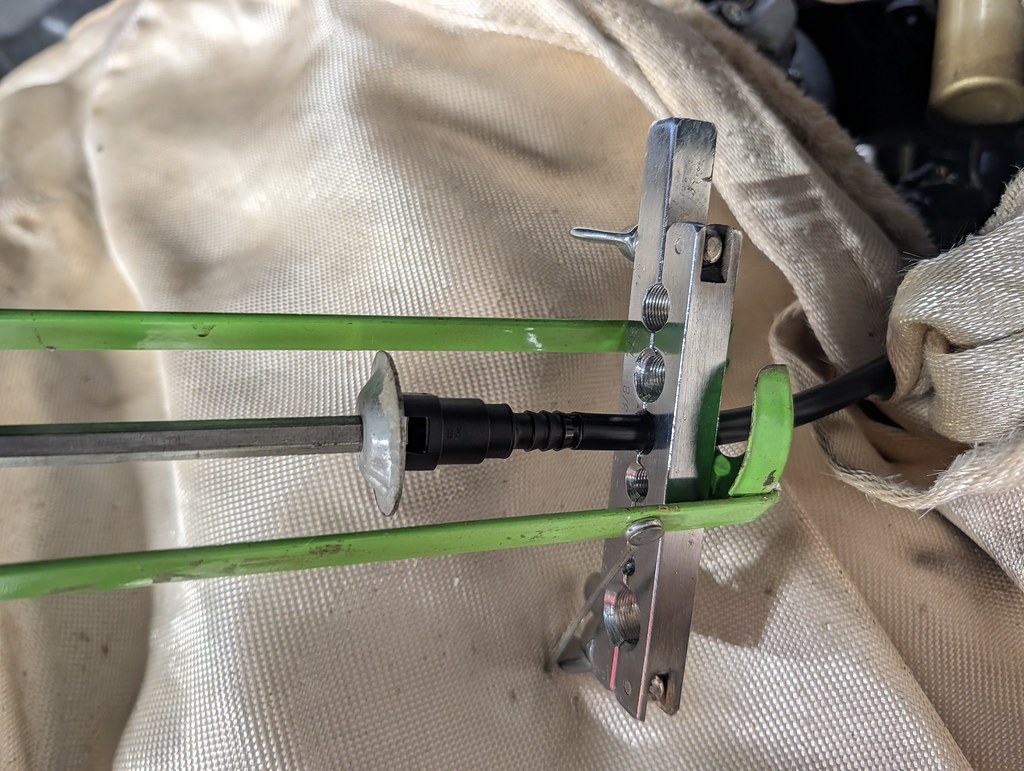
Once it's fully pressed onto the tube you're all done. Start to finish is maybe 2 minutes.
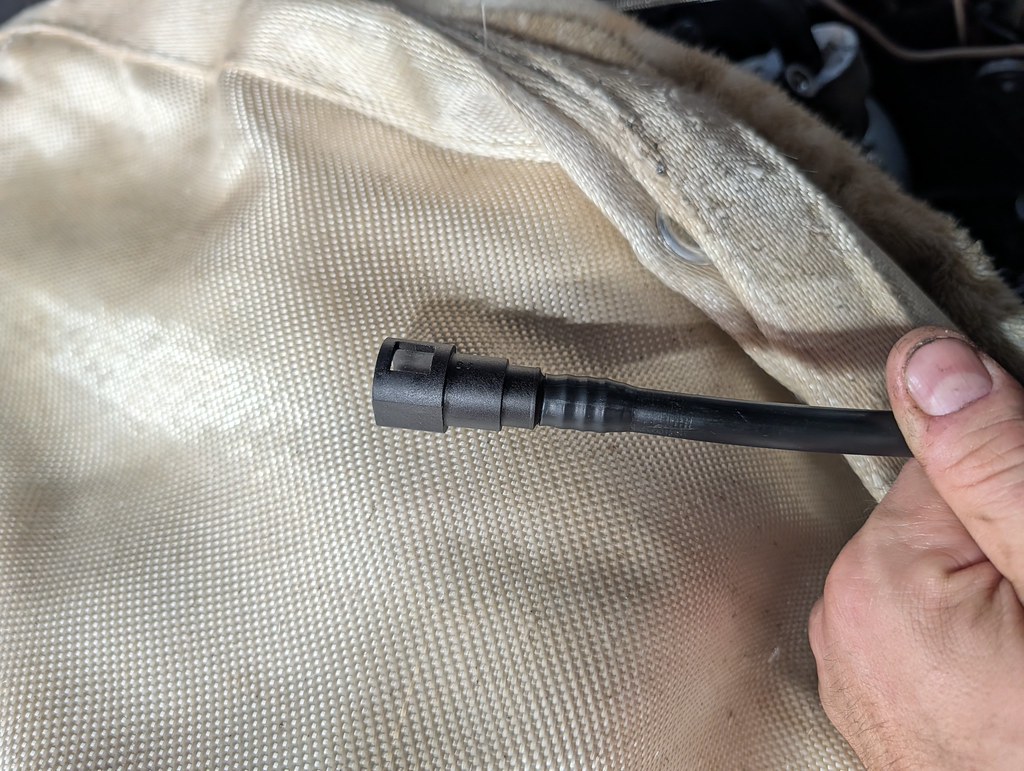
I don't love how much rusty stuff is in the engine bay. For now it all works, but I do have a plan to do a pretty major overhaul of the engine compartment. Once the fuel line was done, it just clicks in place just like a factory model. Love it. I cycled the fuel pump several times then came up to full pressure. I verified no leaks, YES! At this point it was closing in on 1am and my 6am alarm comes around pretty quickly.
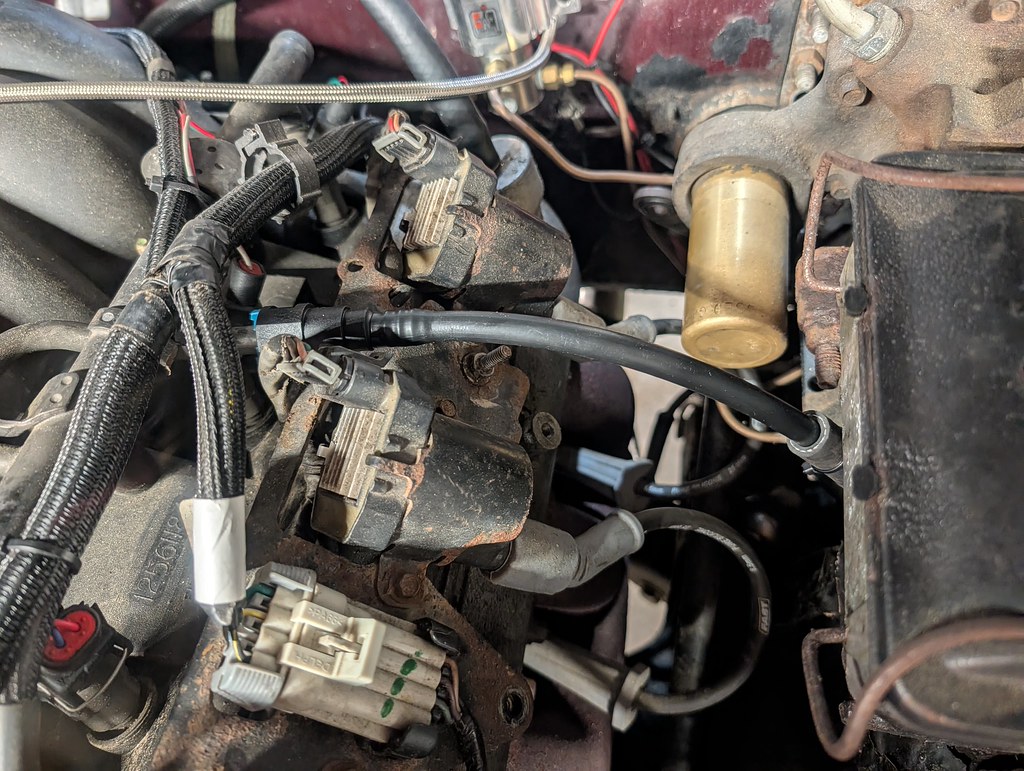
I usually have about 20 mins after the kids get on the bus and when I have to sign onto work, so I couldn't wait to give a test fire. The engine fired right up as it did before so that was no surprise, but when I would free rev the car no more fuel pressure drop!
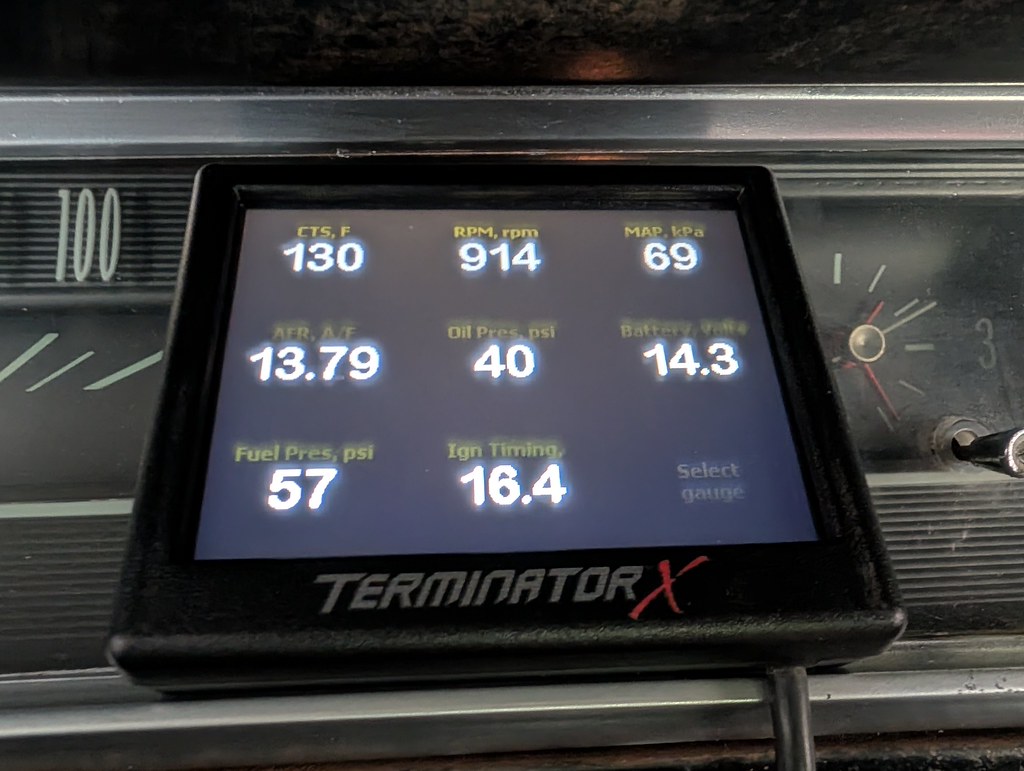
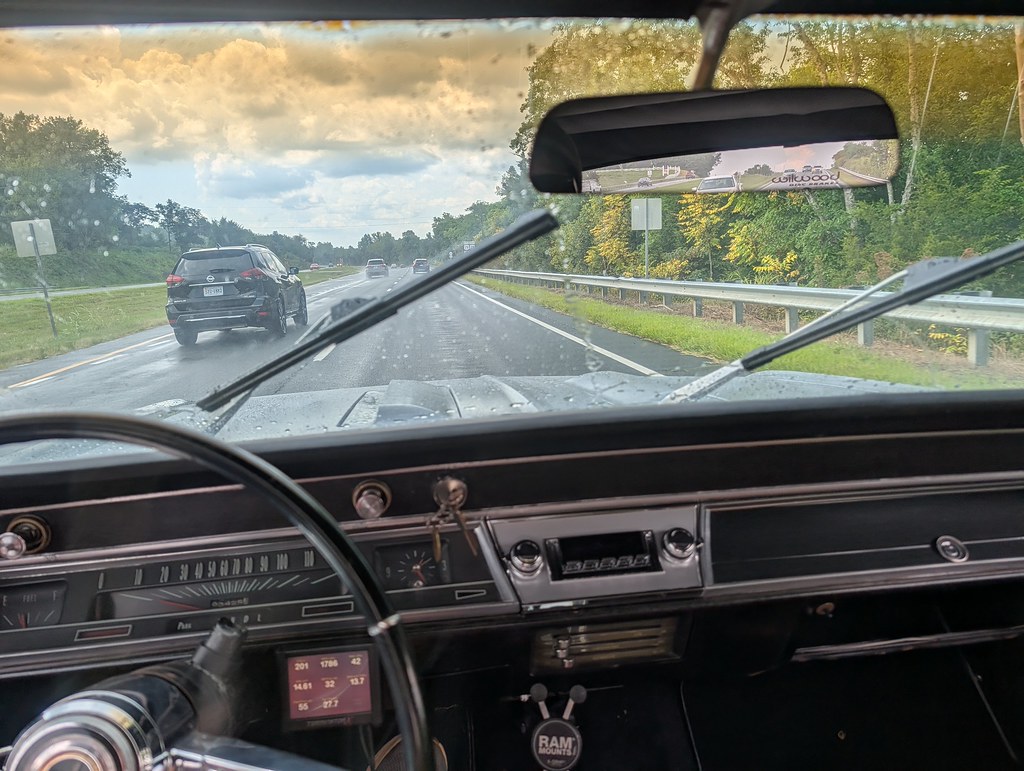
I couldn't wait for lunchtime to come so I could take it to the gas station and actually see how she runs with full fuel pressure. I was very pleased on my trip, car doesn't overheat (although it runs closer to 200* so that's something I need to look at), has full fuel pressure and good oil pressure. Once I confirmed everything was good, I let it rip in 2nd gear and it scoots! I really missed driving a manual transmission and this car is very easy to drive. Pretty quick 10 mile drive to more or less shake down the car. Then today at lunchtime I ran to the next town over to run an errand, this time I got up to 70 mph and the car just cruises at 2k rpm. I love that! The front suspension feels very dialed, I took my hand off the wheel for probably a half mile and it was dead straight. The tune is slowly getting dialed in and I'll need to review the data now that I have some more miles on the car. On the way home, I actually got caught in a small rainstorm so it was a real test. The wipers barely worked and only on low speed. Put that on the to-do list.
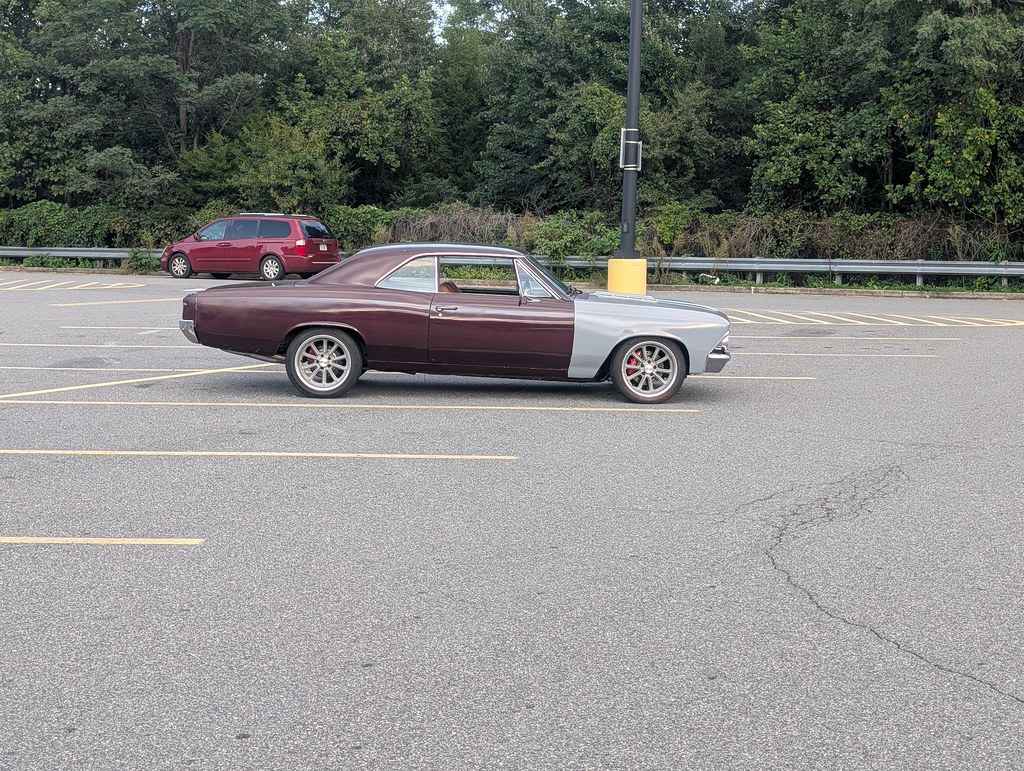
I love how dialed the car seems to be right out of the gate. I love that I can drive the car and slowly fix the things that bug me. One of the first things on my list is to cruise over to the automotive paint store in Charlottesville and have them scan the maroon paint. I'd like to match the front fenders and hood pretty soon. I'll probably just use the little rattle cans that they have, since I'm eventually going to paint the whole car something completely different. But for now, it will at least look more complete.
That brings me up to date. Have a great weekend!
Ryan
1955 Nomad project LC9, 4L80e, C5 brakes, Vision wheels
1968 Camaro 6.2 w/ LSA, TR6060-Magnum hybrid and etc SOLD
1976 T/A LS1 6 Speed, and etc. SOLD
Follow me on Instagram: ryeguy2006a
08-28-2026 #16
Registered User
- Join Date
- Nov 2006
- Location
- Mountain Springs, Texas
- Posts
- 4,877
Nice work on that tank!
1969 Camaro - LSA 6L90E AME sub/IRS
1957 Buick Estate Wagon
1959 El Camino - Ironworks frame
1956 Cameo - full C5 suspension/drivetrain
1959 Apache Fleetside
08-28-2026 #17
Registered User
- Join Date
- Nov 2018
- Posts
- 996
Nice work. That really makes me want to get a TIG welder despite having a fairly new MIG.
08-29-2026 #18
Registered User
- Join Date
- Nov 2012
- Posts
- 373
Nice work! I love the caulking gun approach. Simple but genius!
1970 Camaro restomod power tour ride
1966 Buick Special restomod, the never ending project
1970 GTO My newest retirement project, time to gather parts!
09-14-2026 #19
Registered User
- Join Date
- Sep 2009
- Posts
- 3,002
Thanks guys. I drove the car around for about a week picking up groceries and running errands around town after the last update. I can confidently say that the fuel system is fixed. It was a decent amount of effort, but I have exactly what I wanted for the fuel delivery. One of the next items that I wanted to address is the cooling system. The car seems to run around 200* which is hotter than any other car I've had with an LS motor. While it doesn't overheat, that is hotter than I'd like to see. I have a suspicion that it is directly related to the water pump and/or thermostat. Most if not all LS water pumps come stock with a 187*, so if it's running 10*+ hotter there is something going on.
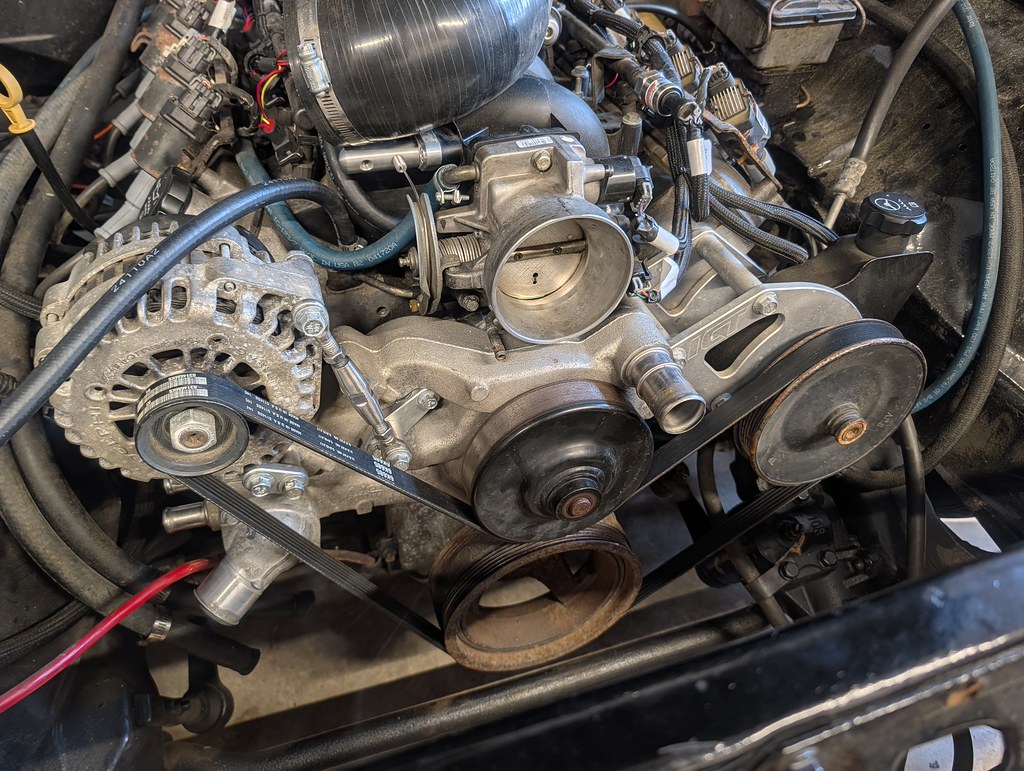
After reviewing all of my options, I opted to pickup a 10-15 Camaro SS water pump to fix or address a few issues that I had with the current setup. The stock 99-06 truck water pump points the outlet of the water pump up high which causes the upper hose to be both unsightly and the highest point of the cooling system. The new water pump brings it lower/better hose routing, keeps my current truck spacing accessories, provides more clearance for the alternator, and allows me to eliminate the 1" throttle body spacer that was needed to clear the old water pump. Eliminating the spacer allows for more space for the CAI between the radiator and accessories. Lots of wins by installing the new water pump.
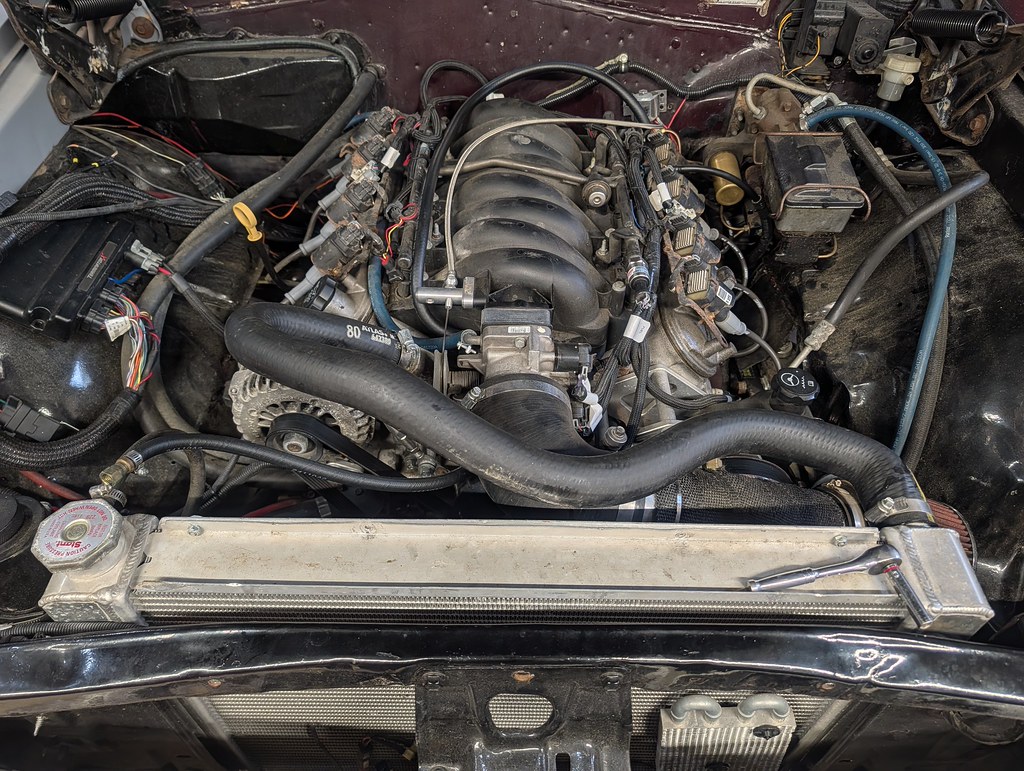
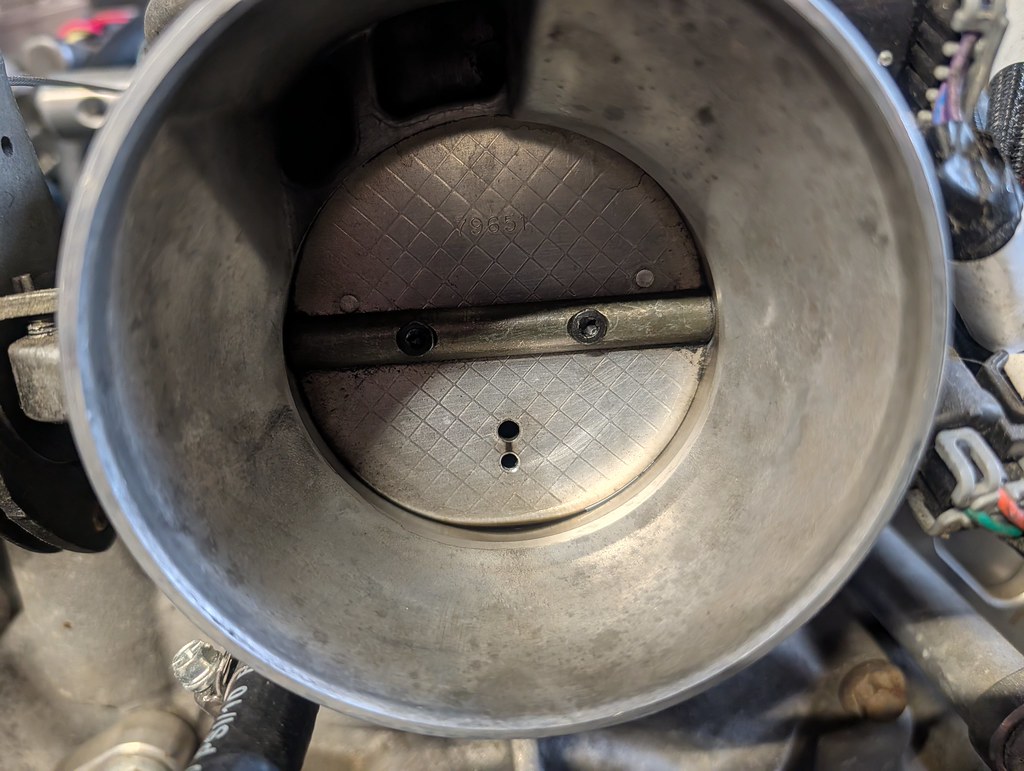
I found out immediately, that this radiator doesn't have a provision for a petcock!? Why... Once I drained the coolant and got the radiator out, I pulled off the CAI and found that someone drilled the throttle blade. I may swap that out for one that isn't cut that I have on the shelf. But for now, I'll keep it as is. That could be the source of the throttle whistle that drives me nuts.
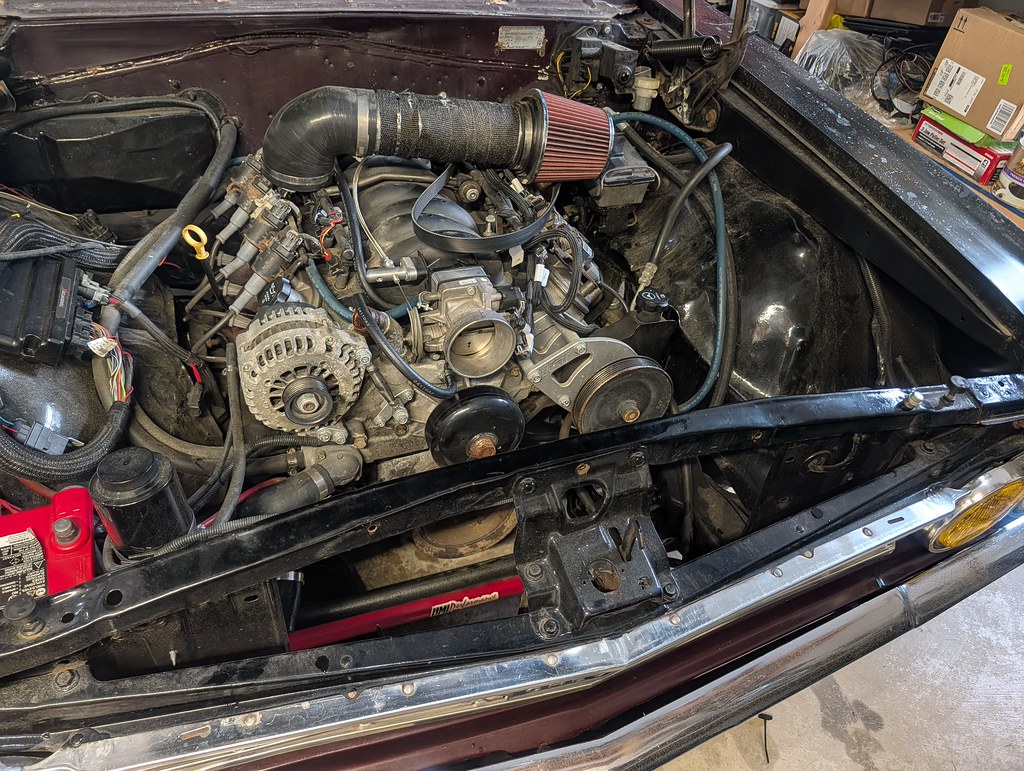
First mock up looks pretty good, but as I tried to fit the alternator bracket I realized there were some differences between the truck and Camaro mounting.
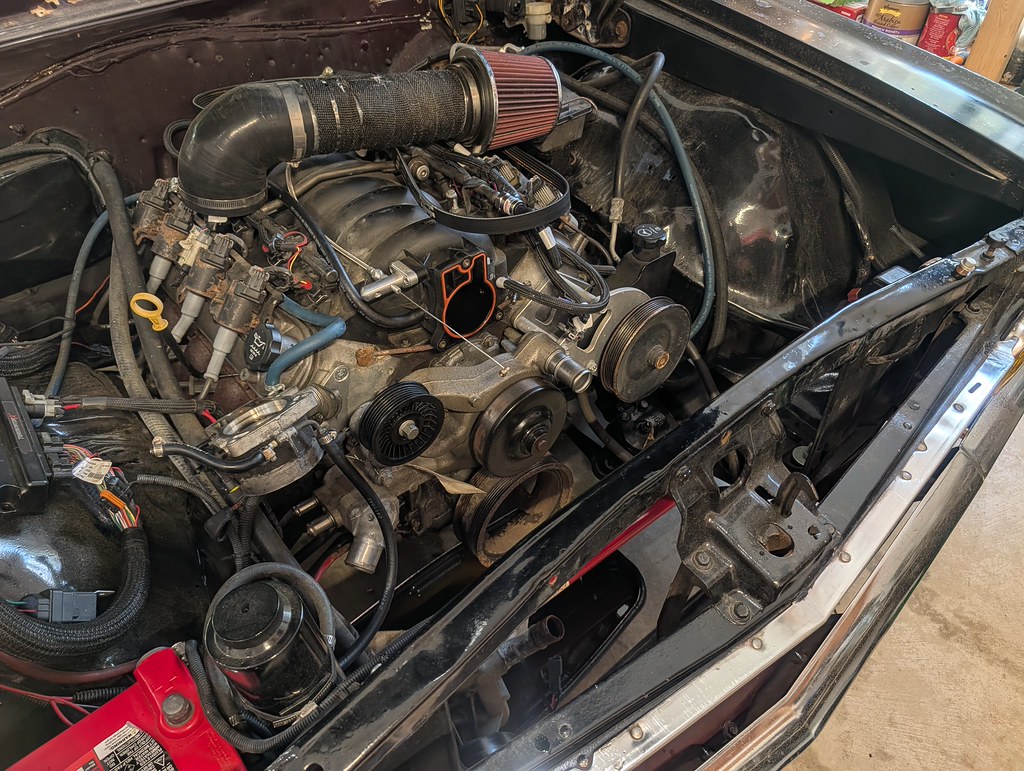
The truck water pump has no obstructions between the water pump mounting holes, but the Camaro does. After a bit of troubleshooting, I determined that I could just grind away some of the bracket and trim the water pump slightly for that little bracket to sit flush.
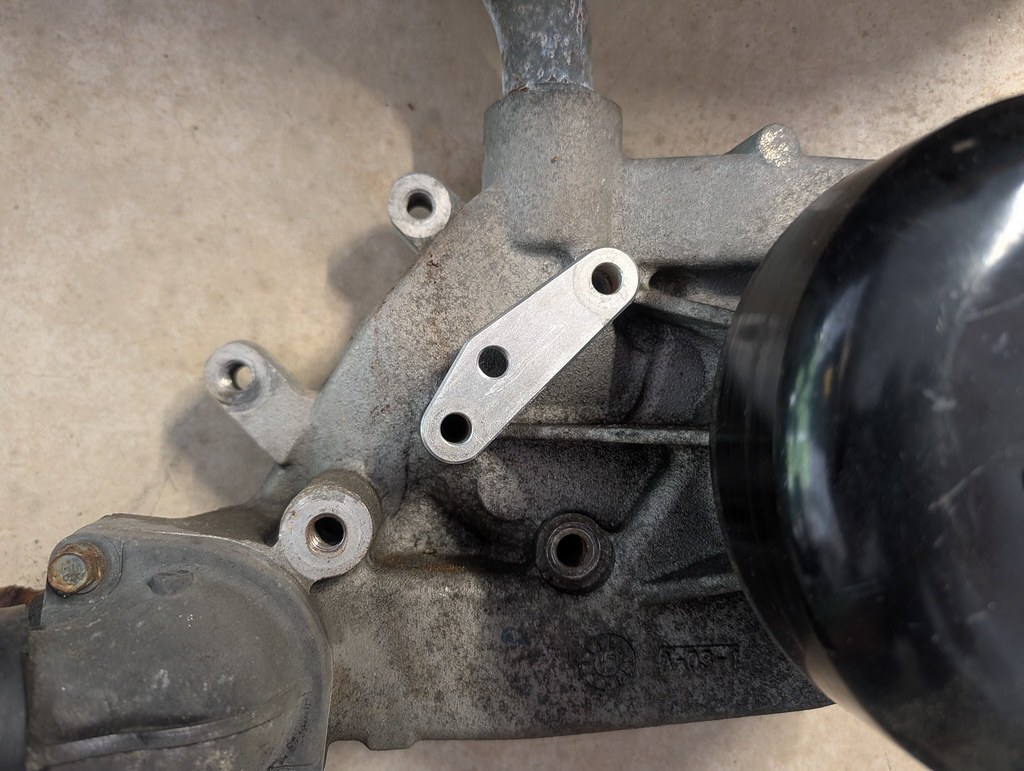
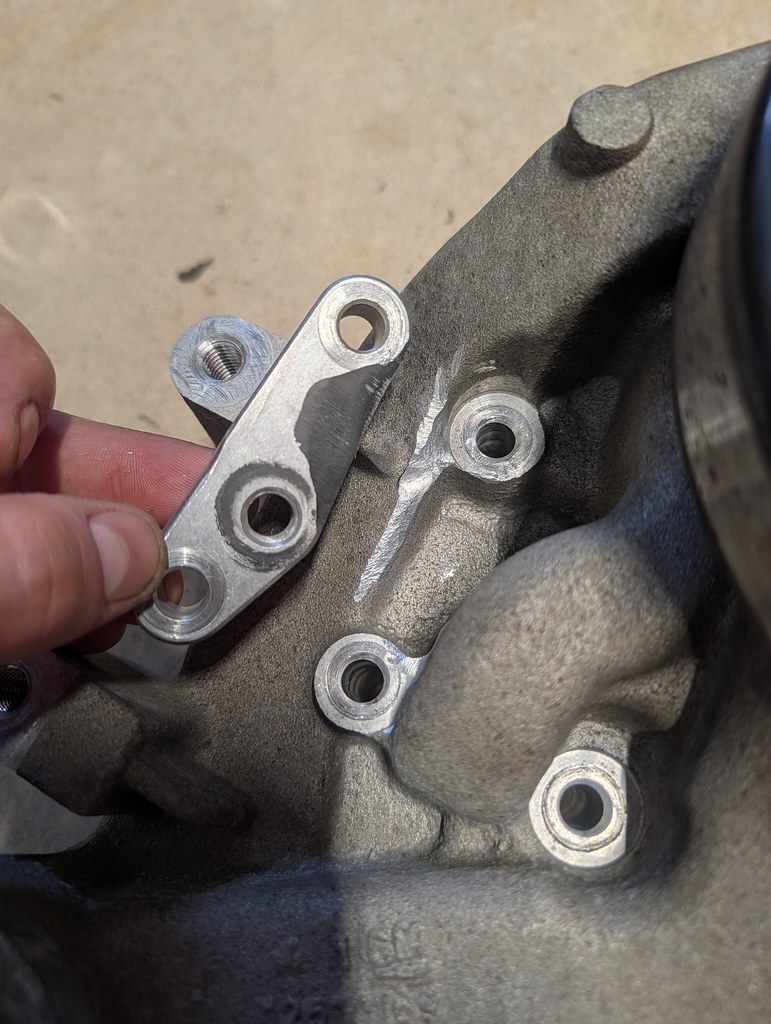
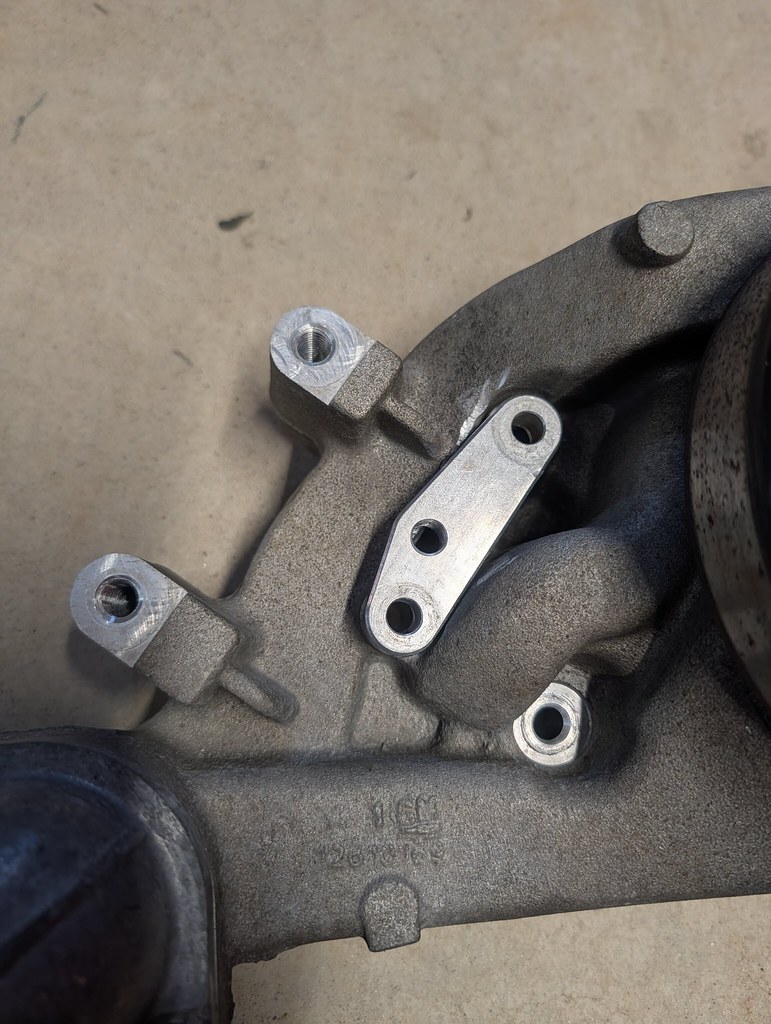
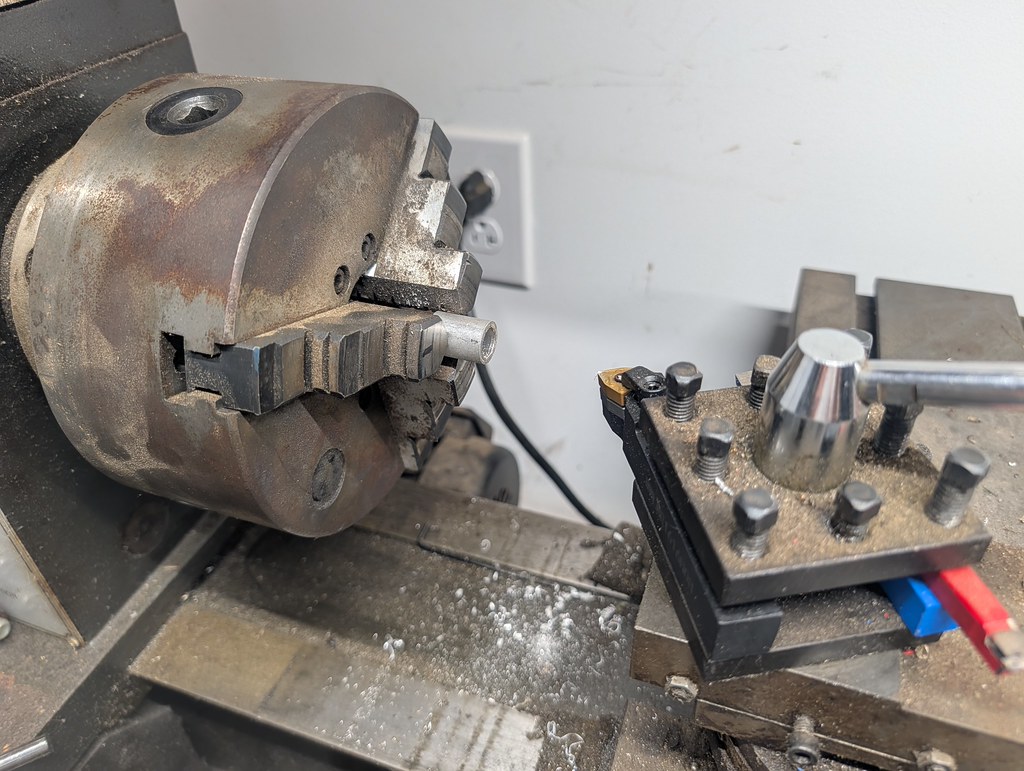
Problem solved... or so I thought. The ICT bracket also uses the stock belt tensioner boss to mount to the alternator. That is also at a different spacing. Rather than cut down the spacer that came with the kit, I used one I had in my junk bin. Chucked it up in the lathe and turned it down to the right size. That fixed the tensioner issue and was able to get it all back together just like before.
Now that my accessories are straightened out, I wanted to test fit the radiator and see if the Gen6 SS Camaro radiator fans that I have will fit this radiator. I thought it would be close, but the width is a perfect fit. The fans are about 3.5" taller than the radiator core, but I can make a little extension piece to take up that short gap. Now the plan is to add some tabs to the radiator and mount up the Gen6 fans. For those that aren't aware, this is a factory 19" Spal brushless fan that is capable of 4k+ CFM with an 850 watt motor. It's a
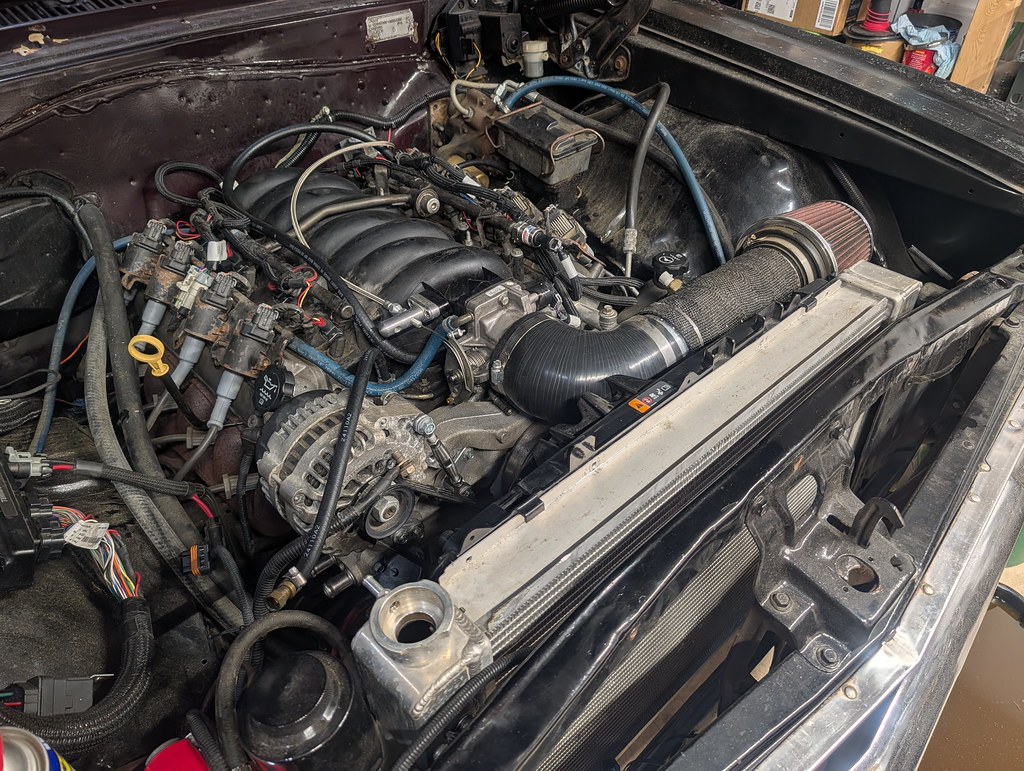
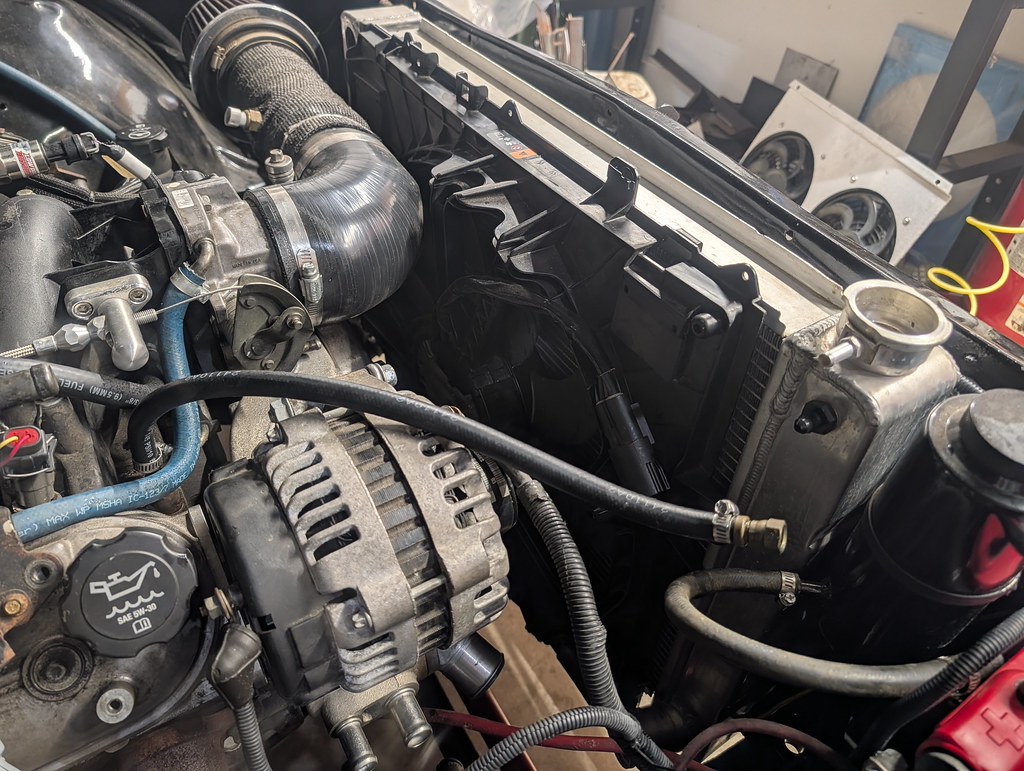
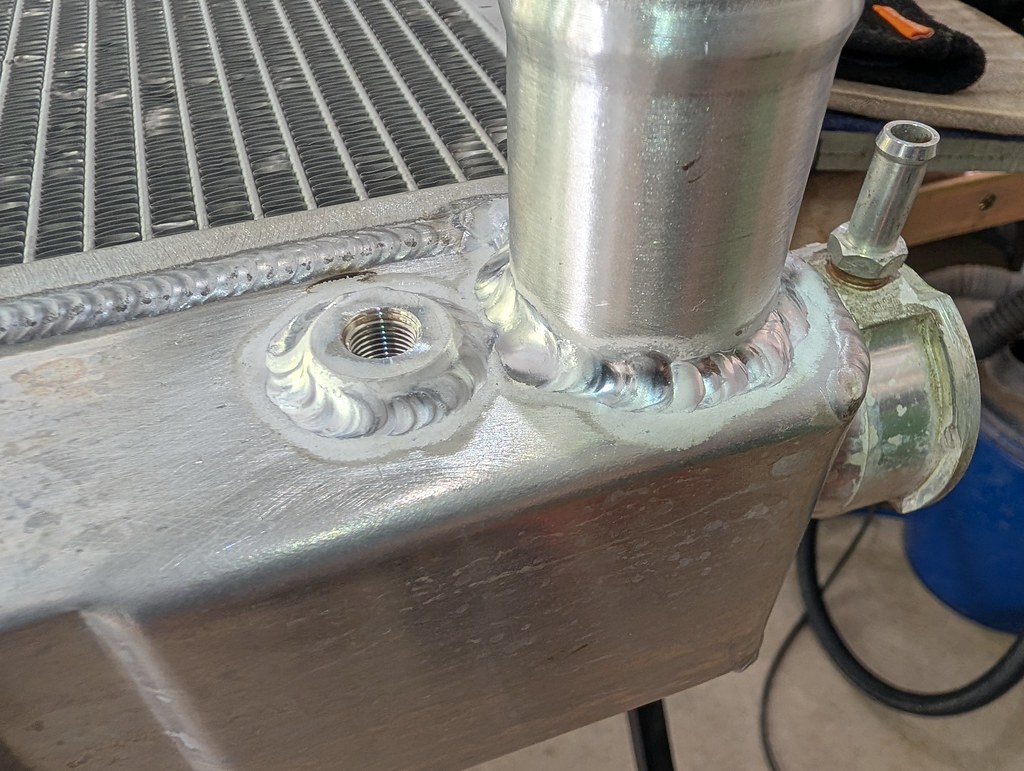
Once I got the CAI installed, it became pretty clear that it would be tough to route the hose back up to the upper inlet of the radiator. Having a dual pass radiator would solve that issue by moving the inlet to the other side and give me a much better routing. I saw someone many years ago convert a radiator to dual pass, so I'm going to give it a shot. While I'm at it, I'm going to add a bung for a drain and steam port. I bought a 1.5" aluminum turbo pipe on Amazon and cut it in half for my upper inlet.
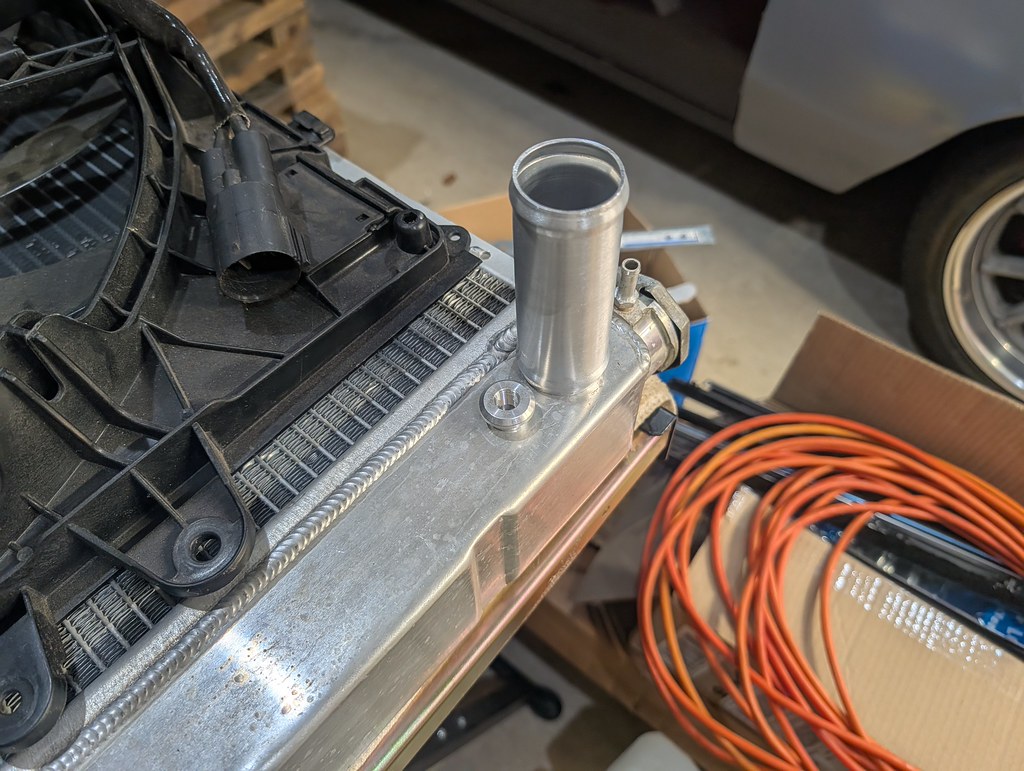
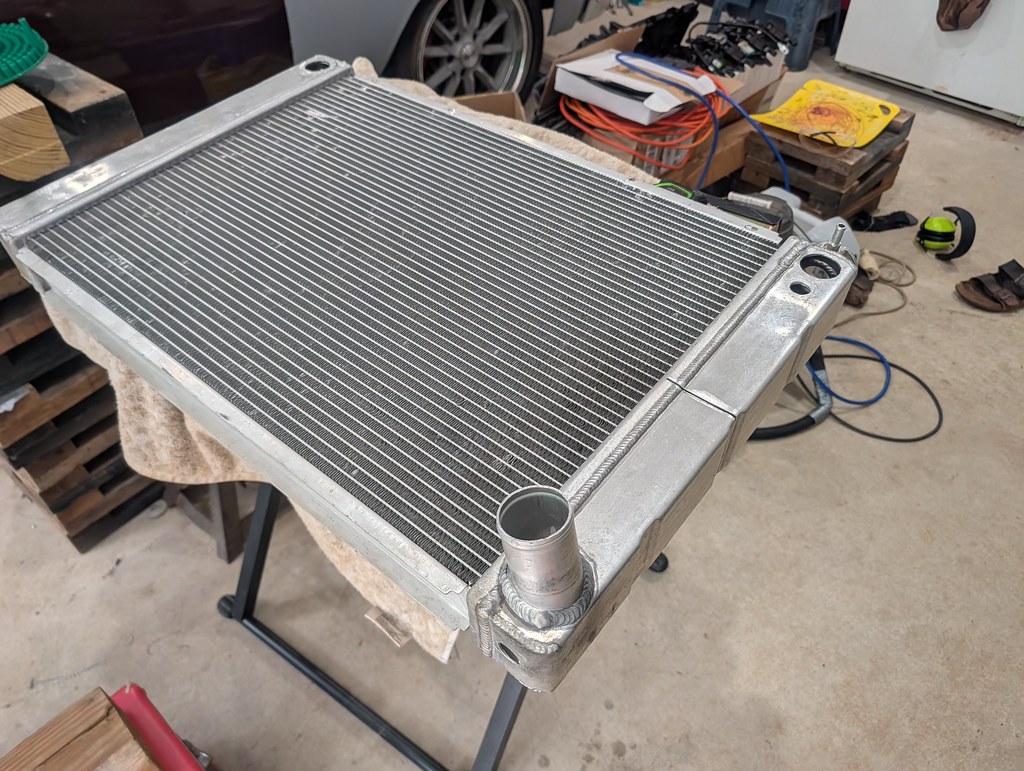
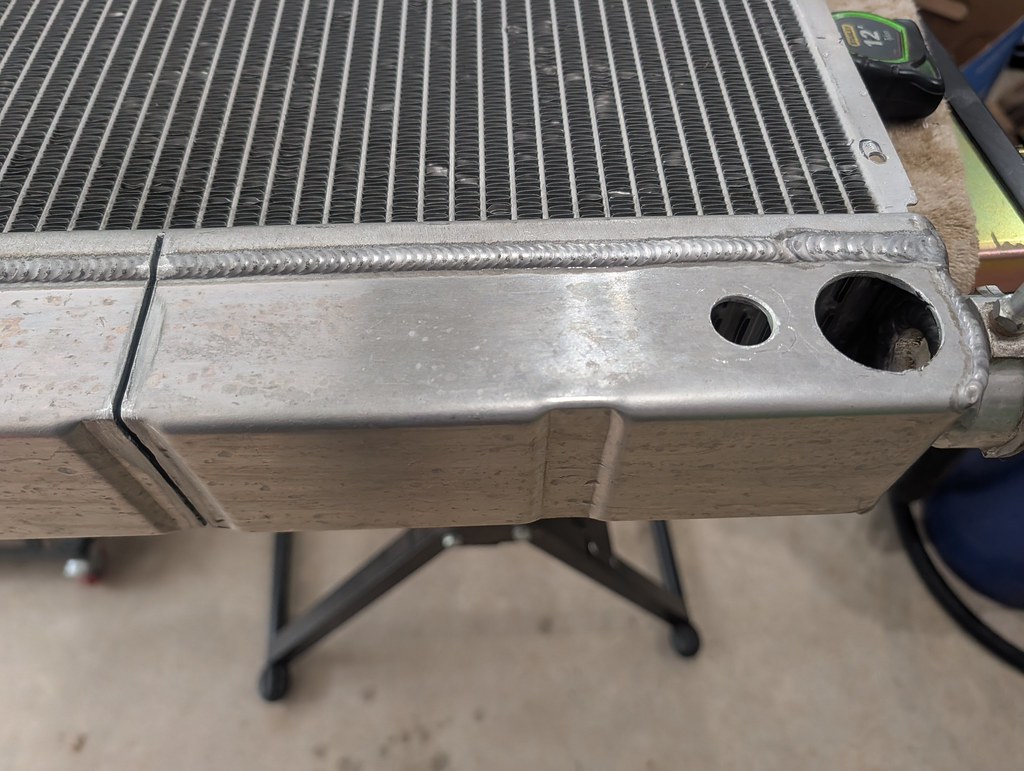
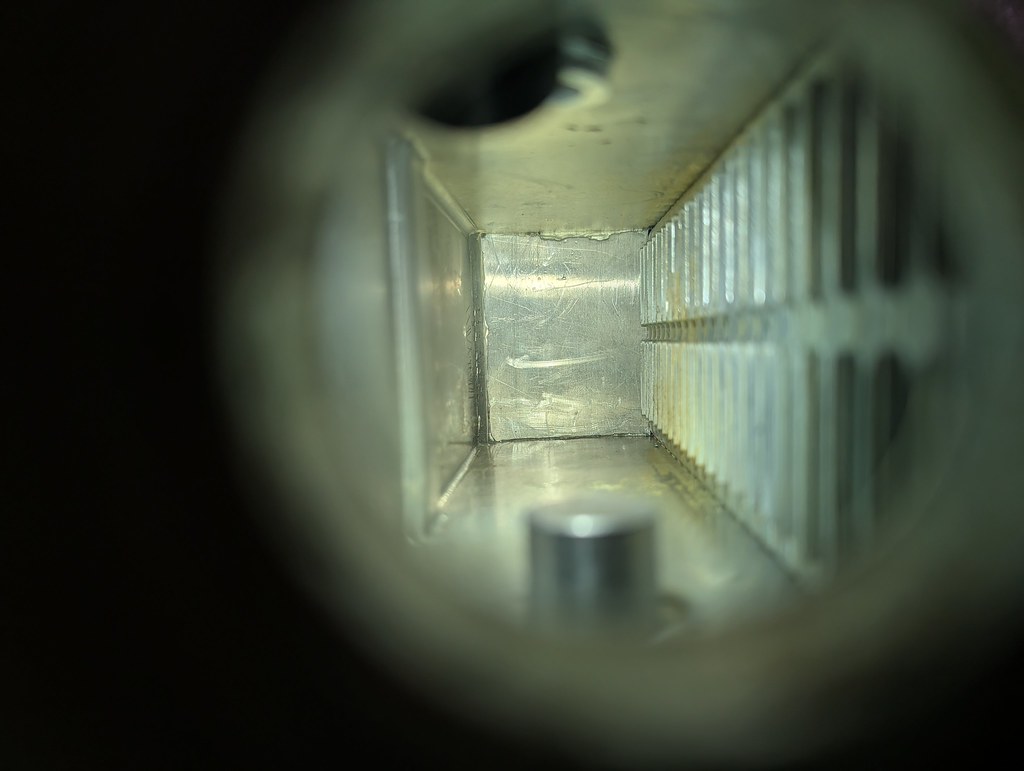
I took a bunch of measurements and carefully made the cut for the dual pass plate. I made sure to get it dead center of the cores so it could block off the flow as much as possible. I'm happy with how tight of a fit I was able to get.
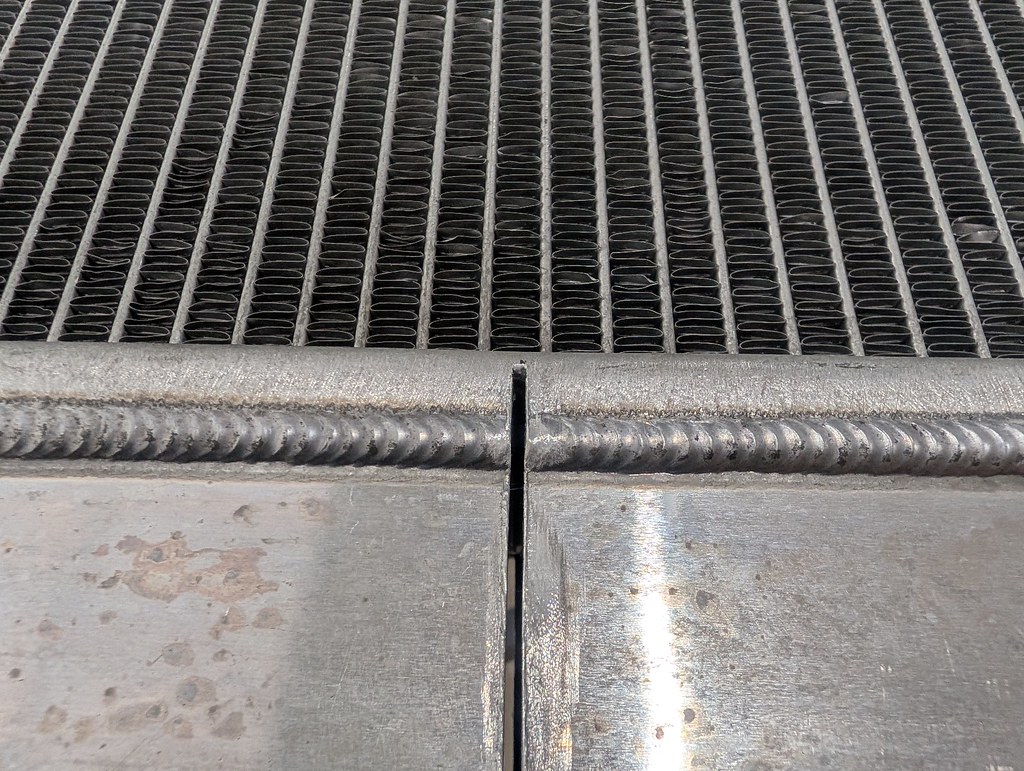
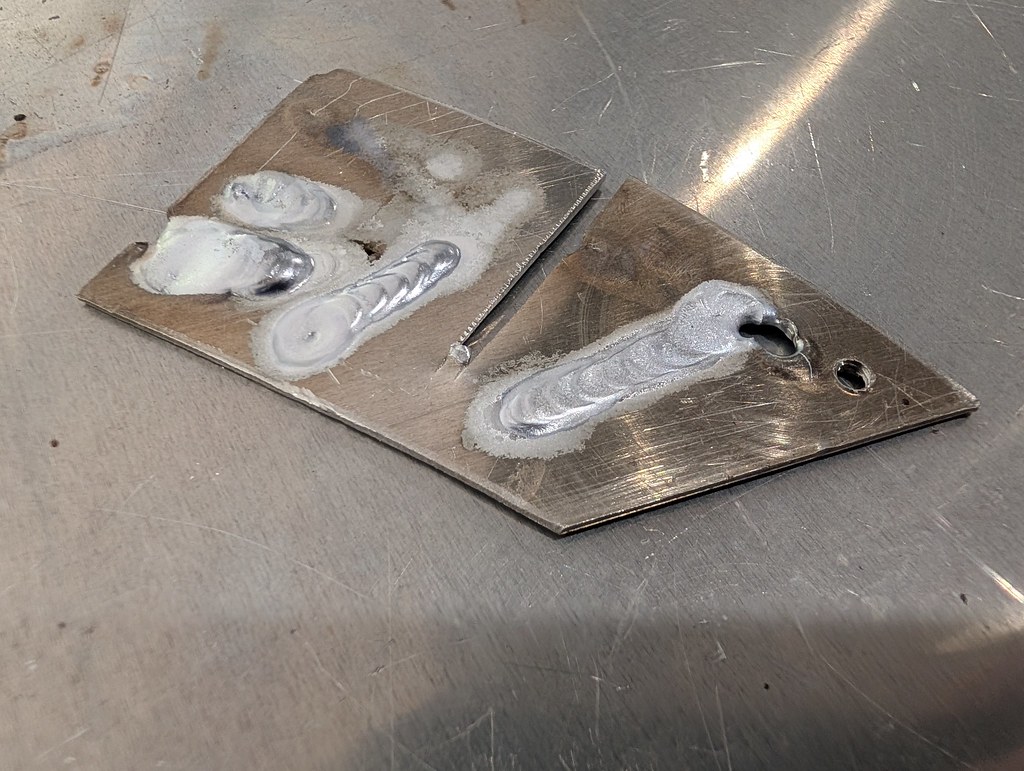
Once I was happy with all of the fabrication and prep work, I set up my welder for AC TIG and started dialing in the settings. Once I was happy with the setup, I got to work.
I started with the bottom drain fitting so that I could get the hang of it and if it was ugly, it would be on the bottom.
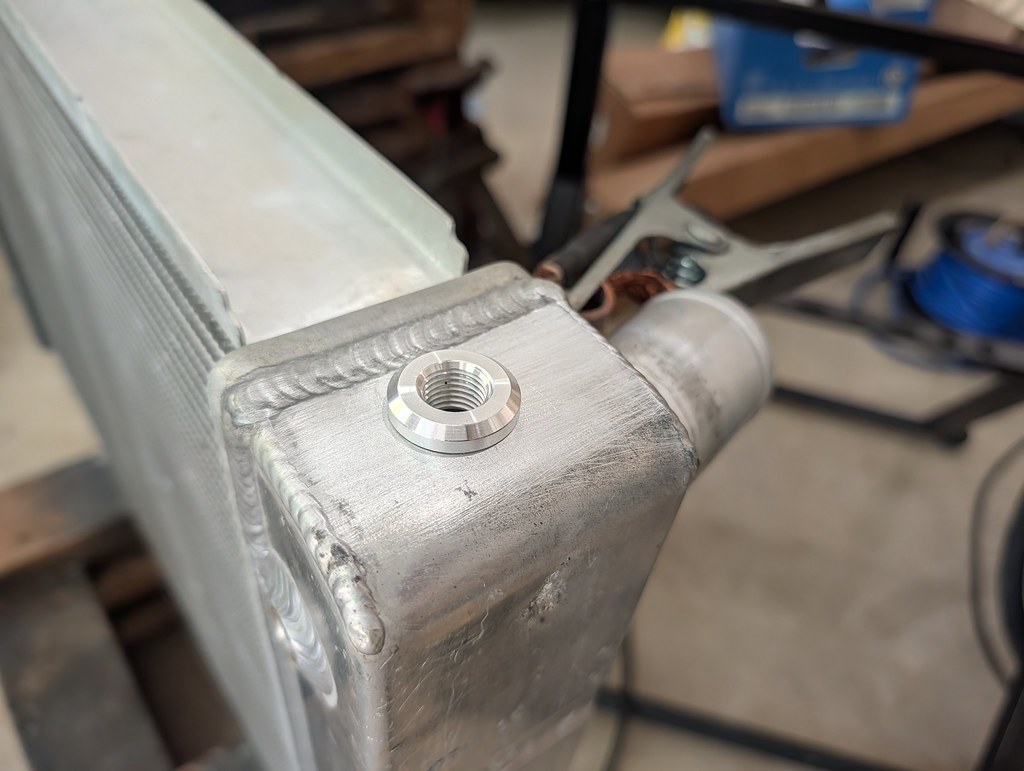
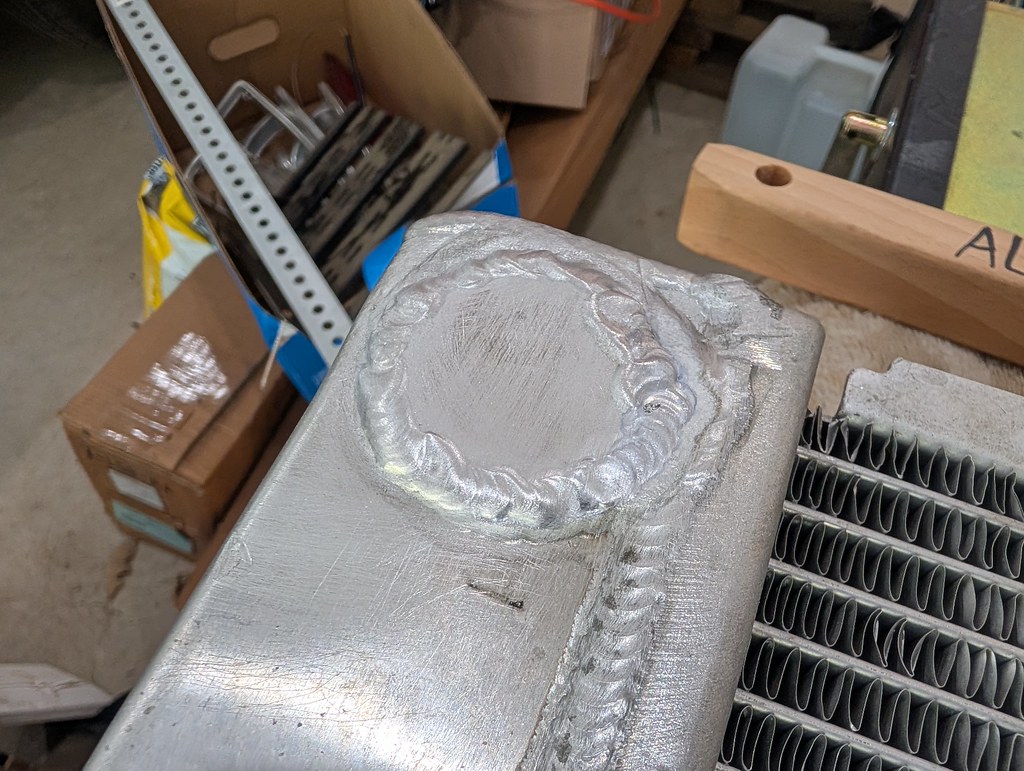
Pretty happy with how that turned out. It took me quite a while though to get the two pieces to initially welded together. I had to play around with the frequency settings and then it worked much better.
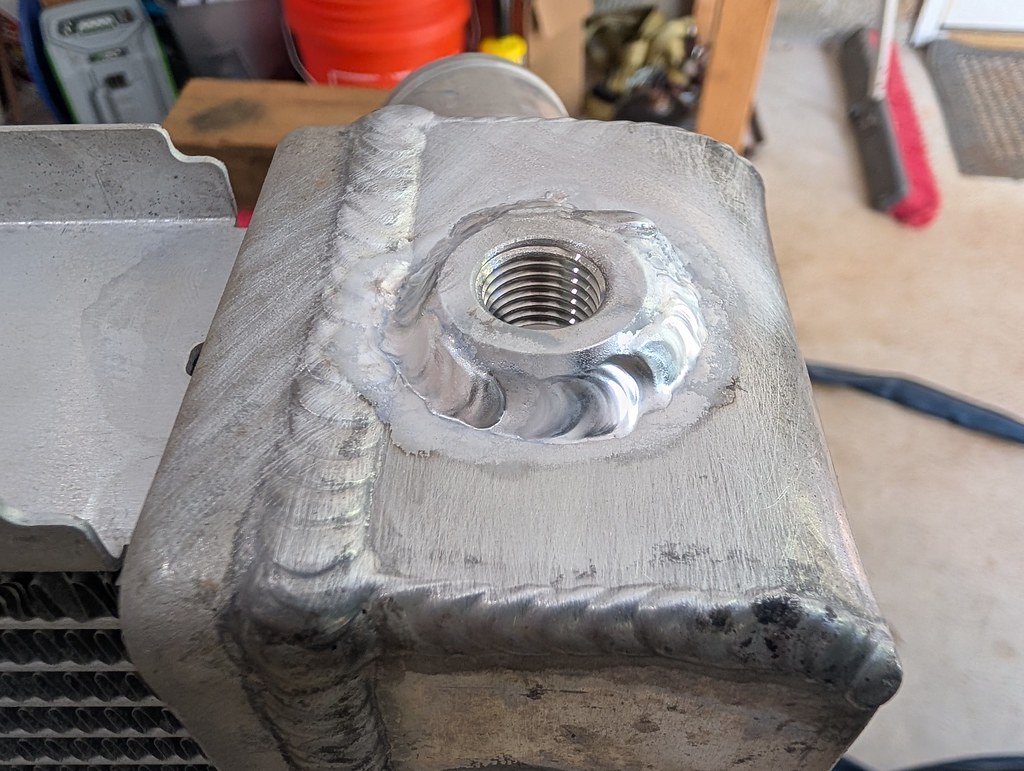
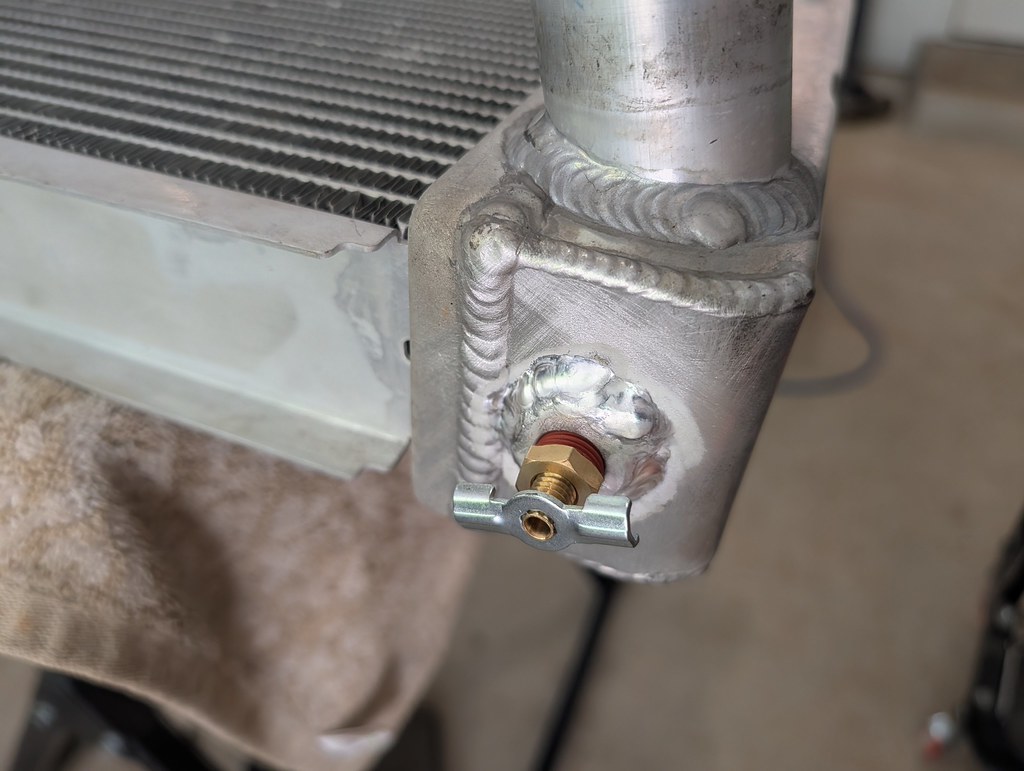
Old inlet all sealed up
New inlet and steam port bung welded solid.
And lastly, I welded the dual pass plate in. I tried to keep the fitment as tight as possible and was happy with how it welded. Although initially the weld was dirty and you could see contaminants in the weld. Not surprising since I couldn't really clean the inside of the tank. I bumped up the AC balance for more cleaning and that cleaned up the last part of the welding. I wasn't sure if it would work or not, but I left the plate a little longer on the final fit up so that it would melt down and act as a filler. It worked really well and towards the end I didn't even need to add any filler.
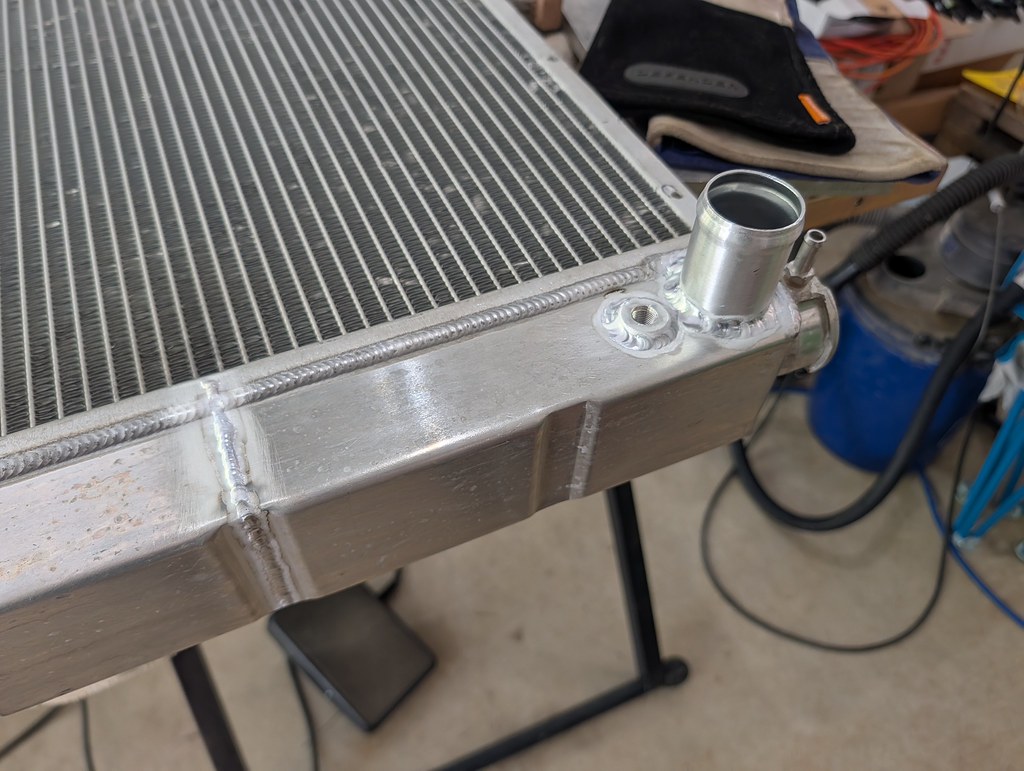
I still want to pressure test the radiator before I install, but I'm very confident that there are no leaks. The way the welds flowed around the bungs and fittings I'm not concerned, but any leak will be addressed. I started working on the brackets to mount the new fan, but I ran out of time yesterday. Hoping to have them wrapped up and welded one night after work. There is a car show this weekend that I'd like to attend. Hopefully all these updates will help to drop the operating temperature.
Cheers,
Ryan
1955 Nomad project LC9, 4L80e, C5 brakes, Vision wheels
1968 Camaro 6.2 w/ LSA, TR6060-Magnum hybrid and etc SOLD
1976 T/A LS1 6 Speed, and etc. SOLD
Follow me on Instagram: ryeguy2006a
09-14-2026 #20
Registered User
- Join Date
- Nov 2012
- Posts
- 373
I like the use of the Camaro fans. I used a huge black magic fan on my 66 and it fits the radiator perfectly. Sadly it’s not brushless so when I comes on there’s a HUGE load on the electrical system that I don’t like. Hopefully it will stay around 200 degrees in traffic. I also have a fan dedicated to the front of the condenser so I always have airflow across it if the compressor is seeing power. Might be overkill but it keeps the AC and trans temps down on my 70 Camaro even sitting in power tour traffic.
1970 Camaro restomod power tour ride
1966 Buick Special restomod, the never ending project
1970 GTO My newest retirement project, time to gather parts!

 Reply With Quote



