


Results 21 to 40 of 41
Thread: 1968 Camaro Double DIN Install
Hybrid View


-
05-03-2015 #1
 New to Pro-Touring
- Join Date
- Oct 2009
- Posts
- 2
My Dash
Single DIN with 7" downward projecting display, hay who smokes anymore anyway, just covers the ash tray and is out of the way of the shift, I've not finished the AC duct work on the console so you can still see wires inside the vents. Originally Posted by DD68SS

-
06-10-2015 #2 Registered User
- Join Date
- May 2015
- Location
- Kansas
- Posts
- 6

I have been thinking about this a lot also. That looks good.
05-08-2017 #3 Registered User
- Join Date
- Jan 2017
- Location
- pickering ontario canada
- Posts
- 196
 1971 chevelle LSA 700hp -

02-04-2017 #4 Registered User
- Join Date
- Sep 2015
- Location
- Orange County, CA
- Posts
- 59
My 69 Camaro has a double din head unit. The dash is a modified version of the DSE dash. Images can be found in the build thread link.
02-06-2017 #5
Registered User
- Join Date
- Jun 2006
- Location
- TX
- Posts
- 177
I got these from their Instagram accounts. I think the way Sled Alley did it is the best i've seen so far with keeping close to stock design. I'm thinking that with some Restomod Air rectangle vents above it, and raise the double DIN up a little more.
Kyle
02-16-2017 #6 Registered User
- Join Date
- Nov 2011
- Location
- Wylie, Texas
- Posts
- 302
I'm right in the middle of doing a double DIN install on my 67. Here's how I did it:
The hole on the lower right is for a couple of USB ports
02-16-2017 #7
Registered User
- Join Date
- Jul 2011
- Posts
- 239
Have any more pics??
02-17-2017 #8
Registered User
- Join Date
- Nov 2011
- Location
- Wylie, Texas
- Posts
- 302
My USB dongle came in the mail and it fit perfectly
Here's the hole I cut in the dash, I then used a hammer and dolly to beat down the raised edges so that my new panel would sit flush.
Use some poster board to make a template for the new panel. I used the original chrome trim for making the template. Then transferred it to 18g sheet metal. Drill the 3 holes at the top first and use this as a way to align the panel to the dash. I used a pipe that I had laying around to make the bend at the bottom of the panel.
Later I cut out the center part of the trim piece leaving about 1/8" near the chrome ring that I bent downward to fill in the gap that will be left. Ignore the holes at the bottom. The original owner hacked it up a bit. I plan on building a center console that will hide the bottom of this trim piece, so I wasn't too concerned about having it perfect. I will also need to do some touch up painting as the paint chipped off a little when I was bending it.
Note at the top of the panel I left a lip that will replace the plastic piece that holds on the top of the trim piece. I bent the lip out slightly so the trim will tuck behind it. Then cut the hole for the top vent. Make sure the mounting holes for the vent will line up with the original holes. Next cut an upside down "U" in the panel and bend it into the dash. I taped the radio trim ring to the panel to determine the best position to cut the hole for the radio. There are two things to consider at this point. Make sure there's enough room behind the panel for the radio to fit. If you bend the flap too far back the radio may not fit. The other thing to consider is the viewing angle. Sit in your normal driving position and make sure you will be able to see the entire screen.
After cutting the radio hole I focused on mounting the Vintage Air controls and the USB ports. I was hoping there would be enough room in the flat part of the flap such that I wouldn't need to make the holes to mount these parts but as it turned out the controls wanted to sit right at the curve, so as you can see I made some cuts to install some flat pieces that I could mount the controls and USB ports too. Yea, I know my welding sucks. I never welded until I started working on this car. I'm getting better.
The last thing I did was mount the cage for the radio. I brought a steel cage off of Amazon. I then installed the radio into the cage and stuck it through the panel hole to determine how far back I wanted it to sit. I wanted the black trim ring to sit just inside the hole but still protrude out slightly. Then I was able to determine how long the cage spacers needed to be. Note the 90 degree bend in the spacers where it is welded to the cage. The cage has a lip around the perimeter of one end.
The lip rests on the bend that I put at the end of the spacer which made it easy to keep everything aligned.
02-17-2017 #9
Registered User
- Join Date
- Jul 2011
- Posts
- 239
How many inches is the radio tilted back from the top front Edge of the vent ?
02-16-2017 #10
Registered User
- Join Date
- Jul 2011
- Posts
- 239
That looks great!!!
02-17-2017 #11
Registered User
- Join Date
- Jul 2011
- Posts
- 239
Excellent info!!very creative way to do it!looks good ..can't wait to see the finish painted product !!
02-17-2017 #12
Registered User
- Join Date
- Nov 2011
- Location
- Wylie, Texas
- Posts
- 302
2-5/16"
02-17-2017 #13
Registered User
- Join Date
- Jul 2011
- Posts
- 239
Thanks!!
02-18-2017 #14
Registered User
- Join Date
- Feb 2006
- Location
- Arizona, Phoenix area
- Posts
- 64
I gotta say that's one of the better looking installs...keep the pics coming
02-23-2017 #15
Registered User
- Join Date
- Jul 2011
- Posts
- 239
I yeah I look forward to seeing the finish product!!
05-08-2017 #16
Registered User
- Join Date
- Nov 2011
- Location
- Wylie, Texas
- Posts
- 302
Got the dash wired and vents plumbed. I'm pretty happy with the way the center dash turned out. Just need to paint the entire the dash, but that's a job for another day.
05-10-2017 #17
Registered User
- Join Date
- Jul 2011
- Posts
- 239
Turned out good
07-06-2017 #18
Registered User
- Join Date
- Feb 2016
- Posts
- 31
Blitzer that's pretty much what i want to do with mine, great job
07-10-2017 #19 Registered User
- Join Date
- Jan 2011
- Location
- Boston, MA
- Posts
- 1,180
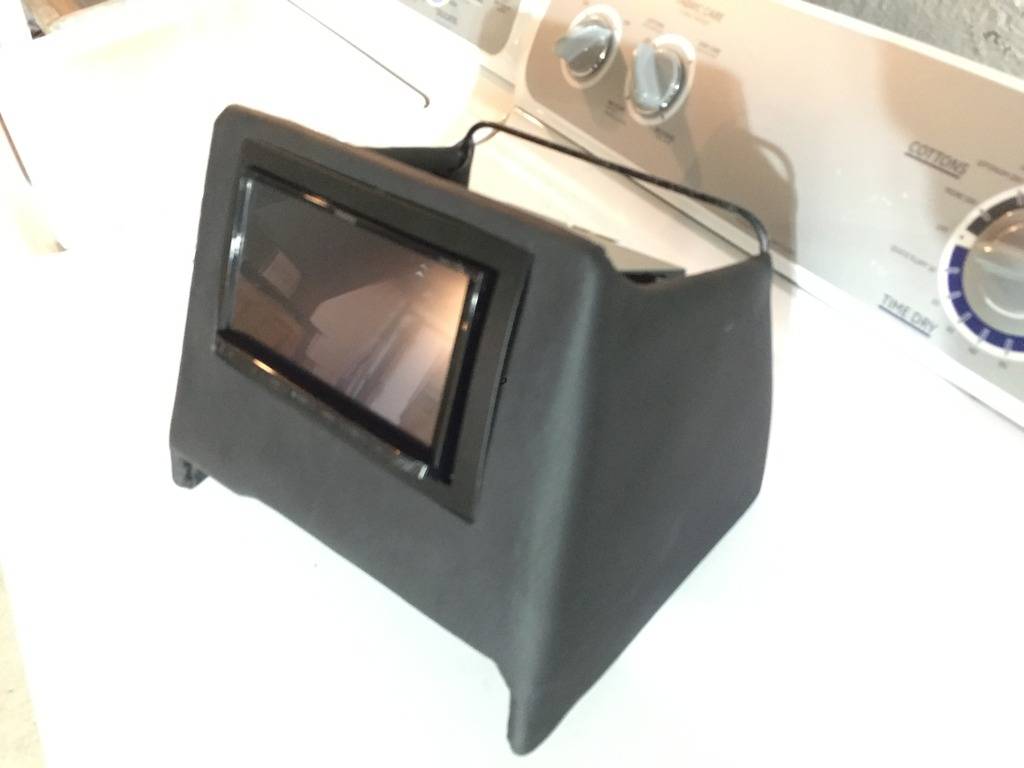
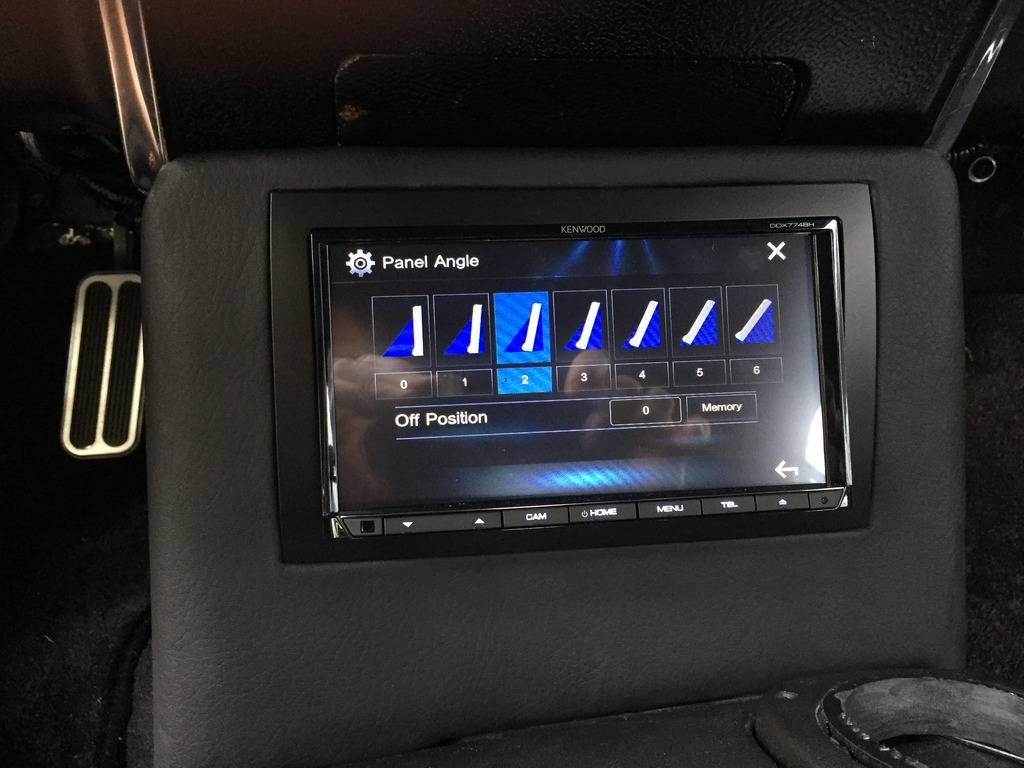
I just finished this one up this weekend to mate the 2002 Camaro console to the dash:


 Reply With Quote





