


Results 1 to 9 of 9
Thread: Butt Splicing
-
03-04-2013 #1
 Registered User
- Join Date
- Aug 2004
- Posts
- 540
Butt Splicing
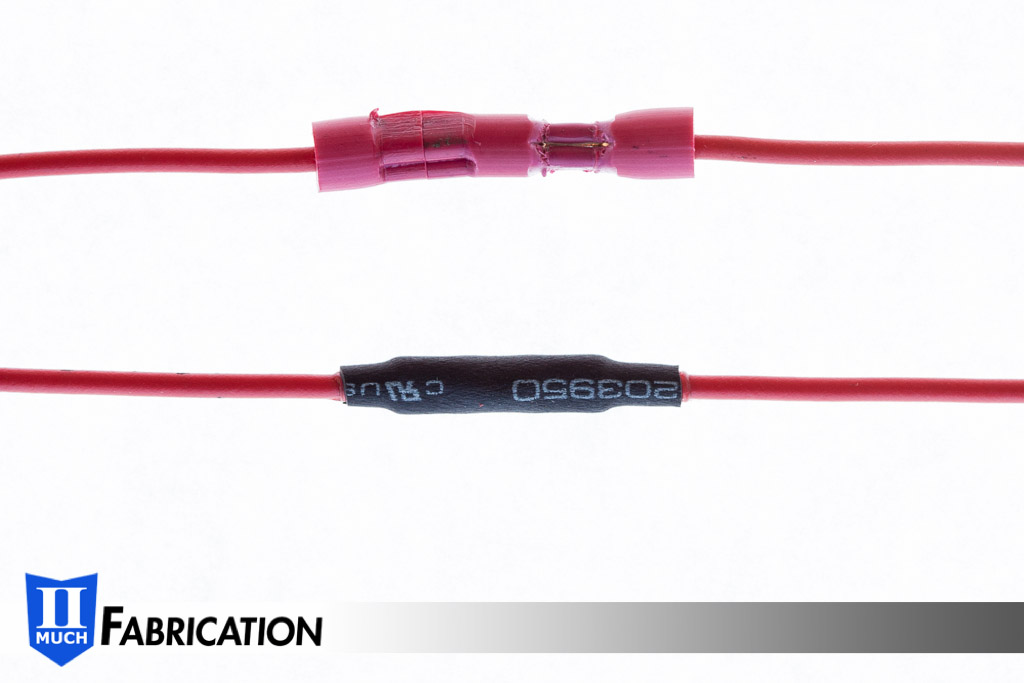
We've updated the II Much Blog with a thrilling post on Butt Splicing!
Ok, maybe its not thrilling, but one of those things I wish I'd have known about when I got started.
Butt Splice Like a Boss!
-
03-05-2013 #2 Registered User
- Join Date
- Feb 2002
- Location
- Santee, CA
- Posts
- 387

I still prefer to solder all of my splices together. After I strip the insulation, I push the wires together so that the strands interweave and then solder them together. It's usually at this point I realize I forgot to slip the shrink wrap over the wire first!

On most connections, I will wrap a bit of electrical tape over the joint before I install shrink wrap, but for connections in extreme conditions (under the car or in the engine bay), I will put several coats of liquid rubber on the connector and install the shrink wrap after it is dry.
Thanks for the information though... definitely going to start buying my shrink wrap from McMaster.
03-05-2013 #3 Registered User
- Join Date
- Aug 2005
- Location
- Hamilton, NJ
- Posts
- 4,318
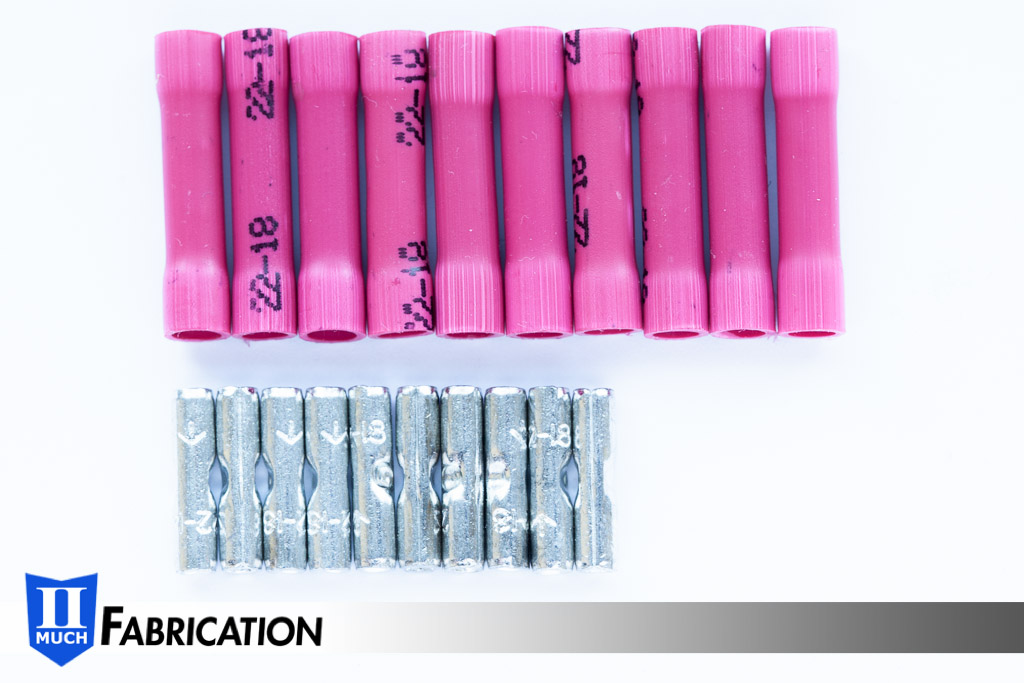
I always use these non insulated ones. I usually crimp & solder, then shrink wrap, but I’ve been moving away from the solder part unless I’m concerned about vibration or it’s in a location I don’t want to fish for. I usually get my supplies at waytek.
 Scott from NJ.
Vent Windows Forever! ...
Feather-light suspension, Konis just couldn't hold
I'm so glad I took a look inside your showroom doors
03-05-2013 #4
Registered User
- Join Date
- Oct 2012
- Posts
- 219
I do these every day and found its easiest in cramped spaces to pre-tin the wire and do a linesman twist then heat with a small iron finishing off with two layers of shrink wrap.
03-05-2013 #5
Registered User
- Join Date
- Aug 2004
- Posts
- 540
I am going to go out on a limb, because I haven't had any luck finding my source, but I remember reading somewhere that SAE recommends against soldering splices. Now i could have imagined this, so I until I find it in writing I'll assume I might be wrong. I did find an interesting .pdf that cites SAE standards http://www.navair.navy.mil/jswag/doc...inter_2012.pdf My understanding is that, especially on smaller wires, the soldering process embrittles the wire and makes it more likely to fail. I am guessing a properly soldered linesman twist holds up just fine though, so maybe my imagined guidance is to deal with people that don't know what they are doing? Originally Posted by Thephranc

Having said that, I'm not suggesting you stop soldering as you clearly know what you need to do for your application, but the blog post is targeted at folks that aren't aware they don't have to use the typical hardware store butt splice.Last edited by JohnUlaszek; 03-05-2013 at 11:16 AM.
03-05-2013 #6
Registered User
- Join Date
- Oct 2012
- Posts
- 219
I should note I don't do these spices on cars but on electrical signs.
03-05-2013 #7 -Moderator/Sponsor-
- Join Date
- Jun 2001
- Location
- Newbury Park, CA
- Posts
- 5,838
John,
Do the 3M parts have the gripping serrations on the wire bore? That type is really nice since it helps to grip the wire and reduce the chances of pullout.
There may be some information concerning the GM recommended wire splice in their Upfitter guide. I'll try and find it.
I did your type of spice extensively when doing the wiring on the Camaro. I don't like splices but they need to be done.
EDIT:
Page D15 http://www.gmupfitter.com/publicat/electrical.pdfLast edited by CarlC; 03-05-2013 at 08:56 PM.
VaporWorx. We Give You Gas http://www.vaporworx.com
03-06-2013 #8
Registered User
- Join Date
- Aug 2004
- Posts
- 540
Good call on the Upfitter guide -- love that thing
From the GM Upfitter Guide (Page D-17)discusses electrical best practices for crimping and splicing.
3. Crimp the splice sleeve on each end. Each wire must be crimped individually. For proper placement, see Figure 28. (Note: Use the appropriate crimp tool designed specifically to use with both crimp-and-seal and butt-splice sleeves.)
The method we discuss in the blog uses a high quality 3M splice with marine type heat shrink to seal the joint.Last edited by JohnUlaszek; 03-06-2013 at 08:24 AM.
03-06-2013 #9 Registered User
- Join Date
- Dec 2004
- Location
- California
- Posts
- 794
I have had 2 sources on crimping vs. soldering.
First my father who was a lineman for Pennsylvania Power and Light for 30+ years. He and I built several projects together. He had told me to use a linesman twist on solid, or an interweave on staranded. Presolder when possible, and after solder to lightly coat with dielectric grease. Shrink wrap twice, once just big enough to reach from end to end on the non insulated part then once cooled to shrink wrap again over top of the first shrink wrap obviously covering more than just the soldered area.
Second, was my automotive electrical teacher in college. He had told us to solder wherever you can using the APPROPRIATE solder. Lineman twist when possible and interweave when possible. Also, NOT all solders are the same the tin/lead content is different in most solders. The question was brought us about resistance because of the solder. When measured with a good Fluke meter the amount of resistance was so minimal its not worth mentioning. The one improtant factor to consider is the location of the solder joint in relation to any bends, twists, mounting of the wire. Copper is malleable, solder isnt as malleable. Thus leading to failures of the solder when not done correctly.
Just two little hints, when you have to do electrical tests dont shove pins into the connectors on either side. Use a small needle and backprobe the wire by inserting it a small amount into the insulation. When you take it out put some RTV silicone over the hole. You dont wear out and make the connectors at teh ends of the wire loose their tightness that way. I have done it for years and have never had a problem! Some people dont like it, but to each their own!
Second, if you use the barrel connectors and splice with them. If you look at the inside of the connector there is a joint where the piece was rolled together. On your crimper pliers there is a male (plunger) and a female (die) the plunger should be aligend opposite the joint. The joint should be aligned with the female (die) side. This promotes the most clamping on the wores and helps the barrel connector retain its strength. Dont get gorilla on teh connector either, It is possible to over do it on barrel connectors. And last but not least, you should notice there are severl different colors. Each color has a wire size that is most effective, stick to it! The last place is to cheat and skip in your wiring and have to trace the mile of wires in your car for a short, or even worse an electrical fire!
Many of you a seasoned vets, some of you are just getting into this. I hope some of you got something from this!
-Shep

 Reply With Quote



