Results 21 to 40 of 70
Thread: 1990 Road Race S10
Hybrid View


-
01-23-2013 #1

 Registered User
- Join Date
- Sep 2007
- Location
- Edmonton, Alberta
- Posts
- 291
Good call on the remote lines, pretty much a necessity. Looking at your pic and Jerome's pic of his header, I'm with you on the driver side working out well because the pan kicks back in where your downpipe would pass. The passenger side might get tight, but depending on your trans/bellhousing you should be able to get a pipe through there.
The anti-squat is very easy to determine. Here's a post i did up on S10Racer.com (great sight, mostly drag racing but a really good crew of smart/technical guys). I can totally understand where you're coming from with keeping things on a budget and just getting out racing. That's the only reason why I rolled with the leaf springs to this point. I still have my satchel link design saved for a later day, but honestly the leaf package I have now is working so well I might not ever do the link setup.
http://www.s10racer.com/board/showthread.php?t=6731....... Raising the front spring eye does raise the IC. I was also alluding to the traction bars effect on reducing leaf distortion, making the IC more constant and predictable. When a leaf spring flexes and distorts (wraps up) it will look like a J (front half only).....in my eyes that has the effect of dropping the IC.
Now on to the location of the instant center (IC)
IC location is defined as the pivot point of the side view swing arm (SVSA).
On a 4 link if we draw imaginary lines that run through the link bars this creates the SVSA. The point at which they converge is the IC location. Easy to plot and imagine. Now, on a leaf spring car the IC is simply the location of the front eye. That's it. Super easy.
To figure out the % anti-squat (AS), draw a line from the center of the rear tire contact patch, making sure it intersects the IC point, and continue it all the way to an imaginary vertical line projecting from the center of the front axle. Now you can figure out the height of this new intersection point.
Draw a horizontal line from the center of gravity to the front axle vertical line. That's your 100% AS line. If your new intersection point is above this line you have more than 100% AS. Below, well then you would have less than 100% AS.
**this is not my image** I referenced it from Herb Adams "Chassis Engineering"
A caltrac or similar device in essence will transfer the moment created by the pinion force and transfer it to the front spring section. This moment will force the front of the leaf spring downwards, giving us separation. This separation will raise the AS line. So it is possible for the caltrac to increase the anti-squat, but it doesn't do it by raising the IC. The front spring eye is still the pivot point of the suspension.
I hope that helps. It's clear in my mind, but describing it with only text is a pain.
Cheers,
Ryer
-
01-23-2013 #2
Registered User
- Join Date
- Jul 2012
- Location
- Iowa
- Posts
- 399

Ive spent some time on s10racer, not alot but some, i spend most my time on here, some on lat-g,corner carvers and alot of time on v8s10.org, the book you linked by herb adams is on my list of books to buy, i just havnt got around to doing that, prolly should now that im to the point where actually knowing that stuff would be usefull.
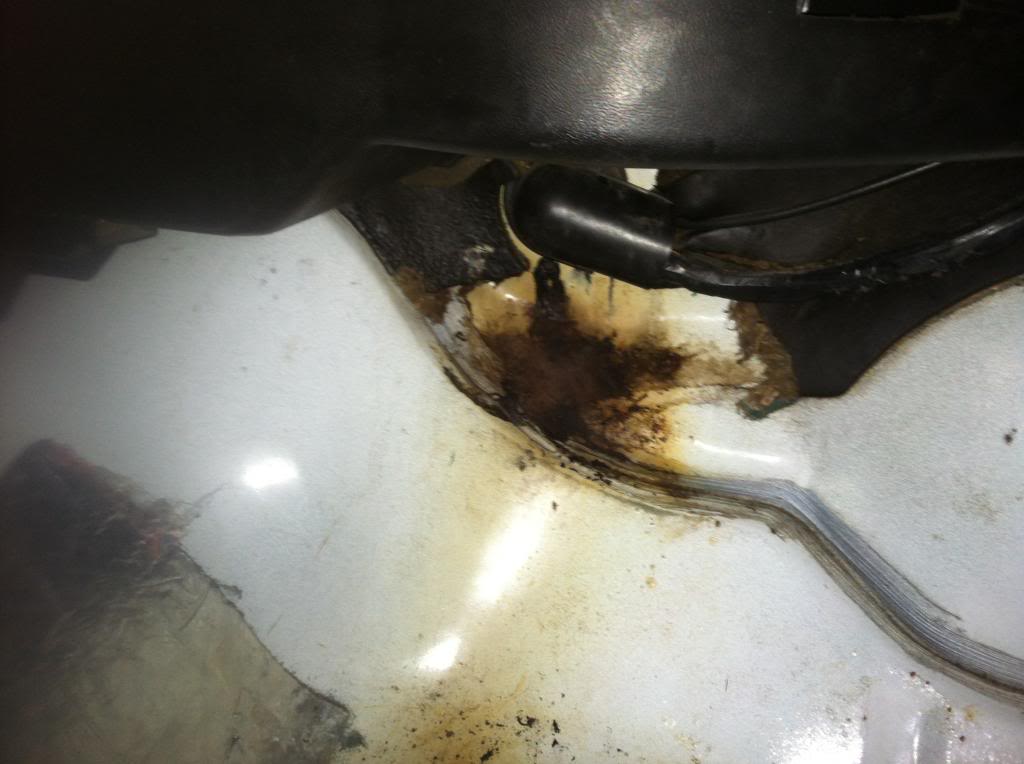
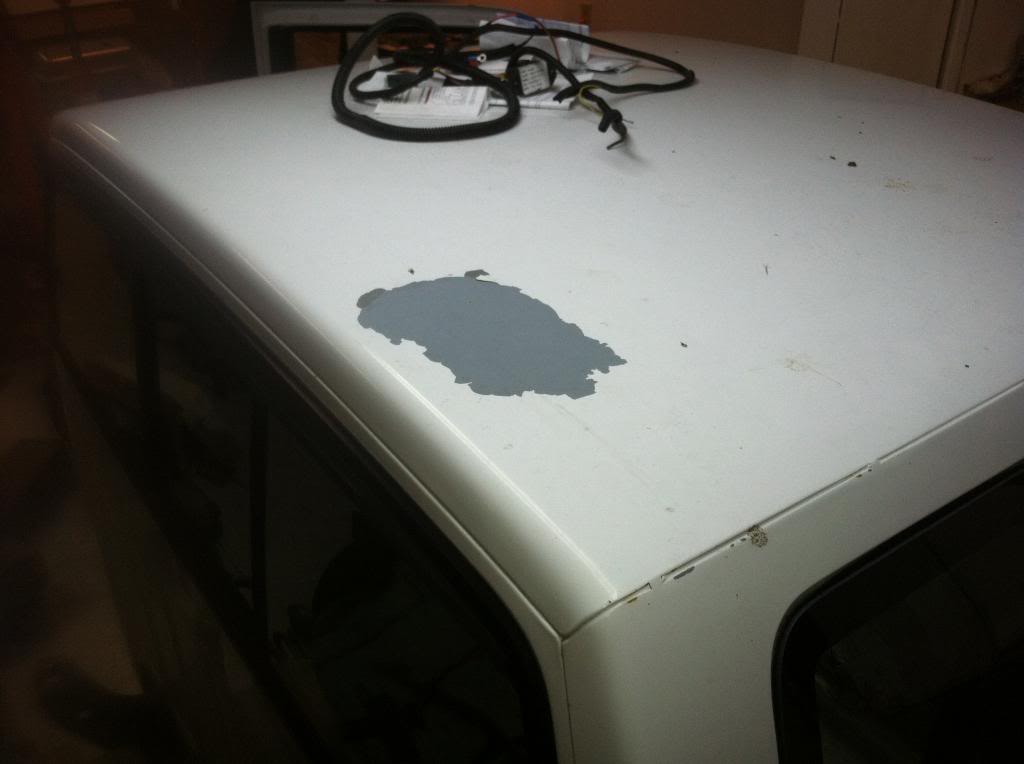
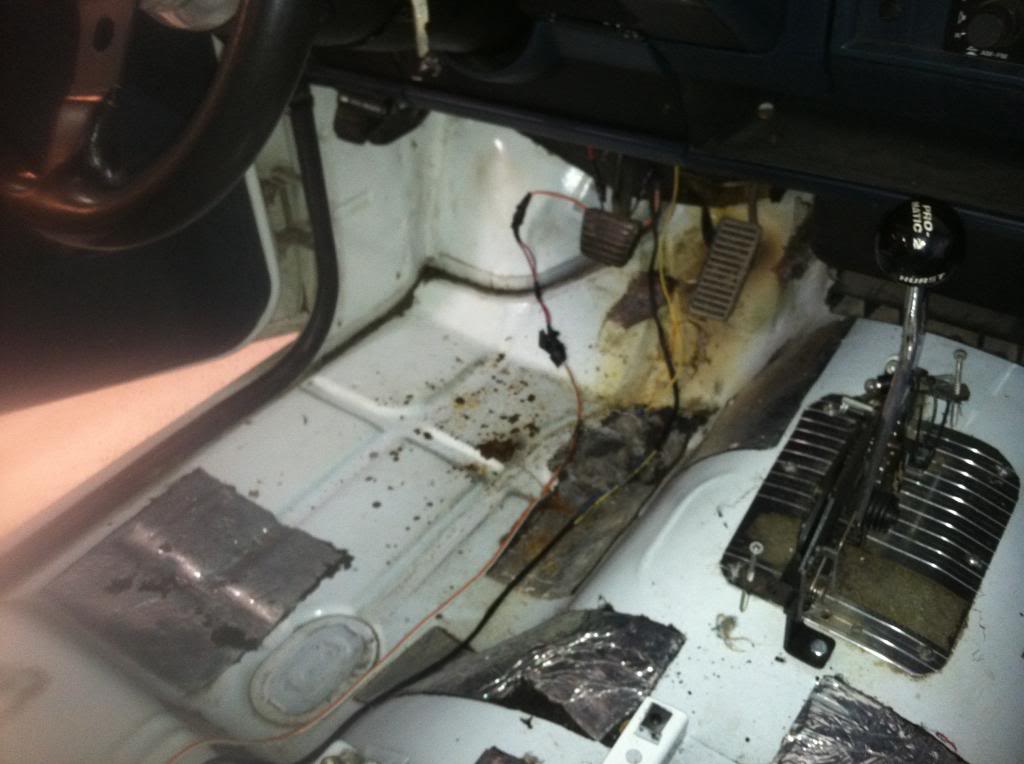
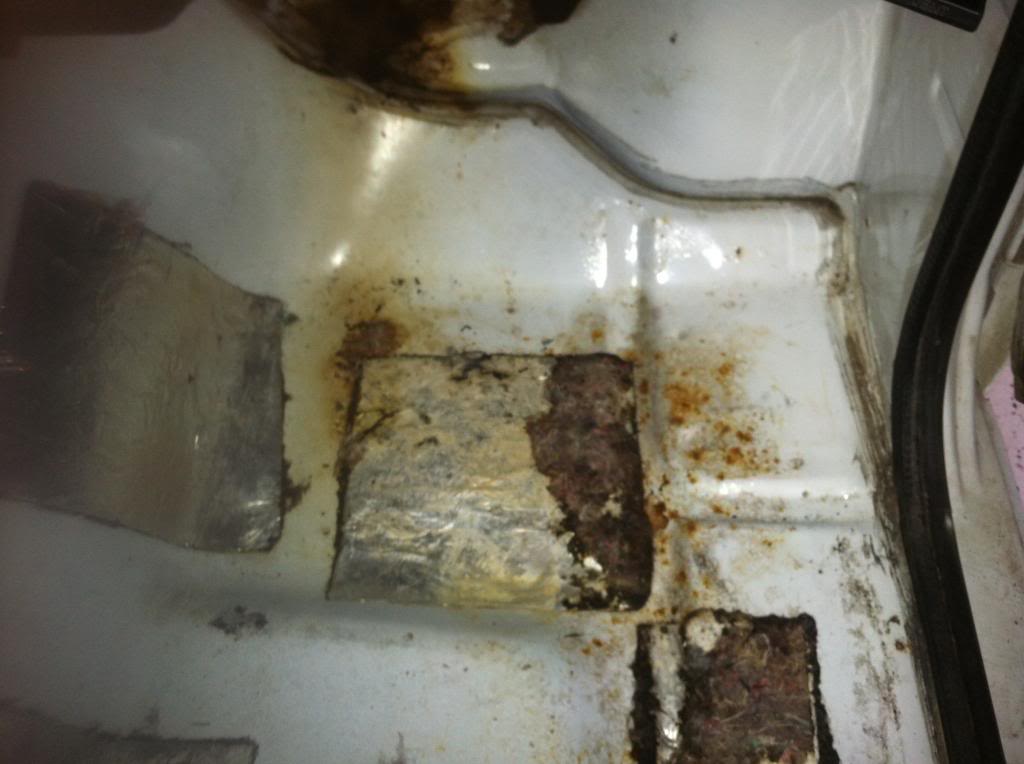
I got the interior tore out tonight, Im really happy with how little rust on have in this truck, only a few spots where the paint is bubbling and a few spots where the paint is flaking off, i dont think this is the original paint to the truck, i think it was white to begin with but i think it just got a cheapo job done, i found a few runs in the paint but overall pretty good, ill have to decide what to do with the paint once i get done with the fab work, it will stay white i know what much
here is where when i blew the header gasket out it cooked the passenger floor, i will prolly notch this area out about an inch or so to give it a bit more room
this is the roof where the paint is flaking off
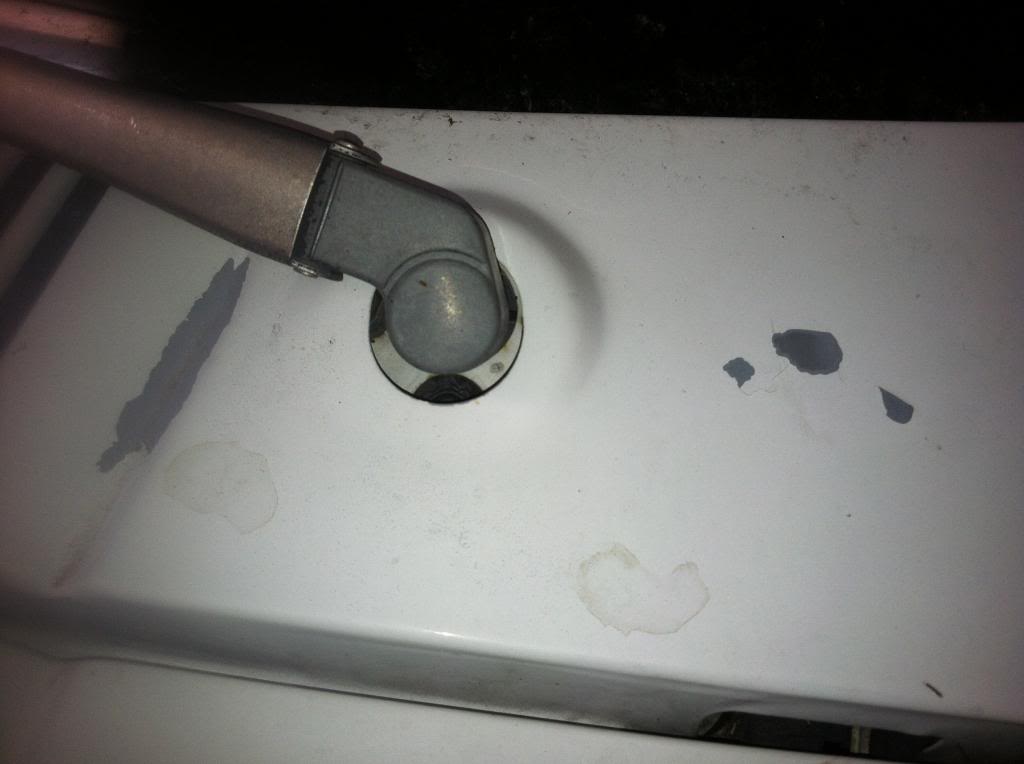
this is the panel with the wiper blades what ever that piece is called
only bubbles i could find on the body so far,this is near the driver side rear corner at the bottom, the bed was totally clean so no pictures to show from there
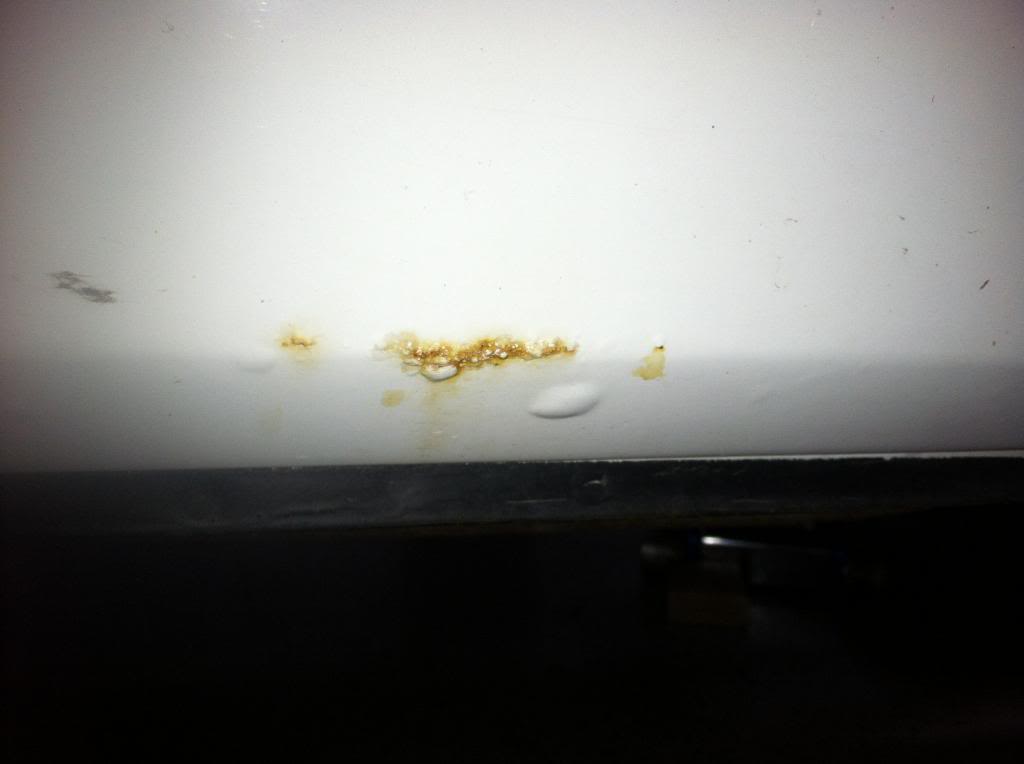
and then this is all thats in the floor, nothing to be worried about at all
 Miles Boyer
The car hobby is dangerous,if the speed doesn't kill you, the cost of parts will.
91 V8 S10
88 Cutlass Pro-Tour
97 Chevy lifted Z-71
96 Corvette
01-26-2013 #3
Registered User
- Join Date
- Jan 2013
- Posts
- 20
Very clean s10. I have a 88 s10 single cab short bed im building up i have yet to find any rust and its still in orginal red paint
02-06-2013 #4
Registered User
- Join Date
- Jul 2012
- Location
- Iowa
- Posts
- 399
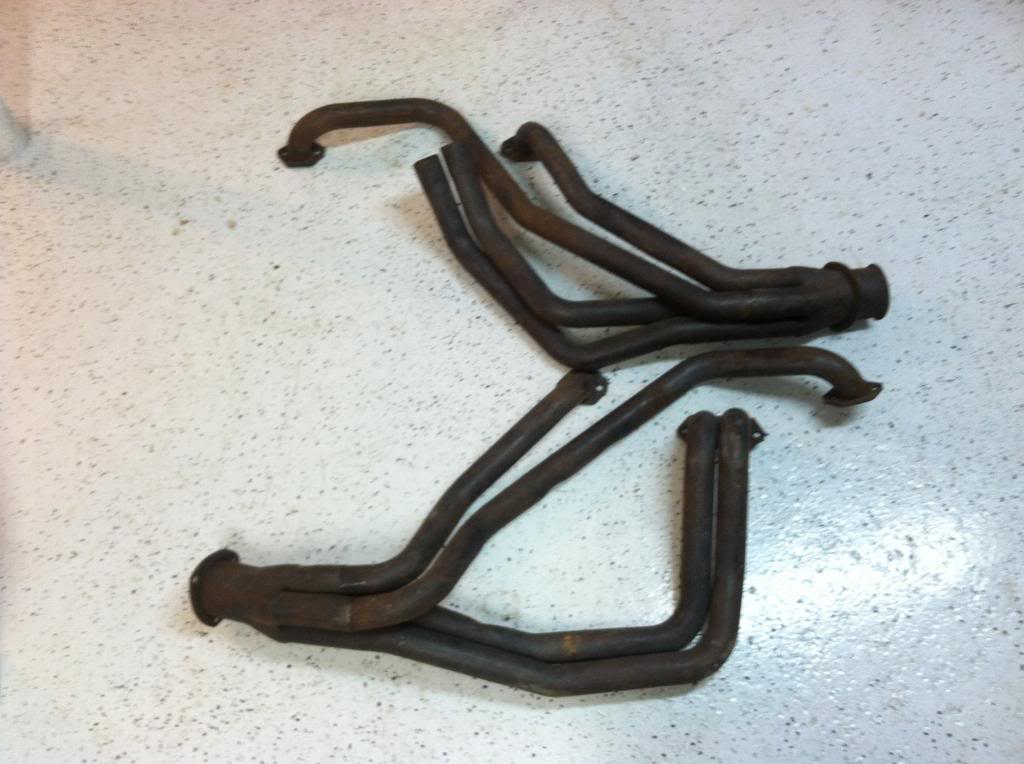
So Ive been sorta busy working on new shelves for the garage and some projects around the house, but I did get some headers at a decent price, they are slip fit ones, I figure with these I should be able to mock up how I need the headers to be shaped and just tack weld the pieces together and then go down to the local speed shop and compare what I have to whats hanging on the wall. Much cheaper then buying a good set of headers and then hacking them to pieces if they didnt fit properly. Does anyone know where I can buy some of the missing pieces that I didnt get with these headers? You can see on the top set that Im missing the flanges that bolt to the head and then Im missing some pipe, Im looking for a cheap kit with a few bends in it and the flanges to do a sorta custom mock up, if these do turn out nice enough I wont bother shopping around and then Ill just get these ceramic coated.
 Miles Boyer
The car hobby is dangerous,if the speed doesn't kill you, the cost of parts will.
91 V8 S10
88 Cutlass Pro-Tour
97 Chevy lifted Z-71
96 Corvette
02-12-2013 #5
Registered User
- Join Date
- Jul 2012
- Location
- Iowa
- Posts
- 399
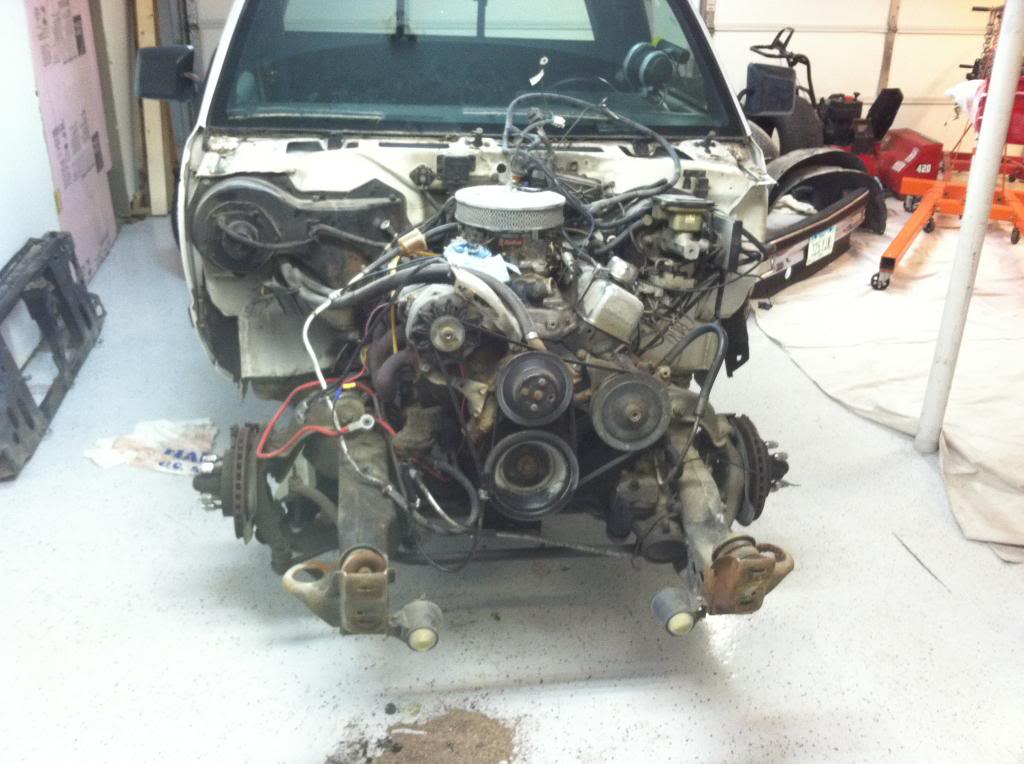
I got the front clip off tonight, the plan for after work is to get the motor and tranny out then clean some stuff up and then make a huge notch in the front cross member to fit the oil pan. Shouldnt be to hard to get the motor and tranny out with there being almost nothing in the way.
Does anyone know of a cheap place to get a 17x9.5" rim with 4.5" of BS, and a used 275-40-17 tire, i want to get the cheapest stuff i can to test fit the tire before i buy the good stuff and find out doesnt work.
 Miles Boyer
The car hobby is dangerous,if the speed doesn't kill you, the cost of parts will.
91 V8 S10
88 Cutlass Pro-Tour
97 Chevy lifted Z-71
96 Corvette
02-13-2013 #6
Registered User
- Join Date
- Aug 2007
- Location
- Albemarle, NC
- Posts
- 1,171
ive got some used tires that sixed, but shipping would be prohibitive. check with your local vette guys. lots of them run that size, and theyll probably give you some take offs. www.corvetteforum.com
and im pretty sure that will clear on the rear, but mine was all muct maxed out with a 245/50/16 on a 16X8 up front.Michael Crawford
1970 plymouth Duster back under construction:
https://www.pro-touring.com/showthre...uring-makeover
1987 GMC S15 https://www.pro-touring.com/showthre...ct-drivabeater
02-13-2013 #7
Registered User
- Join Date
- Jul 2012
- Location
- Iowa
- Posts
- 399
Shipping prolly wouldnt be any worse then $20-$30 I bet and I only need one tire,so shoot me a price you would want for one,the tire just needs to hold air thats all im looking for, its just the mock up for the front, I want to see if its possible with a little massage here and there to get it to fit, and vette guys in iowa,lol, they never let their cars out. The sand and salt from winter doesnt get washed off the road till about may or june and then heaven forbid they drive in the rain during the summer and then back in the garage by october because its snowing, those guys are a silly bunch,takes them years to burn up a set of tires. Good idea on the corvette forum ill give it a look.
Miles Boyer
The car hobby is dangerous,if the speed doesn't kill you, the cost of parts will.
91 V8 S10
88 Cutlass Pro-Tour
97 Chevy lifted Z-71
96 Corvette
02-13-2013 #8
Registered User
- Join Date
- Jun 2010
- Location
- Georgia
- Posts
- 2,178
looks like a cool build. These S10's are narrow and can get some great speed when compared to the wider PT cars.
02-13-2013 #9 Registered User
- Join Date
- May 2011
- Location
- Northwest, MO
- Posts
- 101
If you really want to get an S10 to handle better see if you can't set the engine back as far as possible and move it down as far as possible. Mine is moved back almost 1' and down almost 9" and it still isn't 100% behind the front suspension center line.
As for stiffening the frame, I made patterns and plate out of sheet steel to box in the frame. My frame is considerably shorter than stock, but it might be feasible to do each side with two long pieces.Tyler Gibson
There's nothing like building up an old automobile from scratch and wiping out one of these Detroit machines... That'll give you a set of emotions that will stay with you... Know what I mean? Those satisfactions are permanent...
02-13-2013 #10
Registered User
- Join Date
- Jul 2012
- Location
- Iowa
- Posts
- 399
Id love to do the engine set back, but I think right now I want to keep the fab work to a minimum, but I have but some thought into it, Ill make that choice this weekend when I start test fitting the engine. If I go that route Ill do the wheel barrow trick and use that for my firewall set back, the plus to doing that is maitenance will be a breeze to get to anything since the motor wont be sitting right up against the firewall.Right now the dizzy is about 1/4" from the firewall, its pretty tight and im not sure how the previous owner did any sort of work on this thing, thats prolly why is in such sad shape. Im also not sure how low I could get the motor or how I would even get it lower then it is, the bottom of the frame will only have a 4" clearance when im done and I dont want anything sitting lower then the frame, I have to keep some sort of street manners. Originally Posted by AutoX_a_Truck?

As far as boxing in the frame that will happen without a doubt, Im still looking into x-bracing, the jury is still out on that if its really needed a mini truck like this. The full size guys do it without thinking but they also have about 6 or 7 more feet of frame to twist then I do. I seen a very simple picture somewhere that had 2 X's in it,one sitting right above the tranny that sits right below the cab, and then the second starts right behind the cab and goes to just about the rear axle.
If you have any pictures of the motor mounts you used to get your engine lower that would be amazing. And what thickness steel should I use, I can get 3 /16 for fairly reasonable I, I have this friday off so I will have the time to go shopping around that day.
Tyler do you have a build thread for your truck? There are some things I would like to look at to get some ideas, mainly roll cage stuff, i dont want a cage yet but I would like to weld some brackets on the frame to place the cage where i would need it, if in the future i ended up doing a cage.Im trying to keep this truck fairly civil to a point, I have a g-body what will get built after this truck is done and its getting the full cage,LS engine t56 combo and basically a track car that is street legal.Miles Boyer
The car hobby is dangerous,if the speed doesn't kill you, the cost of parts will.
91 V8 S10
88 Cutlass Pro-Tour
97 Chevy lifted Z-71
96 Corvette
02-13-2013 #11
Registered User
- Join Date
- May 2011
- Location
- Northwest, MO
- Posts
- 101
I just have the S10 frame, not the S10 body so I can't help much with the roll cage. Wasn't sure how wild you wanted to go with modifying the firewall, I just thought I would suggest moving the engine back and down as far as possible to keep front end push down. Probably couldn't go near that much with the S10 cab, but every bit helps. Not sure how much lower you can go mounting to the crossmember.
3/16" for boxing the frame would be more than enough. I think I used 1/8"
http://killbillet.com/attachment.php...2&d=1263849781
The motor mounts are custom fabricated and mount the engine solid to the backside of the lower control arm mounts. The oil pan isn't lower than the front crossmember.
http://killbillet.com/attachment.php...1&d=1264972651Tyler Gibson
There's nothing like building up an old automobile from scratch and wiping out one of these Detroit machines... That'll give you a set of emotions that will stay with you... Know what I mean? Those satisfactions are permanent...
02-18-2013 #12
Registered User
- Join Date
- Jul 2012
- Location
- Iowa
- Posts
- 399
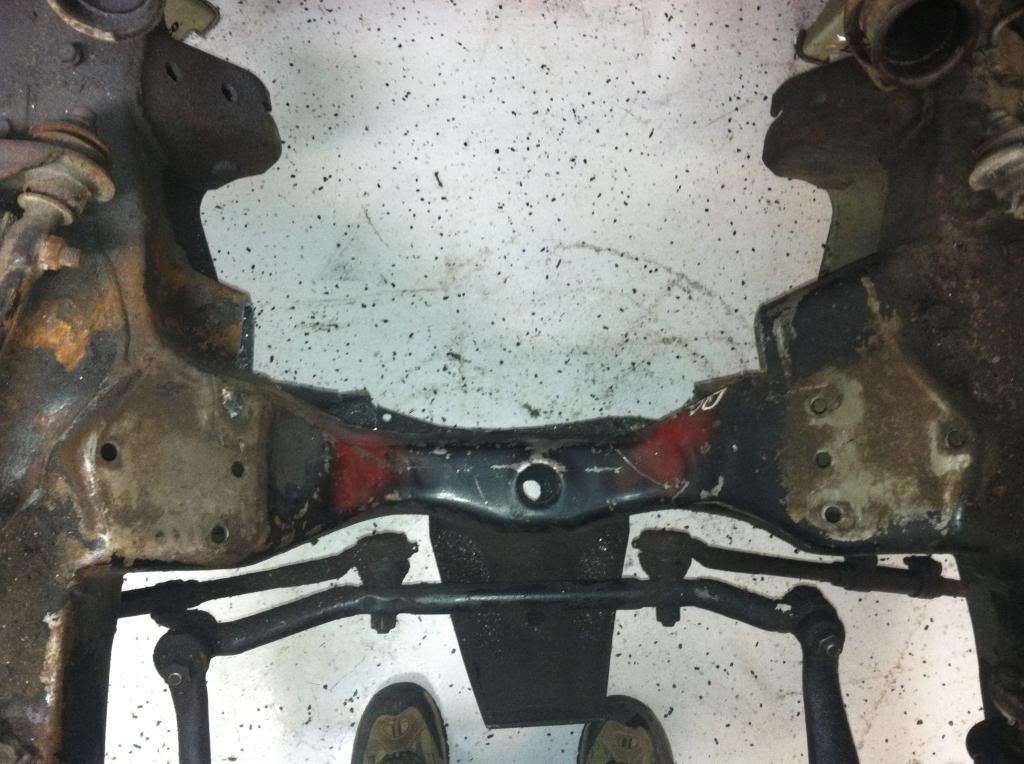
So I got alot of work done this weekend, got the old motor and tranny yanked out. Then took the entire interior out and all the stuff off the firewall, taking the dash out took me alot longer then I would of thought it would of, took around 5 hours by the time i labeled all the wires and make sure to mark all the bolts also. Then i got to the fun part of trying to figure out how to get that massive oil pan on my new engine in, on the first test fit before i did any cutting i was a bit worried, if i left the engine mounts in the same place that the old motor had them i would of had to cut the entire cross frame out and that would be a no-go. So all said and done i have moved the engine back about 3 or 4 inches, had to cut the firewall out a bit and notch the frame about 2 1/2".
with the motor out

all the stuff off the firewall
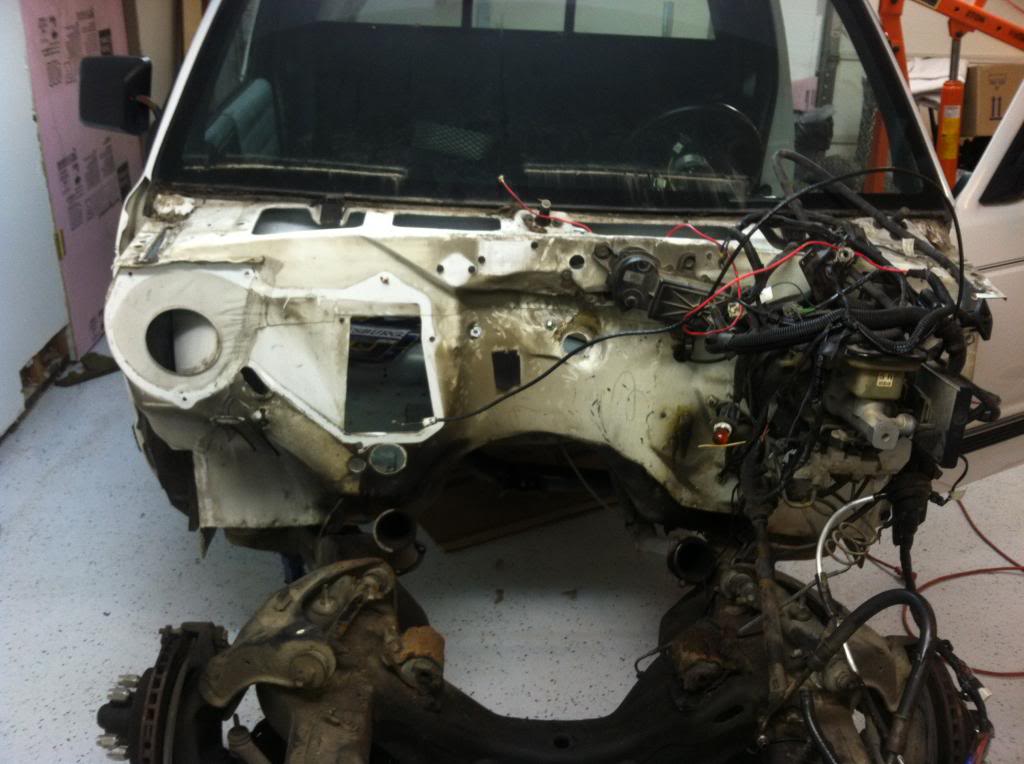
dash and everything gone
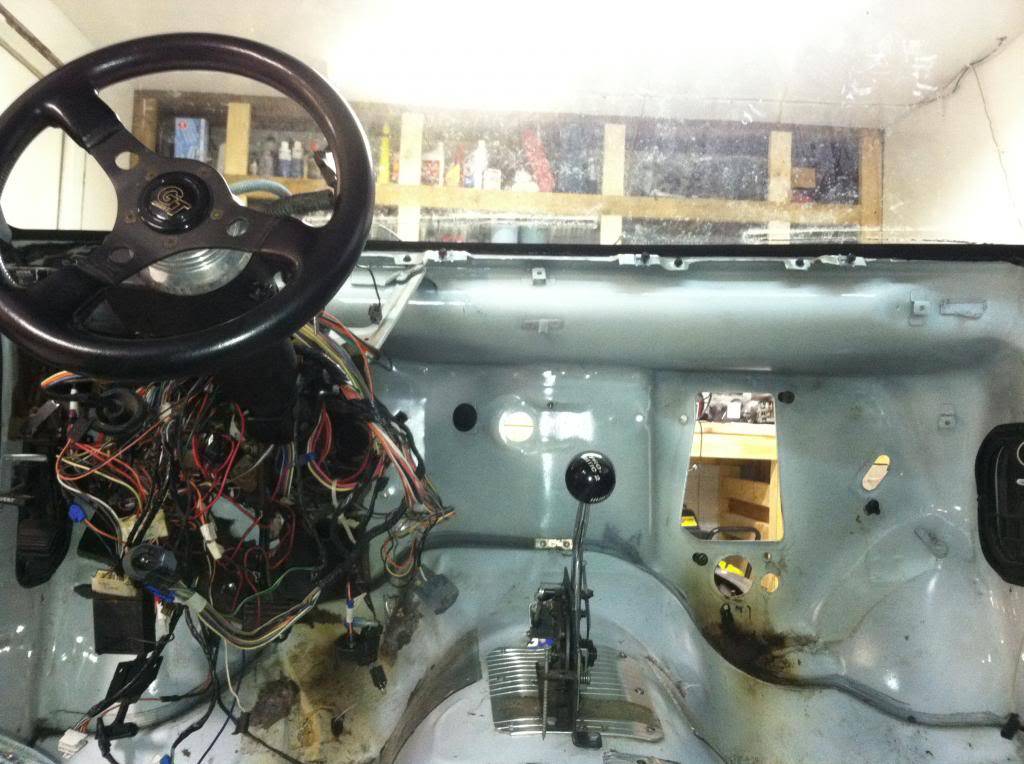
this was the first cut, it ended up much larger then the first set of cuts, i didnt want to cut out to much then have to weld more in, took about 12 test fits to get this fairly close, you can see the cut that i had already done on the top part of the frame and the "box" hadnt fallen yet till i had the bottom cut
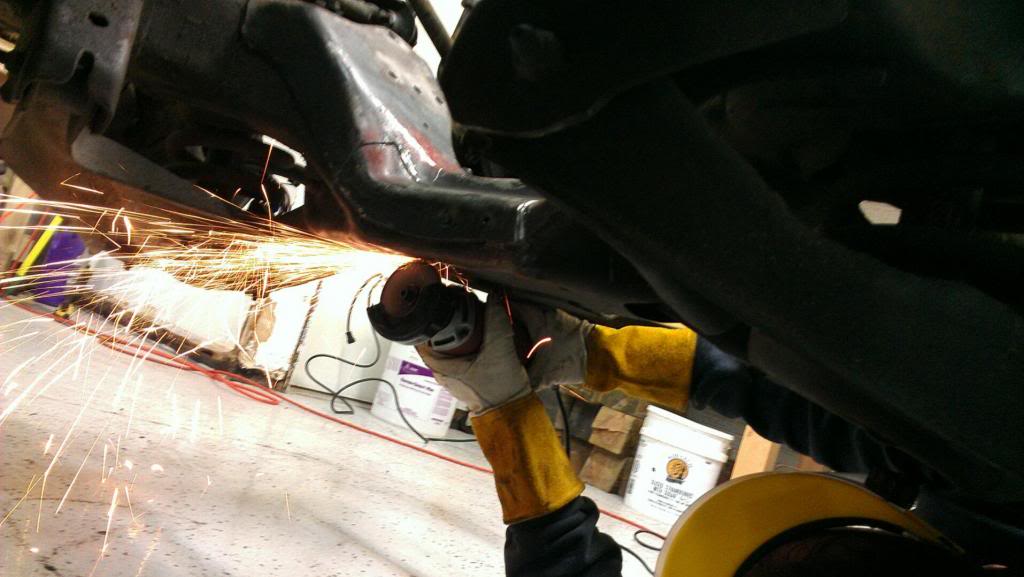
my buddy cutting the motor mounts out, i couldnt figure out how to get the nuts on the underside of the engine mount so we just cut the heads of the bolts off
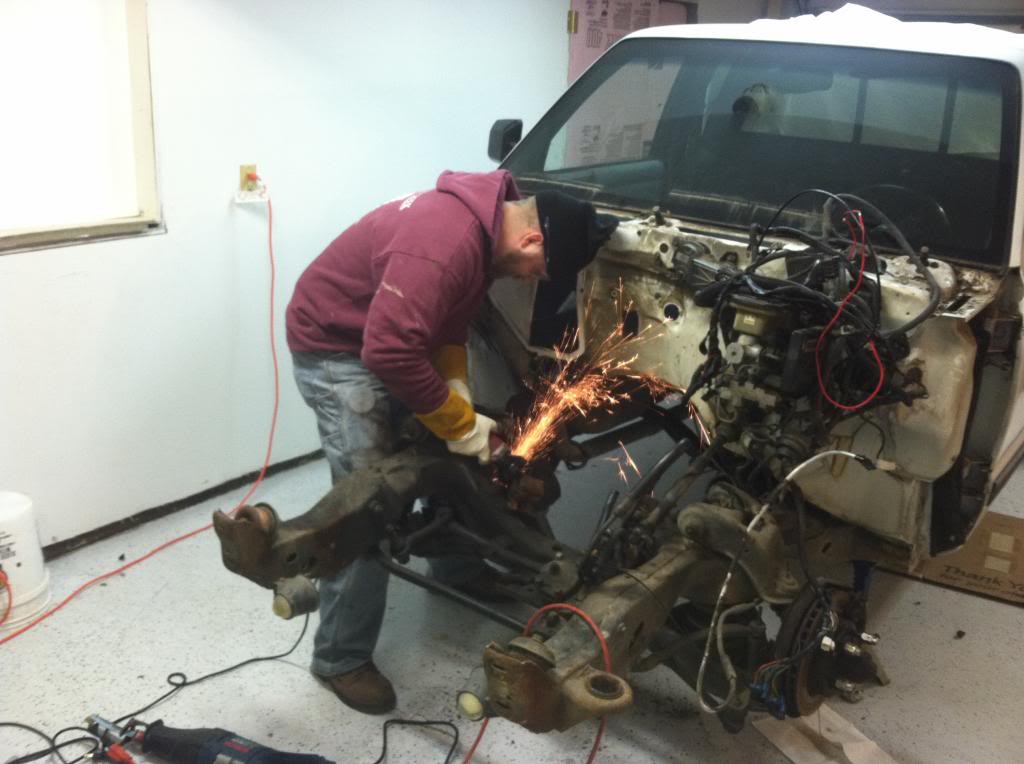
the hole i made in the firewall, more will end up being cut for the distributor but as of right now the engine will sit pretty close to where it should without the pan hitting anything
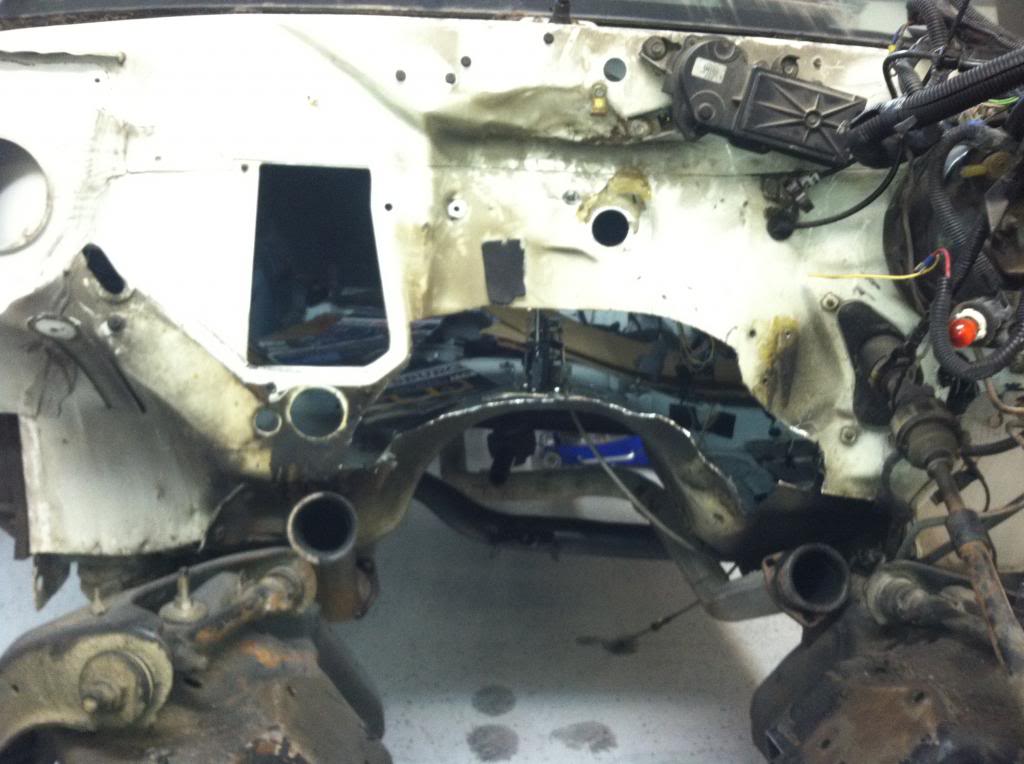
this is whats left of the frame, i should of took a before pic but i didnt think of it till after i had started cutting, you can see how far i had to cut in, and this was with moving the engine back the 4" or so, that oil pan is huge
 Miles Boyer
The car hobby is dangerous,if the speed doesn't kill you, the cost of parts will.
91 V8 S10
88 Cutlass Pro-Tour
97 Chevy lifted Z-71
96 Corvette
02-20-2013 #13
Registered User
- Join Date
- Jul 2012
- Location
- Iowa
- Posts
- 399
So i sat the motor in tonight and took some pictures to show you guys and i need some help or some ideas.
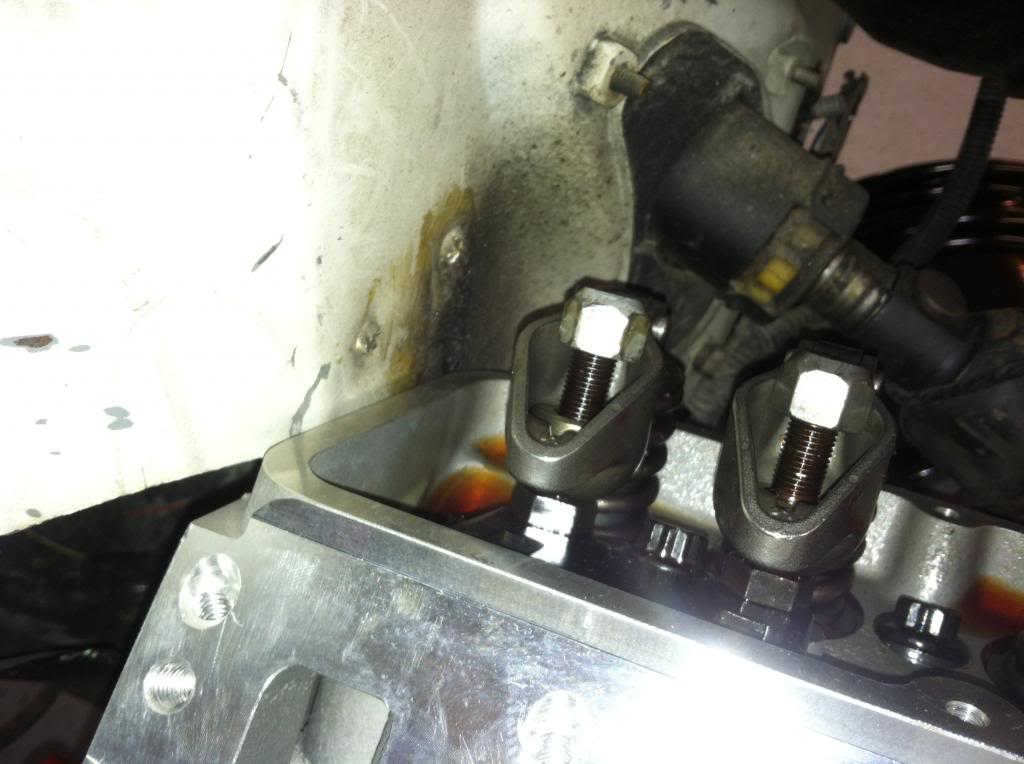
1. where my gas pedal mounts to the firewall will prolly have to be cut out, the motor actually is touching the firewall in this place, so i will need some help with what to do for my pedals
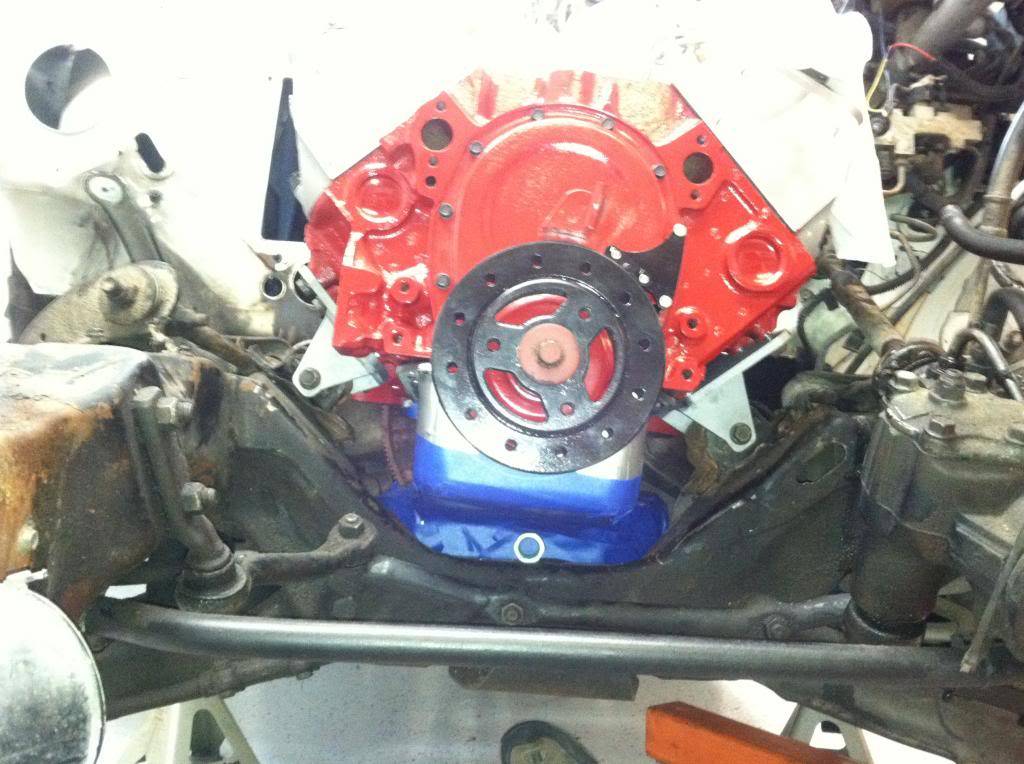
2. the bottom of my oil pan sits about 2-3 inches from the frame, if i drill some holes in my motor mount to lower it is this really going to screw up my driveline angles or with this not be that big of a deal
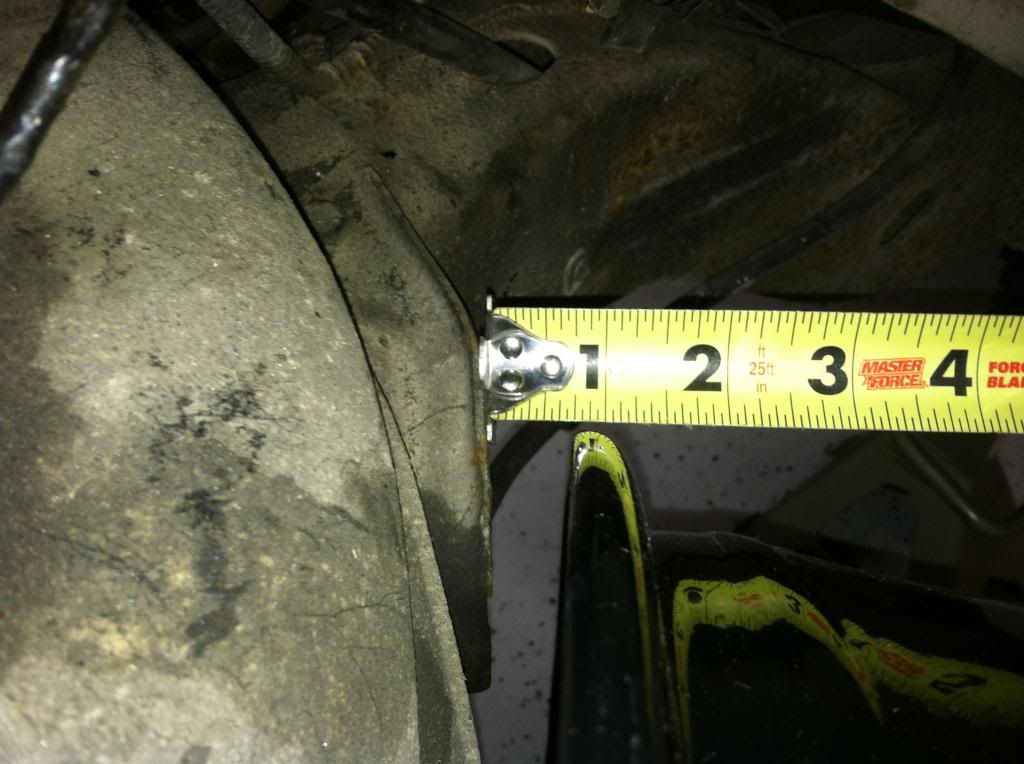
3. i got my mock up rims but this did no have the correct back space on them so i just threw some washers behind this rim to put my BS where is should be, how much room will i need for clearance
4. i will 100% no doubt in my mind have to make a set of headers, do you guys know of any cheaper kits that are decent, i already have the majority of what i need from the set i already have that i will be chopping up
the holes are where the pedal mounts to, the engine is actually touching the firewall in this pic
this bolt in the center of the pic is a little large then 1" tall, so i have between 2 and 3 inches of room there, can i trim my mounts down to get the engine to sit lower?
these two pics are with the shims in and the suspension at full drop, i will be getting tube uppers and a belltech spindle so im sure the amount of room will change but how much room will i need for proper clearance for a tire

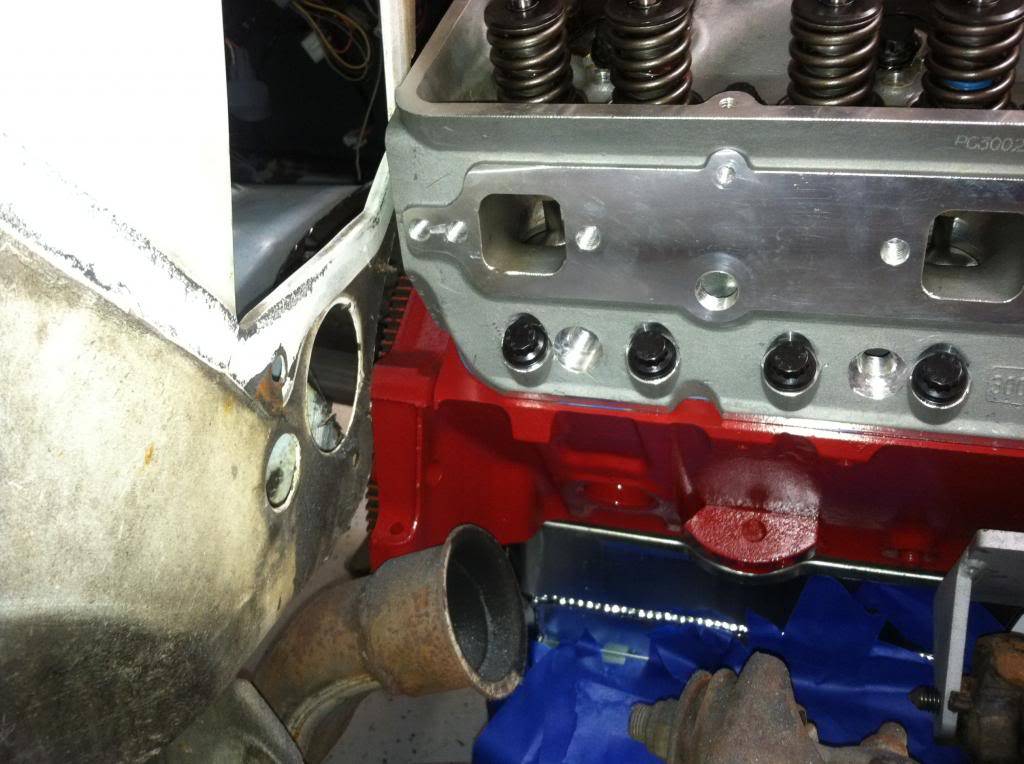
this is to give you an idea of how far back ive moved the motor, this is where the old shortys hooked up, i will have to cut more out of my floor to get the headers to fit and to get the tranny to even fit and thats why i wonder about the driveline angles and what you guys have done
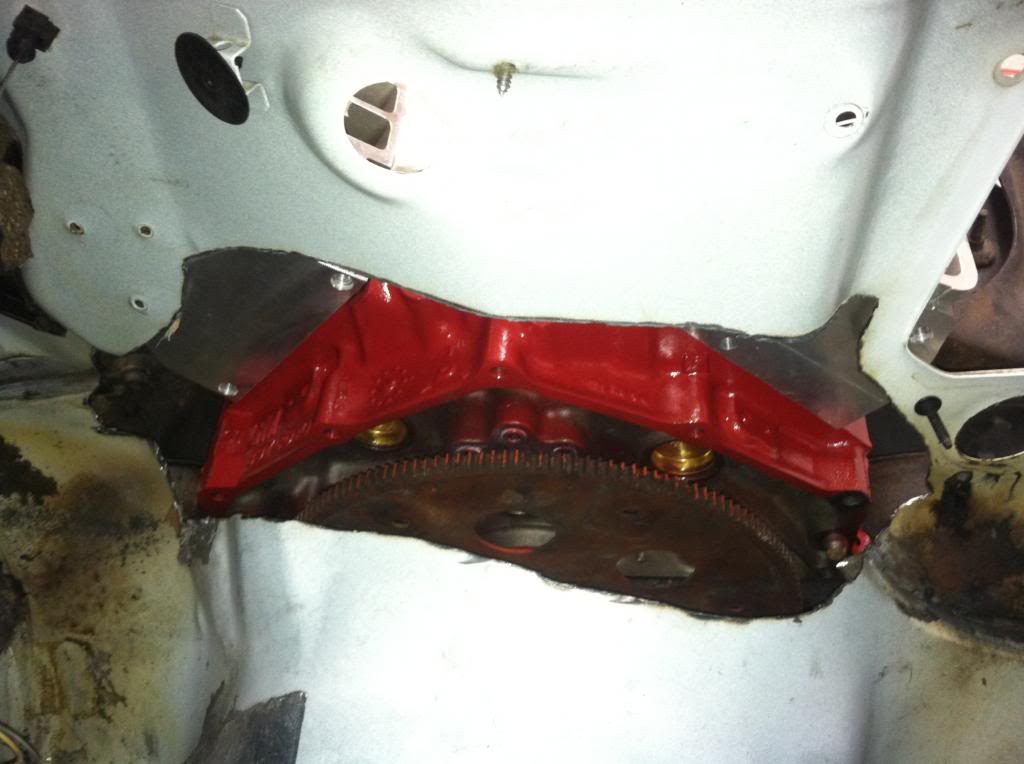
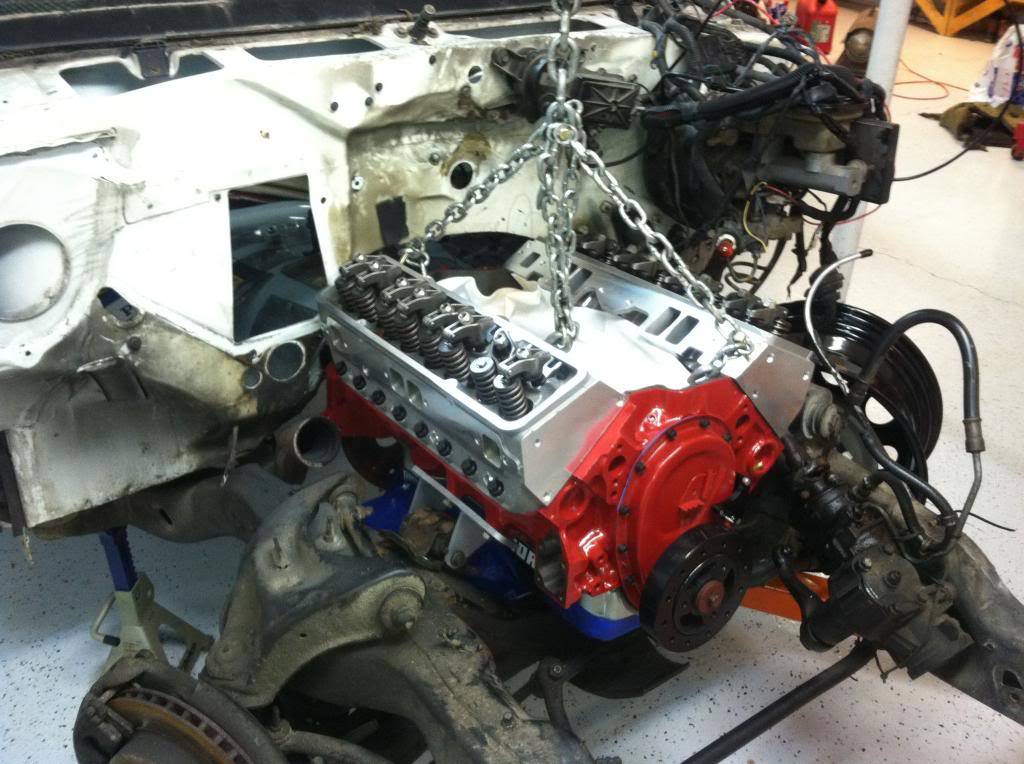
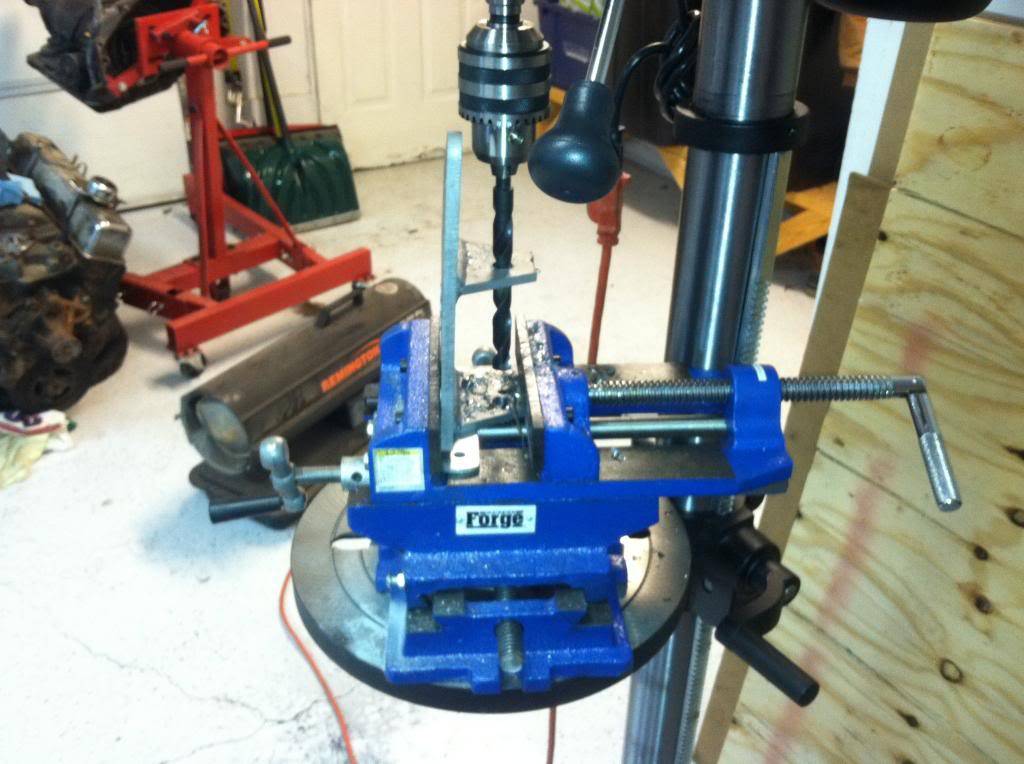
this is a very crude mock up, but its within a 1/4" of where it prolly needs to be, i need to buy a drill press to drill some holes in the motor mount so i get bolt everything down correctly
 Miles Boyer
The car hobby is dangerous,if the speed doesn't kill you, the cost of parts will.
91 V8 S10
88 Cutlass Pro-Tour
97 Chevy lifted Z-71
96 Corvette
02-21-2013 #14
Registered User
- Join Date
- Jun 2010
- Location
- Georgia
- Posts
- 2,178
that's one of the hardest parts of any build. One change "here" leads to 10 changes "there".
02-21-2013 #15 Registered User
- Join Date
- Sep 2006
- Location
- New York, NY
- Posts
- 458
I don't remember having an issue with the motor touching the firewall. If I remember right, the cab mounts are slotted. It may be worth checking if your cab is pulled all the way back.
Also, you may want to check that you are using the correct mounts. It looks like you're using the 2.8L rubber mounts, but the "shells" look like the 4WD mount to me. I'd recommend the mounts here.
02-21-2013 #16
Registered User
- Join Date
- Jul 2012
- Location
- Iowa
- Posts
- 399
the only reason the motor hits the firewall is because i have that massive oil pan that i had to make room for, and ive cut up as much as i feel comfortable with on the frame, if i can slide the cab back wont that mess with the rest of my body panels when i put them on? im not a body man and that sort of thing really scares me. Originally Posted by jerome
good call on the motor mounts, it does look like i have the 4x4 mounts, im going to drill some holes in mine like the 2x4 ones have to lower the motor and see what that does and then if that doesnt do the trick ill have to get some of the ones you listed, and ill bet money that bushing part is the stock v6 stuff, ill be buying new v8 ones once i get some more mock up stuff done and then do another parts orderMiles Boyer
The car hobby is dangerous,if the speed doesn't kill you, the cost of parts will.
91 V8 S10
88 Cutlass Pro-Tour
97 Chevy lifted Z-71
96 Corvette
02-22-2013 #17
Registered User
- Join Date
- Jul 2012
- Location
- Iowa
- Posts
- 399
I need some advice, i will be ordering all of my suspension this weekend and i got to thinking about the drop spindles that i will be getting. Since the tie rod almost already hits the rim if i put on drop spindles wont that raise the rim mounting point and cause the tie rod to be 2" lower and then cause issues? Or do you guys its possible i already have drop spindles and would there be a way to check, i know this truck is lower then stock i just dont know the PO did it, i assumed he cut the springs by the way i did everything else on this truck.
here is what is on there right now

so with help from others in another post on this forum and i do indeed have drop spindles, this is the picture i went off of
 Miles Boyer
The car hobby is dangerous,if the speed doesn't kill you, the cost of parts will.
91 V8 S10
88 Cutlass Pro-Tour
97 Chevy lifted Z-71
96 Corvette
02-26-2013 #18
Registered User
- Join Date
- Jul 2012
- Location
- Iowa
- Posts
- 399
So i managed to get the motor right where i wanted it this last weekend, I went ahead and ordered most of my suspension stuff so i can start on that this week. My plans are to get the cab off this week and do the suspension and all the frame work. And my pretty new radiator came in, I got it from superior radiators, I think they did a good job on it.
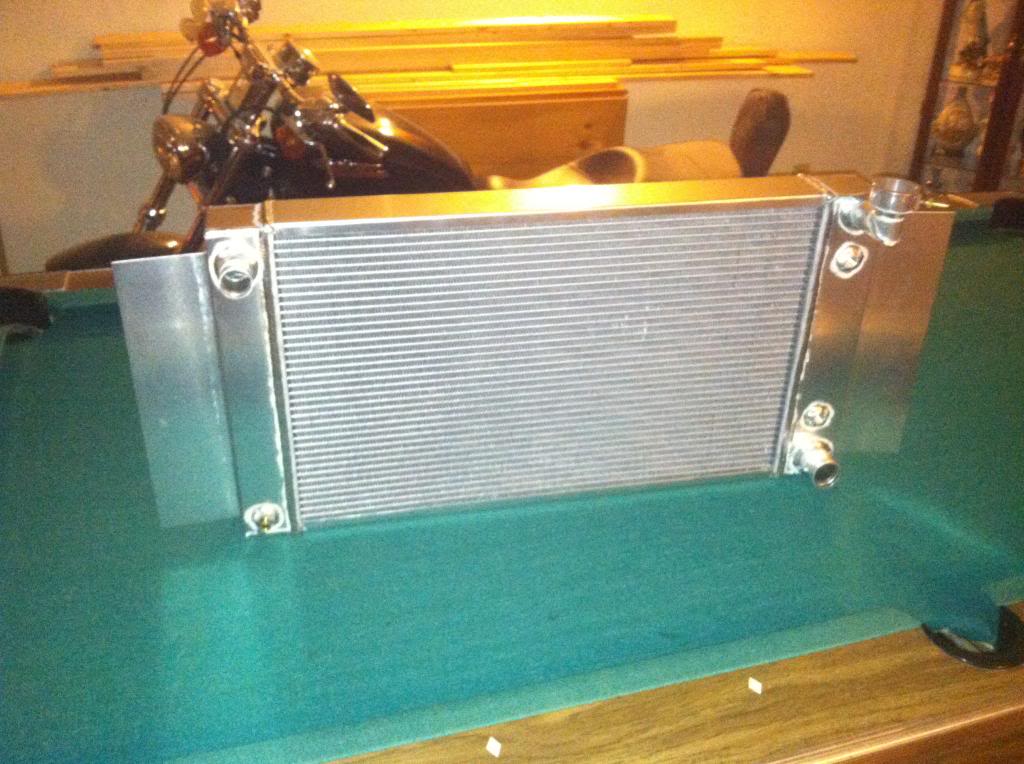
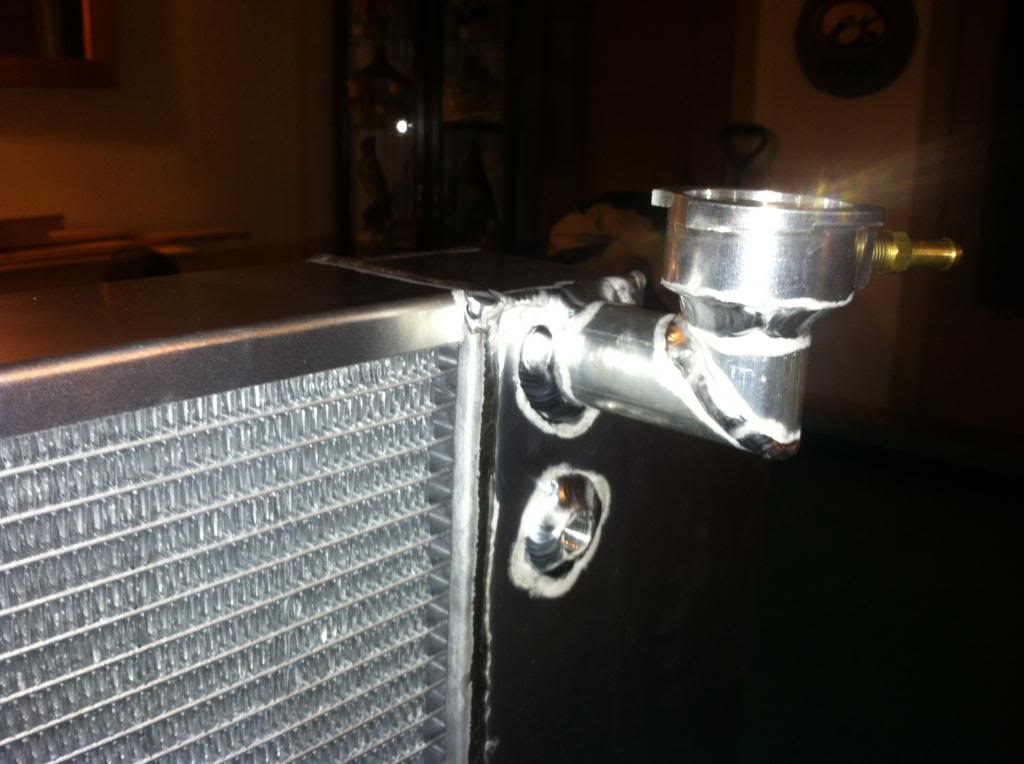
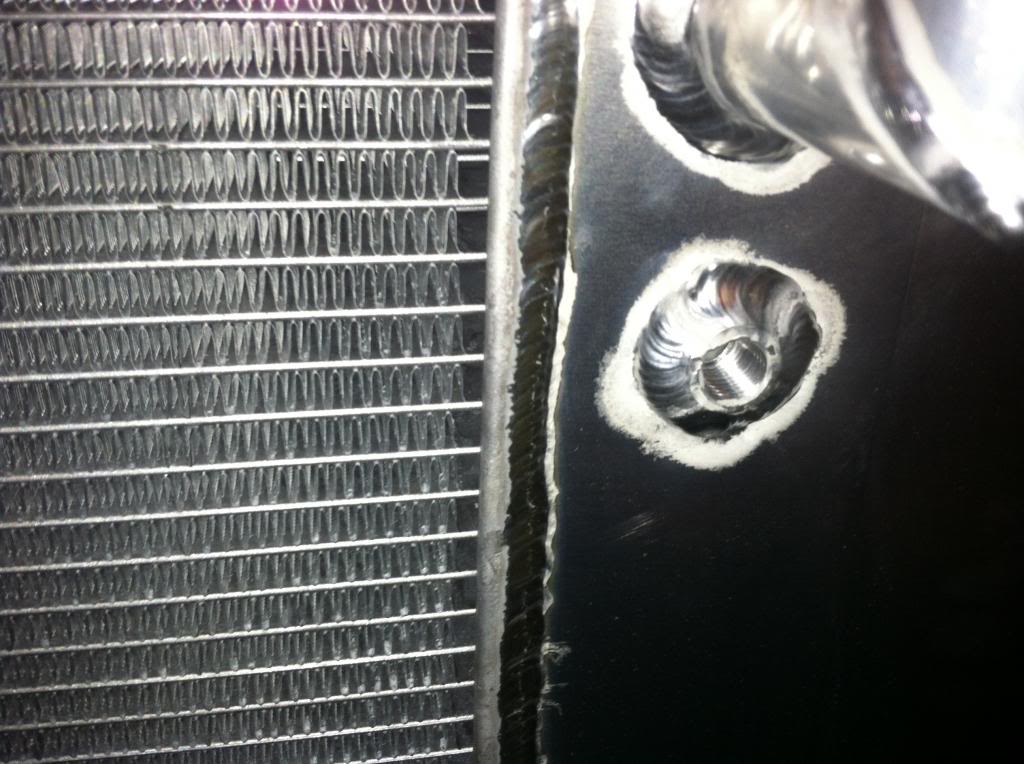
And one of the new tools i got, i love this thing.
 Miles Boyer
The car hobby is dangerous,if the speed doesn't kill you, the cost of parts will.
91 V8 S10
88 Cutlass Pro-Tour
97 Chevy lifted Z-71
96 Corvette
03-13-2013 #19
Registered User
- Join Date
- Jul 2012
- Location
- Iowa
- Posts
- 399
so i got my front end mostly put together for mock up, only thing i didnt do was the bottom tall balljoints, i didnt want to goof them up before paint, the eibach springs i found out are for a 4 banger s10 and once i got them in they seemed super soft, but i dont have the sway bar hooked up or any shocks installed, im going to run them for now and see how i liked them, took me a bit longer to get this all done,had to wait on some parts in the mail and then got called in one weekend and then during this week i had 12" of snow melt and then 6" of rain during the snow melt and it flooded my basement
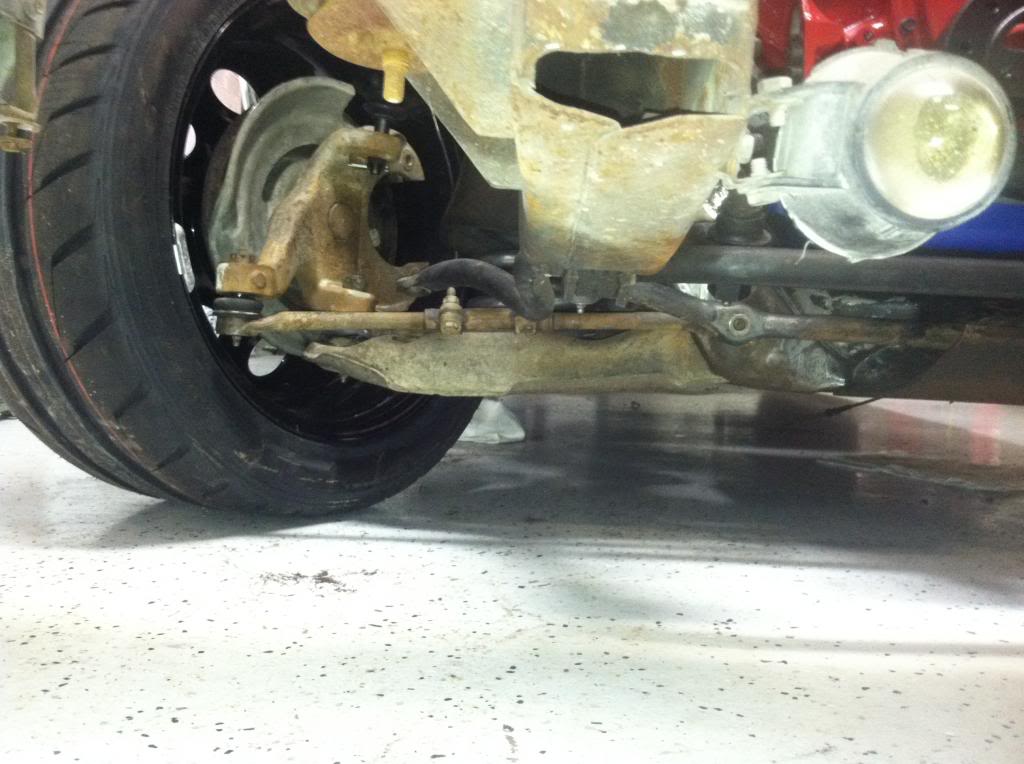
this is with a 2" drop spindle, 2" drop springs for a 4 cylinder, and tall upper ball joints, the bottom talls are not in yet so there will be another 1/2" drop, and there is no interior in the truck, the motor has aluminum heads and the intake and carb is not on and the tranny is not installed, no radiator either, so there should be a bit more drop once things settle and everything is installed
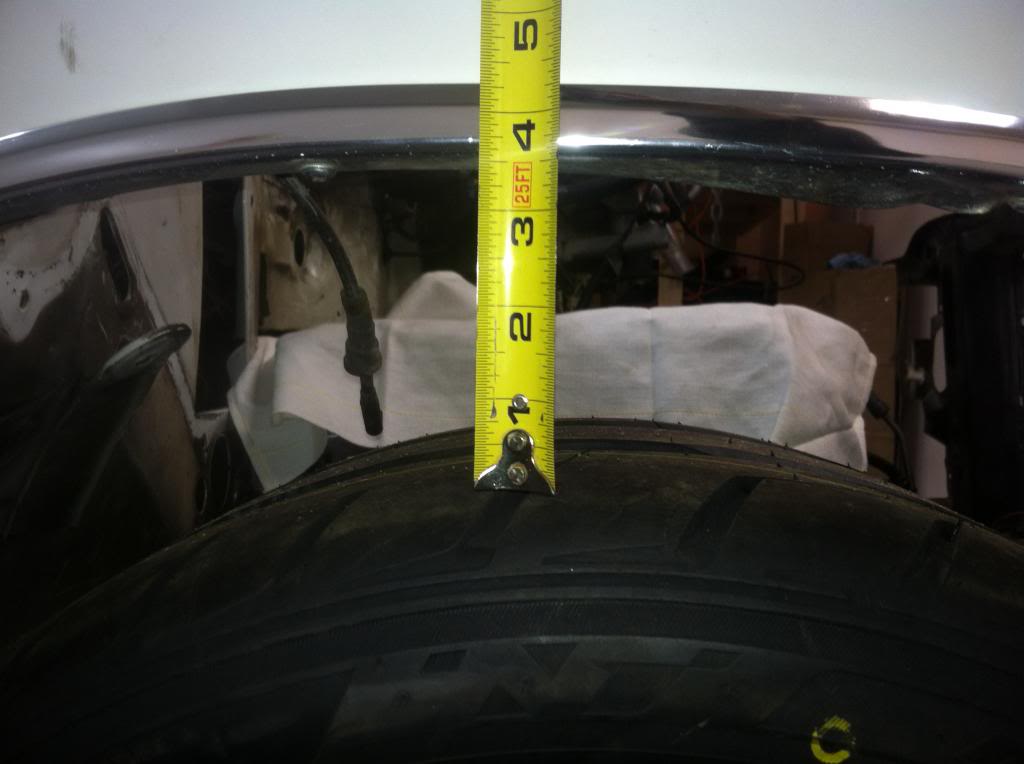
my frame is sitting right around 6" of height right under the door, i was hopeing for 4-5"
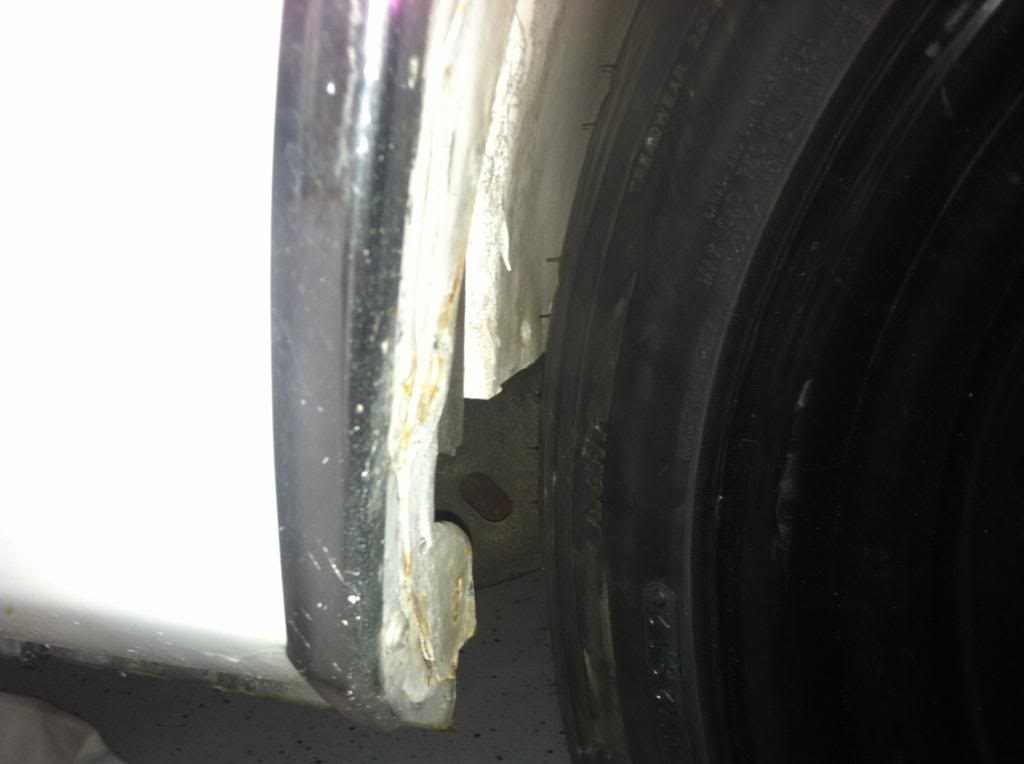
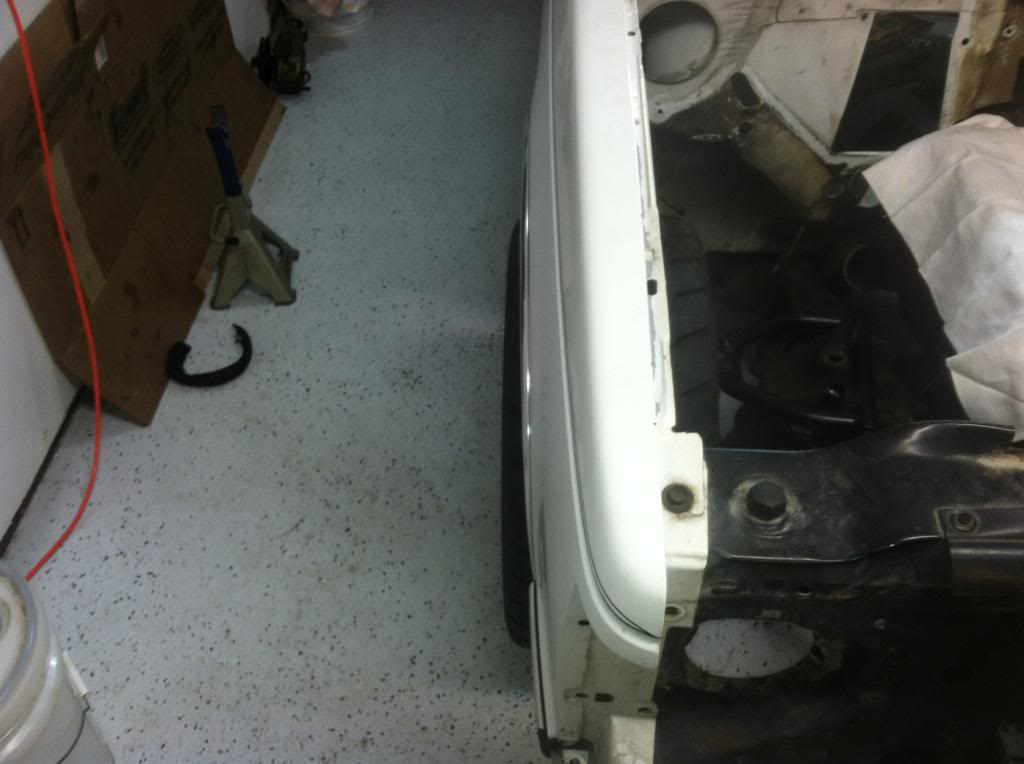
the rear of my passenger wheel well, once i put the inner fender on there will be some rubbing
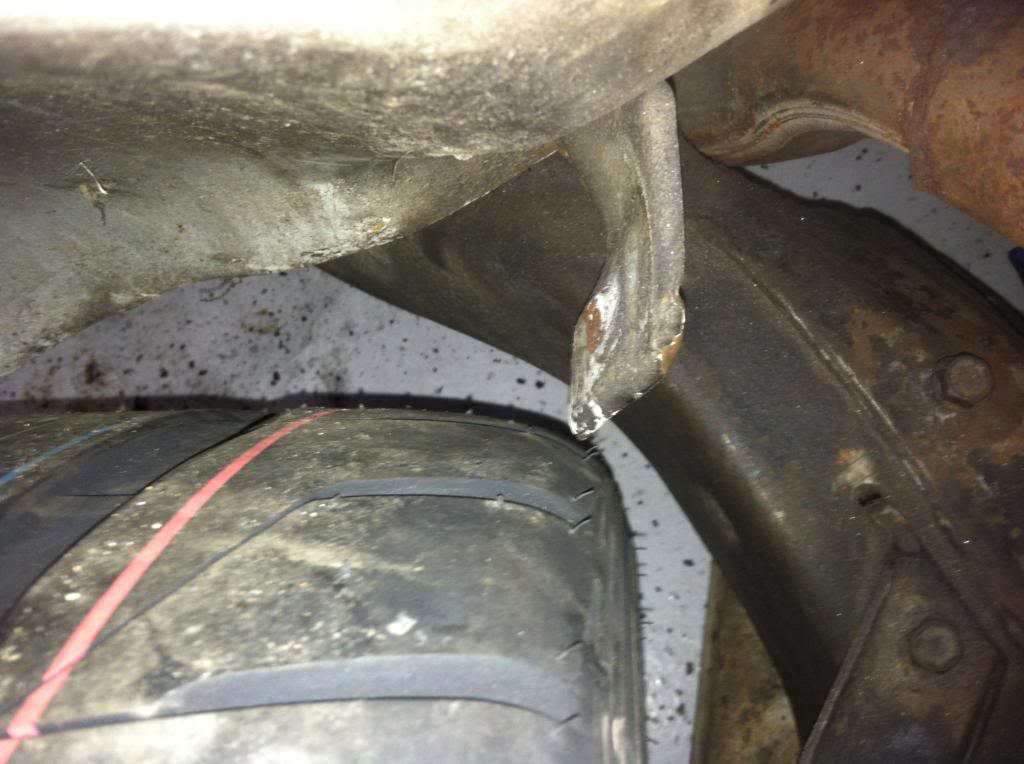
the tab that holds on the other side of the inner fender
ride height, 9" rim with 4.5" bs on with a 275-45-17 tire
 Miles Boyer
The car hobby is dangerous,if the speed doesn't kill you, the cost of parts will.
91 V8 S10
88 Cutlass Pro-Tour
97 Chevy lifted Z-71
96 Corvette
03-14-2013 #20
Registered User
- Join Date
- Apr 2006
- Location
- MD
- Posts
- 232
From what I understand, the S10 frames and the G-body frames are similar. If the front ends are the same, you can get to the bottoms of the engine mount nuts by putting a swivel on an extension and going up through the hole in the frame for the lower control arm bolts. There should also be a hole in the crossmember for the upper bolts that you can slip a wrench into. I usually put some tape on the box end of a wrench and jam it on the nut so you don't loose the nut when you take the bolt out. Just in case you ever need to do it without destroying the hardware.

 Reply With Quote