


Results 1 to 20 of 22
Hybrid View


-
01-01-2013 #1
 Registered User
- Join Date
- Sep 2010
- Location
- Santa Clara, CA
- Posts
- 622

Drilling Rotor Hat for Larger Studs
As some of you may know, I am replacing/re-doing the rear brakes on my project to correct some questionable stuff done by the build shop. I won't belabor that point too much here. Anyway, after spending a lot of time trying to get back to the place I was before, I have come to realize that the wheel studs on my axles are slightly larger than the holes provided in the Wilwood hat. Wilwood actually addresses the situation in the instructions, stating:
"NOTE: Some OEM and aftermarket axles come with stud sizes larger than 0.50” diameter. Verify stud size and have a qualified machine shop drill the hats to the correct size, if necessary."
My question is, is there any harm in me drilling these out myself? I do not have a drill press, so it would be free drilling with a cordless drill. But, the current holes are around .5", the studs measured out at .53", and the previous shop looks like they drilled the old hat out to about .55"--so we're only talking about going from 1/2" to maybe 9/16" at most--actually, a 14mm bit looks like it would be the closest match to what the old shop had done, which fit fine....
As always, thanks for the advice.Steve
-
01-01-2013 #2 Registered User
- Join Date
- Nov 2008
- Location
- Lawrenceburg, TN
- Posts
- 4,098
the stud holes aren't that precise, the rotor hat is centered from the hub center (both front and rear) drill away
01-01-2013 #3
Registered User
- Join Date
- Feb 2011
- Posts
- 295
I agree with Rod. The centerbore should be centering the rotor, not the stud holes. In fact I'm shocked the existing holes are to small. Personally I like things that fit tight and would probably drill it pretty tight. Problem is most drill don't won't very well when enlarging a hole slightly. There are special bits specifically for this job like core drills and reamers. It depends how fancy you want to get. Originally Posted by Rod

John
01-01-2013 #4
Registered User
- Join Date
- Sep 2010
- Location
- Santa Clara, CA
- Posts
- 622
Thanks for the quick replies. I don't really want to get too fancy but your comment about drills not being very good at enlarging a hole slightly caught my attention--any suggestions on how to deal with that? Is a shot of WD-40 on the hole a good idea? Originally Posted by jpgolf14
Steve
01-01-2013 #5
Registered User
- Join Date
- Feb 2011
- Posts
- 295
Yeah when you use a normal drill to just barely enlarge a hole, they tend to catch, drill off center, and produce a poor quality hole. For what you are doing I'm sure it will be functionally just fine, just probably not all that pretty and not a lot of fun to drill, especially without a drill press. Originally Posted by sjaroslo
Lubricant is not a bad idea, but will probably not do much to help the catching issue. If your rotor hats are aluminum, WD-40 actually works quite well. If they are iron, no lube is necessary.
My suggestion is to use very low pressure until the drill starts to cut. Once the hole is started, it should cut ok.
An even better idea is to chamfer the hole before you drill. That will help the bit start and stay centered.
01-02-2013 #6 Registered User
- Join Date
- Mar 2007
- Location
- Florida
- Posts
- 2,391
I'll add to check the wheel studs for a taper that may require a chamfer on the inside of the hat anyway.

01-02-2013 #7 Registered User
- Join Date
- Feb 2007
- Location
- Vancouver, WA
- Posts
- 183
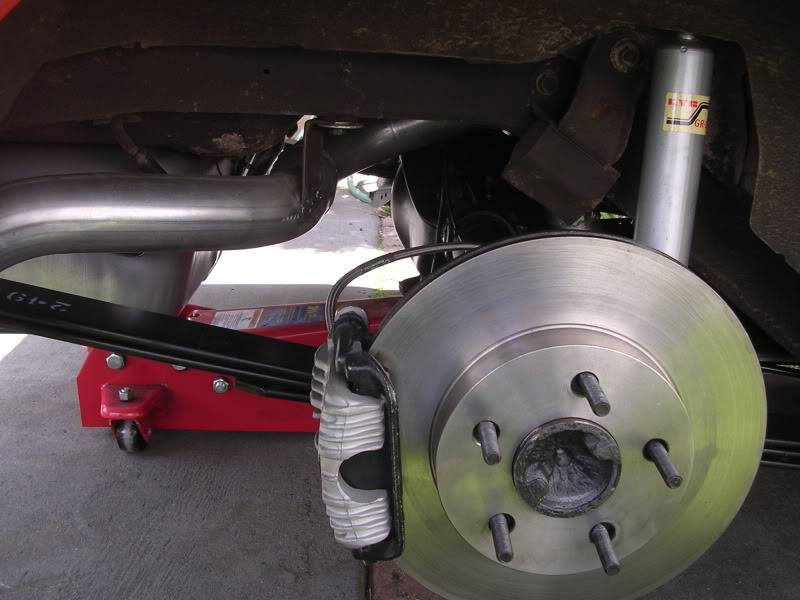
Just to confirm the hole size isn't that important because the rotor registers on the axle. This is an early 4th gen Camaro rear disc setup on a 5 on 4 3/4 first gen axle - note how big the holes are. I believe this rotor fit more than on application so they just made the holes big enough to fit either. I have since swapped out the rear discs for the later 4th gen setup (LS1) and it is much the same. Have run both for many miles w/o issue.
01-02-2013 #8
Registered User
- Join Date
- Sep 2010
- Location
- Santa Clara, CA
- Posts
- 622
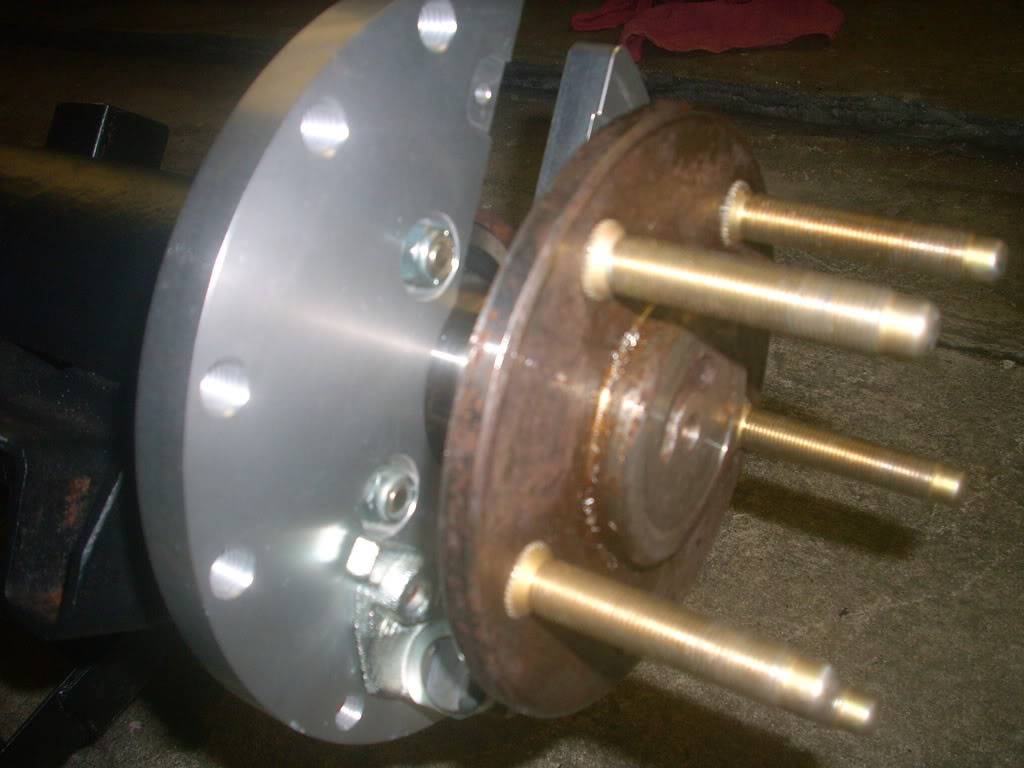
You can see here that the base of the wheel studs are just ever-so-slightly larger than the threaded portion...
Attachment 69329
They are so close that indeed the threaded portion fits through the hat no problem, but the base of the stud does not; it is difficult to see here but the hat is standing proud of the axle flange...
Attachment 69330
Now I know what the small ring that was in the packaging is for--the hats that the shop used were an exact fit around the axle stub, but these are larger; the ring included in the kit fits perfectly to a counterbore cut on the inside of the hat and the ID perfectly matches the OD of the stub. I wonder if I can stick that ring to the hat with a dab or two of silicone seal to keep it from falling out during a brake service somewhere down the road...?
I'm really shocked about gort69's photo--while I understand that the rotor can't jiggle up and down because it registers off of the stub, it still seems to me that the rotor could rotate back and forth with the application of the brakes--enough cycles of that and I would think that potentially dire circumstances could ensue! But that's just me being a worry-wart, I'm sure....Steve
01-02-2013 #9
Registered User
- Join Date
- Nov 2008
- Location
- Lawrenceburg, TN
- Posts
- 4,098
the rotors will not move with the clamping force of the 5 lugs at 110 lbs each, (just being safe on the torque) some axle or cars require more Originally Posted by sjaroslo
01-03-2013 #10
Registered User
- Join Date
- Jan 2006
- Location
- Oregon
- Posts
- 1,773
Like Rod pointed out, so long as your wheels are properly torqued, your rotor should never be free to move...if it is, it means your wheel is moving as well and you're probably going to be breaking wheel studs shortly. Your wheel studs should be in pure tension, so don't let the idea that your rotors apply any side loading or shear to them get any traction in your head, because they don't. You're much better to err on the side of extra large clearance holes through the rotor than too tight and have them not seat entirely when you torque your wheels. Originally Posted by sjaroslo
Tobin
KORE3It's what I does.
01-03-2013 #11 Registered User
- Join Date
- May 2002
- Location
- Northern California
- Posts
- 10,716
I like to use a step drill...Although its not necessary, if you don't mind the drive you are welcome to use my drill press. Originally Posted by sjaroslo
MrQuick ΜΟΛ'ΩΝ ΛΑΒ'Ε
01-04-2013 #12 Registered User
- Join Date
- Sep 2006
- Location
- Southern Indiana
- Posts
- 4,709
WD40 SUCKS to drill with, you want to burn up bits, use that.
My preference is synthetic motor oil in squirt can. Since I am a tech I can drain Mobil 1 cans at work BUT also I used Mobil 1 in my 350 roller after swapping in the roller cam. BUT for tapping and drilling I do prefer synthetic oil. Thicker the better, but thats me. I had a set of Snap On Thunder bits that I used to drill wheel studs out with when lugnuts came in stripped and not coming off.
As for hand drill, no big just be careful and make sure you have it clamped down good.Lee Abel
AFTERMARKET PERFORMANCE
1977 Chevy Monza 2+2:Project "Cheap Trick"
1978 C10 Long bed , On air and trailer puller
2006 Buell Blast ,Just a bike to ride and for mileage
1966 Caprice 4dr Sports Roof fact.327/now 350/SOON 454???? Project "II Old,,,ZERO BUDGET OR LESS CAPRICE!"
01-04-2013 #13
Registered User
- Join Date
- Feb 2011
- Posts
- 295
Actually, WD40 is quite good for aluminum. It is worthless on anything else. The op's hats are aluminum. Originally Posted by MonzaRacer
In aluminum you are not using oil to absorb heat, rather you are using it to reduce the aluminum's stickiness. It is basically impossible to burn up a HSS bit in aluminum since the coefficient of thermal conductivity of aluminum is so high.
01-04-2013 #14
Registered User
- Join Date
- Sep 2010
- Location
- Santa Clara, CA
- Posts
- 622
Drilling Rotor Hat for Larger Studs
Thanks for the continued feedback on this. I do not think that the hats are aluminum because they weigh a ton and they have the integrated parking brake drum but now my curiosity is piqued so I'll have to see if Wilwood lists the material.... I picked up a 9/16" bit from Home Depot so I'm hoping to make some time to give it a shot this weekend and I'll report back.
Steve
01-05-2013 #15 Registered User
- Join Date
- Jun 2006
- Location
- Katy,TX
- Posts
- 1,678
Might double check the hats that they are the exact diameter as the axle pilot AND the pilot is ong enough to register and locate the wheel.
For me clamping the rotor in a drill press with C clamps and using a bit to locate the existing hole exactly, then drilling with larger bits. You can get a decent small drill press that can do the job for not alot of money.1978 Black Trans Am 455 Edelbrock heads [email protected] through mufflers on pump gas
1981 Trans Am 400 stock type motor
79 Camaro getting a 500" 695 hp IA2 Pontiac motor
1965 GTO project car
470ci/Chevy dual quad 409 604 HP 64 Impala SS project
2004 Pulse Red GTO
01-08-2013 #16
Registered User
- Join Date
- Sep 2010
- Location
- Santa Clara, CA
- Posts
- 622
The material is cast iron:
http://www.wilwood.com/Hats/HatProd....temno=170-9492
I've decided to have a shop take care of this.... The temptation is great to pick up my own small drill press but it will totally become a dust/spider collector for the rest of eternity. Hope to drop them off on Friday. Of course, I wish that I had figured this out before I bolted/safety-wired the rotor on to the hat, but I'm hoping that isn't really going to cause an issue for a shop to deal with. If so, *sigh*, I'll cut the wires and unbolt the rotors from the hats and go that route. I'm fairly damned proficient at safety wiring at this point!Steve
01-08-2013 #17 Registered User
- Join Date
- Mar 2004
- Location
- Mid-Michigan
- Posts
- 2,764
Just drilled these 'vette rotors out for the van this past weekend. Took all of two minutes with the 1/2" Milwaukee and a .563 dia. bit.

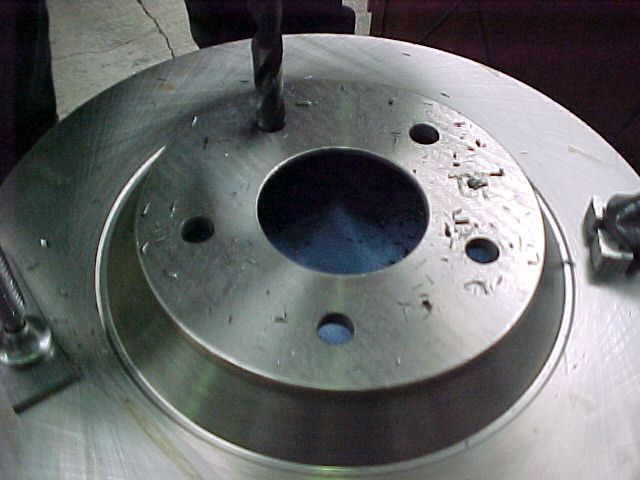
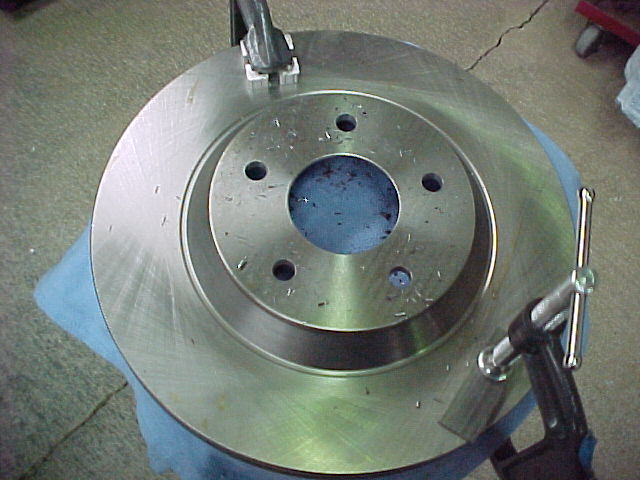
These register on the hub so there are no worries about the lug hole size. They slip on nicely over the 1/2 studs we put in the hubs.
MarkMark:
"Bad Ast" Astro Van. Just because I did it... Doesn't mean it's possible...
This my Bad Ast thread...
https://www.pro-touring.com/showthre...roject-Faze-II
This is my Fotki album...
http://astroracer.fotki.com/
01-08-2013 #18
Registered User
- Join Date
- Sep 2010
- Location
- Santa Clara, CA
- Posts
- 622
Nicely done, sir!
Steve
01-12-2013 #19 Registered User
- Join Date
- Aug 2007
- Location
- East Washington state
- Posts
- 457
If I didn't know I hadn't taken the pics I would have thaught sjaroslo had come in and taken pics of my problem. Same exact problem, collar on bottom of stud larger than stud hole in rotor. Read the thread, remembered I had a step bit, when it was mentioned, and within 5 minutes I was back to assembly and a lot happier. Spent two hours before that trying to figure out what in the hell was wrong. My rotor has a good tight fit on the hub centric so I feel confident drilling out the stud holes. Its nice to have a place to come and trouble shoot and get good info. Now back to the garage.
LaMont Mulligan aka munster, leroy, mull, just don't call me late for dinner..
My car is Therapy. 69 - Firebird into Camaro wana be. Sheep in Wolves Clothing. DSE tubs, Air Rides Airbar Rear susp., CPP Tubular CA's w/Shockwaves, Unisteer Rack&Pinion, RS Hideaways, Polished calipers, drop spindles, 4wheel disc, Be Cool rad, 18" Coddingtons Junkyard Dogs w/12"wide mod on rears, BFG KDW's 335/30/18 & 245/40/18 fronts. 383 Stroker, Edelbrock Vic Jr Heads and Manifold, lunati cam solid Roller, Pro-Magnum Roller Rockers, Demon, MSD Dist, 6AL, Thorely Tri Y ceramic coated headers. Converted to 68 dash. Moser narrowed 12 bolt and fitted for Airbar.
01-12-2013 #20
Registered User
- Join Date
- Sep 2010
- Location
- Santa Clara, CA
- Posts
- 622
That is indeed one of the many awesome things about this forum. the amount of intelligent and thoughtful help available is really amazing.
Steve

 Reply With Quote



