


Results 261 to 280 of 288
Thread: LSx 1967 Mustang
-
09-09-2016 #261
 Registered User
- Join Date
- Sep 2015
- Posts
- 171
 I need to find a set of wheels. I keep seeing deals and low prices for mustangs. Have to find them for my chevelle
 Originally Posted by DCx

-
09-09-2016 #262
Registered User
- Join Date
- Aug 2004
- Location
- Los Angeles
- Posts
- 592
Have a look at Jegs.com. I have always found sales on wheels there. I just picked up a set of the Mustang Bullet Replicas in 17X8 and 18X10 for 390 shipped to my door. They are the OE brand out of Florida Originally Posted by wyattroa
The rule is measure twice and cut once. My problem is I still measure with a mic and cut with an axe!
10-01-2016 #263
Registered User
- Join Date
- Aug 2004
- Location
- San Bernardino, CA
- Posts
- 883
I got most of the hot side done today. I think it turned out okay. Lets just say cutting and fitting mandrel bends is not easy!

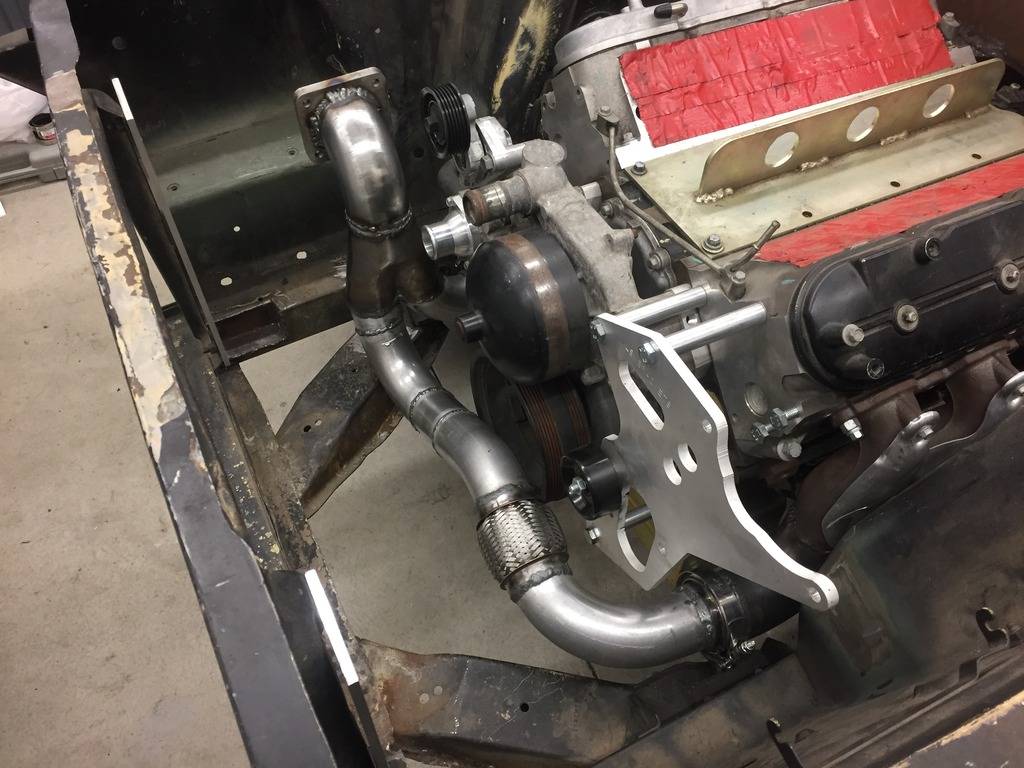
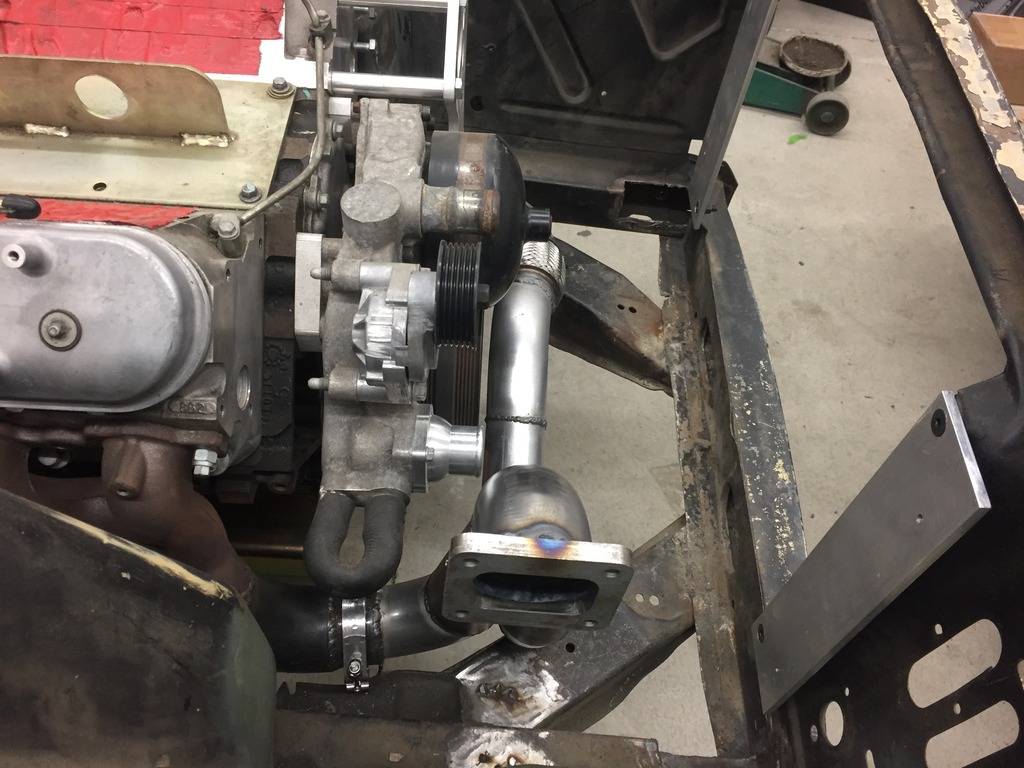
I have a fingers gap between the crank pulley and the pipes. I had to re-route the pipes to make room for the lower radiator hose. I picked up some 90* silicone elbows and plan on running a 90 from the radiator and an aluminum pipe that will 90 to the straight outlet on the water pump.
Next on the list is to build the outlet from the turbo and over the valve cover. Then find a good location to drill a hole for the waste gate. I was thinking of putting it on the 3" 90* bend that enters the T4 flange. The exhaust flow would go straight up into it. Then i would tie it into the down pipe.
10-01-2016 #264
Registered User
- Join Date
- Aug 2004
- Location
- San Bernardino, CA
- Posts
- 883
oops, double post...
10-02-2016 #265 -Moderator/Sponsor-
- Join Date
- Apr 2001
- Location
- The City of Fountains
- Posts
- 16,118
Where is the waste gate going? Ideally you want it going straight up right after your merge.
Andrew1970 GTO Version 3.0
1967 Cougar build
GM High-Tech Performance feature
My YouTube Channel Please Subscribe!
Instagram @dr__efi
I deliver what EFI promises.
Remote Holley EFI tuning.
Please get in touch if I can be of service.
"You were the gun, your voice was the trigger, your bravery was the barrel, your eyes were the bullets." ~ Her
10-03-2016 #266
Registered User
- Join Date
- Aug 2004
- Location
- San Bernardino, CA
- Posts
- 883
exactly. i am going to add a small length of 1.75 pipe and mount the waste gate on the 3" elbow that is welded to the t4 flange. I am using a 45mm turbo smart hyper gate. I need to remove my compressor housing on my turbo and drill it for a vacuum fitting to reference the waste gate. Originally Posted by andrewb70
10-03-2016 #267
Registered User
- Join Date
- Dec 2010
- Posts
- 709
I'm liking the turbo stuff--I find it motivating. On some level, it seems that the plotting of components is actually more difficult than the actual pipe fab, especially without an awesome quantity of space. Your pipe looks good so far.
On a side note, one thing I picked up from the all-too knowledgeable Sloppy Mechanics is the idea of a smaller hot pipe (2" vs. 2.5") feeding into the merge, which is supposed to afford quicker spooling (less lag/suspense). I'm sure this is also relative to the size of your turbo unit. I should know more in five years . . .
Keep at it!
10-03-2016 #268 Registered User
- Join Date
- Jul 2011
- Location
- Prescott, AZ
- Posts
- 206
We may have missed it, but what are the specs on the turbo? It looks like a hybrid?
10-03-2016 #269
Registered User
- Join Date
- Aug 2004
- Location
- San Bernardino, CA
- Posts
- 883
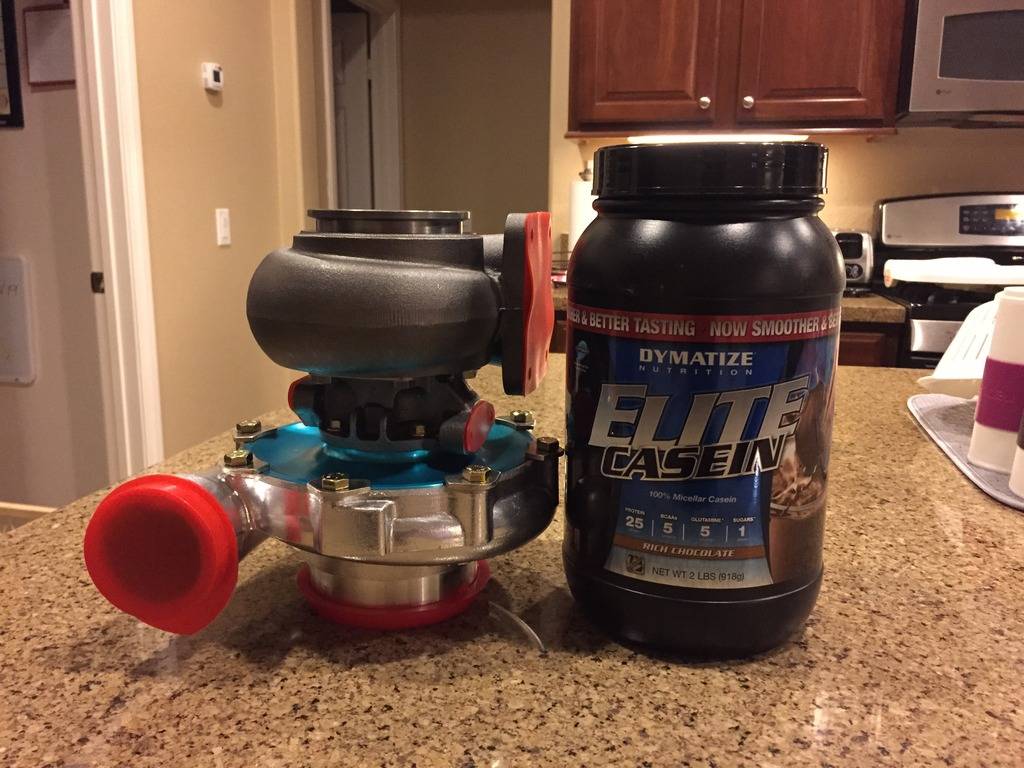
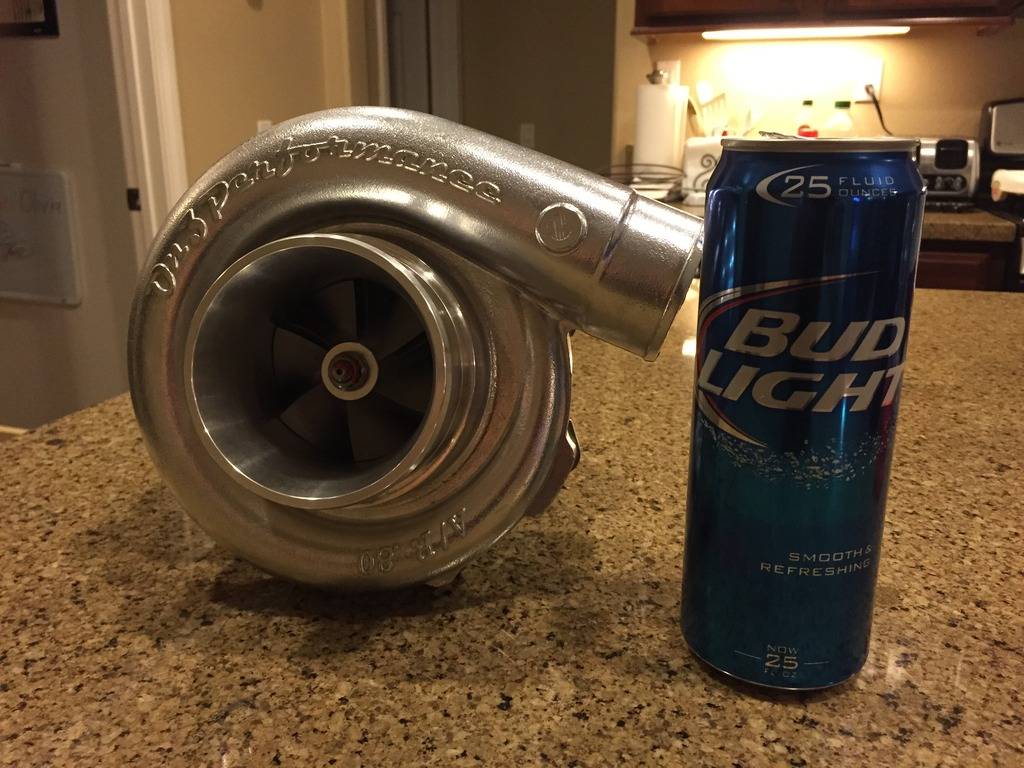
It's an ON3 Performance 76/68 .80ar T4 turbo. It was under $400. Seems reliable by many LS1 tech users and their Instagram page. Originally Posted by Centerforce
10-05-2016 #270
Registered User
- Join Date
- Jul 2011
- Location
- Prescott, AZ
- Posts
- 206
It should spool up nice and quick with a hot side that size.
10-06-2016 #271
Registered User
- Join Date
- Aug 2004
- Location
- San Bernardino, CA
- Posts
- 883
I hope my rear gears aren't too much for the street. I was told my 8.8 had 3.73 gears. I was thinking maybe 3.23 would be safer on the street to stay out of boost at a cruising rpm. I guess I will find out when I get it on the street. Originally Posted by Centerforce
I got quite a bit done today. I went down to Global West's headquarters and picked up a tubular export brace. I was told by the sales associate that the brace was in redesign and they didn't have any in stock. Another guy in the back said I could buy a pre-production model that was raw and un-powdercoated. I gladly bought the brace and raced home to test fit it. I didn't have too much difficulty installing it, however I will need to make some spacers for the cowl area. It doesn't bolt flush to the cowl and I don't want to bend the cowl when I tighten the bolts down.
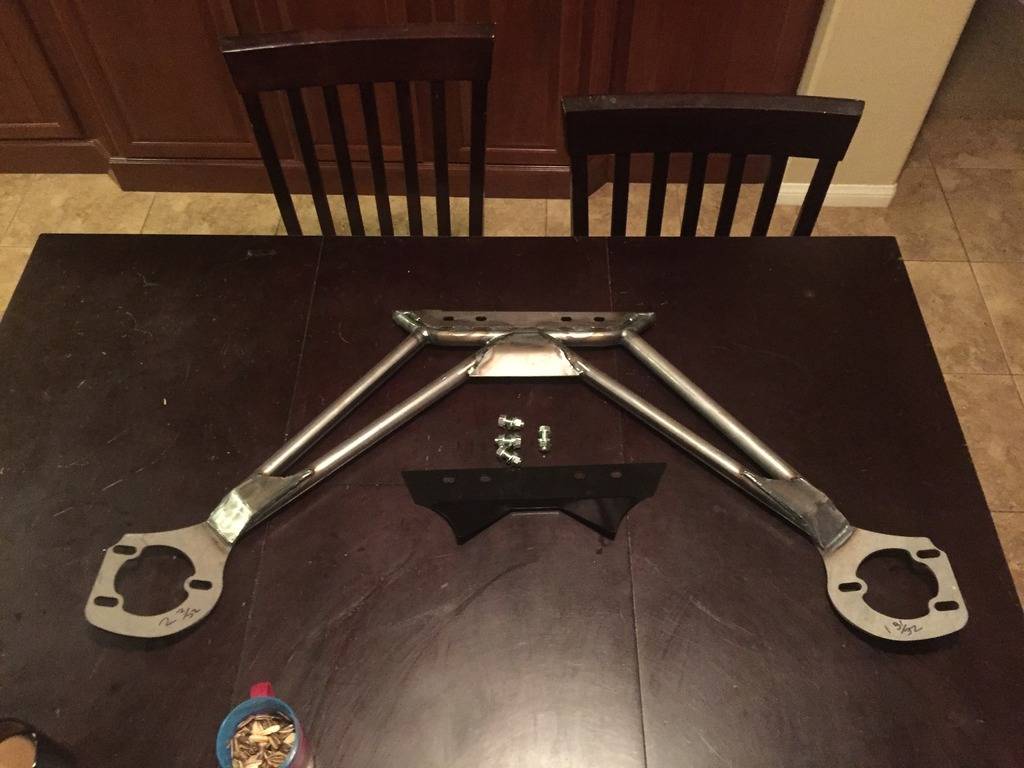
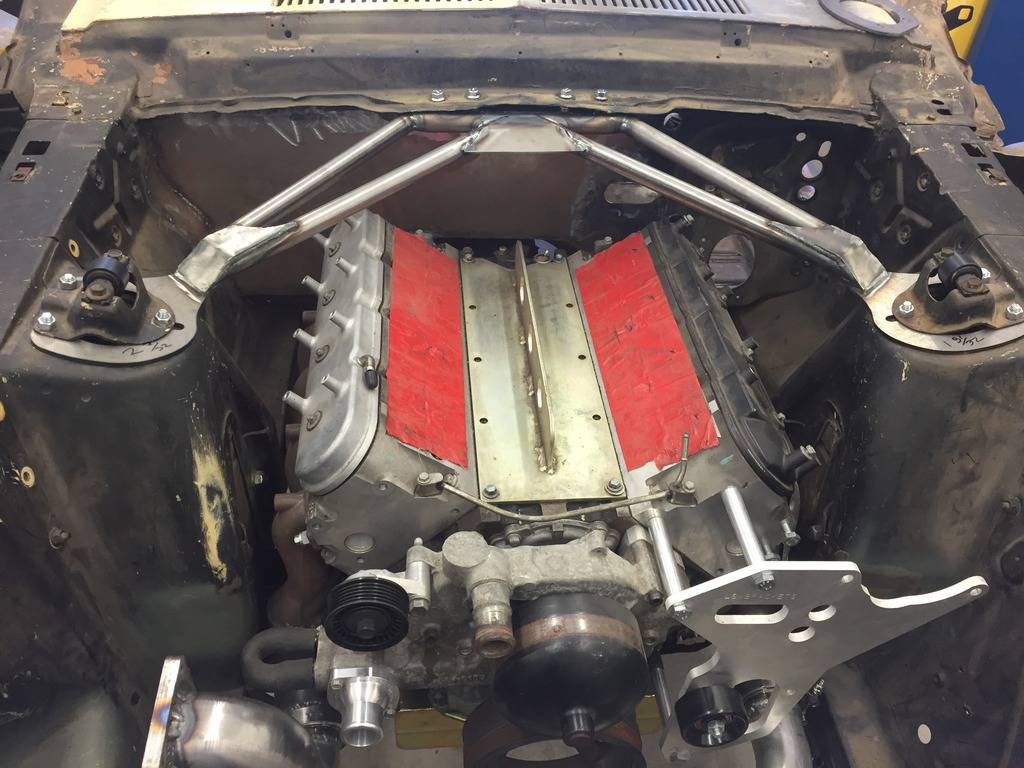
Next on the list was to modify the Holley valve covers for more down pipe space. I cut the coil mounts off and attacked them with a 40 grit flap disc on my grinder. I will DA them with a lighter grit and have them powdercoated. Fortunate for me holley casted these well and the coil mounts has lots of meat behind them
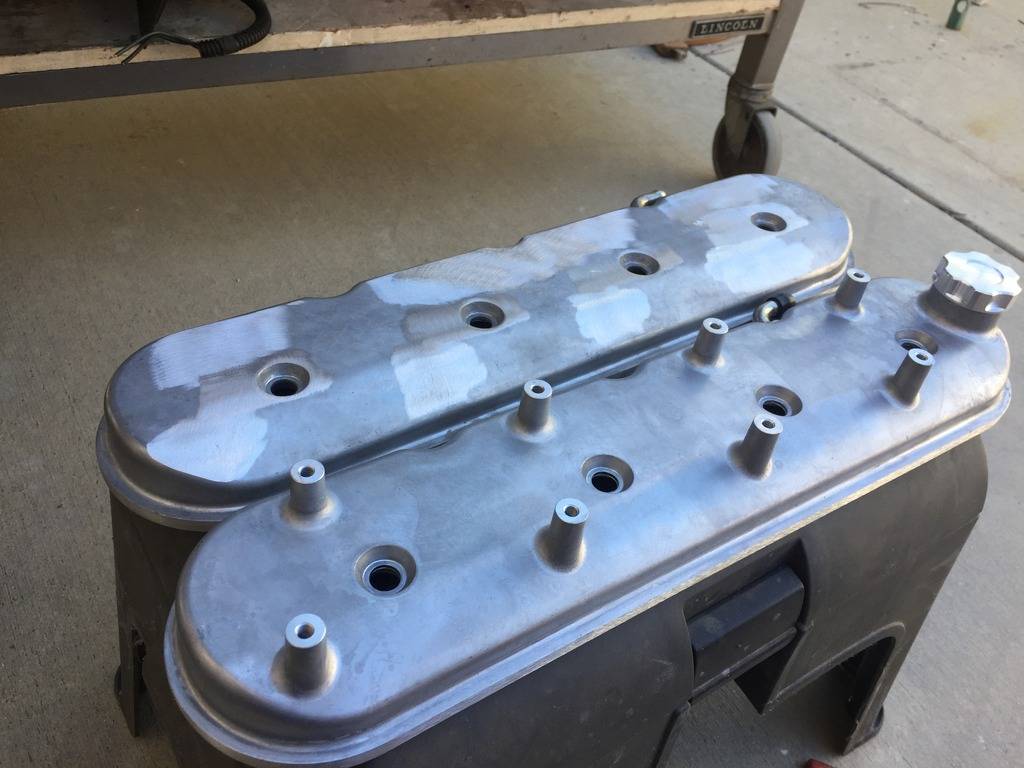
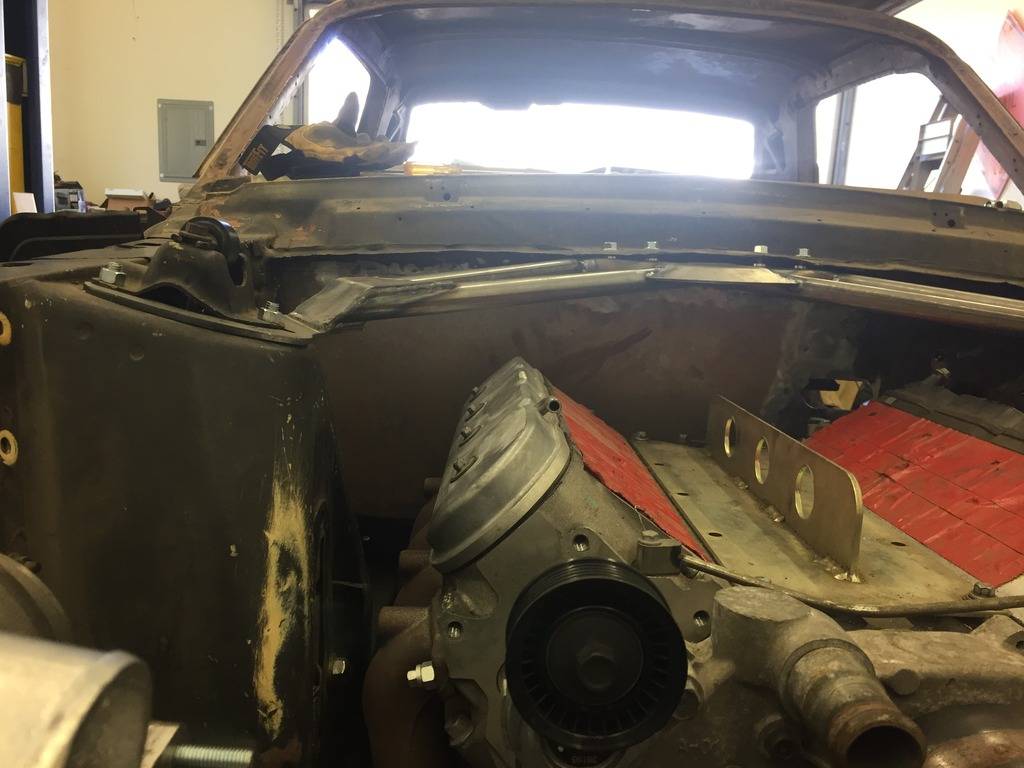
The original plan was to use two three inch 90* elbows and have them wrap around the shock tower and mate up with the 3.5" down pipe. It looked ugly and it was difficult use the formed 3" to 3.5" transition section I had. I shifted gears and ended up only using a 5" long piece of three inch tubing at a 45* angle and matted that up to my transition and another 45* 3.5" piece of tubing. I like the way it turned out.

I tossed the intake on for fun. Found out that I don't need to cut my block to run my LS6 valley tray and that the stock fuel rail just clears the export brace and gives me enough clearance to slide the intake in under it. I plan to run holley fuel rails. I hope they fit.
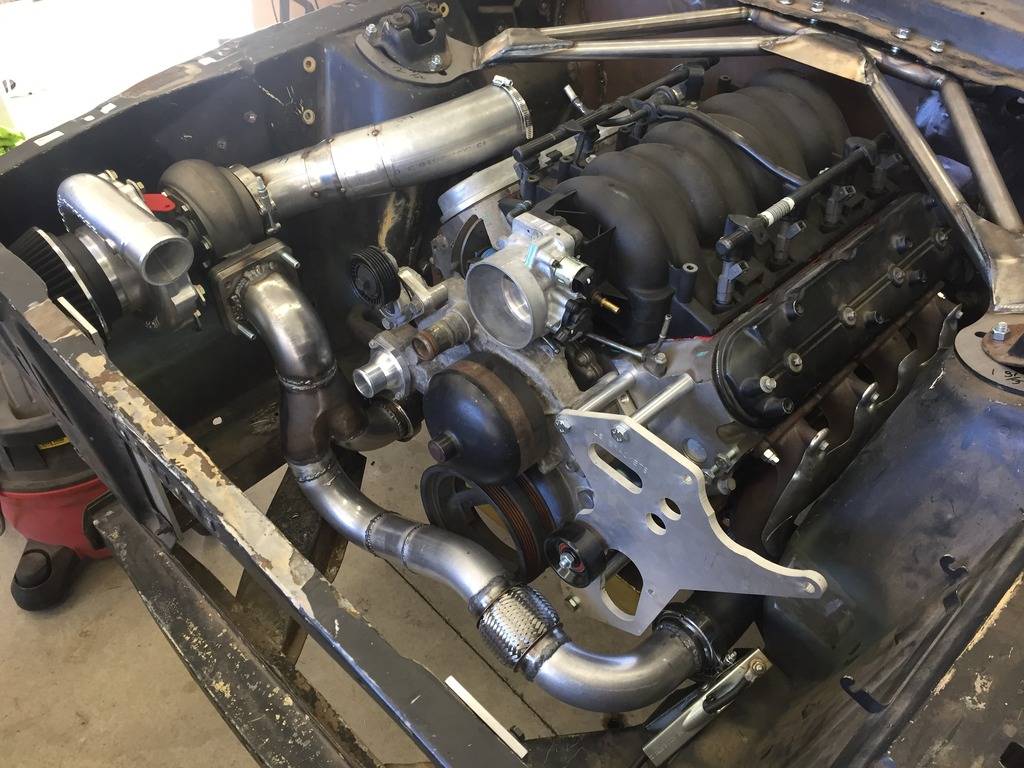
As for the waste gate. I cut a length of 1.75" pipe at a 45* angle and taped it to the merge pipe. I didn't have my dremel with me so I will modify the merge later, but I did mock up the waste gate. I might just dump it right into the down pipe. I planned on running the dump pipe the length of the down pipe but not quite sure about tieing that in when I have to worry about O2 sensor location down stream.

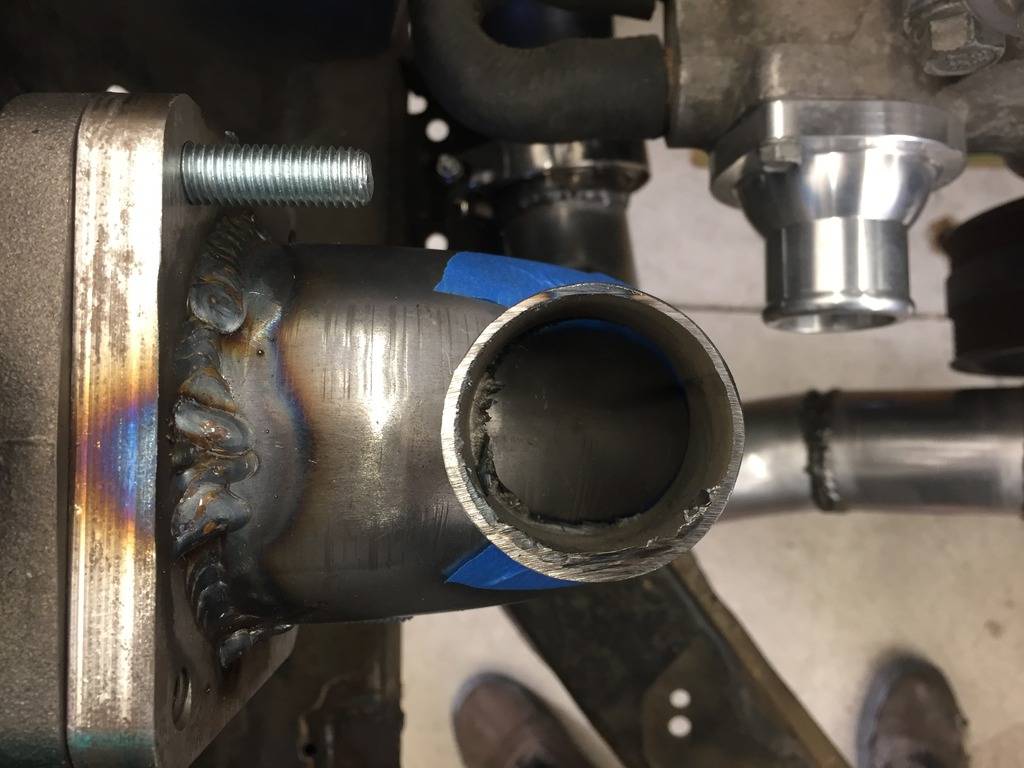
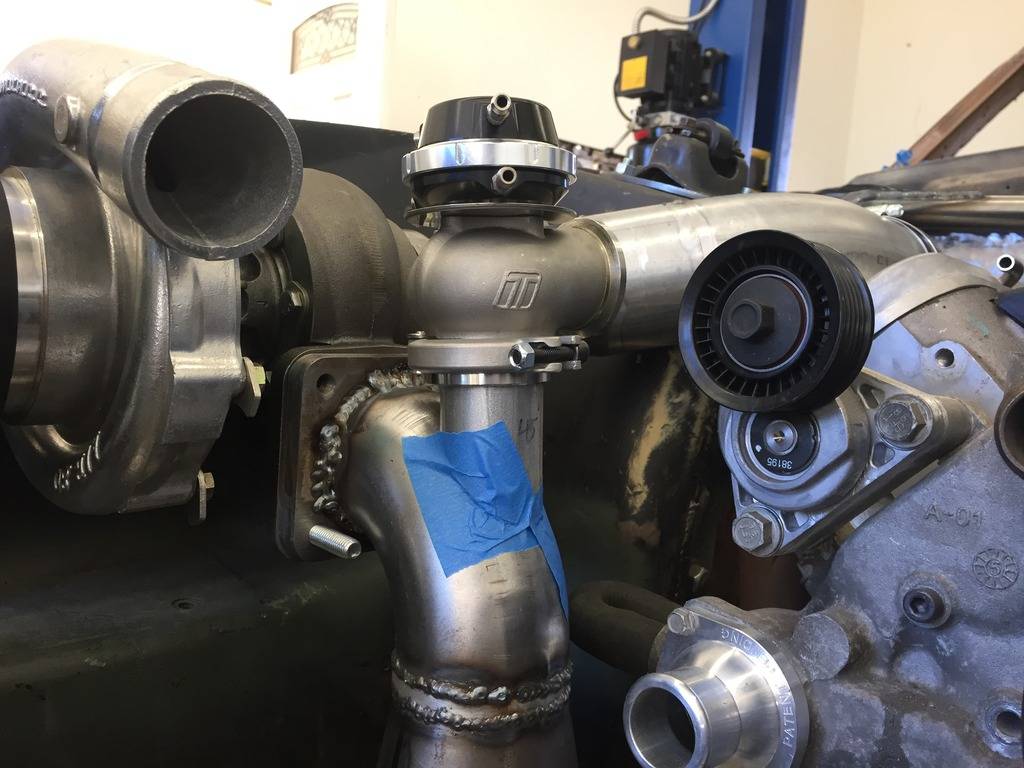
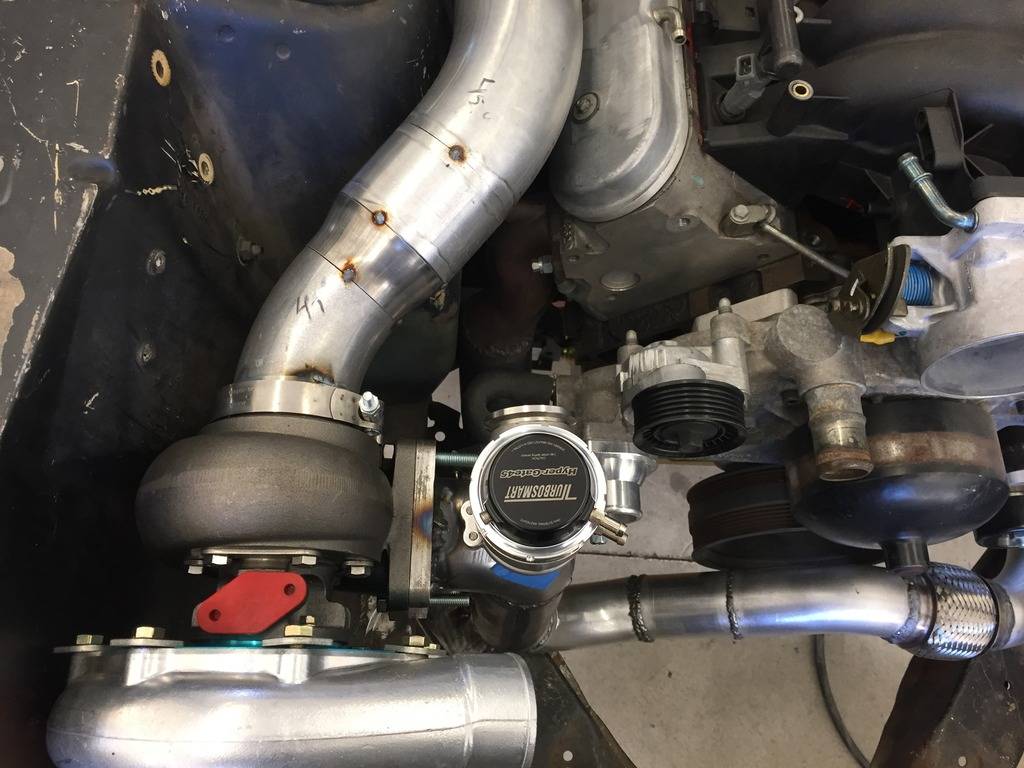
I need to order 3.5" V bands and an O2 bung. I need to make the down pipe section over the valve cover removable.
10-07-2016 #272 Registered User
- Join Date
- Nov 2009
- Posts
- 169
Looking great keep this updating!!!!
64 Mercury Comet
408w boosted
More boost on the way!
10-08-2016 #273
Registered User
- Join Date
- Aug 2004
- Location
- San Bernardino, CA
- Posts
- 883
Not much of an update at all. I went by Global West again and picked up one of their monte carlo bars. I got to talking with the guys there about my project and was invited to the back of their warehouse to check out a 66 mustang they built to showcase all of their suspension. What a awesome gesture! The car had fixed back Corbeau racing seats and an Ididit tilt column. I'm 6 feet tall and I had room to spare sitting in that car. They said on my next visit in they would dig up all of the part numbers on the seats and brackets for me. I am now leaning towards Corbeau as a seating option for the car.
Anyway, the monte carlo bar fits awesome. I still need to drill holes in the brackets but just mocking it up and setting the hood on the car I have plenty of clearance above the intake and the hood.
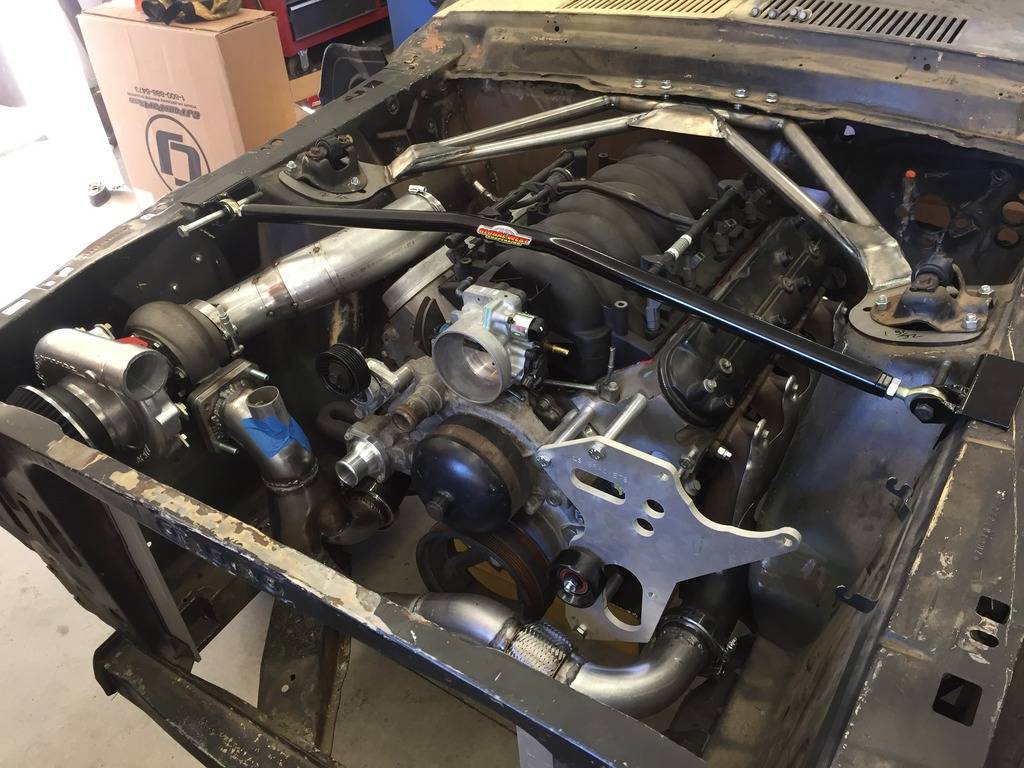
Since real estate is filling up fast on my firewall with that huge export brace in the way the next step is to order the fuel rails, fuel pressure regulator, and the vacuum manifold so I mount them all to the firewall or make brackets for the back of the cylinder heads. I am also swinging towards a wilwood master cylinder.
ugg. more money, more parts, more problems. lol
10-09-2016 #274
Registered User
- Join Date
- Jan 2014
- Location
- Austin, TX
- Posts
- 664
Love the build...in for the updates!
10-10-2016 #275 Registered User
- Join Date
- Jan 2006
- Location
- McKinney, TX
- Posts
- 1,625
Looks awesome, side note but I thought the export brace mounted on the top of the cowl.
66 Mustang "Project: Ballin on a budget"
89 Mustang "Box Wine"
10-10-2016 #276
-Moderator/Sponsor-
- Join Date
- Apr 2001
- Location
- The City of Fountains
- Posts
- 16,118
The GW brace mounts on the bottom and has another plat that goes on top to sandwich the pinch weld. I have one on my Cougar. Originally Posted by Z06killinSBF
Andrew1970 GTO Version 3.0
1967 Cougar build
GM High-Tech Performance feature
My YouTube Channel Please Subscribe!
Instagram @dr__efi
I deliver what EFI promises.
Remote Holley EFI tuning.
Please get in touch if I can be of service.
"You were the gun, your voice was the trigger, your bravery was the barrel, your eyes were the bullets." ~ Her
10-11-2016 #277
Registered User
- Join Date
- Aug 2004
- Location
- San Bernardino, CA
- Posts
- 883
Correct. I have the plate. Just didn't install it. My Cowl is covered in seam sealer and i need to grind down the pinch welds some to make it fit flush. Originally Posted by andrewb70
11-06-2016 #278
Registered User
- Join Date
- Aug 2004
- Location
- San Bernardino, CA
- Posts
- 883
Sorry for the delay on progress. School and work have been keeping me busy. I managed to finish the down pipe, now I am stuck waiting on some parts to arrive in the mail.
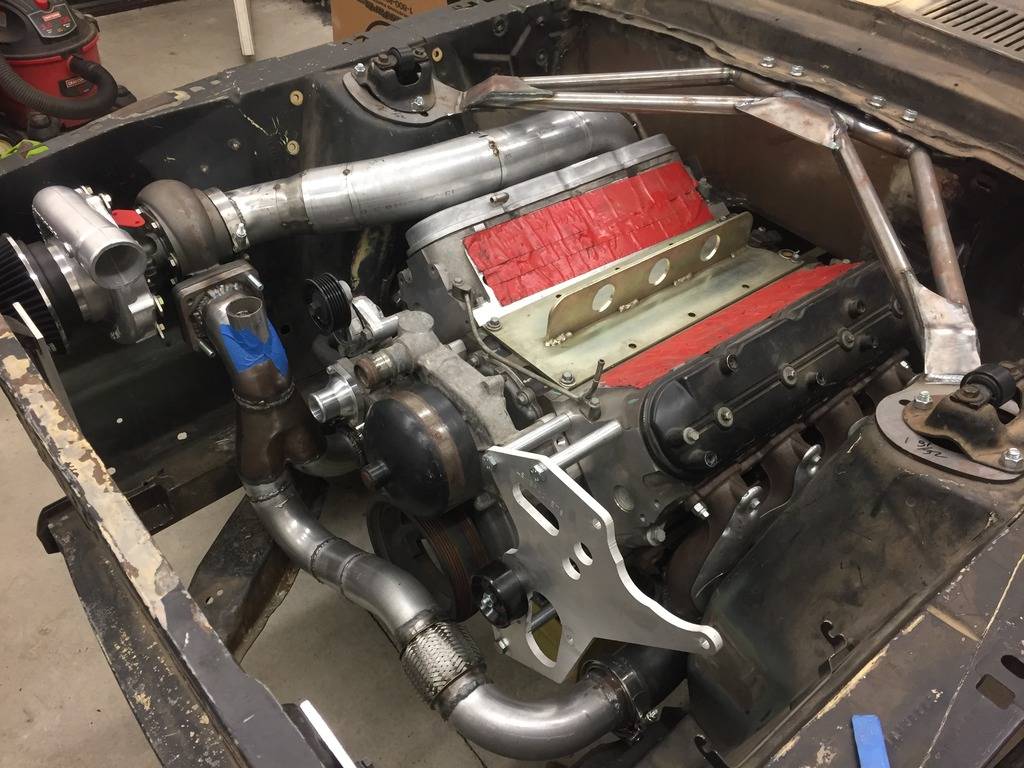
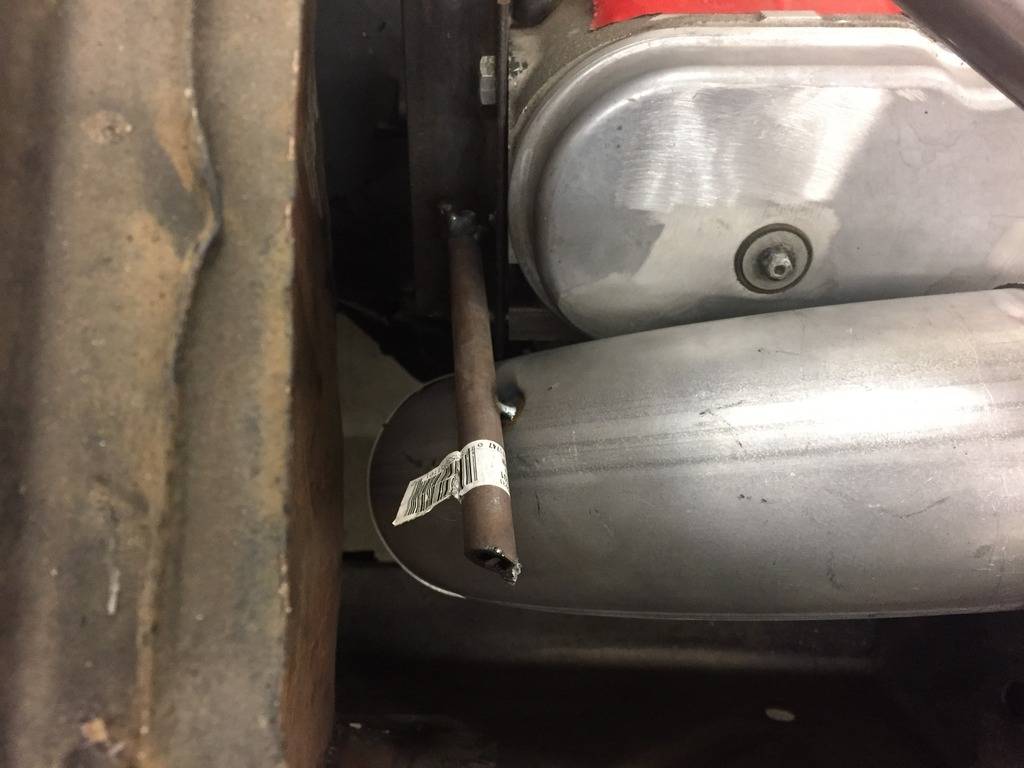
I tacked a support to the tube until i can get the rest of the exhaust welded up.
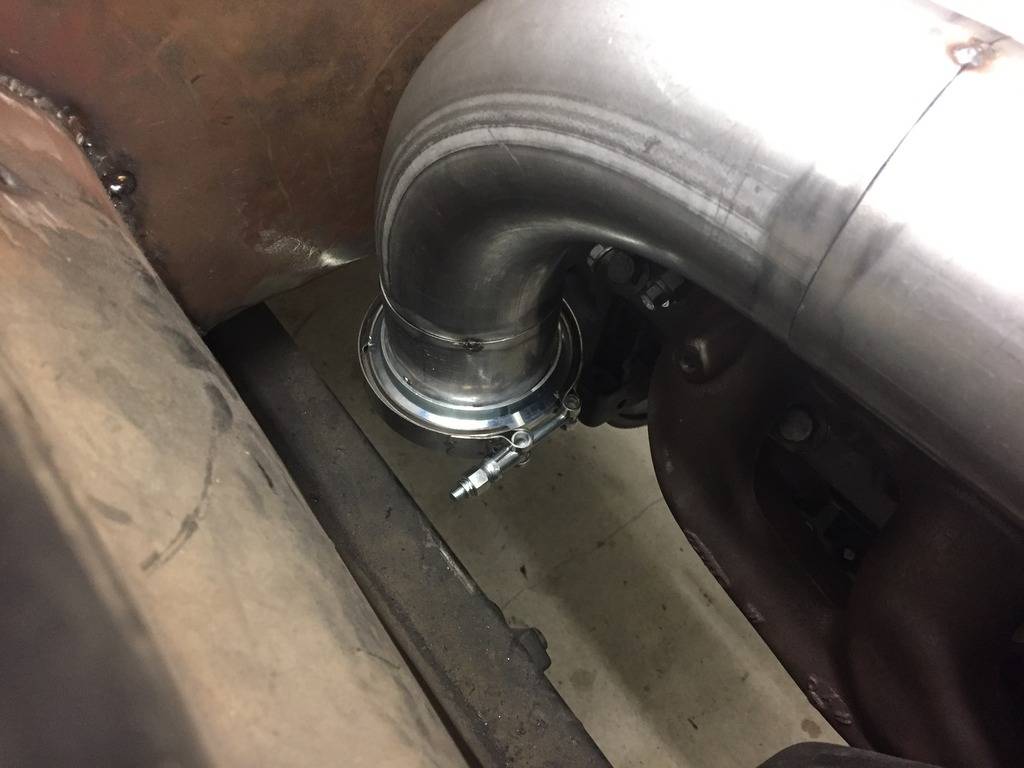
I decided to make the pipe removable just above the frame. It may looks close but its the the OD of the v band clamp. I plan to weld a flex joint directly to the v band outlet then run a 90* bend under the car. The exhaust will be very basic and tuck up tight towards the floor. I made a crude pass through notch in my transmission cross member with some 3/16 plate. I plan on ordering a 3.5" in/out dynomax race bullet and dump it under the rear seat floor pans in front of the axle.
I ordered a 4" cobra head coupler for the turbo in an attempt to run a larger air filter. If it will fit I will angle the coupler straight down and cut out the battery tray area and place the filer outside of the engine bay. It should fit behind the front apron.
11-11-2016 #279
Registered User
- Join Date
- Aug 2004
- Location
- San Bernardino, CA
- Posts
- 883
Not a huge update but I got a few hours in on the car and finalized the routing of the exhaust from the down pipe. The flex joint I picked up would not fit between the frame and the bell housing of the trans so I opted to place it down below.
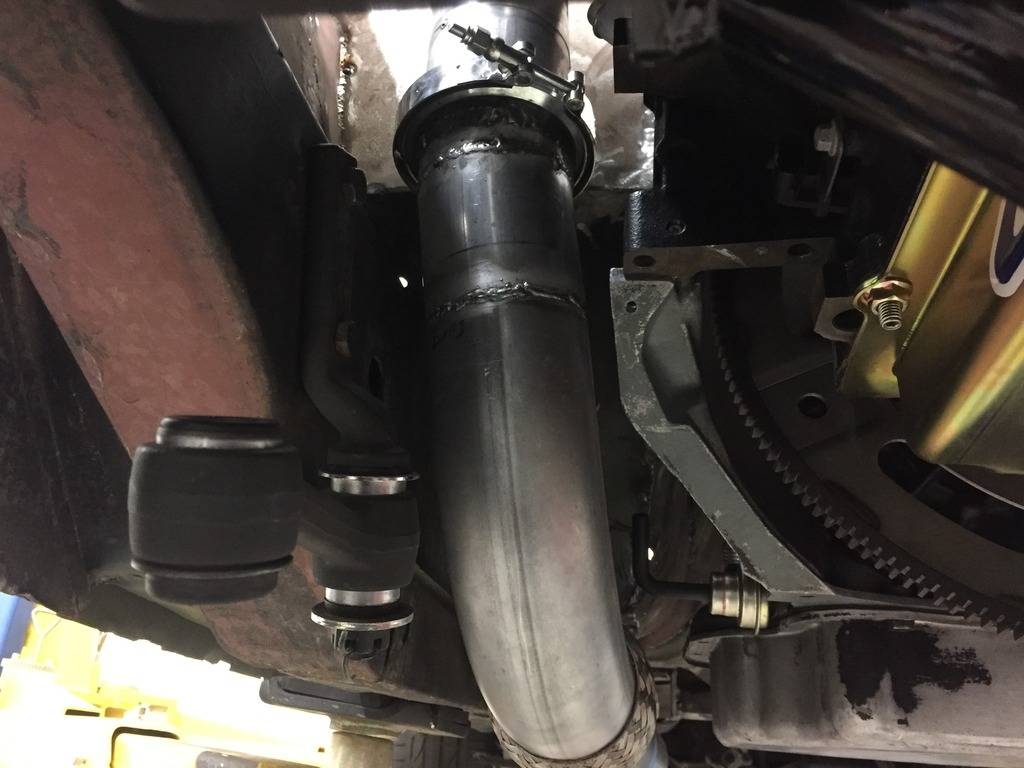
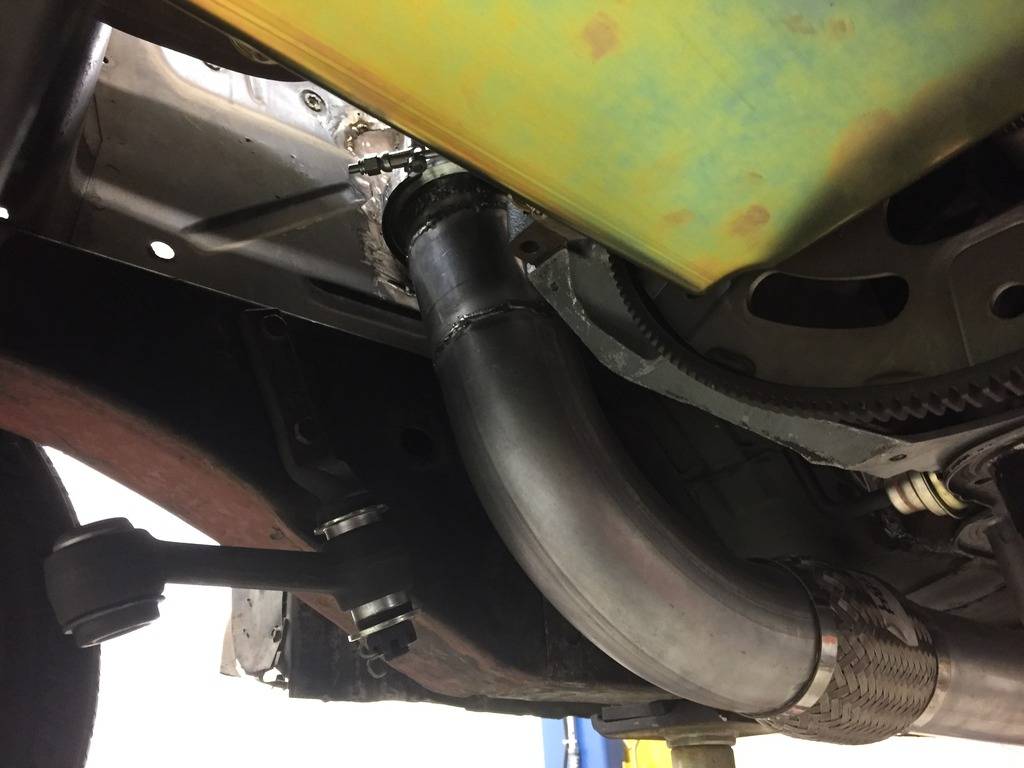
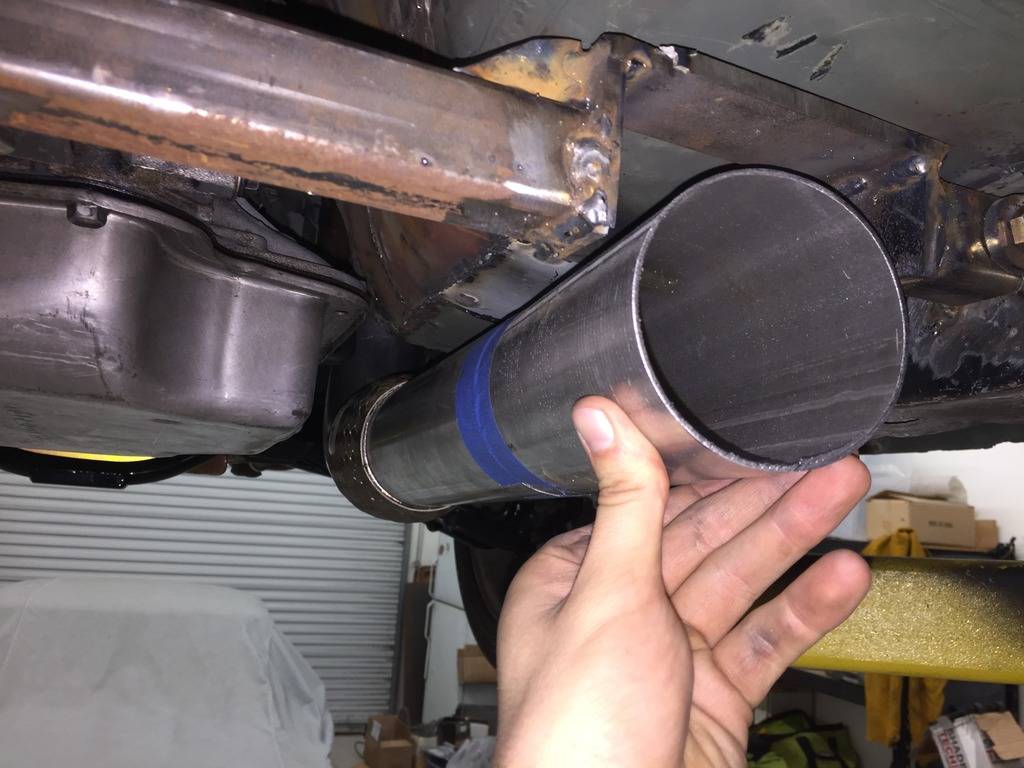
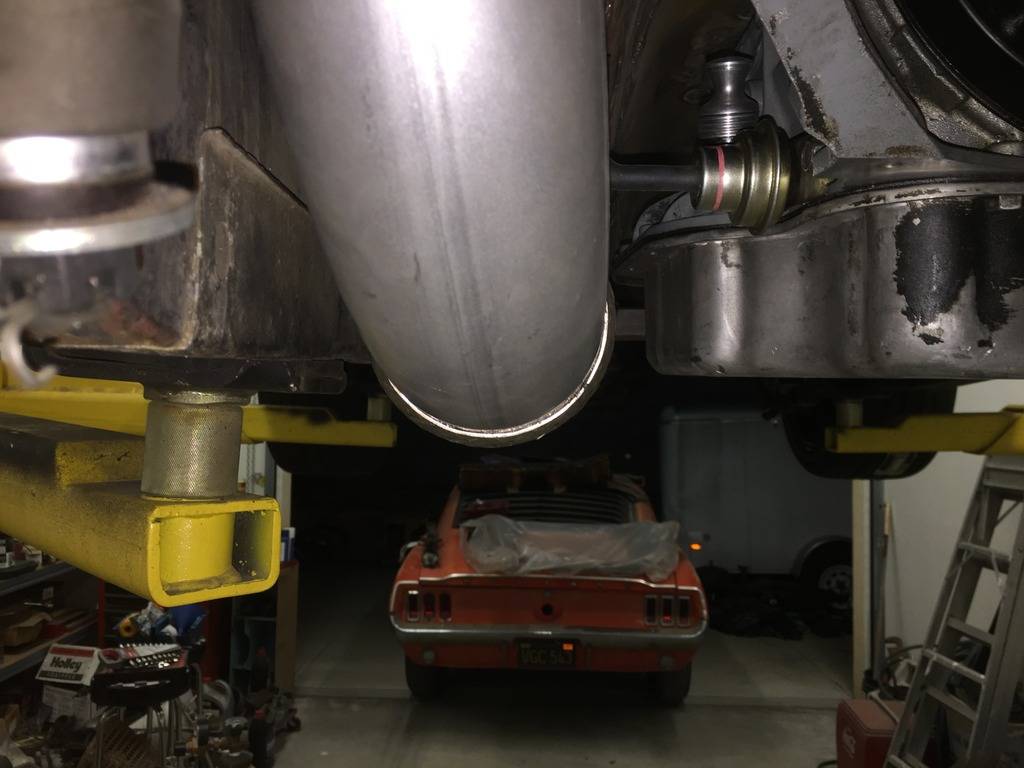
The exhaust hangs a but lower than my subframe connectors. The floor pans in the rear will be an issue and force me to make a slight dip in the piping.
Among other things I picked up some Holley LS fuel rails, Aeromotive A1000 FPR, and a vacuum manifold that bolts to the rear of a LS cylinder head, along with weld bungs needed for the oil drain, O2 sensor, and the AIT sensor.
11-12-2016 #280
Registered User
- Join Date
- Aug 2004
- Location
- San Bernardino, CA
- Posts
- 883
My cobra head coupler arrived. I almost forgot I ordered this thing!
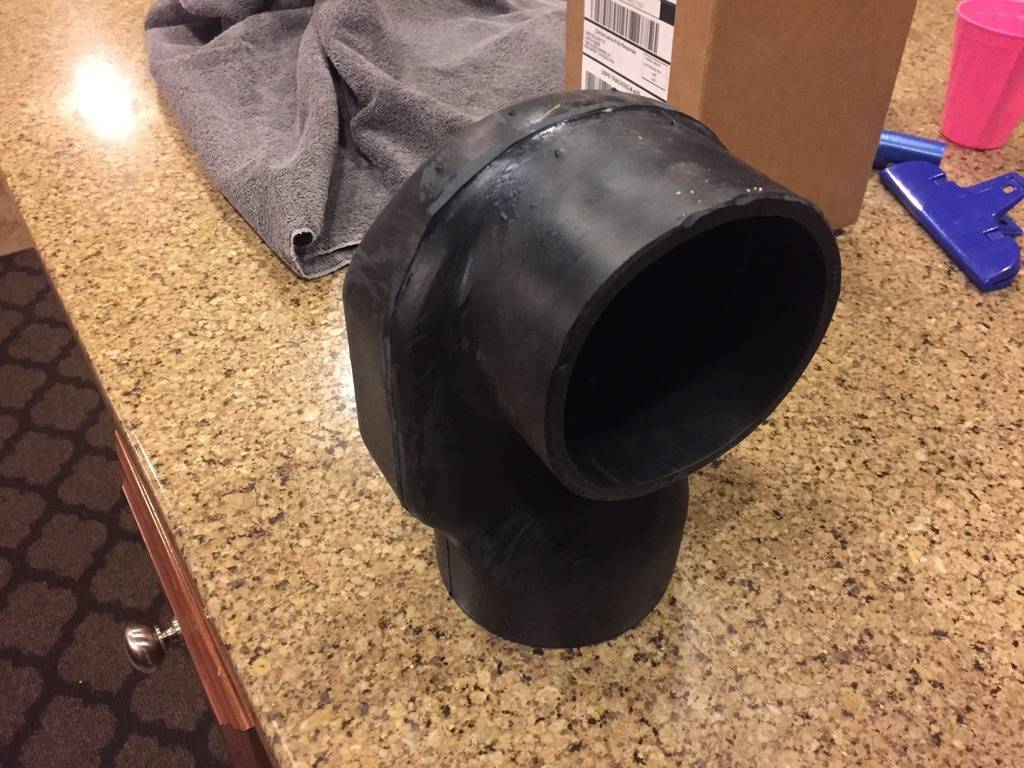
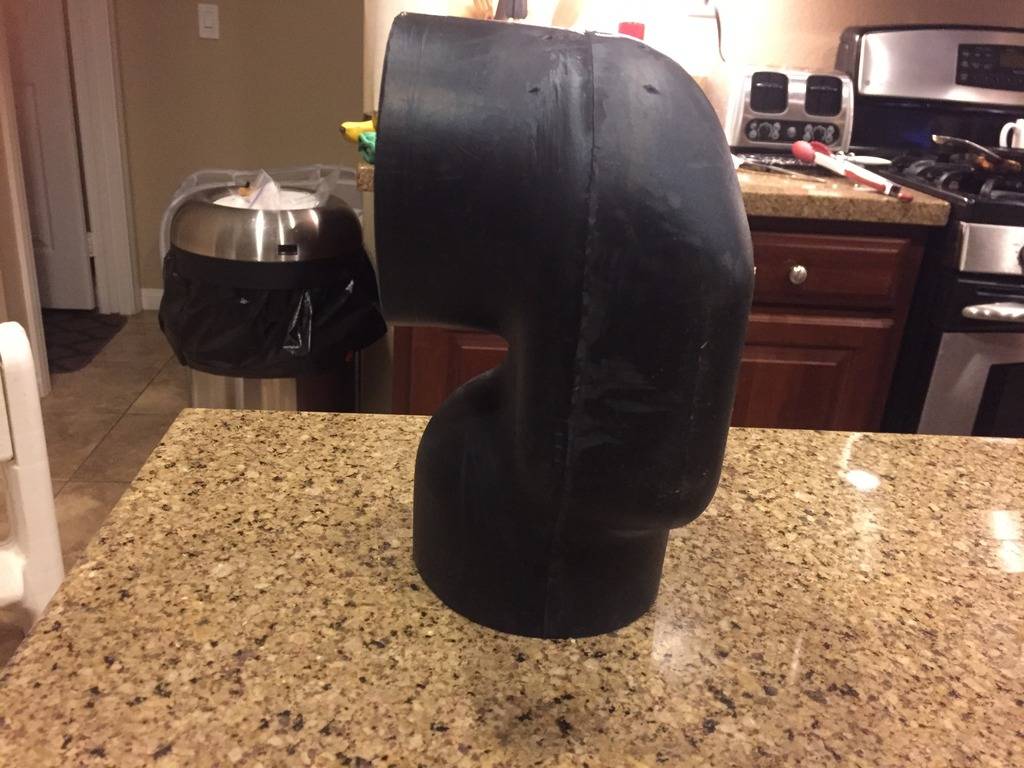
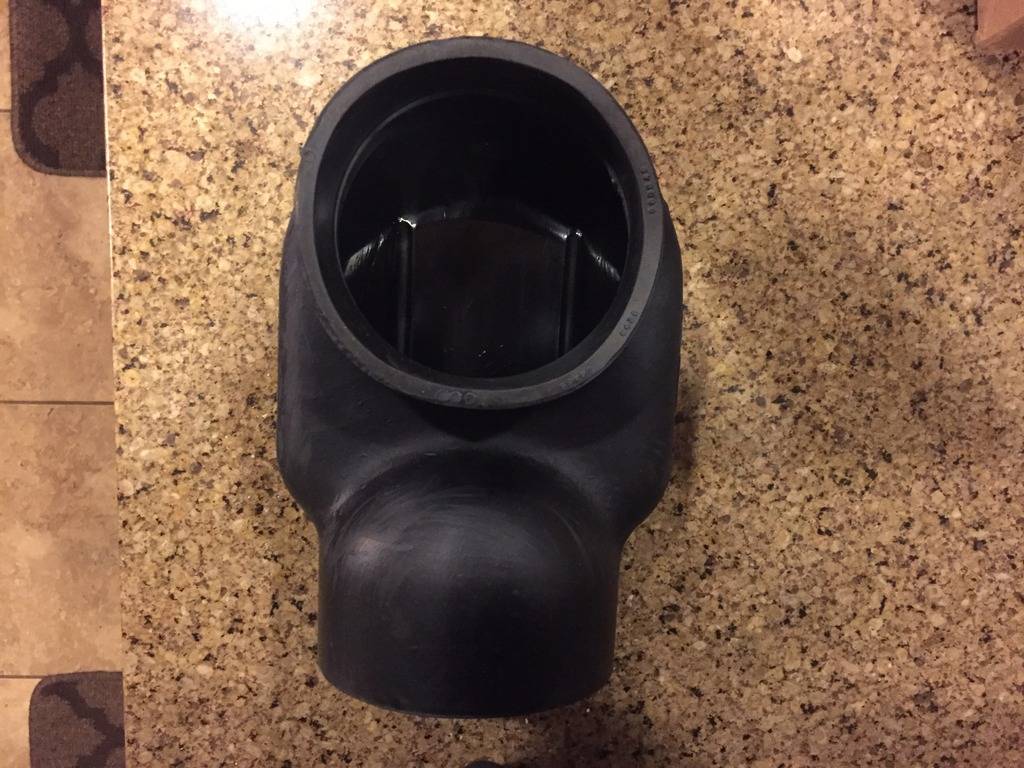
It is made out of very heavy rubber. It should fit perfectly between the core support and turbo. There is no way for me to just cut a hole in the core support to run a longer filter because the headlight bucket and the hood bumper are in the way. It will have to be relocated down below.
I also dreamed up an idea to mount a long rectangular intercooler behind the front valance between the park lights. I would have to cut a large hole where the licence plate mounts to and secure the intercooler to the frame using some flat stock. It should work out just fine to route the charge pipe thru the battery apron behind the head light extension. There is loads of room there and no interference with the front wheels.


 Reply With Quote





