


Results 221 to 240 of 288
Thread: LSx 1967 Mustang
Hybrid View


-
01-02-2016 #1
 Registered User
- Join Date
- Aug 2004
- Location
- San Bernardino, CA
- Posts
- 883
I decided to go cheap and mod my gas tank myself. I went to a local pick a part and got a 2000 mustang gas tank for $20. I cut the fuel pump ring off the top and drilled the fuel pump basket spot welds out. I bought a 98 cobra fuel pump module (has 3/8 feed, 5/16 return) with a walbro 255 pump installed. all in all i have in tank efi for under $200.
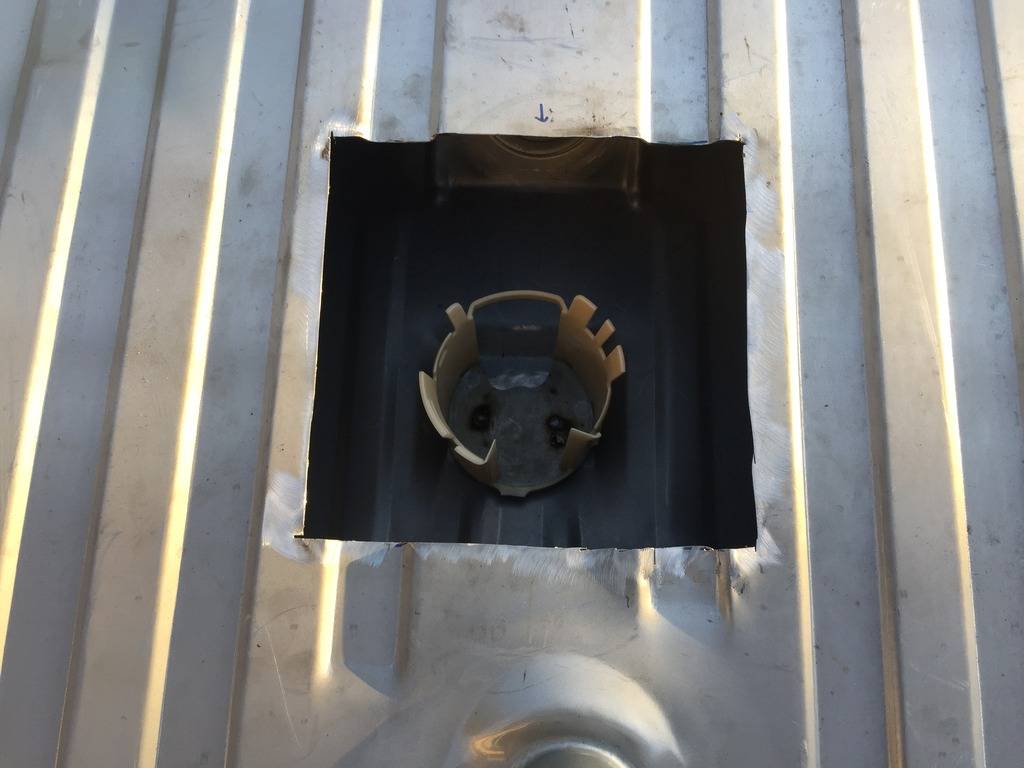


the mustang fuel pump module is pretty unique, the pump assembly snaps into the welded basket and the hat is separate and connected by the feed hoses. The 98 mustang gt and cobra were the only year that used this basket setup with a feed and a return line in the hat, the previous years used the pump on a stick setup like a fox body. all years above 98 used a pwm fuel pump with only a single feed line.
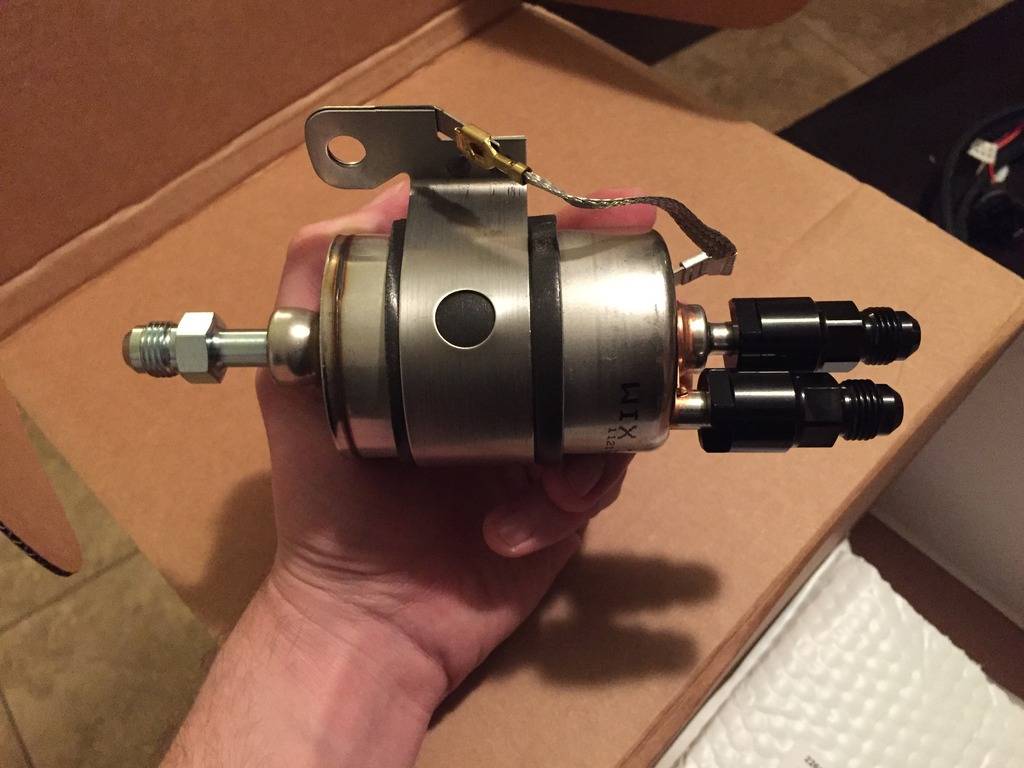
running a vette filter regulator
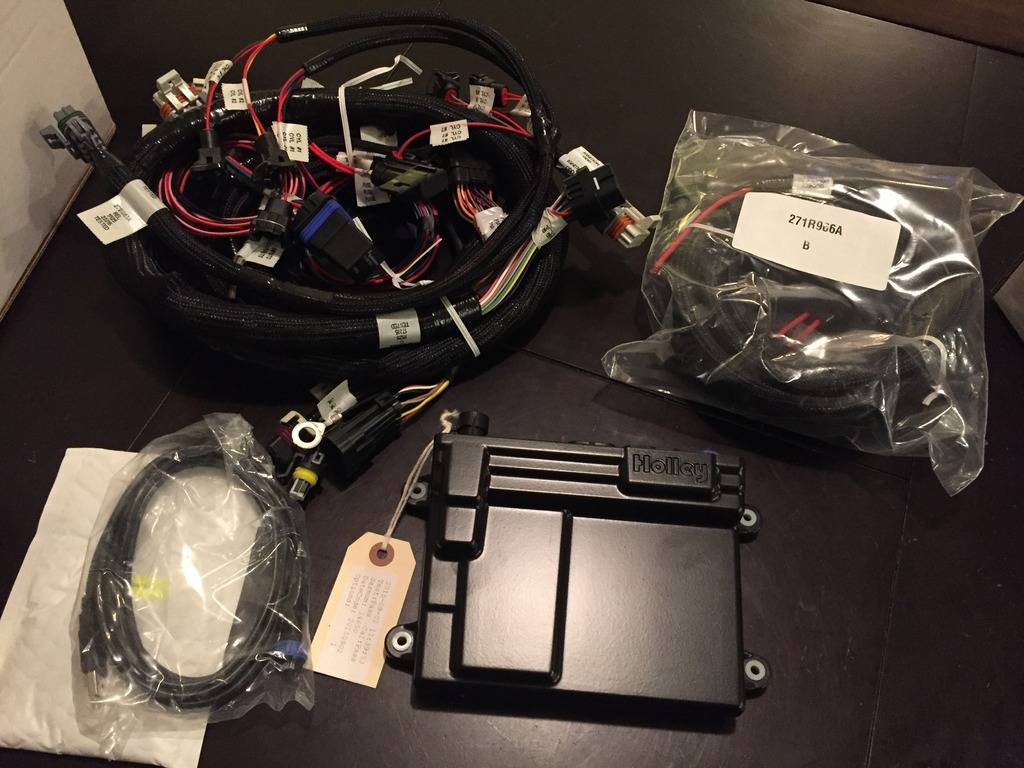
also picked up a Holley HP LS1 kit.
-
01-02-2016 #2
Registered User
- Join Date
- Aug 2004
- Location
- San Bernardino, CA
- Posts
- 883
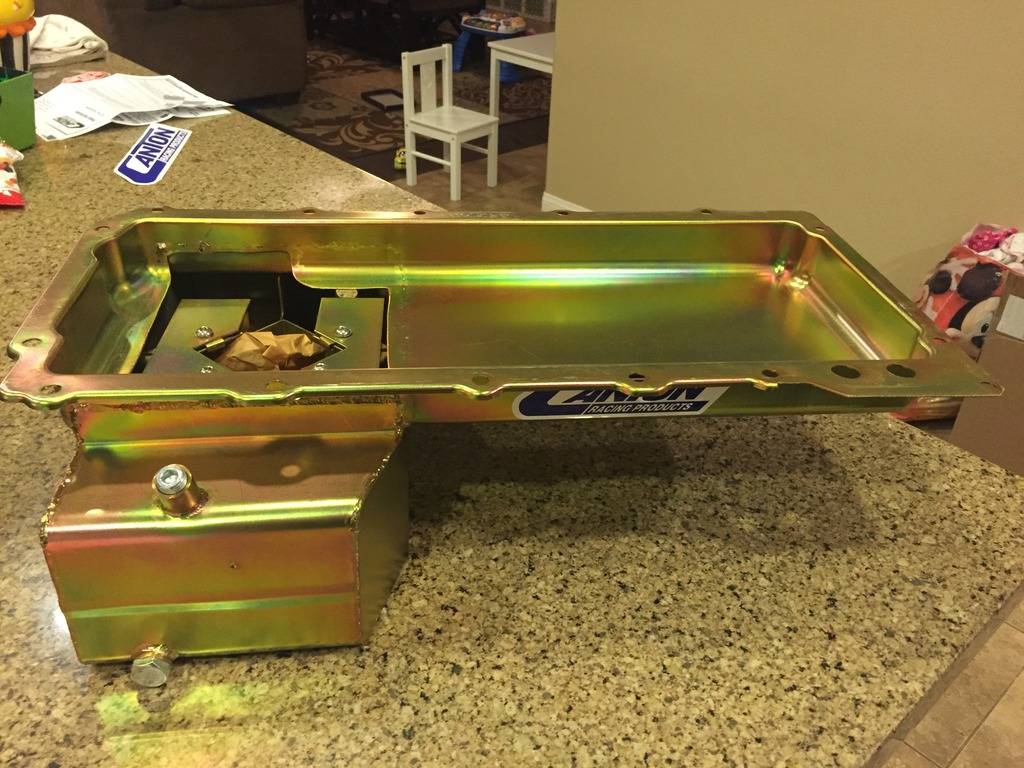
I ditched the GTO pan and went with a canton front sump. Gives loads of room for the factory cross brace and steering. Im going with manual for now, but power will be an easy upgrade.

ditched the power steering pump and re located the idler pulley. easy swap back to power if needed.
01-02-2016 #3 -Moderator/Sponsor-
- Join Date
- Apr 2001
- Location
- The City of Fountains
- Posts
- 16,118

That alternator may hit the fender. I have the Holley alternator bracket and it's very close. That bracket looks like it's even farther out.
Here is a decent picture to show how close it is...

Andrew
*edit* Or not....I see in a previous post you already had it mocked up...LOLLast edited by andrewb70; 01-02-2016 at 09:51 PM.
1970 GTO Version 3.0
1967 Cougar build
GM High-Tech Performance feature
My YouTube Channel Please Subscribe!
Instagram @dr__efi
I deliver what EFI promises.
Remote Holley EFI tuning.
Please get in touch if I can be of service.
"You were the gun, your voice was the trigger, your bravery was the barrel, your eyes were the bullets." ~ Her
02-11-2016 #4
Registered User
- Join Date
- Aug 2004
- Location
- San Bernardino, CA
- Posts
- 883
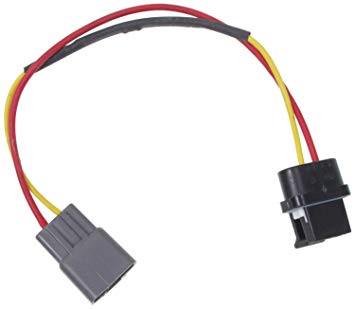
looking at this again it looks like you duplicated the same wiring as a 10/12SI alternator? i just watched a youtube video on a 10si to cs130 conversion and the guy used a gm harness pigtail that has a resistor in line and the additional wire for the "bat" stud. Originally Posted by andrewb70

thanks again Andrew!
02-11-2016 #5
-Moderator/Sponsor-
- Join Date
- Apr 2001
- Location
- The City of Fountains
- Posts
- 16,118
I don't have a wire from the 4 pin plug going to the Batt terminal. I have the L terminal going to the Dominator through a resistor and I have the S terminal going to the hot side of the starter relay, which is what I'm using for most of my additional power feeds. Originally Posted by DCx
Andrew1970 GTO Version 3.0
1967 Cougar build
GM High-Tech Performance feature
My YouTube Channel Please Subscribe!
Instagram @dr__efi
I deliver what EFI promises.
Remote Holley EFI tuning.
Please get in touch if I can be of service.
"You were the gun, your voice was the trigger, your bravery was the barrel, your eyes were the bullets." ~ Her
02-17-2016 #6
Registered User
- Join Date
- Aug 2004
- Location
- San Bernardino, CA
- Posts
- 883
im just going to use the holley alternator plug i have with the resistor already installed and call it a day! Originally Posted by andrewb70
andrew, i ordered a painless (3) relay bank (pn:30107) to trigger the fuel pump and my fans. looking at the holley hp diagram the harness already has a fuel pump relay that can handle 12 amps, i saw in a holley forum that you can use the large green wire to trigger an additional relay if you have a large amp draw on the pump. is that what you did, run a separate relay from the green power wire? the fuel pump is powered by the ecu already so it isn't a separate programmable output like the fans correct?
i will have a week off from work and school here shortly. expect lots of progress.
************* never mind! did more digging and discovered this!
I've never used the ECU's fuel pump trigger wire to directly power the pump (even if it is less than 10 amps).
I've always used a separate relay (2nd relay) because that green wire is still only 14 AWG.
The 2nd fuel pump relay is used so the fuel injectors aren't subjected to the pump's amp draw.
It's only a 20 amp fuse and it also feeds power to the fuel injectors (& ignition coils - LSx).
I prefer to use 10 gauge wire due to its long length, especially for high output race pumps.
You'd simply use the green fuel pump wire to trigger the primary fuel pump relay.
01-03-2016 #7
Registered User
- Join Date
- Aug 2004
- Location
- Los Angeles
- Posts
- 592
Just went through the thread. Scope Creep has been crazy on this one!
It funny, mess with a Mustang and the purists get their pantys in a wad. I didnt have one person give me crap about putting a Caddy in a Pinto.The rule is measure twice and cut once. My problem is I still measure with a mic and cut with an axe!
01-03-2016 #8
Registered User
- Join Date
- Apr 2010
- Posts
- 95
Huh. Go figure. Originally Posted by Protour_Pinto
01-03-2016 #9
Registered User
- Join Date
- Aug 2004
- Location
- San Bernardino, CA
- Posts
- 883
progress has been very slow. I went back to school, who would have thought a Masters Degree would stall my progress... lol
I had major issues with my th400 trans i picked up back in April. The guy i got it from was super sketchy and i got screwed on the deal. I had to replace the tail shaft on it. he some how threw on a th375 tail, thankfully the trans is a TH400 and had the larger main shaft. found out the filter tube was wrong, governor was missing, speedo drive gear and driven gear missing. mixed bolts on the pan, greasy case was painted over. thankfully the inside looks good and has new gaskets and seals. I have my fingers crossed it runs okay.
I had a Champion 24" core 67 mustang big block radiator made for the car. I had the outlet and inlet sized appropriately for an LS motor. I need to adapt my F body fans to it.
I will photograph more of my goodies as i get time. I am about to take a load of sandblasted parts to get powdercoated.
01-06-2016 #10 Registered User
- Join Date
- Apr 2015
- Location
- Burlington KY
- Posts
- 357
Cant wait to see this running.
"Racing is life. Everything else is just, waiting"
01-28-2016 #11
Registered User
- Join Date
- Aug 2004
- Location
- San Bernardino, CA
- Posts
- 883
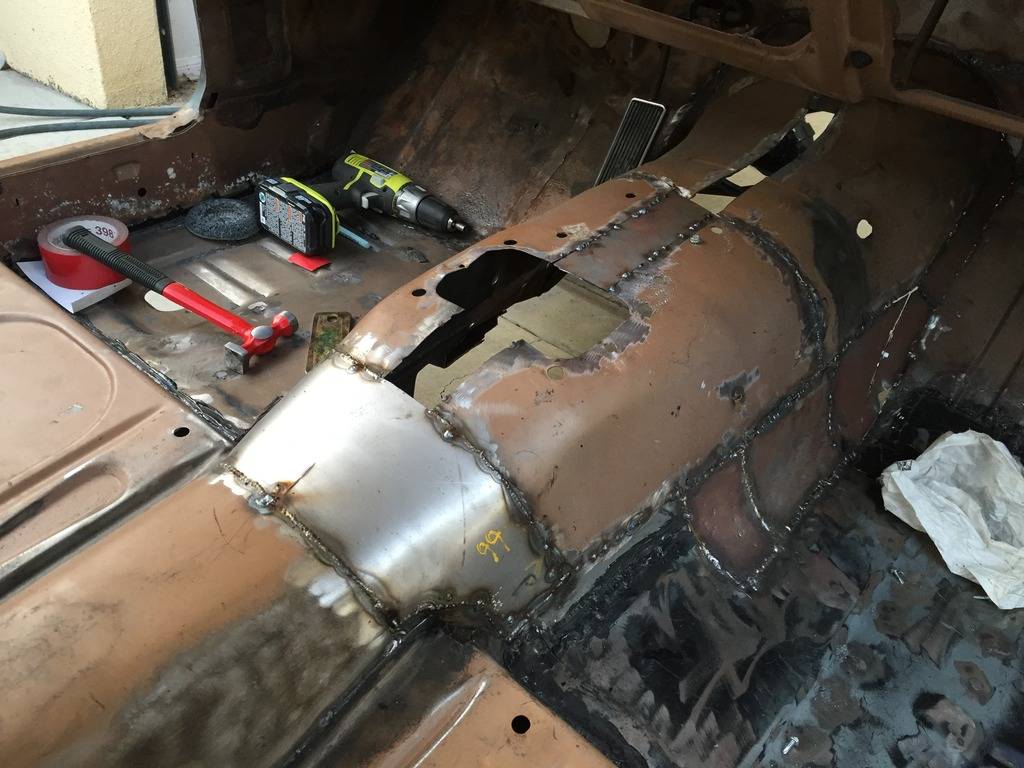
did a little work on my hacked up trans tunnel. i used sheet metal screws to form the patch to the floor then i cut it out with body saw and welded it in.
01-29-2016 #12
Registered User
- Join Date
- May 2015
- Location
- North central Montana
- Posts
- 83
cool project. I likw the ls in the car but my brother, however would bite his tongue off screaming about this. For those moments i just tell him it is cuz you want to win a race. LOL. I hope you are saving money for lots of tires tho.
Bruce Jeppesen
"RANGERS LEAD THE WAY"
1966 Chevelle
1978 Ford F-150 4x4
1930 Model
https://www.pro-touring.com/threads/1...e-PT-Challenge
Need more time, more money and more ambition!!!
02-18-2016 #13
-Moderator/Sponsor-
- Join Date
- Apr 2001
- Location
- The City of Fountains
- Posts
- 16,118
Here is what I did for the fuel pump relay:
http://ls1tech.com/forums/conversion...l#post18833535
Andrew1970 GTO Version 3.0
1967 Cougar build
GM High-Tech Performance feature
My YouTube Channel Please Subscribe!
Instagram @dr__efi
I deliver what EFI promises.
Remote Holley EFI tuning.
Please get in touch if I can be of service.
"You were the gun, your voice was the trigger, your bravery was the barrel, your eyes were the bullets." ~ Her
02-24-2016 #14
Registered User
- Join Date
- Aug 2004
- Location
- San Bernardino, CA
- Posts
- 883
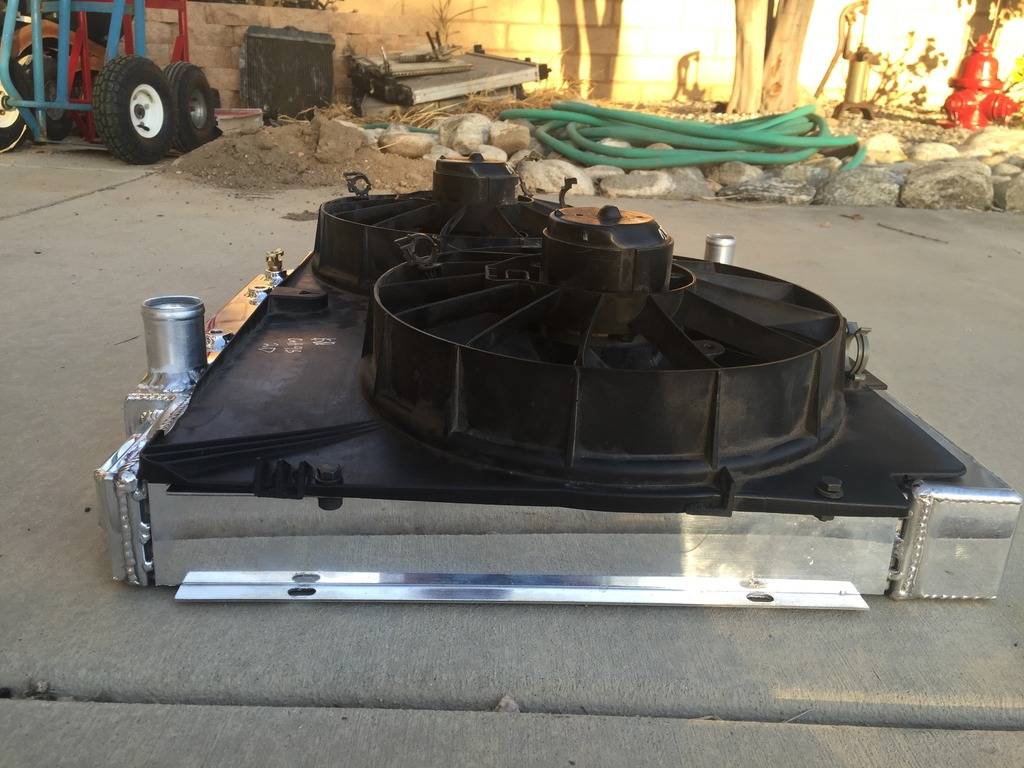
I spent most of the day figuring out a way to mount my champion 3 core radiator I had made. I chose a big block mustang radiator but had the outlet and inlet swapped and sized for an LS motor. I originally wanted to use the factory saddle brackets for a big block but quickly realized that the way the radiator was made the tank sat on the frame rather than the repo saddles I purchased. Also the core is too thick and the top bracket would not fit. I moved to plan B and got some 1/4 inch thick aluminum bar stock off ebay and made my own radiator mounts. I drilled and tapped it to mount the radiator 1/8 of an inch from touching the frame rails. To top it all off I butchered a set of 2000 Camaro SS fans I had laying around and mounted them to the fan shroud brackets. All in all, I am please with the way it turned out.
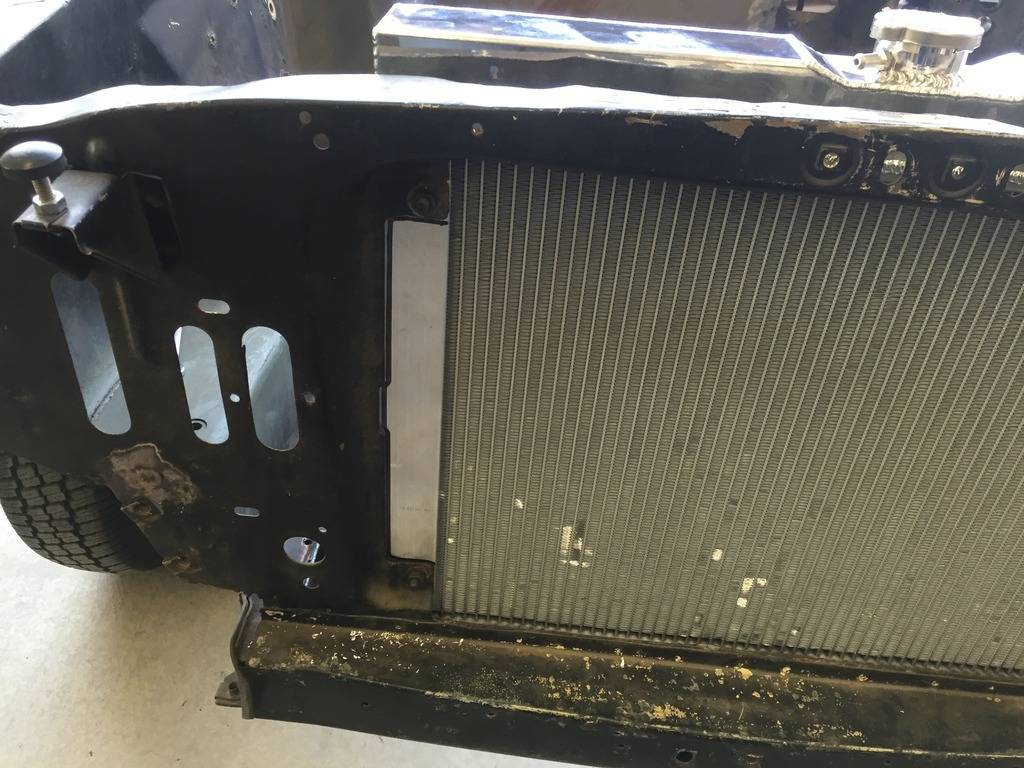
I marked the aluminum, i still need to cut out the overlap.


I also pulled out the parking brake from under the dash. My pull handle was broken and I could not get the pin out of the handle for the life of me. I ended up cutting off the old handle with the grinder and pulling the knurled pin out with vise grips. I will replace it with a billet handle in the future.
03-02-2016 #15
Registered User
- Join Date
- Aug 2004
- Location
- San Bernardino, CA
- Posts
- 883
I test fitted my 10" speedway torque converter. plugged into the trans just fine. what do you all think of this gap? its about .20, i stacked all the washers from the ARP bolts i have and its a perfect fit. do you think i should use all 3 washers or just 2 washers and pull the converter forward a bit?
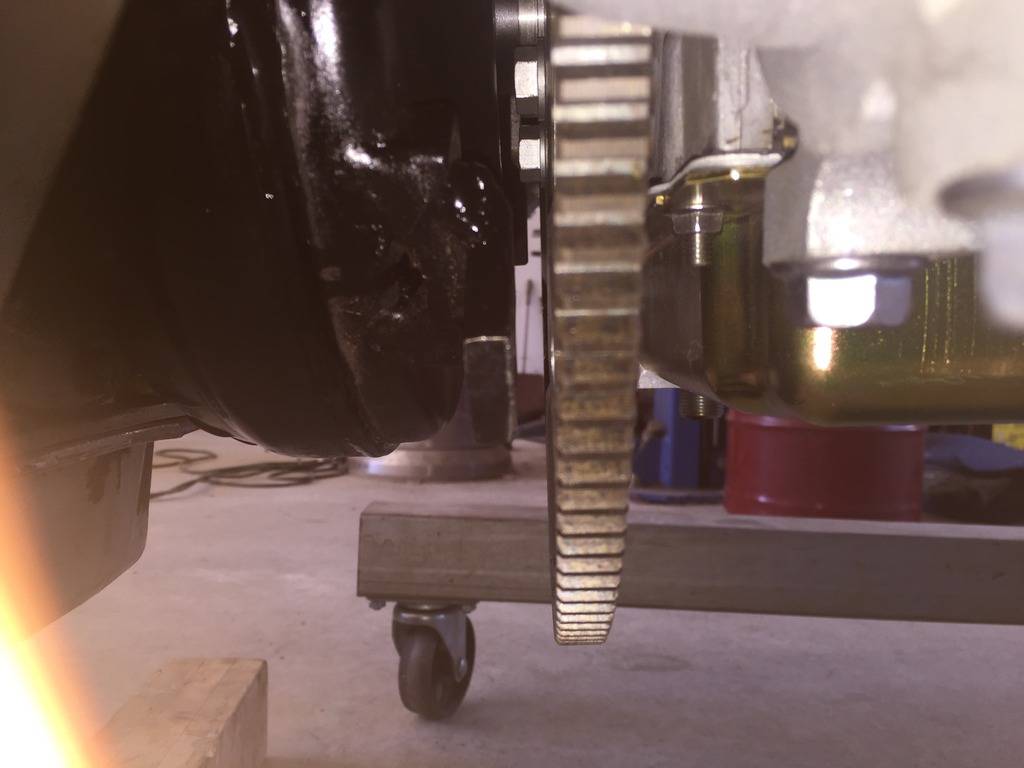
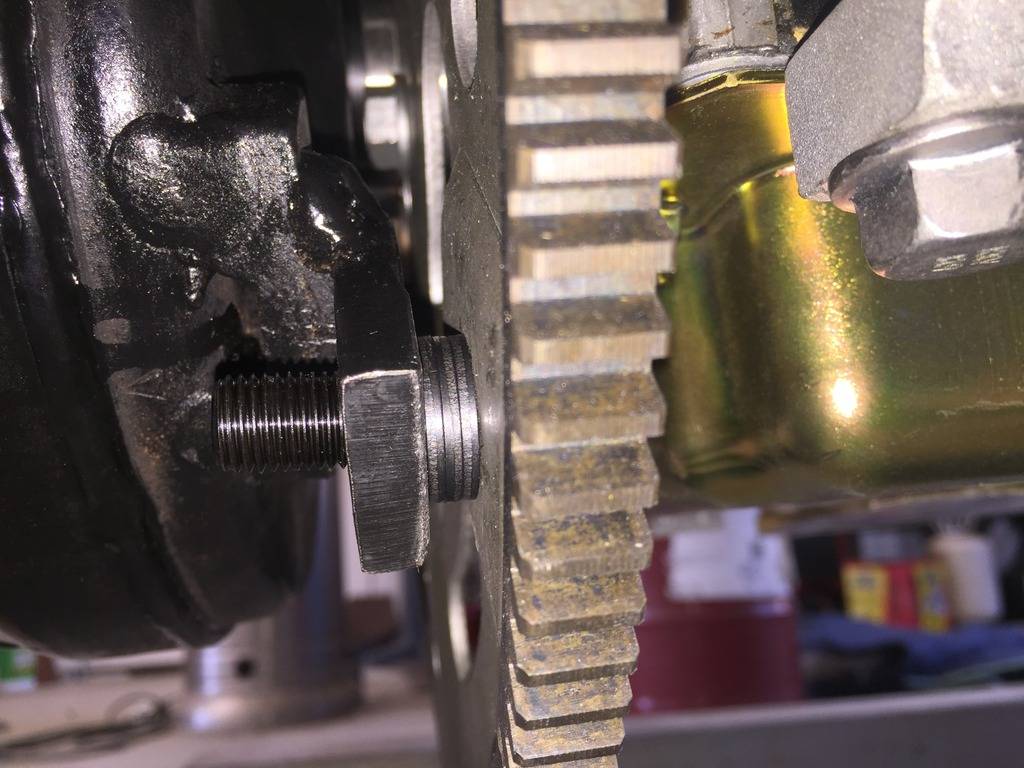
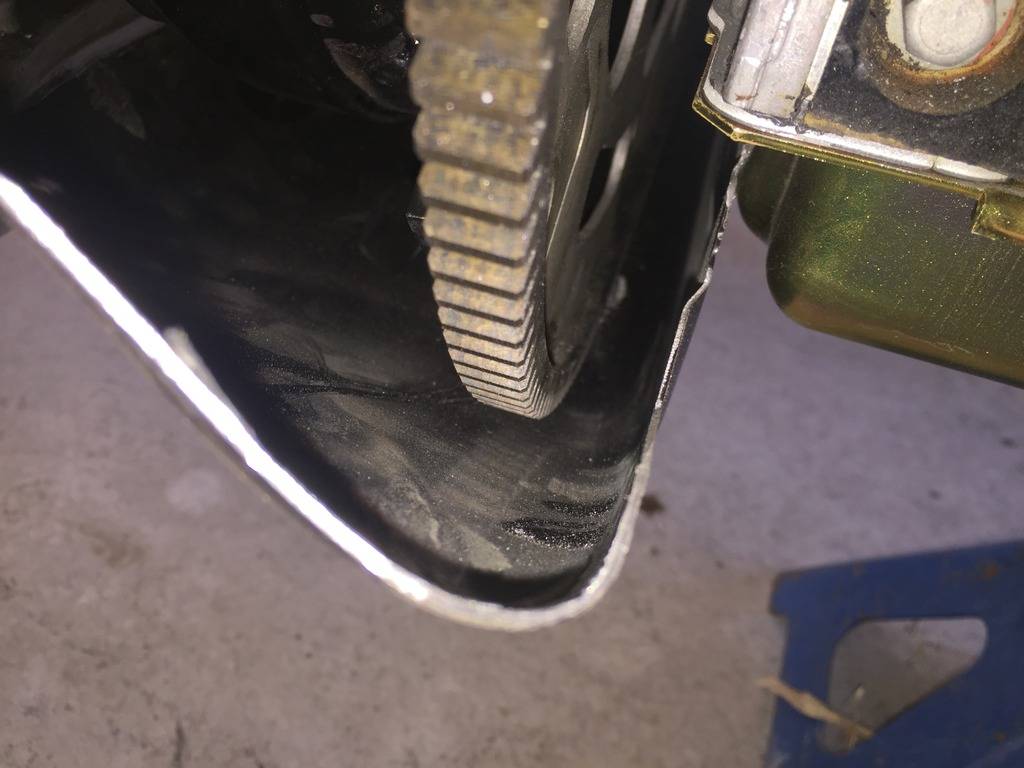
I also cut up a cheap-o TH400 flex plate shield from ebay and made it work on my 5.3.
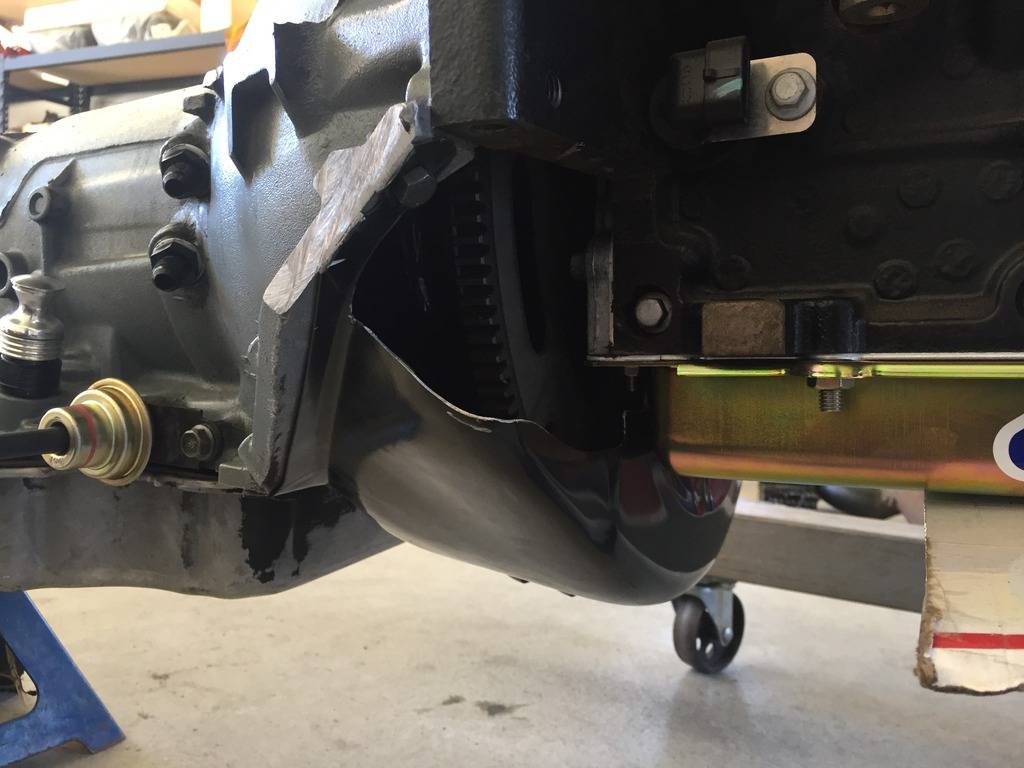
yes, i cut the "ears" off my trans case. i drilled and tapped the case to accept the shield.
05-19-2016 #16
Registered User
- Join Date
- Aug 2004
- Location
- San Bernardino, CA
- Posts
- 883
I took a load of parts to the powder coaters last week. they turned out better than expected. I use all of the original parts off of the car. since the vent and quarter window frames had some heavy pits and peeling chrome i just had them blasted and coated. some of the large pits are still visible, but that doesn't bother me much.
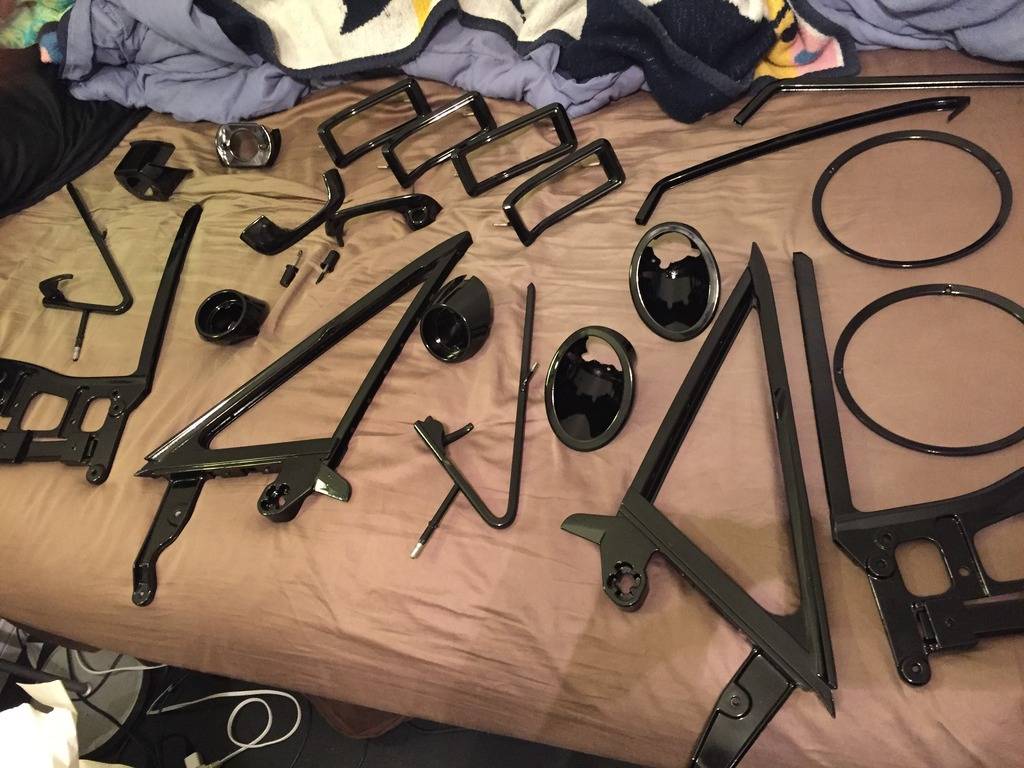
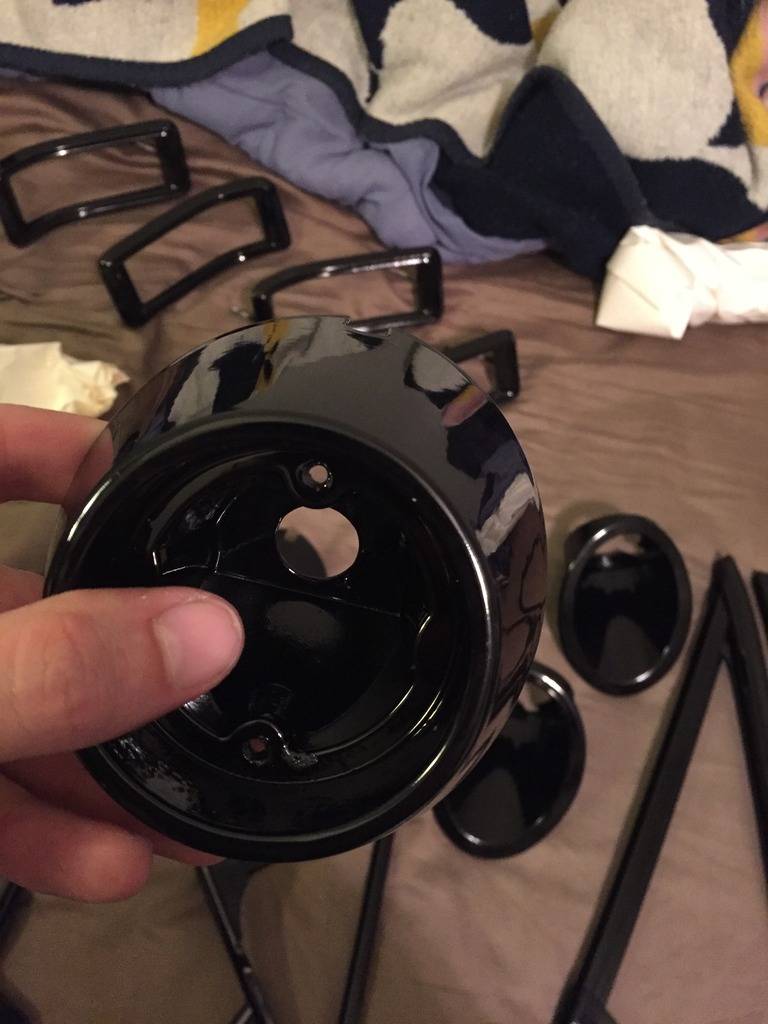

this is the worst area of pitting on the drivers vent frame. its only noticeable when you look for it.
I just dropped off a pop open gas cap, tail light buckets, and all of the front and rear glass window trim. next after that the bumpers and my choice of rims will get the same gloss black.
05-19-2016 #17 Registered User
- Join Date
- Dec 2006
- Location
- SF Bay Area
- Posts
- 462
If you don't mind me asking, what did it run you to get all that powercoated?
It looks great, btw!chunger
'68 Ranchero 500
'70 Cougar XR-7 Convertible
'98 Mustang GT Convertible
05-19-2016 #18
Registered User
- Join Date
- Aug 2004
- Location
- San Bernardino, CA
- Posts
- 883
not at all! everything pictured plus the door glass surround stainless (not pictured) was $280. that price included: Originally Posted by chunger
Vent window frames
vent glass frames
quarter window frames
door glass trim
door handles and buttons
reverse light housings
parking light housings and brackets
tail light trim bezels (6 total, 4 pictured)
headlight retaining rings
all these parts were original ford pieces, removed from the car and boxed up. they were dirty, pitted, and peeling. the shop baked, blasted, and acid stripped most of them. i cant wait to see how the gas cap and window stainless turns out!
the powder coat is far less thick than expected. the glass channels are .33 and the glass is .22 thick. leaves me with roughly .055 thickness for setting tape. i can use the recommended 1/16 tape or chance using 3/64 tape for the difference. i may try both and see what fits the best.
05-21-2016 #19
Registered User
- Join Date
- Aug 2004
- Location
- San Bernardino, CA
- Posts
- 883
what do you think i should do about mirrors for the car? mine came equipped with a drivers remote mirror only. after taking it apart i just gave up and realized that it would be a pain in the butt to disassemble completely to have powder coated. I am going to roll the dice on this one and buy two 67 square manual mirrors and have them powder coated. I was reading on some other forums that i can heat the mirror with a propane torch and wait for the glass to fall out. I have searched high and low for replacement glass for a mustang mirror but cannot find any! if this method does not work i will have to use drastic measures and go with some 67 camaro manual mirrors. They had vent windows so they are angled right for a mustang and THEY MAKE REPLACEMENT GLASS FOR THEM! that way i can just bust it out and reinstall it afterwards.
I want zero exterior stainless and chrome. I might have to have the door and trunk locks coated with a key inserted in them so just the fronts get powder coated.
I am missing one side of thin grill trim and my center joint is all mangled. i got a replacement center joint coming in the mail from ebay for $10. i hope its shape is usable. I need to also get a replacement hood lip molding, mine has a heavy dent right in the middle. it amazes me that the front clip or my car was perfect and both headlight buckets are immaculate but the hood trim is banged up.
as far as the grill goes, mine got mangled. im sure i could hammer the frame straight, cut out the center and weld in some diamond mesh but i think i am just going to get an ebay billet piece and have it coated.
05-31-2016 #20
Registered User
- Join Date
- Aug 2004
- Location
- San Bernardino, CA
- Posts
- 883
I bought a wheel works wheel fit 45 kit and tested multiple combinations with a new set of 275/35/18 bridgestone pole position tires. I finally settled on a 9.5" rim with 5.5" back spacing. I really like the results! I unbolted the U bolts on the axle and supported it on jack stands and lowered the car body to simulate ride height. I will let the pics show the results.
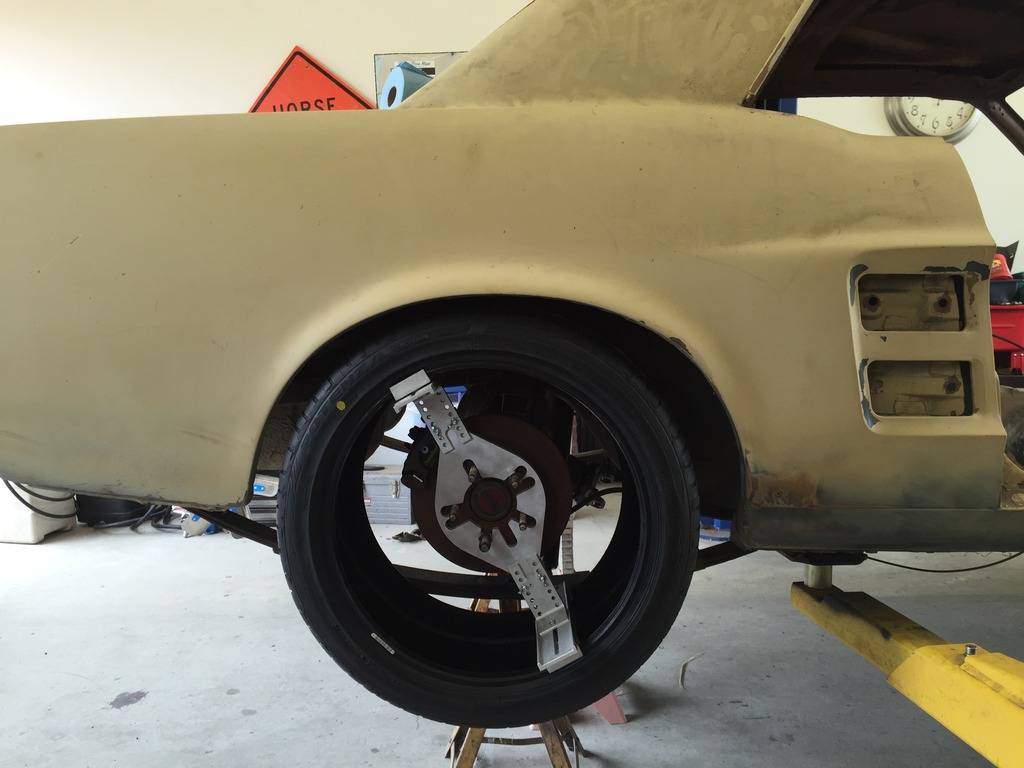
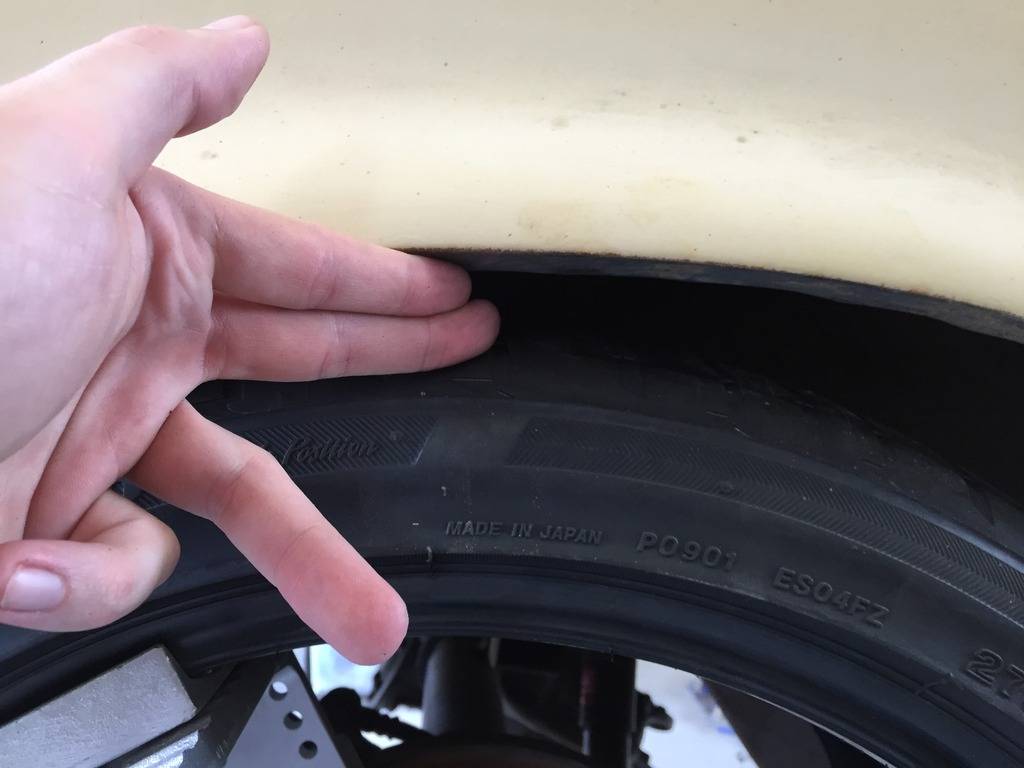
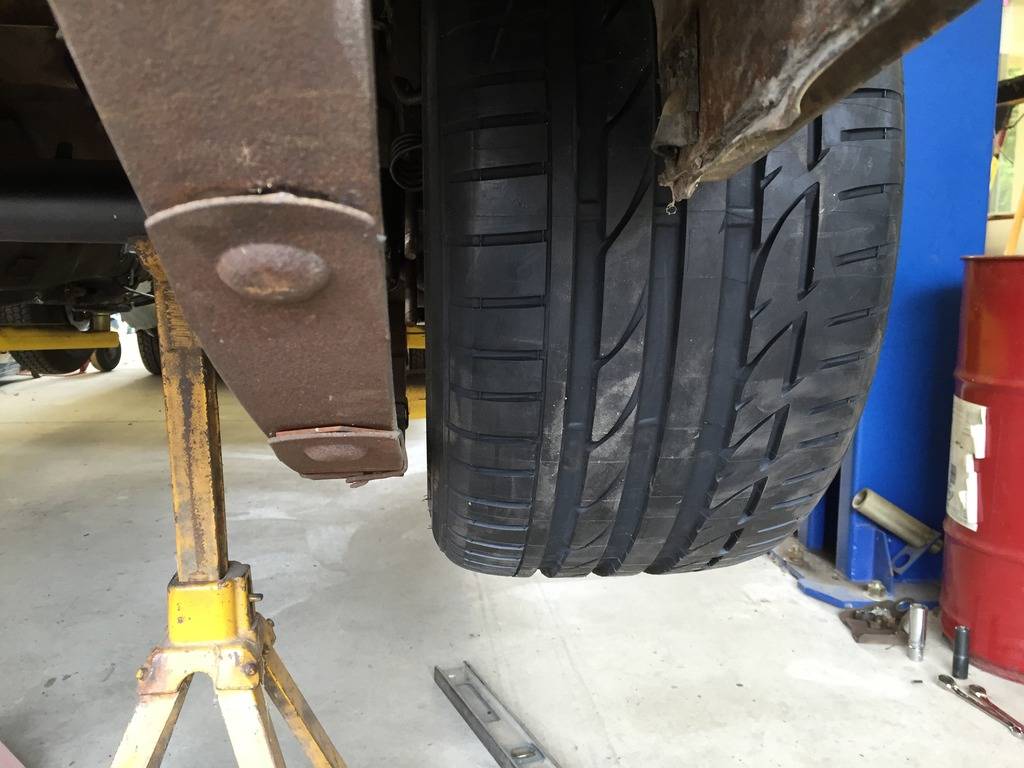
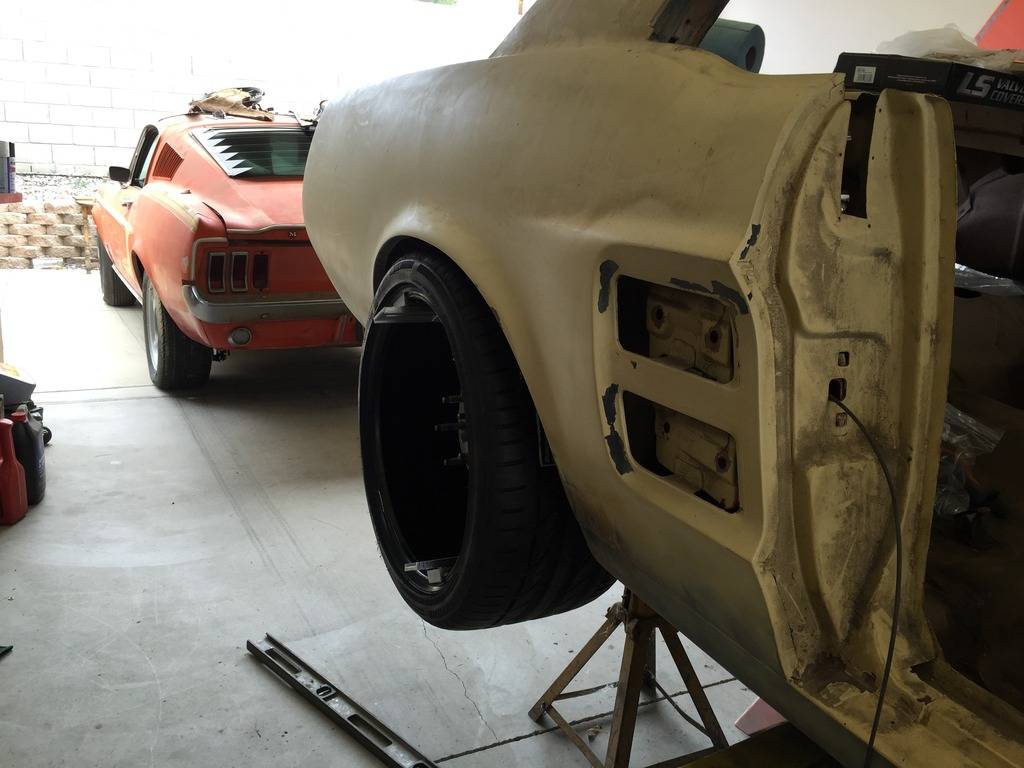

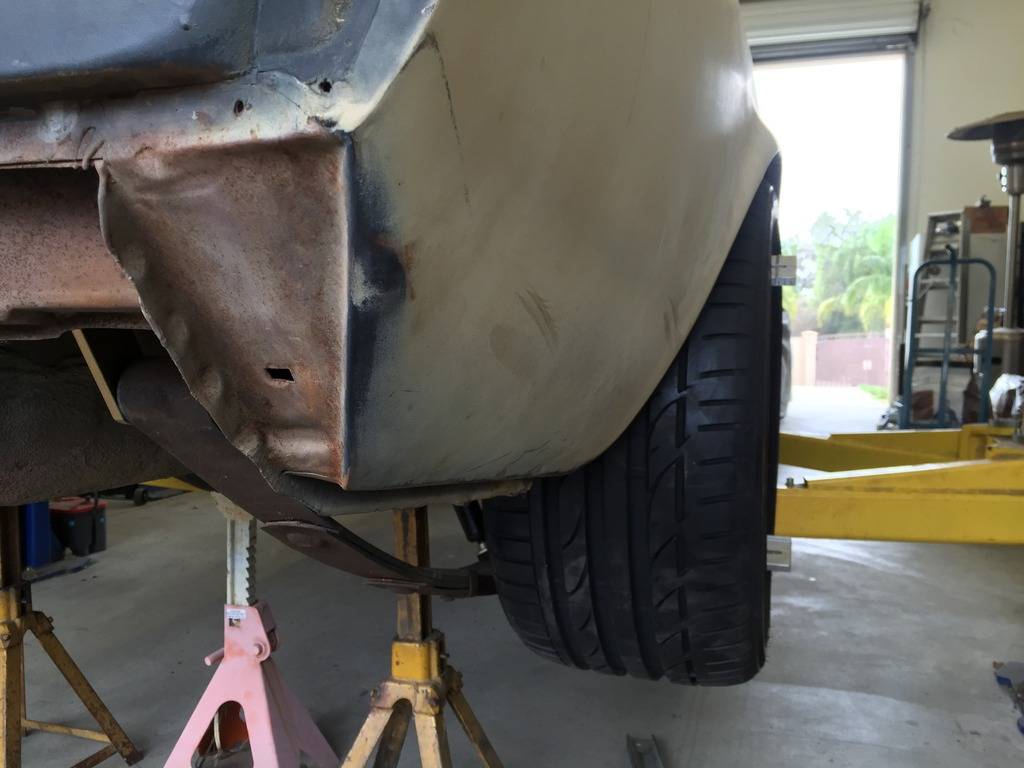
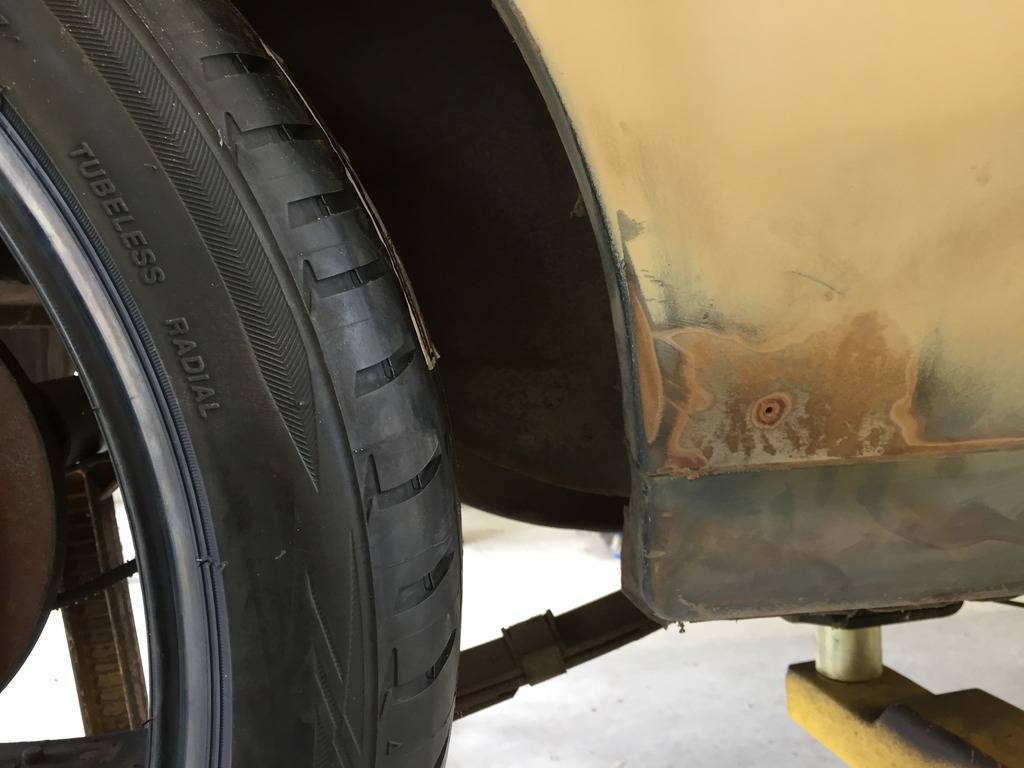
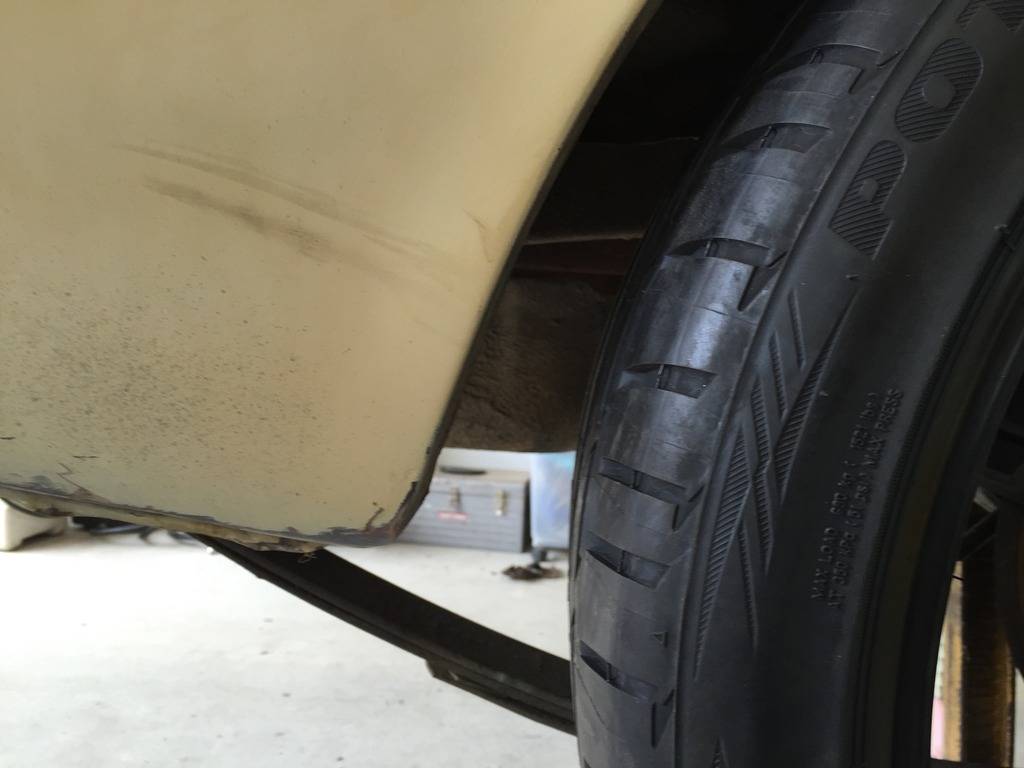
I also put the wheel fit into some 225/40/18 and tested them up front with a simulated 8" wheel with 4.5 back space. It was perfect, no contact at all lock to lock and it fit nicely in the fender.
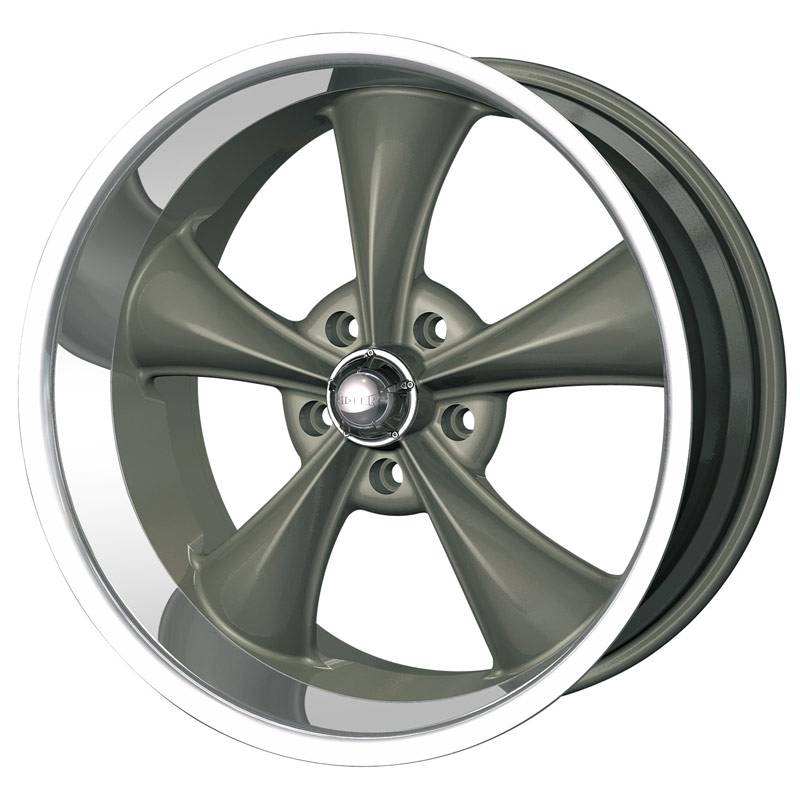
i picked up some Ridler 695's from ebay for $535 shipped... they are a generic 5 spoke coys/troque thrust knock off but i couldn't beat the price for the correct 18x9.5/5.5BS and 18x8/4.5BS wheels.


 Reply With Quote





