


Results 181 to 200 of 288
Thread: LSx 1967 Mustang
-
01-11-2014 #181
 Registered User
- Join Date
- Aug 2004
- Location
- San Bernardino, CA
- Posts
- 883
lets start over again...

after ordering a set of summit racing block hugger headers i realized i was unable to install them due to my motor mount placement. they weren't going to work any way... but that sparked an idea to cut off my existing motor mounts and start over with a new motor placement that would retain the stock steering box and rear steer. what i cam up with was building some motor mount platforms since the mustang is lacking them. here is what i came up with...
first to move the engine forward to clear the steering box i needed to add some width to the shock towers. I hollowed out the inner sections and cut down the bolts for the upper control arms. I also trimmed the support structure ends and grinder them smooth. i did not disturb the factory spot welds. as you can tell the inner structure was just sheet metal. no spot welds. i will box it all in with some new metal.
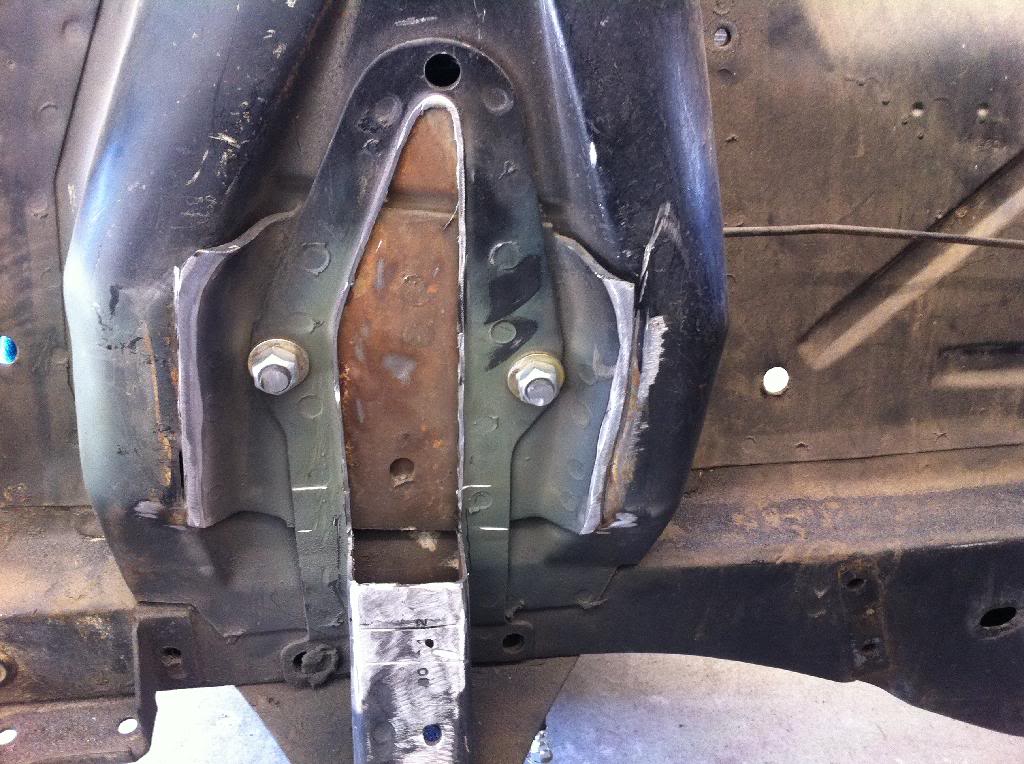
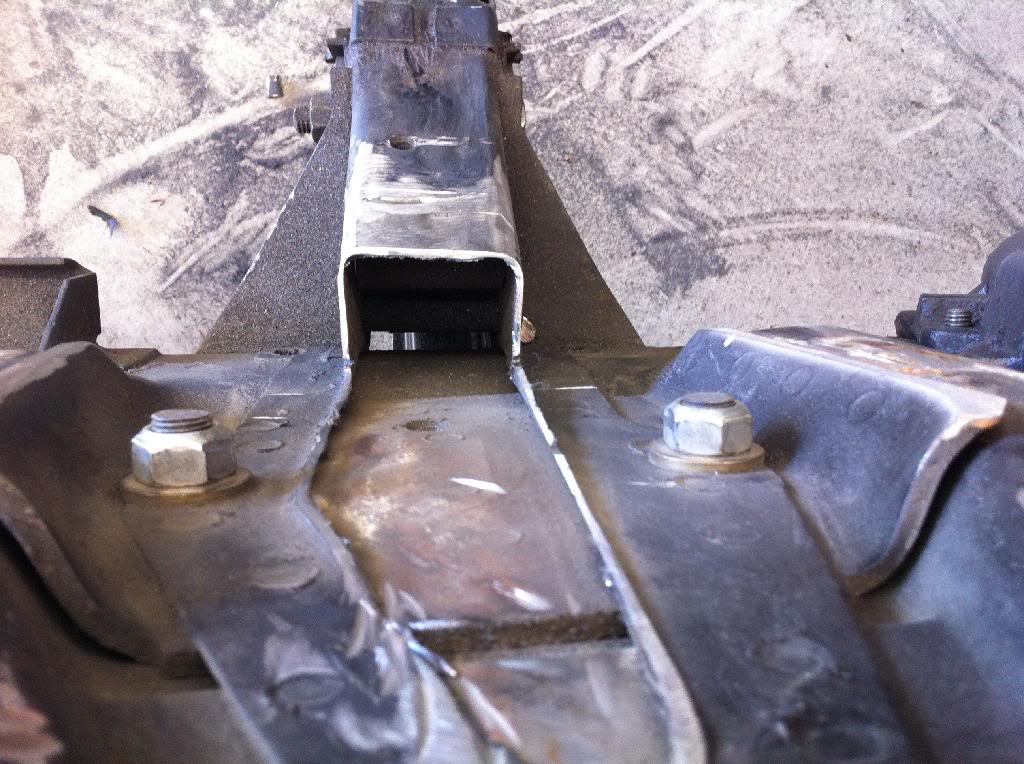
next up were the new motor mount platforms. I used 3/16 plates and made support structures that will be welded to the frame rails.
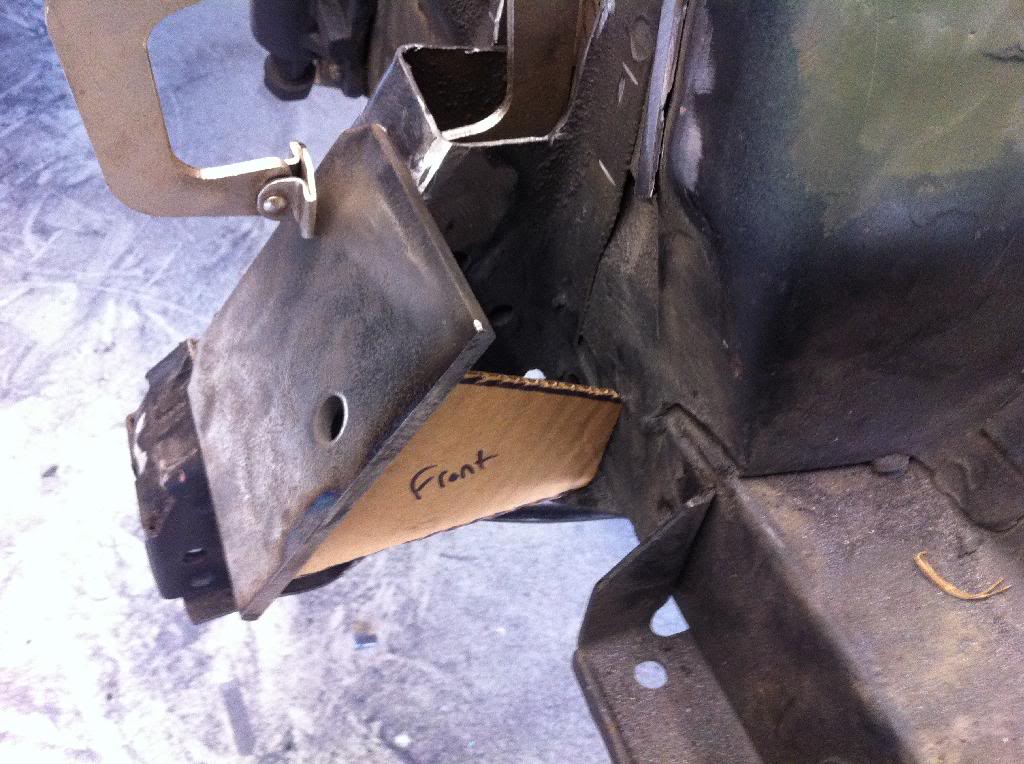
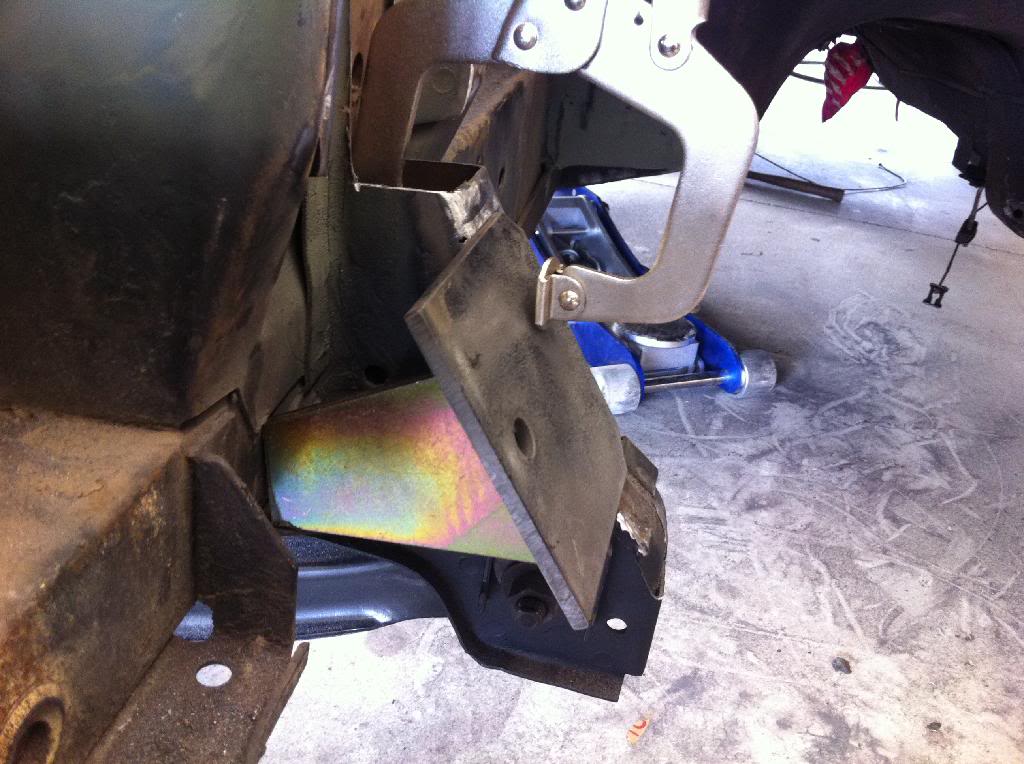

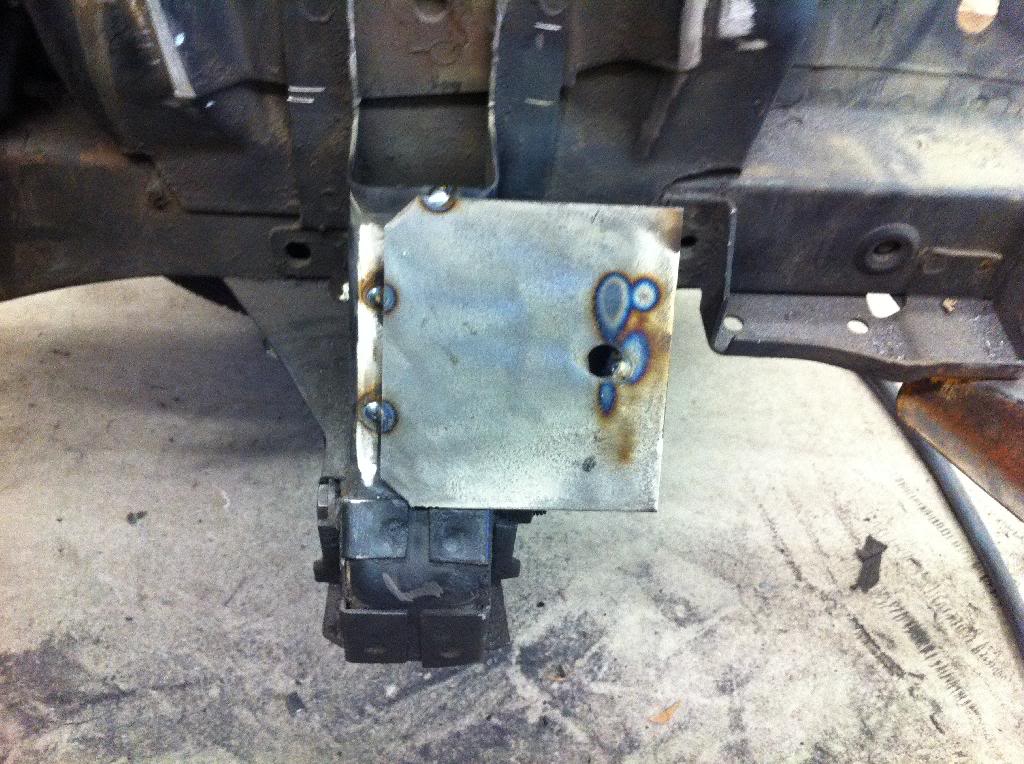
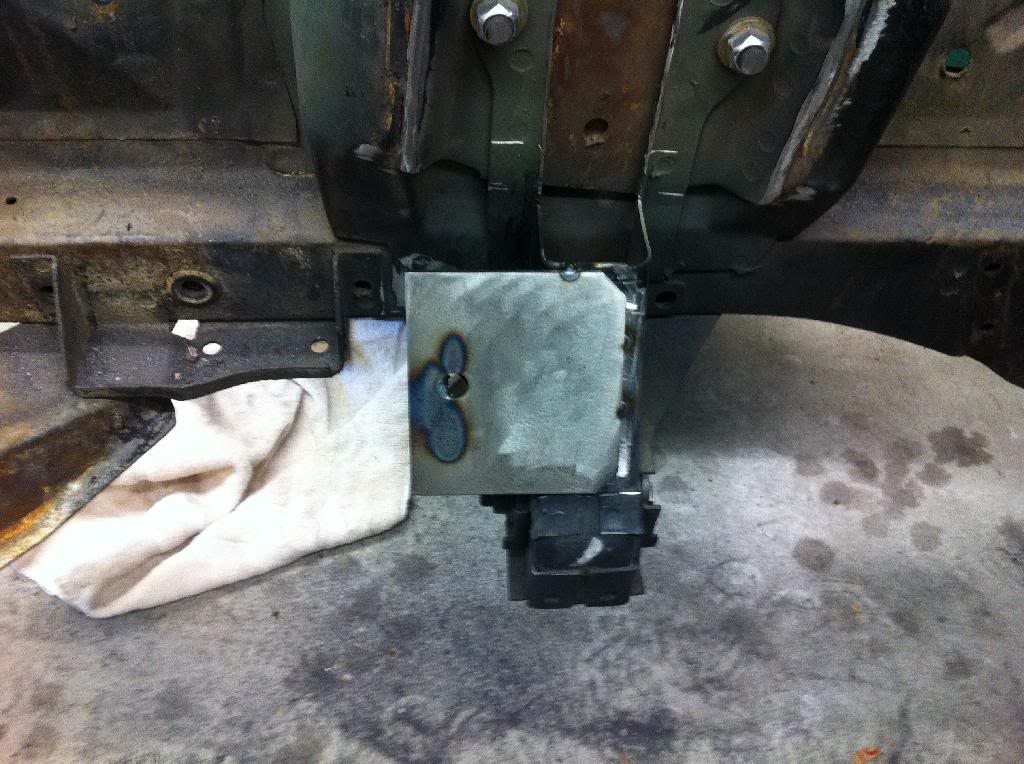
thick plate is a blast to weld.
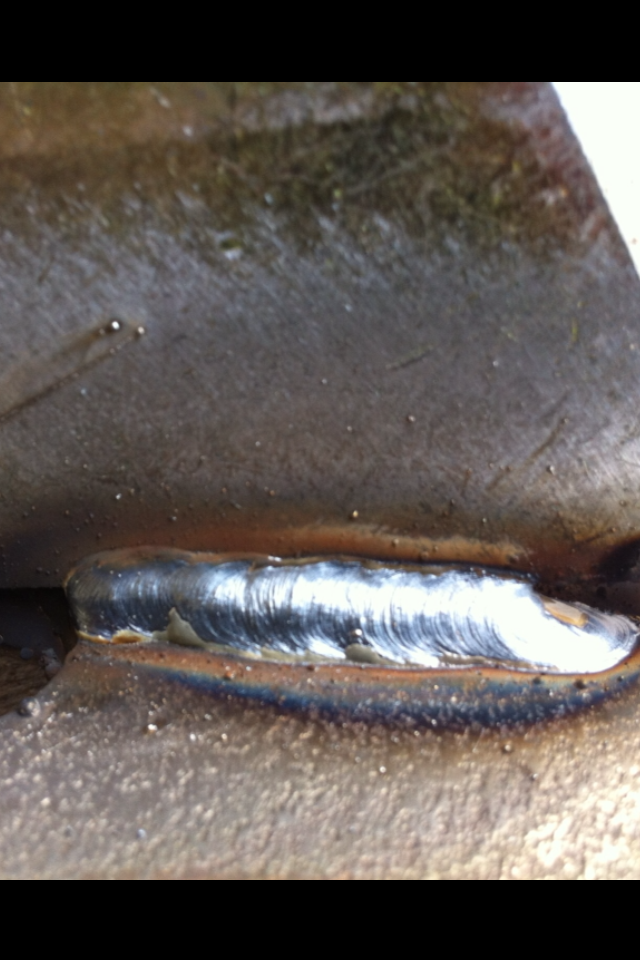
I then set the motor down on the plates tacking in the old camaro frame stands.
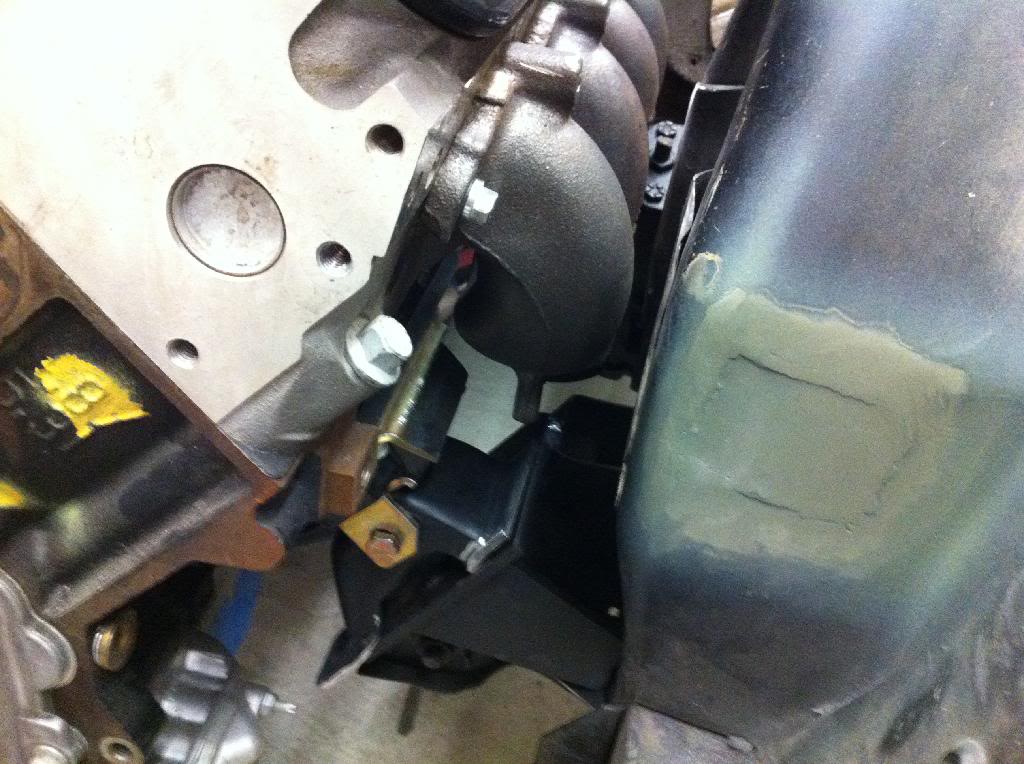
Using the LS3 Corvette manifolds i had kicking around i was able to have a pinky width around the steering box. it looks really awkward in the photos but the engine is centered over the springs and the passenger side head is 3.5" away from the firewall. I actually have access to the bell housing bolts and can run a heater now. the previous engine placement was pretty much up against the firewall. I checked my dads 390 and its about 3 fingers distance from the firewall. his big block has a similar placement as my 5.3.

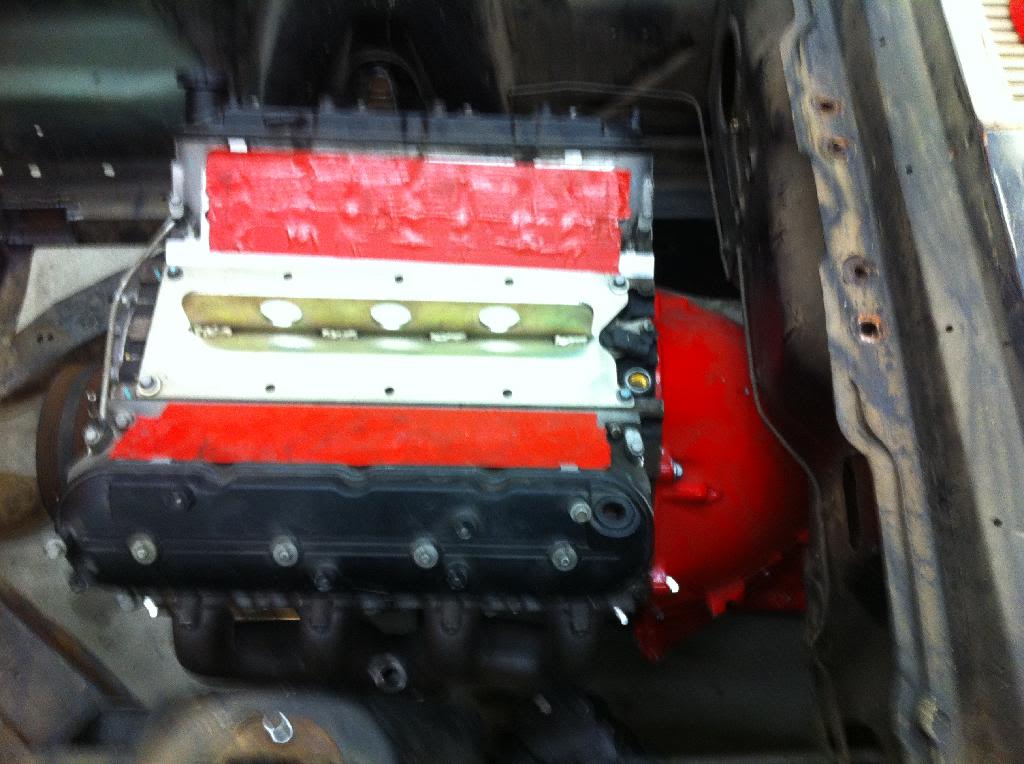
and some mock up photos.
The radiator should work.

my low mount alternator also works
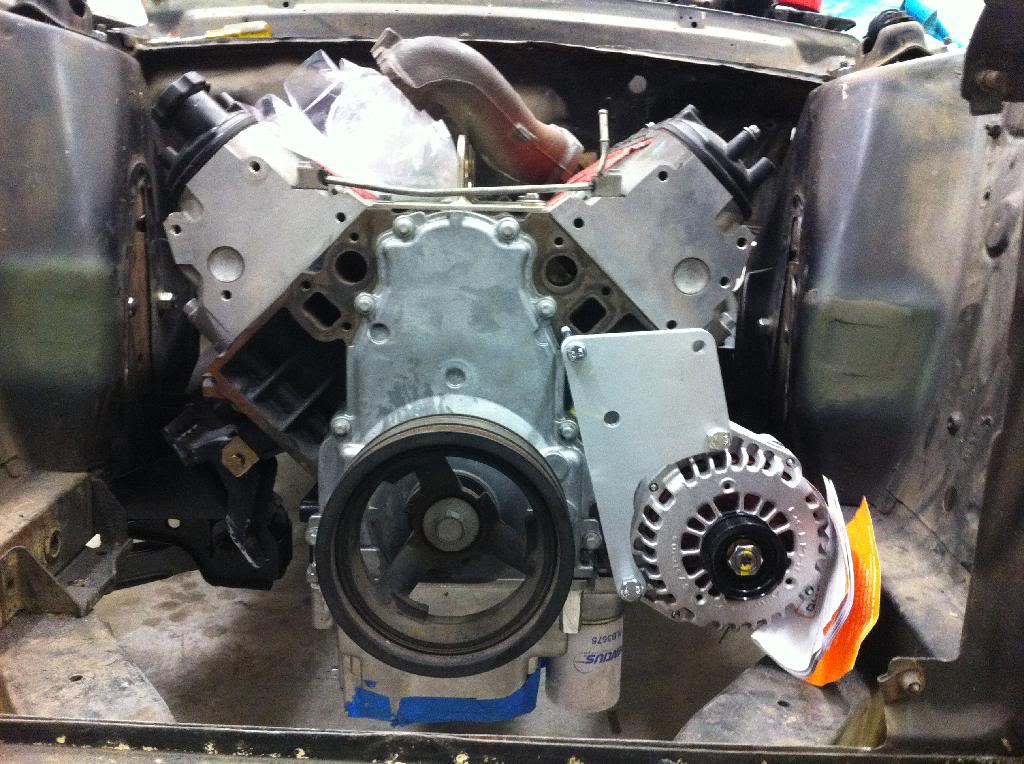
I will most likely make some new motor mounts out of plate and tubing. the camaro mounts got pretty mangled when i cut them off. also i need to center up my trans in the tunnel a bit more. all in all it was a productive day.
-
01-13-2014 #182 Registered User
- Join Date
- Aug 2007
- Location
- Roanoke (FortWorth) Texas
- Posts
- 786
While your in the mood for cutting, you should go ahead and notch your shock towers and do the upper control arm drop.
ChrisTotal Cost Involved - Ridetech - Fatman - Total Control Products - Gateway Performance - MaverickMan Carbon
01-13-2014 #183
Registered User
- Join Date
- Aug 2004
- Location
- San Bernardino, CA
- Posts
- 883
i only needed room in the control arm bolt area. I should be okay with all the tower cutting.
I am not happy with the engine placement at all. i can place the engine in a much better location while hooked to the hoist but the camaro frame stands just dangle and won't sit on the plates. I ordered some 2.5" long 3/16 thick weld tabs i plan in making some new frame mounts out of. if i can lift the engine up another 1/4" i can slide it back more. I tacked in the camaro frame stands as a temporary fix.
01-14-2014 #184 -Moderator/Sponsor-
- Join Date
- Apr 2001
- Location
- The City of Fountains
- Posts
- 16,118
 I am not a huge fan of the early style Chevrolet mounts. The 1970 and later mounts are a much better design. If I was making mounts from scratch, I would start with the Holley mounts: http://holley.com/12613HKR.asp
 Originally Posted by DCx

Then on the frame side, get the 2nd gen Camaro shells and use commonly available rubber inserts; they are like 4 bucks each from RockAuto.com.
Andrew1970 GTO Version 3.0
1967 Cougar build
GM High-Tech Performance feature
My YouTube Channel Please Subscribe!
Instagram @dr__efi
I deliver what EFI promises.
Remote Holley EFI tuning.
Please get in touch if I can be of service.
"You were the gun, your voice was the trigger, your bravery was the barrel, your eyes were the bullets." ~ Her
01-14-2014 #185 Starting The Transformation
- Join Date
- Jul 2006
- Location
- Ca
- Posts
- 135
Looking really good. By the looks of the room at the rear of the motor/bellhousing area could you move the engine back say 1"-1-1/2"? Are you planning to use the Ford steering box or going for an aftermarket set-up?
Thanks
01-14-2014 #186
Registered User
- Join Date
- Aug 2004
- Location
- San Bernardino, CA
- Posts
- 883
The plan is to use the stock steering box and suspension set up. Im going to build new motor mounts this weekend and try to position the engine back more. Its hard to find off the shelf headers or manifolds that work with the mustangs steering box. Originally Posted by MichaelUser
If i was to switch to an aftermarket rack i would go with steeroids. Their rack frame bracket bolts up to the idler arm and steering box locations and the kit uses billet tie rods with adjustable bump steer. The downer is the rack and steering column is nearly $1500. But it would allow me ro run pretty much any rear dumb manifold, shorty header, or possibly a long tube design that would fit a nova or camaro.
01-15-2014 #187
Registered User
- Join Date
- Aug 2004
- Location
- San Bernardino, CA
- Posts
- 883
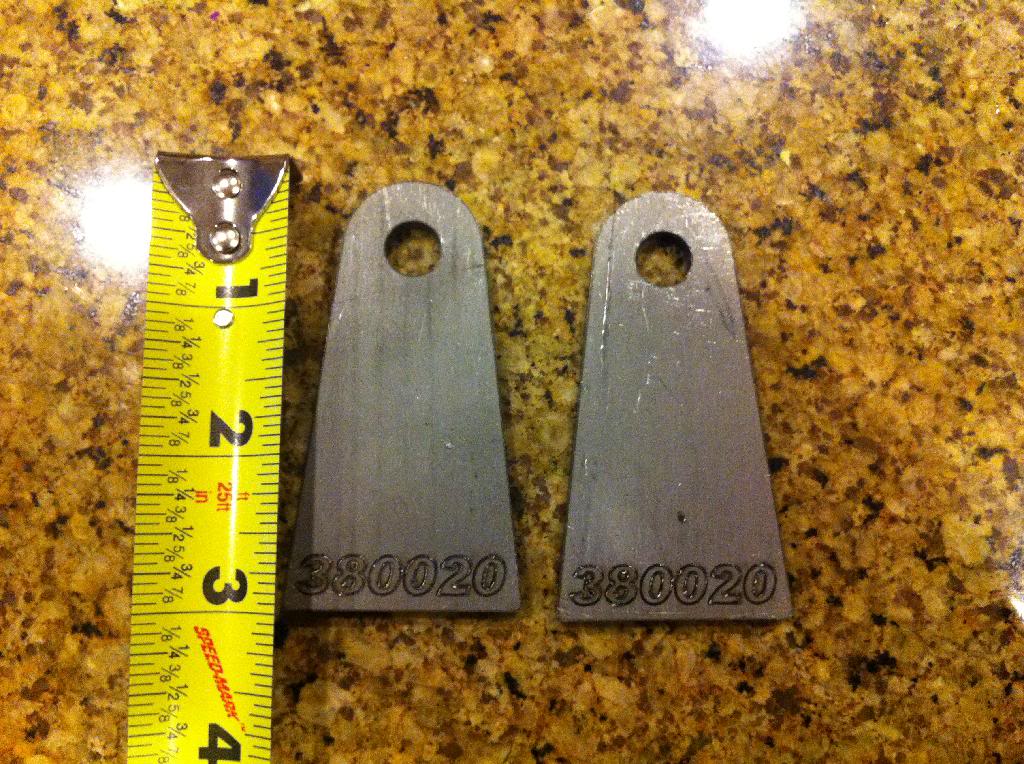
Got my weld tabs from tab zone. $2 each, I ordered 8 to fill the 5 piece minimum order. I also got some steel tubing from home depot. Will see how these pan out.

02-01-2014 #188
Registered User
- Join Date
- Aug 2004
- Location
- San Bernardino, CA
- Posts
- 883
well the engine mount idea never happened. I just could not get he engine to sit how i wanted it to with the steering box in the way. I have decided to just man up and buy a steeroids or aeroform (same thing) power rack and pinion setup to relieve myself of all this exhaust manifold madness.
i ordered a new billet bracket setup from LS brackets, it utilizes the 5.3s power steering pump but tucks it in towards the block and also lowers the alternator down to the height of the ls1 intake. the alt will be level with the cylinder head but will clear the shock tower.

i also scored a great deal on a used 4L60E trans on craigslist! it came complete with the converter, lines, and dip stick. I decoded it, its from a 2002 4.8l silverado. i used my stock curved flex plate and it bolted up fine. i even found converter bolts that work in the autozone help section. i need to source more bell housing bolts now. the 4l60 uses 8 but i only need 7. the bell has one broken tab, no biggie tho.
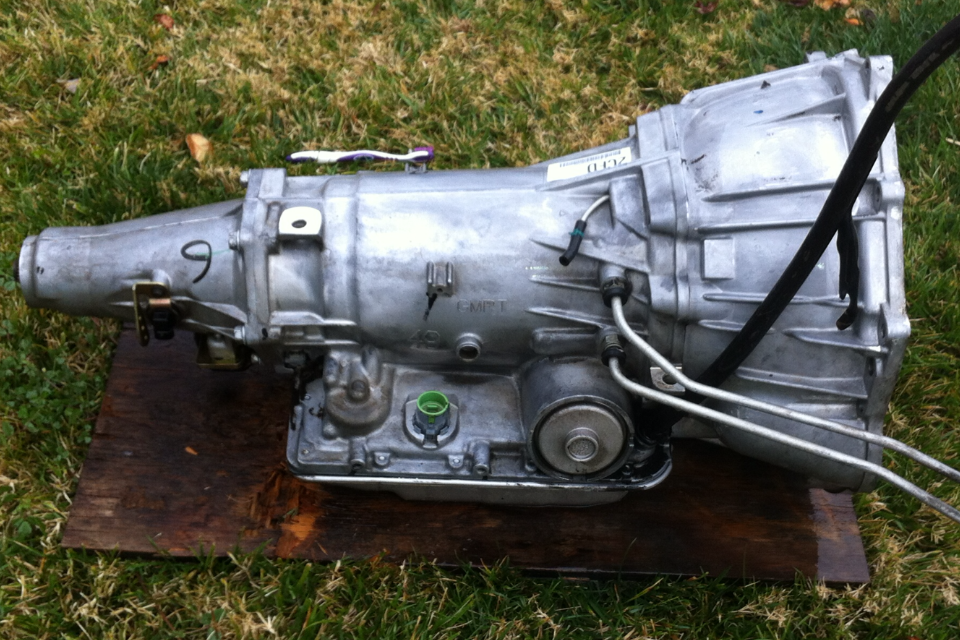
i attached it to the motor and dropped her back in along with the camaro frame stands. with the tail shaft supported by a chain i got it all to fit in there. the head is 2.5" from the firewall and the trans fits in the hole. i will fit it in better once i get the steering rack.
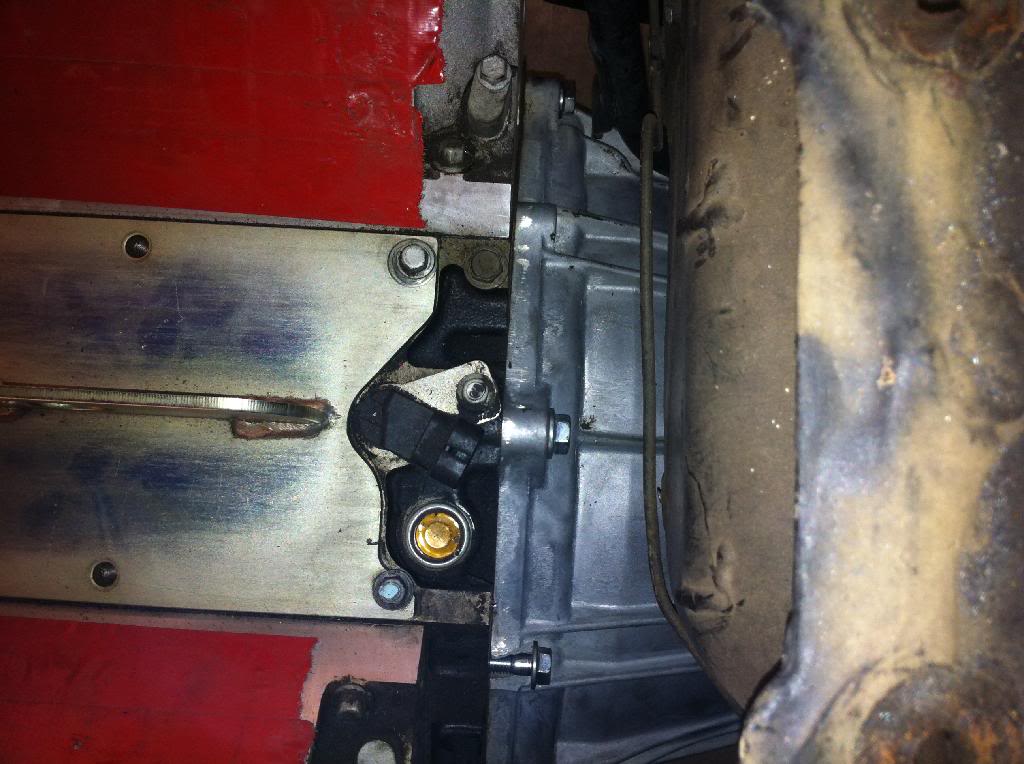
the pan on this trans is a beast! i might have to further notch the old trains cross member/floor brace. you can see in this pic i cut the center section out of my old welded up th400 trans mount.

since the rack and piñon will give me all the room i need for exhaust i was wondering what would fit in the car. LS3 camaro manifolds come to mind and can be had for pretty cheap but then again headers are always welcome. its far too costly to order and test fit blindly and shortys are such a waste.
now that i have a 4l60e i can finally order the correct harness from PSI. since the top end of the motor is all LS1/6 i was just going to get a harness and computer for an LS1. the trucks cam should run fine on the LS1 tune. i don't want to hassle with a truck PCM since the fuel tables and injectors for a truck are way different than a LS1.
02-01-2014 #189
New to Pro-Touring
- Join Date
- Jan 2012
- Posts
- 35
Some people think removing the shock towers decreases chassis rigidity. Originally Posted by I_make_oil
02-02-2014 #190
-Moderator/Sponsor-
- Join Date
- Apr 2001
- Location
- The City of Fountains
- Posts
- 16,118
You can get the correct style bellhousing to block bolts from McMaster Carr.
Andrew1970 GTO Version 3.0
1967 Cougar build
GM High-Tech Performance feature
My YouTube Channel Please Subscribe!
Instagram @dr__efi
I deliver what EFI promises.
Remote Holley EFI tuning.
Please get in touch if I can be of service.
"You were the gun, your voice was the trigger, your bravery was the barrel, your eyes were the bullets." ~ Her
02-06-2014 #191
Registered User
- Join Date
- Aug 2004
- Location
- San Bernardino, CA
- Posts
- 883
I received my new front accessory drive yesterday. I just posted the old one for sale in the classifieds. I was unable to return it due to the sellers 14 day ebay return policy. my loss, someones gain.
aside from that i was looking to get a kilduff console shifter for the car. it would be a lot cheaper than getting the shift works 4l60e conversion for the 69 camaro shifter i have and buying a repo console.
found a pic of one installed in a mustang! check out the video on the shifter. its pretty cool if you have never seen one.
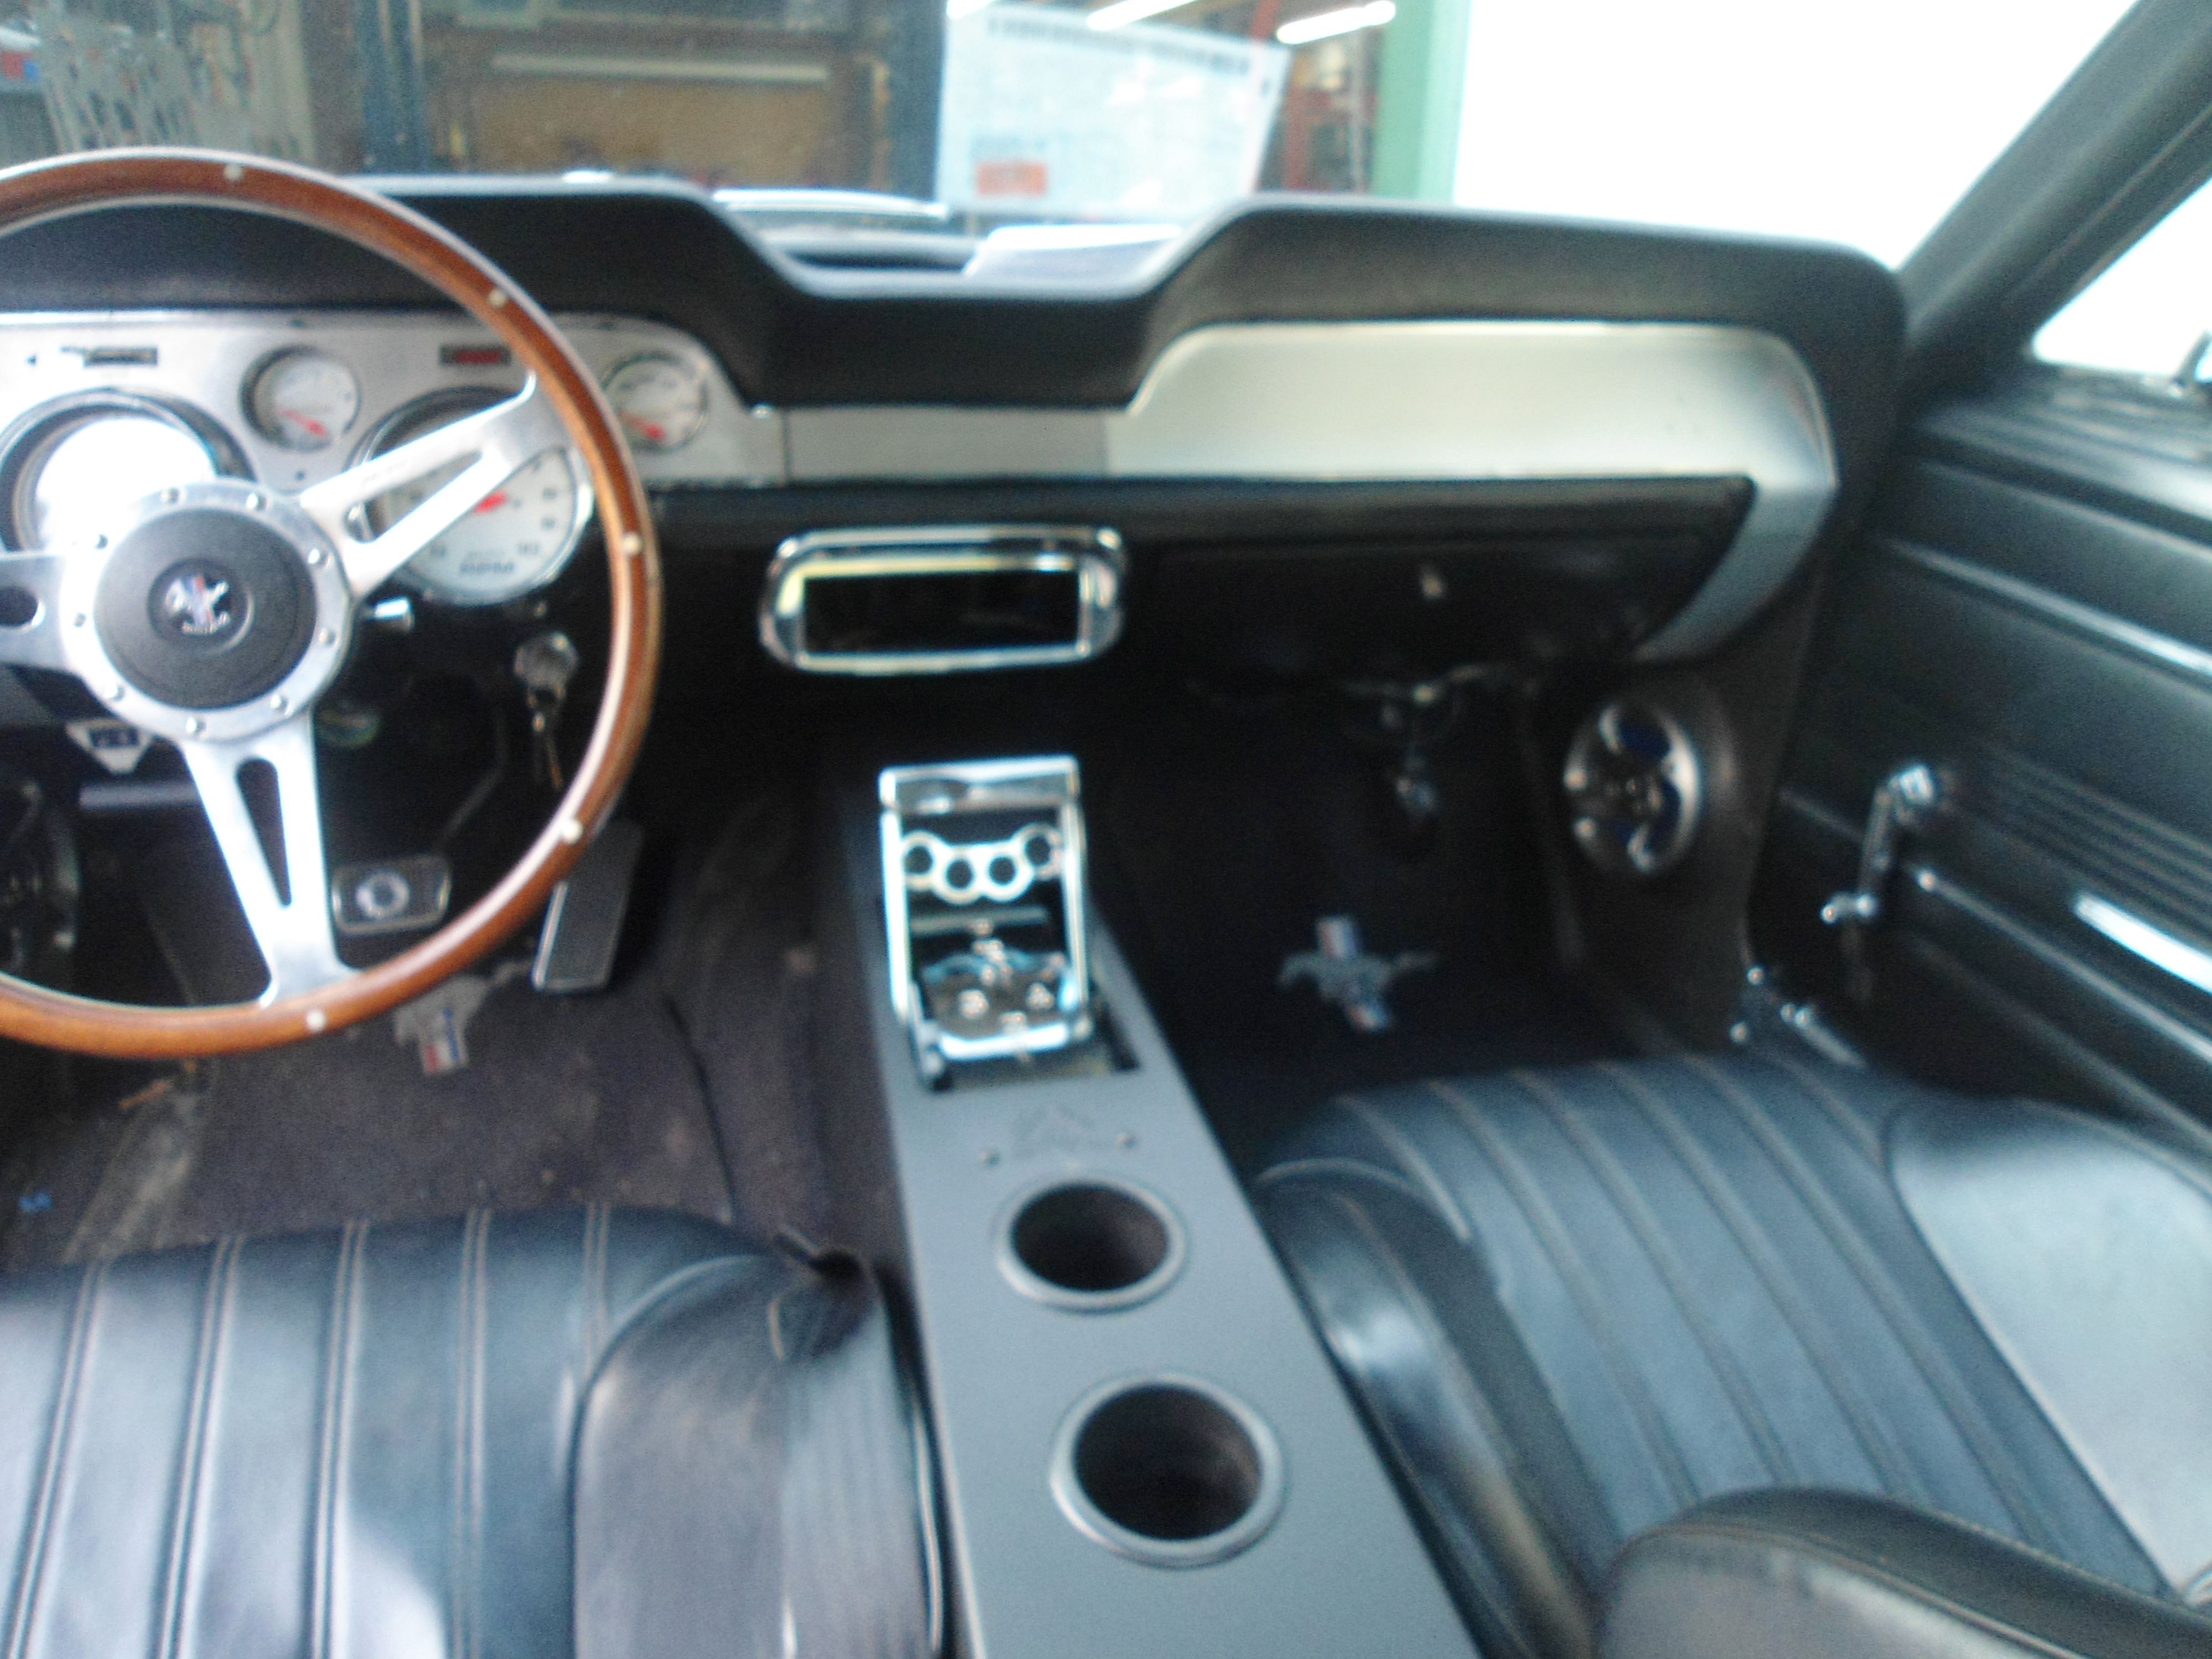
http://youtu.be/YJ7P7wE5fTo
02-21-2014 #192
Registered User
- Join Date
- Aug 2004
- Location
- San Bernardino, CA
- Posts
- 883
finally pulled the trigger on a compete LS6 intake only to find out it was dropped during shipping! knowing how much of a pain in the ass ebay and pay pal can be i decided to just fit it myself.
The crack wasn't too bad. it looks like the intake took a hit to the gasket flange. The gasket saved it from completely breaking off.
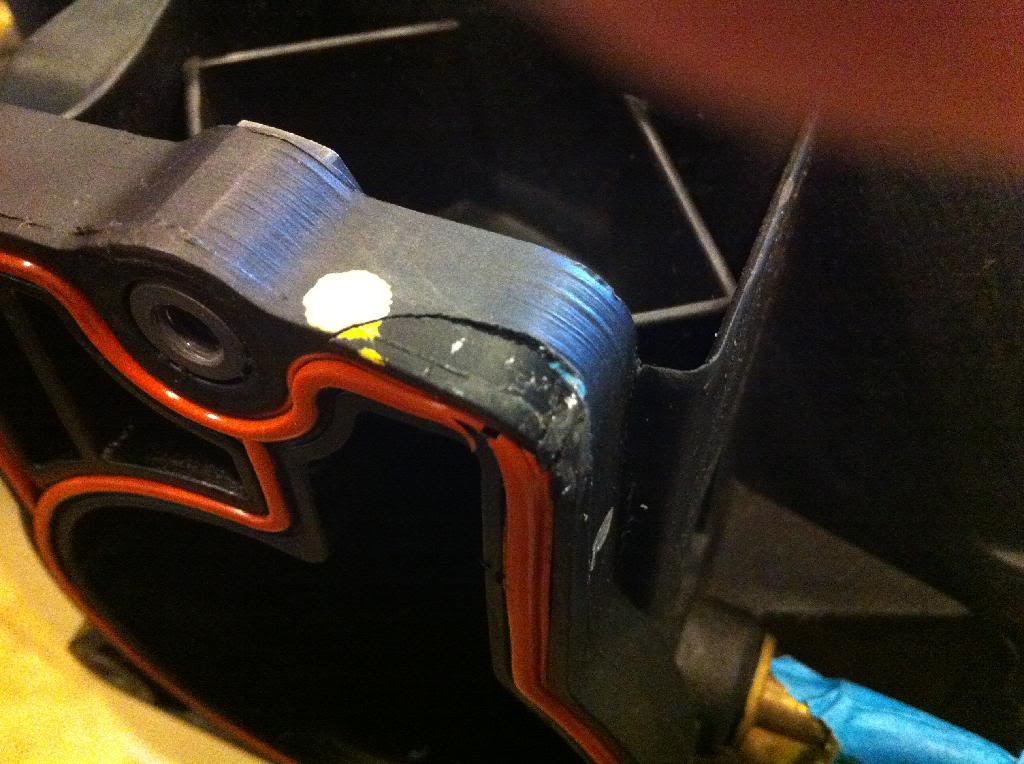
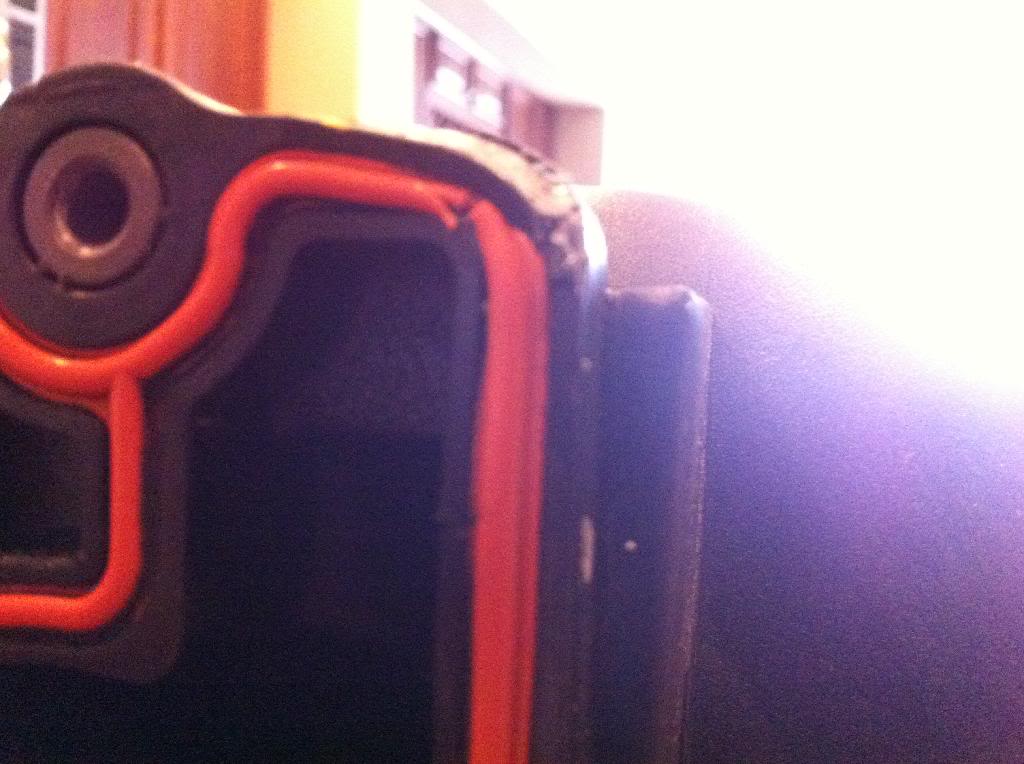
I then removed the gasket, heated the area up with a hair dryer and gently lifted the cracked piece back into position. This picture was take after i lightly sanded the area.

I then mixed up some loctite abs/plastic 2part epoxy and filled in the entire crack area. I let it sit for 12 hours then lightly sanded the area again.

I am going to replace the gasket since it has a very tiny tear in it. just as a precaution i might apply a tiny bit of black permatex RTV in the gasket flange where the crack was before fitting the new gasket.
Im just glad the rear vacuum fitting survived shipping. It still Crappy that i had to fix an expensive low mileage part!
06-05-2014 #193
Registered User
- Join Date
- Aug 2004
- Location
- San Bernardino, CA
- Posts
- 883
The addition of a child drastically changes a budget so drastic times call for drastic measures! lol
here is what i have been up to...
decided the engine and ls3 manifolds would work if it were set back and lifted a bit. so out went the old firewall.
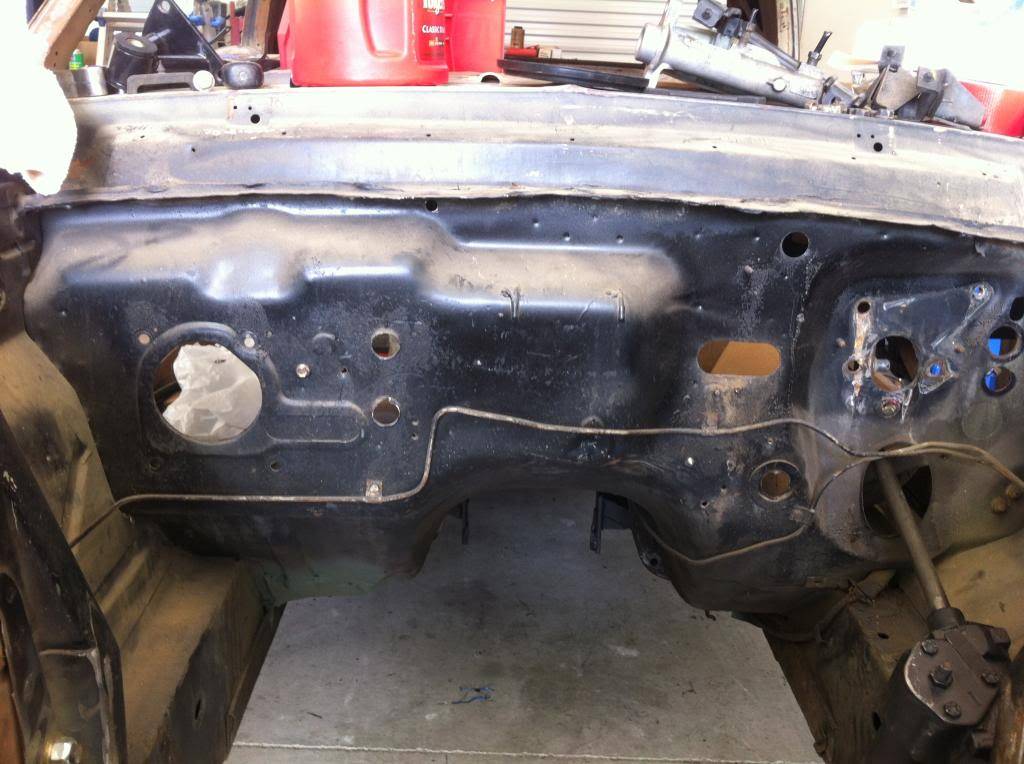

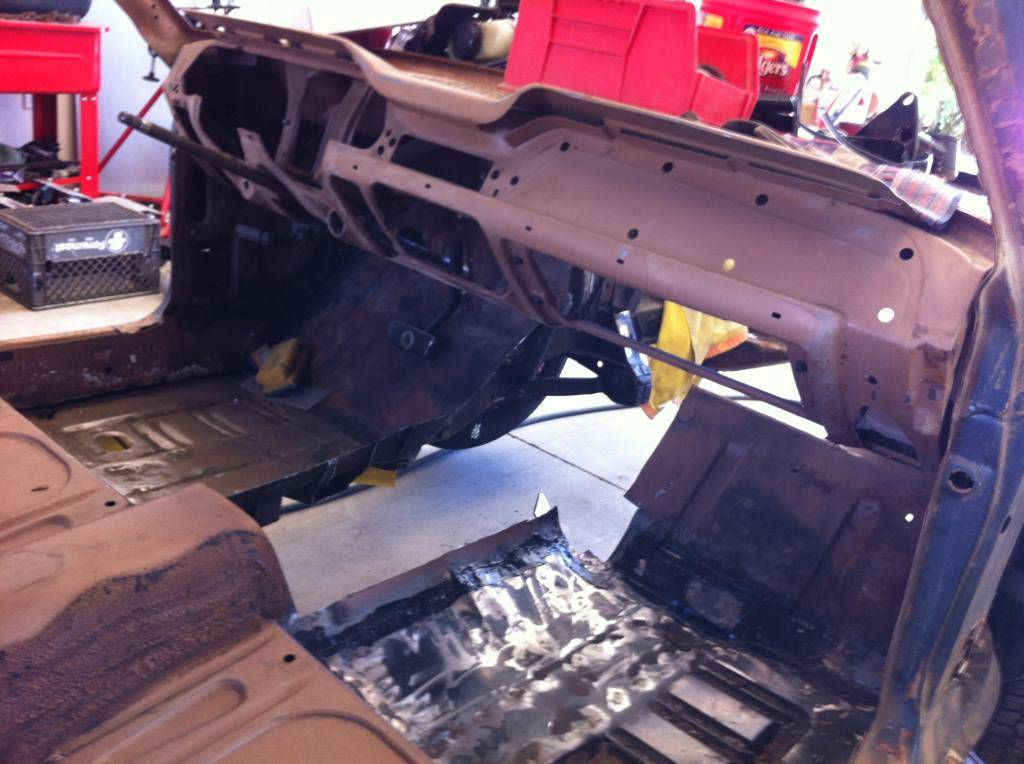
and the tunnel and floors...
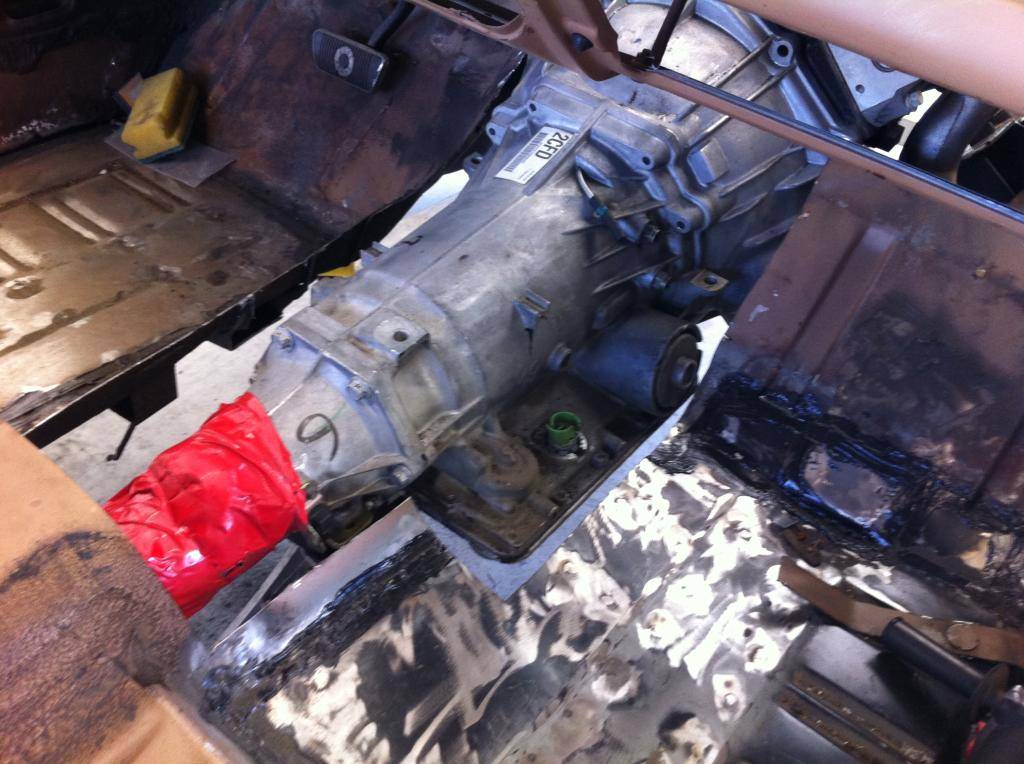
busted the green connector on my trans :(
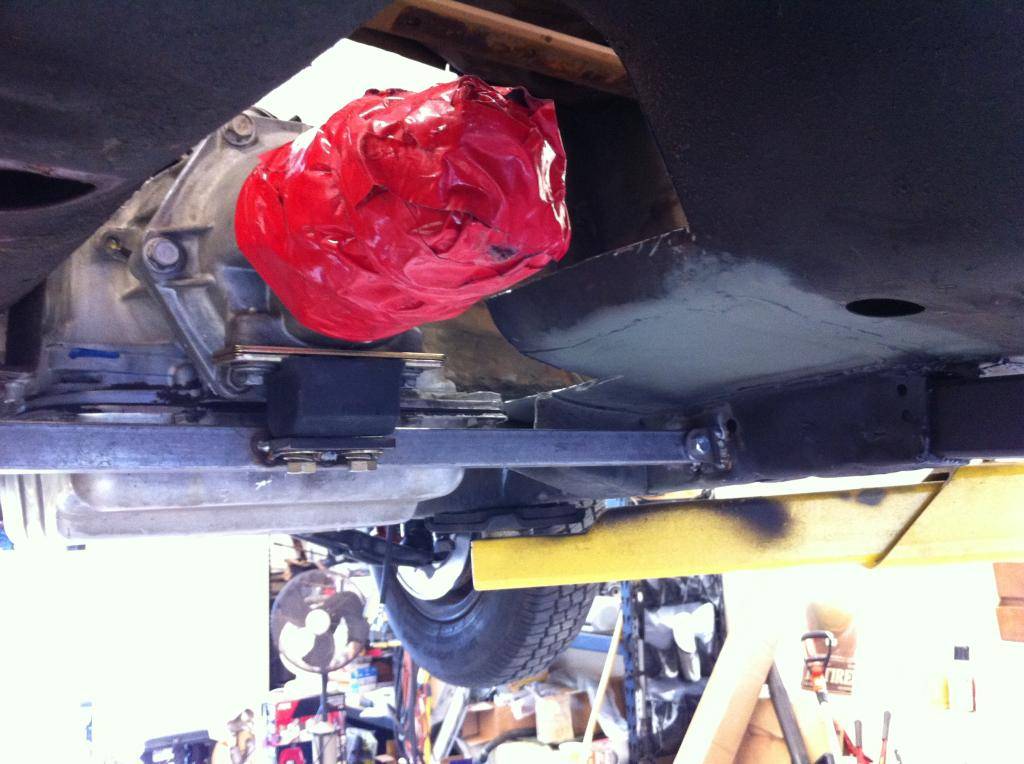
welded my tabs to the existing frame and ditched those nasty plates i made before.

made a simple trans mount out some extra tabs i ordered and some square tubing

with some ebay flanges and some elbows i have the exhaust clearance i need with the stock box.
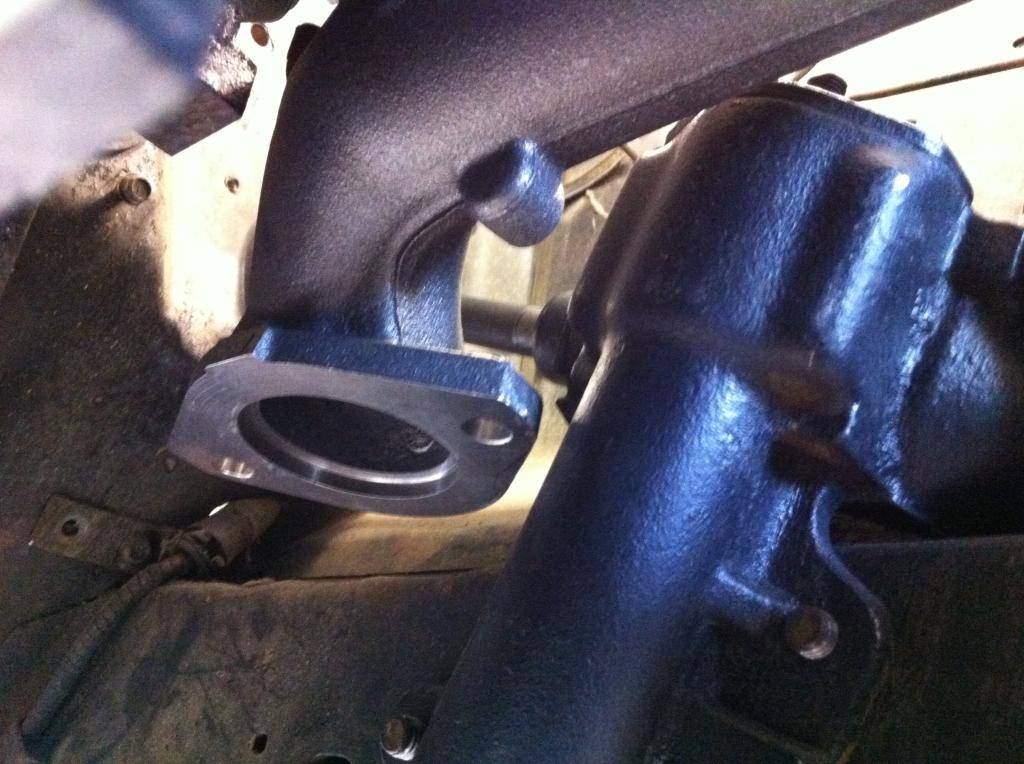
also added some tin man fab frame connectors before i cut up the car

08-21-2014 #194
Registered User
- Join Date
- Aug 2004
- Location
- San Bernardino, CA
- Posts
- 883
back from the dead! i have been busy with firewall fab. butt welding sheet metal is such a pain in the butt. check out my handy work. I decided to weld in a flat 18g firewall and use existing trans tunnel by splitting it in two and lifting it up. lots of small patches to go but this is as far as i got so far.
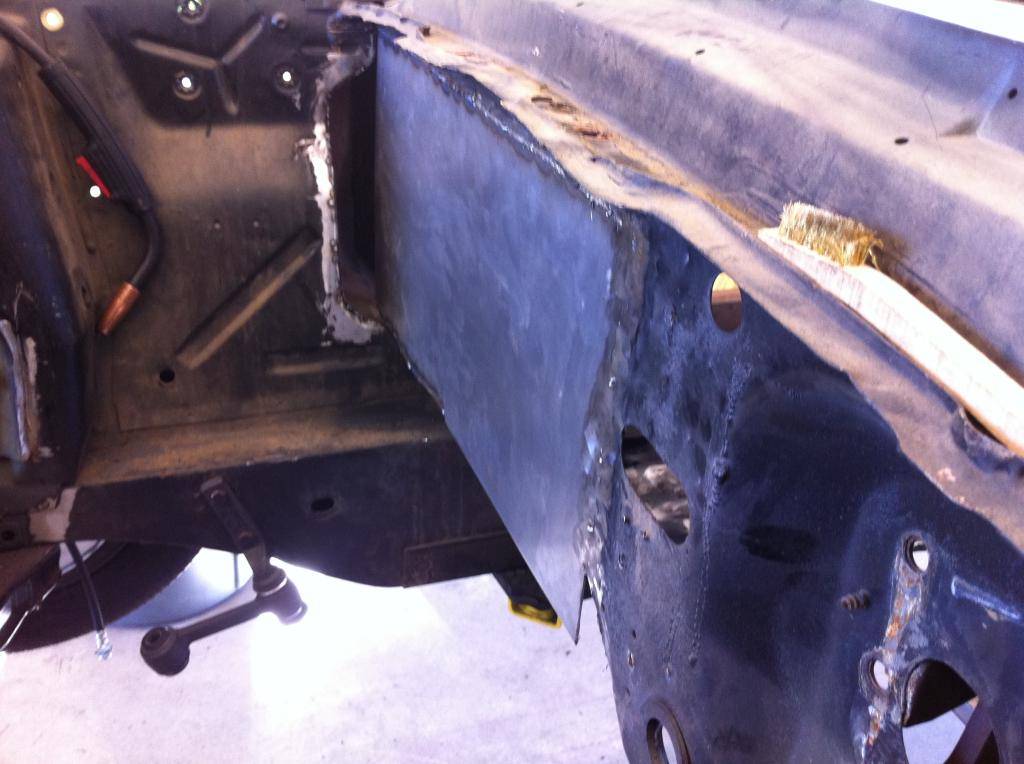
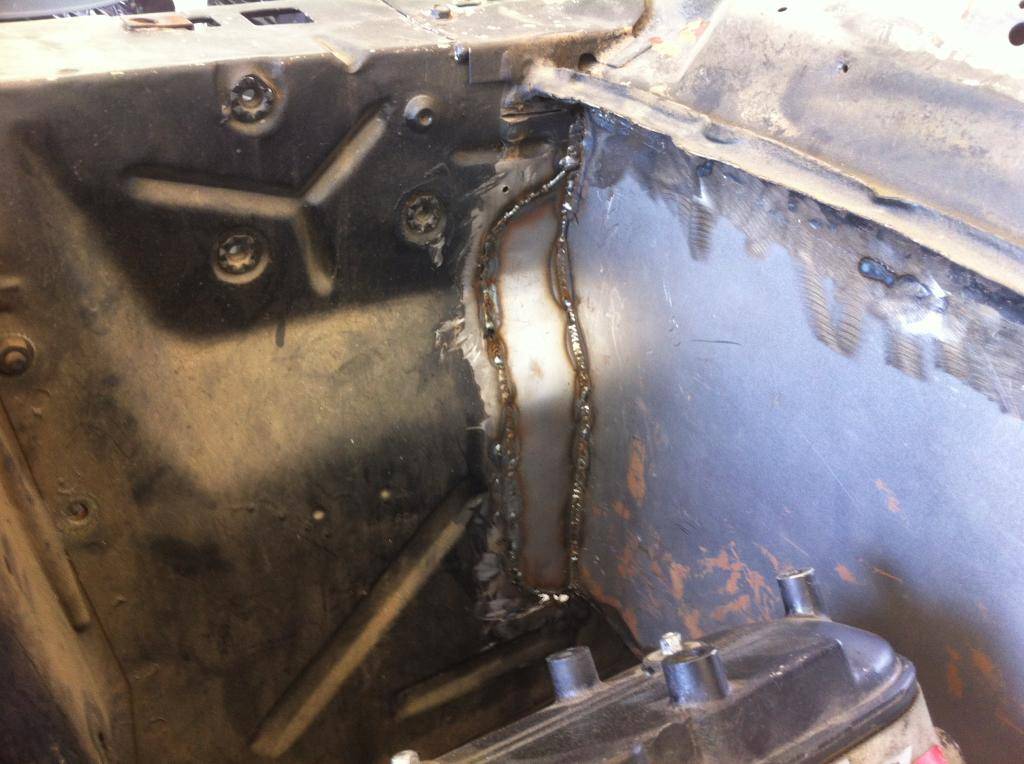
this was loads of fun to make.
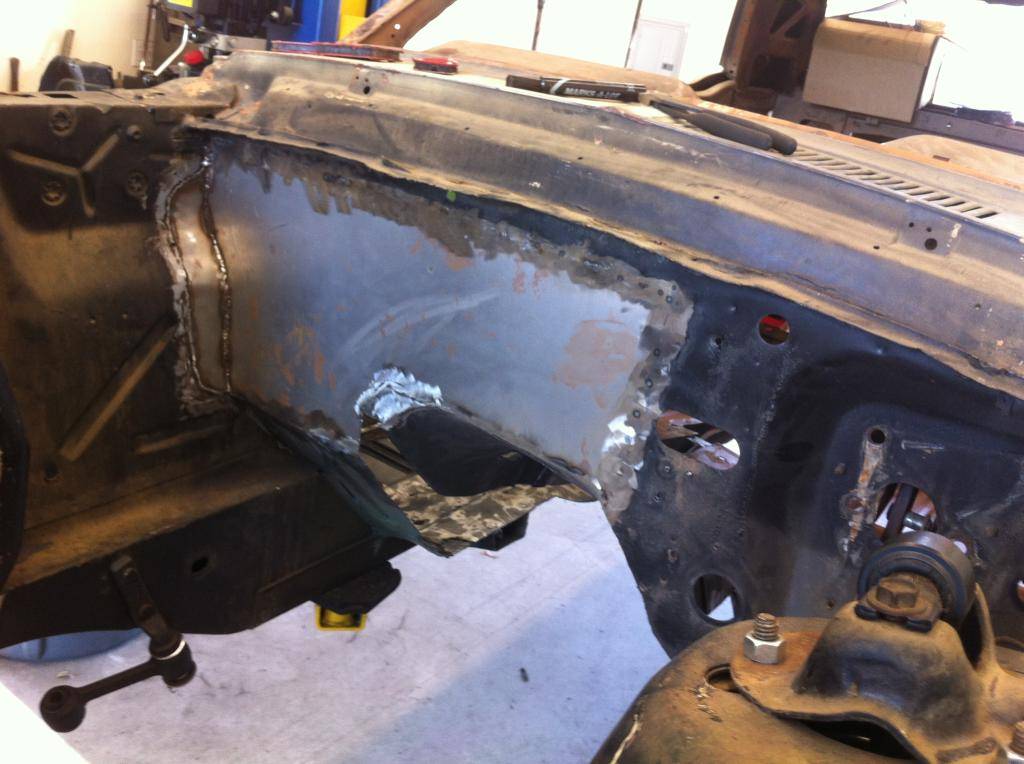
transition to the tunnel went better than expected.
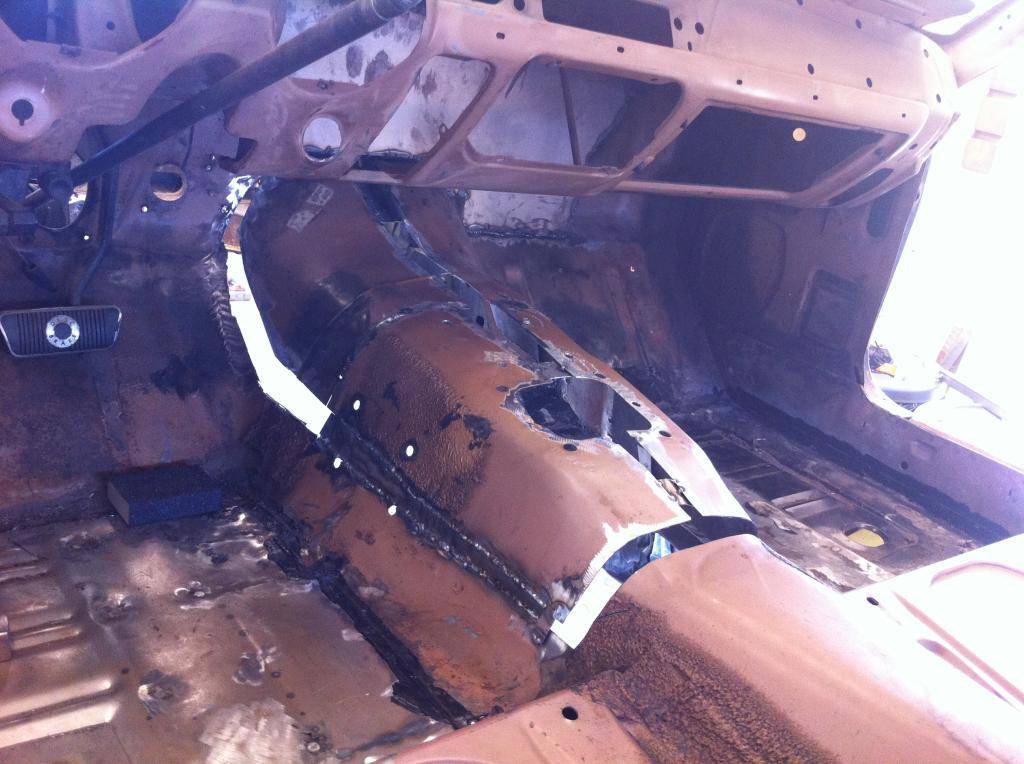
the choppy floor... im so glad this will be out of sight. its so ugly. plan to cover it all in a thick coating of u-pol raptor.
08-22-2014 #195
Registered User
- Join Date
- Feb 2013
- Location
- Berwick, South Louisiana.
- Posts
- 203
Nice work. Looking good.
01-14-2015 #196
Registered User
- Join Date
- Aug 2004
- Location
- San Bernardino, CA
- Posts
- 883
thank you. after seeing Andrews 67 cougar i realize i could have changed a few things to make a cleaner install.
01-14-2015 #197 Registered User
- Join Date
- Sep 2004
- Location
- Wilmington NC
- Posts
- 242
Very cool! I have been tossing around the idea of going LS power in my 66 once I reach that point. I'll be taking notes :D
01-14-2015 #198
-Moderator/Sponsor-
- Join Date
- Apr 2001
- Location
- The City of Fountains
- Posts
- 16,118
I really hope that I don't have to do all that work to make the T56 fit in the tunnel! Ugh...
Andrew1970 GTO Version 3.0
1967 Cougar build
GM High-Tech Performance feature
My YouTube Channel Please Subscribe!
Instagram @dr__efi
I deliver what EFI promises.
Remote Holley EFI tuning.
Please get in touch if I can be of service.
"You were the gun, your voice was the trigger, your bravery was the barrel, your eyes were the bullets." ~ Her
01-14-2015 #199 Registered User
- Join Date
- May 2010
- Location
- British Columbia
- Posts
- 509
oh , you will Originally Posted by andrewb70
01-14-2015 #200
Registered User
- Join Date
- May 2010
- Location
- British Columbia
- Posts
- 509
I installed a TCI front suspension kit in my Cougar , which means bye bye shock towers . No strength lost at all . Originally Posted by ochohill


 Reply With Quote





