


Results 1 to 15 of 15
-
11-13-2011 #1
 Registered User
- Join Date
- Jan 2009
- Location
- San Antonio, Texas
- Posts
- 283

Rear Diff Mounting Issue - Flex Form Leaf Springs
Fellas -
Details on the car - 71 Javelin, 401, 4 sp, 500 flywheel hp, 9" full floater, 3,300# race weight, street legal but just barely.
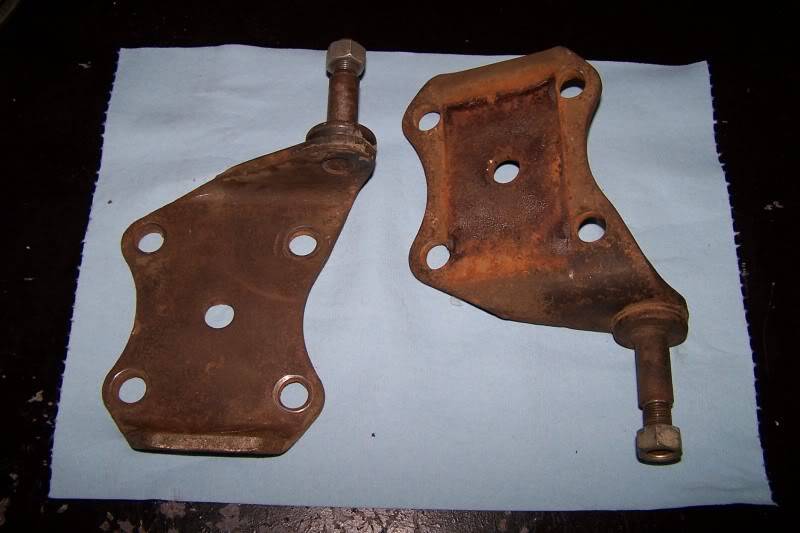
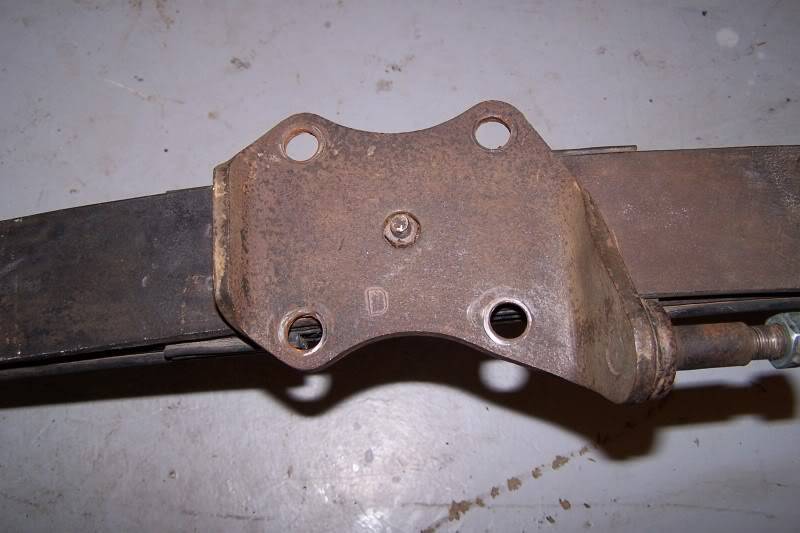
I removed the AMC 20 rear end in order to replace it with a Speedway Engineering full floater 9" with 1* negative camber. Speedway welded leaf spring pads on the rear for me. I also swapped out the heavy multileaf springs for a pair of composite springs from Flex Form.
The problem I'm having is that the AMC 20's axle tubes were 2.5" in diameter and the 9" tubes are 3" in diameter - - this means that my U bolts are too narrow to fit over the axle tube (shouldn't have a problem sourcing new ones) and the shock/spring bracket that the leaf springs and shocks mount to has holes that are 1/2" too close together. There's not enough material left to drill the holes 1/4" wider on each side.
Options that I can think of -
1. Purchase new or used lower brackets and U bolts that will work for my setup. Any ideas here?
2. Somehow reinforce/build up the brackets and drill the holes 1/4" further out.
3. Figure out how to fab up some U bolts that will fit a 3" tube, but neck down to 2.5" below the tube.
A related question - should I still use a rubber pad between the leaf spring and the bracket? Not too worried about a smooth ride, but wondering if it's necessary. Flex Form installed thin hard plastic pads (1/16"?) in the bracket area and apparently that's all some folks use.
Thanks,
Scott


 Check out my YouTube channel for vintage car and truck rescues and rebuilds! THE BULLETPROOF GARAGE!!! - YouTube
-
11-13-2011 #2
 Registered User
- Join Date
- Apr 2009
- Location
- san diego
- Posts
- 5,101
Option 3: I would not do this.
Option 2: This would be easy and you would make it exactly the way you wanted it.
Option 1: Source some mustang leaf pads, but these might not have the correct shock setup for you. They have a hole for the shock mount, so the shocks need to have studs not eyelets.My build thread: https://www.pro-touring.com/showthre...ing&highlight=
The mustang build thread: https://www.pro-touring.com/showthre...el)&highlight=
-
11-13-2011 #3
Registered User
- Join Date
- Jan 2009
- Location
- San Antonio, Texas
- Posts
- 283
Bryce - Originally Posted by Bryce

My fab skills are limited; can you elaborate?
Thanks
ScottCheck out my YouTube channel for vintage car and truck rescues and rebuilds! THE BULLETPROOF GARAGE!!! - YouTube
-
11-13-2011 #4
Registered User
- Join Date
- Apr 2009
- Location
- san diego
- Posts
- 5,101
Basically a flat plate with the correct hole pattern for the wider space u-bolts and the center pin. Also I would either bend the edges of the plate to add stiffness or weld on a strip on the sides. Also I would weld on a off the shelf clevis to mount the shocks, this will make the lower shock mount a double shear set up instead of the single shear pin that is currently there.
I can draw something up real quick if that would help.My build thread: https://www.pro-touring.com/showthre...ing&highlight=
The mustang build thread: https://www.pro-touring.com/showthre...el)&highlight=
-
11-13-2011 #5
Registered User
- Join Date
- Jan 2009
- Location
- San Antonio, Texas
- Posts
- 283
Ok, you're talking about fabbing up a completely new bracket. That makes sense. A drawing would be most helpful. Originally Posted by Bryce
Thanks!
ScottCheck out my YouTube channel for vintage car and truck rescues and rebuilds! THE BULLETPROOF GARAGE!!! - YouTube
-
11-13-2011 #6
Registered User
- Join Date
- Apr 2009
- Location
- san diego
- Posts
- 5,101
Here is a quick model I just, just for reference. Originally Posted by Bulletpruf
My build thread: https://www.pro-touring.com/showthre...ing&highlight=
The mustang build thread: https://www.pro-touring.com/showthre...el)&highlight=
-
11-13-2011 #7
 Registered User
- Join Date
- Oct 2009
- Location
- New Derry, PA
- Posts
- 1,265
You could also cut the shock mounts off the old plates and weld them back on the new ones with a gusset. That way all you'd have to fab is the flat lower plate and the gusset. Not as good as Bryce's idea, but maybe a little simpler. Either way, it you're not sure about your welding skills, take it to someone who is... Originally Posted by Bulletpruf

Ray Kaufman - Wyotech Chassis Fab and High Performance Instructor. Words of Wisdom from an old master... at Asylum Custom Interiors website
-
11-14-2011 #8
 Registered User
- Join Date
- Feb 2005
- Location
- Sydney, Australia
- Posts
- 1,797

What do you think of....split the existing bracket and weld in a section to lengthen it to the right size...redrill the centre bolt hole.
I'd just use the thin plastic supplied in place of the factory pad...the factory was more worried about NVH than performance.Regards,
Leigh
Sydney, Australia
1971 Firebird 455
https://www.pro-touring.com/showthre...Project/page27
-
11-14-2011 #9
Registered User
- Join Date
- Jan 2009
- Location
- San Antonio, Texas
- Posts
- 283
Bryce - Originally Posted by Bryce
Very nice! Now I see what you're saying about the shear.
Thanks for taking the time to create the schematic.
ScottCheck out my YouTube channel for vintage car and truck rescues and rebuilds! THE BULLETPROOF GARAGE!!! - YouTube
-
11-14-2011 #10
Registered User
- Join Date
- Jan 2009
- Location
- San Antonio, Texas
- Posts
- 283
Another good idea. I can weld, but not sure I could get adequate penetration on something this thick. Originally Posted by exwestracer
Thanks
Scott
Check out my YouTube channel for vintage car and truck rescues and rebuilds! THE BULLETPROOF GARAGE!!! - YouTube
-
11-14-2011 #11
Registered User
- Join Date
- Jan 2009
- Location
- San Antonio, Texas
- Posts
- 283
Yet another good idea. Not sure why I didn't think of that. Originally Posted by LeighP
Thanks
ScottCheck out my YouTube channel for vintage car and truck rescues and rebuilds! THE BULLETPROOF GARAGE!!! - YouTube
11-14-2011 #12
Registered User
- Join Date
- Jan 2009
- Location
- San Antonio, Texas
- Posts
- 283
Looks like I have some aftermarket options:
Mancini Racing - http://chucker54.stores.yahoo.net/lespshpl.html
Allstar - http://www.summitracing.com/parts/AAF-ALL60036/
Thanks
ScottCheck out my YouTube channel for vintage car and truck rescues and rebuilds! THE BULLETPROOF GARAGE!!! - YouTube
11-16-2011 #13
Registered User
- Join Date
- Jan 2009
- Location
- San Antonio, Texas
- Posts
- 283
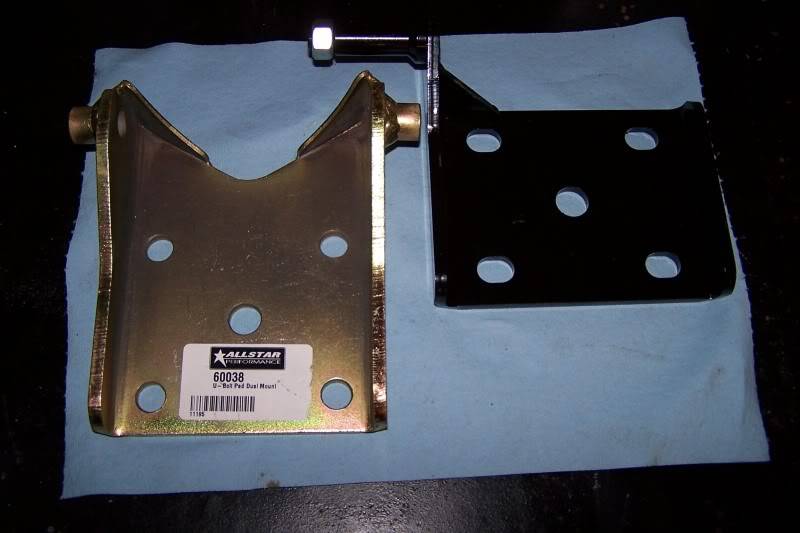
I bought a pair of the Mancini's and a pair of the Allstars. The Allstars I bought have a provision for mounting the shock on either side of the axle, which will allow me to run the factory staggered shock setup.
My findings -
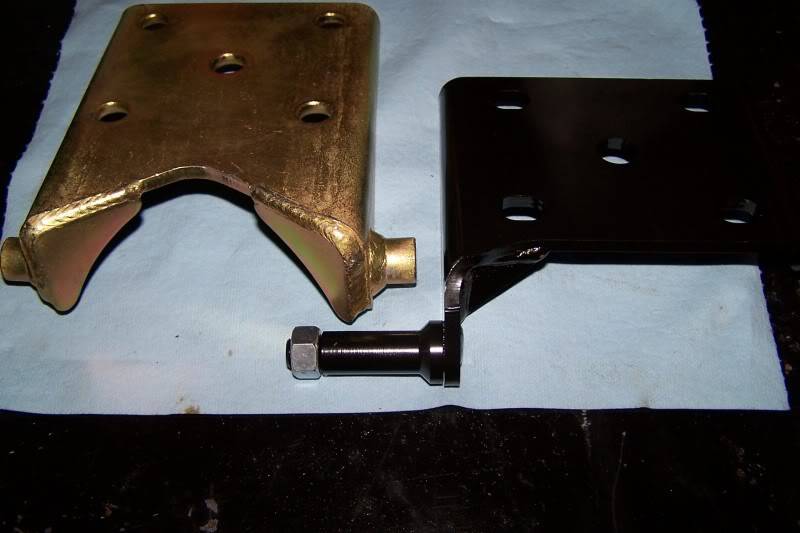
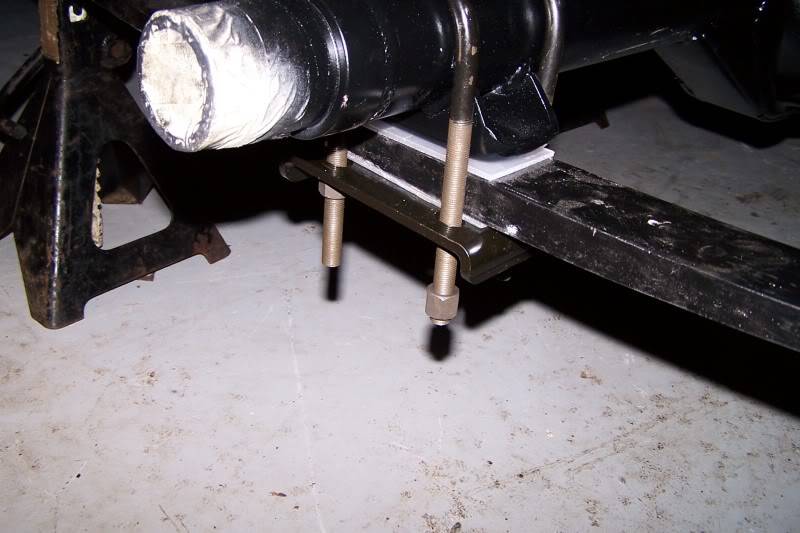
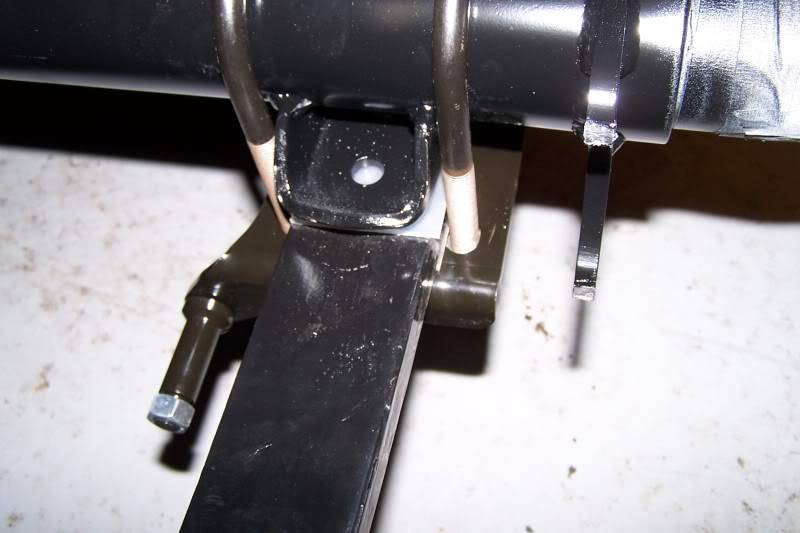
The Mancini stuff is well made, weigh 2.558# each, constructed out of .25" steel (gusset is .185"), and have a .71" shock mounting pin. Fit is fine when mocked up.
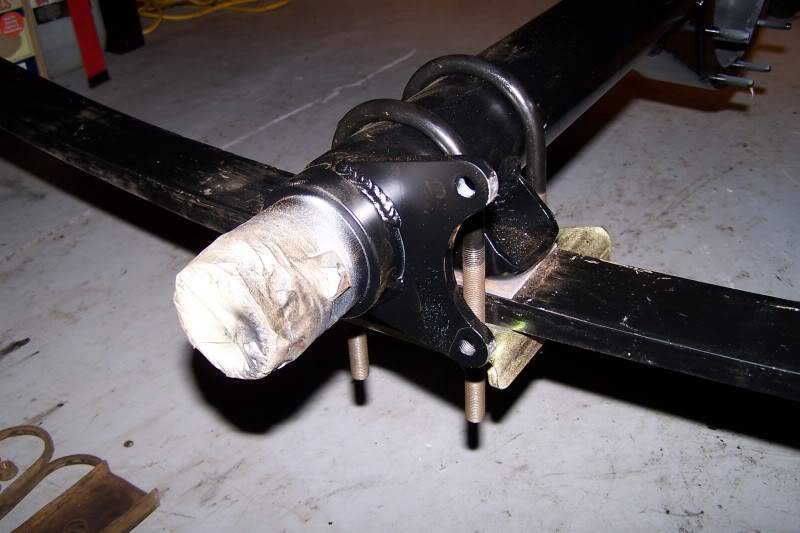
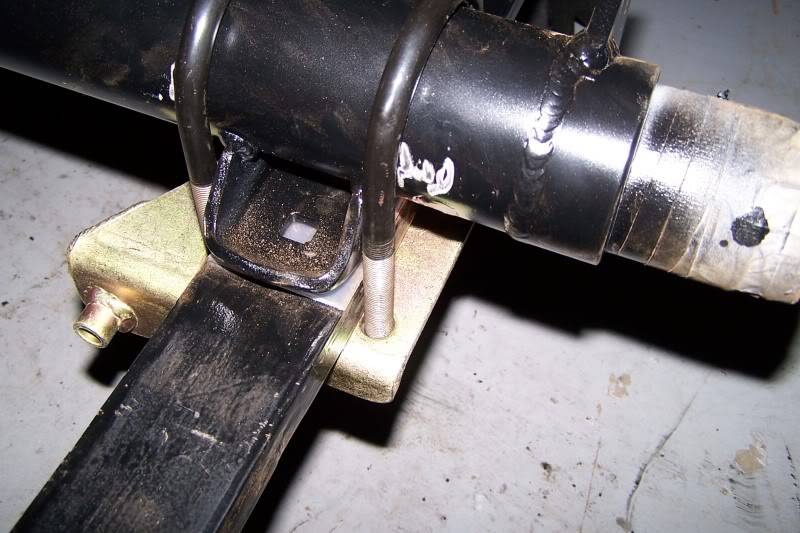
The Allstar parts are also well made, but a bit heavier at 3.502# (weighed without shock pin), constructed out of .25" steel (.122" gussets), and did not come with a shock pin. Fit is fine when mocked up.
The stockers are surprisingly a bit thicker at .32", weigh 2.334#, and have a .625" pin.
I also ordered some u-bolts from Mancini. Also nice looking stuff. The u bolts are too long by a few inches, but that won't take long to fix.
I intend to use the Mancini parts, but will hang on to the Allstar brackets in case I want to try a staggered shock setup.
Pics follow.
Thanks
Scott
Mancini and Allstar bits side by side. Mancini brackets are black.
Flipped over. Sorry for the lousy pic.
Mancini mounted.
Pic 2 of Mancini mounted.
Allstar mounted.
Pic 2 of Allstar mounted.
 Check out my YouTube channel for vintage car and truck rescues and rebuilds! THE BULLETPROOF GARAGE!!! - YouTube
11-17-2011 #14
Registered User
- Join Date
- Feb 2005
- Location
- Sydney, Australia
- Posts
- 1,797
They look like a good win.....better than modding the original.
Regards,
Leigh
Sydney, Australia
1971 Firebird 455
https://www.pro-touring.com/showthre...Project/page27
11-17-2011 #15
Registered User
- Join Date
- Apr 2009
- Location
- san diego
- Posts
- 5,101
Nice find!
My build thread: https://www.pro-touring.com/showthre...ing&highlight=
The mustang build thread: https://www.pro-touring.com/showthre...el)&highlight=

 Reply With Quote



