Results 101 to 120 of 174
-
03-26-2012 #101

 Registered User
- Join Date
- Aug 2011
- Location
- Burleson, TX
- Posts
- 130
 It will be some combination of Black, blue and or orange. Still playing with that some.-Ken
 Originally Posted by KnightMare

PS-Love the convertable!
-
03-26-2012 #102
Registered User
- Join Date
- Aug 2011
- Location
- Burleson, TX
- Posts
- 130
Kaine-alot of time, patience, bloody knuckles and even more money and you'll be the talk of the town! Thanks for the compliment! What's your schedule on your build? I'll be watching.-Ken Originally Posted by kainedogg
-
04-01-2012 #103
Registered User
- Join Date
- Aug 2011
- Location
- Burleson, TX
- Posts
- 130
Rear Seats Install Continues
Well I finaly think I have figured out and made all but two modification to get the rear seats installed.
In this process I had to remember that the modifications and final installation must incorporate a way to de-install the seats at a later time if need be. This took me lots of time as I am a very simple thinker and this was a more complex challenge than I originally thought it would be. I hope it all works as planned and the seats stay in place like they are suppost too!!!!
I have only been working on the passanger side so far so here are some pics of the modified seat frames for the passanger side as compared with the OEM drivers side:
Upper rear seat frames. The only modification was to cut off the extra rod between the two seats after seperation.
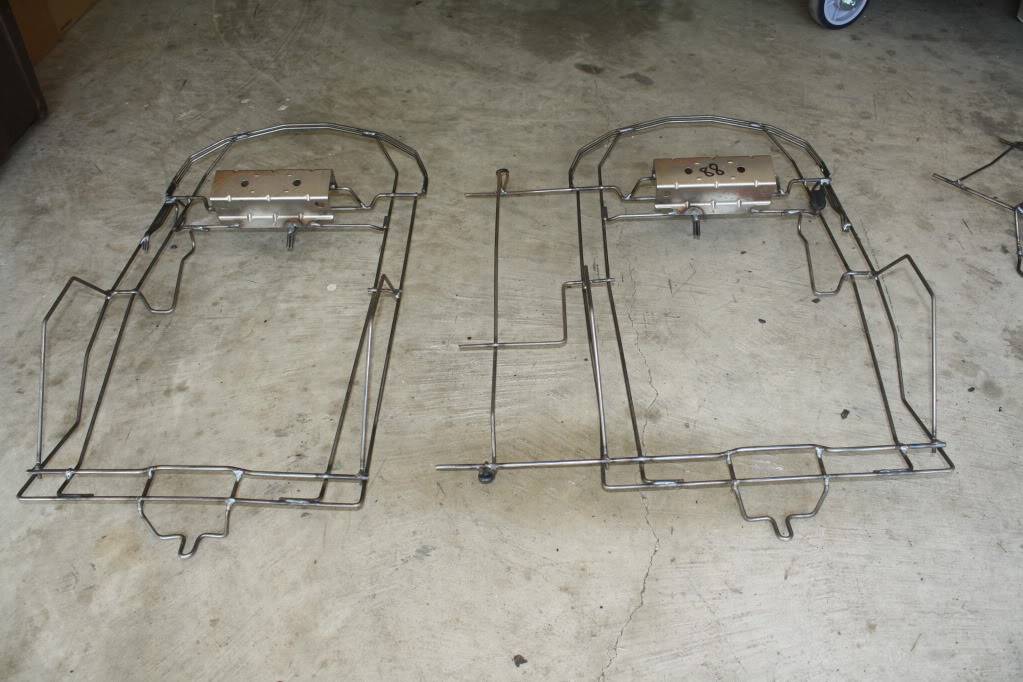
Lower seat frames. There are several modifications on the passanger side as compared to the OEM driver side.
Here you can see the rod that I welded in to take advantage of the existing forward seat bracket.
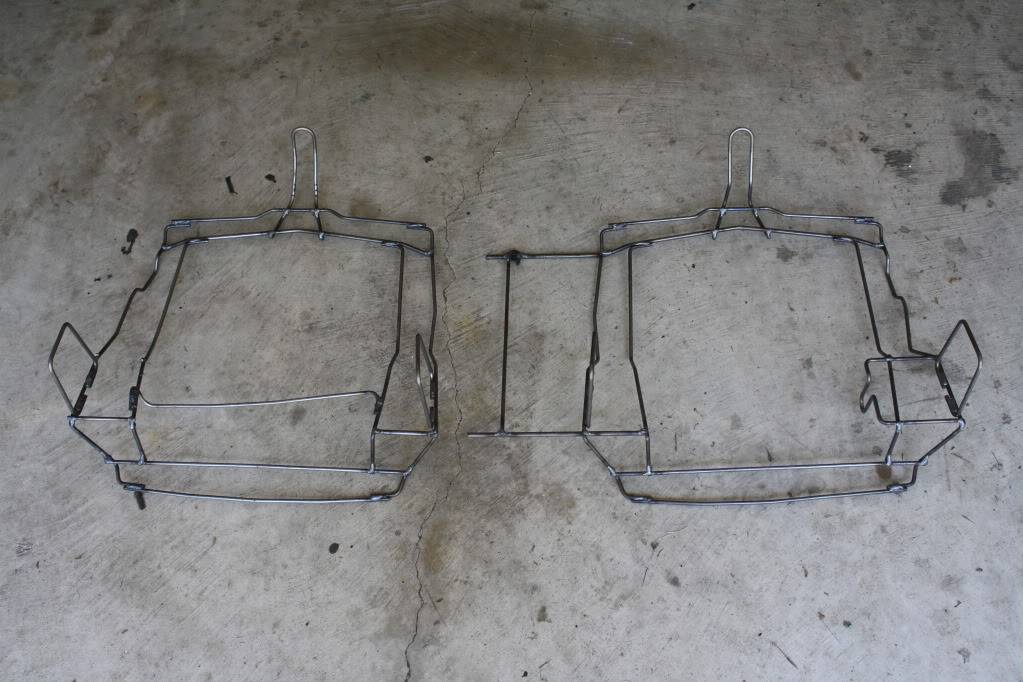
Here I turned one frame around to show the difference where I had to flatten out the side rods so the frame would sit in it's new location better.
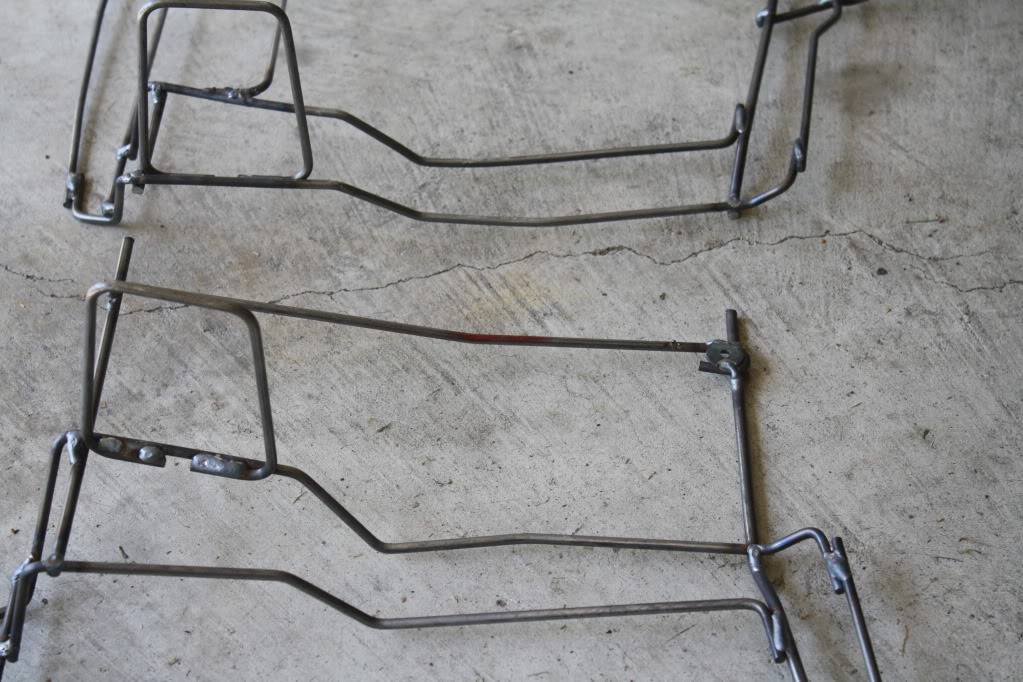
Here you can see were I did the same thing to the side rods on the other side as well as remove the loop of rod that was used to locate and fasten the seats in the 04-06 GTOs.
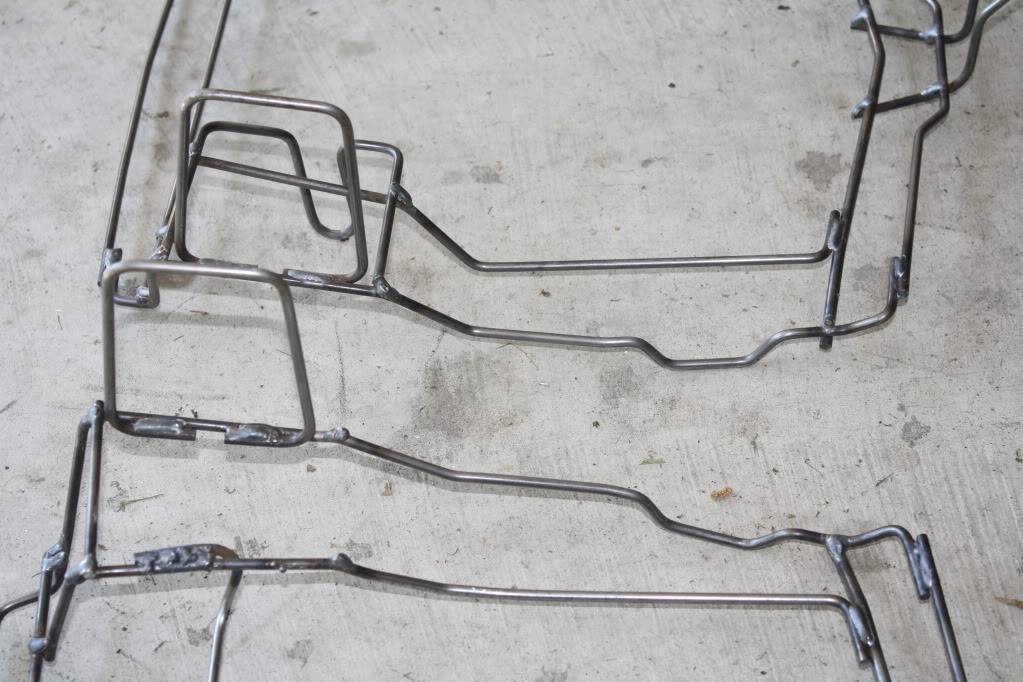
Here you can see the shape modifications I made to make the rear loop reach the rear connecting point and put some tension on the new rod that goes through the existing seat bracket in the Le Mans.
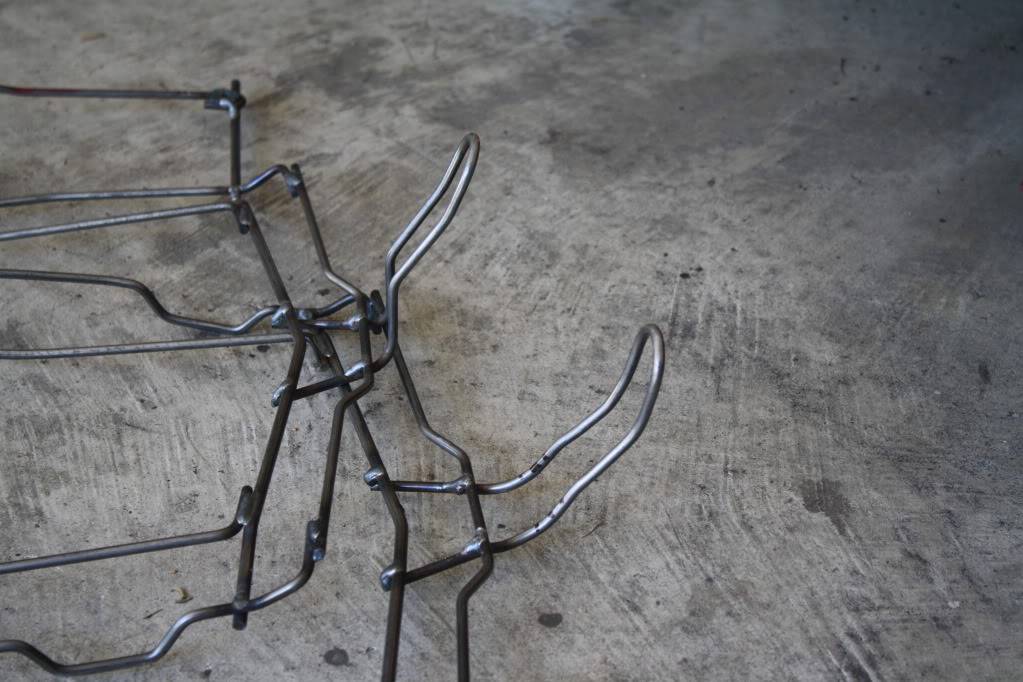
The idea, and so far what has worked up to now in many mock ups, is to put the bottom part of the seat in first. I know what you are thinking, this is totally opposite of the norm, and you are right it is! You can also see that I cut out the original upper seat attachment screw bracket. I will weld it back in its new position where you see it below behind the upper and lower seat frame loops.
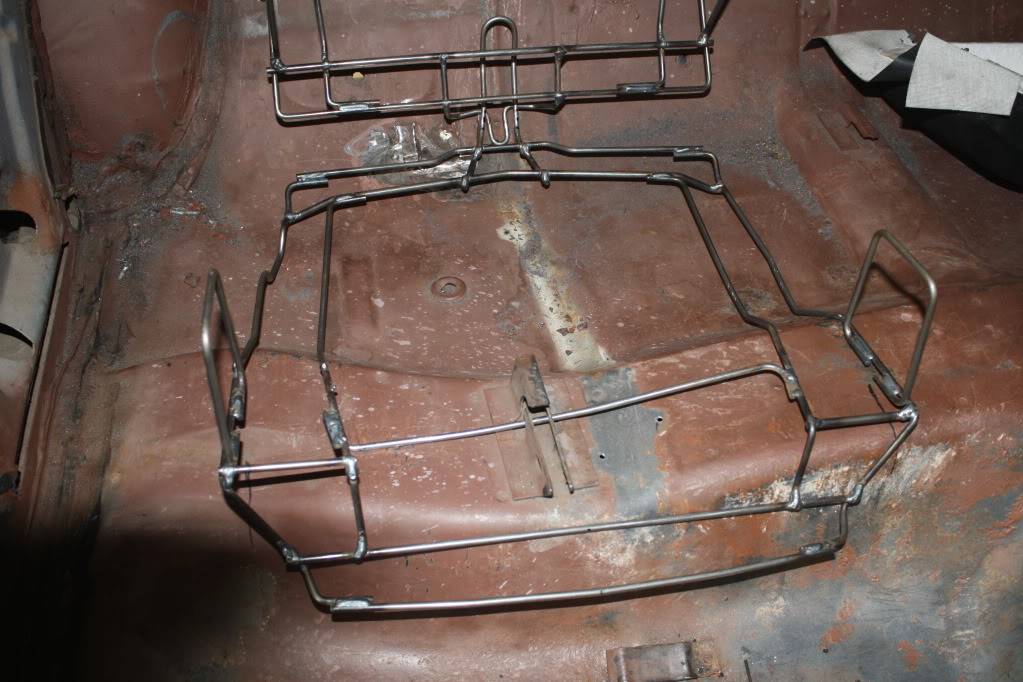
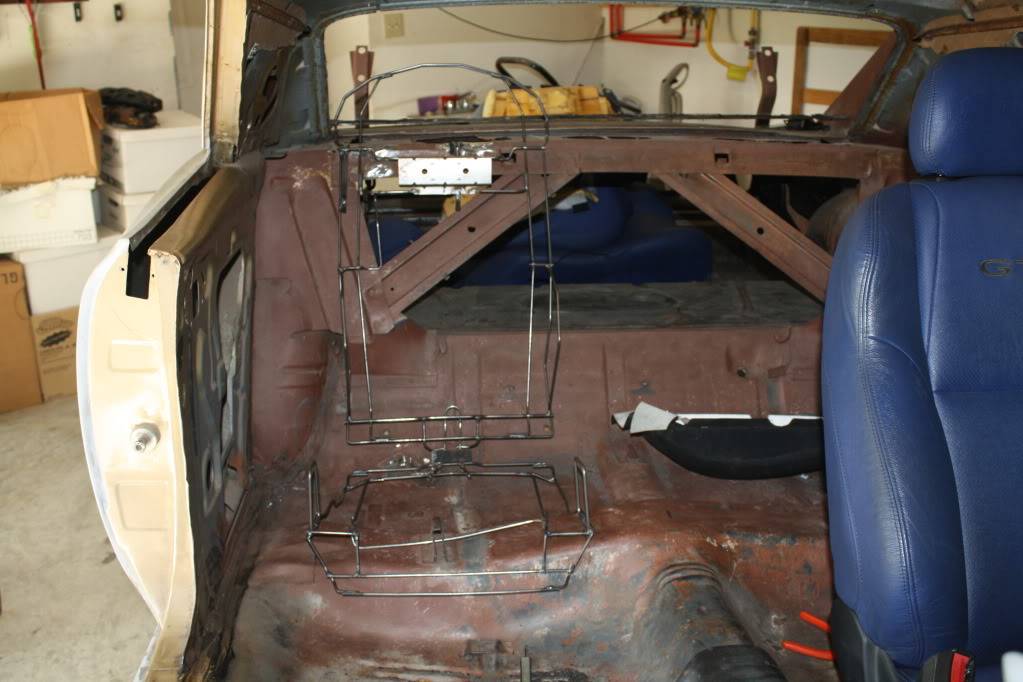
Install the upper seat into position comes next by locating the frame "hangers" in the slots I made just below the break in the package tray. You will also notice the rear glass set back into place so I could test this procedure and make sure there was enough room for both installation and de-installation without hitting the glass. It will be tight and it will take a little finesse but it can be done.
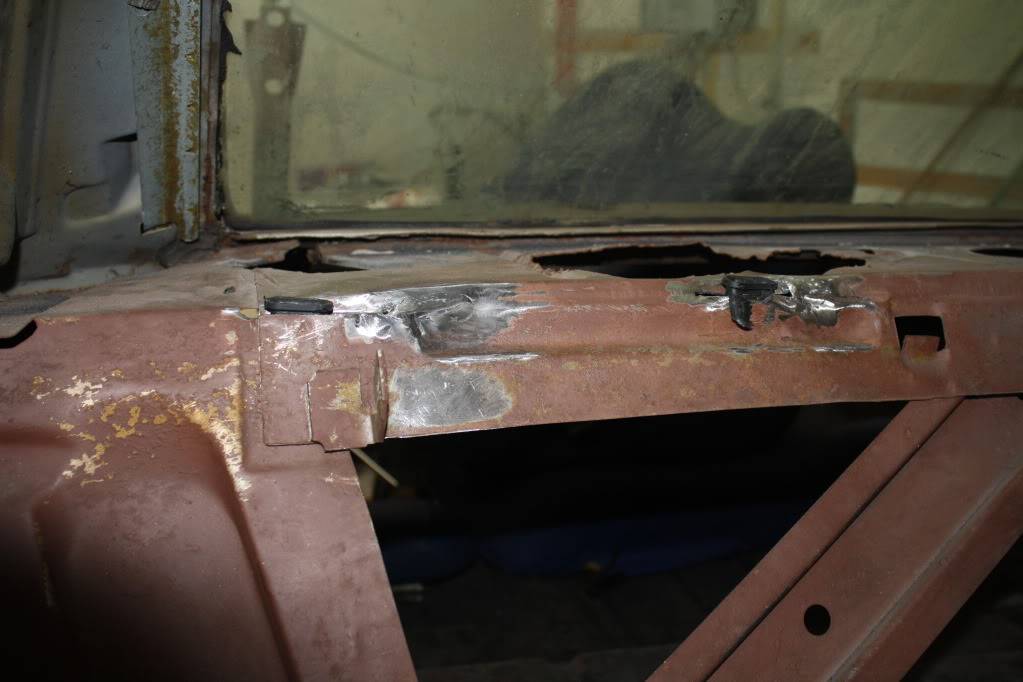
I will cut a piece of flat stock and weld it to the lower frame hoop and use it as a washer and locater to make sure the seat bottom sits all the way down. The screw will run though this washer and the upper frame loop to secure the seat in place as a unit.
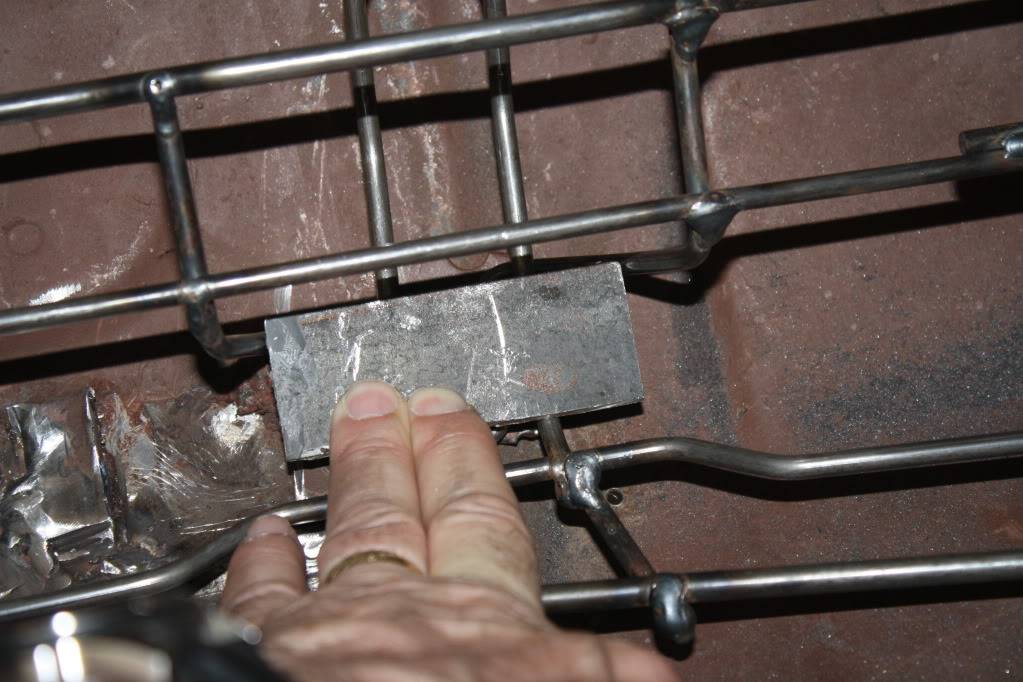
Here is the whole seat frame installed. I still have to cut and weld in the flat stock to the lower frame and relocate the original hold down bracket and weld it in.
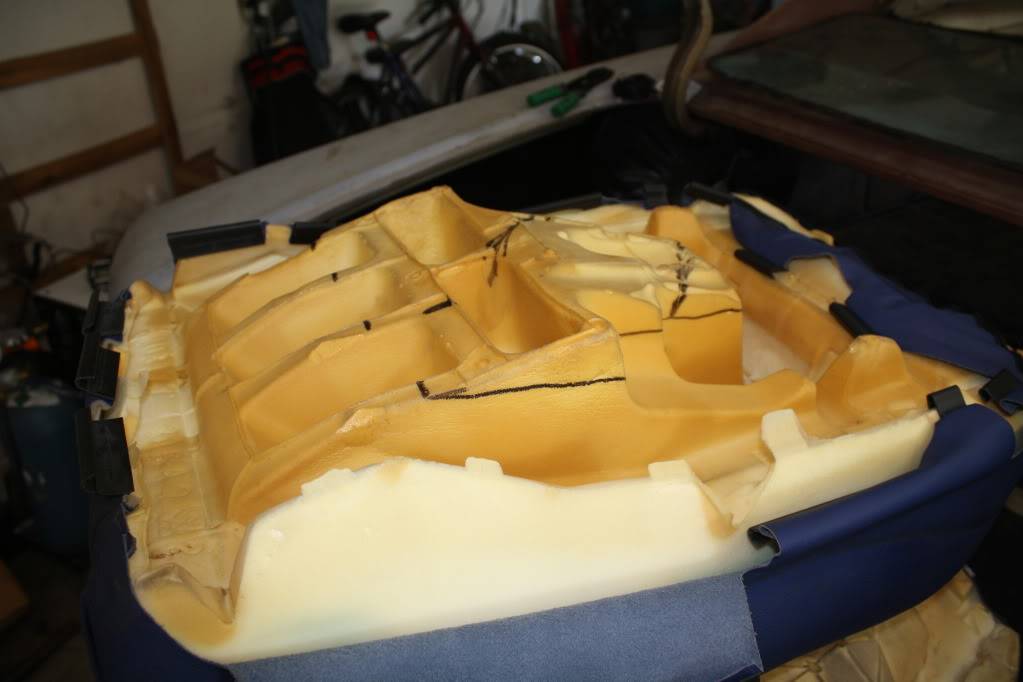
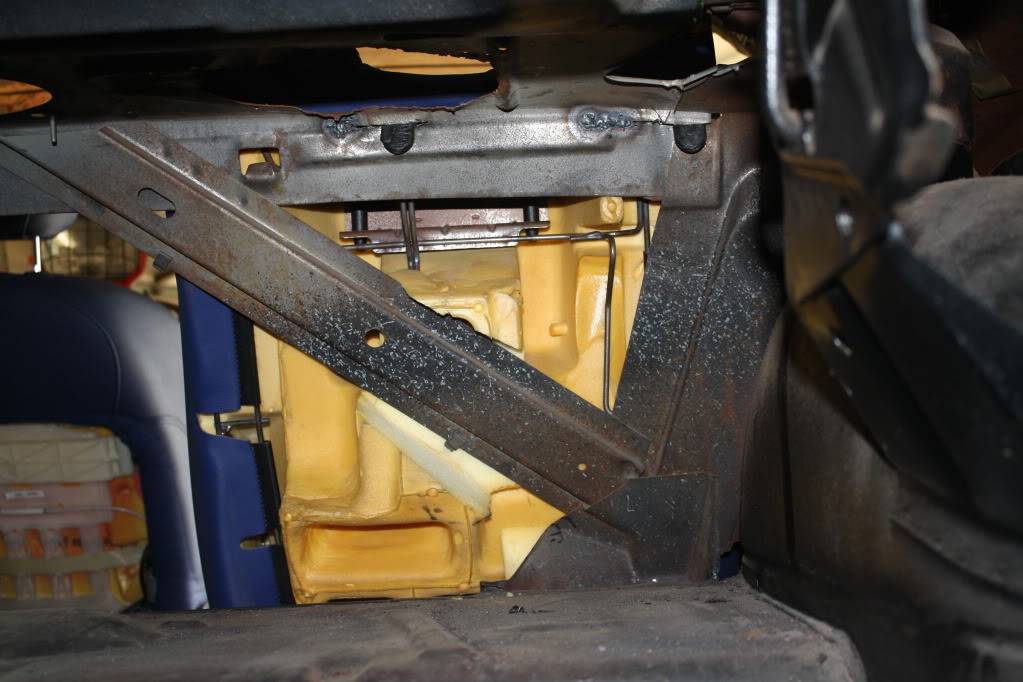
I am also going to trim some of the foam from the upper seat as there is too much there and it pushes hard against the body frame rail the runs between the floor and the package tray. After a couple of test cuts it looks like a kitchen electric carving knife will work great for this.
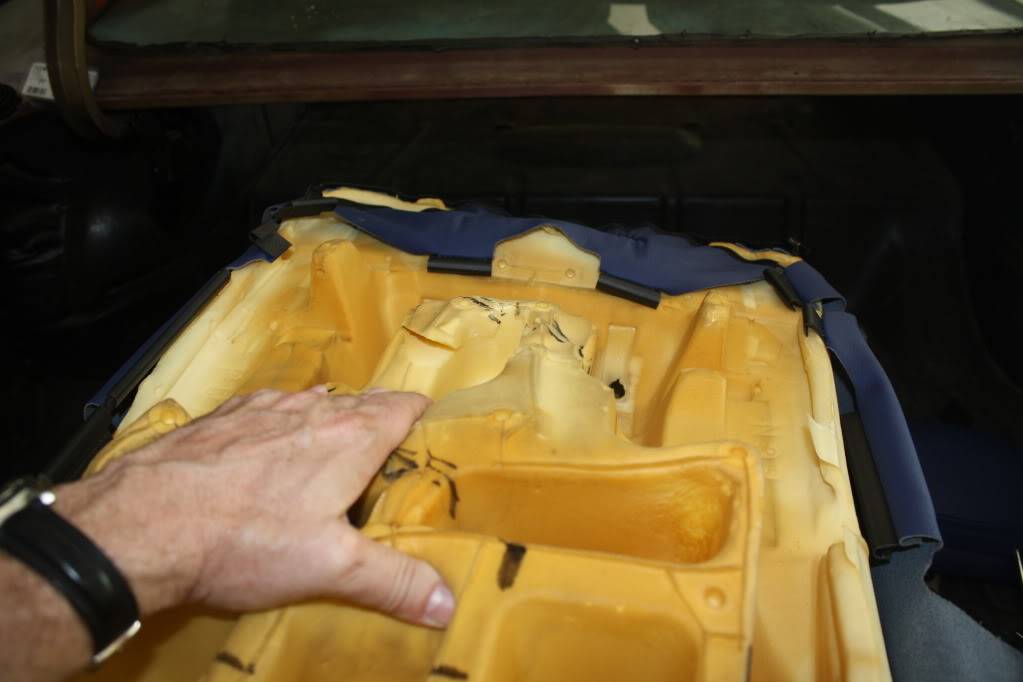
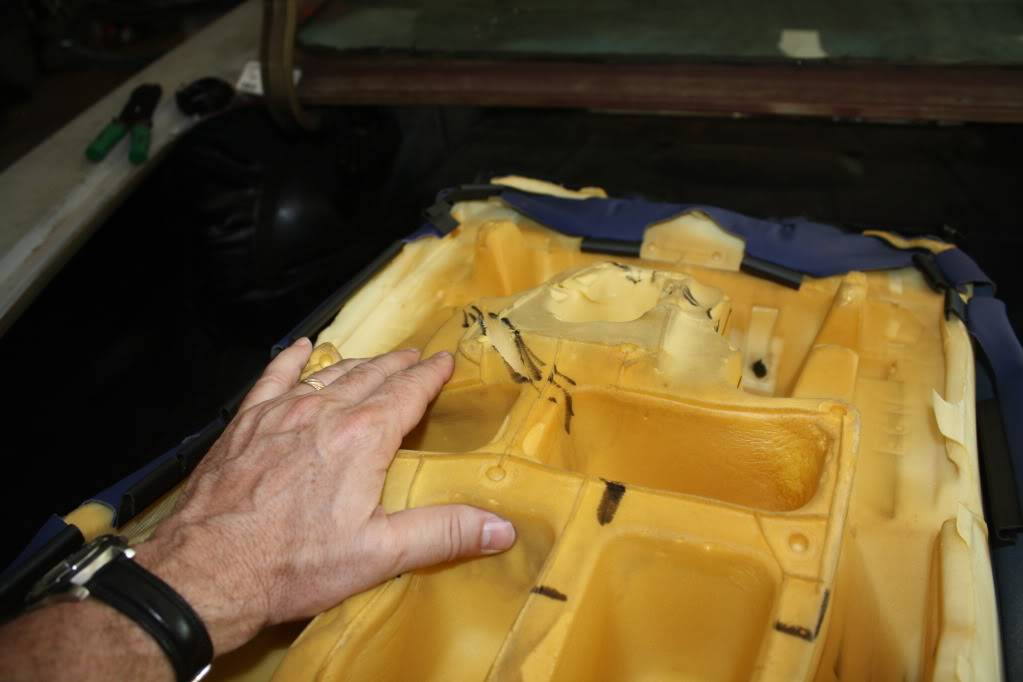
I will update again when I have a finished product. Ken
-
04-02-2012 #104
 Registered User
- Join Date
- Nov 2011
- Location
- Chicago, IL
- Posts
- 35
Looks good Ken. I am thinking I will go with half of your plann. I am going to go with a stock rear seat and put in new buckets up front. If you don't mind me asking what did you pay for your newer GTO buckets? As all ways keep up the good work.
-
04-02-2012 #105
Registered User
- Join Date
- Aug 2011
- Location
- Burleson, TX
- Posts
- 130
Mark the front and back together were $600.00 plus shipping. There are less expensive ones out there but I went for these because 1.) they are blue and 2.) the leather was in such good shape I knew I could get by for awhile before a recover would be needed. What color are you thinking about? Ken Originally Posted by TEMP GTO
04-02-2012 #106 Registered User
- Join Date
- Aug 2004
- Location
- Rustburg, Virginia
- Posts
- 3,436
Project is coming right along...nice work.
1970 RS/SS350 139K on the clock:
89 TPI motor w/ 1pc rear seal coupled to a Viper T56 via Mcleod's modular bellhousing w/ hydraulic T/O bearing from the Viper, 12 bolt rear w/ 3.73 gearing, SC&C upper control arms, factory lowers with Delalums, C5 brakes at all four corners, Front Wheels 17x8's with Sumi 255/40/17 and Rear Wheels 17x9's with Sumi 275/40/17.
Brief description of the work done so far can be found here: http://www.nastyz28.com/forum/showthread.php?t=112454
04-02-2012 #107
Registered User
- Join Date
- Nov 2011
- Location
- Chicago, IL
- Posts
- 35
Thanks Ken. I am thinking I am going to go with black. the car is going to either be a silver or a charcoal/gun metal gray.
04-16-2012 #108
Registered User
- Join Date
- Apr 2012
- Posts
- 2
hello ken .
nice build you got going on .
hey i have a serpentine kit from billet specialties 13450PA that i recently bougth for my build , but i decided to do a supercharger setup so this will no longer work for me .
every thing is new in the box,
im in arlington tx. if you want to see them let me know. billet wont take them back since i opened the box!
04-21-2012 #109 Registered User
- Join Date
- Apr 2012
- Location
- Lexington, KY
- Posts
- 24
Hey Ken,
Just read your thread. Lots of good info here. I was wondering if the car will stay Lemans or cloned into a gto (hood and tails)?
Also, when you mentioned the custom repop 67 dash you said that the a/c plate is not available. Can you not find an OE one or is it the matching of the colors?
I'm new here and in the process of doing a 67 Tempest. So, I'm reading all related threads to keep my headaches to a minimum.
Looks like your ride will be a heck of a car when she's finished!
04-23-2012 #110
Registered User
- Join Date
- Aug 2011
- Location
- Burleson, TX
- Posts
- 130
Diego, Originally Posted by chvz99
Thank you for the offer. As in PM let's get back together in July if you still have it. Ken
04-23-2012 #111
Registered User
- Join Date
- Aug 2011
- Location
- Burleson, TX
- Posts
- 130
Boostmaster, Originally Posted by boostmaster
It will have a GTO hood. In keeping with the "New car in an old body" theme I would like to have LED tail lights. I like the GTO tails better but the cost of the change over may be prohibitive at this point. Still working on that.
The main reason for not going with the Thunder Road dash is I do not think I could get a good enough match in surfaces/finishes in the A/C plate that I would be satisfied with. I really am liking the layout my son and I have been working on and that leaves my options completely open as to gauge manufacture and selection.
Thank you for your kind words and good luck with you project! - Ken
04-23-2012 #112 Registered User
- Join Date
- Feb 2005
- Location
- Pine Bush, NY 12566
- Posts
- 122
...just stumbled upon this thread. Very cool project, ...and awsome work!!

04-23-2012 #113
Registered User
- Join Date
- Aug 2011
- Location
- Burleson, TX
- Posts
- 130
Kevin - Thank you very much! - Ken Originally Posted by KevinK
04-29-2012 #114 Registered User
- Join Date
- Jan 2008
- Location
- Houston, TX
- Posts
- 193
Ken,
On the Covan's website it shows the Ac/Heater Controls hole to be optional. It'd be more work, but you could use different controls with it but maintain the same texture throughout the panel. That is if they really offer it without the void.Asa Walker
Houston, TX
04-29-2012 #115 -Moderator/Sponsor-
- Join Date
- Apr 2001
- Location
- The City of Fountains
- Posts
- 16,125
Great project. I just read the whole thread and you are making great progress.
With regard to the gauge layout. I recommend that you mount the tach and the speedo as close together as possible. I speak from experience on this. With a smaller diameter steering wheel, which I am sure you will be using, it will be hard to have full visibility of the two center gauges unless they are very close together. An alternative layout would be to mount the tach in the middle and a smaller speedo off to the side. While this setup is not symmetrical, it will be much more practical.
Also make sure the the transmission crossmember can slide out of their perches by turning the crossmember clockwise or counter clockwise as viewed from the bottom. Remember, with the body in place, the exhaust in place, and the transmission raised just slightly off the crossmember, you will have precious little room to maneuver. I have my stock Pontiac style crossmember inside the c-channel of the frame, like the OEM was, and it is a challenge to remove it for servicing. I am just afraid that you will bolt everything together slide a body on top and then realize later that you can't remove the crossmember.
Andrew1970 GTO Version 3.0
1967 Cougar build
GM High-Tech Performance feature
My YouTube Channel Please Subscribe!
Instagram @dr__efi
I deliver what EFI promises.
Remote Holley EFI tuning.
Please get in touch if I can be of service.
"You were the gun, your voice was the trigger, your bravery was the barrel, your eyes were the bullets." ~ Her
04-29-2012 #116
Registered User
- Join Date
- Aug 2011
- Location
- Burleson, TX
- Posts
- 130
Asa long time no hear! Yes that would be an option but the more I get into this the more I am looking at using 6 gauges along with the speedo and tach. Covan's only offers 4. I know there would be no way to add gauges and have it look right. However, if I do reel things in a bit and go with just the standard 4 guages then I will look at the option much again. Thanks Ken
04-29-2012 #117
Registered User
- Join Date
- Aug 2011
- Location
- Burleson, TX
- Posts
- 130
Andrew, I belive I checked for that when I first welded those perches in because I was trying out a couple of different mounts along with alot of test fitting. When I get back to the chassis I will definatley check that out and make sure! I do plan on a 13-14" steering wheel and try to leave 1/4" between the trim rings of the speedo and tach. I will be mocking all that up as I go along to ensure functionality. Thanks for your comments especially about the trans crossmember!
I checked out the first few pages of your thread and you have provided some great information. By the way I quess I am officially old-I remember HO Racing was the place to go for performance suspension upgrades for old cars like ours back in the 80s and early 90s.
04-29-2012 #118
Registered User
- Join Date
- Aug 2011
- Location
- Burleson, TX
- Posts
- 130
Finished one rear seat and started on the other
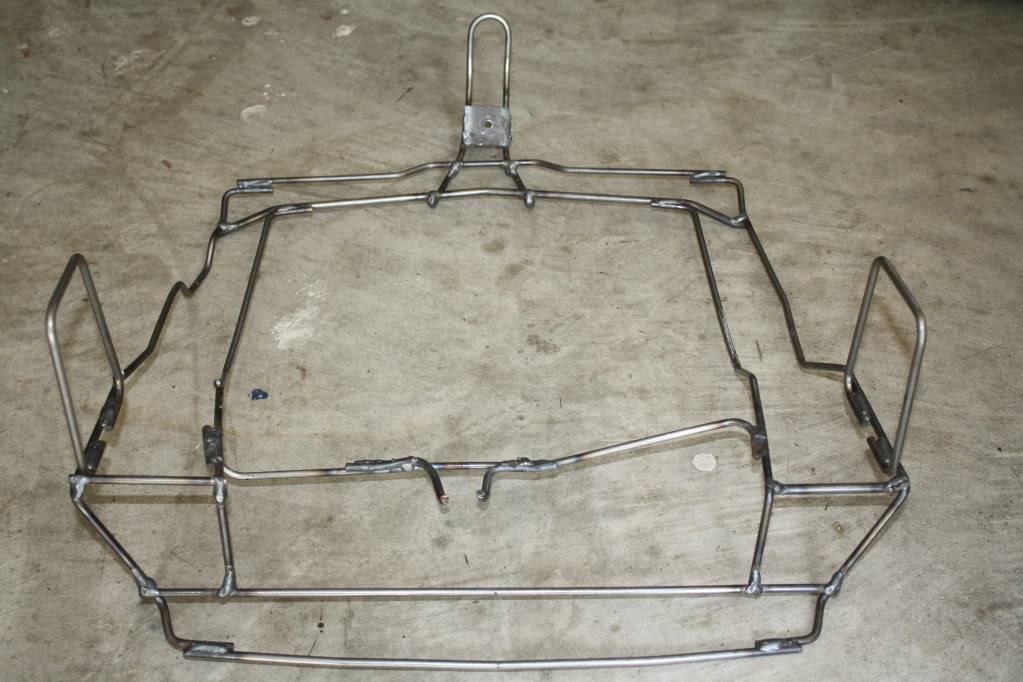
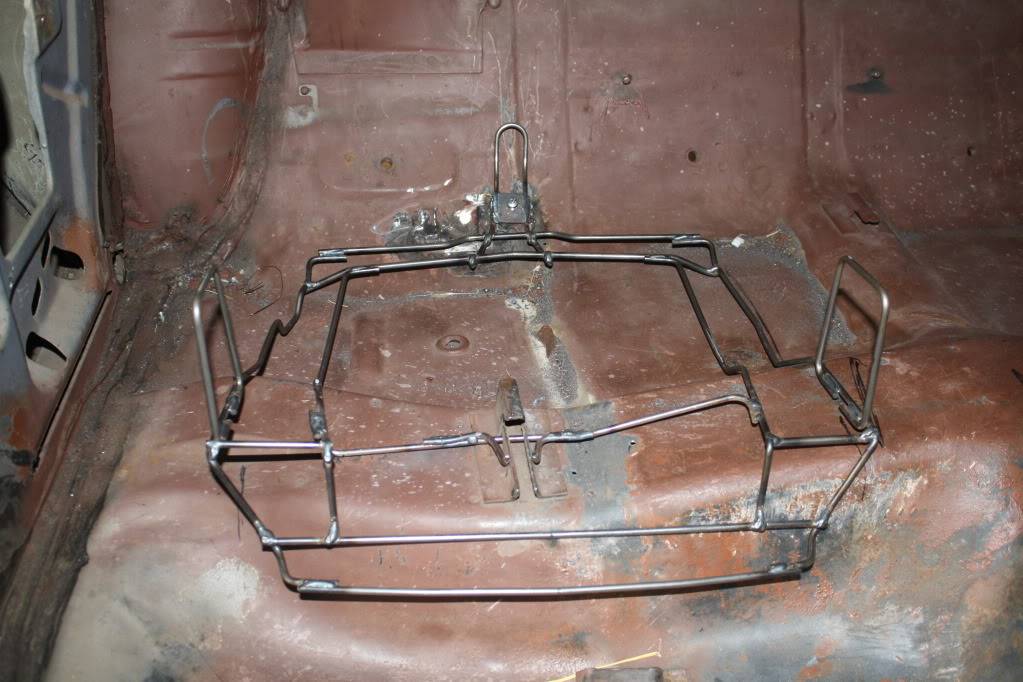
Here is the lower seat frame with the flat stock washer welded in along with a couple of ugly additions to the cross rod. I put those on because the seat bottom wanted to wonder a bit from side to side this keeps it tight against the seat bracket.
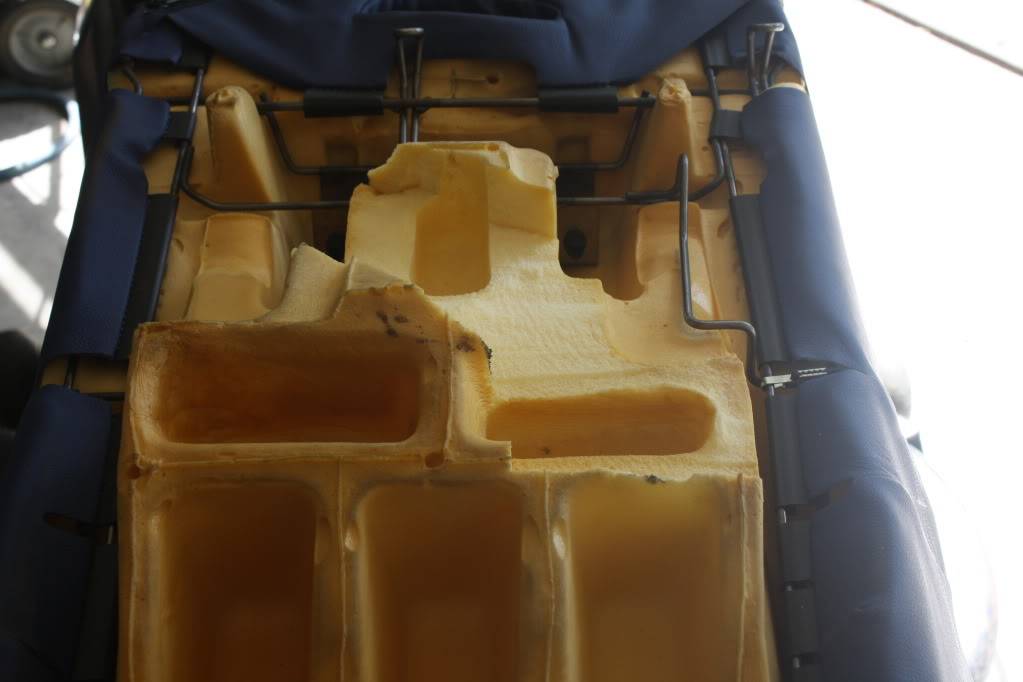
Here the foam has been trimmed from the seat back to better fit up against the body.
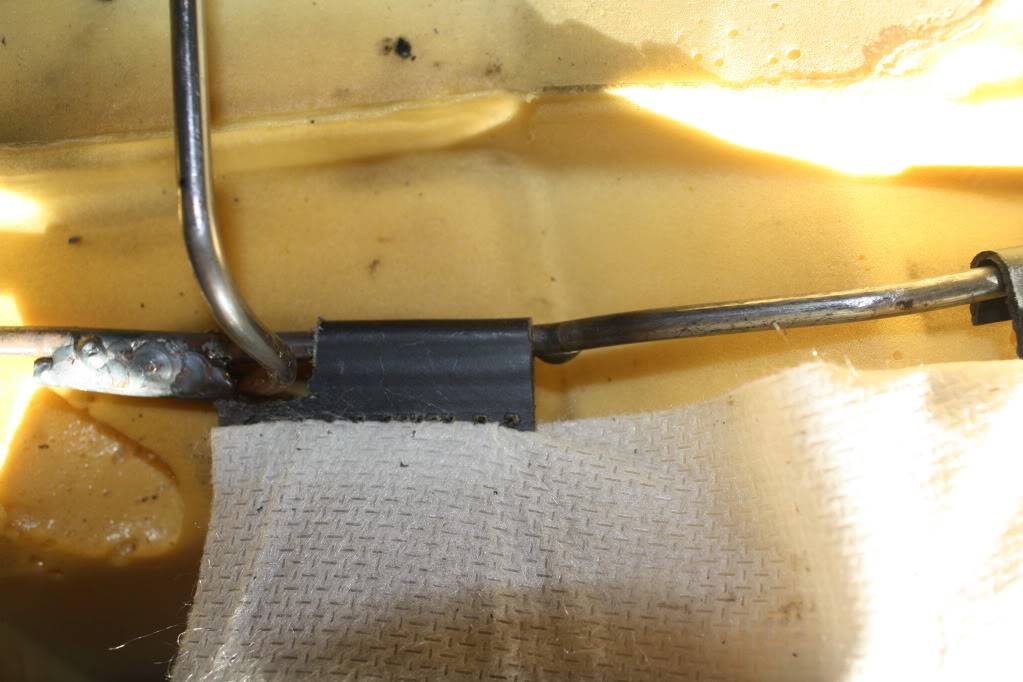
I did have to trim one apolstery clamp to fit the modifications to the lower seat frame.
Here are a couple of shots of the finished passanger rear seat. One shows the relationship of the seat to the OEM arm rest which I currently plan to use.
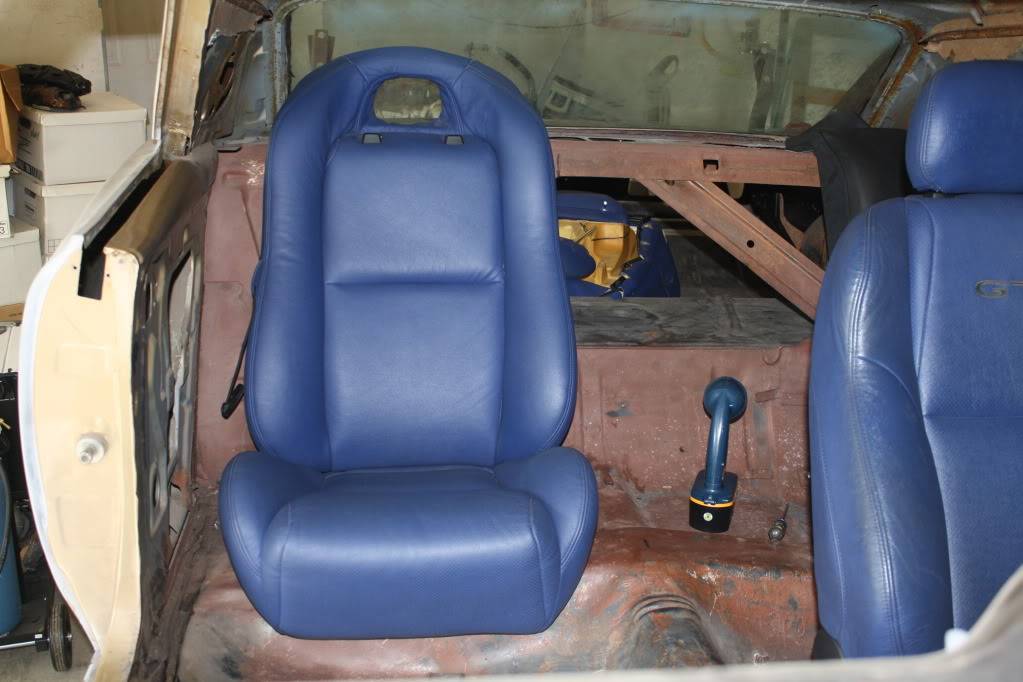
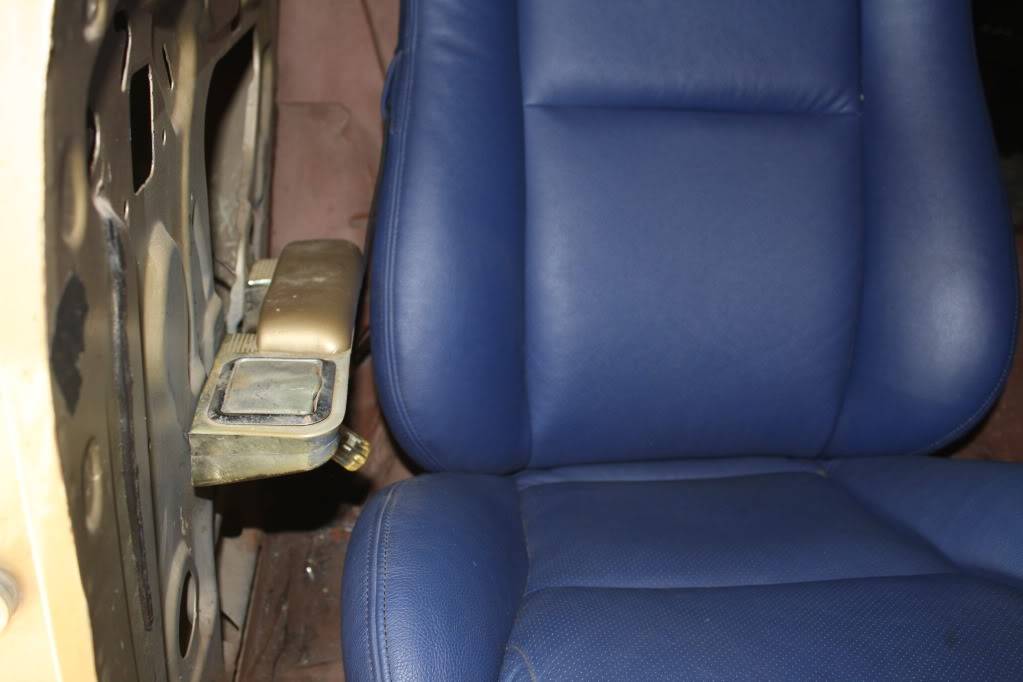
I finally got started on the driverside rear seat.
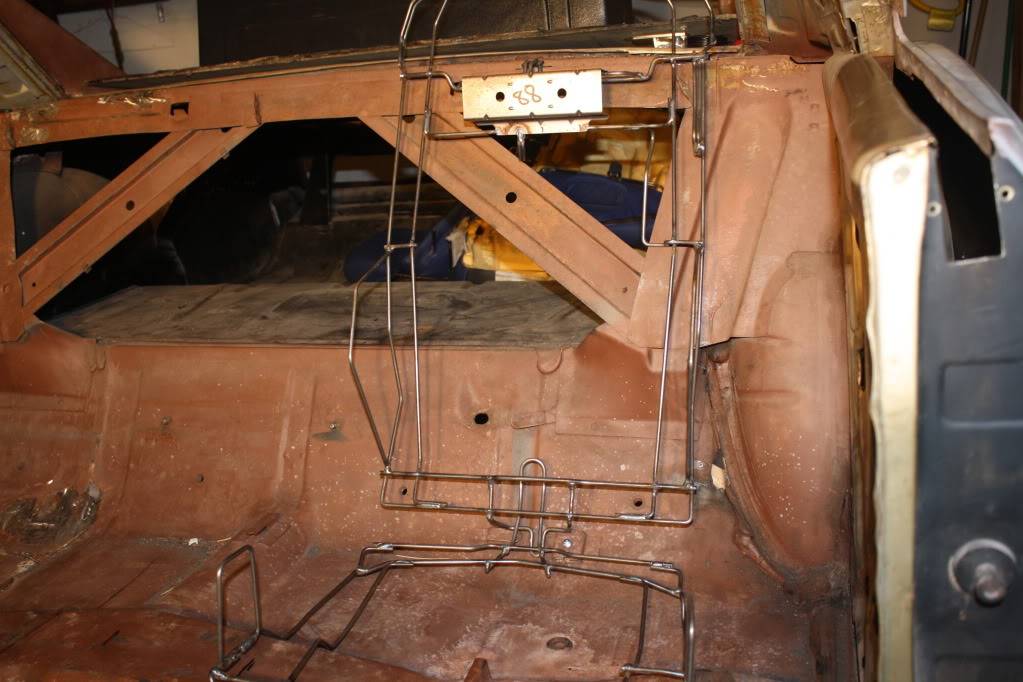
All was going very well until I broke my tubing bender just before needing it to bend the cross rod. Well that's where the old saying comes from "Use the right tool for the job". I just don't have the right tool and the cheesey light brake line tubing bender just did not stand up to rolled steel rod.
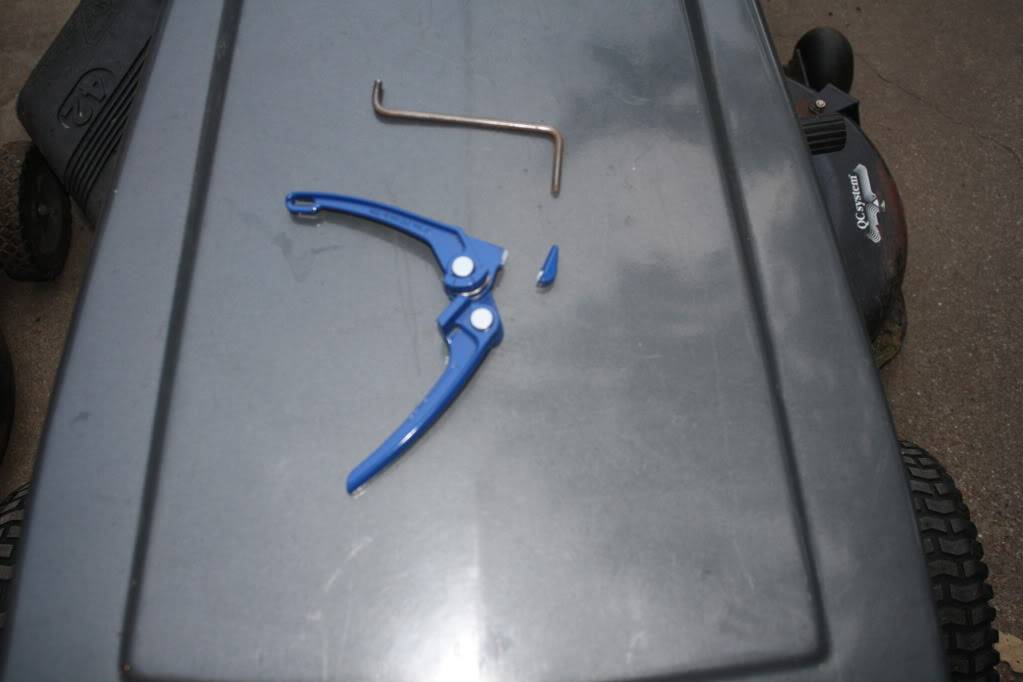
So this is where I stopped today.
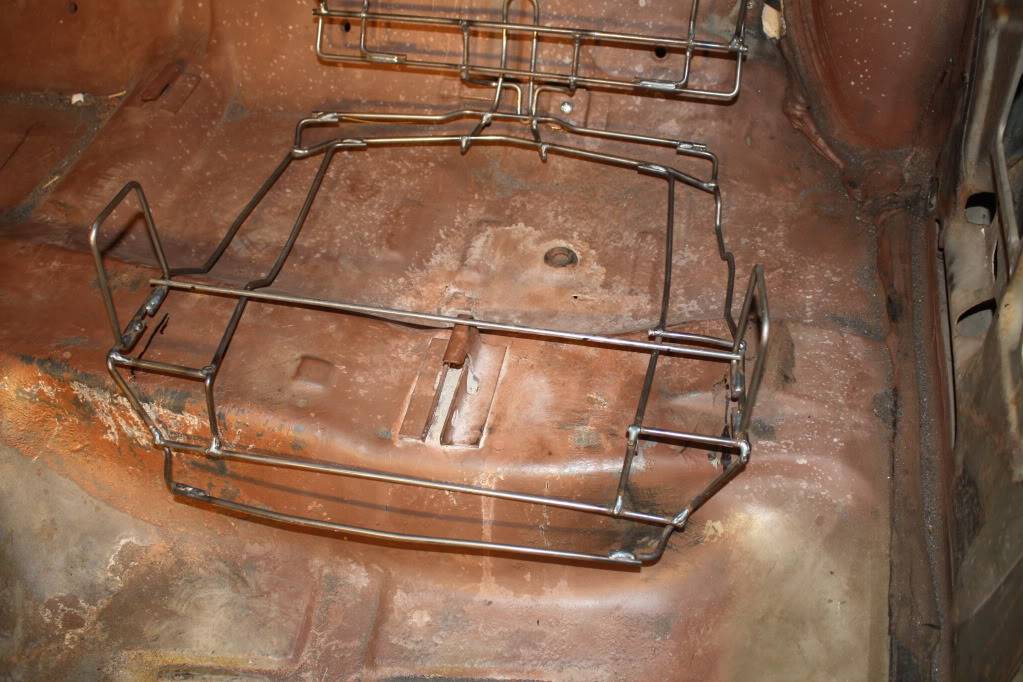
Will get back at it when I can. But it may be a few weeks.
04-29-2012 #119 Registered User
- Join Date
- Feb 2006
- Location
- Idaho Falls, Id
- Posts
- 1,341
Just saw this for the first time. Very nice so far. Frame looks good that color
Traven
05-04-2012 #120
Registered User
- Join Date
- Jan 2008
- Location
- Houston, TX
- Posts
- 193
What are the plans for this weekend ken? Keep it up.
Asa Walker
Houston, TX

 Reply With Quote