Results 1 to 20 of 27
Thread: 69 Camaro Convertible Build
-
02-13-2011 #1

 Registered User
- Join Date
- Feb 2002
- Location
- Santee, CA
- Posts
- 387

69 Camaro Convertible Build
I've been a member for a while now and have posted many times, but never started a build thread. Better late then never...
I bought the car back in mid 2000 on eBay (located in New Jersey). It was an original SS350 (X11) A/C car that now had a 396 backed by a M21 4-speed.
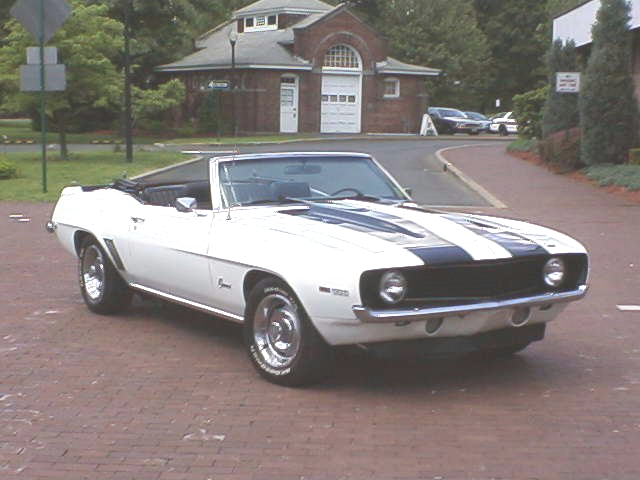

We enjoyed the car for several months, before deciding to pull it off the road and have the engine gone through (was leaking a lot of fluids). Before we knew it, we had the entire car apart and the body was heading out for acid dipping.
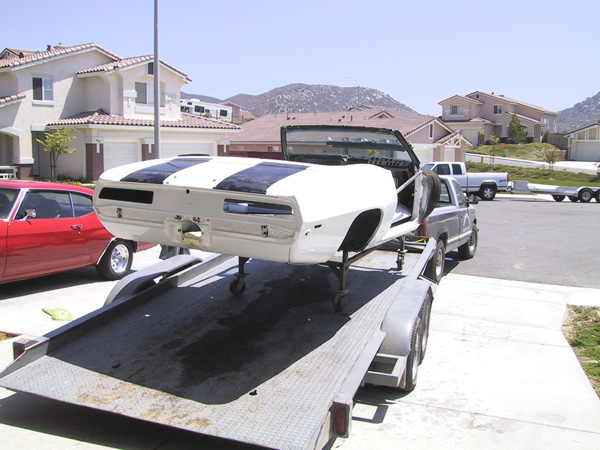
Initially, the plan was to put the car back to an original look and to swap the 396 for a ZZ502 crate motor. But as so often happens, plans changed. We ended up putting the 502 in my wife's Chevelle and I started down the pro-touring path with the Camaro.
The car ended up at a shop for several years having various customizations made. Long story short, I decided it best not to have the shop finish the car and took it back. I continued with fabrication and mock-up in my garage and started looking for a painter last fall when I met Pat ( 67-ls1-vert).
After only a couple of months, I got the car back painted GM Torch Red with Ford Tuxedo Black stripes. I'm now in the process of putting everything back together. Below are a few pictures of the car when I got it back in January.
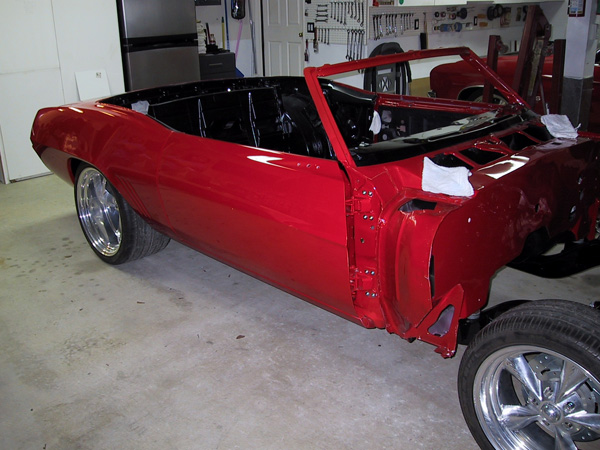
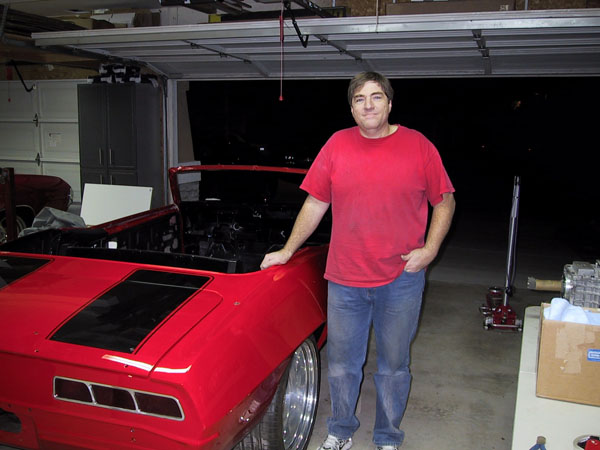
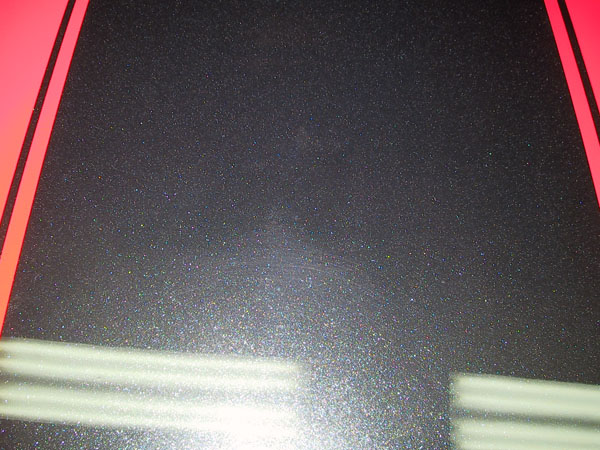
Here are some of the details on the car:
DRIVETRAIN
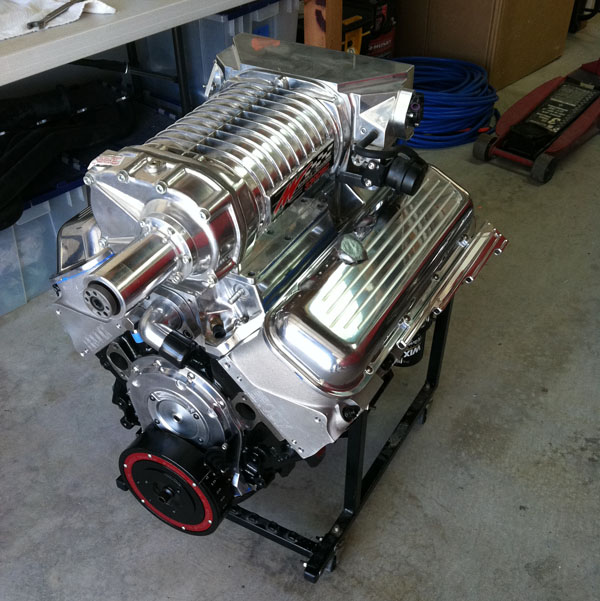
Dart 540 with Brodix heads
Whipple 3.0L EFI Supercharger
F.A.S.T. EFI
Tremec TKO-600 5 Speed with Hydraulic clutch
Chevy 12 bolt (narrowed 2"), 4:11, Auburn Posi
BRAKES/SUSPENSION
Wilwood 4-Piston (front and back)
ABS Power Brakes Electro Boost system
Leav springs relocated inward front & back (Earl's Classic Chassiworks)
Hotchkis rear leafs and front sway bar
Superior 2" Drop Spindles
TIRES/WHEELS
Colorado Custom Lazaer Wheels
18x8 Fronts with 245/40-18 Pirelli's
20x12 Rears with 345/25-20 Pirelli's
BODY
Stock cowl hood raised 1/2"
Smoothed (door handles, locks, side markers, etc.)
Smoothed firewall and hidden wiper
Painted Torch Red with Tuxedo Black stripes (by Pat's Custom Cars)
Painted and Smoothed Bumpers
Custom radiator support and Grill
Modern side mirrors (Buick)
Marquez Billet Tail Lights and Driving Lights
HID Headlights
INTERIOR
New (2000) Camaro front seats
Marquez Door and Rear Panels
Custom center console with double din nav(still being planned)
DSE Dash with Autometer Nexus gauges
Vintage Air Gen II Compac system
Electric-Life power windows
-
02-14-2011 #2 Registered User
- Join Date
- Mar 2009
- Location
- overseas
- Posts
- 3,434
looks great so far!!
 Kevin S. (overseas in Germany)
1963 Chevrolet Impala 2d ht Coupe
www.CruznArt.com
CRUZN - Automotive Artworks
02-14-2011 #3 Registered User
- Join Date
- May 2005
- Location
- Miami
- Posts
- 2,218
Yeah what he said ^^^^^^^^^^^^^^^^^^ Originally Posted by CruizinKev
 1955 Chevy 150
http://imageshack.com/a/img911/7169/QLWsvk.jpg
1968 Camaro
http://imageshack.com/a/img901/7223/twfpl9.jpg
1956 Chevy 210
http://imageshack.com/a/img834/6076/8azy5.jpg
___________
Jeff
02-14-2011 #4 Registered User
- Join Date
- Mar 2008
- Location
- Ramona, Ca. San Diego area
- Posts
- 1,307
Hey Eric, Bought time you posted a thread on your car. Good to see the car is on the ground back on it's wheels. Looking good. I cant wait to see all the panels back on.
67 Camaro convertible (Jinx)
02-14-2011 #5 Registered User
- Join Date
- Nov 2006
- Location
- Ma.
- Posts
- 5,560
Nice car you have there, that color looks great. It should be a hell of a ride when your done.
Wayne
Car FINALLY home !!!!!! lol
Project FNQUIK https://www.pro-touring.com/showthre...ghlight=FNQUIK
02-14-2011 #6 Registered User
- Join Date
- Nov 2008
- Location
- Lawrenceburg, TN
- Posts
- 4,098
I NEED more pictures please,

03-14-2011 #7
Registered User
- Join Date
- Feb 2002
- Location
- Santee, CA
- Posts
- 387
Project Update - Doors/Windows
A bit behind on updates, so I may post these in several replies...
Got my doors mostly put together, but still have some wiring to finish up.
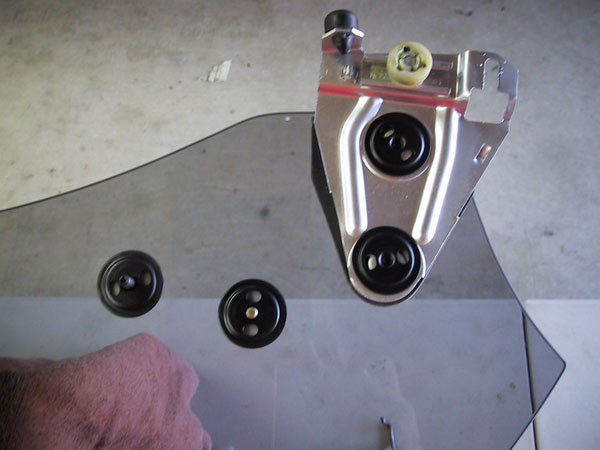
Bead blasted and painted all of the window components. Replaced all of the glass with a smoked set from Frank at Prodigy Customs. Had installed a set on my wife's Chevelle a couple years ago and had to have a set for the Camaro.
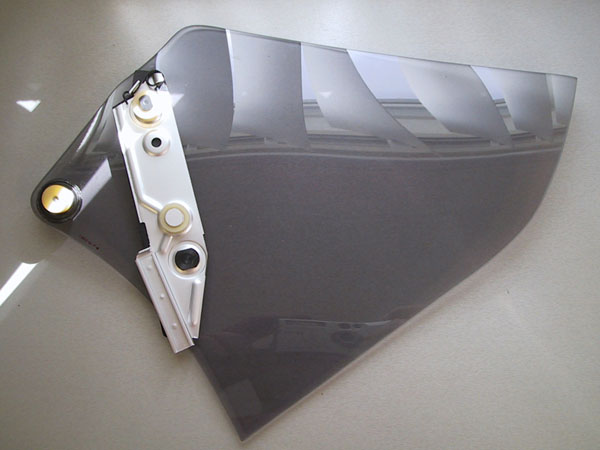
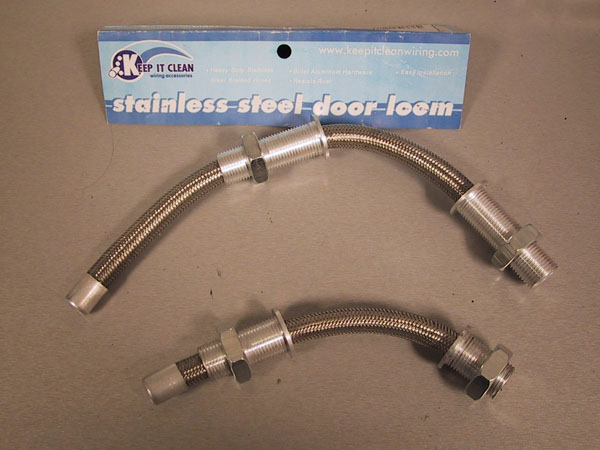
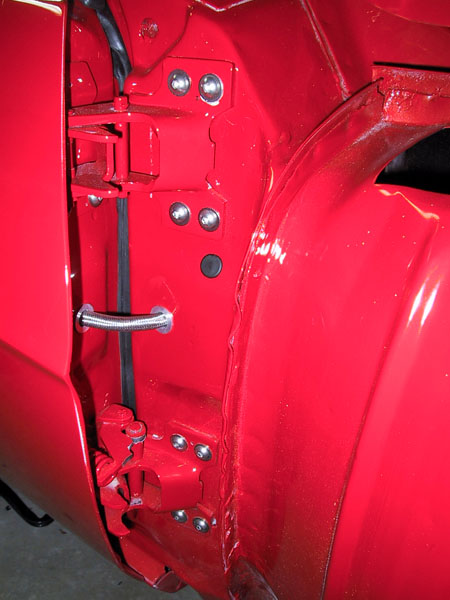
I also installed a set of door looms. I had originally purchased a set of Electric Life looms, but found that the slip collar was difficult to install so that they set flush against the door. Instead, I ended up purchasing a set of AutoLoc looms. They were half the price, but more difficult to modify. I cut down both of the bolts and shortened the tube. I found out that on the Camaro, the loom is actually extended more when the door is open, not closed. Be careful when cutting your looms to fit.
The loom on the top is how they come, the one on the bottom is the modified version:
The installed loom:
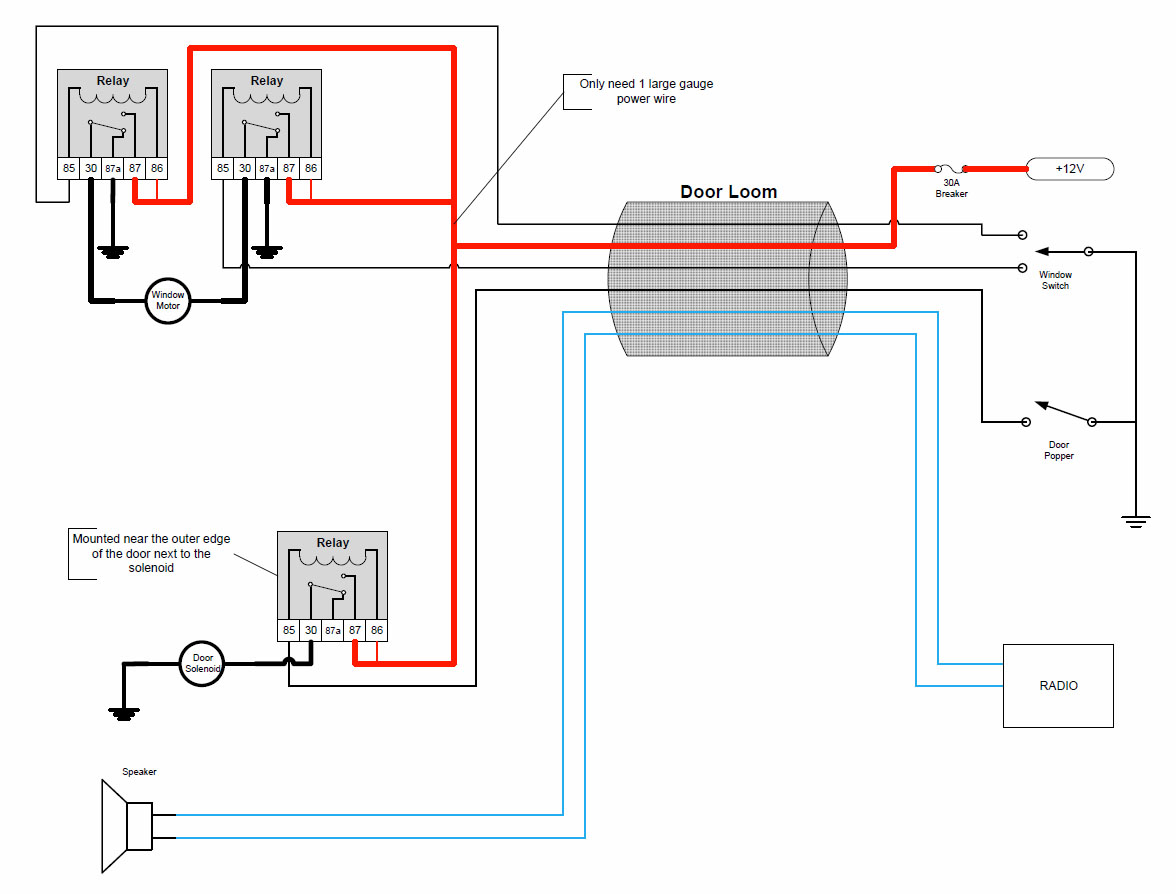
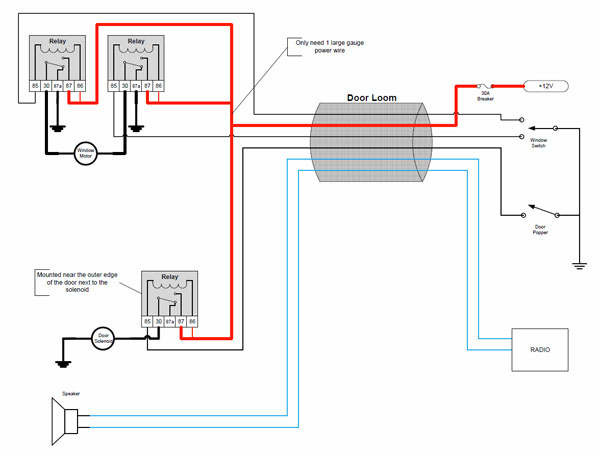
One concern I had was getting all of the proper size wires to fit through the loom. Decided to use a single large gauge wire for the power windows and door poppers (shaved the handles) and small gauge wire to activate via relays.
My original design required 3 relays (2 for the windows - Up/Down) and 1 for the door popper:
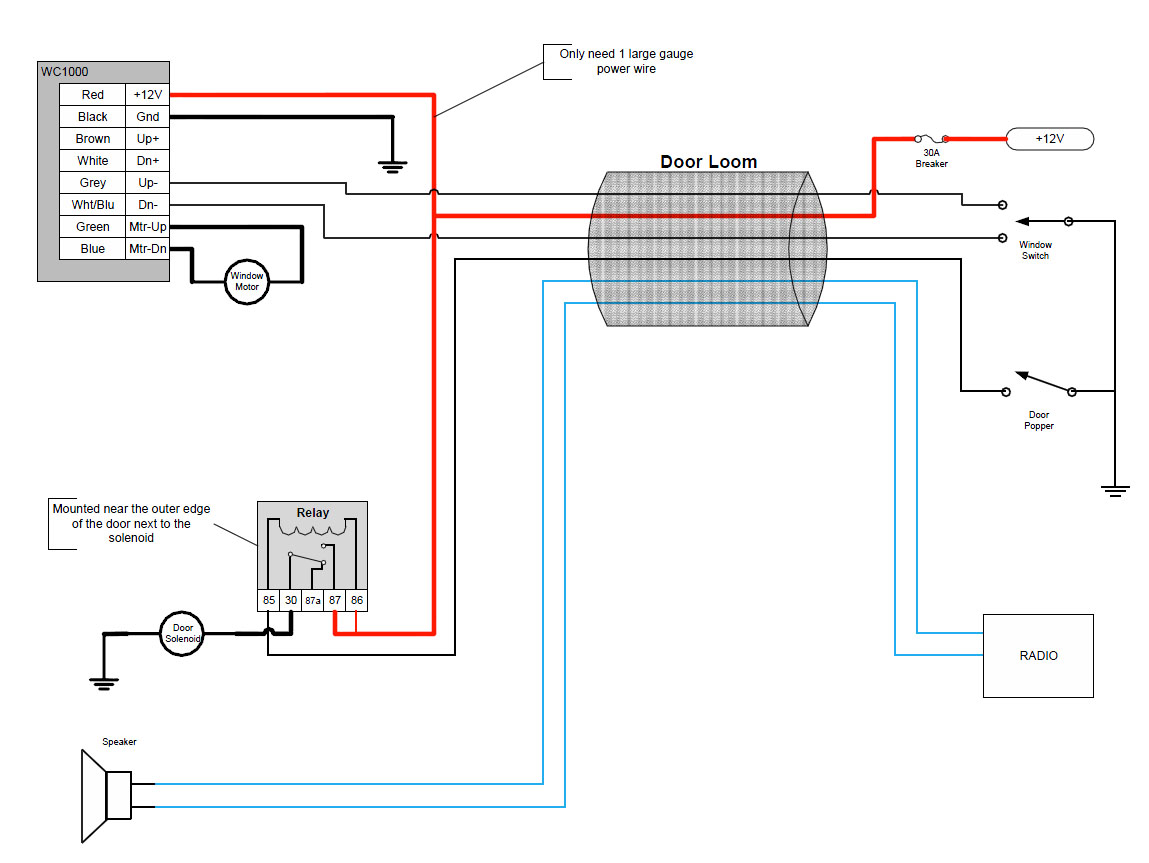
I didn't like all of the relays and wanted to add 1-touch capability to the windows. After some searching, I came across the AutoLoc WC1000 window controller. This controller provides the same functionality as the dual relays, but also gives you the 1-touch control. Currently these are onsale on amazon.com for only $25 each!
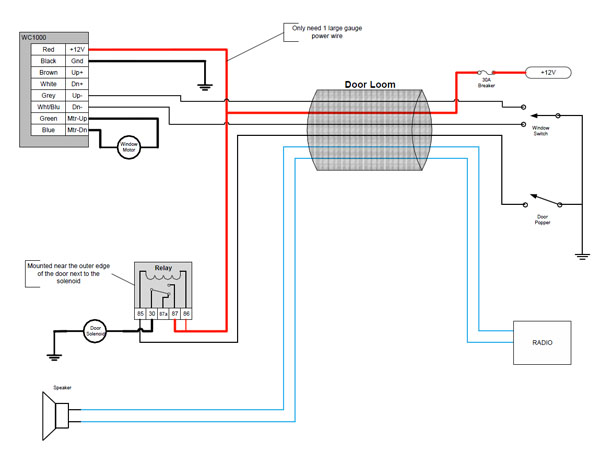
The WC1000 hasn't come in yet, so I plan to do some testing with it. I may need to use the positive triggers instead, but this just means a slight wiring change at the switch (go to power instead of ground). You can also use these to roll-up the windows from a remote key FOB.
I also have the mirrors installed and am currently working on the wiring. Since they are fairly small motors, I'm just going to use the standard wiring.
The mirrors are from a 91-99 Buick LeSabre. I had to add a bit of plastic and reshape the base to get them to fit right. A cheap plastic welding kit from Harbor Freight did the trick. They came up really nice after Pat (Pat's Custom Cars) worked his magic:
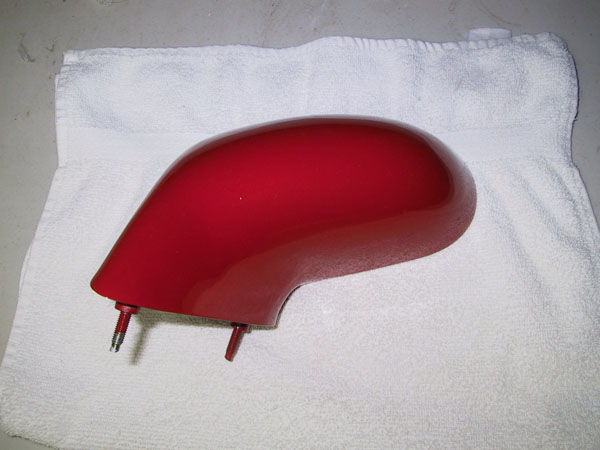
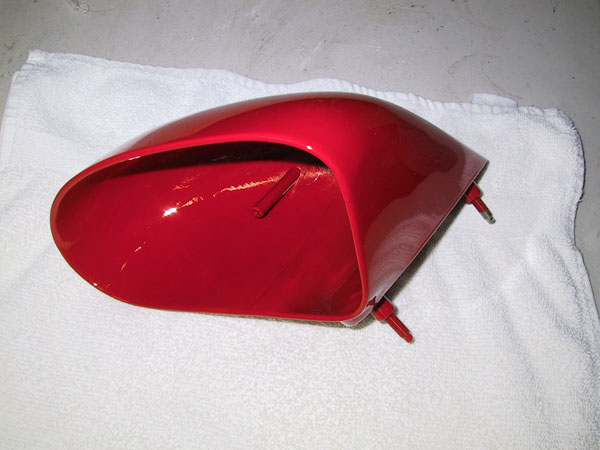
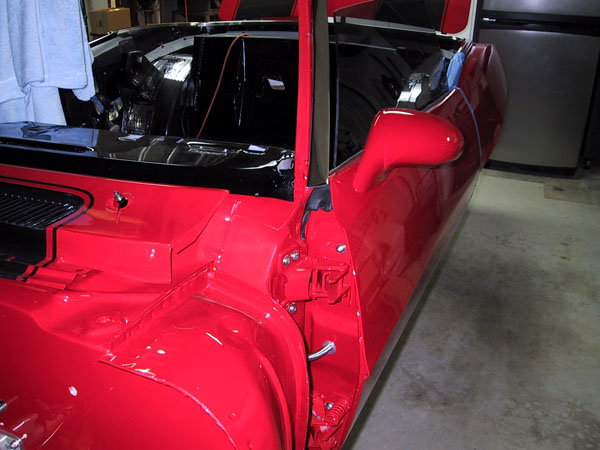
The glass was removed prior to paint (a real pain, but worth it). I did some research to find connectors that would plug directly into the mirror harness. Found that I needed an AC Delco PT219. Amazon.com has these for around $35 each (ouch!) This last weekend I hit the junk yards and picked up 2 harnesses for under $7 (counting the cost of admission).
More updates soon...
03-14-2011 #8
Registered User
- Join Date
- Mar 2008
- Location
- Ramona, Ca. San Diego area
- Posts
- 1,307
looking good Eric... look forward to seeing more update on the completed car. Better hurry, I'm going to pass you up.
 67 Camaro convertible (Jinx)
03-14-2011 #9 Registered User
- Join Date
- Jan 2008
- Location
- Charlotte
- Posts
- 1,295
Power mirrors... nice... heated?
2005 LeMans Blue Corvette w/ T56 & Z51 & C6Z06 Brakes, Build Thread: https://www.pro-touring.com/showthread.php?64496
2005 GMC Sierra 2500HD LLY / Allison
2014 Chevy SS LS3 / 4 Door
03-14-2011 #10 Registered User
- Join Date
- Nov 2005
- Location
- St.Petersburg, FL
- Posts
- 194
Eric,
Speaking from one 'vert lover to another, the car is looking great! I didn't notice if you were putting subframe connectors in it or not, but it sure stiffened mine up alot (Detroit Speed). Looking forward to the rest of the build.
Matt'69 Camaro Coupe, Full Ridetech stage 3 suspension, moser wavetrac 12bolt, Forgelines, Ls3 T56 Magnum and once again tuned by Ed!
'69 Camaro Convertible, all DSE Stuff, LME 430 LS7, tuned by Ed Hutchings and built by http://www.gforcedesignconcepts.com/
03-14-2011 #11
Registered User
- Join Date
- Mar 2008
- Location
- Ramona, Ca. San Diego area
- Posts
- 1,307
Yes he has subframe connectors and a big minitub.
67 Camaro convertible (Jinx)
03-15-2011 #12
Registered User
- Join Date
- Feb 2002
- Location
- Santee, CA
- Posts
- 387
You should know Jinx....you painted them!
I started on the care before many of the after market parts were available. Tubs and subframe connectors were done by William's Classic Chassiworks. Will get some pictures posted in the next couple of days.
I also wanted to provide a quick update / warning. Got the AutoLoc WC1000 window controllers last night. Did a quick test of 2 of the units and neither one worked as advertised. In order to partially roll up or down the window, you have to hit the button once to start it moving then hit it a second time to stop the window. Not a huge issue, but I didn't like it. The bigger issue is that the unit wouldn't roll up my window. Only moved it up about .25" at a time. Already got a return scheduled with Amazon...going back to the relays. Be careful if you were thinking about buying these things. Great idea...if they worked.
03-16-2011 #13
Registered User
- Join Date
- Feb 2002
- Location
- Santee, CA
- Posts
- 387
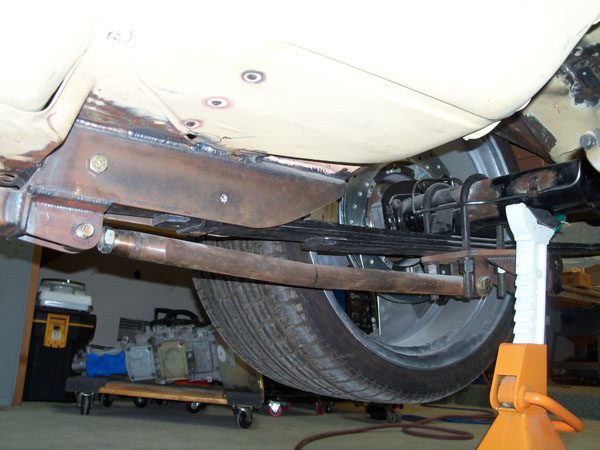
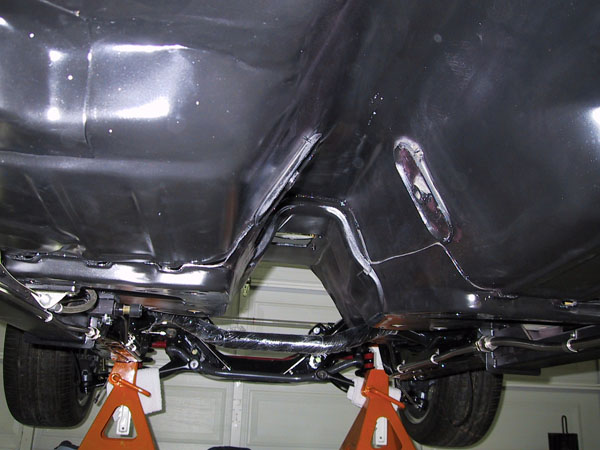
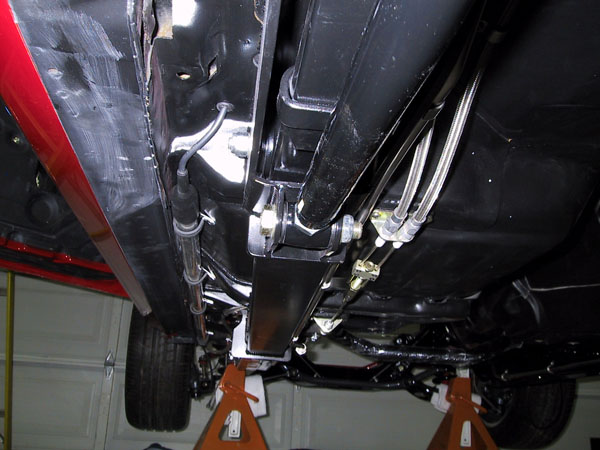
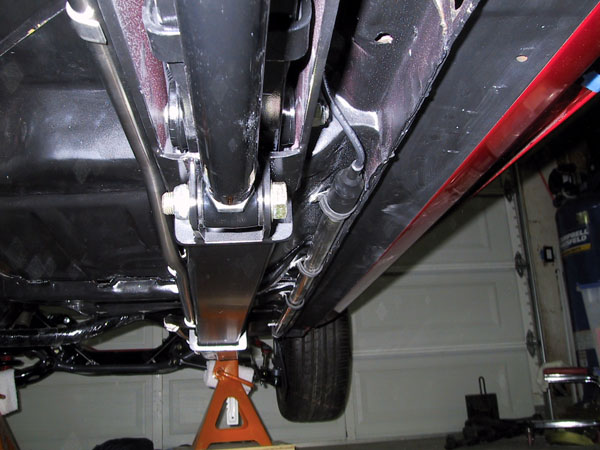
Camaro Tubs and Rear Suspension
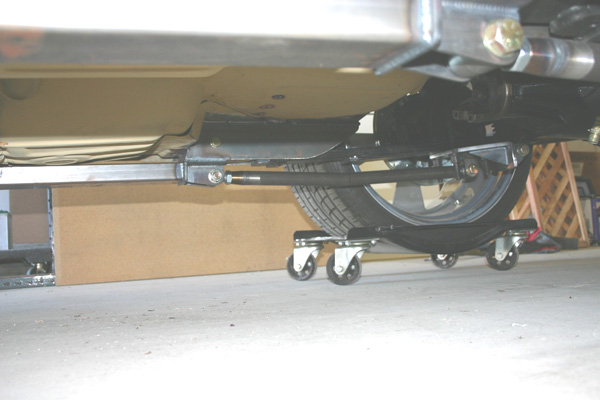
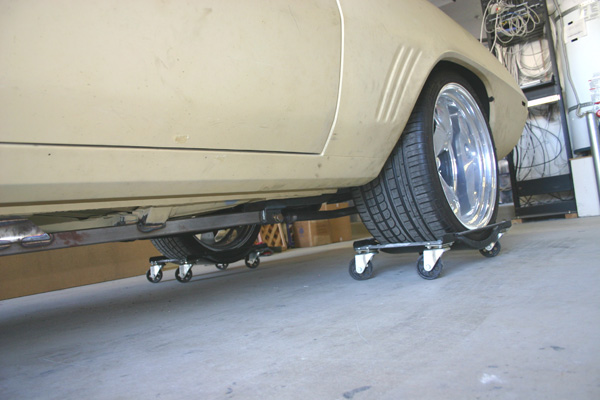
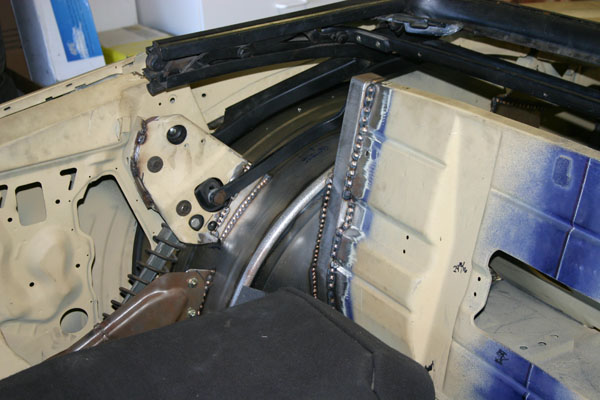
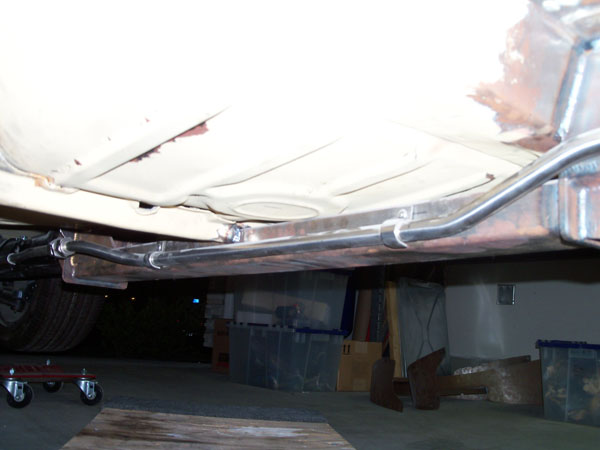
The tubs and rear suspension on this Camaro have been done twice. The first time was by RJ Simrock Racing who totally butchered the job and left me with a car that was deemed unsafe to drive. RJ cut too far into the frame rails and didn't stiffen things up enough. He also used a set of offset hangers to move the leaf springs inward, but bolted them directly to the sheet metal floor.
I ended up taking the care to William's Classic Chassis Works. William's completely cut out all of the work that RJ had done, built new tubs, and reinforced the frame rails. They also built a support bar for the rear shocks and moved the leaf springs inward by relocating the pockets (front and rear!). William's did excellent work, but the final bill ended up being nearly twice as much as the original quote.
Here are some early pics (pre-paint):


And a few pictures post paint (Yeah...I know...neon under the rockers, but I like it and so do my kids):

04-29-2011 #14 Full Blown G-Machiner
- Join Date
- Sep 2010
- Location
- alpine ca
- Posts
- 657
nice work eric like the tub work wish i could have warned you about rj
john1972 NOVA SPEED TECH TORQUE ARM AND FRONT ARMS , RUSHFORTH NIGHT TRAINS, DRIVERZ INC
BUILD LINK
https://www.pro-touring.com/showthre...t-(GREY-MATTER)
04-29-2011 #15
Registered User
- Join Date
- Nov 2006
- Location
- Ma.
- Posts
- 5,560
They did a nice job. Too bad you had to deal with the first guy. It looks great.
Wayne
Car FINALLY home !!!!!! lol
Project FNQUIK https://www.pro-touring.com/showthre...ghlight=FNQUIK
05-02-2011 #16
Registered User
- Join Date
- Feb 2002
- Location
- Santee, CA
- Posts
- 387
Got my motor!
Gregg from Gregg Scott Racing Engines dropped off my Dart 540 weekend....
05-02-2011 #17
Registered User
- Join Date
- Jan 2010
- Location
- Elk River, MN
- Posts
- 676
Holy hell, that motor has got to be a torque monster...
-mattMatt Peterson 84 Monte Carlo - Sold :( | 99 Corvette Racecar | 2001 Z06 Daily Driver
https://www.pro-touring.com/showthre...ng-Bertha-Back
http://ls1tech.com/forums/conversions-hybrids/1499192-84-monte-5-3-build.html
https://www.pro-touring.com/threads/...rvette-Racecar
05-23-2013 #18
Registered User
- Join Date
- Feb 2002
- Location
- Santee, CA
- Posts
- 387
First, let me start by apologizing for my lack of updates. I decided it was time to bring this build thread current by posting multiple updates.
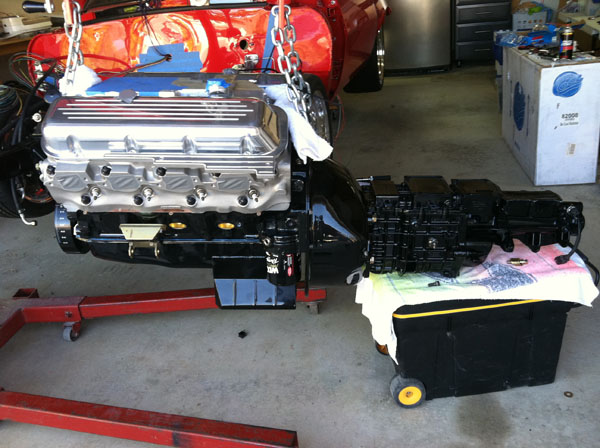
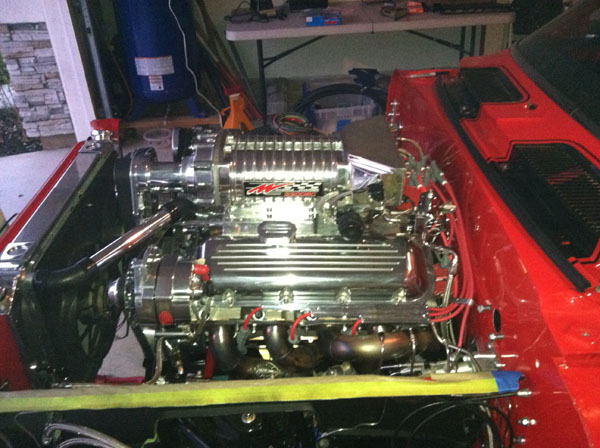
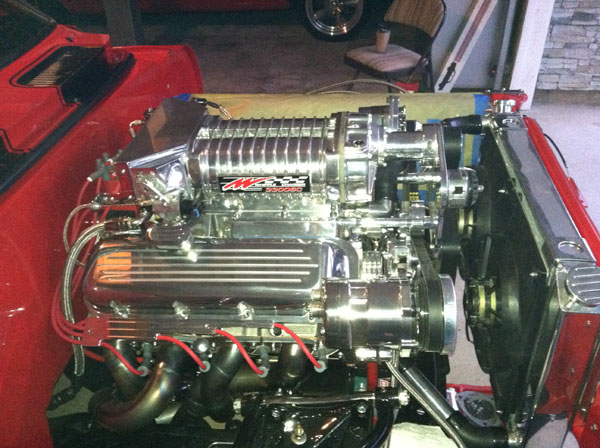
Last I had posted, the Dart 540 had been delivered by Gregg Scott Racing engines:
- Dart 540 Big Block with Brodix Heads
- Whipple 3.0L Supercharger (EFI) with 2100cfm Throttle Body
- Tremec TKO600 5 Speed (Classic Chevy) w/McLeod Clutch and Scattershield
- Keisler Hydraulic Throwout
- F.A.S.T. EFI, MSD Pro-Billet HEI
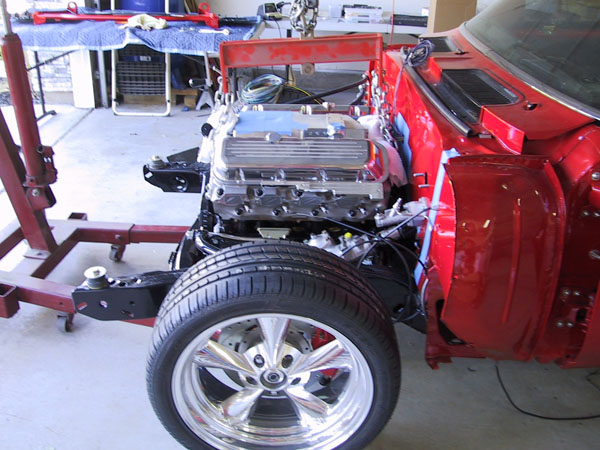
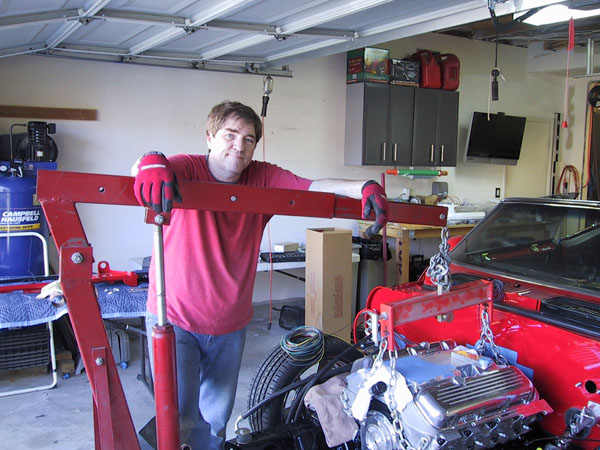
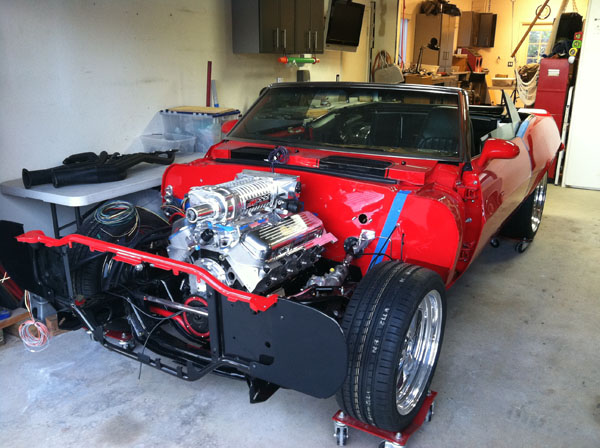
Here's a few pictures of the engine going in (Oct-2011)
Motor, pan, trans, and bellhousing painted Tuxedo black to match the stripes
Scary install....pretty tight at the firewall!
05-24-2013 #19
Registered User
- Join Date
- Jan 2009
- Posts
- 54
Wow, that things gonna move!
06-02-2013 #20
Registered User
- Join Date
- Mar 2008
- Location
- Ramona, Ca. San Diego area
- Posts
- 1,307
Yeah, that car hauls ass. I drove it and it made me smile pretty big. But so did his CTS-V! Eric loves horse power.
67 Camaro convertible (Jinx)
Tags for this Thread

 Reply With Quote