


Results 41 to 60 of 67
Thread: Ball Joint Stuck!
-
06-03-2010 #41
 Registered User
- Join Date
- Aug 2009
- Posts
- 48
its a wooden handled claw hammer not sure of the weight. I'd say 2 lbs. And its hitting hard enough to throw sparks.
78 Trans Am 6.6L,TH350, 3.08 posi, work in progress.
-
06-03-2010 #42 Registered User
- Join Date
- Oct 2006
- Location
- Phoenix, AZ
- Posts
- 826
You need a 5lb "engineer's hammer" at least. You're generating speed with that claw hammer but there's no "torque" upon impact.
Jeff K.
69 Camaro SS, 406 SBC, TKO600, 9" w/3.73 tru-trac, Speedtech Arms, AFX Spindles, Lee 670 Box, Baer GT front, C5Z rear. Hyperco Leafs w/ Fays2 Watts Link + Varishocks.
06-03-2010 #43 Registered User
- Join Date
- May 2005
- Location
- Fontana, CA
- Posts
- 4,960

A single jack at least.
Nick R.
69 Camaro - 383, 700R4, 12 bolt 3.55, Hotchkis, Bilstein, Global West, Morris Classic
08 HHR SS - Still Stock for now
Do you still believe in all the things that you stood by before? Are you out there on the front lines, or at home keeping score?
Do you care to be the layer of the bricks that seal your fate? Would you rather be the architect of what we might create?
06-03-2010 #44 Registered User
- Join Date
- May 2002
- Location
- Northern California
- Posts
- 10,716
I like to live on the edge of death.....don't you guys wear face shields and leather clad kevlar jackets when your in the shop? I do...safety glasses and face shield and I've never seen a hammer shatter. What kind of hammers break? The Mythbusters couldn't do it with a quality hammer. Originally Posted by a67

seriously yeah, be safe and use safety equipment.
I just can believe this is giving the poor guy this much grief. Nuts.
Hold on...sparks? you need to hit it square...a grazing hit will create sparks. Should contact flat and a dead stop blow. Doubt you are generating much force with the claw hammer. Get youself a big ball peen...I love these 40 oz-er's,

Charlies right, you need to get in there and swing on it. try to hit it square at these sections and opposite side for the bottom. I'd pull the caliper and rotor off, pop off the tie rod and crank the spindle to what ever side you can get a nice swing in but hit it square.
VinceMrQuick ΜΟΛ'ΩΝ ΛΑΒ'Ε
06-03-2010 #45
Registered User
- Join Date
- Aug 2001
- Posts
- 924
Get a bigger hammer. What you are using is too small. You will see. A 4 or 5 pound hammer will work.
06-03-2010 #46
Registered User
- Join Date
- Mar 2008
- Posts
- 952
the biggest claw hammer i've seen is a 28 oz framing hammer. i have a few 20oz framing hammers from my days building trusses, and most people that have never swung a hammer for a living think they are insanely huge since the hammers in most people's houses are 16oz or smaller. Originally Posted by tnbandit
so in conclusion, your hammer is too small- get a bigger hammer. even with 9 years of swinging a hammer 12 hours a day building trusses, my mighty Craftman fiberglass 20oz hammers usually aren't big enough to get balljoints to pop apart. a 2lb sledge would be a good investment for you at this point. also, don't be afraid to swing that thing.
06-03-2010 #47
Registered User
- Join Date
- Aug 2009
- Posts
- 48
Thanks guys. I'll try to swing by Walmart tonight but doubt they'll have anything like that. Maybe Lowes this weekend. This is frustrating.
78 Trans Am 6.6L,TH350, 3.08 posi, work in progress.
06-03-2010 #48 -Moderator/Sponsor-
- Join Date
- Jun 2001
- Location
- Newbury Park, CA
- Posts
- 5,837
Wallmart will have a big enough hammer.
Also, it's likely that the threads on the ball joints are damaged from the separator. Use a thread file to correct them, or replace the joint. It's a lot easier to fix this stuff before trying to re-assemble.VaporWorx. We Give You Gas http://www.vaporworx.com
06-03-2010 #49
Registered User
- Join Date
- May 2002
- Location
- Northern California
- Posts
- 10,716
i know, its upsetting us too and its not even our car. LOL Originally Posted by tnbandit
We hope you get this fricken ball joint loose!!
VinceMrQuick ΜΟΛ'ΩΝ ΛΑΒ'Ε
06-03-2010 #50
Registered User
- Join Date
- Aug 2009
- Posts
- 48
Oh trust me I've got all new parts going back in. Once this puppy breaks loose I got all new ball joints upper & lower and all new control arm bushings. Just stock rubber as I can't afford. The good stuff LOL.
78 Trans Am 6.6L,TH350, 3.08 posi, work in progress.
06-03-2010 #51 Registered User
- Join Date
- Nov 2008
- Location
- So. Cal.
- Posts
- 1,240
Geeze, wonder why I used the pile driver and a pickle fork. Yeah, a pain, you have to remove the control arms to use it. But mine wasnt budging, no matter what. It was a 1971 car and prolly original ball joints.
I dont like hitting the spindle so much. But I do think if you were to lube the threads of your tool and apply all the force that you could (before breaking it) and give the spindle some solid taps with a nice 3lbs sledge it should snap open.
But if it doesnt I wouldnt keep hammering on the spindle. And Im talking about a decent swing. Say about a foot and a half. Some decent hits. It should pop loose with the preloaded tool.
If it doesnt I would think about removing the control arm(s) and taking it to the bench or press. When I did my difficult ball joints I was gonna replace them anyway. So I wasnt concerned about wrecking the surface of the joint or the boot. But I didnt want to hurt the spindle. With the tool (pickle fork) placed correctly it put all the load on the ball joint, not the spindle. The wedge goes on the ball joint, not the spindle.
Not saying you should have to go my route. But just in case.
Oh, and after removing my ball joints the pin of the joint was clean and smooth as well as the bore on the spindle. I have NO idea why it grabbed so tightly. Just one of those things.
And why didnt I take it right to the 50 ton press? Well to be honest I didnt think it was gonna need that. And to make up a holder for the entire thing would have taken me just as much time. I had the control arms out anyway for other work.
I still like the pickle forks. Just gotta make sure to put the wedge on the ball joint side and not the spindle side. And use a really BFH! In my case it was the jack hammer Oh, and when my control arms were clamped up in the vice I tried using one of my biggest sledges on the pickle fork. It wasnt doing anything cept giving me a workout. Thats when I brought out the pile driver. JR
What I write is opinion, none of it is factual. 2010
Oh, and when my control arms were clamped up in the vice I tried using one of my biggest sledges on the pickle fork. It wasnt doing anything cept giving me a workout. Thats when I brought out the pile driver. JR
What I write is opinion, none of it is factual. 2010
Even though I'm conscious it doesn't mean I'm coherent. 2011
I'm getting better with age. Best thing about old age is I don't know any better. 2012
06-03-2010 #52
Registered User
- Join Date
- Aug 2009
- Posts
- 48
WOO HOO!!!!!!!!!!! FINALLY the mechanical gods have smiled down on me! It finally broke loose with the separator tool. First the top joint broke loose, then I realigned my spreader tightened it a little and about 3 good whacks with a 3 lb ball peen hammer was all it took.Thanks for all the advice and tips. Now just waiting on parts to arrive and start the reassembly process. Hopefully that won't be such a pain.
When replacing the control arm bushings, will i have to have those pressed out & new pressed back in? Also the lower ball joints, do I need to get those pressed in on just let the castle nut draw it in? Thanks again.78 Trans Am 6.6L,TH350, 3.08 posi, work in progress.
06-04-2010 #53 Registered User
- Join Date
- Aug 2004
- Location
- Rustburg, Virginia
- Posts
- 3,436
Woohoo!...glad you got it....it was bothering me and it wasn't even my car....(just like MrQuick said)
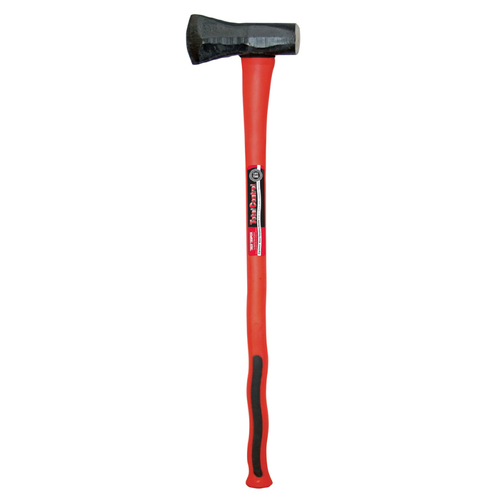
You guys will probably laugh....I use the hammer end of a fiberglassed handled firewood splitting maul....not sure of the weight but it fits up in the fender well area and allows a good hard smack at the spindle...never fails to unstick a ball joint in one whack.
 1970 RS/SS350 139K on the clock:
89 TPI motor w/ 1pc rear seal coupled to a Viper T56 via Mcleod's modular bellhousing w/ hydraulic T/O bearing from the Viper, 12 bolt rear w/ 3.73 gearing, SC&C upper control arms, factory lowers with Delalums, C5 brakes at all four corners, Front Wheels 17x8's with Sumi 255/40/17 and Rear Wheels 17x9's with Sumi 275/40/17.
Brief description of the work done so far can be found here: http://www.nastyz28.com/forum/showthread.php?t=112454
06-04-2010 #54 Registered User
- Join Date
- Aug 2008
- Location
- Pgh, PA
- Posts
- 2,177
Yes, and Yes. If you're using stock control arms the old bushings need pressed out and new ones pressed in. The lower balls need to be pressed in. Originally Posted by tnbandit
 '66 GTO Vert Project "Red Ink", 462ci of stroked pontiac power, TKO600, SC&C Stg II+, Tubular lowers, Currectrac Rear suspension, Moser 12bolt w/Truetrack, Wilwood Master and discs all around, too much fun for words...
06-04-2010 #55
Registered User
- Join Date
- Aug 2004
- Location
- Rustburg, Virginia
- Posts
- 3,436
There is an easy to use ball joint press(fairly inexpensive tool) that you can use if you want to squeeze in a new lower ball joint into the LCA. As for taking the old one out....I now use a press because I have one, but I used to just support the LCA over a short 3-4" piece of pipe and hit the stud with a large hammer and it will drive right out.
1970 RS/SS350 139K on the clock:
89 TPI motor w/ 1pc rear seal coupled to a Viper T56 via Mcleod's modular bellhousing w/ hydraulic T/O bearing from the Viper, 12 bolt rear w/ 3.73 gearing, SC&C upper control arms, factory lowers with Delalums, C5 brakes at all four corners, Front Wheels 17x8's with Sumi 255/40/17 and Rear Wheels 17x9's with Sumi 275/40/17.
Brief description of the work done so far can be found here: http://www.nastyz28.com/forum/showthread.php?t=112454
06-04-2010 #56
Registered User
- Join Date
- Aug 2008
- Location
- Pgh, PA
- Posts
- 2,177
Yeah John, you're right. I guess I just always figured if I need to have access to a press anyway to put the new ones in, just press the old ones out also. But not everyone has access to a good press.
A little heat can also help if you're not pressing the old ones out.'66 GTO Vert Project "Red Ink", 462ci of stroked pontiac power, TKO600, SC&C Stg II+, Tubular lowers, Currectrac Rear suspension, Moser 12bolt w/Truetrack, Wilwood Master and discs all around, too much fun for words...
06-04-2010 #57 Registered User
- Join Date
- May 2006
- Location
- Rhode Island
- Posts
- 676
Here's the press I used to remove the old ball joints and install the new ones, worked great.
http://www.harborfreight.com/3-in-1-...kit-38335.html
The bushings on the other hand were more difficult for me. I made one of those homemade removal tools, which worked pretty well, but I couldn't press the new ones back in, so I actually dropped mine off at my local shop and had them press the new ones in, he charged me $15 a piece, well worth it to me to get it done the right way.
06-04-2010 #58
Registered User
- Join Date
- Aug 2009
- Posts
- 48
My work has a small hydraulic press that would do the job, but i'm not sure what kind of coupling to use to keep from damaging the bushings and ball joint. Maybe a similar sized socket?
78 Trans Am 6.6L,TH350, 3.08 posi, work in progress.
06-04-2010 #59
Registered User
- Join Date
- Aug 2004
- Location
- Rustburg, Virginia
- Posts
- 3,436
yes...I use a piece of pipe the same diameter to press in and a piece of pipe slightly larger underneath to press them out. Originally Posted by tnbandit
Control arm bushings....Hmm, I used my 20T shop press on the lower bushings, but I swapped the entire upper arms out that came with new bushings. For the uppers, some use a 5/8" diameter threaded rod with large washers/nuts and such to press in and out without bending the arms.1970 RS/SS350 139K on the clock:
89 TPI motor w/ 1pc rear seal coupled to a Viper T56 via Mcleod's modular bellhousing w/ hydraulic T/O bearing from the Viper, 12 bolt rear w/ 3.73 gearing, SC&C upper control arms, factory lowers with Delalums, C5 brakes at all four corners, Front Wheels 17x8's with Sumi 255/40/17 and Rear Wheels 17x9's with Sumi 275/40/17.
Brief description of the work done so far can be found here: http://www.nastyz28.com/forum/showthread.php?t=112454
06-04-2010 #60
Registered User
- Join Date
- May 2005
- Location
- Fontana, CA
- Posts
- 4,960
Or the local tire shop should be able to do all the CA bushings and LBJs for 20-30 bucks.
Nick R.
69 Camaro - 383, 700R4, 12 bolt 3.55, Hotchkis, Bilstein, Global West, Morris Classic
08 HHR SS - Still Stock for now
Do you still believe in all the things that you stood by before? Are you out there on the front lines, or at home keeping score?
Do you care to be the layer of the bricks that seal your fate? Would you rather be the architect of what we might create?

 Reply With Quote


