


Results 61 to 80 of 108
-
05-28-2011 #61

 Registered User
- Join Date
- Jun 2009
- Location
- Central FL
- Posts
- 1,231

Love it.Dan
-
05-28-2011 #62
 Registered User
- Join Date
- Nov 2006
- Location
- Ma.
- Posts
- 5,560

You guys did an awesome job on those Rail covers. I like them just the way they are. Maybe you could put some red tape on the coils to see if the MSD coils or atleast the color would change the look a little more to your liking.. Nice work.
Wayne
Car FINALLY home !!!!!! lol
Project FNQUIK https://www.pro-touring.com/showthre...ghlight=FNQUIK
-
05-28-2011 #63
Registered User
- Join Date
- Apr 2011
- Location
- Strawberry Plains,TN
- Posts
- 6
I've worked on this car and pics don't do any of it justice
05-29-2011 #64 Registered User
- Join Date
- May 2010
- Location
- Chattanooga, TN
- Posts
- 137
I think I should correct something with the way I wrote post as I don't like to take credit for work I didn't do. Re-read my post and see it looks like I did all the work. Originally Posted by Ripped

I didn't do any of the real work.
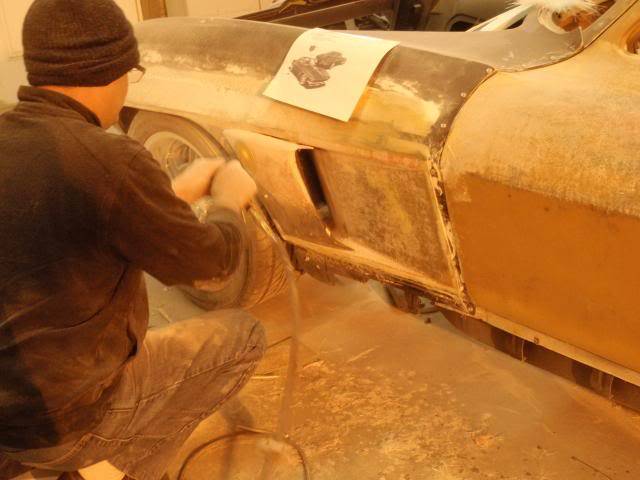
I came up with the shape and what to cover design wise, with one exception. Co-Owner of shop is the one who made my vision come to life by doing all the real work.
Design wise he is the one who came up with the shapes/contours around the coil opening that give them the professional look. I knew they needed something to keep them from looking plain, and he knew what would do it.
He is also the one that made my vision for lower front fender vent come to life. I made a rough clay model of what I wanted and thought would bring out the lower fender to give the tire coverage I was looking for, and he made it happen. What was on the rendering was to flat to do it.
08-19-2011 #65
Registered User
- Join Date
- May 2010
- Location
- Chattanooga, TN
- Posts
- 137
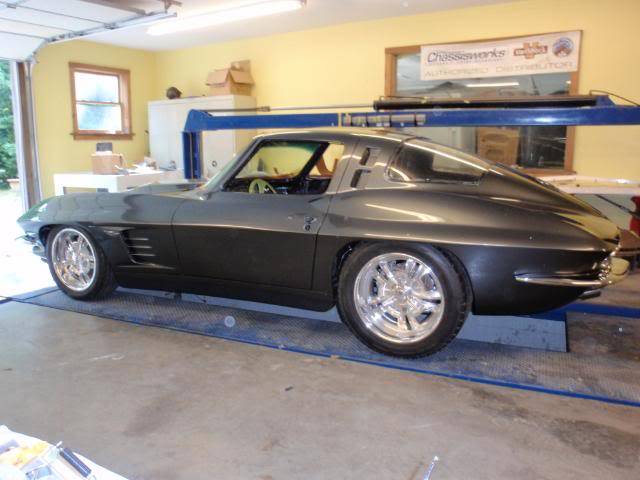
Guess it's time to try and explain color and/or colors of paint I chose for car. Since I at least like to think car has a modernized look to it, I decided to use a contemporary style new car paint color rather than original or period paint color.
Look of new car paints are more of what you would have called custom paint in the past. Lot of people will think it's a custom mix rather than off the shelf new car paint when they see car in person. Anyone seeing car in pictures will not really have a clue about it's color and/or colors and paints really pops in certain lighting conditions, which I'm sure could make some old timers say "What the Hell was he thinking." Younger generations on the other hand think it just normal paint...:D
Like many new car paints in the past 3-4 years paint I use is Pearlized or what some call prizmatined, (pearl shell color like chips that changes color as light strikes it from different directions). There is also another type of pearl that can be use in even a stock corvette color were color itself is almost the same, it just adds pop to the paint. My 66 paint uses that type pearl to make it pop lighter are darker depending on light.
Going to start trying to educate you on paint with colors it can turn both inside and outside when it cloudy or late in day. Color I really hate to see it turn.
Hood sitting on stand under fluorescent lighting. Ugly flat grey.
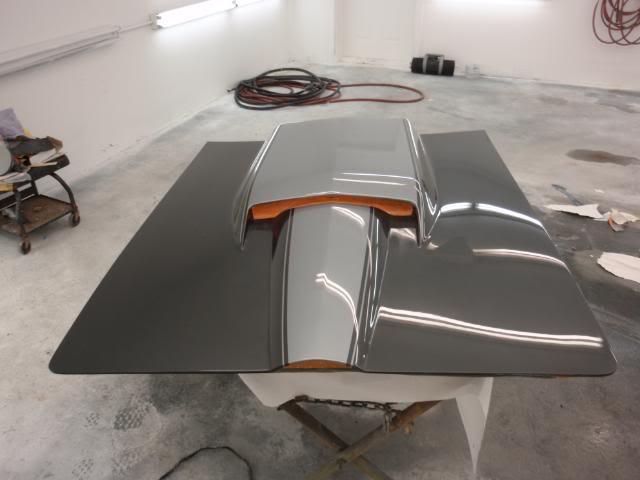
Hood moved outside in sun. Notice that flat grey has gone to almost black.
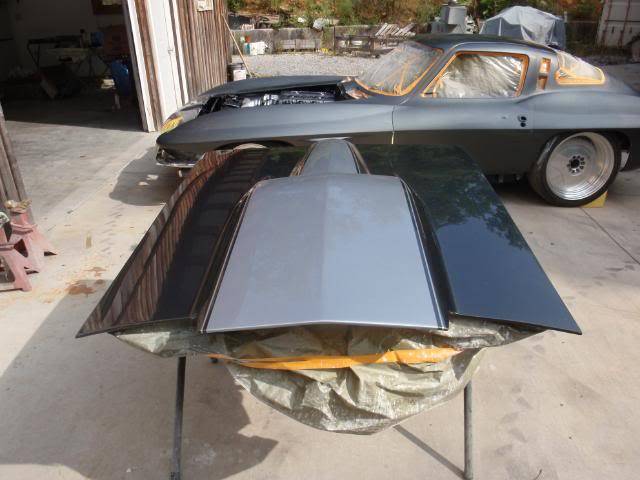
Hood placed on body. This time if you look a the side of stinger, you can see what was black color in the previous picture has changed to a color similar to color of stripe.
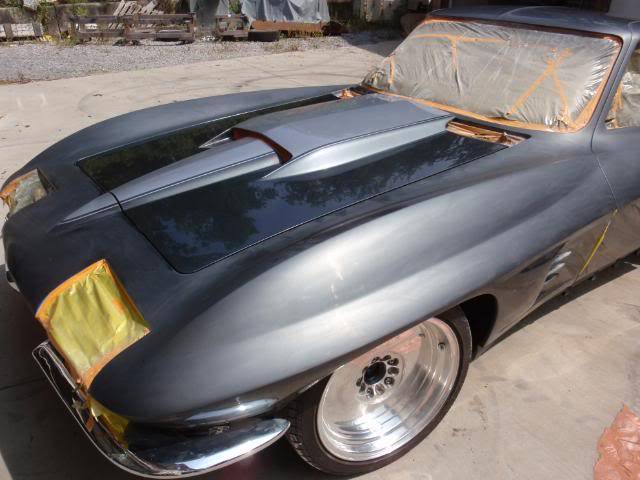
Now in this picture you see another shade of grey, but watch what happens when I move and take pictures where direction of light changes and as it does, so does color/shade paint turns.
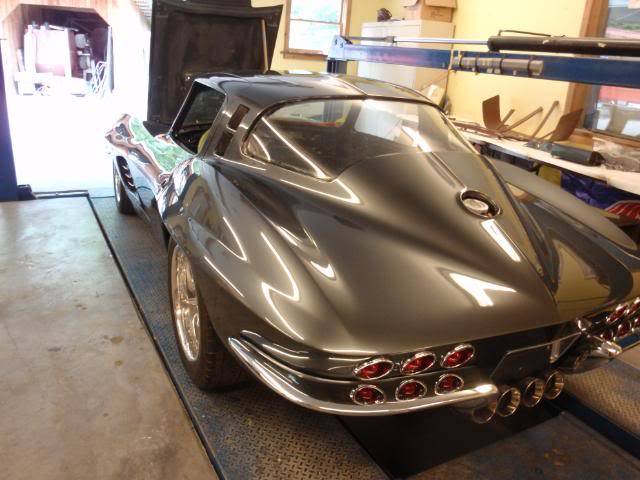
I Changed camera angle of shot and this time body looks Black.
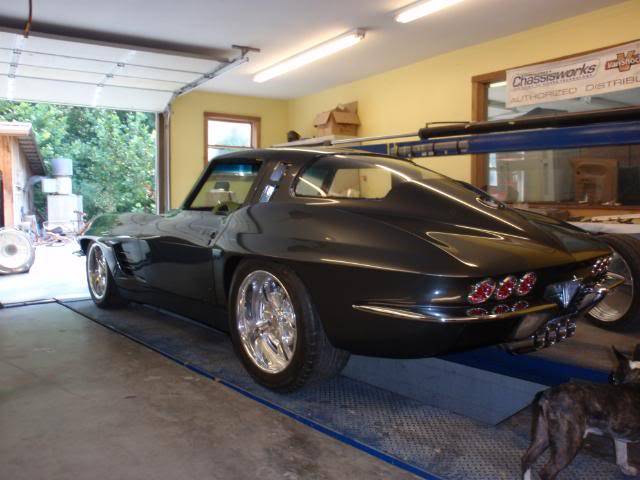
I've moved back, used flash and if you look from rear to front, at about start of lower fender vent, you may be able to see paint there is starting to take on a blue tint to it.
Now light source that caused that blueish changed in prior picture, is the main light source on this shot of front of car. Now the paint color has changed to a blue.
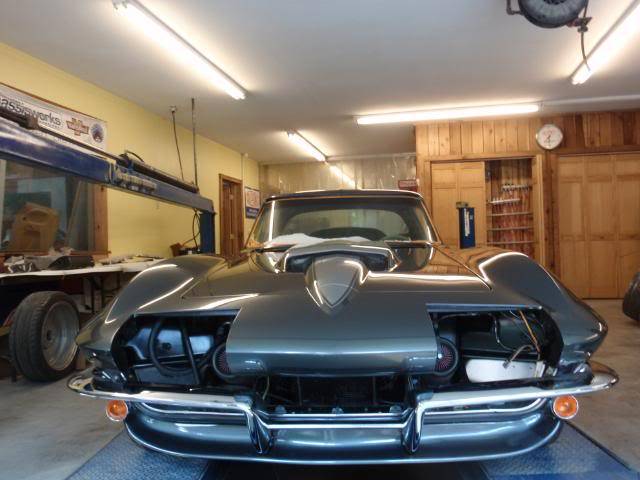
This time with hood up. It's not black or grey color anymore.
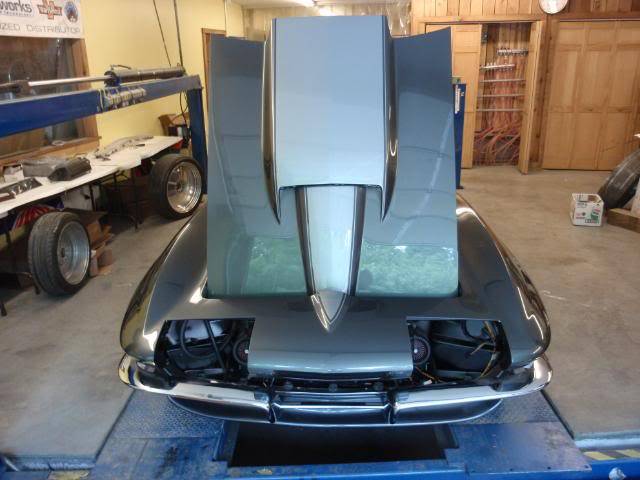
Now from side angle shot, you can see paint goes from blueish color toward the grey hood was in first picture.
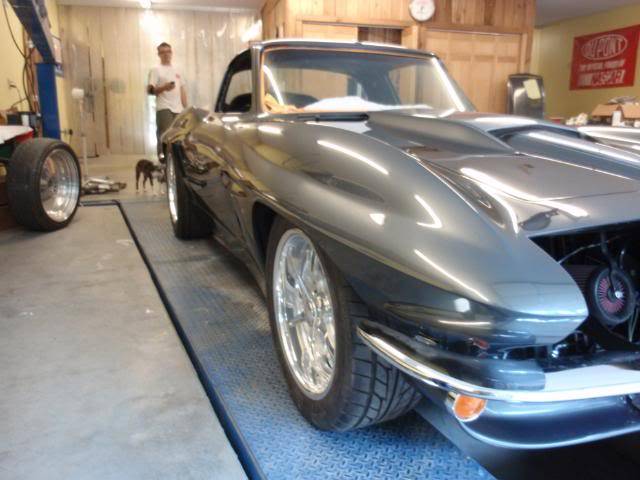
Backed away for this last shot.
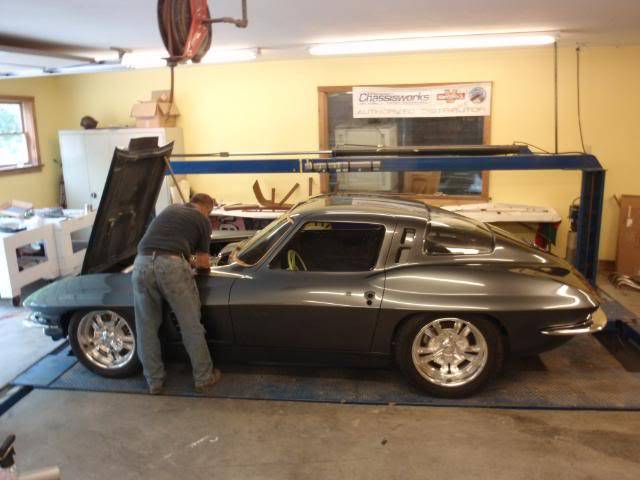
So in future when you see a picture of car were the paint is ugly, please don't worry, it can look even worst or maybe even better.
Camaro_fan1 in my biased opinion said it best.
Originally Posted by camaro_fan1
08-19-2011 #66
Registered User
- Join Date
- Aug 2004
- Location
- Dunwoody, GA
- Posts
- 4,983
Love the color! and the car really.
Trey
"The early bird may get the worm, but the second mouse gets the cheese."
~ Jon Hammond
1979 WS6 Trans Am stock LT1/T56 drive train out of my Formula. BMW M-parallel rims. C5/C6 brakes
build thread https://www.pro-touring.com/showthre...ghlight=begins
09-04-2011 #67
Registered User
- Join Date
- May 2010
- Location
- Chattanooga, TN
- Posts
- 137
Car builder down in Austraila made statement below that I found myself facing back in Sept of last year and had the paint on car not lifted and required complete repaint, I would have probably just stayed with what we had already done, like it or not.
I had not done what I wanted to do with center dash layout and how we mounted 4 Rocker switches 3 that control transmission functions, and one that operates the NPP exhaust Mild to Wild RPM opening setting.Thought for the day:-, when building any part of your car:- step back and take a real hard look at what you have done.
If you don't say "WOW" I really like that:- pull it off and start again. If you have to find a reason to like what you have done, then it's wrong, pure and simple.
While I had no problem staying with my original stock gages and clock, slivered faced, with 200 MPH speedo, I also wanted and most likely needed a Transmission Fluid Temp gage so I could monitor it's temp later on.
Plus the car's body had been changed to modernize it's looks, rest of the interior is fixing to get it's more modern look too, and my builder thought I needed to update look of gages to give them a more modern look to match.
I caved in as redoing center dash as that cured my big problem with it's look.
If I was going to updated gages it would only be if I could do it using stock needles as I hate aftermarket ones as they are dead giveaways that you have aftermarket gages, plus I wanted a classier look than needles on most aftermarket gages have. Also only if the Midyears big Iconic clock could be refaced to match so I could keep it. Another requirement was they not have manufactures name and/or gage name in big letters on them. I hate that as it's a really dead giveaway that gages might not be factory. My car is so old most don't know what original gages looked like anyway.
I wanted gages that give the impression as if they were a concept GM design department might have done. After all my main goal is for a Concept Car look of a production body that cold be use in place of the Grand Sport Corvette race only bodied cars. Found a company that was willing to do what I wanted including facing original clock to match, so I pulled the trigger.
Here is what I had.
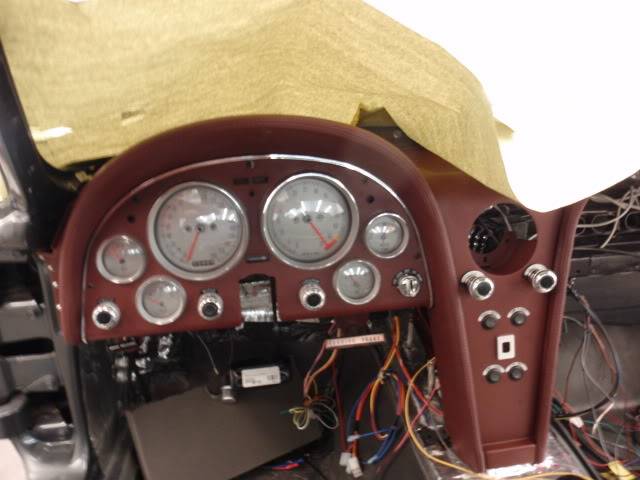
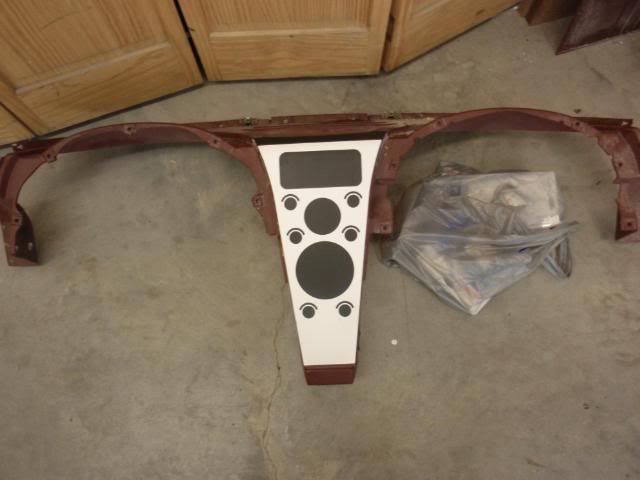
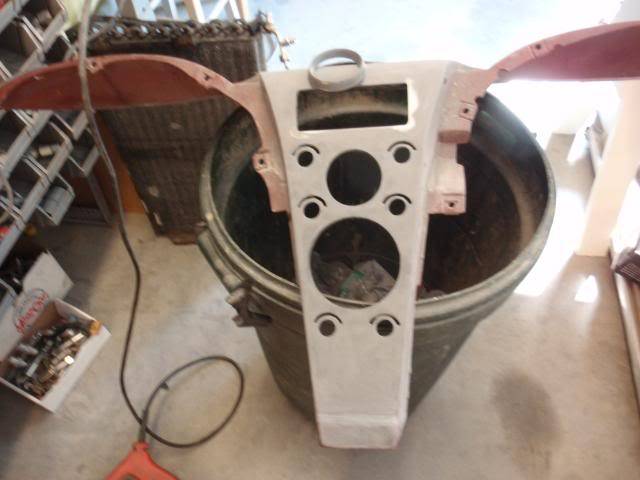
Here is paper layout stuck to center dash so builder could cut all the openings spaced correctly and most of all the slots that let me use modified Radio control bezels to mount rocker switches into and add sticker to try and simulate the stock control bezels as it allowed the builder to cut the half moon hole for their locater tab for alignment. Also add Radio opening at top of center dash, opening for trans temp gage, along with moving it lower to save it due to needing to install radio higher up due to width problem with it.
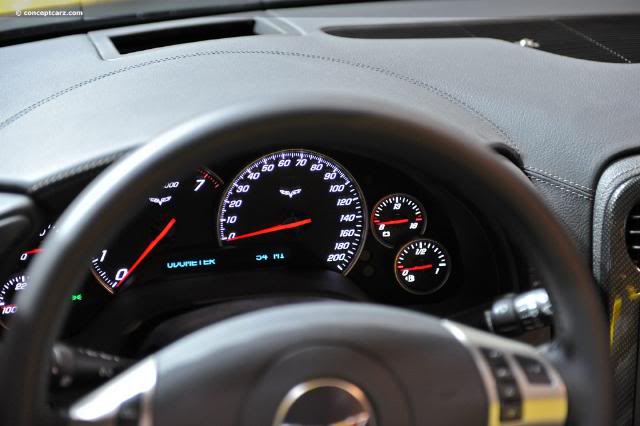
Here is picture of 2011 Corvette gages I used for lettering style and use of cross flags on Speedo and Tach. Might as well update to a look that keeps it in the family.
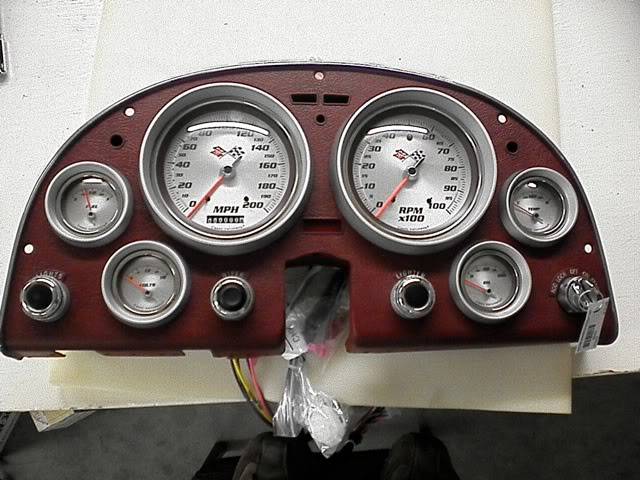
Here is only close up of gage cluster I have. Took it when cluster arrived this past Tuesday, before we had a chance to repaint it due to scratches in paint.
Where able to use stock needles to try and misdirect people who don't look close and see gages are aftermarket not original ones refaced. Clock is refaced to match, rather than have it not match or like most who go with aftermarket gages not used due to not matching look of gages.
Use dulled spun look bare aluminum for face, slanted lettering like the C6 gages have, with midyear style Cross flags to match look of late model cross flags. The lighting diffuser rings in gages where painted same color as dash, again for a try at a little misdirection. The red dot in tach just below 50 is a superbrite LED shift light triggered by Raptor Performance switch, I've used before on Motorcycles where space is limited. There are also tiny red dots at 15,25,35,45,55 and 65 MPH increments on speedo, again used as misdirection or gages not being aftermarket, as no Mfg in his right mind would do that.
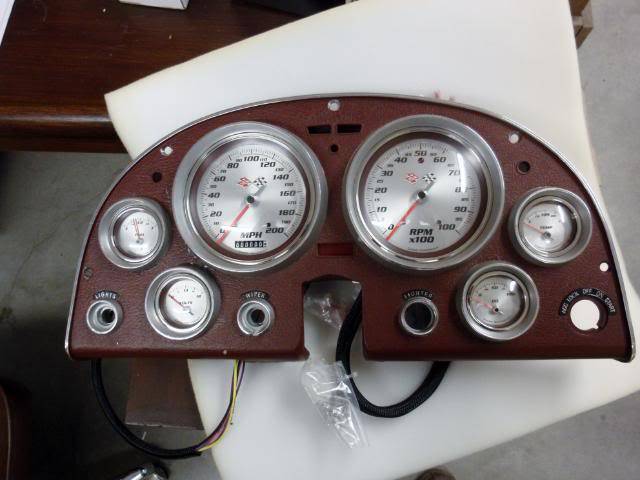
Ater repaint.
Here is the center dash layout with trans temp gage with a bezel we made to make it match clock and rest of gages mounting.
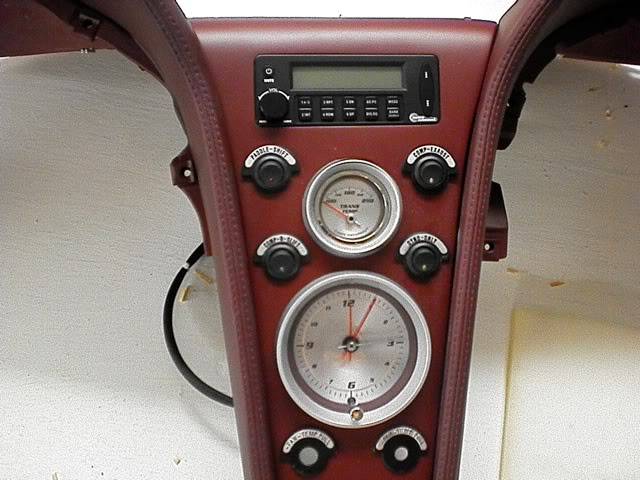
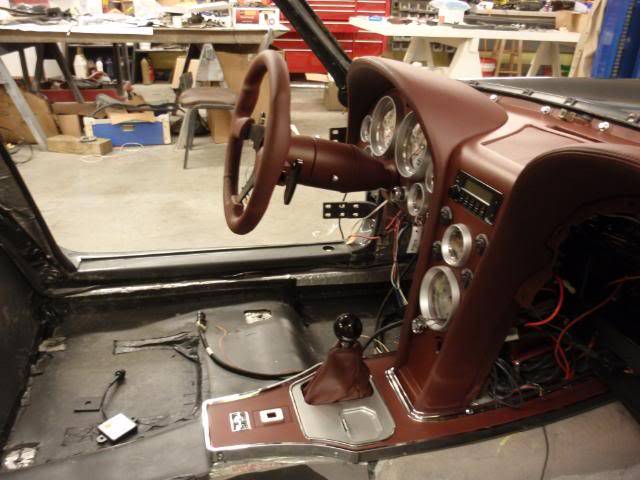
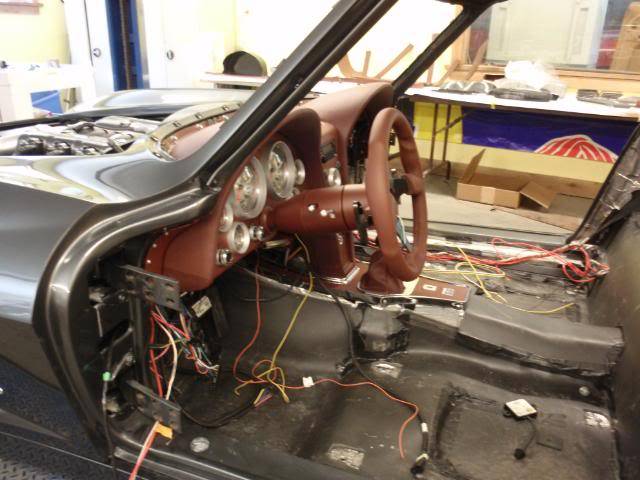
Here is a look at how dash will look in car when installed. It's the best I could do to clean up the looks of it vs he 1st attempt, that was worst, at least to me. As some of you may have noticed, the clock does not have the polished stainless ring around it's face like all the gages do, because it is the only refaced original gage and company didn't have a gage same size we could use the lens retainer off of to do that. Shame we couldn't pull that off too! Maybe one day I will find a way to to it.
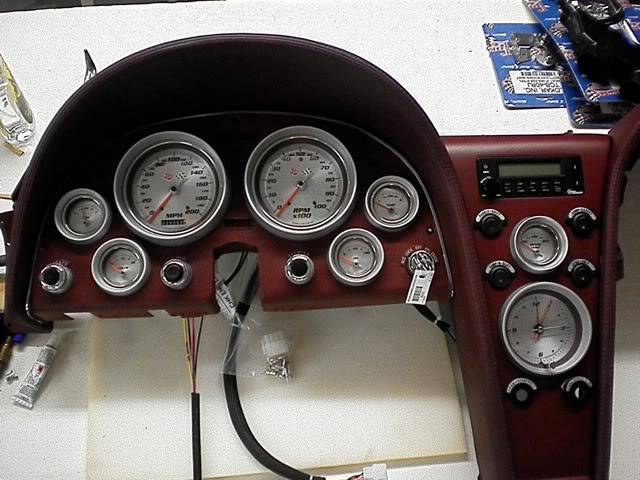
At least I can say no other Midyear Restomod Corvette has these style gages in it.
09-04-2011 #68 Registered User
- Join Date
- Jul 2010
- Location
- OREGON
- Posts
- 364
Gauges turned out killer... Do they have domed covers?
09-04-2011 #69 Registered User
- Join Date
- Dec 2005
- Location
- Portland Or.
- Posts
- 313
AWESOME job on the gauges, that clock rules!
68 Camaro under construction
-Chris-
09-04-2011 #70
Registered User
- Join Date
- May 2010
- Location
- Chattanooga, TN
- Posts
- 137
The lens/covers are domed, like the originals. Originally Posted by FRENCHBLUE72
09-04-2011 #71 Registered User
- Join Date
- Feb 2008
- Posts
- 118
Mate, that is absolutely beautiful. I love the look of vintage instruments, and you have nailed it perfectly. I'd go as far as saying you have the best looking custom dash that I have ever seen.
Matt Barr.
09-04-2011 #72 Registered User
- Join Date
- Jul 2009
- Location
- Grand Rapids, MI
- Posts
- 1,559
Who built the gauges then? They are perfect for your car, and that clock is awesome!
09-05-2011 #73
Registered User
- Join Date
- May 2010
- Location
- Chattanooga, TN
- Posts
- 137
Classic Instruments. Originally Posted by wellis77
09-05-2011 #74 Registered User
- Join Date
- Jun 2007
- Location
- Dayton Ohio
- Posts
- 1,283
awesome build. I love the valve covers
GTO Project https://www.pro-touring.com/showthre...-The-Great-One
Colorado Project https://www.pro-touring.com/showthre...cab-CodeRedZQ8
Check Out My YouTube Channel http://www.youtube.com/c/geedsgarage
09-05-2011 #75 Registered User
- Join Date
- Nov 2008
- Location
- NC
- Posts
- 583
It looks amazing, great job.
09-15-2011 #76
Registered User
- Join Date
- Sep 2011
- Location
- Florida
- Posts
- 5
Man what a car. Awesome work, awesome car. I love it. I did some time at a body shop years ago, besides it's been in the family forever. That's one car that sticks in my head and brings me back in a time warp. I drove pretty much all of the older ones. I really like the 68-73's as well. But we put a rear quarter and a front clip on a 66 vert. The smell of bondo/glass resin still takes me back to this day, to where this all started for me. I only got to drive it once but for me they just had a killer look that just screams pro-touring. Something I always wanted to build into a real drivers car.
09-15-2011 #77
Registered User
- Join Date
- Aug 2011
- Posts
- 165
Are you sure you're not in the poorhouse already?! :-D Wow, looks like a million bucks... or at least a cool 100 grand! Beautiful car; mean and classy.
09-15-2011 #78
New to Pro-Touring
- Join Date
- Aug 2011
- Posts
- 19
I love the oval exhaust. The amount of time spent on the details on this car are SICK!
How much time do you think you have into those valve covers?
09-15-2011 #79
Registered User
- Join Date
- May 2010
- Location
- Chattanooga, TN
- Posts
- 137
I'm sure getting close to being it. Shipping the car roundtrip to Las Vagas and back should just about do it. Originally Posted by sixfivepost
If I'm not sleeping in the Poor House, I'll be sleeping in the car...
09-15-2011 #80
Registered User
- Join Date
- Jun 2011
- Posts
- 145
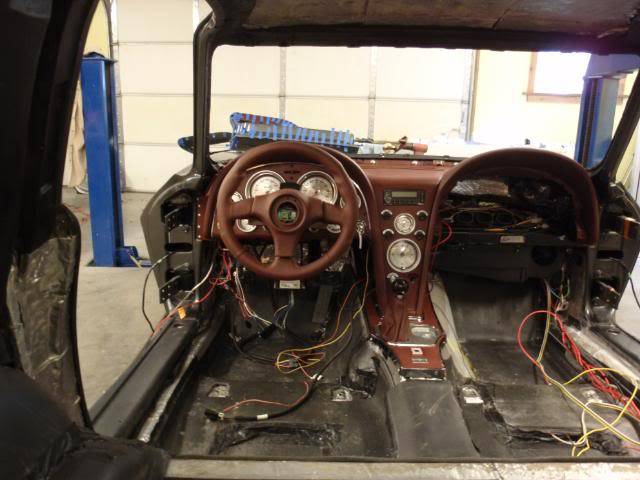
wow sweet ride man!! love the details.. are you keeping the dash that color?
Dave Van Nuys
83 455 Regal in progress

 Reply With Quote


