


Results 1 to 20 of 32
-
08-16-2009 #1
 Registered User
- Join Date
- Aug 2009
- Posts
- 28
03 Mitsubishi Triton from DownUnder
Ok guys not to sure how this will get accepted on your forums but after seeing the build up here of the Pro-Touring chevy i had to do it.
Yes it is a mini truck, but i am trying to go down a different path with this particular one.
Ok it's pretty much done now i suppose you could say, so i will try put the pictures in the best order i can. The last and most recent work has been done by a shop on the east coast of Austrailia called DW customs. They have been pumping out some killer rides now for the last 4-5 years and have just moved into a new shop which is going to be awesome. Check them out at www.dwcustoms.com
-
08-16-2009 #2
Registered User
- Join Date
- Aug 2009
- Posts
- 28
Ok this is the day it was first lowered. Bog stock just slammed
 [/IMG]
Put some 18x7 and 20x8.5 Intro Prowlers on it
[/IMG]
The gutters on the roof all shaved up
[/IMG]
It was pretty low on leaf springs, got stuck on speed humps ALOT
[/IMG]
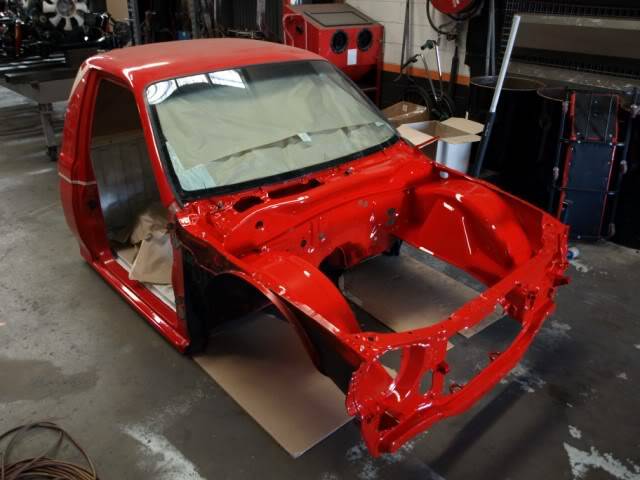
And this is what it looked like painted up in PPG red, with black out Billets
[/IMG]
[/IMG]
Ok so it was a pretty tidy truck, but just not low enough. I never thought in my wildest dreams i would have this thing layed out expecially on its sills thats why i had it painted. Unfortunatly the paint is rather damaged and is going in for a full re-spray once everything is finished again.
08-16-2009 #3
Registered User
- Join Date
- Aug 2009
- Posts
- 28
Well it spent 2 weeks on a train and headed over to the east coast of Australia.
The strip down began
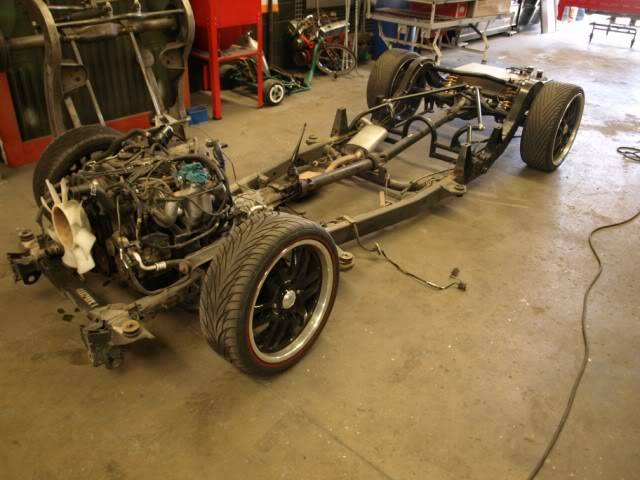
Nothing fancy with the cross members, just cut flat and plated with 5mm plate. At the time that was all i wanted, however i do regret not going all out with nice tube cross members, next time huh!

There is an Slam RE6 tucked in there, lots of work was done with the upper and lower arms

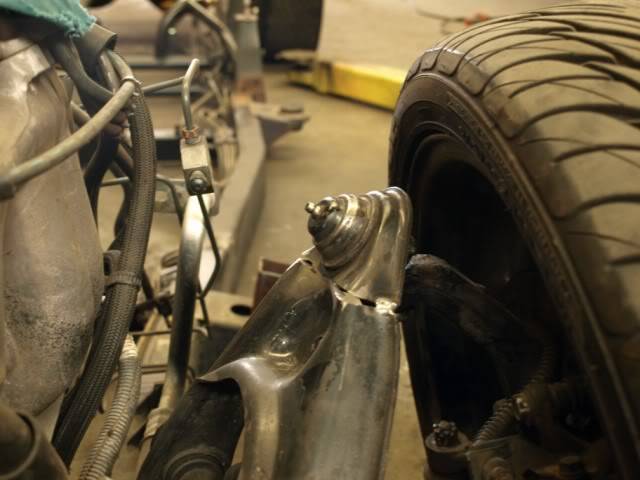
Upper ball joint position changed as it was binding when layed out
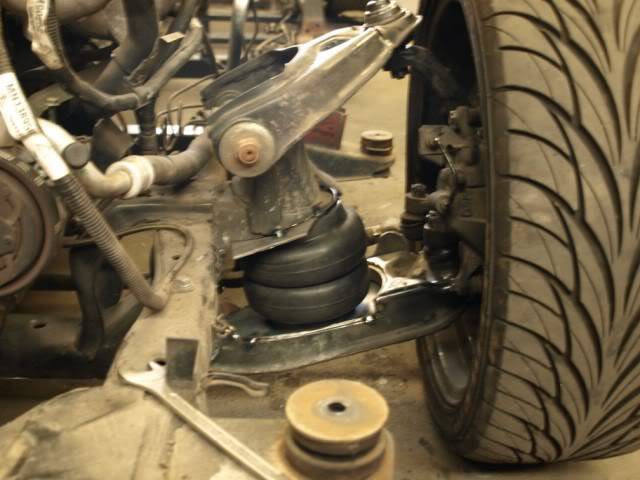
Lower arms were plated and modded to allow plenty of clearance for the bag

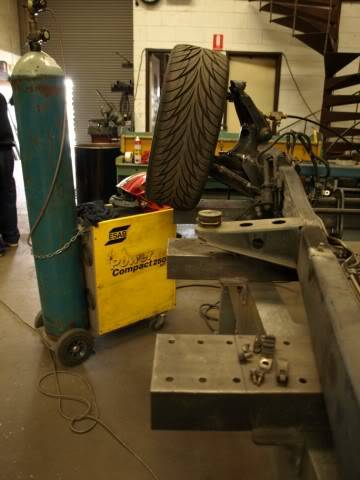
Lower shock mount
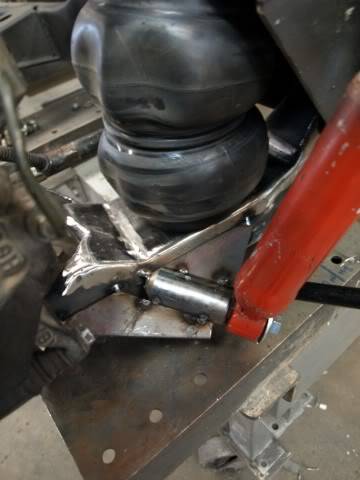

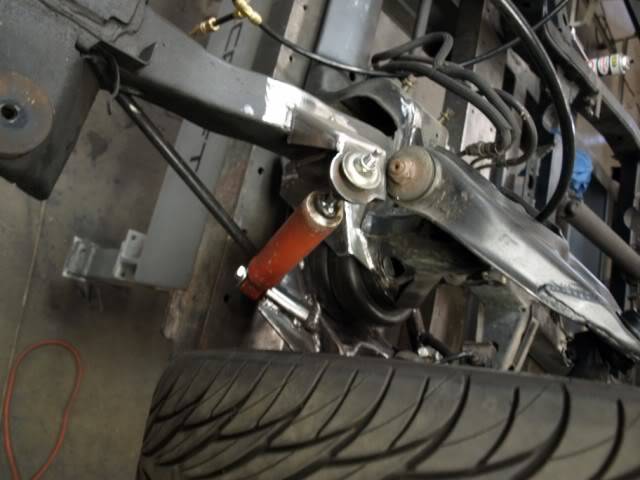
Nothing fancy one again, but a plated engine cross member

08-16-2009 #4
Registered User
- Join Date
- Aug 2009
- Posts
- 28
Next up was the Z notch to the front of the frame. The truck copped a 3" body drop so the front horns had to be lowered so the rad support would line up with the rest of the truck.

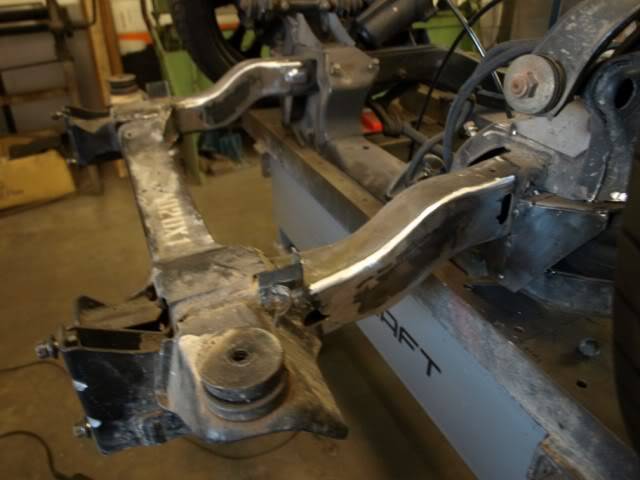
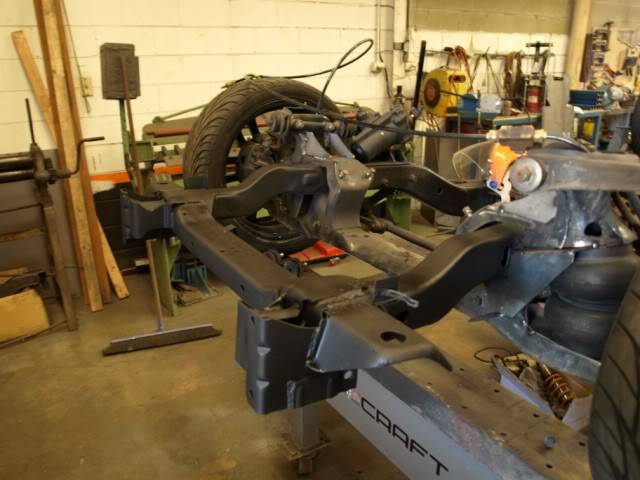
What Z notched officer? it's all factory!
08-16-2009 #5
Registered User
- Join Date
- Aug 2009
- Posts
- 28
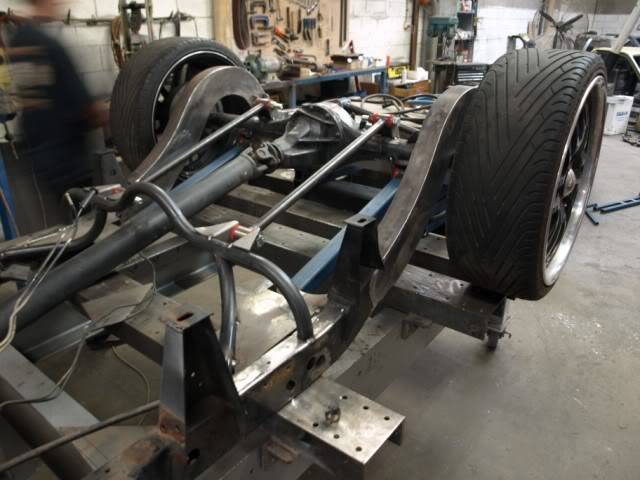
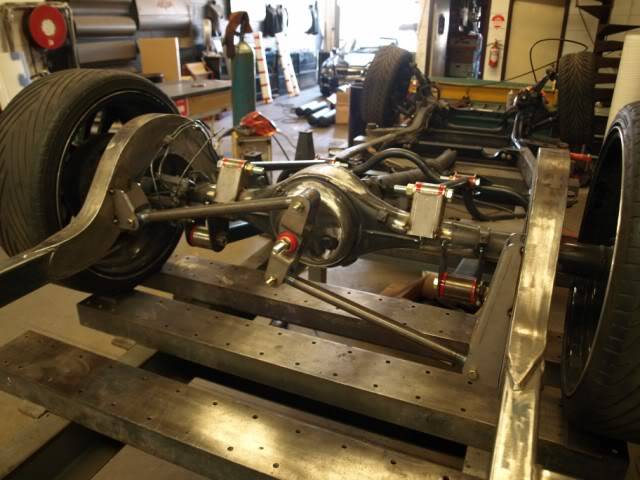
Alright well before it went to the east coast i had a friend start doing some work on it. It was just a simple 4 link set up to run coil overs. The work was good but the boys over at DW's were concerned trying to get there idea's to work with what was there. The fact that i'm 4000km's on the other side of the country meant they would only be happy if the work that was done was removed.
So off came the rear clip
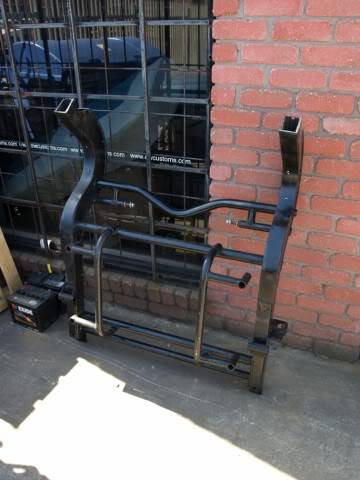
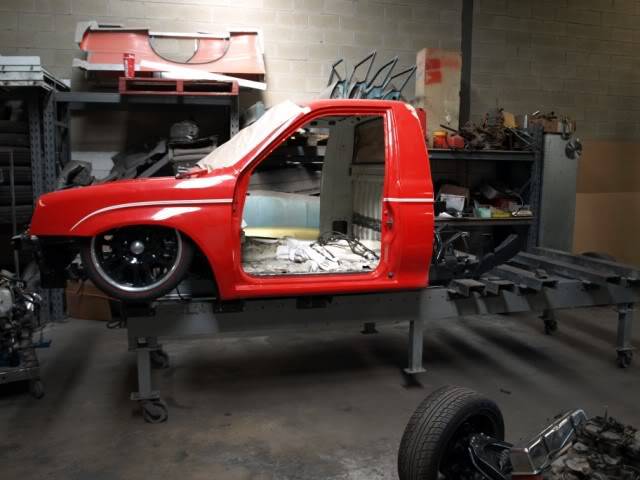
This is the new notch and rails going on
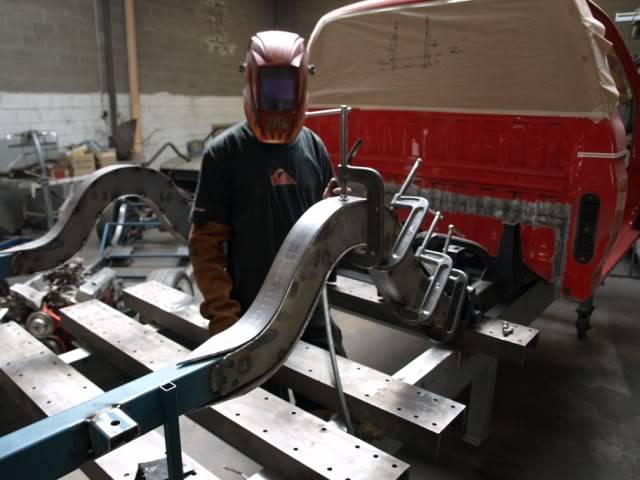

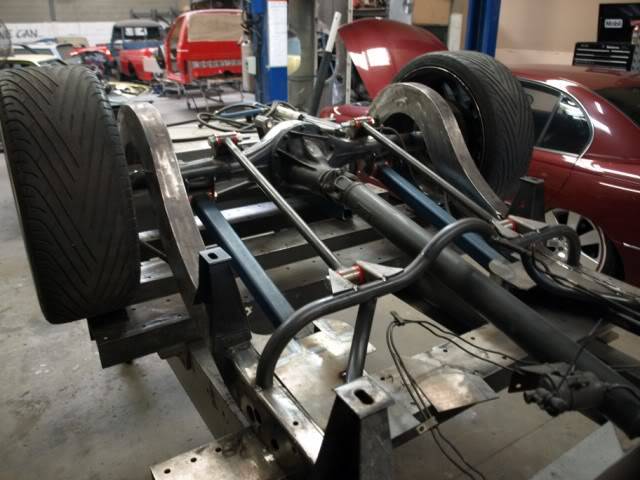
Now it did have a triangular 4 link in it but they prefer to use paralel 4 links in all there trucks, and having driven on both set ups, the new one deffinaly handles the corners much better with no movement in the rear
08-16-2009 #6
Registered User
- Join Date
- Aug 2009
- Posts
- 28
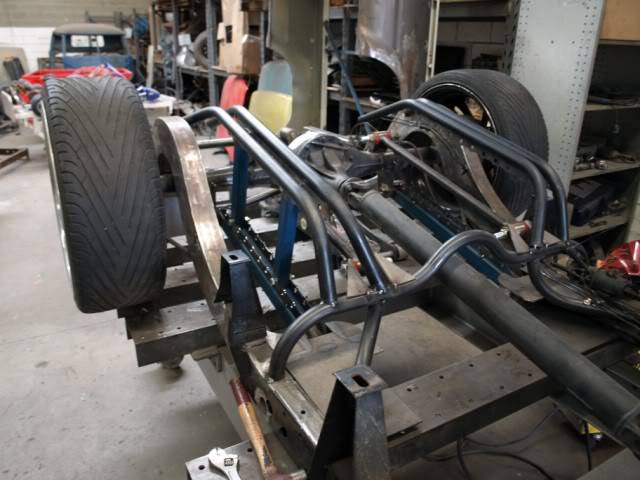
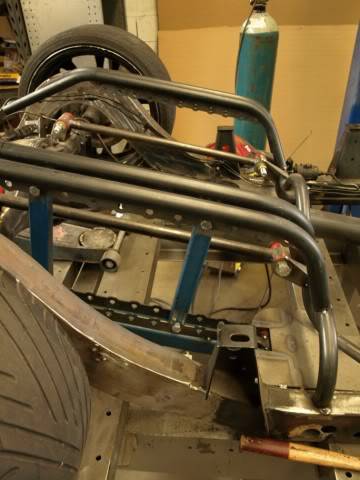
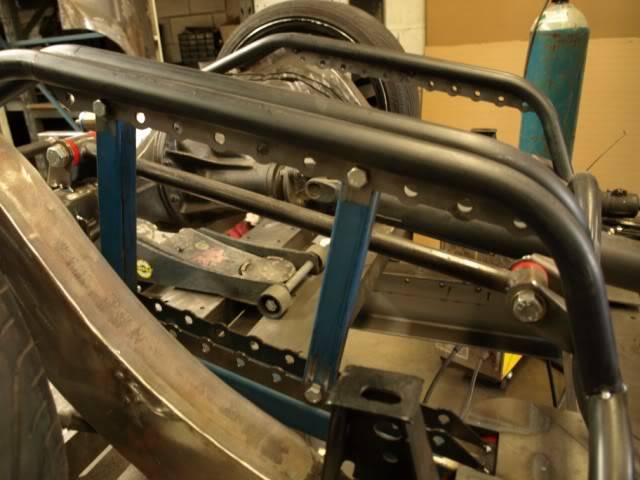
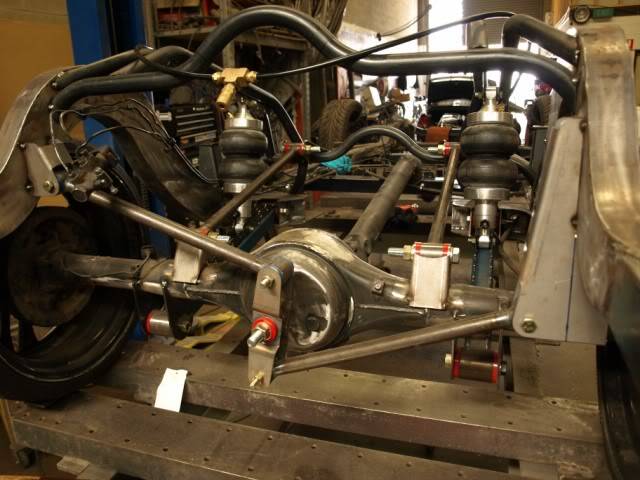
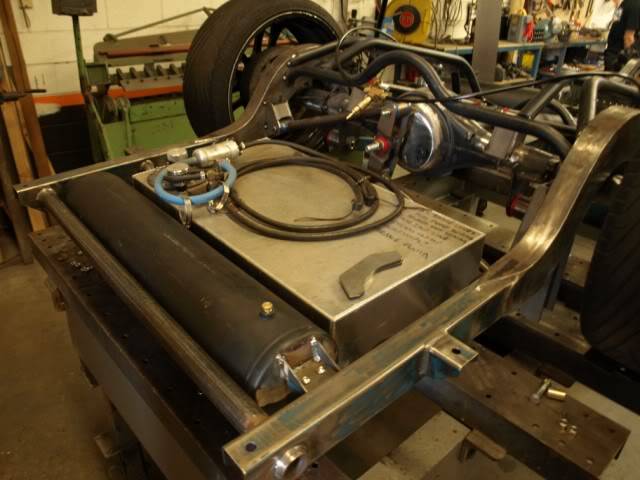
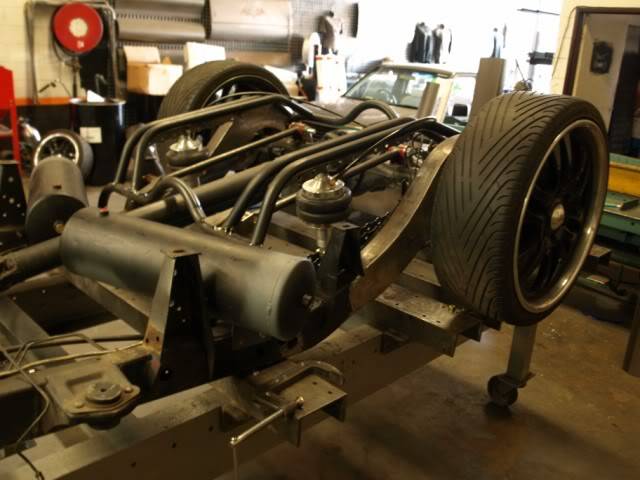
They came up with some very fresh mounting points for the shock waves and coil overs. It has 10 different mounting positions so that they can be swapped out and changed for different ride qualitly. It currently has the shock waves in the third whole from the front. When it's set at ride height there is a reasonably low amount of air in there so it is a very smooth ride.
The further you move it back, the more lift it gets and the stiffer the ride, but who builds a mini truck to get massive lift right?

08-16-2009 #7
Registered User
- Join Date
- Aug 2009
- Posts
- 28
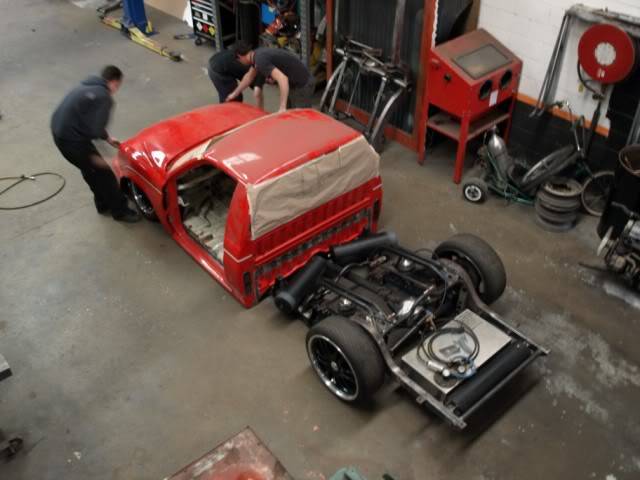
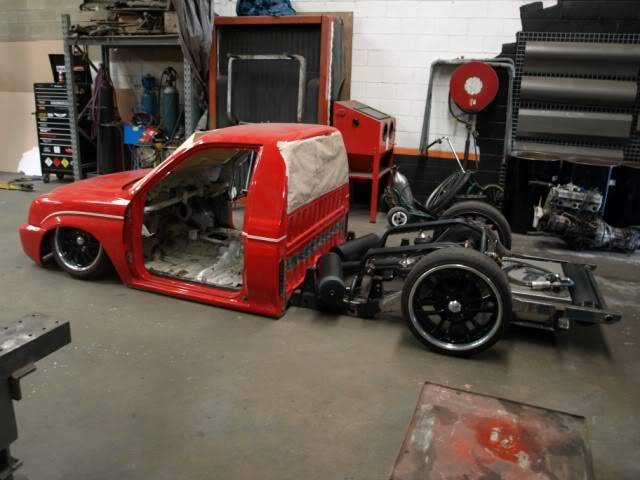
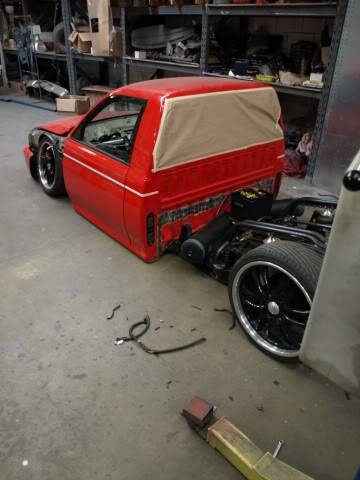
Cab was placed back on the frame and peiced together for a kodak moment. I used to love coming home from work and checking my e-mails to see if there was new pics. It was like being a kid again (i am only 22)

08-16-2009 #8
Registered User
- Join Date
- Aug 2009
- Posts
- 28
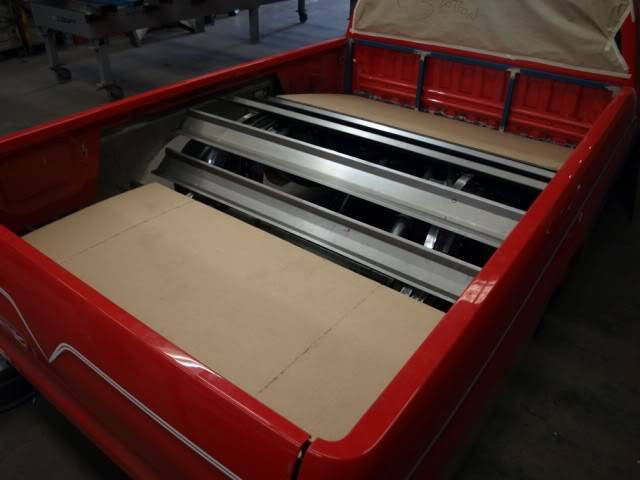
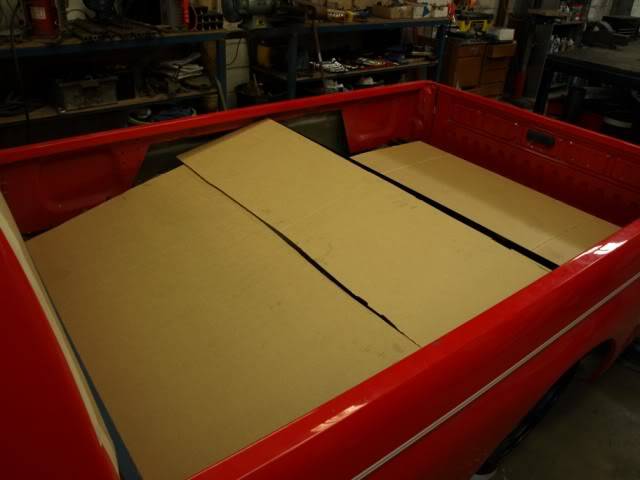
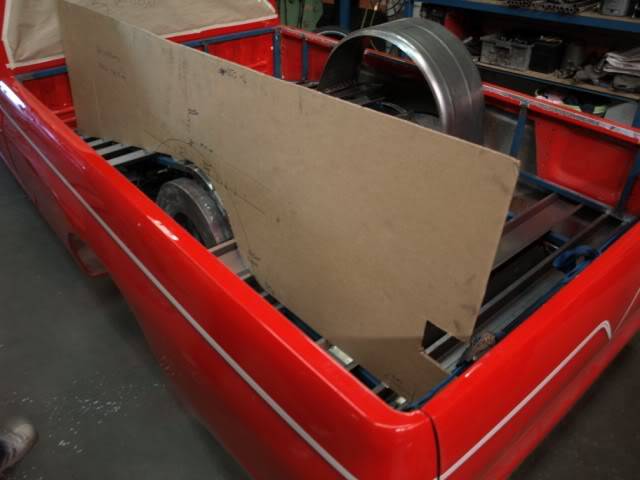
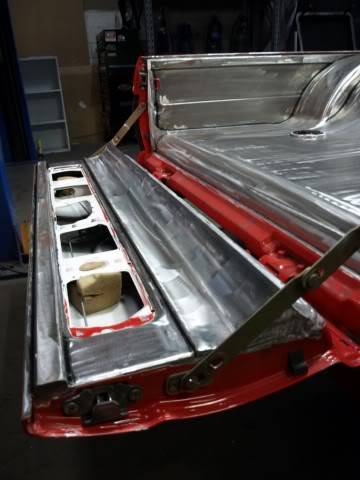
I was originally going to run a false in the tray only leaving me about 100mm in depth, i didn't want a notch cover or anythng like that just 2 wheel tubs pocking through.
After lots of thought i figured that would be a **** idea, so i went the complete opposite way and told them i wanted as much room and depth as possible.
Another 'have too' was a opening functional tail gate, i hate them welded up, i beleive are needs for looks and something to sit on haha
It also had to be flowing with no square sharp lines where possible. This is what we came up with threw numerous drawings to each other and i can't fault the final product, very happy.
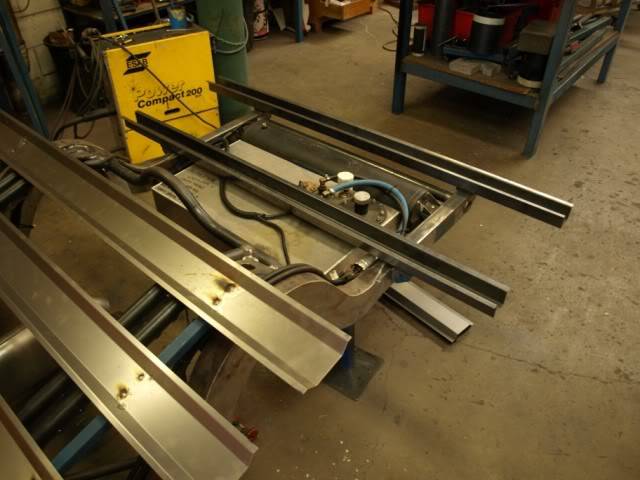
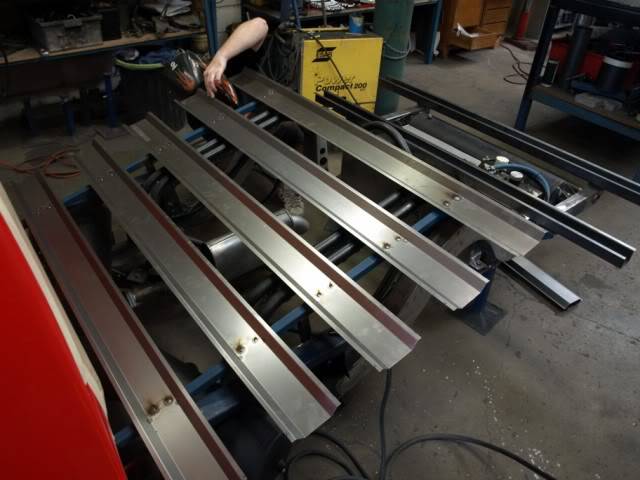

The idea behind the folded sheet is for a factory look from underneath and for weight. If it was framed out in 20x20 box it would have weighed a **** load. The folds are done in 1mm sheet work very well as you will see.


08-16-2009 #9
Registered User
- Join Date
- Aug 2009
- Posts
- 28
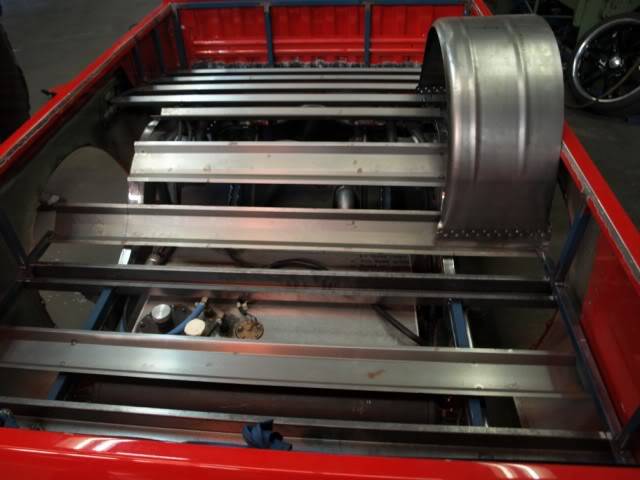
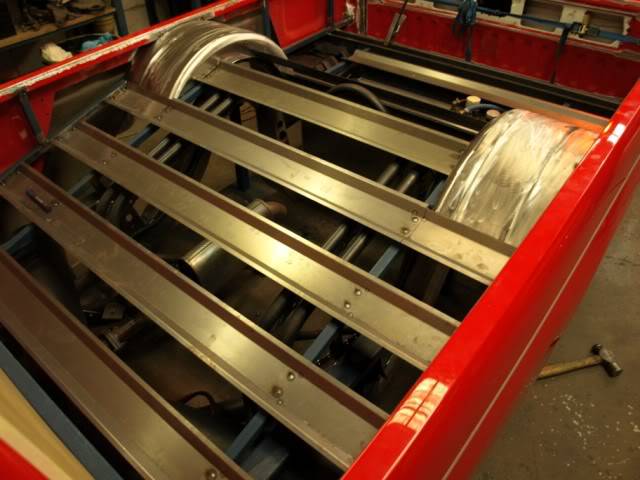
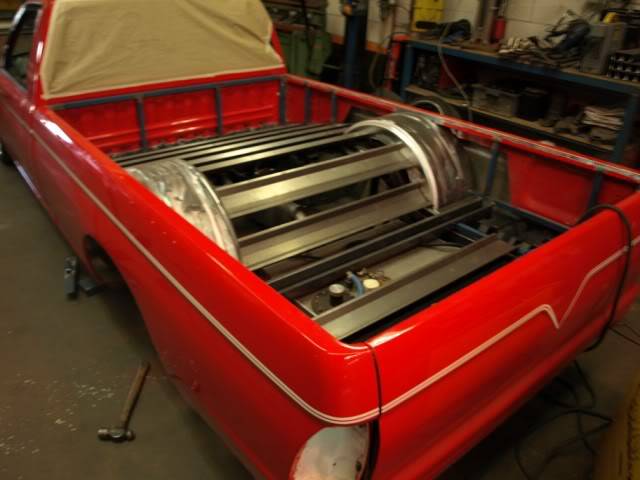
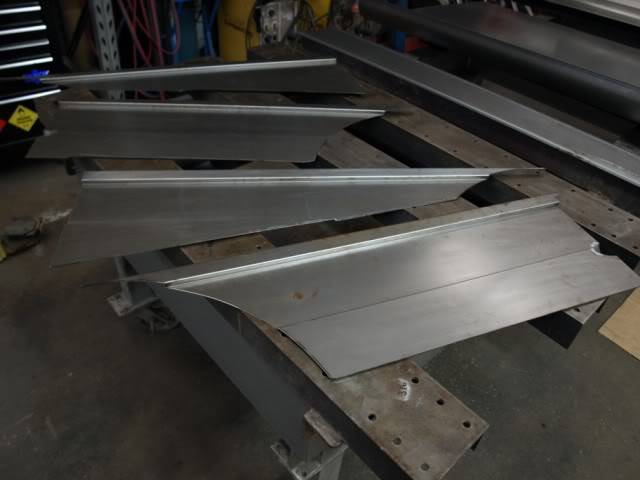
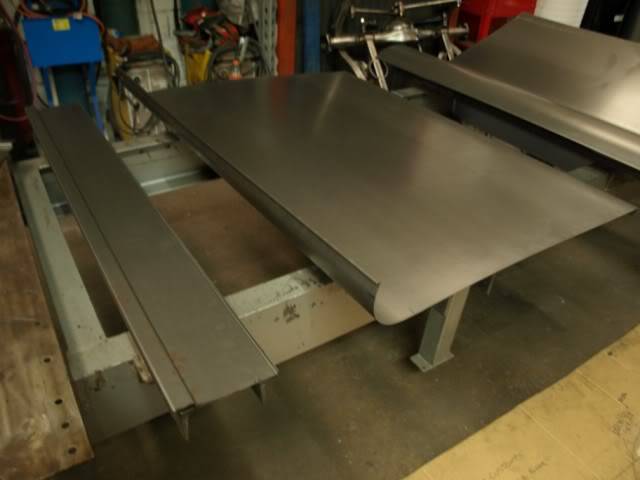
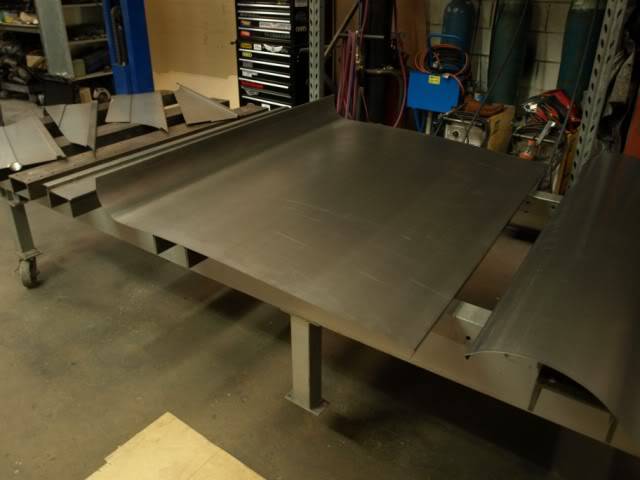
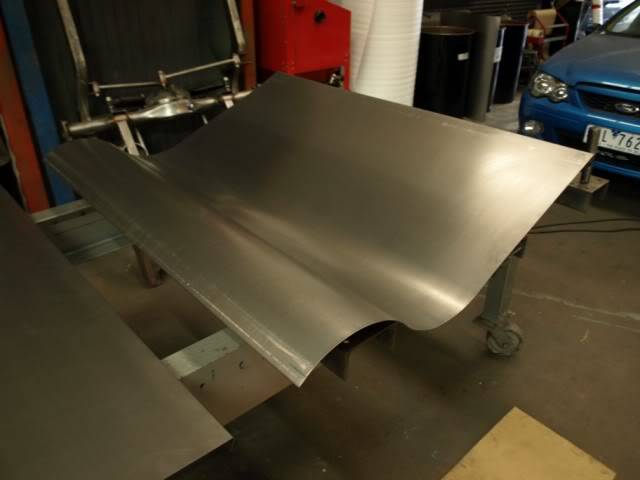
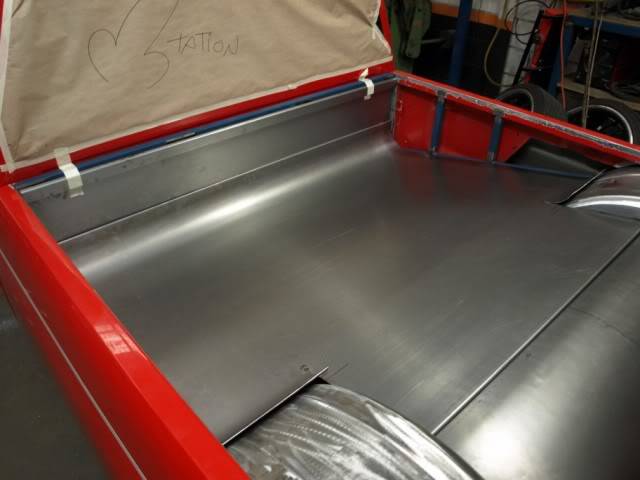
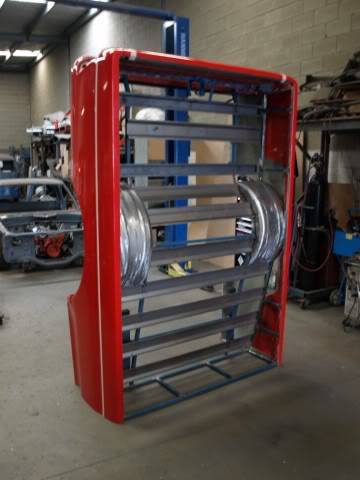
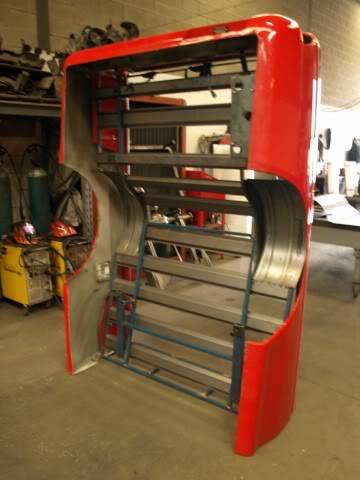
So what we have is an extremely strong tray, that isn't all that heavy, sure it's heavier than stock, but for the work and sheet thats in it, 3 people can lift it on and off
08-16-2009 #10
Registered User
- Join Date
- Aug 2009
- Posts
- 28
You can see the spot welds that were placed every 120mm so the sheet isn't going to lift, and by only doing small spots welds it stop any warping
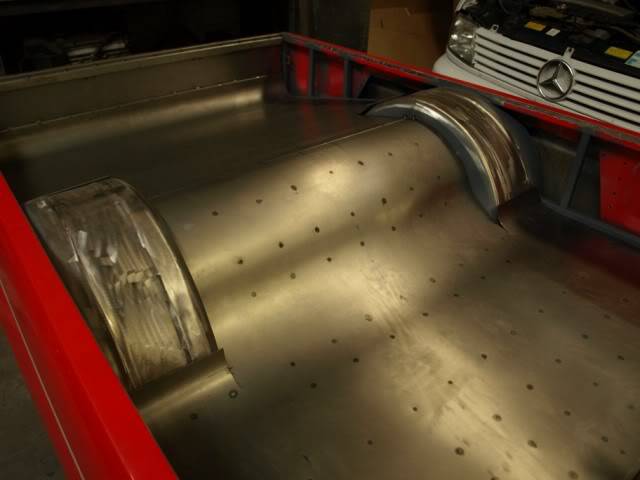
battery placed in tray.
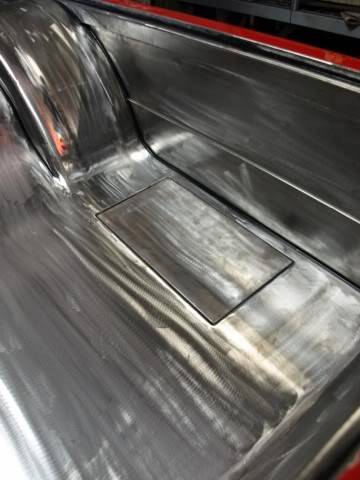
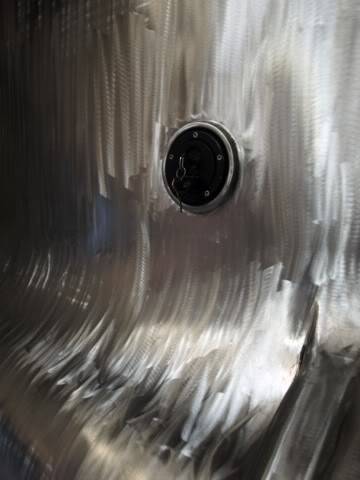
Maximus the midget putting in the fuel filler

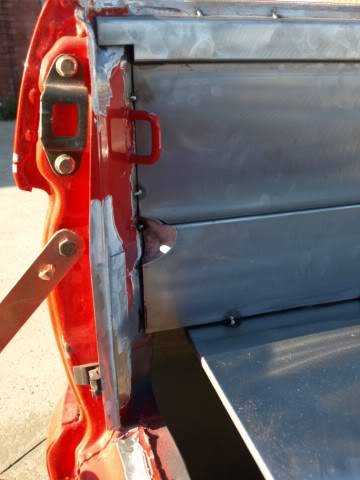
Small notch out in the panel as my tail light bolts in from the rear
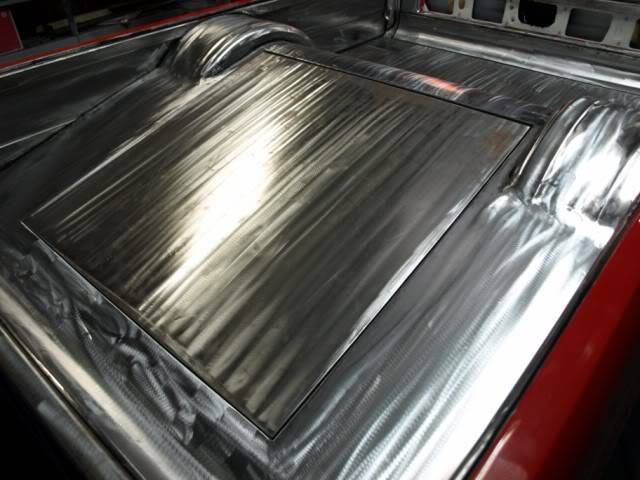
A hinged door for easy access to air system and to show off the work under neath the floor

08-16-2009 #11
Registered User
- Join Date
- Aug 2009
- Posts
- 28
Nearly forgot to put my front tubs up. Got a bit carried away with the tray build
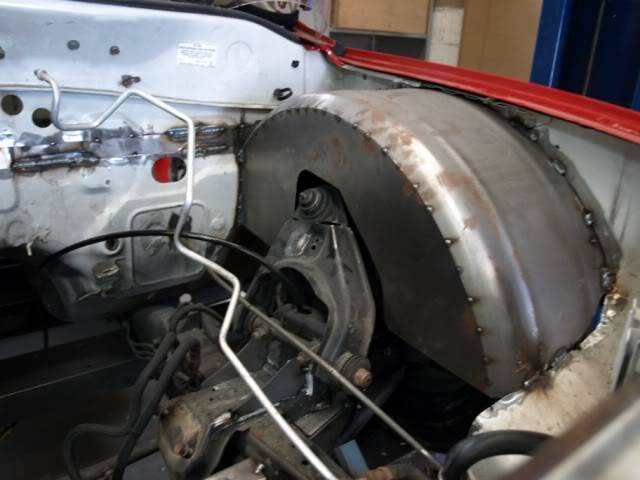
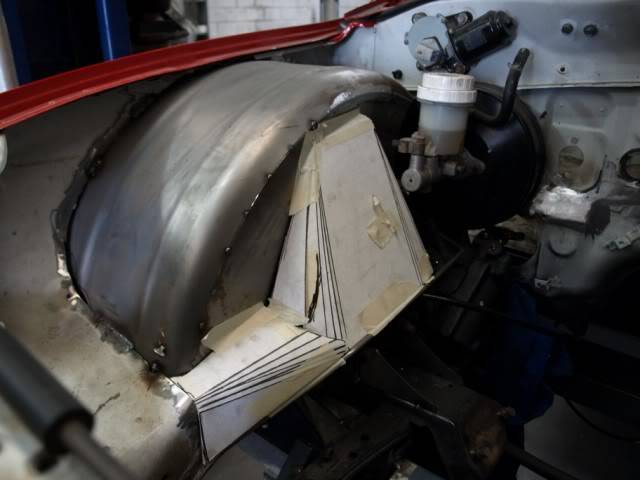

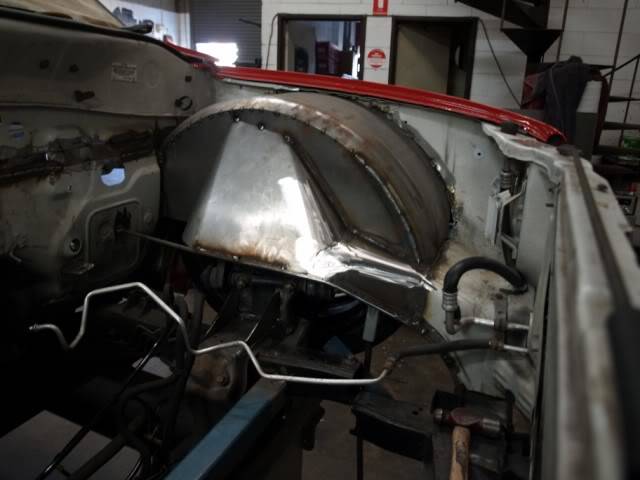
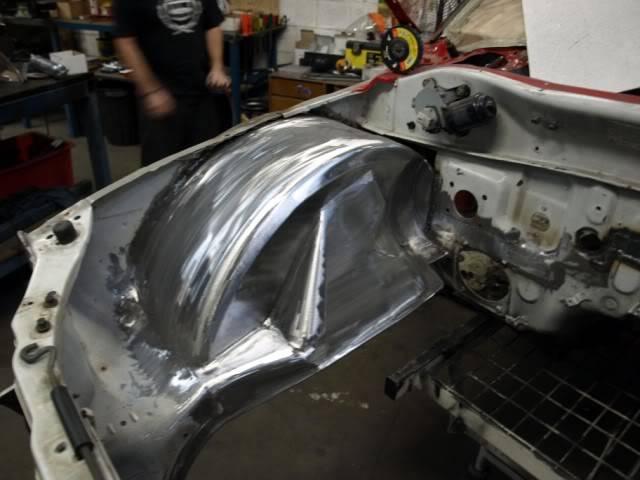
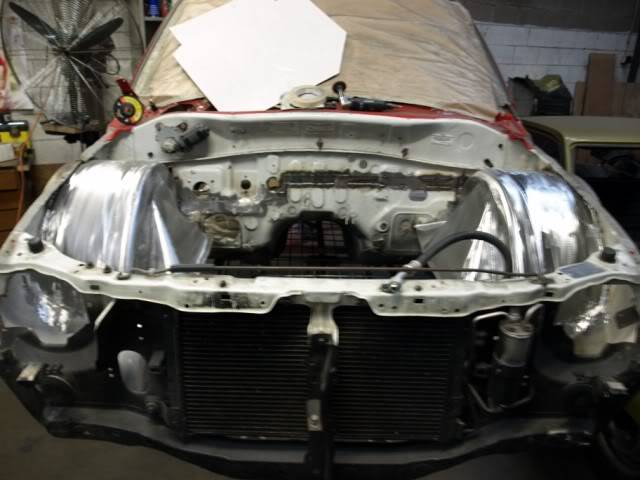
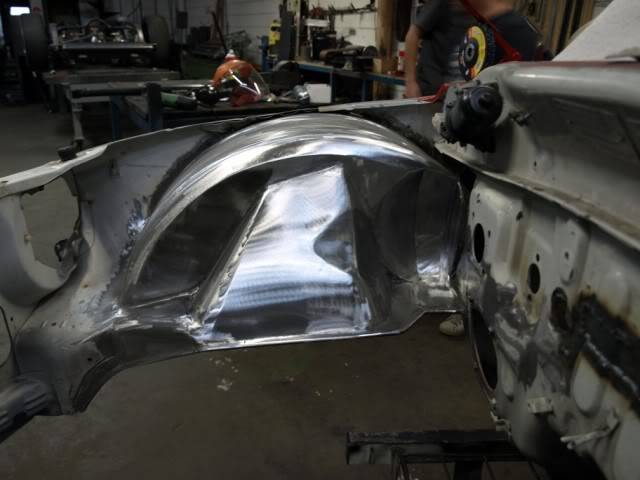
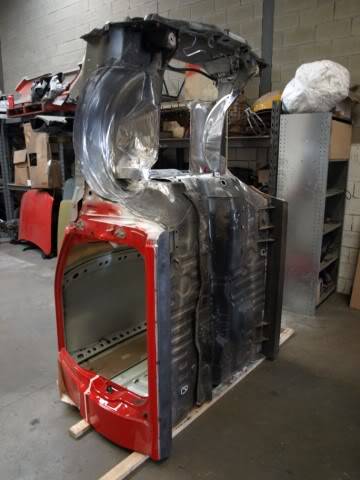
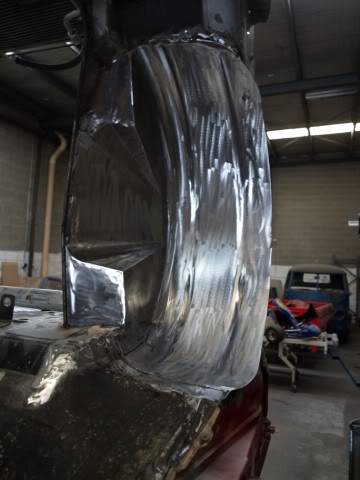
Our laws downunder require us to have our inner wheel tubs fully enclosed. So normally that much work isn't required but i think it looks really good,and finishes off the engine bay so to speak.
08-16-2009 #12
Registered User
- Join Date
- Aug 2009
- Posts
- 28
When the cab was bodied they replaced the rockers or sills what ever you like call them with 3mm sheet.
Yes it will lay hard on the ground, and will be driven at times 5-10mm off the ground, it won't be dragged tho. So the sills were beefed up a little so they are capable of sustaining a bump on the ground at 100kph
They did this along the whole cab, and tray sills aswell. This is the small area they did wear the front guards bolt on.


This is also the new cab mount on the under side of the cab
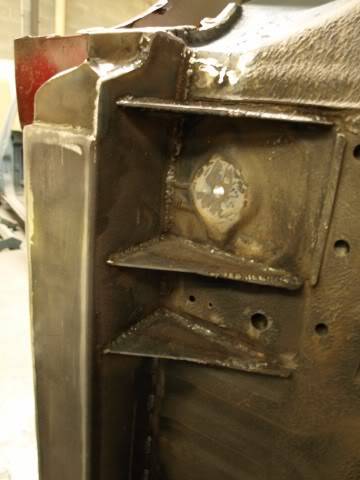

the gaps have since been tidied up to allow for paint ect

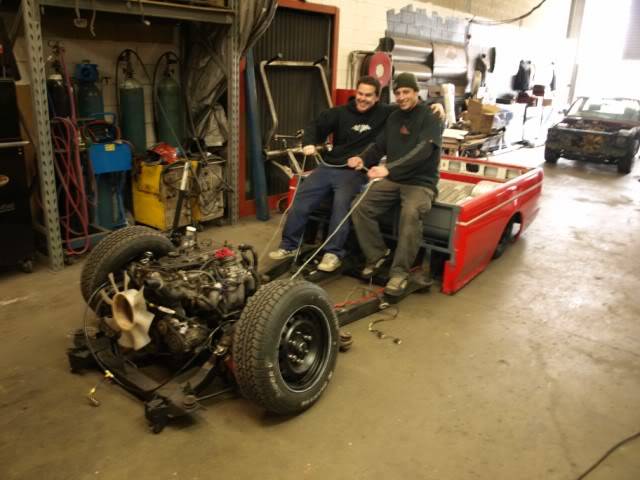
These are just 2 pictures i like that i couldn't find a spot for other than here haha

08-16-2009 #13
Registered User
- Join Date
- Aug 2009
- Posts
- 28
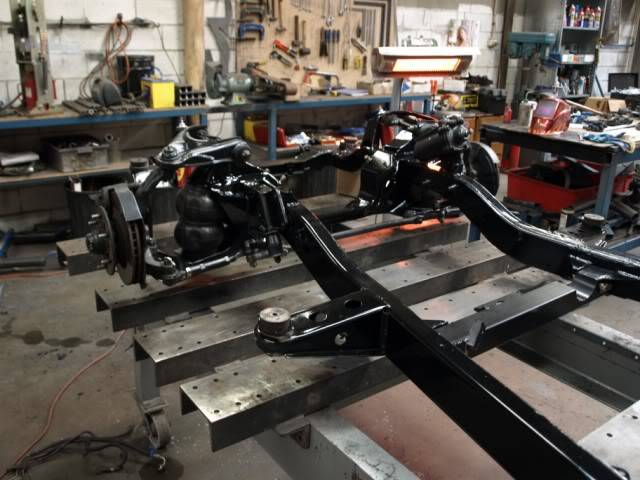
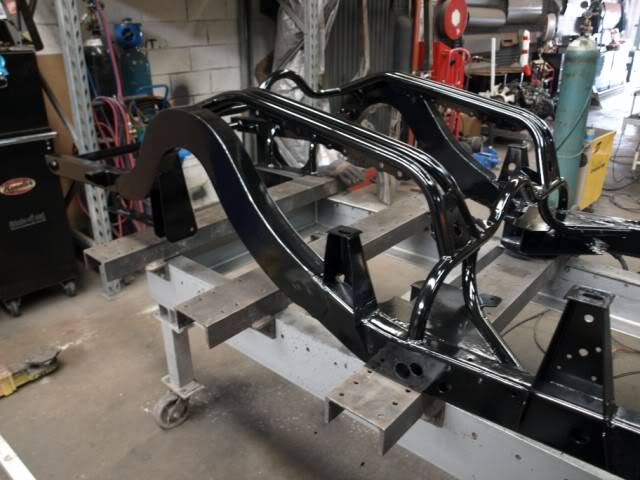
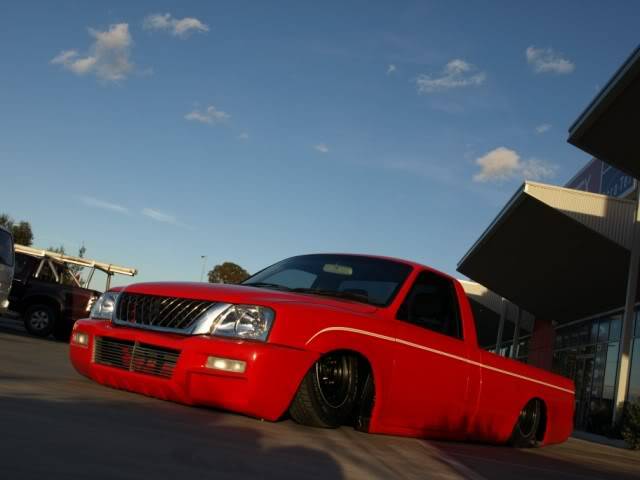
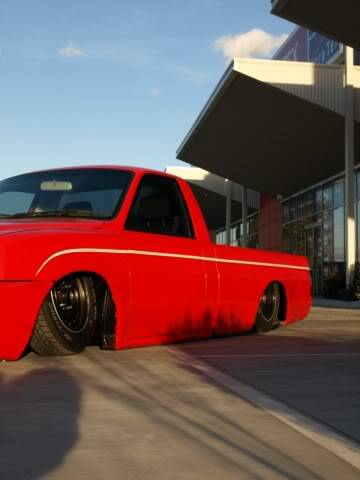
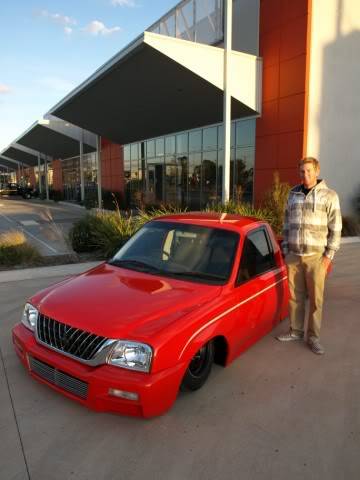
Ok so after that mountain of pictures it's coming to the reassemble side of things. The truck was stripped and put back together 3 times during the 6 months this work was carried out.
But now it's all coming together and i can see why i spent so much money on the build.





08-16-2009 #14
Registered User
- Join Date
- Aug 2009
- Posts
- 28
The truck is still over in the east coast. It sat for a little while waiting for an engineer to do his thing, so while it's doing nothing it's getting more work.
Just small consmetic stuff, but it's getting new upper and lower billet grills, a new front bumer will be made, with out that lower section and with out the licence plate box. Also the rear roll pan will be modified.
So the wheels that were on it, are currenlty off being power coated in satin black, no polished lip or anythng. They will also have Intro air brush onto the black centre caps in red.
Once it lands back in Perth Western Australia it will be back off to Sean who painted this big gurl
He did the first paint job and is a really good guy, no messing around.
Then trimed, not sure of colours or design yet, but dark greys will blend in, don't want anything outrages.
There is a big show over here in January next year that it will debut, then after that it will come off the road for an LS2 and 4 speed auto.
So thanks for your time,enjoy the build and let me know what you think, i will keep you posted on the progress if it gets intrest.
Dougy
08-16-2009 #15
Registered User
- Join Date
- Aug 2009
- Posts
- 28
The truck is still over in the east coast. It sat for a little while waiting for an engineer to do his thing, so while it's doing nothing it's getting more work.
Just small consmetic stuff, but it's getting new upper and lower billet grills, a new front bumer will be made, with out that lower section and with out the licence plate box. Also the rear roll pan will be modified.
So the wheels that were on it, are currenlty off being power coated in satin black, no polished lip or anythng. They will also have Intro air brush onto the black centre caps in red.
Once it lands back in Perth Western Australia it will be back off to Sean who painted this big gurl
He did the first paint job and is a really good guy, no messing around.
Then trimed, not sure of colours or design yet, but dark greys will blend in, don't want anything outrages.
There is a big show over here in January next year that it will debut, then after that it will come off the road for an LS2 and 4 speed auto.
So thanks for your time,enjoy the build and let me know what you think, i will keep you posted on the progress if it gets intrest.
Dougy
08-16-2009 #16 Registered User
- Join Date
- Apr 2007
- Location
- SEBRING, FL
- Posts
- 160

Very cool build! Always nice to see what's being built in other countries. Keep the updates coming.
Travis L
08-16-2009 #17 Registered User
- Join Date
- Aug 2008
- Location
- Huntsville Alabama
- Posts
- 188
very nice work!
DMC69-69ss350
08-16-2009 #18
Registered User
- Join Date
- Feb 2008
- Posts
- 35
The pic of you standing next to it is awesome, really shows how low it is.
08-16-2009 #19 Pro-Touring Veteran
- Join Date
- Jun 2002
- Location
- Long Island, NY
- Posts
- 11,320
Awesome project! Anything with that amount of fabrication fits in great at Pro-Touring.com. Welcome to the site.
08-17-2009 #20 -Moderator/Sponsor-
- Join Date
- Apr 2001
- Location
- The City of Fountains
- Posts
- 16,118
Nice build, but need more pictures of the girl, preferably in focus. Originally Posted by Tukn


Andrew1970 GTO Version 3.0
1967 Cougar build
GM High-Tech Performance feature
My YouTube Channel Please Subscribe!
Instagram @dr__efi
I deliver what EFI promises.
Remote Holley EFI tuning.
Please get in touch if I can be of service.
"You were the gun, your voice was the trigger, your bravery was the barrel, your eyes were the bullets." ~ Her

 Reply With Quote


