

Results 21 to 40 of 48
Thread: The Chevelle Challenge
-
06-01-2009 #21

 Registered User
- Join Date
- Apr 2005
- Location
- dayton, oh
- Posts
- 952
i'm not seeing any pictures... am I retarded?
-
06-01-2009 #22 Registered User
- Join Date
- Dec 2006
- Location
- Out of the Burbs of Detroit to SoCal, then onto my ancestral homeland, the woods of Cascadia
- Posts
- 1,753

 Originally Posted by jackfrost

Is that a statement and a question, or two related thoughts?
I'm seeing the pix here...Greg Fast
(yes, the last name is spelled correctly)
1970 Camaro RS Clone
1984 el Camino
1973 MGB vintage E/Prod race car
(Soon to be an SCCA H/Prod limited prep)
06-01-2009 #23 -ɹoʇɐɹǝpoW-
- Join Date
- Jul 2002
- Location
- Mesquite, TX
- Posts
- 4,941
Okay, I am an idiot.
Yes, it's true in general, but also for a specific reason. I measured the sway bar (13/16") and then turned around and ordered 15/16" sway bar bushings.
Didn't realize my error until I started putting it all together.
I'm thinking that the universe is trying to help me get this car on the road though; when I put the poly bushings back in their package to put in the suspension drawer, I found a new set of stock rubber 13/16" bushings. I don't remember buying them, and I don't know where else they would have come from... but that's acceptable; knock 15.95 off the total build cost so far.
I also found a set of locks with keys and a new ignition switch in another drawer. I'd already bought a set, too. The ones I found have the newer style keys so I'm thinking they came with my 67 Camaro I sold. I'd credit the build for those too but I'd rather use the old style keys.
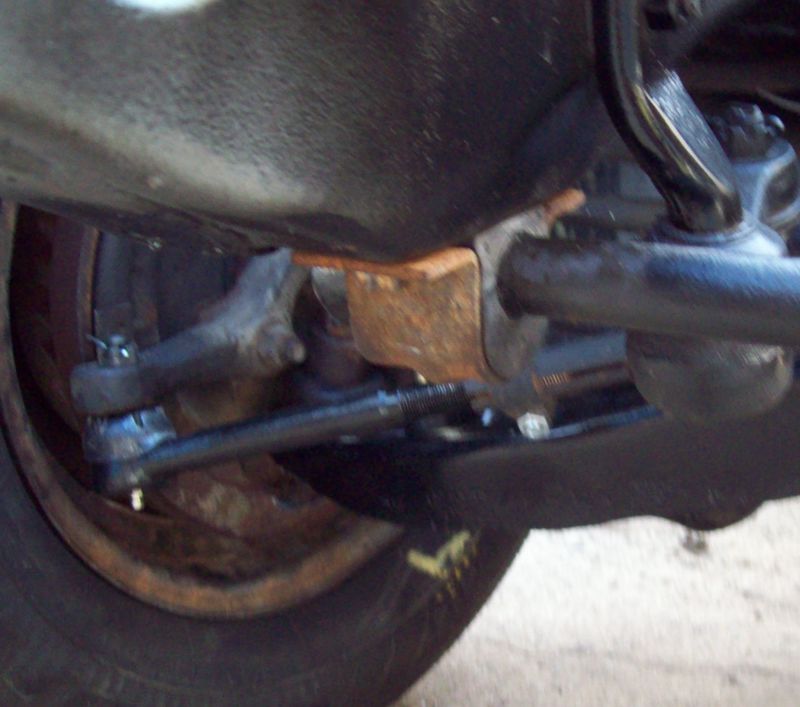
So the remaining outer tie rod came in, and like I mentioned I was able to use the rubber sway bushings I found -- I hadn't blasted the bushing brackets since the poly ones came with new brackets but I can shoot some chassis black on them later.
Shot a lot of the Tractor and Implement enamel. Painted things that I probably should have blasted and primed first - one hood hinge I'd cleaned up and primed back in '03, and the other was still as-received. Both got painted, the un-sandblasted one looks horrible though.
I don't see a purpose for painting the inside of the heater box.
I got the new brake booster, and the old MC looks horrible - but I'm not building this to show.

Found the z-bar, found the wiper motor bracket, found the seat belts. Did not find the trunk latch or the wierd bolts for the wiper motor. Not even positive that I got the latch with the car.
Tomorrow, more than likely, I go to the local Sherwin-Williams auto paint store (the only auto paint store I know of in Mesquite) and get some single-stage black to do the dashboard; once the dash is painted, I can mount the column and finish the front suspension. Still need to mount the front shocks, tighten the LCA bolts, and replace the rag joint.
06-02-2009 #24
Registered User
- Join Date
- Apr 2005
- Location
- dayton, oh
- Posts
- 952
Originally Posted by jackfrost
figured it out. my company thinks derekf.com is a porn site.
06-02-2009 #25 Registered User
- Join Date
- Apr 2009
- Location
- san diego
- Posts
- 5,101
Originally Posted by jackfrost
same hereMy build thread: https://www.pro-touring.com/showthre...ing&highlight=
The mustang build thread: https://www.pro-touring.com/showthre...el)&highlight=
06-02-2009 #26
-ɹoʇɐɹǝpoW-
- Join Date
- Jul 2002
- Location
- Mesquite, TX
- Posts
- 4,941
Yeah, so does mine.
Used to be Websense had a way to report they were wrong... apparently now you're at their mercy.
06-05-2009 #27
-ɹoʇɐɹǝpoW-
- Join Date
- Jul 2002
- Location
- Mesquite, TX
- Posts
- 4,941
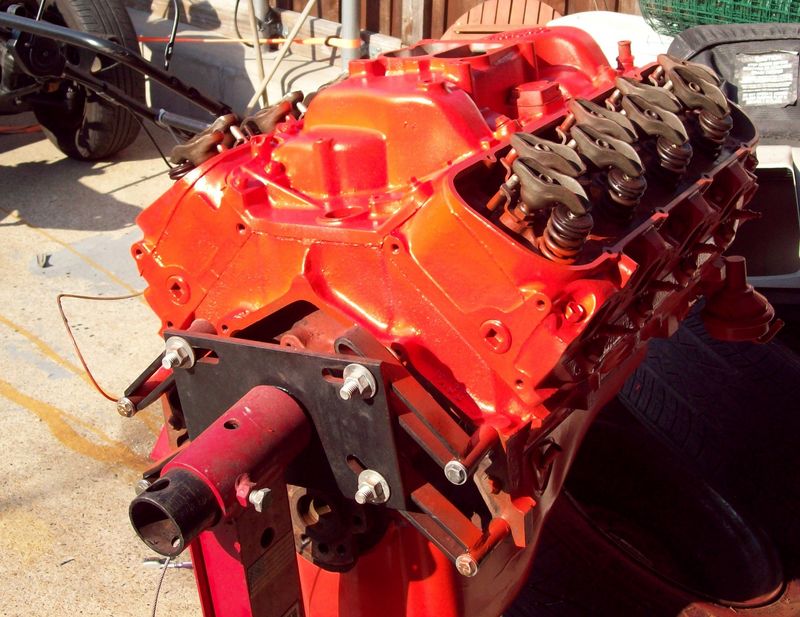
I have engine.
Okay, to be truthful, I've always had the engine... but now it's on the stand instead of sitting on the floor behind the El Camino.
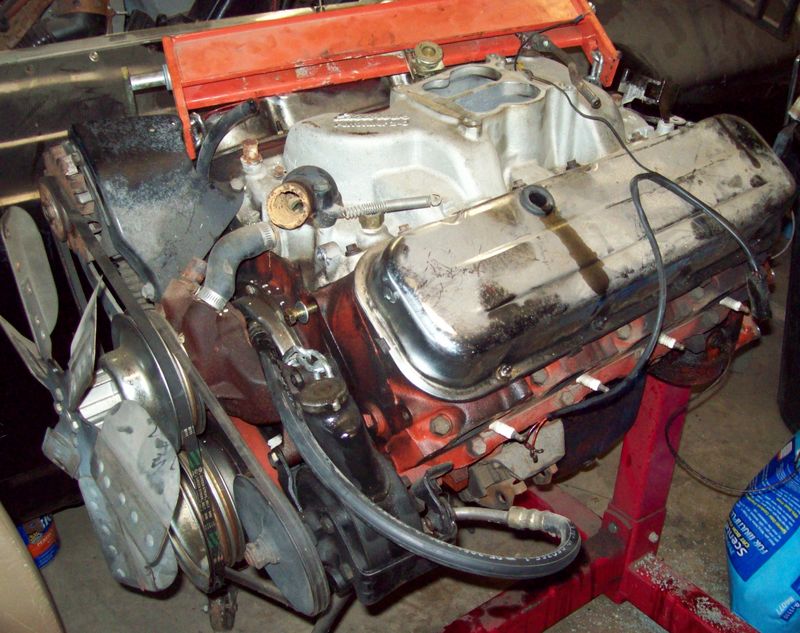
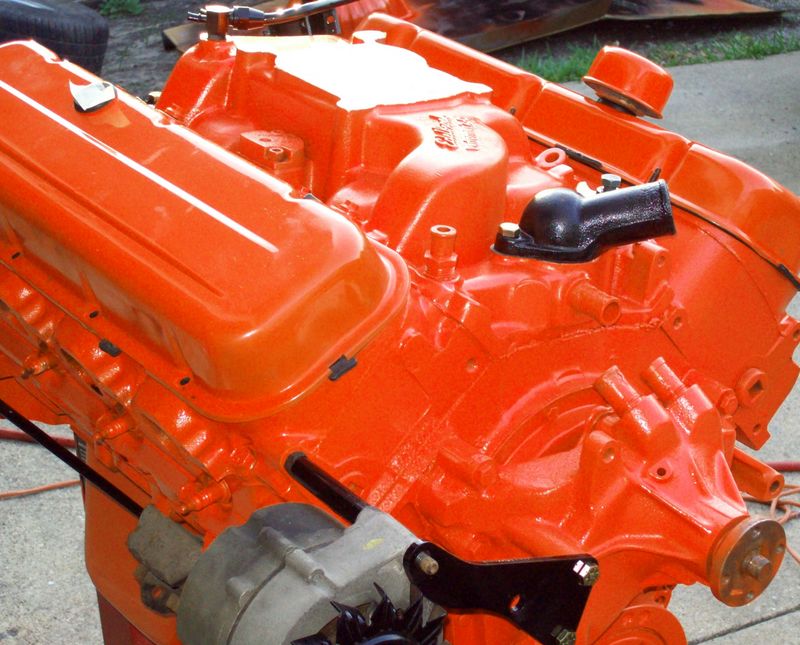
I've got work to do there. Engine will have no chrome - valve covers and timing cover (currently chrome) will be scuffed and shot Chevy Orange. Aluminum intake too. Engine itself only has ~8-10k miles on the last buildup, which was to L34 specs so I don't plan on pulling the heads off. Outside of engine needs cleaned and a new coat of paint, of course.
There is a chance, however, that I wiped a lobe on the cam during engine break-in back in the day; I had a carb issue that dumped quite a bit of fuel into the cylinders and the oil definitely got ruined. I'll have to check that.
Beyond all that, I'll be replacing the flex fan with a clutch fan and the pulleys with other pulleys with less grooves (no AC or PS on this car).
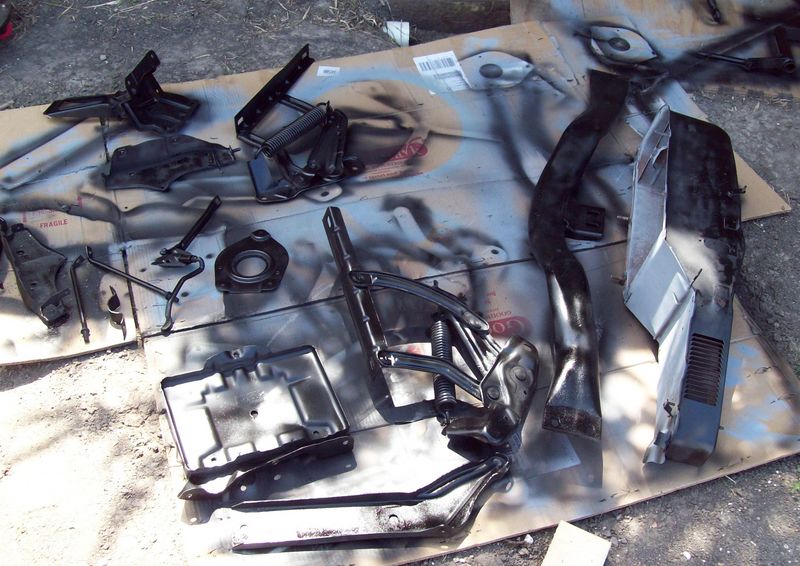
Brackets, thermostat housing, and other similar things need to be sandblasted and repainted. I need to install the pilot bushing and get the shift ball for the z-bar.
06-11-2009 #28 Registered User
- Join Date
- Mar 2009
- Location
- Southern Nevada
- Posts
- 146
You ever find some rollers for the 'velle? I have some Enkei mags that I replaced a little while back. 14x7" fronts, 15x8" rears with nearly new 265/50s on the rear -- the 14" front tires are shot due to previous alignment issues.
I'd donate them to your cause, but I'm not paying shipping (89191)
Anyhow, the offer is on the table for you.1969 Chevelle SS396
Currently figuring out more ways to make simple tasks difficult.
Build thread...
--Dan
06-11-2009 #29
-ɹoʇɐɹǝpoW-
- Join Date
- Jul 2002
- Location
- Mesquite, TX
- Posts
- 4,941
Dan - I've got the old 15x8 wheels from the El Camino but the 275/50-15 tires on them won't even begin to fit in those tiny stock wheelwells in the back of the Chevelle; I suspect the 265s are the same way... so while I appreciate the offer, I'm going to have to pass.
I have made progress, sorta.
I tore the engine partially apart and scrubbed it and used degreaser and all that sort of stuff. I don't want to go much further down, mainly because I'm lazy and all the gaskets are special order at my local auto parts store.
I have the paint and the gaskets to put it back together. The valve covers and intake will be the same orange as the block; I still need to clean the valve covers up a bit more before I shoot it.
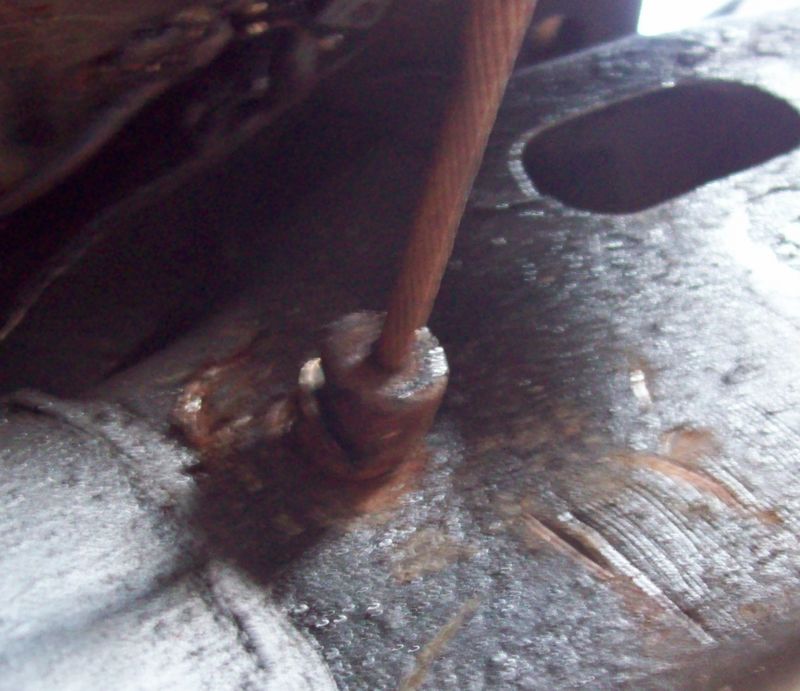
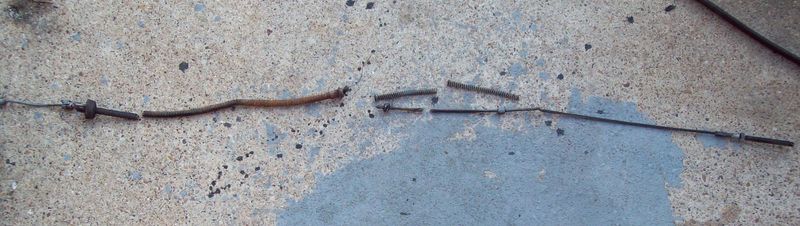
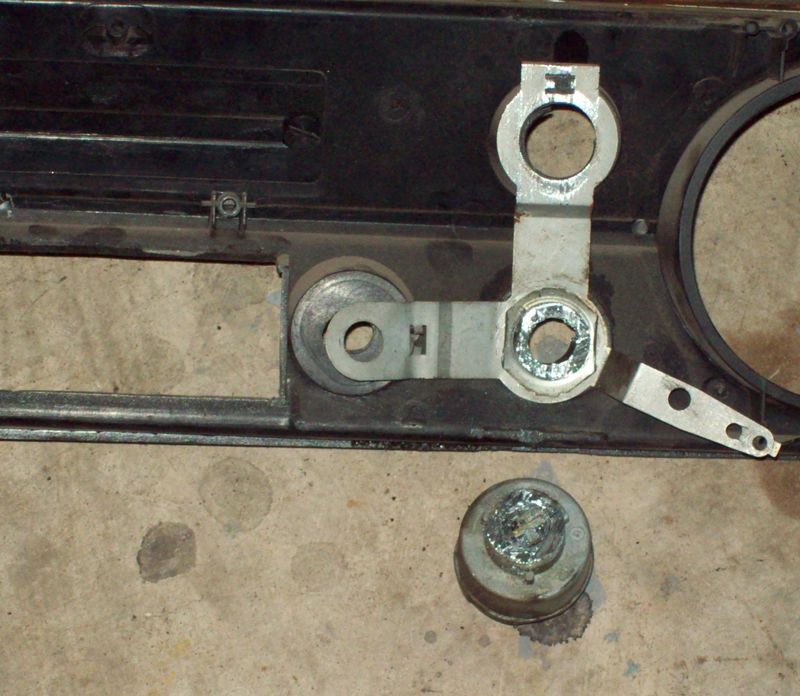
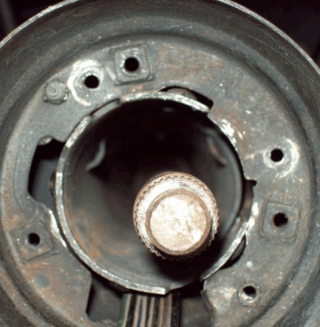
I've replaced the parking brake cables. It seems like such a simple thing to do... except when it's seized up, and then maybe not so much. Best tool I used for this? 30" bolt cutters. Second best? Air chisel to get the bit out of the frame. Cable came out in eight pieces:
(the frame thing)
(cable in eight pieces)
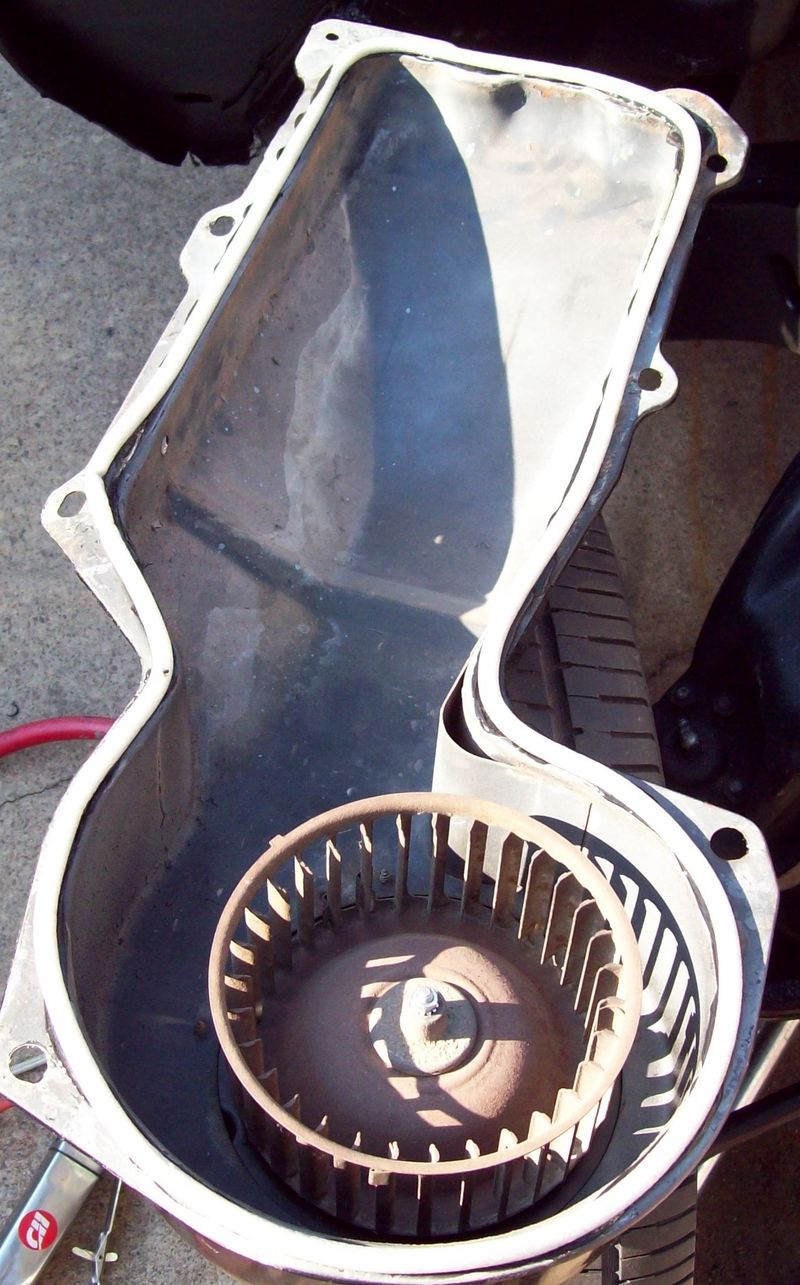
Heater box is assembled, but I won't be putting it in until the dash is painted.
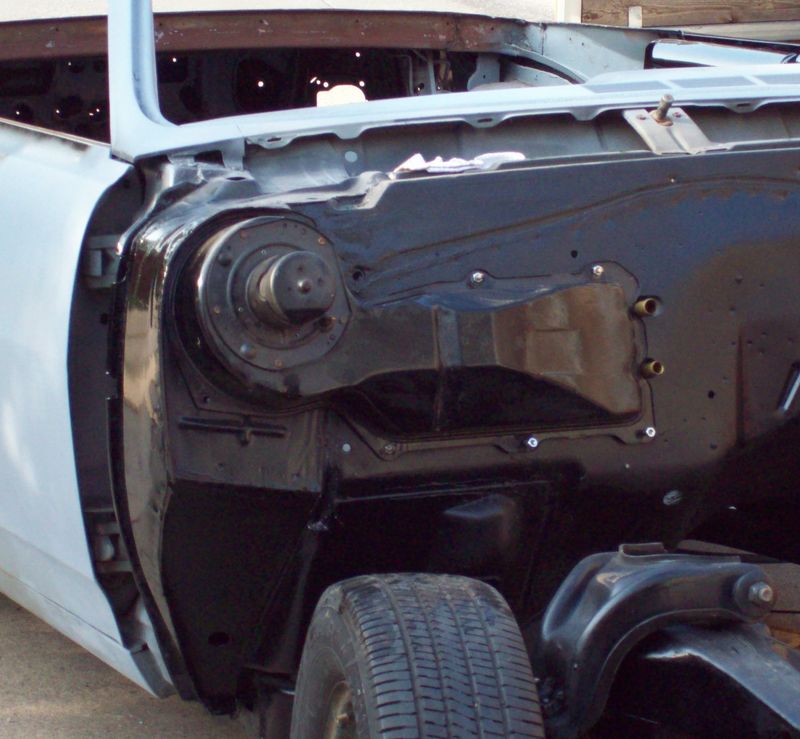
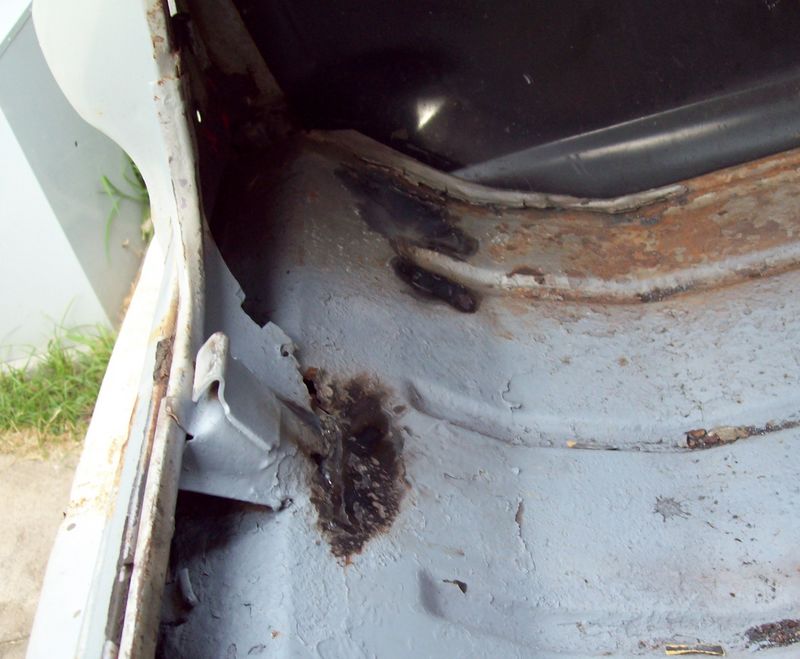
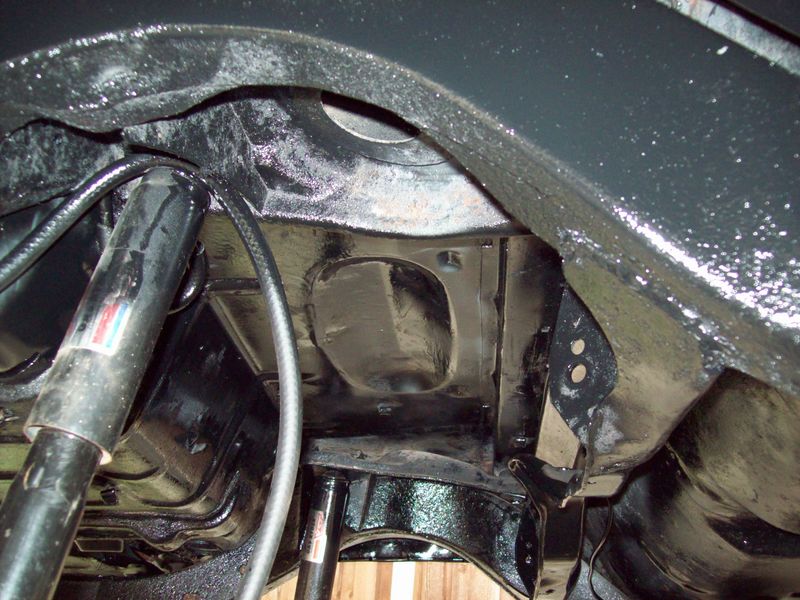
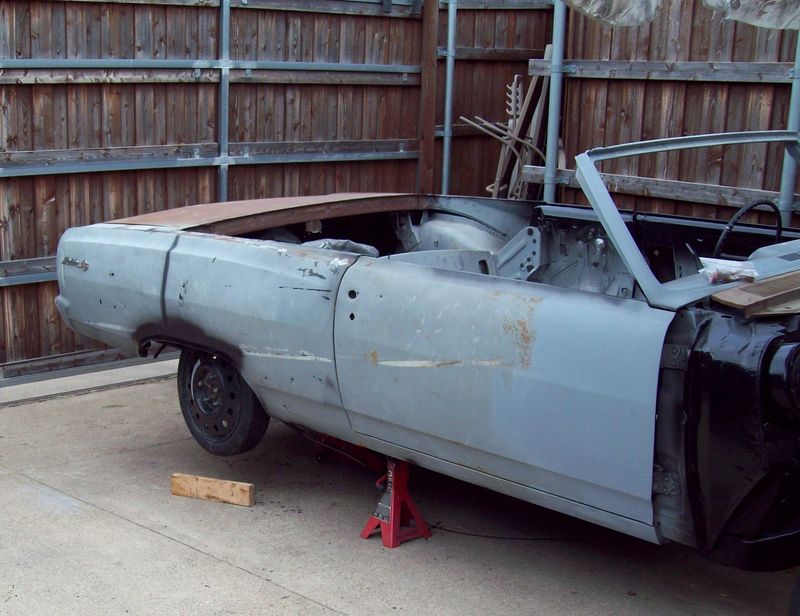
I've started in on the remaining rust repair - I've still got some rust in the trunk floor, and I need to finish the work on the wheelwells.
Here's what the trunk floor looked like 7 years ago before I moved:
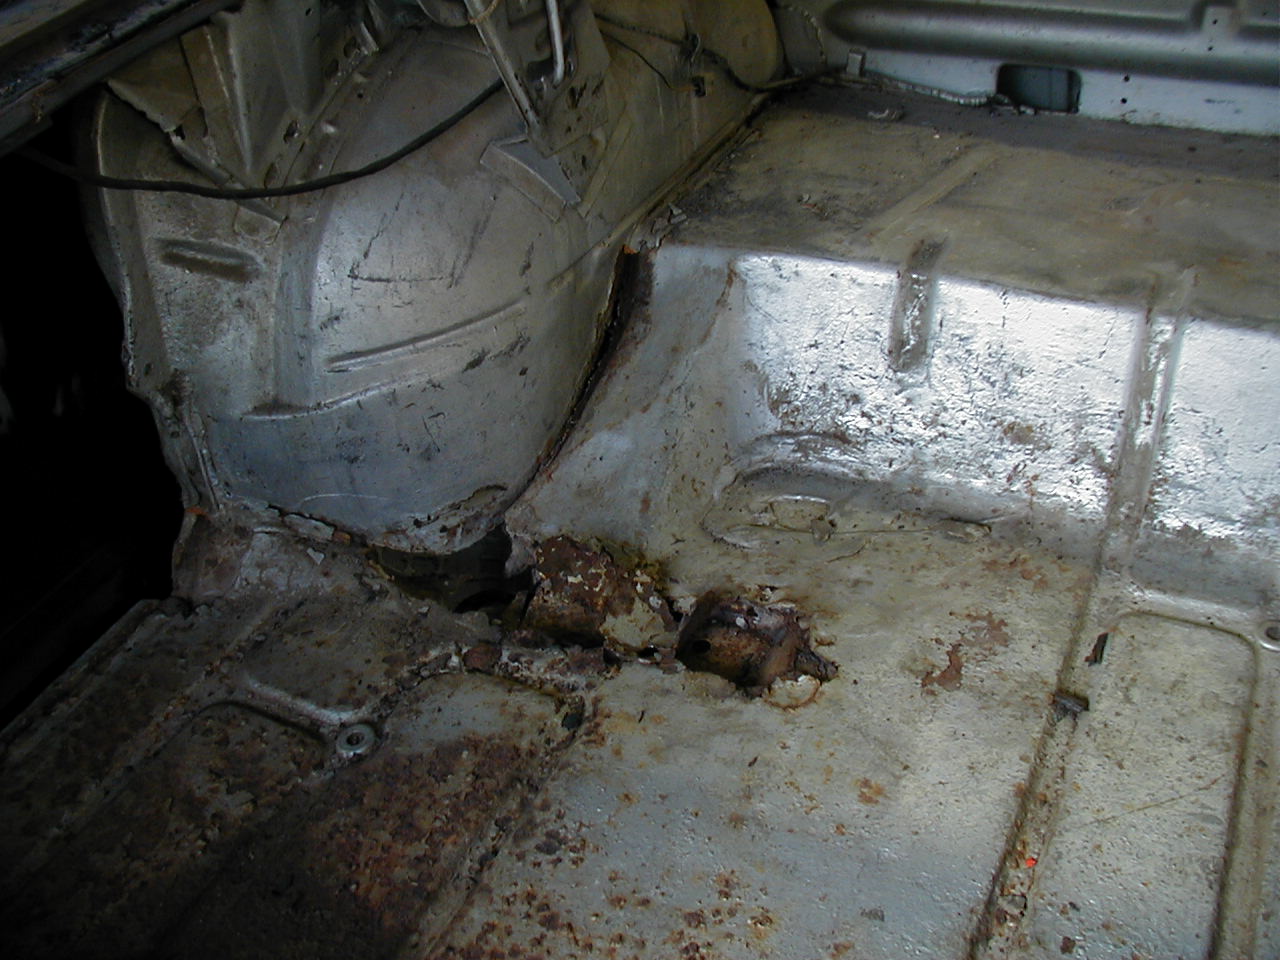
Strangely, it hadn't improved any over the years.
Cut the rust out, cut a replacement bit out of sheet steel, prime the frame:

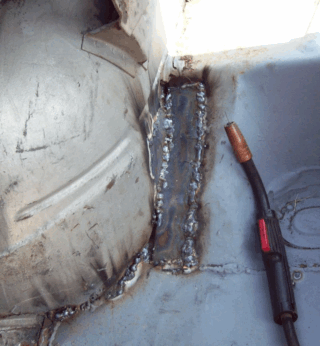
Get my weld on:
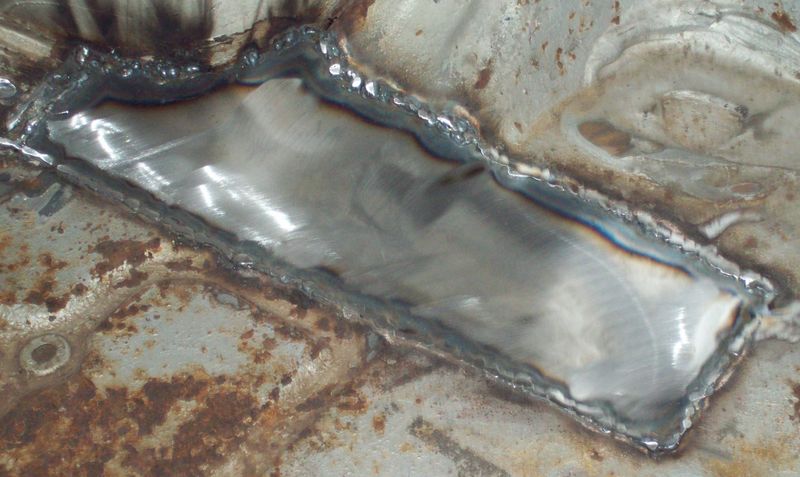
Yeah, it's not that great of a weld... but it's the first sheetmetal work I've done since about '03. Just a lot of bead to grind down; didn't burn through or anything.
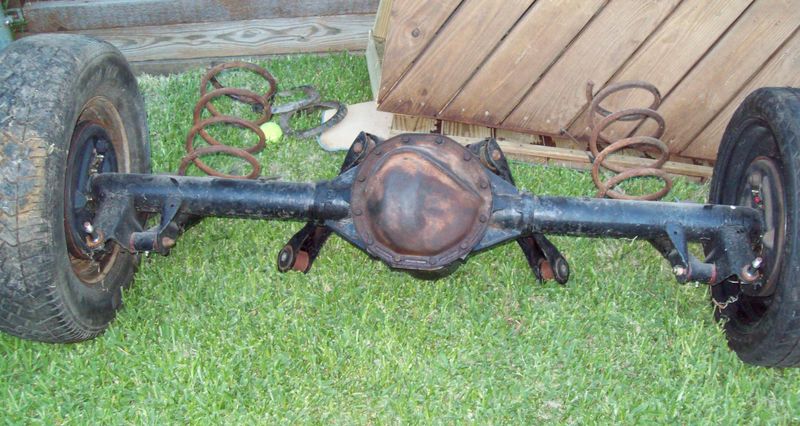
Next up, pull the axle out to finish the rust repair in the wheelwells.
06-11-2009 #30
Registered User
- Join Date
- Mar 2009
- Location
- Southern Nevada
- Posts
- 146
Ahh, yeah... Thought you were building a '68 then realized your EC was '68 and your project was a '65. My mistake. Originally Posted by derekf
1969 Chevelle SS396
Currently figuring out more ways to make simple tasks difficult.
Build thread...
--Dan
06-13-2009 #31
-ɹoʇɐɹǝpoW-
- Join Date
- Jul 2002
- Location
- Mesquite, TX
- Posts
- 4,941
Okay, who's the moron who decided that rebuilding a car in the driveway in Texas in the summer was a good idea?
Oh yeah. That was me. I'm starting to regret it - and it's not even hot yet.
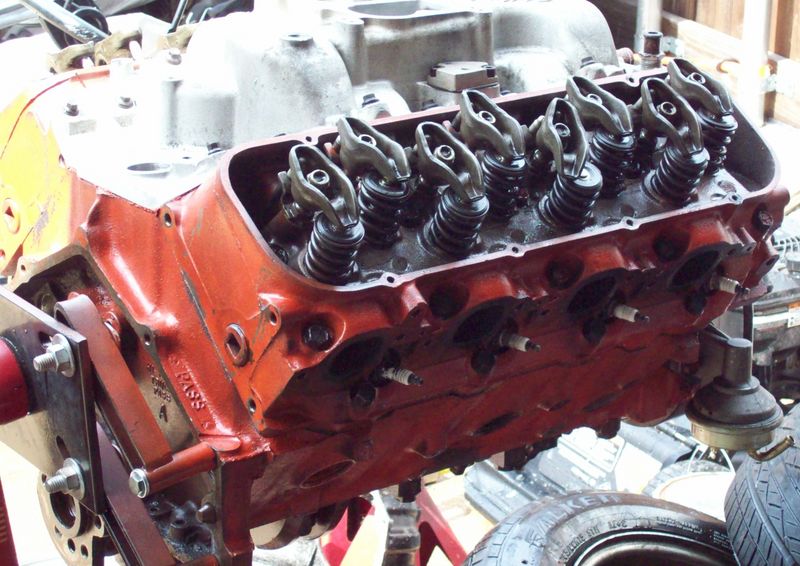
Engine is cleaned up and put together with new gaskets. I haven't installed the valve covers yet as I know I'll have to adjust the valves.
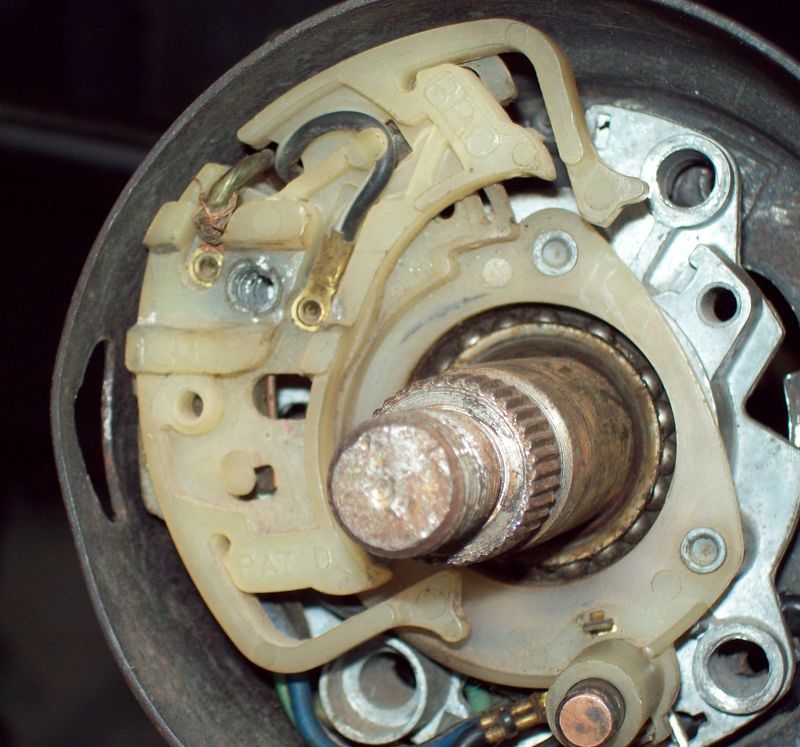
I've never had the key to the car - and to remove the ignition lock, you turn the key one notch and then stick a pin in this little hole... but with no key, that wasn't an option. However, I have a band saw. It works too.
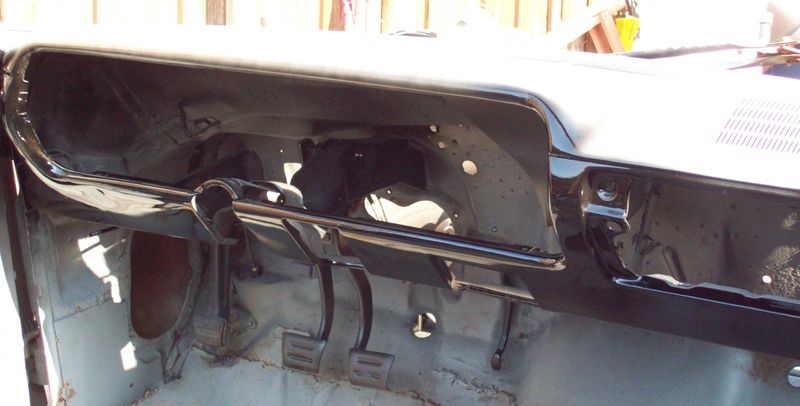
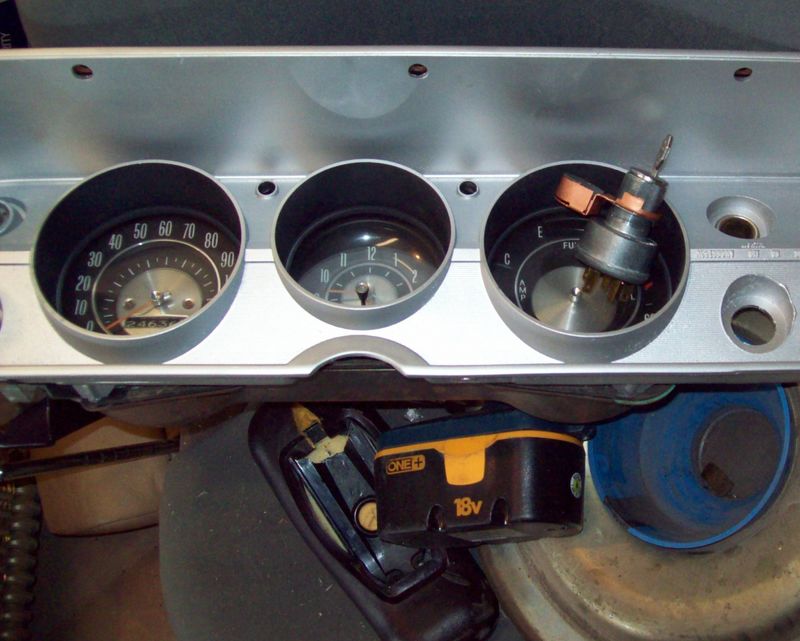
Dash got cleaned up, paint stripped, and new paint put on. Still need to do the flat black areas.
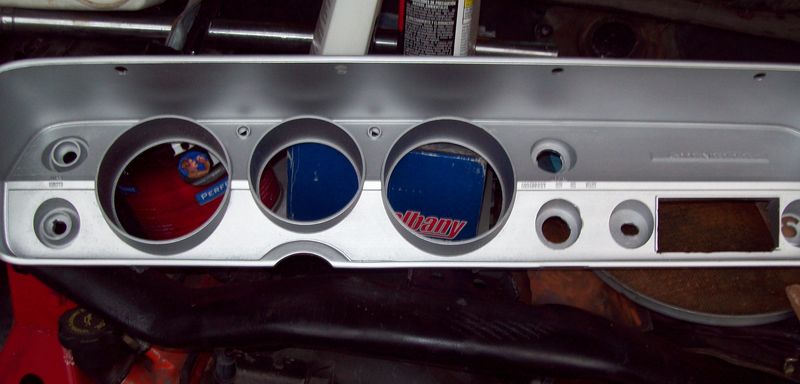
I have shot paint on the lower half of the dash (top half is a flatter paint) and the tops of the doors.
Also painted the glove box door, ashtray and the like.
Heater is installed.
I spent more money.
I was at 1381.26.
Subtract the 15.95 for the sway bar bushings I returned.
Add:
26.96 for headlamp switch, thermostat with gasket and valve cover gaskets.
8.99 for a replacement dipstick after I broke mine.
Reckon that puts me right at 1401.26.
06-13-2009 #32 Registered User
- Join Date
- Sep 2006
- Location
- Southern Indiana
- Posts
- 4,709
Derek,
While you may be regretting the heat, the satisfaction of this driver/build will be so great, and the looks and compliments will be very worth it.
I have done similar things for most of my daily drivers, heck your doing even more than I had time/cash/parts for.
I have a 402 BBC sitting in THE YARD under a tarp. I just hope it hasnt gotten hurt. But friend has a 80 Caprice Classic 2dr, and its going into that one, I just need to pull front pump from th400, replace bushing and seal and get car home, in buddies field for now with all the rain. My intentions are using my old Dual Gate, maybe an old Grand Prix Console (SD421 even), some seats a buddy gave me and I even have an old Unlimited products 4 in cowl to bond on the hood. Its gonna have 15x7 and 15x8 ralleys, and may have to look around for bbc AC brackets and pulleys as it had AC and I love being able to get off work and cool off,,,and crossbreeding AC systems is one of my specialties..
Not sure if I ll get to do any type of paint or just get some old flat/semi gloss black and live with it, may cut springs OR simply scrounge up Cool Ride all away round for better handling.
But then also have to think about working on Monza soon too.
06-15-2009 #33
-ɹoʇɐɹǝpoW-
- Join Date
- Jul 2002
- Location
- Mesquite, TX
- Posts
- 4,941
Score, and bonus:
I found a complete exhaust system for the car on Craigslist for 20 bucks - it'd been pulled off a 72 Elky with a BBC so I should be able to shorten it just a little bit and have it fit just fine.
Bonus: it looks like Websense has figured out that derekf.com isn't a porn site, so my images should be working now.
Yeah. That's going to be the sucky part of this one - not a factory air car. Originally Posted by MonzaRacer
06-15-2009 #34
-ɹoʇɐɹǝpoW-
- Join Date
- Jul 2002
- Location
- Mesquite, TX
- Posts
- 4,941
Okay - so today I almost completed assembling the engine (I still need to rebuild the carb, and apparently I forgot to paint one of the brackets... and I haven't looked to see if I have single-belt pulleys in the attic. A few little things left to do - I need some bolts, need the pulleys and bracket, need plugs, need heater bypass hose.
Dash is painted:

Heater box is properly weatherstripped:
Ashtray, steering column, and heater controls are mounted (no picture).
Rag joint is off, pending the rest of disassembly to replace it (see this post for details)
Starting to think I can repair the rest of the wheelwell rust without taking the axle out. That's good, in that I don't have to take the axle out... but it's bad in that now I have to make the brake lines in place. We'll see how it goes.
Bellhousing is out of the parts washer, cleaned up, and painted Chevy Orange. Tomorrow may be take the engine off the stand, put the clutch on it, put the bellhousing on, and put it in the car. Or maybe it won't. We'll see there too.
I think I'm right on schedule to have it run by 16 July. The only two real holdups will be the parts to rebuild the tranny, and I ran out of epoxy primer Saturday morning - and that stuff is expensive!
06-30-2009 #35
-ɹoʇɐɹǝpoW-
- Join Date
- Jul 2002
- Location
- Mesquite, TX
- Posts
- 4,941
Yeah, I've been slacking on getting the pics off the camera - makes for slow updates.
It's hot enough outside now that I can't really work out there until 6, which just gives me a couple of hours per day to move forward.
Anyway, updates:
Got the old rag joint apart, and put the new one on.
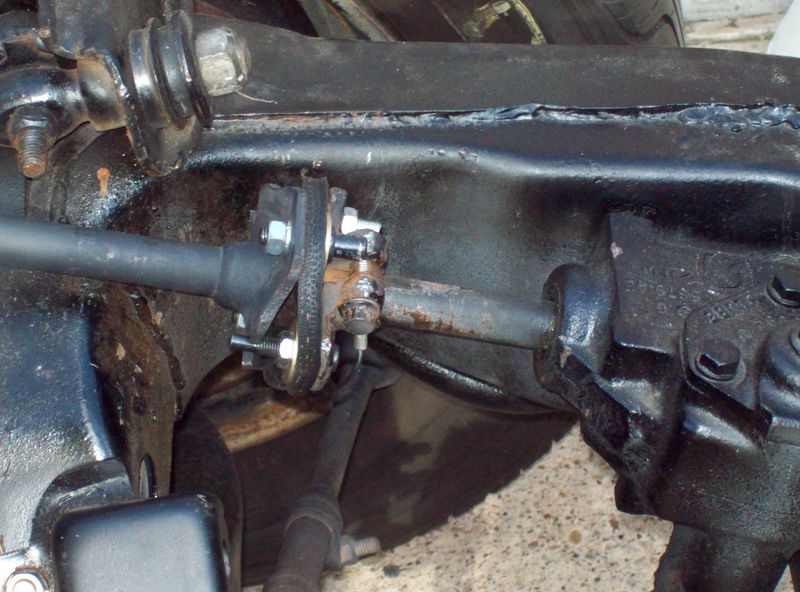
I've run brake line everywhere and while in theory it's all connected, I do not have a warm fuzzy feeling about the quality of the flares though, so I may be reworking it again. On a side note, the Summit flaring tool was utter crap; the threaded bit galled up on the FIRST flare and I wasn't able to use it for any others... good thing I'd inherited some flaring tools.
Rear axle removed to get easier access to the wheelwell rust
It was a lot easier to bend and attach the brake lines without having to work around the trunk floor, too.
I did some more rust repair in the trunk. There's four patches here.
and (small pic because I had some gas issues - it got breezy while I was welding)
Still got a bit more welding to do and a lot of grinding.
I'm having some trouble getting the column together right. When I have the upper carrier put in the right place (there's only two ways the tabs fit right into the top of the column) and what looks like the proper way to have the column collar on, the turn signal couldn't possibly work - the opening is about an inch below where the lever attaches.
("help" post on that coming soon)
When I cut the old ignition switch apart, I believe that I threw the old cut up one away and did not save the bezel nut - and the replacement didn't come with one. Dash is together, except for that:
I suspect that my headlight knob is from the old 67 Camaro project. This one had the knob when I got it, so I suppose it'll turn up eventually and until then this one will work.
I'd cut the fuel line in a couple of places years ago (a little too aggressive with the sawzall) when I was doing rust repair on the convertible top well. Still need to get some 3/8 line to fix that; that and the remaining wheelwell rust are what's keeping me from putting the axle back in.
Wipers are done (for the most part) - motor is attached, linkage attached to the motor.
I was, however, wrong on the end date for the Challenge; classes start on 13 July, not 16.. so I have a little less than two weeks. It's a good thing I specified "running" not "driving", I won't be able to afford the gears for the tranny by then.
06-30-2009 #36 Registered User
- Join Date
- Nov 2006
- Location
- Ma.
- Posts
- 5,569
Nice progress
Wayne
Car FINALLY home !!!!!! lol
Project FNQUIK https://www.pro-touring.com/showthre...ghlight=FNQUIK
07-02-2009 #37
Registered User
- Join Date
- Jun 2009
- Posts
- 10
que hermoso coooocheeee!!!!!!! Beautiful car----
rafa de argentina
07-02-2009 #38 Registered User
- Join Date
- Jun 2007
- Location
- Dayton Ohio
- Posts
- 1,283
nice work man
GTO Project https://www.pro-touring.com/showthre...-The-Great-One
Colorado Project https://www.pro-touring.com/showthre...cab-CodeRedZQ8
Check Out My YouTube Channel http://www.youtube.com/c/geedsgarage
07-06-2009 #39
-ɹoʇɐɹǝpoW-
- Join Date
- Jul 2002
- Location
- Mesquite, TX
- Posts
- 4,941
Okay, there is now one week left before classes start back up.
The wheelwell rust is repaired. You get no pics of that either a) because I forgot to take any, or b) because my welds look so bad that I'm embarrassed to post any pics. You can choose which answer you prefer. I do need to get some seam sealer though to make sure no water gets through though.
The rest of the undercarriage has been painted. The cut fuel line has been repaired.
The axle is most of the way back in. I'd forgotten how much I hated trying to get everything lined up, and more importantly I forgot that my driveway has a decent slope so it's really a two or seven man job. I've got one of the bolts all the way through, and the rest are most of the way through... so it's just a matter of getting them lined the rest of the way up and pushed through.
Once the axle is in, it'll be time to take the pressure washer to the inside of the tank and get it cleaned up and installed; then the car can come off jackstands and the engine can go in. I do have the tank straps, bolts, new sender, and you can see the new fuel hose stuck up at the shock above.
In preparation, I went up in the attic and grabbed the front clip (what? You don't keep entire cars in yours?).
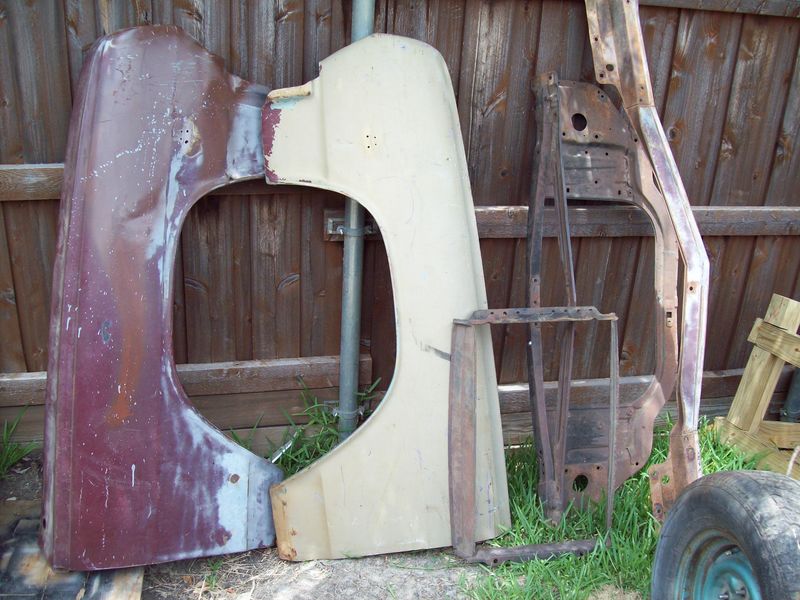
A little rust to repair on the bottoms of the fenders, but not too bad.
Will I get it running over the next week? Maybe. It's looking likely that I'll have to cheat - rather than running the Painless harness, just making a harness that drives the coil and the starter; brakes might not be bled; transmission definitely will not be installed (since I still don't have the gears).
My "parts I'm searching for" list is pretty short these days not counting the tranny parts - I need the bezel nut for the ignition switch, since I threw the old one away and I need either the top of the steering column collar thing for a BPC turn signal switch or a "Guide" type switch (this thing is the collar surround I'm talking about)
Not really required for starting the car, but will be needed for driving it.
07-13-2009 #40
-ɹoʇɐɹǝpoW-
- Join Date
- Jul 2002
- Location
- Mesquite, TX
- Posts
- 4,941
Well, I'm writing between classes and the car doesn't run, so I suppose that by some definitions I have failed at my challenge.
Reasons for not getting it done in time are varied; from the Texas heat to limited funds; from "scope creep" to the wife's honey-dos.
The engine is not in the car. The fuel tank hasn't been cleaned. There's still one more brake line to flare (and I'm not sure my flares are any good).
On the other hand, all is not lost. As the wife pointed out, I got more done over the past six weeks than I had in the previous six years. The car is in much better shape, at the very least I've added to its life by repairing the rust.
I'm looking forward to class ending and the temp dying down.
Hopefully by then I'll be a little better off financially and be able to get the rest of the parts I still lack.
I'll be creating a new project thread at that point -- the challenge is over.

 Reply With Quote


