


Results 1 to 20 of 120
Thread: Project Fool's Gold
-
01-06-2009 #1

 Registered User
- Join Date
- Jan 2006
- Location
- Dallas, Ga.
- Posts
- 439
Project Fool's Gold
Well guys it has been a while coming since I work by myself and at a leasurely pace, but I'm finally getting far enough along to introduce this project. Most of my time has been spent waiting on parts to arrive, some took a few days while some took as much as six months (LD 3-link).
It's a 72 Camaro which I've named Fool's Gold due to color and I'm pretty foolish on this one budget wise I guess you could say.
Here's what I started with, just a hull that was very solid I picked up for 1K.
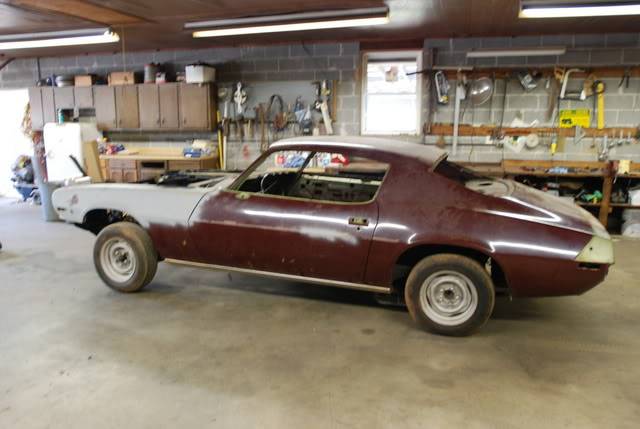
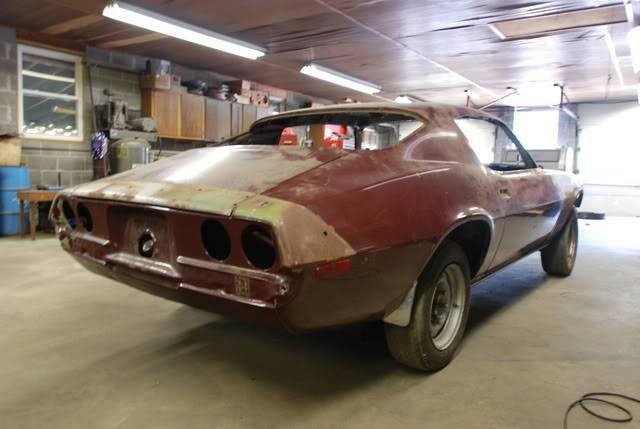
It's pretty solid, only had one repaint (maaco by the look and thickness of it) and very little patching needed in the floor or elsewhere. I hired Carter Hickman to do a rendering for me and can't say enough nice things about him. The rendering will be very close to the finished product with some slight massageing to the stripe and maybe a few other small things that I've rethought. Here is the final rendering comp from Carter.
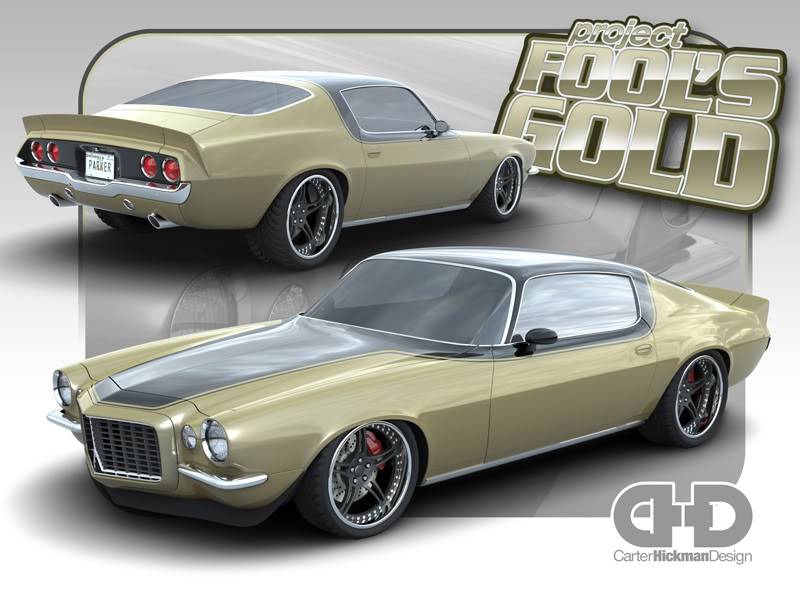
I started by sandblasting the floor sections inside and out along with the wheelwells. I then did the few floor patches and installed the DSE mini-tubs. You can see the install in detail here http://www.nastyz28.com/forum/showth...ni-tub+install
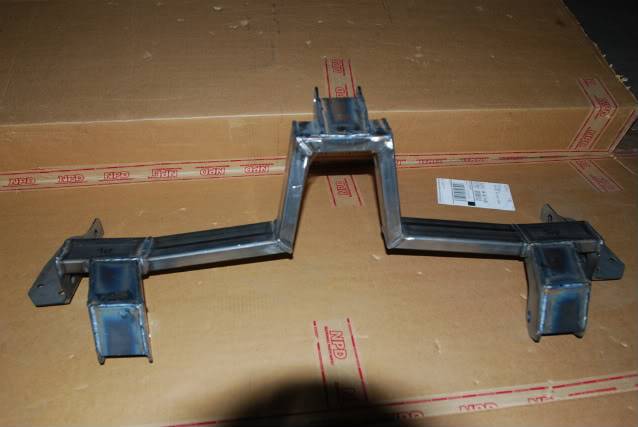
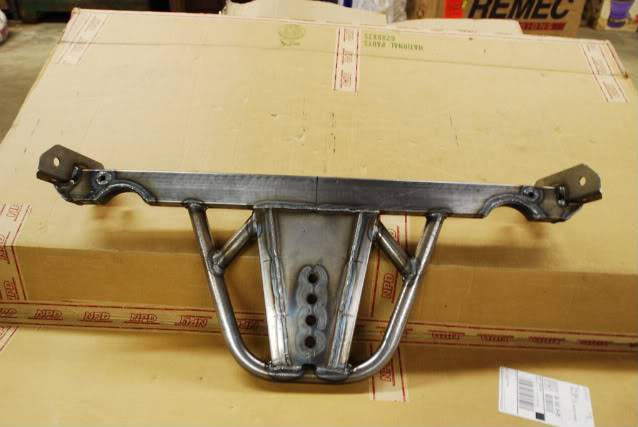
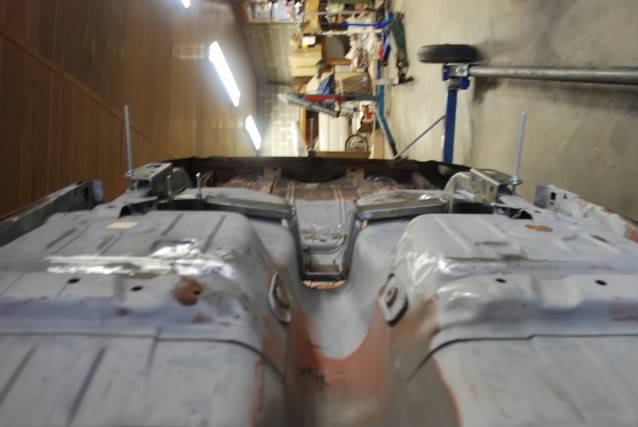
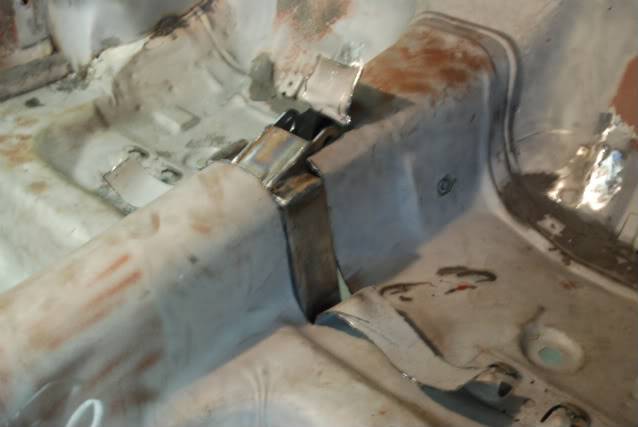
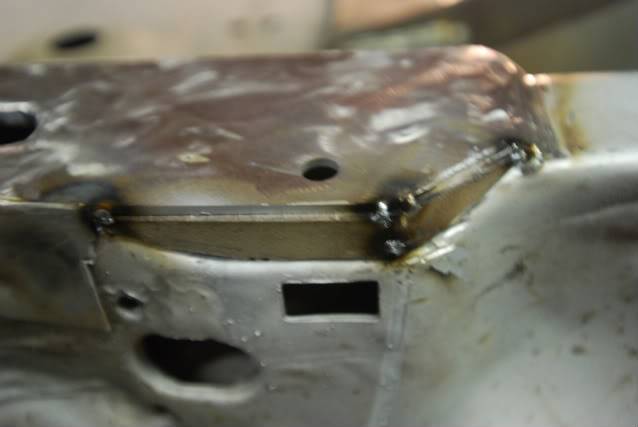
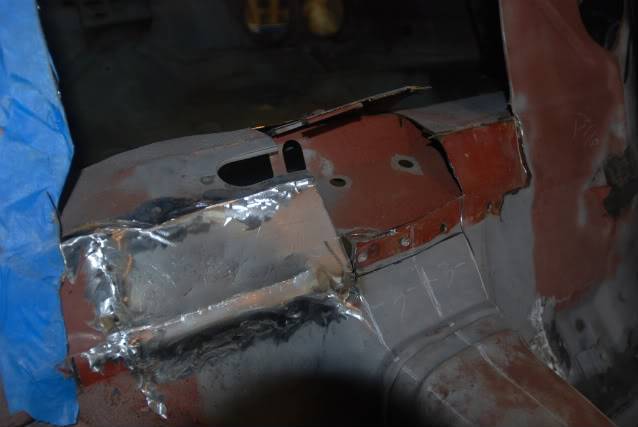
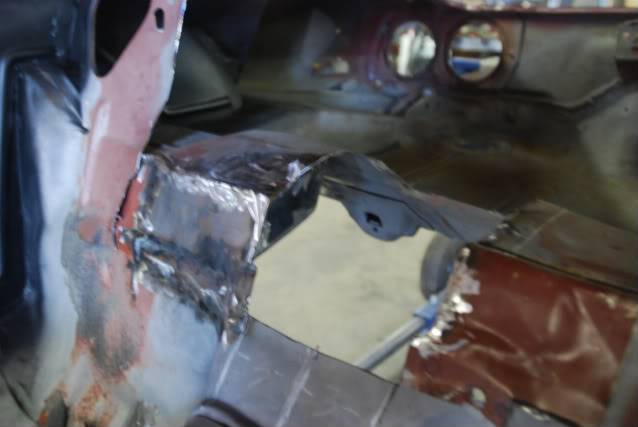
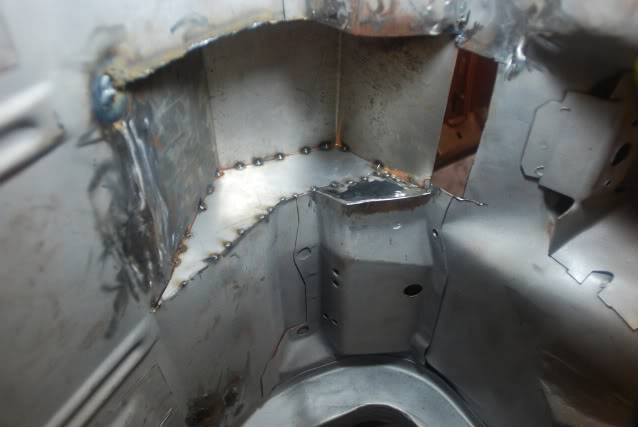
After the mini-tub I installed the Lateral Dynamics 3-link. Please excuse the qaulity of the pics I've been shooting with no flash or tri-pod I promise to do better LOL.
Here are a few pics of the LD 3-link install.
Tommy
-
01-06-2009 #2
Registered User
- Join Date
- Jan 2006
- Location
- Dallas, Ga.
- Posts
- 439
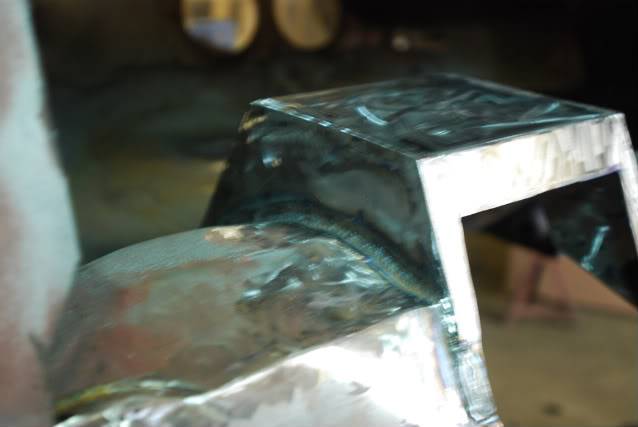
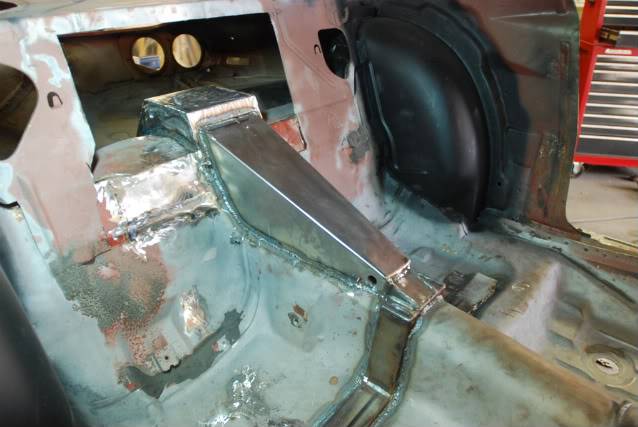
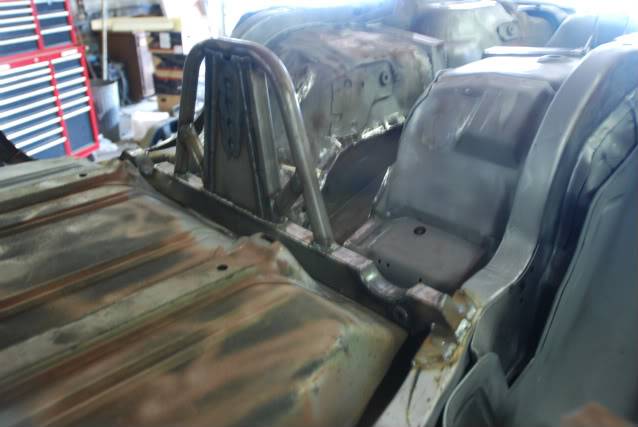
After welding in the crossmembers I had to build the close out for the center link from scratch. The reason was that Mark R&Ded the unit on a 70 model which they have a flat straight divider between the trunk and rear seat. The 71 up models are stamped different in this area and have a vapor canister mounted there. Once this was done I mocked up the rear suspension and found that the lower links hit the frame rails before reaching full compression. So after getting a hold of Mark I found out it was designed for the frame to be notched.
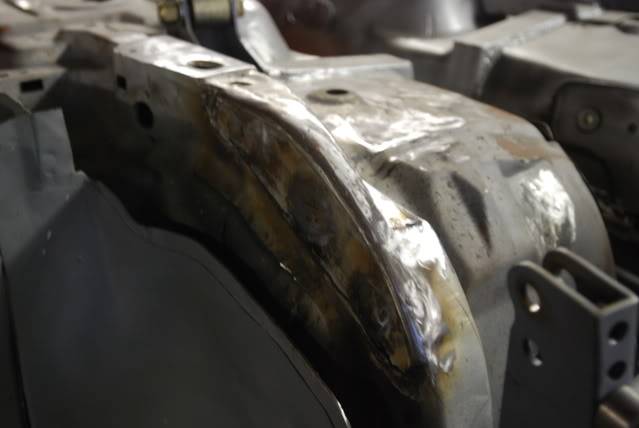
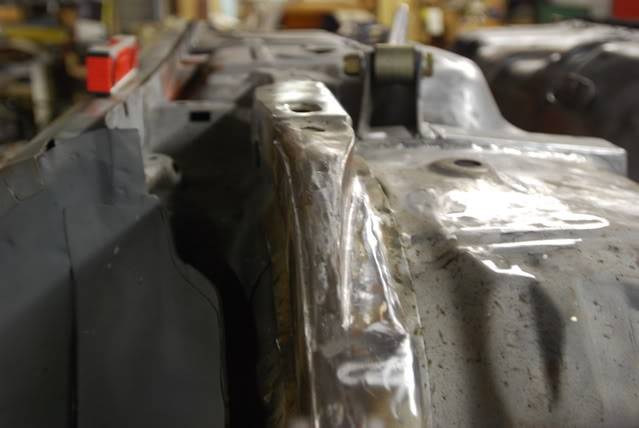
It made me a little nervous cutting this large of a section out of the rail at the radius point so I cut a piece of 1/4" steel in the shape of the radius and welded it to the uncut side. It runs from thr top of the radius down to the bottom of the rail and 1 inch past the cut on each side. This should give it plenty of stiffening and support. Also the right angle cut outs were done with 1/8" angle. Once all of this was done I mocked up the rear suspension one last time to check clearances during articulation. I also mocked up the backing plates for the Kore3 kit which adapts C6 Z06 rear brakes with parking brake to the 9" Ford rear.
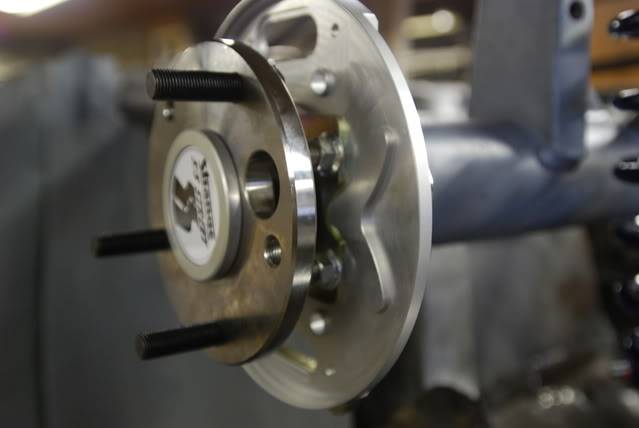
These parts from Kore3 are absolutely beautiful! CNC machined backing plates and all brackets and hardware are gold cad plate. You CANNOT beat the service from Tobin at Kore3 and the parts are flawless and worth the price in my opinion. As you can see the Strange axles were also mocked up for the measurements to be taken for the wheel backspace. It will be an 18x12 with a 5 5/8 backspace. I narrowed the rear 4" from stock width so the rear would have a deep lip on the wheel for killer looks. I'm using aftermarket Racing Brake brand 2 piece rotors all around for this project and the rears have a cast iron hat instead of aluminum like the front for the parking brake. The drum section on the rear rotors is slightly deeper than stock C6 Z06 so.110 had to be milled from the lip on the backing plates for clearance. If you use stock rotors then Tobins kit is spot on. Luckily I have a friend which I've known since first grade who owns and operates a machine shop so I can use a mill or lathe when I need to.
Here is the rear all mocked up.
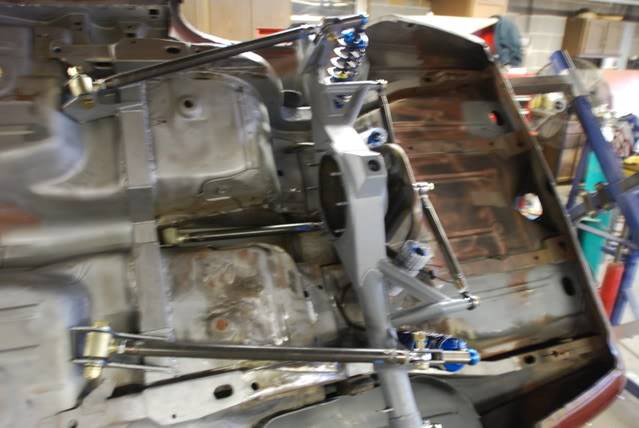
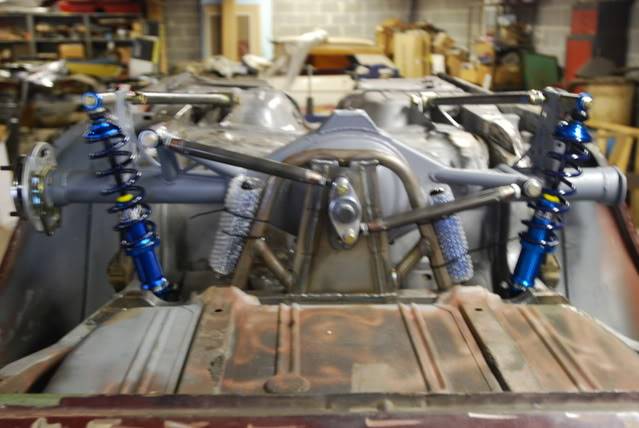
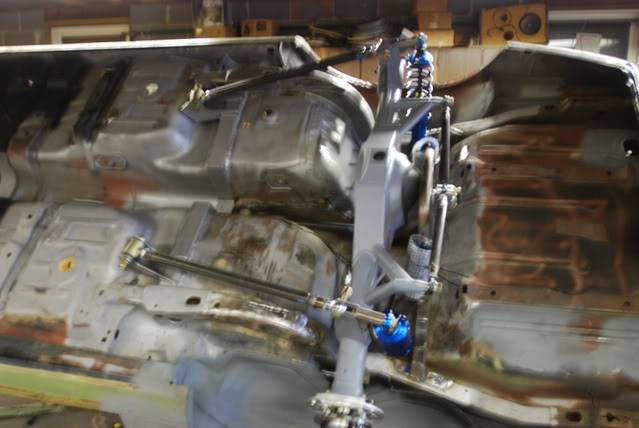
Next up I moved on to fitting the sub-frame and powertrain along with the DSE frame connectors.
Tommy
01-06-2009 #3
Registered User
- Join Date
- Jan 2006
- Location
- Dallas, Ga.
- Posts
- 439
I fitted the DSE sub to the body with solid bushings also from DSE and sqaured it. Once this was done with the shell off the rotiserie the frame connector installation was a breeze. I installed them completely except for welding them to the sub-frame itself. that way I could break it all back down for blasting and paint. The frame will be welded to the connectors later after the priming and finishing of the bottom of the shell.
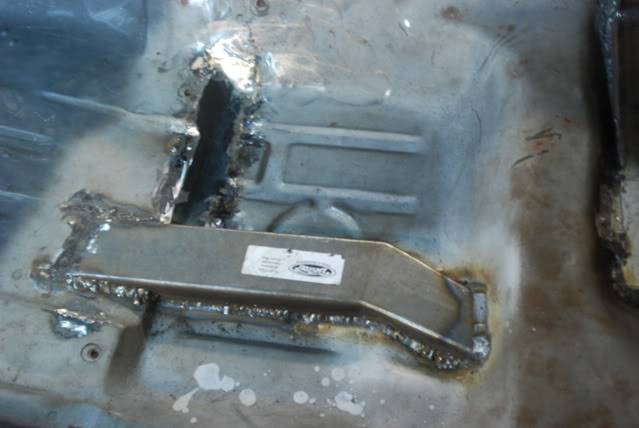
Once this was done I decided to mock up the engine and transmission to the car.
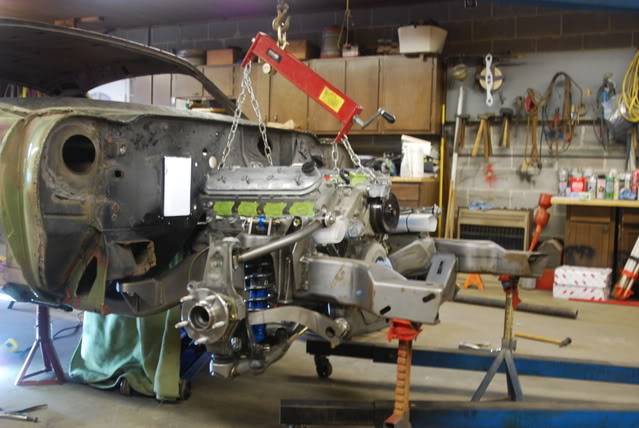
At this point I discovered I had a few problems. The trans would only go high enough for a 4.5 degree driveline angle before hitting the tunnel. This was too much so I decide to cut the tunnel and fab a new one.
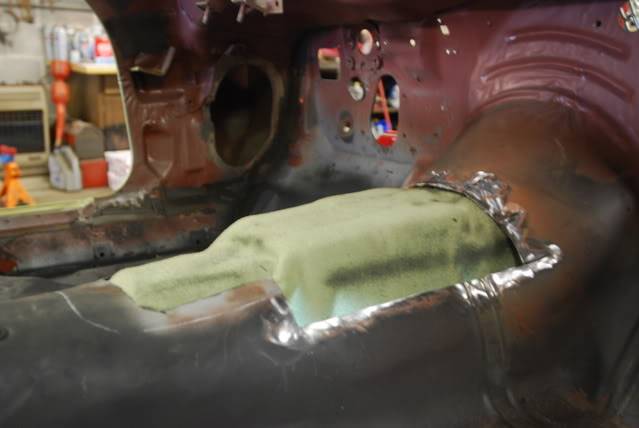
Boy did this snowball in a hurry. My tunnel had been cut already for a 4 speed conversion by one of the previous owners and it looked as if they did it with a hatchet so cutting and refabbing a tunnel didn't bother me. The problem is that almost no one has used this frame and an LS in a second gen. but DSE, The Dale Jr. car used a t56 so I figured that was the reason for modifying the tunnel. After close inspection of the photos on their site and a phone call to DSE I discovered they also had to modify their 70 test car for the Tremec. No big deal right! Well after studying the photos on their site and looking at the parts mocked up on my shell I decided the only way to obtain maximum exhaust clearance with this low of a ride hieght was to also build a crossmember into the body as DSE had done.
I started with a piece of 1.5x3 sqaure tubeing with 1/8" wall. I then cut the floor out to accept it between the rockers while also using doubler plates at the rockers for more strength.
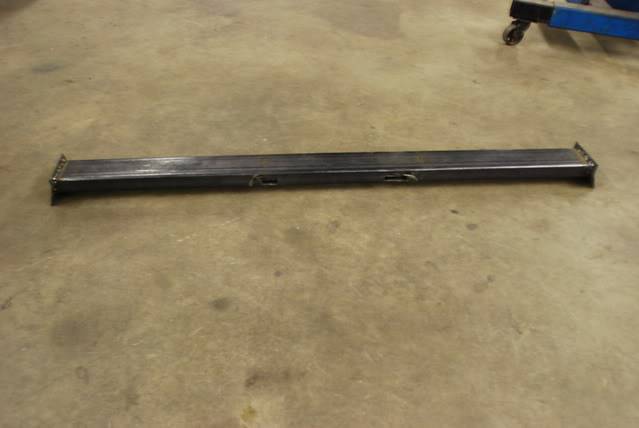
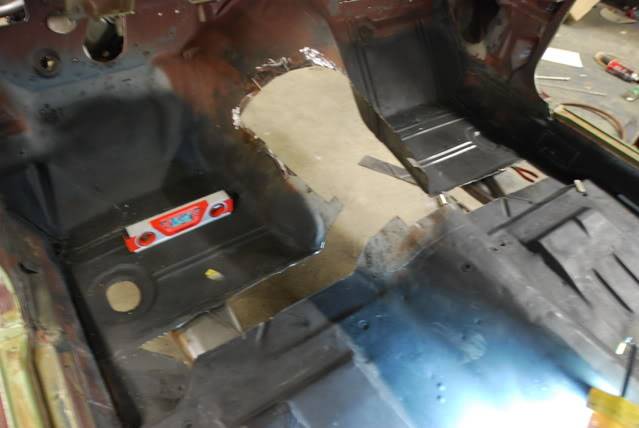
At this point I did not have access to anything that would mandrel bend a sqaure tube so I built the center from 1/8" plate. First I cut the sides, then welded ribs every 2 inches.
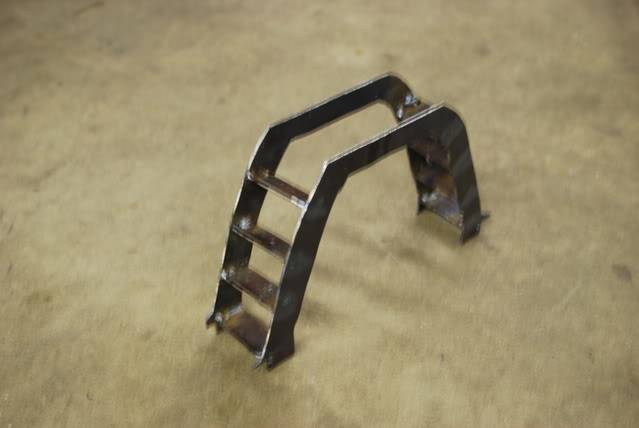
Then I fitted and welded this to the main tube. The next step was to cover the top and bottom by welding a strip of 1/8 plate on both, it was also plug welded to the ribs for strength and stiffness. I left the top open as once the unit was welded in the car I would machine a collar from solid stock to provide access to the shifter and weld it in after cutting out the top. On the bottom I used 1/4"x2" angle with 2 holes drilled and nuts welded to fab legs for the actual transmission crossmember.
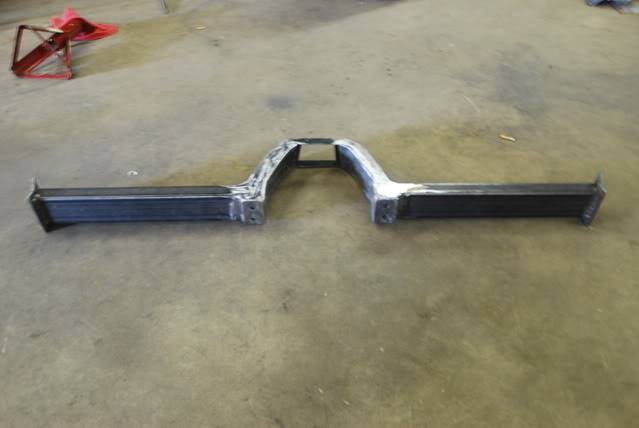
After welding this assembly into the car I machined the collar and welded it in along with fabbing a new tunnel.
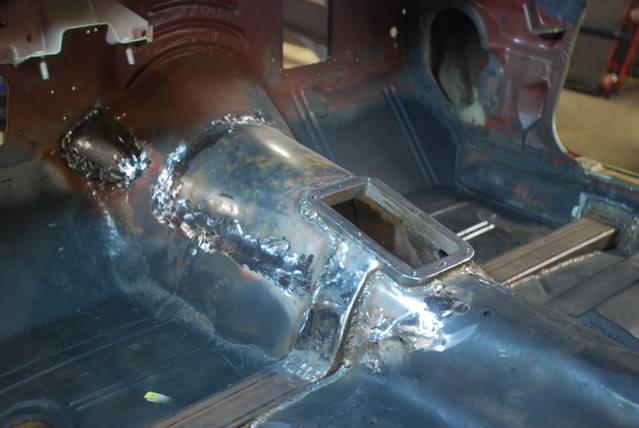
This was the finished result. On the bottom I took a piece of 1.5" dom tubing with 1/8" wall and milled a slot in each end. I then machined two pieces of 1/4" plate with holes to match the legs on the crossmember and welded those in the ends of the tube. The final step was machining a tab with slots out of 1/4" plate for the trans mount and fitting it all together in place and welding it up. This made a crossmember about nine inches long to hold the trans and except for it protruding down ( but not lower than the frame ) I have exhaust clearance all the way up to the floors on each side with no crossmember in the way. This was a design from my own head combining what DSE did with their test car and the Dale Jr. car.
Now I can finally send the shell off to the media blaster this week and start on the topside WOOT! The frame, rear housing and suspension parts will also go for paint and powdercoat this week. Maybe this thing will pick up some momentum finally.
Another note: The reason for all of the tunnel mods etc. is because the DSE mounts for the LS based engine set it back a little over 2 inches from the stock small block position. This shoves the trans deeper into the tunnel and requires raising it. I have about 1 inch of space between the firewall and the right head on the engine. This set back along with the lightwieght all aluminum LS should do wonders for the cars wieght balance.
I know I'm not the best fabricator by a long shot, especially compared with a lot that I see here. At least I'm trying, learning, and have pride in doing it myself so maybe no one will make too much fun of my work.
Tommy
01-06-2009 #4 Registered User
- Join Date
- Apr 2007
- Location
- St Joe, Mo
- Posts
- 274

Nice work, thats going to be awesome.
Ryan
1969 X11 Camaro- Peelin paint, rust, the whole works
01-06-2009 #5 Registered User
- Join Date
- Oct 2004
- Location
- St.Anne Il
- Posts
- 3,924
Tommy that is looking killer..and i think the fab work looks great alot better than i can do i know that and hell you are doing it all on your own ..thats cool.!!!
Darrin Stalnecker
1969 Camaro Convert full pt pr
2007 Corvette Supercharged
1968 Camaro LS1 T56
http://www.fquick.com/dropit69
01-06-2009 #6 Registered User
- Join Date
- Dec 2004
- Location
- Beaufort , NC
- Posts
- 1,849
That is some sweet work on the trans mount!! Dig the rendering to!
1968 F100 sb full vic chassis swap
1965 Mustang coupe 347 5 spd cheap touring SOLD
2003 Porsche 996 Outlaw LS2 swap SOLD
1992 Lexus SC400 daily SOLD
1966 Porsche 912 Outlaw SOLD
1968 Ford F-100 sb SOLD
01-06-2009 #7
Registered User
- Join Date
- Jan 2006
- Location
- Dallas, Ga.
- Posts
- 439
The plan calls for DSE tubs, frame, frame connectors, roll bar, and fender braces. The rear as you seen is Lateral dynamics 3-link. The shocks are Afco double adjustable with remote reservoir all around. Brakes will be C6 Z06 with hydraboost and Racing Brake brand two piece rotors. The engine will be an LS2 stroked to 402 with Trick Flow 225 cnc heads, comp cam and Fast intake. The trans is Tremec TKO 600 while the rear is 9" Ford with Tru-Trac and 3:73 gears all from Strange. I'm working on some other things for it but we'll let them be a surprise for later. Wheels are Forgeline SP3P with BFG's thanks to Frank.
Tommy
01-06-2009 #8 Registered User
- Join Date
- Jun 2007
- Location
- Various Barns in Northern Illinois.
- Posts
- 875
Sweet, Nice work!
Life is Better Spent in the Garage
Laine O
72 Camaro, 468, TH400, 3:42 = FUN!
92 Camaro RS, Restored Autocross wannabe
LIVE LOVE DRIVE!
01-06-2009 #9 Registered User
- Join Date
- Dec 2005
- Location
- Maryland
- Posts
- 1,863
Wow,I think I like the build shots more then .I do the finished car shots.That thing should be wicked Tommy.Do you have a completion estimate?Ron
Ron Schwarz
01-06-2009 #10
Registered User
- Join Date
- Jan 2006
- Location
- Dallas, Ga.
- Posts
- 439
Hoping by RTTH this year but I'm not sure if the money will hold out for that. I've kinda been pulling out all the stops on parts and it's adding up. Pretty soon I'll have more in it than the gray car, I know I will by the time it's a roller with the powerplant complete.
Tommy
01-06-2009 #11
Banned
- Join Date
- Aug 2003
- Location
- Orlando, FL
- Posts
- 8,745
I have a lot of parts on that car. been waiting to see it!
Looks awesome.
01-06-2009 #12 Registered User
- Join Date
- Jun 2006
- Location
- NW burbs IL
- Posts
- 1,732
Tommy, from the looks of it you have the hardest part accomplished, fabrication wise. I love the rendering and name.
Edit: I read through everything after I posted this and will say if anyone makes fun of your fab work, they better put up or shut up. Your doing an excellent job.Matt
Current project: " Chain Reaction "
A.K.A. " BIG " by wife, biatch in garage.
1969 RS Camaro L92 T56 Quadra-link, CW sub, Ford 9" a progressive build.
Ex track car: 1995 Camaro LS1 T56
01-06-2009 #13 Starting The Transformation
- Join Date
- May 2006
- Location
- Wa State.
- Posts
- 235
Sweet Project, rendering looks great!
Thanks for sharing all the pics. -Ed Nelson
1967 Firebird.......
1970 Corvette. -Sold
01-06-2009 #14 Registered User
- Join Date
- Sep 2007
- Location
- Thehoodstock,GA
- Posts
- 793
Awesome, awesome project!
Love the rendering & love the rear suspension.
Pls keep up posted.MarkK
01-07-2009 #15 Registered User
- Join Date
- Aug 2007
- Location
- East Washington state
- Posts
- 457
I think alot more people will envy your work then talk it down. I don't think anyone really would anyways. Looks a hella lot better than mine and I paid to have it done.
LaMont Mulligan aka munster, leroy, mull, just don't call me late for dinner..
My car is Therapy. 69 - Firebird into Camaro wana be. Sheep in Wolves Clothing. DSE tubs, Air Rides Airbar Rear susp., CPP Tubular CA's w/Shockwaves, Unisteer Rack&Pinion, RS Hideaways, Polished calipers, drop spindles, 4wheel disc, Be Cool rad, 18" Coddingtons Junkyard Dogs w/12"wide mod on rears, BFG KDW's 335/30/18 & 245/40/18 fronts. 383 Stroker, Edelbrock Vic Jr Heads and Manifold, lunati cam solid Roller, Pro-Magnum Roller Rockers, Demon, MSD Dist, 6AL, Thorely Tri Y ceramic coated headers. Converted to 68 dash. Moser narrowed 12 bolt and fitted for Airbar.
01-07-2009 #16
Registered User
- Join Date
- Aug 2007
- Location
- west michigan
- Posts
- 514
I've been waiting to see some of the build shots on this car for a while. Love the rendering.
I think finished this car is going to be awesome...
very cool work so far.Chad Read
01-07-2009 #17
Registered User
- Join Date
- Jan 2006
- Location
- Dallas, Ga.
- Posts
- 439
LOL, You'll be sending a lot more before it's done Frank. Originally Posted by ProdigyCustoms

Thanks for all the compliments guys!
Tommy
01-08-2009 #18
Registered User
- Join Date
- Oct 2006
- Location
- Colorado
- Posts
- 256
Tommy,
The fab work and project looks great! Nice work.
Could you possibly do me a favor and measure the inside width frame rail to frame rail of both the Watts bracket assembly and the 3rd link front frame where they weld to the frame rails? I'm building a Challenger and since LD doesn't make a kit for an e-body mopar I'd be interested in knowing how close the Camaro is compared to my Mopar just to see if it could be modified for my application. Originally LD was to do e-bodies but they never went that far.
Thanks, Wes
01-08-2009 #19 Registered User
- Join Date
- Oct 2005
- Location
- Greenville, IN
- Posts
- 1,072
KilleR MetaL work there! LovE the coloR and the StylE of that year CamarO! Keep us up to DatE; PleasE!
Kevin
01-08-2009 #20 Full Blown G-Machiner
- Join Date
- Jan 2007
- Location
- Phx, Az
- Posts
- 924
that paint sceme is sweet! awsome ride
1973 C10,400sbc, Baer Brakes, 4 link,TOYO tires
2010 Charger RT
__________________
Joe

 Reply With Quote



