


Results 41 to 60 of 451
Thread: TwinTorino
-
01-10-2009 #41

 Registered User
- Join Date
- Oct 2005
- Location
- Greenville, IN
- Posts
- 1,072
LookS PrettY GutteD! Smok'N man, Smok'N!
Kevin
-
01-17-2009 #42 Registered User
- Join Date
- Nov 2005
- Location
- Motorcity, Canada
- Posts
- 292
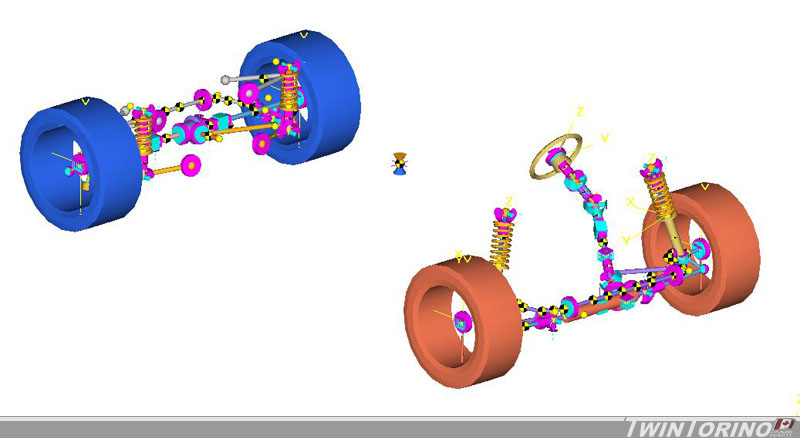
We have been spending some time lately figuring how we want to set the suspension up, and seeing what we want to run for hard points on the chassis etc. We also want to figure out how to set up the rear springs/shocks, since there is not a lot back there. We started to get the chassis points into the computer and figure out roughly how the car will behave when we set up the points the way we want to. The models is being created using program called Motionview (by Altair Engineering) which is for multibody dymanics. This is then sovled using a program called ADAMS.
Here is the model as it is today. The front and rear suspension have all the basics points in. Not much to see aside from the bare basics. You can clearly see all the main suspension parts for the front MacPherson strut suspension and SLA rear IRS. The key here is the info it spits out.. and not having detailed graphics. I will post some animations once they are up and running, as it makes more sense when you see things moving. Now it is time to determine the kinematic behavior of the car (camber/caster/toe curves) and them move onto the dynamic side of things (spring rates, shock rates etc). Also been spending some time with a complete 3D rendering of the car which should be ready to post in a week or two.
This is much easier to do now before everything is finished, and it is not really easy to guess how a car will behave by just looking at where points are. This will provide a starting point for setup, as it is much harder to move points when everything is welded in for good.
01-27-2009 #43
Registered User
- Join Date
- Nov 2005
- Location
- Motorcity, Canada
- Posts
- 292
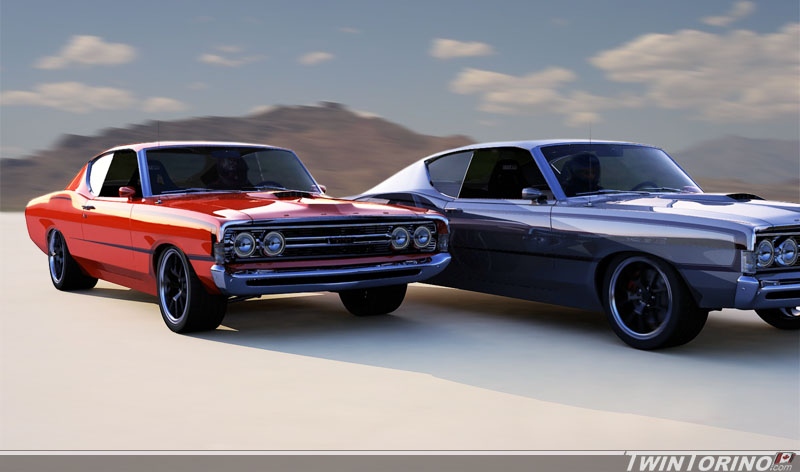
Finally got some renderings going for the cars.. figured I would post here as well as it goes along with the build progress of the cars. This was my first crack at 3D rendering.. just needed a good project to learn how to use it. More to come in the near future.
Also have lots more done on the front suspension and the subframe connectors. Pics to follow shortly.
01-27-2009 #44 -Moderator/Sponsor-
- Join Date
- Apr 2001
- Location
- The City of Fountains
- Posts
- 16,126

Great work!
Andrew1970 GTO Version 3.0
1967 Cougar build
GM High-Tech Performance feature
My YouTube Channel Please Subscribe!
Instagram @dr__efi
I deliver what EFI promises.
Remote Holley EFI tuning.
Please get in touch if I can be of service.
"You were the gun, your voice was the trigger, your bravery was the barrel, your eyes were the bullets." ~ Her
01-27-2009 #45 Pro-Touring.com Sponsor
- Join Date
- Aug 2004
- Location
- Chicagoland
- Posts
- 957
I dig this car. Nice job!
Jeff Schwartz 815-770-0751
SchwartzPerformance
Where classic style meets modern performance.
455 Commanche Circle
Harvard IL 60033
SchwartzPerformance.com | Facebook | Twitter
01-27-2009 #46 Registered User
- Join Date
- May 2007
- Posts
- 60
Nice rendering! Can't wait for updated pics.
69 Torino GT Formal Roof
420" W - TKO 600
01-28-2009 #47 Registered User
- Join Date
- Apr 2007
- Location
- SEBRING, FL
- Posts
- 160
Liking this project! I need to turn my brother on to this thread, seeing how he has a 69 429 CJ he's been redoing, I think he would love this. Keep it coming!
01-30-2009 #48
Registered User
- Join Date
- Nov 2005
- Location
- Motorcity, Canada
- Posts
- 292
Couple more updates:
Three main things on the go right now - front suspension/steering/brakes, floor of car/subframe connectors and steering column/pedal setup and seat positioning. Rear suspension is on hold until custom bent tubes and rear coil overs arrive.
First the suspension. Have found most of the front suspension components online in the past month or so (nearly new for discounted prices of course). Nice thing here is since I am running SN95 (1994-2004) Mustang based suspension - the sky is the limit with aftermarket parts.
Front suspension will consist of (parts are on the way or in hand now for one car):
Maximum Motorsports front tubular lower control arms
Koni dual adjustable (DA) front struts with adjustable rebound and compression damping
Maximum Motorsports coil over kit
Maximum Motorsports caster camber plates
Stock Mustang front spindles/hubs
Hypercoil springs - have not decided on rate yet
Since the strut rods are no longer needed, the brackets that house the bushings were removed. Custom brackets will be made up to stiffen the area once again and also provide mounts for the radiator, A/C condensor and ABS unit.
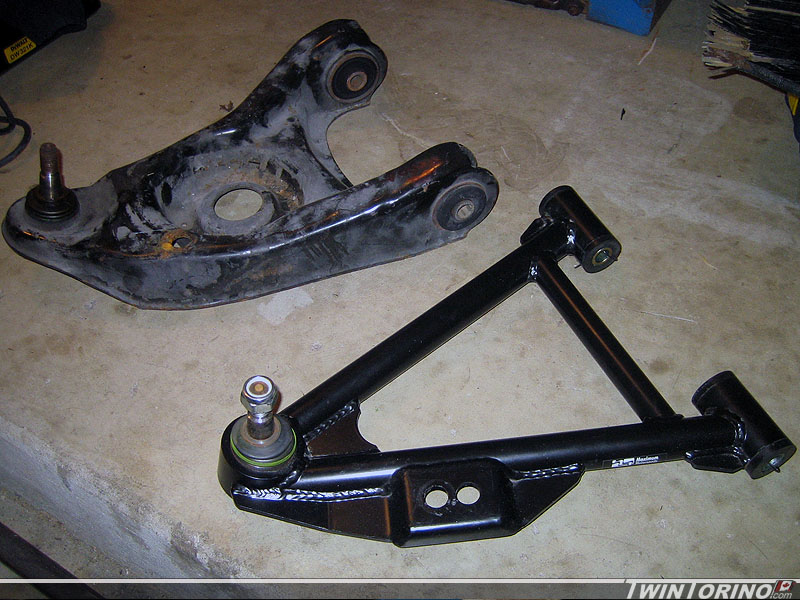
With the suspension almost in position, the stock control arms make contact with the frame. Tubular control arms correct this issue, although just barely. The goal here is to get the suspension in the exact same position as in a stock Mustang to keep the suspension geometry the same (easier said than done as we are finding out).
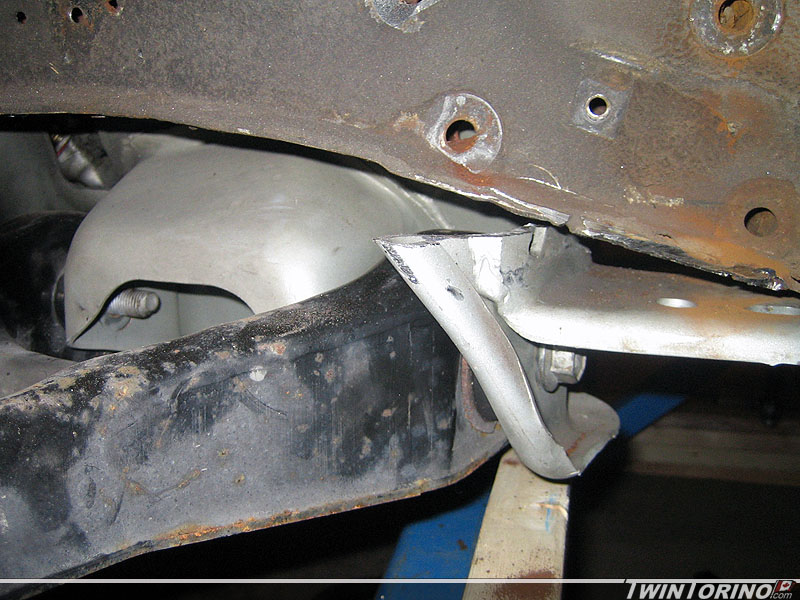
Nearly new tubular control arms compared to the old ones. Since we are running coil overs, spring pockets are no longer needed. They are also lighter and much better looking.
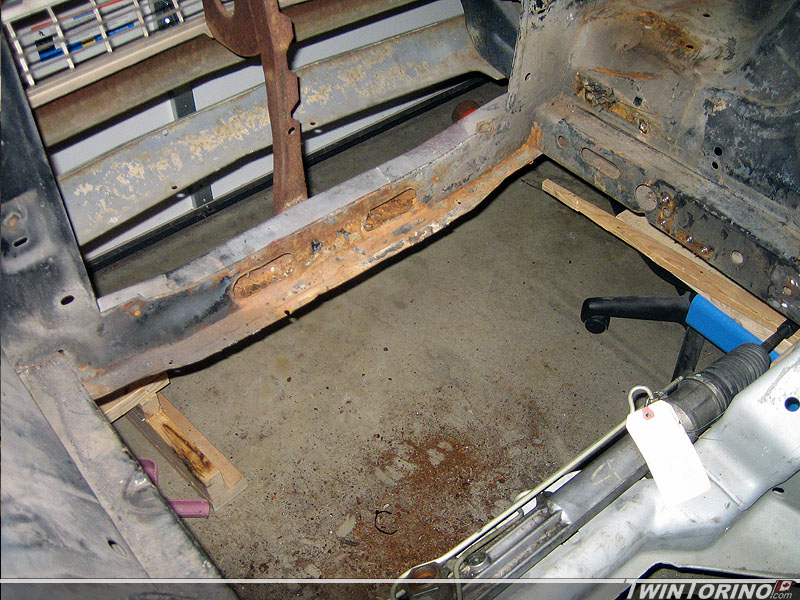
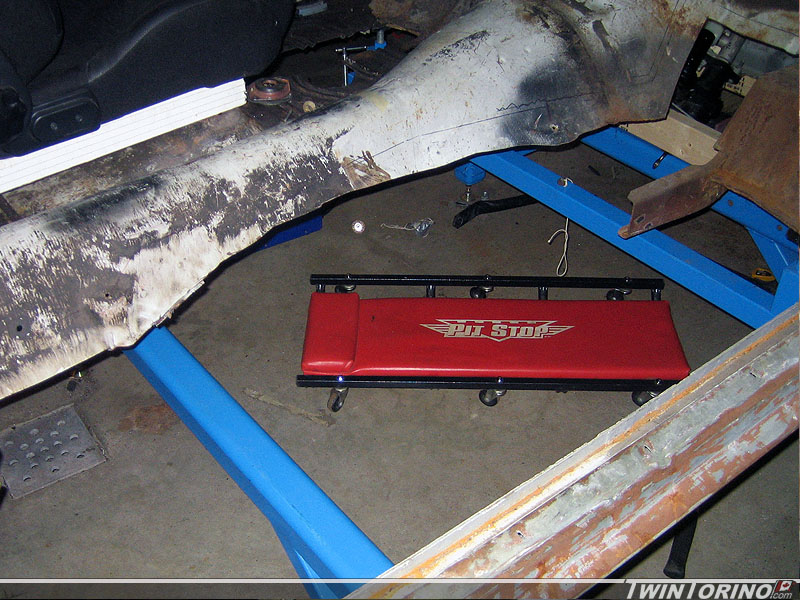
As for the subframe connectors - hoping to have them in within the next week or so. The passengers side is nearly ready to go in. Just have to jog the subframe connector 4" as the front subframe is 4" inboard of the rear (more to come on that shortly). As you can see, the front trans mount has been removed, and the remaining piece left will be used for welding to the connectors. A custom trans mount will need to be made for the 6-speed, and also a driveshaft loop needs to go in as well as seat mount supports. This will all make a bit more sense once they start going in.
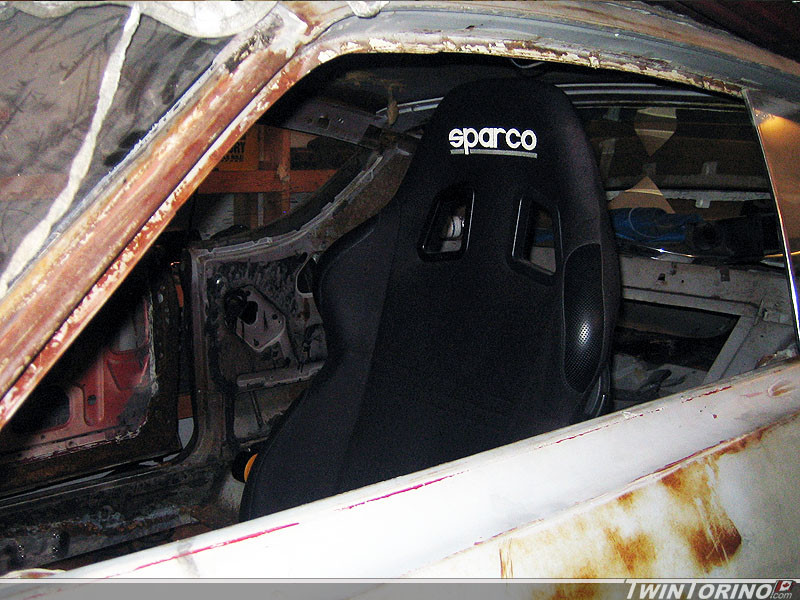
Got started on laying out the driving position this week as well.
Starting fitting the Sparco's into the car. They are extremely comfortable and will help keep a person planted when on the road course. Stangely enough, sparco does not make seat adapters to bolt into a Torino, even though the model name is Sparco Torino .
.
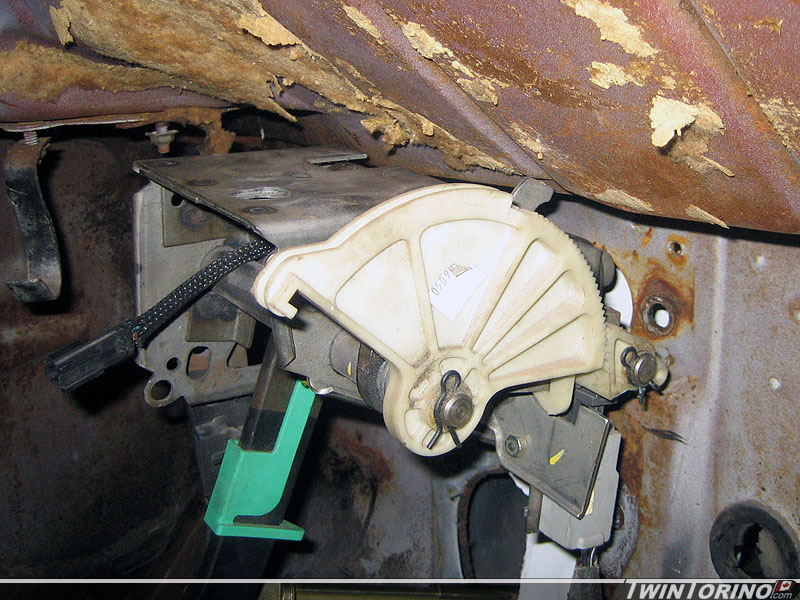
Started to fit the Mustang pedals into the car. Several reasons for using these instead of Torino ones. Mustang uses a cable clutch and Torino ones need significant mods to make work with the clutch quadrant. Want to be able to keep the stock Mustang pedal ratios going into the hydroboost. Want to be able to use the stock Mustang electronics since all the dash wiring is from a 2004 Mustang. Also like the pedal positions much more and they are much better for heel/toe driving on the track. Measurements were taken from a 2004 Mustang to be able to position the pedals the same distance from the firewall, height off the ground, and releationship to the steering wheel. The goal here is also to use a stock floor shift Torino column as I hate the look of a new column in an old car.
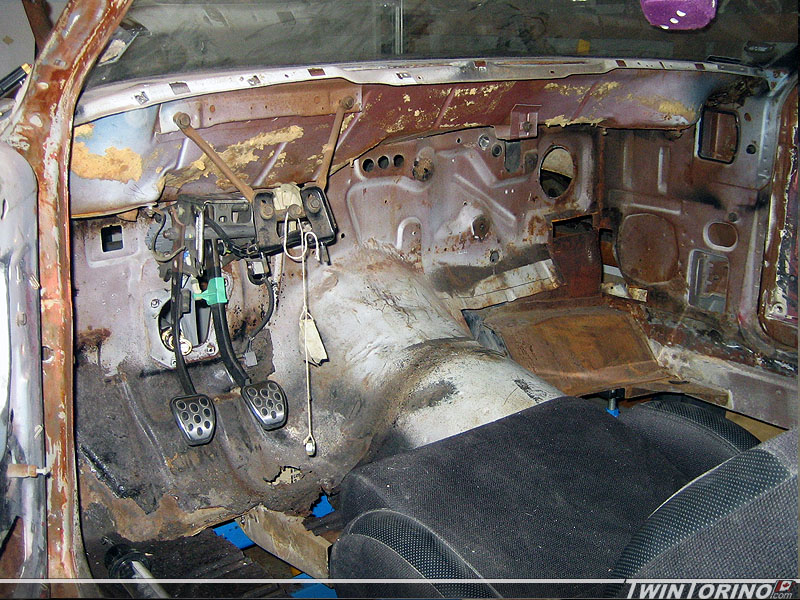
Well.. here is the first issue as we were expecting. The clutch quadrant hits the windshield wiper motor area. This area will need to be modified to make it work. It is looking like we will end up grafting a Mustang firewall onto the Torino. That way everything will bolt right up (including brake clutch and gas pedals, steering column, hydroboost unit, heater box and all wiring and cable pass throughs) and look much cleaner. Since we have 2 complete Mustang firewall assemblies and a plasma cutter.. this should not be a big deal.. famous last words I guess.
Stay tuned..
02-02-2009 #49
Registered User
- Join Date
- Nov 2005
- Location
- Motorcity, Canada
- Posts
- 292
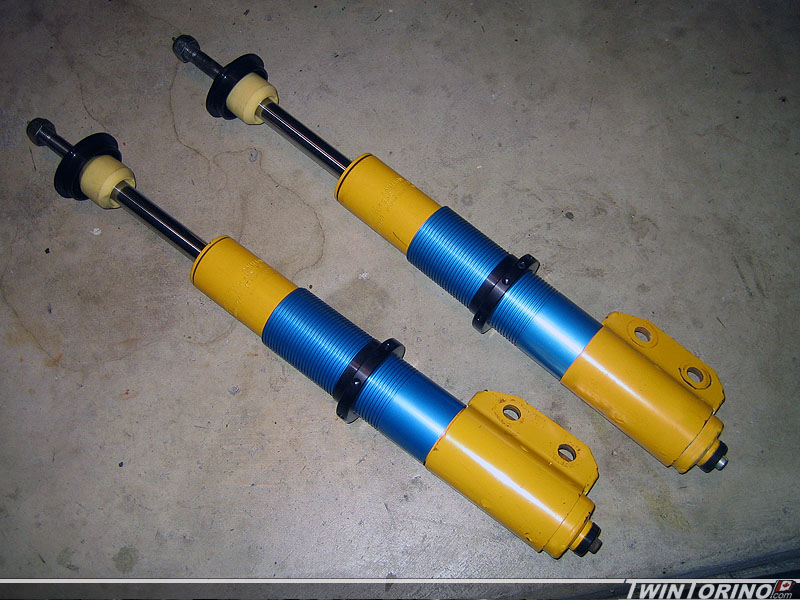
All the go fast parts are now starting to arrive as I find them on the net (used of course). These are the front struts for the car. They are dual adjustable (DA) Konis with adjustable rebound and compression settings to I can turn the fun on when I arrive at the track. I also added the Maximum Motorsports coil over kit. Kinda scary.. but this kit new would have cost me more than I paid for my complete Torino. I should have everything else for the suspension in the next couple weeks.
June is quicky approaching - need a running and driving car for the Hot Rod Power Tour which is rolling through MI. That is only 4 months away!! Paint can wait until the fall.
02-03-2009 #50 Registered User
- Join Date
- Nov 2008
- Location
- Westminster, MD
- Posts
- 579
Incredible build! Love the resources you're using, going to be a nice pair of Torinos!
Ed Cooney
'96 Buick Roadmaster Estate Wagon, LT1/4L60, full bolt-ons & Solomon's tune, 18" Ridler wheels, lowered with Belltech springs
‘70 Buick Skylark Convertible project w/ GN drivetrain
'91 Formula, pending track day build
02-09-2009 #51
Registered User
- Join Date
- Nov 2005
- Location
- Motorcity, Canada
- Posts
- 292
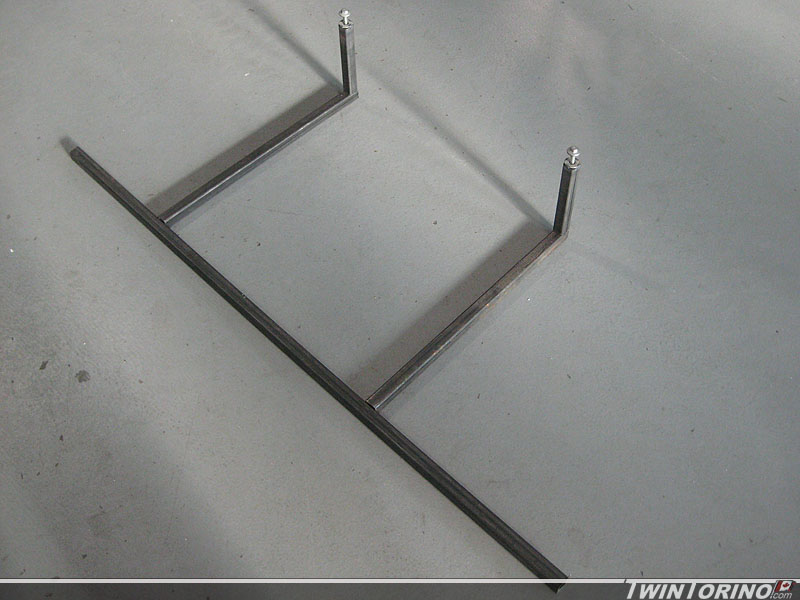
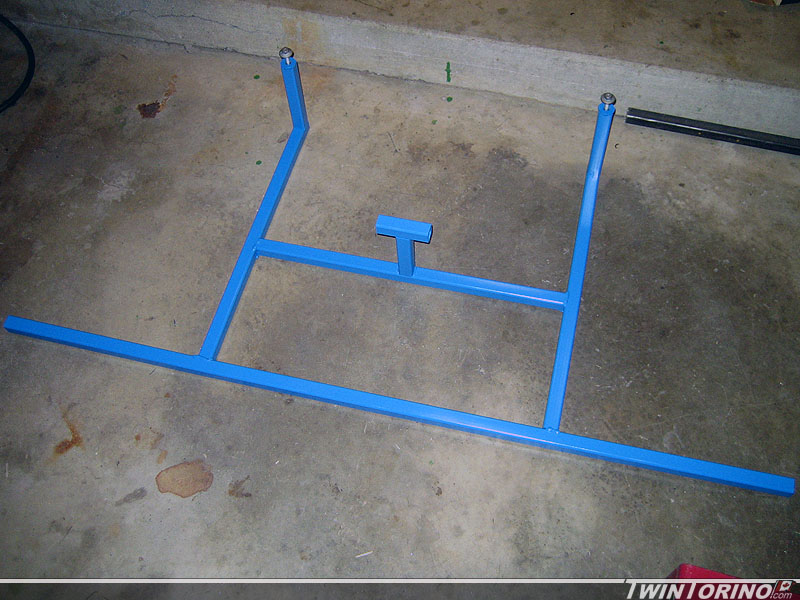
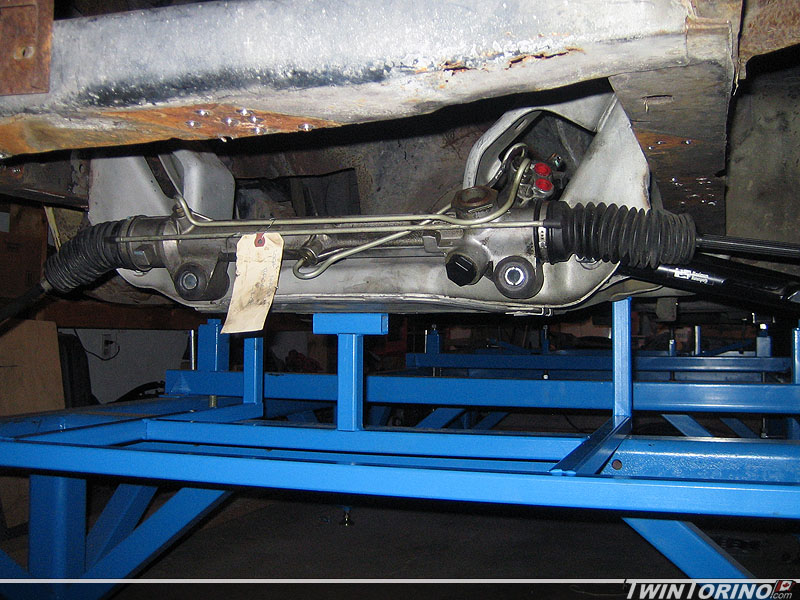
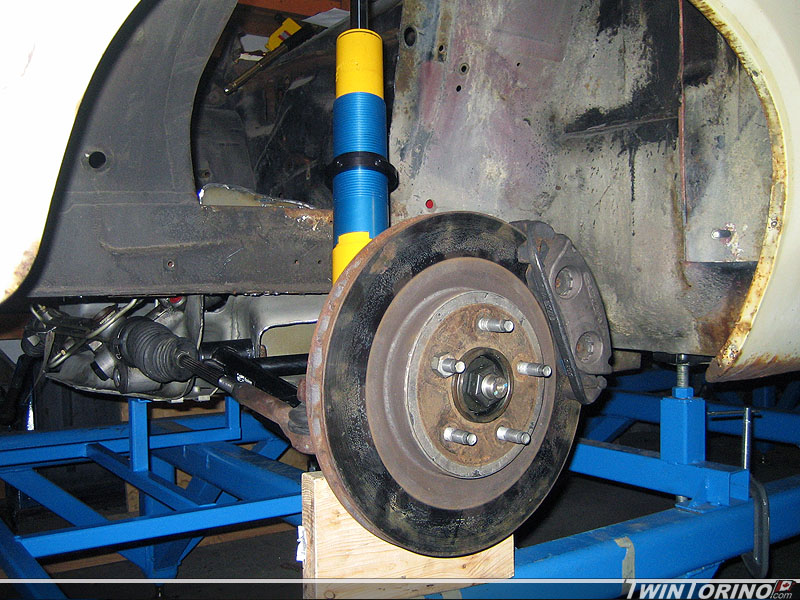
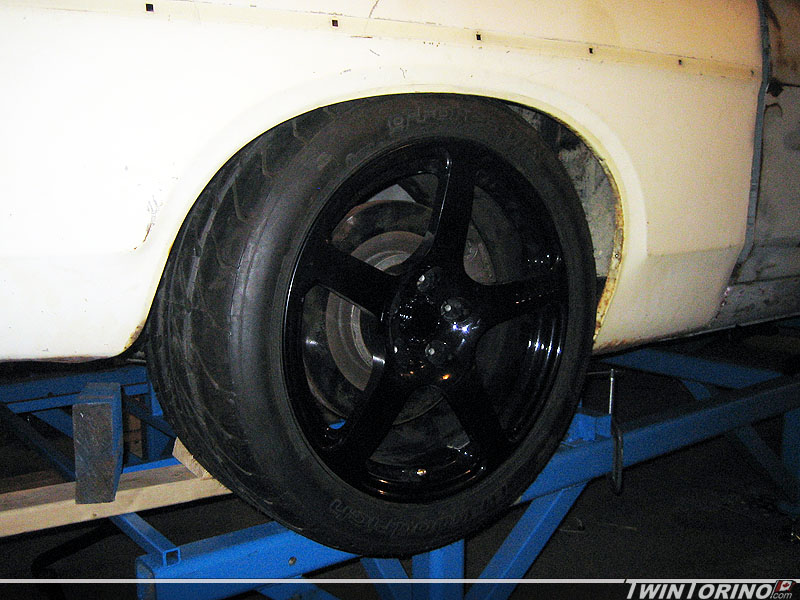
In order to get the suspension in place and get the suspension in the correct vehicle position, we needed to build a fixture that would work with our chassis jig. The k-member was used as reference and mounting points were chosen and located. Once this was built, it was placed on the vehicle so a tire and wheel could now be put into place. Finally starting to look like a real front suspension. Lets just say that 18x10's are a tight fit up front and will likely not fit. They will likely need to be narrowed as that is the only size they come in. They are Roush forged 18x10's and will likely be the track trims. Lots of new clearance issues came up with this.. and we be datailed as the install continues. The coil overs are going to prove to make matters worse for clearances. More carnage to come tomorrow (Torino Tuesday) as we start hacking up the firewall to fit all the Mustang components. Stay tuned..
02-12-2009 #52
Registered User
- Join Date
- Nov 2005
- Location
- Motorcity, Canada
- Posts
- 292
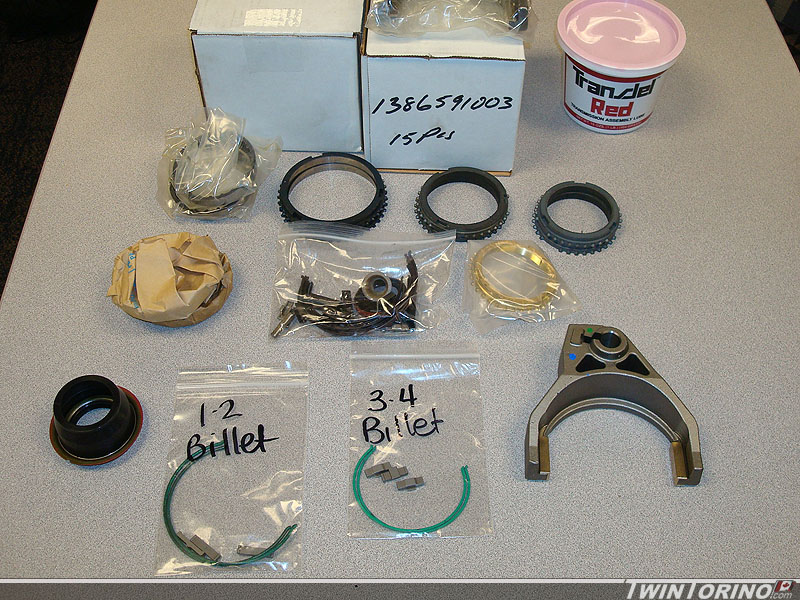
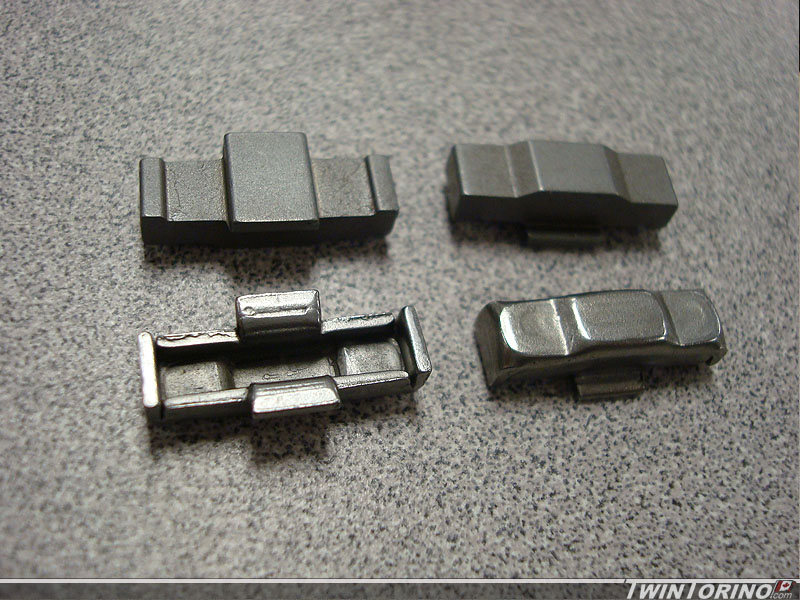
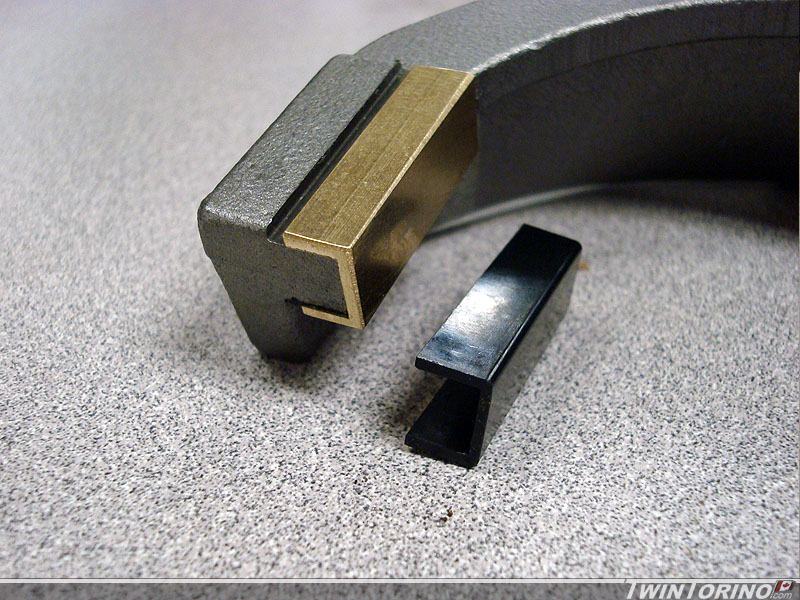
It is finally transmission rebuild time. Since we both bought known broken transmissions (to save money of course) we knew we would have to rebuild these anyway. We decided to upgrade the known weak points in the T56 transmission since these cars will see some track duty. The kit upgrades the trans with carbon kevlar synchronizer rings and replaces all of the typical wear items. There are two main weak points inside the case: 1) The stamped 1-2 and 3-4 keys are being replaced with billet ones as shown below. 2) The aluminum 3-4 shift forks are being replaced with steel pieces (from a Viper trans), and also replaced the plastic fork pads with brass ones.
02-12-2009 #53
Registered User
- Join Date
- Nov 2005
- Location
- Motorcity, Canada
- Posts
- 292
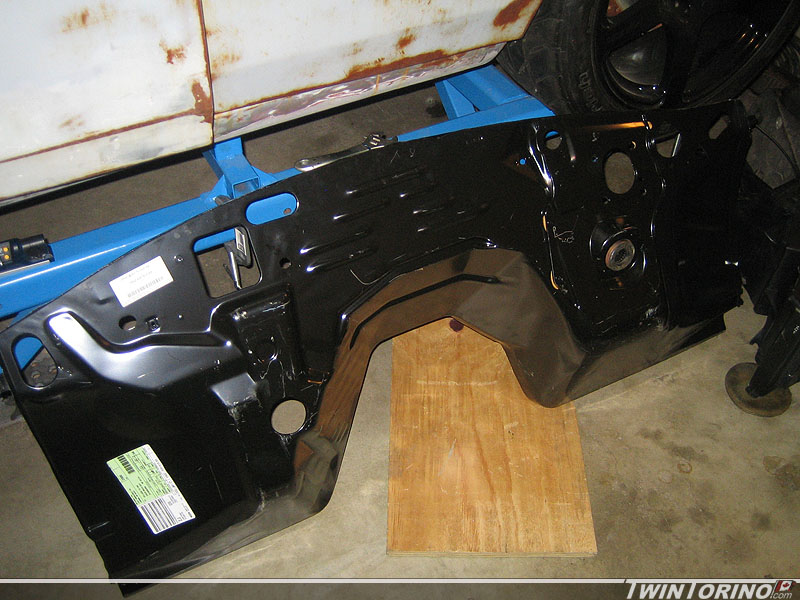
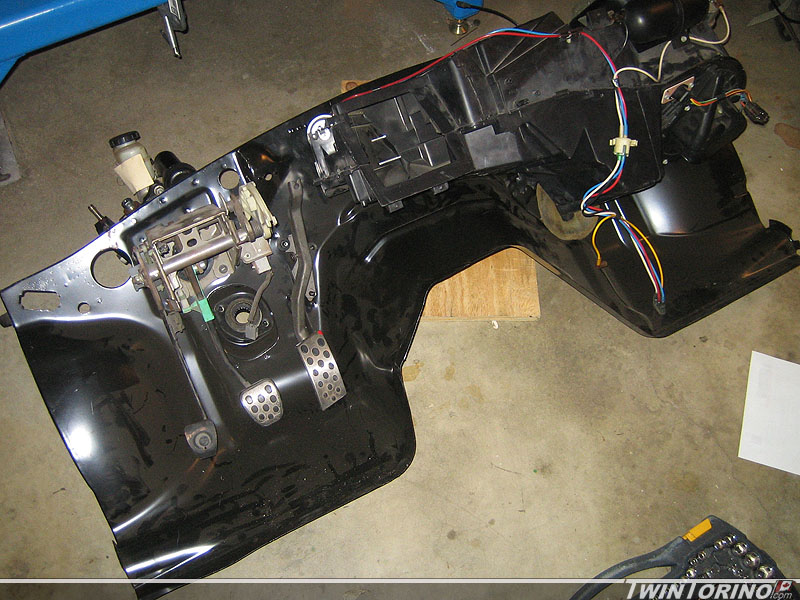
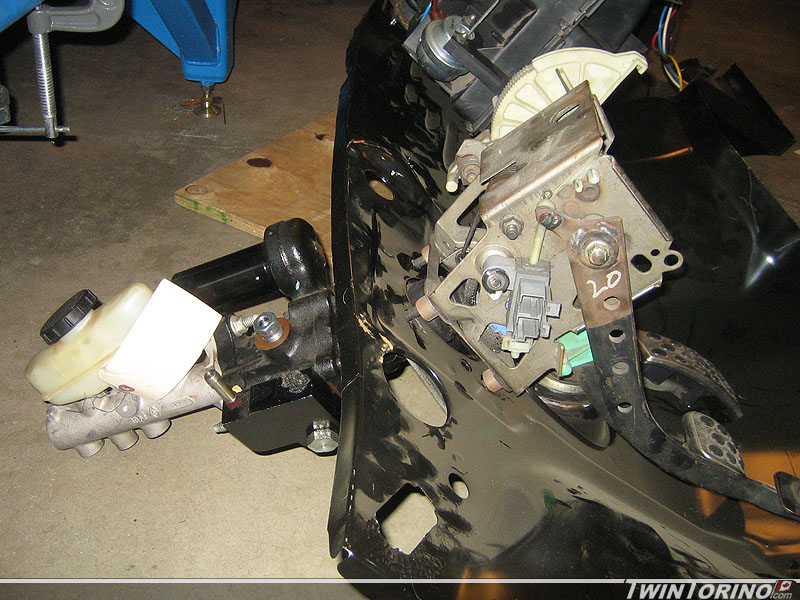
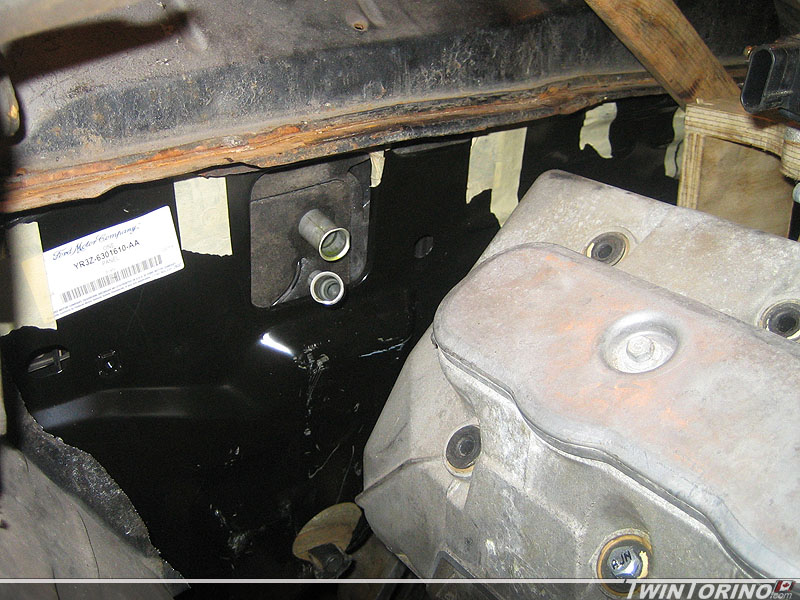
After going back and forth on how to make these pedals work out, along with the clutch cable, gas pedal & cable, heater box, wiring harnesses, steering column pass through etc. etc, we can to the conclusion that the firewall would likely be hacked to pieces by the time we got done with it. If only we had a firewall from a Mustang. We had two that were already part of a complete car, but those have lots of other pieces spot welded to them and they would likely be ruined trying to get the out, let alone how long it would take. I put a call into a friend who works at a dealer, and the next thing I know he was telling me that firewalls are available and are cheap! I guess when you think about it - how often would a firewall be replaced? Are car would likely be written off before needing to replace one. As you can see below - everything wil bolt up nicely and look like it was supposed to be there. Obviously this is not a quick bolt on modification and will require lots of cutting and welding, but it will be worth it in the end for sure. In the end, the cost of the firewall was less than 2 replacement Torino toe pans, so this was a no brainer.
02-17-2009 #54
Registered User
- Join Date
- Nov 2005
- Location
- Motorcity, Canada
- Posts
- 292
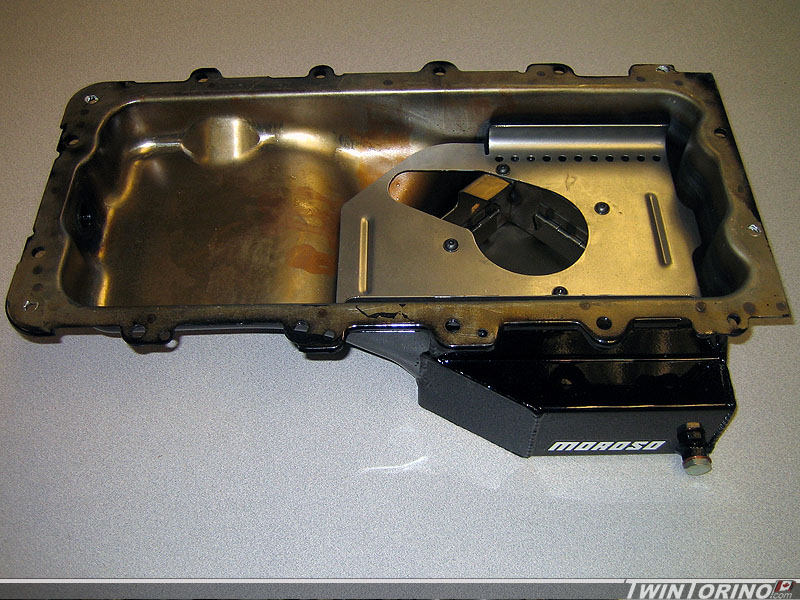
Starting to order up some of the parts required to rebuild the engine (or at least check it out) and then add part like oil pans that are spefically for road racing. We decided to get a Moroso pan that is specifically designed for use during on track events and has seprate trap doors to keep the sloshing to a minimum.
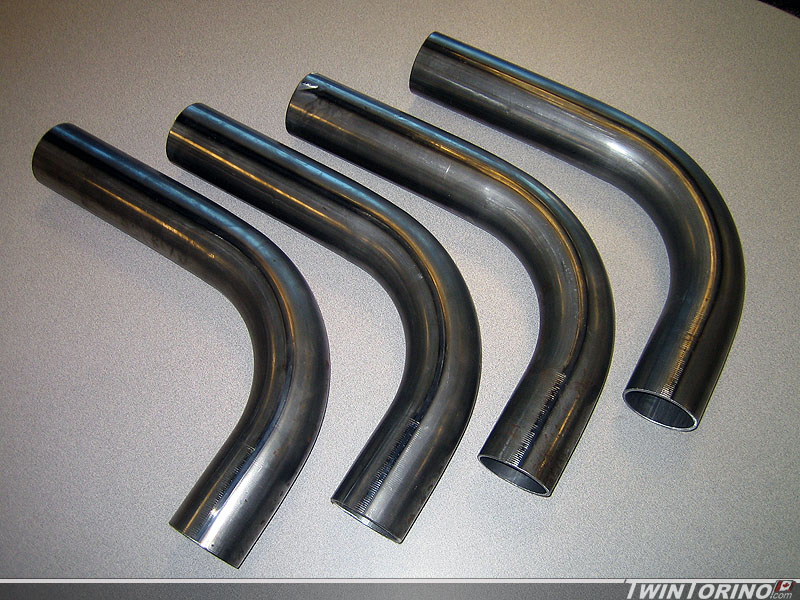
Also had the IRS tubes show up today which will allow us to complete the rear suspension install. These are 2.5" x 1/8 wall tubes we had custom CNC mandrel bent for this application. They came out great as you can see.
02-17-2009 #55
Registered User
- Join Date
- Nov 2005
- Location
- Motorcity, Canada
- Posts
- 292
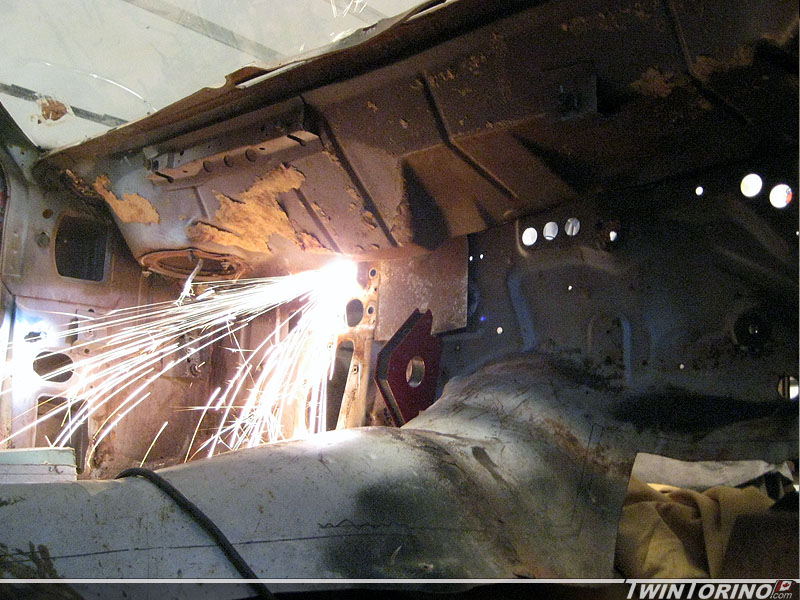
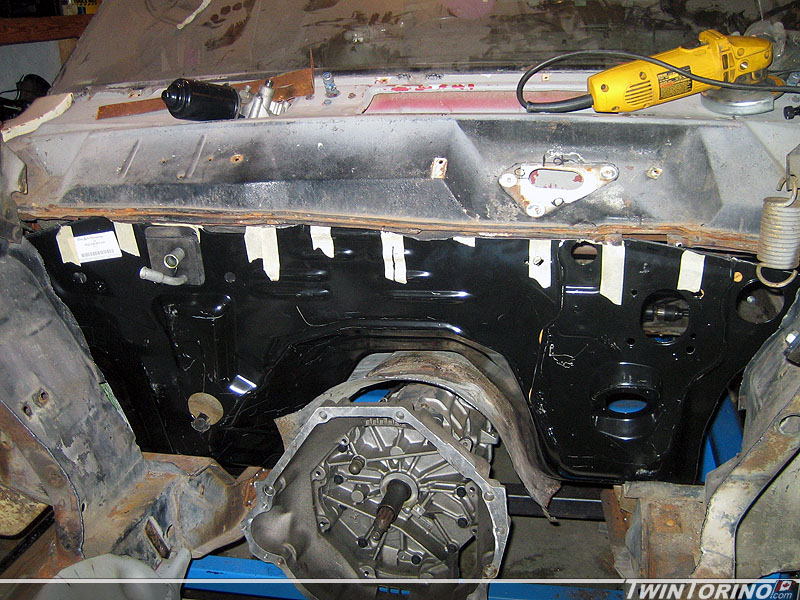
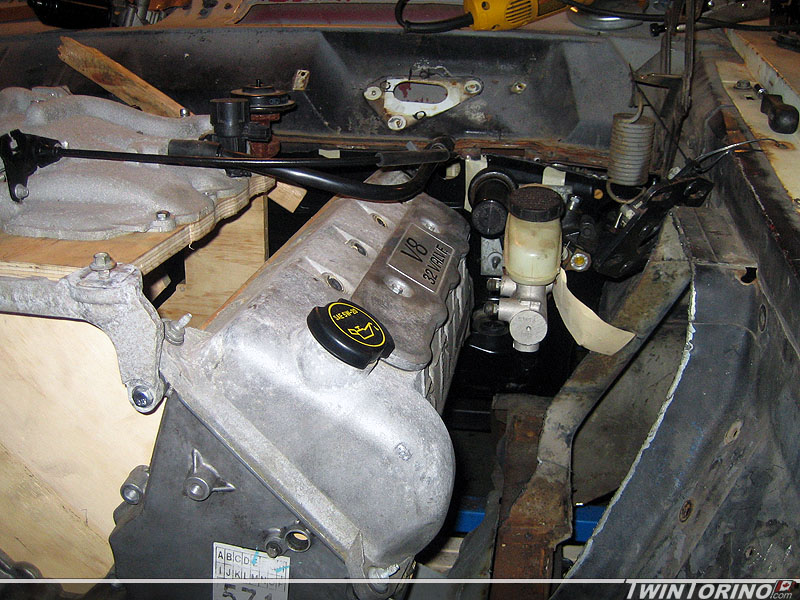
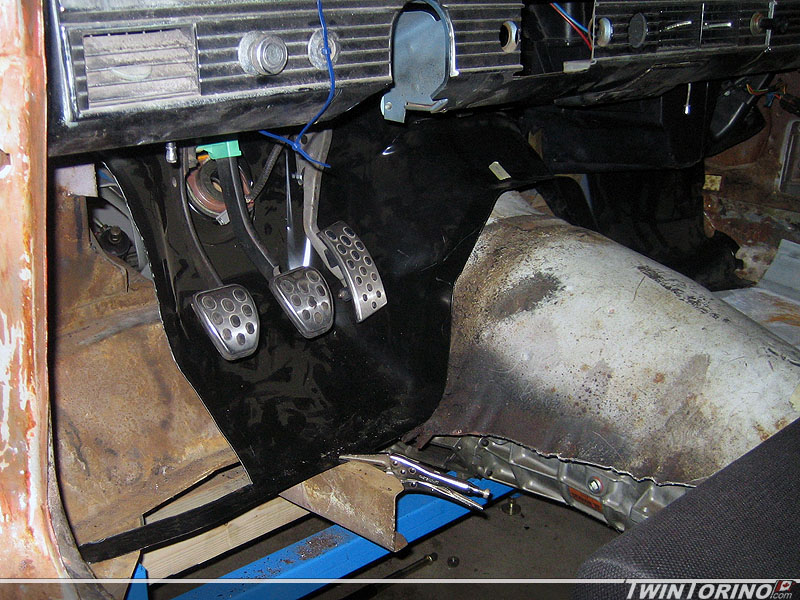
Too late to turn back now. Firewall is now gone and there is now a large hole in the car
. Surprisingly, with only some slight removal of material from the Mustang firewall, the piece started to fit up quite nicely. It will obviously need material added in certain places since the Mustang is a diffrerent size vehicle altogether. Started to install parts to see how they fit into the package and everything is finally falling into place. Pedals, hydroboost, steering shaft and heater box were all installed. Next the trans will be installed so we can see what is going to have the happen to the trans hump if anything. With the engine in, everything also fits nicely. The throttle and clutch cables also worked out quite nicely. The pedal spacing is much better compared to stock as well. Not sure what the pedal pads will look like in the end, but for now they will retain the 2004 SVT Cobra look.
02-18-2009 #56 Registered User
- Join Date
- Apr 2005
- Location
- dayton, oh
- Posts
- 952
great project. reminds me of the sn65 project.
is this all just on the one car? or are both at the same spot?
02-18-2009 #57 Registered User
- Join Date
- Nov 2008
- Location
- iceland
- Posts
- 1,859

Wow awesome metal work....keep posting pics
Bjarni B
My Chevelle project The Awakening
http://www.1971chevelle.net/

http://www.kvartmila.is/smf/index.php?topic=27028.0
CHEVY POWER RULES!
02-18-2009 #58
Registered User
- Join Date
- Nov 2005
- Location
- Motorcity, Canada
- Posts
- 292
Thanks guys - I appreciate the comments.
There are definitely similarities between these and the SN65. We are focussing on making this a daily cruiser, but have the adjustability to make it suitable for the track car on the weekends. Most of the suspension has been modified as you can see.
The big thing we are doing is here is setting the suspension to where it would be on a stock Mustang (not lowered). This way we do not have issues with bump steer and camber change like a lowered Mustang would have. We set the suspension to a "design" height and lower the body to get the ride height (which required a lot of cutting to make it work). To do the equivalent to this on an SN95 Mustang would require moving every suspension point up to match the height that the car was lowered (Very difficult and time consuming as you would imagine).
Main focus is on Torino #1 right now, but we are buying and making 2 of everything as we go. Once the IRS cradle is fixed in place as well as the firewall and front suspension, this car will come off the jig and the other one will go on. The second car will go much much faster since we have fixtures built and we will know exactly what to do the second time around. At this point we have 2 of everything for the most part (engine, IRS, trans, front suspension, brakes, pedals etc).
03-02-2009 #59
Registered User
- Join Date
- Nov 2005
- Location
- Motorcity, Canada
- Posts
- 292
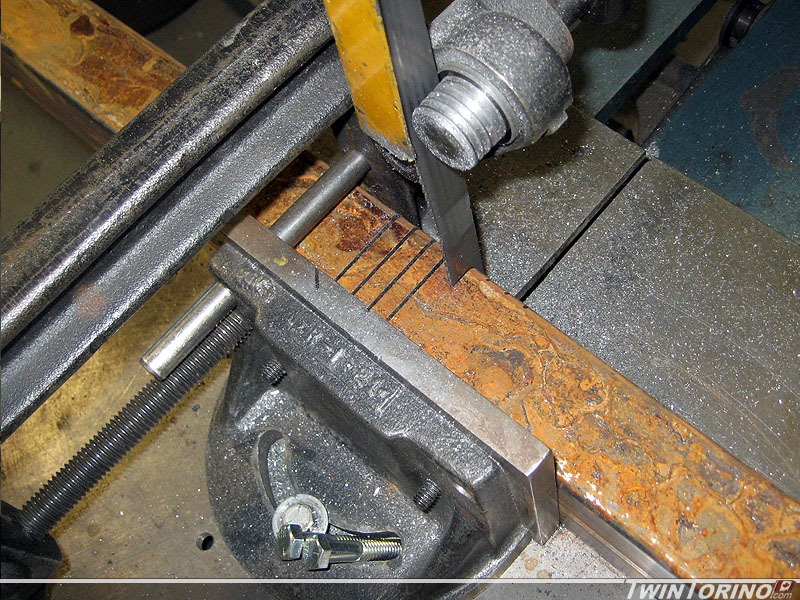
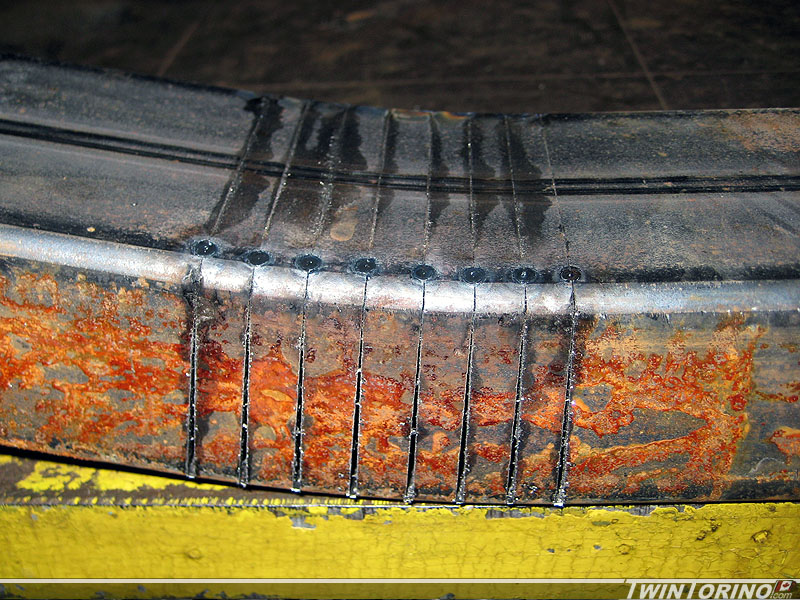
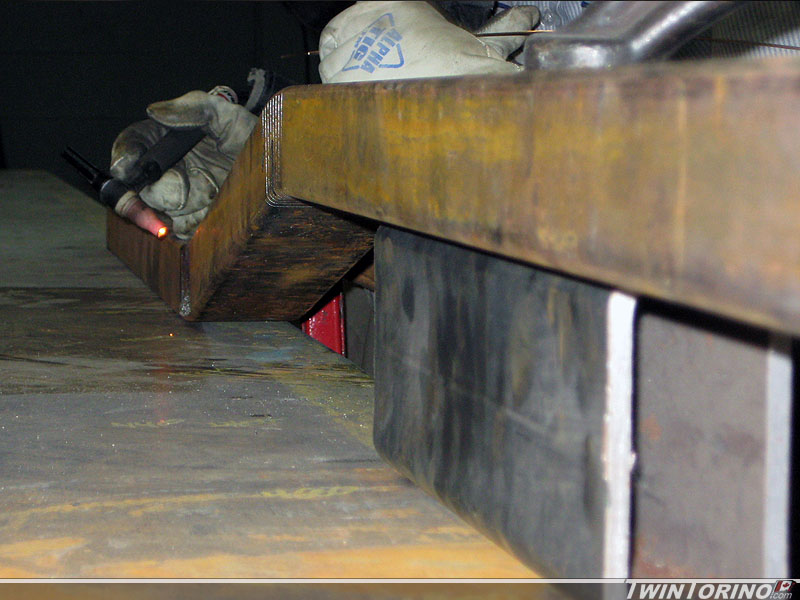
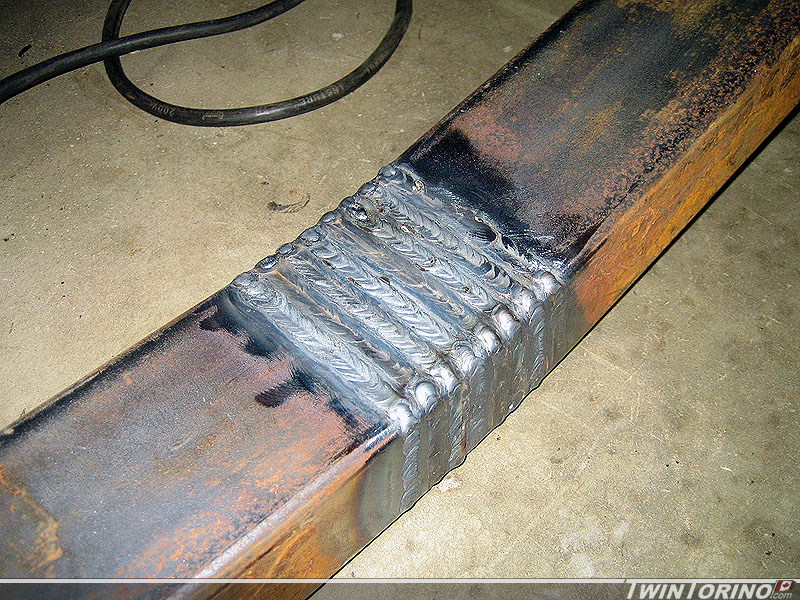
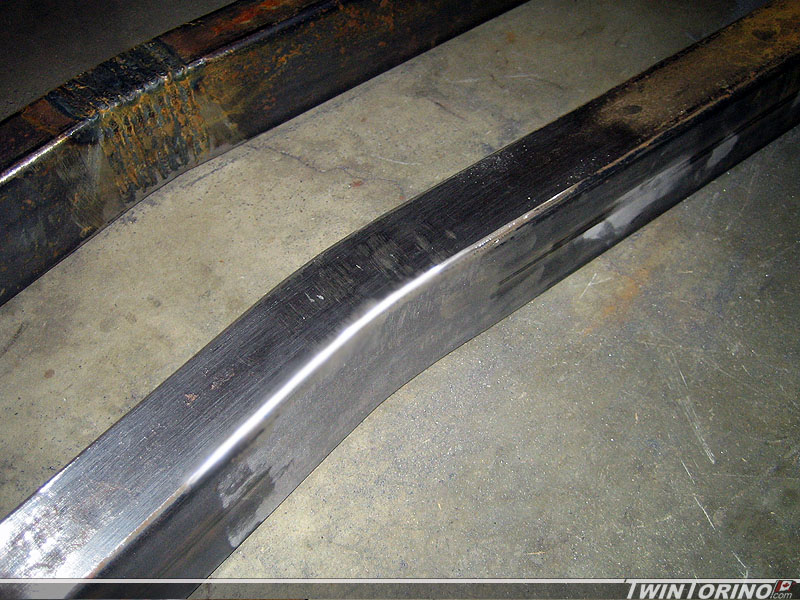
Finally making some progress on stiffening up the chassis. Since the floors are cut out, we decided to run a full connector from the front torque box / frame rail to the rear one. The goal here is to make it look like the frames connect to one another and make it appear factory installed. First problem with that idea is the front subframe is offset 4" from the rear. We decided to add a 4" jog into the part as shown below. This involves calculating the angle to bend the material, measuring the width of the bandsaw blade, and then making the necessary cuts to get there. Then lots of miles on the TIG to attached everything together again. It is a rather long process in comparison to just notching it out, but looks much cleaner (even though noone will likely notice once installed).
Also started to grind away some of the weld to smooth the surface out. Very happy with the end result. Should be able to get them cut to length and start cutting up the floors to make them fit this week.
03-02-2009 #60
Registered User
- Join Date
- Nov 2005
- Location
- Motorcity, Canada
- Posts
- 292
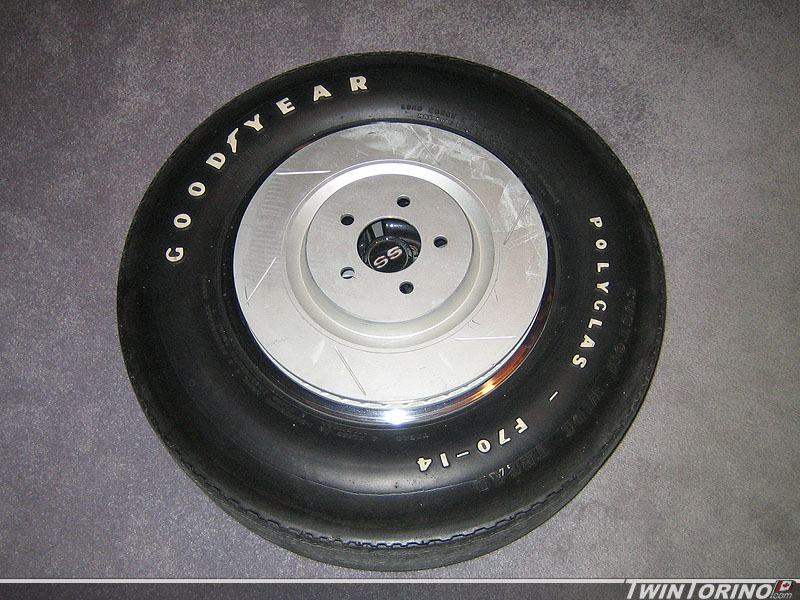
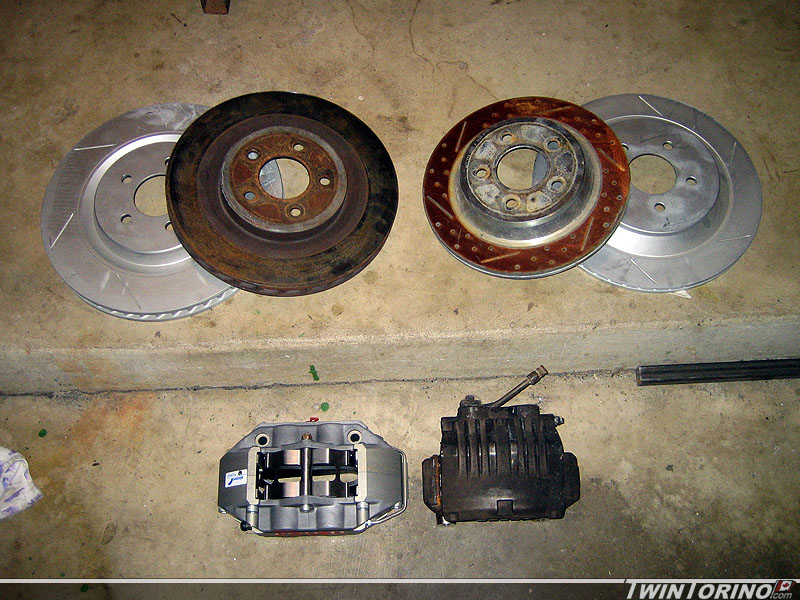
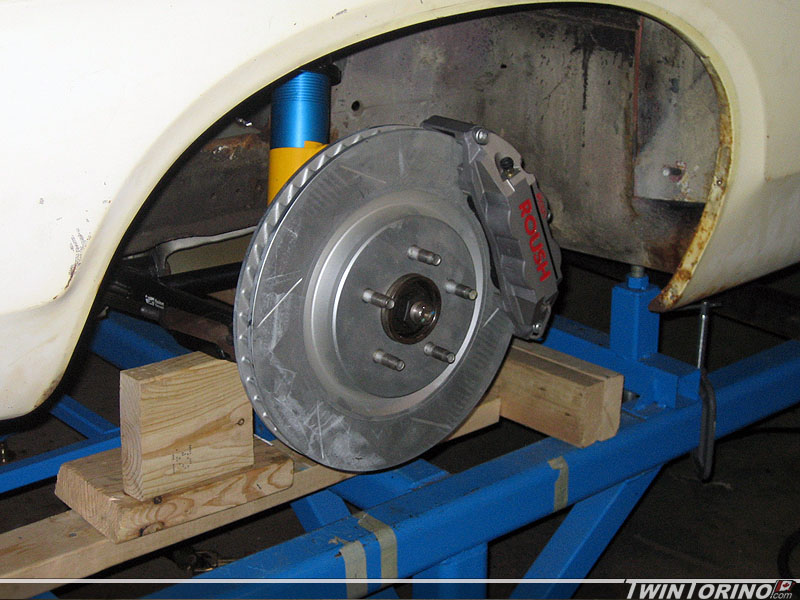
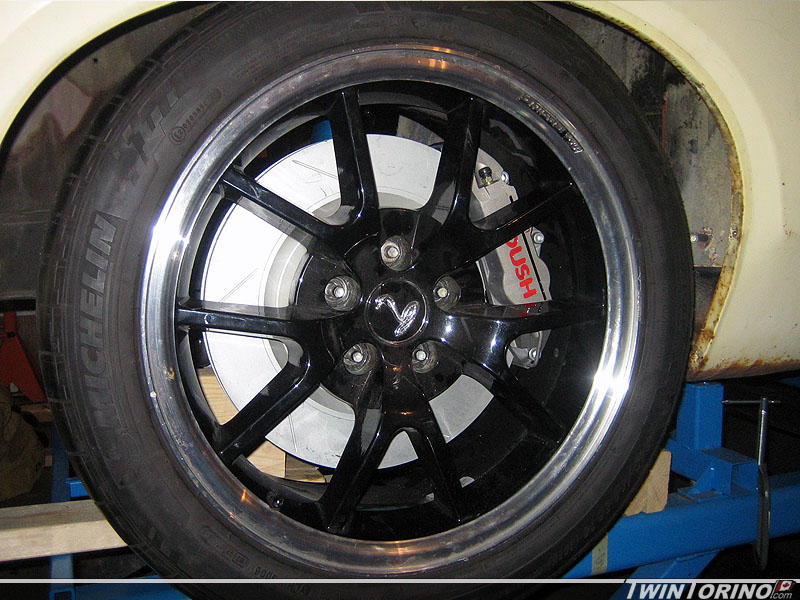
Well.. I typically run on a tight budget and hate to buy anything new.. but I had to make an exception. I found this set (technically 2 sets I guess) of Roush Alcon brakes at a great price on clearance. I just had to have them. The calipers and rotors and made by Alcon, and the misc hardware and mounting brackets are made by Roush. This kit is made for the Roush Stage 3 Mustangs from 1999-2004 (SN95). The front rotors are 14" (compared to the 13" Cobras) and the rears are 13" (compared to the 11.65" Cobras). The calipers are 4 piston with race/track pads. Can't wait to see how these work. The barely fit within the 18" FR500 wheels. I have had issues in the past with melting the dust boots on the Cobra brakes, so hopefully that problem will go away.
How big are 14" rotors? They are the same size as the rims on a 1969 Camaro..

 Reply With Quote


