


Results 1 to 20 of 45
-
10-19-2012 #1
 Registered User
- Join Date
- Nov 2004
- Posts
- 444

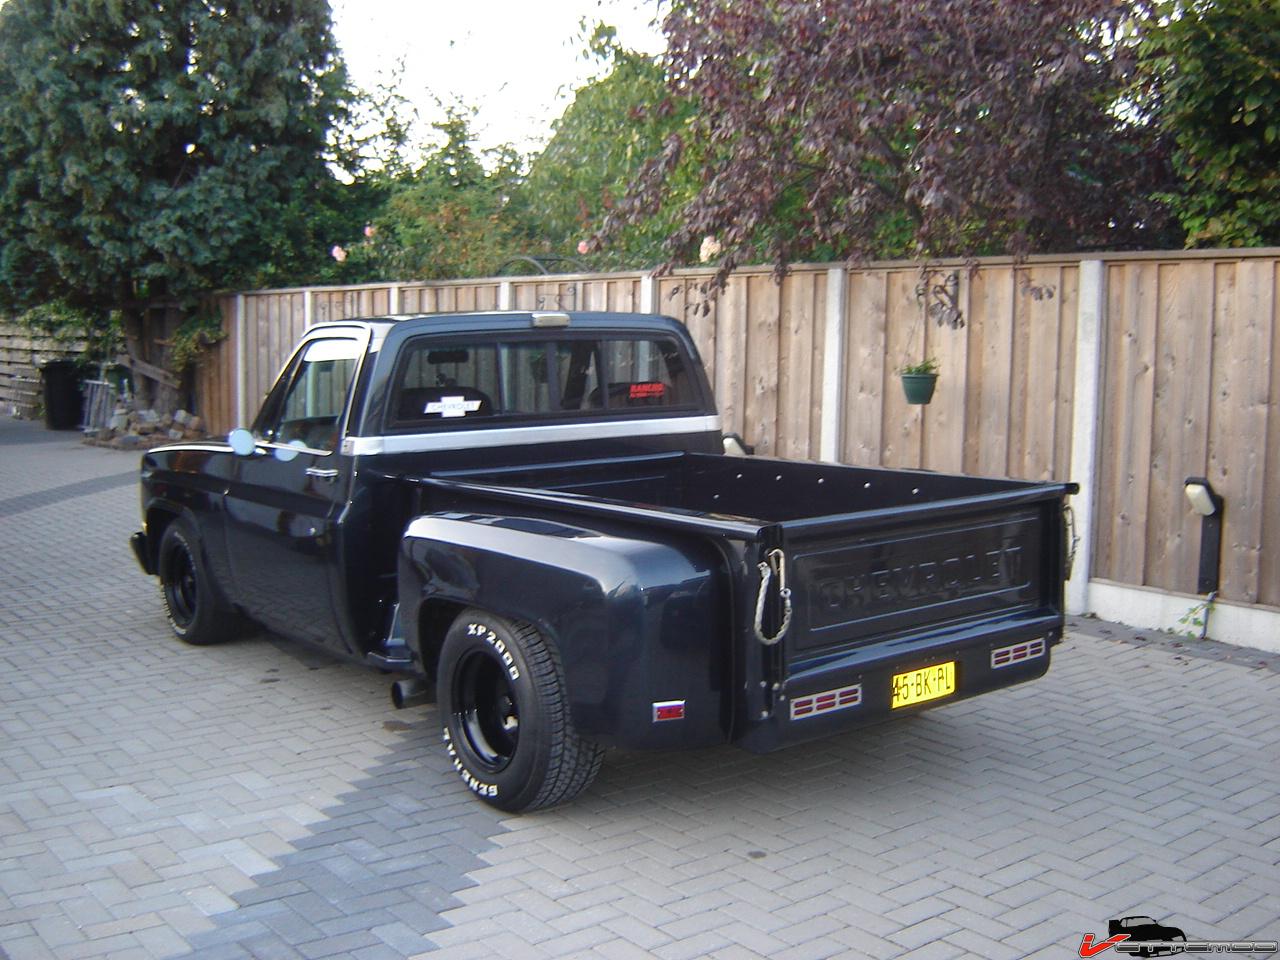
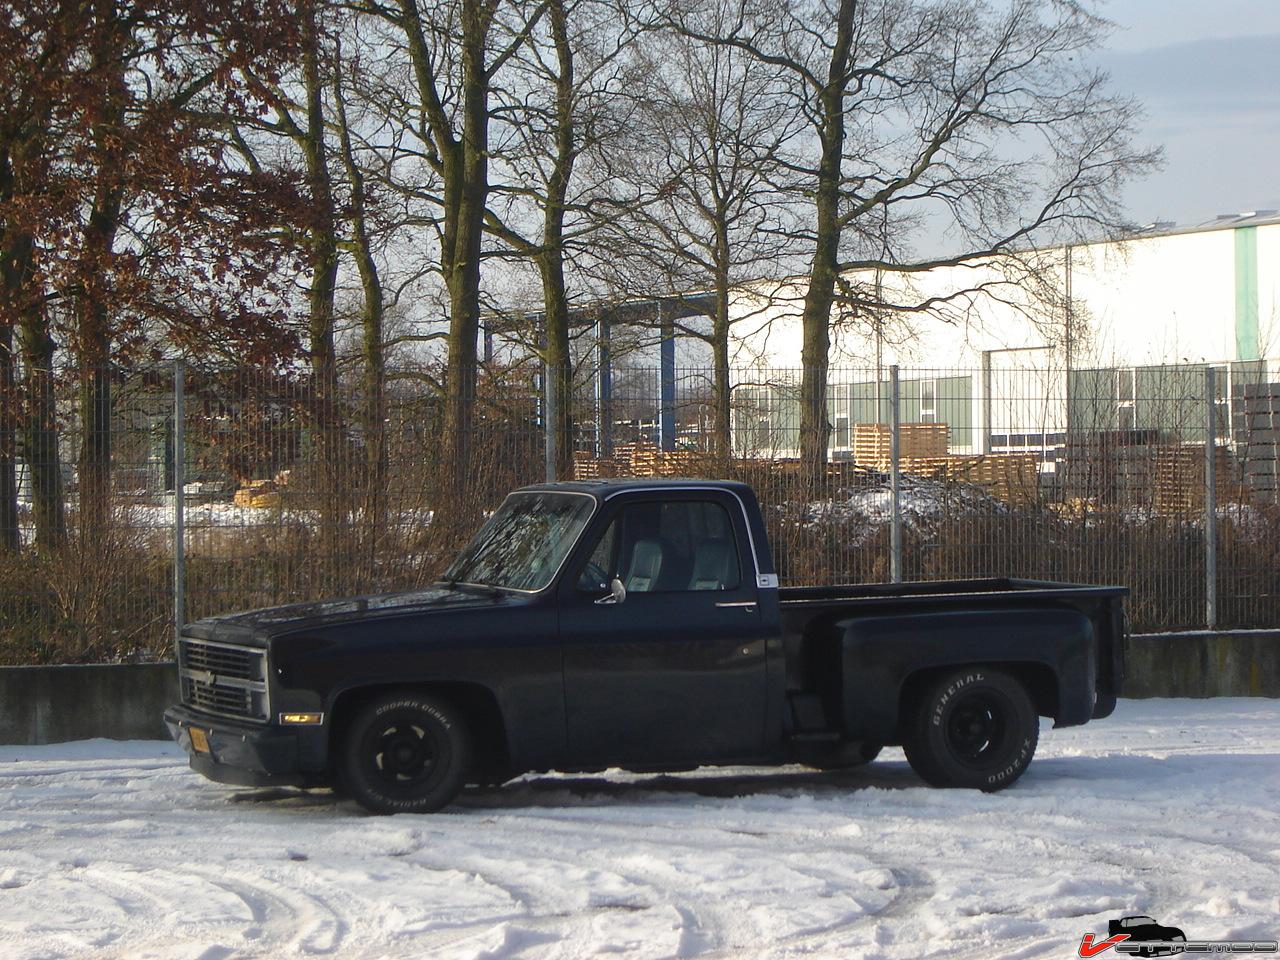
One of my little in between projects, 83 stepside.
Not quite pro touring, yet. Will upgrade to some better front brakes, maybe susp. Thinking about building a long arm setup for the rear. In the mean time I have been redoing some stuff due to rust and decided to build a new & better engine for it with parts I had lying around mostly. No sense in sinking tons of money into it while I have other major money guzzling projects running (main proj. is 495LSX 82 Trans Am now) and some unfinished ones (road race 82 vette and 87 procharged iroc camaro)
So... the truck. Like I said not quite pro touring but it is lowered and has a lot of custom details on it, especially the interior, dropped it and it has rolled out fenders. It's got the blacked out look, what I like to refer to as road fighter look. My 82 TA and 88 Camaro beater have the same look.
I've been driving my truck hard for a couple of years and it hasn't done it a lot of good. For a while I used it for a daily driver because my DD was wrecked and I didn't want to drive any of my other cars (the ones that were not in pieces)
Last year I got a nasty rain water leak somewhere from the cowl area, right above the fuse box so I parked it, waiting for when I had time to figure out what was going on. I also blew 2nd gear out of the TH400, must be the clutches because when I put it in 2 manually it works (bands)
Here's what the truck looked like... shame I can't drive it right now. It was always a lot of fun.

This is probably the culprit...all that white crap. I have some minor bubbling of the paint on the bottom of the front fenders. Caused by a blocked drain hole and fender rolling... :(
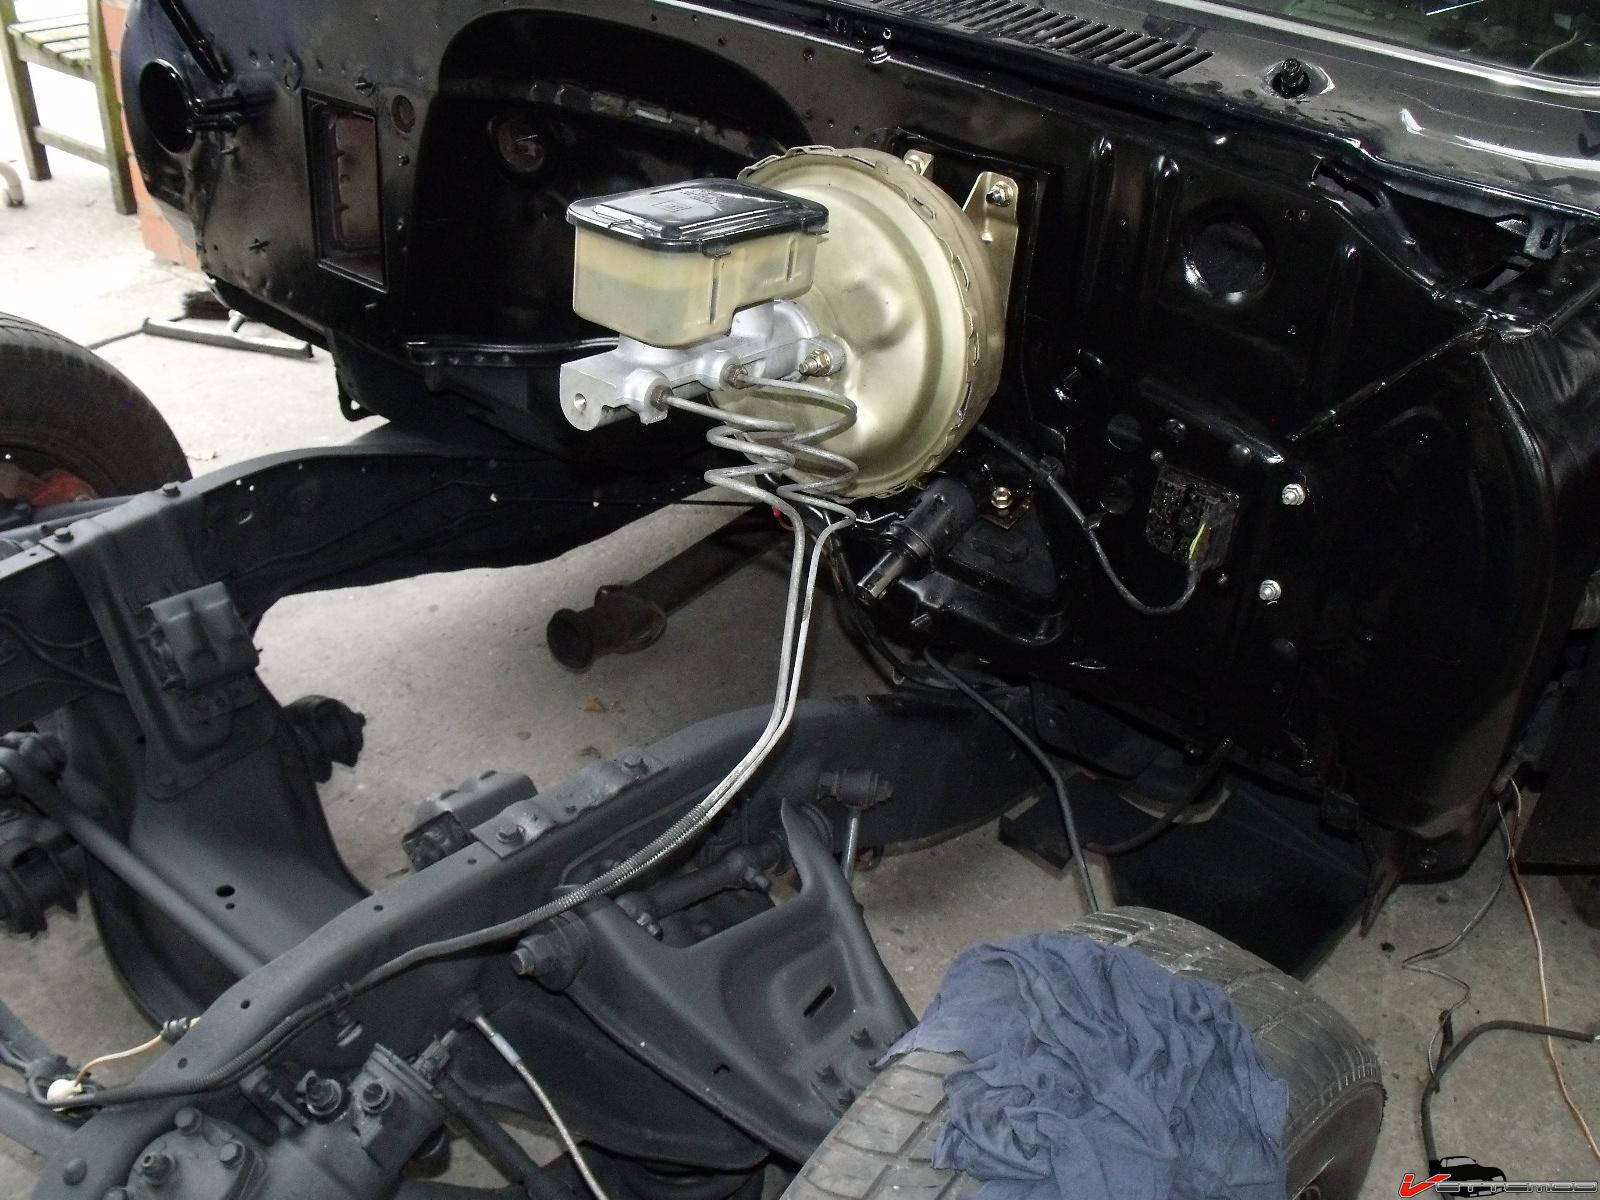
Anyway...time to check out what's up. After pulling all of the interior out I could see daylight around the fuse box. Not good! Time to pull the brake booster, and sure enough..there was the ugly. 2 panels seperated and rust coming from in between. Probably cracked sealant from the brake booster and the wiper motor deflecting the firewall.
I cut out the offending piece and found what I expected to find.. rust holes

Time to cut out all the nasty and weld in a fresh patch. The section I cut out was beyond repair so I fabbed a new panel for that too.
I ground the welds a little smooth (this can't be seen anyway) and liberally applied corrosion protection and seam sealer.
Welded on the fabbed new front patch panel
halfway there
almost there
done
Now, everything else looks like a big mess. So, only thing to do is tear it all apart.
I took the front section out, repaired a bunch of nasty bubba welding repairs and misc. brackets baked on by an idiot with a stick welder.
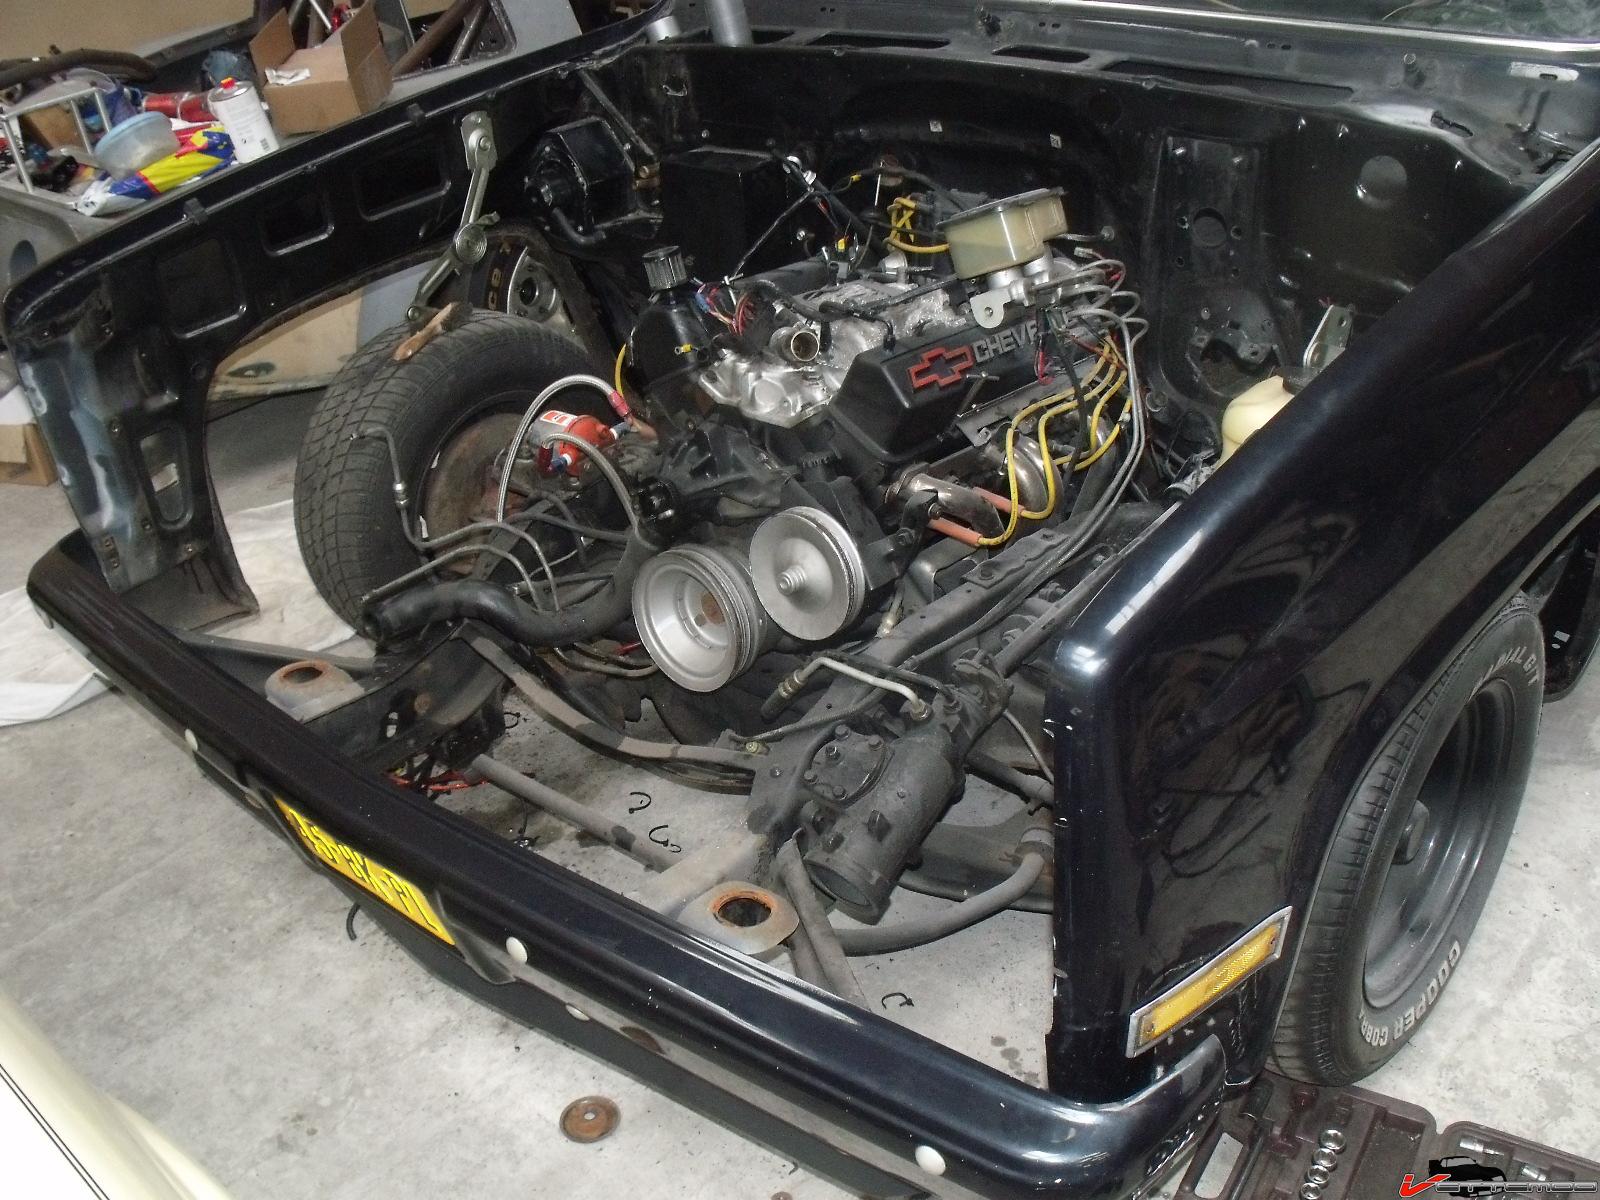
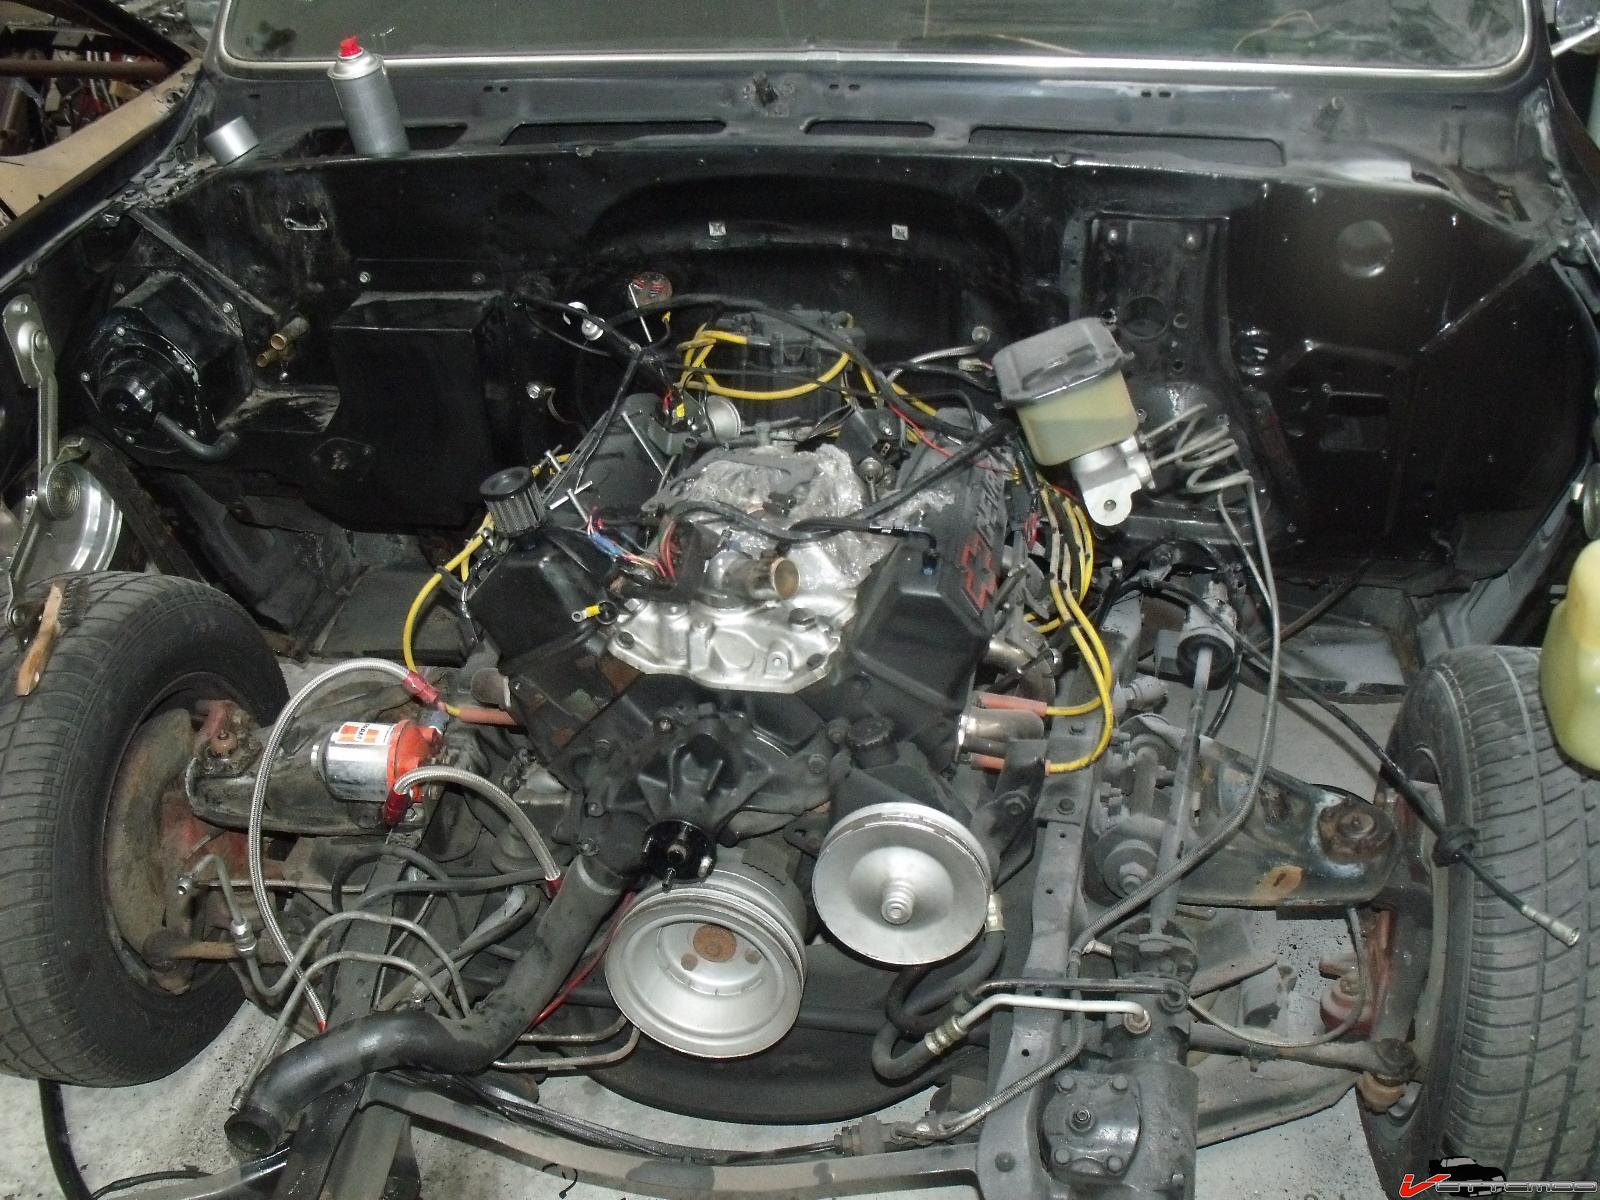
Old crap that came out (and some fresh powdercoated stuff in there)
I don't have a pic of the freshly coated rad frame, bracketry, lamp buckets and what not. (will this weekend)
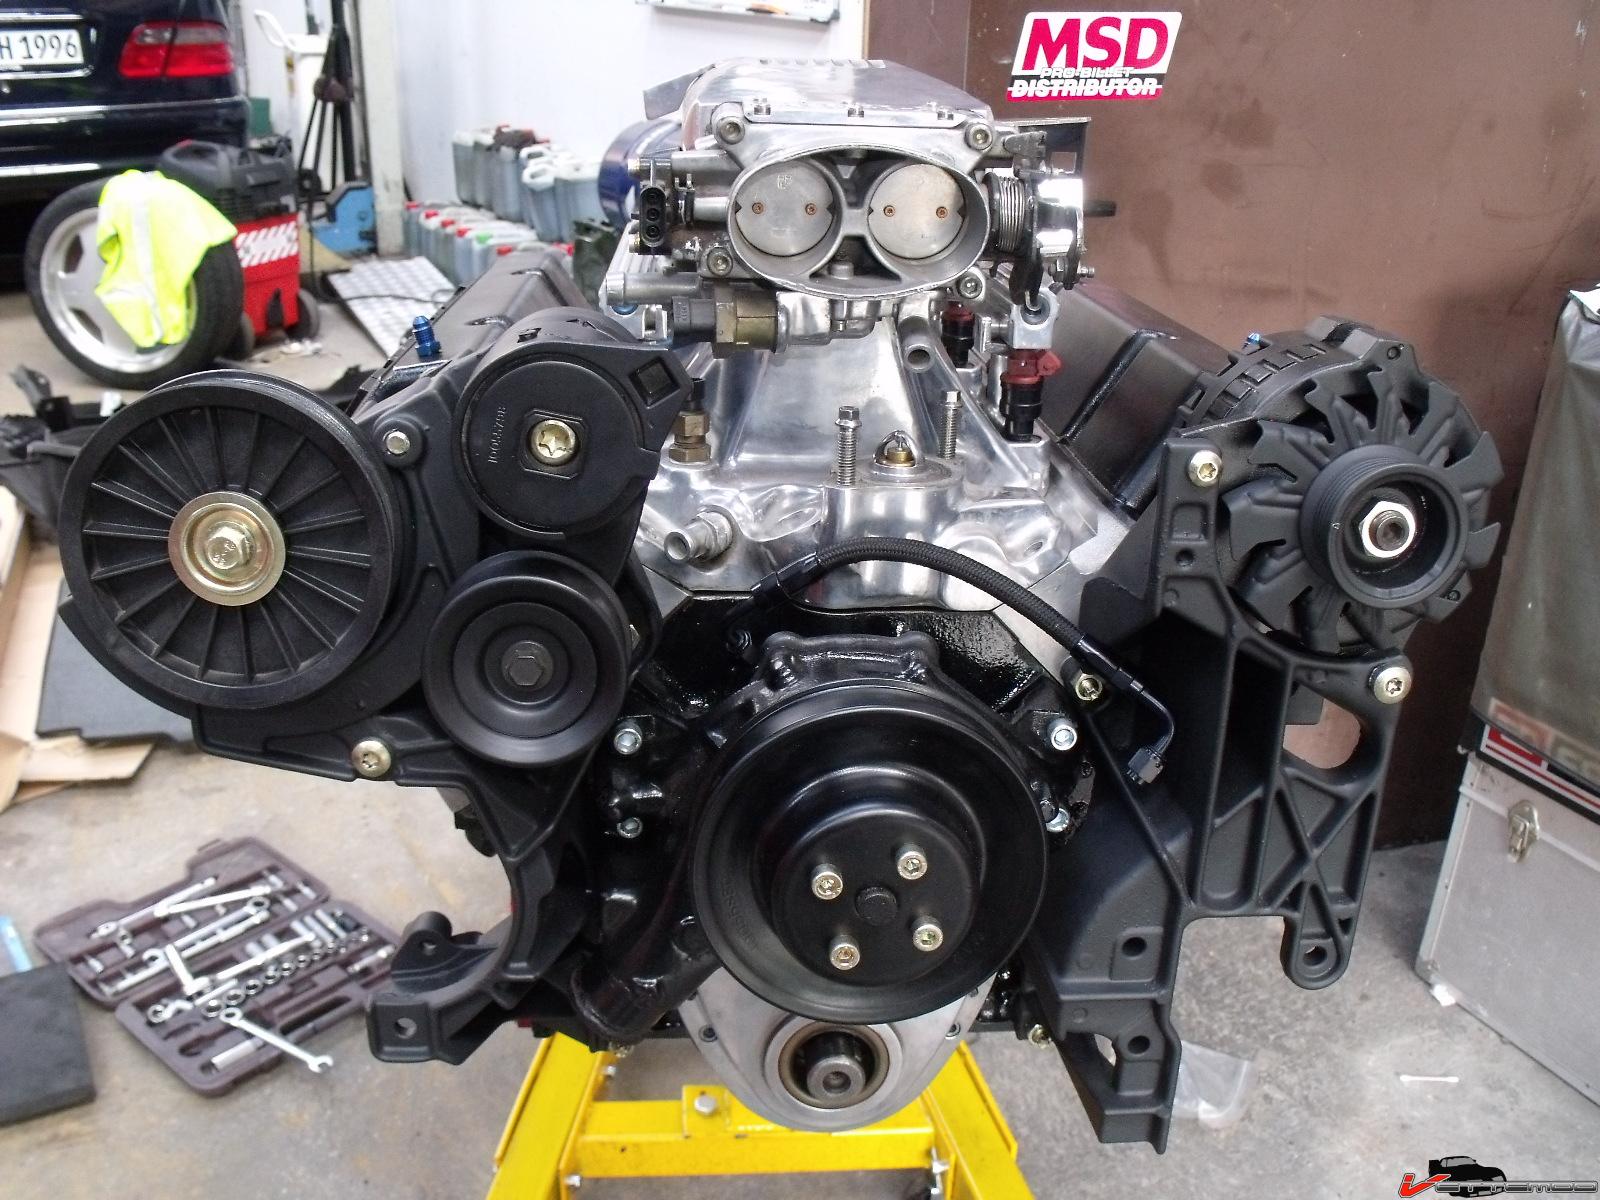
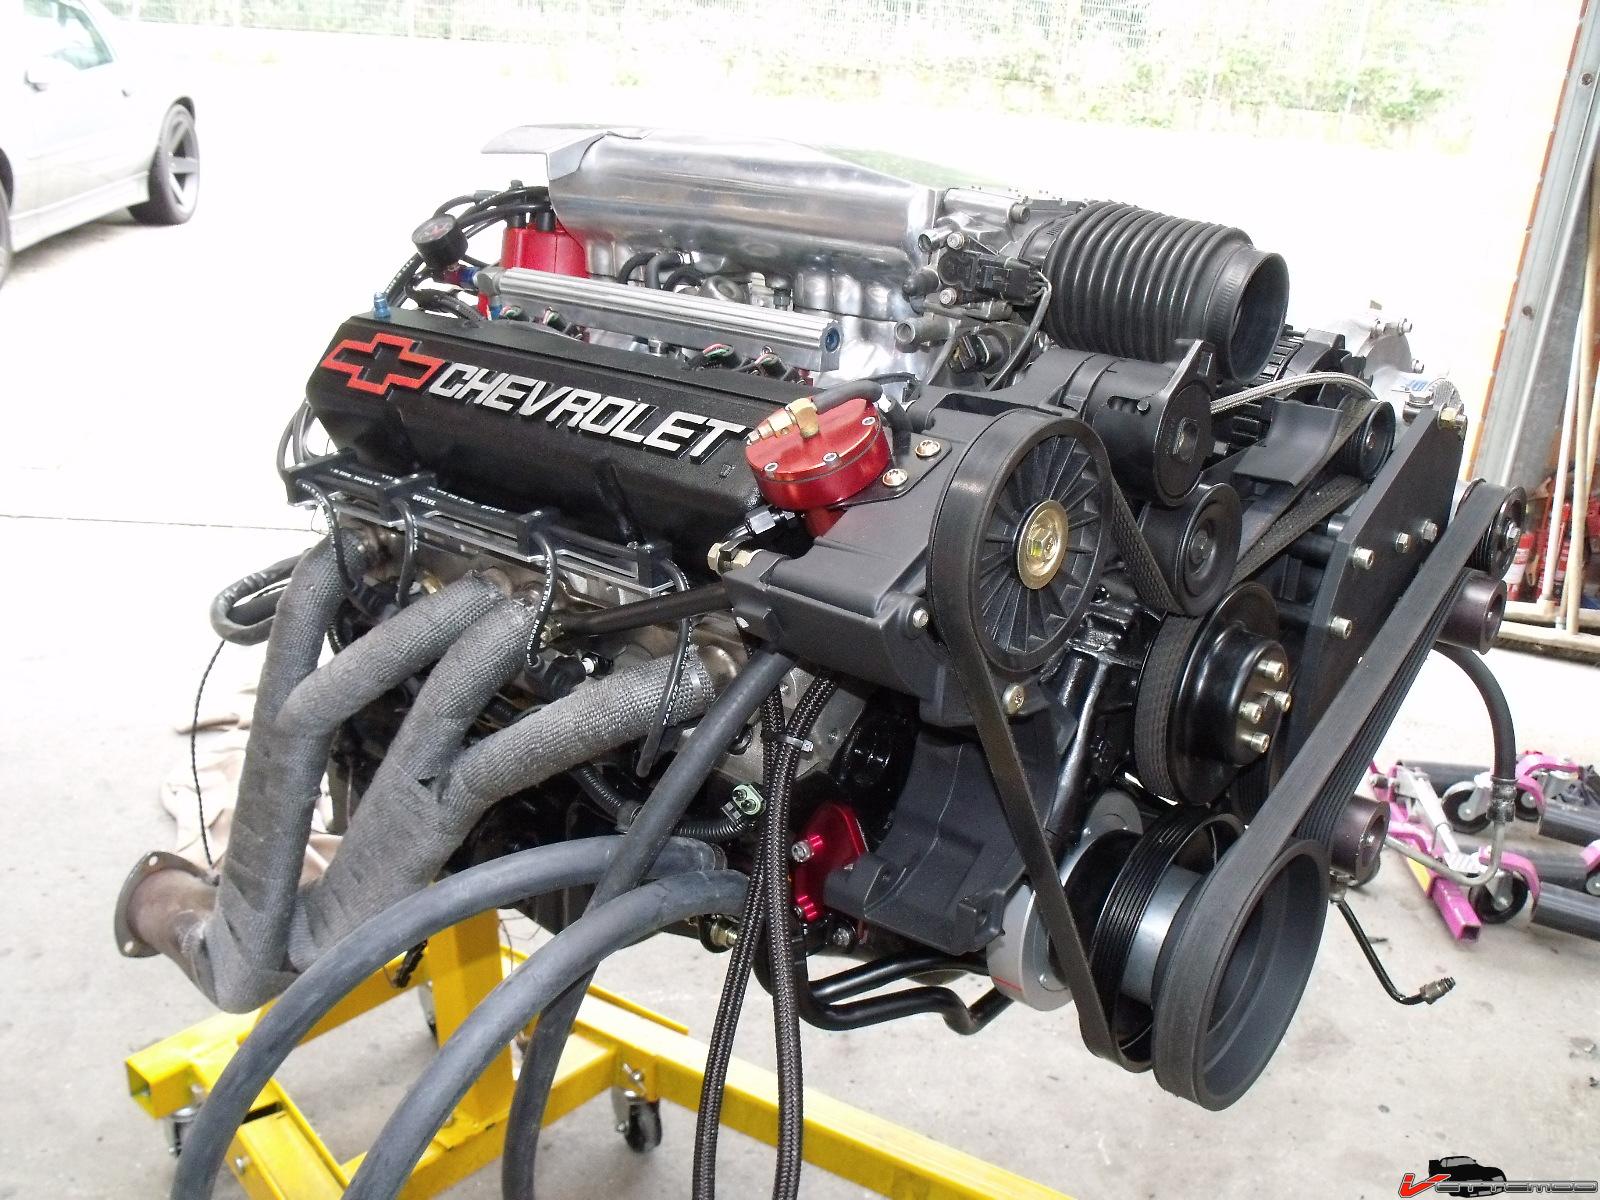
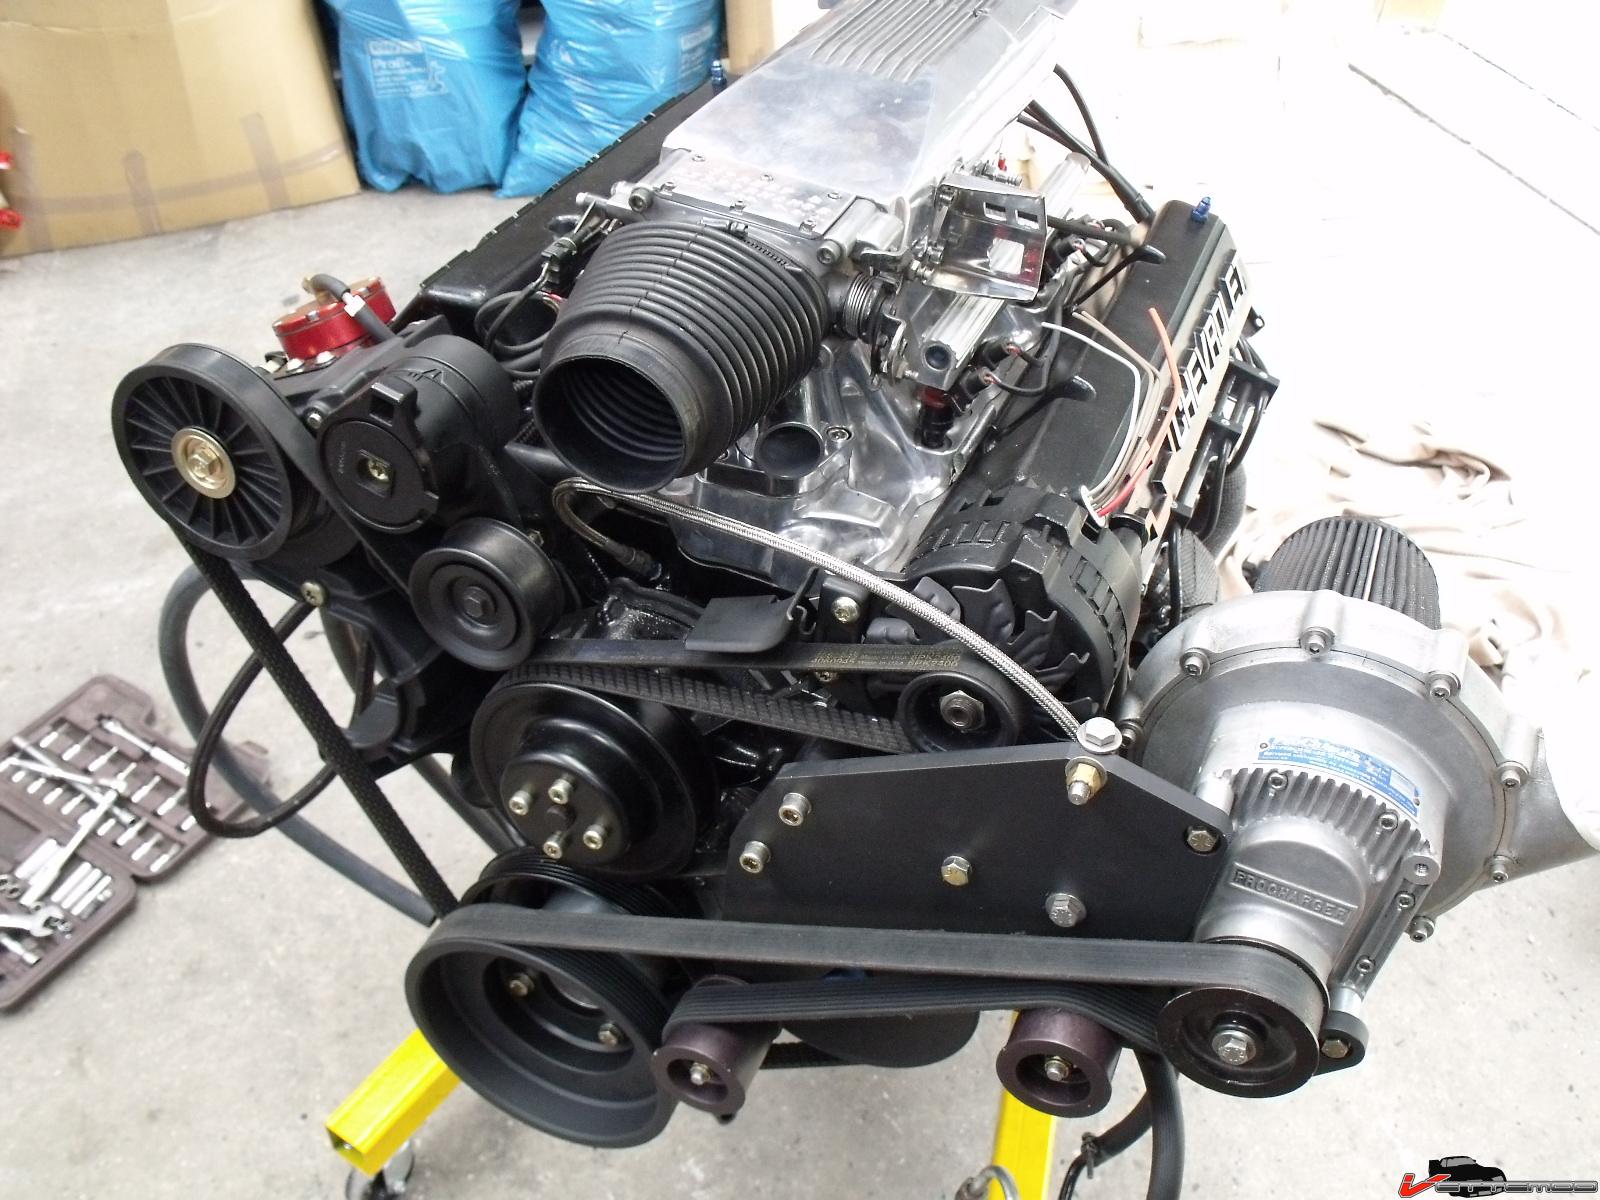
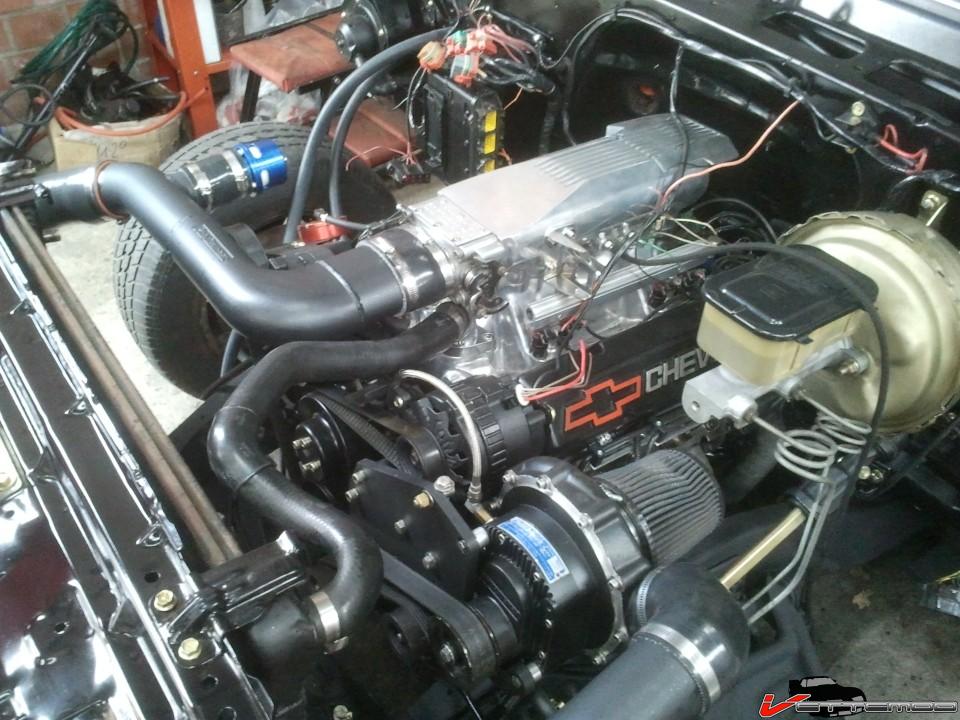
So, what to do about the engine. It needed more oomph for sure and I have a lot of spare stuff from my camaros/trans ams and other projects. The decision was quickly made. I am installing a 3rd Gen F body serpentine system. This will take care of the annoying power steering belt whine. I only had 1 belt because I remove the other belt (no AC/smog pump) It's also a clean looking setup. I had it powdercoated matte black and the bolts are all gold zinc plated. The heads I also had lying around. Some TFS G1 Twisted Wedge heads. No one seems to like them, I do. I have 3 sets and only 1 set gave me guide wear issues because I was stupid enough not to use crane gold rockers and go with the recommended .010 longer push rod. A checker tool is a must with these to set them up properly.
I also have a complete HotRodLane/Street & Performance Multiport MPFI system lying around, it has a complete standalone harness w/ fuse box and a weatherpack ECM. Then I found my spare Procharger P600 bracket...and a P600 head unit :D Not a hard choice to make (can tune ECU myself, have the stuff..been there done that on 3rd gen camaro and GTA)
Initially I thought about running a Vortech carb enclosure..but EFI it will now be. I can run a 700R4 on it too without resorting to lockup kit (never worked to my liking on other cars)


... nah
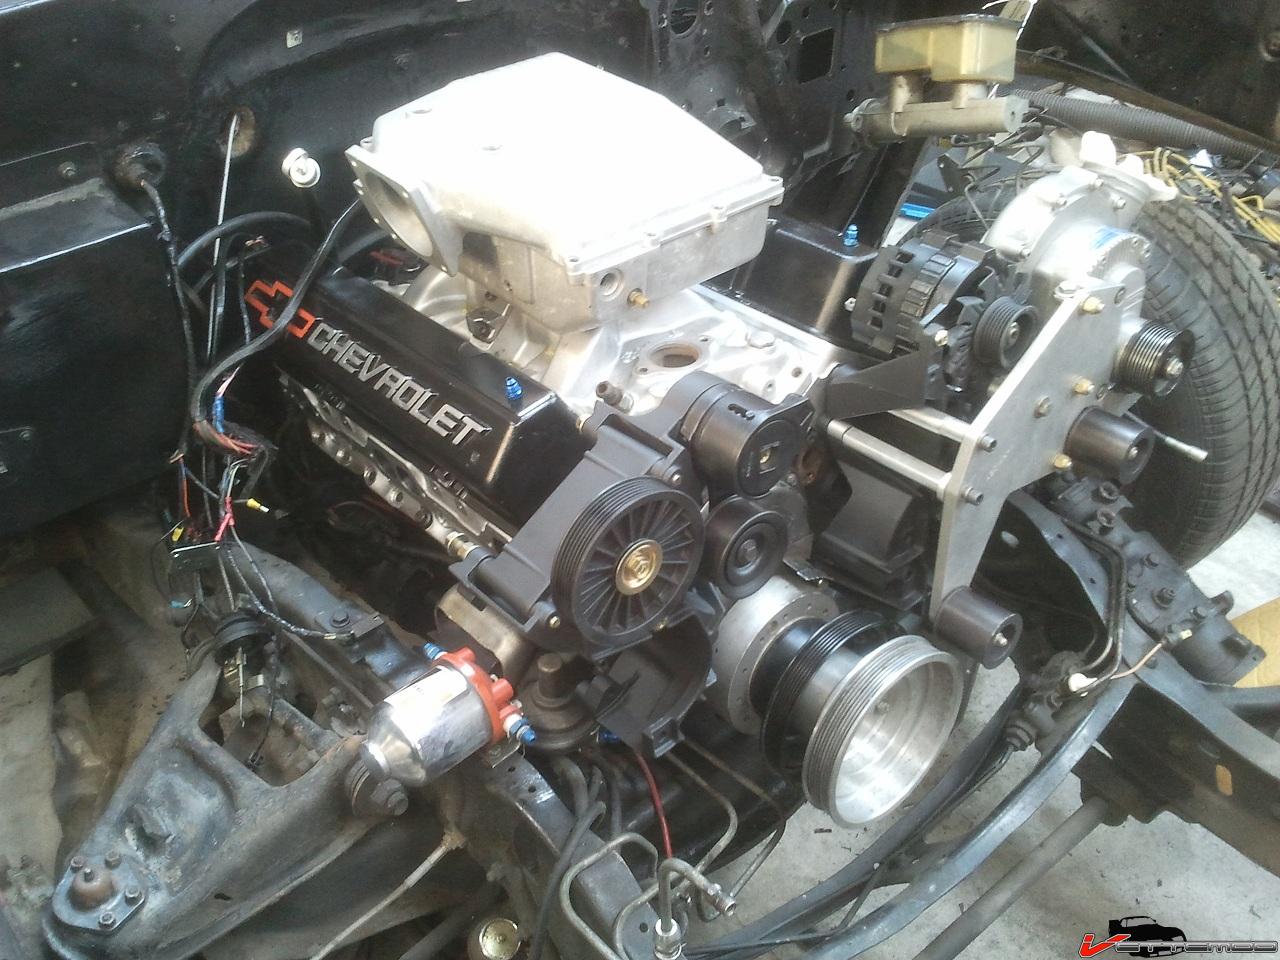
...yay!
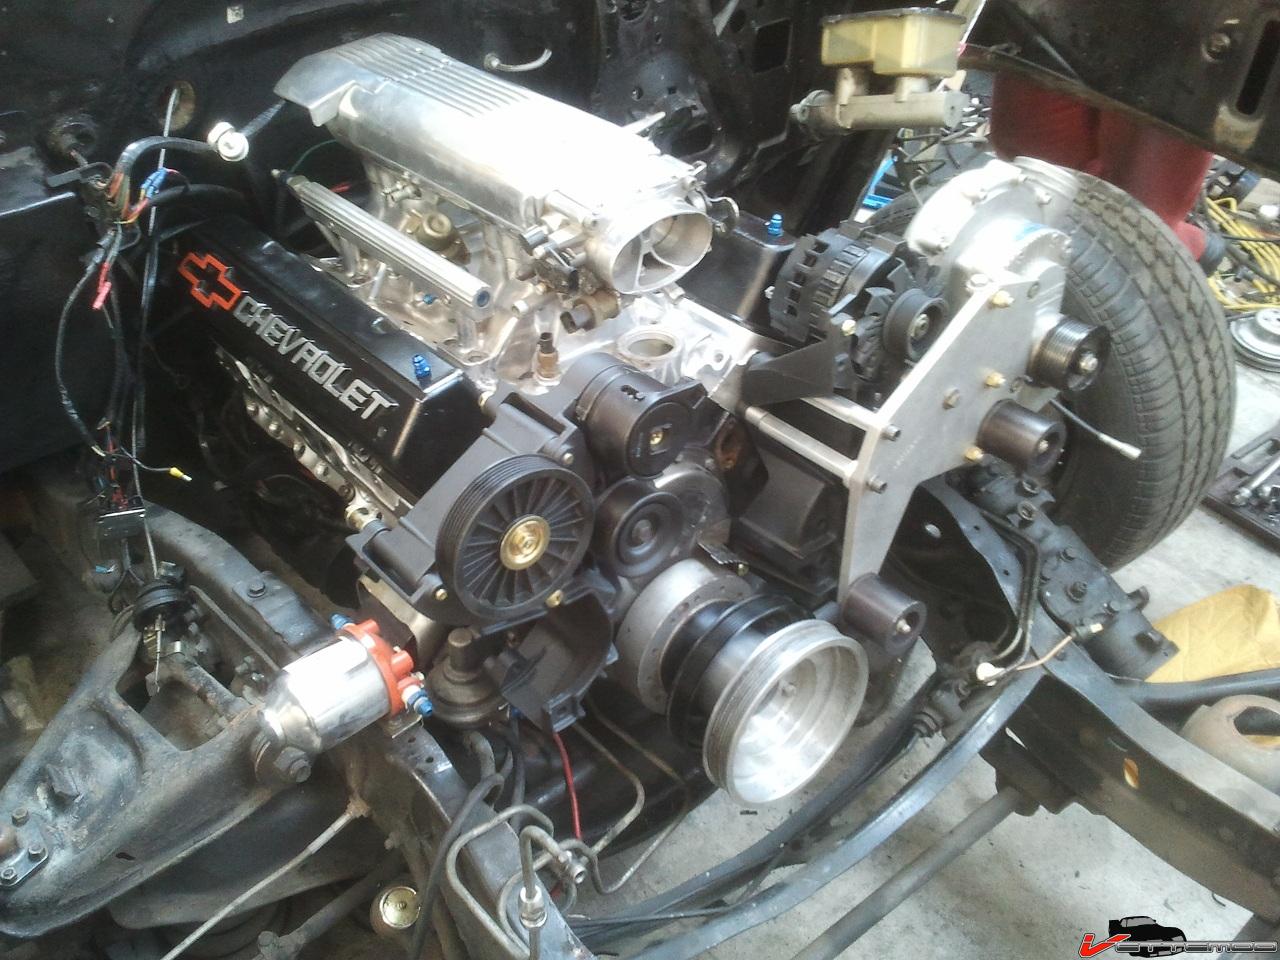

-
10-19-2012 #2
Registered User
- Join Date
- Nov 2004
- Posts
- 444
I have a Procharger FMIC for it but also have 2 smaller ones from a later F body. Have not decided which to run yet. I did remove the blanking plate from the rad shroud just in case. They are excellent holes to run piping through.
Repaired and powdercoated rad frame, assembled w/ all PCed parts (what a crappy pic, didn't notice that before...I suck at photography)

Repaired and coated inner fenders.. a little dusty from sitting
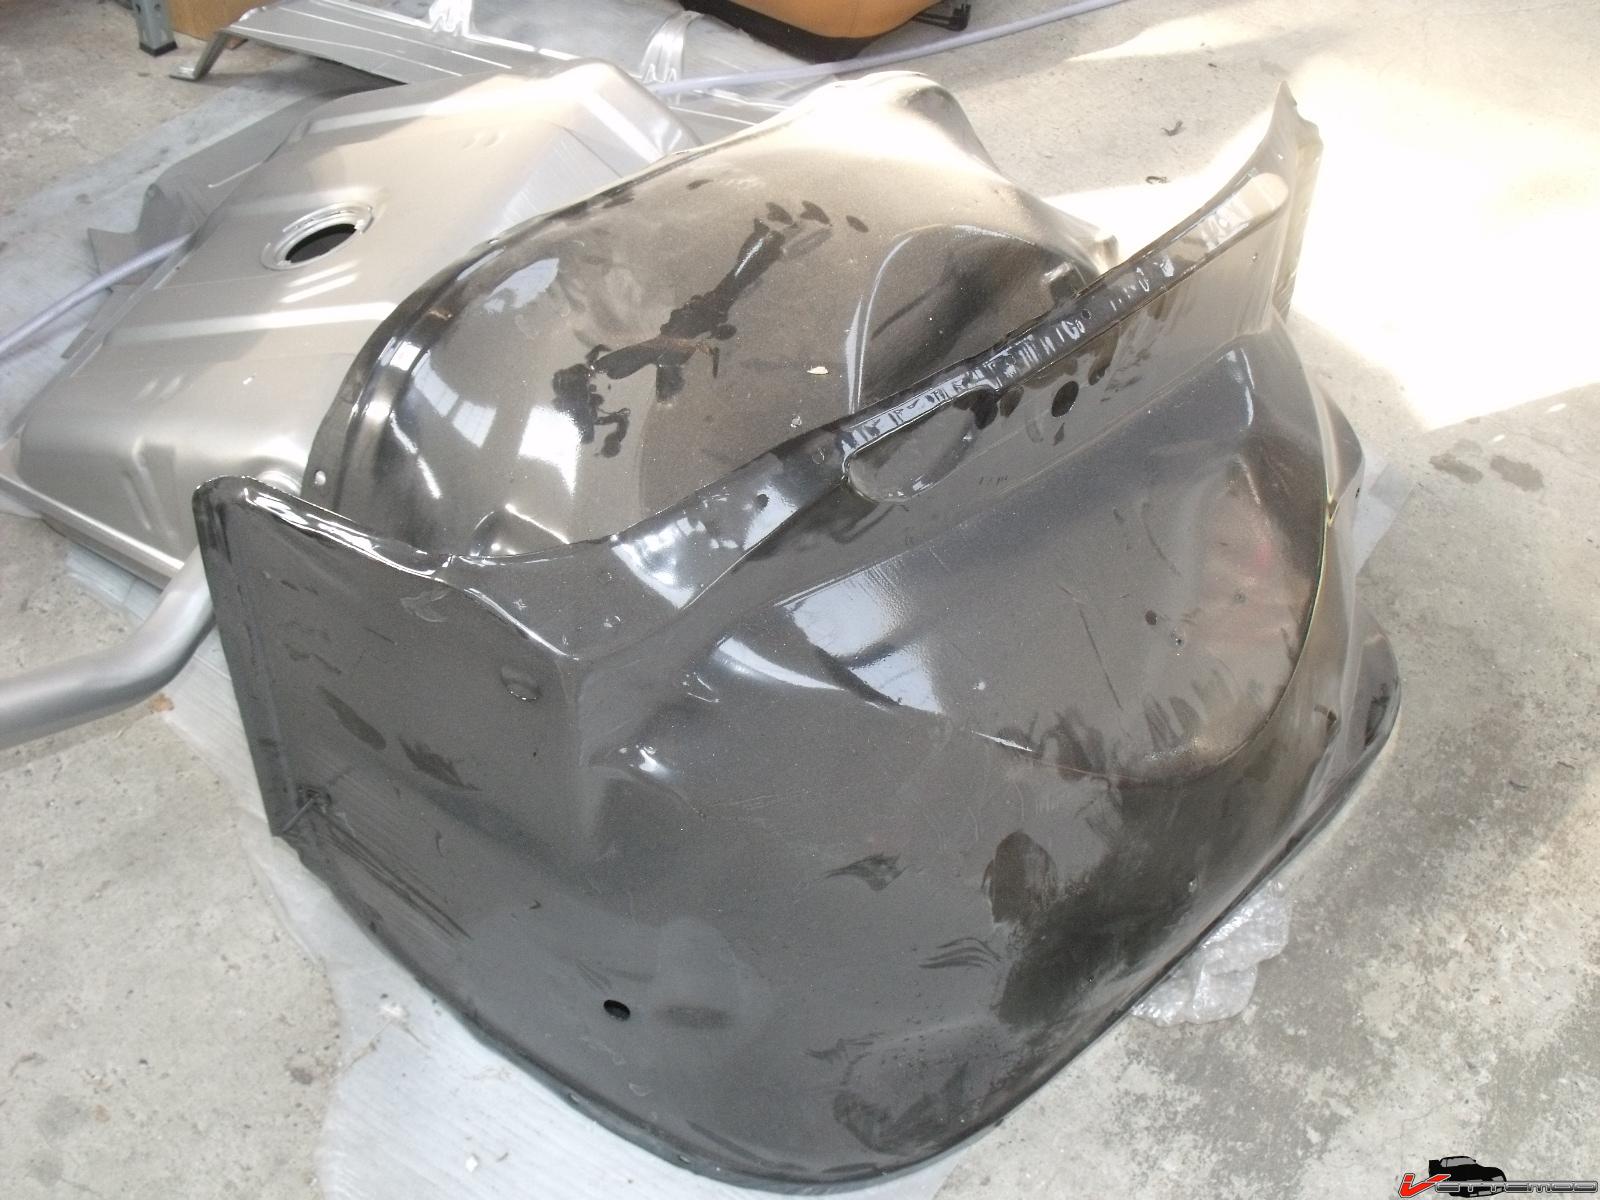 [/QUOTE]
better pic of rad frame
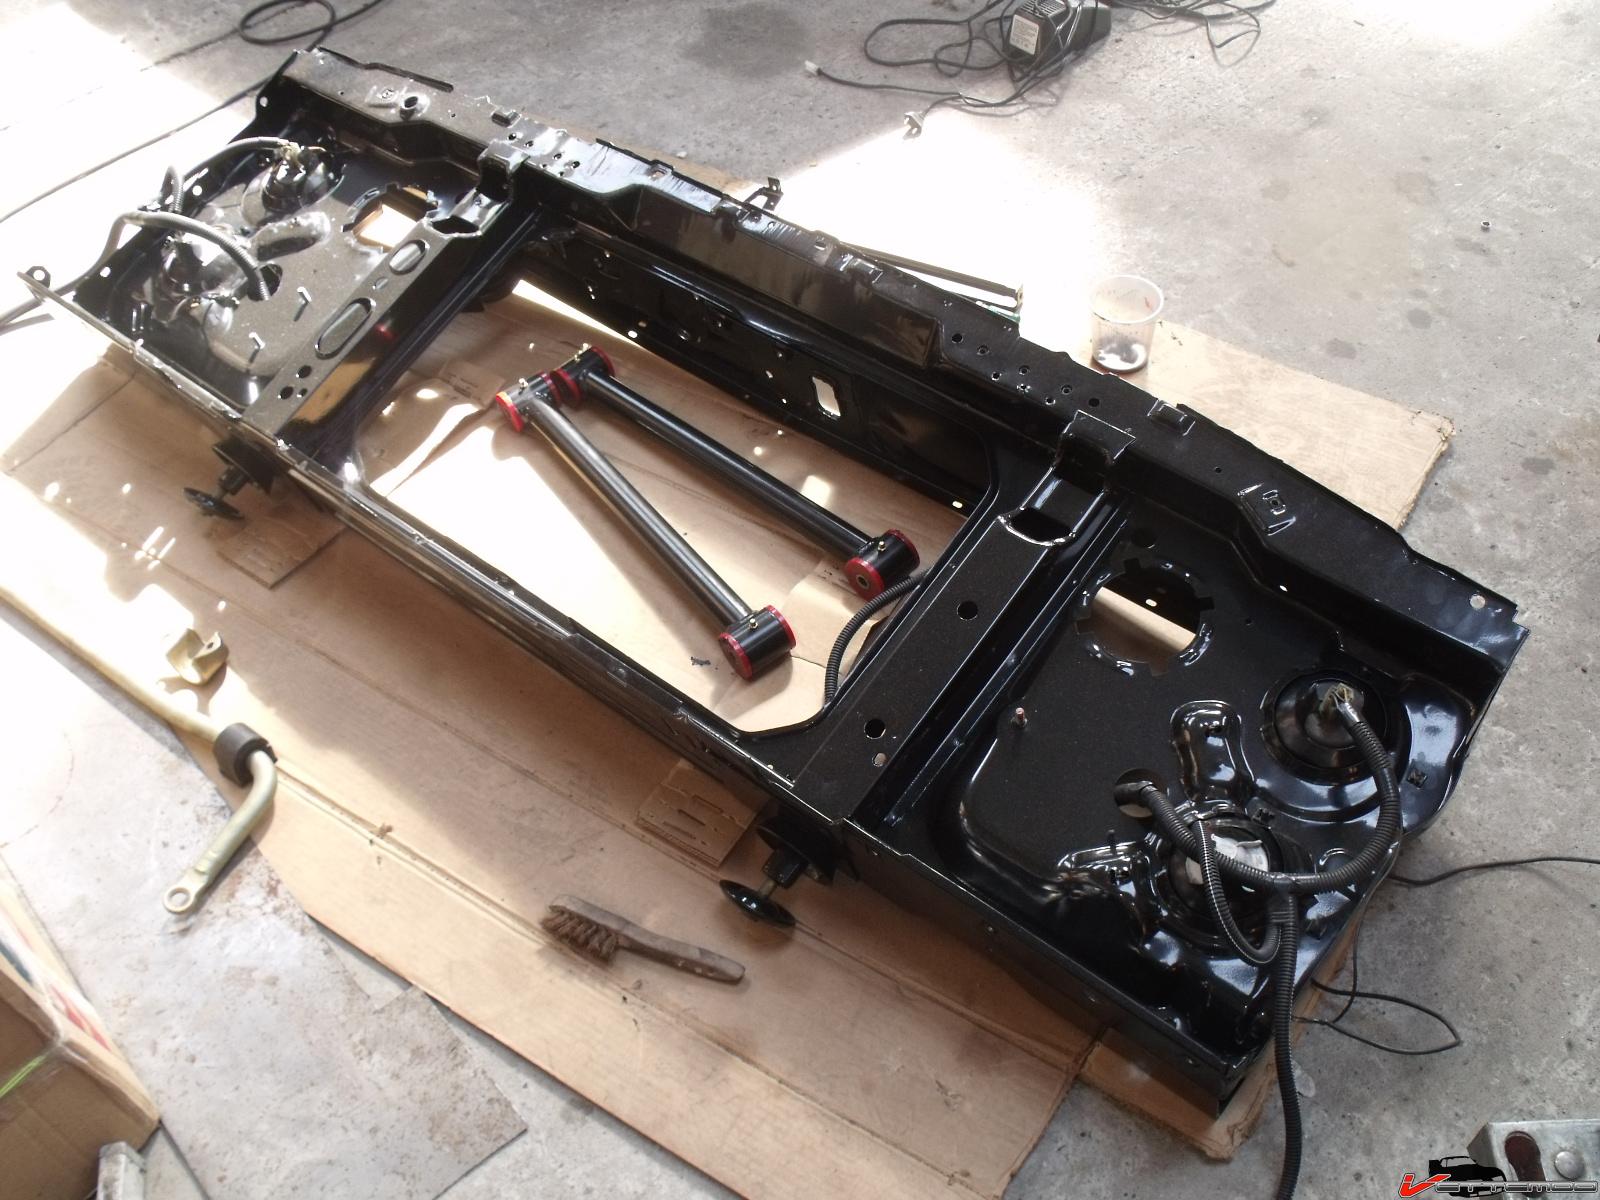
pulled the engine/trans
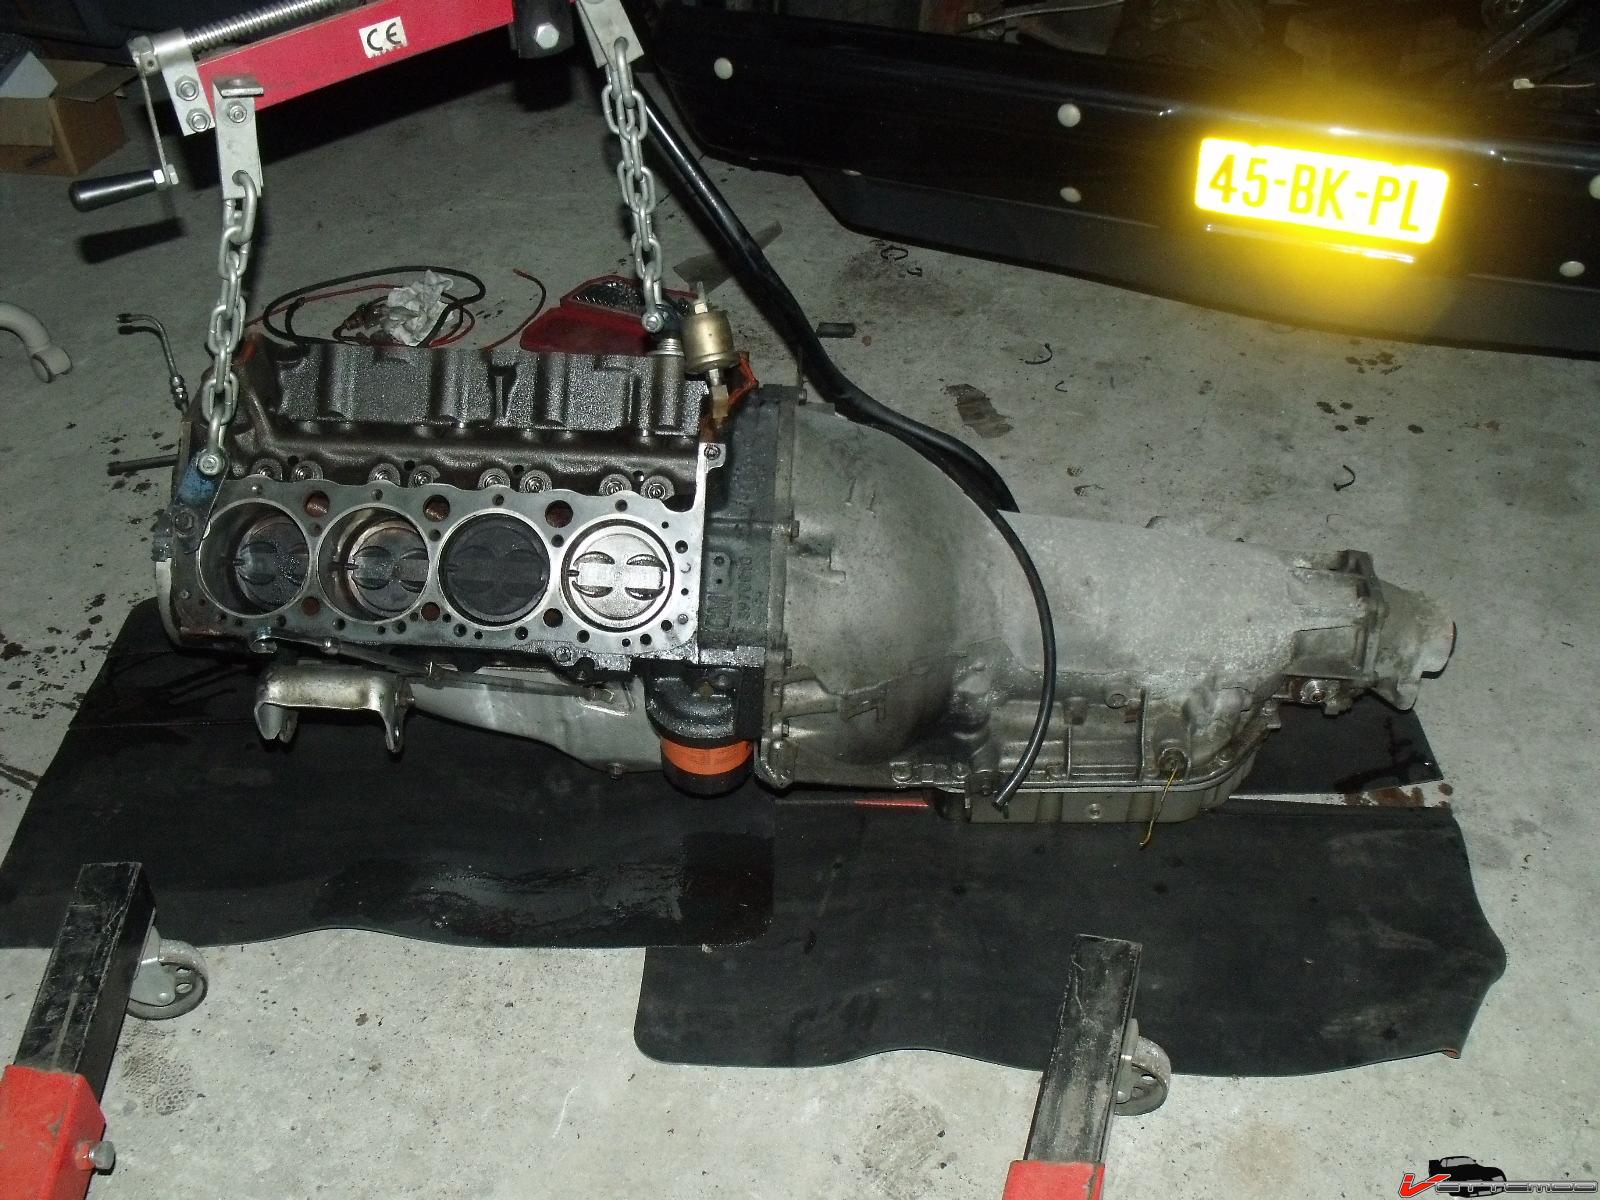
what a mess
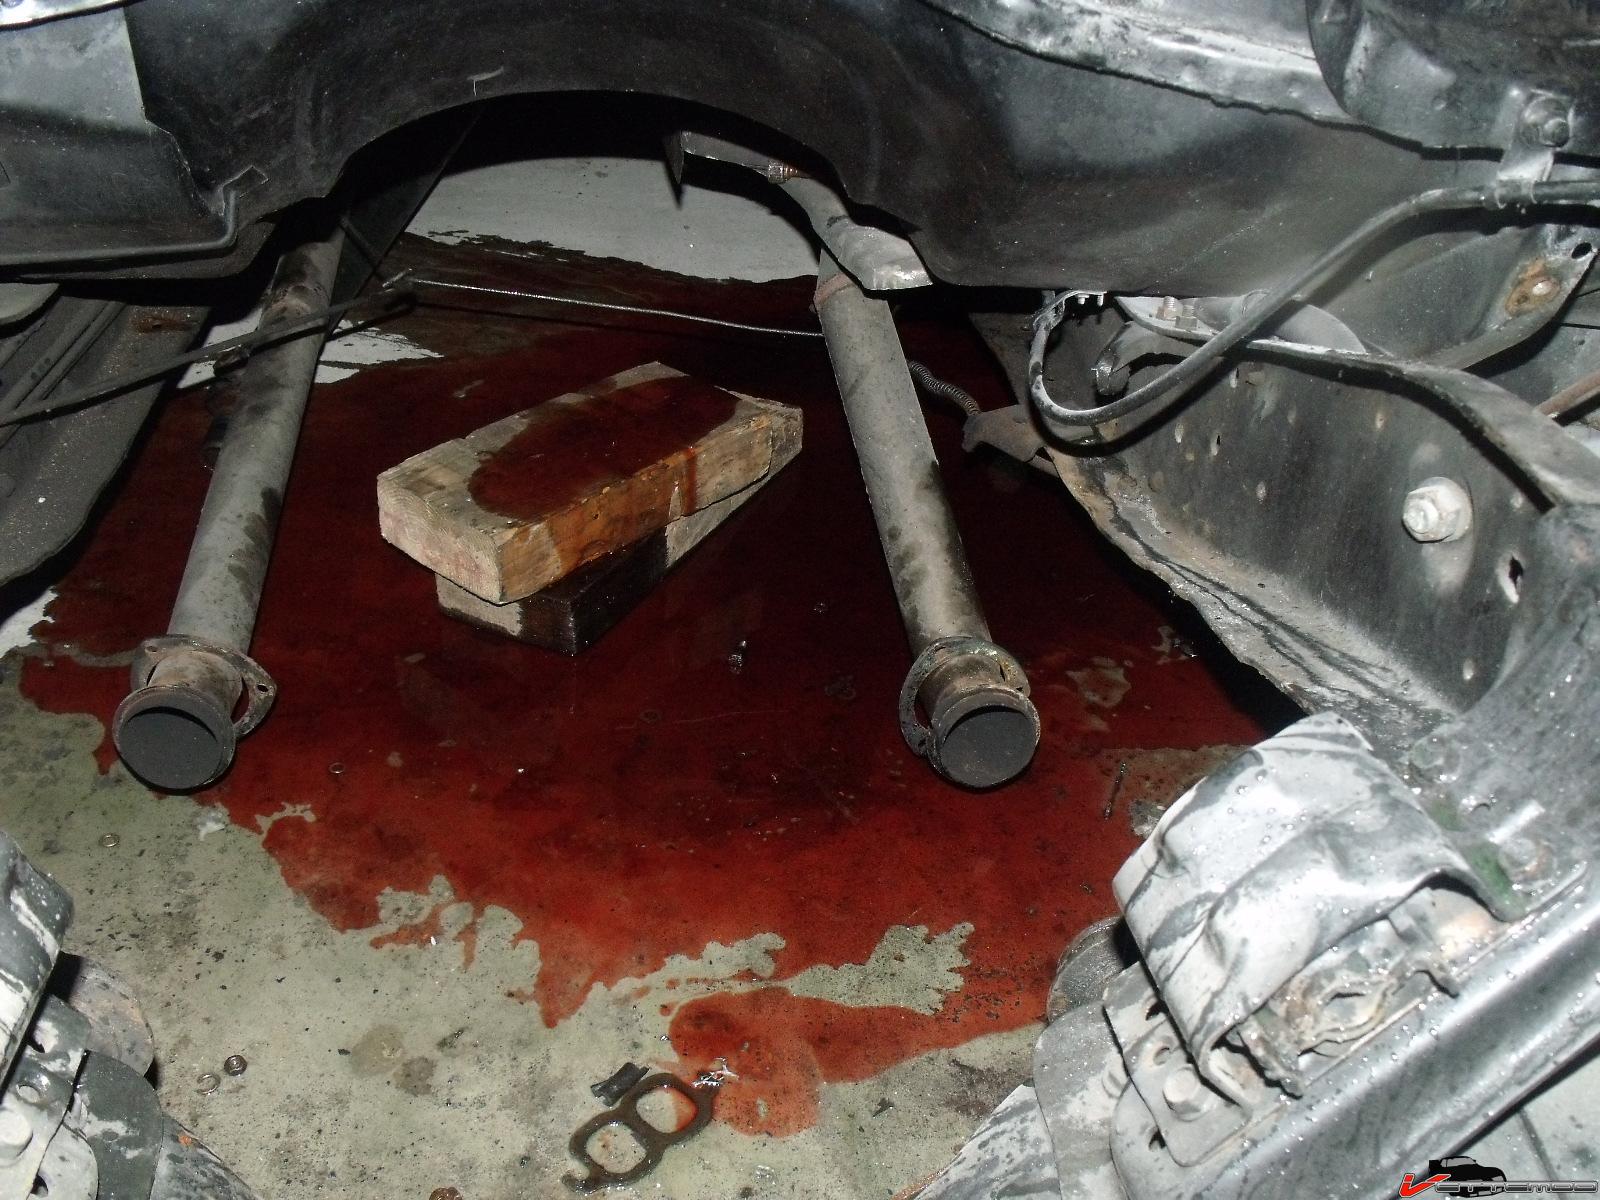
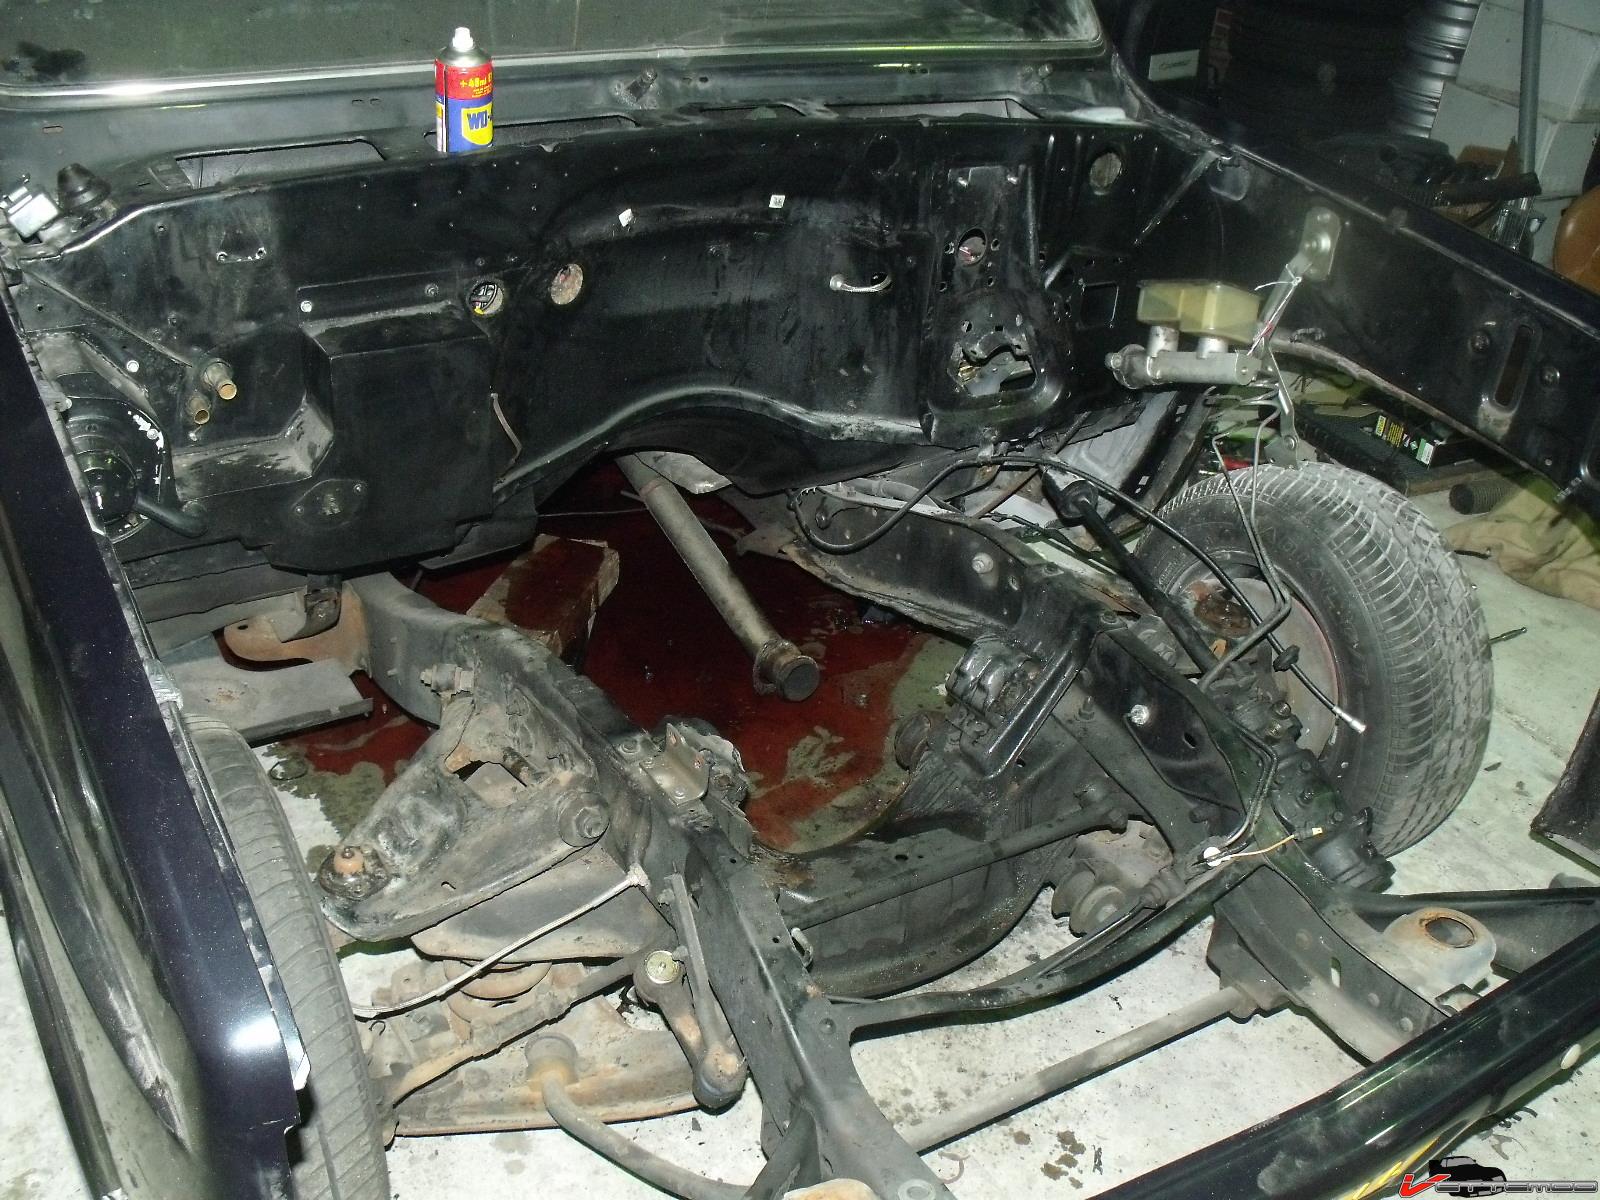
There was more rust in the firewall and fenders I have the firewall fixed now. I'll tackle the fenders later. Building a new engine for the car, still have to install the procharger.
I will coat the underside of the car with some type of rock guard so I didn't paint the firewall below the belt line

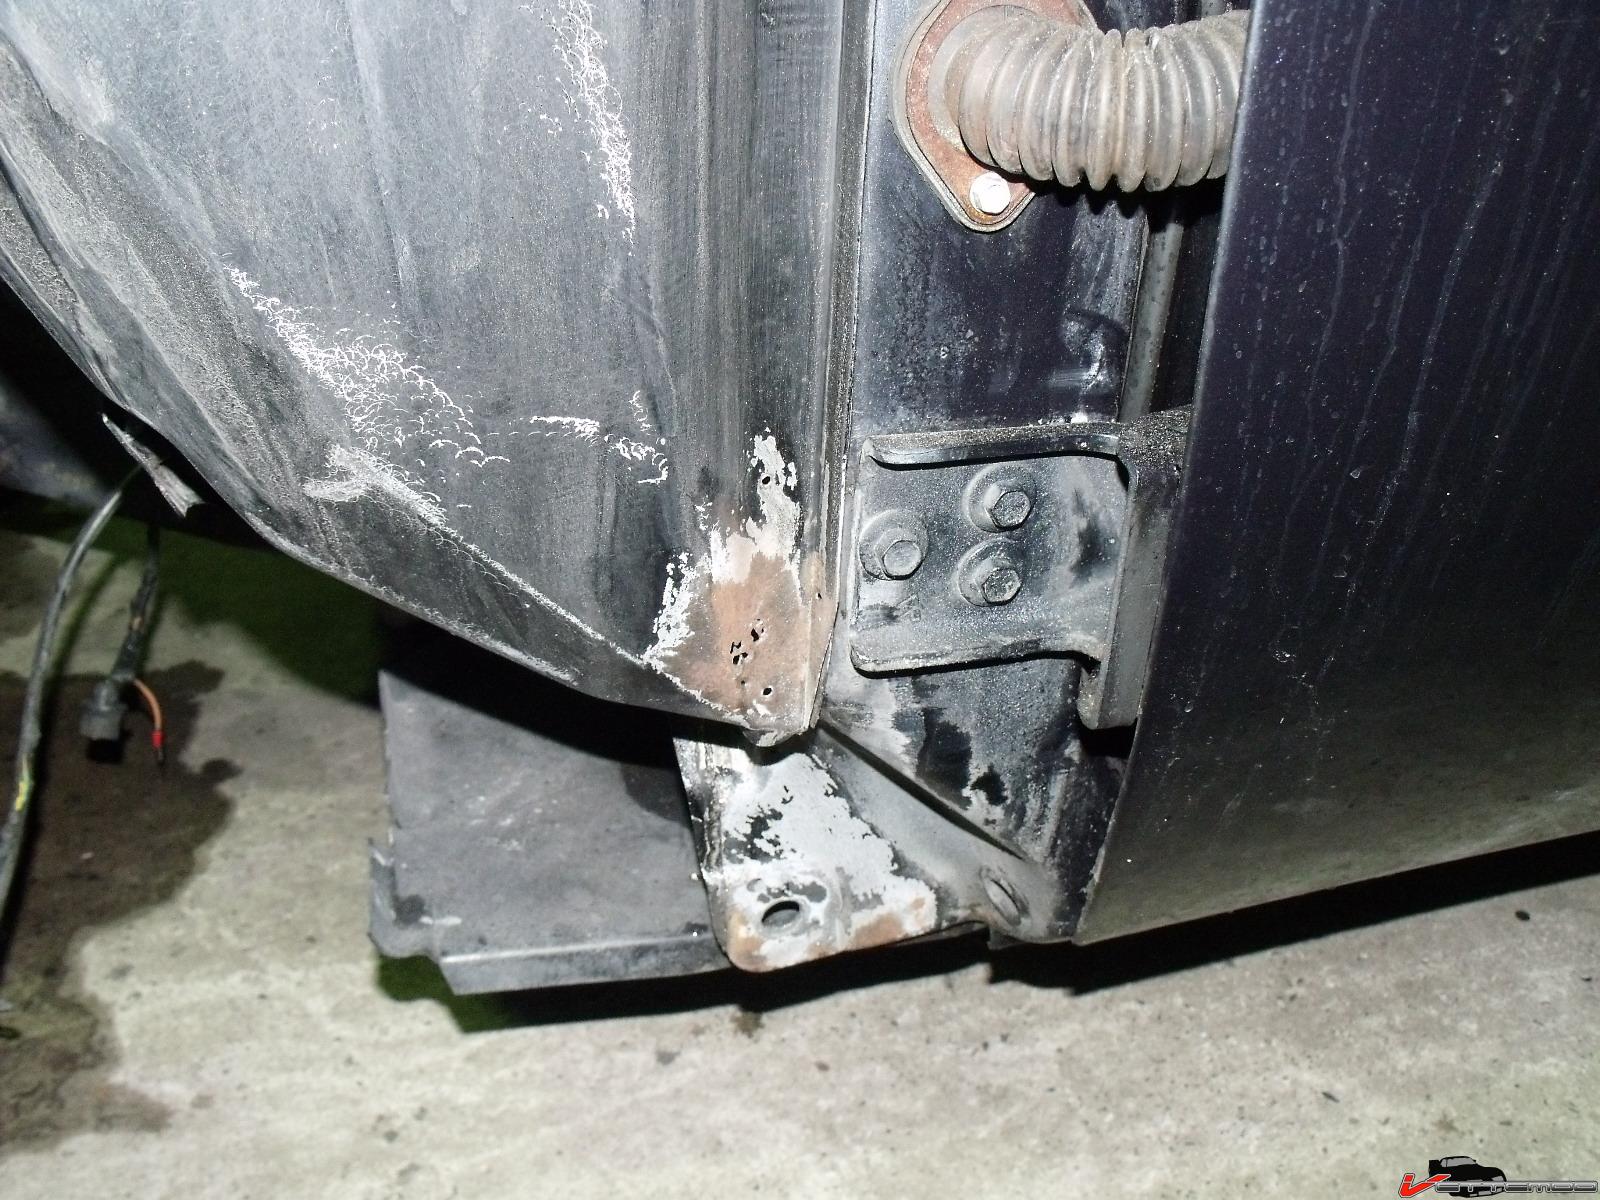
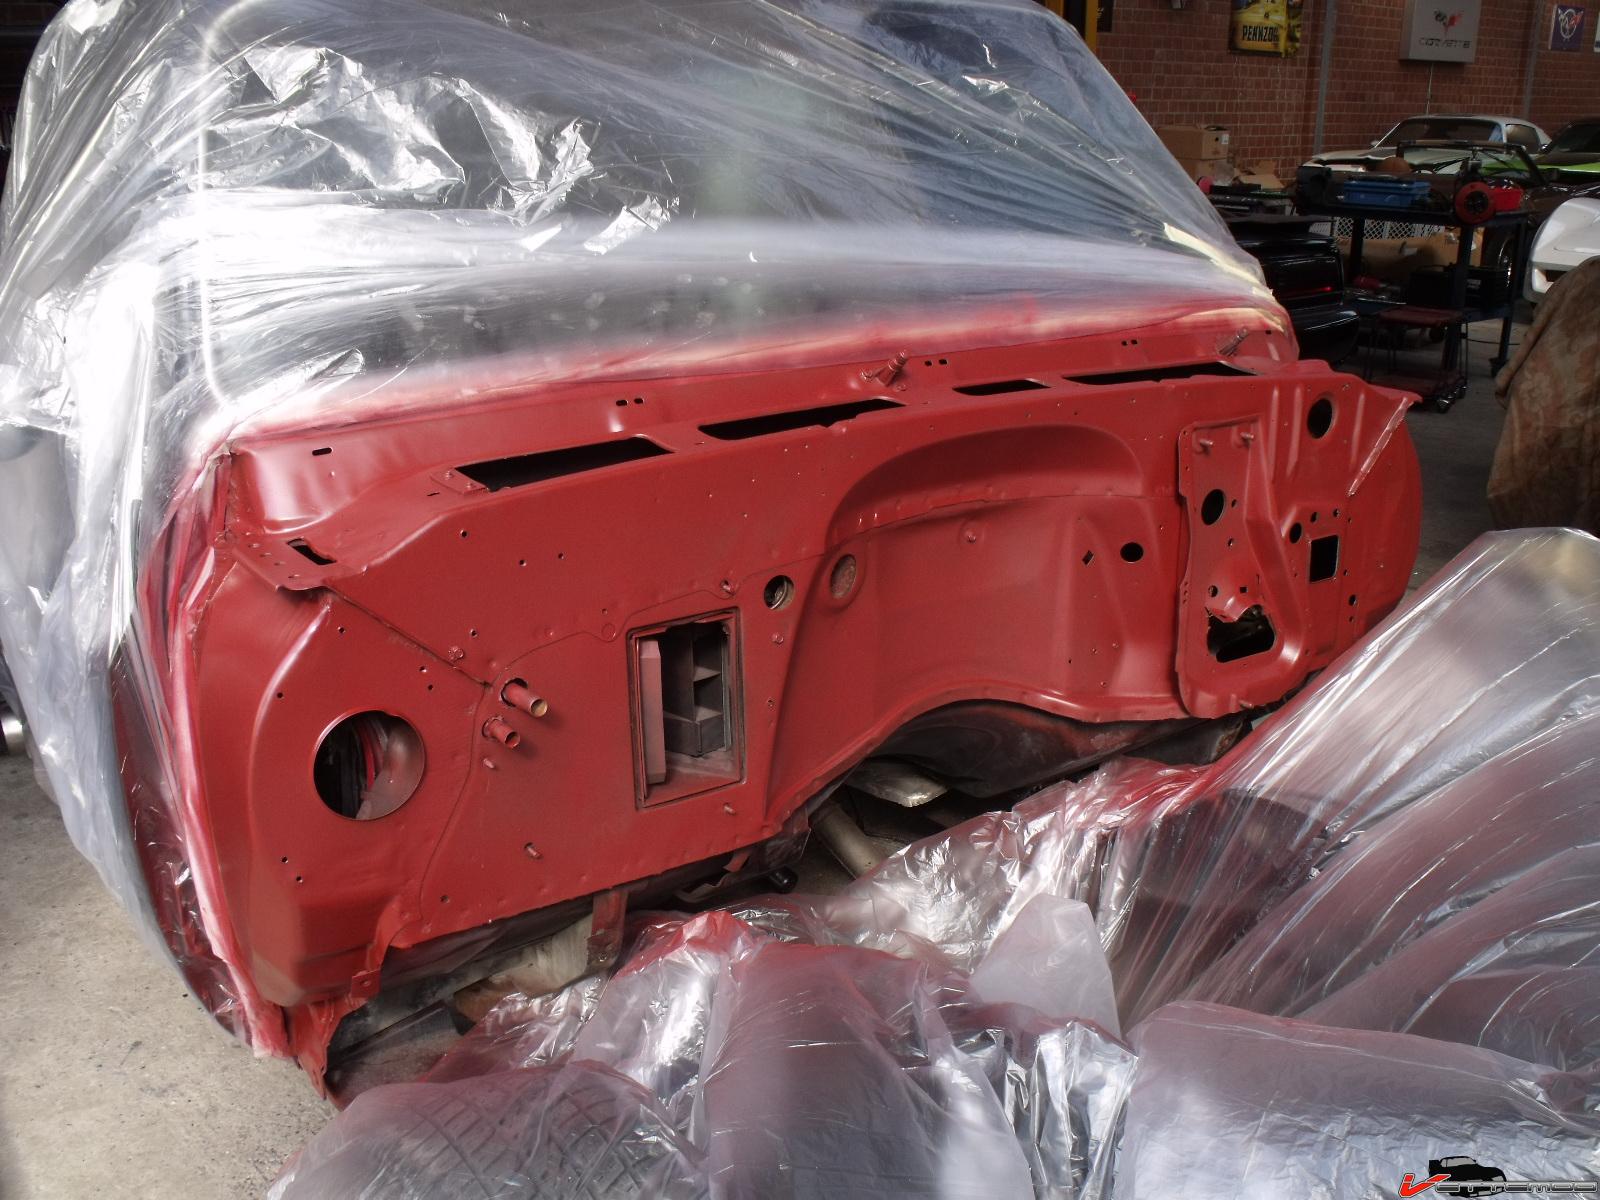
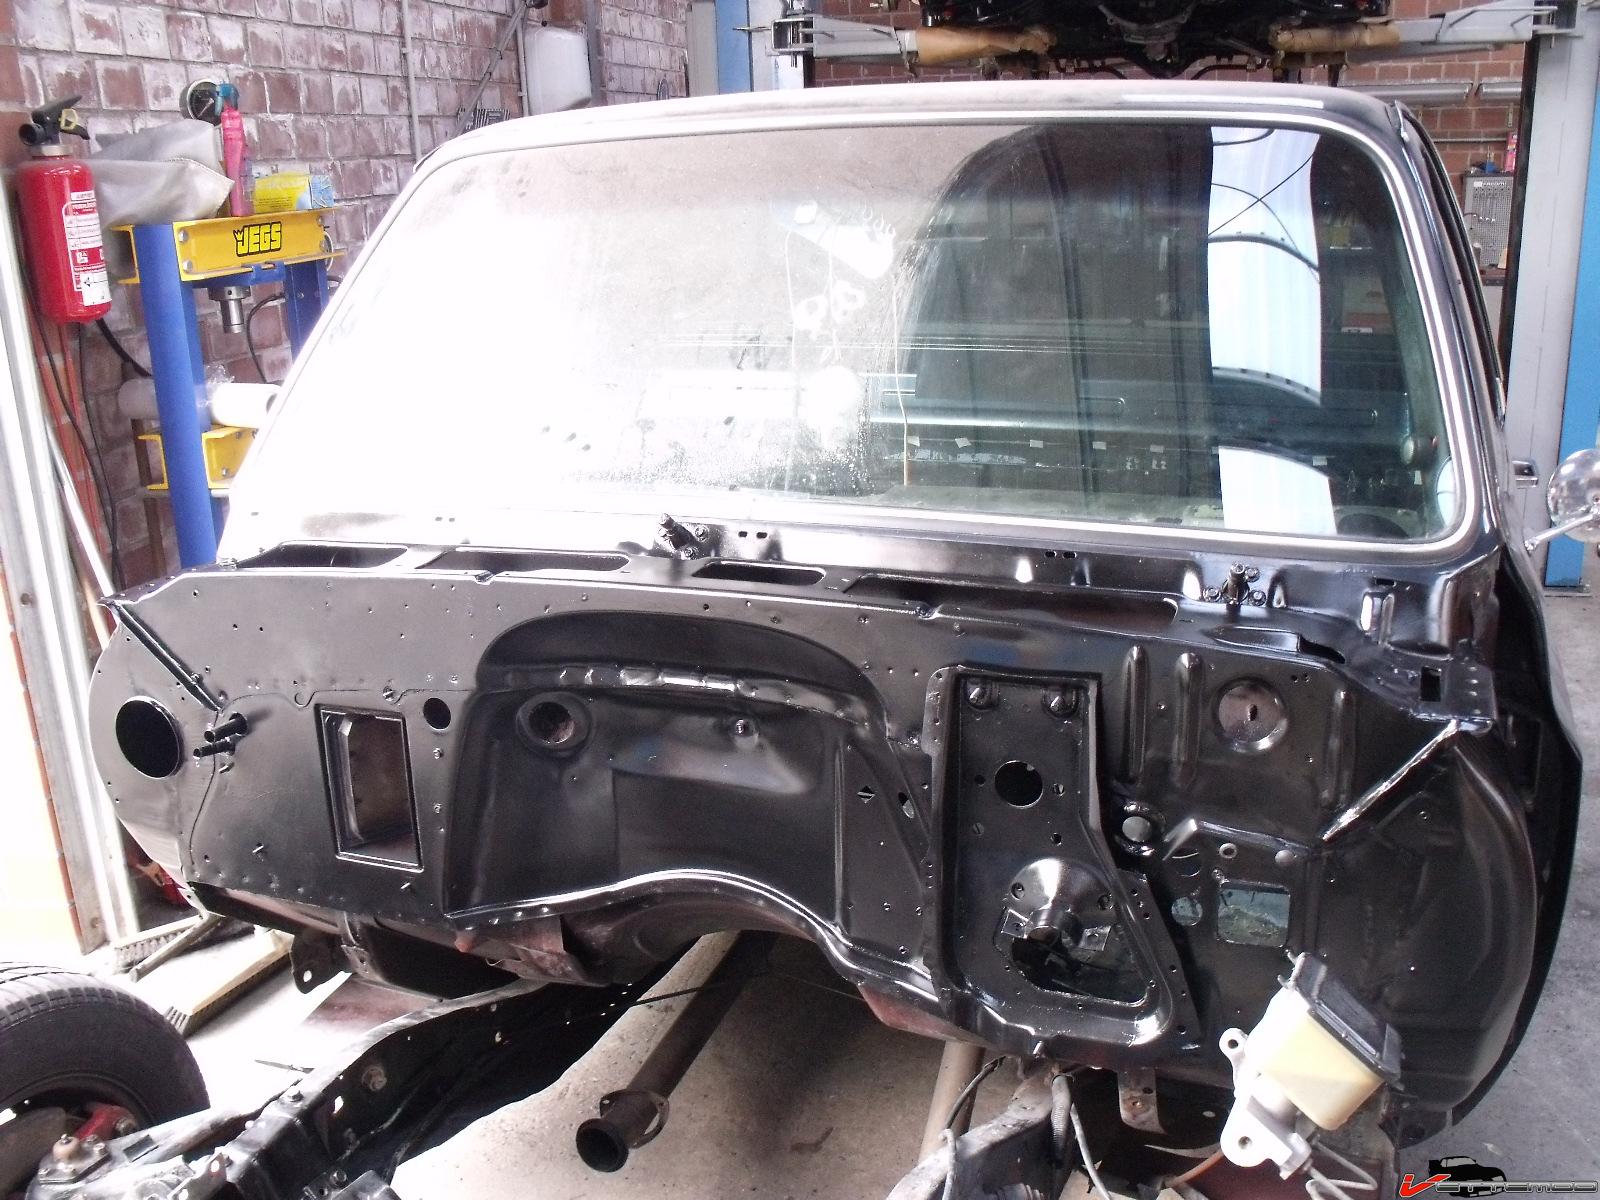


Sprayed the chassis w/ stone chip stuff, nothing fancy
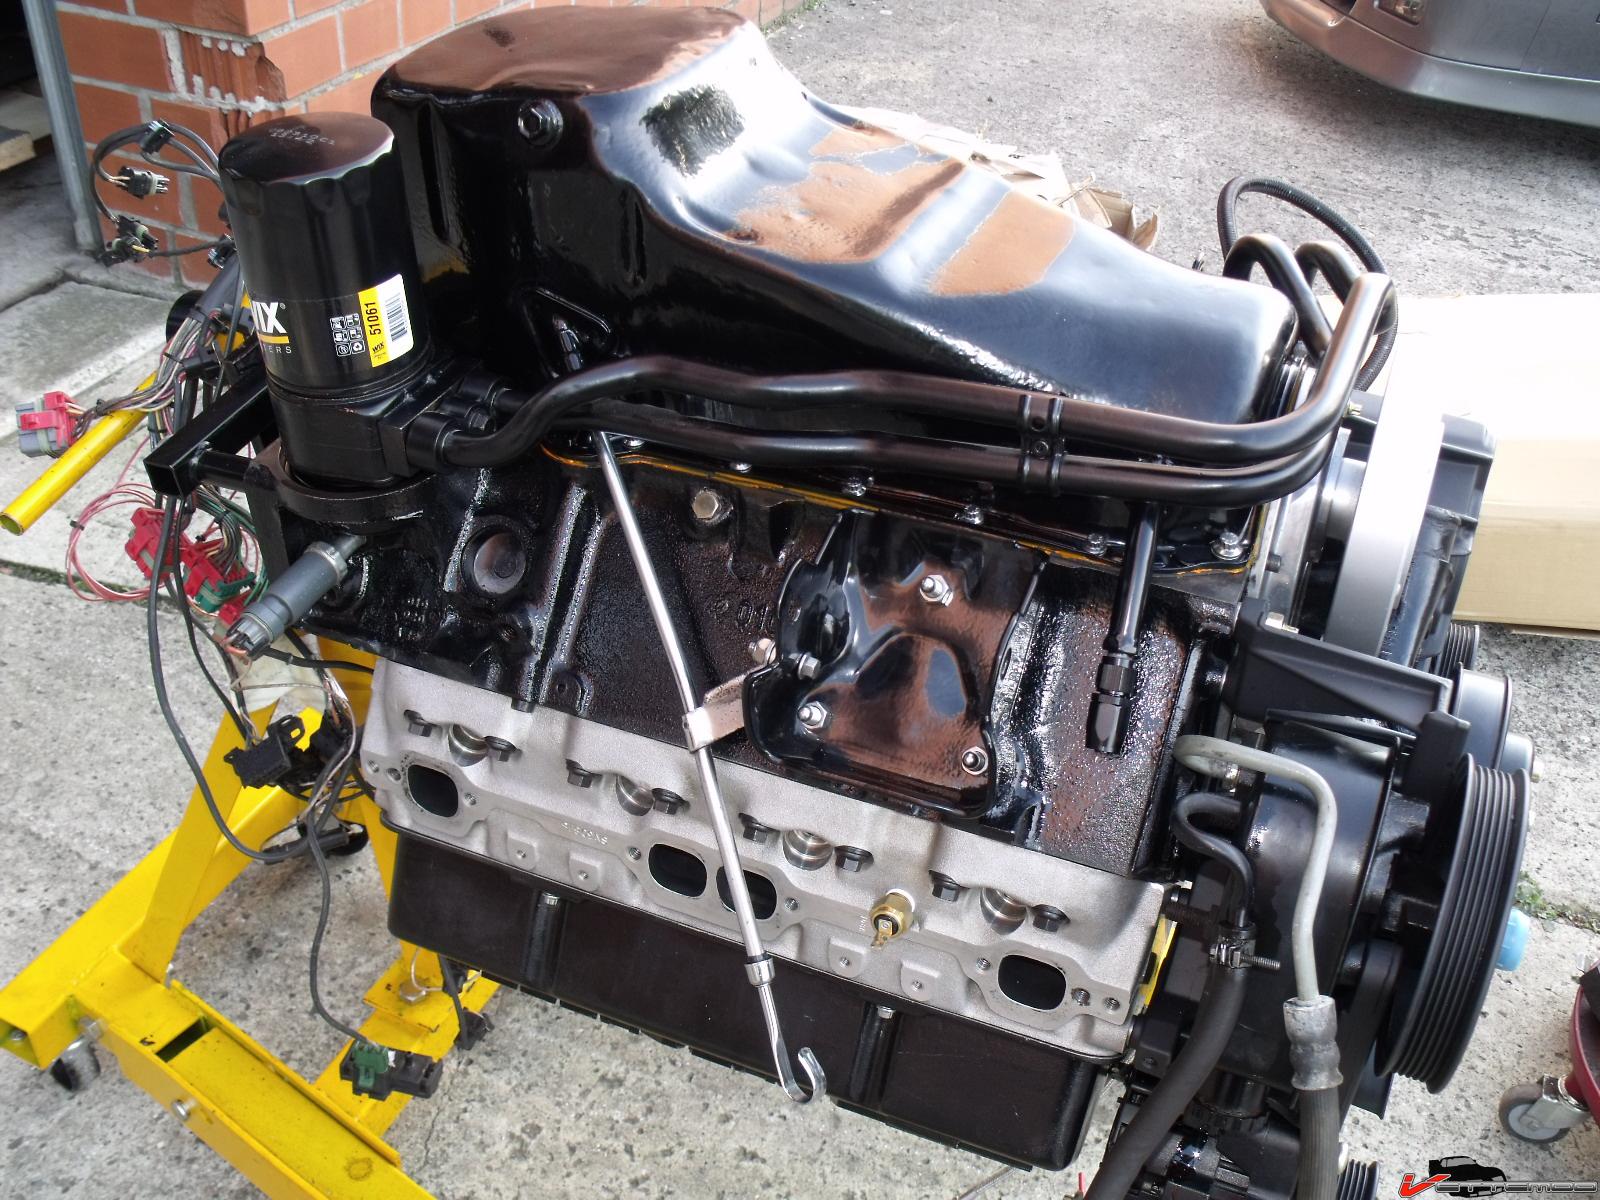
did some more work on the engine. Waiting for plated bolts and powdercoated parts to come in and my Summit order (new cam and bunch of other stuff) so i can put it back in. Did finish the wiring harness for the engine & EFI
Buttoned up most of the engine after receiving my summit order and getting stuff back from the powdercoater.
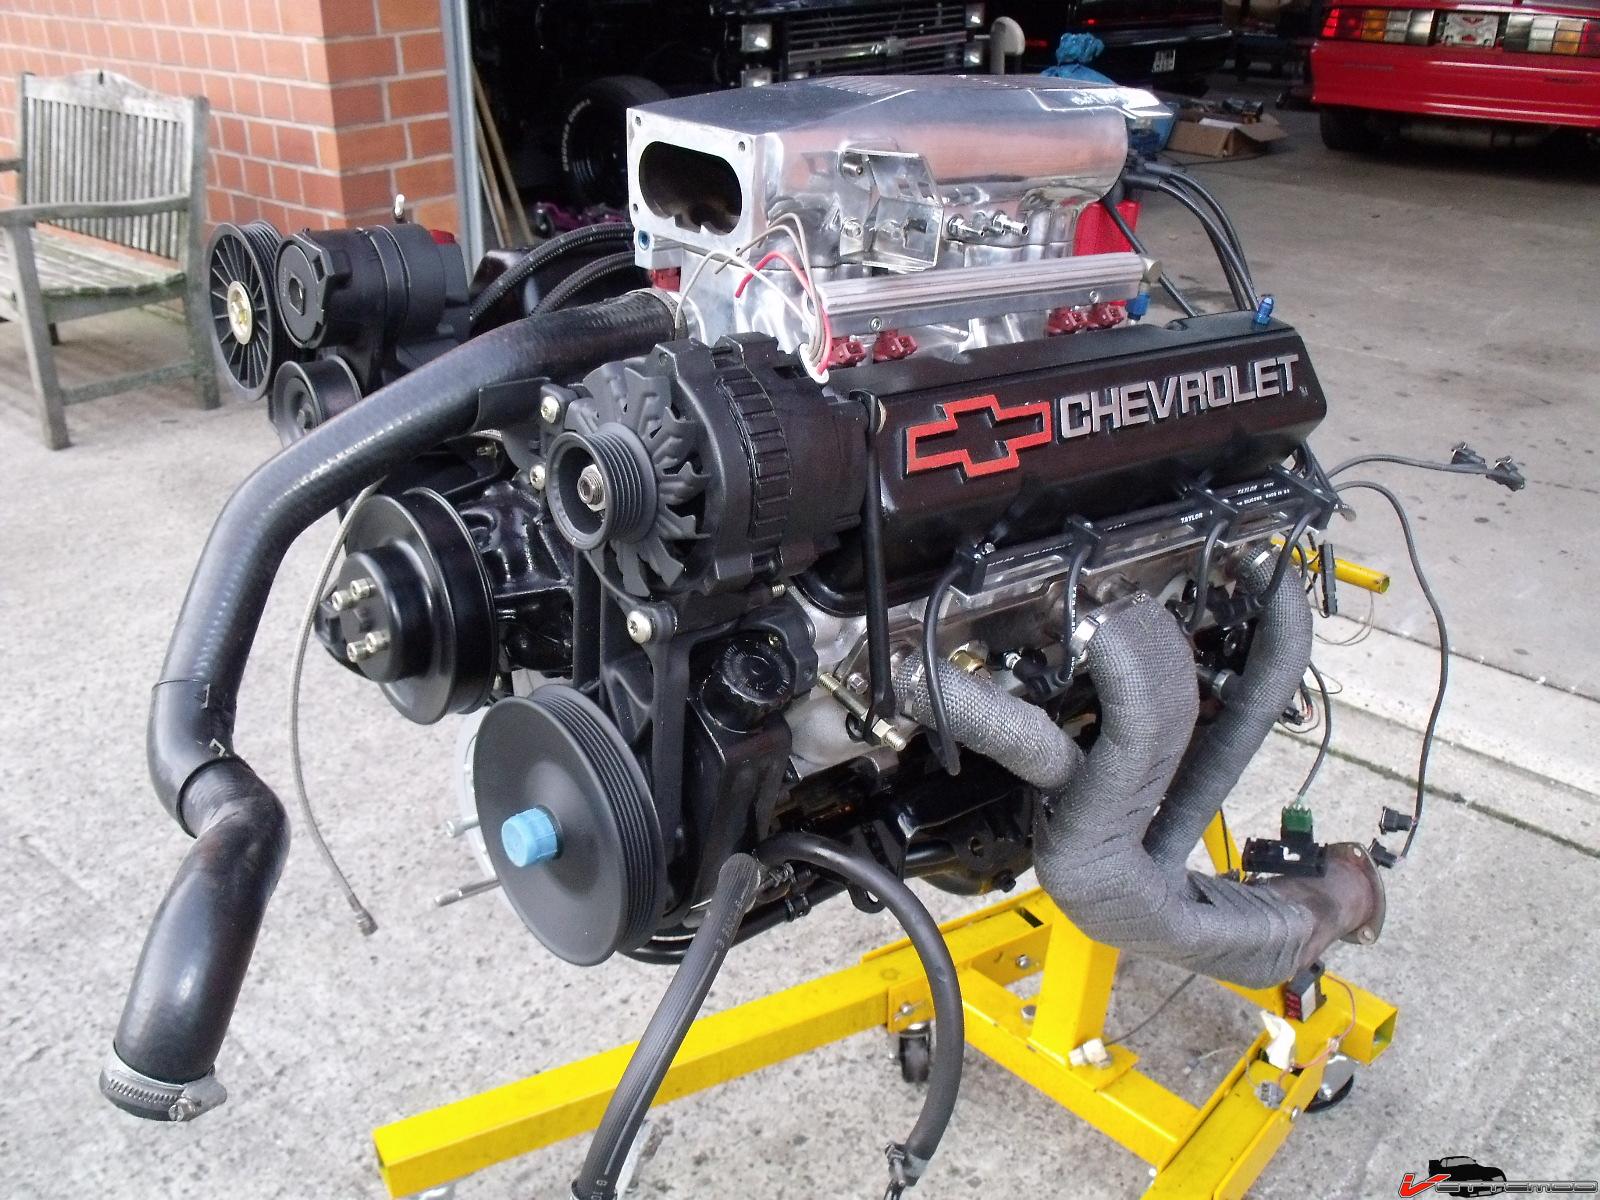
pan with oil return for SC and a heat exchanger so oil heats up more quickly

10-19-2012 #3
Registered User
- Join Date
- Nov 2004
- Posts
- 444
Forgot to pick up the bucket of bolts from the plater so I didn't have bolts for a lot of stuff. I did reinstall the powdercoated (custom) heater box and used torx screws to secure it all, much cleaner than what was in there.
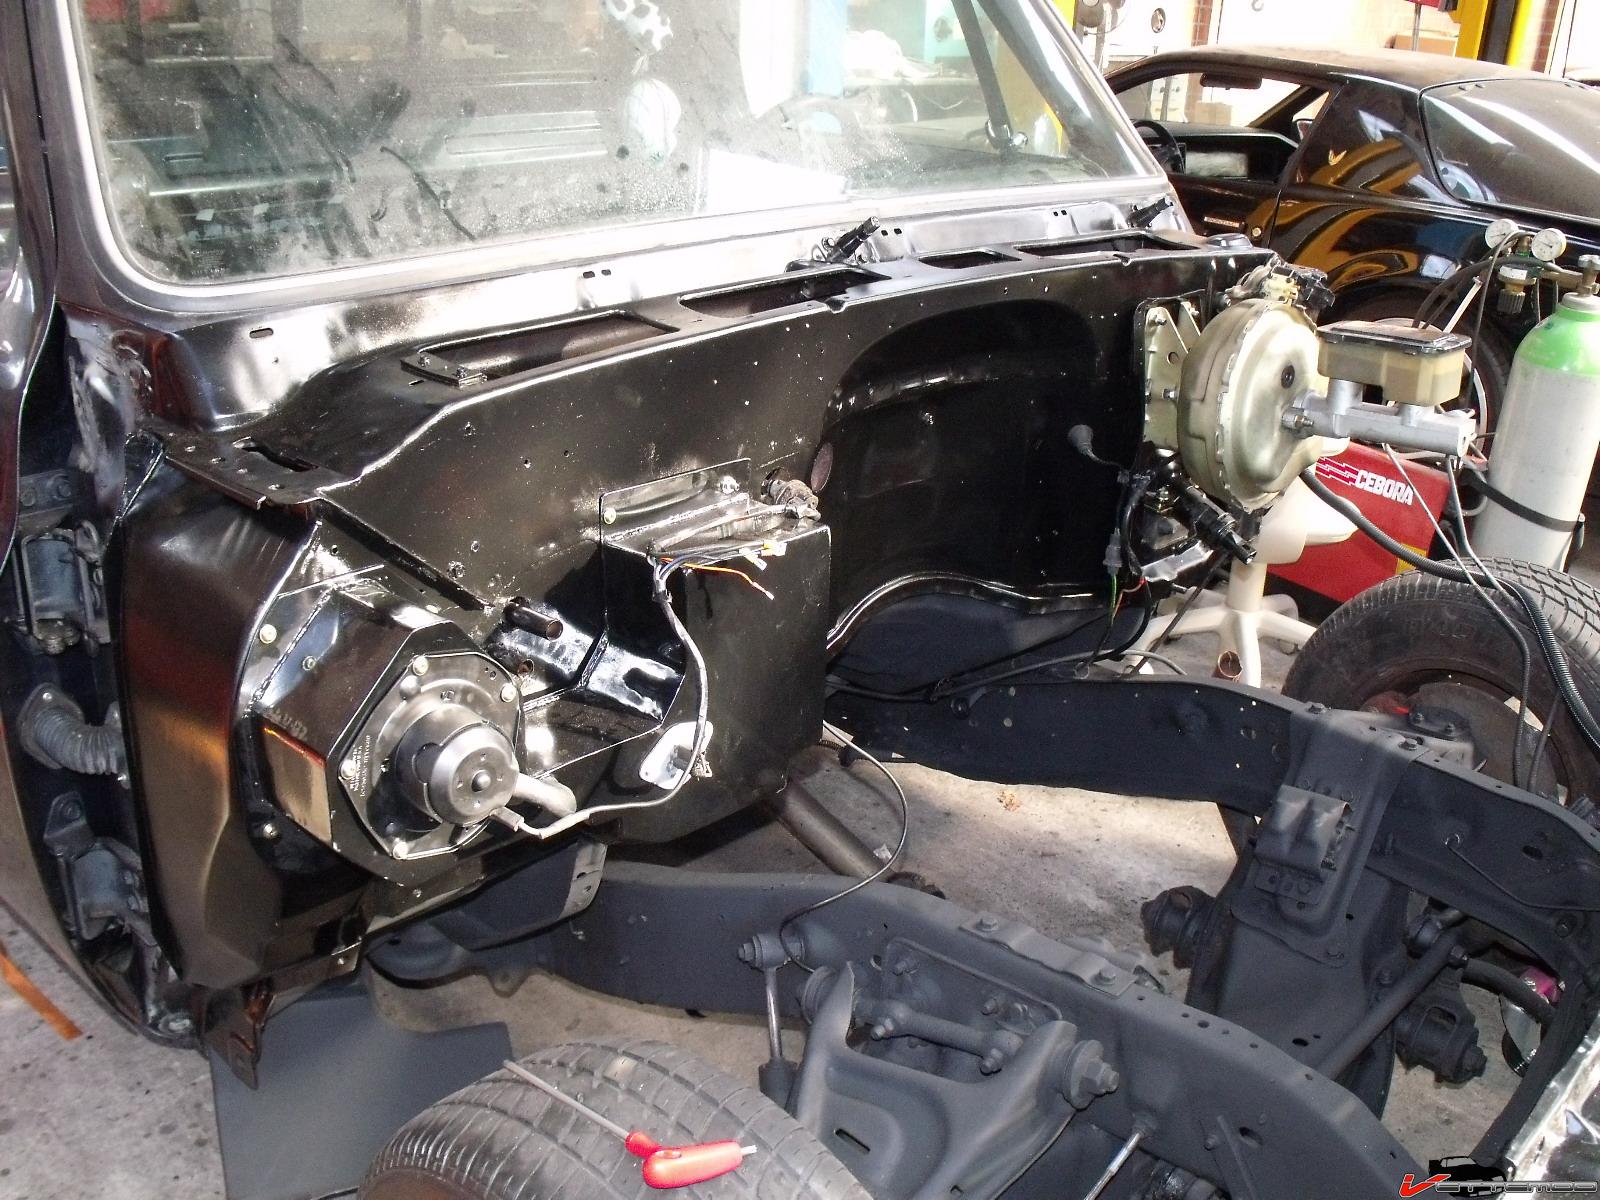
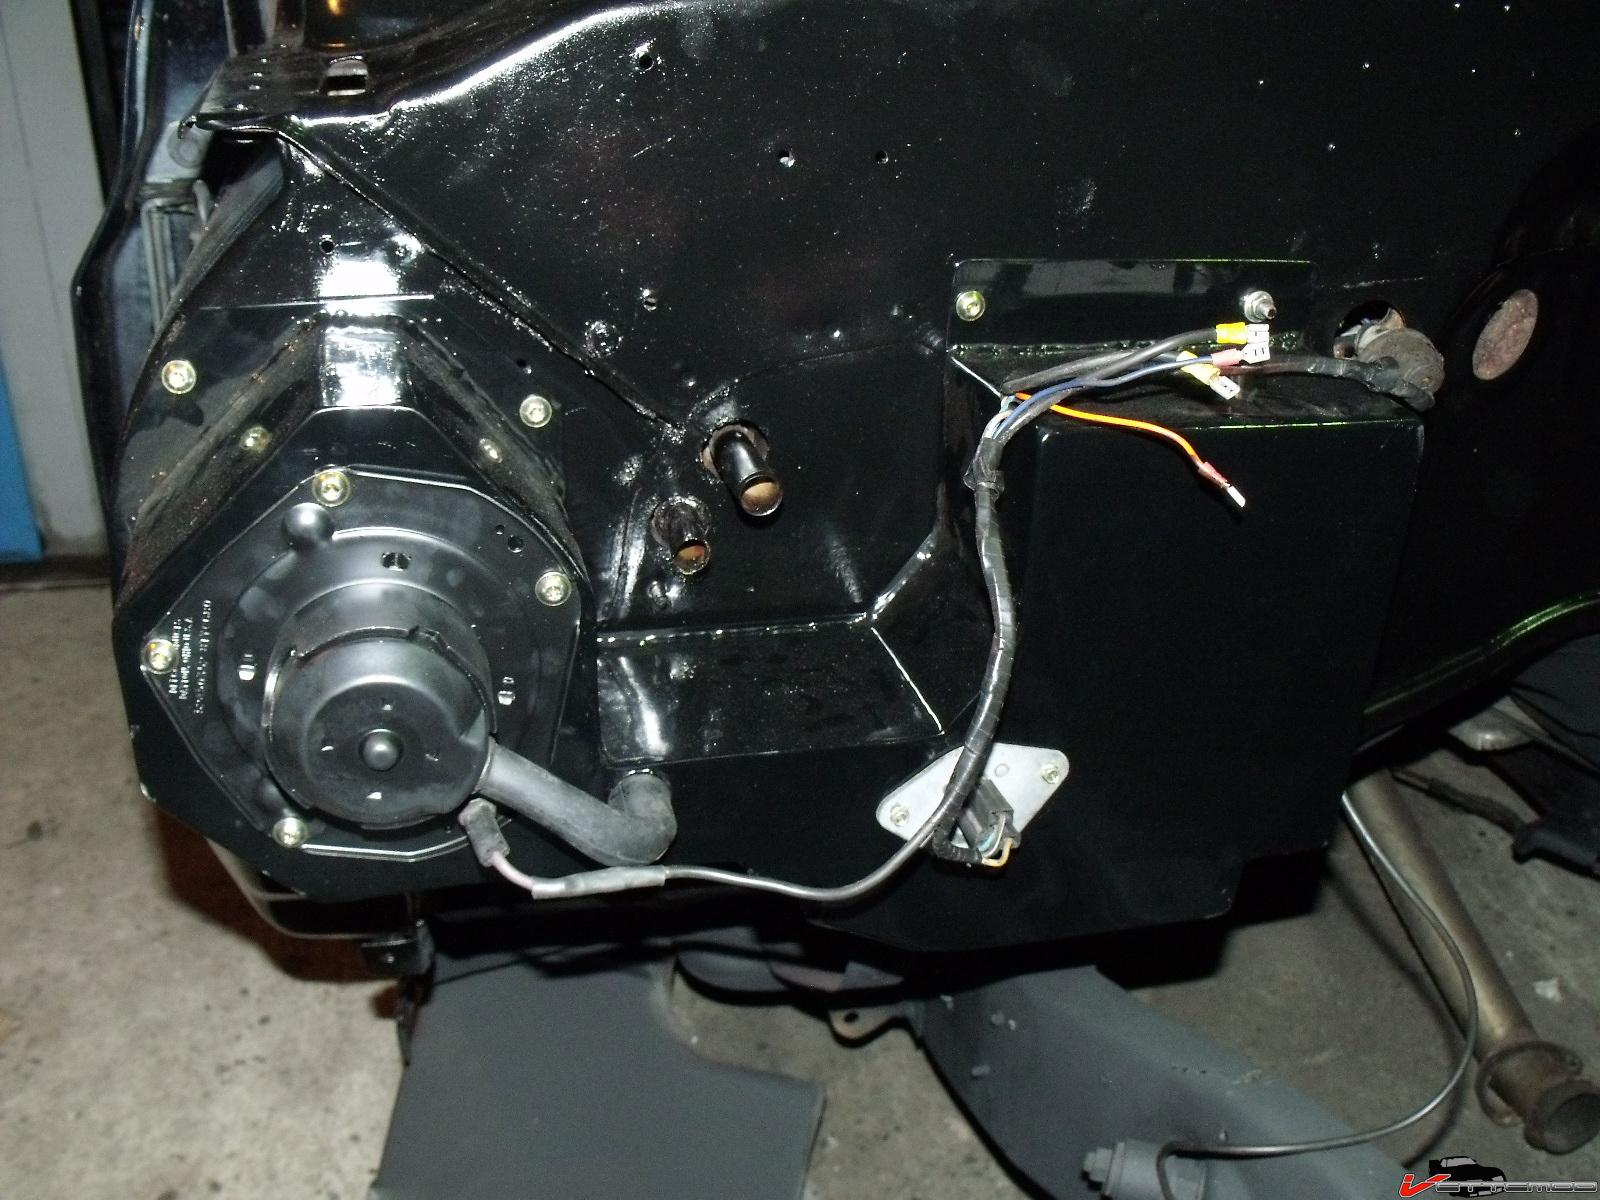
Wiring still needs to be cleaned up, I cleaned up the wiring for the front, still have to do the engine loom and the starter harness. I can not stand those crimper AMP connectors and splices. I solder and heat shrink all my connections.

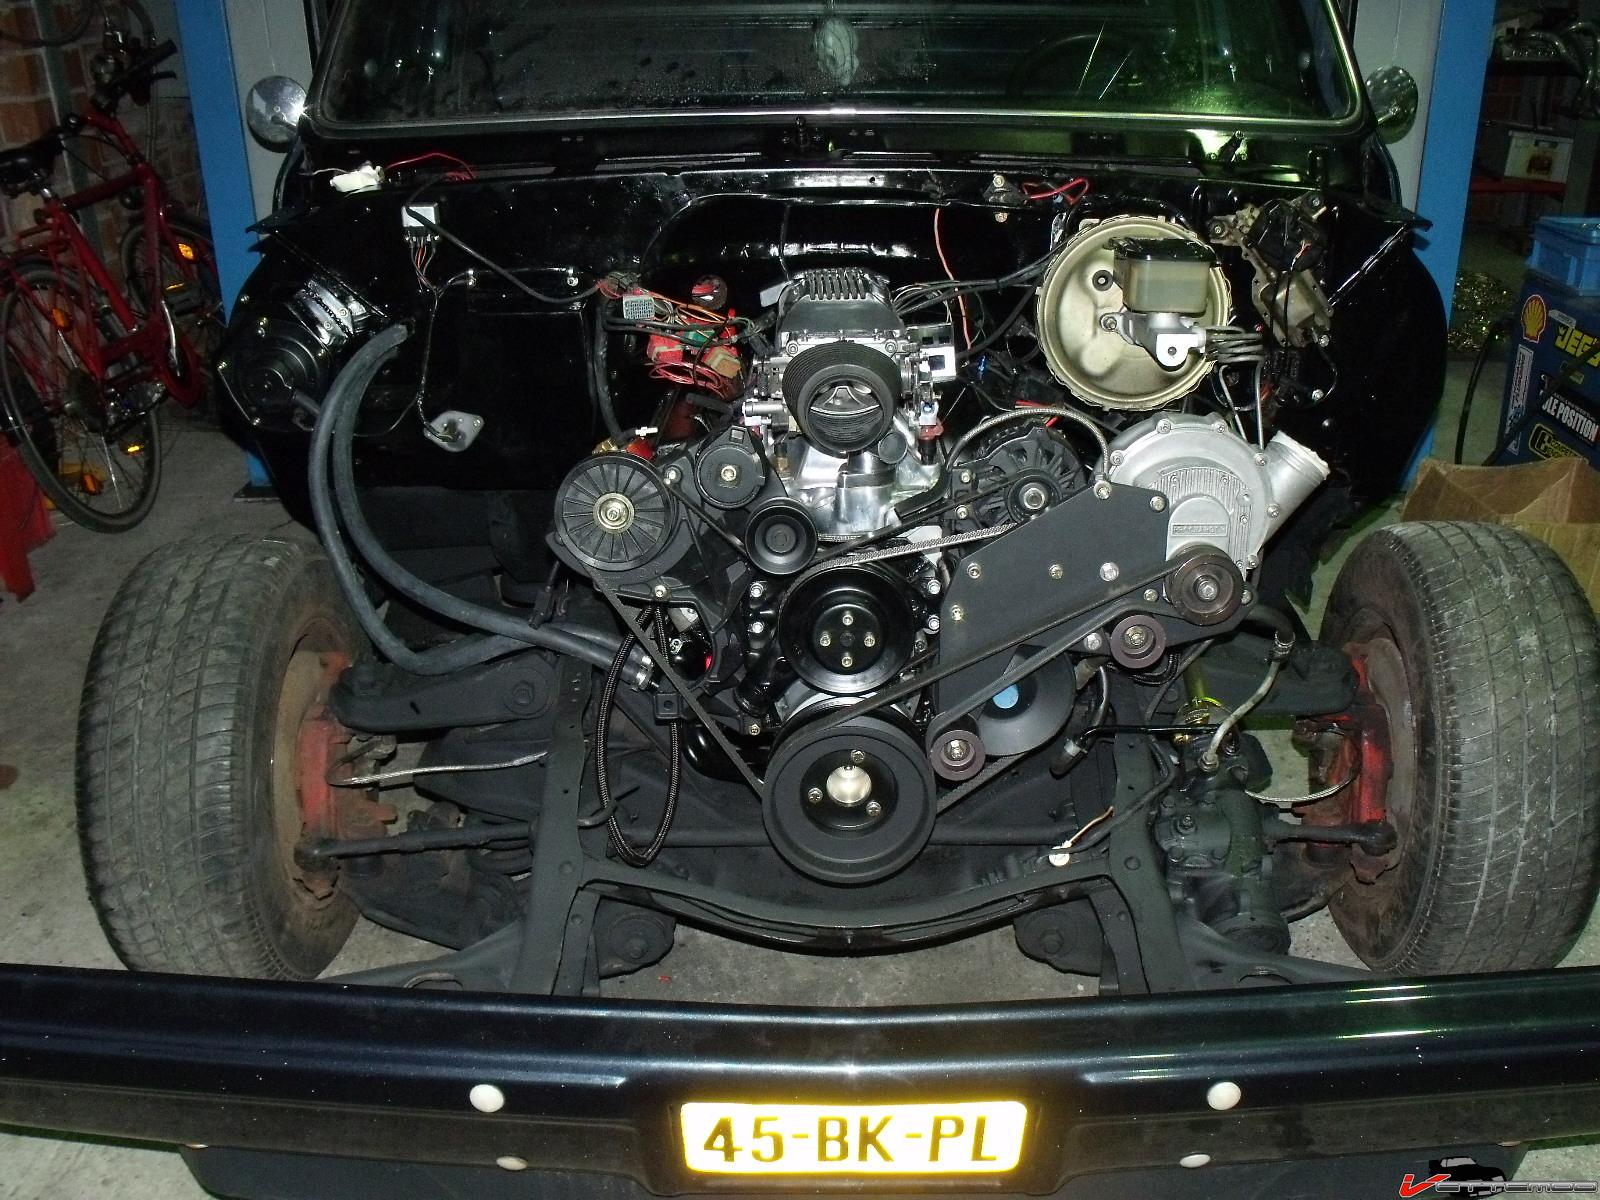
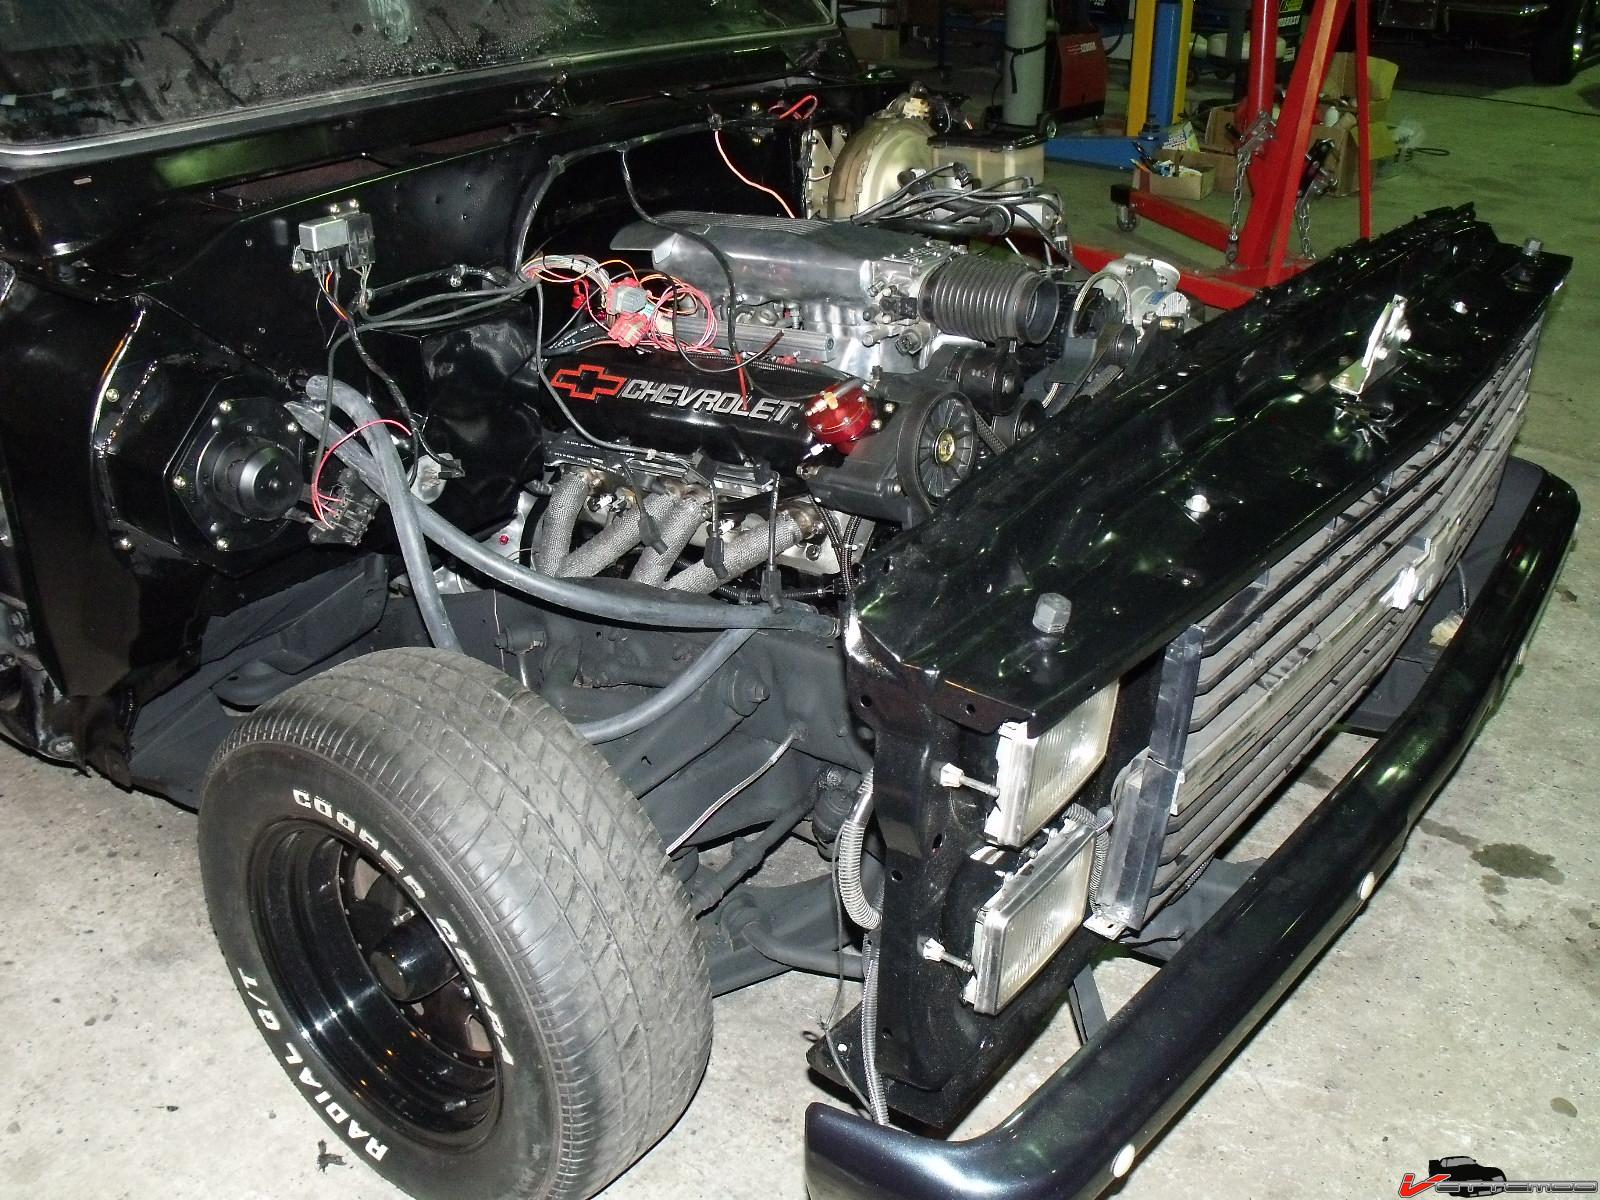
Got the engine done, all it needs now is the supercharger and the intercooler & piping. Didn't have the bolts to put the IC and pulley on. All hoses and everything is new.
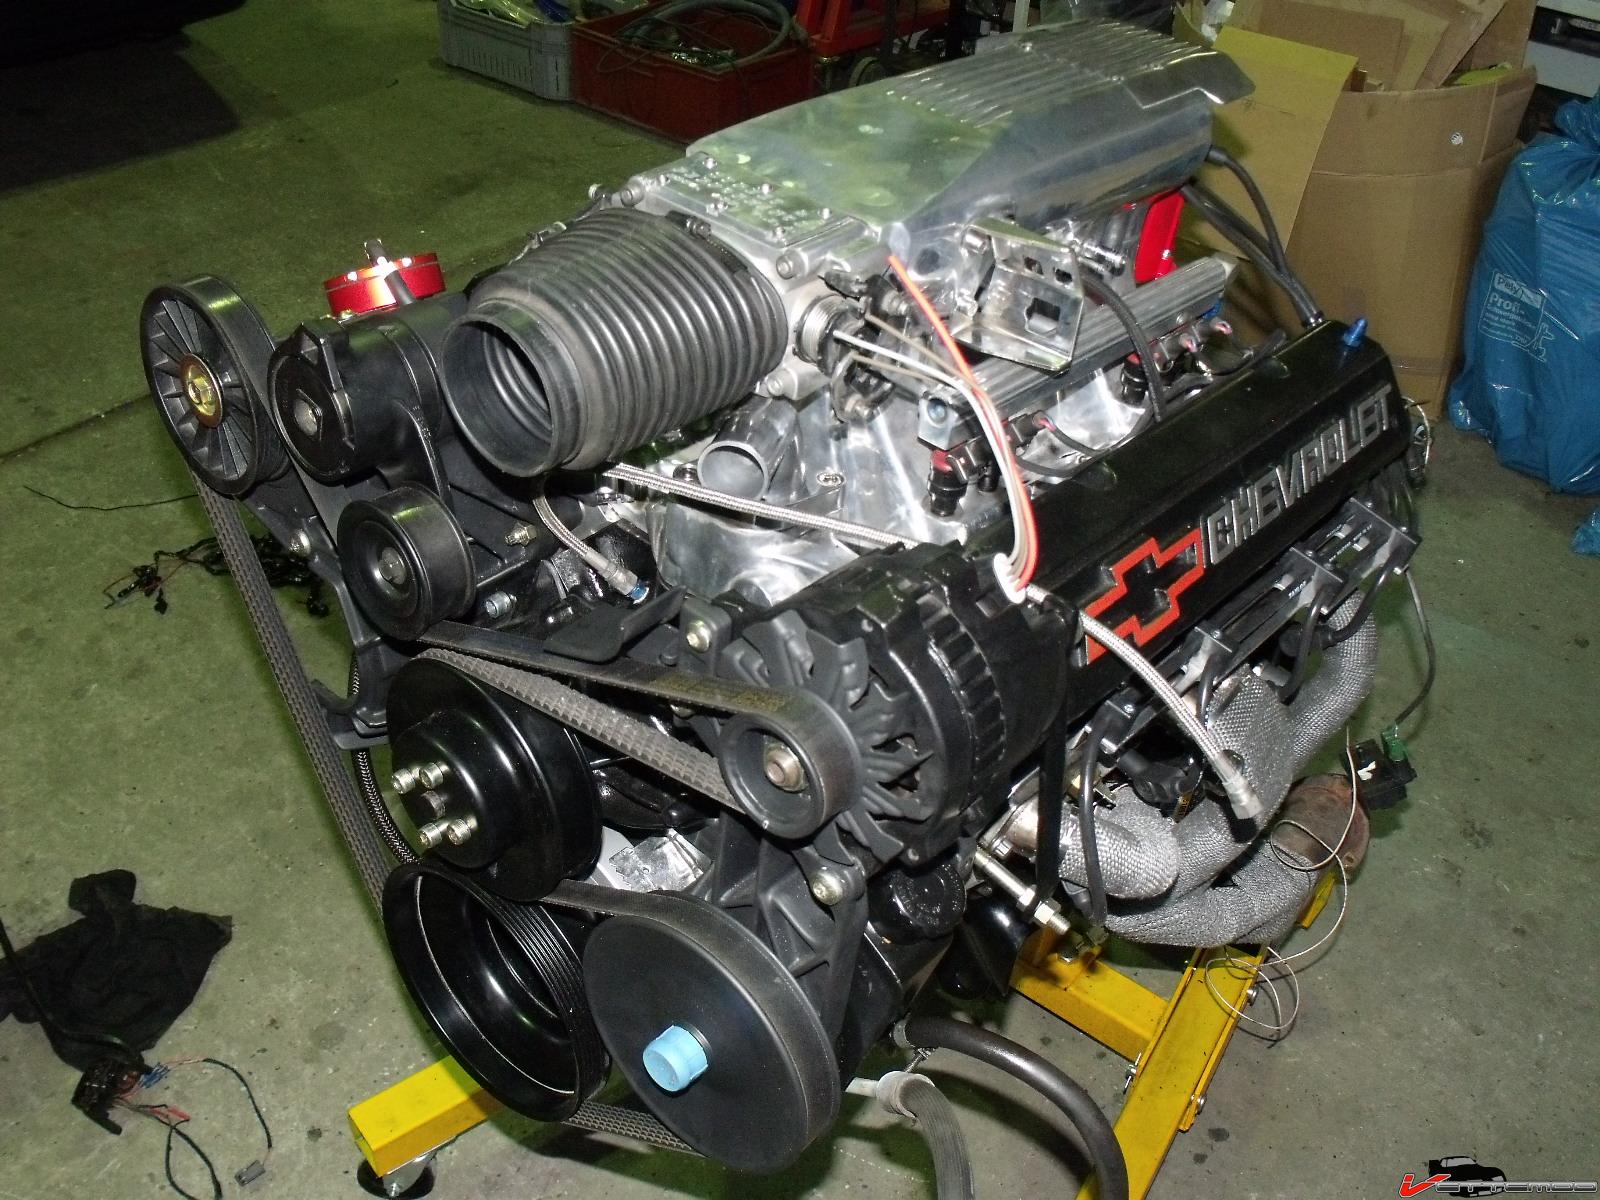
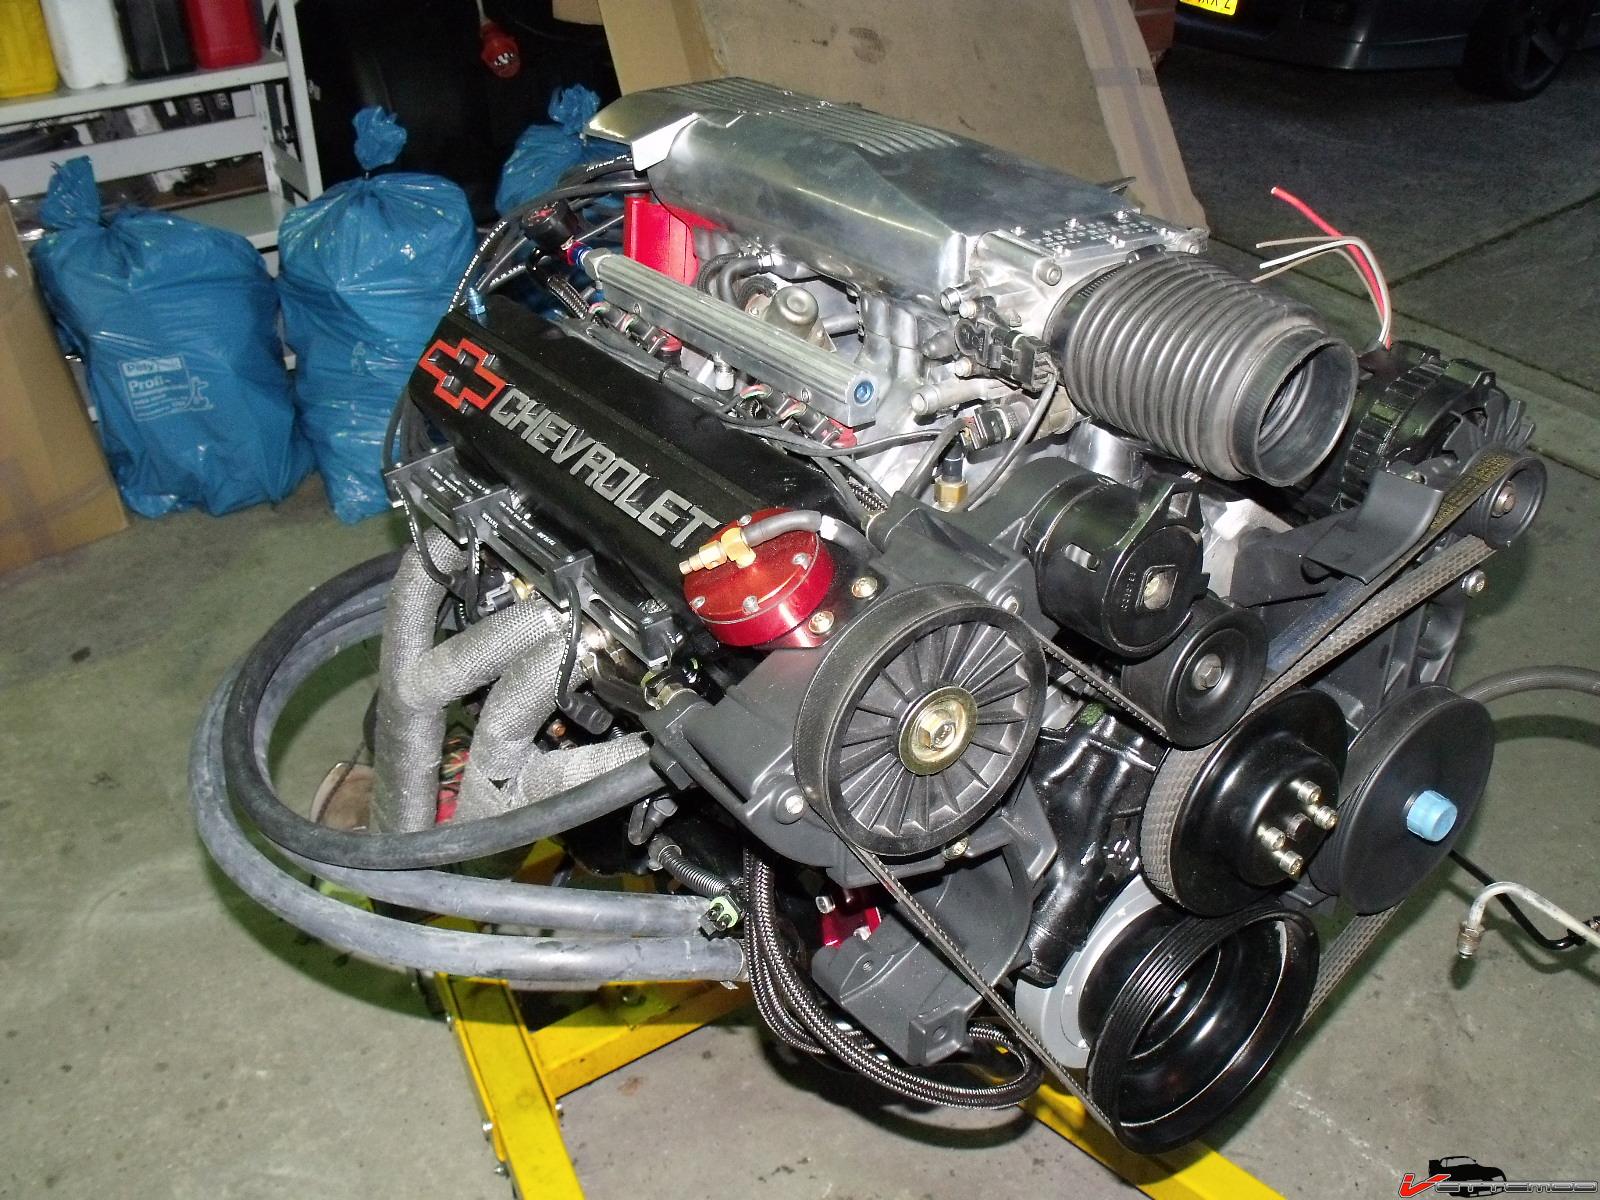
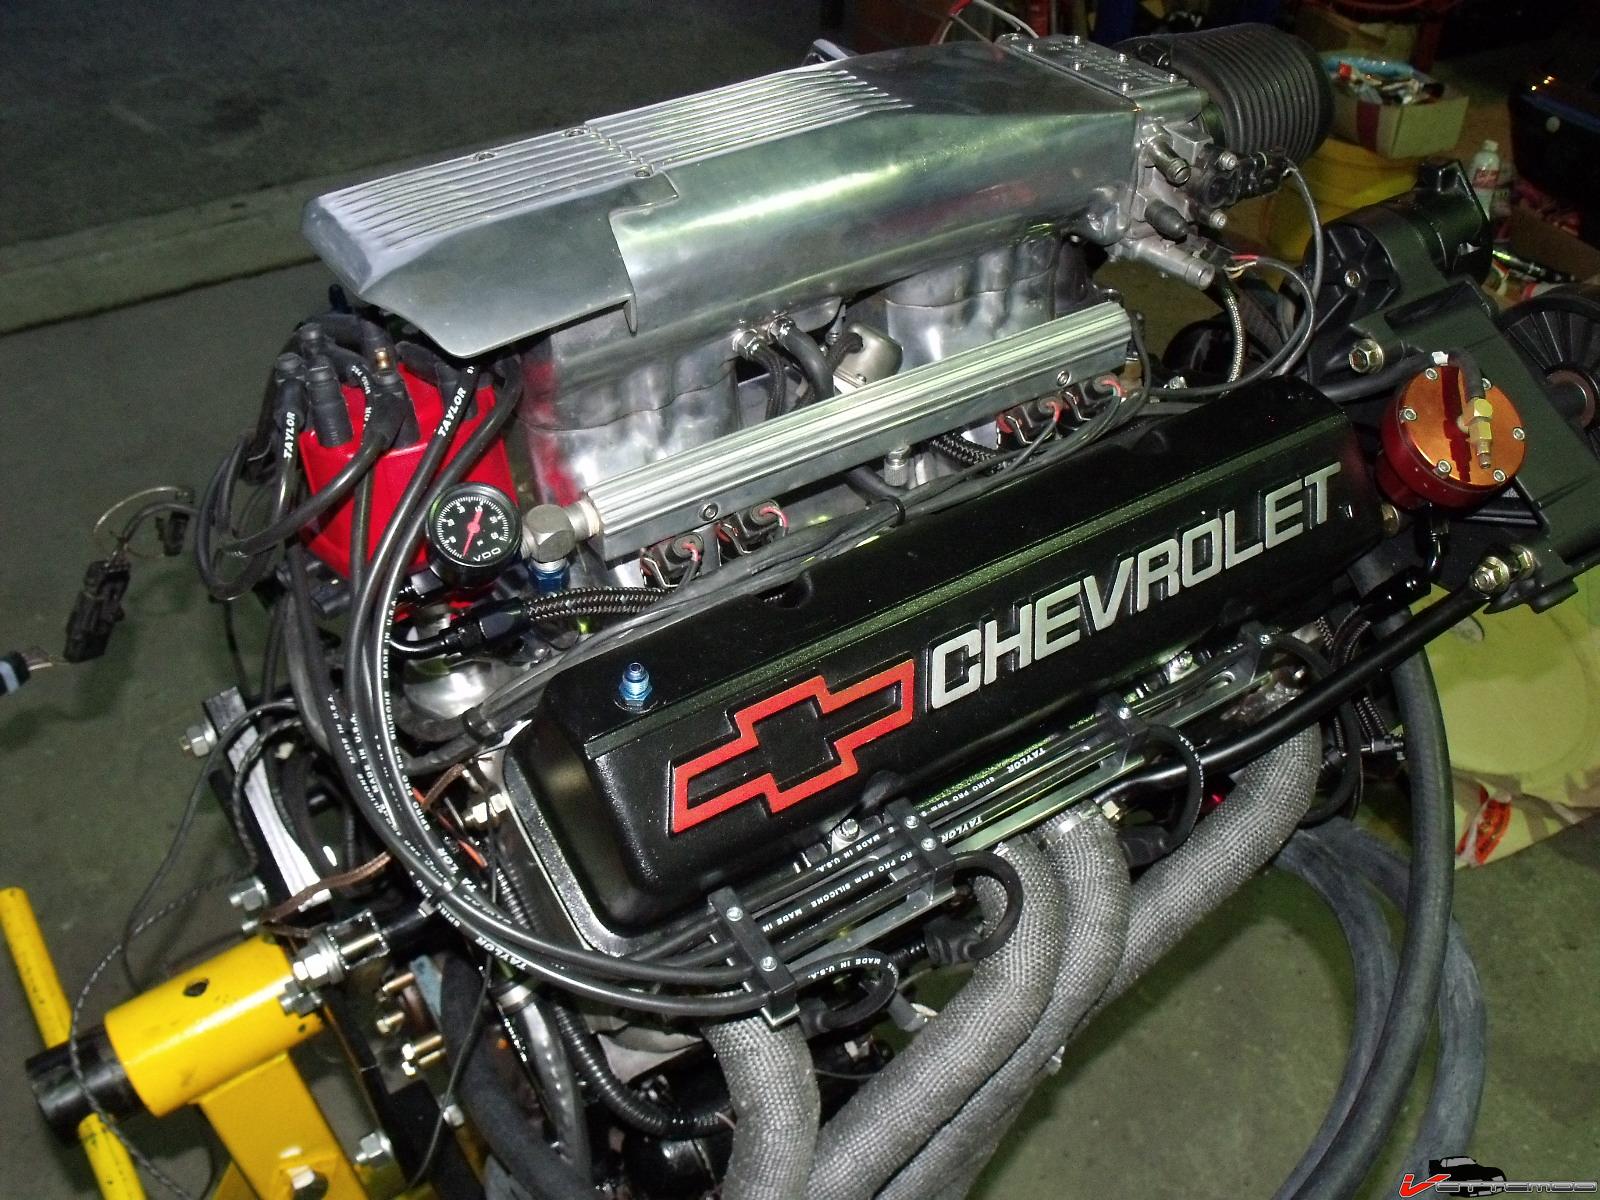
Progress is real slow, especially since it takes a lot of time to fix the hacked up wiring harnesses. I want to make them as clean as possible, redo all the connections and spliced with solder and heat shrink. I got all the harnesses done, except for the last section on the firewall running down to the starter and the section for the alt. charging wire and brake warning switch. All the others are done, the fuxebox is completely redone (some wires cut off with only a hair sticking out)
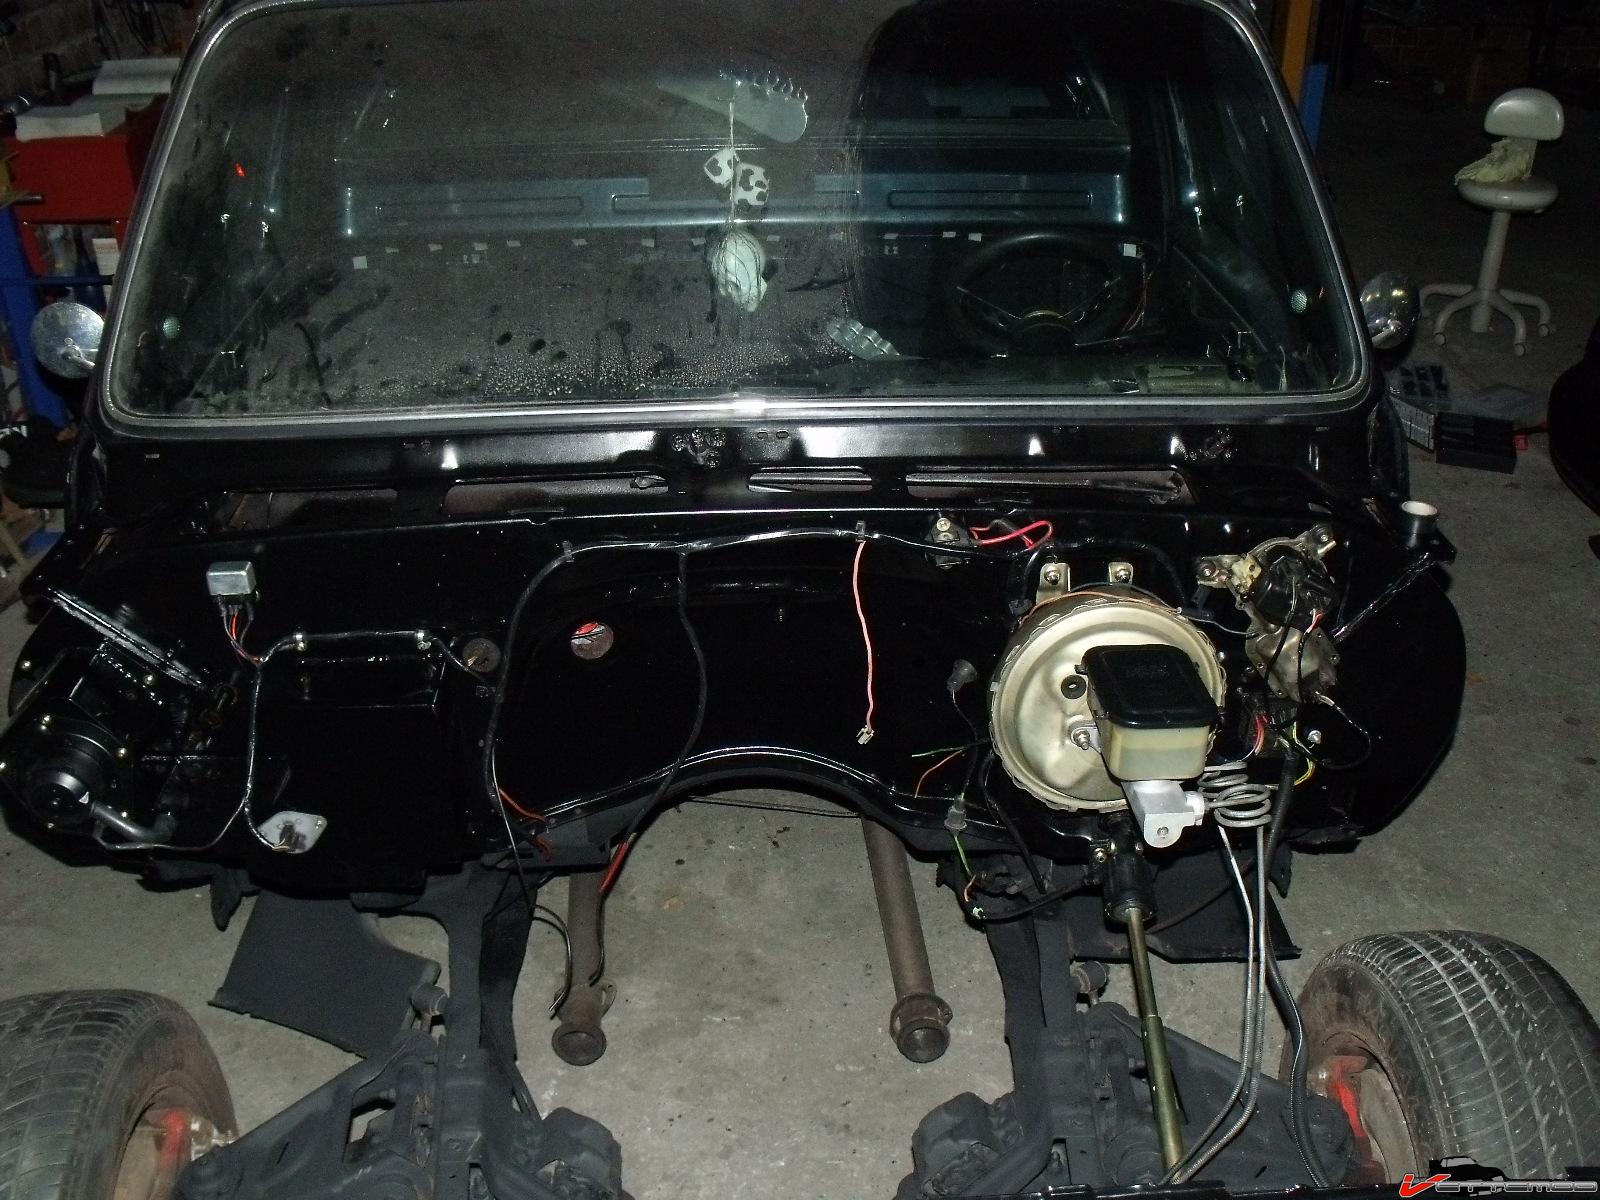

all the wires on the engine will have to be tucked away neatly too. I will mount the weatherpack ECM on the heater box. I disassembled the ECU so I can powdercoat the housing. Had to take it apart anyway to remove the calpak that was in there, I'll need to hook up an ostrich and do some tuning on it for sure and then burn a new prom and install that (so it's weather sealed again, which it isnt with the ribbon cable for the ostrich sticking out)
Bead blasted the steering shaft and had it zinc plated. The steering column end didn't come out so pretty because some residual grease leaked out and screwed up the finish so I painted that black

The engine is fully assembled :D YAY thinking about either painting the SC black or installing a polished one that my buddy has, the polished look would go with the intake although I don't really like bling stuff. I'm all about matte black and machined & anodized aluminum


cleaned up rebuilt 700R4. Still needs deep sump pan (have it)

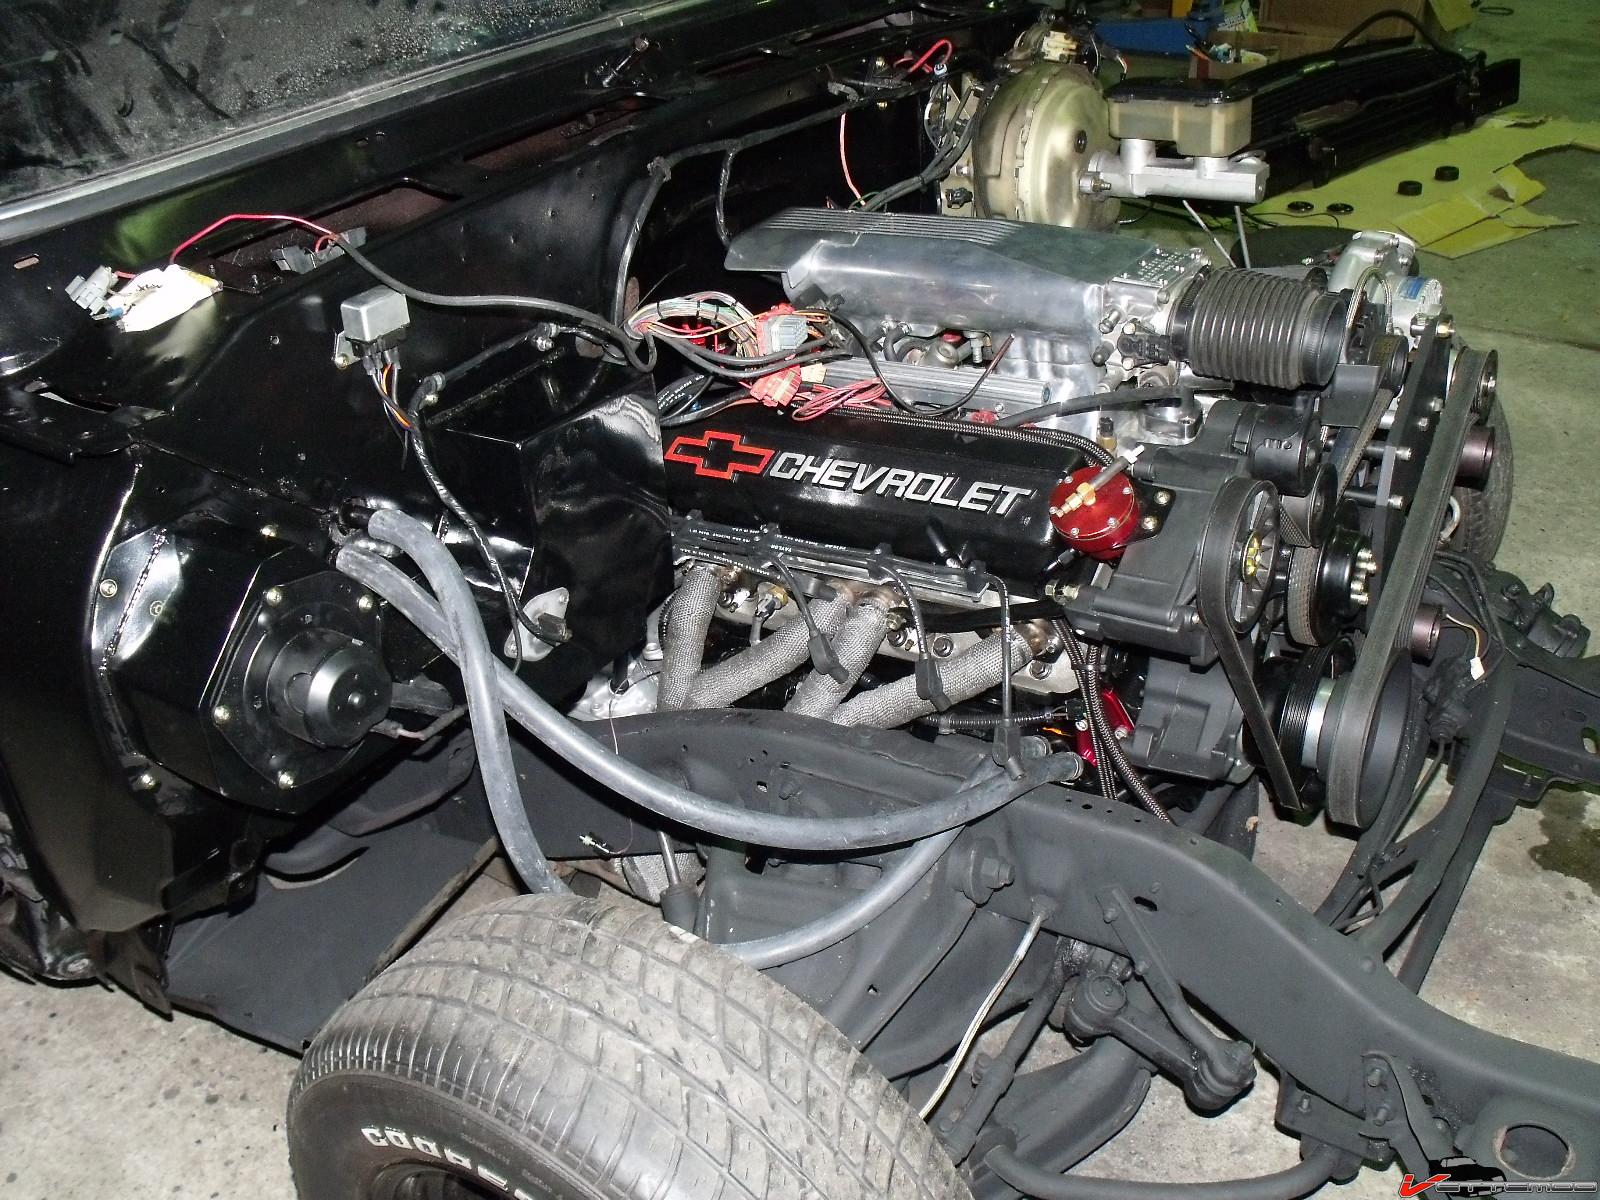
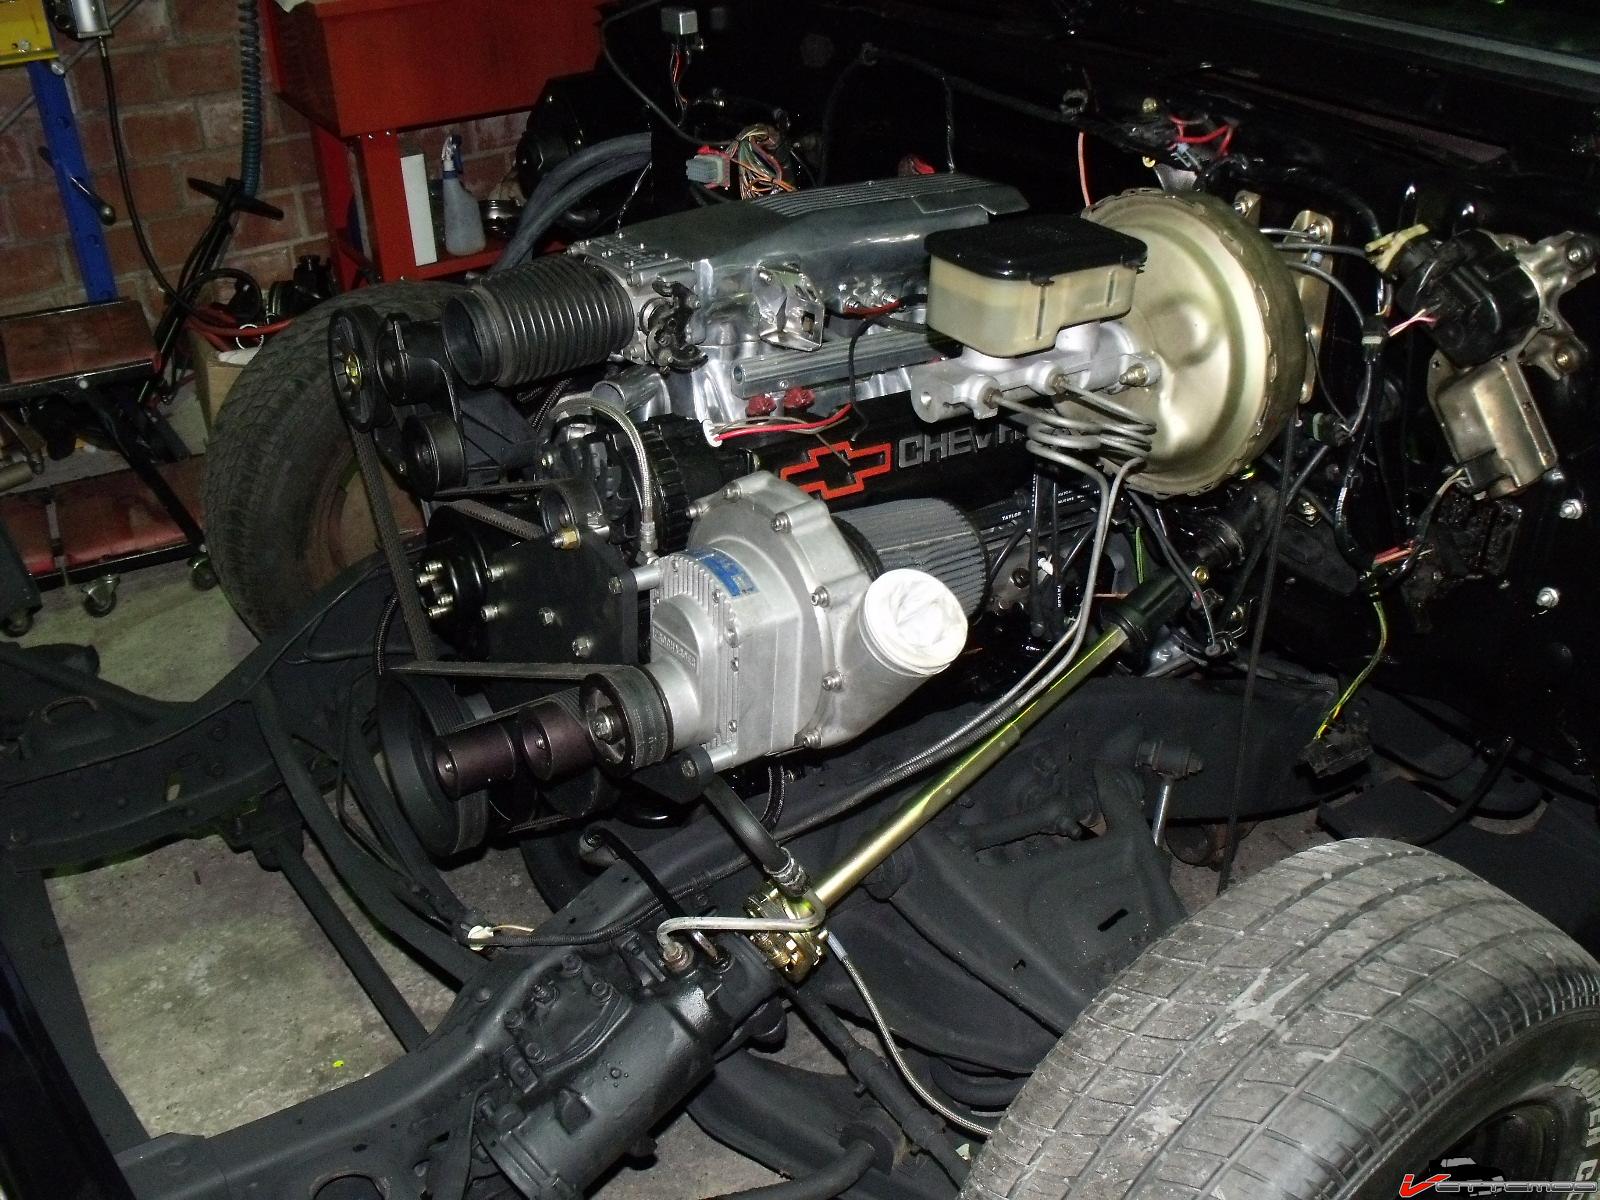
dropped it all in


10-19-2012 #4 Registered User
- Join Date
- Jul 2010
- Location
- OREGON
- Posts
- 365

Nice....Diggin the s.c.
10-19-2012 #5
Banned
- Join Date
- Aug 2012
- Posts
- 82
Great tires on that POS!
10-19-2012 #6 Registered User
- Join Date
- Jul 2008
- Location
- ohio
- Posts
- 1,135
really???? Originally Posted by Trans
 keep the wheels a spinning and the Beavers a grinning
 (burt reynolds-smokey and the bandit)
11-24-2012 #7
Registered User
- Join Date
- Nov 2004
- Posts
- 444
Not much interest apart from some low life POS who's apparent sole purpose here is to crap on other people's stuff. Probably just a zit faced foreskin waxer!
anyway
Not a whole lot of progress here, waiting on fenders to come in from the US. I did finish the exhaust system and all wiring. I also painted the supercharger black.
Next is doing the intercooler & ducting

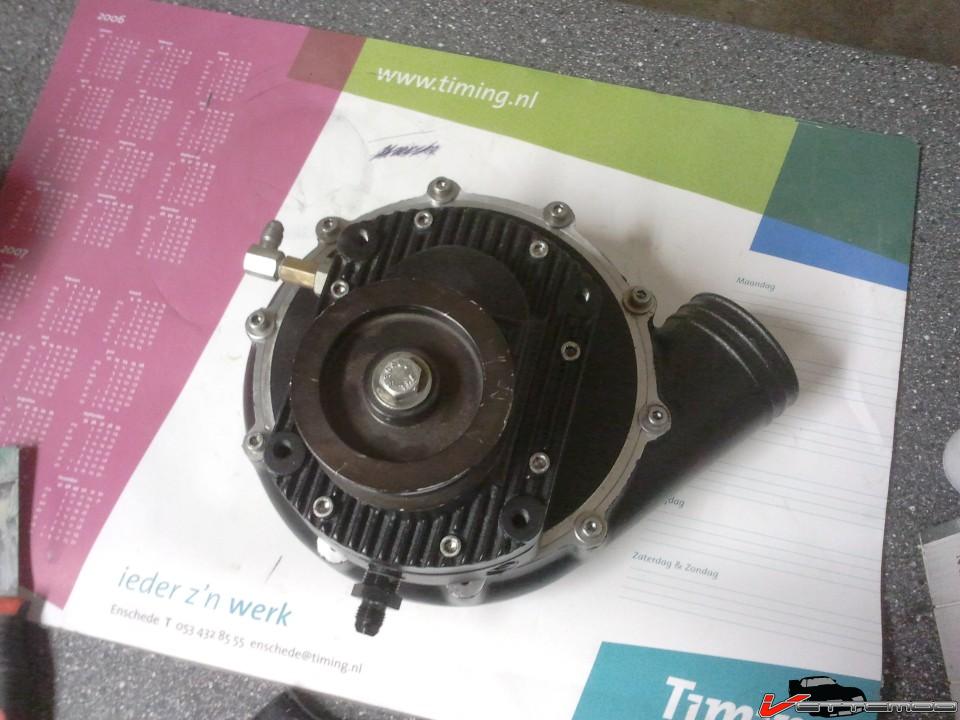
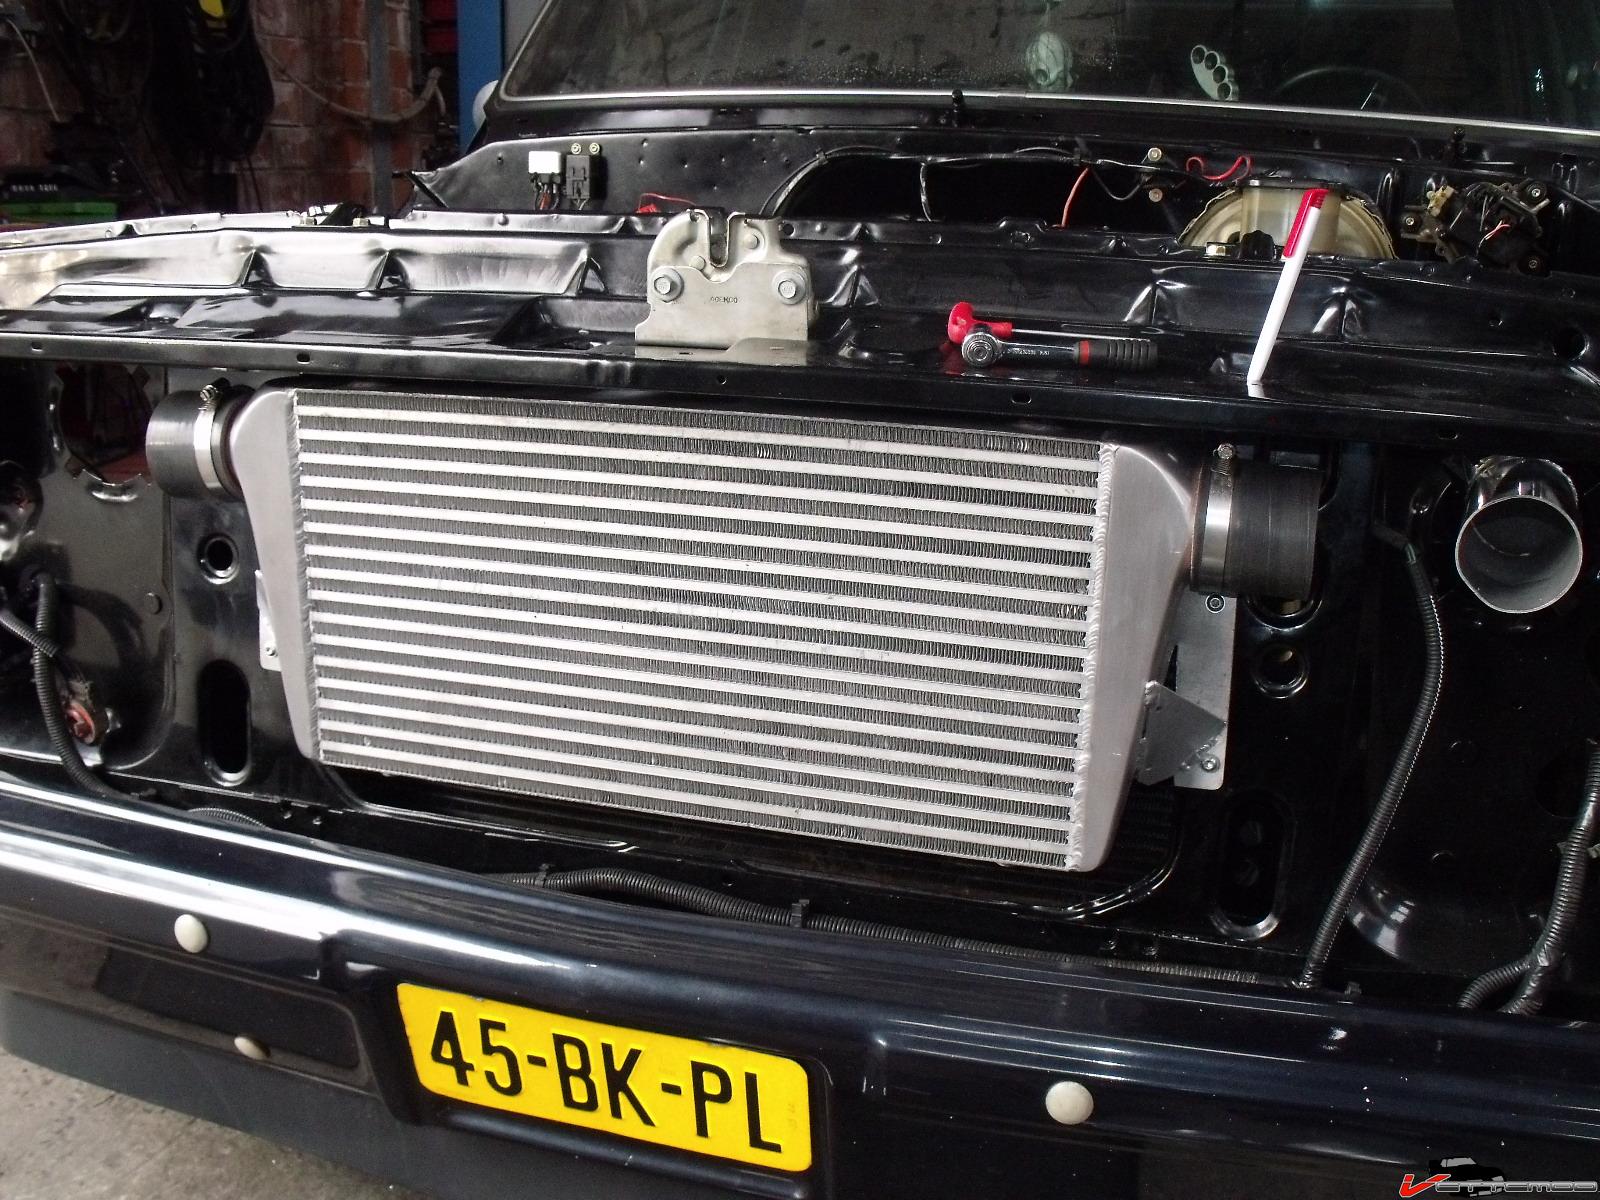
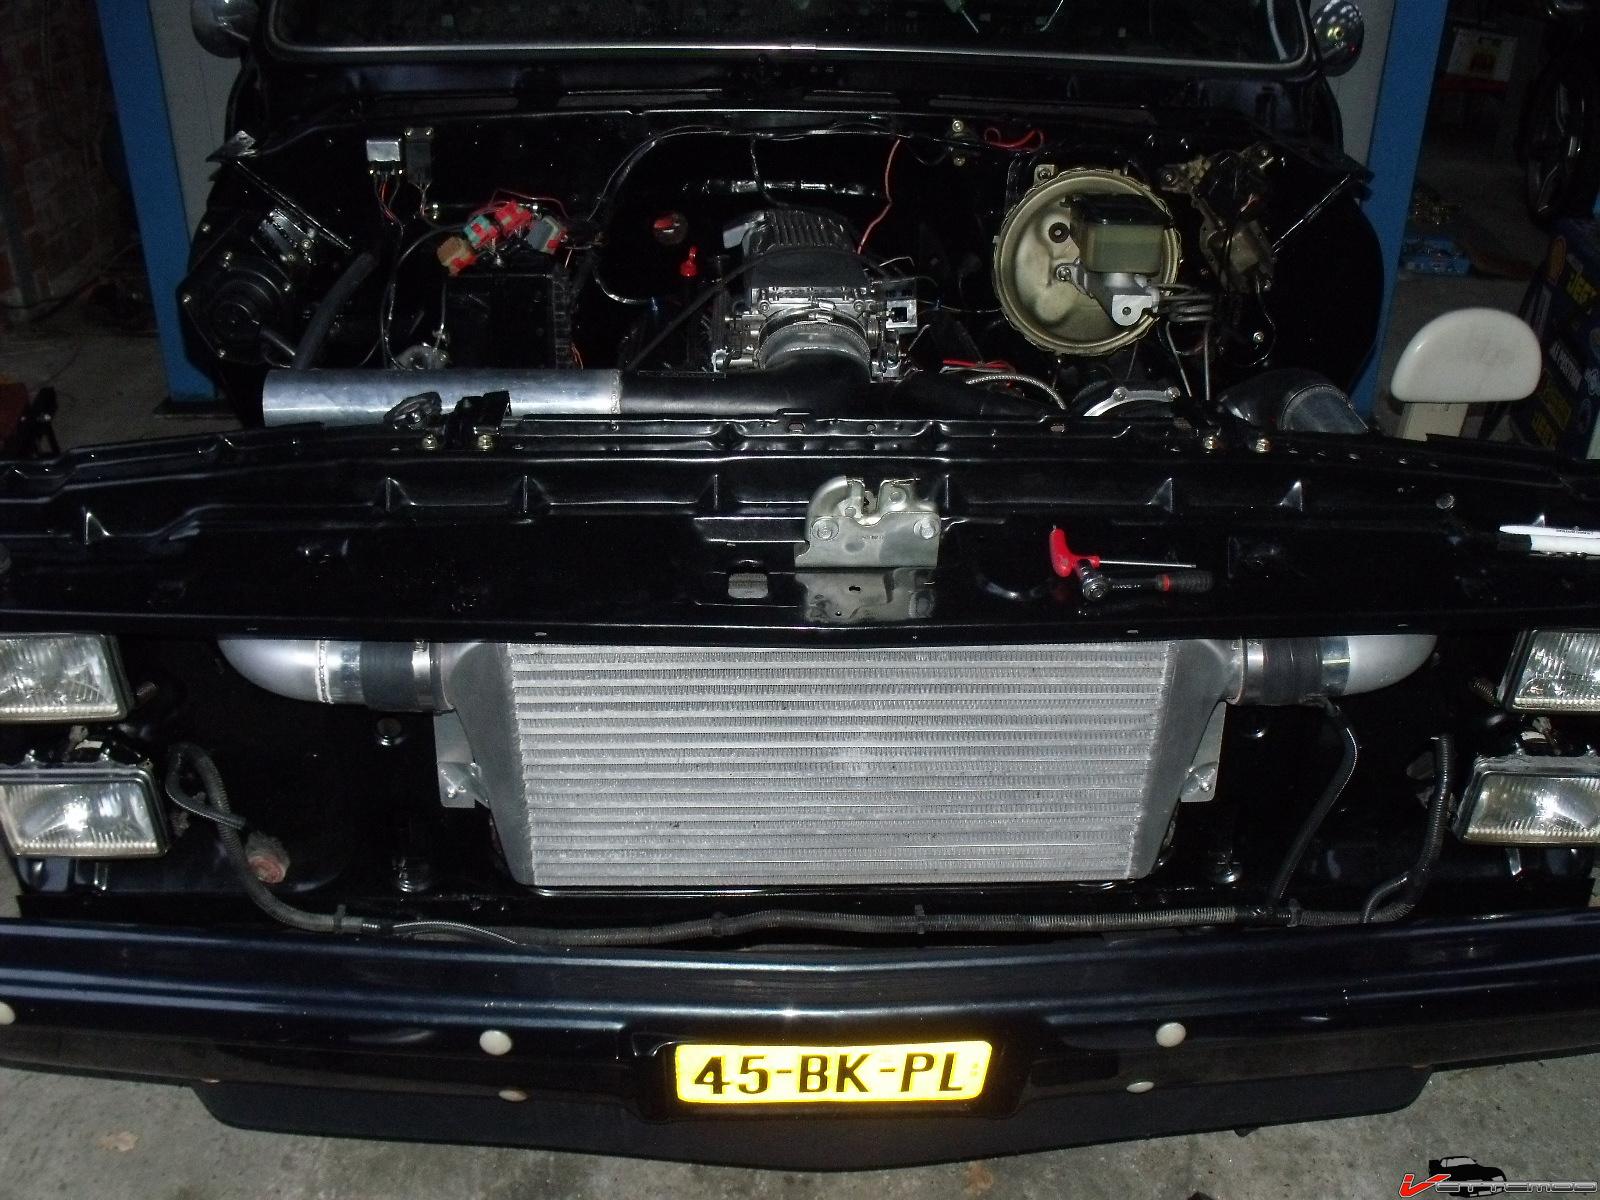
All the IC piping is done
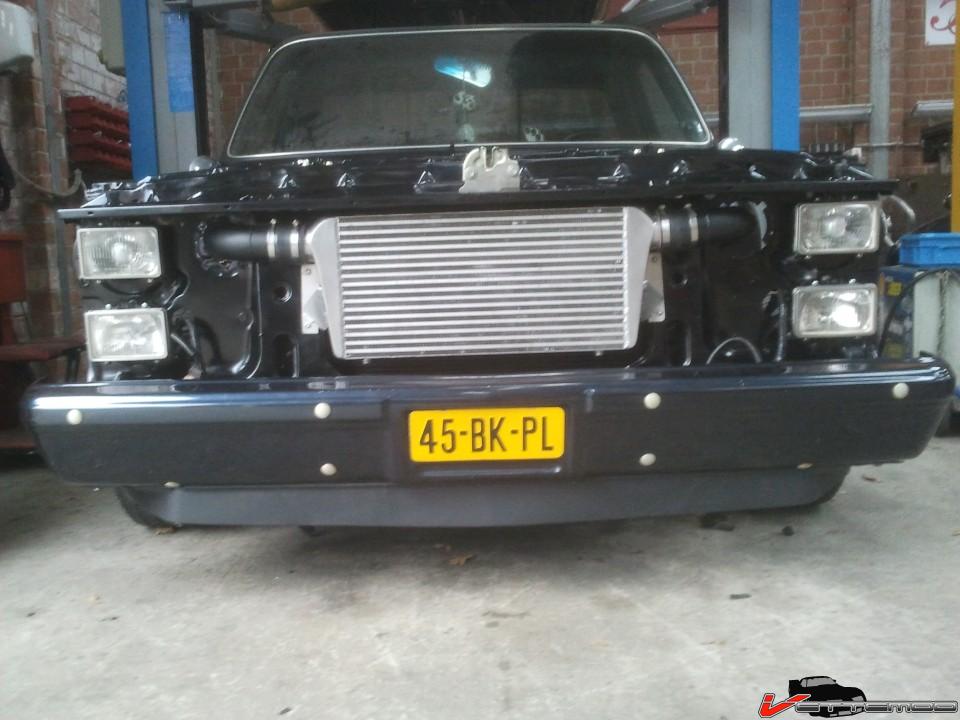
fabricated brackets for the IC, the thing had to be mounted at an angle otherwise the grille won't fit. It's still a tight fit nonetheless.

Made it around the corners LOL
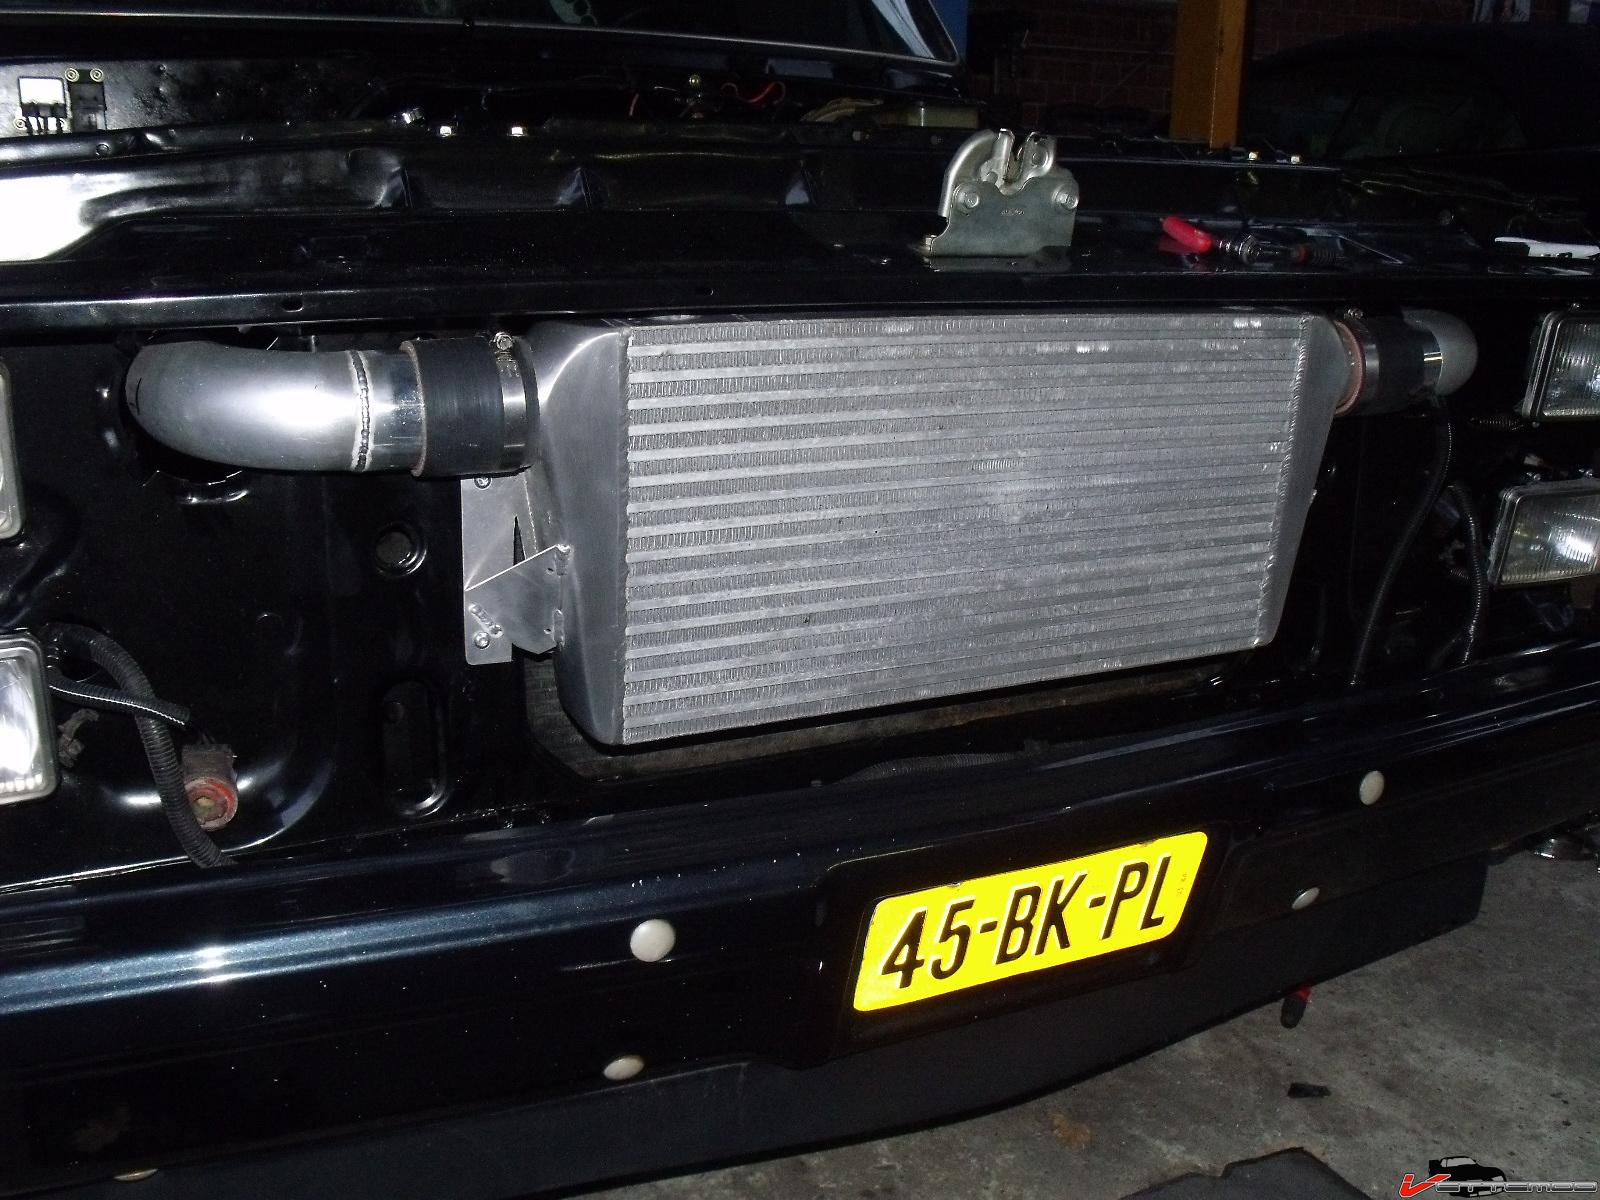
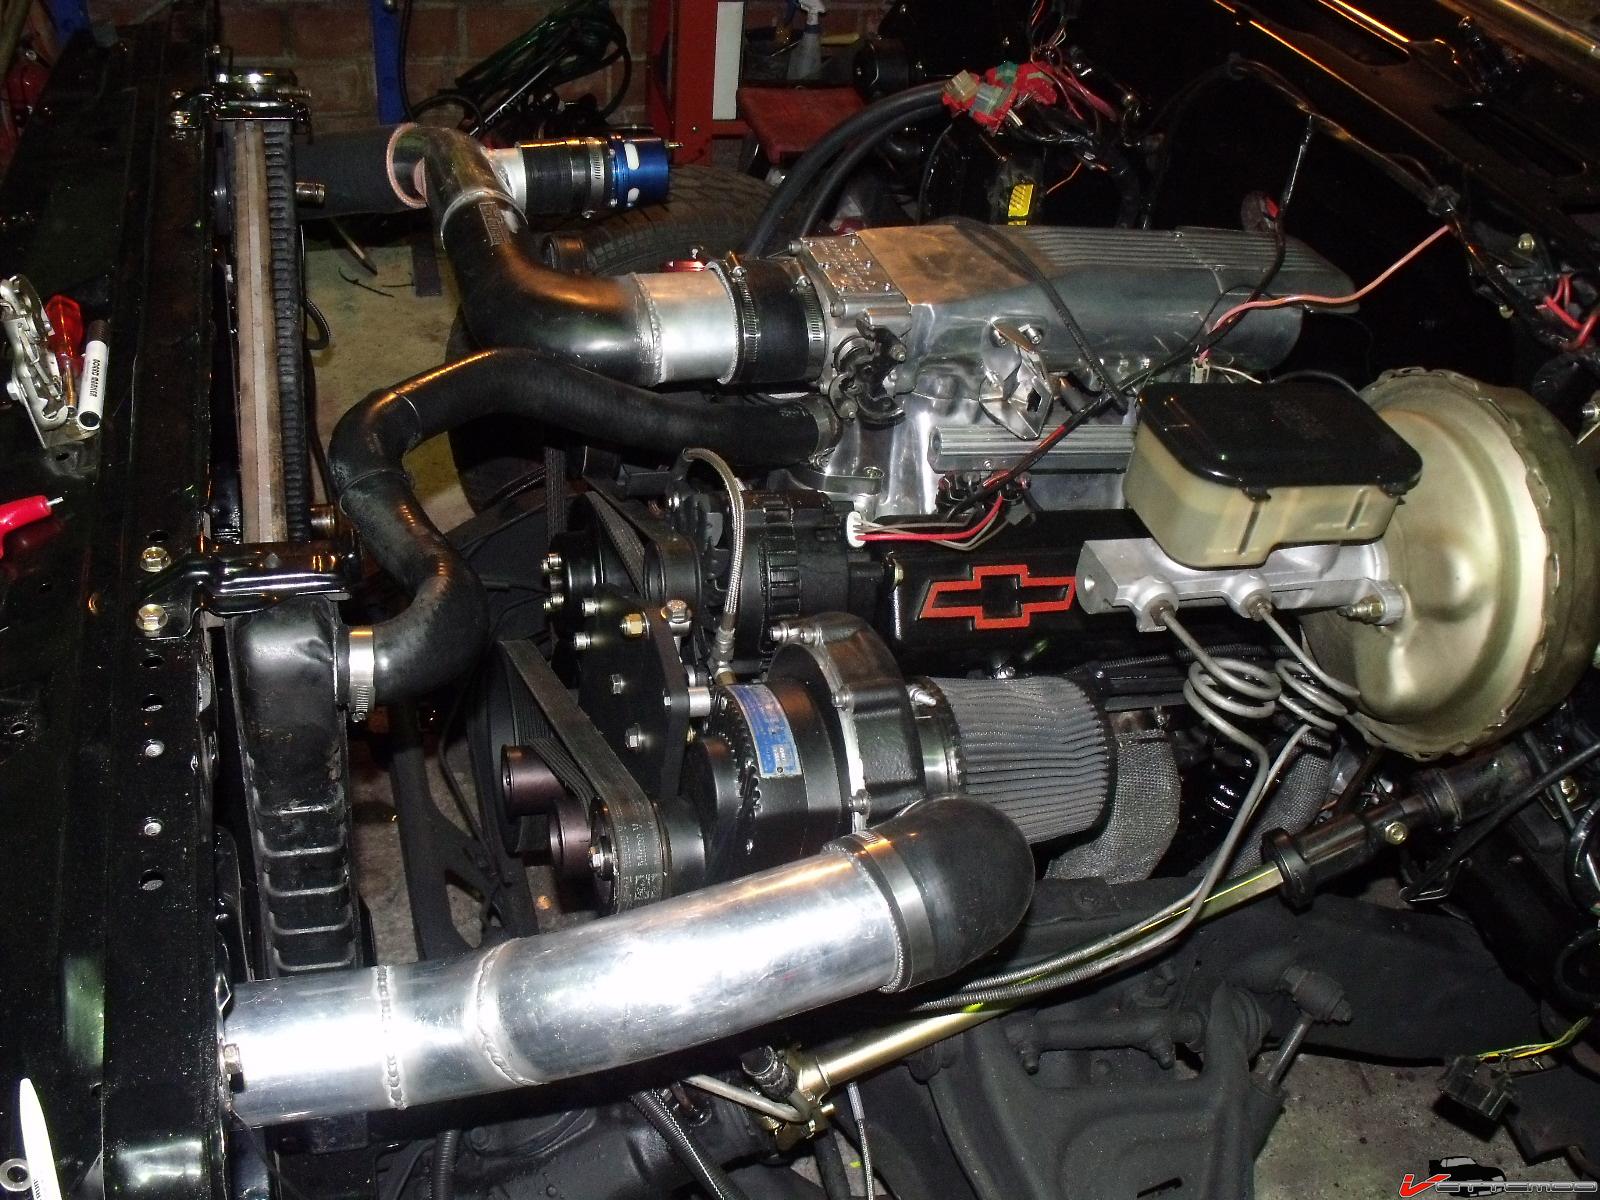
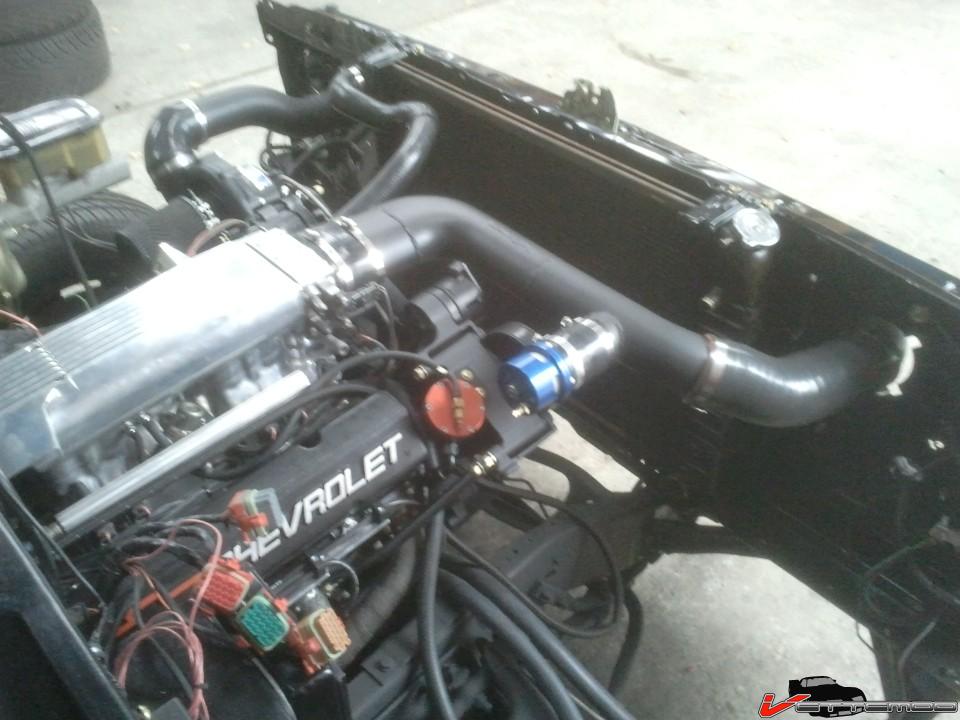
And the other side... I cheated y making this a 2 pc section it would have been a major PITA to install it if it was 1 piece and the long silicone section gives me a lot more tolerance with engien movement.
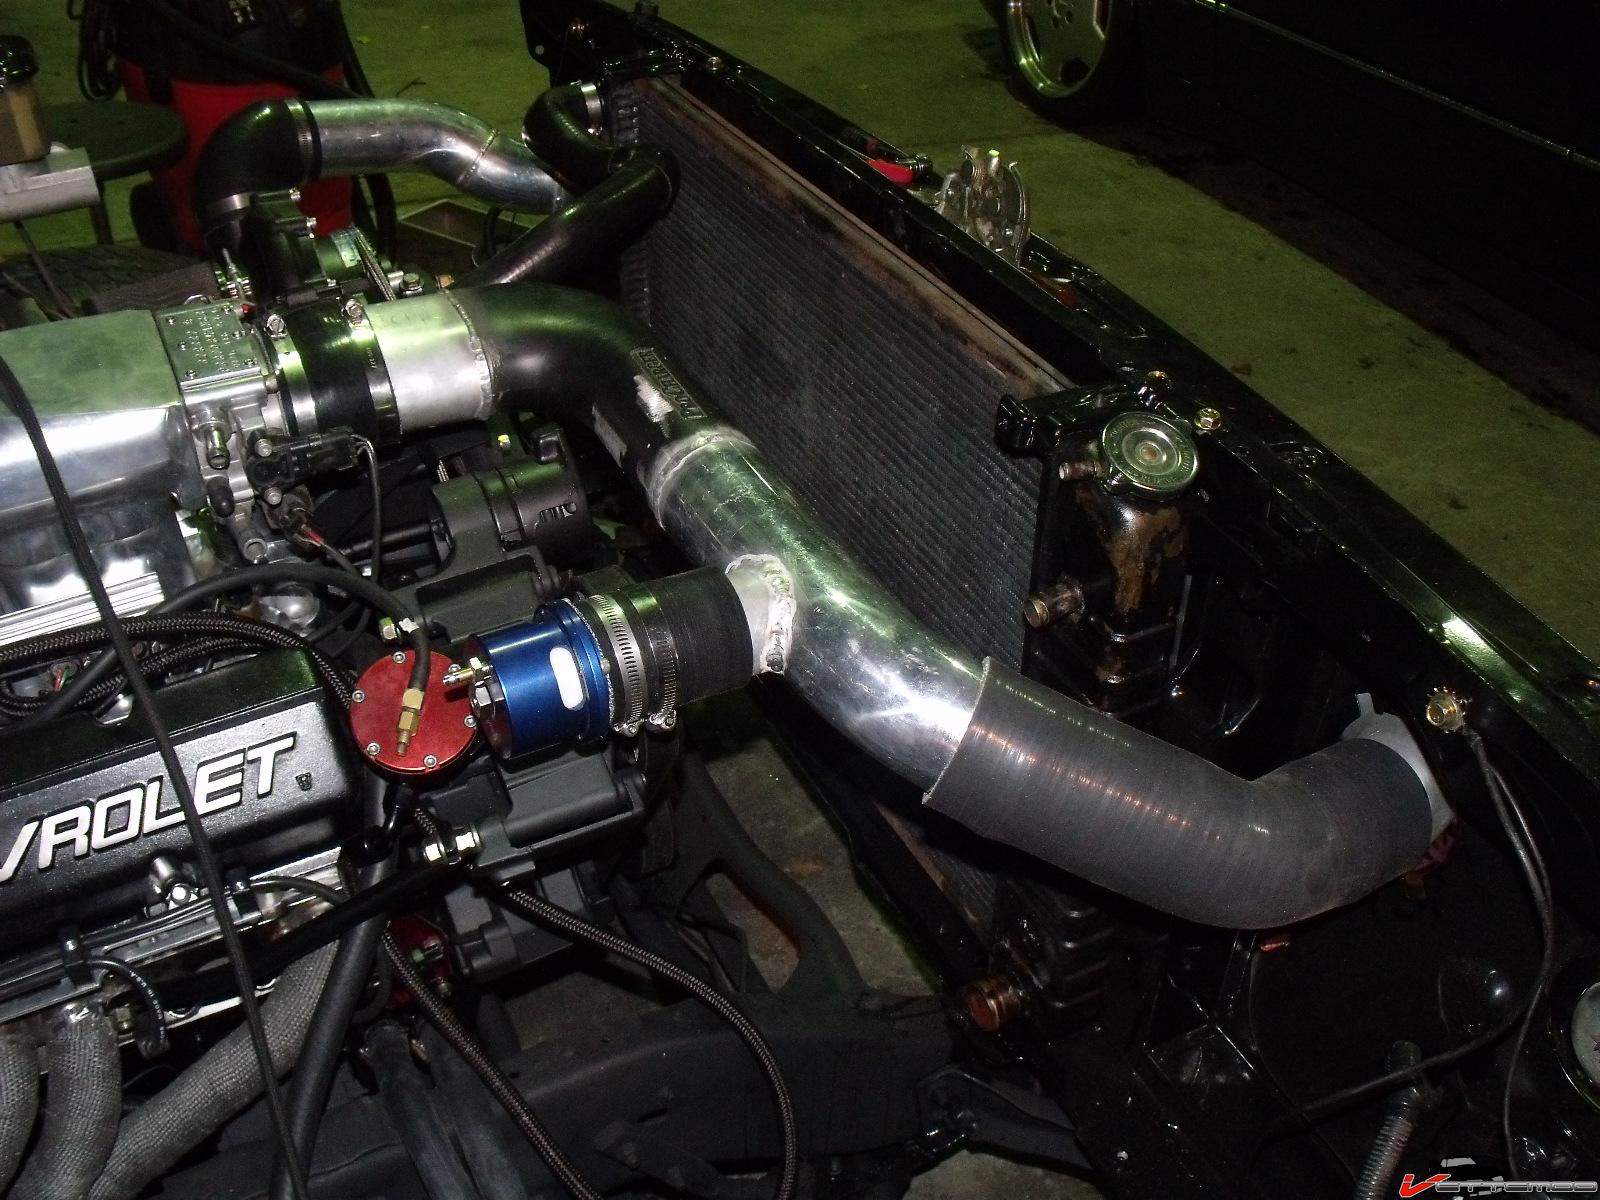
custom blow off valve

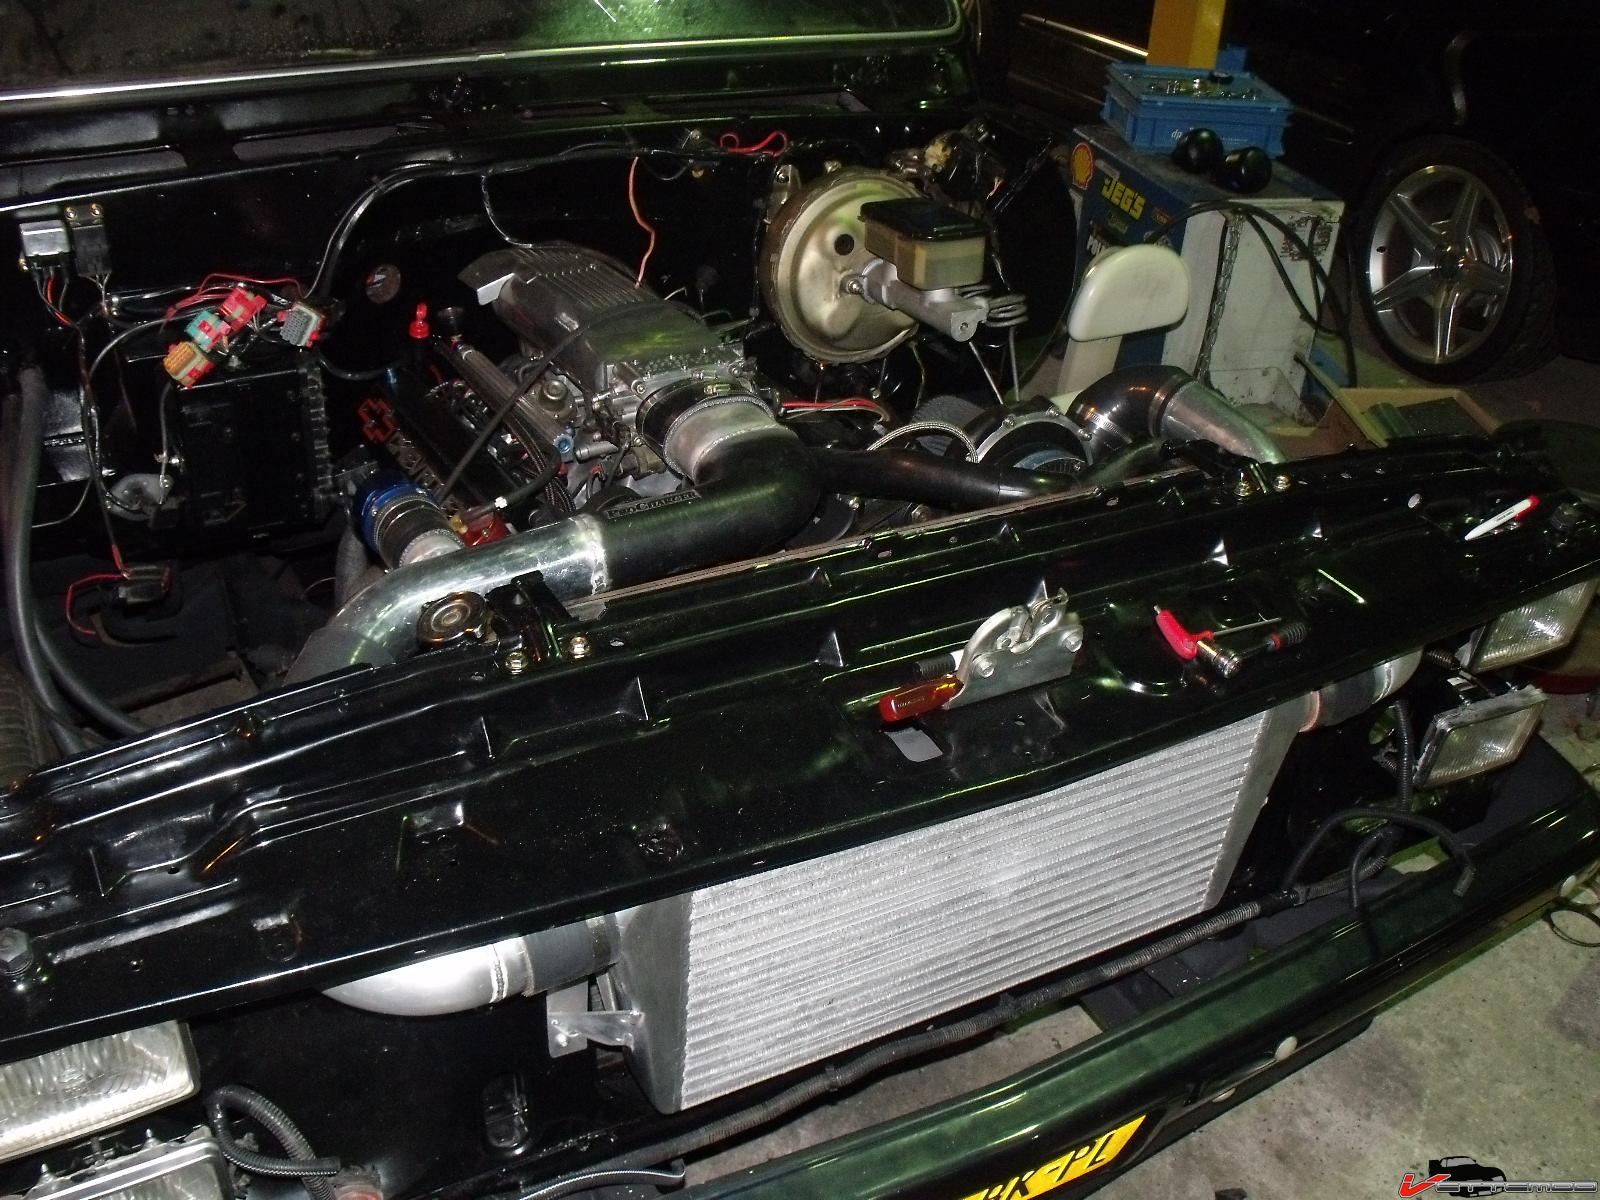
done.. the tubing will be all powdercoated flat black.

11-24-2012 #8 Registered User
- Join Date
- Nov 2012
- Location
- Shoals Indiana
- Posts
- 7
I love trucks like this. It's awesome without the overkill price tag. Definitely a hotrod. Nice work.
11-24-2012 #9
Registered User
- Join Date
- Nov 2004
- Posts
- 444
I could go balls out on it and get or build a new front and rear suspension for it but that would mean my 495LSX 82TA build would be backlogged even more than it is and I still have my full custom susp/steering/frame 82 twin turbo race corvette that I need to finish.
I don't want to put large wheels on it, I feel it doesn't look right. At the most I may do some 16" super wide rears one day, maybe use the spare 16" Hoosier Pro Streets I have but I don't want to cut up the bed. The rear is super nice and all flame inc coated before it was sprayed. Would be a sham to cut it up. As is I thik I can ruck a 315 in the rear, it's got rolled and bowed out fenders there already. (There's a 2" spacer behind those 10" wide rims)
11-24-2012 #10 Registered User
- Join Date
- Apr 2001
- Location
- The Netherlands
- Posts
- 1,509
Again a great build....I need to drop by sometime to see your projects in real life. I like the way you approach your projects...whish I had so many nice "spare" parts to pick from :-)
11-24-2012 #11 Registered User
- Join Date
- Dec 2005
- Location
- Birmingham, AL
- Posts
- 3,355
killer stance!
Stephen
11-24-2012 #12
Registered User
- Join Date
- Jul 2008
- Location
- ohio
- Posts
- 1,135
Looking good....... glad to see you painted the procharger....thought it stuck out with everything being black....looks just right now....cant wait to see it on the road
keep the wheels a spinning and the Beavers a grinning(burt reynolds-smokey and the bandit)
12-01-2012 #13
Registered User
- Join Date
- Nov 2004
- Posts
- 444
Got the piping all done, powdercoated flat black... dropped my camera and it's now kaput so crappy cell phone pics :(



12-01-2012 #14 Rat Pack Member

- Join Date
- Sep 2006
- Location
- Indiana
- Posts
- 2,670
12-01-2012 #15 Registered User
- Join Date
- Jul 2010
- Location
- Pittsburgh, PA
- Posts
- 114
Love this truck, I personally like the wheel/tire setup as-is, it gives the truck a kind of street fighter/old school feel. Upon re-reading your first post, "road fighter" is a great way to put it!
It would probably be a bit of work, but if you shaved the chrome drip rails and the trim band that goes around the back of the cab, it would give it a super clean look. Of course, that would require a bit of paint work too.95 Rio Red Mustang Cobra
Procharger D1SC 347 stroker, full maximum motorsports suspension, Full Tilt Boogie 03 Cobra IRS, Tremec 3550, 19x9.5 and 19x11 HRE 542R. 566rwhp/614rwtq
https://www.pro-touring.com/threads/...ra-OCD-Machine
12-24-2012 #16
Registered User
- Join Date
- Nov 2004
- Posts
- 444
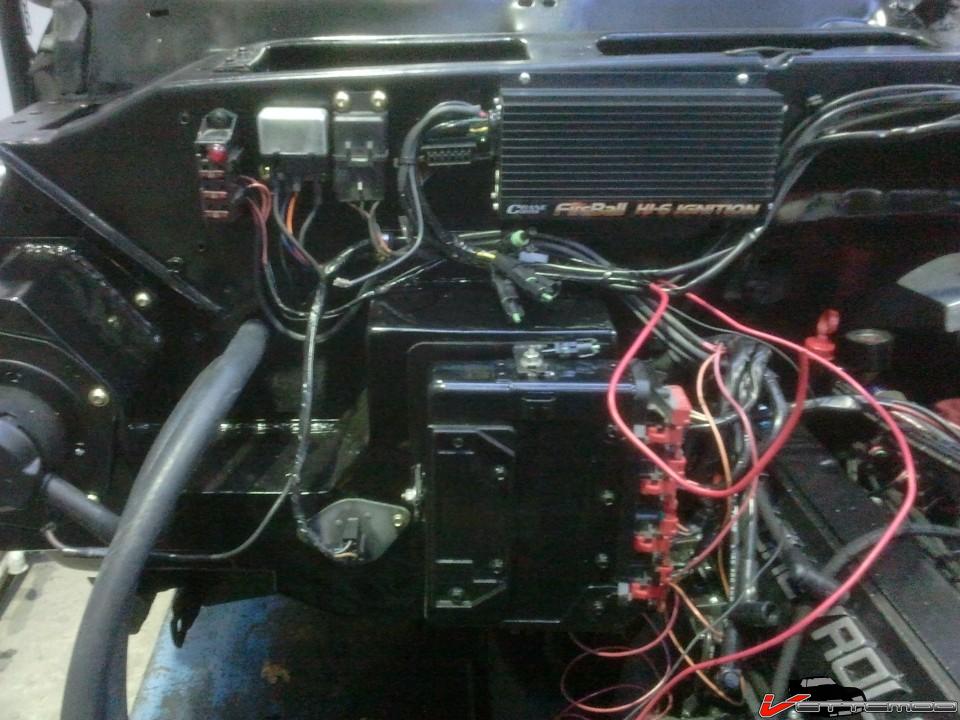
Decided to put my spark control here....it's a bit more of a wiring cluster F than I would have liked but oh well.... form follows function I guess
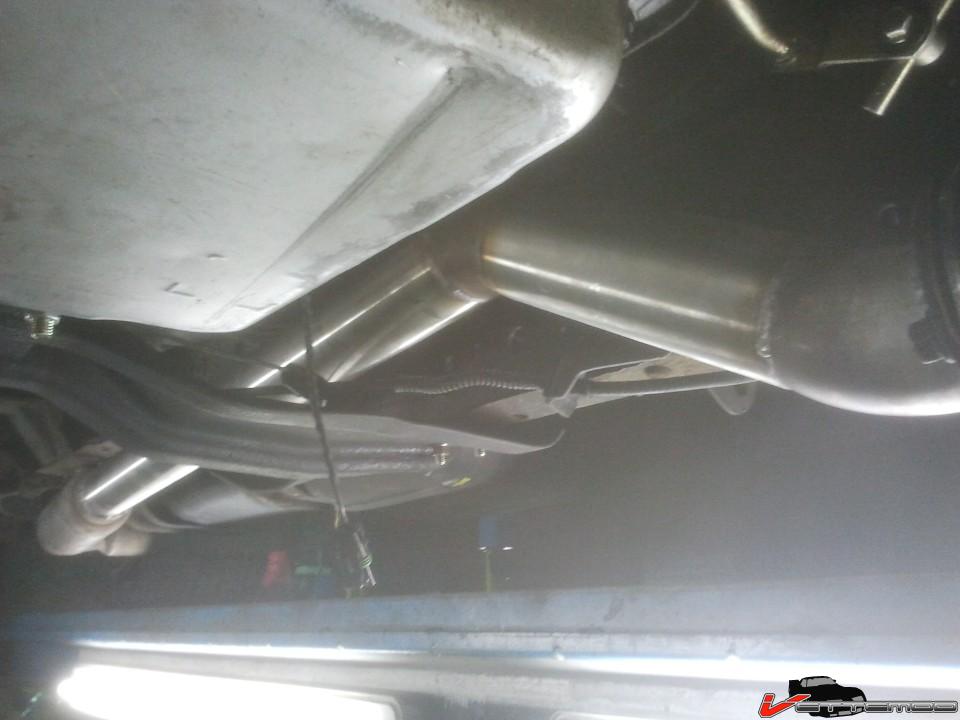
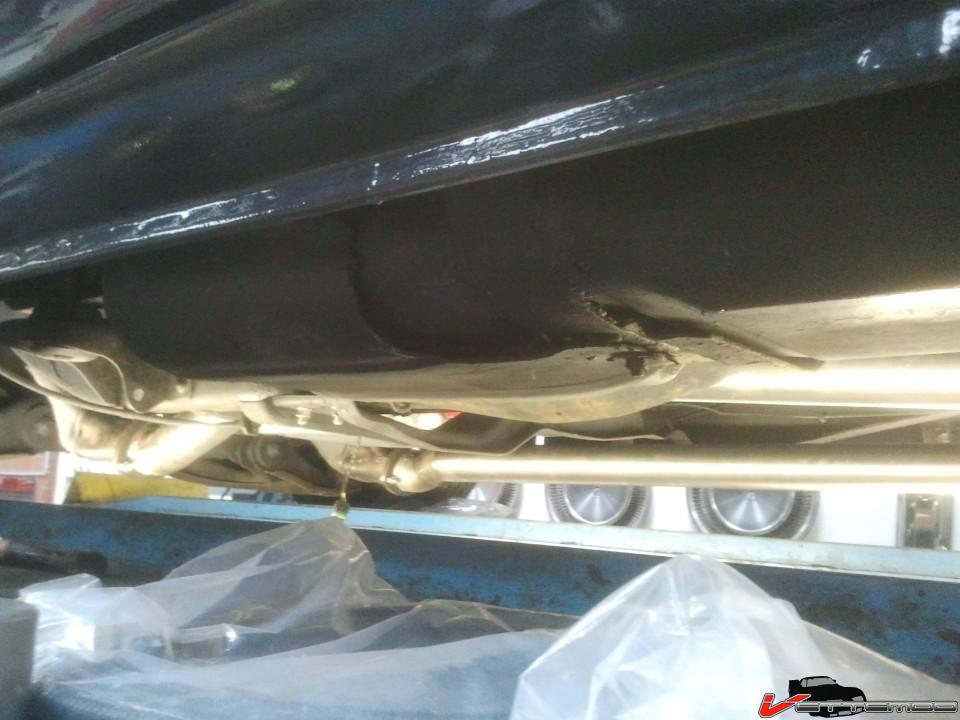
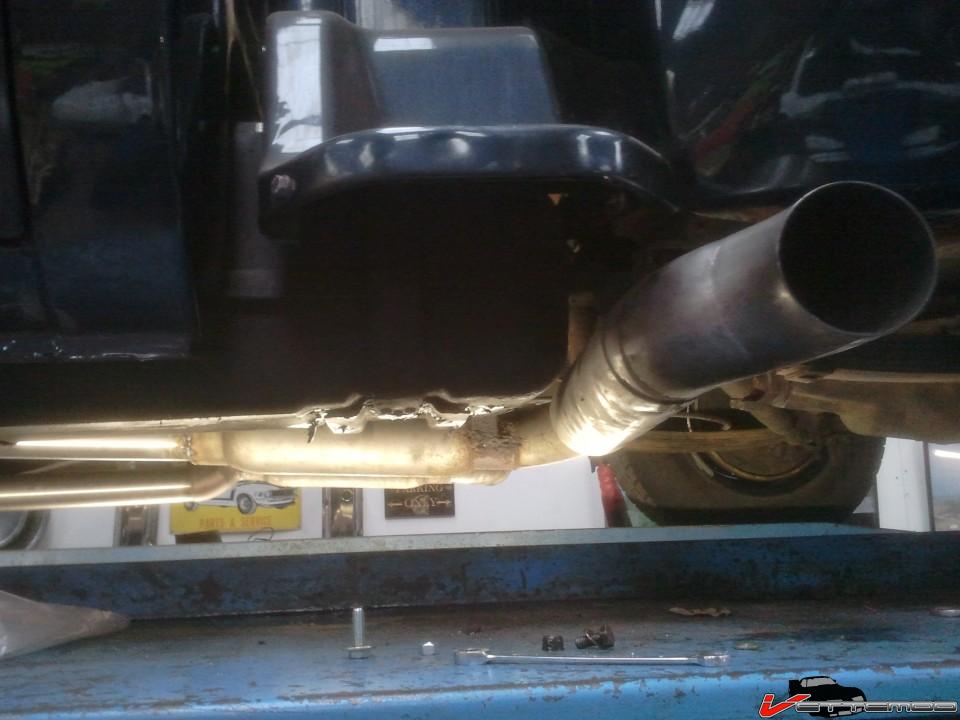
Decided to redo the exhaust. It was already stainless but an ugly quickie job that I never really liked. Also the pipes are a bit small in the middle so I stepped up from 2.5 to 2.75 and tucked them up higher. I only finished the drivers side, the other side is still the old stuff. I had to modify the dr. side to clear my VSS signal adapter/cable coming out of the tranny.
I had issues with it scraping behind the collector. The exhaust now runs directly up from there with nice smooth bends.

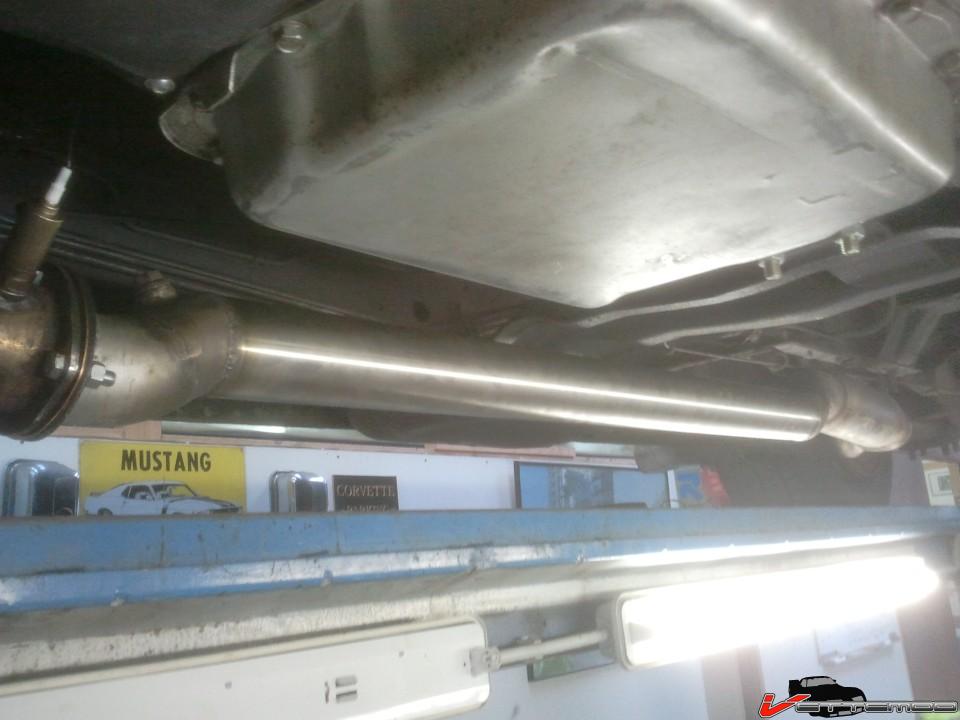
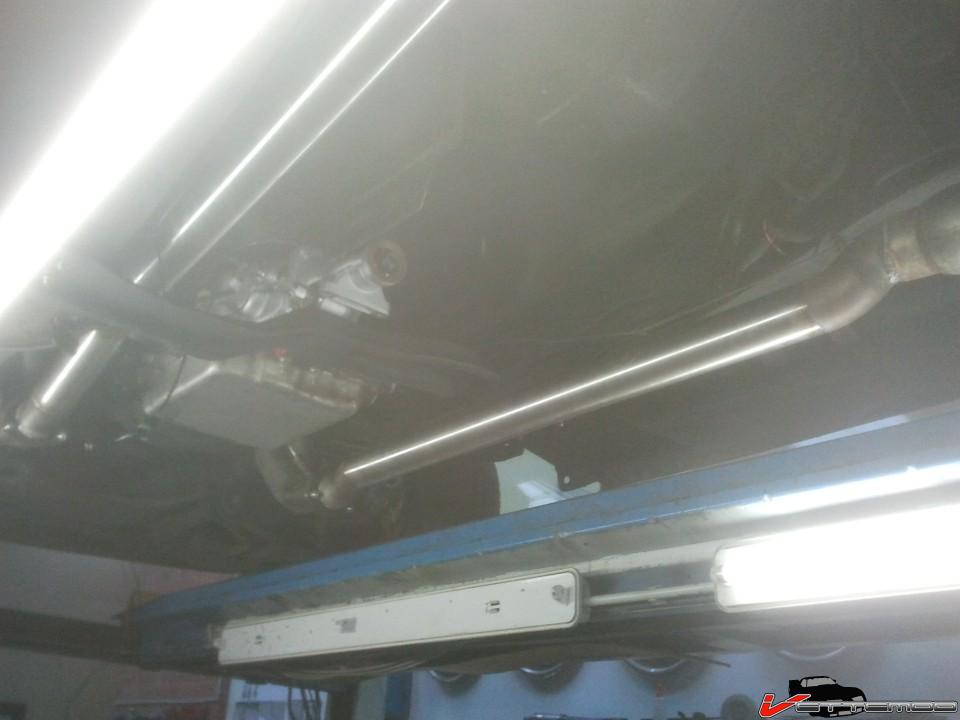
other side done also

12-24-2012 #17 Registered User
- Join Date
- Jul 2011
- Location
- NC
- Posts
- 461
One of my little in between projects, 83 stepside.
Looking good! I like where your headed with this! See a few of these still on the roads but not like this!
12-27-2012 #18 Registered User
- Join Date
- Jun 2010
- Location
- ottawa ontario
- Posts
- 45

lookin good man!
06-19-2013 #19
Registered User
- Join Date
- Nov 2004
- Posts
- 444
better pics of exhaust
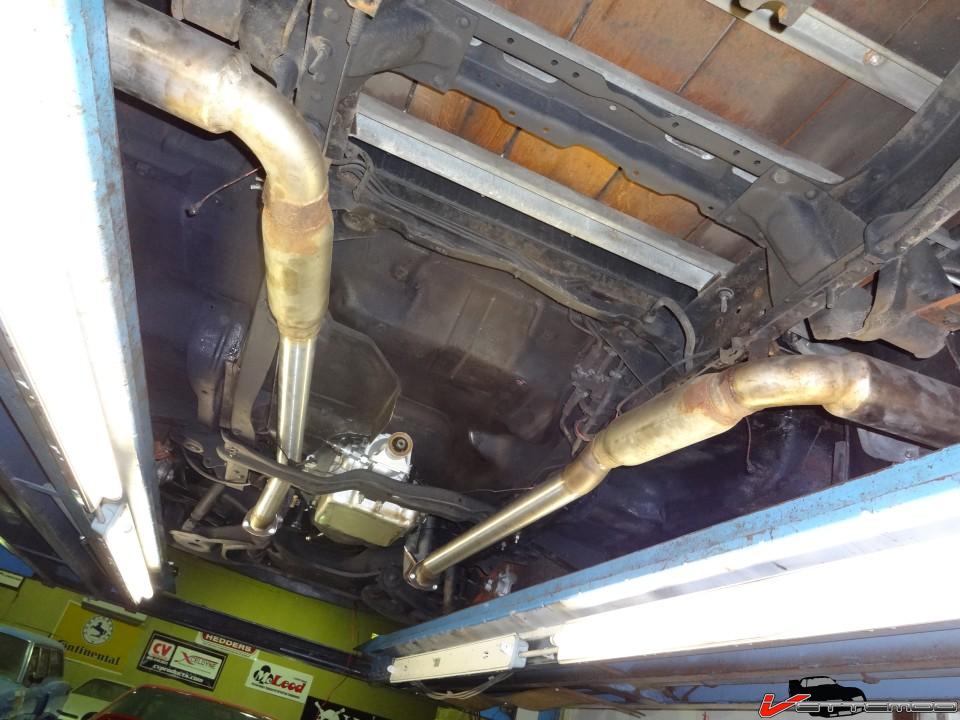
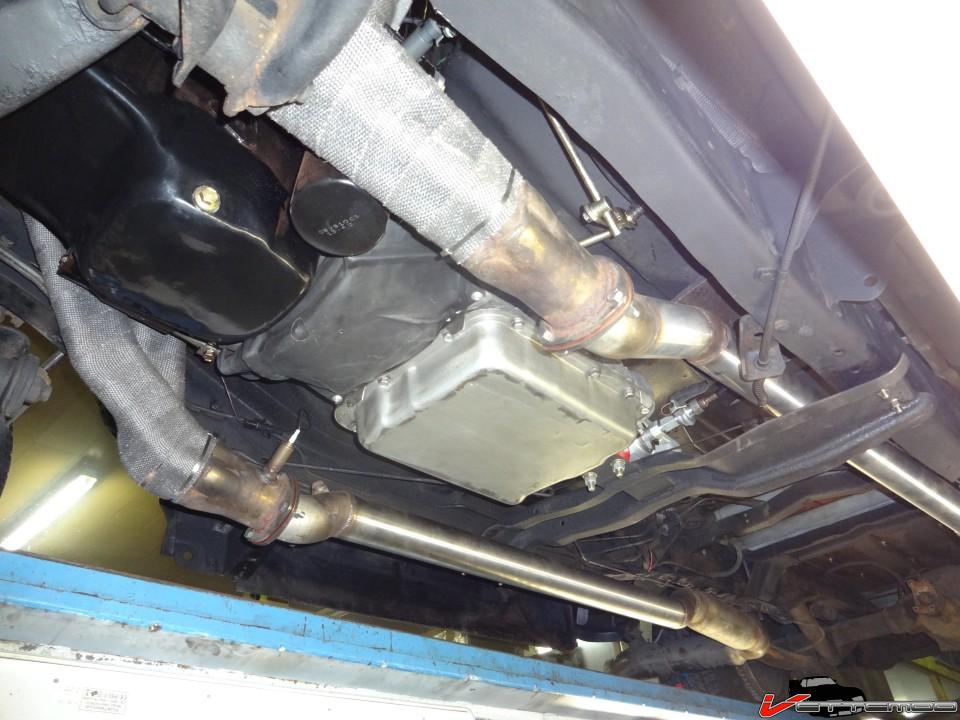


when the mufflers rust out I will replace them with some stainless ones, those are the only part that is not stainless ...well apart from the hideous hanger bracket the guy who did the exhaust for me years ago made... another reason to do everything yourself and not farm it out... people take short cuts
Got both tanks out, one had a pinhole the other has some rut also but it's not leaking. I repaired the pinholed one. The other is still airing out gas fumes
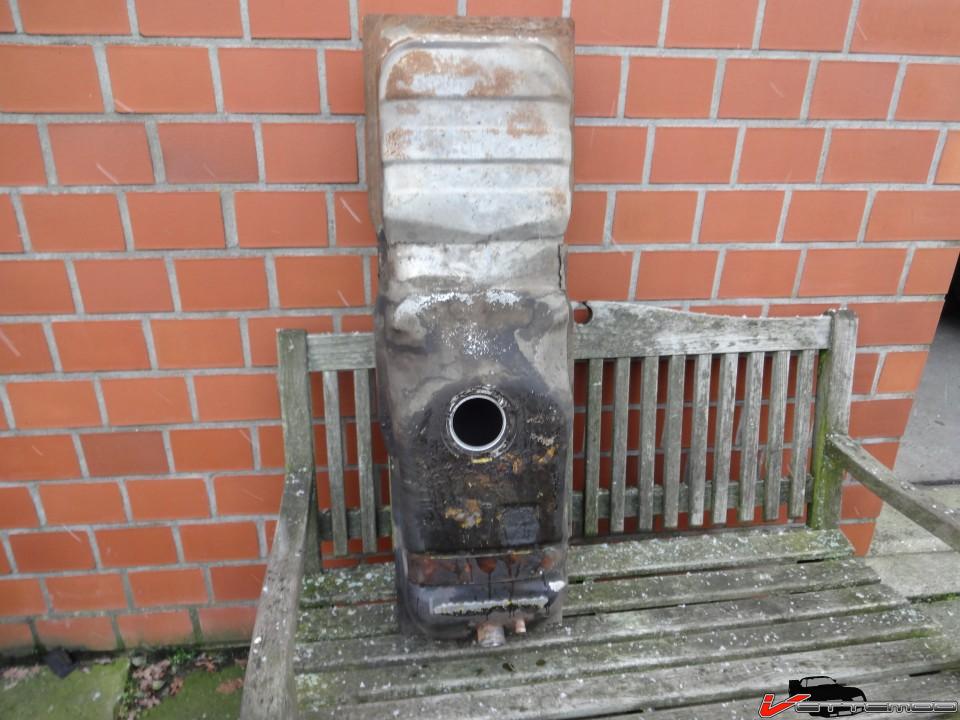
When I get it back it will all be nicely powdercoated.
Finally picked up the contents of my container shipment. Apart from a bunch of parts for my various other cars (projects) the stuff for the truck was in there, some rust free fenders off an ambulance, a bumper with driving lights that I'll shave and put fog lights in and the remainder of parts needed to finish some stuff here and there (and the missing tank for the dually)
Powdercoater already had part of the parts batch done but not the tanks themselves so hopefully those will be done this week, same for the last batch of bolts and nuts from the plater...then it's time to rock & roll and get this thing together. With the fenders mocked up and the inners in place I will be able to finish the fuel system and finish my swirl pot for the EFI pump
For the rest there's a bunch of small stuff and trim pieces that came off the same parts car the fenders came off... and a whole bunch of parts for another one of my projects including a 495LSX short block.
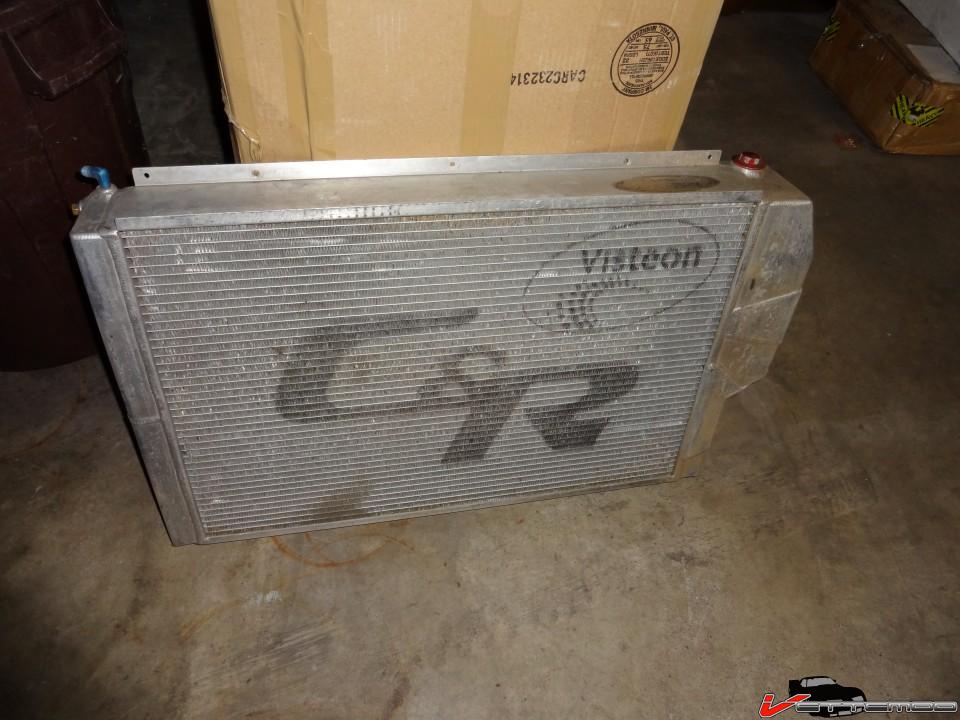
Also got a slightly larger radiator for it. It's a used cup radiator. Probably needs mods to make it fit though
thank you amberlamps for donating these fenders :D
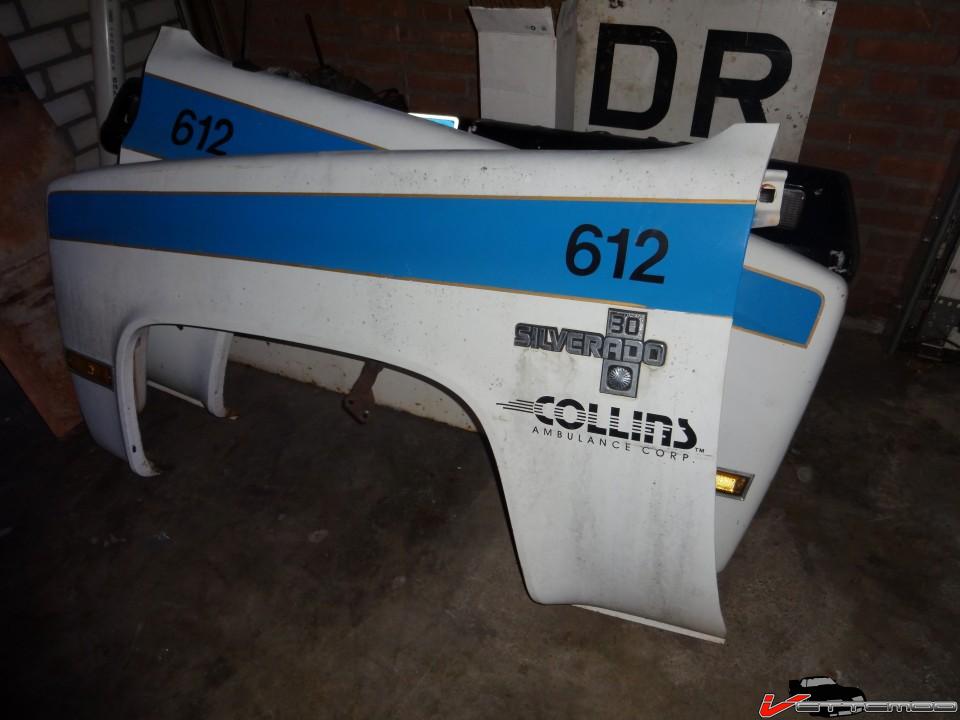
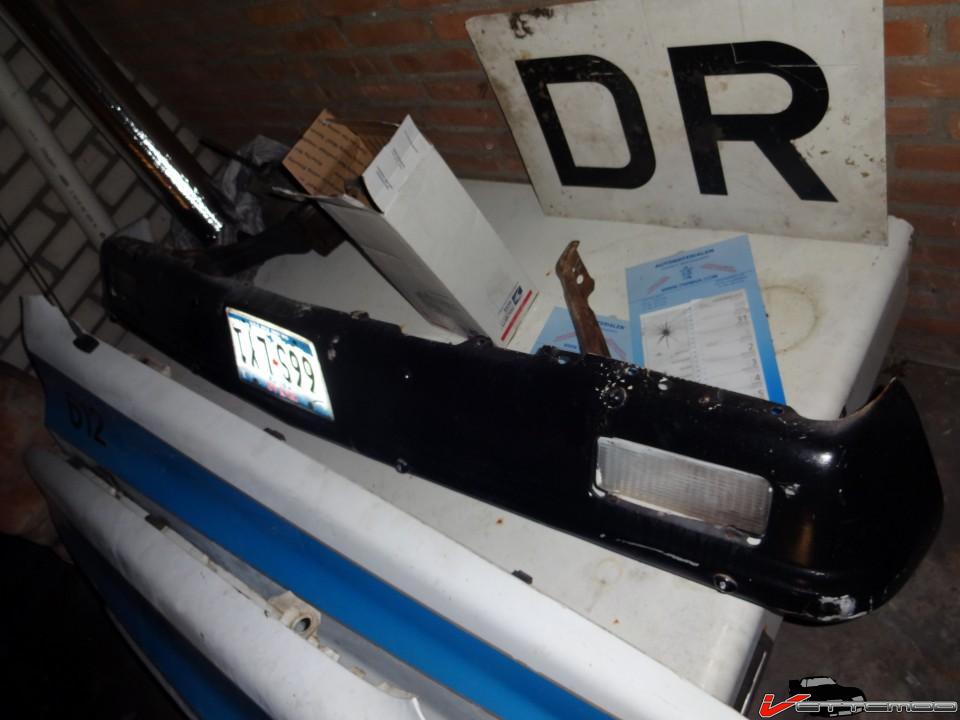
as it sits now
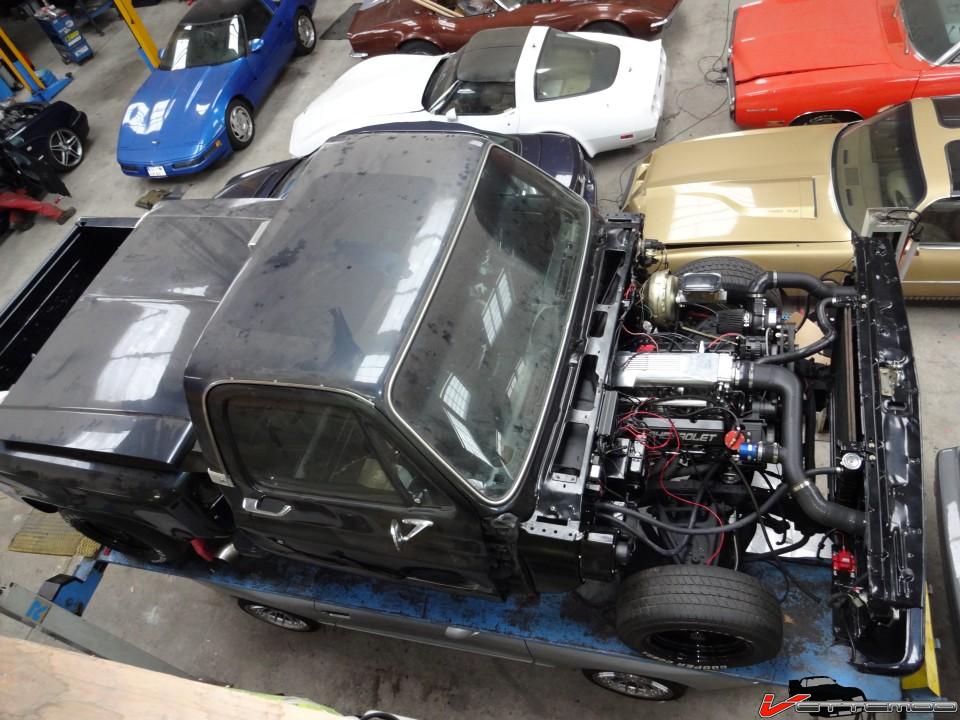
That puny little radiator needed to go so I took 1 of my spare racing radiators (have similar ones in my 82 vette and 82 trans am), it's a dual pass. Only drawback is it's for a Y plumbed setup normally so it has 2 -12 inlets. I will fab a custom thermostat housing for it. Not a real big problem. This should keep things nice and cool and will plumb the oil bypass directly to the -12 oil to water heat exchanger ports, possible w/ a remote filter (have all those parts in spares for other cars)
This system also uses a remote pressure release valve (have it, also a C&R piece) and a reservoir. Will only be able to mount that after mounting the fenders, inner fenders, fuel surge tank and main fuel pump


Long time nothing new but I finally got my tanks back and got it all assembled again.
I had them back earlier and when I was cleaning them I found out they were coated poorly, the primer coat was showing through in some spots making for a cloudy whitish hue.
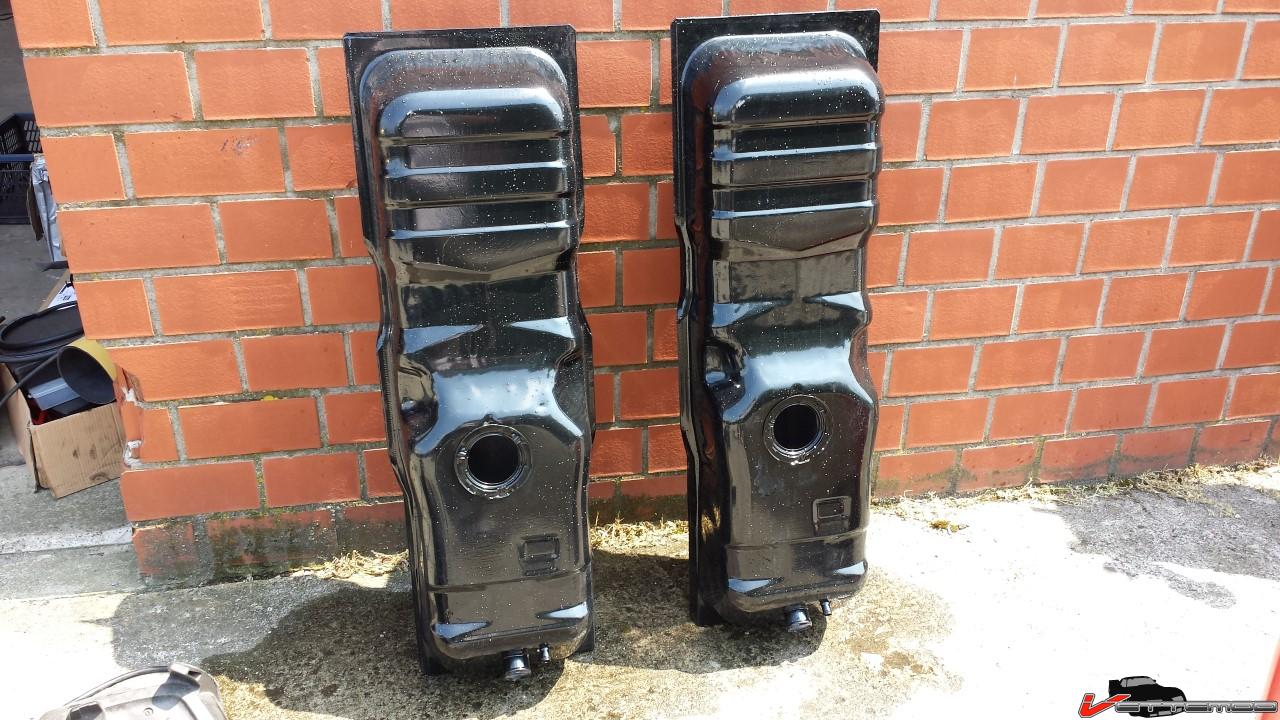
Back they went and they came back looking good...only problem..I forgot the locking rings OOPS. They were in a bucket with zinc plated parts that I didn't take with me...crap.

Also had to tacke the cooling system since the nifty rad I have in it has a dual -12 hookup instead of a big 20 or 24 (or a normal hose bung) so I had to fabricate something and decided to cut up and modify one of those cheap swivel neck thermostat things. Next time I'm buying a C&R billet one because this chinese POS is cast from something like bird doodoo.. I could not get a clean weld on it. The only cleanly welded part is the 2 an bungs welded together.. they are a clean aluminum alloy. The other stuff more resembles potmetal (welded that a couple of times when fixing headlight frames on C3 corvettes) what a royal pain. What left to do? Grind till it's semi clean. Hope it's not porous/leaking.
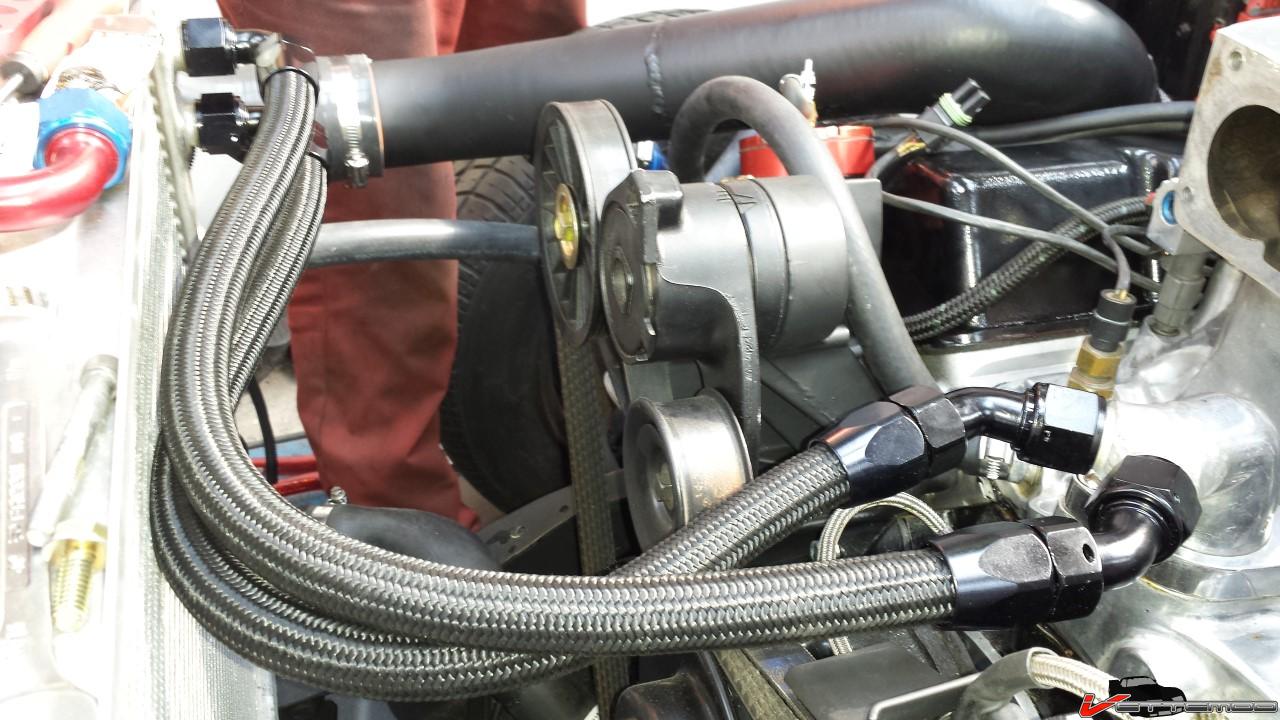
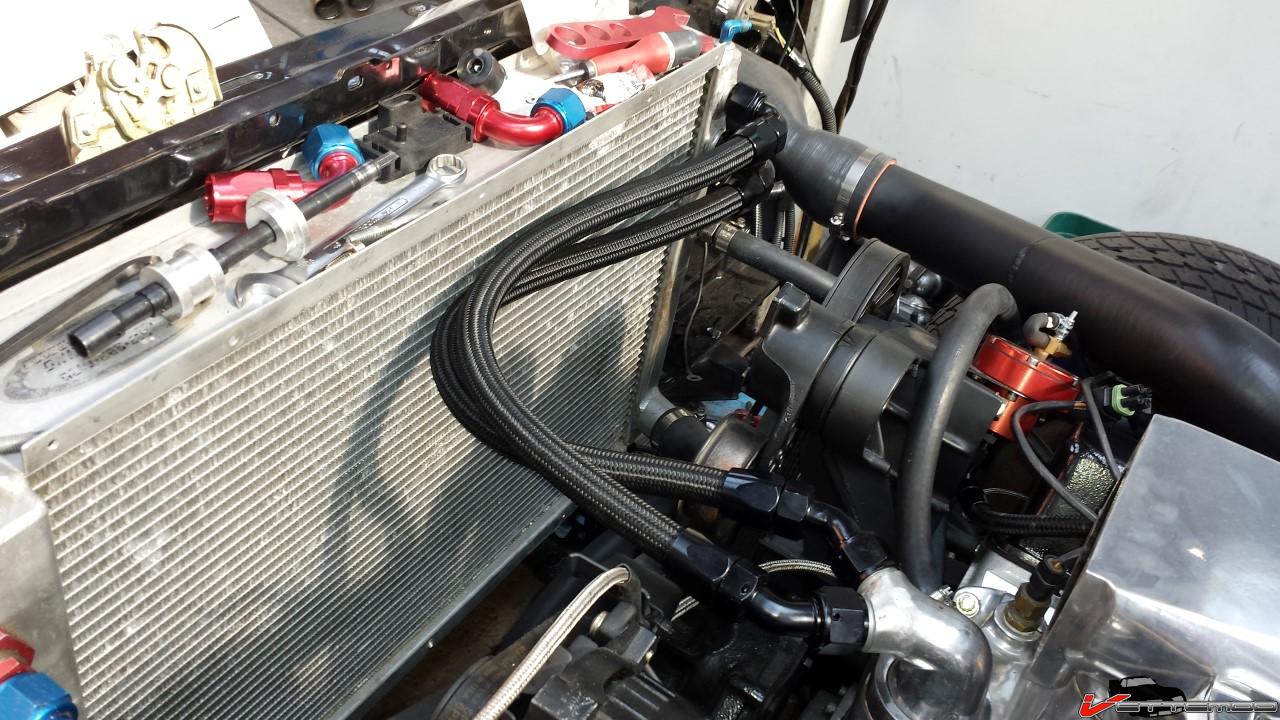
it even fits under the intake ducting :D
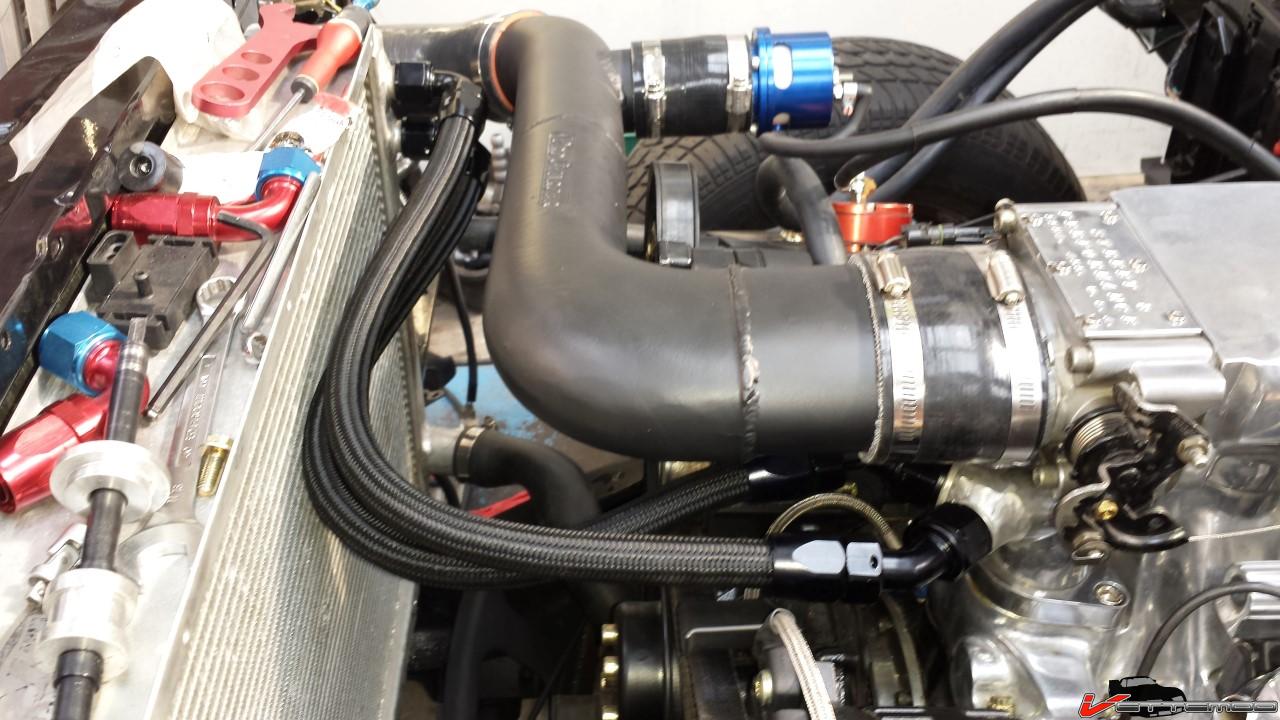
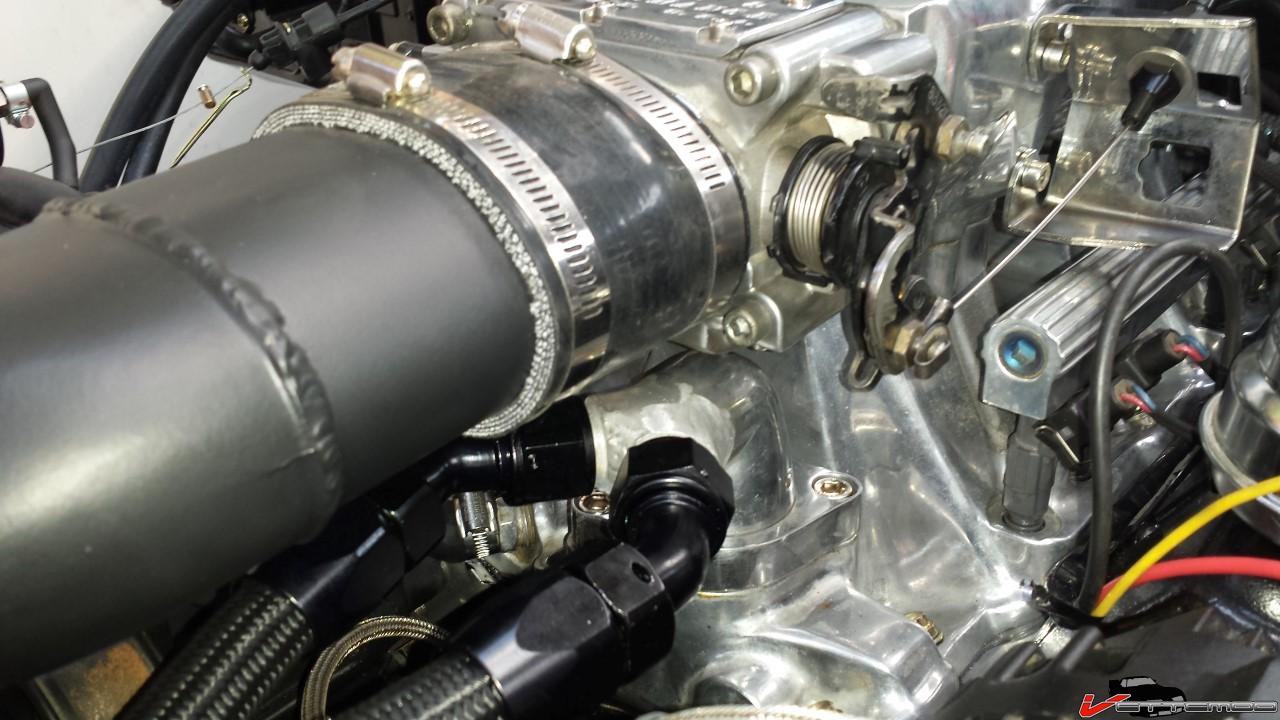
Next problem is my fuel system. Decided to put a mech pump back on the block, retain the low pressure switching valve system and have the pump fill a surge tank that will feed my aeromotive/paxton EFI pump.
This is the surge tank w/ hookups. Top most is the vent to the tank so it burps air out. The 2 others are feed from mech pump and return from EFI pump. The EFI feed is on the bottom. The large one on the top sticking out sideways will be plugged.

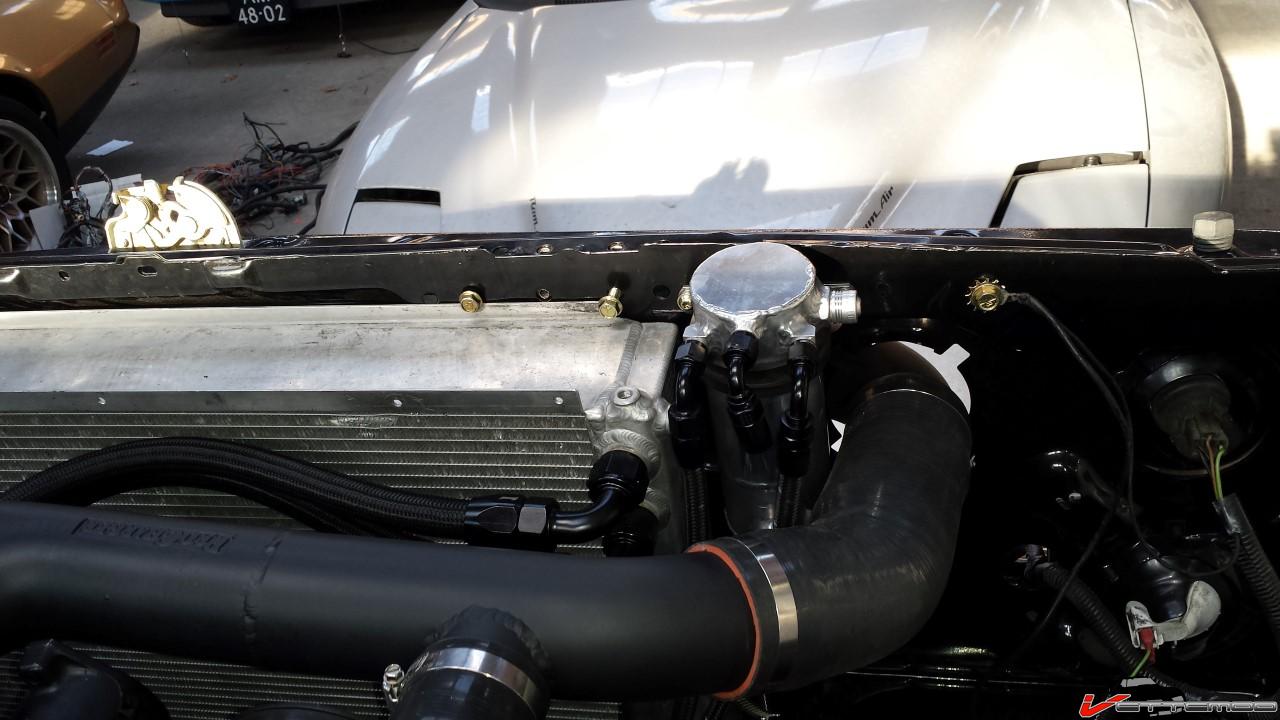
getting fuller and fuller in there
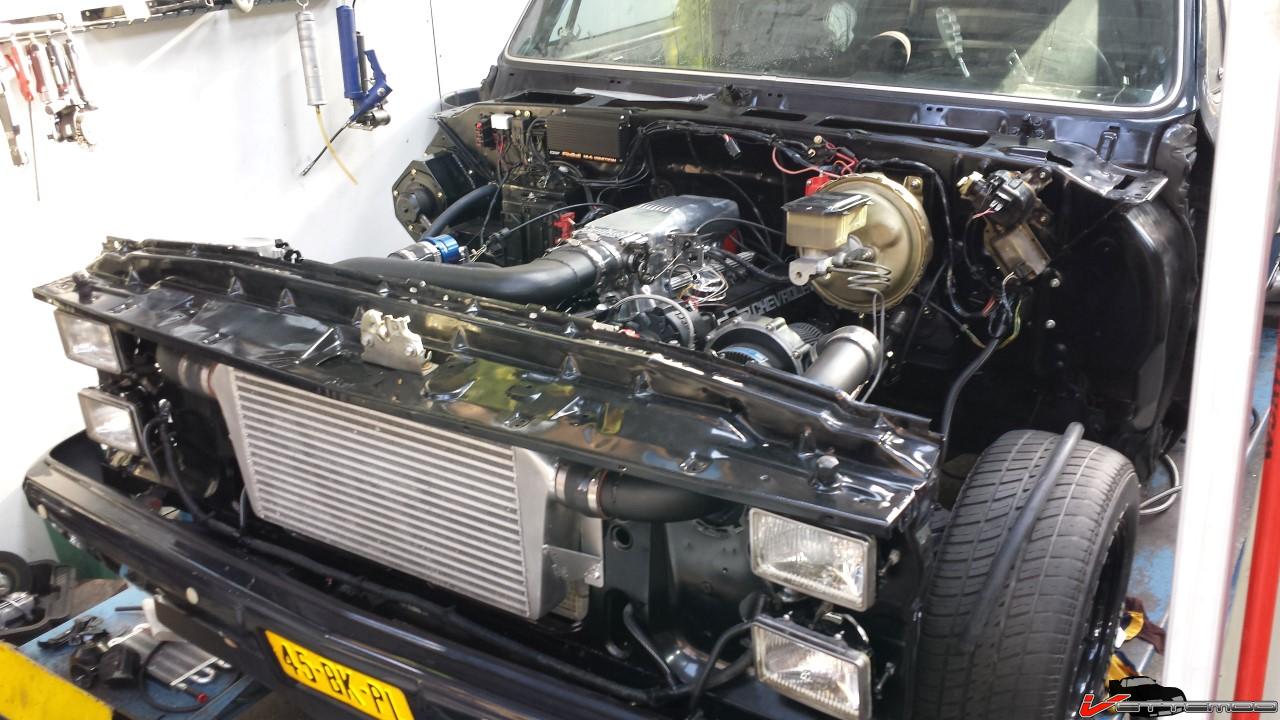
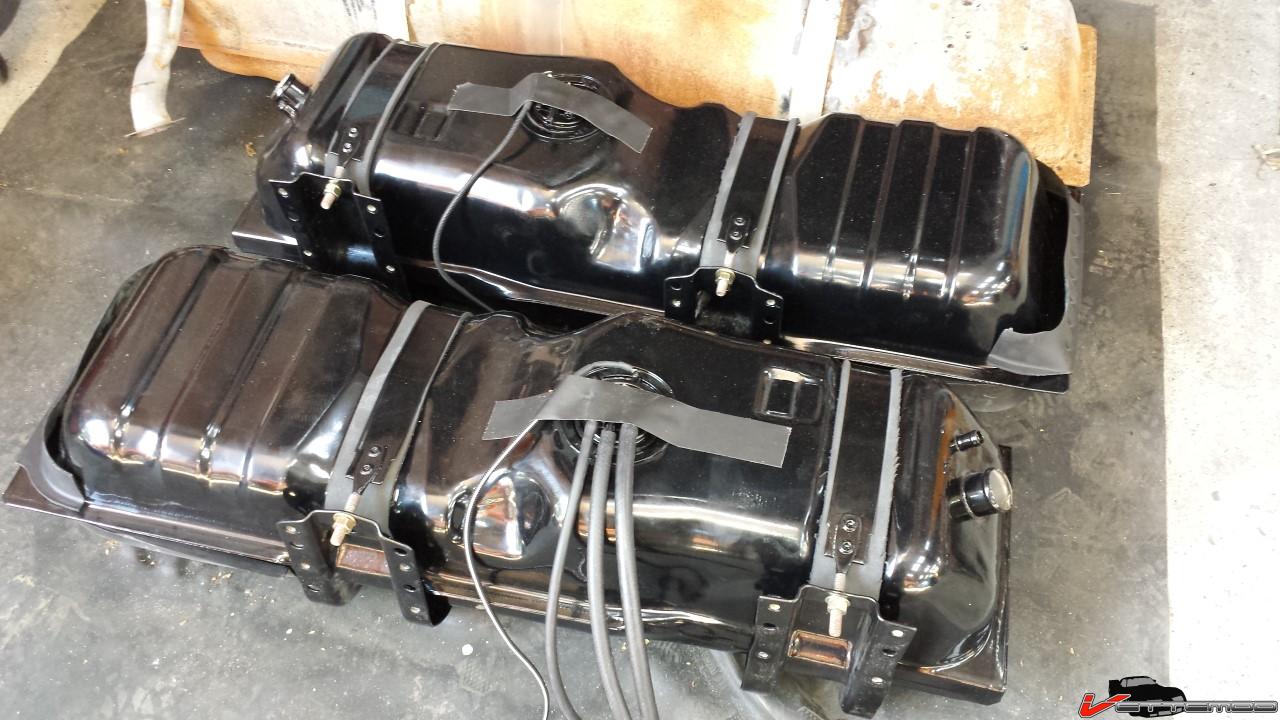
Tanks are in. Boy what a wrestling match getting these in without scratching them uo. These things are made to go on with the cab off. Not a fun job at all. Also when I had 1 in I realized the rear brackets were not the same and sure enough I had them mixed up :(
complete tank with sender retainer ring this time
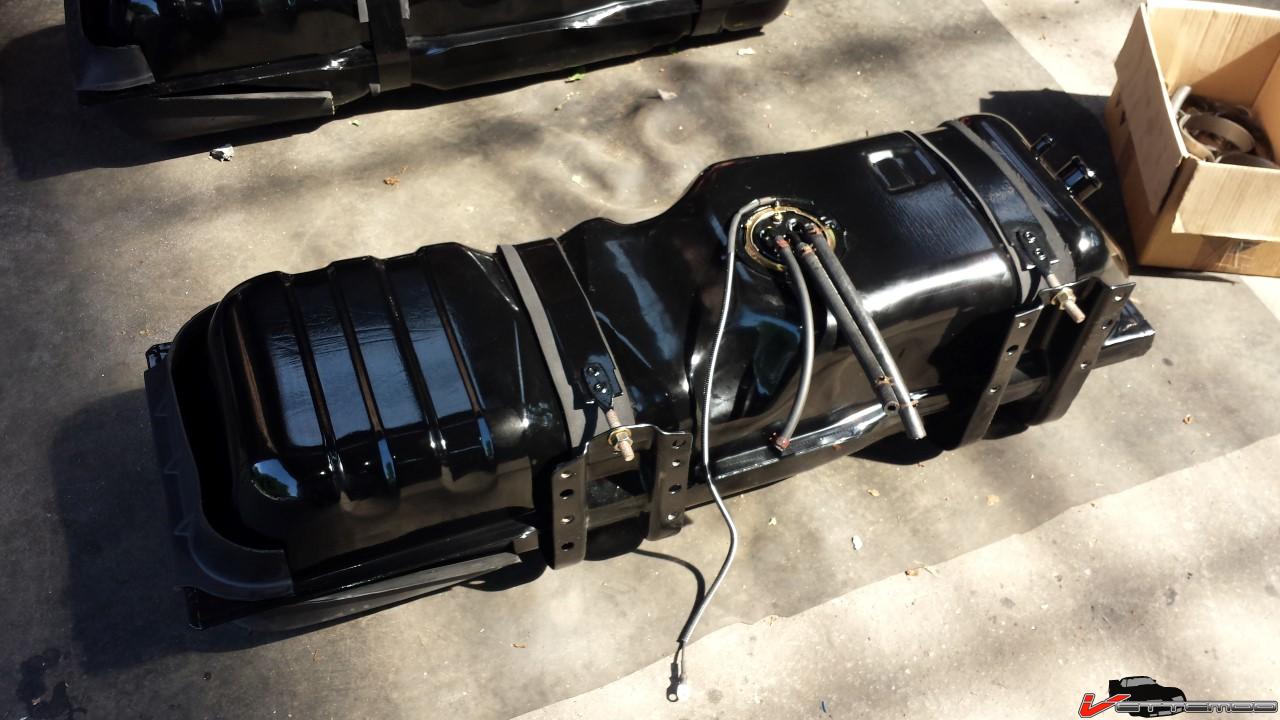
installed... glad I had them done in black and not gunmetal or argent silver like I normally do. These show and that would have messed up the blacked out look
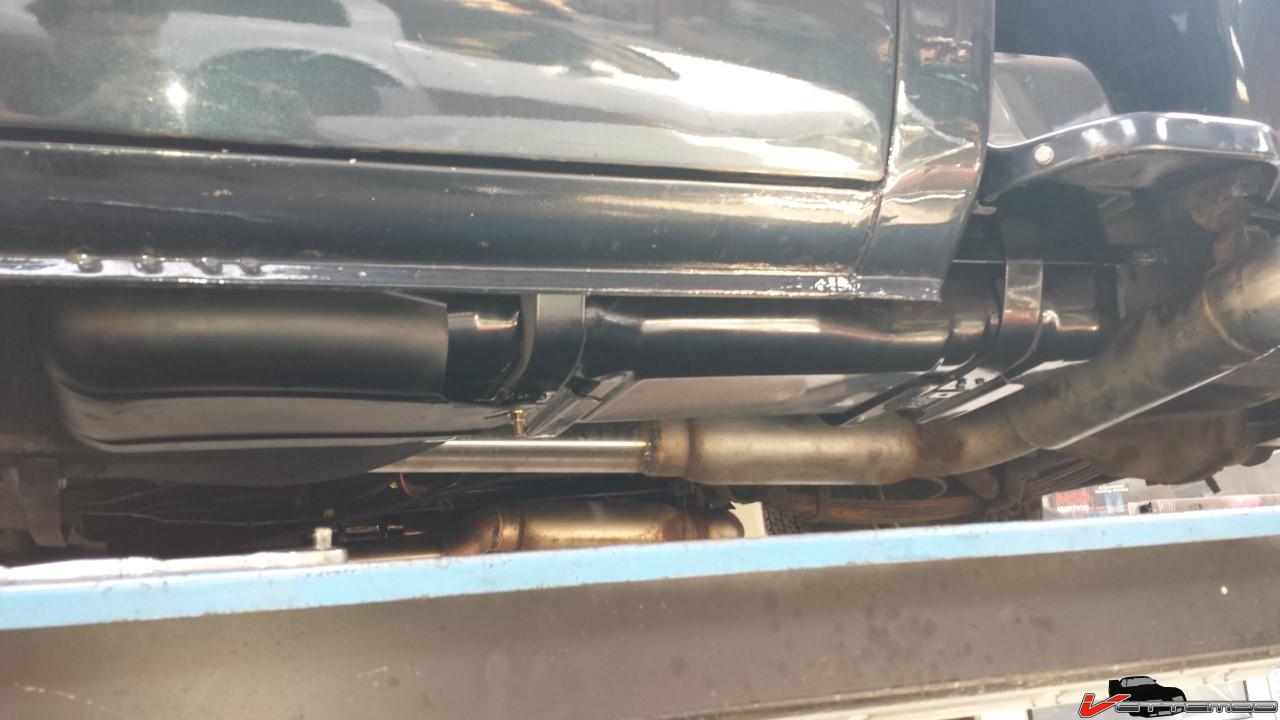
inner fenders back on. Soon I will fire this thing up for the 1st time
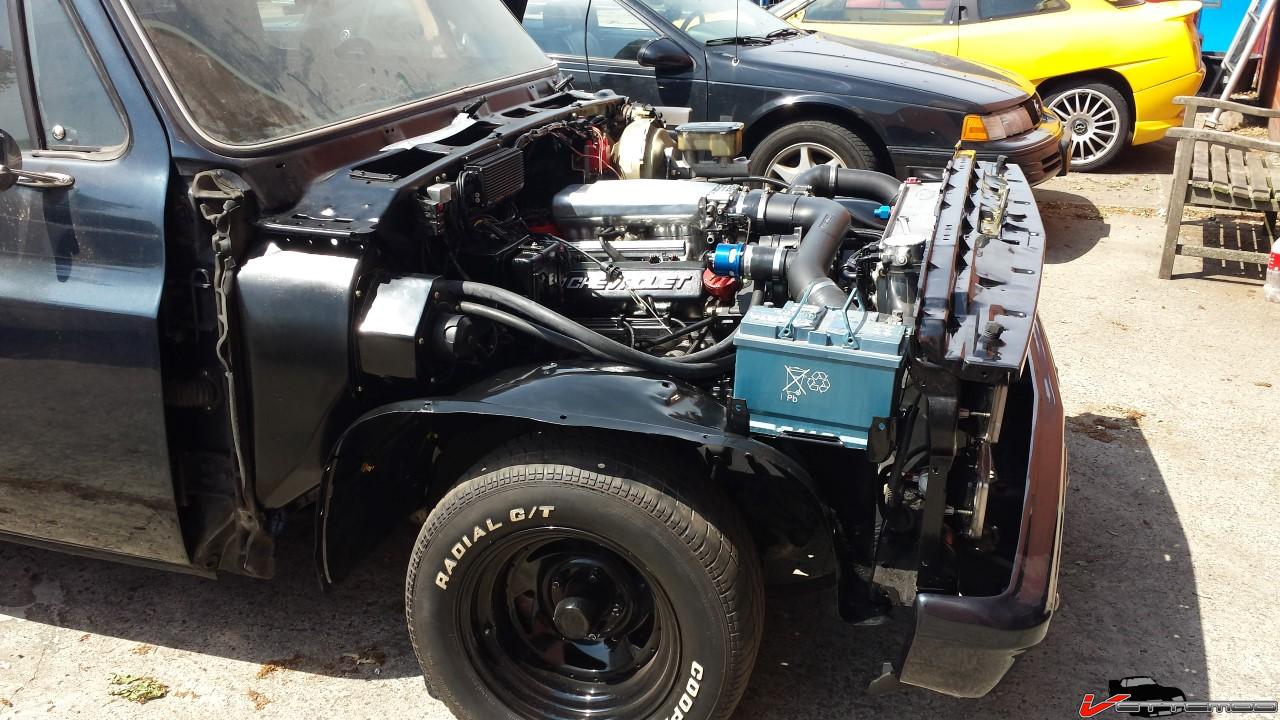
06-20-2013 #20 Registered User
- Join Date
- Mar 2009
- Location
- overseas
- Posts
- 3,434
good work so far man!
 Kevin S. (overseas in Germany)
1963 Chevrolet Impala 2d ht Coupe
www.CruznArt.com
CRUZN - Automotive Artworks

 Reply With Quote



