Results 41 to 60 of 206
Thread: project drivabeater
Hybrid View


-
01-10-2009 #1
 Registered User
- Join Date
- Aug 2007
- Location
- Albemarle, NC
- Posts
- 1,171

todays progress:
none on getting the trans back together. i can't figure out a way to get the tapered roller pressed off the input shaft, so im taking it to a shop on monday. i hate farming stuff out....
i did get the shelves built in my shed, go to a baby shower, and make some progress on the truck though.
add 7.00 for dupli-color vynil dye.
i used a plastic bag to cover the steerig wheel, and the Stanly News and Press, thursday edition, to do all my masking. the tape was left over from the grille project.
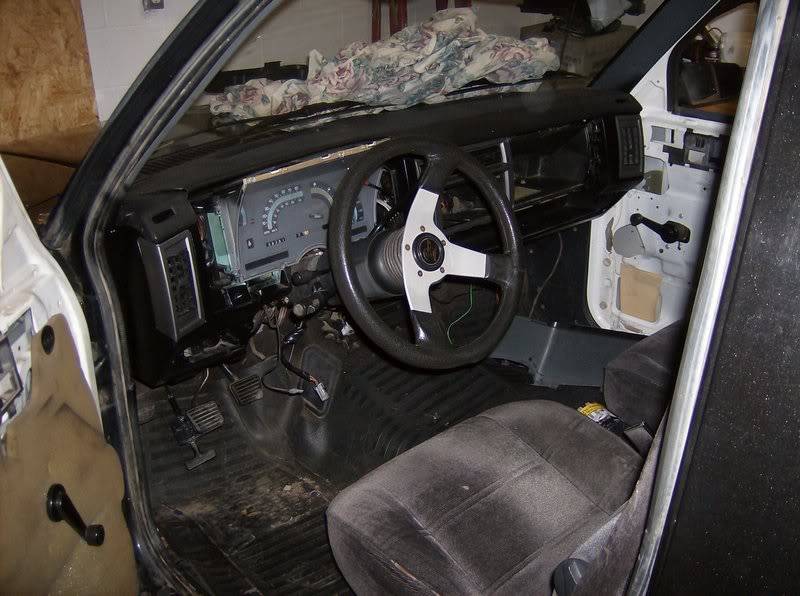
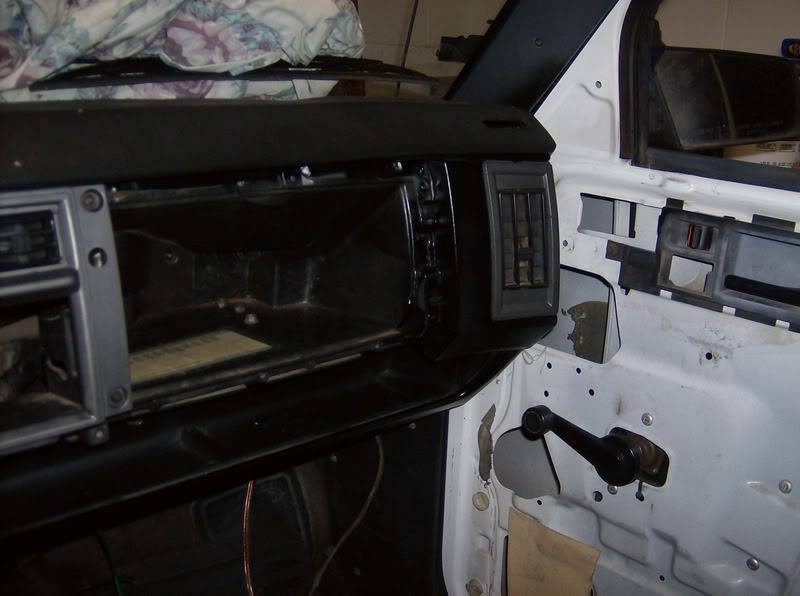
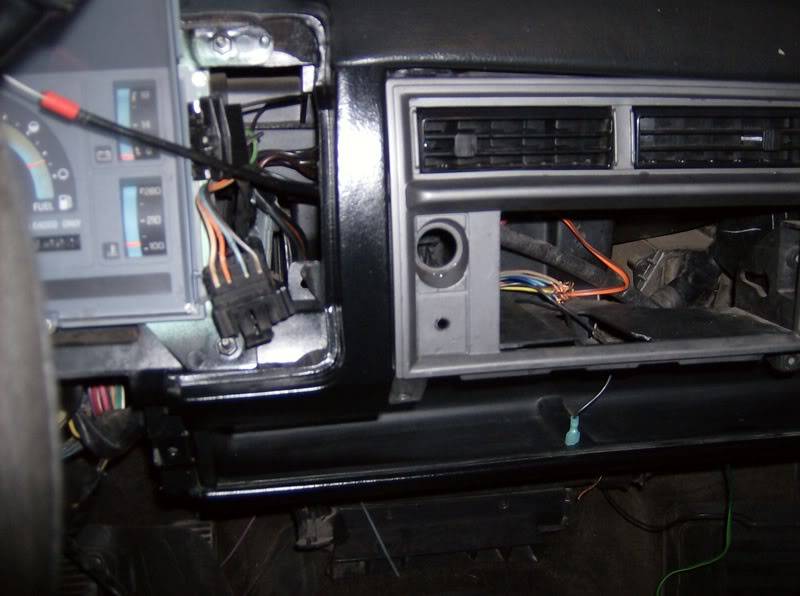
notice the pewter bezels? theyer out of the parts truck. i like them with the black. just enough color.
reason im ddiong this is that all the dashes in my area are as bad, or worse than the one that is in it now. so why spend a bunch of money on it?
the dash cap is going back in, even though its cracked too. this time, it will be installed correctly. something it wasnt when i pulled it. ill also be doing the entire interior over in black, except for the carpet, seats, and sunvisors. well, at least until i find cheap black versions...
and the last shot is of the finished clutch pedals. three days of hell for these things, so im freaking proud of them. i never wantto do it again, though....
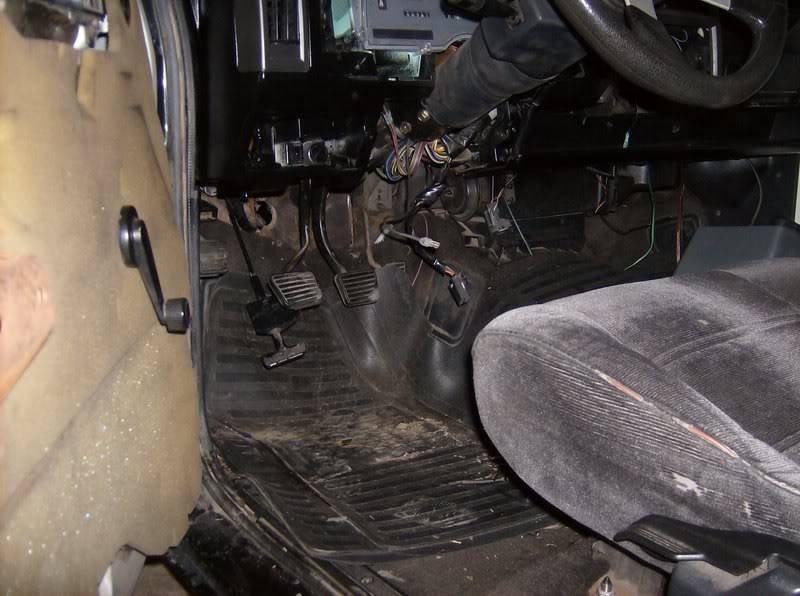
1137.29 and counting...
Michael
Michael Crawford
1970 plymouth Duster back under construction:
https://www.pro-touring.com/showthre...uring-makeover
1987 GMC S15 https://www.pro-touring.com/showthre...ct-drivabeater
-
01-19-2009 #2
Registered User
- Join Date
- Aug 2007
- Location
- Albemarle, NC
- Posts
- 1,171
its been a long weekend....
first, budget stuff: 8 dollars for the 15 loose rollers for the input shaft from NAPA. 10 for the tapered roller bearing on the input shaft, 5 for the grease seal (both from Autozone), and 5 to get the tapered roller swapped out (local big rig repair facility).
so current budget total is : 1165.29
and i sold my stock leaf springs for 25, so new budget ttal is 1140.29
the reinstall of the input shaft went fairly well for a guy with fat fingers. took some vasaline to hold it everything in place, jiggled, wiggled, cussed, screamed, etc. about two hours later, the input shaft was back in, and the trans was ready for reinstall.
so saturday, i took the truck down to my dads shop, as he has a lift and heat, made it quite nice. about halfway there, the automatic gave up the ghost. only had 1st and 2nd. so i limped it the last 20 miles in second. took forever. when i got there, i had to back the truck up. it took full throttle to get the truck to move in reverse, and even then, it wasnt happy.
when we dropped the pan sunday morning, there was a 1/4 inch of metal built up on the magnet in the pan. and the fluid smelled BAD. but at east i got my money's worth outta it!
when we pulled the driveshaft, we found places where it used to have weights. dunno where they went...
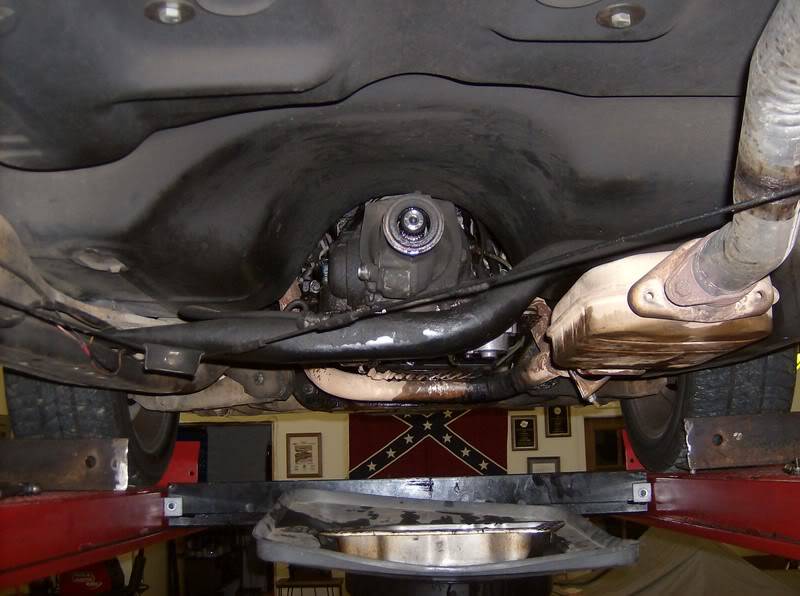
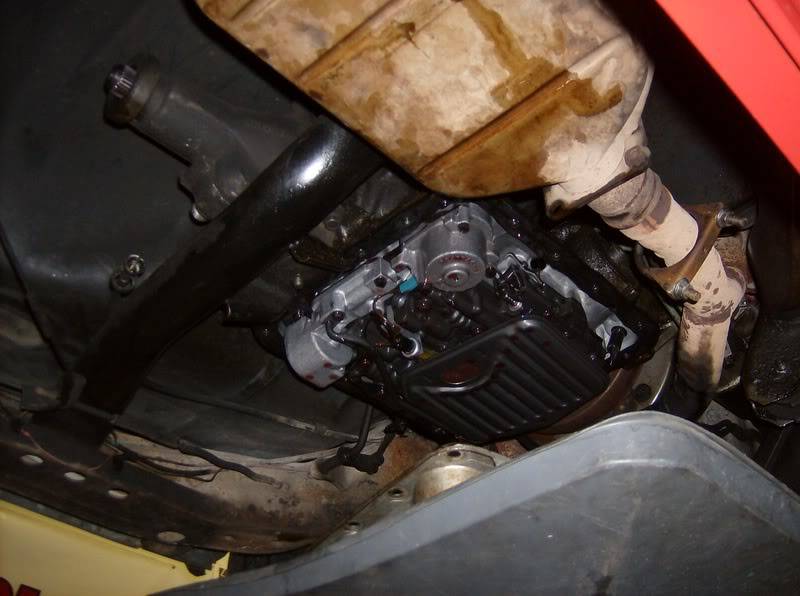
after letting it drain, we started to yank it. there were only 2 bolts in the torque converter, and three holding the trans to the motor. none of those three were even finger tight.
once the automatic as out, we installed the five speed. pilot bearing, flywheel, etc all went in without a hitch. no messed up threads, nothing. it was great!! ive never had a big job go that easy.
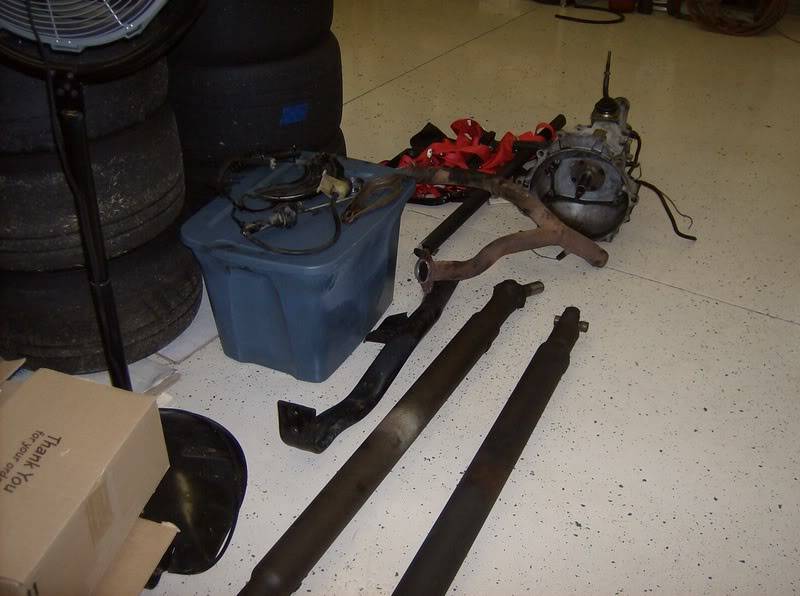
my buddy Dustin, my father, and myself spent most of yesterday putzing around with it. between bench racing, looking at stuff, cleaning parts, eating, and just general BSing, we didnt work that hard. 10 hours later, we were done.
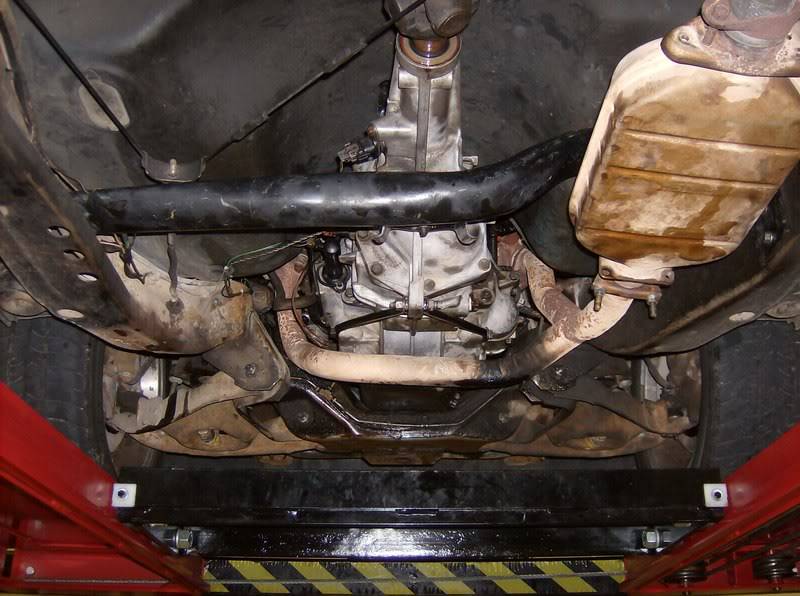
at the end of the day we worked on stuff like the shifter, the clutch hydraulics, etc. that was the hard part.
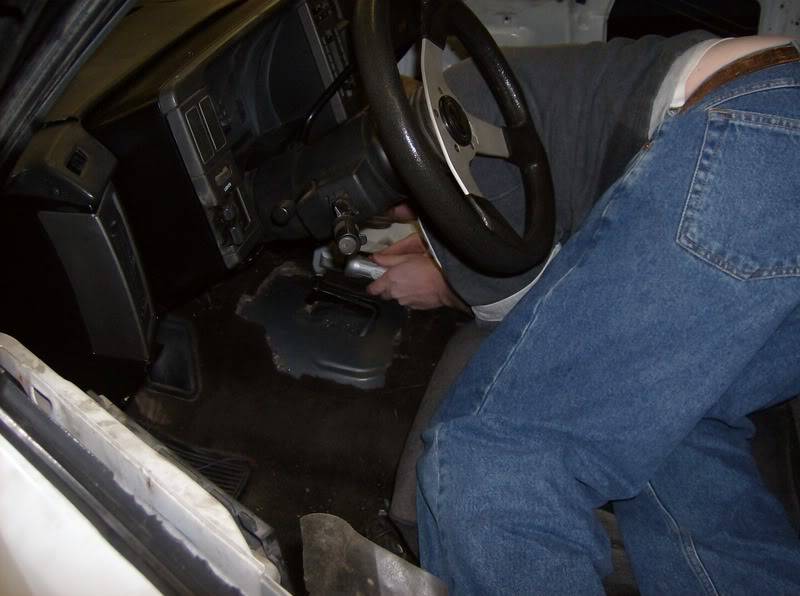
dustin cut the most anal retentive floorboard hole ive ever seen. he even used a straightedge guide for the air nibbler, filed the opening, etc. spent way too much time on the hole for the caliber of this truck.
heres a picture of him doing it.
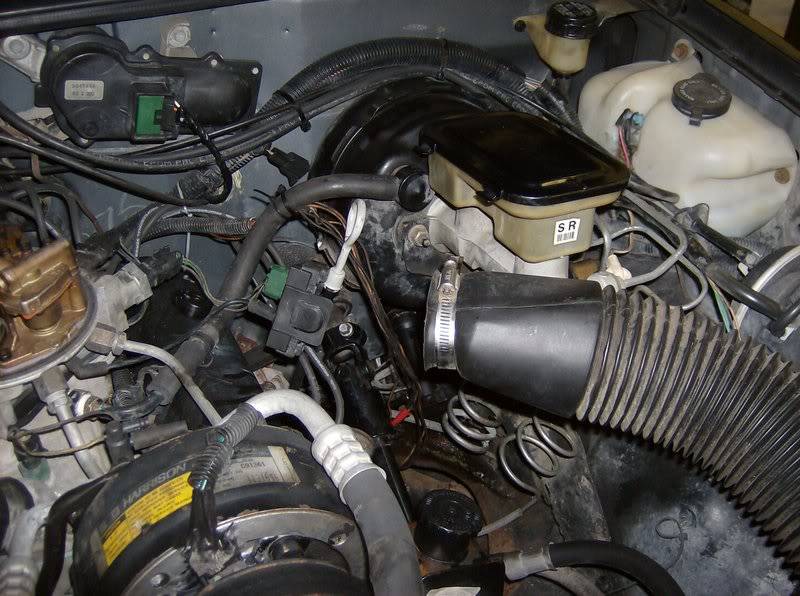
while he was doing that, i was puting in the hydraulics. i had to gring the firewall opening with my trusty dremel to get the master to clear, but that was the only bad part. and getting the hose routed around evertything. stupid plastic hoses.
but eventually it got done.
we then drained all the fluid, hosed the innards of the tranny out with 2 cans of brakecleaner, and refilled it with fresh ATF. gotta love having a bunch of open bottles of stuff to use up.
when we first started the truck, is strated in gear with the clutch depressed. we gravity bled the clutch hydraulics. nothing. wound up pulling the slave completely out of the truck, and rotating it all over while gravity bleeding. clutch engages right at the floor now.
when we wint to test drive, the tranny would not go into any gear, though the the clutch was now fully disengaging. turned out that we had to let the fluid get pumped all around the tranny again after the brakecleaning i gave it. once that happened, it shifted great! no noises, full throttle up and downshifts, good holding on the ZOOM clutch, easy pedal pressure, etc.
we buttoned the interior kinda back up after removing the mechanical speedo cable, and running the new wiring for the reverse lights and electric speedo. the parts truck didnt come with a shift knob, so i sued the stock one from my old Dakota. threads matched and everything. i still have to fix soem under dash wiring and HVAC issues, fabricate the panels to put the Autometer gauges in, and redo the rest of the interior.
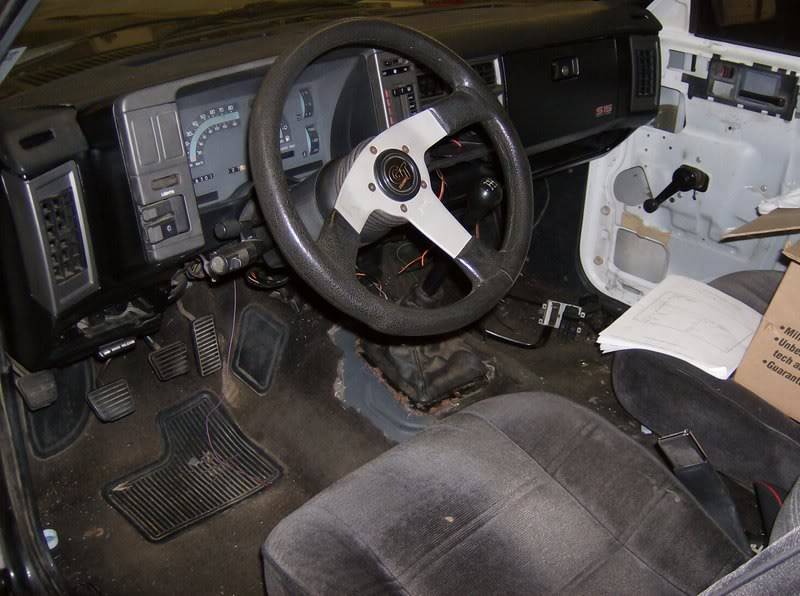
my though on the interior is to do all the light grey, dash level-up stuff in gloss black, and leave the dark grey alone. what do y'all think?
the truck runs a lot better now, and is a blast to drive. feels like theres at least another 20 horse in it, probably due to all the parasitic loss of the busted 700-R4.
i also bled out the brakes today while i was down at the shop. feel a lot better now.
MichaelMichael Crawford
1970 plymouth Duster back under construction:
https://www.pro-touring.com/showthre...uring-makeover
1987 GMC S15 https://www.pro-touring.com/showthre...ct-drivabeater
02-06-2009 #3
Registered User
- Join Date
- Aug 2007
- Location
- Albemarle, NC
- Posts
- 1,171
parts and pieces keep rolling in.
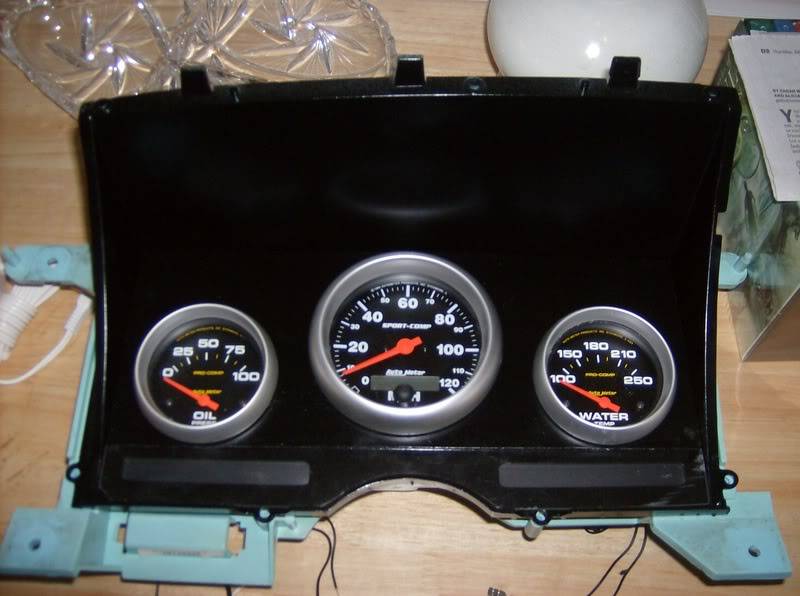
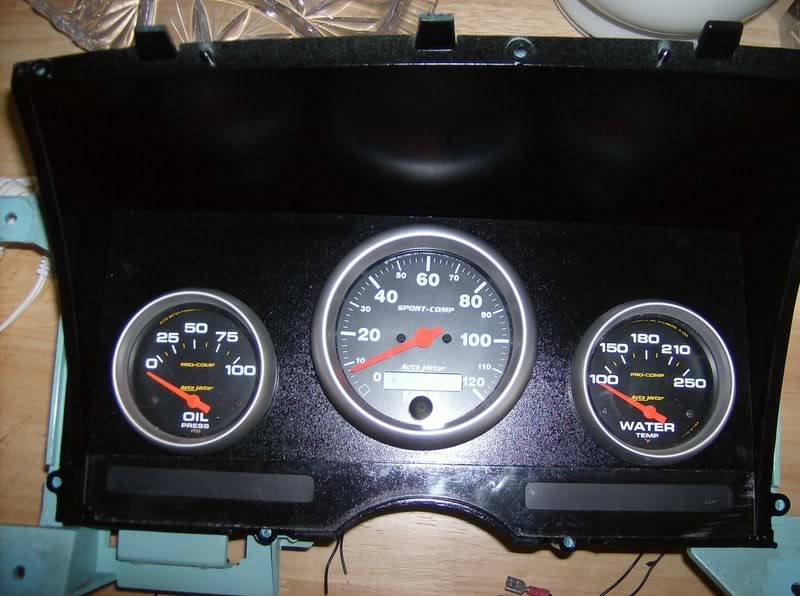
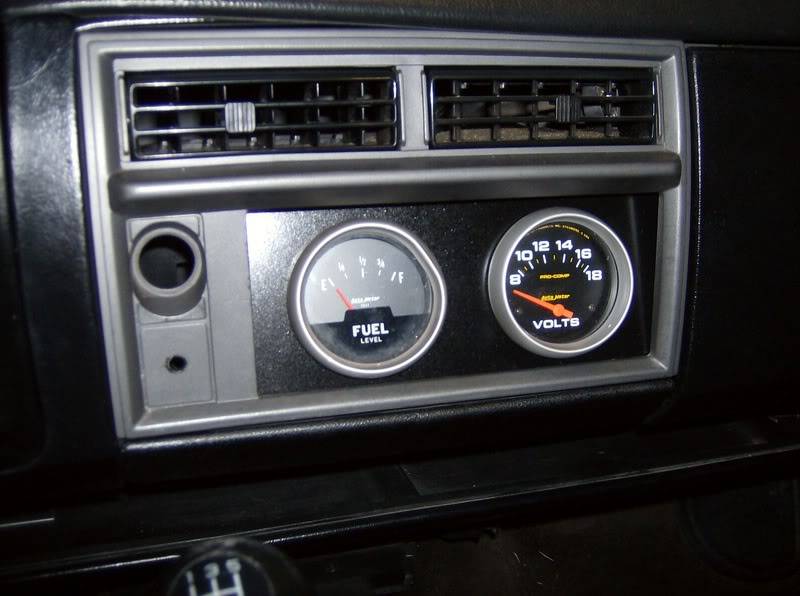
up first: the solution to my speedometer problem. 102 bucks worth of autometer gauges in a custom panel. panel is still getting finished, along with the auxiliray panel where the radio used to be. 9 dollars in lexan from lowes.
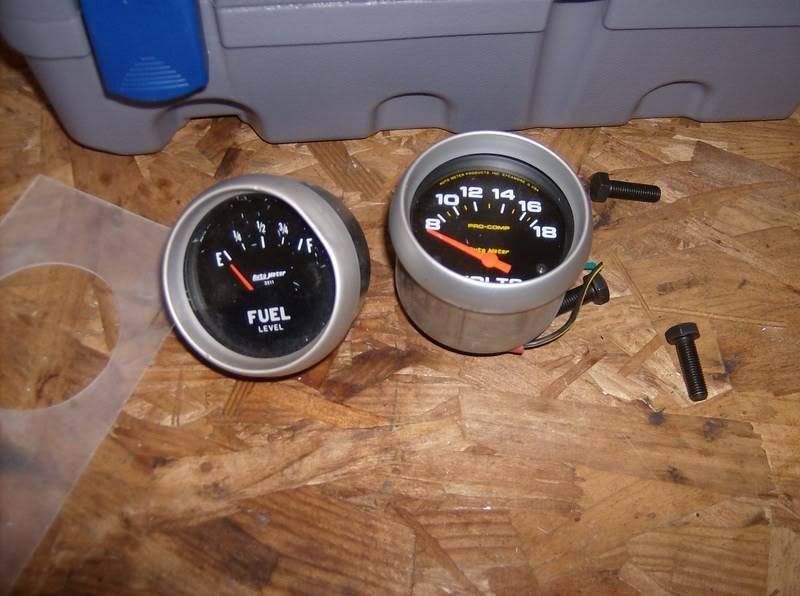
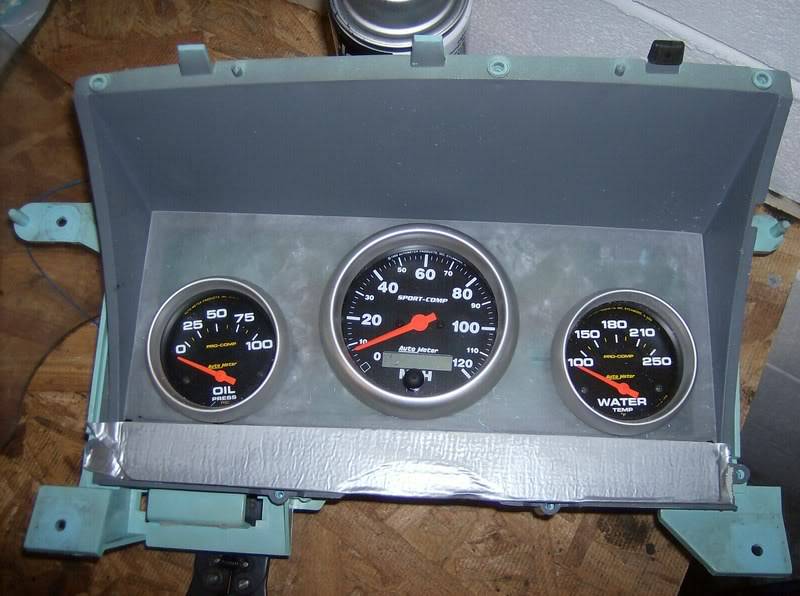
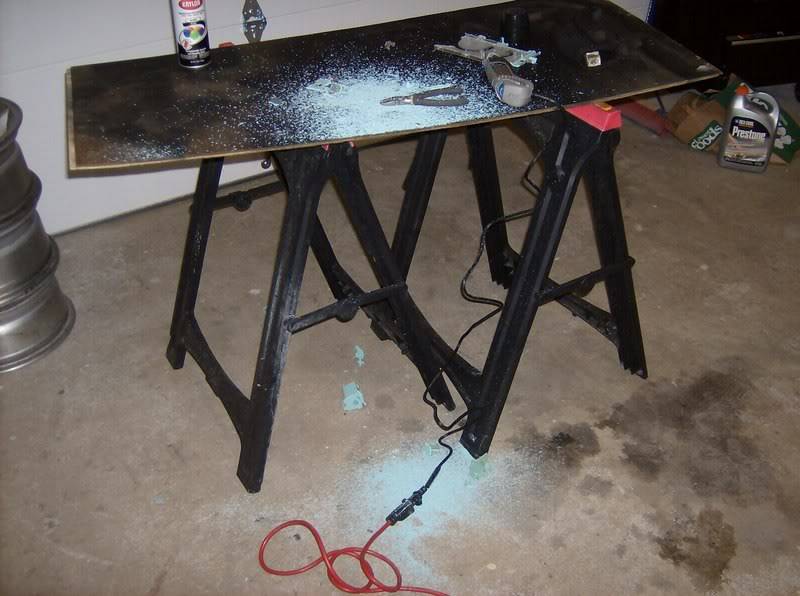
and a picture of what was left after a whole bunch of cutting
the panel will reuse the factory indicator lights, be hooked up with a 12 pin quick connect from radio shack, and fit in all factory openings with all factory hardware. unfortunately, i could not reuse the factory lexan cover, so hopefully it all looks good when im done. still have to find a spot for my radio though...
next, i got a free set of Falken tires for the 15 inch Z28 wheels. so i pulled the old bald tires off...
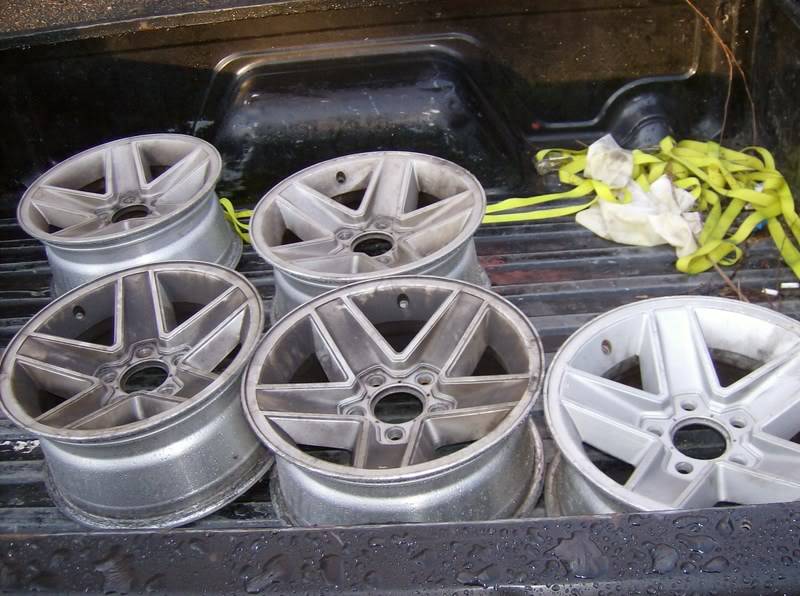
and cleaned them. paining them black, and need to find a set of center caps in silver or chrome.
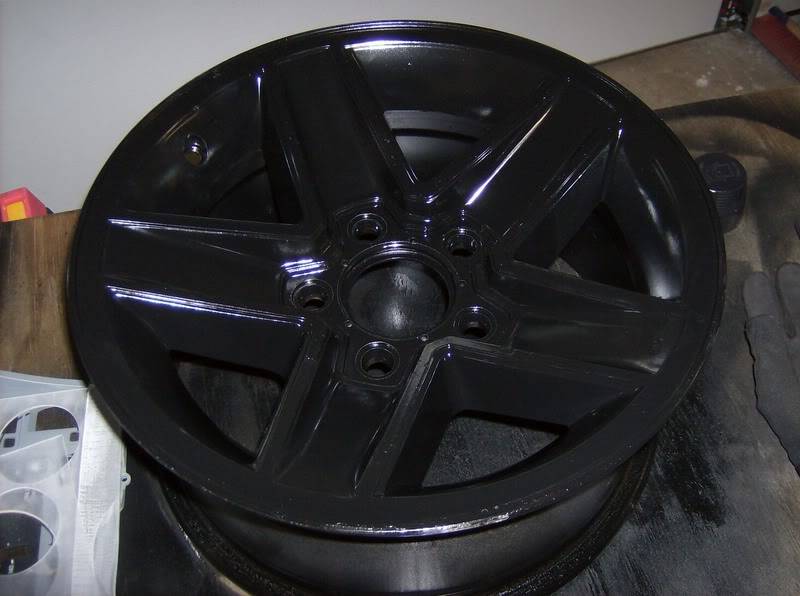
i got the LCA bushings and ball joints pressed in at a local shop for 45 dollars (my time has recently become much more valuable to me, more on that in a minute)
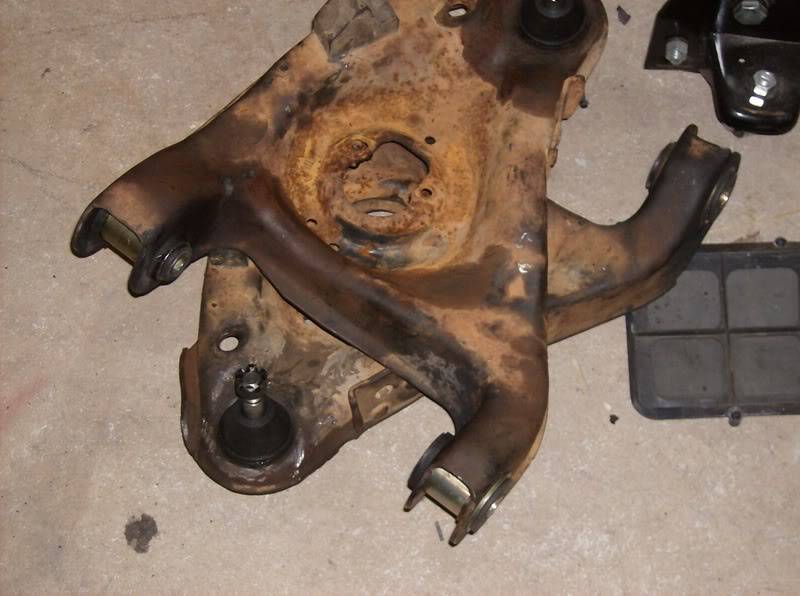
and my uppers came in from UB machine. these are prototype pieces set up for the tall ball joint conversion on G-body's/s-series trucks. were running them on mine, and seeing what we get. the upper ball joint is from an 82 1500 2wd chevy truck, and is a 1/2 longer stud. circle track guys have been doing it for years, just never really caught on with street guys. until SC&C did theirs with the Howe ball joints and SPC arms.
when UB machine finally releases these arms, they will have bushings on the cross shaft. right now, there metal on metal.
im impressed with the quality of these pieces so far. good weld penetration, thick tubing, burr free holes, raised lip on the ball joint plate, etc. did require a little clearancing on the upper ball joint, but only by a couple of thousandths on the inside edge of the mounting flange.
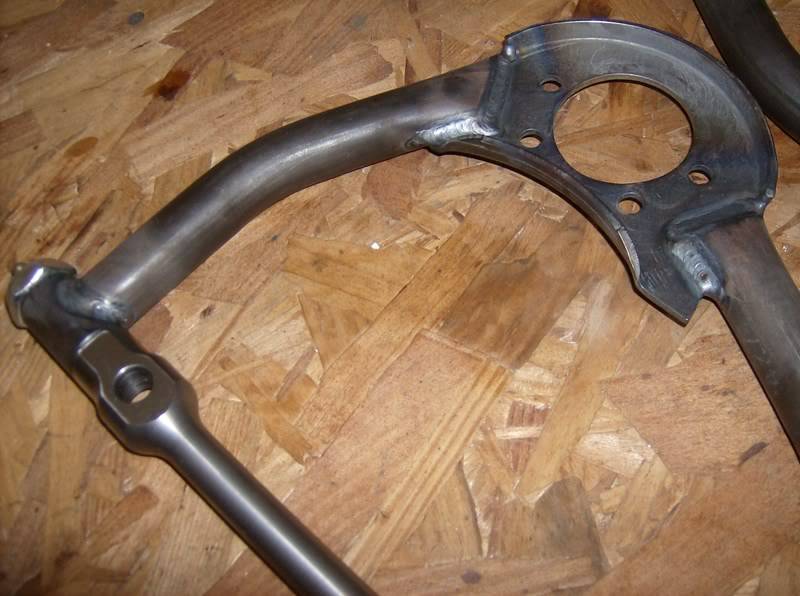
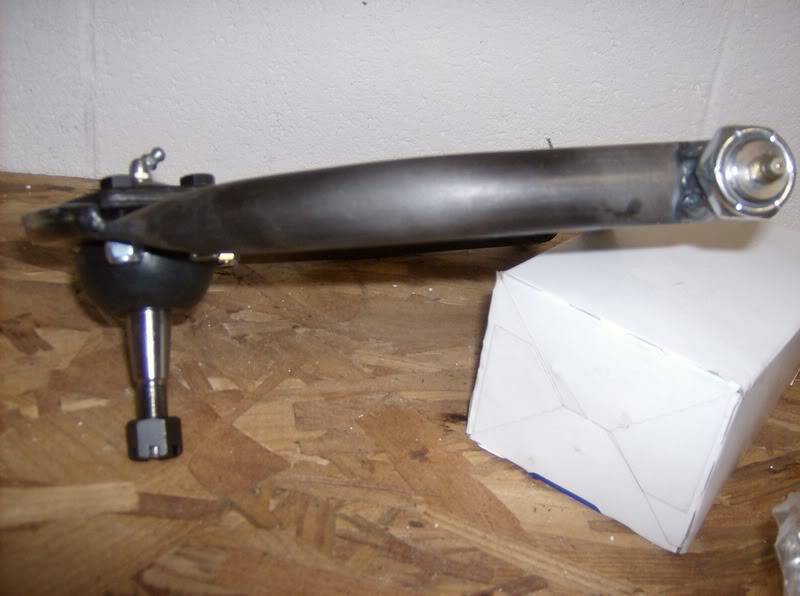
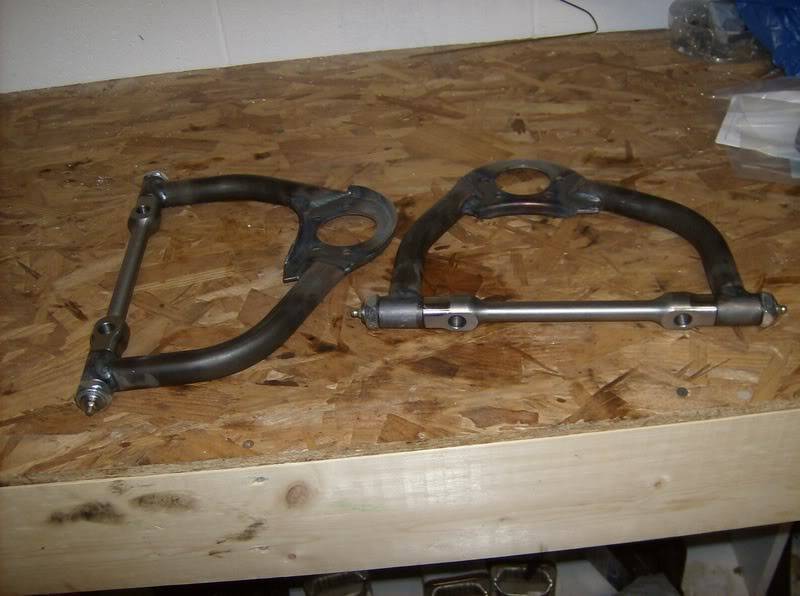
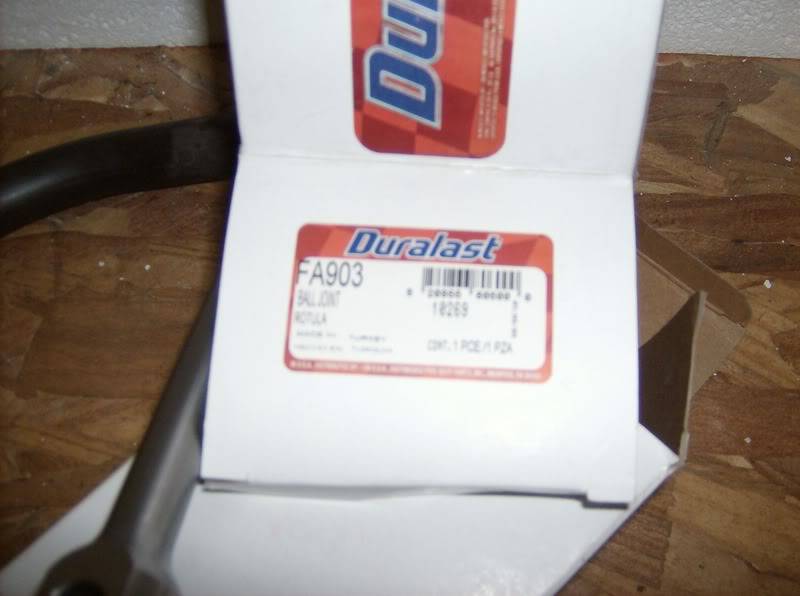
ill gove a report as i et them on and tested out. well see what kind of alignment and clearance i have with them.
and last but not least, my daughter was born last week. she wasn't due till the 17th, but shes healthy, and so is my wife. im not getting much sleep now, and all my priorities have changed, but its the greatest thing thats ever happened to me.

budget total for the truck (minus ball joints, as i have to find the reciept) 1296.29
ill update tomorrow with suspension rebuild stuff if i can get shop time in with my daugter being fussy.
michaelMichael Crawford
1970 plymouth Duster back under construction:
https://www.pro-touring.com/showthre...uring-makeover
1987 GMC S15 https://www.pro-touring.com/showthre...ct-drivabeater
02-07-2009 #4
Registered User
- Join Date
- Aug 2007
- Location
- Albemarle, NC
- Posts
- 1,171
as far as front discs, ill probably either go with the blazer dual piston setup, or the camaro LS1 setup. those two chosen so i can still run my IROC's at the autocross track.
hopefully the budget does work out like im planning, as im still planning on running the GRM challenge this fall. as long sa the funds are availible for me to do so.
rear discs im starting to look at. speedwy offers a bracket to use the caddy parking brake caliper and some unknown rotor on the rear. bolt on for my factory axle. which means i can sell the spare.
on a side note, i got the driers side rebuilt today. no pics, as the camera was dead. still have to torque everything, reicnstall the brakes, and sit it back down on the ground. then we'll see where these prototypes get me in the camber/caster settings. currently only running 2 shims each stud in the uppers.
michaelMichael Crawford
1970 plymouth Duster back under construction:
https://www.pro-touring.com/showthre...uring-makeover
1987 GMC S15 https://www.pro-touring.com/showthre...ct-drivabeater
02-10-2009 #5
Registered User
- Join Date
- Aug 2007
- Location
- Albemarle, NC
- Posts
- 1,171
mini update:
the front end is rebuilt. the new UCA'a went in well. needed slight gringing on the upper ball joint mounting flange for me to be happy with the fit. pulled out all the alignment shims to get a baseline when i take it over to the alignmnent shop. the problem came when i sat it back down on the ground. the IROC's hit the ball joint mounting flange pretty hard. so i ground on it. still hit. a pair of 3/8 spacers have solved the problem for now, but i need to buy a set and get some longer studs. anyone know the Part number for the longer studs?
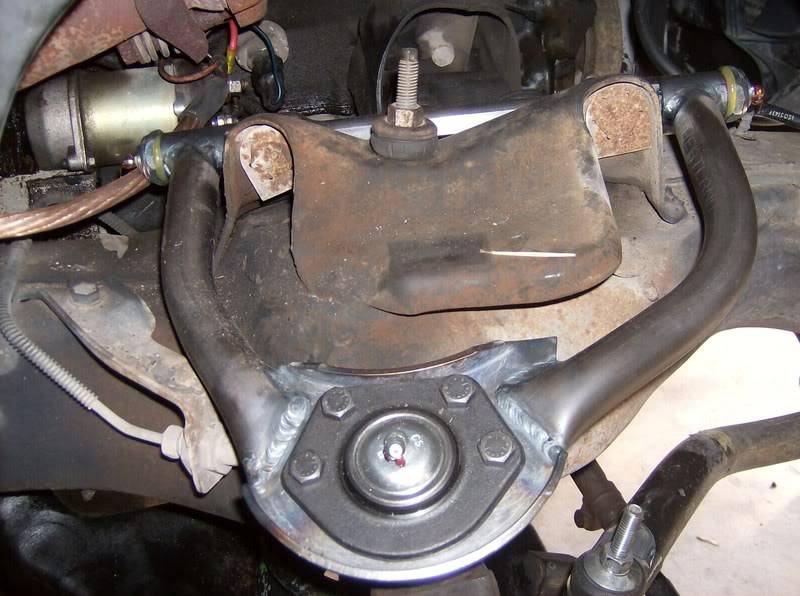
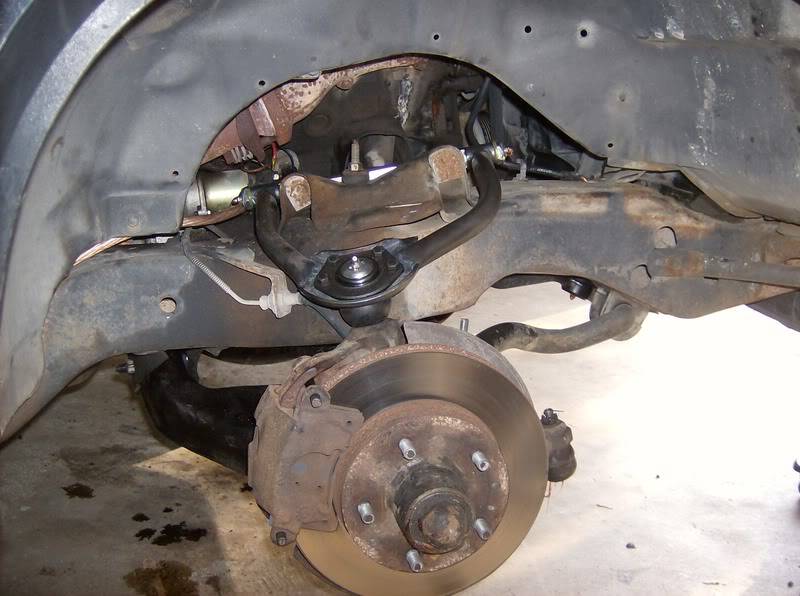
also got further on the Autometers. cluster is built and painted, but not wired. same with teh auxilirry panel.
michaelMichael Crawford
1970 plymouth Duster back under construction:
https://www.pro-touring.com/showthre...uring-makeover
1987 GMC S15 https://www.pro-touring.com/showthre...ct-drivabeater
02-10-2009 #6 Registered User
- Join Date
- Jun 2007
- Location
- Greenwood, SC
- Posts
- 1,611
Great project! I think you are approaching it in the perfect order too. Just don't get carried away with the looks. If you keep it simple, it will look good.
Keep up the good work!JC Scott

03-07-2009 #7
Registered User
- Join Date
- Aug 2007
- Location
- Albemarle, NC
- Posts
- 1,171
finished aligning it today. the damn thing just sticks. i pushed it harder, and felt more comfortable in it doing so, on a twisty backroad between my house and the church. just incredible. even on those crappy 15's im running right now. i will say yokohmas suck. if they werent free, id feel like i paid too much.
michaelMichael Crawford
1970 plymouth Duster back under construction:
https://www.pro-touring.com/showthre...uring-makeover
1987 GMC S15 https://www.pro-touring.com/showthre...ct-drivabeater
04-30-2009 #8
Registered User
- Join Date
- Aug 2007
- Location
- Albemarle, NC
- Posts
- 1,171
so i have a little update:
budget first:
1 inch drop coils: were 30 bucks. no longer on truck, so were down 30.
2 inch drop blocks: cost 30 bucks. so total remains the same.
went out to the Tarheel Sports Car Club autocross at Maxton airport the beginning of the month. about halfway through the day, i was turning the same times as novices in WRX's, so we were doing great. caught a lot of **** about how high the truck was from the safety steward, though.
on about my 15th run, hotlapping the piss out of it, i noticed coming off the first roundabout that i had no oil pressure whatsoever. 0, zilch, none, not even a damn flicker of the needle moving. i figured that at that point the damage had already been done, and i might as well get my last Banzi run in. had my fastest time of the day, and FTD for the novice school that run. brought it in, still running, and notmaking anynoise. figured it was probably a bad gauge or something, but decifded not to risk it. had to be drug home by my father on a flatbed trailer. turned out that i had a piece of the teflon tape i used to seal the threads on the sending unit plugging the hole in it. DAMMIT!!!!
so no money fix there. while i was underhood, i took care of the boring on the intake for the 4.3 TBI (traded a wiring harness for a dart to my machinist for the gaskets, machining, and throttle body), fixed the leaking distributor O-ring, deleted the EGR, Cruise, and extra wiring, and generally cleaned up. dunno how much weight i got rid of, but its at least 15 lbs worth of crap.
i also decided that i had coaught hell for ride height for the last time. so we went straight into the dirt for ride height. took my stock 2.8 coils, cut one full turn outta them, and threw some 2 inch blocks in the back. according to my measurements form my bbuddies 91, its about a 3/5 drop now, and handles much better than before. the UB machine UCA's accomadated this much spring drop with room to spare.
i know the geometry is suffering right now, but after i find some stupid cheap 2 inch spindles, ill go back to 1 inch springs, tall LBJ's, LS1 brakes, etc and have better geometry again.
i also had to cut the bumpstop brackets fromt and rear to have it dribvable. rides really good, and looks killer.


i have also now started on phase two, now that the chassis, ride, reliability, and safety are where i want tham. thats the part of the program where i make it look halfway decent. friend of mine donated the leftover Bondo, spreaders, spot putty, sandpaper, and primer from where he just got done doing his truck, and another friend of mine who paints cars for a living will be spraying it and goving me the paint. hes taking all the different leftover black cans of basecoat that he has, mixing them all up, and shooting it. it will be black, just not entirely sure what shade. ill have to buy the clear and a case of beer for him.
so this is my first real attempt at bodywork, and i think is coming along pretty good.


MichaelMichael Crawford
1970 plymouth Duster back under construction:
https://www.pro-touring.com/showthre...uring-makeover
1987 GMC S15 https://www.pro-touring.com/showthre...ct-drivabeater
04-30-2009 #9 Registered User
- Join Date
- May 2008
- Location
- Western MA
- Posts
- 86
It's always the little things isn't it? Glad it was a free fix though. Are there any more events coming up that you can try your updated suspension modifications out at? Originally Posted by dusterbd13

01-12-2009 #10 Registered User
- Join Date
- Apr 2005
- Location
- dayton, oh
- Posts
- 952
this is a great project. thanks for posting it. it should be a real fun driver when you're done
02-02-2009 #11 Registered User
- Join Date
- Apr 2005
- Location
- Chicago
- Posts
- 2,788
Not sure how i missed this thread but - awesome project.
The funny thing is this is exactly how mine started out and spiraled out of control.
As for interior - I say go all blackmarty-mj
GarageScene.net High Speed Welding KDHotrods RecoveryRoomInteriors WegnerAutomotive Autometer Ride-Tech
02-03-2009 #12 Rat Pack Member

- Join Date
- Nov 2004
- Location
- LYNCHBURG,OHIO
- Posts
- 512
Pretty cool project!!
Greg Tholen
GT Motorsports
Dealer for Wilwood,Baer,Viking,Moser,BMR,Earl's
(937)763-7272


02-03-2009 #13 Starting The Transformation
- Join Date
- Jan 2008
- Location
- Ca
- Posts
- 168
I'm digging the smaller truck builds.
02-06-2009 #14 Starting The Transformation
- Join Date
- Jan 2009
- Posts
- 343
gunna have ya a nice little truck when ya get done. reminds me of my 94 s10. aww sad now. congrats on the baby also
02-07-2009 #15
Registered User
- Join Date
- Feb 2009
- Posts
- 8
duster congrats on the little one. now your toy's are going to disappear right before the tools do ;P
the rear is a 7.5 but you all ready know that I assume by your other post. the 8.5 axle tube comes out of the center section about .75 inchs bigger in diameter and then necks down to the standard axle tube size. The 7.5 axle tube is the same size all the way from the center section to the end.
nice work on the build I like what you are doing with it. I've built similar projects but I always like to watch how other people solve the same problems. I think your going to come in with a better budget though as I did a tall spindle conversion and wrapped up a bit of money in it. Are you planning on doing larger brakes on the front? if so what are you planning, blazer disc, c5 or do you have something else in mind?
for the rear disc the lt1 camaro style brakes are a great bolt on and if you use a 98 and up emergency brake cable from a blazer and mount a hand release in the truck it is pretty much bolt on minus a little work on the plumbing. just make sure you get the shims behind the brackets when you pull them off the rear so you can center the caliper again.
the v6 and v8 lt1 disc rear are the same also but some cars did have drums.
looking forward to your up dates. keep up the good work when your not entertaining the little one.
02-07-2009 #16
Registered User
- Join Date
- Mar 2005
- Location
- Jackson Ms
- Posts
- 1,220
nice build and congrats on teh baby. they make life fun!!
 Chris V
SOLD
02-10-2009 #17 Registered User
- Join Date
- Nov 2008
- Location
- Iceland
- Posts
- 896

Great project and congrats on the baby, Keep up the good work
02-10-2009 #18 Starting The Transformation
- Join Date
- May 2006
- Location
- Orangeville, Ontario Canada
- Posts
- 119
I love this project!
Keep it up and congrats on the baby.1987 Monte Carlo Super Slow - Super Worn Out 355, Carb, Giggle Juice, 3" Duals, 200-4R & 4.56s
1987 Turtle Buick - T63e, 83s, FMIC, MPE DP, PowerLogger, MAFT Pro, 4" Single, ProPain & 3.08s
2002 Crapmaro B4C - LS1, A4, SLP Lid, DiabloSport, Cutout & 3.23s
2007 TrailBlazer Super Slug - LS2, A4, AWD, Tune, CAI, Exhaust & 4.11s

If you didn't build it, it's not yours.
02-24-2009 #19 Registered User
- Join Date
- Sep 2007
- Location
- Buford, GA
- Posts
- 923
Hey man - I've been meaning to subscribe to your thread for a while now.
Truck is coming along nicely. I really like it. And like was said before try to keep it simple. Because before you know it you will be dropping in an LT1 w/ T56 and going freakin' nuts with it. Ask me how I know!
Also, as stated above, the rear is your standard 7 5/8" rear. And I would try to find some Blazer rear discs if I were you COUPLED with the DP Blazer front disc setup. I sold a set of fronts for $250 but you can find them cheaper. Rears should go for around $200. And as said before don't forget the 1/4" spacers behind the axle flange plates so the calipers center over the rotors.
KEEP IT UP!Adam
1985 S10 - LT1 + T56
1964 Chevy II 4-Door - LS1 + T56
02-24-2009 #20
Registered User
- Join Date
- Aug 2007
- Location
- Albemarle, NC
- Posts
- 1,171
i have to pull the front end back apart. apparently, i put the control arms on the wrong sides, hence the tire/wheel interference and 7 shims on the front sud to get some caster OUT of it.
and the brakes are up next until Power Performance comes out with tht tall lower ball joint. going with the blazer fronts, as reccomended, and a speedway rear disc kit cause its a lot cheaper.
ill have a full update as soon as i swap the UCA's and recover from food poisoning.
MichaelMichael Crawford
1970 plymouth Duster back under construction:
https://www.pro-touring.com/showthre...uring-makeover
1987 GMC S15 https://www.pro-touring.com/showthre...ct-drivabeater

 Reply With Quote