


Results 21 to 40 of 473
-
06-13-2008 #21

 Registered User
- Join Date
- Dec 2007
- Location
- British Columbia, Canada
- Posts
- 723

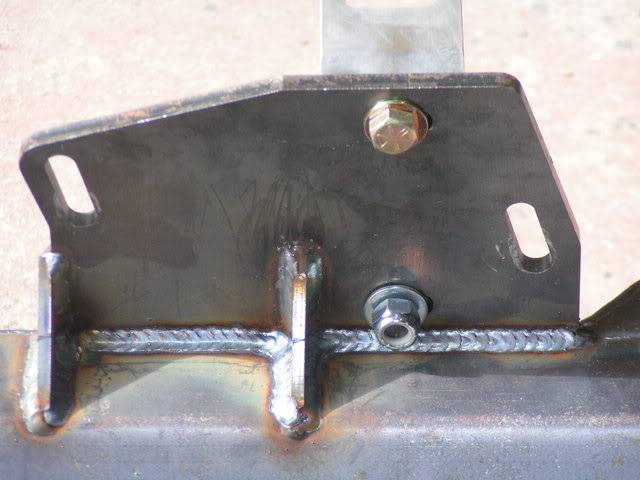
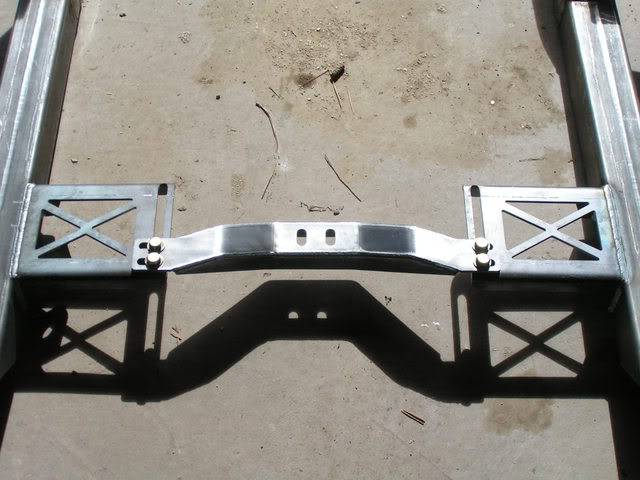
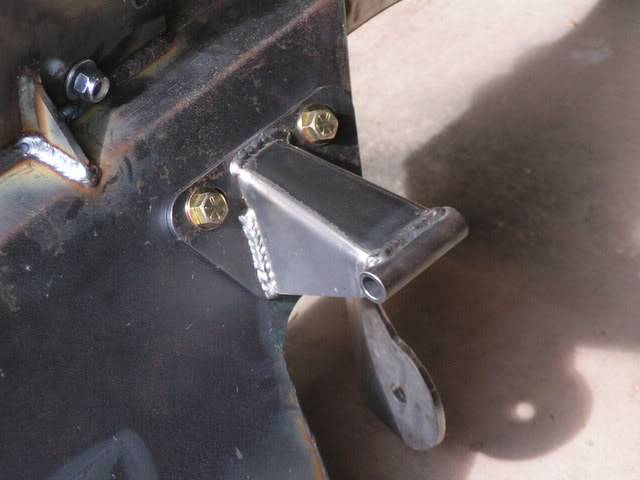
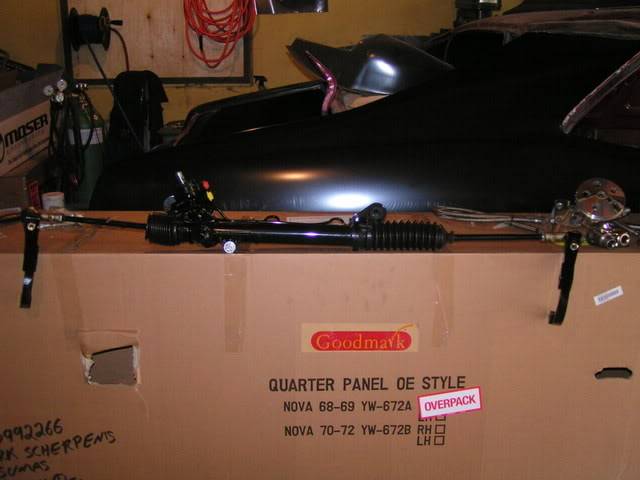
So I finally got to go to Killer Customs and pick up my Speed Tech subframe. It is awesome!!!! And it was $1000 cheaper than some of the other companies (every penny counts). I also picked up my new Unisteer rack and pinion kit, thanks to Dark Angel. Now if I can just get the deep tubs and quarter panels done...I can get the frame bolted up. Here's some pics.
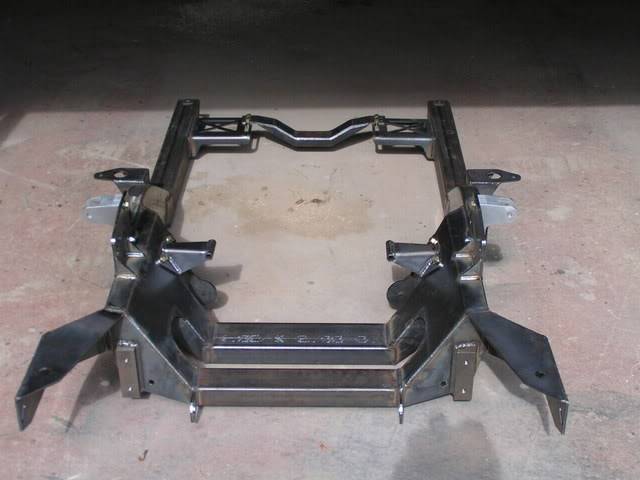
G-Mod built in
Built in adjustable trans crossmember
Adjustable motor mounts
Billet shock mounts
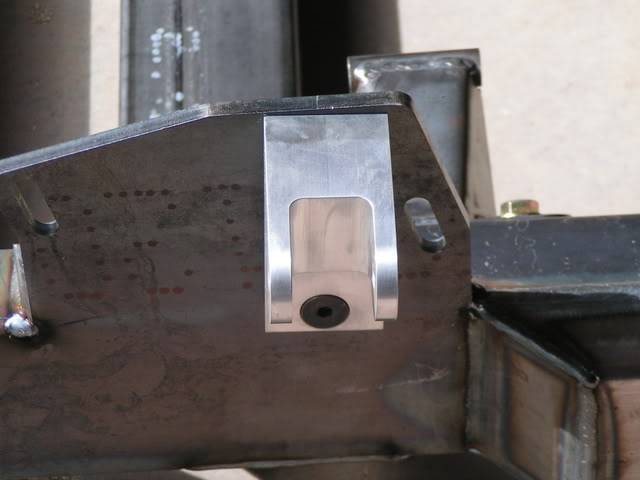
Ready for some wider tires up front now
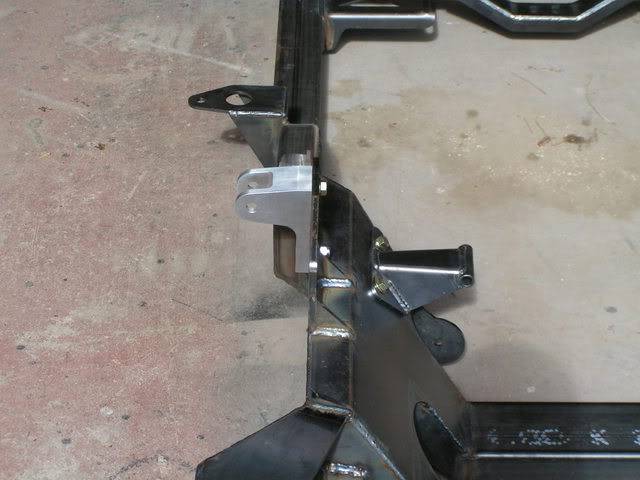
A feature I hope to never use, built in tow hooks
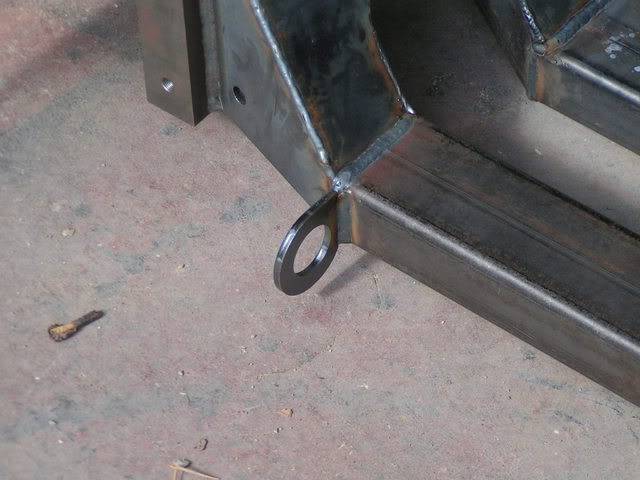
Sway bar mounts up front, not underneath where the frame can break (mine did)
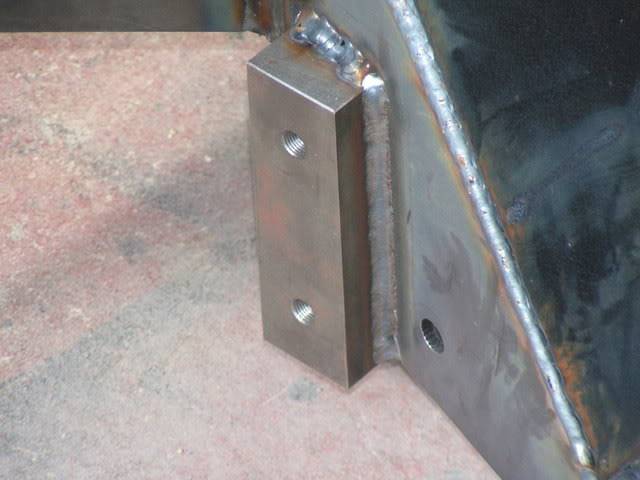
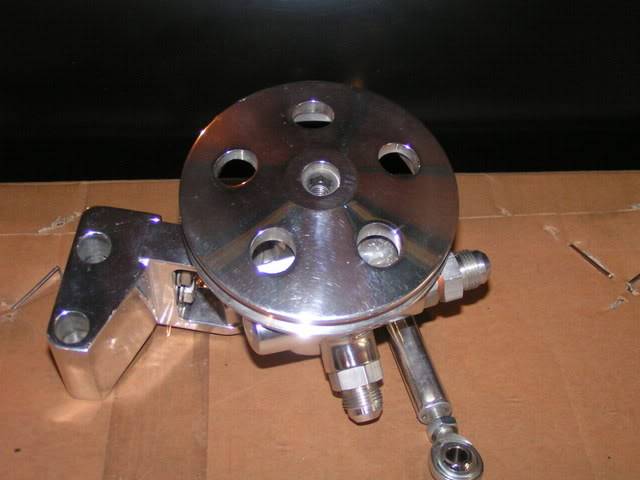
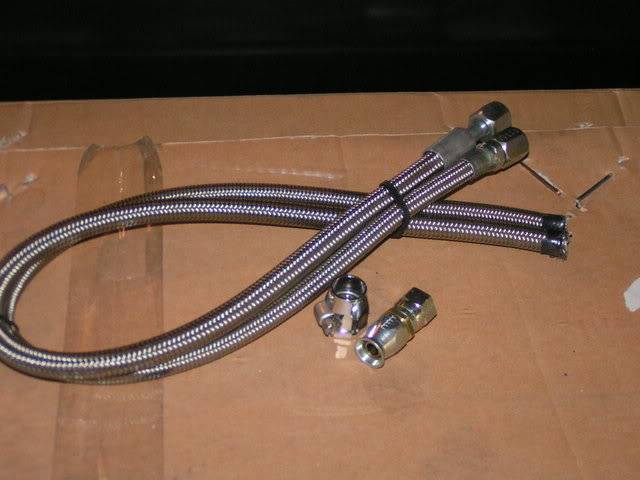
Unisteer rack and pinion kit
Polished pump
Braided lines
Now back to the shop to see if I can get the passenger side quarters done today.
-
06-13-2008 #22
 Registered User
- Join Date
- Mar 2007
- Location
- Sacramento, CA
- Posts
- 653

man that subframe is nice. Wish I had done that long ago. Car's coming along nicely!
Dave Smith
29 Ford Roadster Pickup blown 327 and stupid
67 Chevelle 396/5 speed PT
65 El Camino L79
-
06-17-2008 #23
 Registered User
- Join Date
- Nov 2006
- Location
- Ma.
- Posts
- 5,560
Progress looks good. Nice subframe it looks like you have a plan. Keep the pictures coming.
WayneWayne
Car FINALLY home !!!!!! lol
Project FNQUIK https://www.pro-touring.com/showthre...ghlight=FNQUIK
-
06-28-2008 #24
Registered User
- Join Date
- Dec 2007
- Location
- British Columbia, Canada
- Posts
- 723
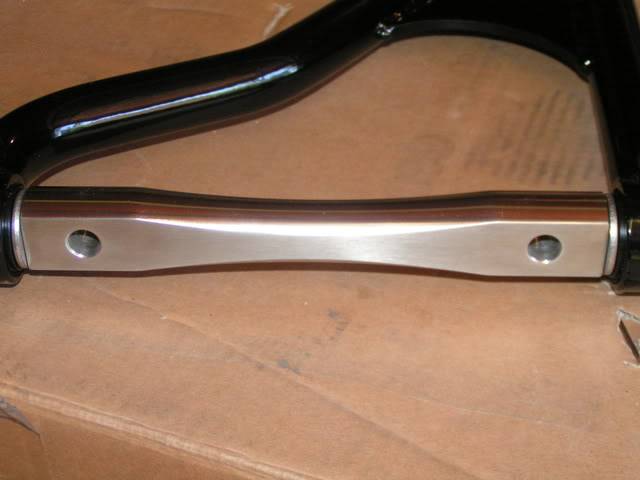
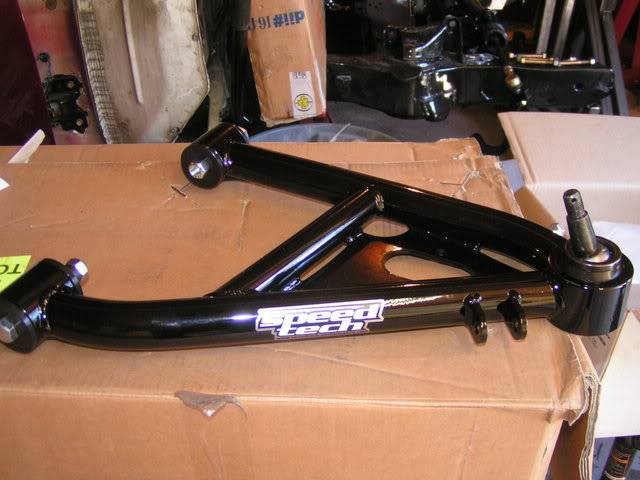
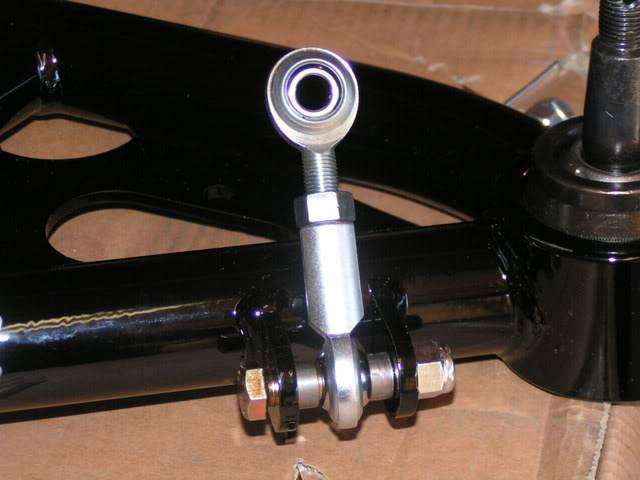
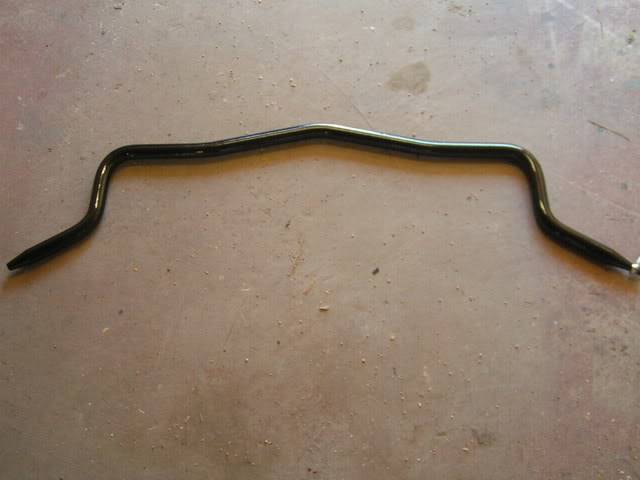
So I got the Speed Tech high clearance control arms and sway bar that go with the Speed Tech subframe. Now I have the entire Speed Tech subframe package, I just bought it in stages that's all. My plan now is to try and get the driver's side deep tub done and get the quarters on. Then I have to put the driver's side cowel panel on, finish welding up the new floor pans and I'll get to try out the rotisserie that I built.
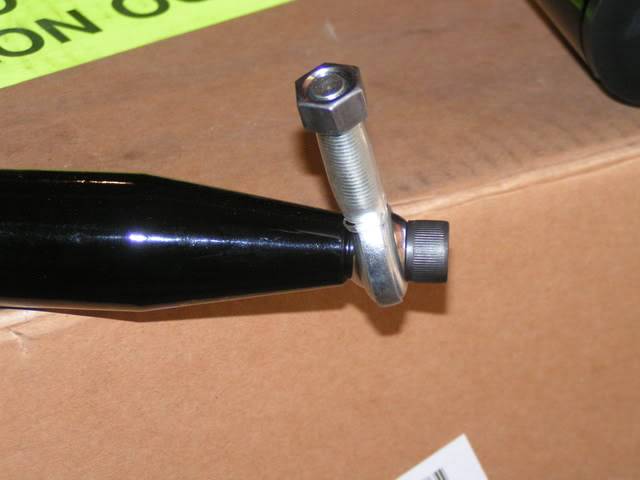
Here's some pics of the Speed Tech high clearance control arms. These things are sick!!!
Upper Control arm with billet aluminum ball joint cover
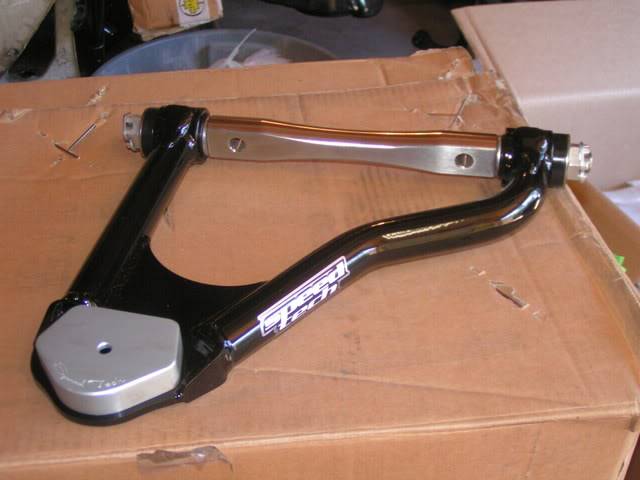
Stainless Steel cross shafts
Lower control arm
Sway bar end links
1.25" solid sway bar
-
07-17-2008 #25
Registered User
- Join Date
- Dec 2007
- Location
- British Columbia, Canada
- Posts
- 723
Well I've been able to make some pretty good progress of the past few days until the power switch on my air compressor blew. Wouldn't turn off at all. Thankfully I have a separate breaker in the shop for the compressor. Oh well..this way I'll be able to get a new on that regulates better for the plasma cutter.
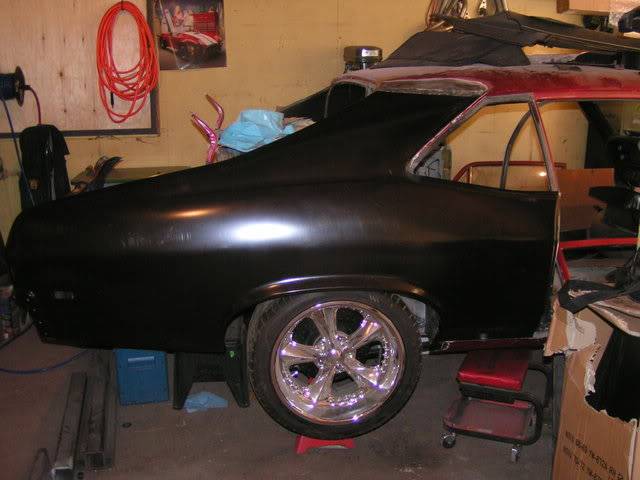
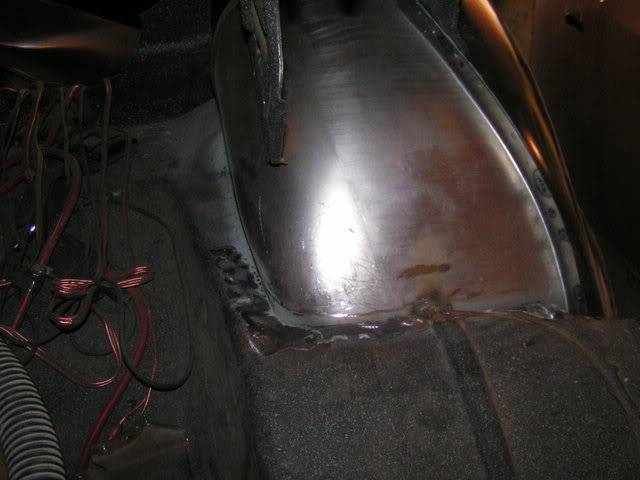
Here's some pics of the passenger side that is mostly done. Still have some welding to finish up, but it's strong enough right now to be secure.
new quarter installed
Deep tub in
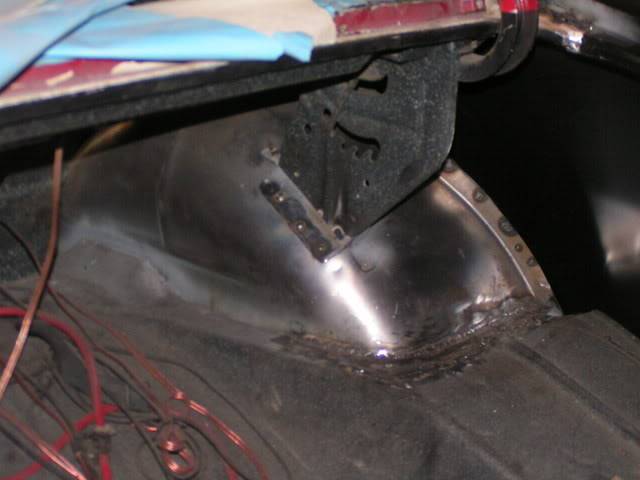
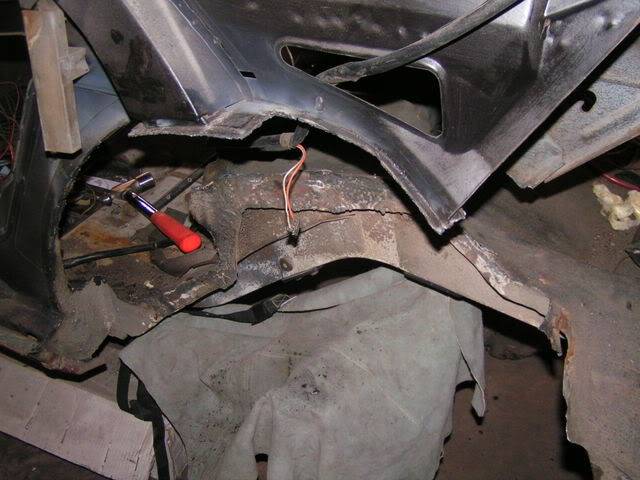
Today I started on the driver's side. Going to replace the outer wheelhouse, put in deep tubs, replace the trunk drop off and obviously the quarter panel. Here's some before pics:
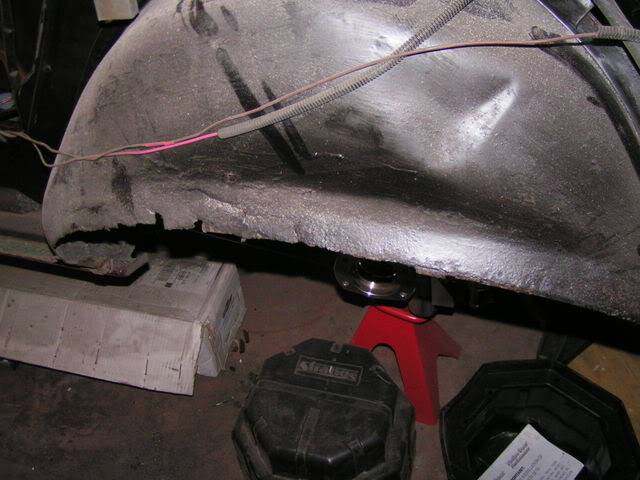
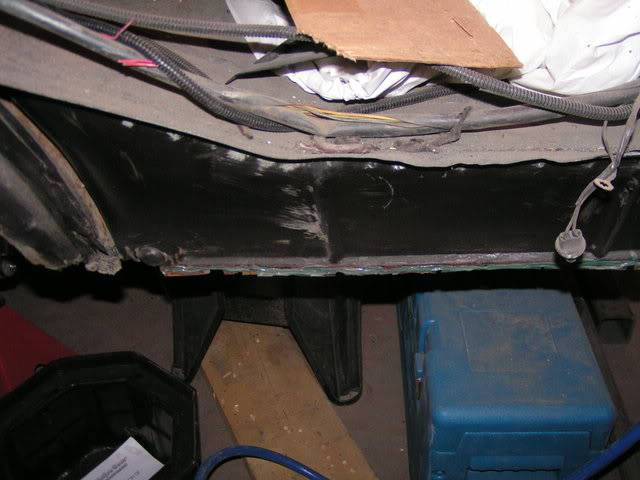
The glue that didn't work :mad:
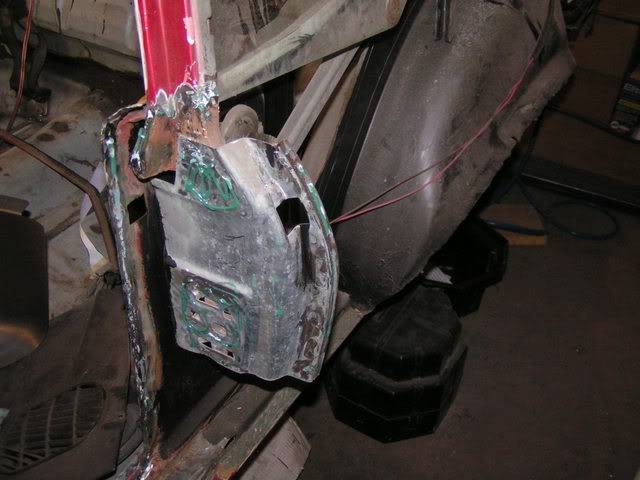
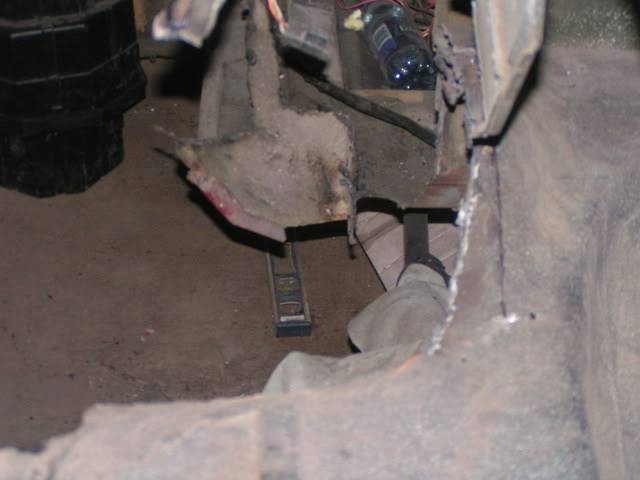
And here's what I got done before the compressor kicked out on me:
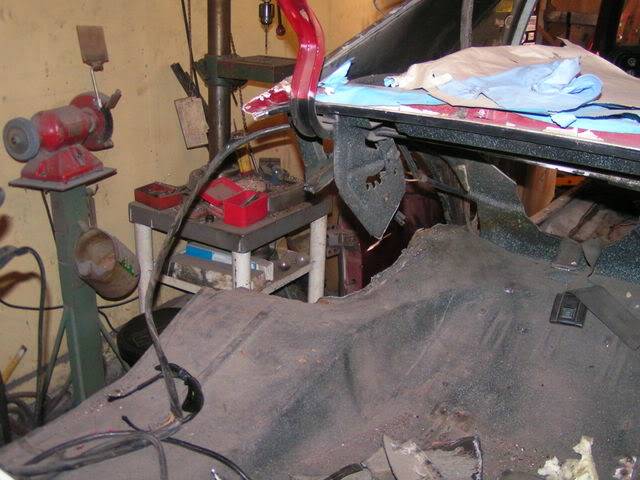
07-17-2008 #26
Registered User
- Join Date
- Dec 2007
- Location
- British Columbia, Canada
- Posts
- 723
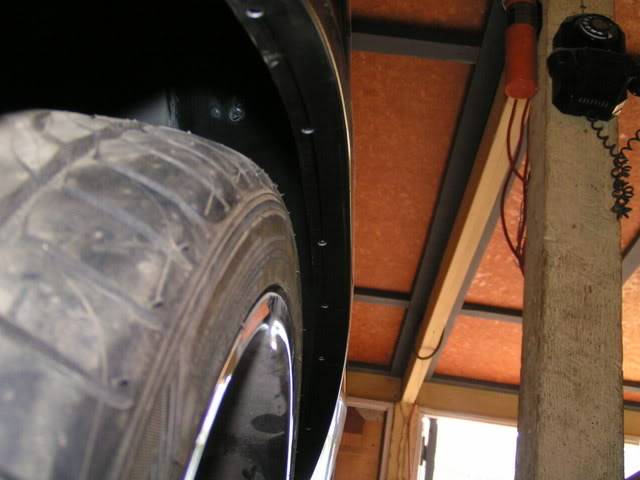
Since I had some spare time after the compressor died, I thought I would look and see how much room I actually have to play with now that I have the deep tubs. The tires that I have in these pics are a 285-35-18. I'll have to trim the quarter/outer wheelhouse lip as it's pretty tight, but wow what a difference. If anyone ever wondered if it was worth it...here's proof.
Gap between tire and wheelhouse/quarter lip
Distance between wheel and inner wheelhouse now
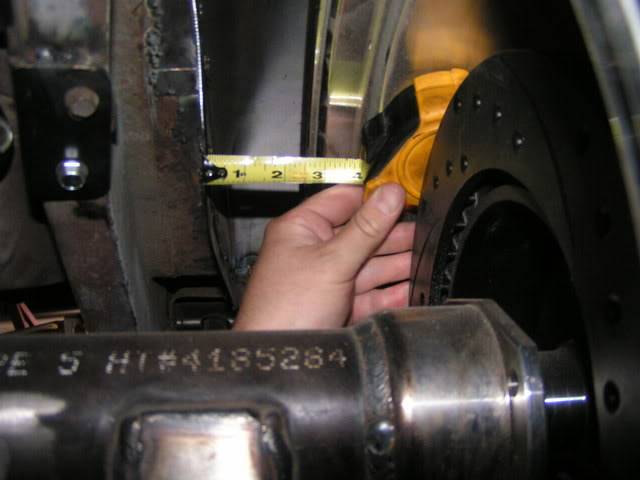
This is a 2 1/2" piece of square tubing that fit between the tire and inner wheelhouse
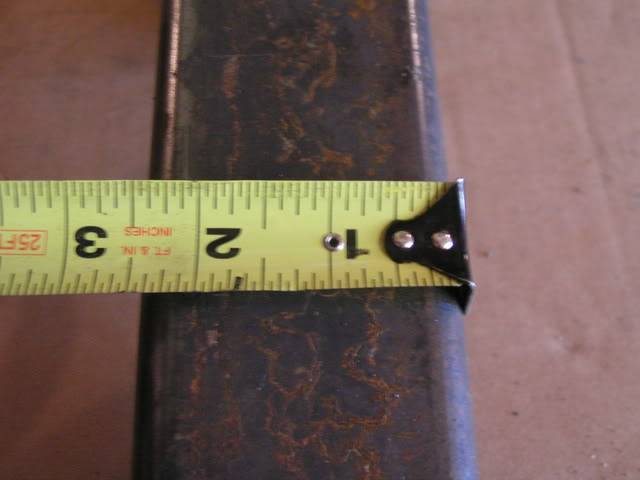
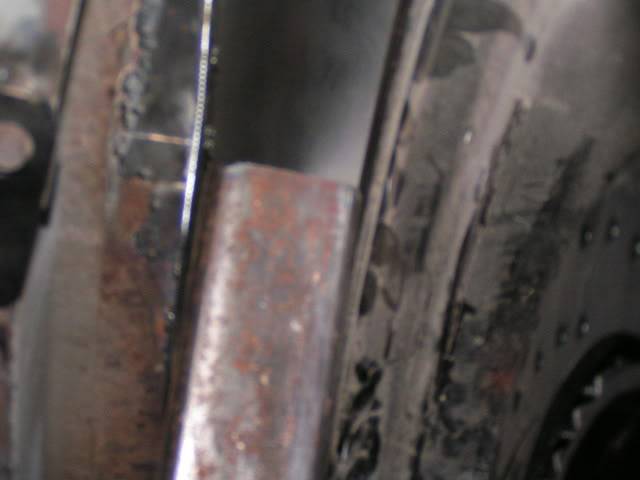
So now I am definately going to send my rims away and get them widened to 12". I need to find a tire though that will fit flush with the rim. Here's what I mean:
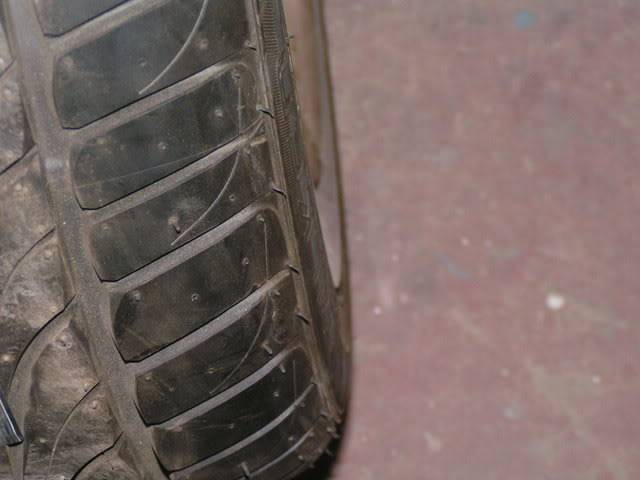
Anyone have any ideas? Well I've locked the shop up and will be off to New York on Sunday for a much needed holiday. In the mean time...off to KMS Tools so I can get my compressor fixed :(
08-02-2008 #27
Registered User
- Join Date
- Dec 2007
- Location
- British Columbia, Canada
- Posts
- 723
So I got to work on the car for a few hours the other day. The driver's side deep tub is going pretty good. I need to cut out the pieces to fill in the frame rail and gap between the trunk and frame rail. It was also good, I looked at some 315 wide tires online and found that on a 11" rim, they will measure 12.6" wide. I cut out a 12.6" wide piece of cardboard and put it in the wheel opening. Lots of room all around!!!! Think I know what size tires I'll be going to.
Some people have asked about notching the frame rails when installing the deep tubs. Here's some pics of what the frame rail looks like notched. The openings will be filled in with some 1/8" steel plates and the tubs get welded to those plates.
Marking for the frame notch
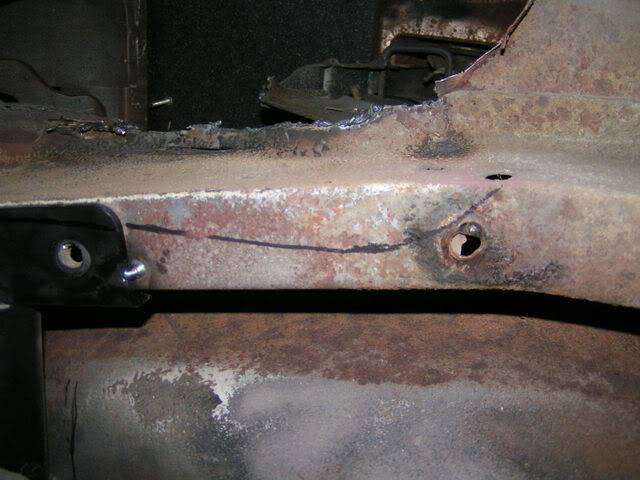
Frame notched
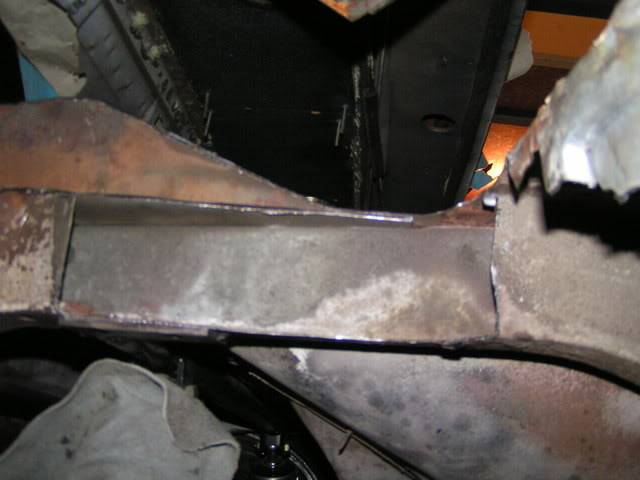
Frame notched from underneath
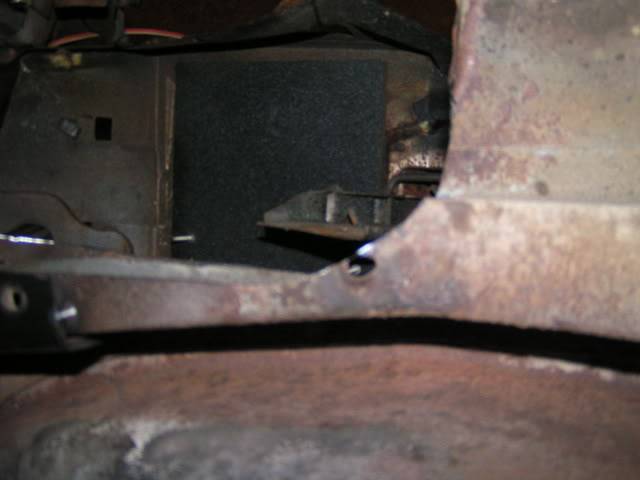
Areas to be filled in with 1/8" steel plates
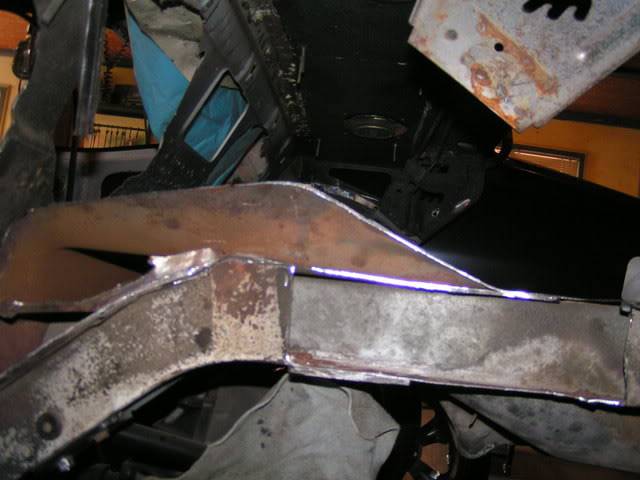
Hopefully I'll be able to get back to work on the car Thursday as I work until then. Will post more pics as I go.
08-02-2008 #28
Starting The Transformation
- Join Date
- Nov 2007
- Location
- Pittsburgh,pa
- Posts
- 252
Work looks great! We are almost side by side. I am installing the mini tubs as we speak. Trying to decide on wheels. I cannot do the 1/8" fill in pieces untill I size up the quadralink. What did you go with? Anyways great work.
Erik
08-03-2008 #29 Registered User
- Join Date
- Sep 2005
- Location
- League City, TX
- Posts
- 707
08-15-2008 #30
Registered User
- Join Date
- Dec 2007
- Location
- British Columbia, Canada
- Posts
- 723
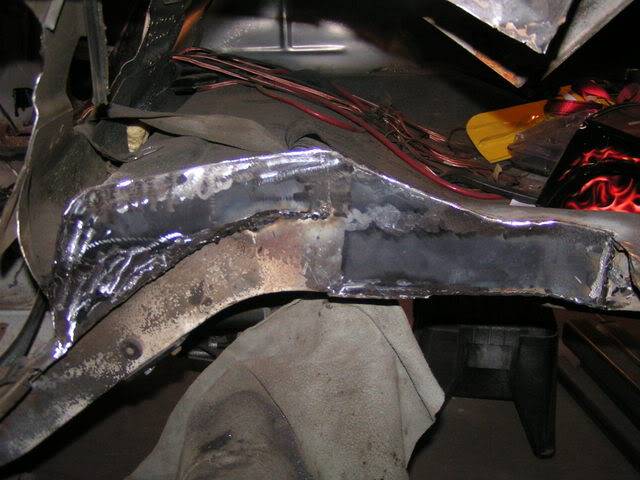
Here's the frame filled in:
08-15-2008 #31
Registered User
- Join Date
- Dec 2007
- Location
- British Columbia, Canada
- Posts
- 723
Made some progress on the car today. The driver's side outer wheel house and deep tub are in.
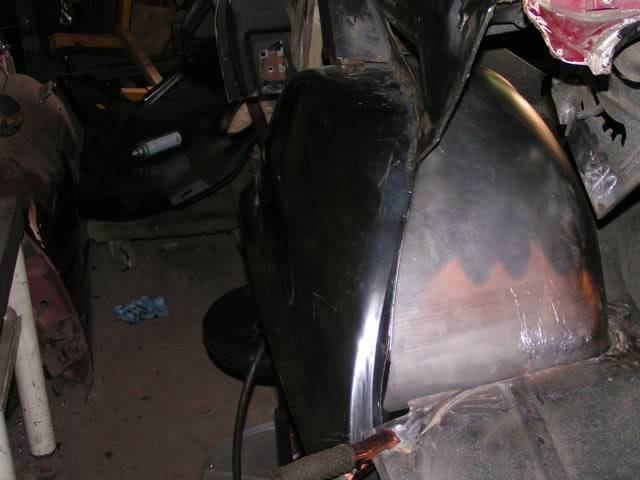
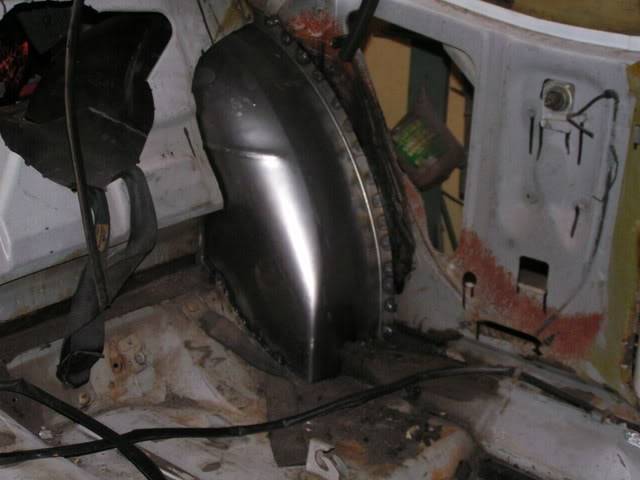
It was easier just to cut the old bracket out so I just made new brackets where the wheel house supports the rear deck lid.
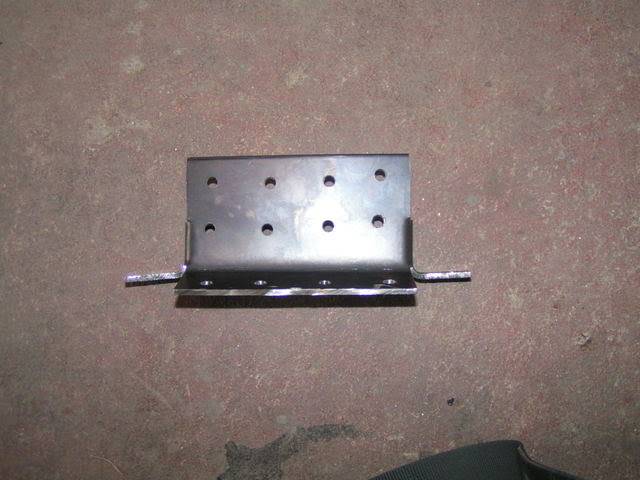
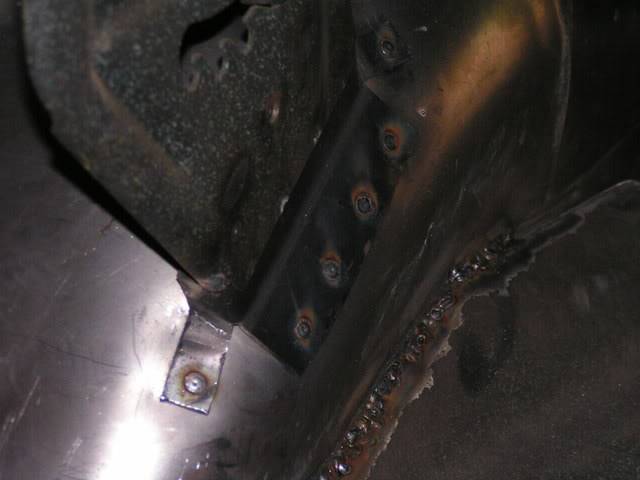
I'm hoping to spend a couple hours in the shop tomorrow when my wife and daughter go to Kelowna, although I told her I would do some yard work also so we'll see. I should have the driver's side quarter panel on by the next update. Once the quarter panel is on, I will be replacing the driver's side cowel panel. I already have the old one off. It looked like someone had been in an accident as the old one was crushed in. I tried to straighten it the best I could.
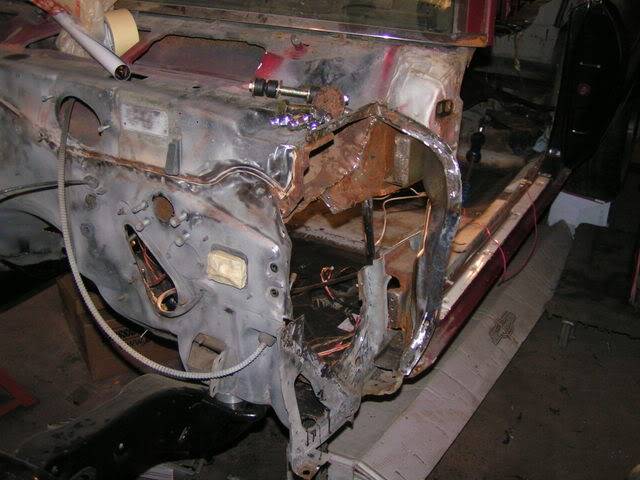
Once I get the cowel panel done, I will probably cut out the firewall and put a smooth one in. Right now I'm leaning towards the Mike's Custom Cars inserts. I was going to make them myself, but after looking at several different pics, I think I do like it with the factory seam reproduced. I find it beind completely smooth almost too much and the seam adds just enough. I'm going to replace the driver's side also and then hide the wiper motor under the driver's side fender. Here's a link to the firewall panels I'm looking at. $145 for both.
http://www.mikescustomcars.com/proje...album=1&pic=10
http://www.mikescustomcars.com/proje...&album=1&pic=6
08-16-2008 #32 Registered User
- Join Date
- Sep 2007
- Location
- Thehoodstock,GA
- Posts
- 793
If it wasn't for life getting in the way..........
Progress looks good.
08-16-2008 #33
Registered User
- Join Date
- Dec 2007
- Location
- British Columbia, Canada
- Posts
- 723
Tell me about it... Originally Posted by BossaNova

Well I made the wife happy, I got up early enough to do some yard work and take a load of garbage to the dump...now the shop is nice and clean again
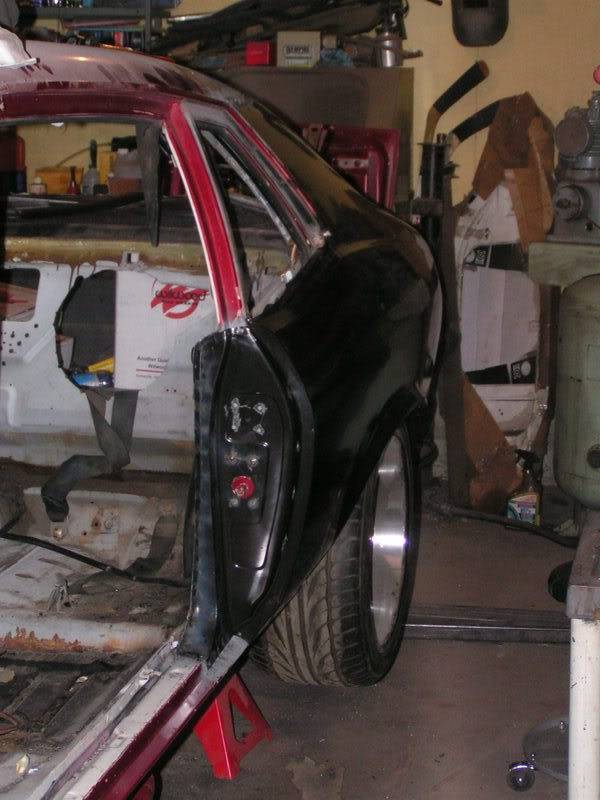
She took the daughter to Kelowna for a girls trip so that left me some time in the shop. I got the driver's side quarter on and am about half way done welding it on. The next chance I'll get to finish it will be next Monday. Here's a pic:
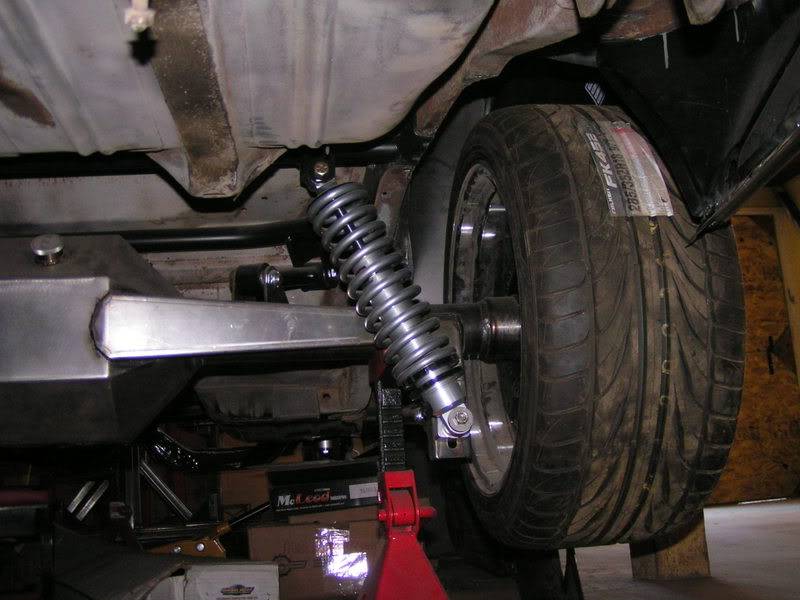
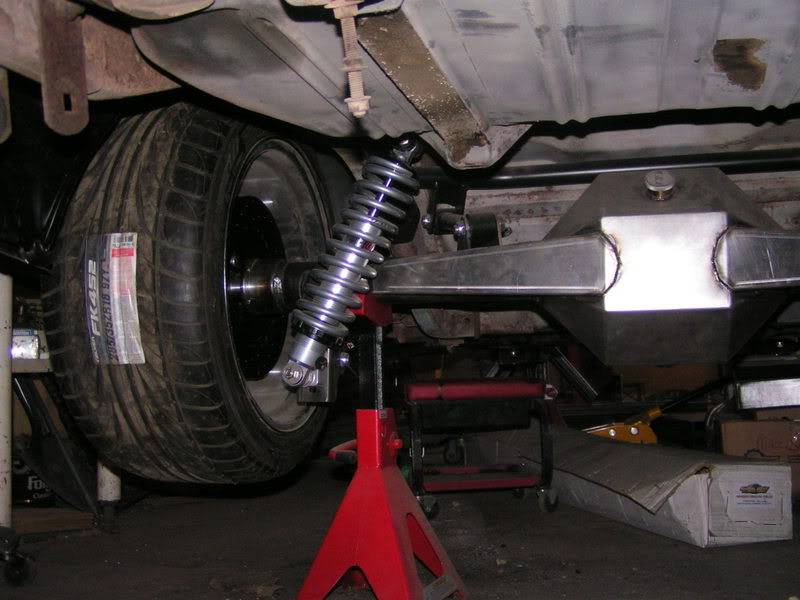
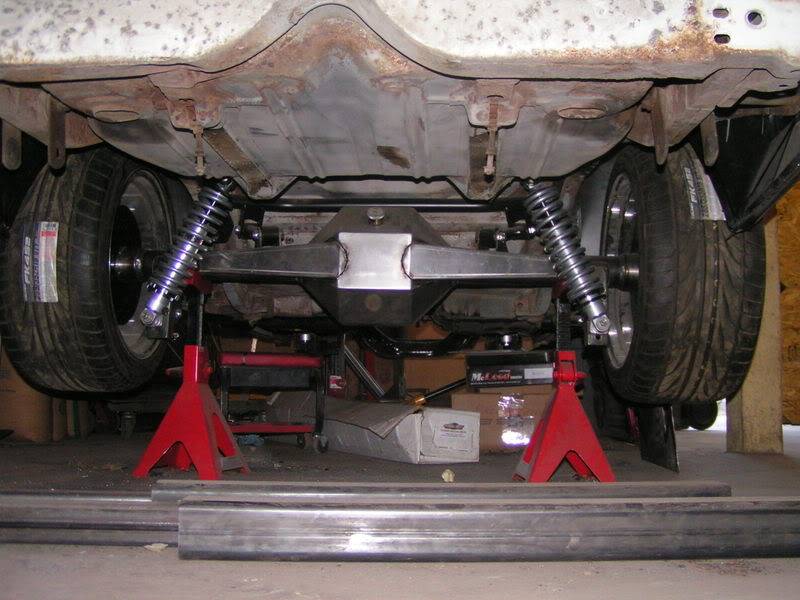
I also put both rear tires on to see how it looks. It looks awesome with the 285's, but I can't wait to get the rims widened and get some 315's, it will look sick :devil: Here's the 285's:
08-17-2008 #34 Registered User
- Join Date
- Oct 2007
- Posts
- 16
Looking great.I really like that front subframe can't wait to see it all together
08-17-2008 #35
Registered User
- Join Date
- Dec 2007
- Location
- British Columbia, Canada
- Posts
- 723
Thanks. That makes two of us that can't wait to see what it looks like together. It's hard just ignoring it, but I don't want to put it together until it's coated. I'm going to order Eastwood's new ceramic chassic coat and put that on. Should look awesome. Originally Posted by grump
08-25-2008 #36
Registered User
- Join Date
- Dec 2007
- Location
- British Columbia, Canada
- Posts
- 723
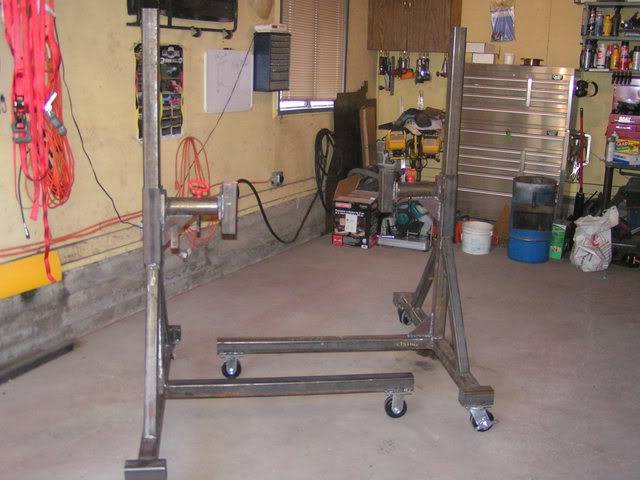
Well today I only got to go into the shop for a couple hours so I thought I would work on the rotisserie to take a break from the car. I had already built most of it, but wanted to change some things and I finally got some good strong casters (capacity is 700lbs per caster). Once I get the rotisserie done, I'm going to put the Speed Tech subframe on it and do some cleaning up and then primer. Then I'm going to try a new product from Eastwood. It's a ceramic coat chassis coat. It has small pieces of ceramic in it and when it hardens, are you ready for this......................it's like a ceramic coat. I ordered some last week and hope to see it in the next couple days. Here's a link to it:
http://www.eastwoodco.com/jump.jsp?i...rID=425&KICKER
Once I get the subframe coated, I'll put the car shell onto it and I plan on putting two coats of POR15 and then a coat of Raptor bed liner on top of the POR15. Should stop the rust and help with sound.
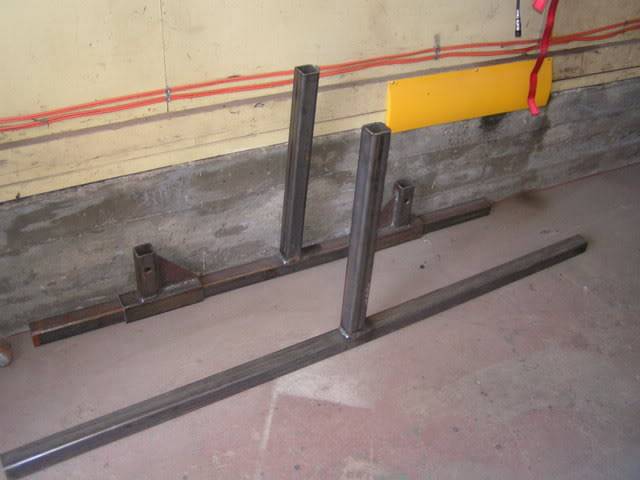
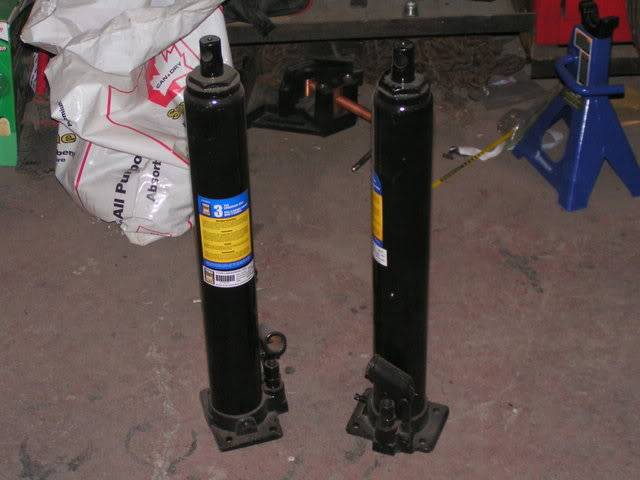
Here's a few pics of the rotisserie in progress:
The bars that will bolt up to the car
Bottle jacks (the same ones that I used to install the g-bar)
08-25-2008 #37 Registered User
- Join Date
- Jun 2007
- Location
- Dayton Ohio
- Posts
- 1,283
real nice man
GTO Project https://www.pro-touring.com/showthre...-The-Great-One
Colorado Project https://www.pro-touring.com/showthre...cab-CodeRedZQ8
Check Out My YouTube Channel http://www.youtube.com/c/geedsgarage
09-01-2008 #38
Registered User
- Join Date
- Dec 2007
- Location
- British Columbia, Canada
- Posts
- 723
Thanks Code Red
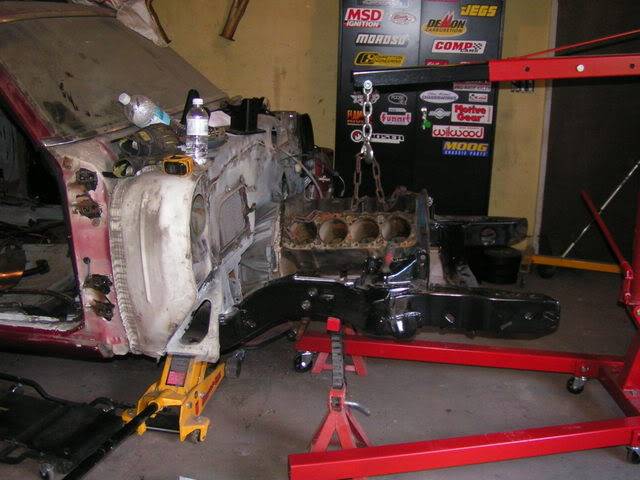
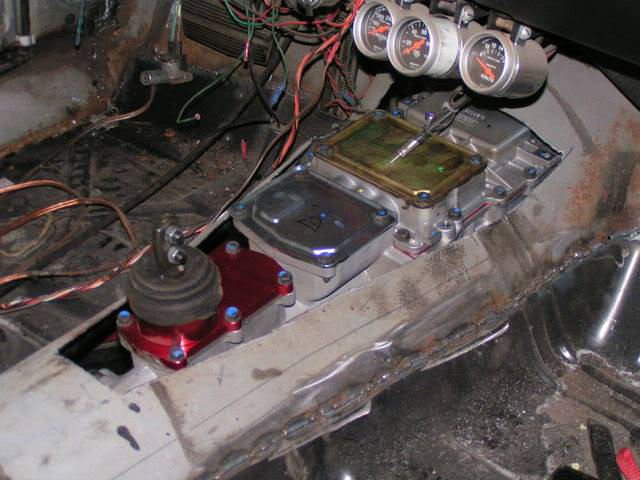
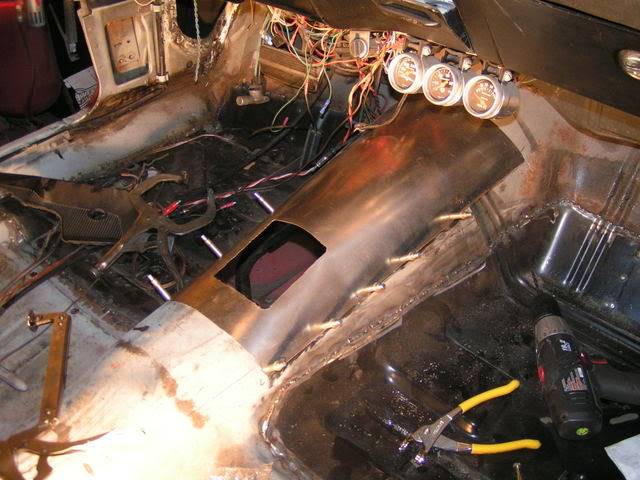
Got a chance to spend a good portion of the day in the shop today. The driver's side cowel panel is on, I finished welding up the floors underneath and I started putting the new tranny tunnel in. I actually got to put my new TKO600 into the car, even if it was only for a few minutes while I cut the hole out in the tranny patch. Tomorrow I hope to finish the tranny tunnel, finish welding up the driver's side quarter panel and then I might even start smoothing the firewall. Hopefully by next week it will be on the rotisserie. Here's some pics from today:
New cowel panel is in
Putting the tranny in with motor mocked up
TKO600 in the car
New tranny tunnel
09-01-2008 #39 Registered User
- Join Date
- Jul 2008
- Location
- ohio
- Posts
- 1,135
nice work mike when you coming down to work on mine

09-02-2008 #40
Registered User
- Join Date
- Dec 2007
- Location
- British Columbia, Canada
- Posts
- 723
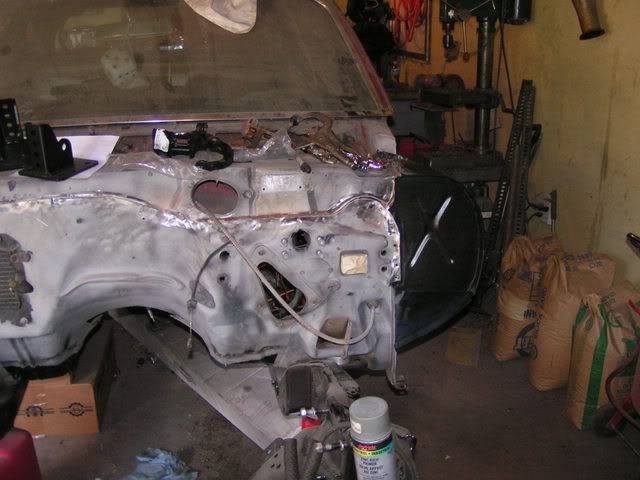
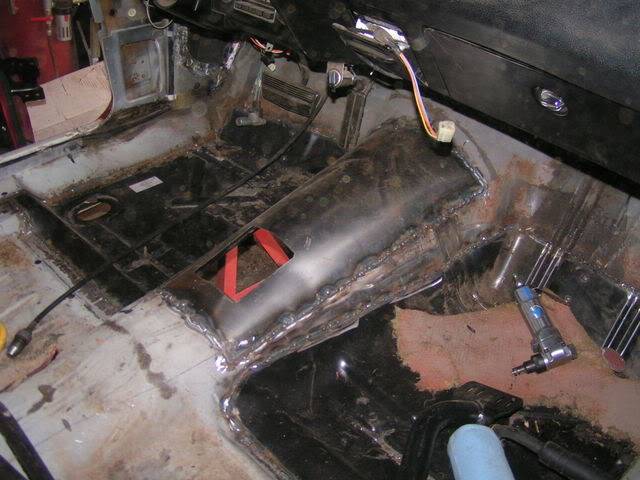
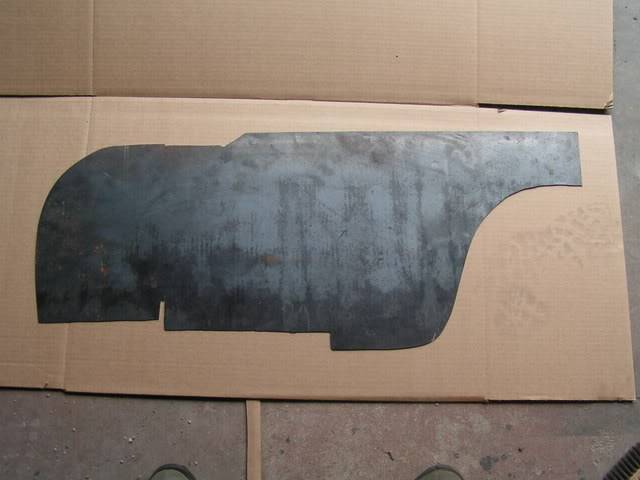
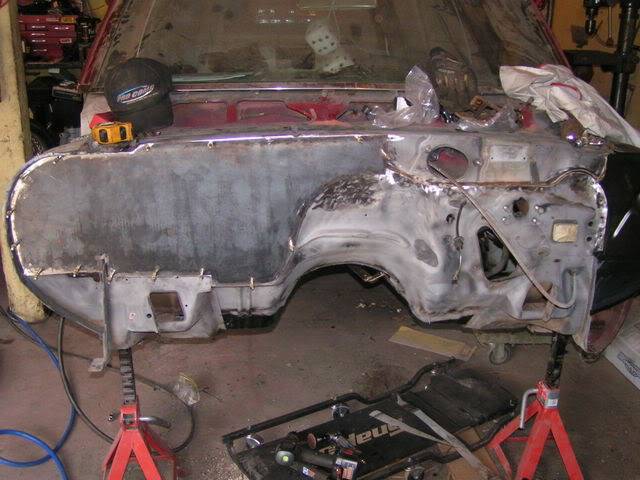
I finished welding in the tranny tunnel today. I also took the stock subframe off for the last time. I was waiting until I have the tranny tunnel fit and the quarters in before I took it off. If anyone is looking for a stock subframe in really good shape, I have an extra one. I decided to start smoothing the firewall today also. Everytime I've seen pics of a smooth firewall, no one has posted an in between photo. They are always before and after. I have an in between photo to share for those who are debating about putting in a smooth firewall.
Tranny tunnel in
Smooth firewall insert
Firewall before
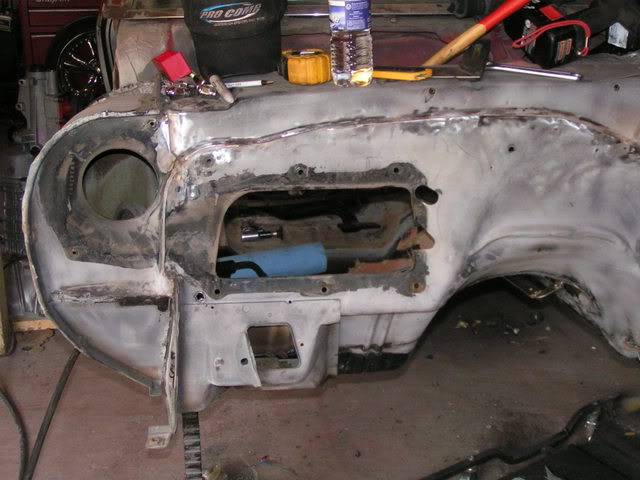
Firewall cut up
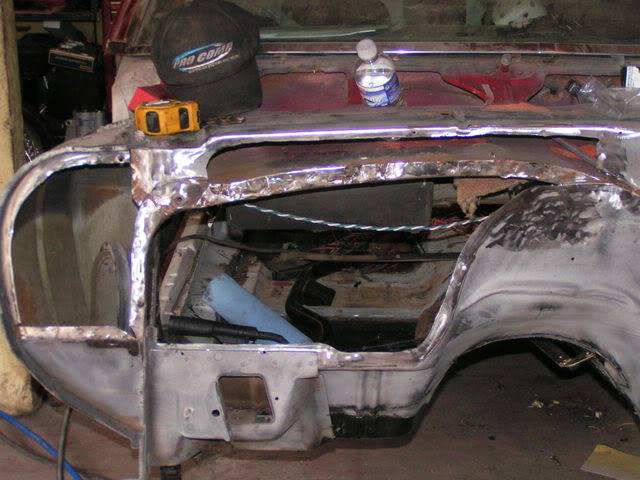
Smooth firewall in. It still needs to have some minor adjustments and to be welded in


 Reply With Quote


