

Results 141 to 160 of 261
Thread: First-Gen S10 Corner Carver
-
06-05-2009 #141
 Registered User
- Join Date
- Oct 2007
- Location
- Wa
- Posts
- 567
Good to see you are still going on this. Where are you getting your machining done at?
Bob
-
08-22-2009 #142
Registered User
- Join Date
- Dec 2003
- Location
- lost
- Posts
- 2,607
Jerome, I'm curious. You used the tall adjusters on the front, where are they set? Towards the lower side or the higher side? I am going to be running these on a project in the future and would like the end ride height about 2-3" lower than you are sitting now. Could you adjust out a few more inches from the tall adjusters?
08-24-2009 #143 Registered User
- Join Date
- Sep 2007
- Location
- Edmonton, Alberta
- Posts
- 291
I'll pipe in on this. The adjuster only has about 2.5" of usable travel. The cup half of the adjuster can be cut to whatever length you like, and you can fine tune with the adjustable part. The best way to approach this is to mock up with the adjusters at their shortest. Find out how much you will need to cut off the cup. Then add 1" to the amount you cut off. Keep in mind that you will want to have the spring seat roughly in the middle of the thread when you are at the desired ride height. This will ensure that you have plenty adjustment either way for adjusting corner weights. It will take a few go arounds of mocking up, measuring and disassembling. Hope this helps some.
Cheers
Ryer
08-24-2009 #144
Registered User
- Join Date
- Dec 2003
- Location
- lost
- Posts
- 2,607
I'm pretty familiar with how the adjusters are used, hell I practically pioneered their use in PT cars. Each application is very specific as to whether the short or tall adjusters are better suited depending on desired ride height, which is why I asked Jeorme specificaly on his application. Originally Posted by bbcc

Not a noobie style question though thanks for chiming in.
08-24-2009 #145 Registered User
- Join Date
- Dec 2006
- Location
- Out of the Burbs of Detroit to SoCal, then onto my ancestral homeland, the woods of Cascadia
- Posts
- 1,753

Sinned- were you the guy w/ the elCamino that was out by Lancaster? I was using your website as kind of a template for wghere I was going on my G body. Does the website still exist?
Sorry for going OT, jeromeGreg Fast
(yes, the last name is spelled correctly)
1970 Camaro RS Clone
1984 el Camino
1973 MGB vintage E/Prod race car
(Soon to be an SCCA H/Prod limited prep)
08-24-2009 #146
Registered User
- Join Date
- Sep 2007
- Location
- Edmonton, Alberta
- Posts
- 291
Cool man. Ya, wasn't sure about your knowledge on the subject. Usualy safe to assume the guy is new.
I have damn near the exact combination Jerome used. Without scaling the truck yet I have the adjusters at 1.25 from bottomed out. The truck is not at full weight on the front yet either.
08-24-2009 #147
Registered User
- Join Date
- Dec 2003
- Location
- lost
- Posts
- 2,607
Web is down but I still have the site saved for future use. I will put it back up with my new project pretty soon. I'll post a link later. Originally Posted by Twentyover
08-24-2009 #148
Registered User
- Join Date
- Dec 2006
- Location
- Out of the Burbs of Detroit to SoCal, then onto my ancestral homeland, the woods of Cascadia
- Posts
- 1,753
Thanks sinned
Greg Fast
(yes, the last name is spelled correctly)
1970 Camaro RS Clone
1984 el Camino
1973 MGB vintage E/Prod race car
(Soon to be an SCCA H/Prod limited prep)
08-30-2009 #149 Registered User
- Join Date
- Sep 2006
- Location
- New York, NY
- Posts
- 458
Memphis-machining done at Cope Brothers in Parkland/Spanaway. It's in the industrial park w/ the line-x on the side of 512
Sinned, I think in the pictures, there's roughly 1" left in the cup (I cut of 2 or so inches off the cup). The adjusters are turned so that the ring is seated on the cup, meaning it is as low as it will go without cutting more.
Full weight isnt on yet, so it will go lower than in the pictures.
Update on the status of the project - I started a job in July on the East coast, so there won't be substantial progress on the project within the next two years at least. It's a downer, but the project will get finished. I'll have a little bit of time at home during holidays, so there will be some progress, but not a ton.
Jerome
10-19-2009 #150 Registered User
- Join Date
- Nov 2008
- Location
- NC
- Posts
- 583
Very cool project. You have done a great job, looks insane.
Congrats on the job to.
Lookin forward to future updates
10-19-2009 #151
Starting The Transformation
- Join Date
- Nov 2006
- Location
- Columbus, Ohio
- Posts
- 125
I love this project, keep up the great work!!!!! cannot wait until it is done!!!
12-25-2009 #152
Registered User
- Join Date
- Nov 2008
- Location
- NC
- Posts
- 583
Any updates?
Happy Holidays
04-02-2013 #153
Registered User
- Join Date
- Sep 2006
- Location
- New York, NY
- Posts
- 458
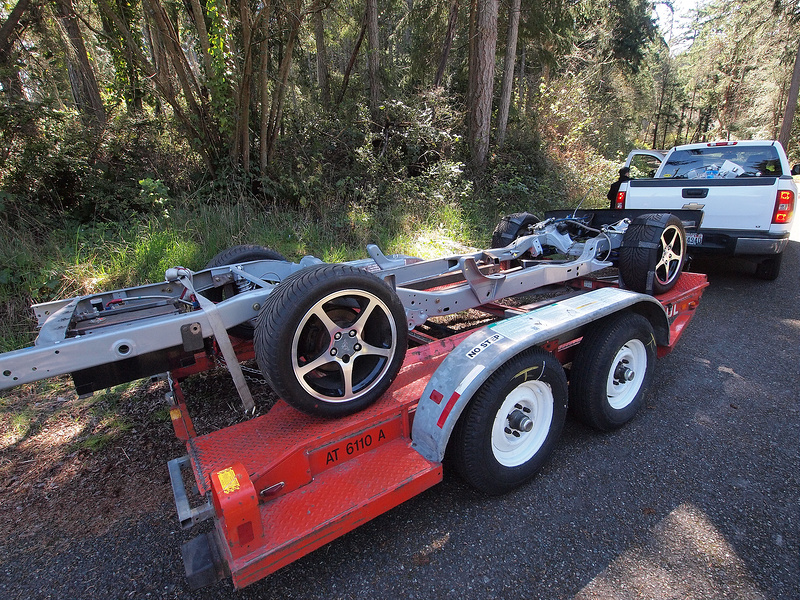
Having lived in NYC for the last 4 years with no access to a garage and with the project at home in WA, I have decided to bite the bullet and hire professionals finish the project. Randy Parker (Parker's Race Shoppe) in Puyallup, WA will be doing most of the work. He builds tube frame dragsters for a living, so I am sure he will do a great job with the remaining chassis fab and fix some of my lesser quality work.
A preview of the next few weeks:
Front suspension:
front coilover conversion
Lee 670 steering box
sway bar
Chassis:
new mid-chassis bracing
new fuel tank mount
new battery mount
6 point roll bar
Rear suspension:
splined sway bar
04-02-2013 #154 -Moderator/Sponsor-
- Join Date
- Apr 2001
- Location
- The City of Fountains
- Posts
- 16,118
Looking forward to more details on this build. Move out of NYC...LOL
Andrew1970 GTO Version 3.0
1967 Cougar build
GM High-Tech Performance feature
My YouTube Channel Please Subscribe!
Instagram @dr__efi
I deliver what EFI promises.
Remote Holley EFI tuning.
Please get in touch if I can be of service.
"You were the gun, your voice was the trigger, your bravery was the barrel, your eyes were the bullets." ~ Her
04-04-2013 #155 Registered User
- Join Date
- Apr 2005
- Location
- Chicago
- Posts
- 2,788
That is awesome news I am looking forward to seeing this truck complete.
marty-mj
GarageScene.net High Speed Welding KDHotrods RecoveryRoomInteriors WegnerAutomotive Autometer Ride-Tech
04-29-2013 #156
Registered User
- Join Date
- Sep 2006
- Location
- New York, NY
- Posts
- 458
Getting started - sitting at ride height:
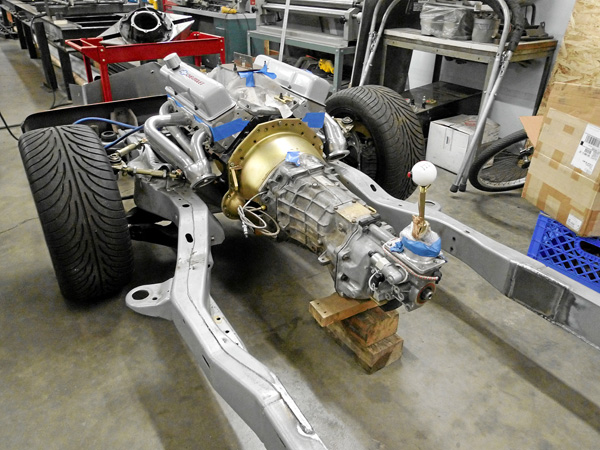
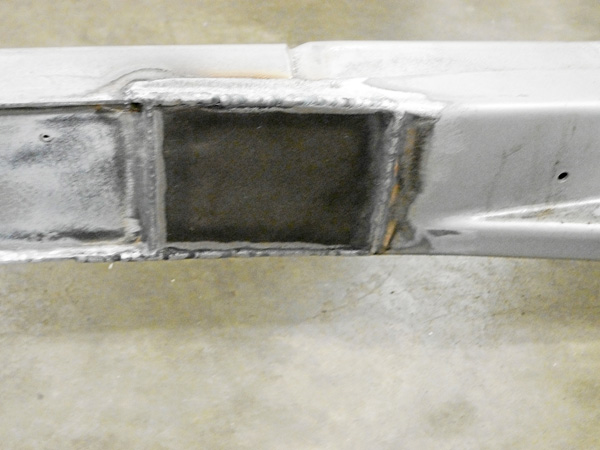
Randy connected the section that I had boxed to the factory boxed area
Next steps:
Rear suspension will be moved backwards to correct the unintentional shortening of the wheelbase that I had done
Re-do of gas tank mount
Re-do of transmission crossmember
04-29-2013 #157
Registered User
- Join Date
- Apr 2005
- Location
- Chicago
- Posts
- 2,788
and the progress begins
marty-mj
GarageScene.net High Speed Welding KDHotrods RecoveryRoomInteriors WegnerAutomotive Autometer Ride-Tech
04-29-2013 #158 Registered User
- Join Date
- Sep 2007
- Location
- Buford, GA
- Posts
- 923
Tell them to swap to an Explorer Rack and Pinion while they're at it. Check out this thread...
http://www.blazinlow.com/forum/showt...nd-pinion-pic-!
Here are some of the pics for that thread...
http://s-seriesforum.com/gallery/Rack-PinionAdam
1985 S10 - LT1 + T56
1964 Chevy II 4-Door - LS1 + T56
05-15-2013 #159
Registered User
- Join Date
- Sep 2006
- Location
- New York, NY
- Posts
- 458
Adam - thanks for the suggestion, but a Lee 670 steering box is already on the way. I figure a good recirculating ball setup is proven and can give just as good feel and performance as a rack and pinion without some of the R&D involved with getting the rack setup right.
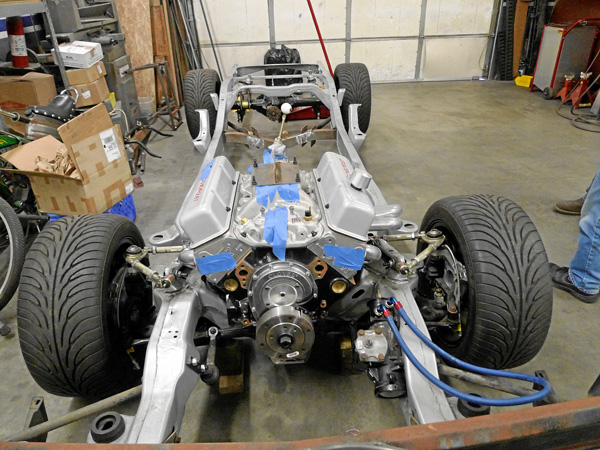
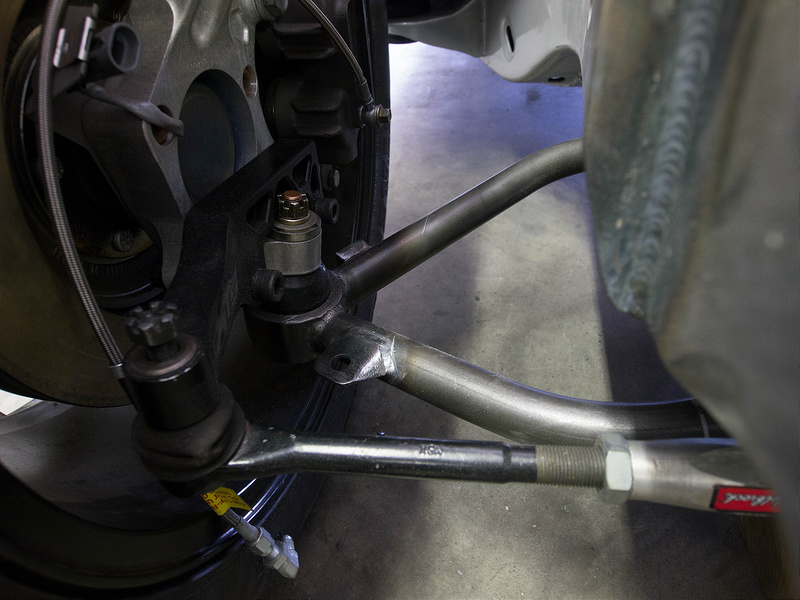
Randy made a jig to locate the upper control arm mounts, cut the spring pocket off of the frame and welded the frame rail up straight, factory-style. He then added a new upper control arm mount:

Pockets were CNC-machined into the plates to accept oval offset inserts to adjust the pickup points for anti-dive:
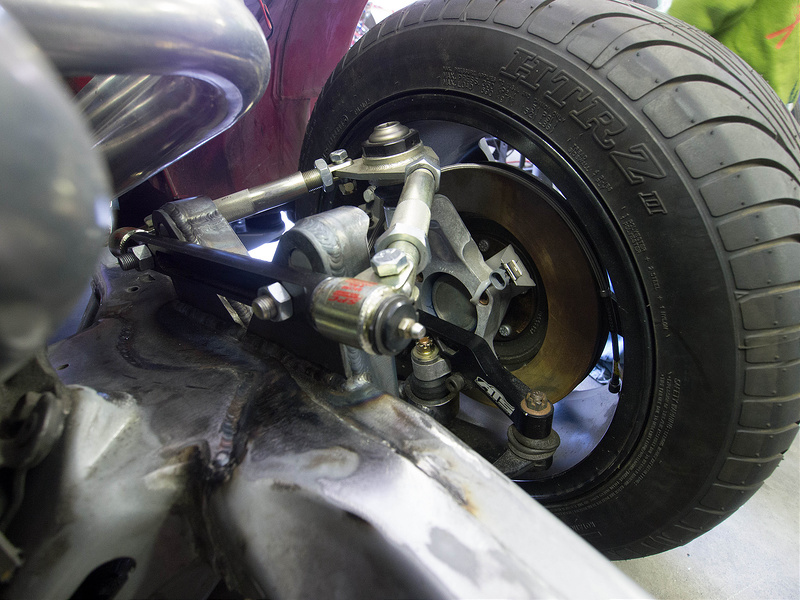
Unfinished Spohn lower control arm where lower coilover bracket will be mounted. Upper coilover mount has not been designed yet. Lower mount will be as close to the lower ball joint as possible and upper mount will locate the coilover as vertical as possible.
I brought the cab and bed to the shop:
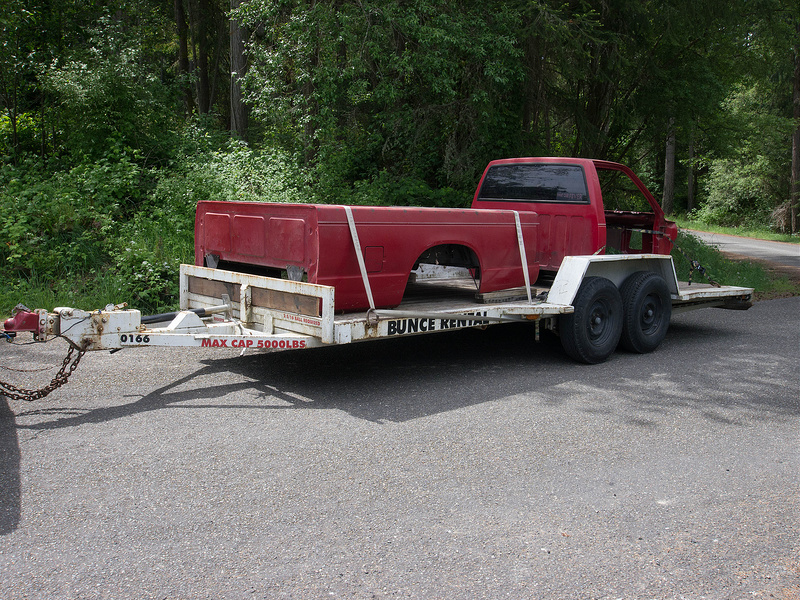
We put the bed and body on to locate where the rearend should be. I had mistakenly shortened the wheelbase when doing the rear suspension the first time, so we will move the suspension rearwards to center the wheels in the wheel arches.

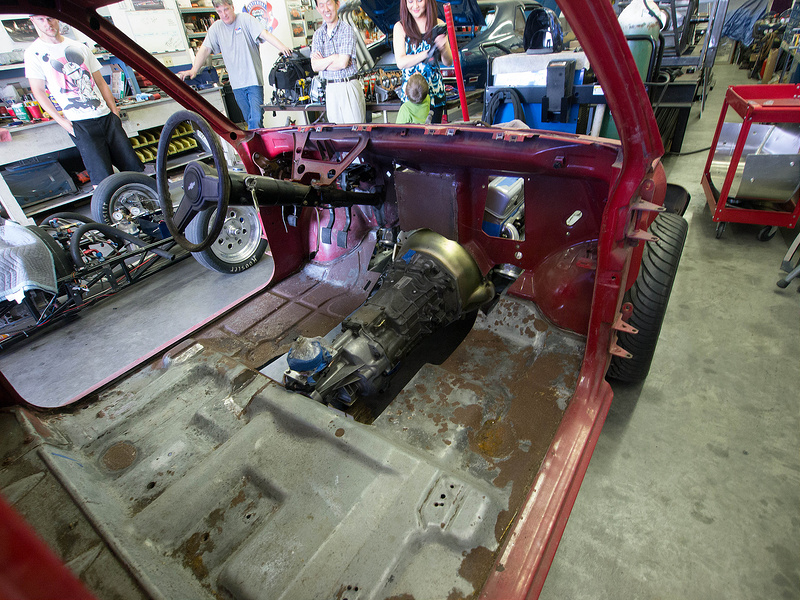
A shot of the interior:
05-15-2013 #160
Registered User
- Join Date
- Nov 2008
- Location
- NC
- Posts
- 583
Its about time you updated this, hah.
Amazing work, everything looks great.

 Reply With Quote


