


Results 1 to 17 of 17
-
10-08-2007 #1
 New to Pro-Touring
- Join Date
- Sep 2007
- Posts
- 78
Project...."BacktoBasics"...1970 Dodge Challenger
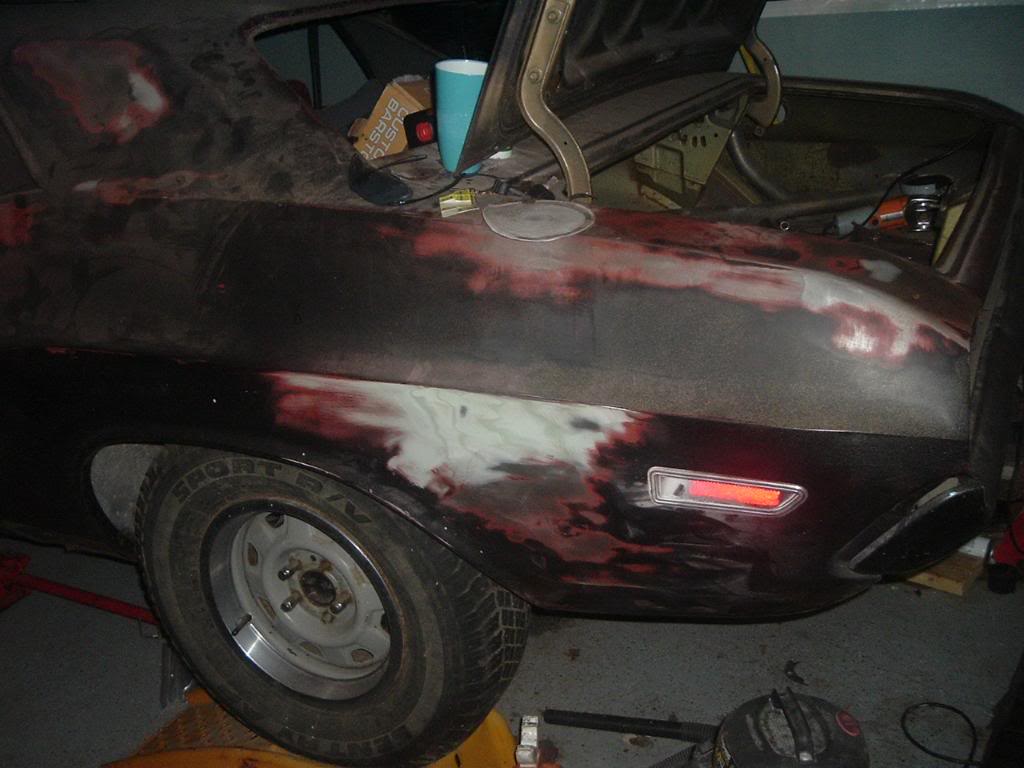
1970 Dodge Challenger, 440 Auto.
I have had this thing for 15 years. It was daily driver for 5 years, and has been in various states of disarray since.
Hotrod announded their Power Tour, and it is right in my backyard. I have committed to having this thing roadworthy, safe, and on the Power Tour.
It needs brake lines, fuel system, and rust repair around the windows.
This is an absolute budget build. I intend to list costs involved, to document the budget nature of the build.
Here it stands.
-
10-08-2007 #2
New to Pro-Touring
- Join Date
- Sep 2007
- Posts
- 78
First order of business, was to unearth the car. It has been "storage" for some time.
2nd project:
Fuel system and trunk floor. The trunk floor was gone. I built cross braces from 1x1 square tubing, and added 2 wide feet on each end. The cross braces were screwed into the frame, and then welded. I bent the straps from 2 wide steel. The straps go under the cell, and up and over the cross braces. This will allow the cell to be removed, from above, through an access panel in floor.
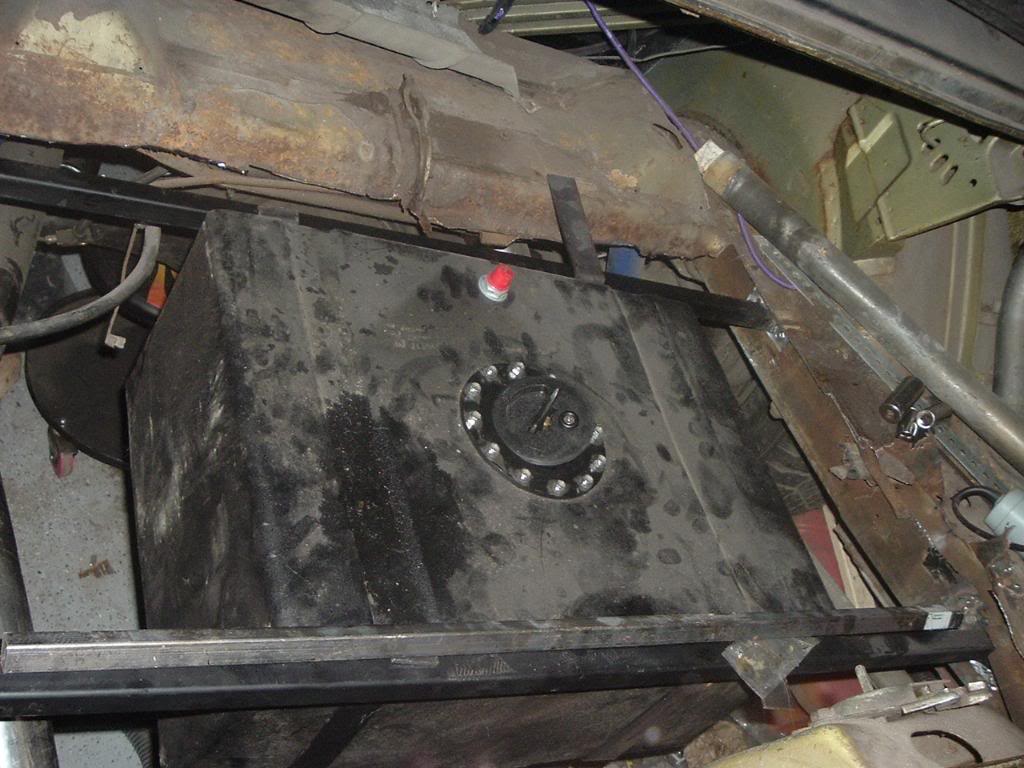
Cross braces and straps visible. Straps and steel total cost 50.00.
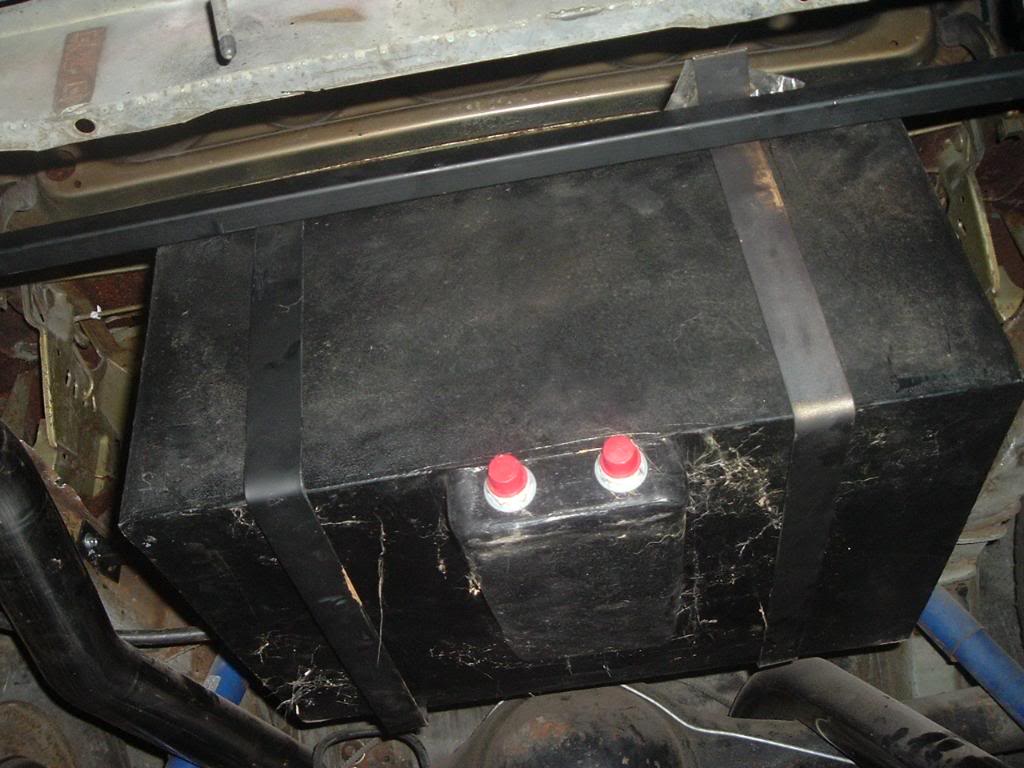
Once the framework is all done and buttoned up, I am going to fabricate the trunk floor. It will be a single sheet of steel, spot welded to the cross braces, and spot welded on the existing extensions, which are solid. I will have to fabricate a door for access to the fuel cell, as needed.
I have to make sure the exhaust is going to clear. I got a screaming deal on a 3" Magnaflow, so I really want it to clear the system.
Total costs, for steel, fuel cell, with sender. 170.00
10-08-2007 #3 Registered User
- Join Date
- Oct 2004
- Location
- St.Anne Il
- Posts
- 3,924

sweet project im like the other millions of cars guys ..love the 70;s challenger and cudas,,,
Darrin Stalnecker
1969 Camaro Convert full pt pr
2007 Corvette Supercharged
1968 Camaro LS1 T56
http://www.fquick.com/dropit69
10-08-2007 #4 Registered User
- Join Date
- Mar 2007
- Location
- Florida
- Posts
- 2,391
Back in the mid 70's I used my dads 70 Challenger to pull my landscaping trailer around because I didn't want to put a hitch on my 68 camaro! AHAHAHA I'f I'd only had a crystal ball !
10-09-2007 #5
New to Pro-Touring
- Join Date
- Sep 2007
- Posts
- 78
This is the ONLY area in my life where I seemed to have a little wisdom when it was needed. I paid 2K for this car, 15 years ago. I got to finance it, so it started my credit life. Despite all the movings, it has always come along. It has the rust around the windows courtesy of someone's silicone patch job, but fenders, doors, frame rails, floors are solid. I will roll it in black primer if that is as far as it gets, but with the power tour stoping 30 minutes away (Topeka, I am in KC) I am forced to get it fixed, and enjoy it.
More to come......
Z
11-05-2007 #6
New to Pro-Touring
- Join Date
- Sep 2007
- Posts
- 78
Some small progress.
I do not have all the parts necessary to mount the fuel cell completely. So I deceded to do someting that required no $$.
I pulled the M/T valve covers, and started sandblasting. I am undecided if I should keep them as blasted, with a clear coat, or hit them with the black wrinkle coat, and sand down the fins, to mimick the Mopar Performance look.... Opinions?
Here is the previous finish, half black, partially stripped, with orange underneath. The orange was TOUGH to get off, so I finally went to the stripper to soften it up,

Here is partially finished product. There is still a lot of paint in the fins, that might require another hit with the stripper. Admittedly my sand is way to soft for the task, but it does the job with some time.
Cost for this segment, so far $0.00
Cost with clear coat, or wrinkle paint $6.00
11-06-2007 #7 Registered User
- Join Date
- Dec 2004
- Location
- Beaufort , NC
- Posts
- 1,849
The black wrinkle sounds good.
1968 F100 sb full vic chassis swap
1965 Mustang coupe 347 5 spd cheap touring SOLD
2003 Porsche 996 Outlaw LS2 swap SOLD
1992 Lexus SC400 daily SOLD
1966 Porsche 912 Outlaw SOLD
1968 Ford F-100 sb SOLD
11-08-2007 #8
Registered User
- Join Date
- Aug 2007
- Posts
- 151
Kool project
11-08-2007 #9
Registered User
- Join Date
- Oct 2007
- Location
- Lubbock, TX
- Posts
- 384
Wow. Looks like you have your self one hell of a car and project. Cant wait to see it finished.
11-08-2007 #10 Registered User
- Join Date
- Jun 2007
- Location
- Various Barns in Northern Illinois.
- Posts
- 875
Low buck rides are cool too! Get er done!
11-09-2007 #11
Registered User
- Join Date
- Jan 2007
- Location
- Atlanta, GA
- Posts
- 227
We need some more Mopars here. Keep up the good work!
11-09-2007 #12
New to Pro-Touring
- Join Date
- Sep 2007
- Posts
- 78
I am going to grab a bunch of tune up stuff:
plugs-wires-cap-rotor to give it a basic tune. For now, its parts store stuff, but I will spend good $$ on premium wires later.
I also need to grab the paint for the valve covers. I am going to try to finish them on Monday, so the engine appears fresh, and starts and runs.
11-09-2007 #13
New to Pro-Touring
- Join Date
- Sep 2007
- Posts
- 78
I did something I have never done before!
I managed to go into a parts store, buy exactly what I needed, and leave, without tools, do-dads, or extra stuff.
I also managed to get out the door for under 55.00!!
I bought plugs, wires, cap and rotor, oil and filter, 2 cans of carb cleaner, and a can of brake clean.
So much for Mopars being expensive!
I did forget the better stripper for the valve covers, and the black wrinke paint. I will have to get that tomorrow. I guess it gives me an excuse to take some old oil back with me.
11-10-2007 #14
New to Pro-Touring
- Join Date
- Sep 2007
- Posts
- 78
I went and got some better stripper, and the black wrinkle paint.
This is after the 3rd round of stripper. The remaining orange is going to be entombed under the black, cause it just doesn't want to come off....
Here is the brand I used, $6.99 a can...
wrinkle paint, wet....
Finished product...
They do not have any silver in them at all, its all black. The picture seems like there is some silver fleck in them, my digital camera is of an older variety and wants to flash everything.
I am torn as to whether I should leave them all black, or sand down the fins......
OPINIONS?
Cost for paint, stripper, and 2 cans of brake clean....17.00
11-10-2007 #15 Registered User
- Join Date
- Mar 2005
- Location
- westchester county new york
- Posts
- 2,995
sand the fins
11-10-2007 #16
Registered User
- Join Date
- Oct 2007
- Location
- Lubbock, TX
- Posts
- 384
 Those valve covers came out great. Thumbup
11-10-2007 #17 Registered User
- Join Date
- Sep 2006
- Location
- Windham, NH
- Posts
- 965
I agree with sanding the raised areas (fins and lettering). I did the valve covers on my old car in black wrinkle. Here is what mine looked like with the raised areas sanded (not the best pic and the engine is dirty, but you can get the idea):
Phil

 Reply With Quote



