


Results 621 to 640 of 862
Thread: The BAD AST Project - Faze II
-
07-06-2013 #621

 Registered User
- Join Date
- Mar 2004
- Location
- Mid-Michigan
- Posts
- 2,764

Hi Martin,
No progress. Been taking care of other stuff and just haven't had the time... I have next week off so I plan to get a few things going on it again.
I have been busy though. Besides building the bender stand I have fixed one of the garden arbors that got blown over in the storm. Fixed a wagon, one of those blow molded plastic ones, that had the left front corner blown out on it.
This is the wagon'

This was the damage.

This is the fix.
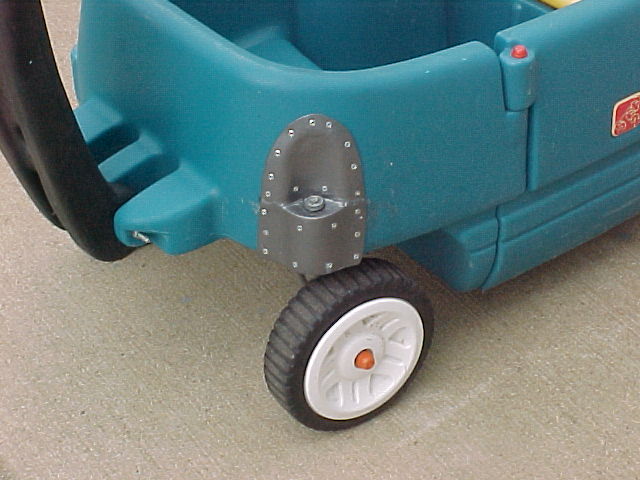
Didn't want to spend all of my earnings on a matching can of paint so I shot it with an almost empty can of gray Hammertone.
I also tightened up the right side bushings and added some washers to help spread the load.
Here are some "in process" pics.
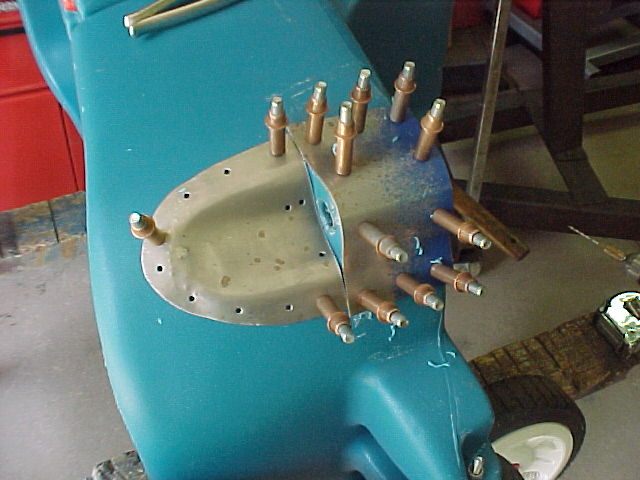
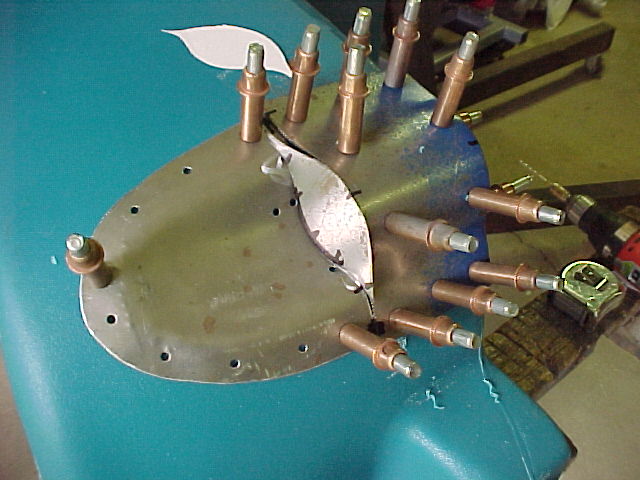
Having a pic cookout today so we have been cleaning and setting up for that. Friends family and a few hot rods and show cars...
Thanks
Mark
Mark:
"Bad Ast" Astro Van. Just because I did it... Doesn't mean it's possible...
This my Bad Ast thread...
https://www.pro-touring.com/showthre...roject-Faze-II
This is my Fotki album...
http://astroracer.fotki.com/
-
08-04-2013 #622
Registered User
- Join Date
- Mar 2004
- Location
- Mid-Michigan
- Posts
- 2,764
Been a while since I updated the thread. Been busy with a bunch of stuff but I have gotten a few things done on the van...
Just so you can see what I've been up to here is a quick rub down.
Fixed that wagon I posted on earlier, Trash picked a vanity and did a MAJOR make-over on that.
Went from this.
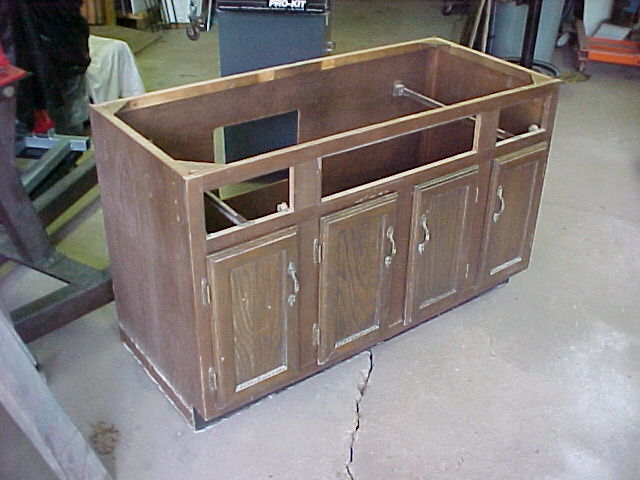
To this...
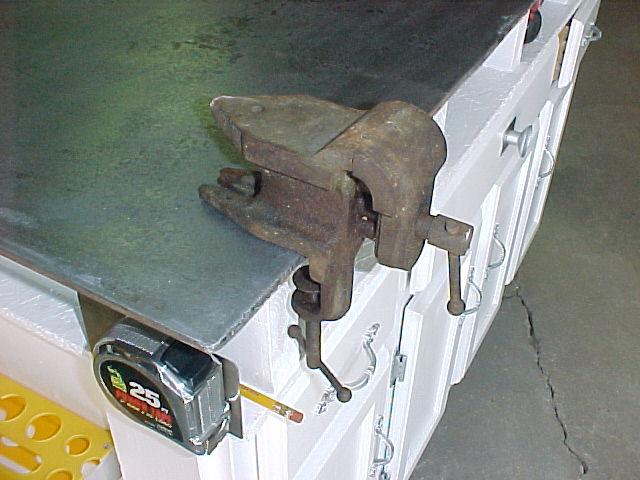
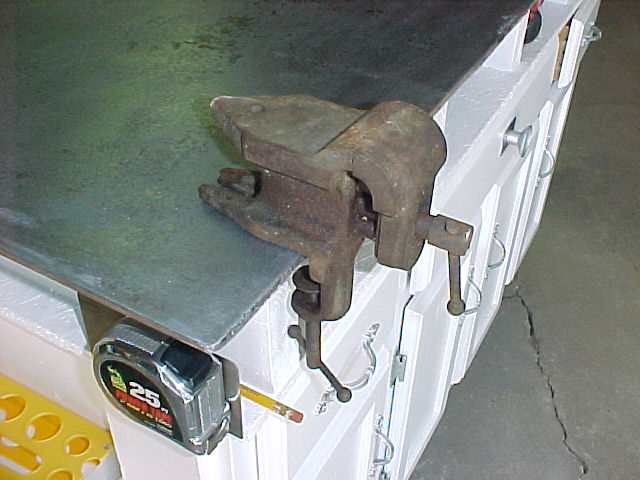
With the 1/4" plate top.
We also built an aluminum box to carry the electrical stuff in the back of the van.
Mel and I built the box last Saturday and I mounted all of the components Sunday and during the week.
Starting with a sheet of .090 aluminum Mel laid out the box and cut it out.
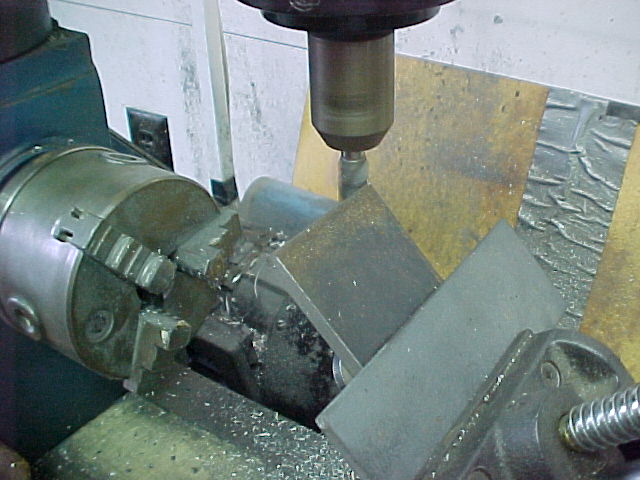
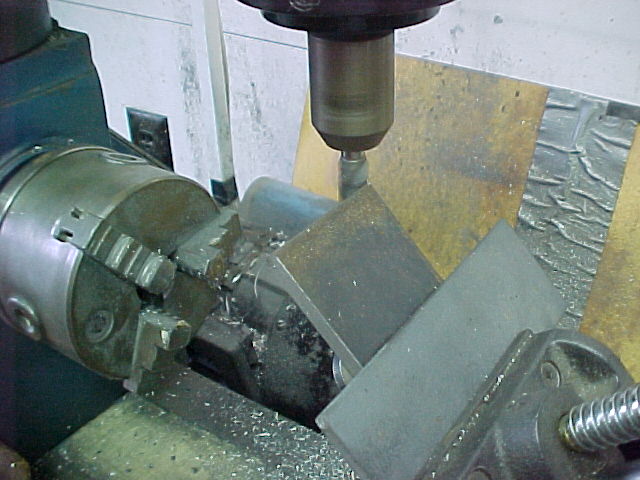
The box is fully enclosed and has 3/4" wide flanges on the inside for the lid to bolt to.
Doing all of the bends was no problem until we had to close up the last two sides.
The top flanges just wouldn't let the 8" finger pass to do the complete bend. We got about 15 degrees out of it.
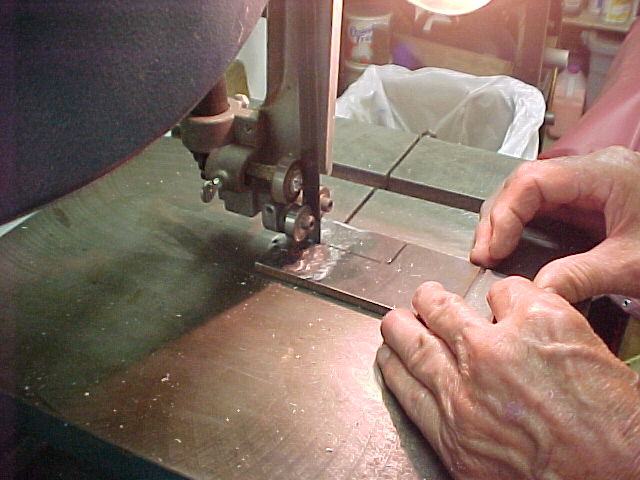
We decided to make a couple of 2 1/2" wide stepped fingers so the flange will slide past the finger and let us complete the bend. Here they are mounted in the brake.
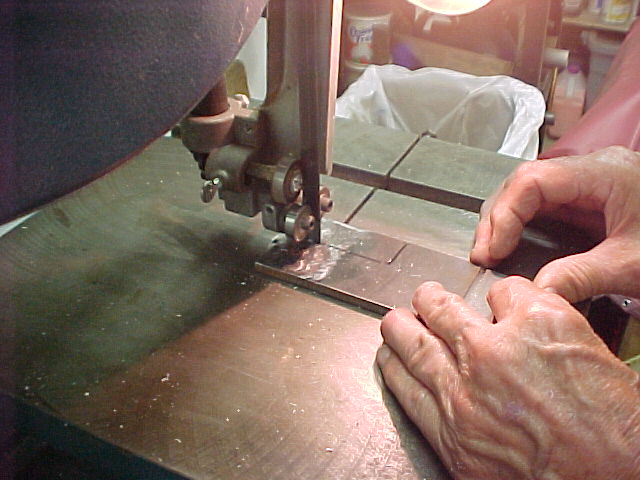
And a close up of the clearance we had to the inside flange during bending.

Here you can see the opposite side is already bent and the last one is well on it's way.
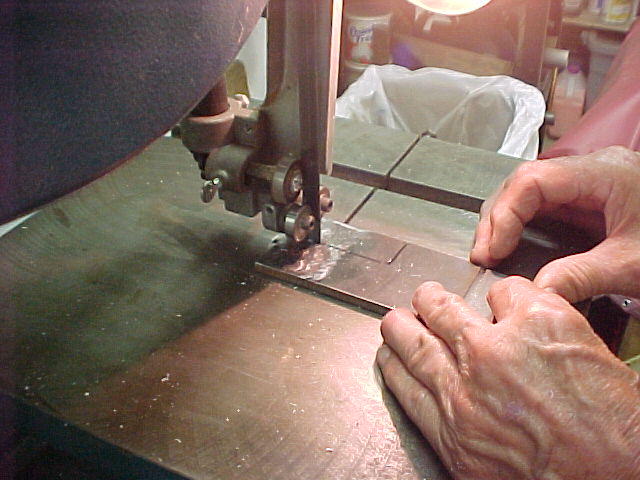
All bent up and welded corners
MarkMark:
"Bad Ast" Astro Van. Just because I did it... Doesn't mean it's possible...
This my Bad Ast thread...
https://www.pro-touring.com/showthre...roject-Faze-II
This is my Fotki album...
http://astroracer.fotki.com/
08-04-2013 #623
Registered User
- Join Date
- Mar 2004
- Location
- Mid-Michigan
- Posts
- 2,764
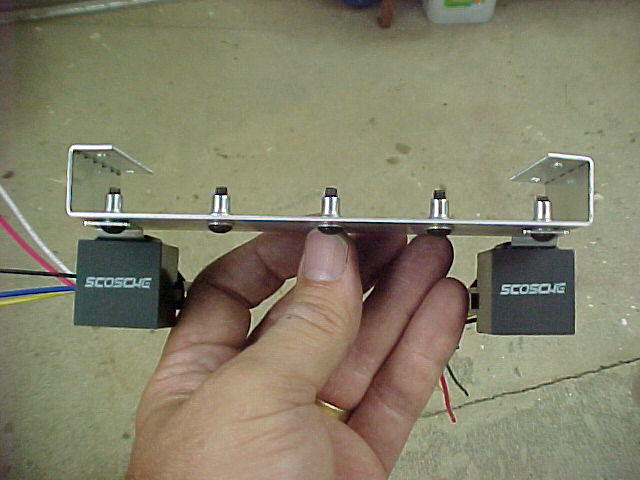
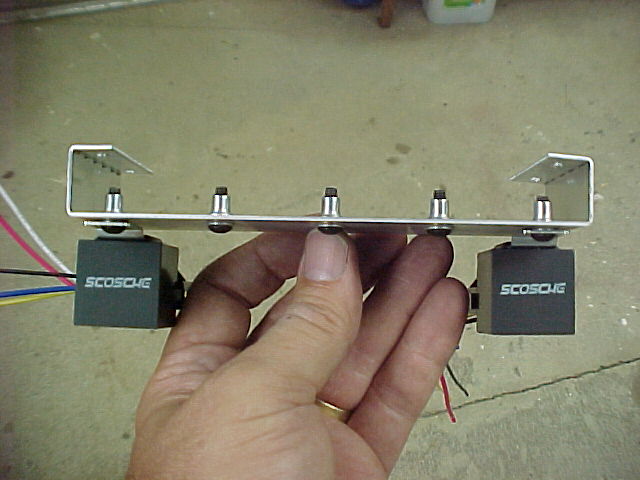
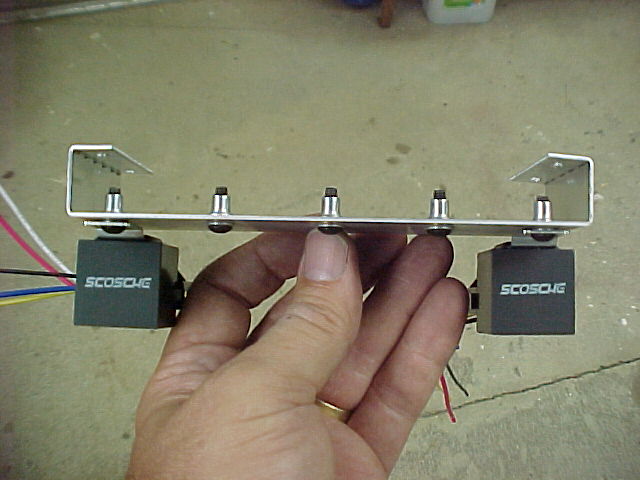
I bent up this little riser plate that rivets to inside the box. This gets the relays up, off the floor, so components and wiring can pass by underneath.
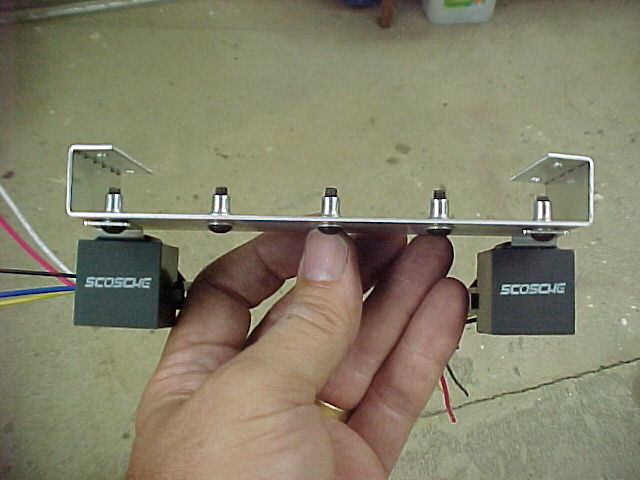
I used some light duty aluminum riv-nuts for the relay mounts. I only plan for two relays back here but you never know...
With all of the components laid out.
I also decided where the Master Disconnect Switch and Starter Solenoid were going to live... THIS is what took me some time. Just figuring out where I was going to stuff all of these components!
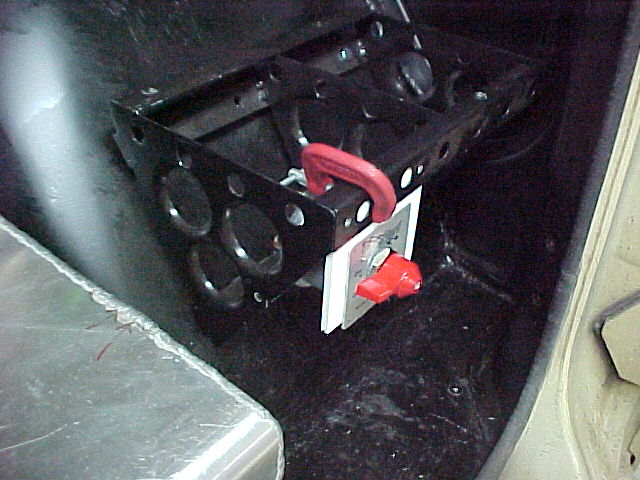
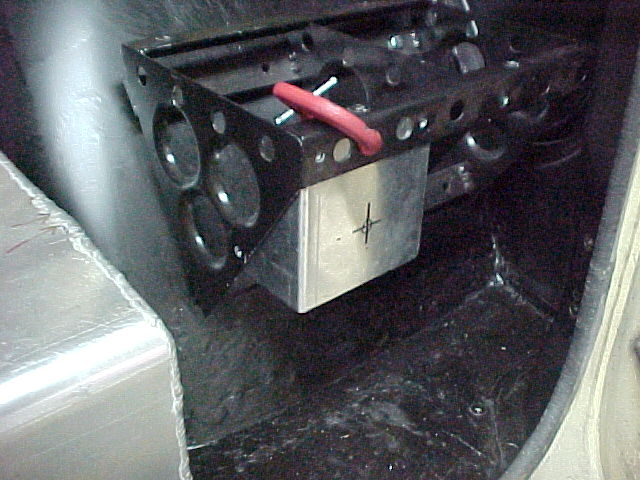
The MDS is going to mount at the back lower corner of the battery bracket.
Here is a mock up with a foam-core "bracket".
I then made a cardboard pattern which will get transferred to more of that .090 aluminum.

Finally getting some real work done...

All bent up and ready for holes.
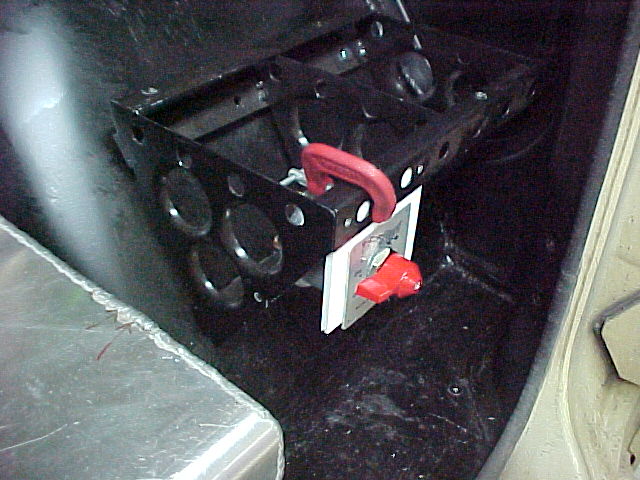
Transferring the hole pattern. You noticed I dropped a nice leg back to the battery bracket at bottom. Adds a ton of stiffness to the switch bracket!

Ready for riv-nuts.
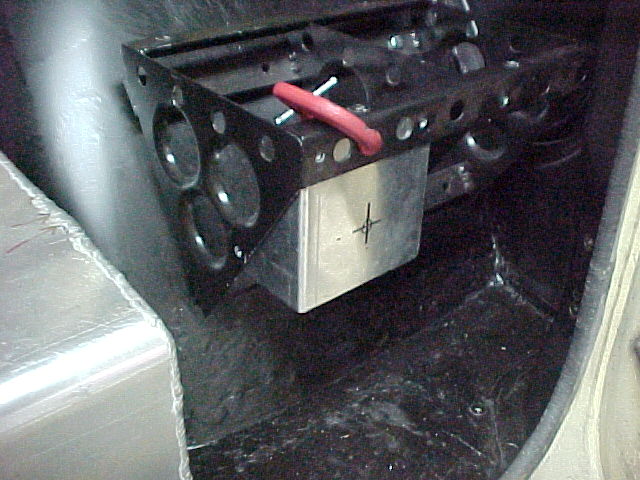

The bracket bolts in, underneath the battery bracket. Nice and clean.
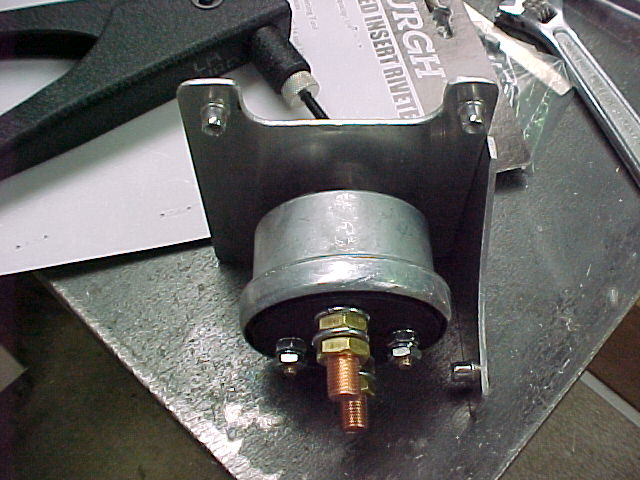
The starter solenoid bolts into the end of the battery bracket. This keeps all of the cable runs very short and the holes in the bracket allow easy routing of the 1/0 cables. These pics are with the battery tray removed so you can see how accessible the cables will be.
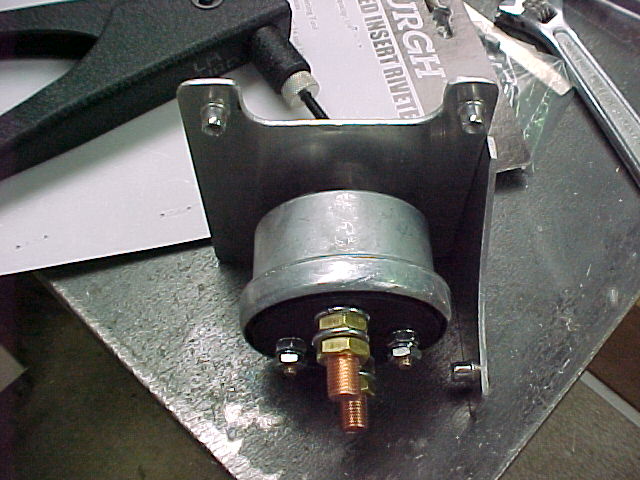
Most of the wiring will remain out of sight. Of course all of this is going to be enclosed anyway.
Thanks for looking. I hope I am back on track for a while.
MarkMark:
"Bad Ast" Astro Van. Just because I did it... Doesn't mean it's possible...
This my Bad Ast thread...
https://www.pro-touring.com/showthre...roject-Faze-II
This is my Fotki album...
http://astroracer.fotki.com/
08-04-2013 #624
Registered User
- Join Date
- Mar 2004
- Location
- Mid-Michigan
- Posts
- 2,764
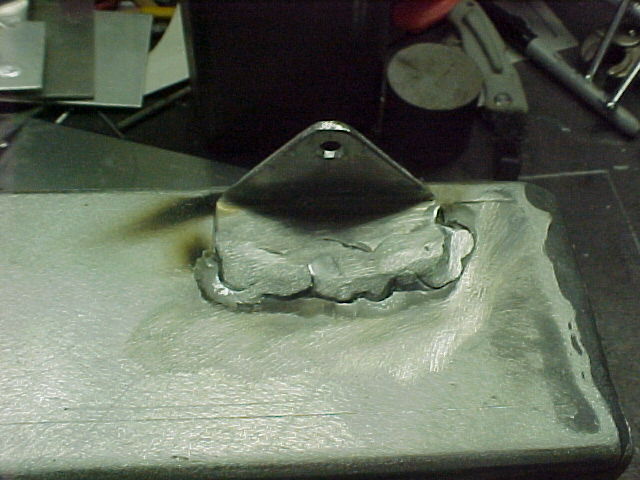
I got the box mounted in the back of the van today. Spent about 4 hours playing with the Tig machine. I made up two little brackets that I welded to the top of the box and bolted the box to the tube structure for the rear enclosure.

There is another screw in the diagonal brace down low in the box to keep it from "flapping". It's good and solid here.

With the cover in place.

And an over all shot with the box and MDS in place.
Well, got a lot done. I am waiting for my snap bushings to get here from McMaster Carr. I need to drill out the wire pass throughs but want these on hand just to verify hole sizes.
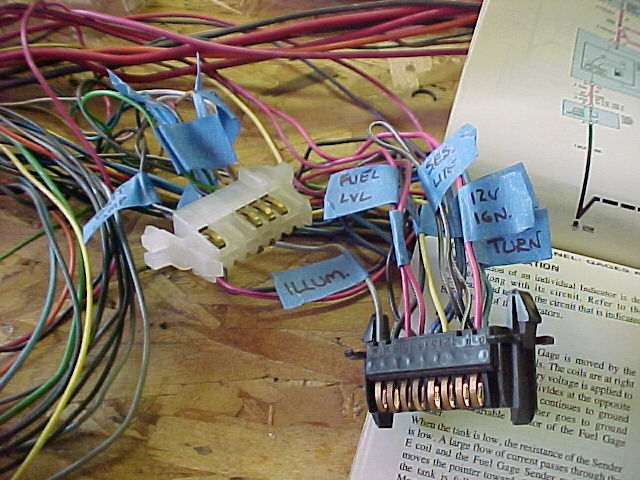
I am planning to start working on the dash harness this week. Cutting the old cluster connectors out and making an adapter harness to adapt the Autometer gauges. Everything is all labeled, just need to do it.

Should be fun.
MarkMark:
"Bad Ast" Astro Van. Just because I did it... Doesn't mean it's possible...
This my Bad Ast thread...
https://www.pro-touring.com/showthre...roject-Faze-II
This is my Fotki album...
http://astroracer.fotki.com/
08-07-2013 #625 Registered User
- Join Date
- Mar 2008
- Location
- Brisbane Australia
- Posts
- 410

Great work as always.
Hot rodder's recycle, wheres those prius' going when the tree huggers have a new fad.
09-06-2013 #626
Registered User
- Join Date
- Mar 2004
- Location
- Mid-Michigan
- Posts
- 2,764
Well, how about an update?
I have been picking away at the wiring. Along with doing a few car shows, fixing mowers and pressure washing my 23 yr old deck I haven't put a lot of time into the van this summer. I finished up the front relay center last night. I'll blow this all apart for paint before I get it wired into the van harness.
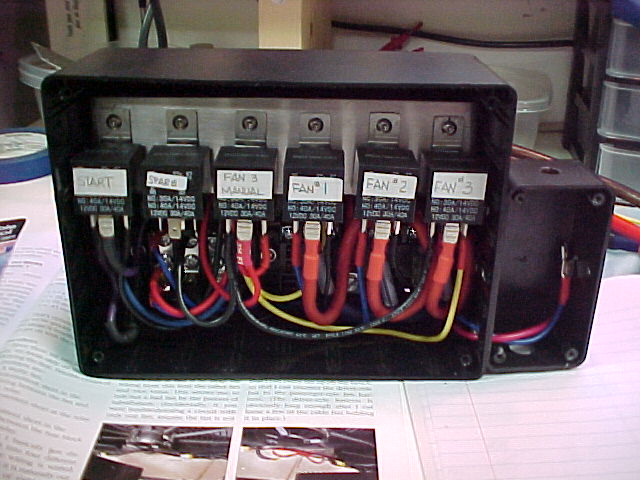
This box carries the relays for the three cooling fans, with their respective manual switch relays, the start relay for the rear mounted solenoid and a spare. The add on box on the right is for the adjustable temp sensor for the rad fans.
This is a pic after I got the fuse panel and ground strip mounted. You can see by the relay labels I did some repurposing before i started wiring. I needed two relays for the trans cooler fan so I decided to move the Park Neutral and B/U Light relays inside under the dash.

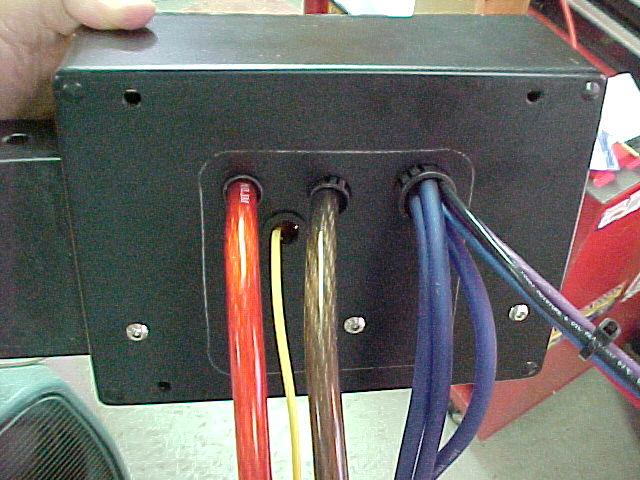
Here is a back view of the box. All of the wires exit through the back and should be fairly well hidden after I get them mounted and loomed. The 4ga power wire will connect directly to the power distribution block which is fed from the alternator and also connects to the battery for charging. This panel will have power at all times so the fans can run for a short time after the engine is shut off for some residual cooling.
I also have a good start on wiring the rear relay box. This one isn't as busy because I had the room to make it a bit larger and there isn't as much "stuff" going into it.
You can see the general layout here. A 200 amp Maxi-Fuse on the left. 6 position fuse panel in the middle with a barrier strip on the bottom and the relay bridge on the right.
The maxi-fuse will pull power off the switched side of the master disconnect and send it too the front through a 4ga cable. This cable will also be the charge wire from the alternator block up front. The fuel pump relay is the only dedicated relay in this box so there is a LOT of room for anything I want to add in the future.
Here is some of the wiring in place. I pulled power to the fuse panel off the fused side of the maxi-fuse.
Because I have all of the circuits designed I know how many wires will be coming into and out of the box. I cut short lengths of the required wire sizes to use to establish the snap bushing sizes. I wrote the required drill size beside the hole locations. I used a step drill to drill these holes.
That's what I've been doing, how about you?
MarkMark:
"Bad Ast" Astro Van. Just because I did it... Doesn't mean it's possible...
This my Bad Ast thread...
https://www.pro-touring.com/showthre...roject-Faze-II
This is my Fotki album...
http://astroracer.fotki.com/
09-07-2013 #627
Registered User
- Join Date
- Apr 2013
- Posts
- 11
Finished first welding cart
Here she is----my first welding cart 'Hobart-themed'! The extended front wheels and low stance make it very stable, and, no, they do not get in my way and I don't trip over them! I couldn't be happier with how it works! The initial idea was to have one that could go up and down stairs if needed and this one can, although I probably won't be doing that too much. The triangular corner gussets were made from the dolly footplate. Some square tubing and bed angle iron rounded out the bill of materials. The Krylon 'Fusion' paint is made for plastic and it worked great on the plastic wheel hubs.
It works great and I'm happy with it. I may add other do-dads at a later date if I think I need to.
09-07-2013 #628 Registered User
- Join Date
- Nov 2006
- Location
- Ma.
- Posts
- 5,560
Nice Job!
Wayne
Car FINALLY home !!!!!! lol
Project FNQUIK https://www.pro-touring.com/showthre...ghlight=FNQUIK
09-15-2013 #629
Registered User
- Join Date
- Mar 2004
- Location
- Mid-Michigan
- Posts
- 2,764
Nice job on the cart Mark! Looks great!
I got some more wiring done on the van this weekend. Got my order from EFI Connection Friday and used a few of the 2 pole weatherpack connectors to start the process on the trans and radiator fans and the fuel pump.
I also got the front distribution block mounted. This is a GM piece used on the 3rd gen F-Bodies. It mounts in a couple of holes on the front of the passenger side fender.
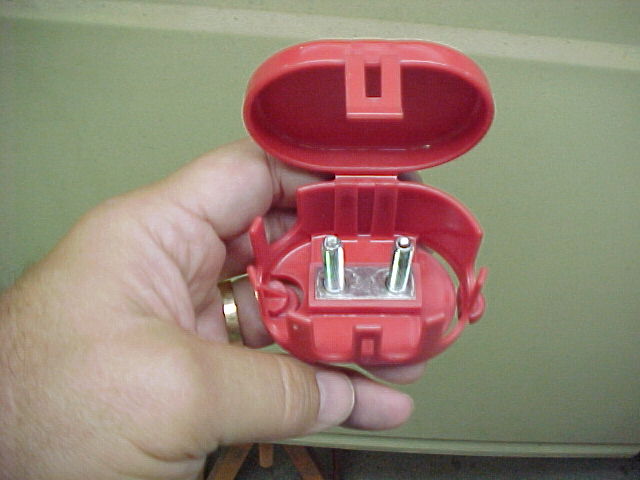
These blocks have a couple of molded on lugs that lock into the fender so there are no fasteners involved.
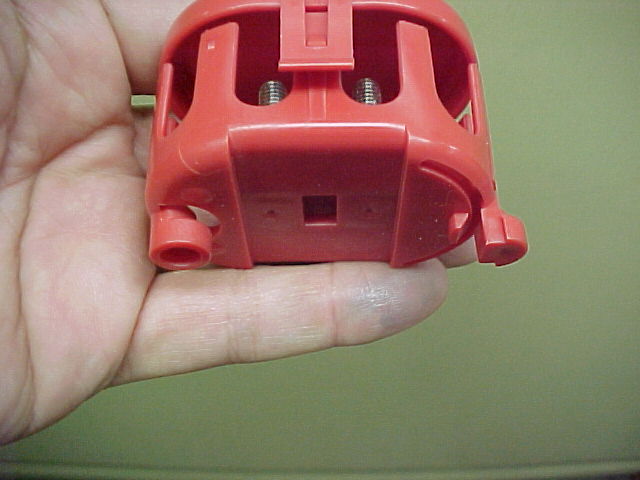
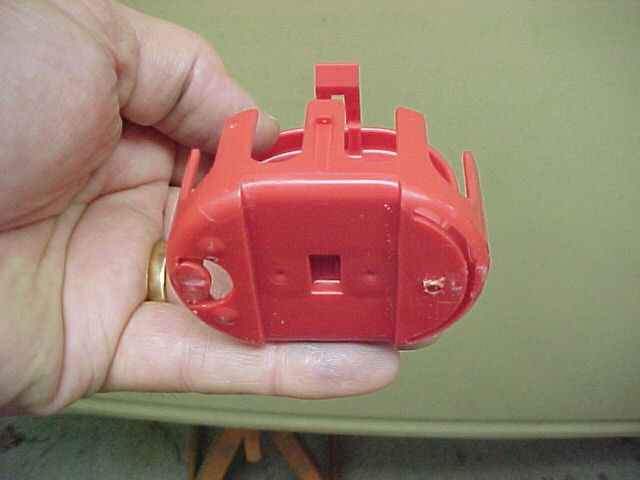
I wanted to be able to simply bolt this down so I trimmed off the lugs and drilled some holes for a couple of 8-32 screws.
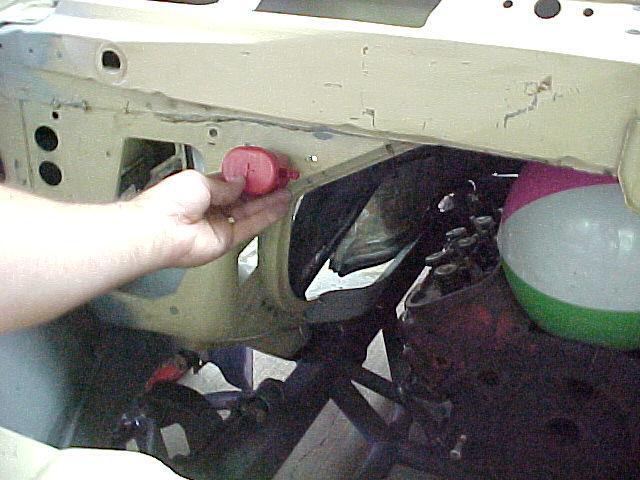
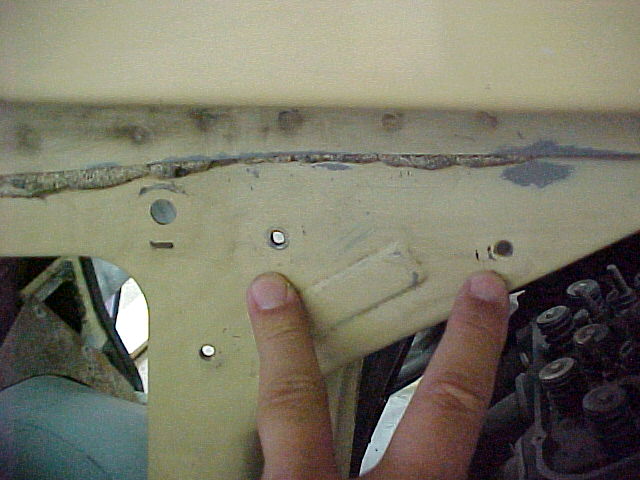
Here is where I am mounting the block. This will be fed directly from the alternator and will route power to the existing GM harness and also back to the battery for charging. All of the cables will be 4 ga like I used in the back to supply the fuse/relay box.
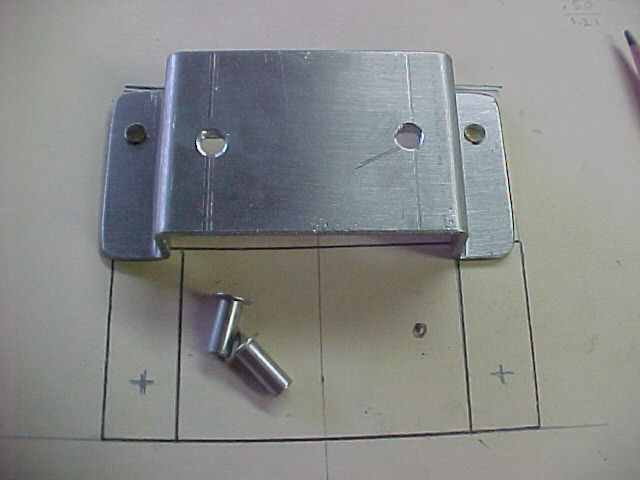
There are two existing holes here that held the old fuel pump relay bracket. I'll make a new bracket out of .090 aluminum.
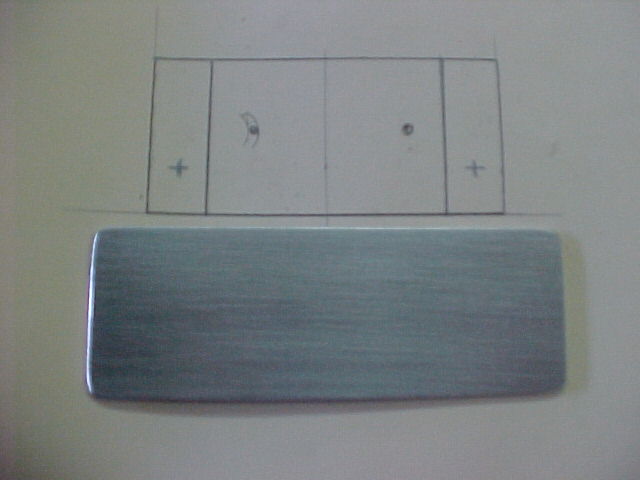
here is the bracket sketched out along with a piece of 90 thou I cut for the job.
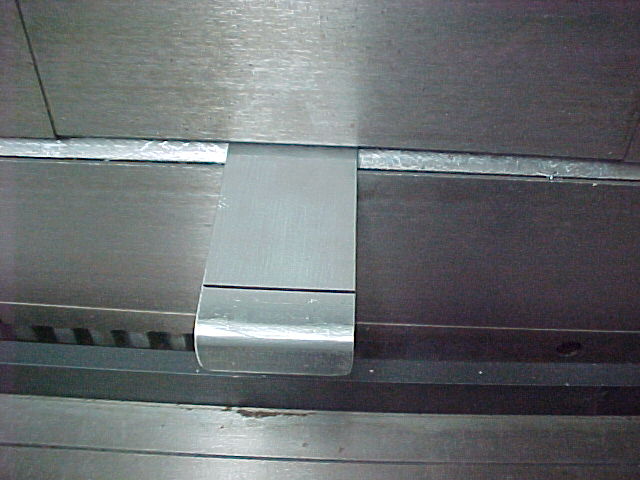
After laying out the bend lines I bent the piece up with the 3 in 1.
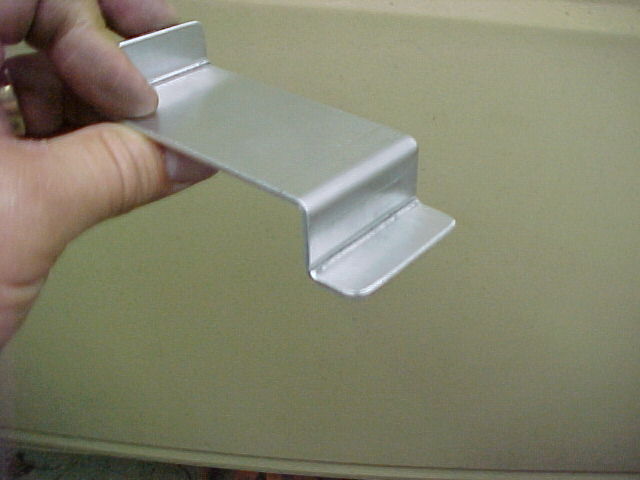

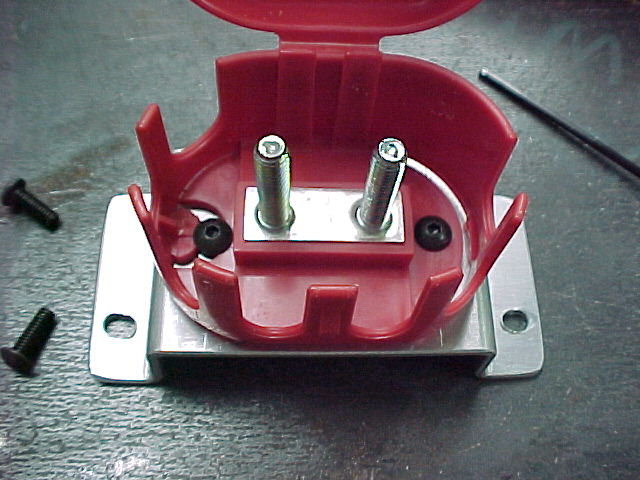
After drilling a few holes. I'll put a couple rivnuts in the bracket for the block screws.
Bolted in and ready to install.
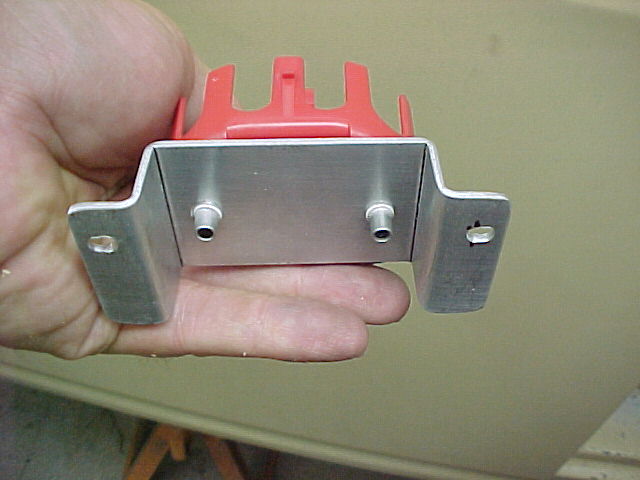
The holes on the firewall just needed to be opened up a bit for the rivnuts.
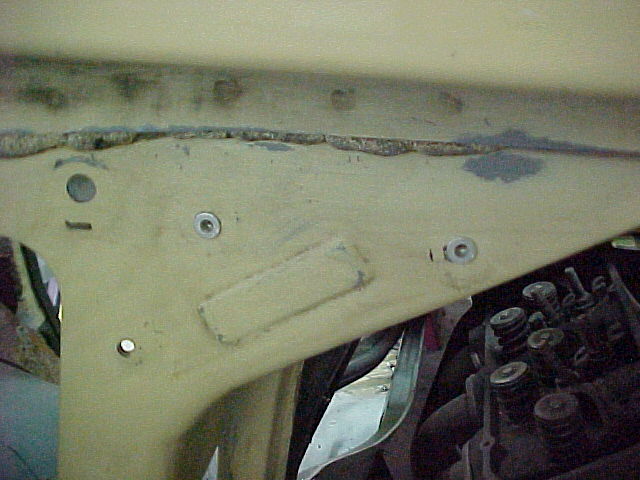
Bolted in.

Lots of room for power take-offs here.
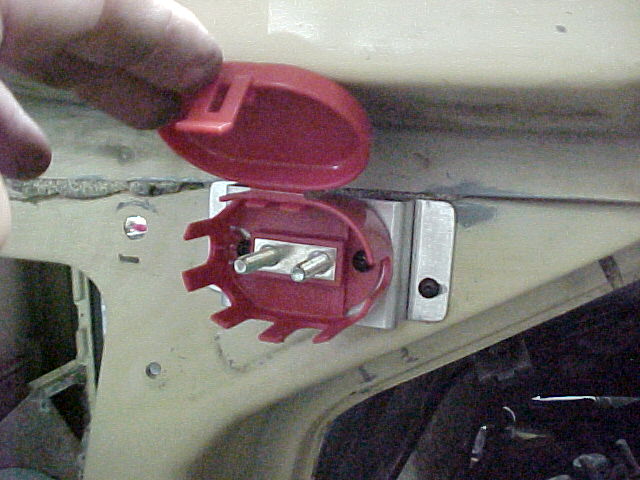
Thanks for looking.
MarkMark:
"Bad Ast" Astro Van. Just because I did it... Doesn't mean it's possible...
This my Bad Ast thread...
https://www.pro-touring.com/showthre...roject-Faze-II
This is my Fotki album...
http://astroracer.fotki.com/
09-15-2013 #630
Registered User
- Join Date
- Aug 2007
- Location
- Albemarle, NC
- Posts
- 1,171
i LOVE astroracer fab porn. I missed it all summer.
please, keep it up.Michael Crawford
1970 plymouth Duster back under construction:
https://www.pro-touring.com/showthre...uring-makeover
1987 GMC S15 https://www.pro-touring.com/showthre...ct-drivabeater
09-15-2013 #631
Registered User
- Join Date
- Mar 2004
- Location
- Mid-Michigan
- Posts
- 2,764
I also got some more routing done. I drilled two holes in the right rear corner for snap bushings. One of which will carry the 1/0 negative cable to ground the frame and body and another for the fuel pump wires.
Here is a long view of the corner.
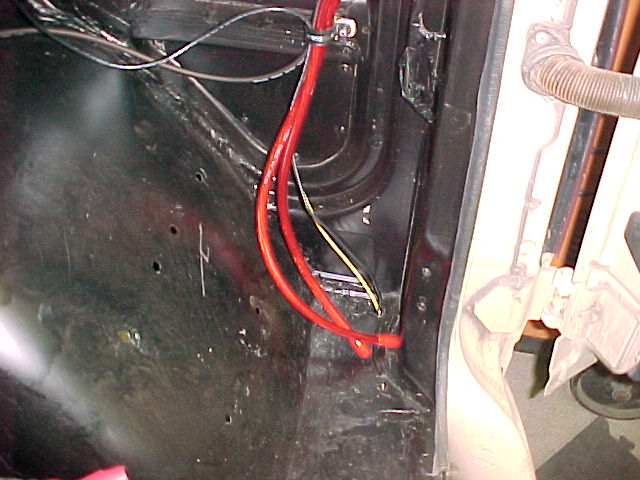
Here is a close up.
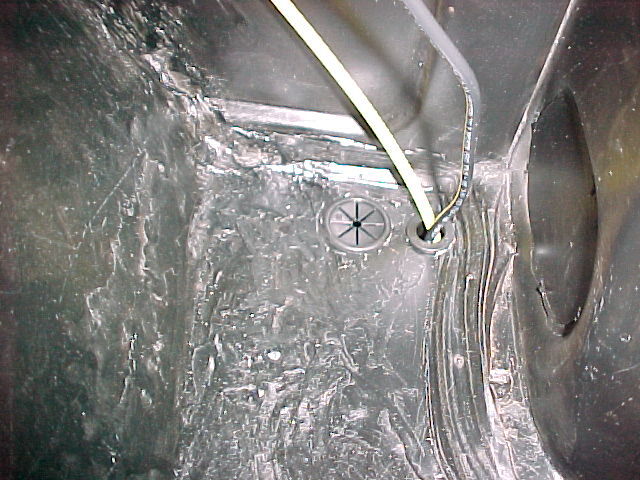
Looking from underneath you can see the routing for the fuel pump wires. I REALLY lucked out here... All of the holes in the brackets were there AND they all were the perfect size for the snap bushings... Very nice.

Of course all of this will get cleaned up and painted before the wires are installed for keeps. I will also cover the wires with loom before final install.
Thanks for looking.
MarkMark:
"Bad Ast" Astro Van. Just because I did it... Doesn't mean it's possible...
This my Bad Ast thread...
https://www.pro-touring.com/showthre...roject-Faze-II
This is my Fotki album...
http://astroracer.fotki.com/
09-15-2013 #632
Registered User
- Join Date
- Mar 2004
- Location
- Mid-Michigan
- Posts
- 2,764
Hey Mike! Originally Posted by dusterbd13

LOL, I like that, very nice!. Yea, it's been a slow summer for the build but I hope to get crackin' on it this fall. I want to get the body back off the frame so I can start finishing the underside and I have some chassis work to wrap up.
Thanks!Mark:
"Bad Ast" Astro Van. Just because I did it... Doesn't mean it's possible...
This my Bad Ast thread...
https://www.pro-touring.com/showthre...roject-Faze-II
This is my Fotki album...
http://astroracer.fotki.com/
09-18-2013 #633
Registered User
- Join Date
- Mar 2004
- Location
- Mid-Michigan
- Posts
- 2,764
I was holding off crimping all of the big stuff until I ordered one of these hydraulic terminal crimpers off eBay last week.

Harbor Freight sells this for 70 bucks. I got it for <55 dollars and free shipping...
I got it today and tried it out on a 1/0 cable terminal. I can say it worked very well and I am glad I waited to do these crimps until I got this tool...
Here is the lug I am going to crimp. As you can see this is pretty big. The tool comes with dies to do up to 2/0.

Excellent investment and it makes some nice looking crimps. I am going to look into hard mounting it to the bench. It gets kind of busy trying to hold the cable in place while trying to actuate the hand pump on the crimper.
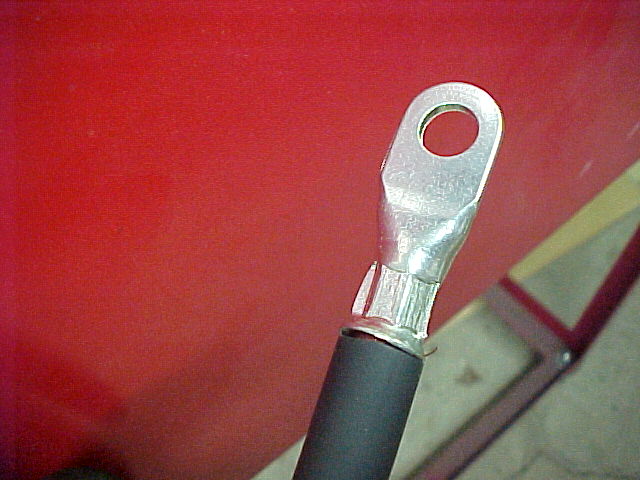
I clamped the lug in the vise and tested the crimp. It will take a lot of force to pull the lug off...
I finished up the crimp with some heat shrink and called it good...
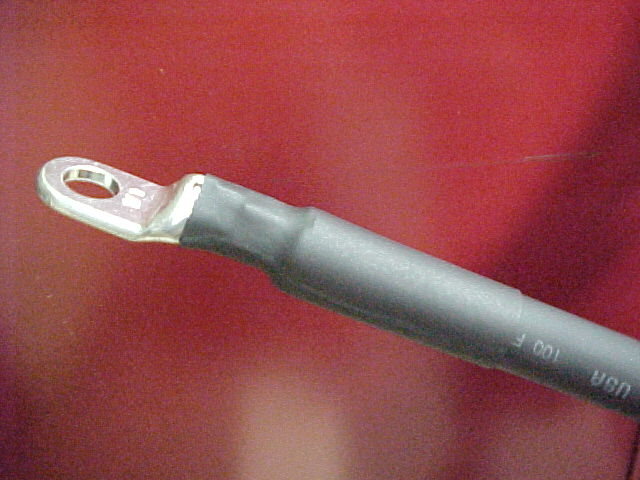
Of course I have at least a half dozen of these to do on the big cables and as many or more on the 4 ga. stuff. Should be fun now.
MarkMark:
"Bad Ast" Astro Van. Just because I did it... Doesn't mean it's possible...
This my Bad Ast thread...
https://www.pro-touring.com/showthre...roject-Faze-II
This is my Fotki album...
http://astroracer.fotki.com/
09-22-2013 #634
Registered User
- Join Date
- Apr 2013
- Posts
- 11
Thanks! Originally Posted by Motown 454
09-22-2013 #635
Registered User
- Join Date
- Apr 2013
- Posts
- 11
Thank you! I'm enjoying the build thread of your van, too.
09-23-2013 #636
Registered User
- Join Date
- Mar 2004
- Location
- Mid-Michigan
- Posts
- 2,764
Thanks,
Glad to entertain...
I modified my crimper yesterday so it will easily clamp to the welding bench. Frees up a hand for holding the wire in place.
I marked out a pattern for a couple of drilled and tapped holes in the head.
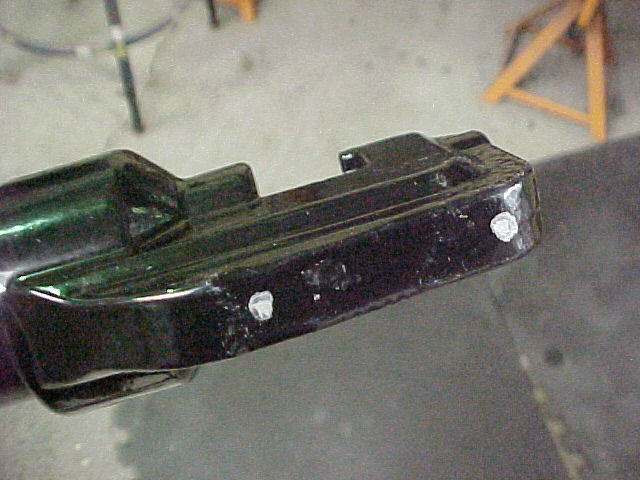
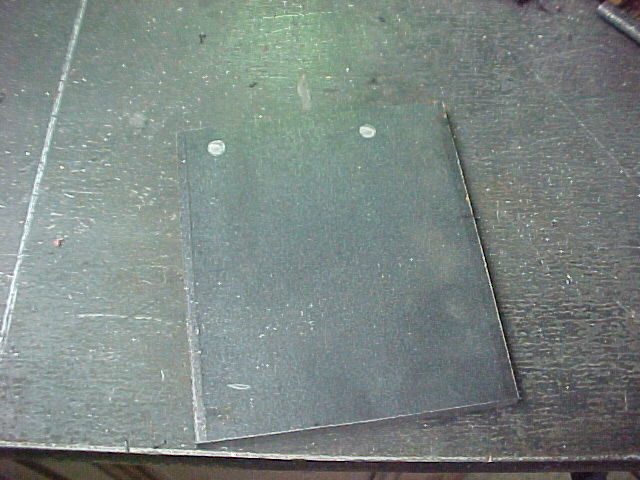
I will be screwing it to this piece of 1/4" plate with a couple of drilled and counter bored holes.
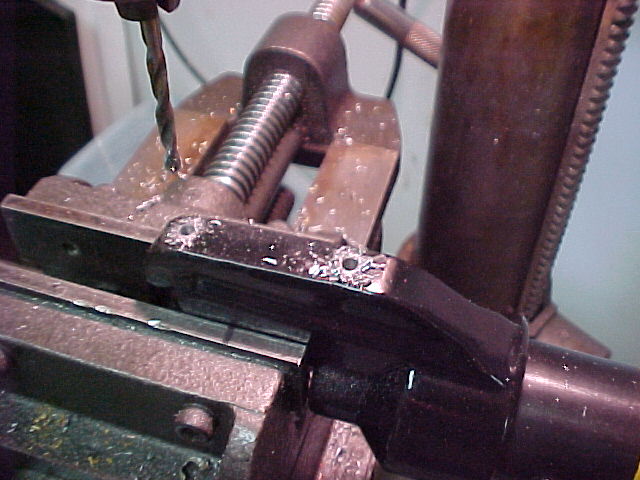
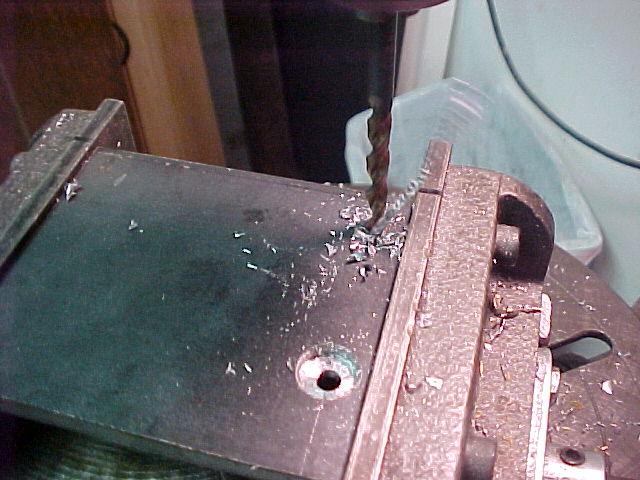
I clamped the tool in the drill press vise and drilled two holes out to .149 for tapping for a #10-32 screw.
Here is the plate getting drilled and counter bored.
Test fit. Bolted up nice and was very sturdy. This will work great when I get to crimping all of the van cables...
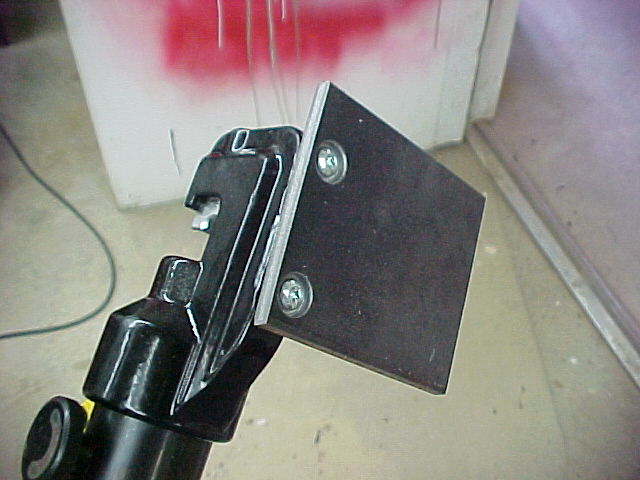
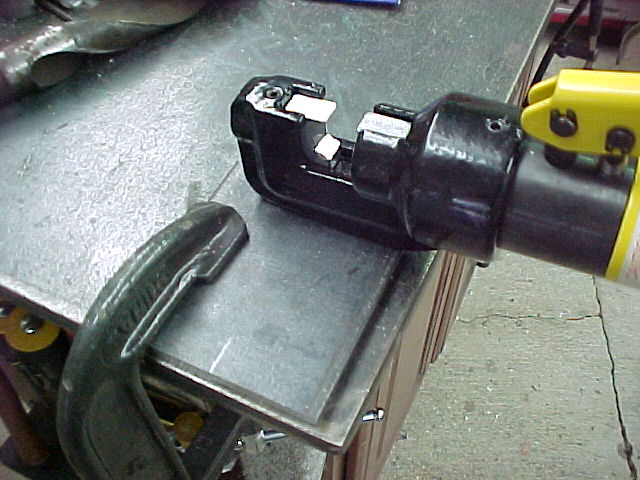
Cleaned and painted the plate.
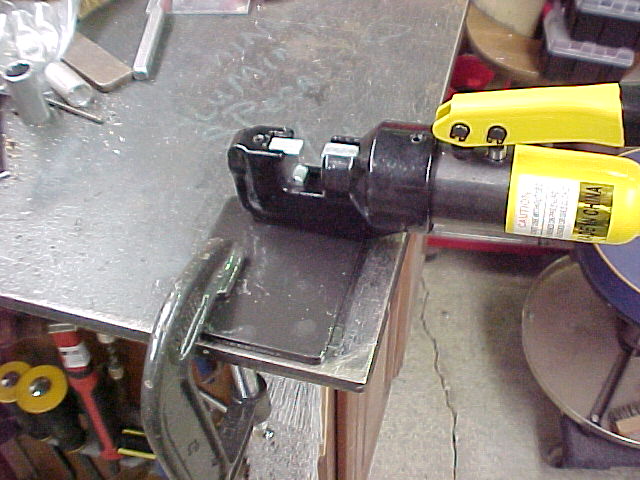
This will be good to go and, if I need it do any crimps in tight places, the plate will come right off.
MarkMark:
"Bad Ast" Astro Van. Just because I did it... Doesn't mean it's possible...
This my Bad Ast thread...
https://www.pro-touring.com/showthre...roject-Faze-II
This is my Fotki album...
http://astroracer.fotki.com/
09-24-2013 #637
Registered User
- Join Date
- Mar 2004
- Location
- Mid-Michigan
- Posts
- 2,764
Even though I am working 10 hrs this week I got out and did some wiring stuff tonight...
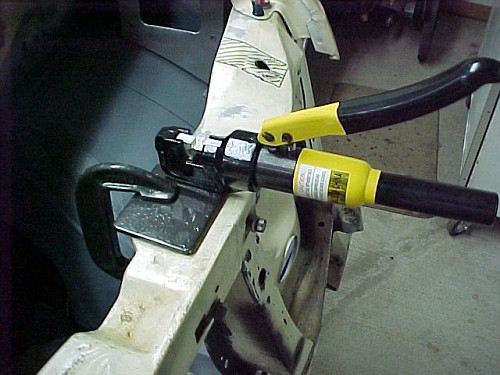
I clamped the Hydraulic Crimper right to the rad support and got busy. This little mod is turning out to be pretty handy...
I hung the relay box and routed the wires in some semblance of how they will be when installed.
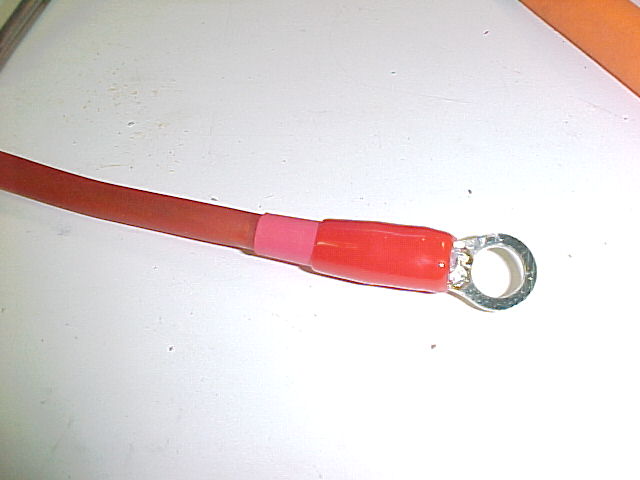
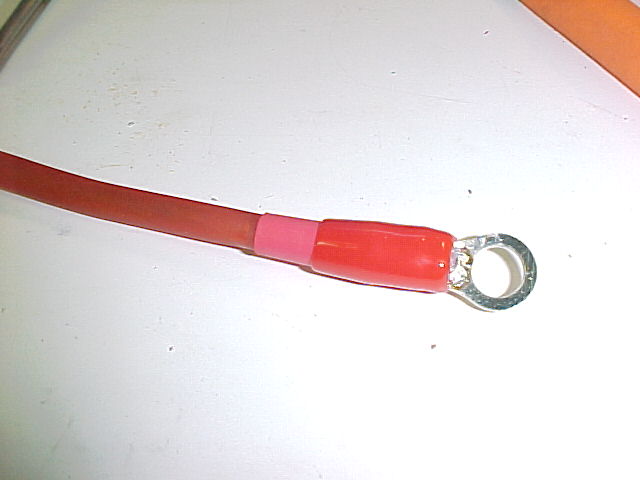
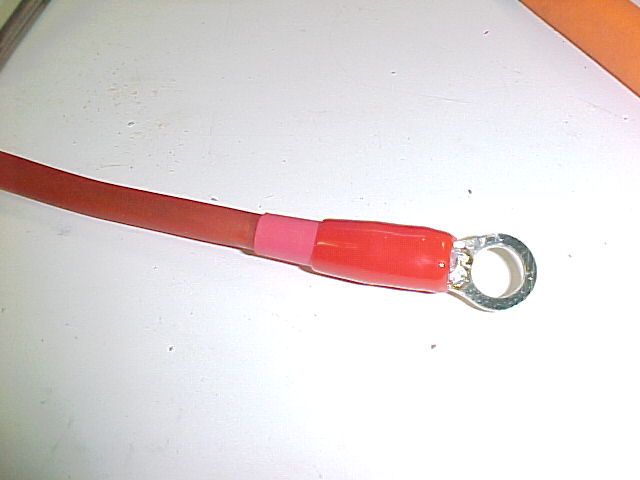
I got the power lead for the relay box, the charge/power lead for the battery (from the back), the power lead for the fuse box and the power lead from the alternator all crimped tonight. Once I got going it took about a half hour to do all of the crimps. Having the crimper right there, where I was working, was nice!

These are some very tight crimps...
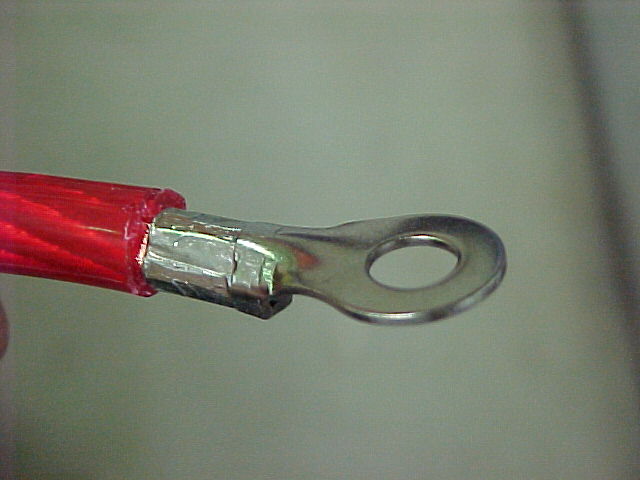
I did learn a bit tonight. The terminals I am using are rolled, with the seam at the top, as you can see here.
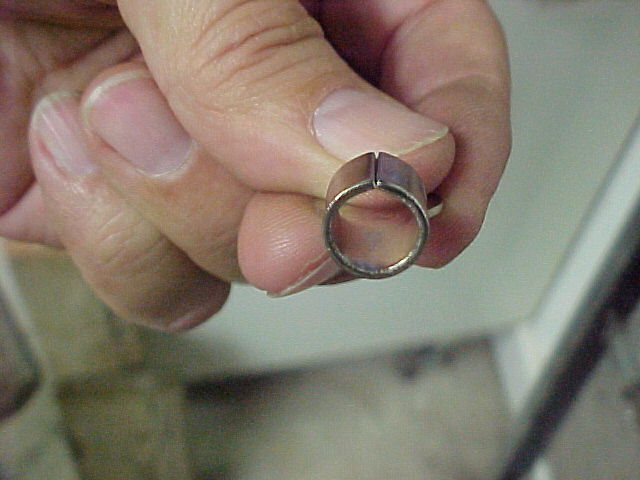
After I did the first one (which I got lucky on) I decided to pinch the terminals closed a bit so one edge is "tucked" under the other. When doing this the edge getting tucked will actually "snap" under the top edge.
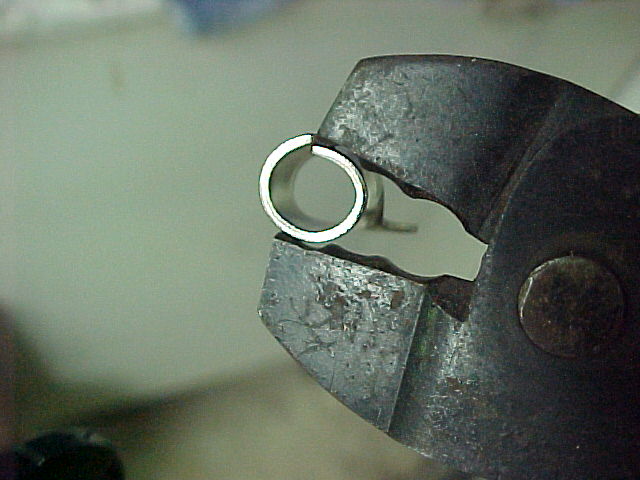
This guides the crimp into a very tight roll. I think it compresses the wire about half it's diameter, just looking at it...

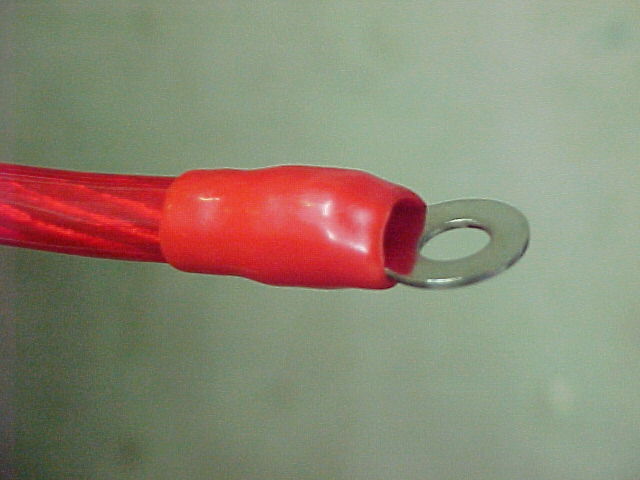
This ready for some heat shrink. I need to get some larger diameter red shrink (this is just the plastic boot that came with the terminal)... I could use black I guess but I am trying to make this stuff look like I thought about it before I did it.
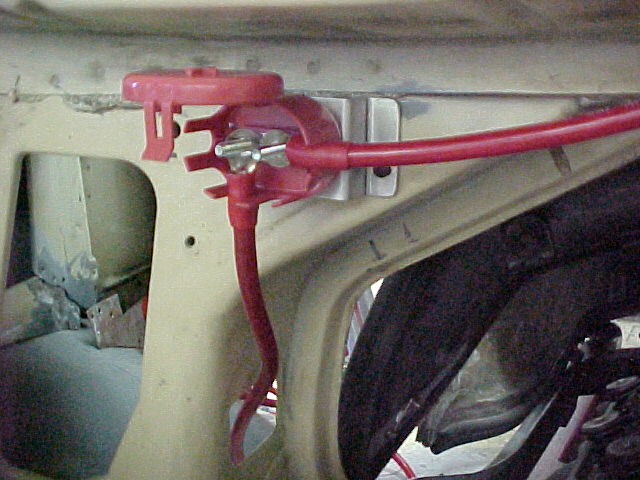
Here is the power block I mounted last week with the cables loosely routed.
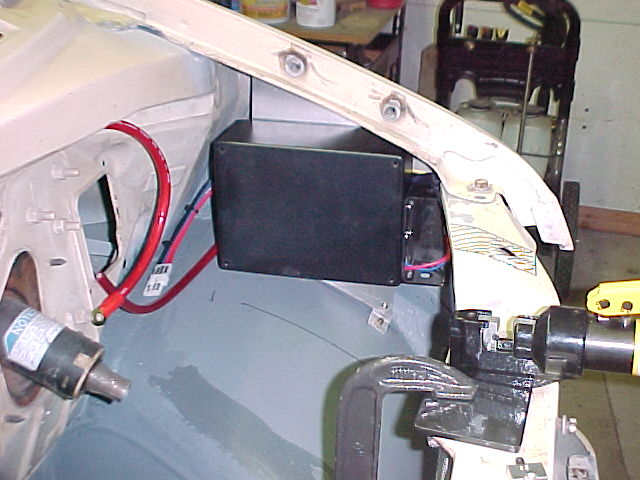
Here is a pic of the relay center with the cover in place... This will get painted body color so it will all but disappear after install.
That's what I did.
MarkMark:
"Bad Ast" Astro Van. Just because I did it... Doesn't mean it's possible...
This my Bad Ast thread...
https://www.pro-touring.com/showthre...roject-Faze-II
This is my Fotki album...
http://astroracer.fotki.com/
09-30-2013 #638
Registered User
- Join Date
- Mar 2004
- Location
- Mid-Michigan
- Posts
- 2,764
I got some grief for my "squashed" terminal on another site so I took a few steps to try to improve the quality of the crimps
I got some better 4 ga terminals from McMaster Carr...
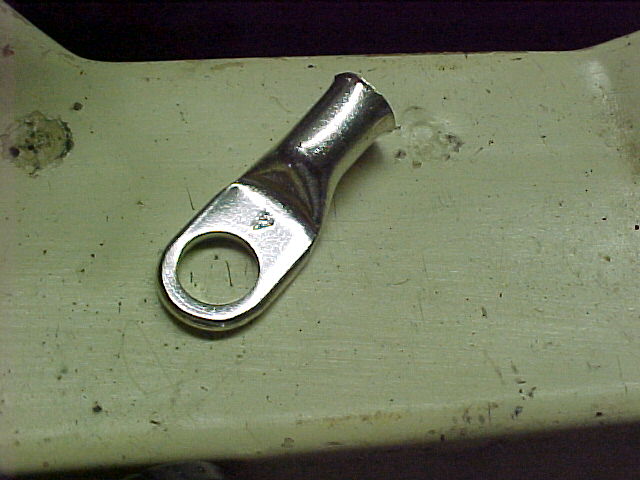
And came up with a plan to hopefully make some better crimps. I used a piece of 1/8th inch diameter steel rod to make an impression in the top of the lug.

I clamped the lug in the crimping tool.
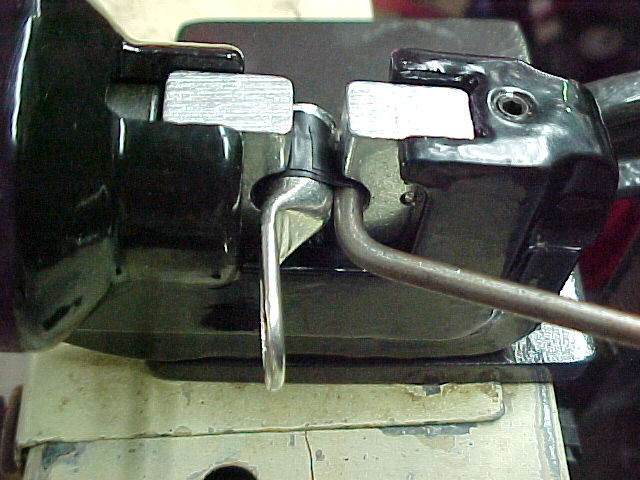
While crimping, this rod caves in the top of the lug similar to the Molex style crimpers.

The caving action draws in the sides of the lug and keeps it from spreading out. Once this is done I removed the rod, turned the lug 90 degrees and recrimped it.
Does this look better?Mark:
"Bad Ast" Astro Van. Just because I did it... Doesn't mean it's possible...
This my Bad Ast thread...
https://www.pro-touring.com/showthre...roject-Faze-II
This is my Fotki album...
http://astroracer.fotki.com/
09-30-2013 #639 Registered User
- Join Date
- Aug 2011
- Location
- Connecticut
- Posts
- 925
What a fantastic build, I cant wait until im to the future stages of my project. I cant wait to get my car down to metal on a rotisserie and give it a proper race car build
1967 Firebird "Poor-Boy Build"
New updated thread
https://www.pro-touring.com/threads/...bird-(Updates)
Follow me on Instagram @NaturalLivingMan
10-02-2013 #640
Registered User
- Join Date
- Aug 2007
- Location
- Albemarle, NC
- Posts
- 1,171
really? someone gave you crap for the "look" of your crimps?
hell, if theyre functional, and the look good under heat shrink, dont worry about it. i dont.
if anything, it looks like you "may" be overcrimping them. just judging by the sharpness and amount of what appear to be burrs. may make a future failure point due to localized stress.
not critisizing. you doing excellent work. i just really cant believe someone is soooo nitpicky as to the "look" of your crimps.Michael Crawford
1970 plymouth Duster back under construction:
https://www.pro-touring.com/showthre...uring-makeover
1987 GMC S15 https://www.pro-touring.com/showthre...ct-drivabeater

 Reply With Quote


