


Results 241 to 260 of 273
Thread: Madaguy 1955 Nomad Build
Hybrid View


-
01-05-2026 #1

 Registered User
- Join Date
- Sep 2009
- Posts
- 3,002

Hope everyone had a Merry Christmas (or other holidays celebrated) and Happy New Year! I was able to get quite a done on the few down days we had during our time off. After going around and back and forth trying to decide where the best location will be for the wastegate, I finally decided to locate it similarly to where the Huron Speed truck kit does on their log manifold. This should give a good priority wastegate flow. I wanted to locate it straight inline with the exhaust flow at the elbow, but there were too many other things in the way and it would also make for a long pipe back into the downpipe. I'll be able to tuck it up nicely and will clear the inner fender and allow for easy access to change springs if needed. It also gives a nice clear shot to route the wastegate exhaust back into the main exhaust.
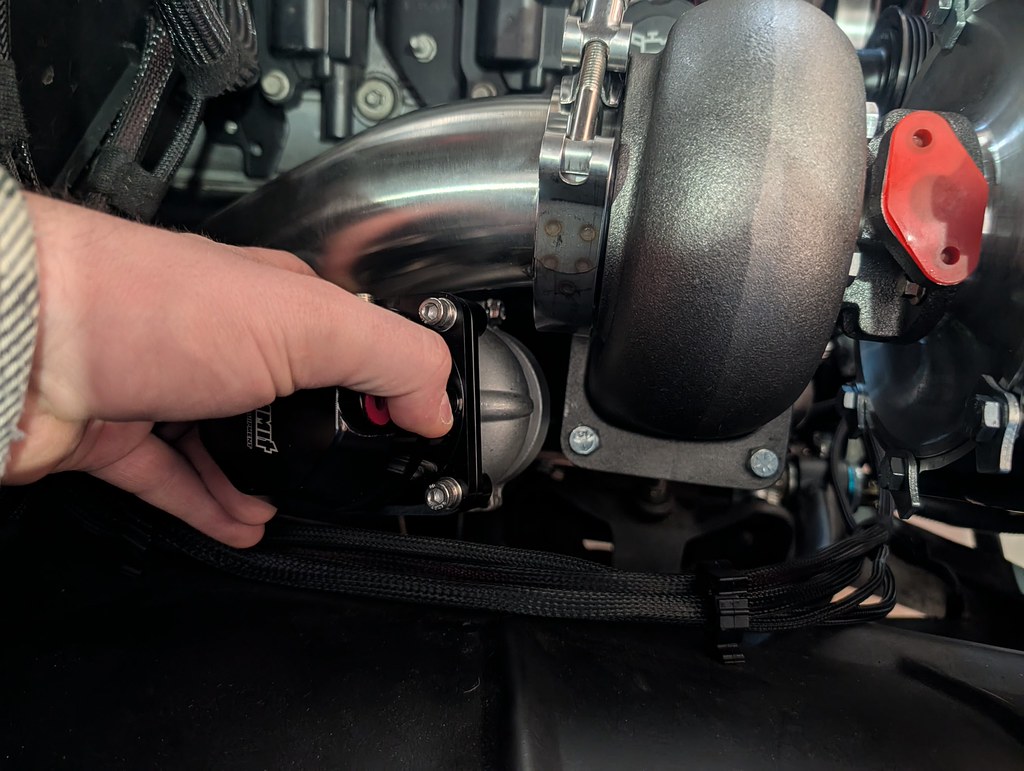
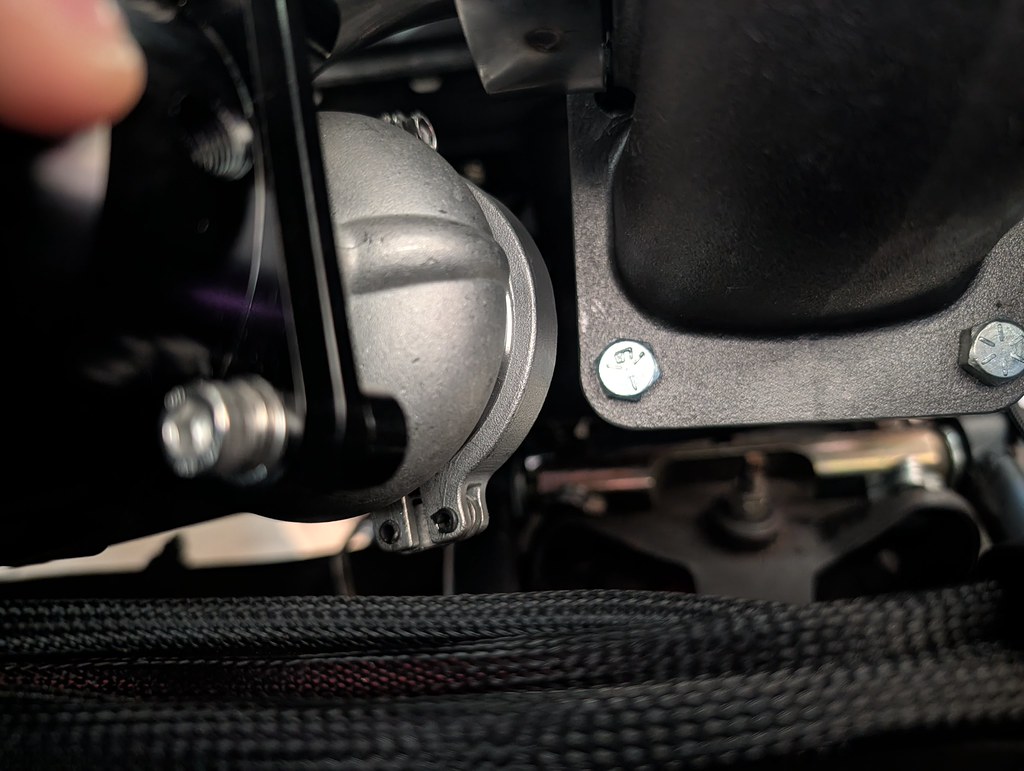
I pulled off the manifold and mocked everything up on my welding table. That way I could get to things much easier to mock it all up. Used some CAD from an old paper towel roll haha.
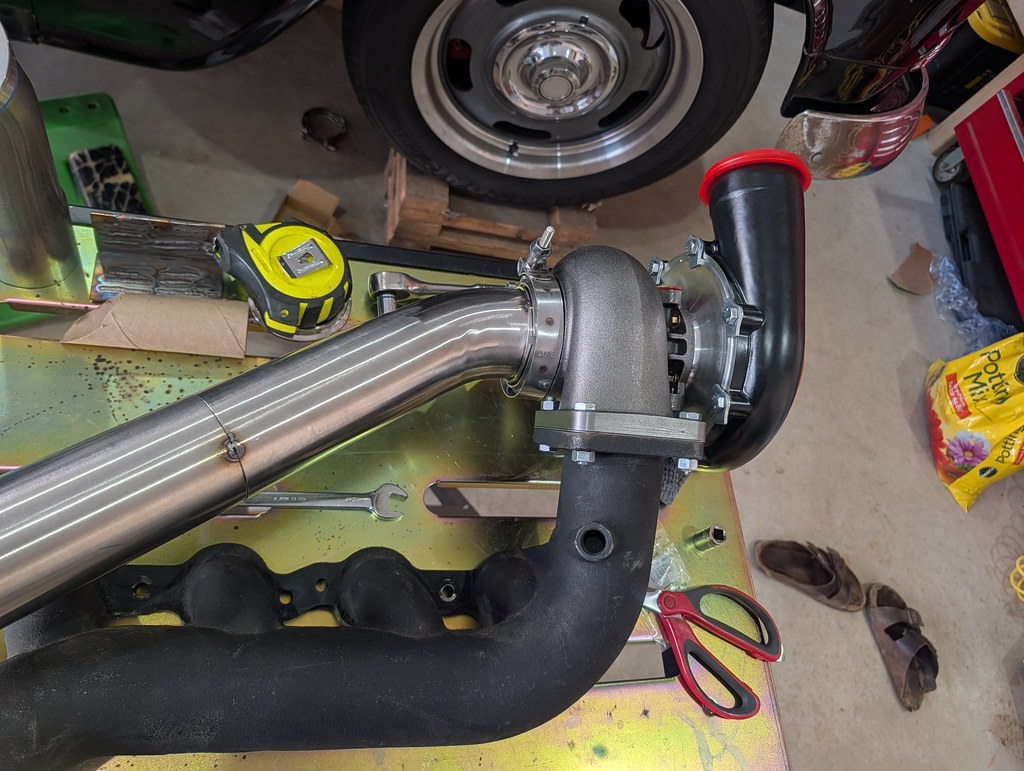
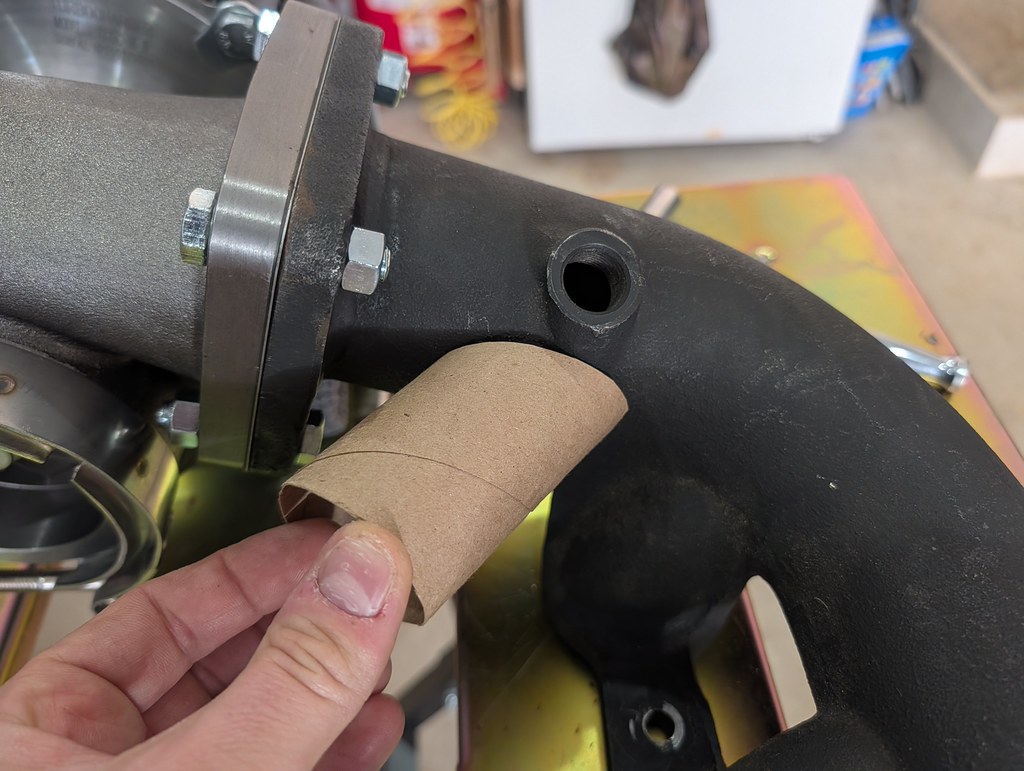
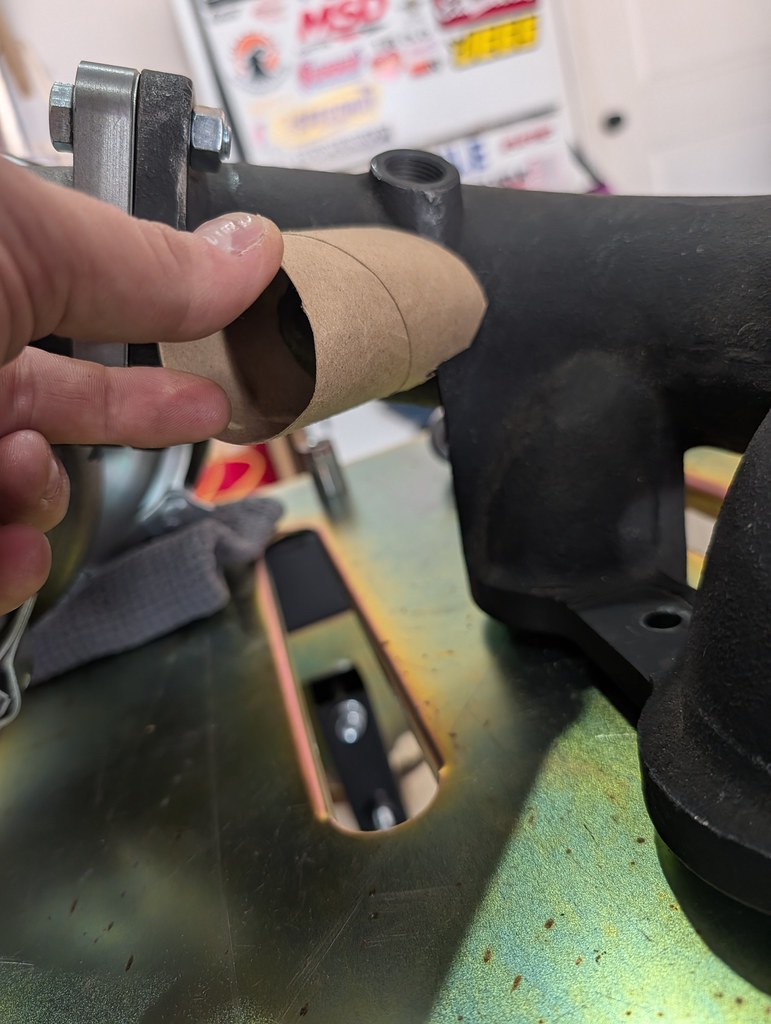
Once I nailed down the location where I wanted to the pipe to come out, I started drilling with the hole saw. Those manifolds are thick! I destroyed 2 before I finally bored all the way through. Then I trimmed up some of the summit racing 304 stainless pipe that I bought for the job. They had a nice mandrel bent pipe with a 180* and some long sections with a 45* as well. Cut off a section to get it mocked in position then test fit on the car.
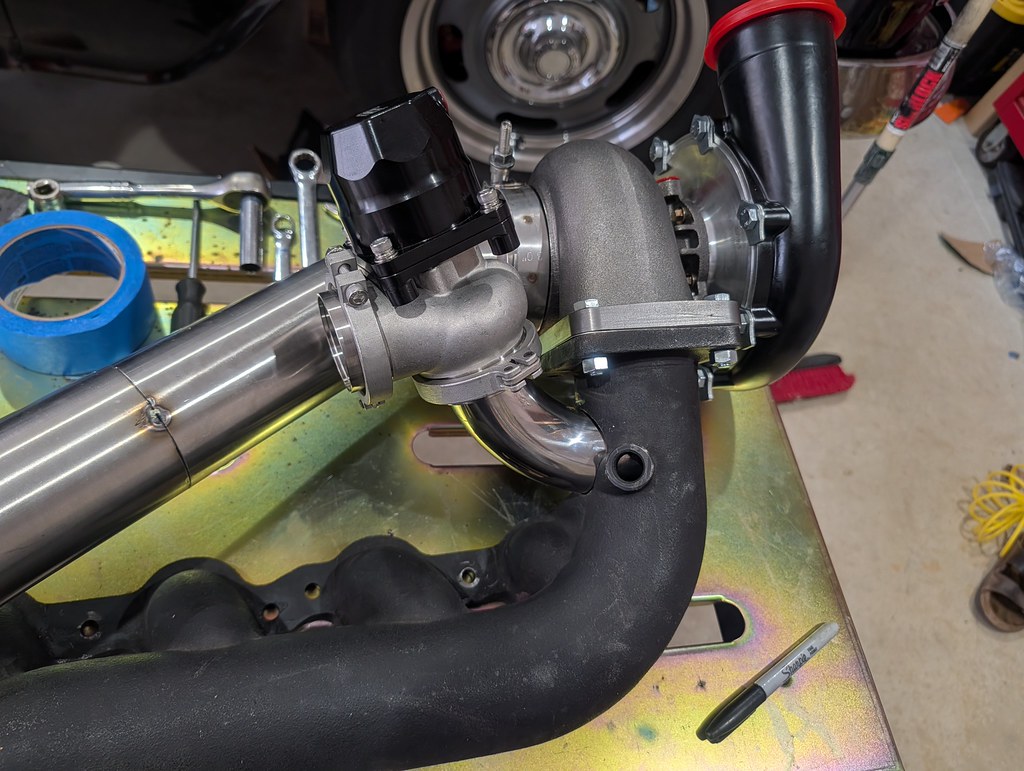
This was the first of about 37 times the manifold was bolted on with the turbo, then down pipe to check for fitment.
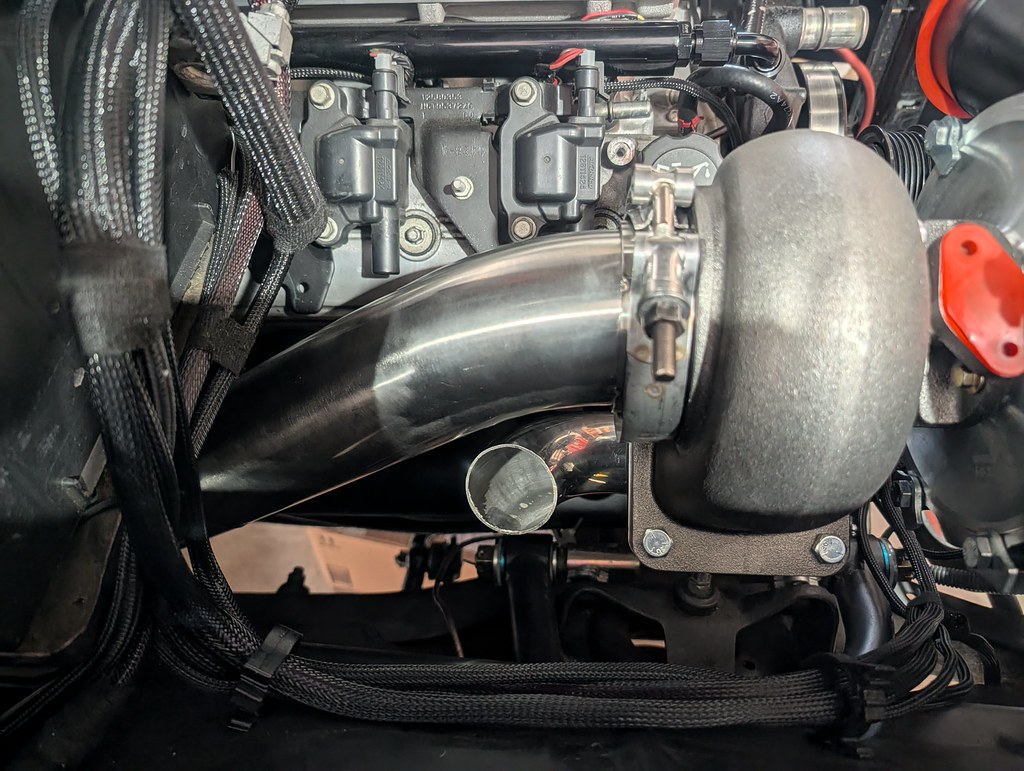
Once I was happy with the fitment, I tacked the first pipe into place. I then determined that I needed another small pipe to angle the wastegate up and at a different angle. I cut and tacked that piece into place and was happy with the fitment. It was tight, but cleared everything. I didn't get any pictures during, but I set up the TIG and purge welded to eliminate the oxidation behind the weld. I'm still practicing with the TIG, but I turned the amps way up and got full penetration into the cast manifold. I made sure to use 309L filler wire that has good adhesion with dissimilar metals such as welding steel to stainless steel.
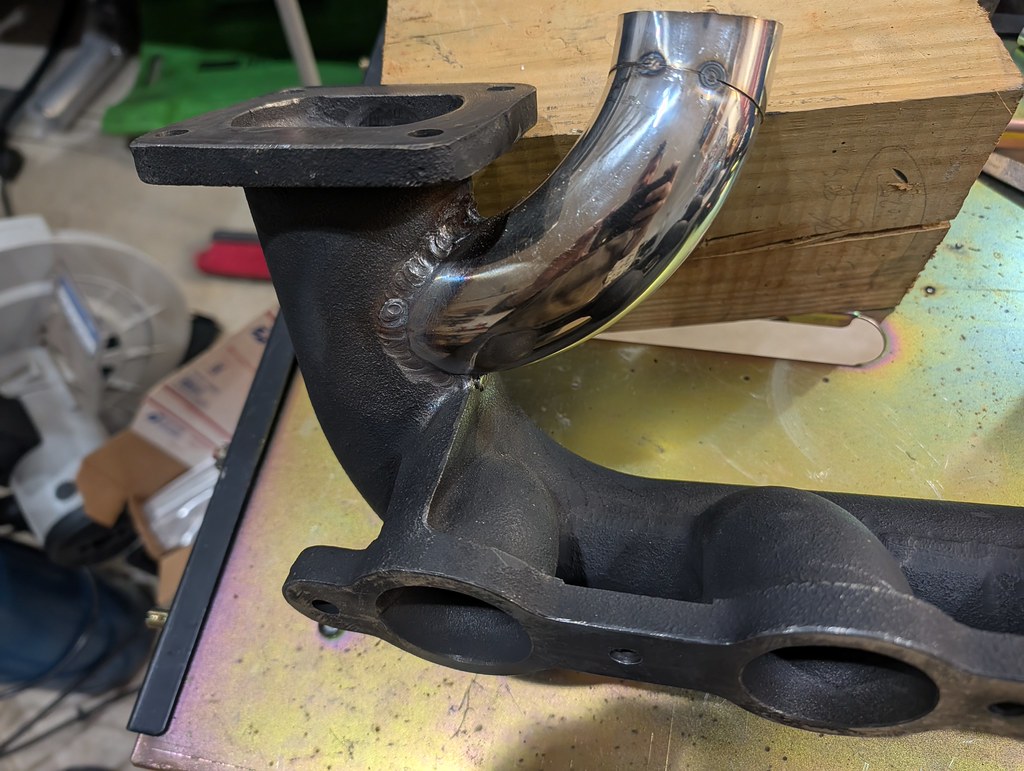
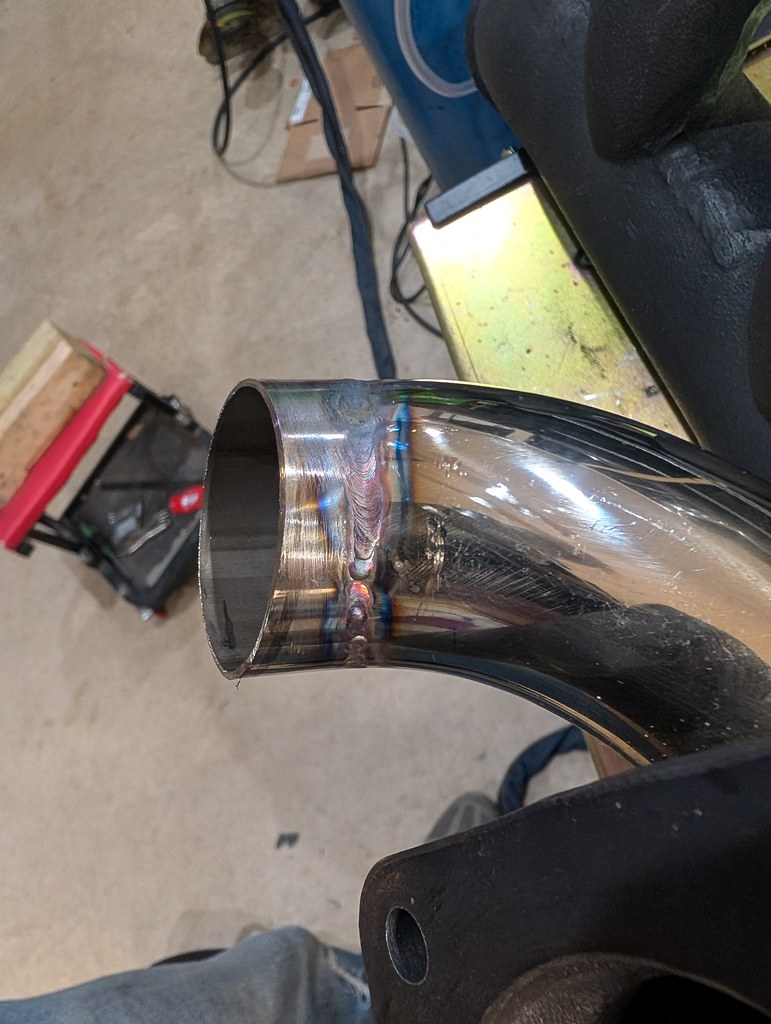
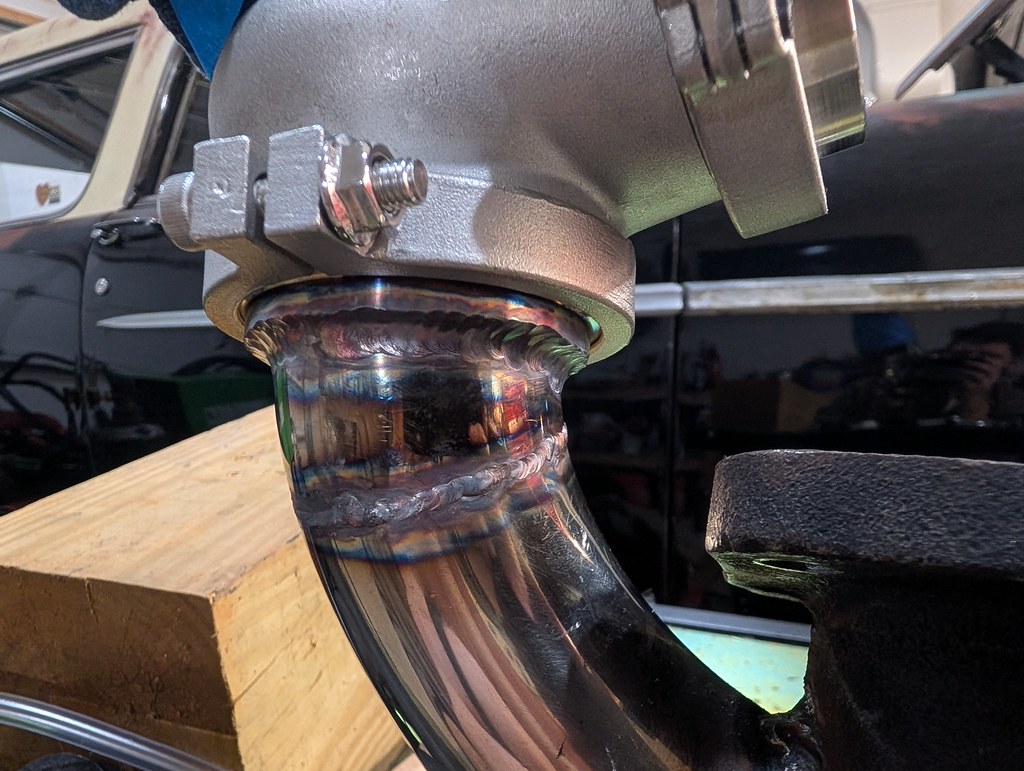
Here's the test fit fully welded to see the clearance. Will be relocating those wires up and away from the heat.
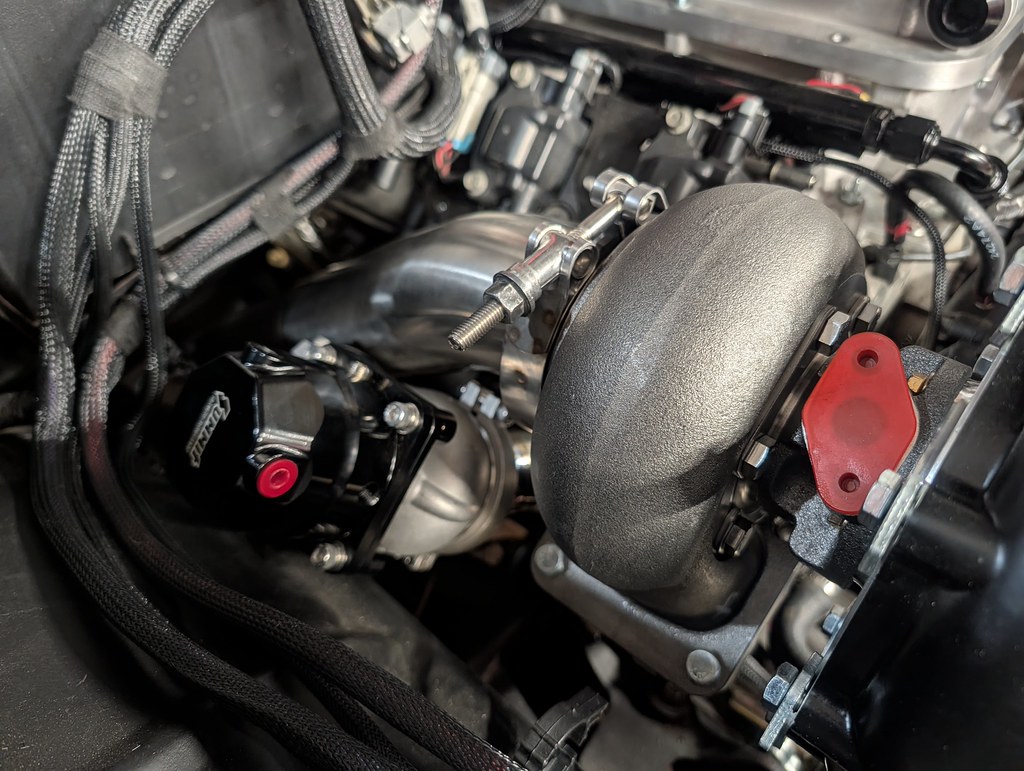
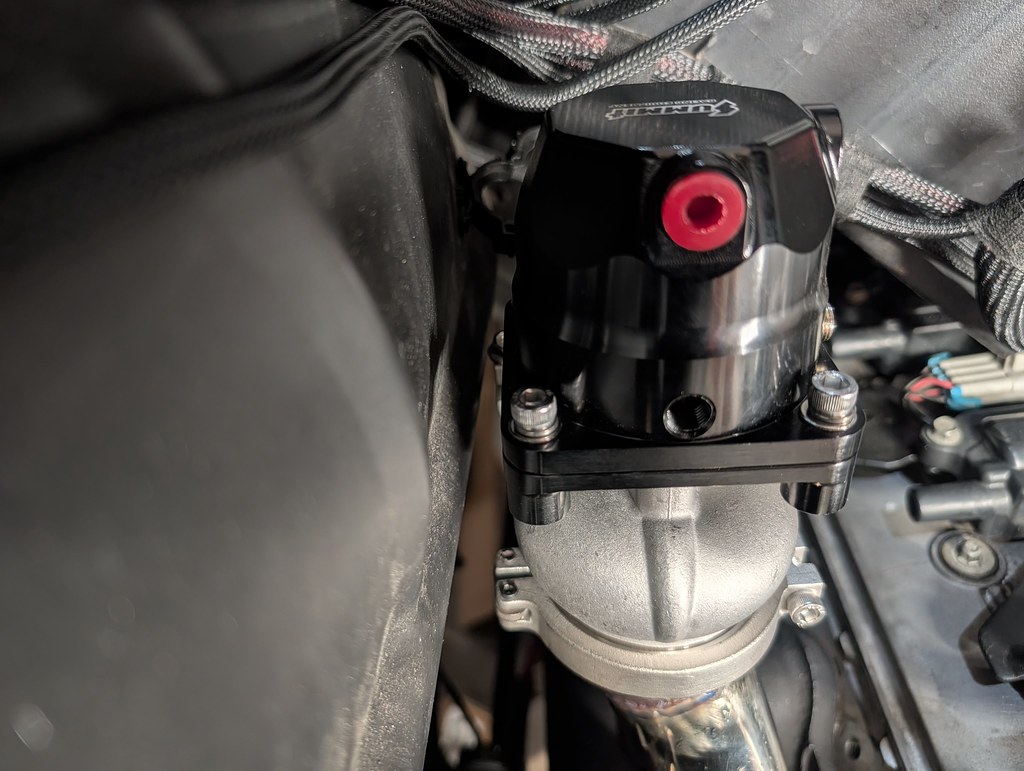
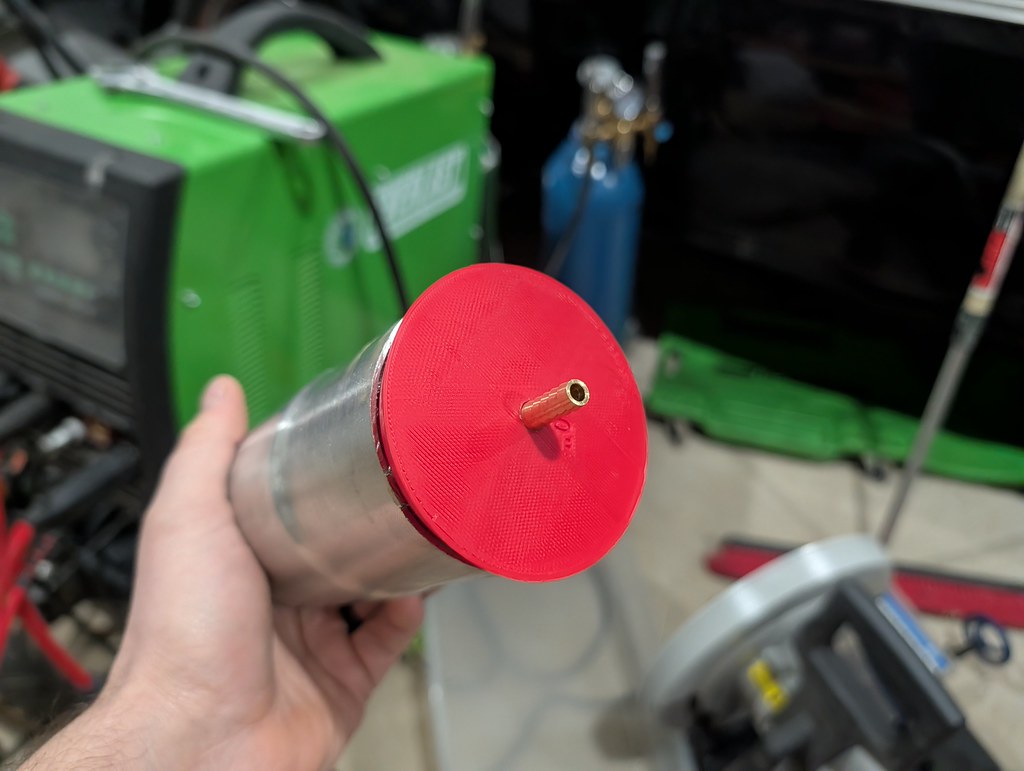
Here's my purge welding setup. I actually used my son's 3D printer to make that little puck for the end of the pipe. Worked really nicely too.
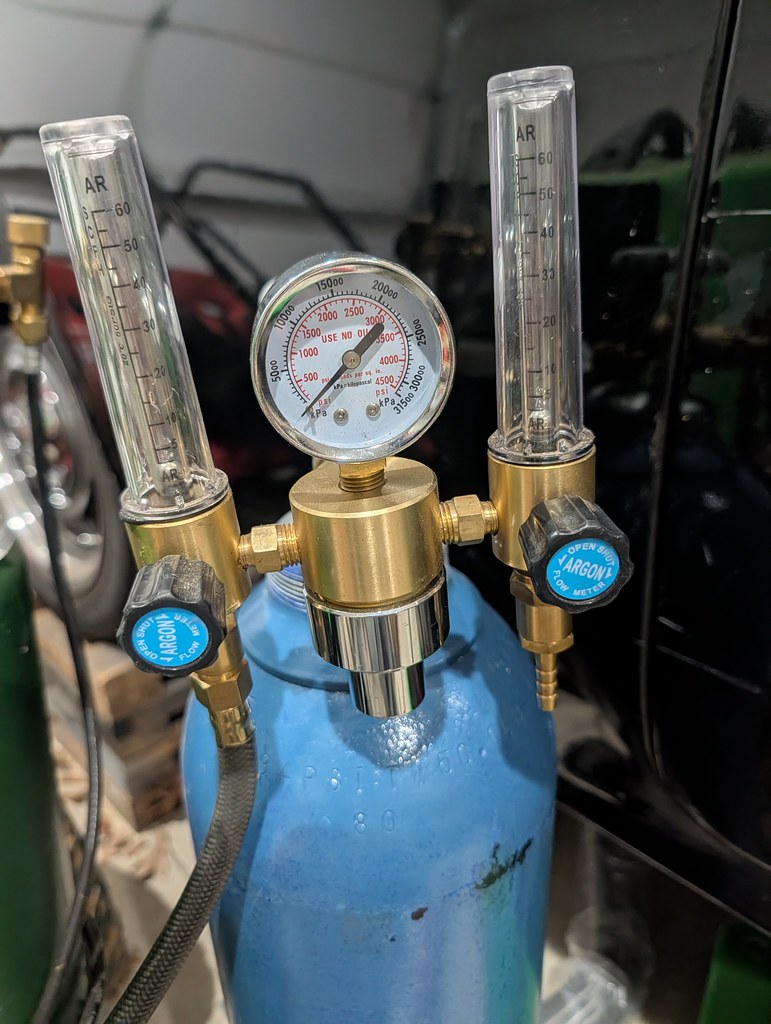
I didn't take any pictures while I was welding, since I wanted to move quickly to avoid using up more gas than I needed. But here's the end results. I welded everything fully bolted together to avoid warping or shifting. I'm very happy with the way it turned out. I'm pretty happy with how I progressed with my welding as the project went on. I was able to get the settings pretty dialed in.
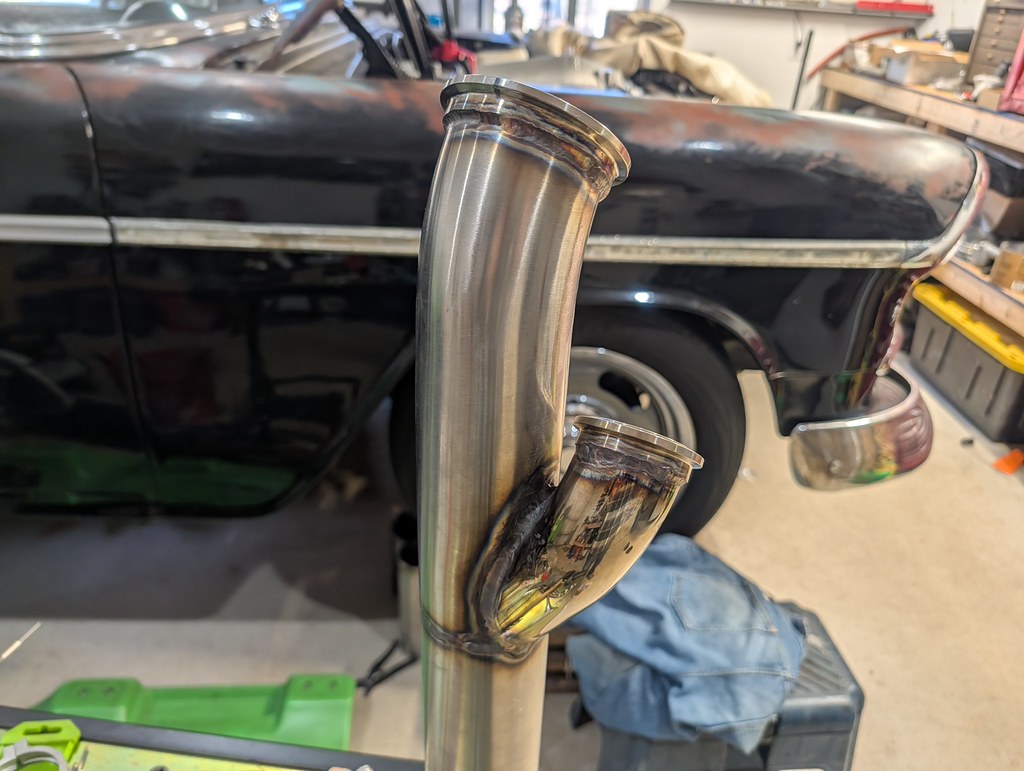
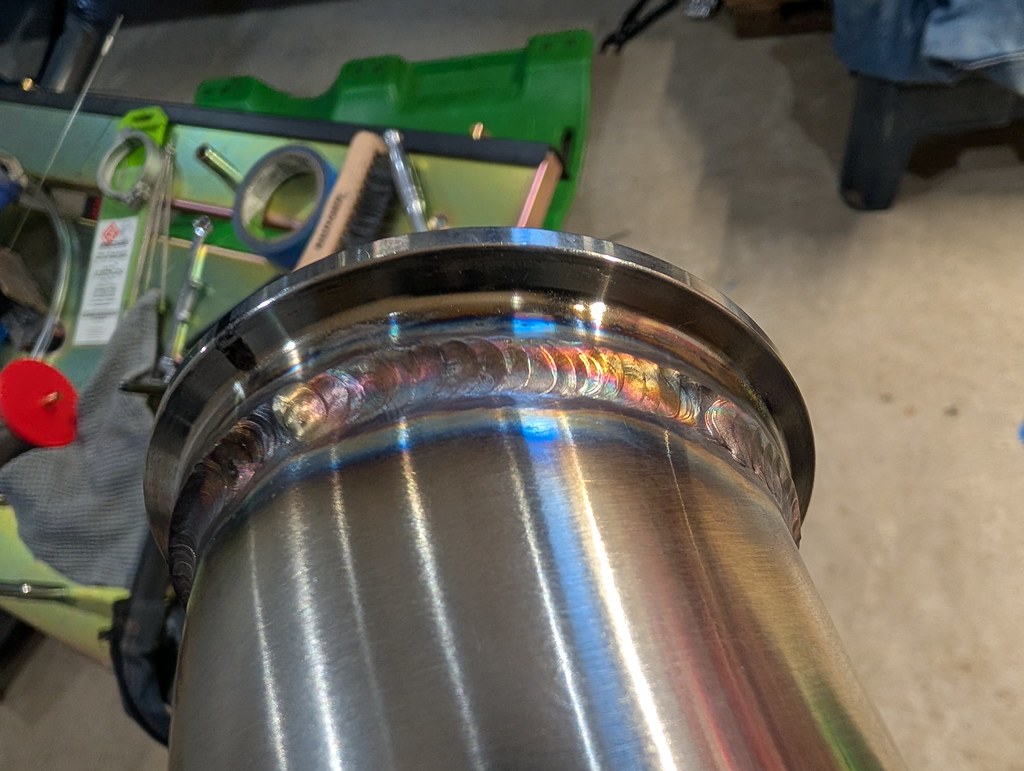
Then at long last, I was able to do a final mock up with the completed pipes. I need to pull them off one last time to paint the log manifold where I welded it, then wrap the down pipe with header wrap to protect the battery.
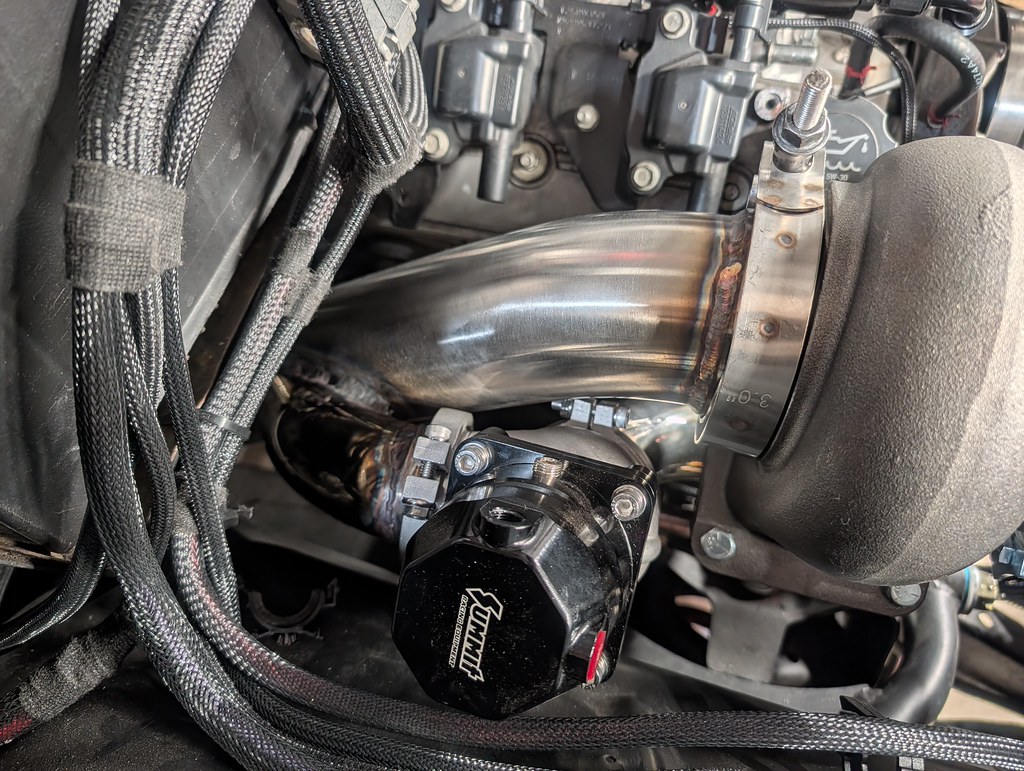
That's basically what the end result will be. I'm very happy with how nicely it tucks up and in.
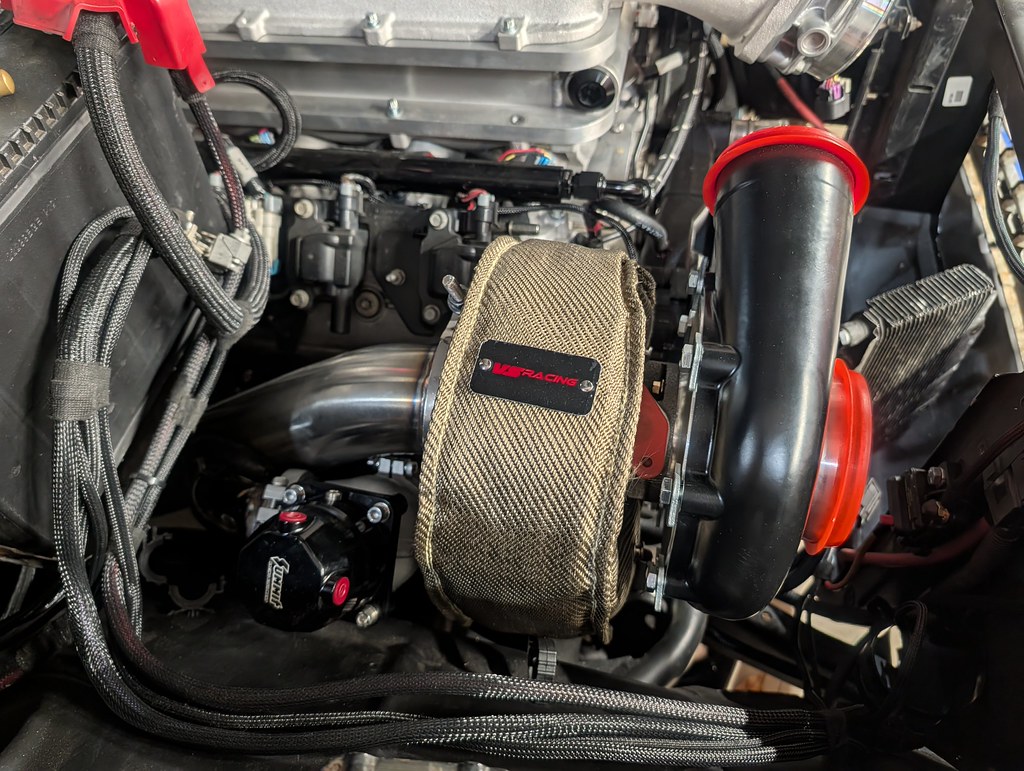
I finally received all the parts for adding the AC condenser, heat exchanger and a new radiator. I'm working now on mocking up all the components to see how they all work together. Hopefully it won't take too much work to get them all to live happily together. Now that the more difficult fabrication work is done on the hot side, I just need to connect the crossover pipe to my passenger side log. Does anyone have a good recommendation for a higher quality flex pipe?
Cheers,
Ryan
1955 Nomad project LC9, 4L80e, C5 brakes, Vision wheels
1968 Camaro 6.2 w/ LSA, TR6060-Magnum hybrid and etc SOLD
1976 T/A LS1 6 Speed, and etc. SOLD
Follow me on Instagram: ryeguy2006a
-
01-05-2026 #2
Registered User
- Join Date
- Sep 2009
- Posts
- 3,002
I love the Ibooster, it does a great job with my C5 front and LS1 rear brakes. They are a bit touchy so it did take a bit of getting used to not aggressively hitting the brakes. I've considered adding a spring to add more resistance to the pedal to try and help with it, but haven't gotten around to that yet. It's definitely an upgrade over manual brakes.
1955 Nomad project LC9, 4L80e, C5 brakes, Vision wheels
1968 Camaro 6.2 w/ LSA, TR6060-Magnum hybrid and etc SOLD
1976 T/A LS1 6 Speed, and etc. SOLD
Follow me on Instagram: ryeguy2006a
01-06-2026 #3
Registered User
- Join Date
- Sep 2009
- Posts
- 3,002
Next on the list was to start mocking up all the coolers and see how they work together. Given the minor damage on the radiator that came in my car and that it had something inside of it, I opted to order a new radiator from Auto City Classics. I hadn't seen it before, but they offer a dual mount for installing radiators in either V8 or 6 Cylinder positions. What I'm hoping is that I can use the V8 mount in my 6 cylinder radiator support to center the radiator and sneak the heat exchanger between the condenser and set back radiator. This will require that I cut the core support cross bar and build a new one, but I think it will be my best bet.
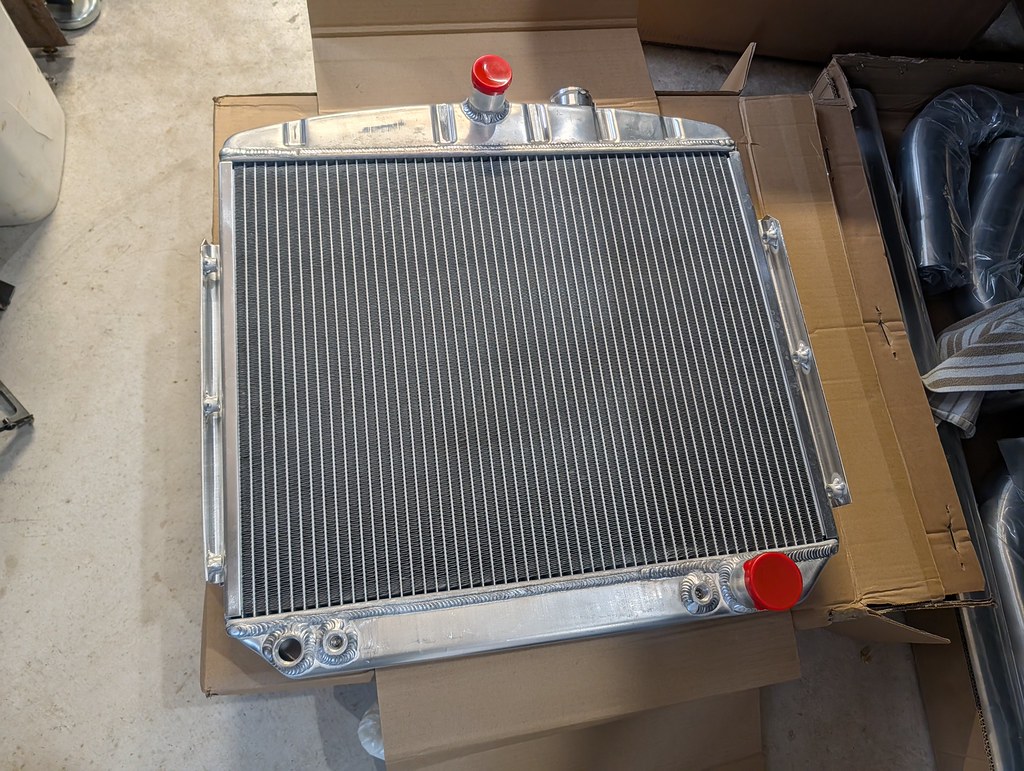
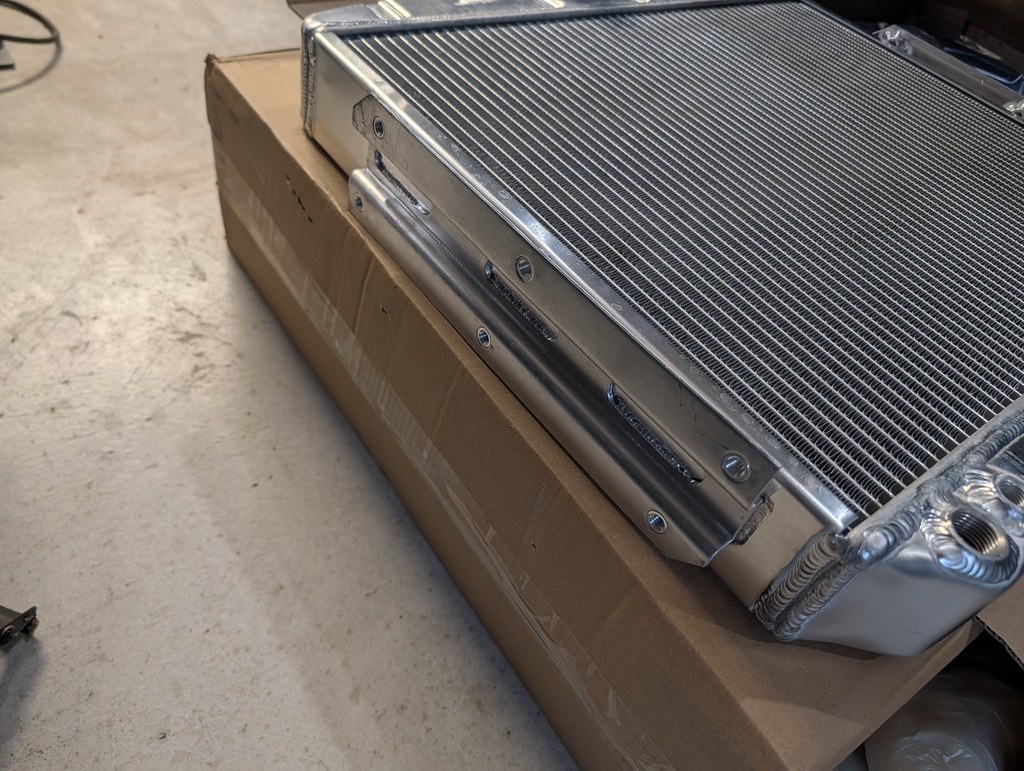
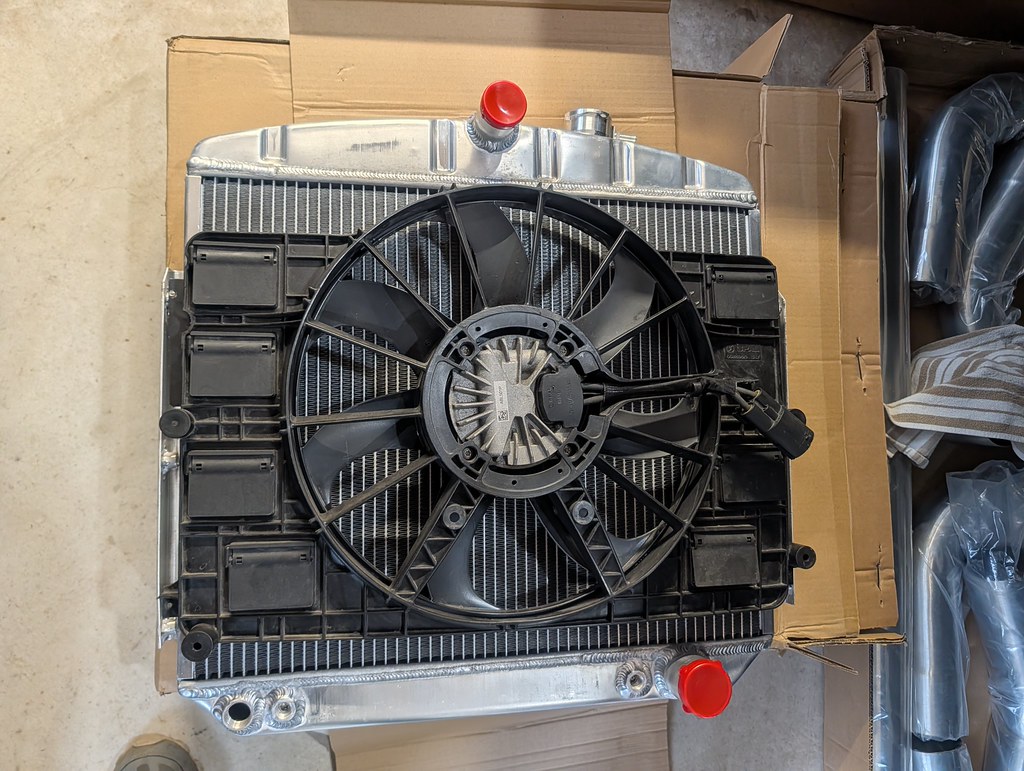
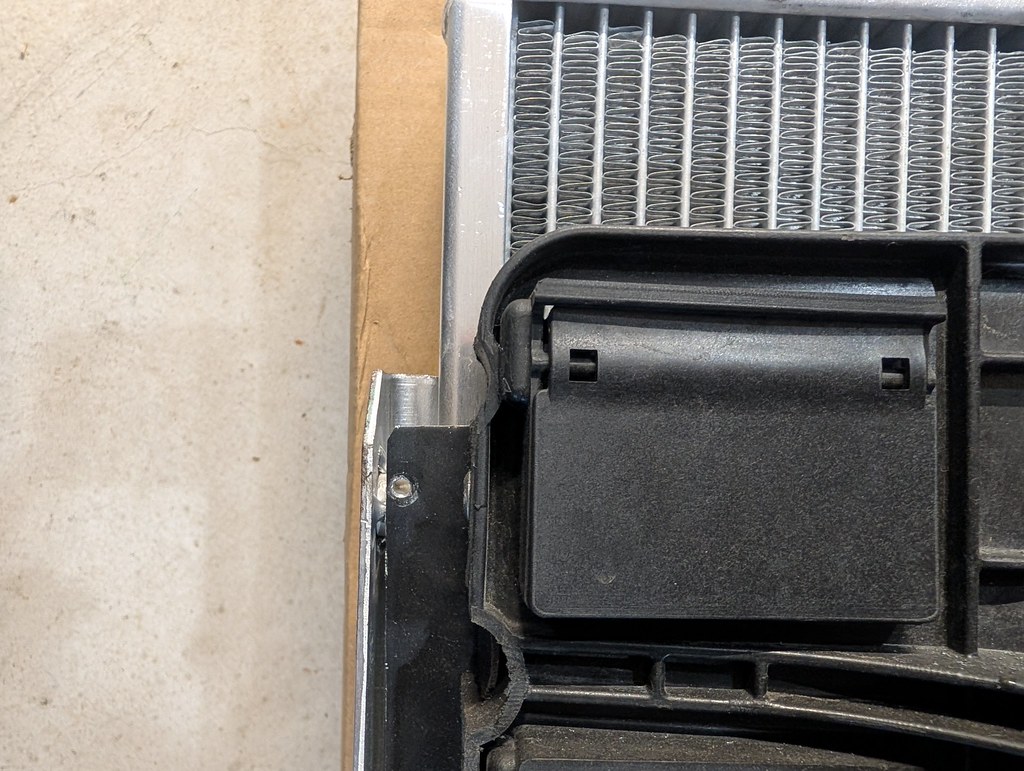
This new radiator has a slightly smaller core than the old one in the car, but I'll be able to make my modified C7 fan work with a little bit of trimming or maybe different brackets. That's a huge relief.
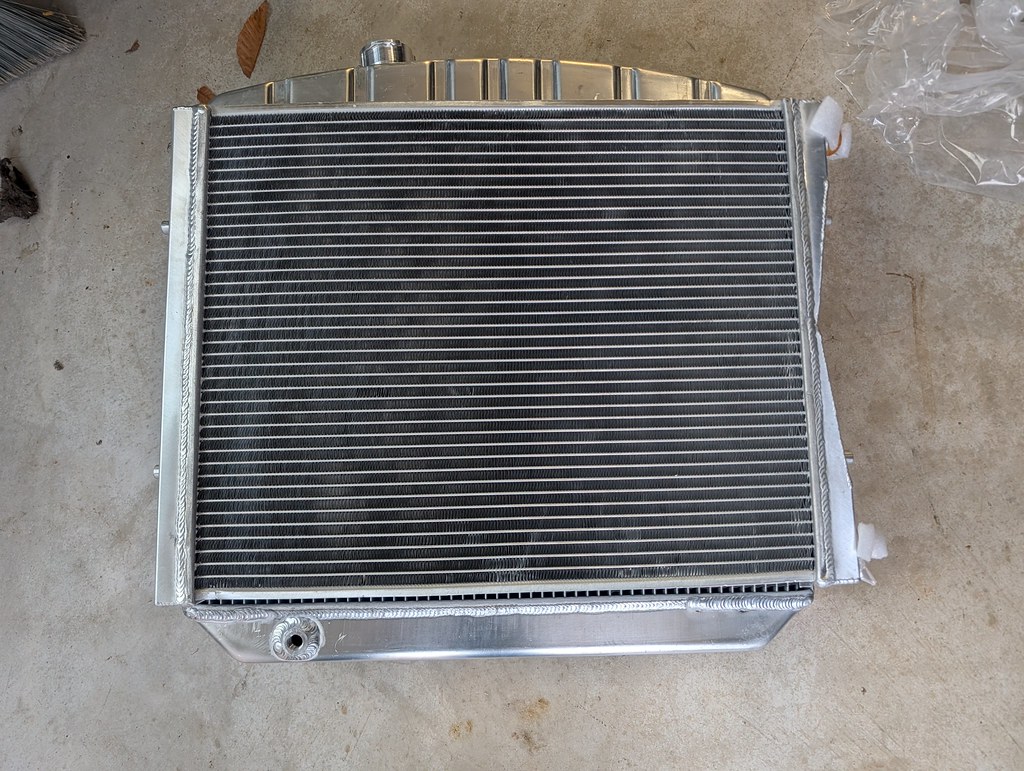
And here's the heat exchanger on top of the radiator. They have nearly the same size core, so that should make for an efficient heat exchanger. Also, the distance between the mounting tabs is about 1/4" longer than the distance inside of the AC condenser brackets. This is supposed to be an upgraded unit for a Cobalt SS.
AC brackets are installed using the stock hardware and locations, so that made things very easy.
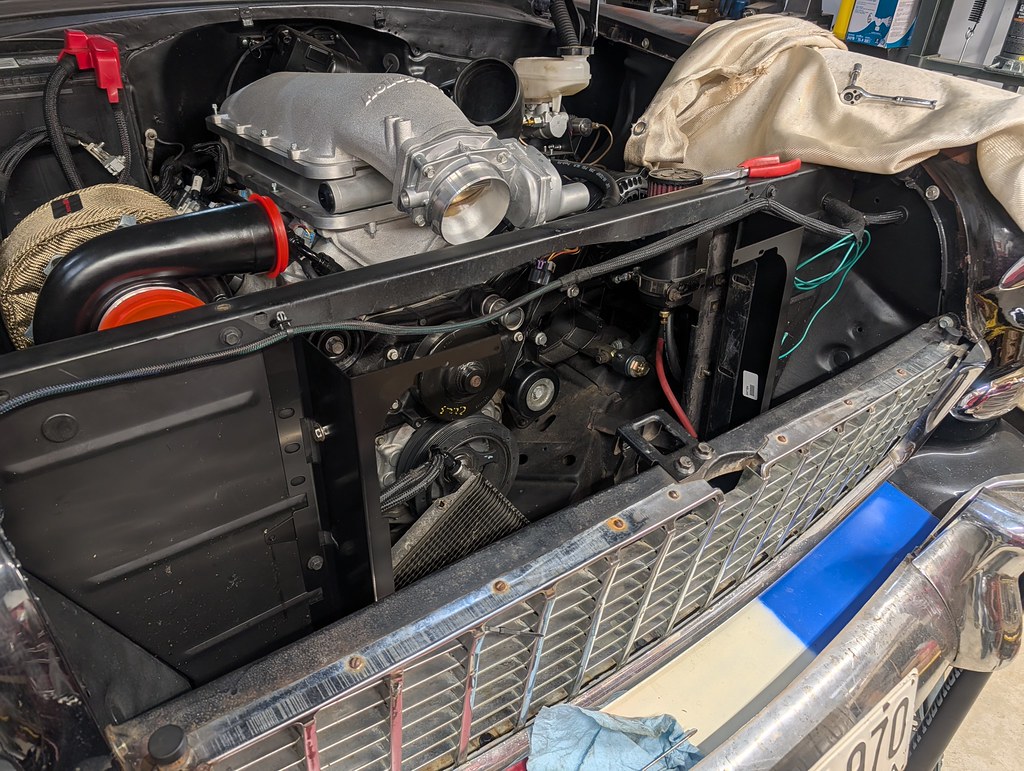
First test fit of the condenser was disappointing. The filler panel hit the condenser and required some clearance around a hump to fit. I was hoping that it would have fit in without modification, but that's how it goes sometimes. It was minor, but I didn't want to change the location of the condenser because it came with pre-bent hard lines to the dryer. I know this isn't the final location where I will put it, but thought it would be good to test fit to get some measurements. It's going to be very close, but doable.
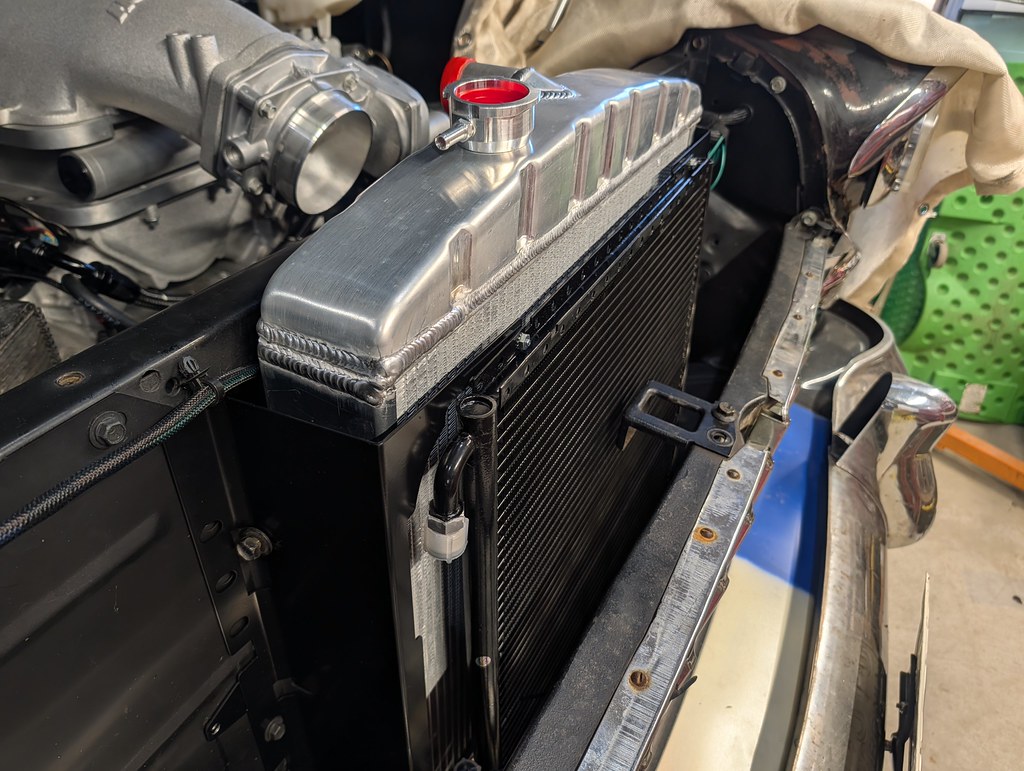
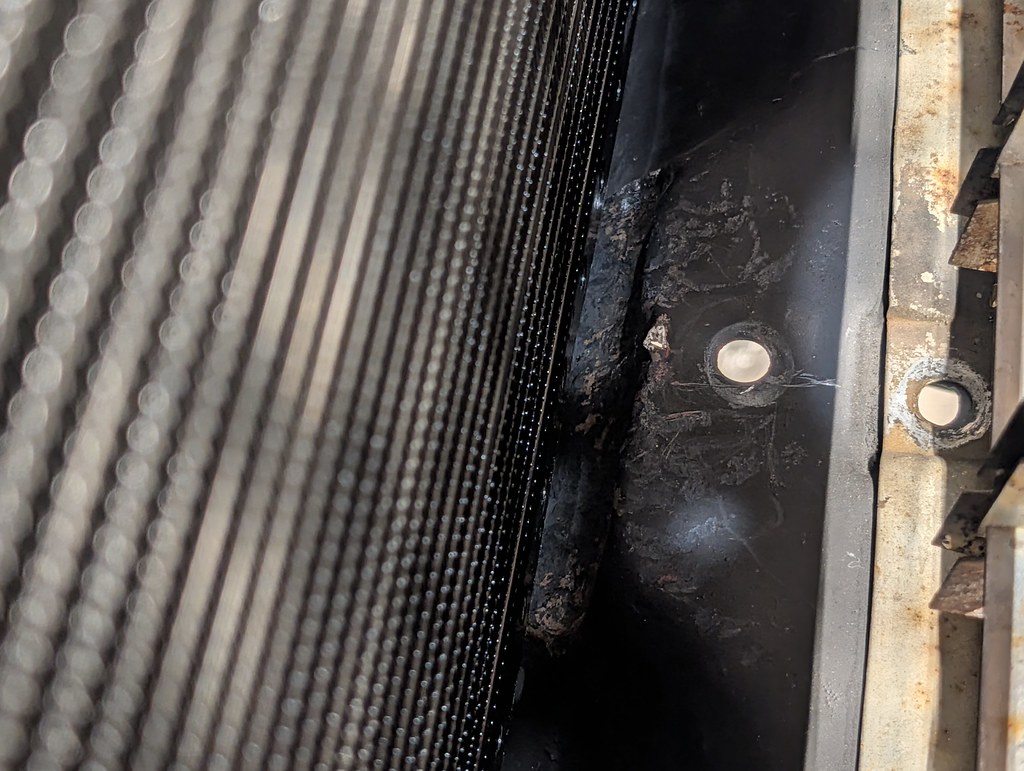
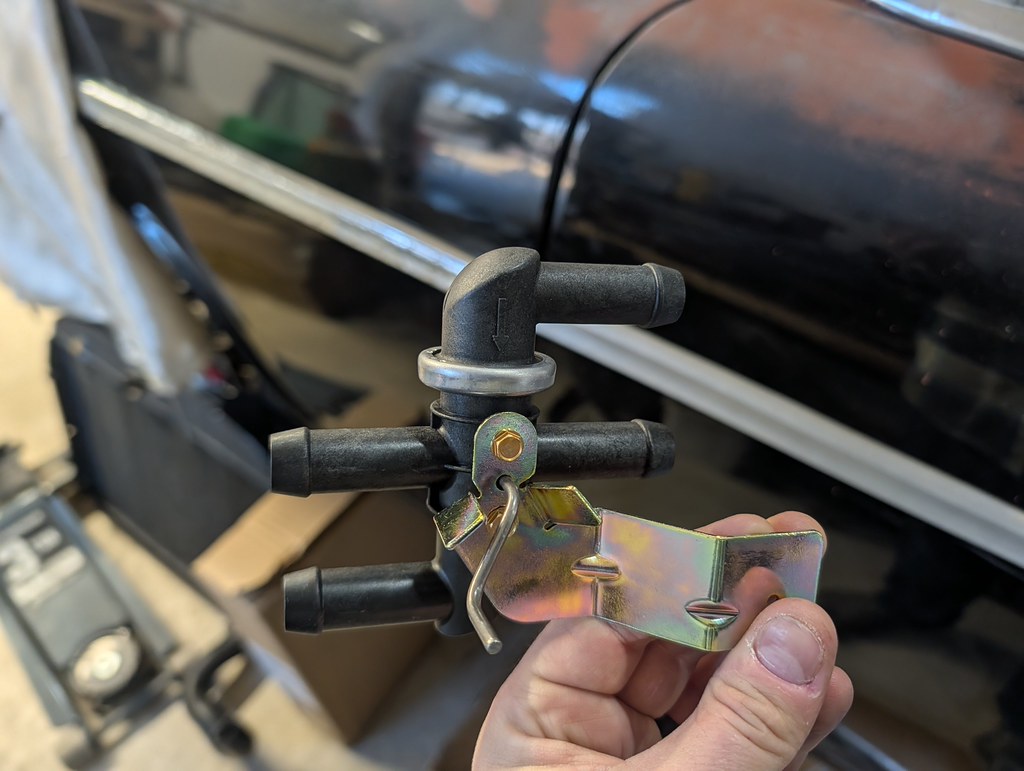
I was also looking at different options for the heater block off that is needed for Vintage Air Gen1 unit. I found that Old Air Products sells a Bypass Heater Valve, Cable Operated, Pull to close 25-1019 that will close the flow to the heater box, but allows for recirculation. This is a better option for LS engines so that the coolant is still flowing through the ports. Some have had issues plugging them off so I figured this would be a safe option.
Last up was just a cool trade that I stumble on. I found a guy selling a Whipple supercharger that was disassembled and needed new rear bearings, so I picked it up really cheap. I found what it needed and slowly assembled it and got it all back together properly. I had it online for sale on FB Marketplace with an option to trade for LS parts. Some guy reached out and had a T56 transmission with new clutch, TOB, shifter and a few other new parts for trade. I had to meet him about 2.5 hours away, but it was much more useful to me than the supercharger. A company SWS motorsports sells an adapter plate for this supercharger to LS motors using the Holley Lo Ram which was an option, but I decided to stay turbo.
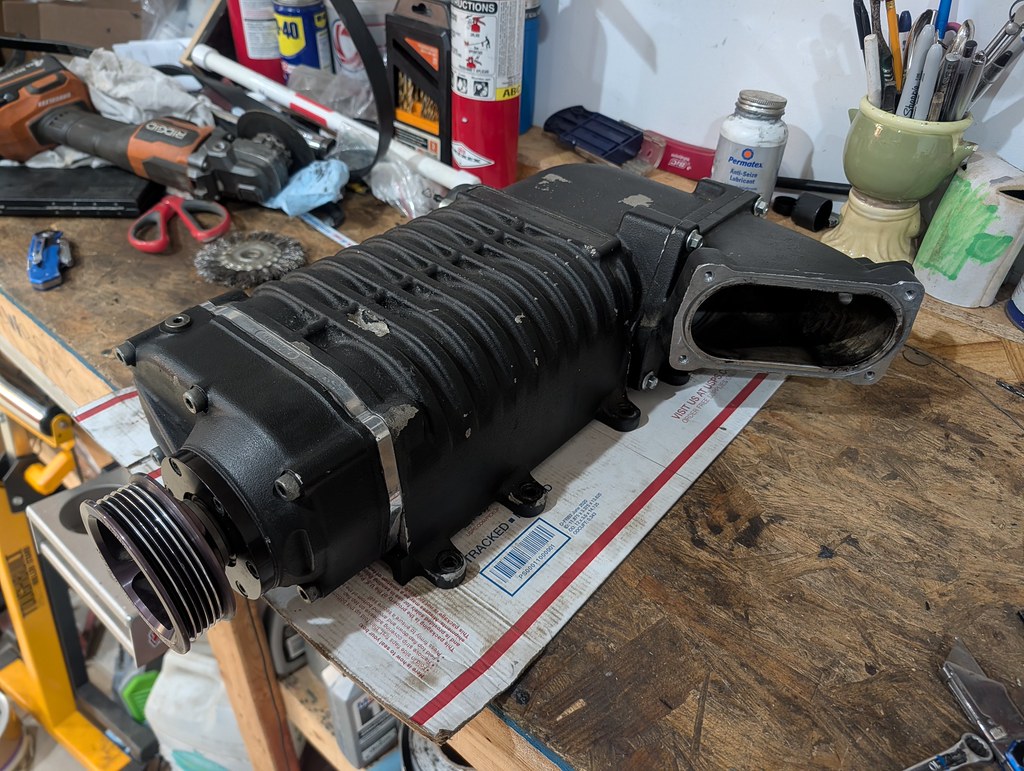
It's a little dirty, but should clean up nicely. Now I kinda want to find a cheap IROC or T/A 3rd gen roller and 5.3 motor to make a fun daily driver.
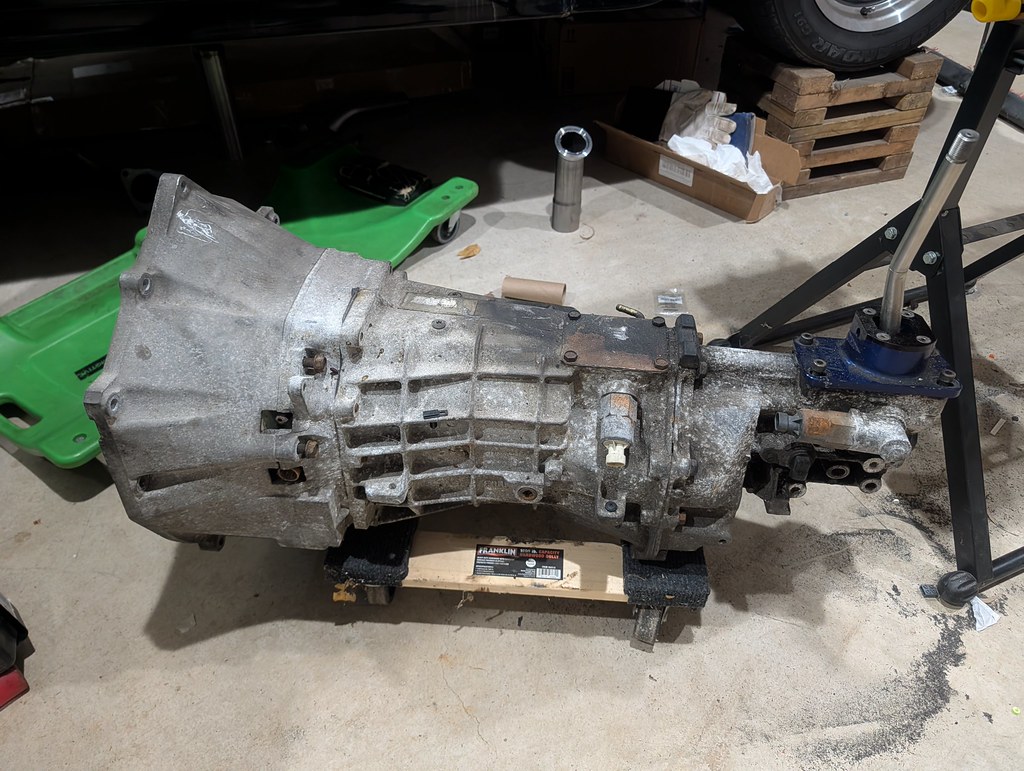
That brings me up to present. I'm hoping to get the hot side wrapped up soon, and then I can focus on getting the cold side buttoned up. I can't wait to hear all of the turbo noises!
Cheers,
Ryan
1955 Nomad project LC9, 4L80e, C5 brakes, Vision wheels
1968 Camaro 6.2 w/ LSA, TR6060-Magnum hybrid and etc SOLD
1976 T/A LS1 6 Speed, and etc. SOLD
Follow me on Instagram: ryeguy2006a
01-14-2026 #4
Registered User
- Join Date
- Sep 2009
- Posts
- 3,002
Continuing to make steady progress. After taking lots of measurements and getting the AC condenser mounted, I knew that was as far forward as I could go. I determined that with the dual mounts on the radiator support, that I would have just enough room to mount the heat exchanger right between the condenser and the radiator. However, that required some cutting. I made a jig for myself before I made any cuts so that I could make a new center mount with the same width before I made any cuts.
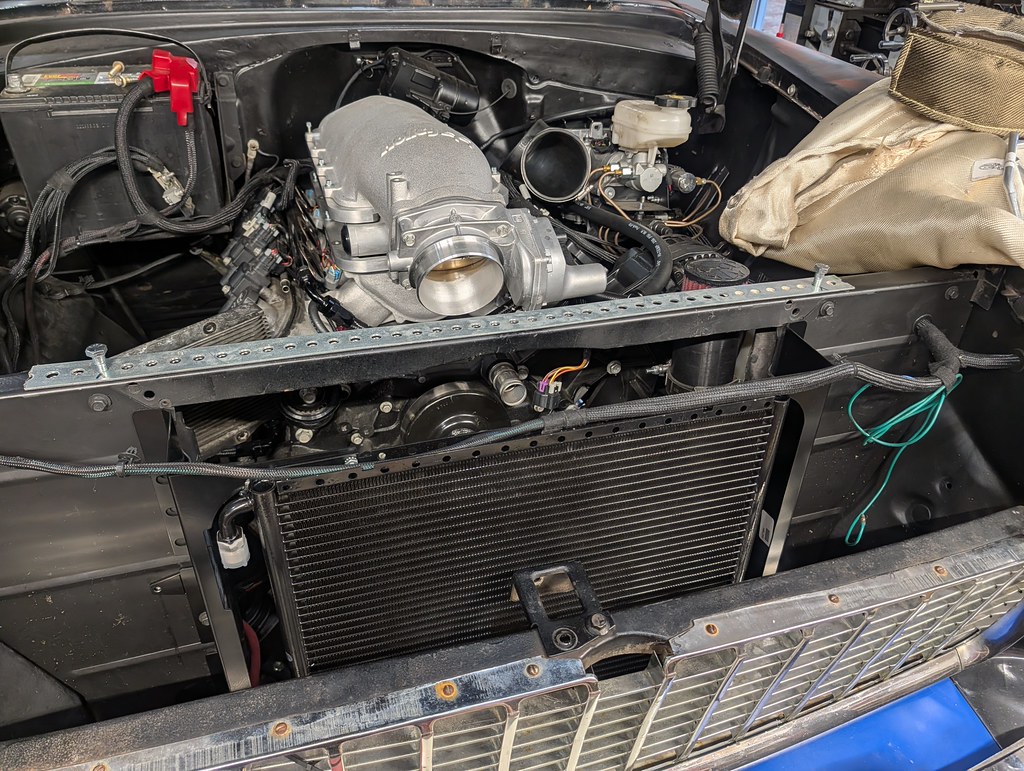
The big cut.
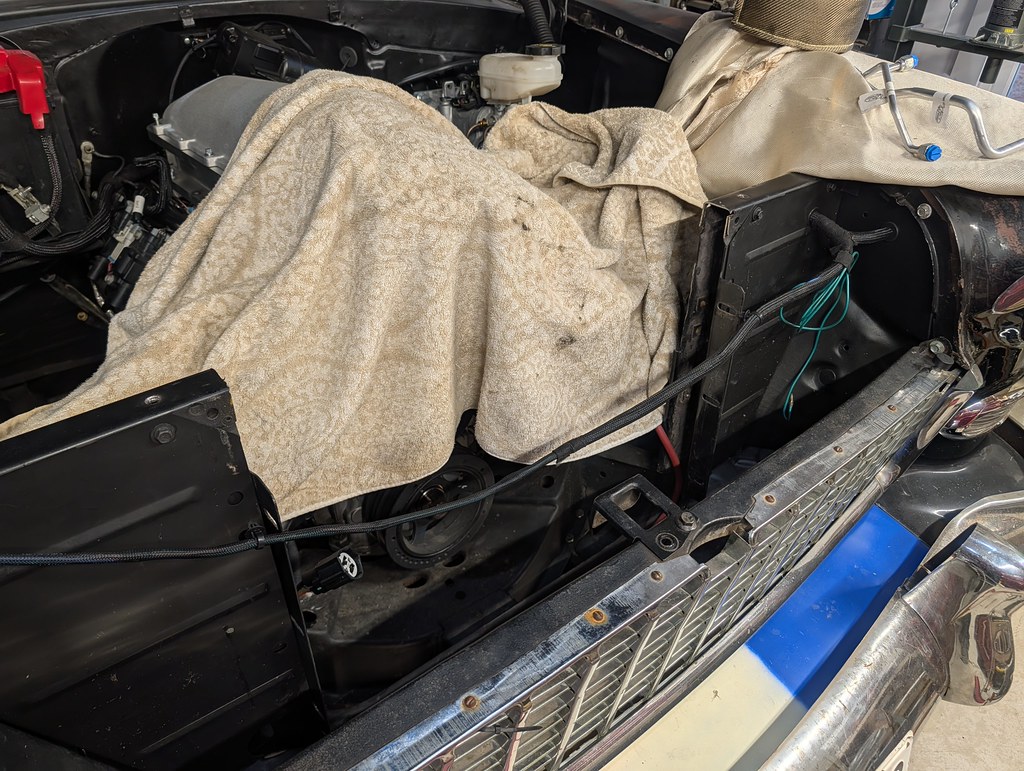
Now it was time to test fit the radiator using the V8 mounts in the 6 cylinder radiator support. This essentially centers the radiator between the radiator support and will give me plenty of room to mount the heat exchanger.
I just have the heat exchanger sitting in this position to confirm that the width will work for me. So happy that it all fits together. I'll rotate the heat exchanger 90* so that the outlets are pointing towards the driver's side where it's less cluttered. I'll mount the heat exchanger pump down low, so I'll find somewhere for that to live. What is even cooler is that by dumb luck, the distance between the AC brackets and the heat exchanger mounts is about 1/8". I'll be able to trim down the mounts just slightly and use the mounts that came on the heat exchanger.
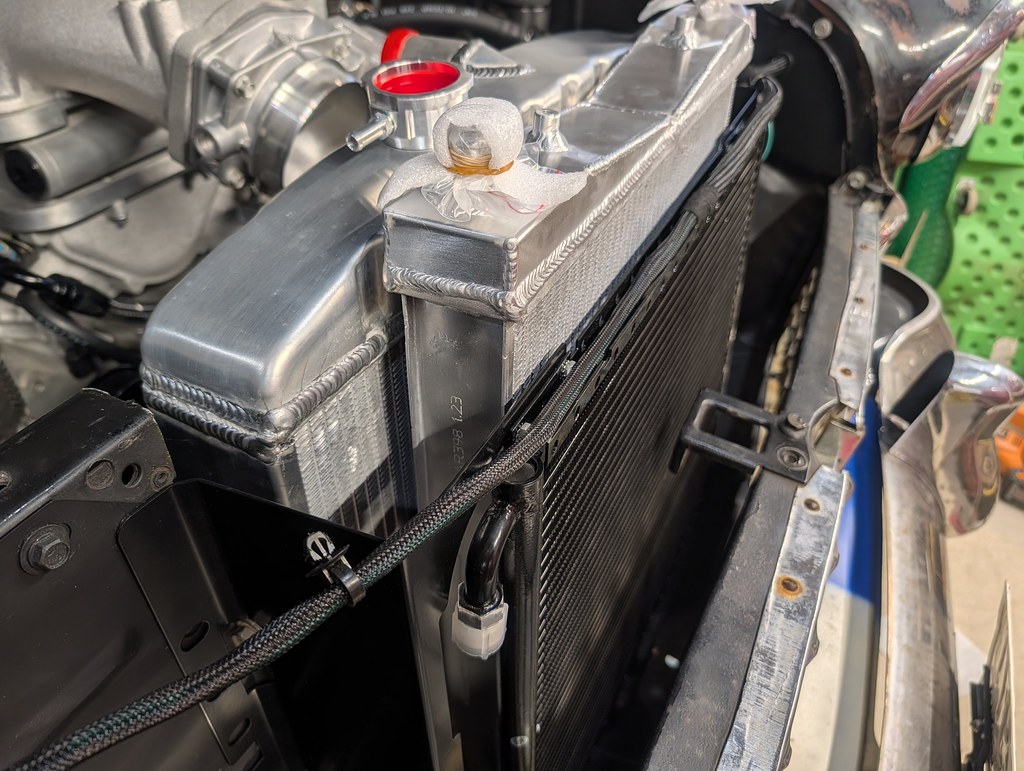
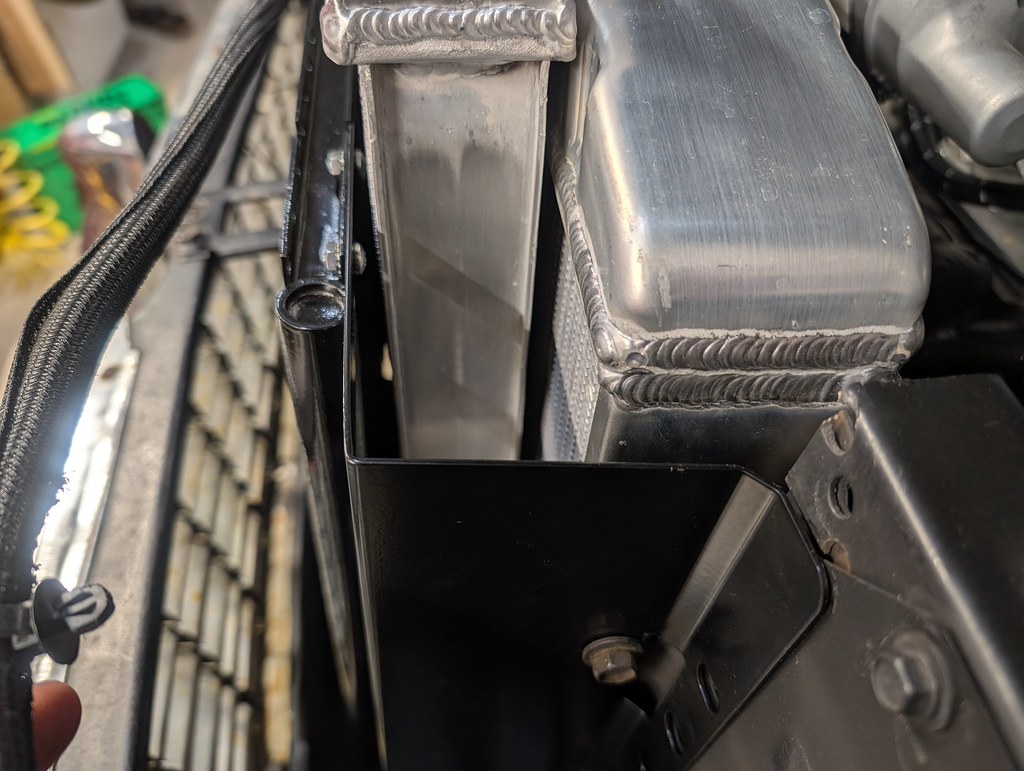
It is fun building cars, but sometimes you take 2 steps forward and one step back. I think that I have a plan that will solve this issue, but I need to do a bit more research. If it works, it will also solve my turbo charge piping issue as well.
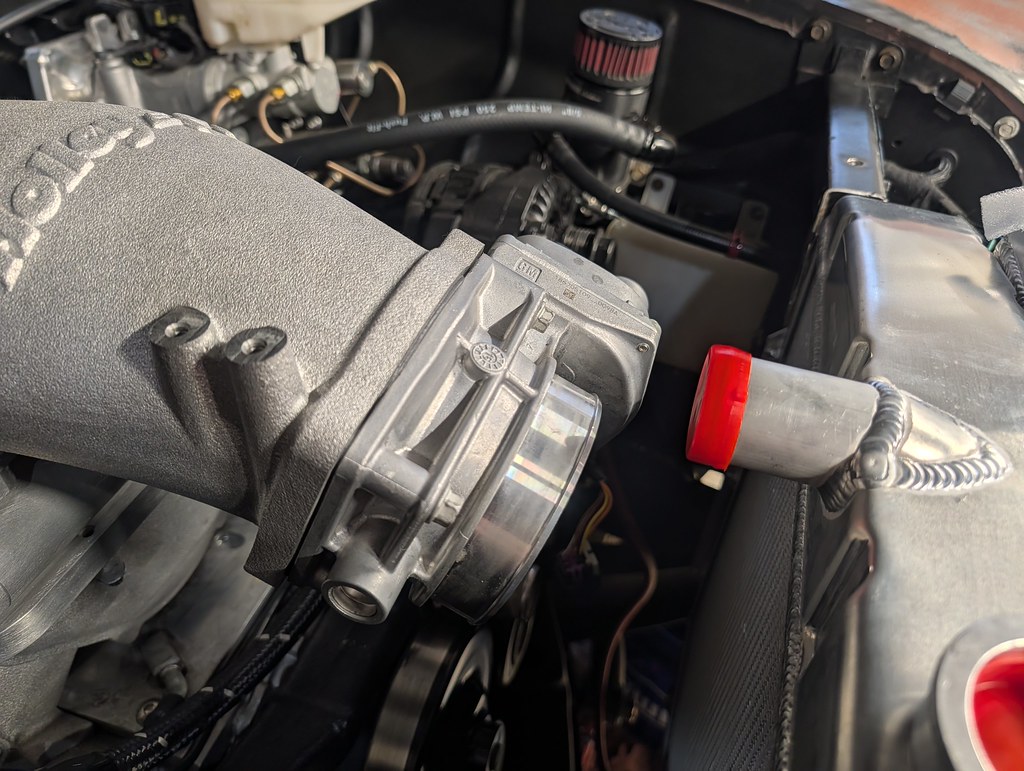
I'm fairly confident that a new or modified intake lid would solve my charge pipe and coolant hose issues. So, after a friend send me a picture of a really cool design he did on fusion, it got me thinking about was CAD options were out there. Then I realized that Chat GPT does a really good job of photoshop and asked it to modify the generic Holley lid. Here's what it came up with after I asked it to move the throttlebody opening to the front and added some ribbing.
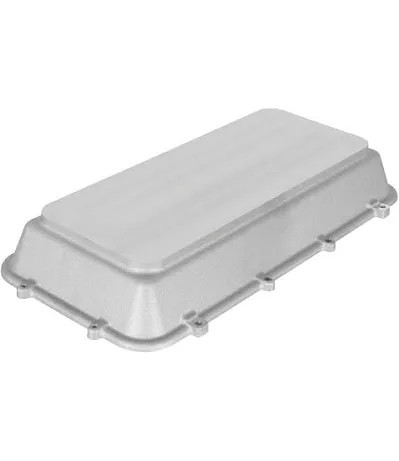
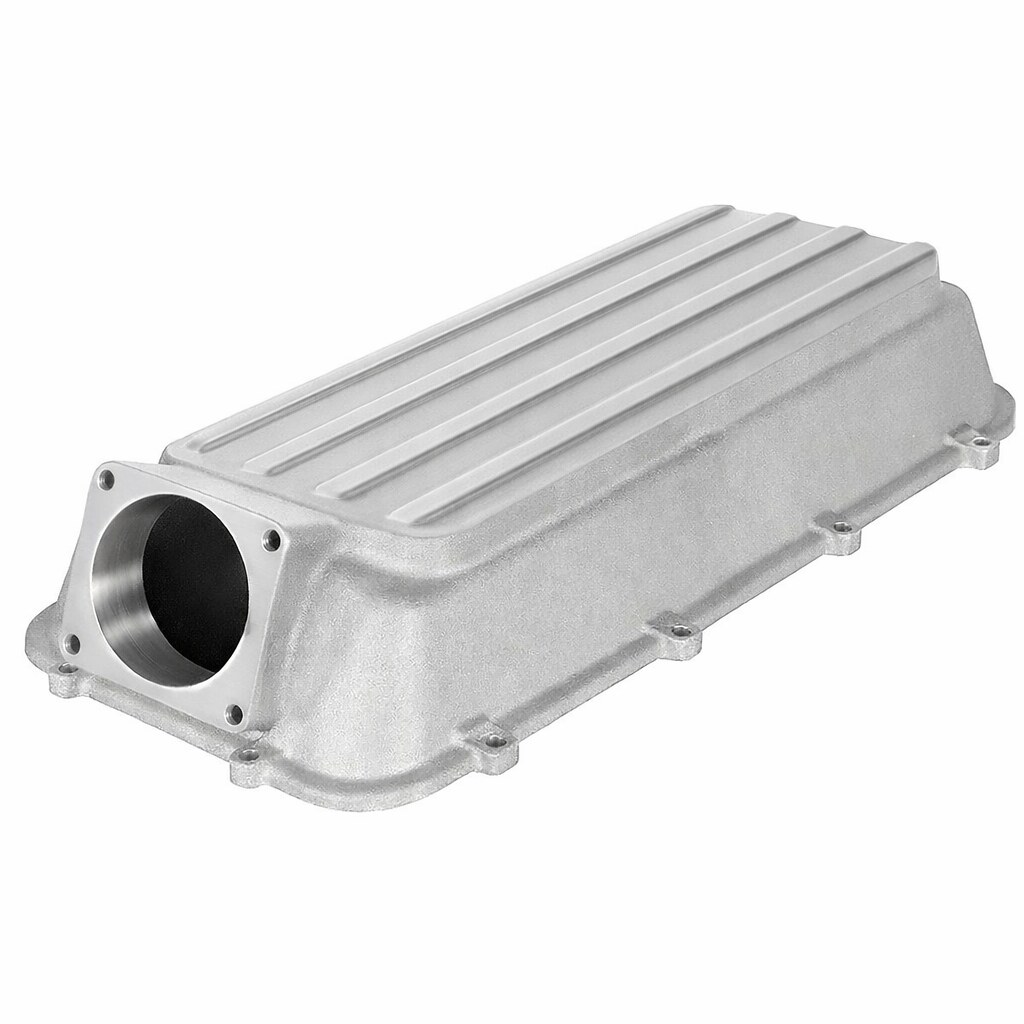
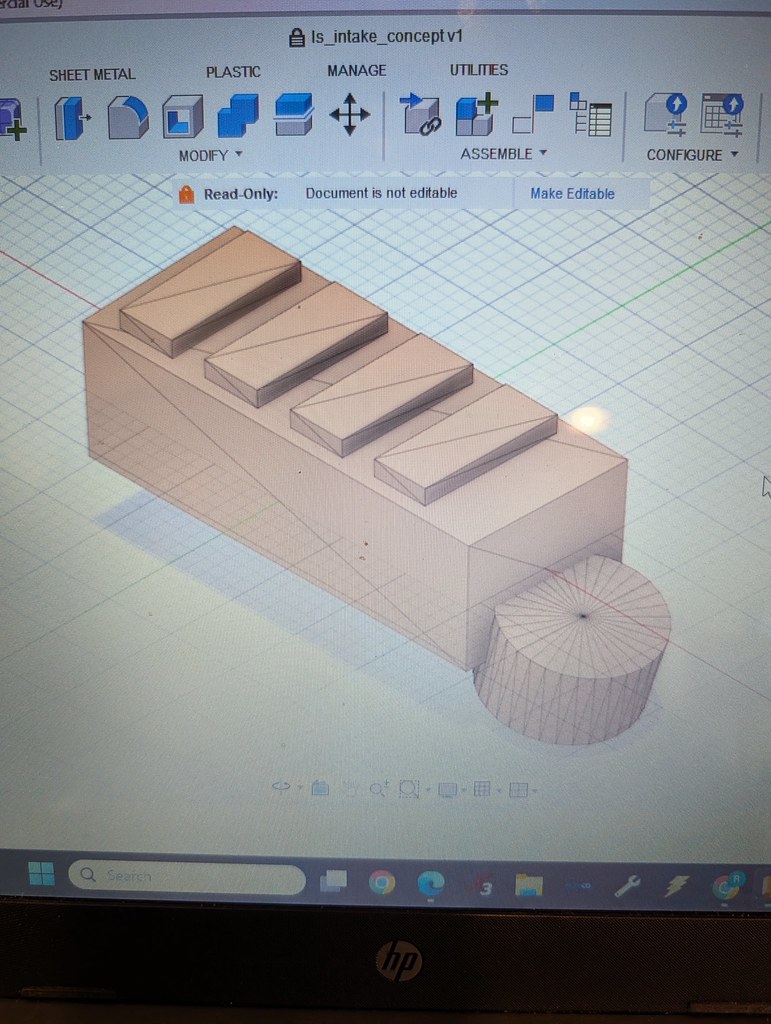
Pretty impressive actually! I don't mind it at all. Then I noticed that people were using it to export to CAD and AI would be able to spit out a model. So I gave it a shot... Well we're not quite there yet with AI haha
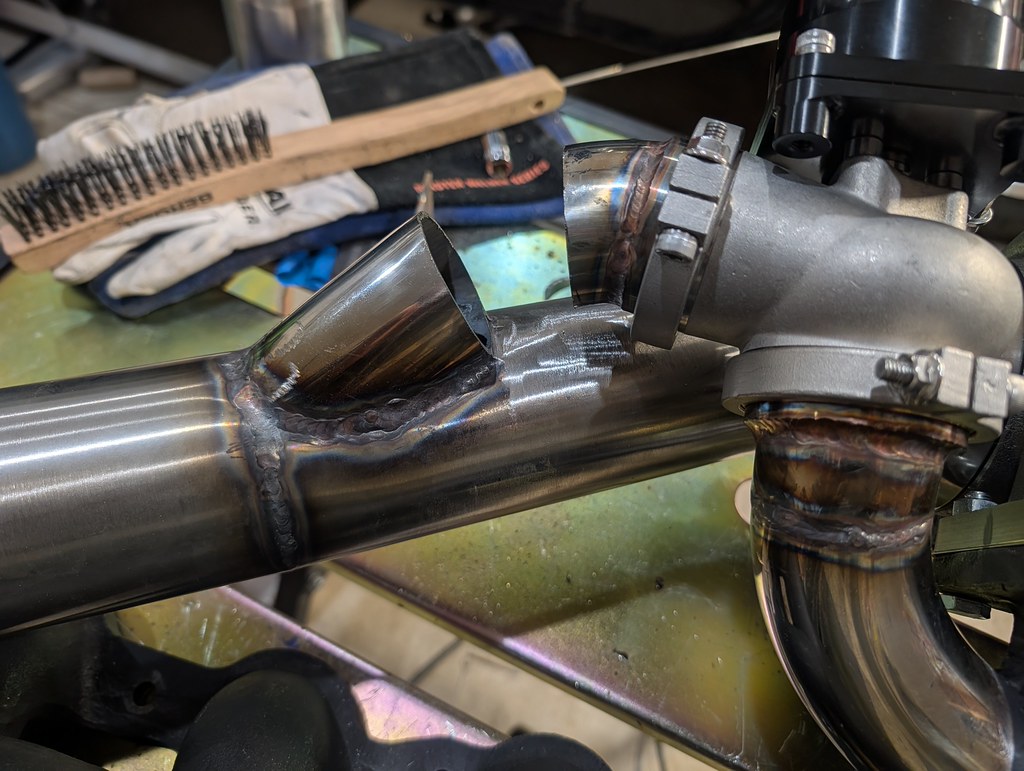
Moving back to the hot side fabrication. I thought that the pipes were welded enough that I could unbolt the downpipe to finish up some welding in tight spots, but unfortunately it still warped and moved on me. So, this time I took no chances and kept it all bolted together to weld and cool. I decided the best course of action was to cut the pipe that recirculates the wastegate back to the exhaust. This also gave me an opportunity to get a burr bit into the hard to reach spots to clean up any flash and excess exhaust piping that was hanging out there. Hopefully this avoids any strange sounds or whistles.
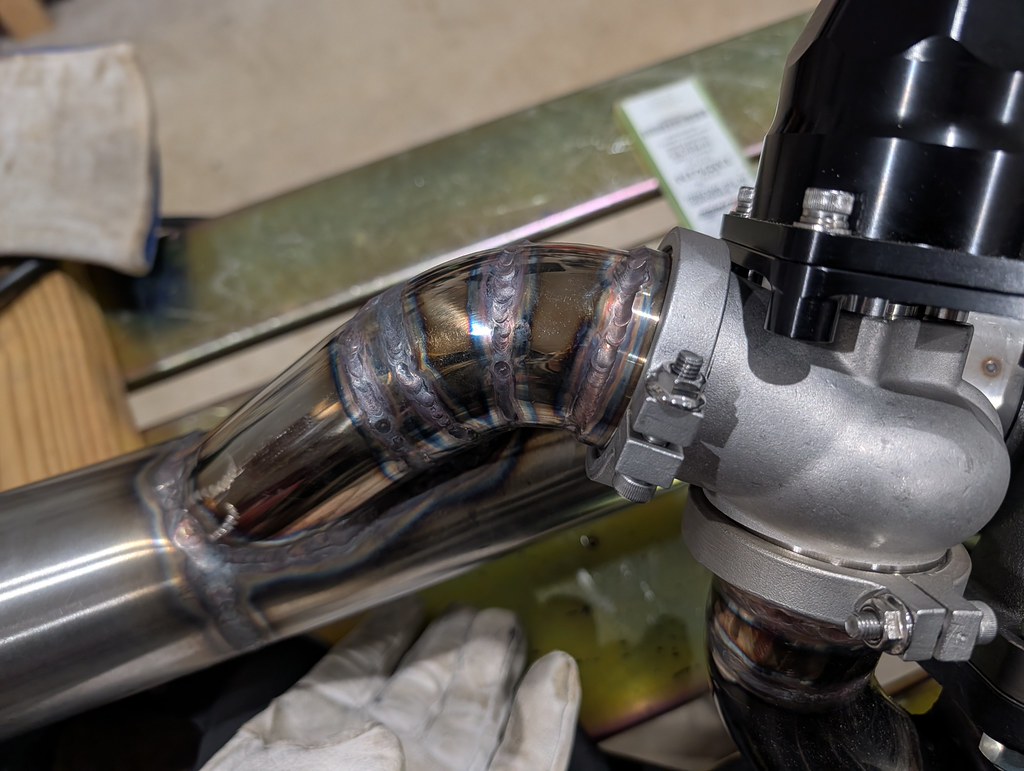
Once that was done, I took it all back apart and confirmed fitment on the car and it all fit together just like it came apart. Very nice! Now it was time to start connecting the rest of the hot side together. This took a lot more effort than I thought, but I now have all the pipes tacked together and things fit great.
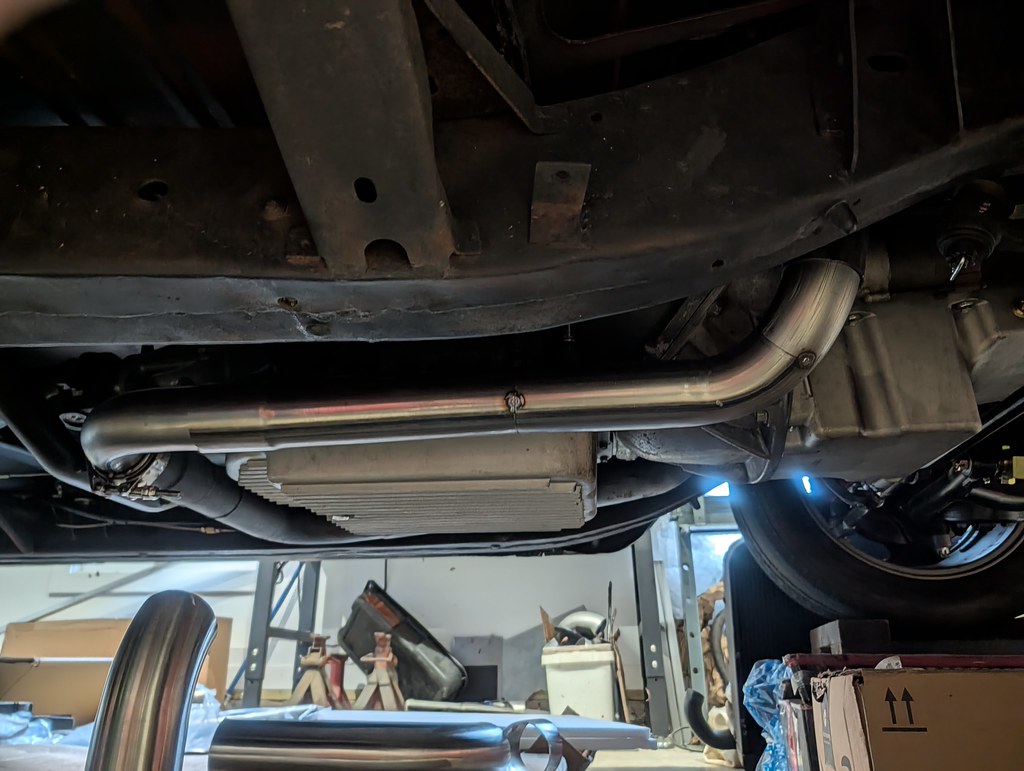
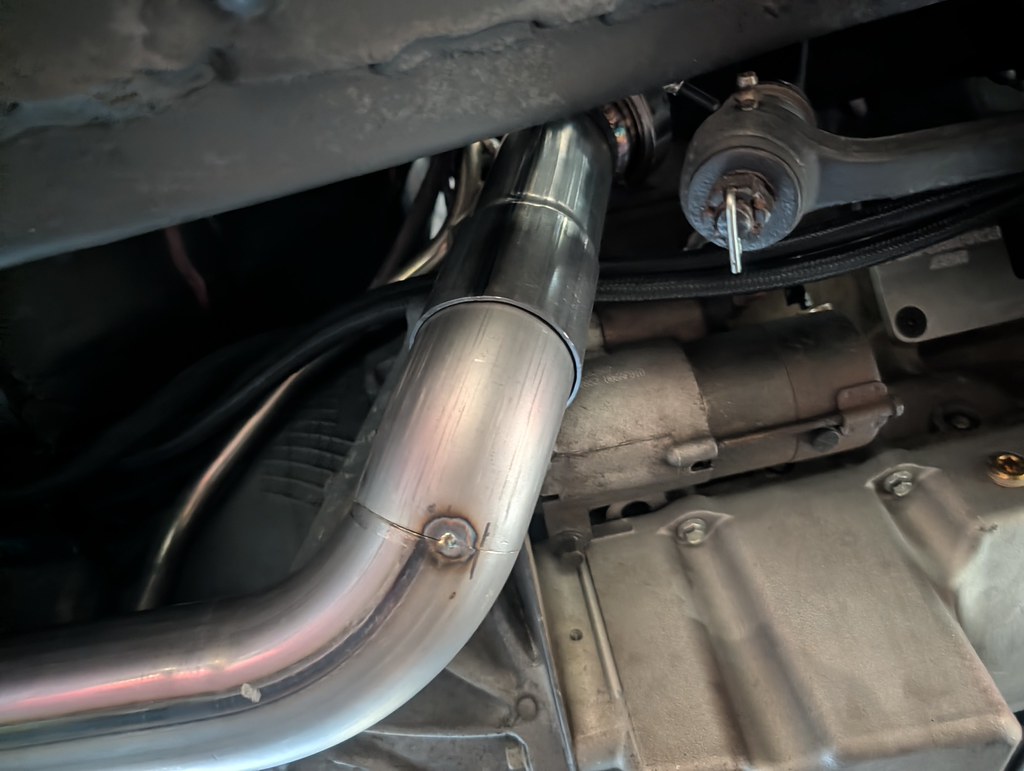
That's all for now. Hoping to get some time here and there throughout the week to get the hot side pipes all welded up now that I have it all cut and fit. I'm also going to add an exhaust hanger at the rear where it goes around the transmission to support the weight. Once that is finished up, I can work on the rest of the downpipe and get the muffler hooked back up. I'm probably going to just keep the muffler and side exhaust to keep things simple. If I have time I may try to mock up a pipe to go over the axle.
Thanks,
Ryan
1955 Nomad project LC9, 4L80e, C5 brakes, Vision wheels
1968 Camaro 6.2 w/ LSA, TR6060-Magnum hybrid and etc SOLD
1976 T/A LS1 6 Speed, and etc. SOLD
Follow me on Instagram: ryeguy2006a
02-06-2026 #5
Registered User
- Join Date
- Sep 2009
- Posts
- 3,002
I've been continuing to work on the down pipe and decided to add another vband near the frame, so that I could remove the pipe much easier. I put a few tack welds on the pipes, then my old welding mask died on me. It was a cheaper unit I got on Amazon probably 10 years ago, so it's served it's purpose for me. When looking around I found a Vulcan unit that was on sale so I picked that one up. What a huge difference it made being able to see. The viewing window is significantly larger than the old one I had, and the auto dim is much more sensitive.
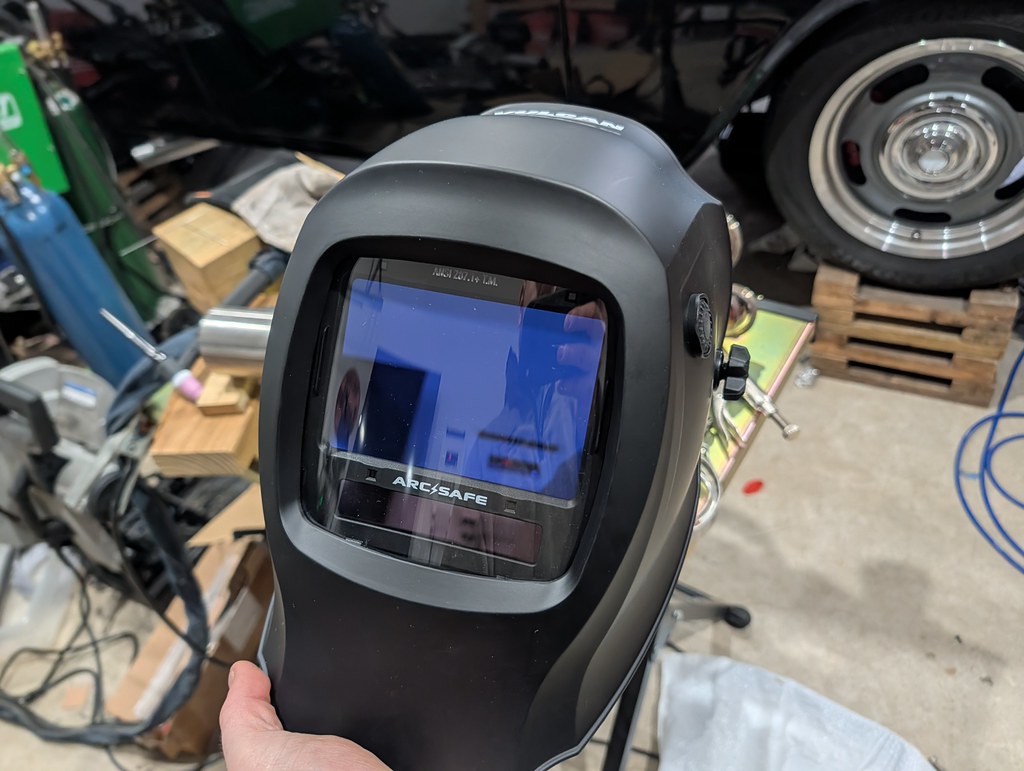
With the practice I've been doing on the pipes and with the new helmet, I was able to lay down some of the best welds I've done so far. Pretty happy with how they turned out.
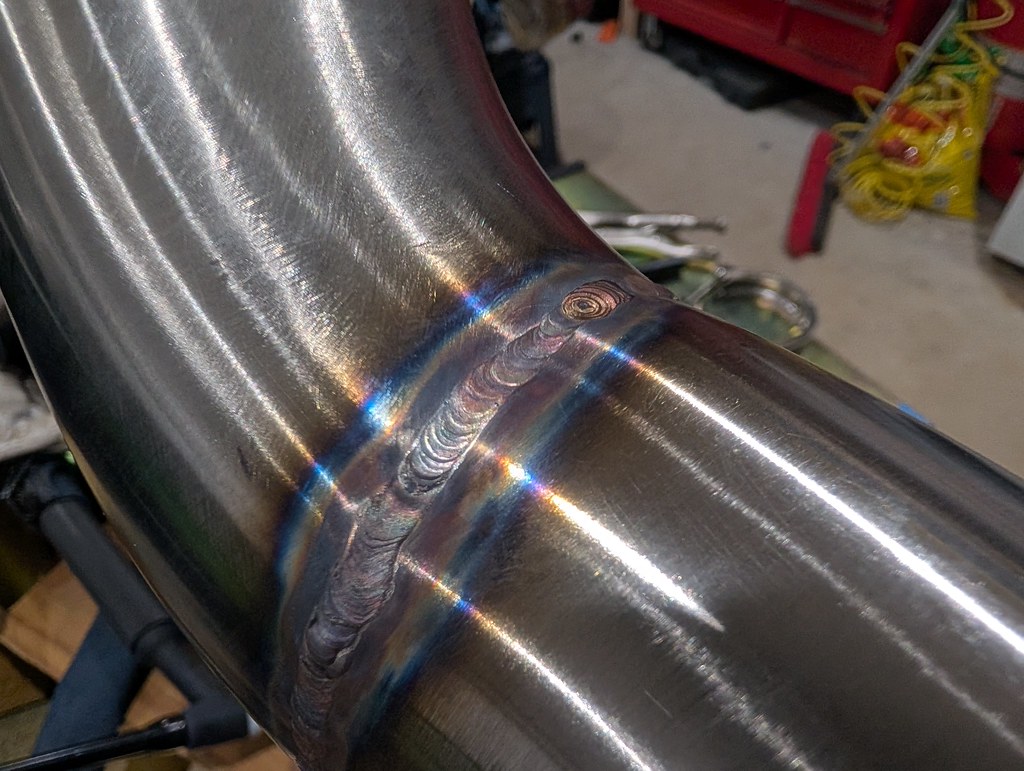
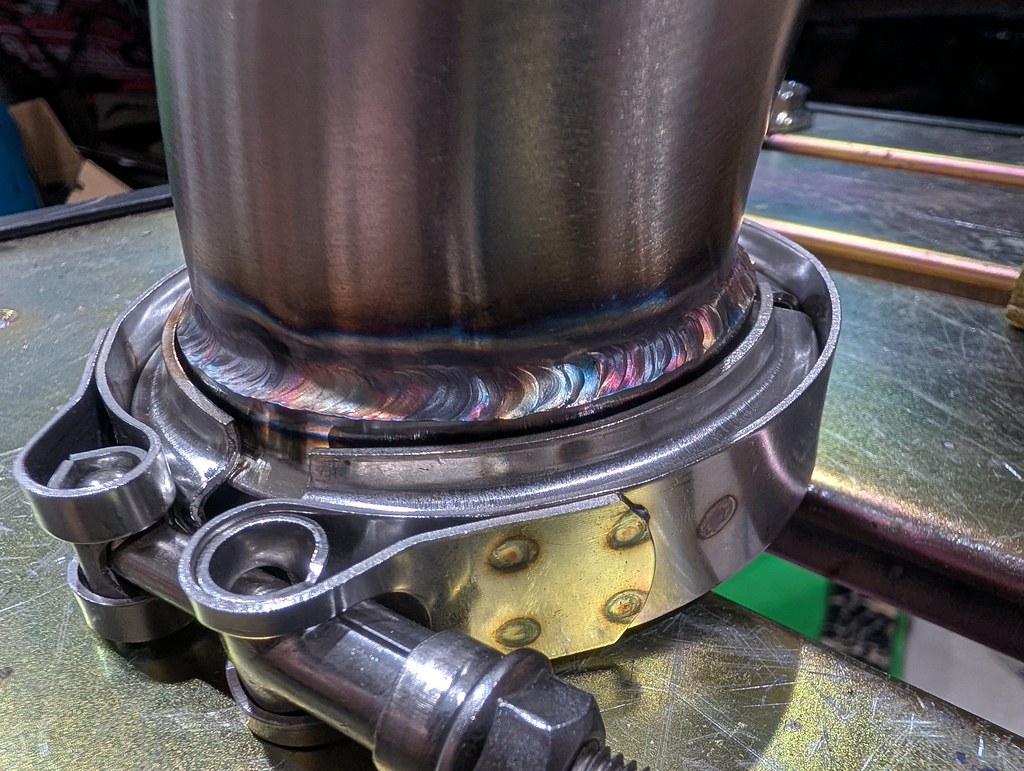
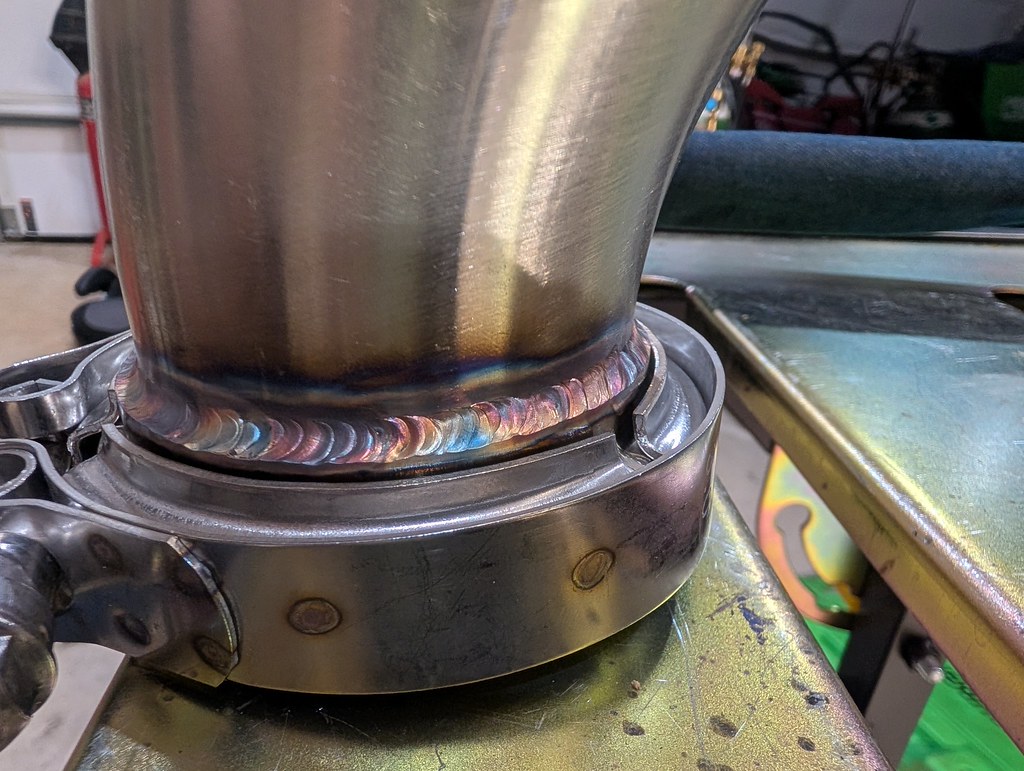
I still need to weld the O2 bung to the pipe, and that section will be done. Then I am going to redo my tailpipe and the full hot side will be fully welded. I'm going to wrap the crossover pipe and add a hanger that will attach to the transmission. Then I can call the hotside completed.
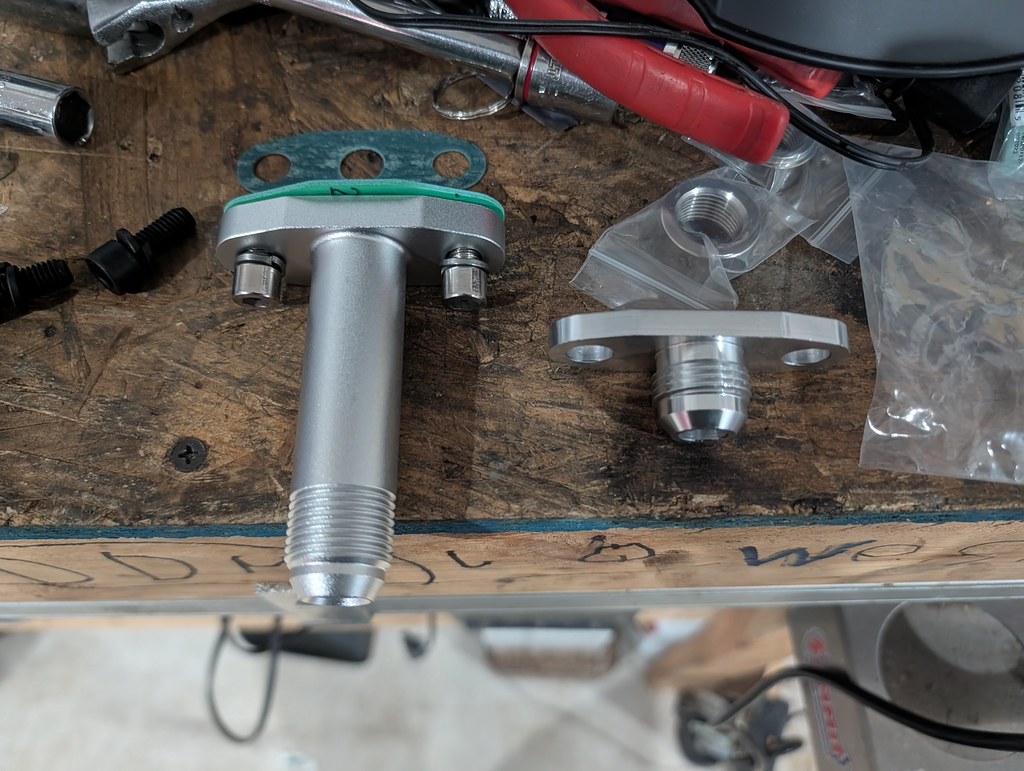
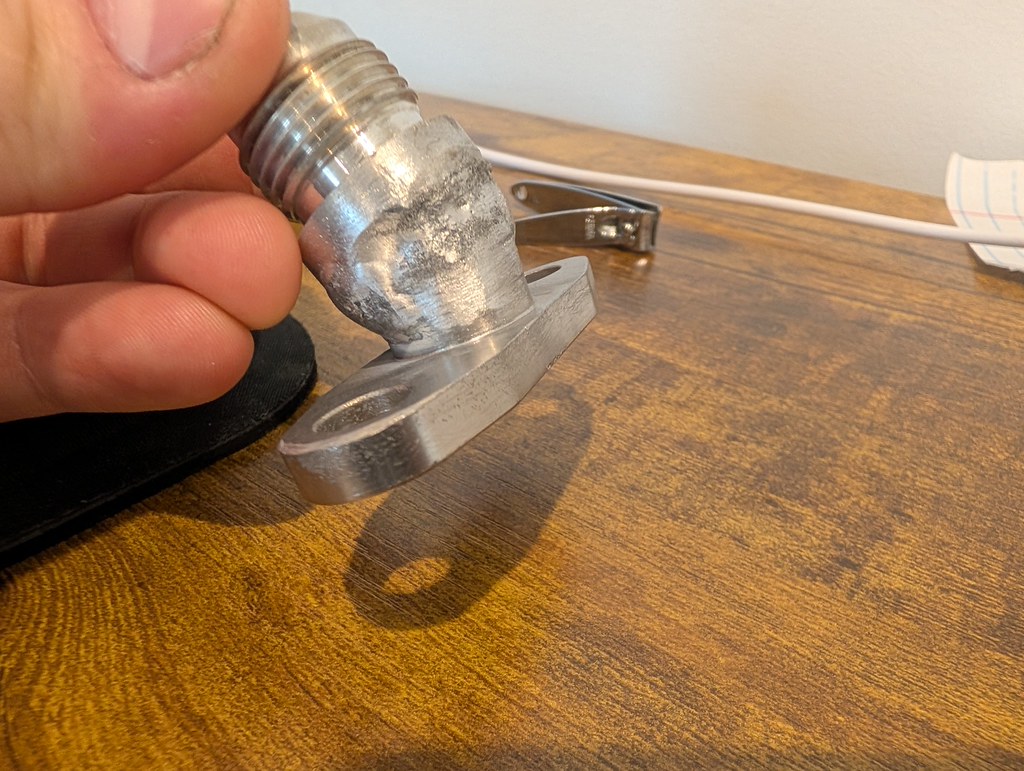
I started to test fit my other components and the turbo drain that came with the VS racing kit wouldn't allow the fitting to be tightened because it hit the housing bolts. I bought an extended drain fitting and that one was too tall. So I opted to trim off the one that came in the kit and weld the -10AN bung I had to it. I've only welded a few things that were Aluminum and I definitely need more practice, but it's stuck together.
Right about this time we were hit with a huge snow storm that brought 7" of snow and about a 1/4" of ice on top of it all. I had to move my tractor into the garage to keep it from gelling up as the temps dropped to sub-zero. My welding station had to be taken down to fit it inside.
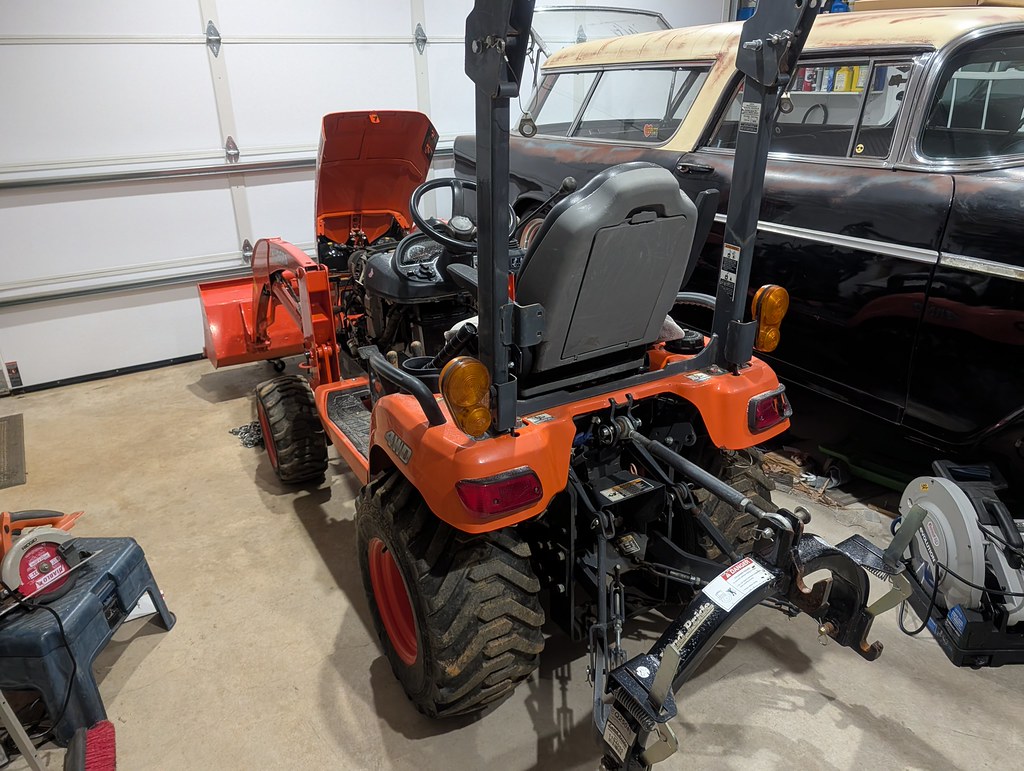
The temps finally came back up this week and decided it was time to move the tractor back outside. With that outside I decided to tackle the mounting of the heat exchanger and see what the final fitment of my cooling blocks will be. I started by locating the heat exchanger within the vintage air brackets. It fits perfectly in between which makes me very happy. I had to cut some holes into the driver's side to allow for the heat exchanger lines to come out.
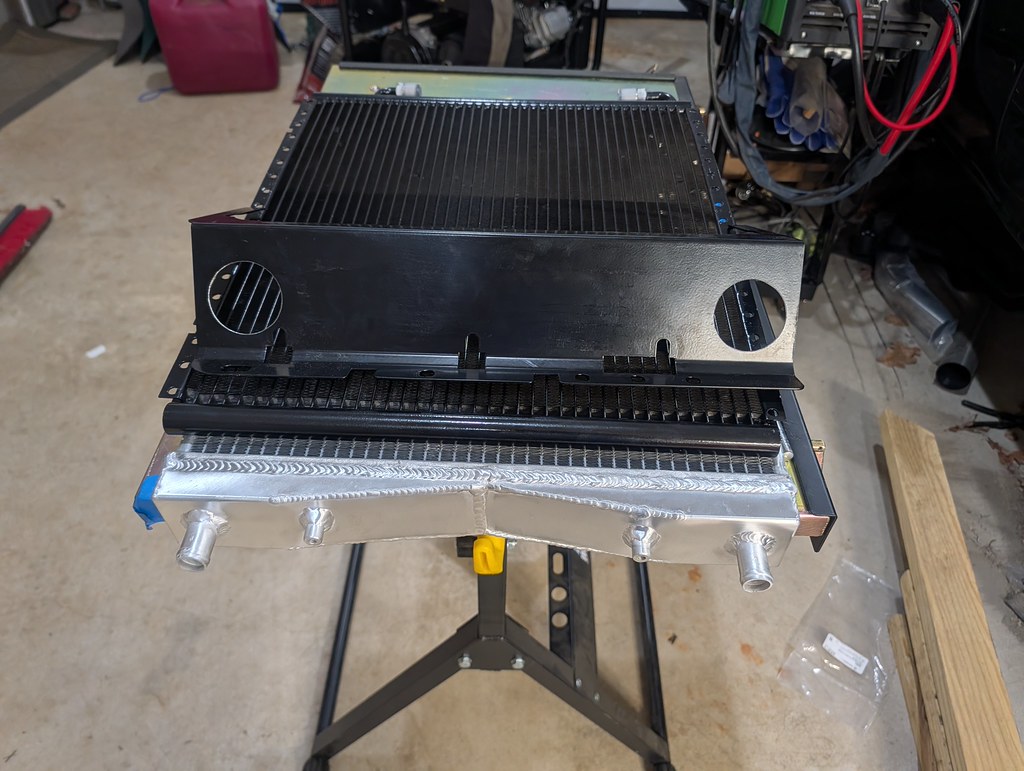
Once I confirmed fitment and ensured that there was enough room for me to tighten the VA condenser fittings, I drilled the side mounting holes. It came together really cleanly. The radiator will tuck in nicely as well. Very happy with this setup so far.
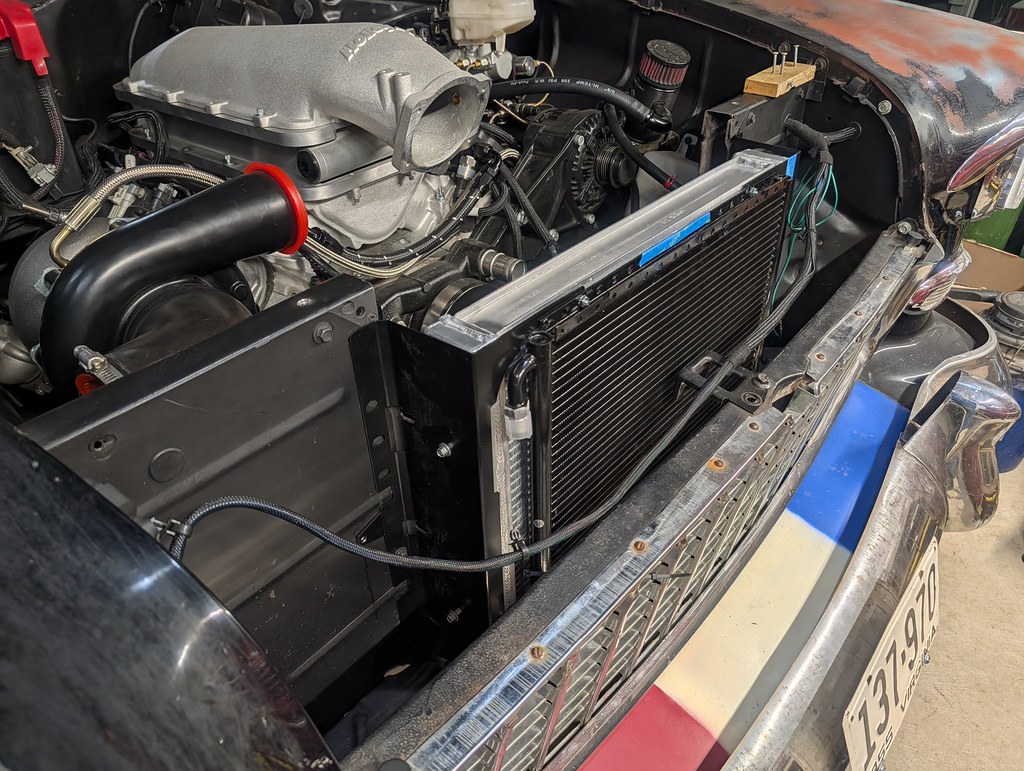
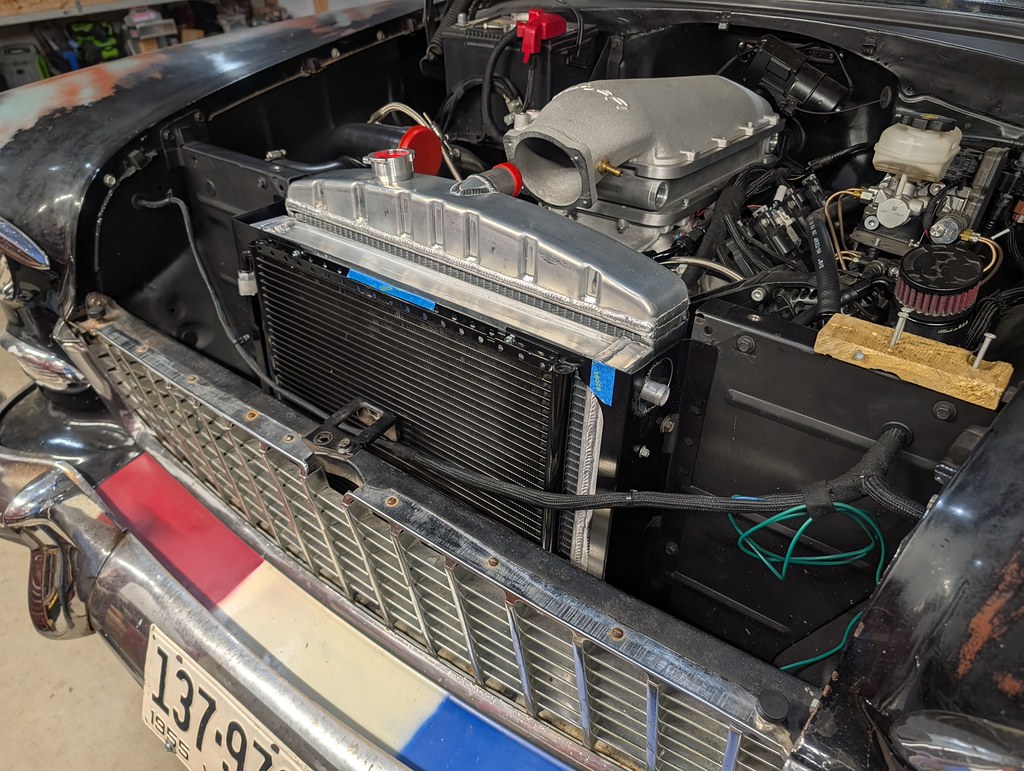
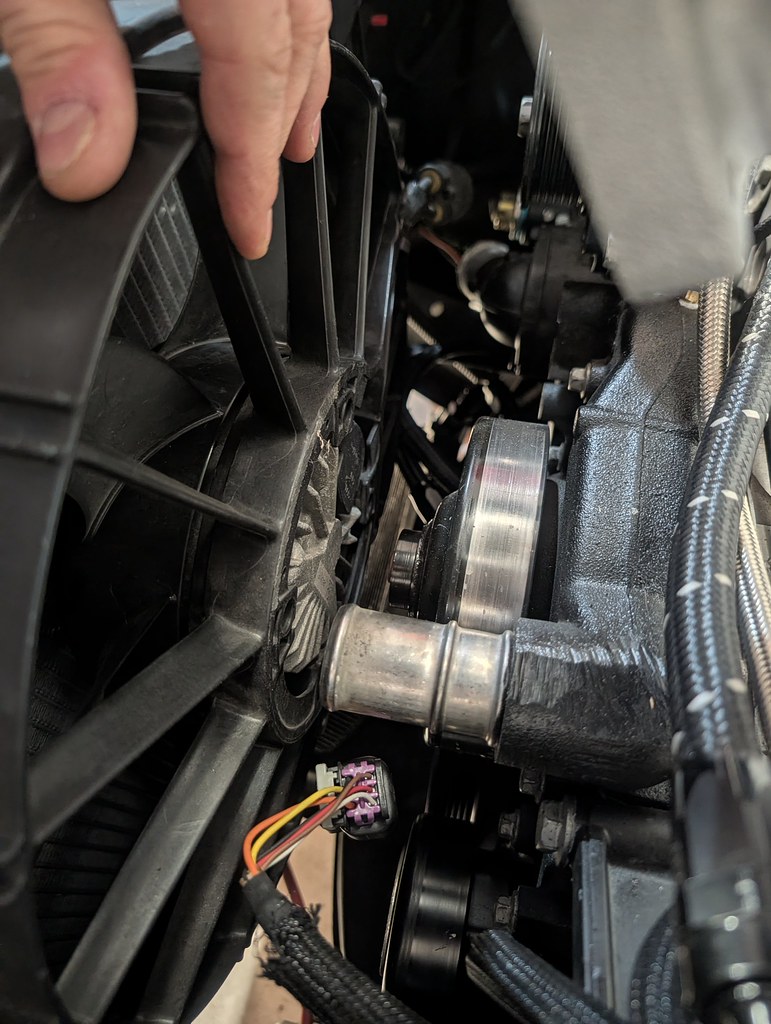
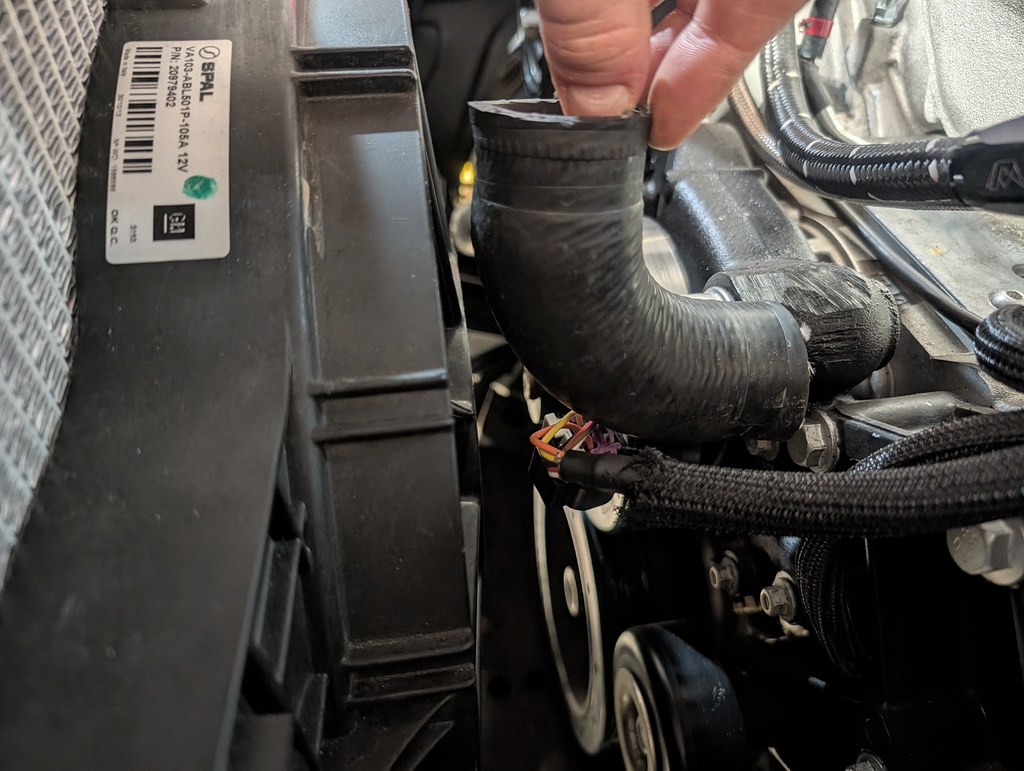
I still need to finalize the fitment of the cooling fan which should fit about 1" closer to the radiator once mounted. The radiator hose will be tight, but I'll be able to sneak it up and around once I trim off a bit of the hose inlet and move the radiator fan.
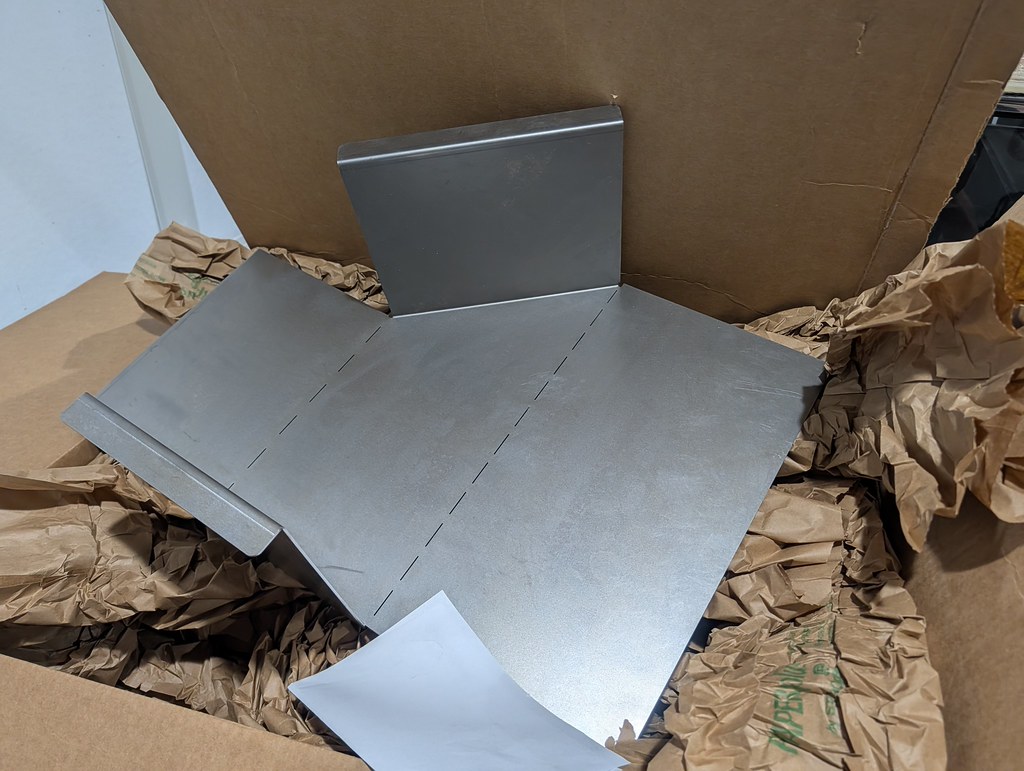
One last thing that is unexpected, but super cool is the rear battery relocation. A guy I've been messaging on line with for a few years works with a restoration shop and did a 56 Nomad and designed this really cool rear battery pocket in CAD. I've been wanting to do that every since I bought the car, but didn't want to take the time to build one. I paid him to let me use his file, then sent it into Send Cut Send. Was very impressed with the company's site as this is the first time I've worked with them. They offered options for me to add bends which is super helpful. In under a week it was delivered to my door. I also picked up a Gen6 Camaro battery cable which has a factory rear mounted battery. Is very heavy gauge wire and will make relocating the battery much easier.
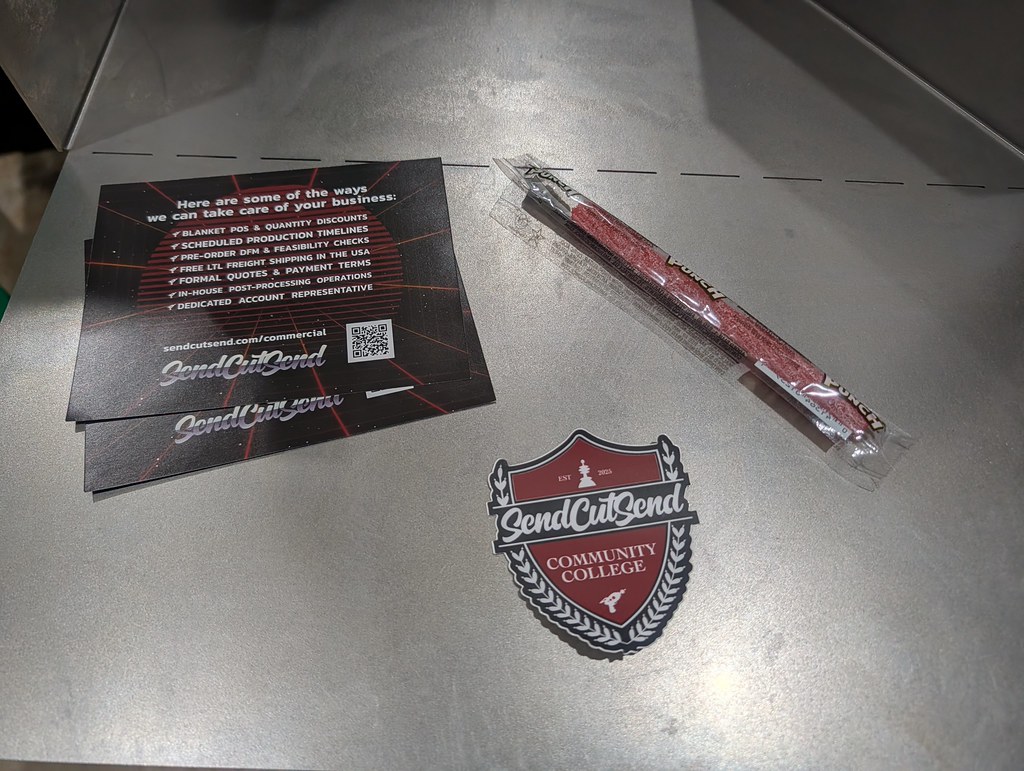
I bought a bunch of TIG Filler rod too so I'm hoping to use this project to get more seat time. I'm still up in the air at this point about how I'm going to do my cold side. I'm either going to buy a new lid that will line up the TB with the turbo outlet, cut and reweld my stock lid, or build a cold side pipe two really tight 90* bends. I need to decide soon.
Cheers,
Ryan
1955 Nomad project LC9, 4L80e, C5 brakes, Vision wheels
1968 Camaro 6.2 w/ LSA, TR6060-Magnum hybrid and etc SOLD
1976 T/A LS1 6 Speed, and etc. SOLD
Follow me on Instagram: ryeguy2006a
02-23-2026 #6
Registered User
- Join Date
- Sep 2009
- Posts
- 3,002
At this point the intake lid is ready to be welded. I was having a bit of trouble getting the weld to puddle up on the thick 1/2" TB flange, and I had been in contact with a local guy who does some great fabrication on racecars. I reached out to see if he'd be interested in welding the flange to my TB and he was extremely reasonable so opted to have the professional do this job. His own personal turbo car has seen as high as 40 psi and he assured me that I won't have any issues with the 8-12psi I'll be running.
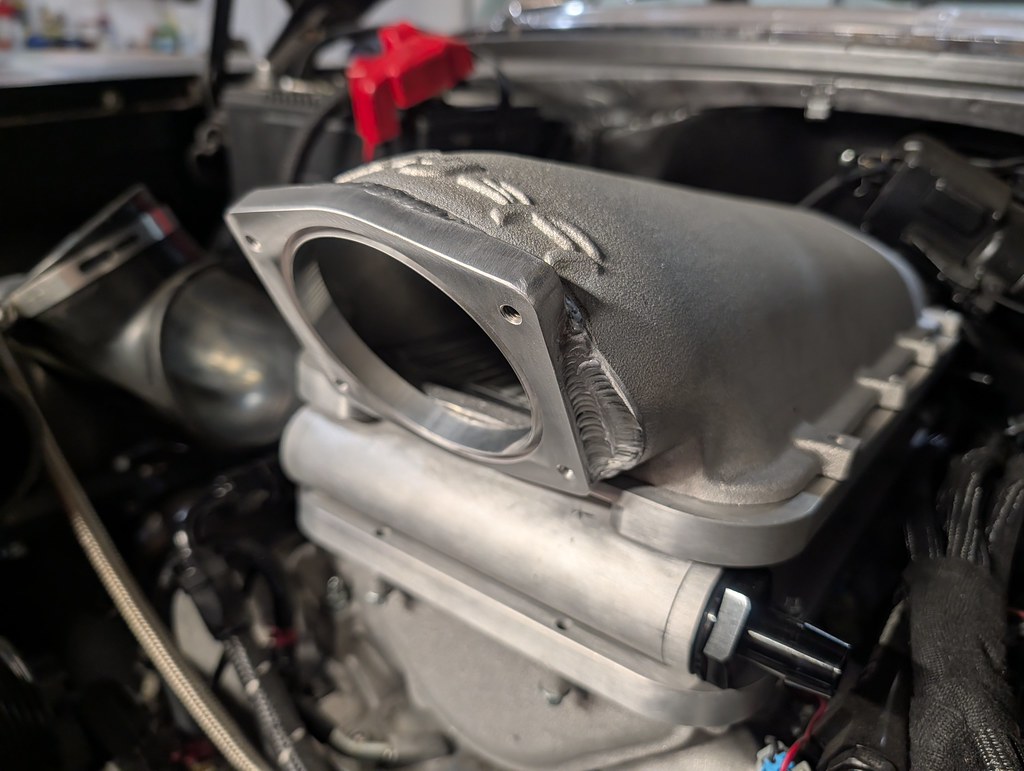
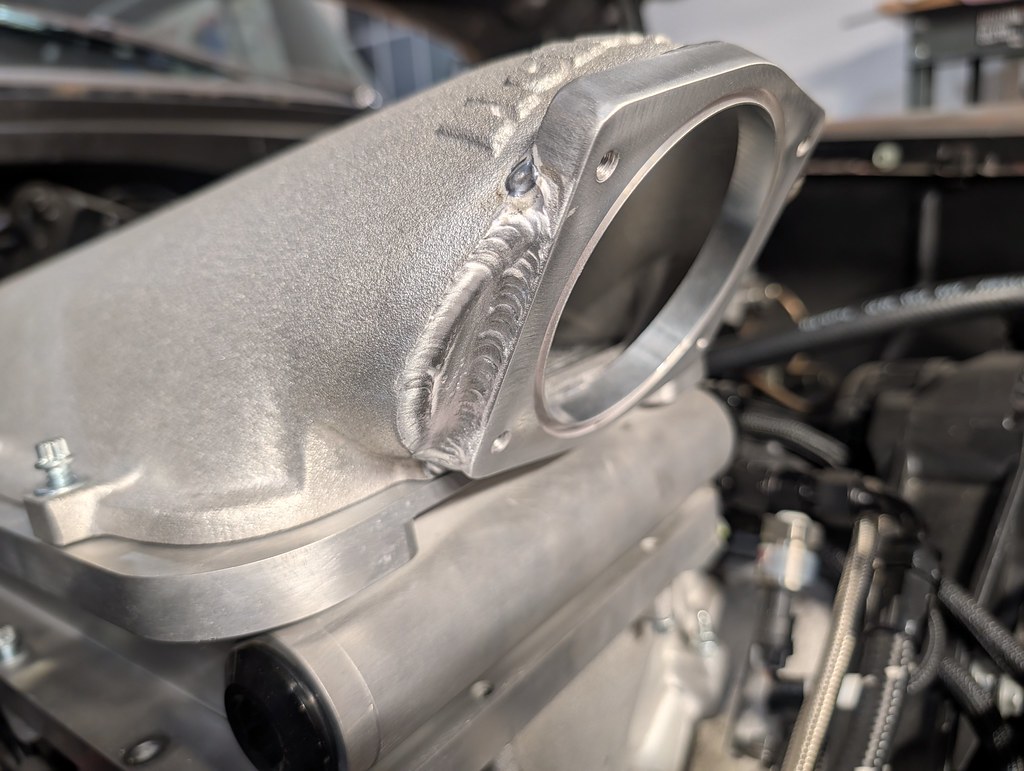
He was very careful around the TB holes on the top of the intake so I didn't have to take a whole lot of effort to tap them. Nice touch.
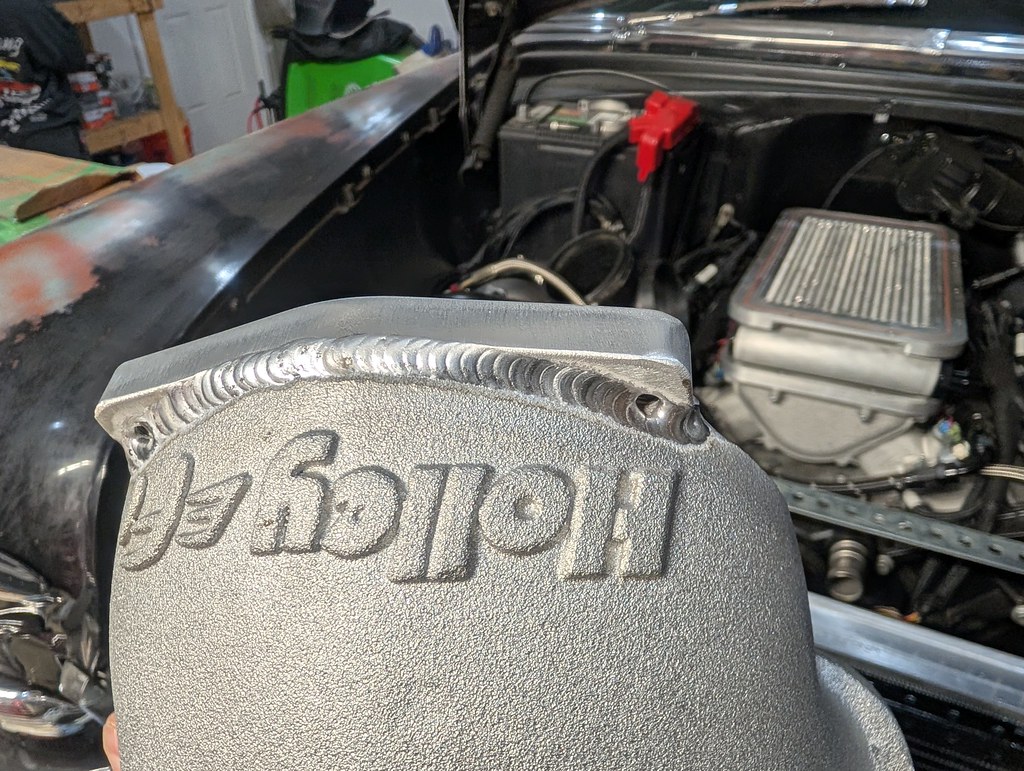
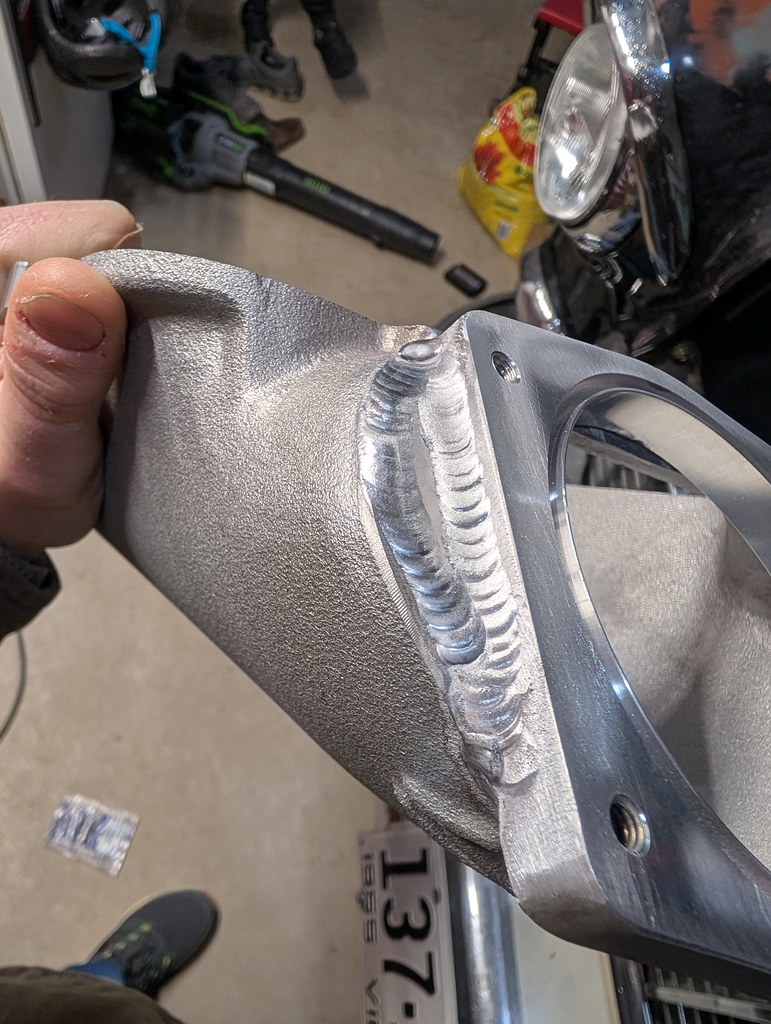
Very quick turn around as well. I dropped it off Saturday and picked it up Sunday night. I think what I'm going to attempt is to sand down the welds and very lightly needle scale the surfaces to replicate a cast finish. I'm going to do a few test pieces to see how the results are. I'd love to make it look like an intake lid that Holley never made and fool some people.
I dug out the CWA50 heat exchanger pump I bought quite a while ago. They are off of 2012ish BMW's with factory turbos and is a Pierburg unit which flows a lot of coolant. They are a great budget option to the universal CWA50 pumps.
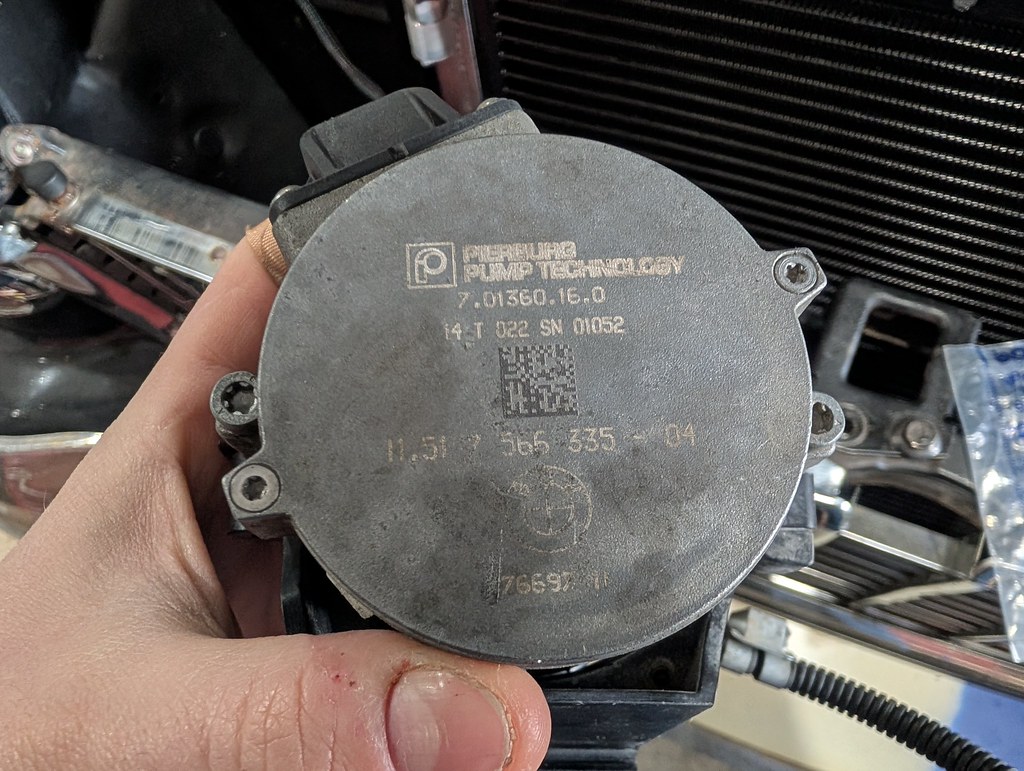
One unique thing is that the inlet uses a quick connect fitting. You can buy a piece from URO that's made for a Volkswagen heater or radiator hose.
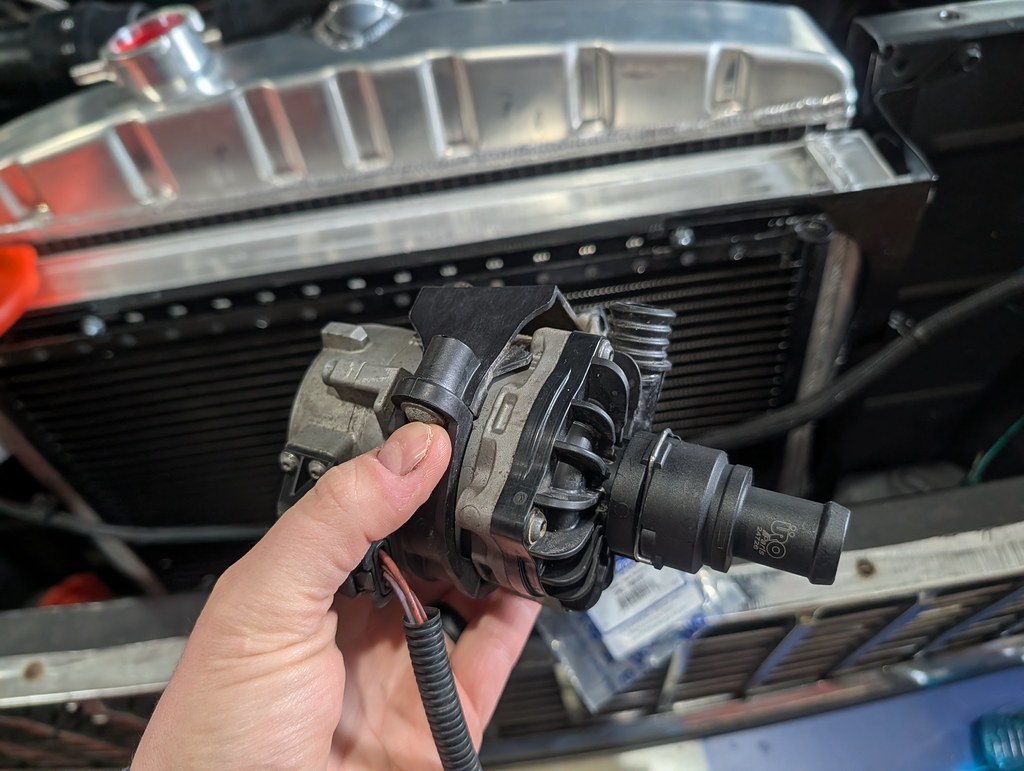
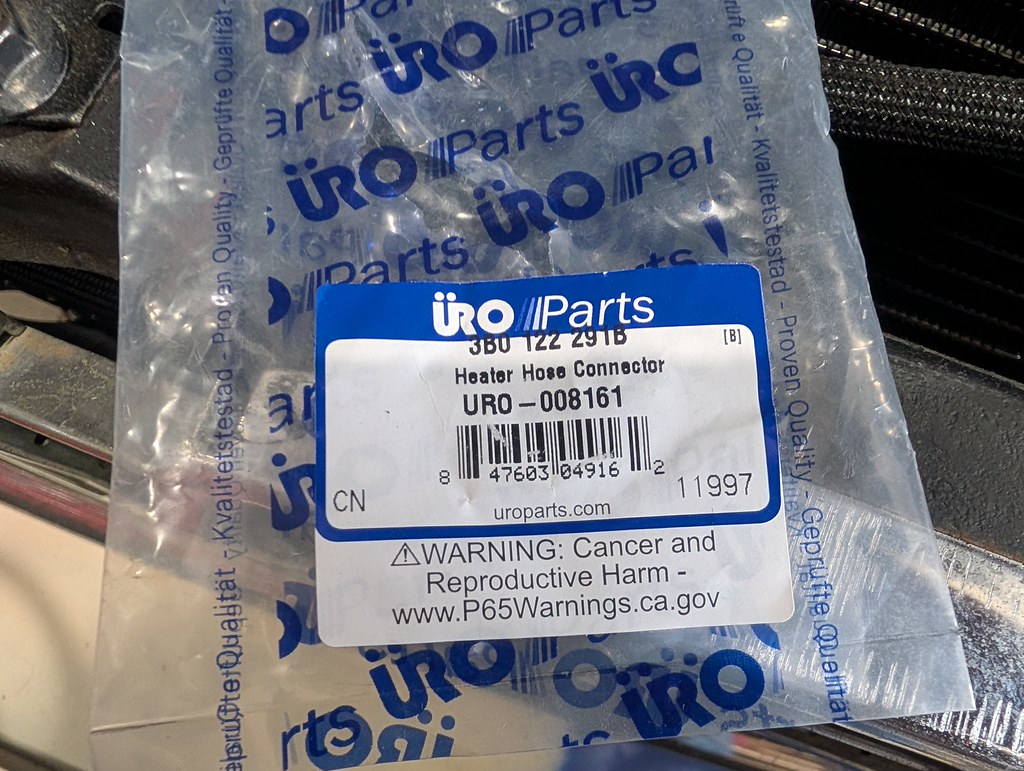
I placed an order from Summit for hopefully the last pieces that I need for this turbo swap. I grabbed a supercharger reservoir from Magnuson, AEM click dial, Low Dollar wastegate/BOV plumbing kit and the pipes/clamps for the charge pipes. I also bought the Sloppy Mechanics Dial a boost unterminated kit since they were sold out of the full kit. I'm not sure if I'll ever really run it on the low boost setting, but I really like the idea of being able to change the boost level with the click of the dial.
I'm down to just a handful of plumbing items such as turbo drain/feed, radiator hoses, heat exchanger hoses, and mounting the heat exchanger coolant reservoir and pump. I'm sure there are a bunch of other little things that I'll need to knock out, and I'm getting very excited to wrap up the winter upgrades. Hopefully within the next few weeks I can the car started up and see if it will make any boost.
Cheers,
Ryan
1955 Nomad project LC9, 4L80e, C5 brakes, Vision wheels
1968 Camaro 6.2 w/ LSA, TR6060-Magnum hybrid and etc SOLD
1976 T/A LS1 6 Speed, and etc. SOLD
Follow me on Instagram: ryeguy2006a
03-04-2026 #7
Registered User
- Join Date
- Sep 2009
- Posts
- 3,002
Been slowly chipping away and checking things off the list. I'm close enough to the end, I decided to make another punch list to keep me on track. I'll probably add a few things as I go, but hoping to possibly get the car out this weekend if it all goes to plan and the parts I ordered come in.
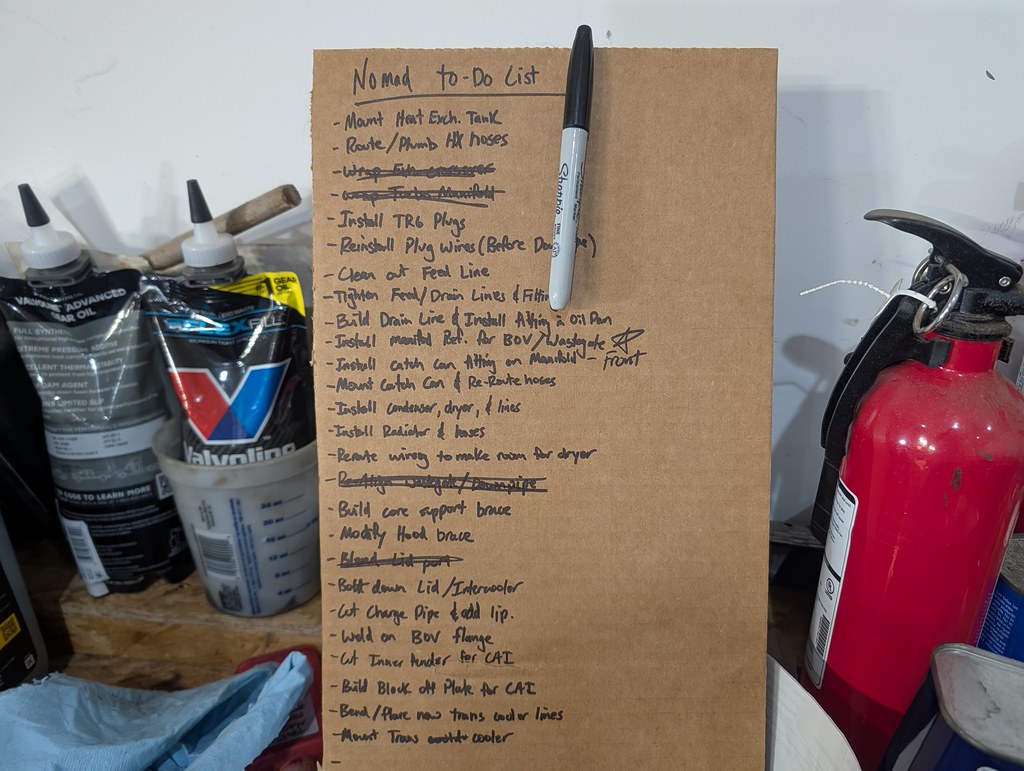
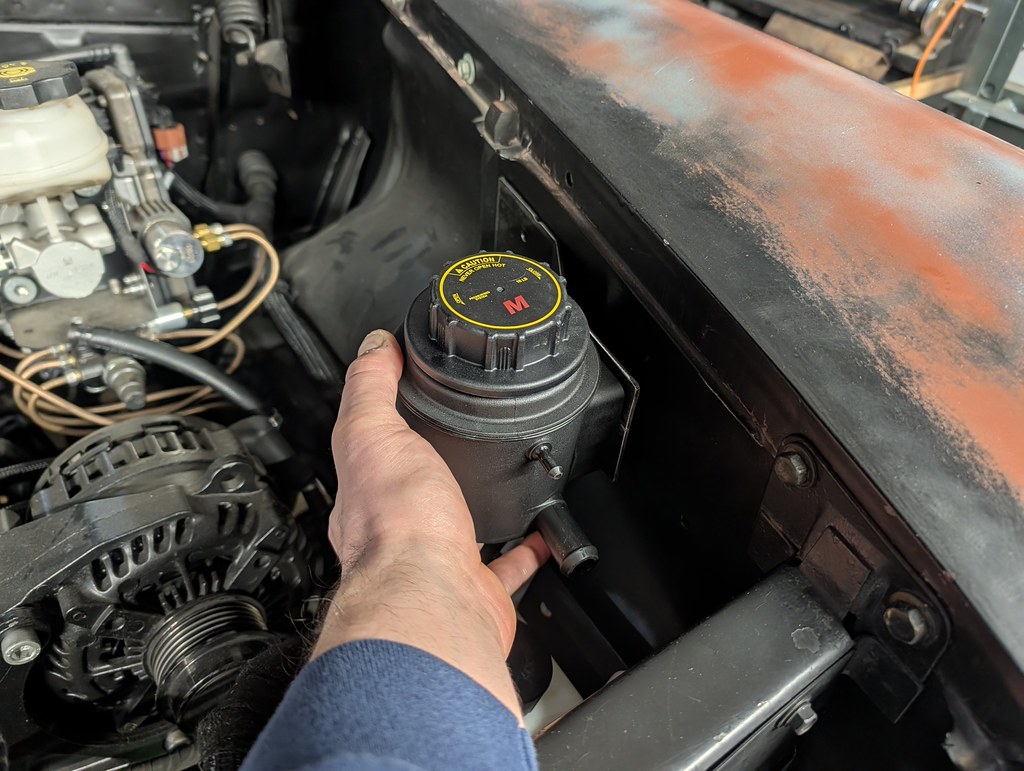
After a bunch of thinking on how I wanted to mount the heat exchanger pump, I finally decided to just make my own bracket. I copied the idea from the catch can mount I have, and this worked out great. It's solidly mounted, with a rubber isolator so it should be happy there. Also doesn't interfere with the overflow tank so that won't need to be relocated.
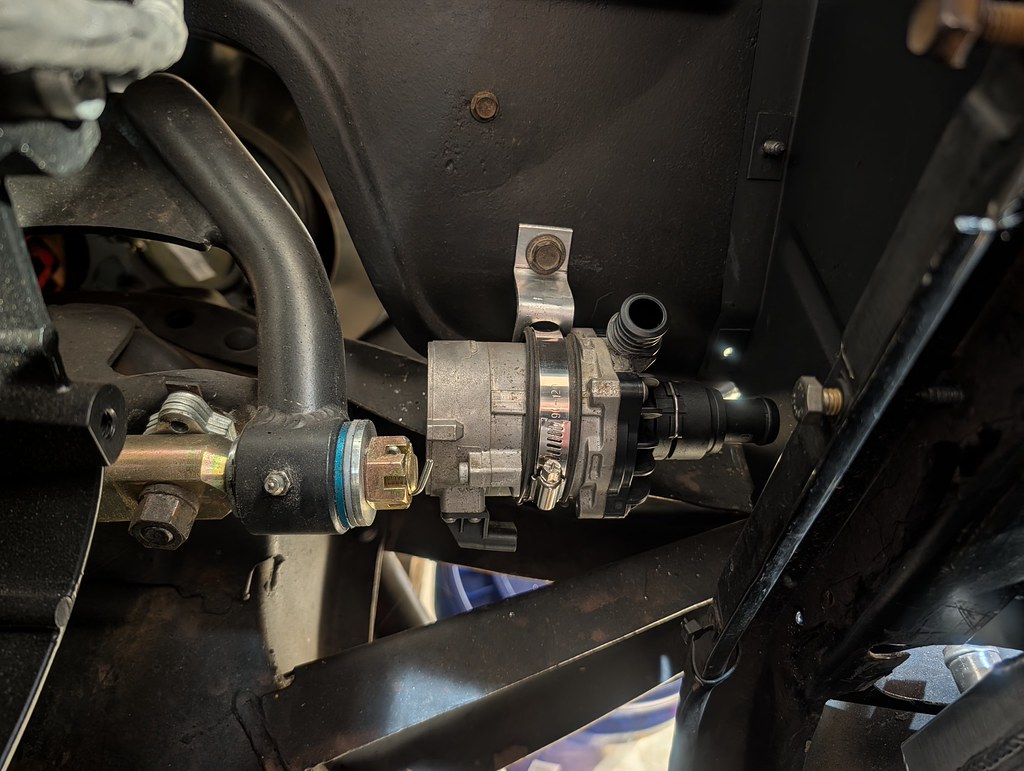
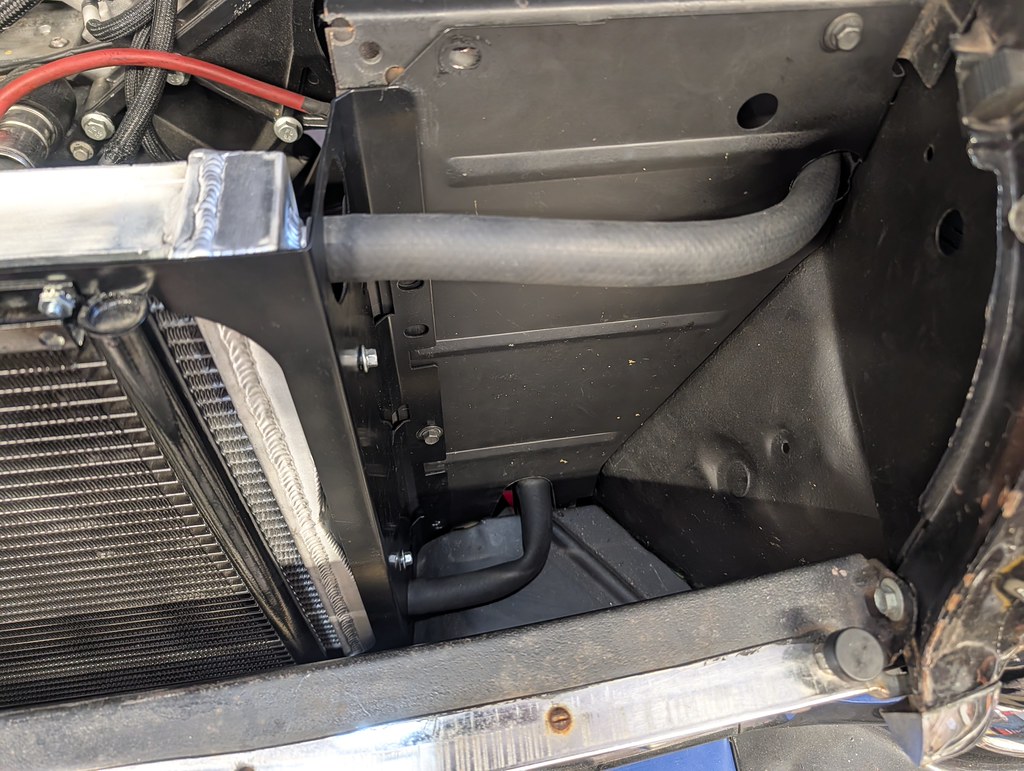
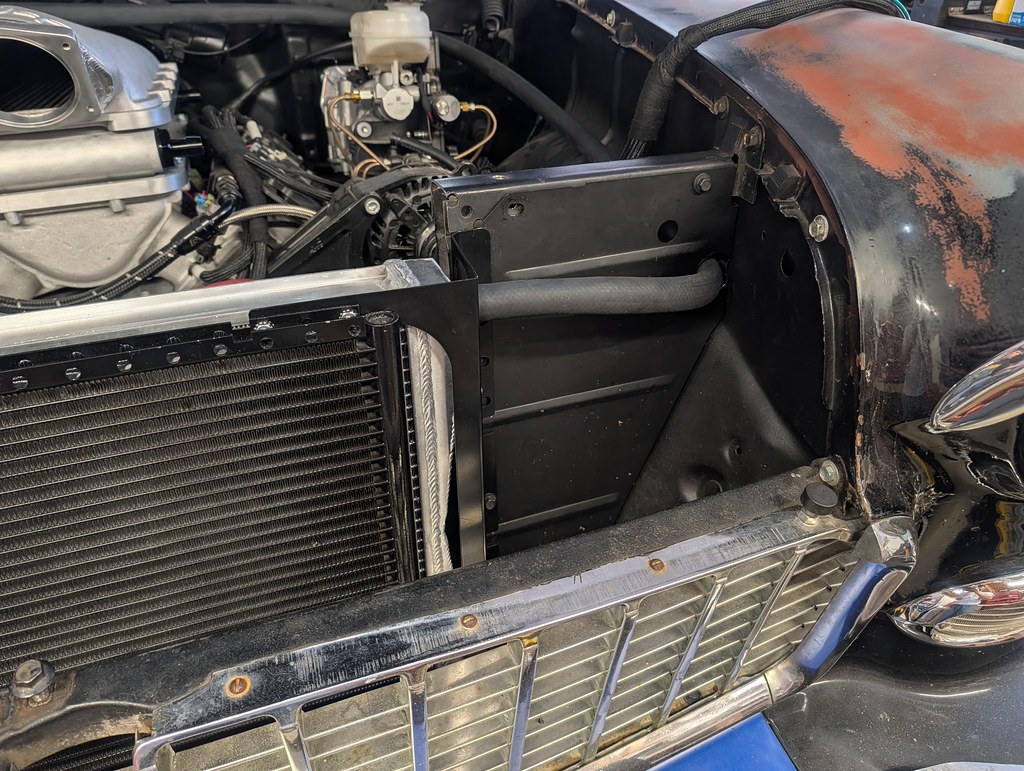
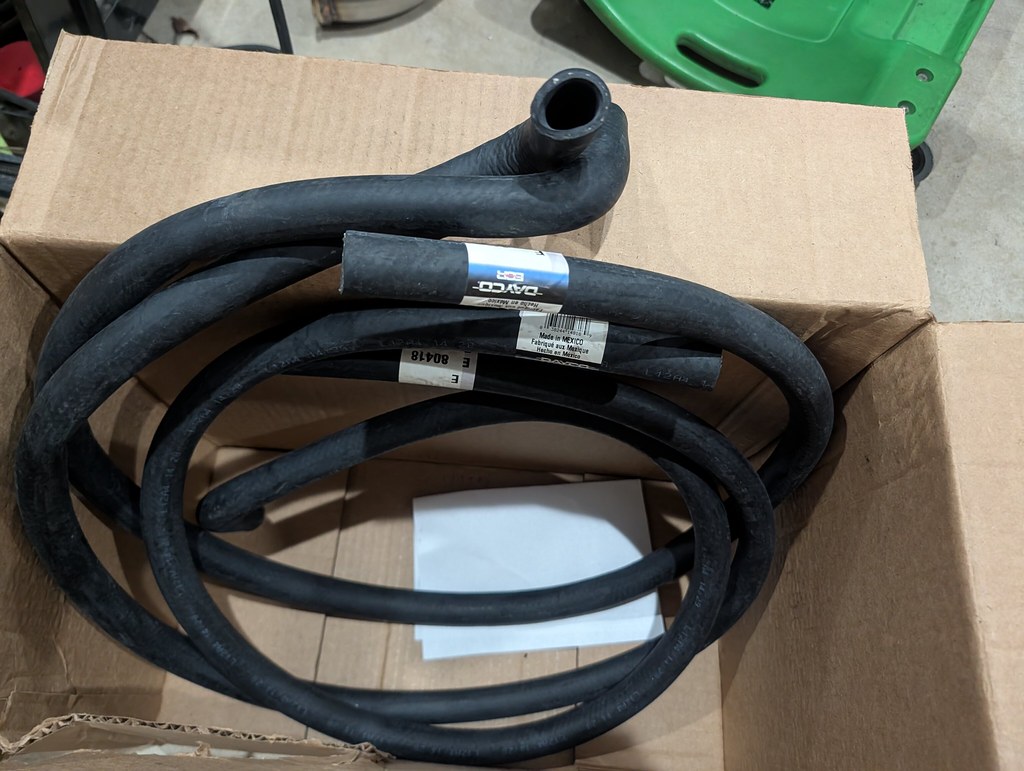
With that mounting location finalized, I could plan for the hoses and where they will need to be routed. Notched the lower and used a hole saw on the upper hose. Will have a nice gentle curve for the lines to follow. I bought a few Dayco hoses that have a 90* bend with about 60" of hose length that I'll be able to use to avoid any tight curves like the lower hose.
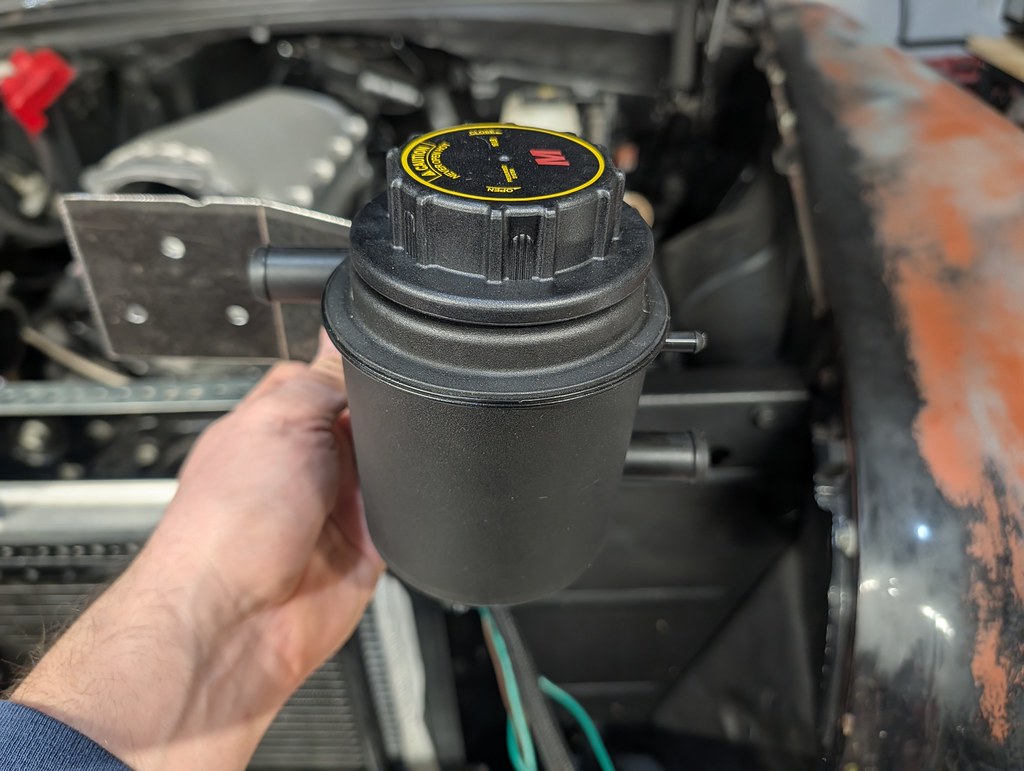
Next up is the Magnuson heat exchanger swirl pot/ reservoir which I found as a necessity when I was building my Camaro with the LSA engine. The heat exchanger pump needed more capacity to avoid draining the lines and creating aeration. This should help to get all the air bubbles out as well. I haven't finalized the mounting location yet, but it will be somewhere on the driver's side inner fender making sure that it's located higher than the Tick intercooler brick.
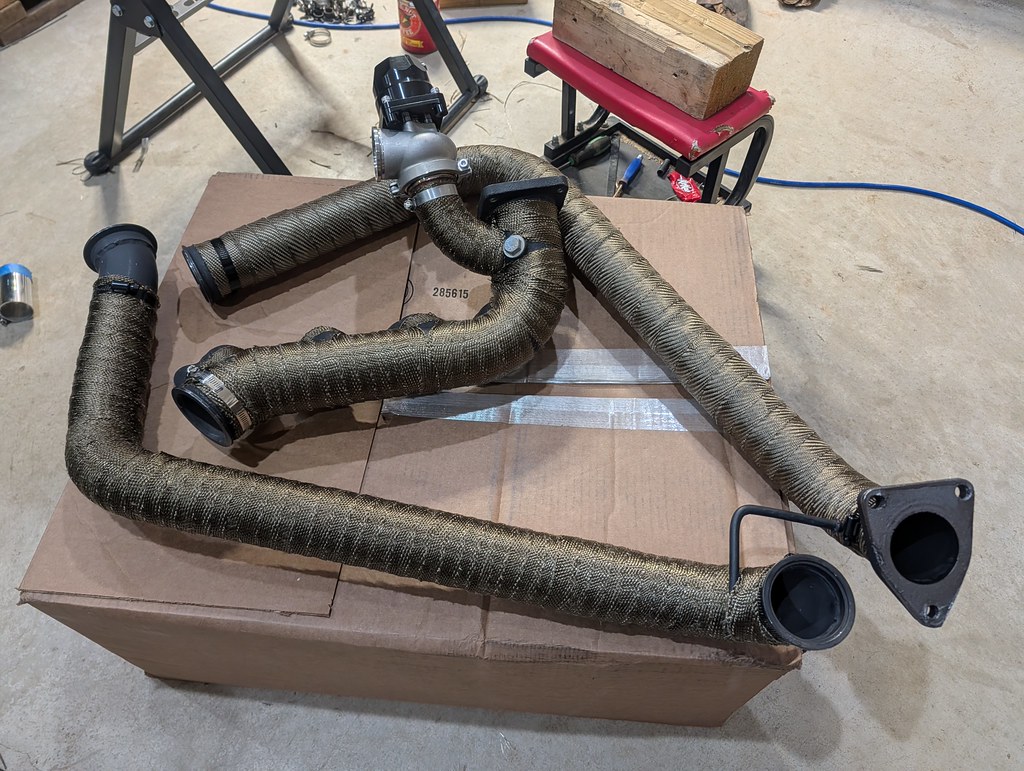
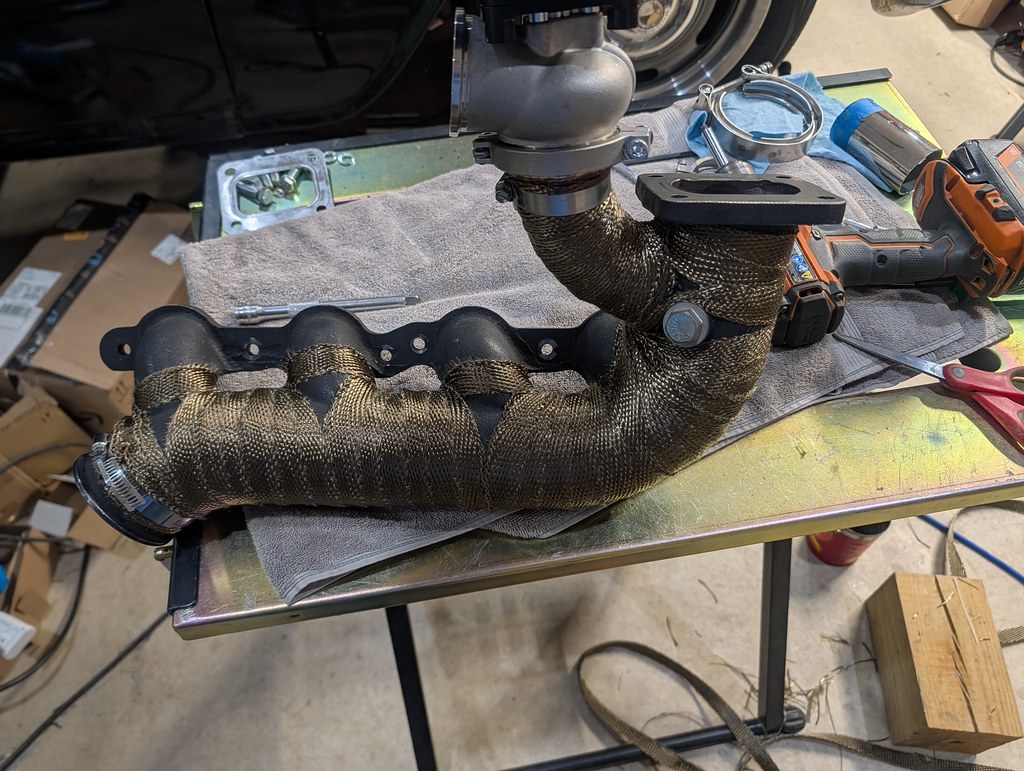
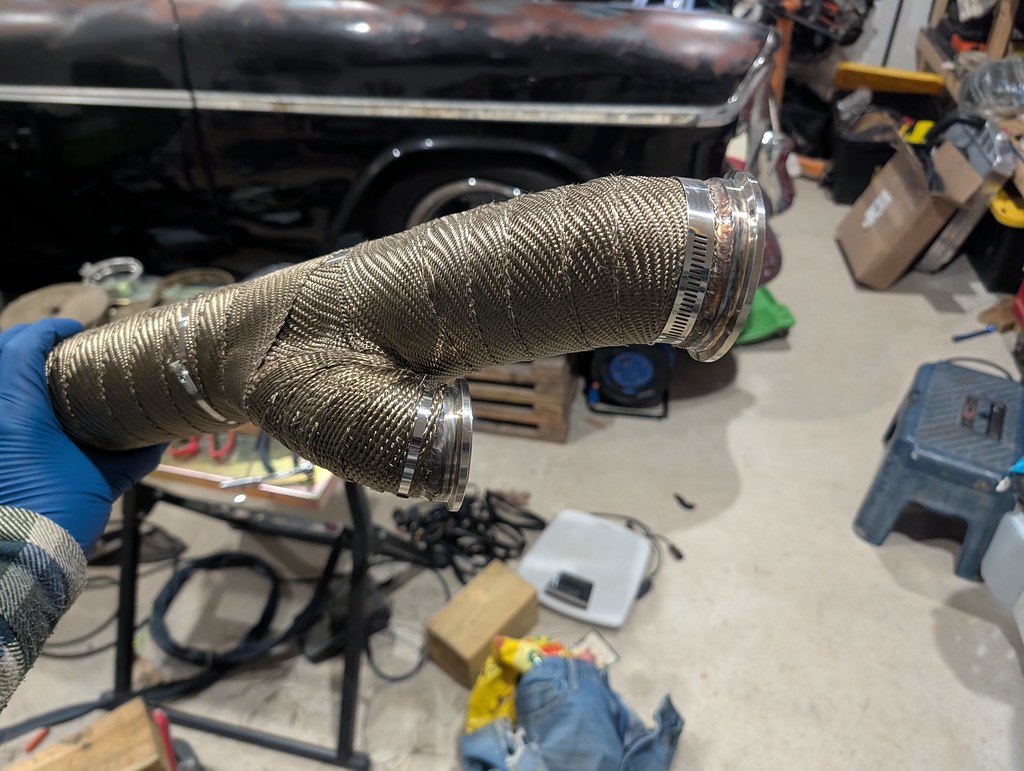
I picked up some Lava Rock heat wrap from Summit and wanted to wrap up the crossover, log manifold and downpipe to help keep the heat inside the pipes and drop underhood temps. It's also supposed to help with the spooling of the turbo, so hopefully it's worth the effort. It was a much bigger pain than I thought... The metal zip ties that came with the kit were junk. I ended up using some stainless steel hose clamps which I read work much better. Glad this is over, but very happy with the results.
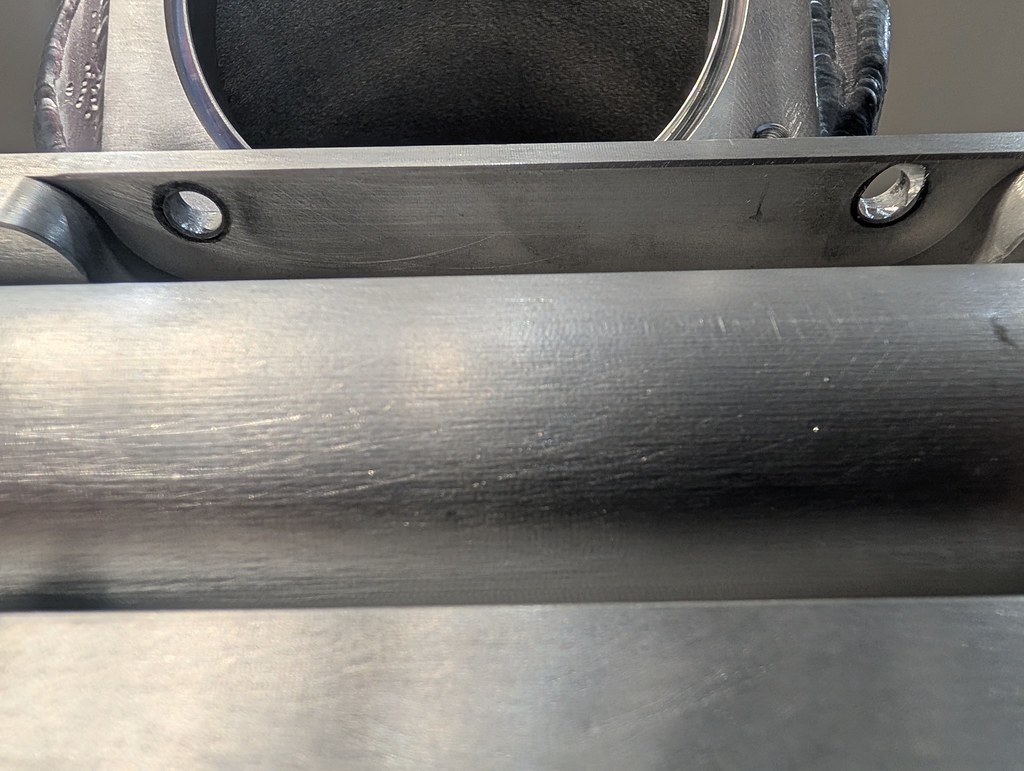
I didn't get any pictures, but there was a lip inside of the intake lid after I had it welded. I took some carbide and drum roll disks and smoothed out the transition so the air had a nice path to flow. I also started planning out the hardware that I'll need to attach the lid. With the angle of the tubes on the side of the intercooler, it wasn't possible to get the bolts into the lid. I realized that if I used a burr to allow the bolt to go in at a slight angle that it would fit into the slot and work. So after carefully clearance the hole, I was able to sneak a shorter bolt in there. Win! Untouched on the left, and clearanced on the right.
I'm getting very close to the point where I can start installing parts for a final time and I'm very happy about that. The weather is starting to turn here in VA and I'm so ready to see how the turbo responds. I think the last task that will be a pain will be making new transmission cooler lines. I originally routed the cooler lines on the passenger side, but with all the pipes and lines that I added on that side, it's too crowded. I'm going to loop them around the rear and come in on the driver's side. I'm still unsure of where I'm going to mount the cooler, but it will likely be right in front of the condenser on the driver's side. This time I'm going with aluminum lines with adapters to go to the 6AN fittings. I'm hoping that in addition to the cooler, that the aluminum lines will also help to dissipate heat.
Thanks,
Ryan
1955 Nomad project LC9, 4L80e, C5 brakes, Vision wheels
1968 Camaro 6.2 w/ LSA, TR6060-Magnum hybrid and etc SOLD
1976 T/A LS1 6 Speed, and etc. SOLD
Follow me on Instagram: ryeguy2006a
02-23-2026 #8
Registered User
- Join Date
- Sep 2009
- Posts
- 3,002
I decided to take a break from working on the exhaust pipes to get the cooling fan mounted onto the new radiator. After tossing around several ideas, I finally decided that I needed to add a few tabs to the radiator to hold the fan. That meant that I needed to bite the bullet and start practicing on my aluminum welding. I've been welding steel/stainless steel for many years, but aluminum is new territory. I had some coupons from a tig welding kit I bought a long time ago and surprisingly the beads looked pretty good after I dialed in my settings.
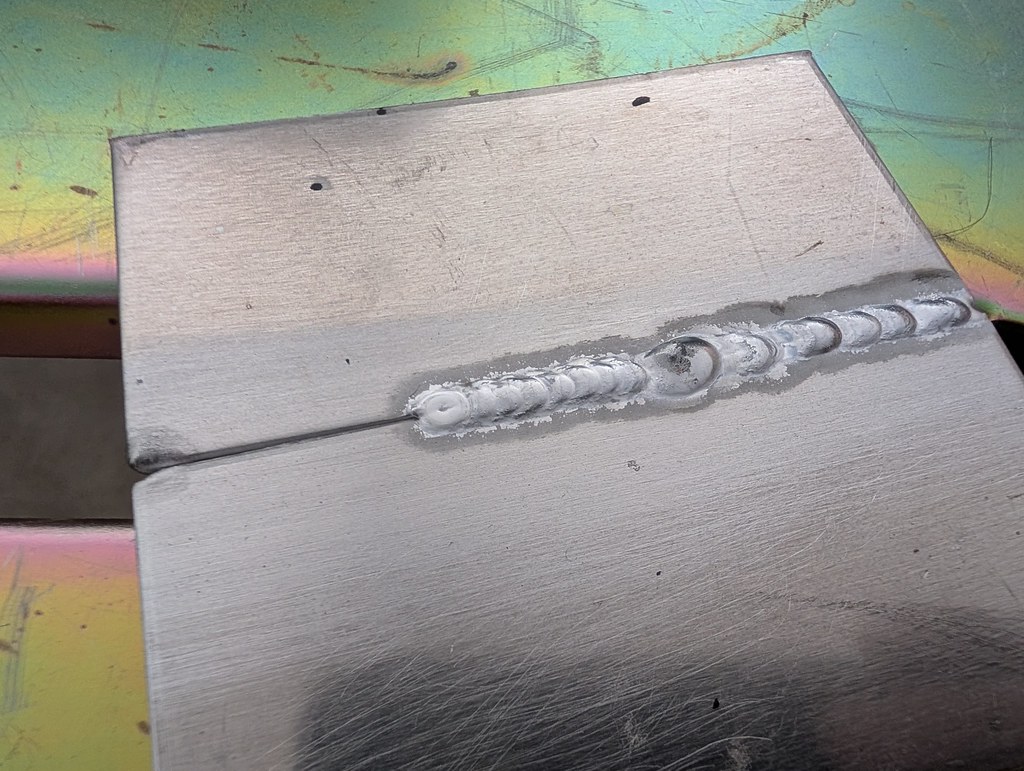
The first two tabs were a bit hot so they melted too much, and I was getting used to how the puddle reacts.
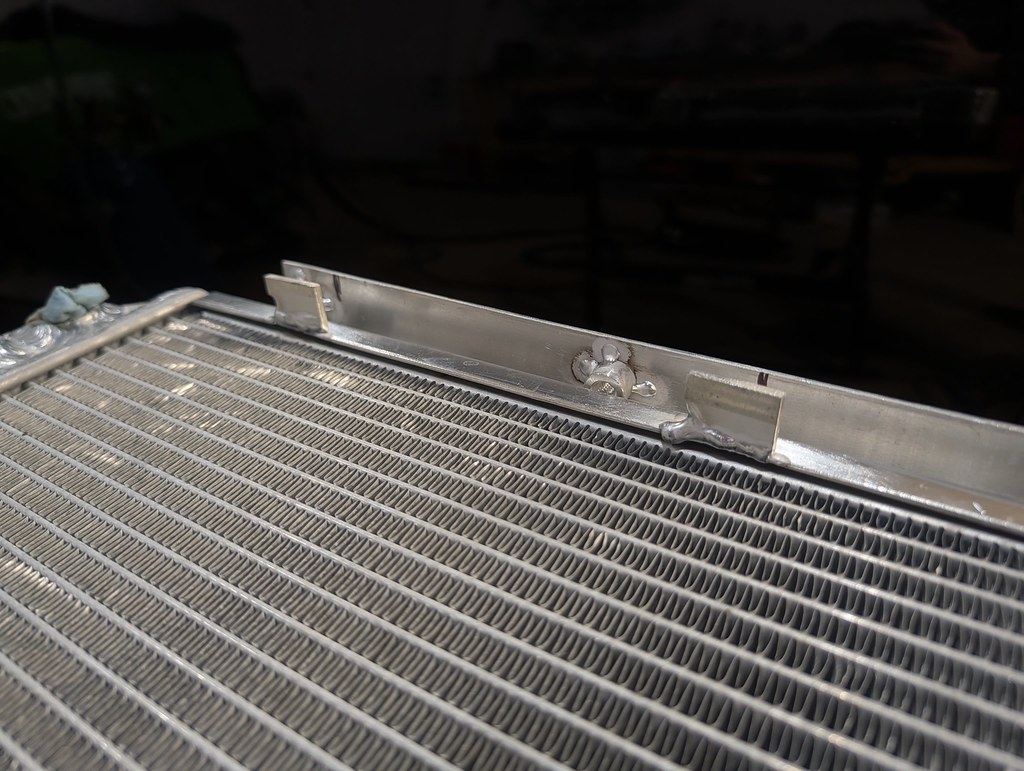
The next two turned out pretty good IMO.
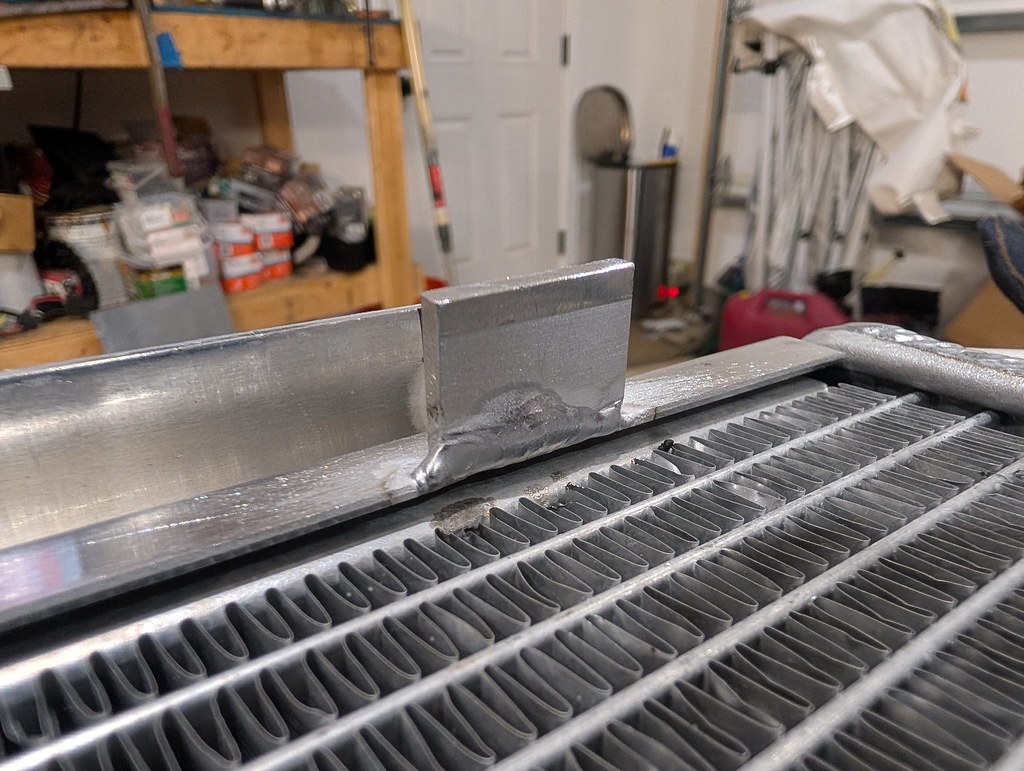
All ready to install now. Thankfully the wiring and everything is the same, so there won't be any changes needed there.
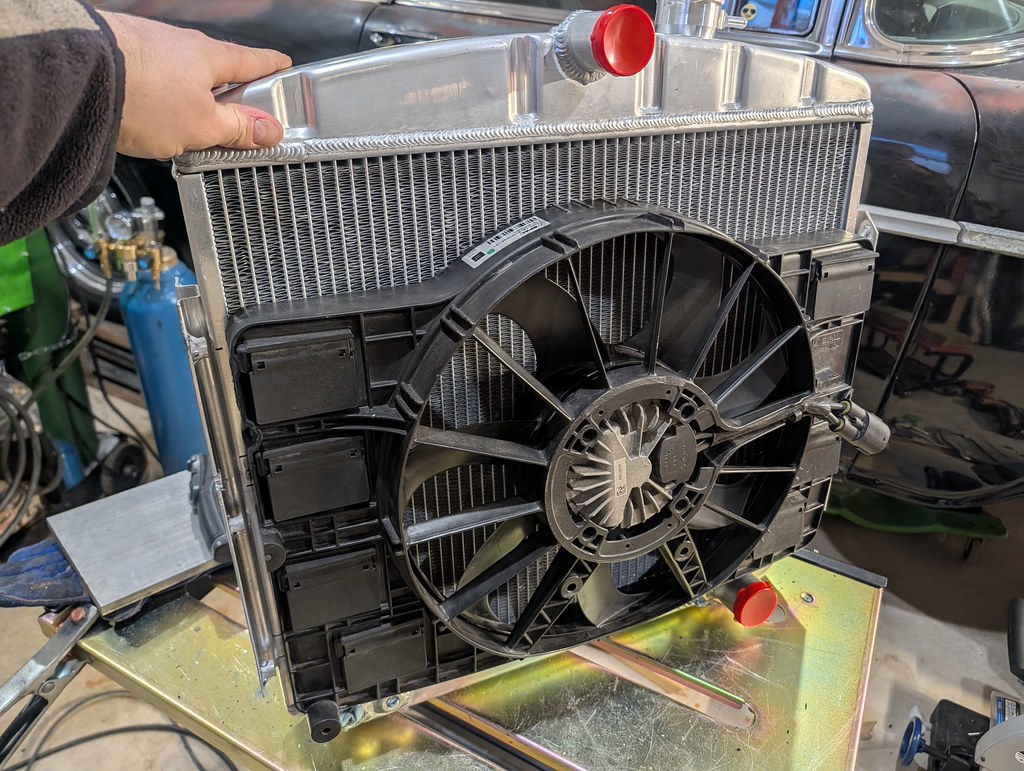
With the final fitment after I trimmed the fans a bit closer, it clears by about a half inch now.
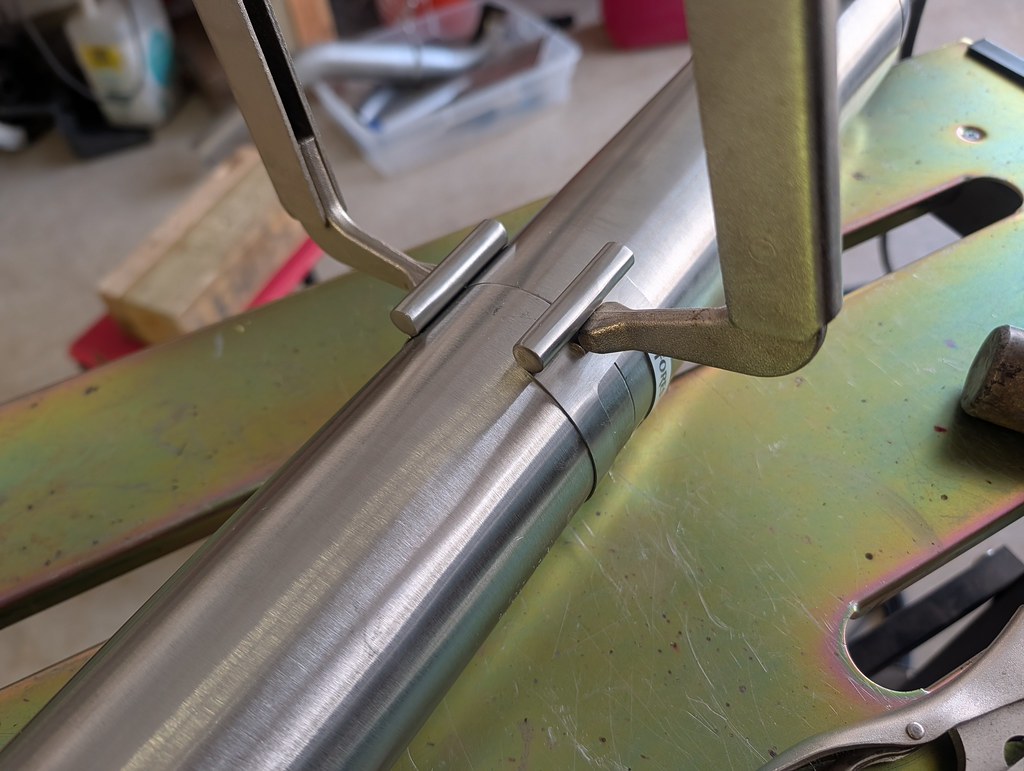
Now back to the exhaust pipes. After fumbling around with the fitment this whole time I pulled the trigger on a set of these exhaust fitment tools for tack welding pieces together. These are worth it and wished I had them from the beginning!
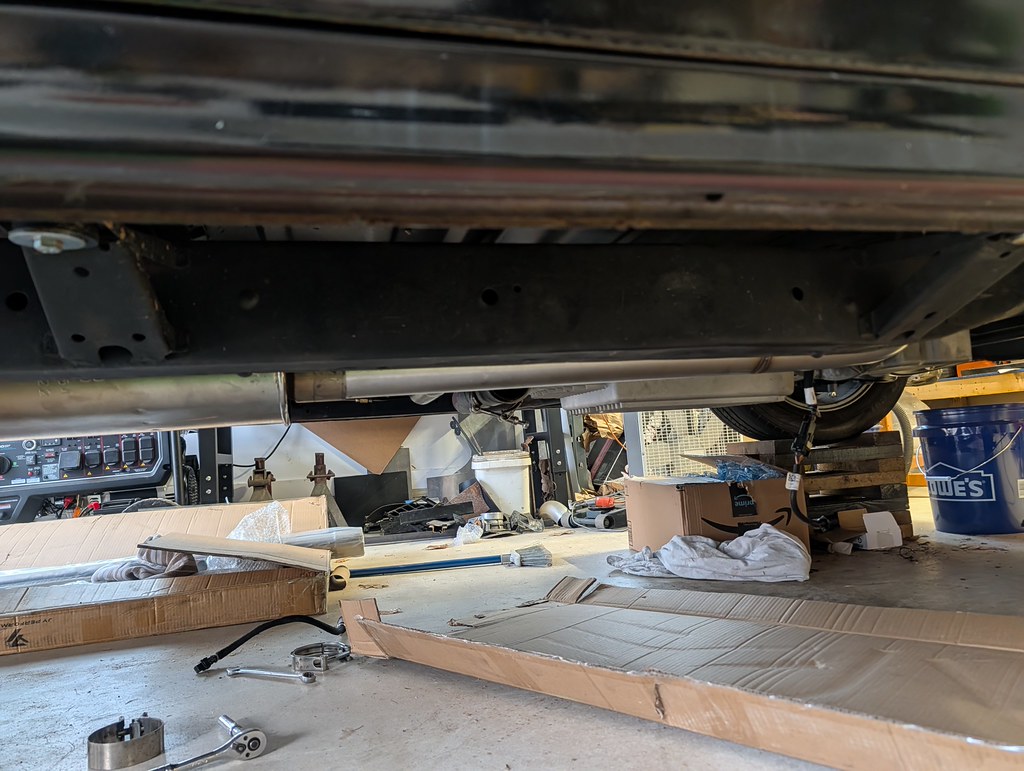
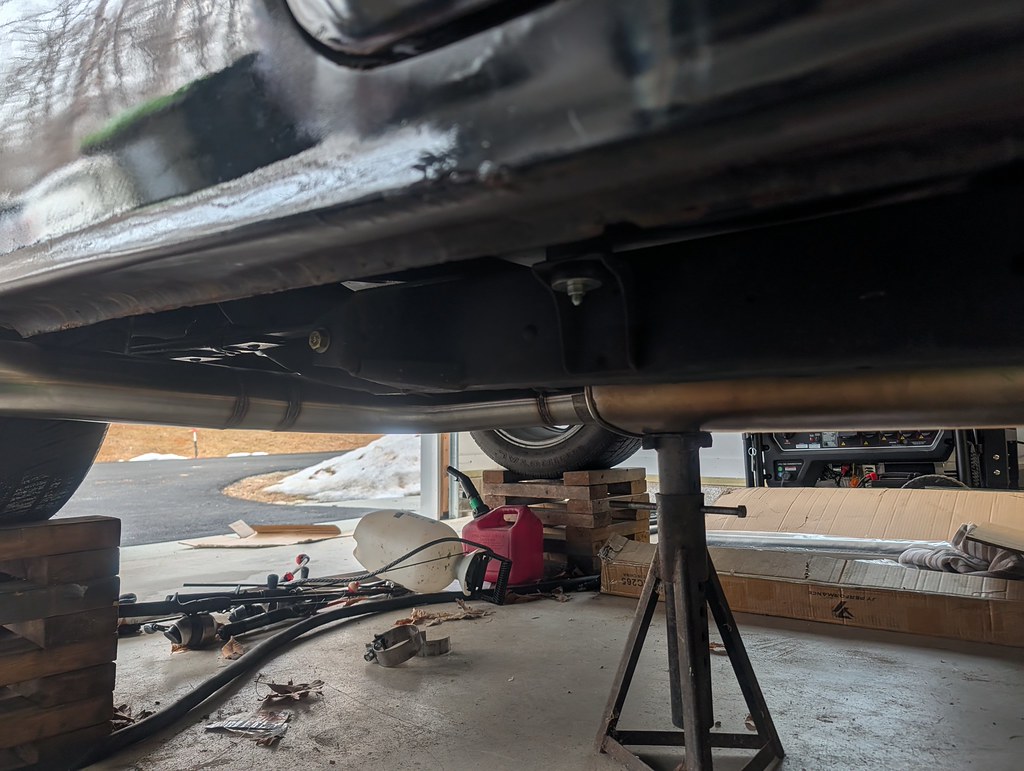
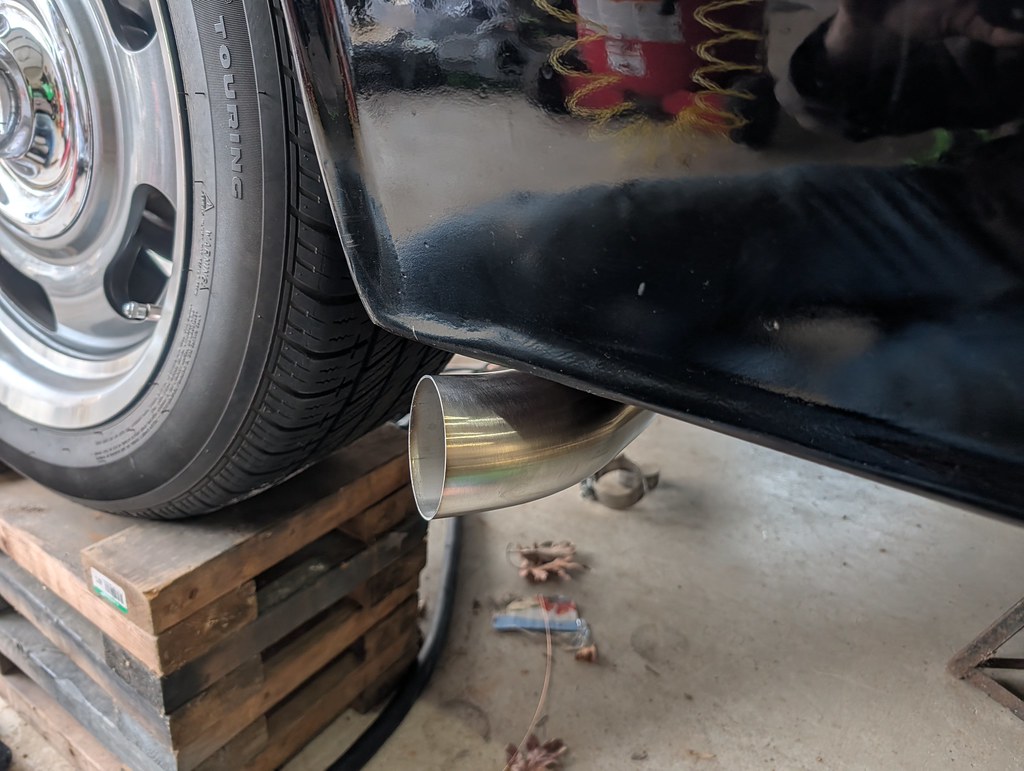
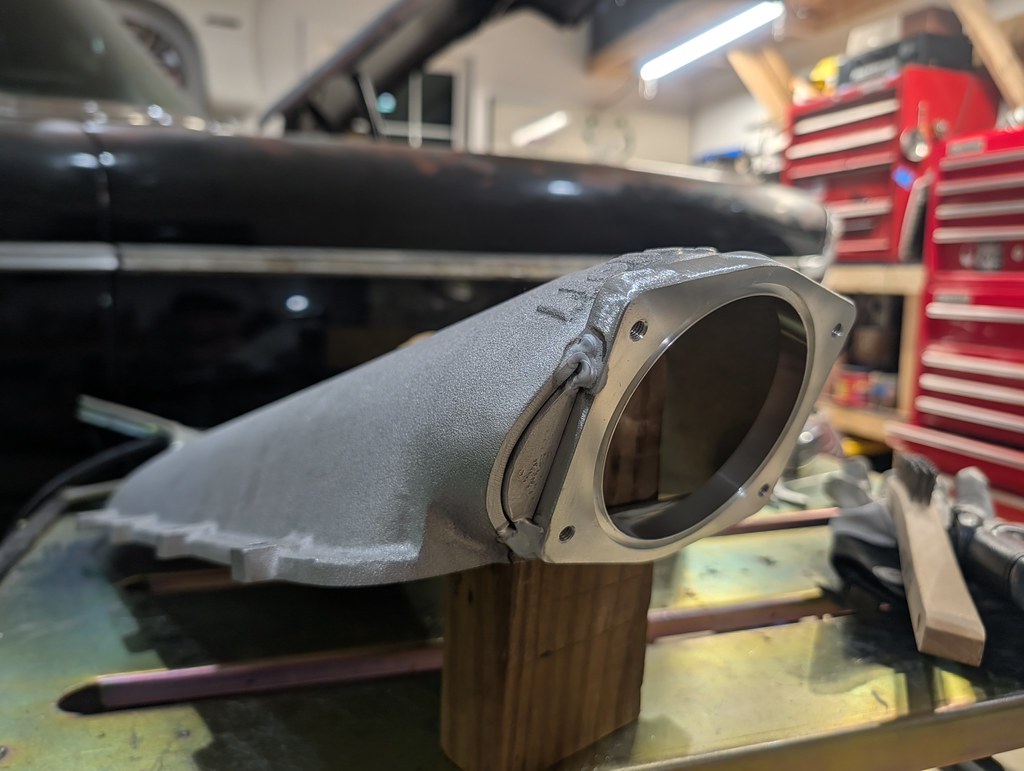
Got the O2 bung welded in and then fit up the final location for the muffler. I'm running the same Walker Quietflow stainless muffler from the beginning. I moved it slightly closer to the frame so that it cleared the ebrake components. When I first built the exhaust I didn't have that installed and it contacted the muffler, so ever since I had to have it twisted down which I didn't like. Now it's nice and flat.

The big cut... I won't lie, I did hesitate for a minute. No turning back now!!
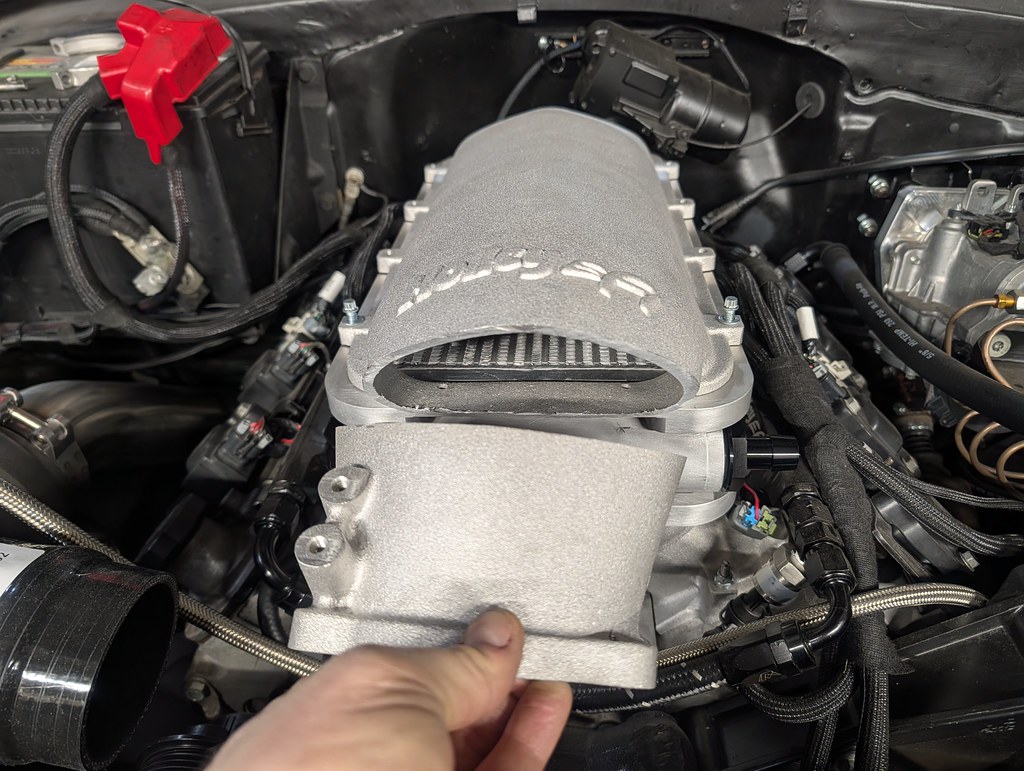
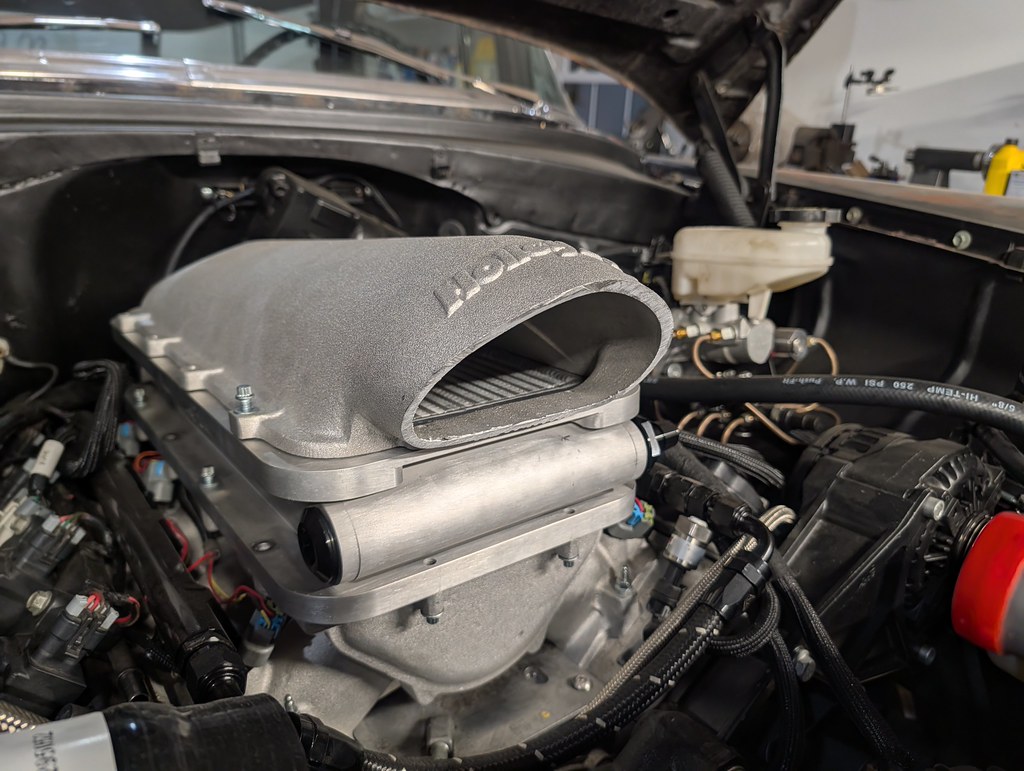
When I made the initial cut, I measured about a half inch longer than I needed to account for any changes that I needed to make. Then I slowly crept up on the final location. I ended up cutting an additional half inch to recess the flange, but kept the outer sides to help locate the flange. This helped out a lot when I tack welded it together.
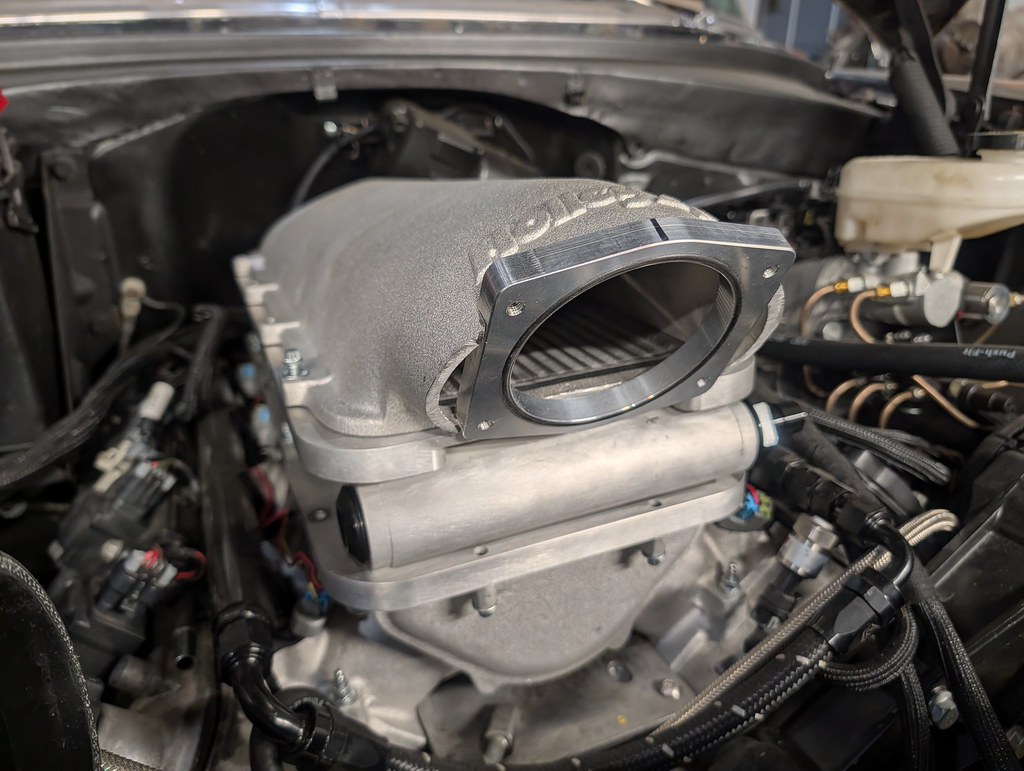
Since I paid the Holley tax on the parts, I wanted to make sure to keep that logo intact after all the modifications.
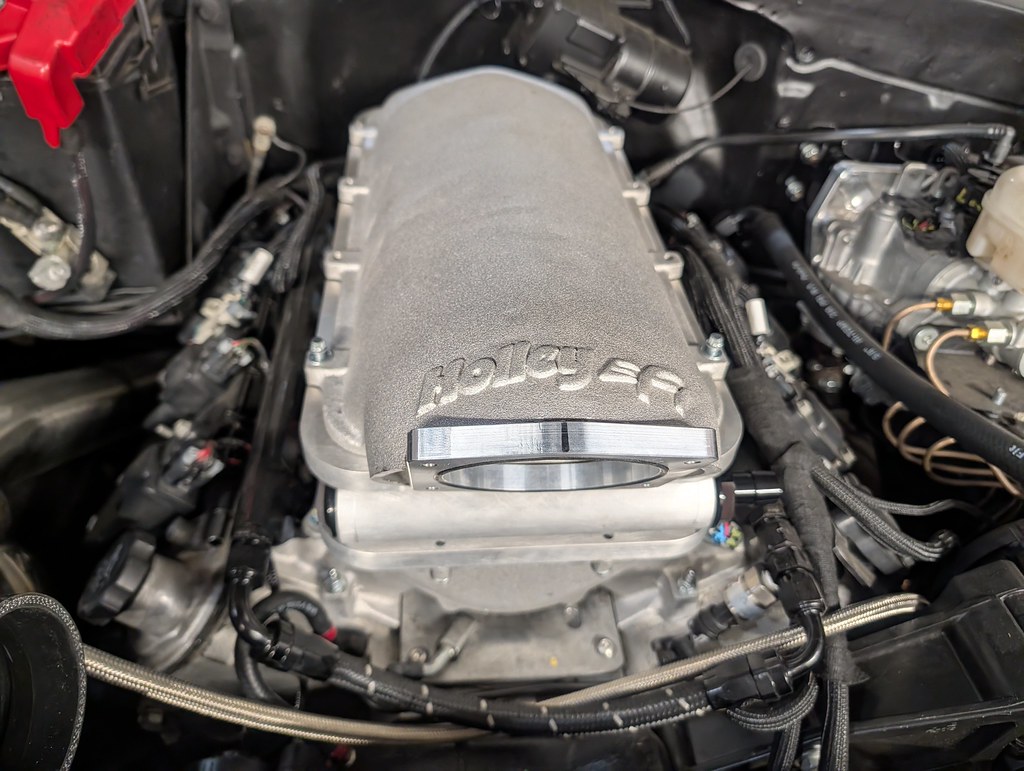
My initial measurements were close that I may not need to add pieces to the sides, but the way the inlet is shaped, I didn't have an choice.
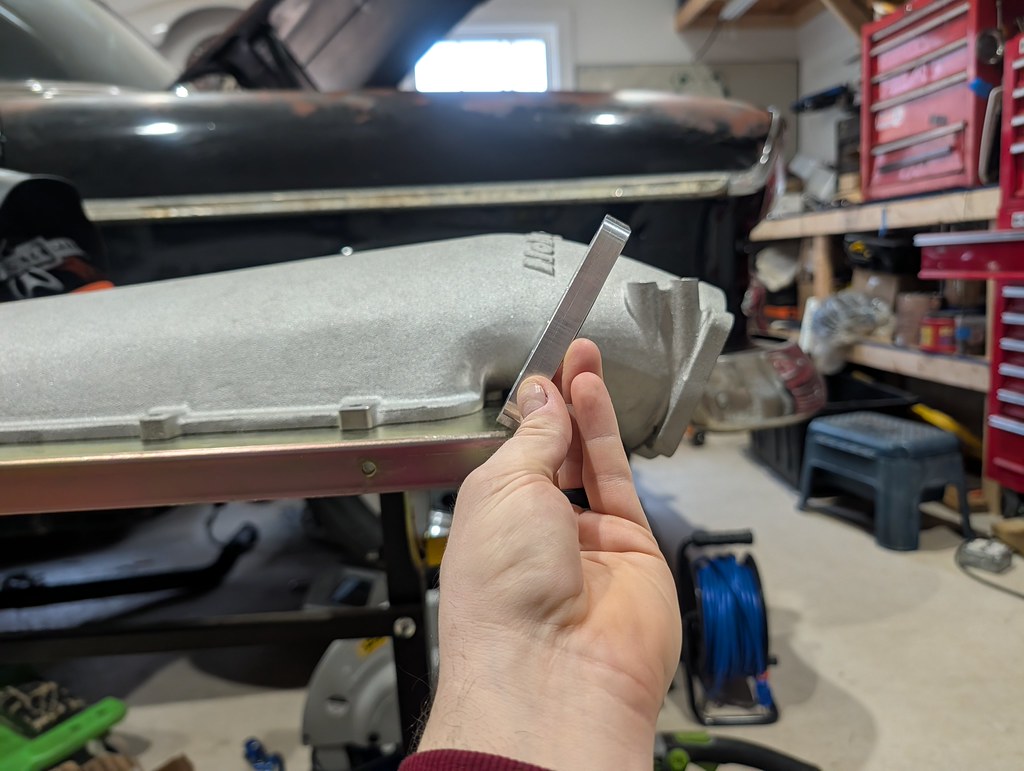
I had some thick pieces of aluminum left over from another project, and they worked perfectly as filler plates for the sides. Once I shaped them for a nice fitment on the sides, I tack welded everything together.
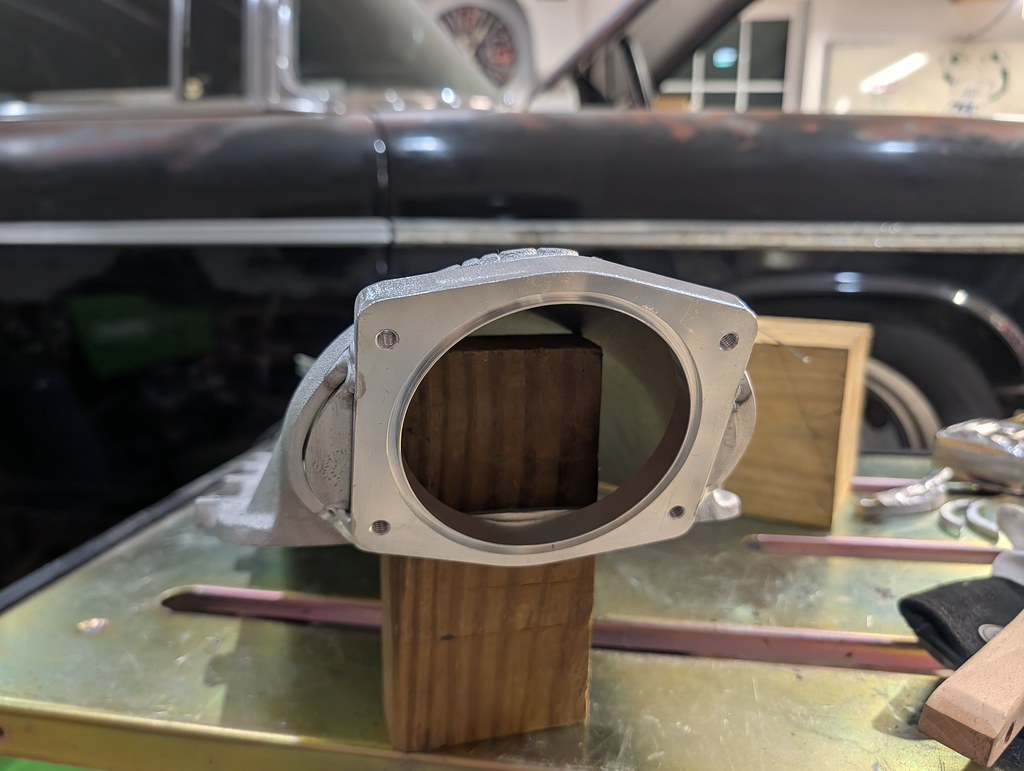
And the final test fit is just what I was hoping for. Everything fits everywhere and I'm very happy with the charge pipe angles and the stock radiator hoses are now a great fit.
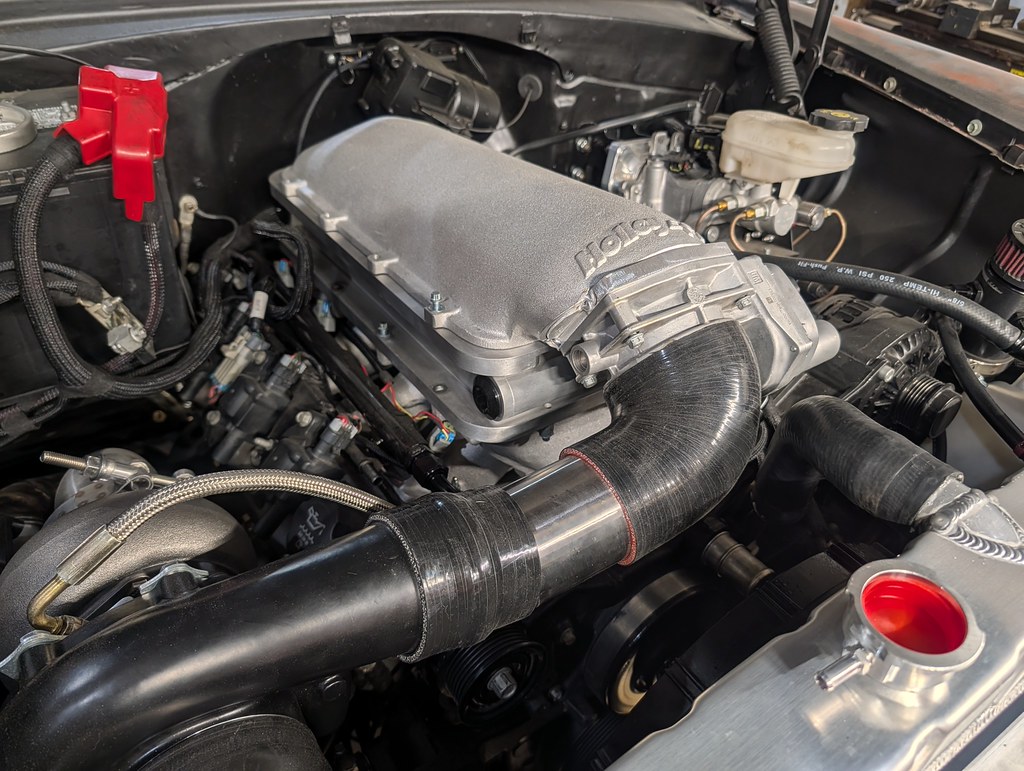
Needs a little trimming, but will clear everything! Huge win.
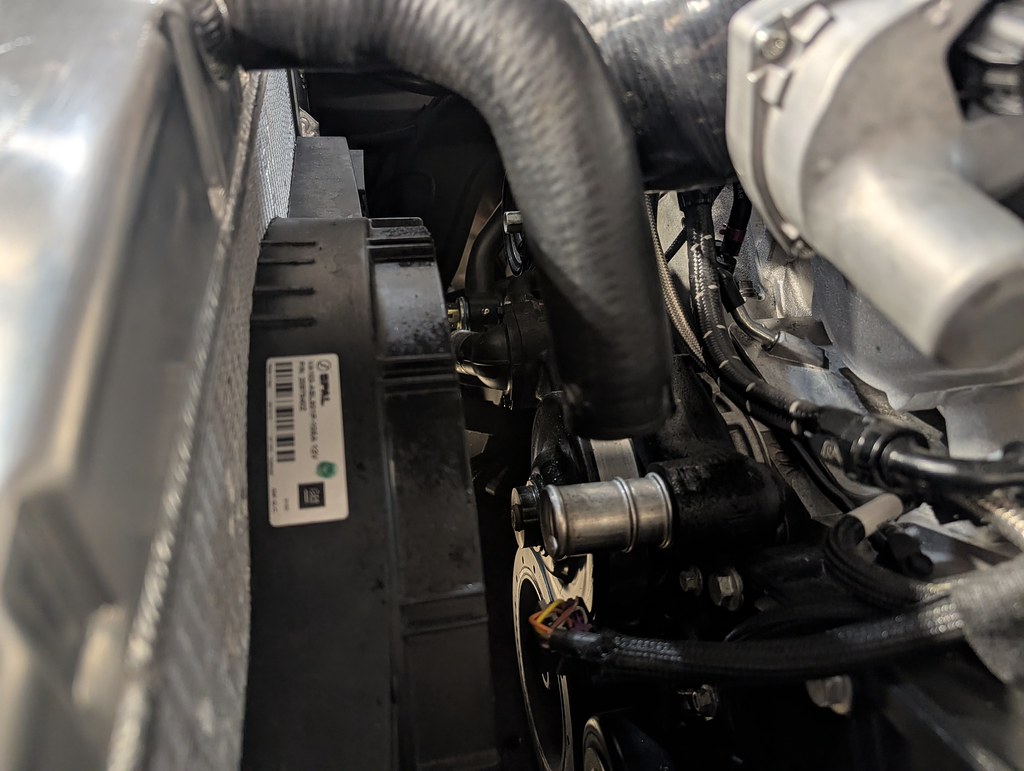
To be continued...
1955 Nomad project LC9, 4L80e, C5 brakes, Vision wheels
1968 Camaro 6.2 w/ LSA, TR6060-Magnum hybrid and etc SOLD
1976 T/A LS1 6 Speed, and etc. SOLD
Follow me on Instagram: ryeguy2006a
03-04-2026 #9
 Registered User
- Join Date
- Nov 2018
- Posts
- 996
That's some good looking work, but I see two small issues that should be addressed. It may just be the angle of the pic, but I'd hate to see an avoidable breakdown report later on.

The picture shows that the top hose is right up against the cut metal. It appears that hose will be cut in a short amount of time as the engine and body flex while driving. The hole needs to be a bit bigger so the hose clears entirely, and the hose needs to be supported to keep it off the edge.
The picture shows a collapsing bend in the hose, and the pump is just past that bend. The pump may be strong enough to suck that shut after a few heat cycles on the rubber. I'd suggest replacing that with a hose that has a formed bend, install a metal 90 degree bend there or put a stainless steel spring inside the hose like what is used on lower radiator hoses. It's a little harder to see, but the hose looks like it's up against the cut metal there too. Could be wrong.
03-05-2026 #10
Registered User
- Join Date
- Sep 2009
- Posts
- 3,002
Thanks for looking out Vimes, I appreciate that. As soon as the replacement hose comes in I'll be replacing the lower HX hose with a formed 90* so I have no issues with flow. The top hose has the same amount of clearance all the way around so no risk of cutting through. It's just the angle of the picture.

1955 Nomad project LC9, 4L80e, C5 brakes, Vision wheels
1968 Camaro 6.2 w/ LSA, TR6060-Magnum hybrid and etc SOLD
1976 T/A LS1 6 Speed, and etc. SOLD
Follow me on Instagram: ryeguy2006a
03-09-2026 #11
Registered User
- Join Date
- Sep 2009
- Posts
- 3,002
The progress continues. I wasn't completely happy with the AN transmission lines that I made when I first got the car going, so I decided to take a different route. I bought a roll of 3/8" Aluminum seamless tubing with some AN fitting adapters. It was a lot of up and down, measuring then making the bends, but I'm very happy with how they turned out. I picked up a nice bender from Harbor Freight and it did a great job on the bends. I made sure to install the exhaust to be sure I wasn't going to be in the way of the pipes.
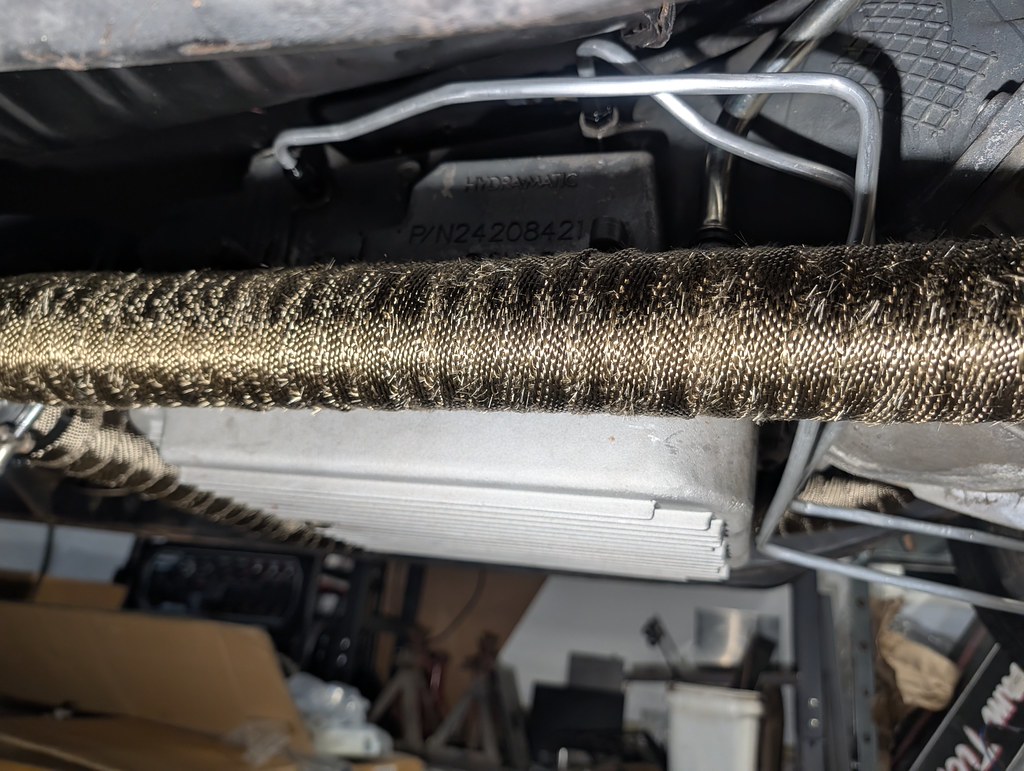
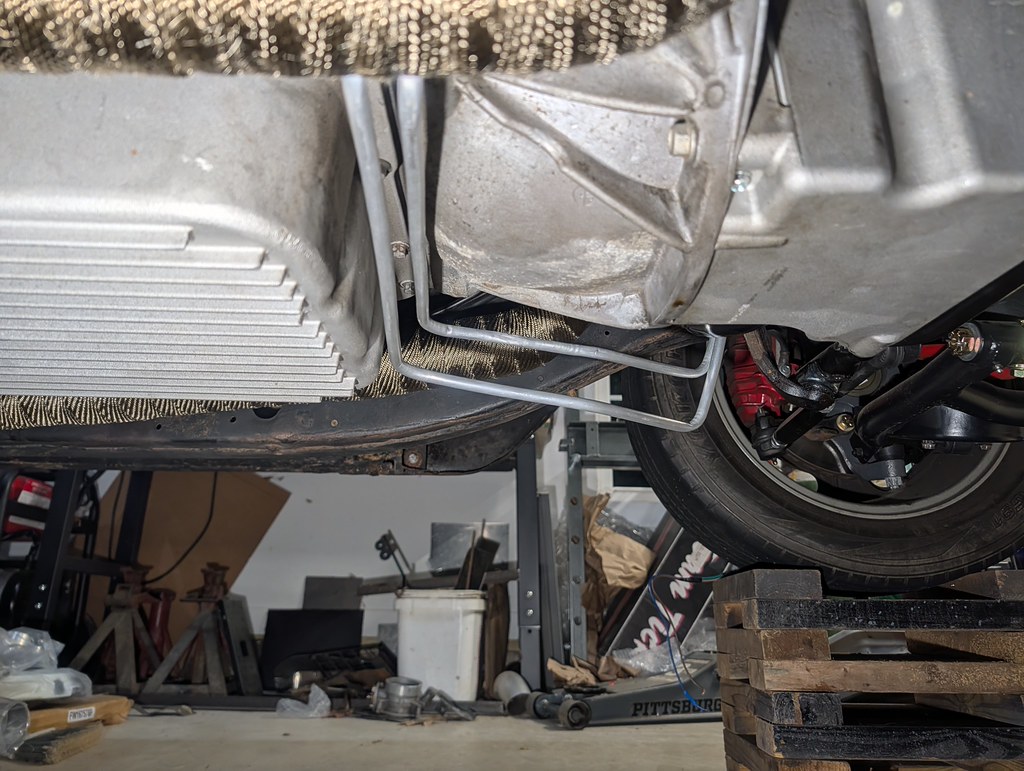
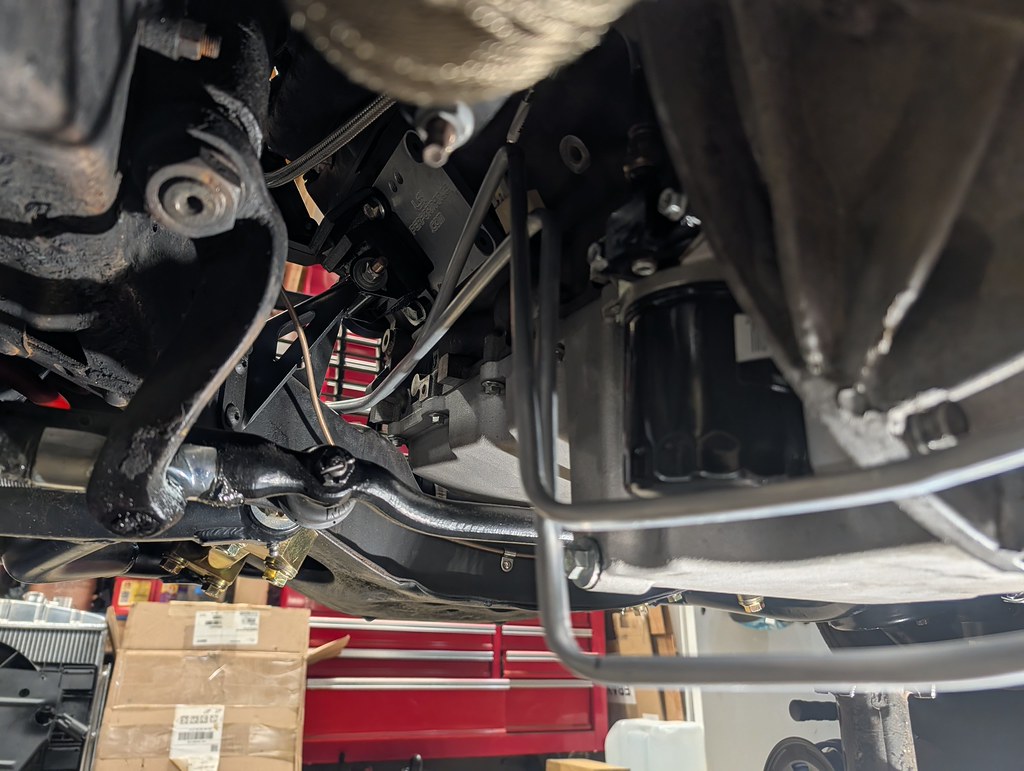
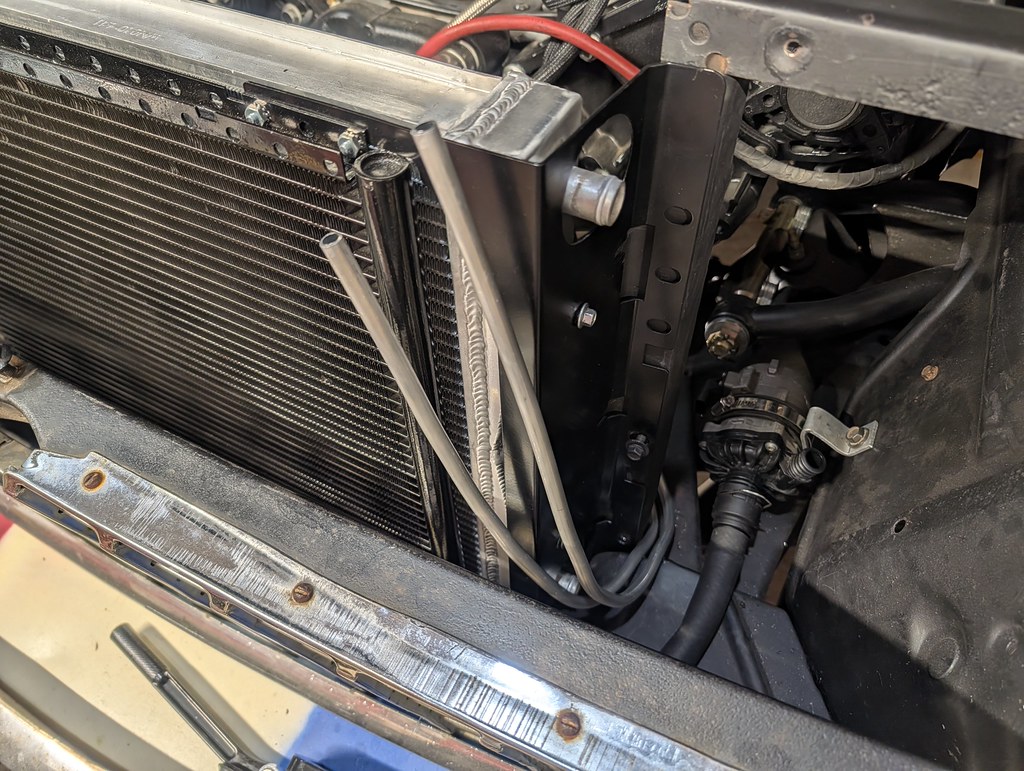
I originally had planned to run them to a bulkhead fitting and then run flex lines to the cooler, but changed my mind. Many OEM's run the hard lines right to the coolers without issues, so that eliminates several leaking points. With the placement of the lines finalized, I could notch the closeout panels and get some components bolted down for a final time.
Next up was deciding how to mount the transmission cooler. After some thought, I opted to just keep it simple and bolt on a 1/8" x 1" strap steel. I welded some studs to the back side, then ground them flush so they laid flat on the condenser.
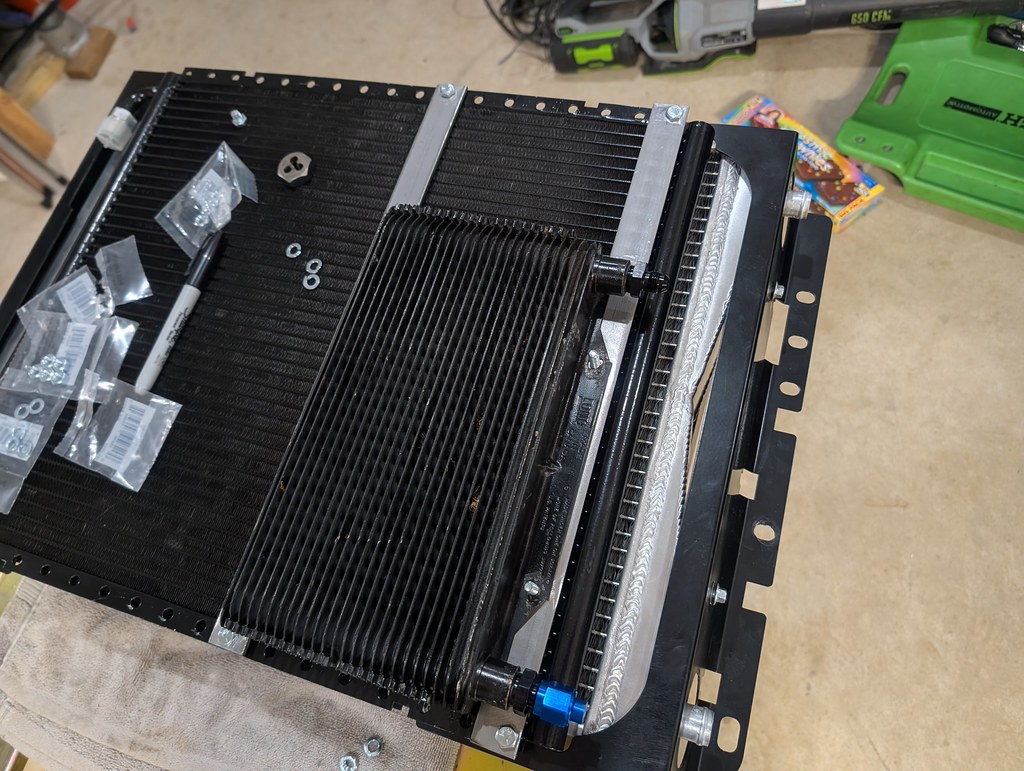
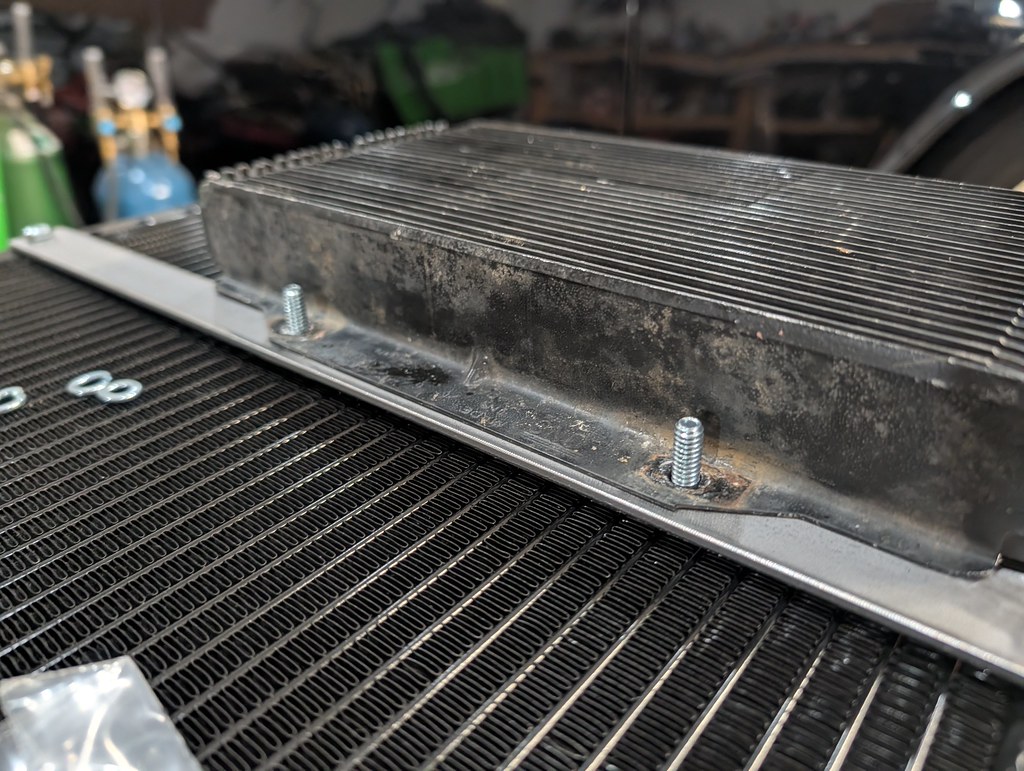
Once the brackets were finished, I painted and reinstalled them on the condenser. I ended up pulling the grill out so that I could do a proper job bending the transmission lines. I tried to take my time and keep things as symmetrical as possible.
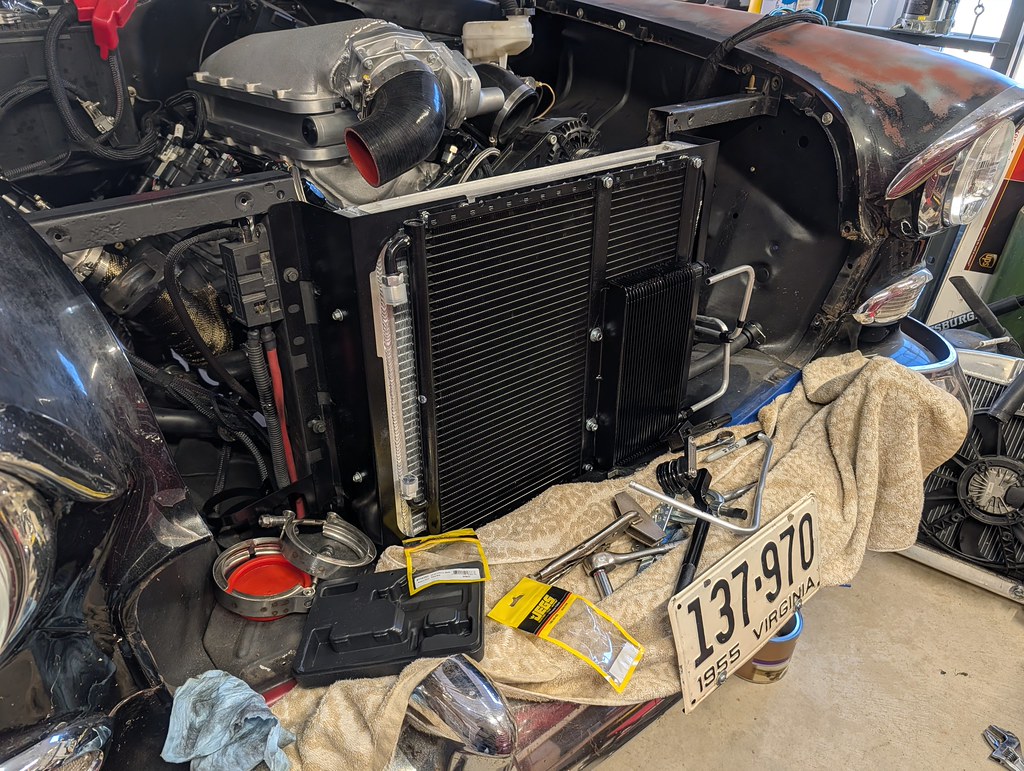
The key word was that I tried. I was thinking ahead and put the tube sleeve and nut on the lines so that I wouldn't forget them before I flared the line. However, I was thinking too far ahead and made a 90* bend and trapped the sleeve onto the line. Being the line is aluminum, you can't bend it straight and rebend it. The metal will work harden and collapse. I very carefully cut it off and had to order a new one from Jeg's. Hopefully it comes by Wednesday this week.
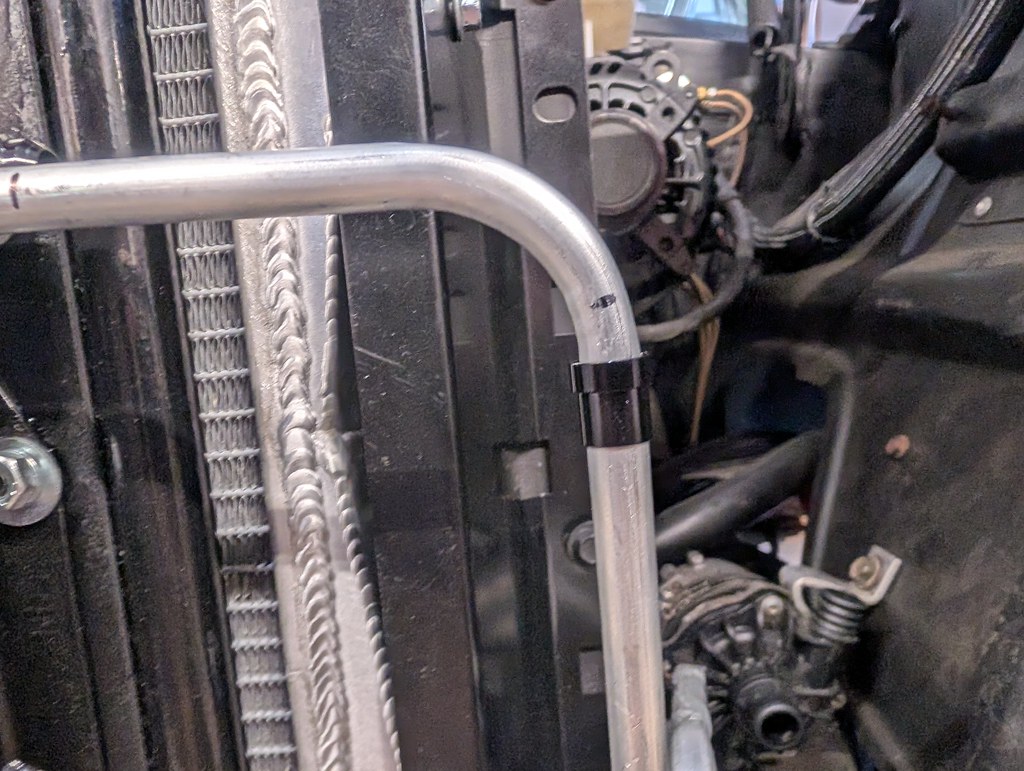
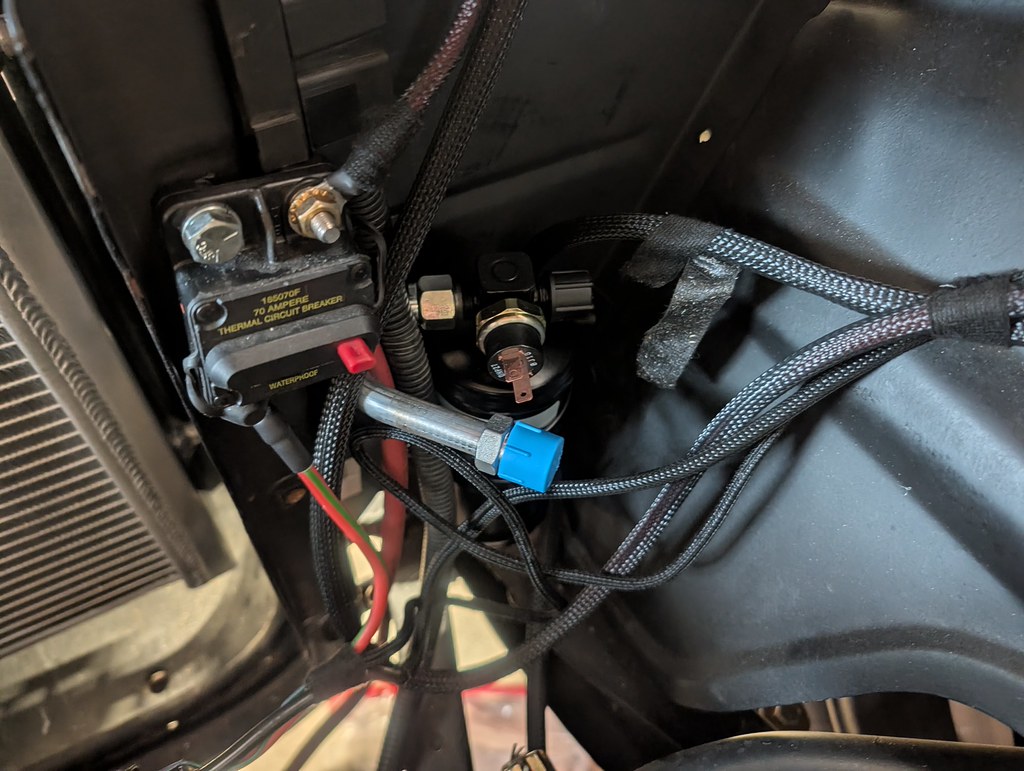
Next was to install the AC Dryer and bracket that came with the condenser kit from VA. It's really nice to just bolt stuff together without having to build your own bracketry. It also came with pre-bent lines, that only required a slight tweak to fit perfectly. I had to move around some of my electrical connections, but everything fit together just like before. Very happy about that. Still need to tidy up the wiring, but that's almost back together for a final time.
Lastly for this update is the condenser/heat exchanger/transmission cooler assembly installed for the final time. I'm very happy with how symmetrical it turned out and love the aluminum lines coming off both sides contrasts with the black cooling units. Once the new tube sleeve comes in I'll flare the tube and then I can reinstall the grill.
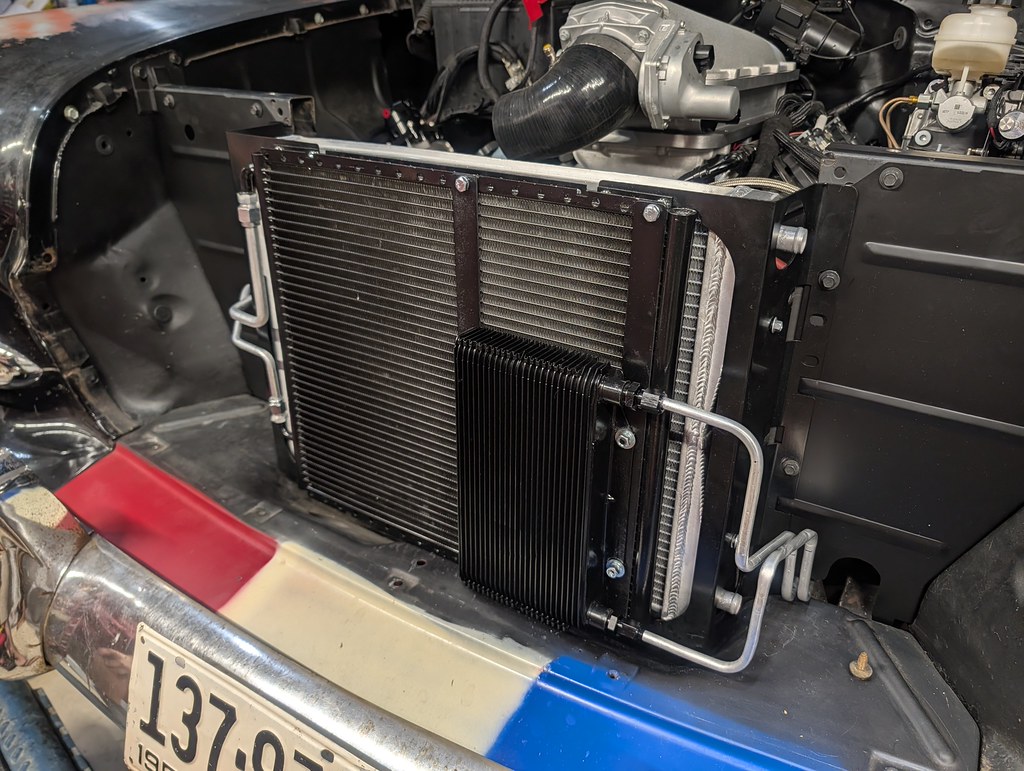
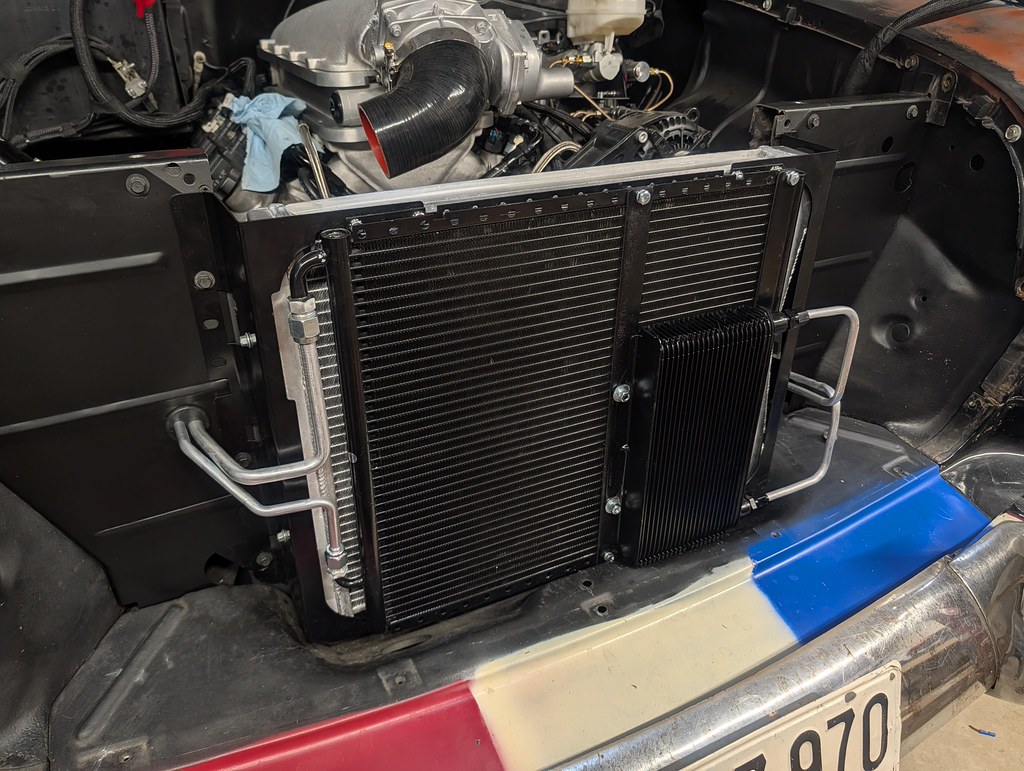
I checked off a lot of items on my list this weekend. The biggest was the transmission cooler relocation with new lines. I'm still waiting on some 3/4" hoses with 90* bends so that I can finish installing the heat exchanger/intercooler hoses. I also swapped all the plugs to a NGK TR6 for a cooler heat range while the turbo manifold was off the car and much easier to access. I'll be tightening up all of the exhaust connections and firing up the car very soon. I'm hoping the next update will include an update with a test drive!
Cheers,
Ryan
1955 Nomad project LC9, 4L80e, C5 brakes, Vision wheels
1968 Camaro 6.2 w/ LSA, TR6060-Magnum hybrid and etc SOLD
1976 T/A LS1 6 Speed, and etc. SOLD
Follow me on Instagram: ryeguy2006a
03-09-2026 #12
Registered User
- Join Date
- Nov 2018
- Posts
- 996
Looking good.
03-16-2026 #13
Registered User
- Join Date
- Sep 2009
- Posts
- 3,002
After some debate on my end, I chose to do add some manifold fittings onto the front of the intake manifold rather than try and get to them from the rear. It's very tight on the back side of the intake so this will also make servicing them much easier. One fitting is for the catch can, and the other is a manifold reference for the wastegate and BOV. I carefully covered everything inside and out so no debris got into the intake runners. Carefully measured for the center of the intake and then made some chips.
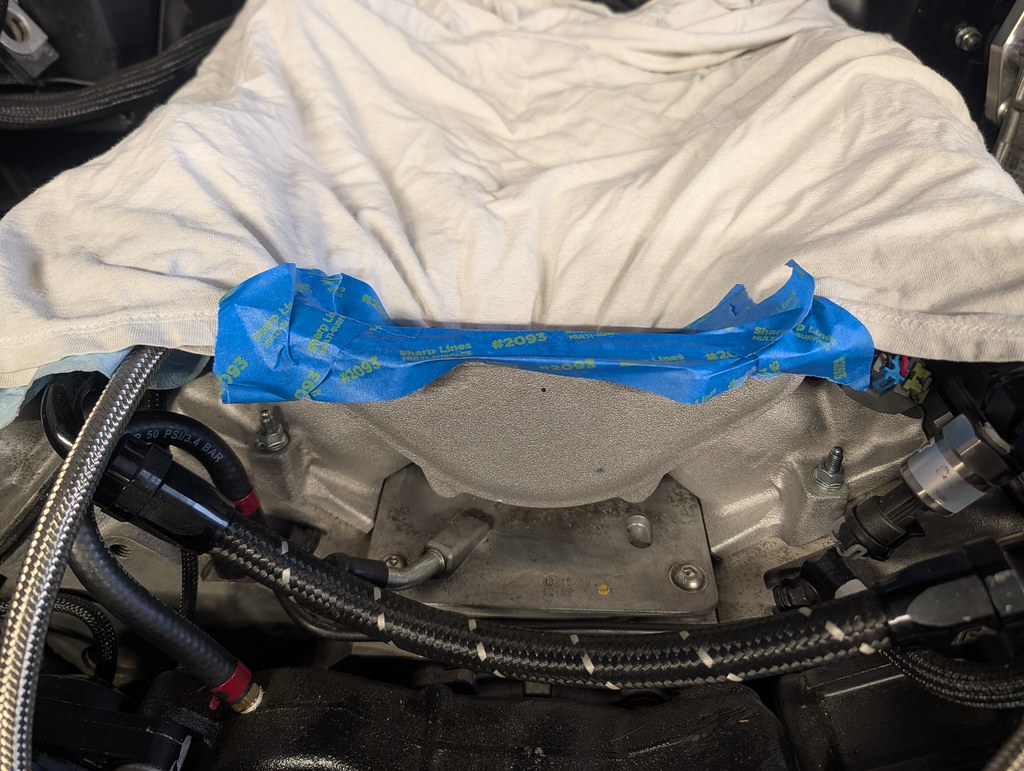
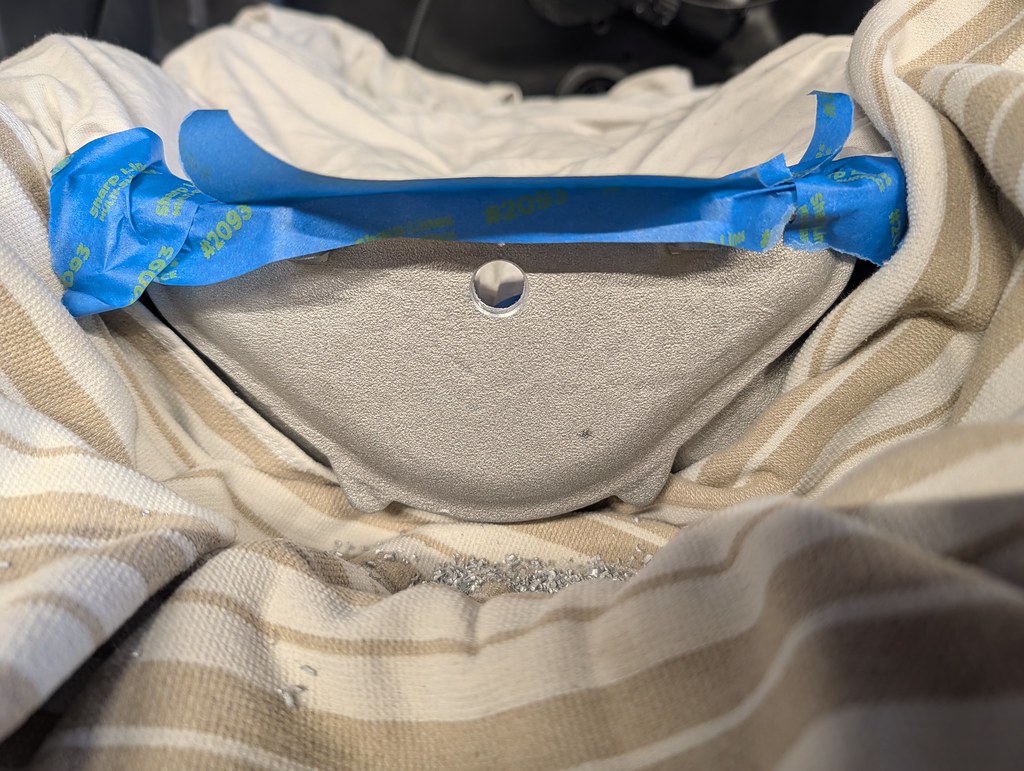
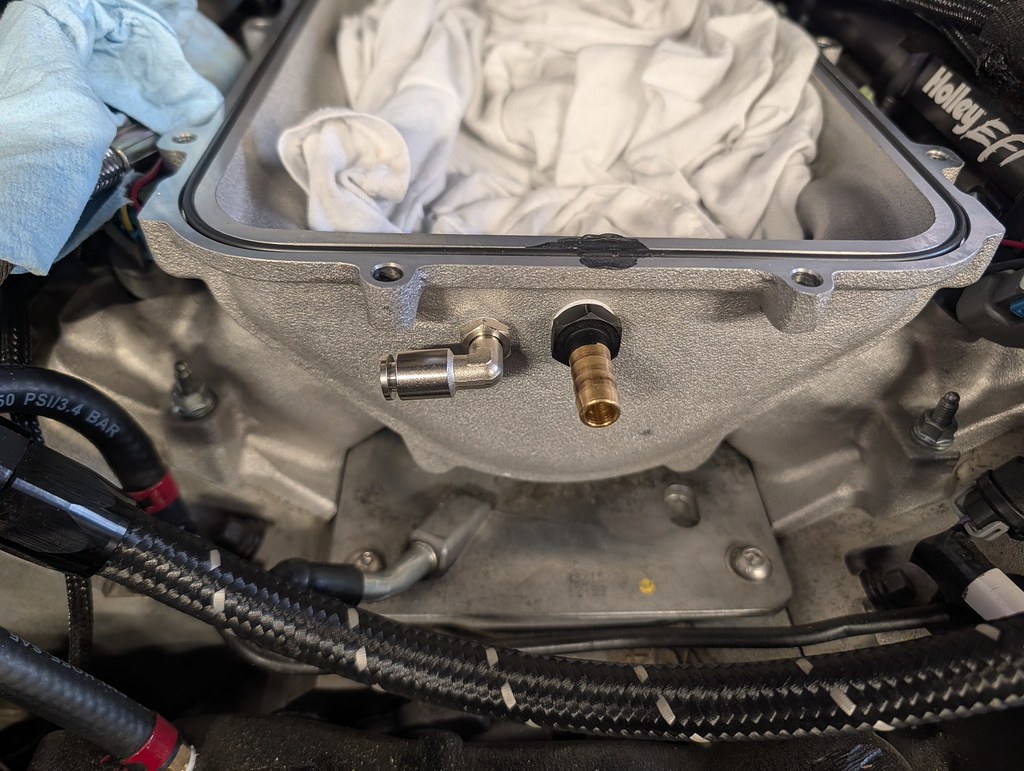
I still need to tidy up the wiring, but the dryer is installed and the lines are blocked off so no debris will get inside until I'm ready to install the AC lines. I love how nicely it tucks down low and out of the way.
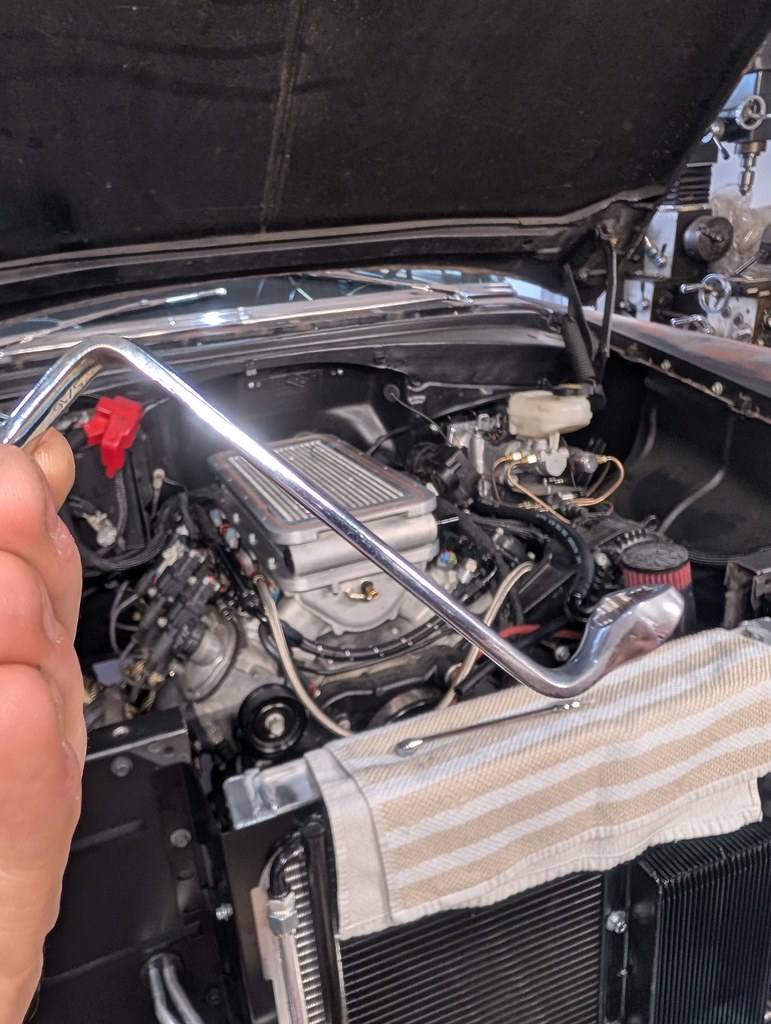
I had a heck of a time getting the rear two intercooler bolts on the back side of the intake tightened. I ended up having to make a tool in order to get them tightened. I had a spare wrench, so it went under a little surgery to make what I needed. Worked great and I could use another wrench to get more leverage to fully tighten it down.
Since I needed to order a new tube sleeve for the transmission cooler lines anyway, I opted to order a new roll of Aluminum lines and re-make the one cooler line. I went back and forth on redoing it because the lines are a pain to install, but I decided to go for it. I accidently made the 90* bend the wrong way when and attempted to twist the line, but it started to kink. Once the new parts arrived, I got to work replicating the first line. It wasn't bad at all since I had a really nice template.
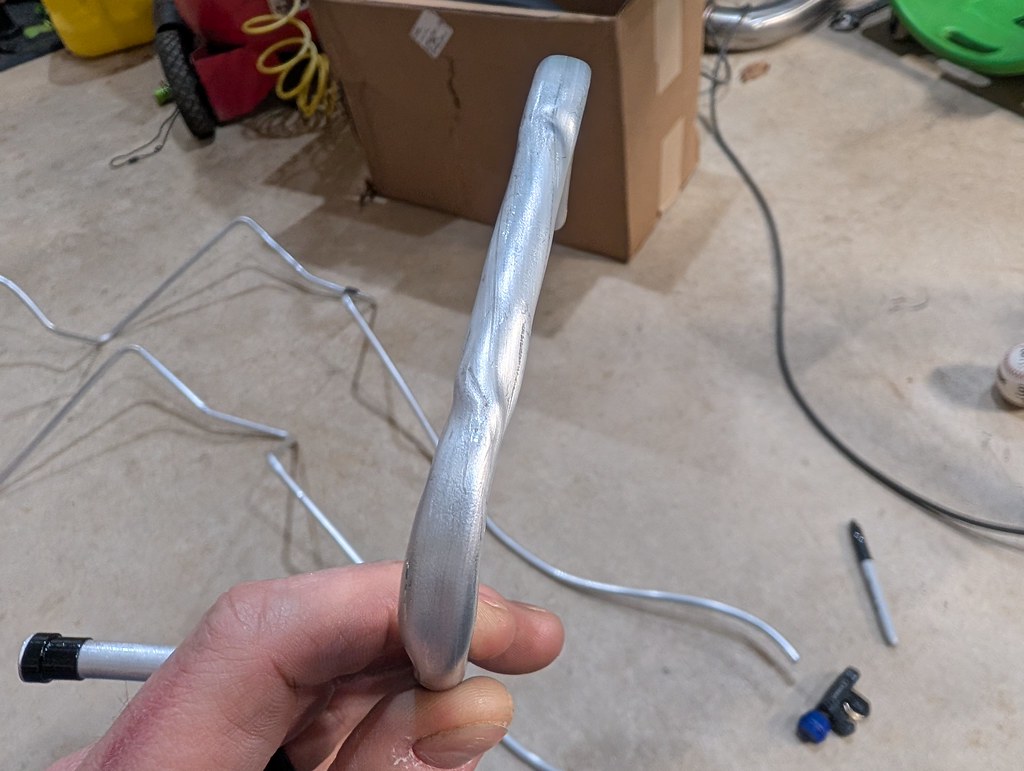
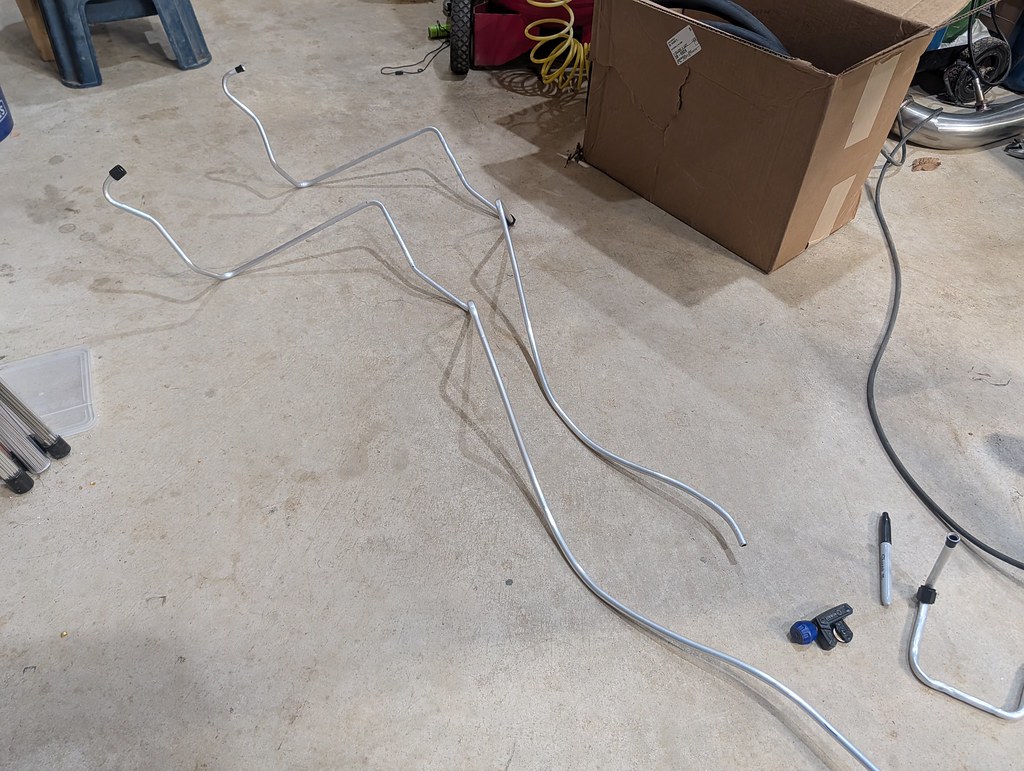
Since the aluminum is so soft, it can kink really easily. I found an easy way to bend it almost straight is to hold it on a flat surface and roll it out holding the one side straight. It gets the line 95% straight, and then you can make careful little tweaks to get it the rest of the way.
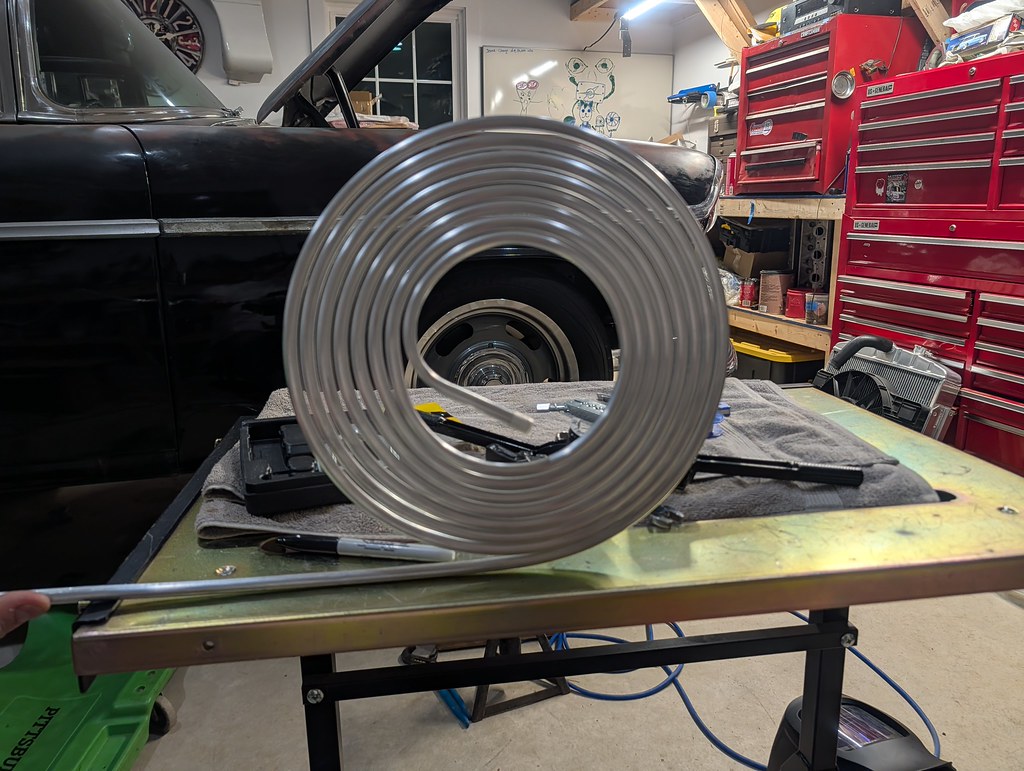
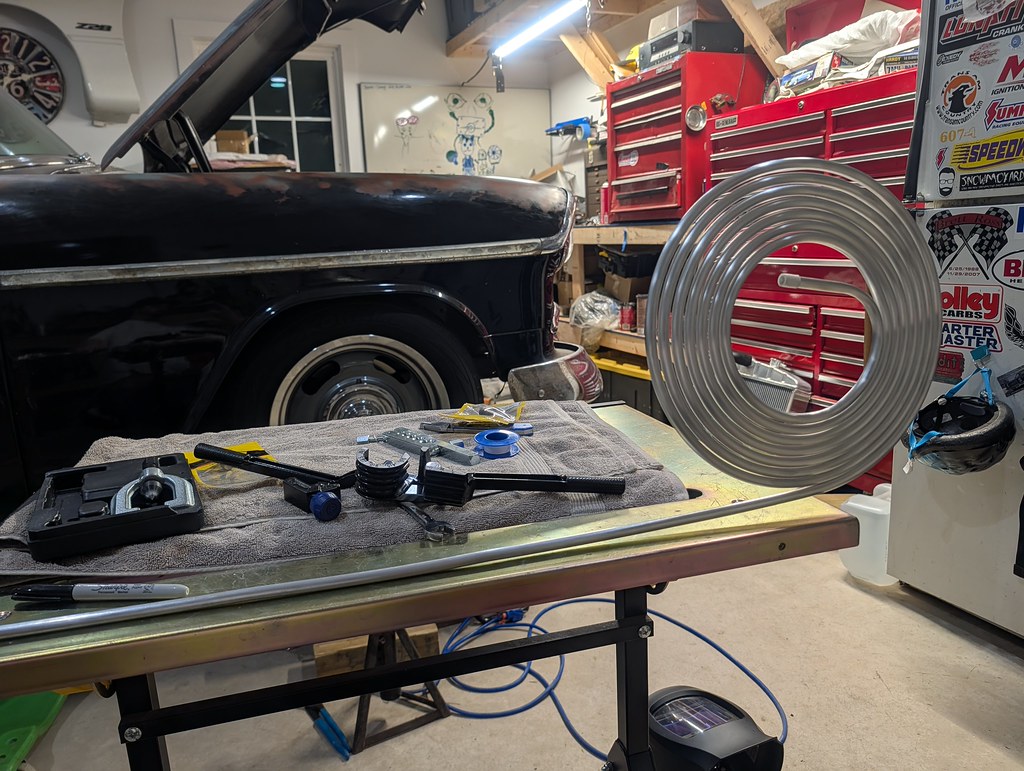
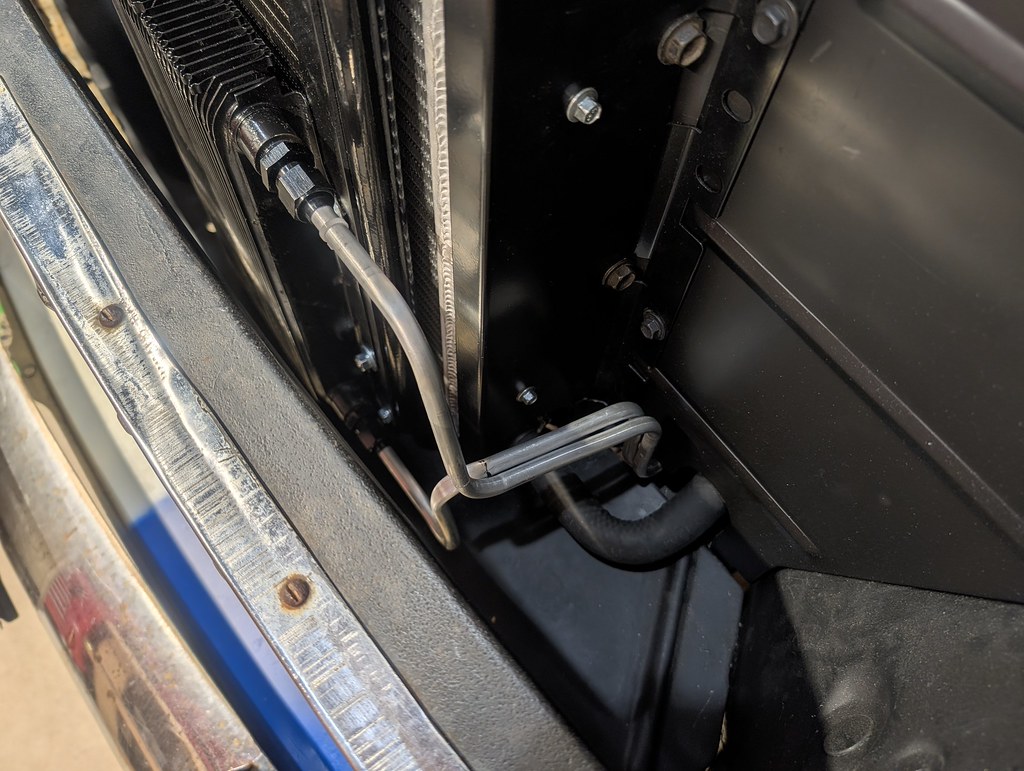
I didn't take more pictures since it was redundant, but the new line is completely finished and looks (and likely performs) way better than it did. Now that is done, I was able to reinstall the grill. Glad more pieces are going back on.
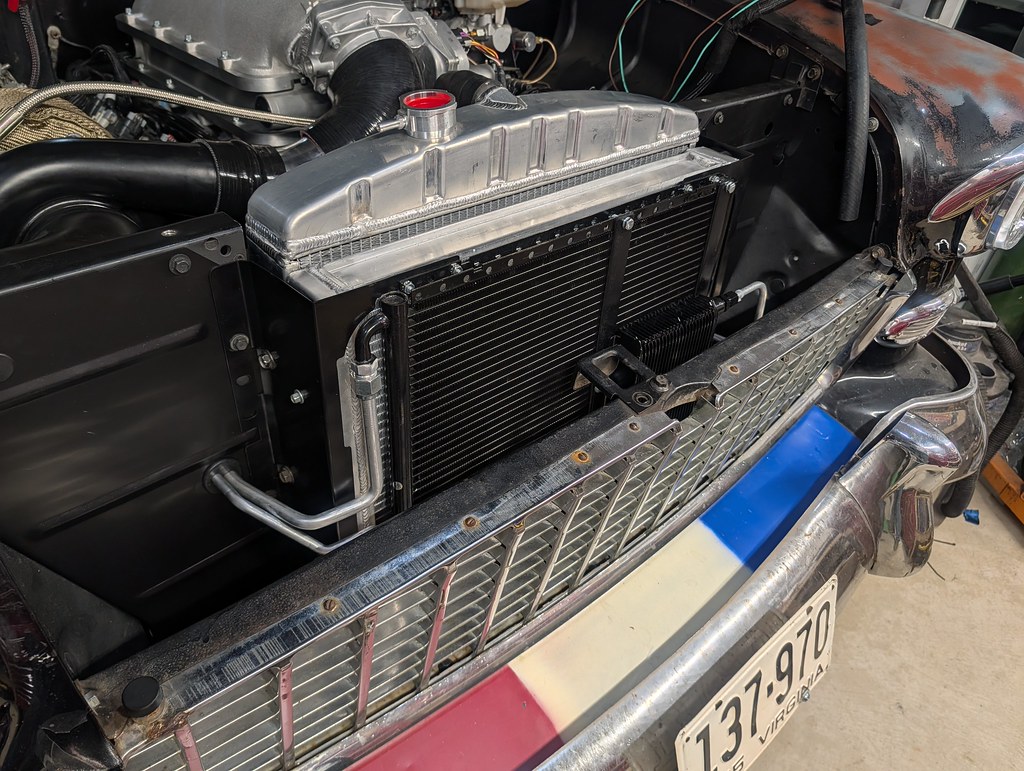
The heat exchanger hoses that I bought two weeks ago finally were delivered, so that I can start to finish plumbing for the air to water intercooler system. I started at this lower hose. It fits just like I wanted to and looks great. The transmission cooler lines are also there and am very happy with how symmetrical they look.
Here's the box of Dayco 80418 hoses. They are 3/4" with a tight 90* on one end and 60" of hose on the other. I know a lot of guys use these for the "LS Swap" heater hoses, but this also worked great for this application.
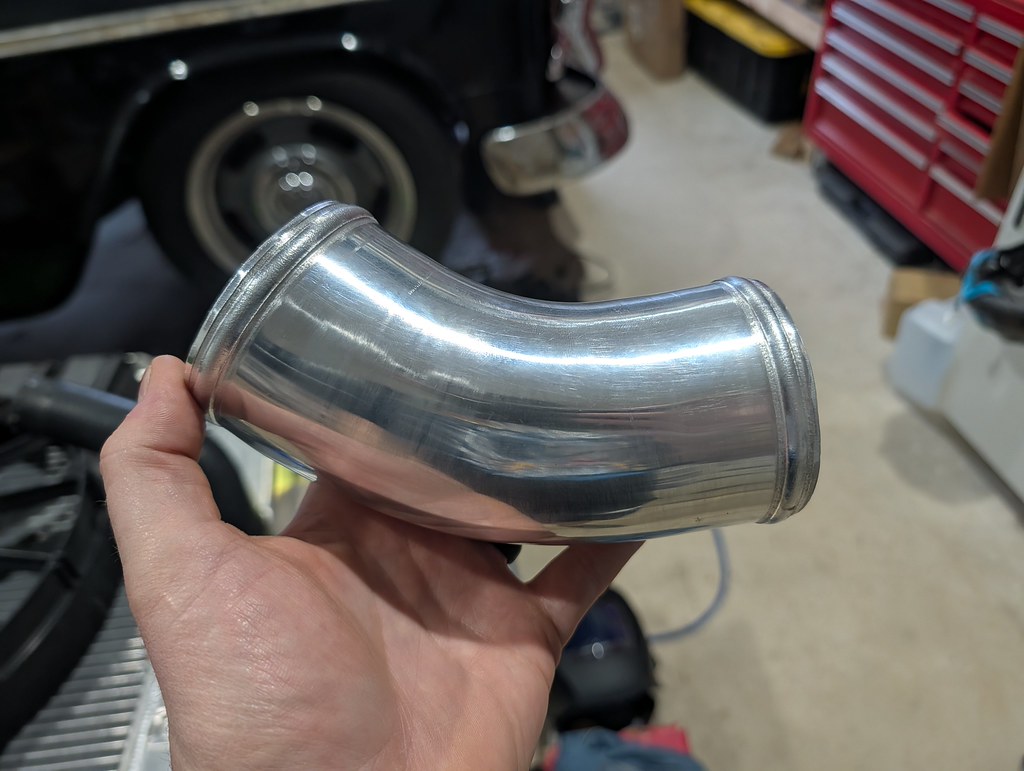
I had bought a cheap bead roller for charge pipes online, but it ended up being junk which is no surprise. The guy that welded my intake said he had a bead roller and I was able to trim up the pipe and take it over to him this weekend. Looks great and is now ready for a BOV flange!
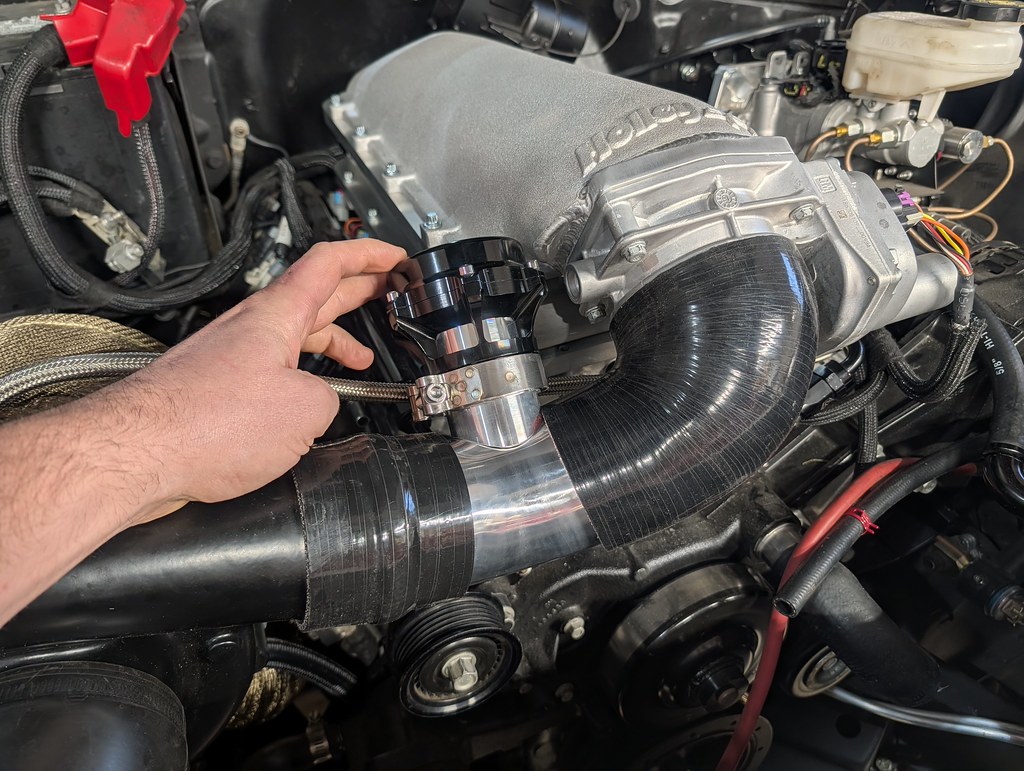
Here's where the BOV is going to live. I'm going to trim up the coupler a little bit once the flange is welded in place, then it will get bolted down.
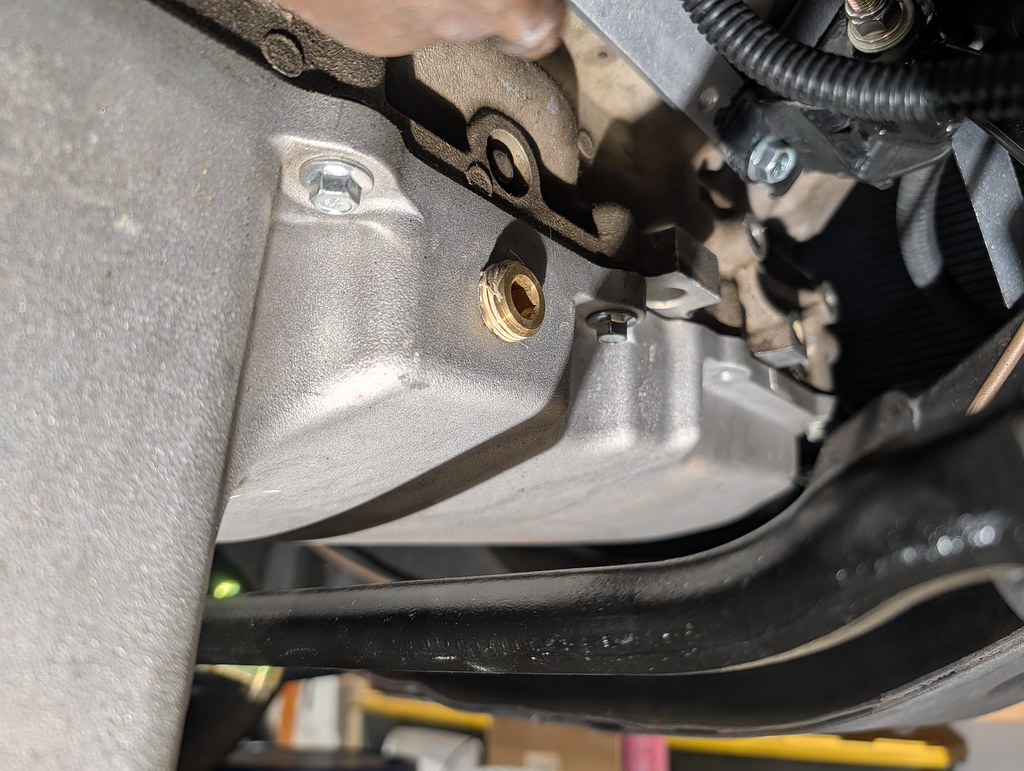
I'm really glad that I planned ahead for this turbo build several years ago when I was first putting the car together. Before I installed the oil pan for good, I drilled and tapped it for my turbo drain. I used a 1/2" NPT, so all I had to do was pull the plug and replace with my fitting. Love an easy job!
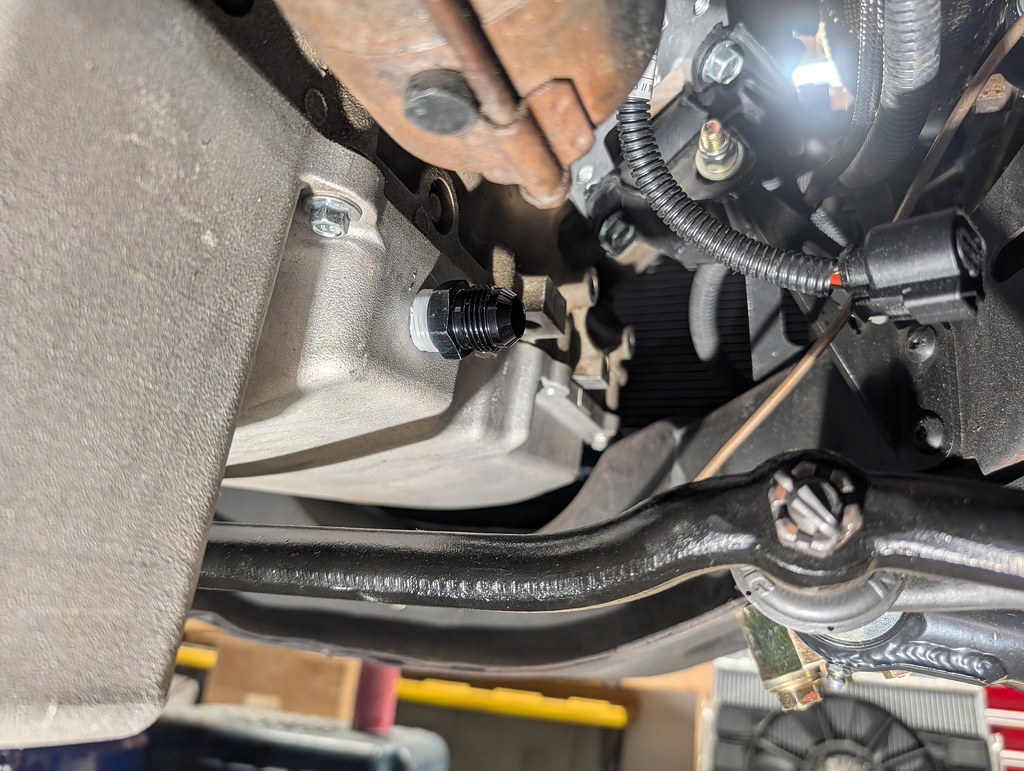
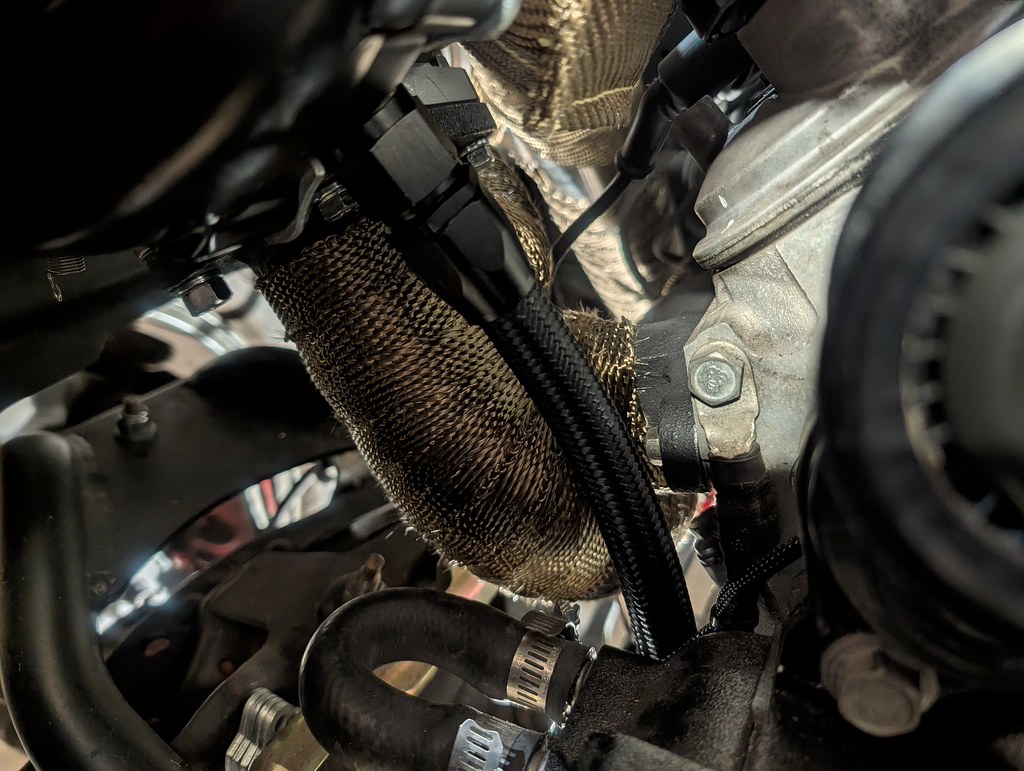
Built and installed the drain line as well. That was very straightforward as well.
The list is starting to get quite small now. It won't be long now until I can see if all this work paid off!
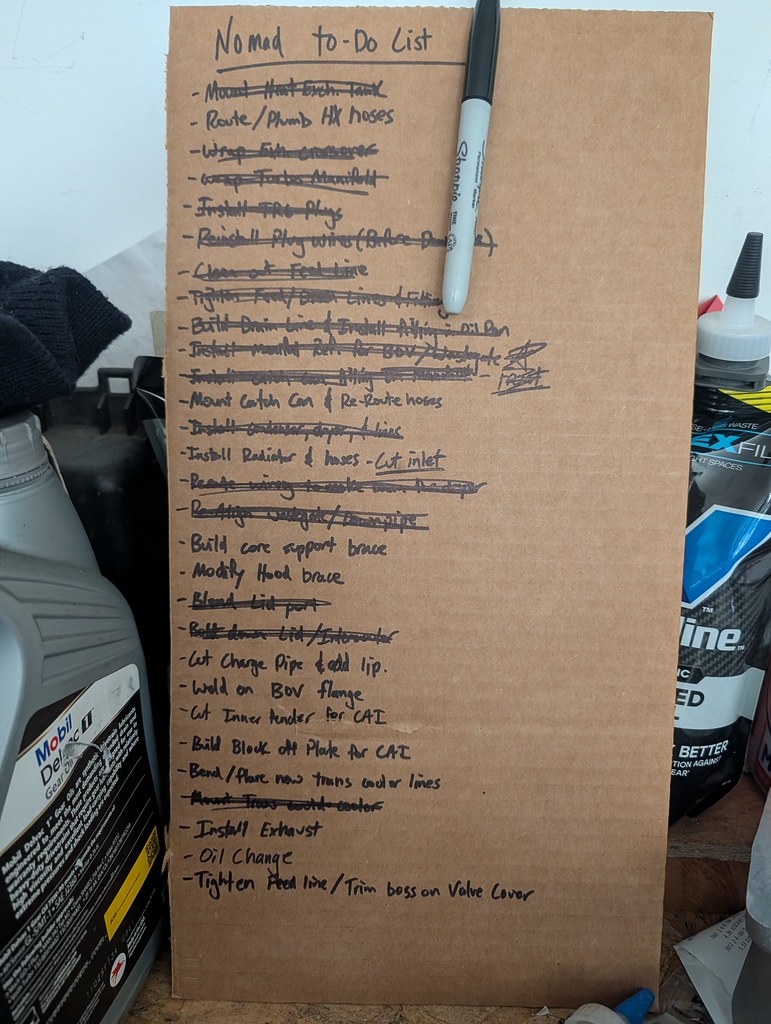
Last big things are reinstalling the radiator, building a mount for the catch can, mounting the HX, finish plumbing HX, and a few misc. hoses and wiring. I can't wait.
Cheers,
Ryan
1955 Nomad project LC9, 4L80e, C5 brakes, Vision wheels
1968 Camaro 6.2 w/ LSA, TR6060-Magnum hybrid and etc SOLD
1976 T/A LS1 6 Speed, and etc. SOLD
Follow me on Instagram: ryeguy2006a
03-16-2026 #14 Administrator
- Join Date
- Jan 2000
- Location
- Thousand Oaks California
- Posts
- 10,230
Nice progress!
Larry Callahan
Founder/Administrator of Pro-Touring.com, G-Machines.com and HostMyJunk.com
To advertise on Pro-Touring.com click here
03-23-2026 #15
Registered User
- Join Date
- Sep 2009
- Posts
- 3,002
Thanks Larry!
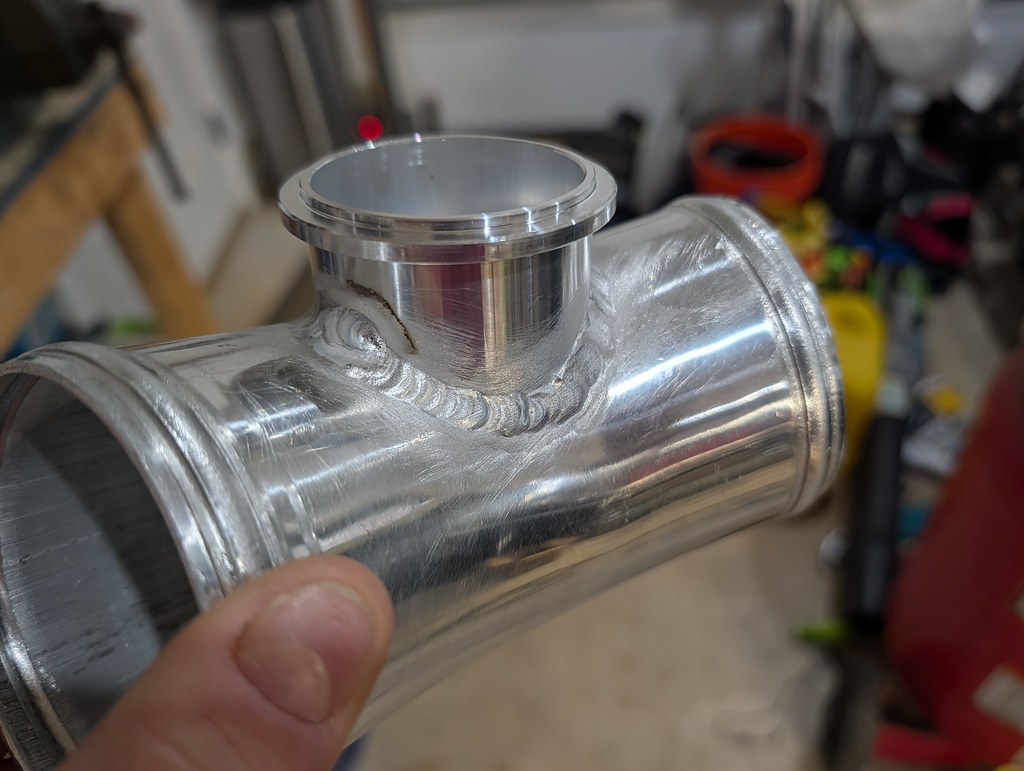
Now that the charge pipe is mocked up and I'm happy with where I can place the BOV, it was ready to be burned in. I left the pipe intact while welding and then used a hole saw to drill out the center. Worked really nicely to prevent me from burning through the pipe. I practiced a little on some scrap aluminum, then pulled the trigger on the real piece. It turned out pretty good considering it's one of the few aluminum pieces I've welded.
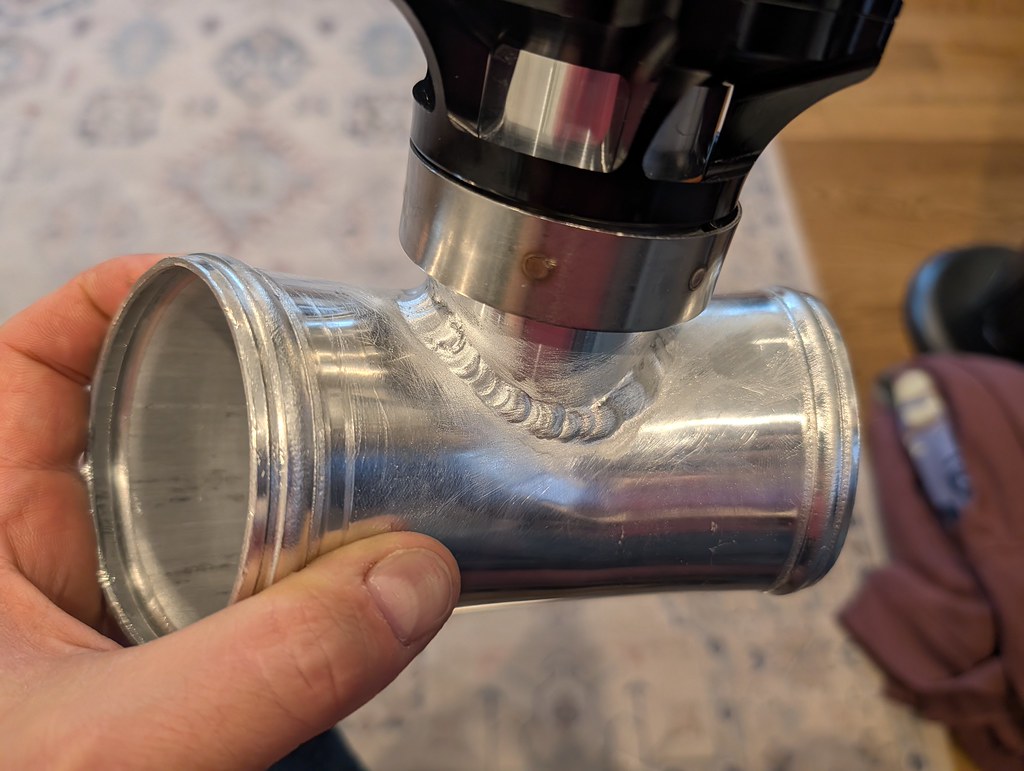
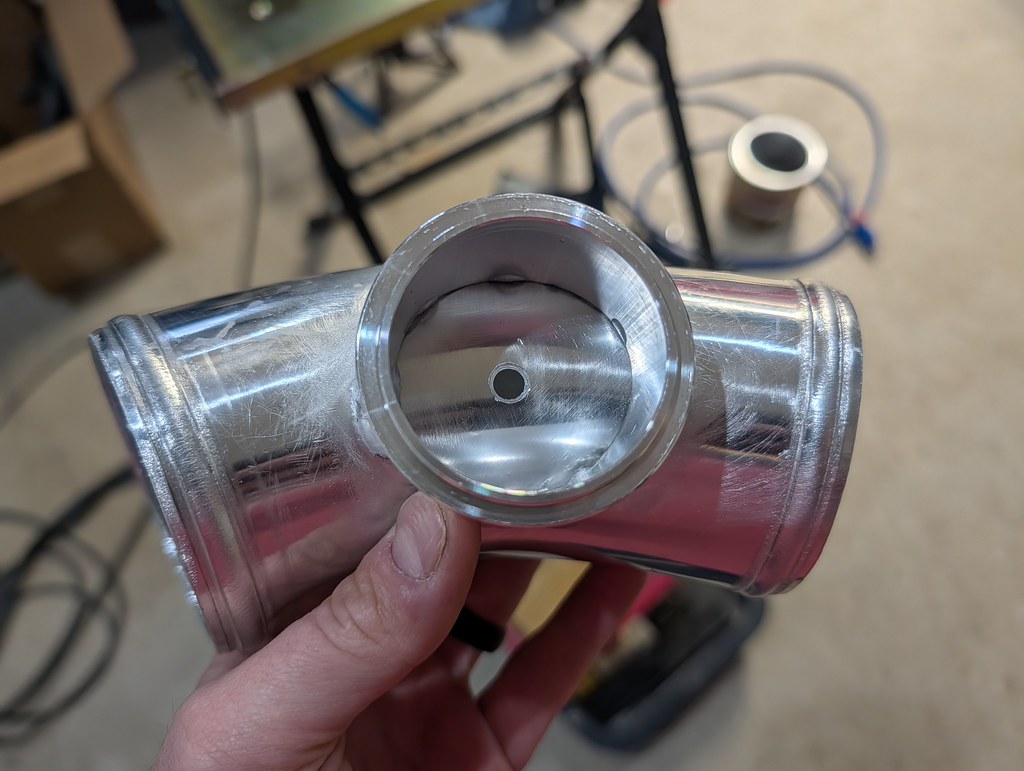
After that was all done it was time to get the pipe installed and bolted down for good.
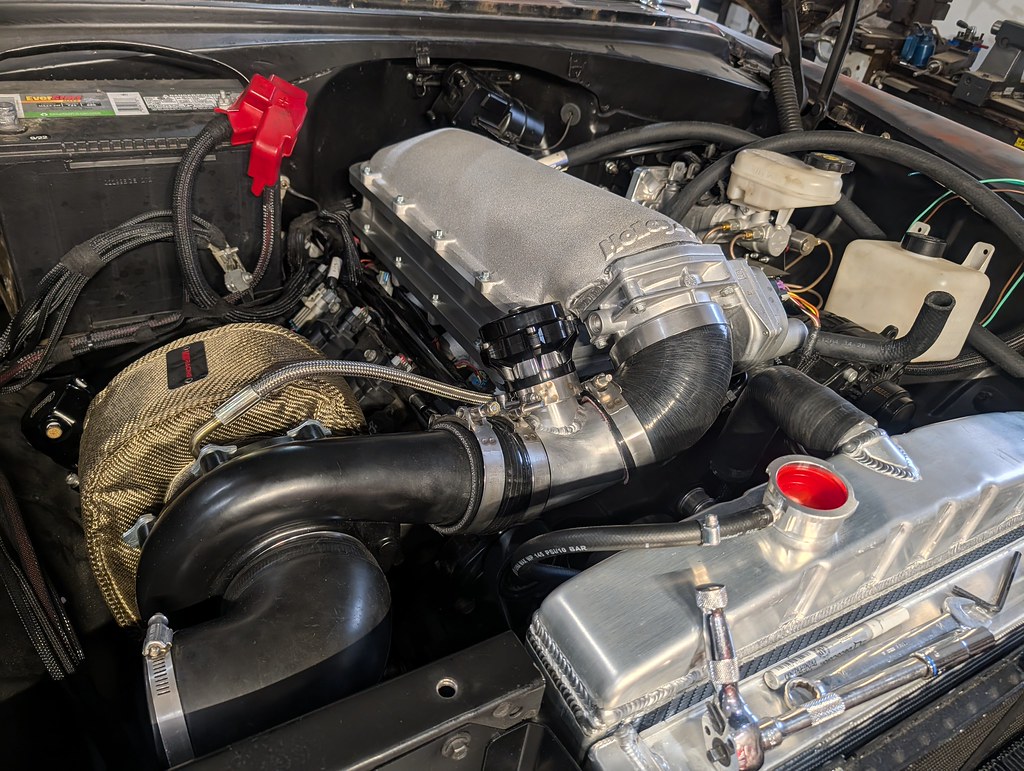
I built a new bracket for the catch can and switched over to mild steel this time. I was going along pretty good, then I think I built up too much heat and it started to glob up at the end of the weld. Plenty strong though.
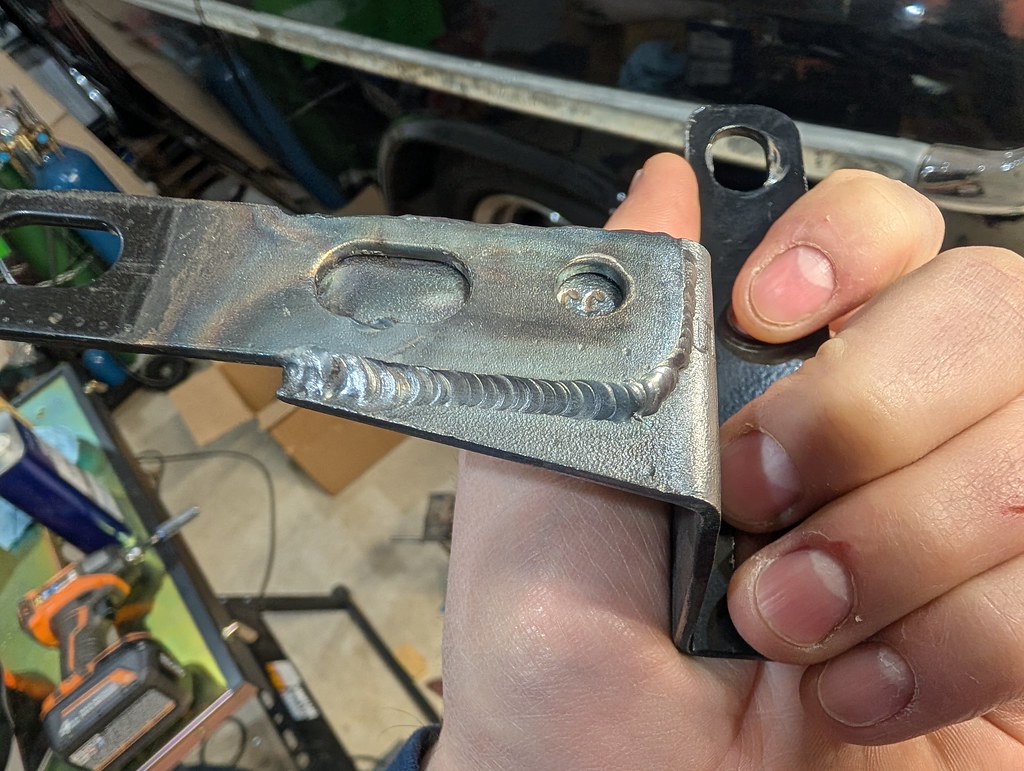
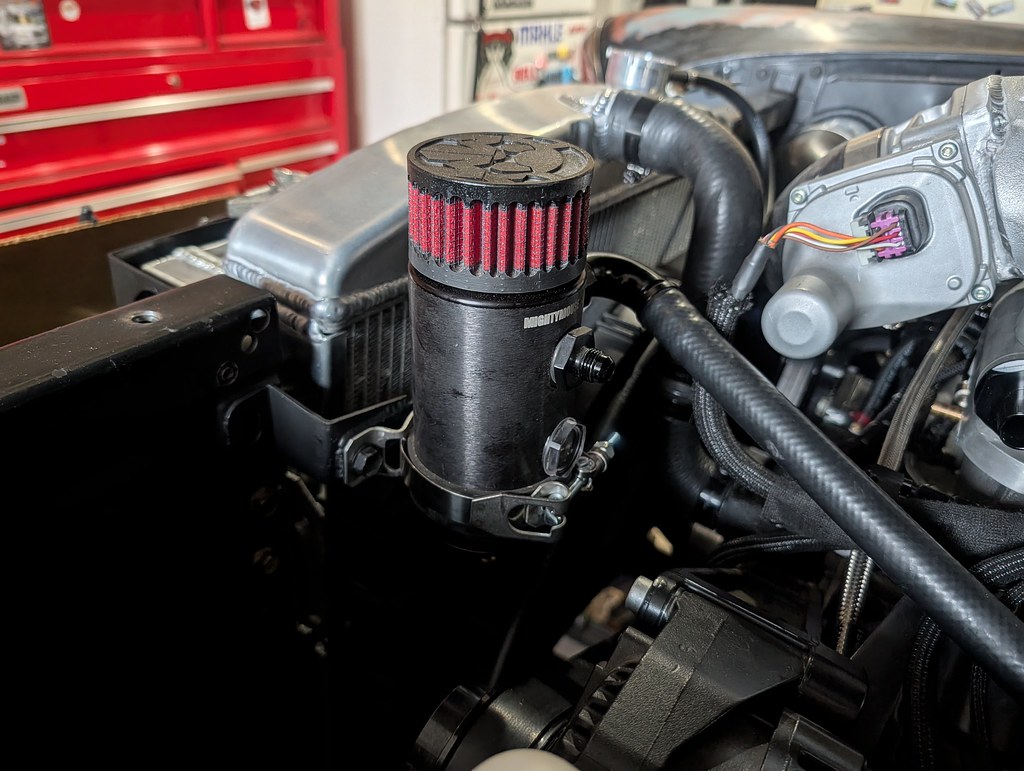
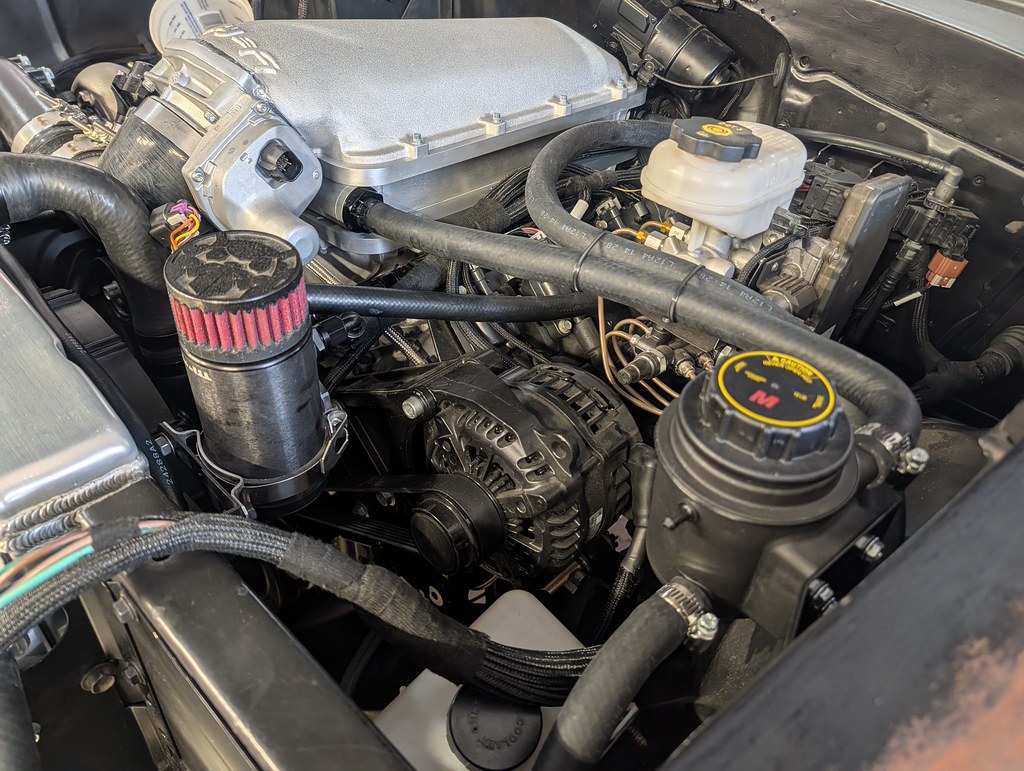
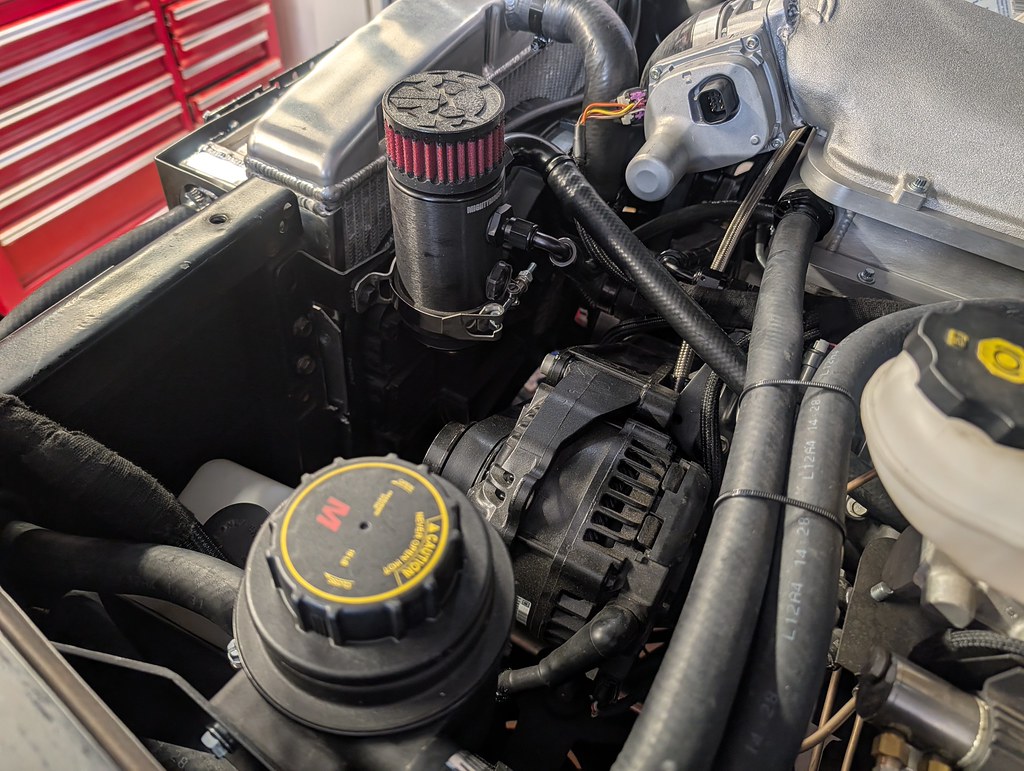
This is when I stopped getting as many pictures because I was just trying to grind out the work. My dad also stopped by this weekend for a visit and he helped me with some small things and verify fitment. We mounted the coolant swirl pot for the intercooler and I was able to get all of the lines routed nice and neatly. You can also see the finished catch can routing.
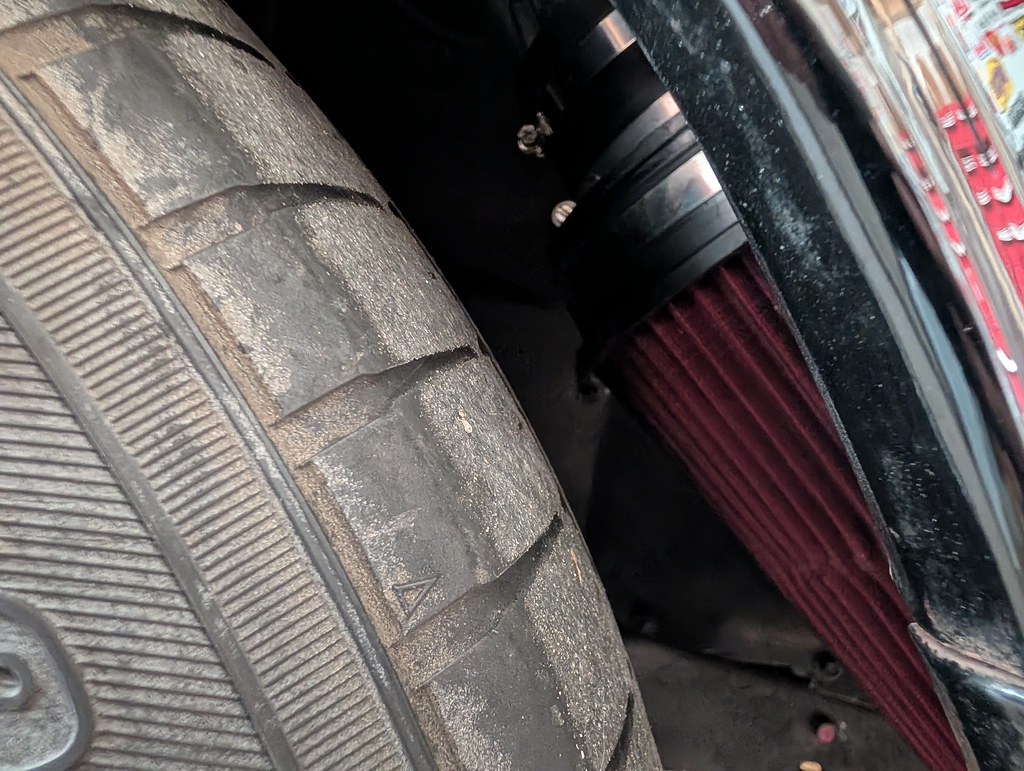
One of the last things that I needed to do was cut a hole for the CAI. There are many ways that I could have routed this, but I liked the clean look of routing it through the inner fender and having the filter in front of the tire.
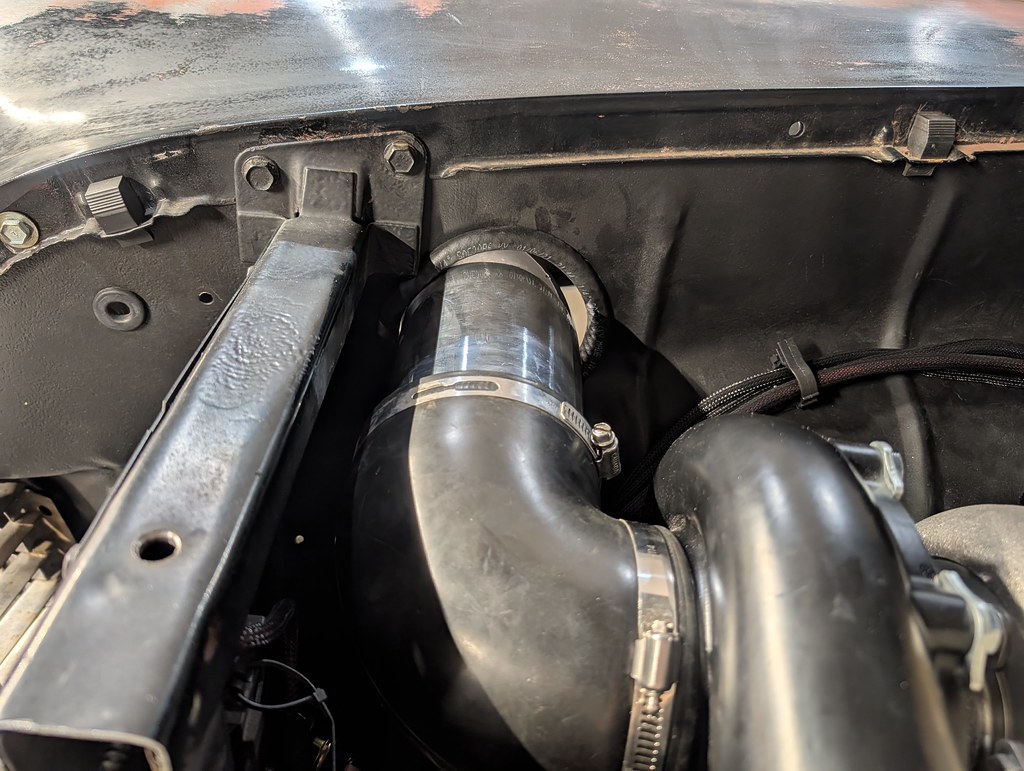
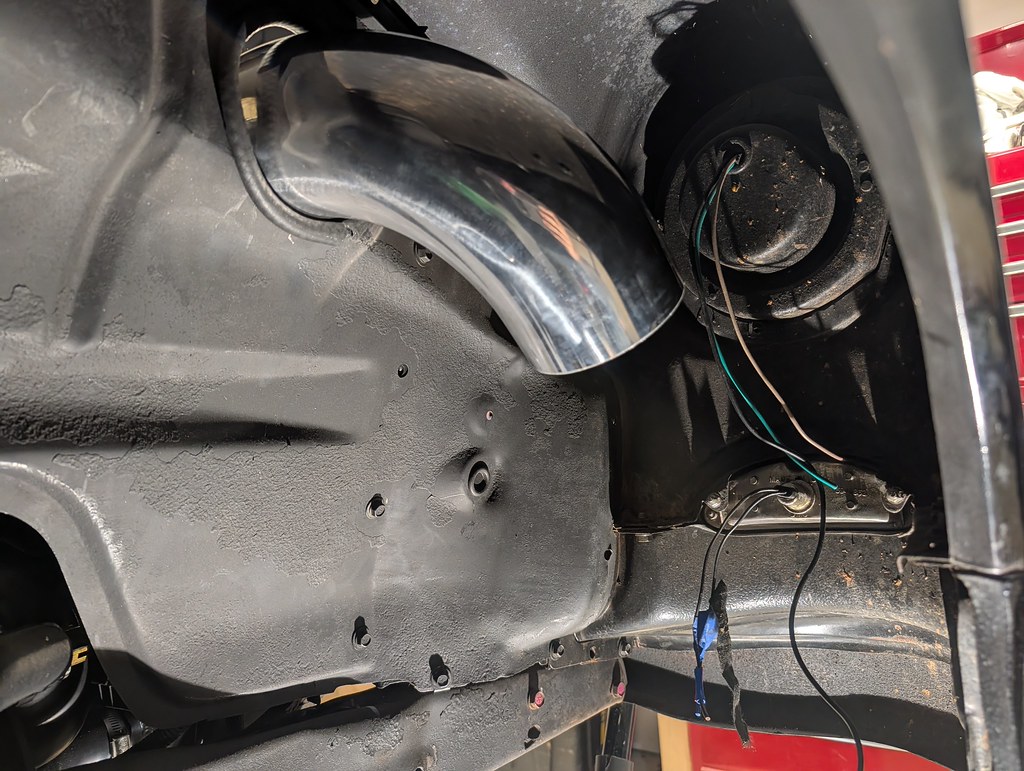
Now after a little test fitting it became clear that I need an additional pipe to route the filter a little differently, but overall very pleased with the fitment of everything. I ordered it and that should be here soon. This was after the first test fit. I was able to loosen the pipe and reclock it higher which gained me another inch, but still would contact the tire at around 3/4 of the wheel turned. Good enough for an initial test drive!!
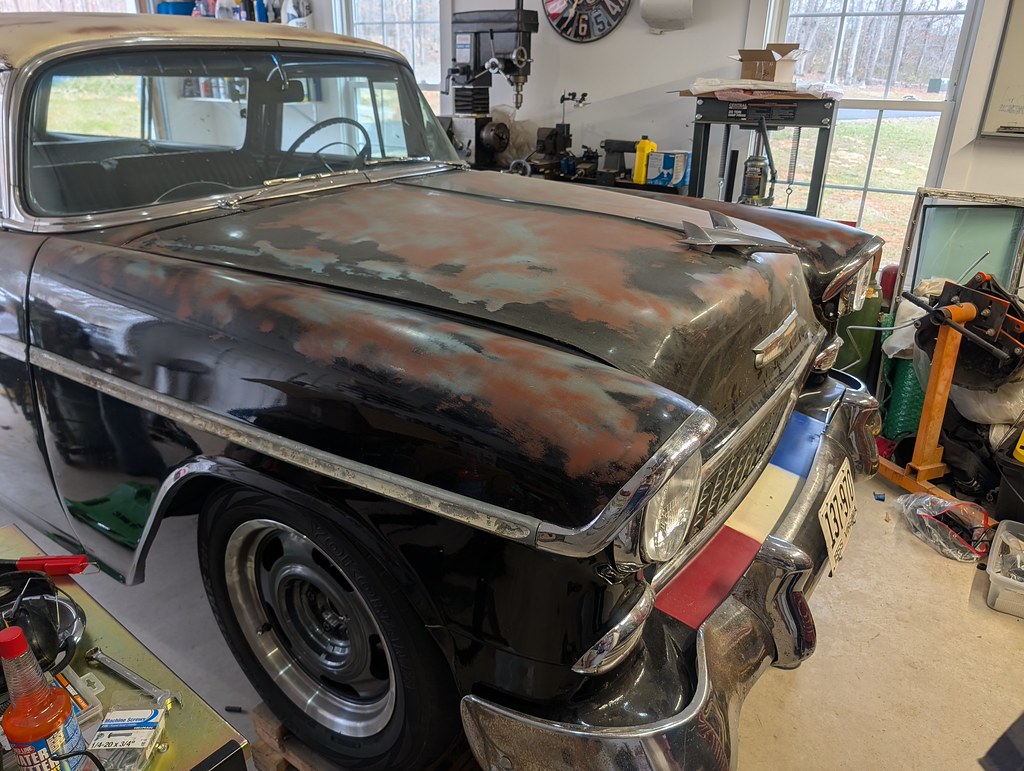
At this point, I had waited long enough and just wanted to see if this thing would actually run/drive and build boost! The one last thing that I needed to do before I could shut the hood was to drill out the rivets for the hood baffle. With the center mounted radiator, that baffle was contacting the radiator. For now, I just drilled them out which allowed for the hood to shut. One thing that I didn't get a chance to do was wire up the heat exchanger coolant pump, so for now I was effectively running it without an intercooler, but I just had to hear it run and drive it down the road again.
I had my dad help to prime the oil system and make sure there was oil feeding the turbo before I fired it up for the first time in 2026. Cranked with no fire... Hmmm... checked everything and ended up leaving the TB unplugged. Plugged that back in and it immediately fired right up! I let it run for a minute or two to check for leaks. Not one leak!! At this point I left off the full exhaust because I wanted to confirm there were no leaks with the new transmission lines. I quickly installed the rest of the exhaust and then lowered it back down onto the ground and backed it out of the driveway again. That felt amazing.
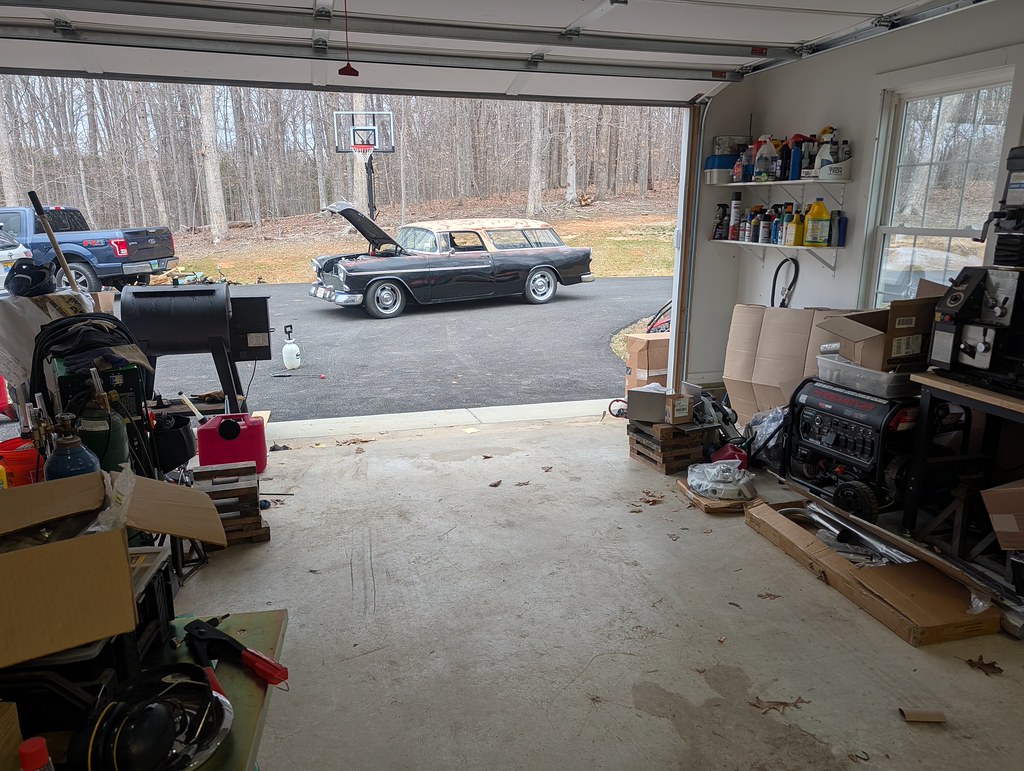
I let it run up to temperature and I had also tripped the breaker for the cooling fans at some point. Once that was reset, the fans kicked on and the temps stabilized. Then my Dad, my youngest son and I drove it up and down the road maybe 3 miles round trip. Everything felt great, and best of all the car built some boost! The coolest part for me was when I let off the throttle and the BOV made that whoosh sound. Such a cool sound! We brought it back and then let it all cool off. I took out the car again yesterday this time with just my Dad and I was able to really get on it. We made a few WOT pulls and the car performed great. It definitely feels more powerful, but I'd still like more. I left the 8 psi springs in that came installed from Summit. When I reviewed the datalog, it looked like the most boost it saw was 135 kpa or ~5psi. I think what I'll do is swap out the springs for the 17psi combination of springs which will hopefully net more like 10-12psi where I'm targeting. I couldn't be happier with the car overall and it's also quieter at cruising speeds which is a nice fringe benefit. The older I get the quieter I'm liking the cars haha. One thing I also thought was really cool is that even without the intercooler hooked up the highest the IAT's saw was 140 and it was about 85* yesterday so it was a pretty good stress test.
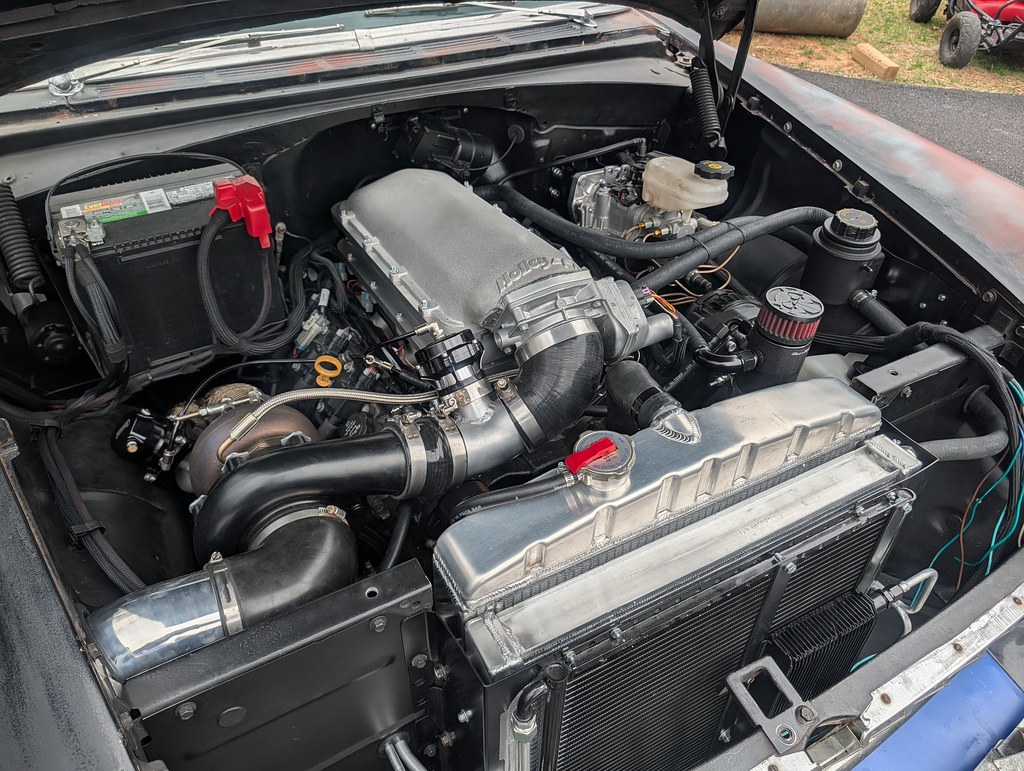
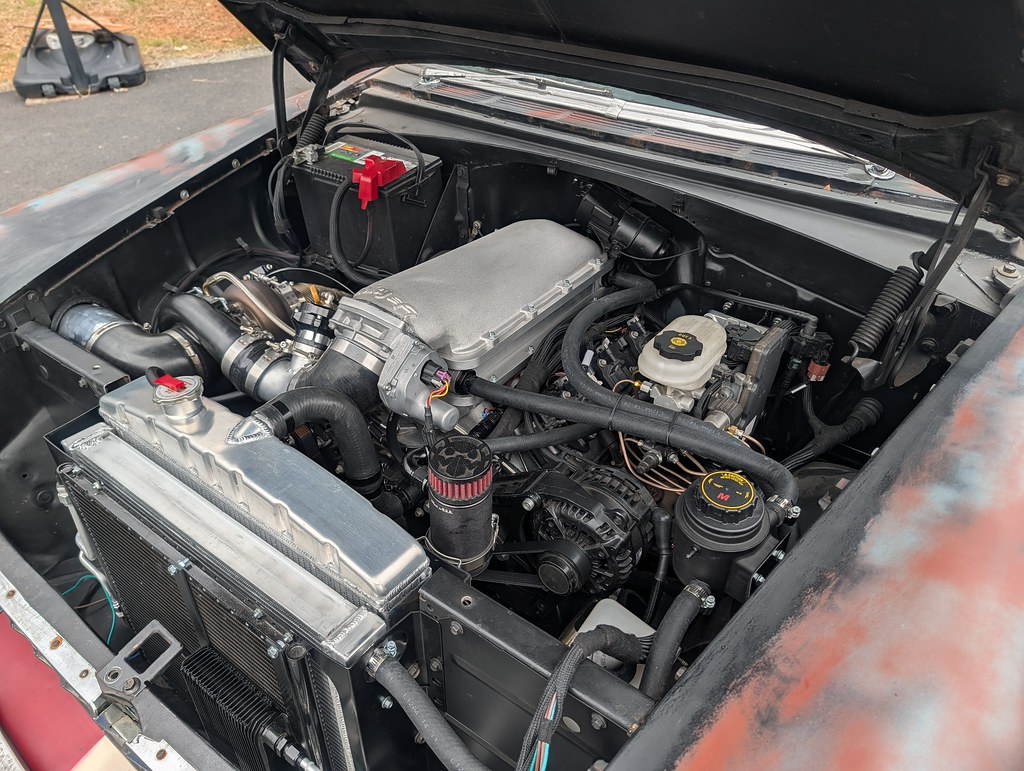
Here are some nearly final engine bay pictures. Once everything burns off with the heat wrap, turbo and whatnot, I'll install the turbo blanket. I think that will help keep things much cooler in the engine compartment.
Cheers,
Ryan
1955 Nomad project LC9, 4L80e, C5 brakes, Vision wheels
1968 Camaro 6.2 w/ LSA, TR6060-Magnum hybrid and etc SOLD
1976 T/A LS1 6 Speed, and etc. SOLD
Follow me on Instagram: ryeguy2006a
03-25-2026 #16
Registered User
- Join Date
- Jul 2006
- Location
- Chesapeake, VA
- Posts
- 678
Ah, now that's a rewarding day!
Cars are meant to be driven.
John B
03-25-2026 #17 Registered User
- Join Date
- Nov 2006
- Location
- Mountain Springs, Texas
- Posts
- 4,877
Like
 1969 Camaro - LSA 6L90E AME sub/IRS
1957 Buick Estate Wagon
1959 El Camino - Ironworks frame
1956 Cameo - full C5 suspension/drivetrain
1959 Apache Fleetside
03-25-2026 #18
Registered User
- Join Date
- May 2009
- Posts
- 145
Amazing to see it run! How did you like the brakes?
03-31-2026 #19
Registered User
- Join Date
- Sep 2009
- Posts
- 3,002
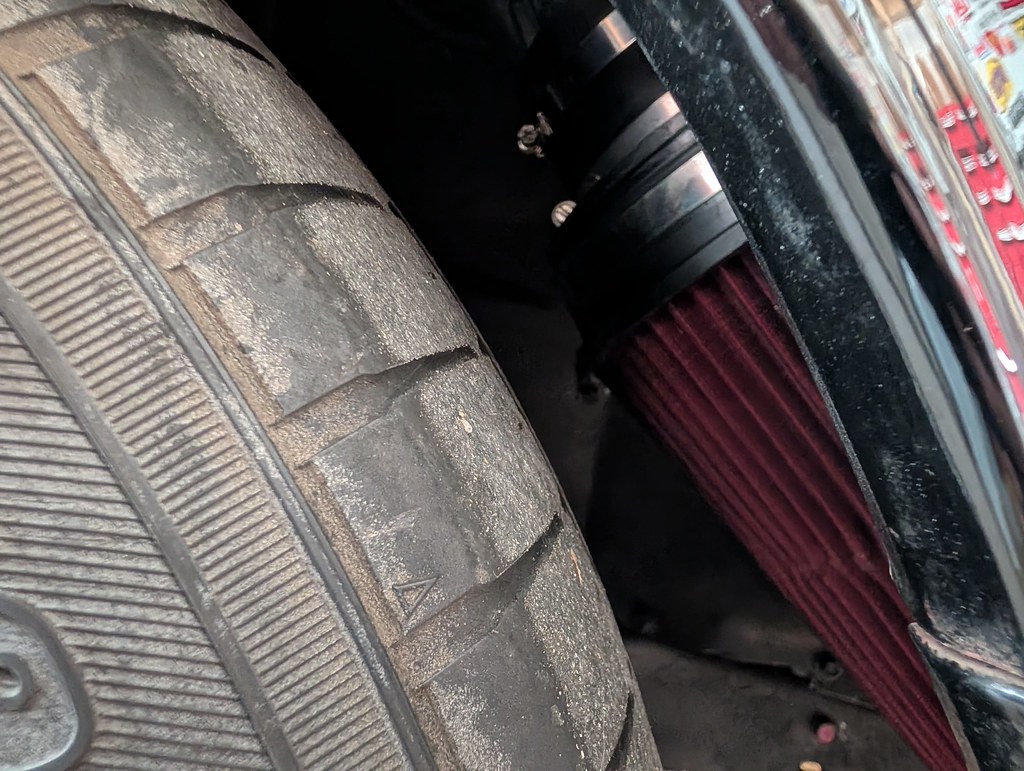
As with all new builds, there are a few bugs that need to be worked out. My biggest issue was the air filter that I was trying to re-use was dimensionally too large. It was not allowing me to rotate up high enough into the pocket in the fender. Once the car was at ride height, I only had about 3/4" clearance. It was enough for me to get a test drive in, but not a long term solution.
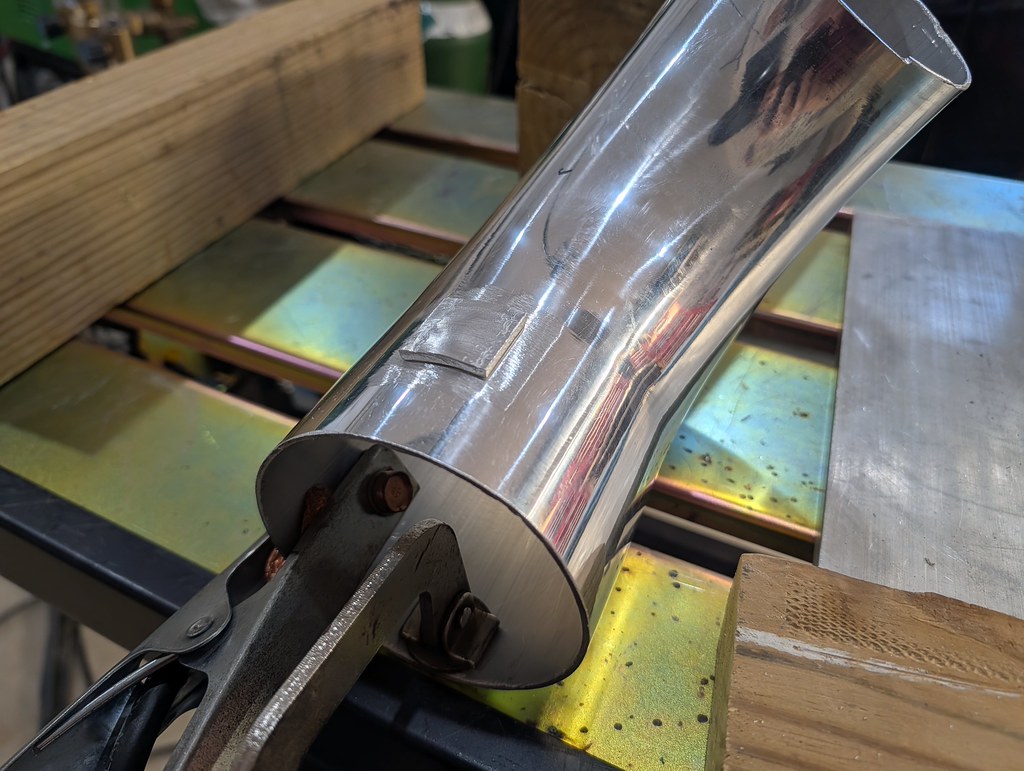
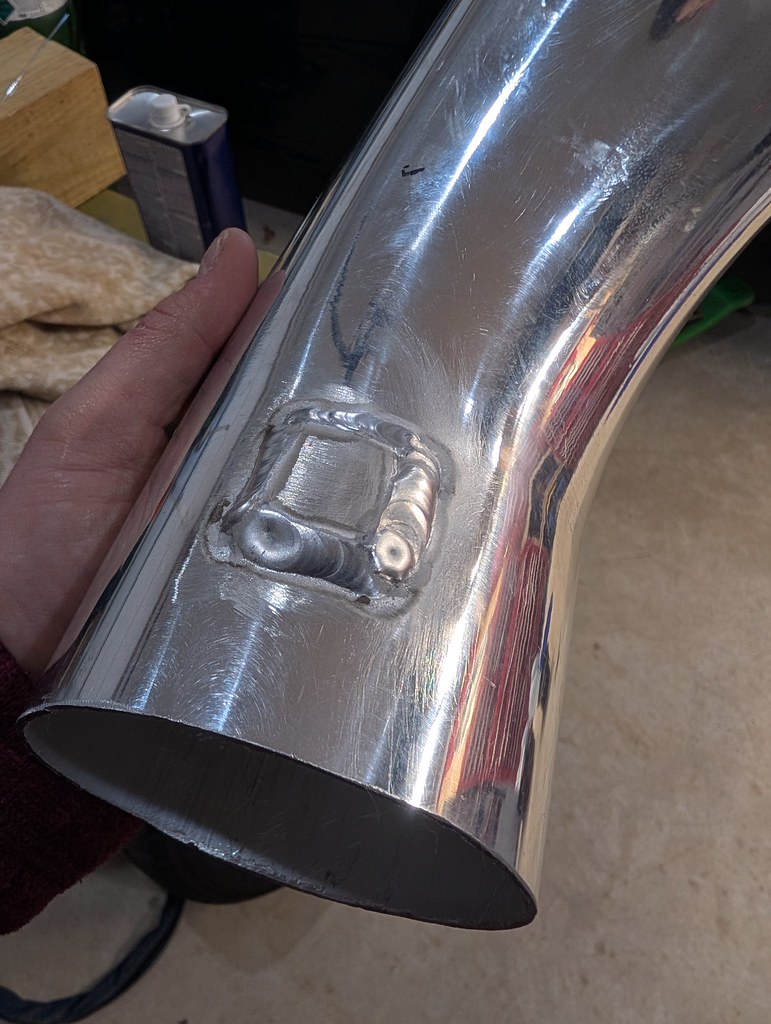
Since I had modified the air filter housing for a fitting to allow fresh filtered air for the PCV, I had to add a fitting to the new tube. Gave me another opportunity to do some AC TIG welding. I cut a little square piece of thick aluminum and bent a slight curve into it to match the curve of the 4" intake tube. Cleaned everything with a wire brush (only used for Aluminum) and acetone. Then I got to work welding it.
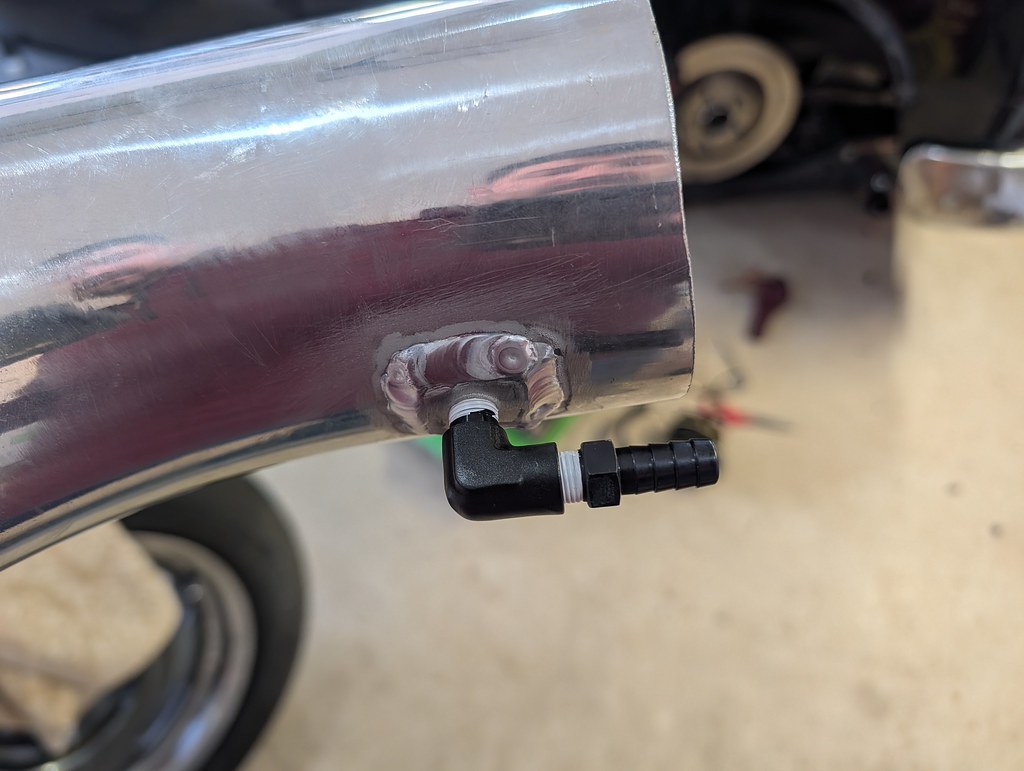
With that modified, I could now reinstall the intake tube and rotate the air filter up where I wanted it. It fits really well and now I have 3-4" of clearance with a jack under the a-arm and the wheel at full lock. No issues with it contacting now.
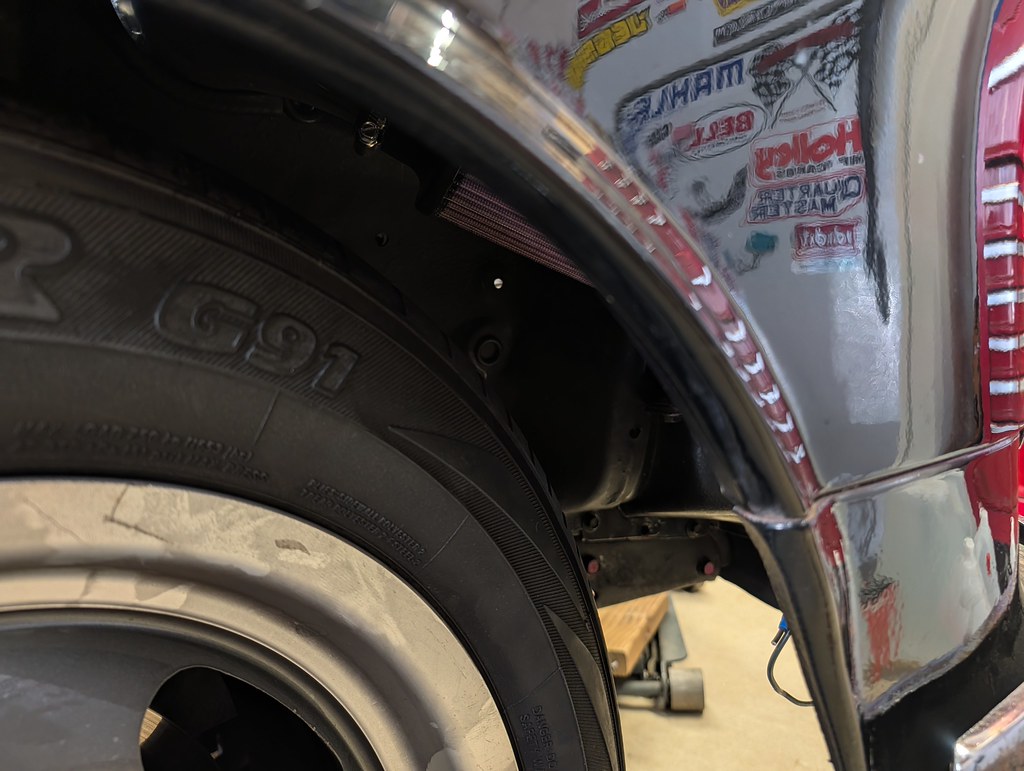
Now I can drive the car without needing to worry about the filter coming off. Next is trying to figure out why the 8.3 psi spring was only building 5.5 psi of boost. I figured that backpressure may be an issue, so I decided to try the 16.8psi combination of springs to hopefully net me around 11psi if the math was the same. 11psi is my target as I'd like to net around 500 rwhp.
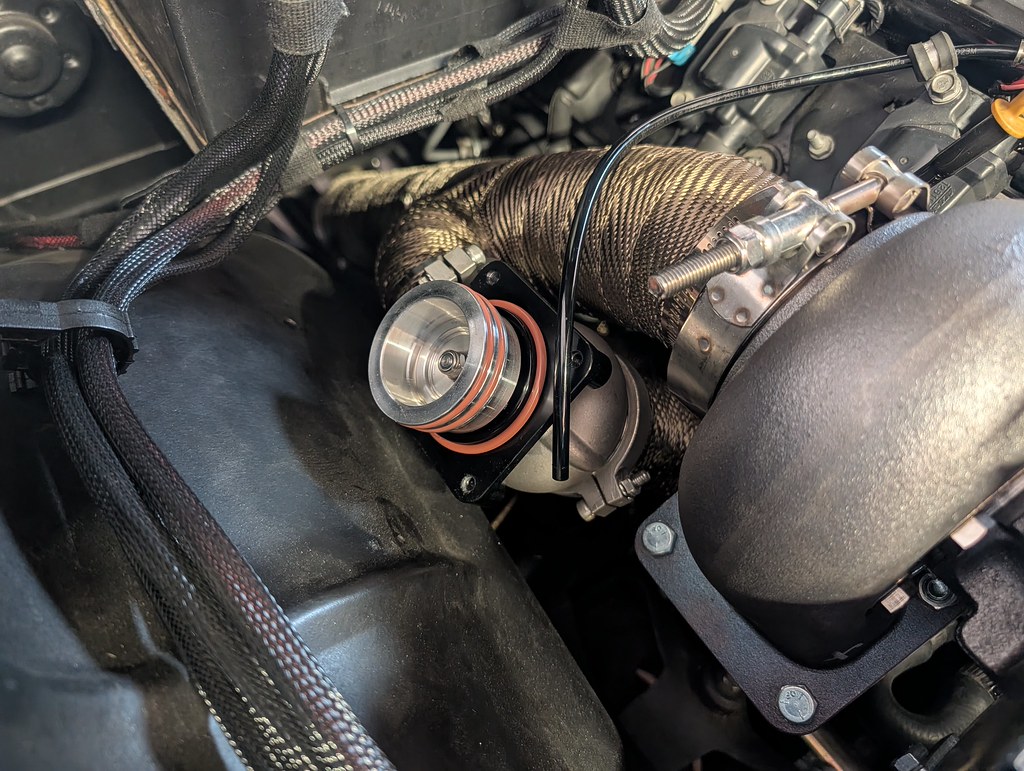
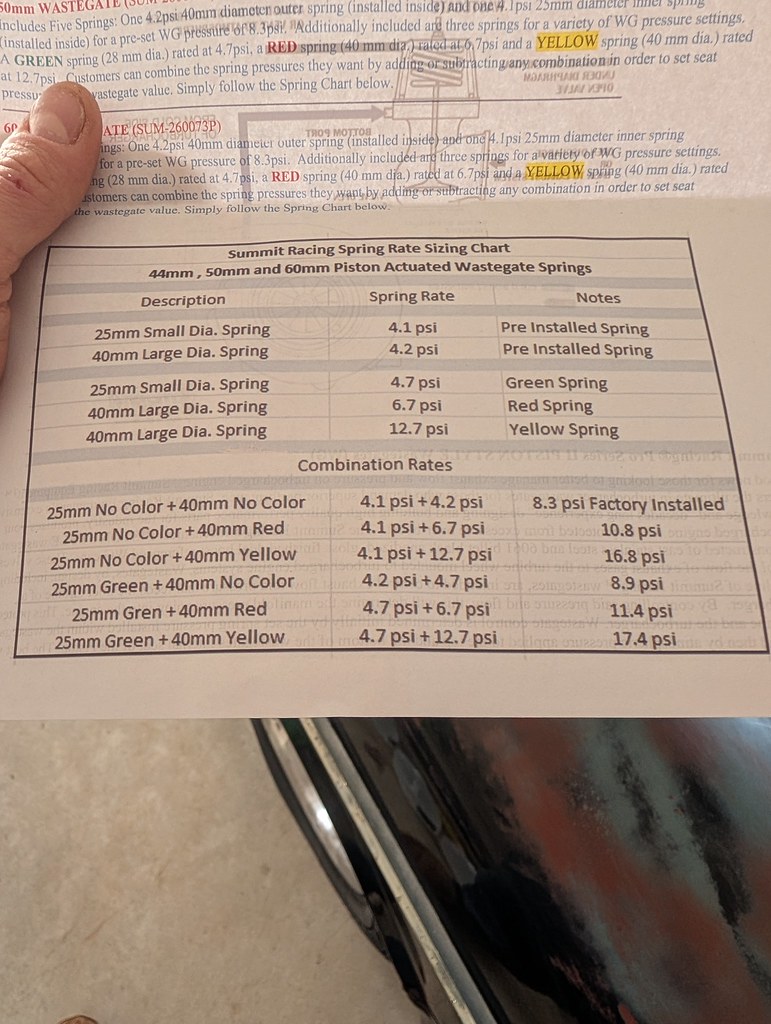
I swapped out the springs and took the car for another test drive. The car was definitely making more power, but after checking the logs it maxed out around 156 kpa which is about 8psi boost. Closer, but I think there may be another issue that is causing the low boost. I was leaning towards backpressure being an issue, but after talking with some buddies, it may be something else. I'm going to make some changes and do more testing. I have the first car show of the year this weekend so I'll get the car out again to see if I can get the boost numbers closer to the wastegate numbers. I also ordered some fittings so that I can finish wiring up a dial and control the boost with Holley.
Cheers,
Ryan
1955 Nomad project LC9, 4L80e, C5 brakes, Vision wheels
1968 Camaro 6.2 w/ LSA, TR6060-Magnum hybrid and etc SOLD
1976 T/A LS1 6 Speed, and etc. SOLD
Follow me on Instagram: ryeguy2006a
03-31-2026 #20
Registered User
- Join Date
- Sep 2009
- Posts
- 3,002
Thanks guys, I appreciate it. Very happy it's back on the road. The brakes are outstanding. I'm running the Tesla Model S iBooster with BBT billet adapter, C5 front brakes, 98-02 Fbody rear brakes and 3/16" NiCopp lines.
1955 Nomad project LC9, 4L80e, C5 brakes, Vision wheels
1968 Camaro 6.2 w/ LSA, TR6060-Magnum hybrid and etc SOLD
1976 T/A LS1 6 Speed, and etc. SOLD
Follow me on Instagram: ryeguy2006a

 Reply With Quote



