


Results 81 to 100 of 173
-
05-11-2022 #81
 Registered User
- Join Date
- Jan 2020
- Posts
- 137
 Originally Posted by Vimes

Im not too worried about it. They are more tucked up than it appears. Also I don't plan on running this car in any inclement weather. I've also power washed countless LS engine bays with the coils right on top of the valve covers and never had an issue. I think they are more robust than people give them credit for, but we shall see. If I have to move them somewhere else I will.
-
05-11-2022 #82
Registered User
- Join Date
- Jan 2020
- Posts
- 137
Fuel rail assembled, installed intake manifold, throttle body and valve covers. I'm in love.
05-12-2022 #83
Registered User
- Join Date
- Jan 2020
- Posts
- 137
Latest video is up
06-01-2022 #84
Registered User
- Join Date
- Jan 2020
- Posts
- 137
Been a few weeks since we've had an update. Been busy with other projects and spring yardwork.
After 5 months my Holley 12.3" dash finally showed up
Which ironically was ordered at the same time as the Terminator X, which has been sitting in the box since January and been moved around the garage 17 times. Finally time to get going wiring this thing.
I think I am going to mount the ECU right on the transmission tunnel underneath my center console. Appears to be plenty of room and the console is easily lifted up and removed with 2 screws if I need to access the ECU. Also hoping to route the harness through the factory gas pedal hole with a grommet, which I still need to purchase.
06-03-2022 #85
Registered User
- Join Date
- Jan 2020
- Posts
- 137
Started wiring last night. Got the ECU mounted to the transmission tunnel and the hole in the firewall enlarged enought to pass through the main harness as well as the power harness. Just ordered a large grommet to put in said hole. Ran into a few issues.
1. It appears my DMB terminator X kit does not include the required DBW harness. Guess i'll have to order that.
2. LS3 MAP sensor does not work with the holley pigtail. I beleive I have a MAP in my LS spare parts bin that will work. Should be fine as long as the 1-5V output is the same.
3. Oil pressure sensor is also not compatible. I will be ordering a truck oil pressure sensor that should be compatible.
06-06-2022 #86 Registered User
- Join Date
- Oct 2009
- Posts
- 222
I bought the appropriate connectors for my engine and re pinned alot cheaper than buying new sensors
1969 frost green camaro
LS3
Speedtech pro touring front subframe
ridetech rear 4-link
moser 12 bolt eaton tru trac 3.73
06-06-2022 #87 Registered User
- Join Date
- Sep 2009
- Posts
- 2,965

You can also check Low Dollar Motorsports for the oil pressure sensor. I used several on my car and they work great with Holley. I used one for fuel, oil and one other pressure sensor.
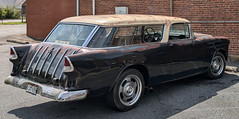
1955 Nomad project LC9, 4L80e, C5 brakes, Vision wheels
1968 Camaro 6.2 w/ LSA, TR6060-Magnum hybrid and etc SOLD
1976 T/A LS1 6 Speed, and etc. SOLD
Follow me on Instagram: ryeguy2006a
06-07-2022 #88
Registered User
- Join Date
- Jan 2020
- Posts
- 137
Thats what im going to end up doing. I'll need to re-pin MAP sensor and oil pressure sensor. Also, Terminator X uses a MAT (manifold temp) sensor. The LS3 does not have these, but it does use a MAF sensor which includes a temeprature portion. I have an LS3 style MAF pigtail leftover from another project so I am going to wire the MAT wires to the MAF temeprature portion and save myself the hassle of buying a MAT sensor and drilling/tapping the intake manifold. I also purchased a slot style MAF bung to weld into my aluminum intake tube a while back and I don't want that to go to waste lol. Originally Posted by Sinnister69
Also received my DBW harness from ebay. Got a great deal and should be able to sell the transmission harness that I didn't need for the same or more.
Got that run through the firwall last night and also installed a rubber grommet to seal it all up. A few more connections to be made and then we can put some power to it and see what happens.
06-07-2022 #89
Registered User
- Join Date
- Oct 2009
- Posts
- 222
Great
Let me know if you need wiring diagrams on tge sensor side i have them somewhere.
Also i have a brand new MAF sensor if you need it. Just pay for the ride1969 frost green camaro
LS3
Speedtech pro touring front subframe
ridetech rear 4-link
moser 12 bolt eaton tru trac 3.73
08-01-2022 #90
Registered User
- Join Date
- Sep 2009
- Posts
- 2,965
Any updates?
1955 Nomad project LC9, 4L80e, C5 brakes, Vision wheels
1968 Camaro 6.2 w/ LSA, TR6060-Magnum hybrid and etc SOLD
1976 T/A LS1 6 Speed, and etc. SOLD
Follow me on Instagram: ryeguy2006a
08-01-2022 #91
Registered User
- Join Date
- Jan 2020
- Posts
- 137
Really hoping to have some this week. I have been full steam ahead on a gen 1 cadillac CTS-V I bought off the side of the road a few months back. Now that that is done I have been able to focus a bit again on the 69. Have re-made some wires including the alternator wire, and cleaned up a lot of factory wiring that has gone astrew over the past 50 years, but nothing really picture worthy. Originally Posted by ryeguy2006a
Hoping to put power to the holley this week and maybe even crank it over to see if it builds oil pressure. More updates to come shortly!
08-09-2022 #92
Registered User
- Join Date
- Jan 2020
- Posts
- 137
Man it has been a MINUTE since we've had an update here. Was cruising right along January through April but really lost steam the past few months while i worked on some other projects. Have spent some time on it here and there the last couple of months but nothing really worthy of an update. All of this will be covered in the upcoming video but i need to finish the holley before I can finish the video lol. Anyways, heres a general update of where we are at:
- ECU is mounted. Decided to put it under the center console. Plenty of room, easy to get to if i need to. Figured this would be better than trying to stuff it in the dash with all the vintage AC stuff.
- All wiring is run through the dash. Used the original hole for the gas pedal cable, slightly enlarged. Bought a 2" grommet and installed that to keep things clean and prevent fraying
- All ECU connections are plugged in in the engine bay. TPS, IAC and the other throttle connections will not be used since I am using the DBW harness. Not sure if i will snip these off or just tuck them away. Probably snip them.
- Re-made starter cable, new battery terminals, new alternator cable since the original one was like 14 guage wire which definitely would not be enough for an EFI car. Cleaned up a bunch of factory wiring by the headlights.
Last night I temporarily finished my "loose wire connections" which tap into the factory wiring. Mainly a switched 12v source to turn the ecu on. Reconnected the battery in the car for the first time in 8 months and turned the key and the ECU came to life. Seems silly, but nice to know this thing has a brain and some power back in it. Even used the power windows to put the windows down lol. All wiring is super temporary at the moment. I'll clean it up and loom it once I know everyhting is right.
Connected my laptop and was able to connect to the ECU. had to update the firmware and software.
Connecting everything thus far has been pretty straight forward, but I will say i'm a little dissapointed in the holley documentation for those not using the 3.5" handheld. No "initial statup wizard", no included documentation on the software etc. Need to read up on that. If anyone has any helpful videos on loading some sort of startup tune or how to use basic functions, im all ears. Going to research that today.
Also still need to wire up my alternator, which is a 4 pin. Going to research that today as well. I know some people only hook up one wire to a 12v ignition source. Anyone also hook up the "sensing" wire?
With any luck I can add some fluids and at least crank it without fuel for now to make sure we've got oil pressure. More updates to come.
08-09-2022 #93
Registered User
- Join Date
- Sep 2009
- Posts
- 2,965
The reason for that is the startup tunes that they spit out are generally not that great. I would suggest starting with a tune that comes with the software that was downloaded to your computer. I think it's located on a folder called Holley. Get one that's close to your setup and use that. Then just go under the engine tab and confirm things like your displacement, injectors, TB, and etc are correct. I used a truck file I think when I first started with my LS1 a few years ago. Did exactly what I mentioned and it fired right up. Also before you start it up, make sure that your MAP is correct. I didn't change mine which defaulted to the internal MAP sensor and it gave me nothing but problems.
If you still are stuck, get with Dr. EFI (Andrew). He'll get you where you want to be.
1955 Nomad project LC9, 4L80e, C5 brakes, Vision wheels
1968 Camaro 6.2 w/ LSA, TR6060-Magnum hybrid and etc SOLD
1976 T/A LS1 6 Speed, and etc. SOLD
Follow me on Instagram: ryeguy2006a
08-09-2022 #94
 -Moderator/Sponsor-
- Join Date
- Apr 2001
- Location
- The City of Fountains
- Posts
- 16,120
I'd be happy to help with the initial start and with the subsequent tuning.
Andrew1970 GTO Version 3.0
1967 Cougar build
GM High-Tech Performance feature
My YouTube Channel Please Subscribe!
Instagram @dr__efi
I deliver what EFI promises.
Remote Holley EFI tuning.
Please get in touch if I can be of service.
"You were the gun, your voice was the trigger, your bravery was the barrel, your eyes were the bullets." ~ Her
08-09-2022 #95
Registered User
- Join Date
- Jan 2020
- Posts
- 137
Good feedback. Whatched a few videos on it this morning and it lines right up with what you are saying. I'll try to get all my sensor inputs done tonight. This may also explain why I wasnt reading anything from my IAT or MAP sensor, because the ECU doesnt know which sensors I have. I'll keep you posted. Originally Posted by ryeguy2006a
I appreciate it man! I will definitely be reaching out. Originally Posted by andrewb70
08-09-2022 #96 Registered User
- Join Date
- Nov 2018
- Posts
- 960
Gonna recommend not snipping any wires, just tape them back and make sure they can't ground to anything. You never know what the future may hold, and you may decide to go back to a cable throttle at some point in the future.
08-10-2022 #97
Registered User
- Join Date
- Oct 2009
- Posts
- 222
I did the 4 wire alternator with sensing wire if you want to know how i set it up let me know
1969 frost green camaro
LS3
Speedtech pro touring front subframe
ridetech rear 4-link
moser 12 bolt eaton tru trac 3.73
08-10-2022 #98
Registered User
- Join Date
- Jan 2020
- Posts
- 137
Would love to know! I know the excite wire needs to go to a 12v ignition source, but im curious where most guys are running the signal wire to. I've heard running it direct to the battery isn't as good as the fuse box, for example. Originally Posted by Sinnister69
Was able to load the 58x holley base map and input all of my relevant sensor information. Also succesfully did a TPS autoset. DBW is working perfectly and all sensors appear to be reading just fine. Are you guys with a terminator running a Fuel pressure sensor? I'm running a return system with regulator so fuel pressure should always be constant. Don't think i'll need one but I could be wrong.
Unplugged the coils, removed spark plugs, primed oil pump through oil galley, removed drive belt, hooked up the starter trigger wire (purple) and turned the key.
She turns over smooth and after 15 seconds or so registered 36PSI oil pressure while cranking at ~150 RPM. Was so happy to hear this thing make some noise for the first time in 7 months. Now we know we'll have good oil pressure as soon as she is ready to fire up.
Up next:
- Clean up this disaster of a wiring nightmare now that we know evreything is working properly.
- Wire fuel pump relay to holley fuel pump wiring.
- Install o2 sensor and finish weld headers
- Tons of other little stuff
- Put fuel in the tank and see if she fires!
Hoping to spend some serious time on it the next couple of nights and this weekend.
New video will be up later today.
08-10-2022 #99
Registered User
- Join Date
- Oct 2021
- Location
- Pittsburgh
- Posts
- 30
I love following your build! Can't wait until mine gets as far along as yours. Heading to the dyno Sunday and we're going to use my dad's Computer from the COPO to get things started then switch over to the Holly. Sorry you had to go through all that, it should be a big help if I run into that. Thanks in advance!
08-11-2022 #100
Registered User
- Join Date
- Jan 2020
- Posts
- 137
New video is up!
https://www.youtube.com/watch?v=ZLj0x-6uL0o&t=10s

 Reply With Quote


